download the einstein manual - physics central
TRANSCRIPT

1
Table ofContentsKit Checklist .................................................................... 2About the World Year of Physics 2005 ............................. 3Logistics of the PhysicsQuest Competition ..................... 4Using the PhysicsQuest Materials ................................... 5Welcome to the PhysicsQuest Experiments .................. 10
Activity 1 | Soapy Films
Teacher Guide ................................................................ 11Student Activity .............................................................Student Activity .............................................................Student Activity 15Challenge Report ........................................................... 17
Activity 2 | Seeing Spots
Teacher Guide ................................................................ 19Student Activity .............................................................Student Activity .............................................................Student Activity 23Challenge Report ........................................................... 27
Activity 3 | As the Washer Swings
Teacher Guide ................................................................ 29Student Activity .............................................................Student Activity .............................................................Student Activity 33Challenge Report ........................................................... 37
Activity 4 | Furry Magnets
Teacher Guide ................................................................ 39Student Activity .............................................................Student Activity .............................................................Student Activity 43Challenge Report ........................................................... 45
National Science Education Standard Links ................. 47References ..................................................................... 48
C o n t e n t s

page 2 • PhysicsQuest • Overview
This kit provides many of the materials needed to complete the PhysicsQuest activities. Below is a list of materials that should be included in this kit, as well as items that you need to provide in order to complete the PhysicsQuest experiments. If your kit is missing any of the materials listed below, please contact the kit vendor through our website, www.physics2005.org/events/physicsquest.t.t
Provided in this Kit
■ This teaching manual■ Treasure map (5)■ Circle/angle guide (5)■ Guide to bubble patterns ■ Guide to magnetic fi eld lines■ Solid insulated electric wire ■ Laser pointer■ Diffraction grating■ Modeling clay■ Metal washers (2)■ Bar magnets (2)■ Iron fi lings
Not Provided in this Kit
■ Container with soapy water■ Chalkboard erasers or talcum powder■ Scissors ■ Paper towels■ Markers■ Meter stick■ Ruler■ Protractor■ Plain white paper■ Adhesive tape■ String (1.5 meters per group)■ Calculators■ Stop watch
K i t C h e c k l i s t

3
About theWorld Yearof Physics 2005
The World Year of Physics 2005 is a worldwide celebration of physics and its importance in our
everyday lives. The year 2005 was designated the World Year because it commemorates the 100th anniversary of Albert Einstein’s “miraculous year.” In 1905, Einstein published three groundbreaking papers describing ideas that set the course for much of the physics of the next century. This year provides an opportunity to celebrate Einstein, his ideas, and his infl uence on life in the 21st century.
A major focus of the American Physical Society — the professional society for physics in the United States — is to promote physics through educational outreach to the K–12 community. To excite and motivate students and teachers, APS is planning a spectrum of projects aimed at various grade levels.
All these projects, including PhysicsQuest, will help students realize that physics is interesting and fun, has important things to say about the world in which we live, and can improve our way of life.
W o r l d Y e a r o f P h y s i c s
page 4 • PhysicsQuest • Overview
General Competition InformationWe are glad you have decided to join the celebration of the 100th anniver-sary of Albert Einstein’s “miraculous year” of important discoveries by participating in PhysicsQuest. PhysicsQuest is a treasure hunt inspired by Albert Einstein and his work. The quest takes students through some of the fundamental ideas of physics in a fun and interesting format.
The PhysicsQuest treasure hunt follows Einstein’s wanderings along the maze of paths that crisscross the grounds of the Institute for Advanced Study in Princeton, New Jersey, where he spent the last 23 years of his life. The map of the Institute grounds, the materials in the kit, and some curious students are all you need to locate the treasure.
Your students will need to work in small groups to solve a set of four experimental challenges, each of which provides a piece of information needed to locate the treasure. These activities are designed to challenge your students to investigate various physical concepts, and at the same time encourage them to become excited about physics and its applications. Hopefully, the lure of the prize will persuade even the most disinterested students in your classroom to engage seriously with the materials.
All classes who successfully complete the activities and correctly identify the location of the treasure will receive recognition. Some of the winning classes will be randomly selected to receive prizes!
Submitting EntriesUpon completion of the four activities, teachers should submit their class results through a form located at:
http://www.physics2005.org/events/physicsquest
Logistics of the PhysicsQuest Logistics of the PhysicsQuest Logistics of the
CompetitionPhysicsQuest CompetitionPhysicsQuest
C o m p e t i t i o n L o g i s t i c s
Competition TimelineNovember 7-18, 2005Receive kits
November 21, 2005 – January 12, 2006Classes perform challenges
January 13, 2006Results submission deadline
January 20 Notify winners
Need Assistance?If you have questions about this project you can visit our website, www.physics2005.org/events/physicsquest or email us at physicsquest or email us at [email protected].

Overview • PhysicsQuest • page 5
Using the PhysicsQuest Using the PhysicsQuest Using the
MaterialsPhysicsQuest MaterialsPhysicsQuest
Activity 1: Soapy Films
The treasure was hidden with reference to objects on the grounds of the Institute for
Advanced Study in Princeton. This activity reveals the
starting location.
Activity 2:Seeing Spots
This activity reveals the direction to walk from the starting location found in
Activity 1.
Activity 3:As the Washer Swings
This activity reveals how far to walk in the direction found in
Activity 2.
Activity 4:Furry Magnets
This activity reveals the specifi c place where Einstein
hid the treasure.
P h y s i c s Q u e s t M a t e r i a l s
Introduction to the Resource MaterialsThe PhysicsQuest competition is based on a series of four activities that are designed to actively engage students in scientifi c inquiry. By investigating several physical concepts and carrying out experiments using a variety of materials, students will gradually collect the information needed to fi nd the location of Einstein’s treasure.
Each of the four PhysicsQuest activities contributes one piece of information that students will need to fi nd the treasure. You can solve all the challenges in one session or spread them out over a number of weeks. The activities can be conducted during classroom time or as an activity for a science club.
The PhysicsQuest activities are designed to reveal clues in sequential order. You can complete the activities in any order or have small groups work on different activities simultaneously. However, if your class does not complete the activities in order, help your students understand that each investigation needs to be completed correctly to locate the treasure.
The activities and a brief description of their relation to the competition are listed in the sidebar. Detailed descriptions and planning suggestions are located in the individual activity guides. Links to the National Science Education Standards for each of the activities can be found at the end of this resource.
Although students can fi nd the location of the treasure using only these four activities, companion extension activities are provided at http//www.physics2005.org/events/physicsquest to help you integrate http//www.physics2005.org/events/physicsquest to help you integrate http//www.physics2005.org/events/physicsquestPhysicsQuest smoothly into your existing science curriculum. We have also suggested ways to incorporate other curriculum areas — such as mathematics and history — into the PhysicsQuest activities. We encourage you to adapt these options to suit your particular classroom.

page 6 • PhysicsQuest • Overview
This guide also offers suggestions for implementing PhysicsQuest in your classroom. The implementation of each PhysicsQuest activity is completely up to you and we encourage you to use your imagination, knowledge of your students, and understanding of the curriculum to supplement the core ideas with your own creative enhancements!
Options for Implementing the Materials in Your ClassroomWe present four detailed models for implementing the activities to help you plan how your class will solve the PhysicsQuest challenges. You may feel that a combination of these or something completely different is most appropriate for your classroom. If you decide to spread the activities out over a period of weeks, you may wish to incorporate some of the extension activities from our webpage and develop the ideas into larger units of study. Since you are only being provided with one set of materials per activity, your students will need to share the equipment such that everyone can be involved in the investigation. Although we provide several alternative approaches for using PhysicsQuest, you are the most equipped to decide the best approach for implementing these materials in your classroom.
Option 1 | One or two sessions
Complete the entire set of PhysicsQuest activities in one class period. You will need to divide your students into at least four small groups so that each group can investigate one of the challenges (note that some activities take longer to perform than others). If you have more than four groups, activities that do not require special equipment can be duplicated. After all the groups have obtained results, have them come together for a discussion and decision about your predication for the location of the treasure. If you do not have time on the day of the investigations, you can compile their results and present them to the class on another day. If you have time on the second day, allow students to present their procedure and fi ndings to each other for peer review. Encourage other groups to ask questions and constructively criticize the results. Remind students that the answer each group obtains is vital to winning the competition and fi nding the location of the treasure.
This option takes less time away from your established science curriculum but still allows your class to actively participate in the World Year of Physics 2005 and possibly win prizes. Since every group

Overview • PhysicsQuest • page 7
will be completing a different activity, each student will have a greater responsibility for carrying out his/her investigation in a way that obtains reliable results. No group can “hide” behind the work of another group!
This option requires signifi cant preparation on your part since you will have to obtain materials and be familiar with all of the activities at one time. Completing all the activities in one day leaves little time for in-depth discussion of the physical concepts students will be investigating. You will not have time to show students the everyday applications of the activities or how they relate to other subjects you have studied throughout the year.
Option 2 | Three sessions
Students complete the PhysicsQuest activities during two days and spend the third day presenting the results of their investigations. Begin by dividing the class into small groups. On the fi rst day, have half of the groups work on Activity 1 and its extensions and the other half on Activity 2 and its extensions. Make as much of a physical division as possible in your classroom between the two sets of groups. For each half of the class, have several stations available so that while one group is taking data for the main PhysicsQuest activity, the others can be investigating some of the extensions. Since you only have one set of materials for the PhysicsQuest activity, you may need to have students only collect data on this day and then analyze it on the third day.
On the second day of the PhysicsQuest activity have students work in the same groups to complete Activities 3 and 4. Again, set up the classroom so that each set of students rotates through stations related to the main PhysicsQuest activity.
On the fi nal day, have all the groups that investigated Activities 1 and 3 pool their data and discuss solutions to those challenges. Have the students who investigated Activities 2 and 4 do the same. Encourage groups to check their solutions with one another and resolve any inconsistencies. Have students prepare short presentations on their procedures/conclusions, their method for pooling their results and resolving discrepancies, possible applications of their investigation, and the extension activities they performed. Then, as a class, compile your results for submission.
Completing the activities over two days allows you to spend more time engaging the students in the physical concepts being explored. By

page 8 • PhysicsQuest • Overview
having several stations, students can explore two sets of concepts and their applications in greater detail. Information they obtain from these demonstrations, discussions, and other extension activities can be included as background and/or support for conclusions in lab reports. This option allows you to assess students’ ability to convey their understanding to peers through their presentations on the fi nal day of PhysicsQuest.
This option is diffi cult to coordinate if your classroom cannot be easily divided into separate areas. If students can easily hear and see the activities of other groups, they may be distracted – especially if they perceive one set of activities to be more “fun” than another. You will also need to prepare two sets of stations in advance and monitor two totally different experiments. This option takes slightly more time away from your established science curriculum and students will only complete half of the activities.
Option 3 | Four sessions
Students complete each PhysicsQuest activity on a different day and small groups all work on the same physical concept at the same time. Begin each day by discussing the purpose of the activity and the basic physics behind the procedure with the class. Break students into groups and have several stations set up around the room. One station should involve collecting data for the main PhysicsQuest activity while the others should be extension activities, discussions, or demonstrations. Leave 10-15 minutes at the end of class for students to analyze their data together. Discuss and record their solutions to the challenge on the board and encourage students to resolve discrepancies.
This option allows the most time for exploring the physics concepts behind the PhysicsQuest activities. Allowing a full day for the class to complete the basic activity and its extensions will make preparation much easier for you. You will only have to prepare for one type of experiment and be familiar with one set of investigations per day. With this option, you can spread the activities out over several weeks and integrate them into your existing science curriculum where the physical concepts are already discussed.
This option will take more time away from your existing curriculum, but hopefully will reinforce ideas already presented in class.

Overview • PhysicsQuest • page 9
Option 4 | Five or more sessions
One possibility is to complete the project as in Option 3, but add an extra day for student presentations and compilation of the competition entry. Take the fi rst four days to complete the activities, encouraging students to pay special attention to their experimental procedure and any diffi culties they encounter. On the fi fth day, have each group present one activity. Their presentations can include background about the physics involved in the experiment, real world applications, procedural diffi culties, data collection and analysis issues, and the fi nal result.
Another possibility for extending the PhysicsQuest activities over fi ve or more sessions is to take several days on each investigation. Discussion of the relevant physical concepts and participation in the extension activities can engage students for many class periods. This option allows you to get the most out of the PhysicsQuest resource.
Creating Cooperative Groups for InvestigationsStudents often have diffi culty being comfortable and productive when investigating scientifi c problems in small groups. Some students are inclined to “take over,” while other students are disengaged and disruptive, making it diffi cult for others to concentrate on solving the problem. Even more students are content to blend into the background and play neither a positive nor negative role in the group.
However, working effectively and effi ciently in a group is one of the most important parts of scientifi c inquiry. Without the ability to work cooperatively and communicate with one another, scientists would be unable to make much progress. To aid you in creating a positive cooperative environment for the PhysicsQuest activities, we provide one possible group work model for use in your classroom. If your students are already comfortable working in groups and dividing work evenly, please continue to use your model. However, if you are looking for a way to offer your students more structure so that they can work effectively in small groups, you may want to consider adopting this model for PhysicsQuest and future investigations. Many other models exist, and we encourage you to continue searching until you fi nd one that works well for you and your students.
Give each student in the group one of the roles listed in the sidebar. You may want to rotate students in these roles for each activity so that they can learn all responsibilities associated with a successful scientifi c investigation.
Give each student one of the following roles:
Lab DirectorResponsible for coordinating
the group and keeping students on task.
Chief ExperimenterSets up the equipment for
taking data and checks to be sure that the procedure is
carried out correctly.
Measurement Offi cerMonitors data collection and
determines the values for each measurement.
Report WriterFills out the Challenge Report
and checks to make sure all of the questions are answered
before the group turns in their report.
Equipment ManagerCollects all equipment needed for the experiment and makes
sure it is returned at the end of the class period.

page 10 • PhysicsQuest • Overview
Welcometo the PhysicsQuestExperimentsto the PhysicsQuestExperimentsto the PhysicsQuest
We are glad you have decided to join the celebration of the 100th anniversary of Albert
Einstein’s “miraculous year” of important discoveries by accepting the PhysicsQuest challenge. Along the way to the treasure, you will meet four challenges designed to test your science abilities. Each of these challenges will lead you closer to fi nding the location of a hidden treasure — if you answer them correctly.
The PhysicsQuest treasure hunt follows Einstein’s wanderings along the maze of paths that crisscross the grounds of the Institute for Advanced Study in Princeton, New Jersey, where he spent the last 23 years of his life. The map of the Institute grounds, the materials you have in front of you, and some curiosity are all you need to locate the treasure.
So get started! Do the experiments, solve the puzzles, and fi nd the treasure!
Introducing PhysicsQuest to Your Students
For many students, learning about the laws that govern the physical world is insuffi cient motivation for actively and energetically engaging in an investigation. PhysicsQuest activities are designed with an awareness of this lack of intrinsic motivation, and a specifi c solution for overcoming it. Each activity has a defi nite purpose beyond teaching students physical concepts — each result moves the students closer to winning the competition and prizes. When students know exactly how each investigation fi ts into this overall goal, we hope they will be more willing to actively participate. And when they allow themselves to actively participate they may fi nd themselves enjoying physics!
W e l c o m e

11
T e a c h e r G u i d e
Soapy Films1Activ
ity
VocabularyMolecules
Forces
Surface tension
Minimize
Energy
IntroductionThe law of minimizing energy governs all physical phenomena. In this activity, students will investigate how the principles of surface tension and minimization dictate bubble formation. The observations they make on the regularity of bubbles and fi lms will start them on the trail of the treasure.
ObjectivesStudents will be able to:
■ Apply the minimizing energy law to explain why differently shaped wands produce bubbles of the same shape.
■ Predict the shape of soap fi lms formed by wands of different sizes and shapes.
■ Use individual observations from experiment to form general ideas about the behavior of physical systems.
National Science Education Standard LinksAll standards addressed by this activity can be found in the table located at the end of this guide.
Background InformationYou may be familiar with the “fi lm” on a glass of water that allows you to fi ll the glass just over the rim. This “fi lm” exists because of surface tension. Molecules in liquids are strongly attracted to other like molecules by forces. A molecule in the center of a glass of water (like the middle one in Figure 1.1), has like molecules on all sides pulling on it equally in all directions. As a result, the molecule in the middle has no NET force acting on it, and it stays still. A molecule on the surface of the water (like the top one in Figure 1.1) only has molecules beside and underneath it.

page 12 • PhysicsQuest • Teacher Guide
These top molecules are pulled downward and have no upward-pulling molecules to balance the downward force. This unbalanced force is called surface tension, and is the reason you can fi ll a cup of water past the top of the rim. The same concept of surface tension allows bubbles to form, because water molecules are attracted more strongly to each other than to the air around them.
Adding soap to water creates space between the water molecules. As the molecules spread farther apart, the surface tension decreases. But, you might wonder, if surface tension allows bubbles to form and if adding soap to water decreases surface tension, why do we usually blow bubbles with soapy water?
Water bubbles pop quickly because of evaporation, not because the surface tension breaks. Adding soap molecules to the mix creates a layer of soap between the water and the air and slows down the evaporation process. We use a mixture of soap and water, therefore, to optimize surface tension and minimize evaporation.
An interesting property of bubbles is that they always minimize the surface area necessary to enclose a given volume of air. Bubbles do this because such an arrangement minimizes the energy of the molecules, and all systems are happiest in their lowest energy state. The shape that encloses the most volume in the smallest surface area is a sphere—which is why all bubbles are spheres. Soap fi lms, which are like bubbles bounded by the edges of a wand, also obey the minimization law. Soap fi lms always form a shape that touches each edge of the wand, but does this with the smallest possible surface area. When a fi lm is created on a triangular prism frame, such as in Activity 1, the shortest path between the edges creates a Y shape (with the angle between each of the legs equal to 120°) when looking down from the top.
Classroom Preparation■ Photocopy student worksheets and Challenge Reports.
■ Prepare bowls of bubble solution.
■ Divide insulated wire equally among the groups.
Activity TimeStudents need 20 minutes to complete the basic activity.
Figure 1.1Molecules Attractive ForcesCredit: Rod Nave, Department of Physics and Astronomy, Georgia State University

Teacher Guide • PhysicsQuest • page 13
Safety NotesReview these guidelines closely with students before the activity and outline consequences for failure to follow them. Although the wire is insulated, the ends may be sharp so students should be cautious. Soap for the bubble mixture may cause irritation if it gets into students’ eyes so safety goggles should be worn. Since the floor will become very slippery if bubble solution spills, be sure that students clean up wet spots on the floor.
Notes on the Activity■ Before the class begins their investigation, you may want to show
them a prototype of the wand they will be constructing since it is diffi cult to visualize. This wand can be tricky to build, but as long as the wires hold a triangle-like shape, it should work.
■ The wand is a specifi c kind of fi ve-sided polyhedron known as a triangular prism. Images of these are available at:
http://mathworld.wolfram.com/Pentahedron.html
Click on “triangular prism” and rotate the image to get a view from all sides. Showing this image to students may help them visualize what they are building.
■ Ask students to predict the shape of the fi lm that will be formed by this wand. Have them draw their predictions on the board.
■ When students build their wand, the separation distance between the triangles needs to be at least 4cm long for this demonstration to work.
■ Tap water contains minerals that may shorten the amount of time the fi lm lasts. If your school has very “hard” water, you may want to use bottled or distilled water.
■ At the end of the activity, you may want to dip the prototype wand into soap solution and use the overhead to project the fi lm and show students what they should have seen.
■ If you have time, have your students make wands of other sizes and shapes to check their answers to the discussion question. What do they notice about the angles between adjoining bubbles?
Materials(bold items are
provided in the kit)
For each student:
Student Worksheet
Safety Goggles
For the group:
Insulated Wire(1 meter per group)
Treasure Map
Bubble Pattern Guide
Angle Guide
Challenge Report
Soap and water for bubble mixture
Container to hold the bubble mixture
Scissors
Paper towels
Marker
Ruler

15
S t u d e n t A c t i v i t y
IntroductionBubbles and soap fi lms are good examples of the cool things that physics helps us understand. Your fi rst challenge is to investigate how soap fi lms form inside wire frames and use this to fi nd the starting place of the treasure hunt.
SafetySafety goggles should be worn at all times because the bubble solution can cause discomfort and irritation if it gets into your eyes.
Procedure1. Draw a triangle on your Challenge Report data sheet with sides
between 5 and 8 centimeters in length. All the sides do not have to be the same length.
MaterialsInsulated wire
Scissors
Bubble pattern guide
Safety goggles
Treasure map
Angle guide
Soap and water for bubble mix
Bowl for the bubble mix
Paper towels
Markers
Ruler
We are glad you have decided to join the celebration of the 100th anniversary of Albert Einstein’s “miraculous year” of important discoveries by accepting the PhysicsQuest challenge. Along the way to the treasure, you will meet four challenges designed to test your science abilities. Each of the challenges will lead you closer to fi nding the location of a hidden treasure — if you answer them correctly.
The PhysicsQuest treasure hunt follows Einstein’s wanderings along the maze of paths that crisscross the grounds of the Institute for Advanced Study in Princeton, New Jersey, where he spent the last 23 years of his life. The map of the Institute grounds, the materials you have in front of you, and some curiosity are all you need to locate the treasure.
So get started! Do the experiments, solve the puzzles, and fi nd the treasure!
Soapy Films1Activ
ity

page 16 • PhysicsQuest • Student Guide
2. Cut a piece of wire long enough to trace your triangle plus some extra to secure the edges. Bend the wire into the shape of the triangle and connect the ends so it is closed as shown in Figure 1.2 (a). Repeat this step so you have two complete triangles.
3. Cut three pieces of wire 6-7 centimeters long. Put one of your triangles fl at on the table and attach these pieces tightly to the corners so they stick straight up in the air. See Figure 1.2 (b).
4. Put the other triangle on top of the wire pieces and connect them to the corners.
5. Cut another short piece of wire and attach it to the corner of one of your triangles to make a handle as shown in Figure 1.2 (c). This is your bubble wand.
6. Dip the wand completely into the bubble mixture.
7. Remove the wand from the mix and let the extra liquid drain off into the bowl.
8. Hold the wand fl at, with the triangles on the top and bottom.
9. Looking directly down through the two triangles, observe the pattern made by the bubble. Draw and describe this shape on the Challenge Report.
10. Compare your shape to the ones on the bubble guide. Choose the one that looks most like your bubble and record that shape in your Challenge Report.
11. Use a marker to draw this shape on the Angle Guide.
12. Place this Angle Guide on top of the treasure map and move it around until each line goes through one of these locations: the sign for the Institute Woods, the sign for the Institute for Advanced Study, and Sciences. Keep sliding the Angle Guide until every line goes through one of these locations at the same time.
13. When a line goes through each of these three locations, the building where all the lines meet on the Angle Guide indicates the place where the hunt begins.
Conclusion CONGRATULATIONS! You are one step closer to fi nding the treasure! The spot you just identifi ed is the starting point for the search.
Figure 1.2 bAttaching Wires to the Corners
Figure 1.2 cAttaching the Handle
5cm5cm
Figure 1.2 aCreating the Triangle

Challenge Report • PhysicsQuest • page 17Challenge Report • PhysicsQuest • page 17Challenge Report
Team Members
Class
Results of ActivityDraw a triangle with sides between 5 and 8 centimeters long.
Draw your bubble wand and the shape of the fi lm inside.
C h a l l e n g e R e p o r t
Soapy Films1Activity

page 18 • PhysicsQuest • Challenge Report
Discussion Question
What do you notice about the angles between adjoining fi lms? Are all the angles the same or different? Do you think that this would be true of a triangular wand of any size?
In words, describe the shape of the fi lm inside the triangle.
What object appears underneath the point where the three lines meet?

19
T e a c h e r G u i d e
VocabularyWave
Crest
Trough
Amplitude
Wavelength
Diffraction
Interference
Seeing Spots2ActivityIntroductionWhen light comes into contact with matter it spreads out, overlaps, and interacts in complex ways that make the sky look blue and rainbows appear after a storm. In this activity, students will explore how light waves passing through a series of small grooves interact by diffraction to create a visible and measurable diffraction pattern.
ObjectivesStudents will be able to:
■ Identify the regularity of light’s diffraction patterns.
■ Explain that light sometimes behaves as a wave.
■ Use mathematics to supplement investigations of physical phenomena.
■ Successfully complete scientifi c investigations when small-scale data values need to be measured accurately.
National Science Education Standard LinksAll standards addressed by this activity can be found in the table located at the end of this guide.
Background InformationLight acts as both a particle and a wave; this activity explores its wave nature and one of the resulting consequences — diffraction patterns.
Imagine waves in the ocean that have crests when the water rises above its natural level and troughs when the water dips below its natural level. Light waves have similar crests and troughs that occur at regular intervals. The distance between two crests or two troughs is defi ned as a wavelength. The height of the crest is called the amplitude and determines brightness in a light wave.

page 20 • PhysicsQuest • Teacher Guide
The electromagnetic spectrum is the range of wavelengths across which the sun emits light. Although the sun emits light over a broad range, our eyes can only see a small subset of these wavelengths called the visible spectrum. The color of light we see depends on its wavelength, for example blue light has a wavelength around 0.0004mm and red light has a wavelength around 0.0007mm.
So how does the existence of crests, troughs, and wavelengths in light waves lead to diffraction? Consider what happens when different parts of identical waves overlap. Returning to the water wave analogy, we expect that when two identical crests from different waves overlap, they form another crest twice as high. This is also what happens with light waves, only in terms of light a crest that is twice as high means light that is twice as bright. This is called constructive interference.
Similarly, when a crest and a trough overlap they cancel each other out and the amplitude equals zero.
Since amplitude corresponds to brightness in light waves, this means a dark spot is created. This is called destructive interference.
When light hits the edge of an object or goes through a small slit, parts of the wave are blocked from moving forward. However, each part of the wave that does continue forward acts as its own new source of crests and troughs. These crests and troughs overlap each other to form alternating bright and dark spots – called a diffraction pattern. If the two interacting waves are not identical in wavelength, the crests and troughs will not exactly line up. In that case, the diffraction pattern will not consist of alternating bright and dark bands as described above, but of bands that vary in color.
Classroom Preparation■ Photocopy student worksheets and Challenge Reports.
■ Arrange lab tables so that there is a blank wall to shine the laser on.
Figure 2.1Constructive and Destructive Interference of Water Waves
Figure 2.2Constructive and Destructive Interference of Light Waves,Light spots show constructive interference

Teacher Guide • PhysicsQuest • page 21
Activity TimeStudents need 20 minutes to complete the basic activity.
Safety NotesReview these guidelines closely with students before the activity and outline consequences for failure to follow them. Warn students very strongly about the dangers of looking directly into the laser beam. Shining the beam into their eyes or the eyes of their classmates may cause serious injury. Consequences for students recklessly playing with the lasers should be outlined before giving out the supplies for the activity. If you are concerned, you may prefer to complete the portions of the procedure involving the laser for your students and have them do the analysis.
Notes on the Activity■ When you put chalk dust in the path of the laser beams, a small
amount works better than a large amount.
■ You may want to label the plastic edges of the grating so students know which edge is which when they are changing the orientation.
■ The laser and the grating should be approximately fi ve centimeters from each other to ensure that the light is bright enough to see the second spot. The entire set-up should be at least a few feet from the wall.
■ When students measure the bright spots on either side of the central spot, they should get the same angle on both sides. If they do not, encourage them to repeat the experiment with more accuracy.
Materials(bold items are
provided in the kit)
For each student:
Student Worksheet
For the group:
Challenge Report
Laser pointer
Grating
Modeling Clay (to hold the laser and
diffraction grating in place)
Several pieces of plain white paper
Pen
Meter Stick
Protractor
Masking Tape
Chalkboard erasers fi lled with chalk dust
or talcum powder


23
S t u d e n t A c t i v i t y
MaterialsLaser pointer (key chain)
Grating (plastic square)
Modeling Clay
Masking tape
Protractor
Plain white paper
Meter Stick
Marker
Chalk erasers
Seeing Spots2ActivityIntroductionThis challenge will give you the direction to walk from the starting point (found in Activity 1) to get to the treasure. If you shine a laser through a surface with many small, parallel grooves (called a diffraction grating), the light diffracts or spreads out. You can fi nd the direction to the treasure by investigating the diffraction pattern created in this activity.
SafetyDo not look directly into the laser beam at any time. Looking directly into the beam can cause serious eye injury!
ProcedureSEEING MULTIPLE LIGHT BEAMS
You can split one beam of laser light into many beams using a grating. A grating is a piece of plastic or glass with parallel grooves that are so small and close together that you can’t see them with your eyes.
1. Put the laser on the desk and point it at the wall. Turn the laser on so you see one bright spot on the wall.
2. Have a group member hold your grating between the laser and the wall.
3. Observe and record the number of bright spots you see on the wall. Draw a picture of what you see on your Challenge Report.
4. Clap chalk dust from erasers in the air between the grating and the wall. Draw a picture of what you see on your Challenge Report.
5. Rotate the grating so that different edges of the plastic square are at the top. Record your observations of what happens to the spots on the wall.

page 24 • PhysicsQuest • Student Guide
LOCATING THE POINTS OF CONSTRUCTIVE INTERFERENCE
1. Tape a white piece of paper to the desk half of a meter away from a blank wall.
2. On the paper, draw a straight line toward the wall and point the laser along this line.
3. Put modeling clay under the laser and attach it to the paper on the edge farthest from the wall as shown in Figure 2.2 and Figure 2.3.
4. Use your protractor to draw a line perpendicular to the laser line 5 centimeters away from the front of the laser.
5. Put modeling clay on this new line and attach the grating to it.
6. Turn on the laser and make sure that your diffraction pattern spreads out horizontally. If it does not, rotate your grating.
7. Use pieces of masking tape to mark the locations of the three brightest spots.
8. Turn the laser off.
Figure 2.3 Overhead View of Set-up
Figure 2.2 Side View of Experiment Set-up

Student Guide • PhysicsQuest • page 25
MEASURING THE BEAM ANGLES
1. Keep the paper taped down, but remove the laser, grating and clay from the paper.
2. Use the meter stick to draw straight lines on the paper from where the grating used to be toward each spot on the wall.
3. Use a protractor to measure the angle from the center spot to each of the other spots you marked. Record your measurements in the Challenge Report.
4. Find the average angle between the brightest spots on each side of the center spot and record it in your Challenge Report.
Conclusion The treasure is hidden in a location that is a certain angle to the right of due north from the location you found in Activity 1. That angle is the same angle you just found.
CONGRATULATIONS! You are one step closer to fi nding the location of the treasure!
Figure 2.4 Overhead View of Measuring Angles


Challenge Report • PhysicsQuest • page 27Challenge Report • PhysicsQuest • page 27Challenge Report
C h a l l e n g e R e p o r t
Seeing Spots2ActivityTeam Members
Class
Results of Activity | Seeing Light Diffract
What do you observe on the wall after the beam goes through the grating? How many spots do you see on the wall? Draw a picture.
What do you see when you put chalk dust between the laser and the wall? Draw a picture.

page 28 • PhysicsQuest • Challenge Report
What happens when you rotate the grating?
Results of Activity | Measuring the Beam Angles
Angle from center spot
Brightest spot on left
Brightest spot on right
Are the angles to the spots on each side of the center beam similar? yes no
If not, you may want to repeat the experiment more carefully.
Find the average of the two angles by adding the left and the right angles together and dividing by 2.
Average __________
Discussion Question
Do you think the angles to the left and right spots will be the same if you change the location of the grating? Why or why not? Would using a different laser change the angles?

29
T e a c h e r G u i d e
VocabularyPeriodic
Period
Equilibrium
Pivot Point
Mathematical Operations: Square and Square Root
As the Washer Swings3ActivityIntroductionThe repeated motion of the pendulum has been studied since Galileo fi rst noticed its predictability in 1583. Insight from studying the pendulum has led us to a better understanding of more complex periodic systems such as bouncing balls, vibrating violin strings, and the orbit of an electron around a nucleus. In this activity, students will explore the effect that changing the length of a pendulum has on its period. They will use this information to predict the length of a pendulum given a specifi c period.
ObjectivesStudents will be able to:
■ Recognize the qualitative relationship between the length and period of a pendulum.
■ Understand the importance of data reproducibility in scientifi c investigations.
■ Form predictions based on experimental evidence.
■ Transform raw data into meaningful graphs and make predictions using graphs.
■ Use mathematical tools to interpret raw data in order to form conclusions about their results.
National Science Education Standard LinksAll standards addressed by this activity can be found in the table located at the end of this guide.

page 30 • PhysicsQuest • Teacher Guide
Background InformationA common pendulum consists of a string attached to a stationary point on one end and a weight on the other end, with the weight and string able to move freely from side to side. When the string is hanging straight down and the weight is at rest, the pendulum is in its equilibrium position. As the pendulum swings back and forth the system undergoes periodic motion. The displacement of the weight from its equilibrium position is called its amplitude. The amount of time it takes the weight to swing back and forth through the center and return to its starting point is defi ned as the period of a pendulum.
The period of a pendulum depends only on its length and on gravity. The amount of weight on the end of the string has no effect on the period. As long as the amplitude of the pendulum is fairly small, how “high” it swings also has no signifi cant effect on the period. Mathematically, the period of a pendulum swinging at small angles can be estimated by the formula:
T = period of motionL = length of the entire pendulumg = acceleration due to gravity at the location of the pendulum
The weight has maximum velocity of motion when swinging through the equilibrium position. The velocity of motion is lowest (equal to zero) when the weight is at the highest point — right before changing directions. Plots of position versus velocity of a swinging pendulum are sinusoidal because of the periodic motion.
Classroom Preparation■ Photocopy student worksheets and Challenge Reports.
■ Cut each group a piece of string 1.5 meters long.
Activity TimeStudents need 40 minutes to complete the basic activity.
Figure 3.1 The Motion of a Pendulum
ampl
itud
e
time
equilibriumposition
λ = one period γ = amplitude
λ
γ
Teacher Guide • PhysicsQuest • page 31
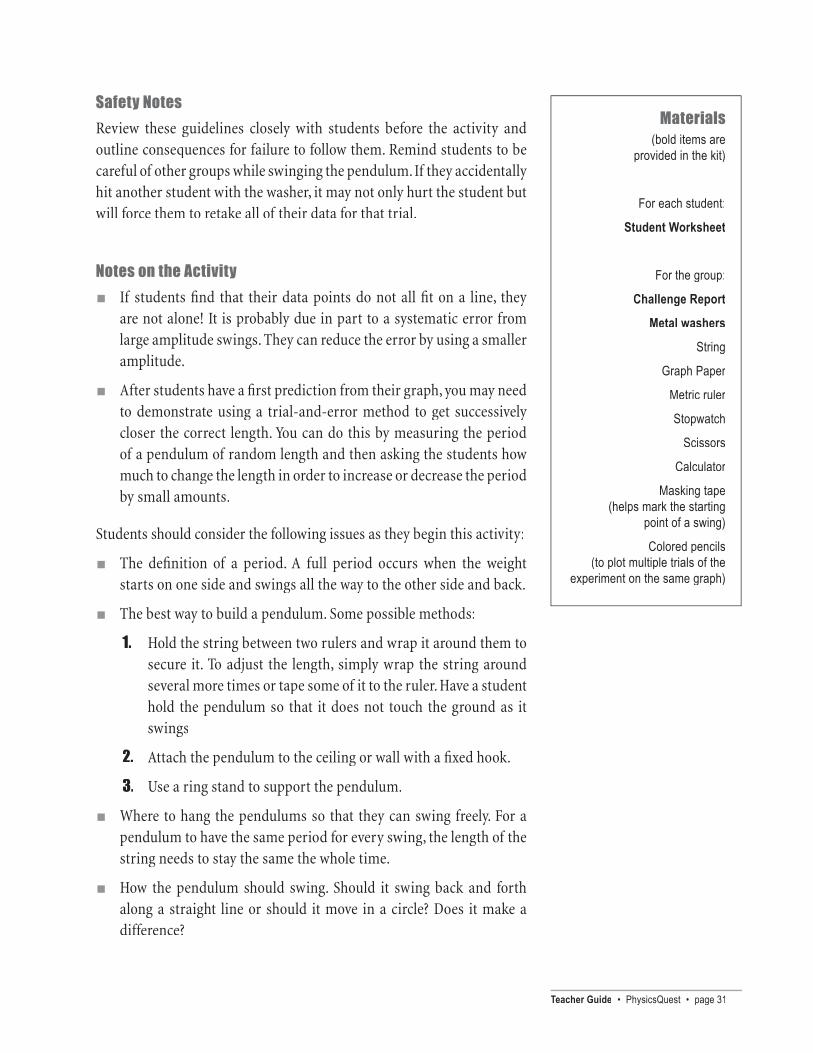
Safety NotesReview these guidelines closely with students before the activity and outline consequences for failure to follow them. Remind students to be careful of other groups while swinging the pendulum. If they accidentally hit another student with the washer, it may not only hurt the student but will force them to retake all of their data for that trial.
Notes on the Activity■ If students fi nd that their data points do not all fi t on a line, they
are not alone! It is probably due in part to a systematic error from large amplitude swings. They can reduce the error by using a smaller amplitude.
■ After students have a fi rst prediction from their graph, you may need to demonstrate using a trial-and-error method to get successively closer the correct length. You can do this by measuring the period of a pendulum of random length and then asking the students how much to change the length in order to increase or decrease the period by small amounts.
Students should consider the following issues as they begin this activity:
■ The defi nition of a period. A full period occurs when the weight starts on one side and swings all the way to the other side and back.
■ The best way to build a pendulum. Some possible methods:
1. Hold the string between two rulers and wrap it around them to secure it. To adjust the length, simply wrap the string around several more times or tape some of it to the ruler. Have a student hold the pendulum so that it does not touch the ground as it swings
2. Attach the pendulum to the ceiling or wall with a fi xed hook.
3. Use a ring stand to support the pendulum.
■ Where to hang the pendulums so that they can swing freely. For a pendulum to have the same period for every swing, the length of the string needs to stay the same the whole time.
■ How the pendulum should swing. Should it swing back and forth along a straight line or should it move in a circle? Does it make a difference?
Materials(bold items are
provided in the kit)
For each student:
Student Worksheet
For the group:
Challenge Report
Metal washers
String
Graph Paper
Metric ruler
Stopwatch
Scissors
Calculator
Masking tape (helps mark the starting
point of a swing)
Colored pencils (to plot multiple trials of the
experiment on the same graph)

page 32 • PhysicsQuest • Teacher Guide
■ How to measure the length of a pendulum. The length is defi ned as the distance from the pivot point to the center of the weight on the string.
■ The amplitude of the swing. The swings of a pendulum only take the same amount of time if the swings are small. However, students also need to be able to clearly see each swing.
■ How to time the swings of their pendulum. Students can time from when the weight is highest at one end until it swings all the way across and back again, or they can time from when the weight passes a certain point until it passes that point again going in the same direction. Be sure they time complete swings, not just half of a swing.
■ When to start timing the pendulum. Should they begin as soon as they let the pendulum go? Let it settle into a steady swing fi rst?

33
S t u d e n t A c t i v i t y
MaterialsMetal washers (2)
Stopwatch
Meter stick
String
Graph paper
Calculator
Figure 3.1Pendulum Period
As the Washer Swings3ActivityIntroductionThe distance from the starting point you found in Activity 1 to the location of the treasure was measured with a yo-yo. It turned out to be 315 yo-yo lengths. Your next challenge is to fi gure out what this distance is in meters.
The yo-yo used had a period of 1.8 seconds. You need to build a pendulum with the same period as the yo-yo. Once you have done this, you can fi gure out the distance you need to go in order to fi nd the treasure.
SafetyBe sure to watch out for other groups when swinging your pendulum. The heavy end with the washers could hurt someone when moving at high speeds.
ProcedureCAN YOU MEASURE THE PERIOD OF A PENDULUM?
The yo-yo used had a period of 1.8 seconds — it took the yo-yo 1.8 seconds to swing from one side to the other and back. To begin with, you will measure the periods of pendulums with different lengths.
1. Build a pendulum by tying the metal washers to one end of a string about 1.5 meters long.
2. Hang your pendulum so that the string is 1.20 meters long from the top point to the washers.
3. Lift the washers to one side and let go. Measure the amount of time it takes the pendulum to swing back and forth 10 times. Record this in your Challenge Report data table.
4. Divide the total time by 10 to get the time of each swing (the period). Record the period in the Challenge Report data table.

page 34 • PhysicsQuest • Student Guide
5. Repeat steps 2–4. Record these values under Trial Two in the Challenge Report data table.
6. Find the average period by adding together the periods from each trial and dividing by 2. Record the average period in your Challenge Report data table.
7. Multiply the average period by itself (square it) and record that in the data table.
8. Repeat steps 2-6 for pendulums of lengths 1.0-m, 0.8-m, and 0.6-m.
9. Graph your data. Make the horizontal axis “Length of the Pendulum in Meters” and the vertical axis “Average Period in Seconds Squared.” Your graph should have 4 data points.
10. Use a pencil and a ruler to draw a straight line as close to all your data points as possible. Check this graph and the answers to the questions with your teacher before moving on to the next section.
HOW LONG WAS THE YO-YO?
1. The period of the pendulum used was 1.8 seconds. Square this value and fi nd it on your graph’s vertical axis.
2. Starting at that value, draw a line horizontally across your paper until you hit the straight line you drew in step 10.
3. Draw another line straight down from where you stopped in step 2 until you hit the horizontal axis.
4. Record the value from the horizontal axis in the Challenge Report data table. This is your fi rst prediction for the length of the yo-yo.
5. Build a pendulum with your predicted length from step 4.
6. Measure the period of this pendulum as you did in the fi rst section. Record your data in the table.
7. Did you get a period of 1.8 seconds? If so, move on to step 8. If not, check that you made your prediction from the graph correctly. If you did, decide whether your pendulum is too long or short. Make a small change to the length and measure the period of the new pendulum. Continue to make small changes until your period is 1.8 seconds. Record all the lengths you try and their periods in the Challenge Report data table.

Student Guide • PhysicsQuest • page 35
8. When you have made a pendulum with a period of 1.8 seconds, record this length (in meters) in your Challenge Report.
9. The person hiding the treasure traveled 315 yo-yo lengths. To fi nd how far he walked, multiply 315 by the length of your pendulum (in meters). Record this value in your Challenge Report data table.
10. On the treasure map, every centimeter represents 50 meters. Divide your number for how far the man walked by 50 meters to fi nd how many centimeters you need to move on the map.
Conclusion CONGRATULATIONS! You are another step closer to finding the location of the treasure! This distance is how far the man walked from the starting point you found in Activity 1 at the angle you found in Activity 2.


Challenge Report • PhysicsQuest • page 37Challenge Report • PhysicsQuest • page 37Challenge Report
Team Members
Class
Results of Activity | Can you measure the period of a pendulum?
What happens to the period of a pendulum when you decrease its length? increases decreases stays the same
When you decrease the length, the weight returns to its starting position: faster slower at the same rate
C h a l l e n g e R e p o r t
Trial One Trial Two
Length Total time Period = Total time Period = Average Ave. period for 10 swings total time/10 for 10 swings total time/10 period squared(meters) (seconds) (seconds) (seconds) (seconds) (seconds) (seconds2)2)2
1.20
1.0
0.80
0.60
Trial One Trial Two
Total time Period = Total time Period = Average Ave. period for 10 swings total time/10 for 10 swings total time/10 period squared(meters) (seconds) (seconds) (seconds) (seconds) (seconds) (seconds
Total time Period = Total time Period = Average Ave. period for 10 swings total time/10 for 10 swings total time/10 period squared(meters) (seconds) (seconds) (seconds) (seconds) (seconds) (seconds
Total time Period = Total time Period = Average Ave. period for 10 swings total time/10 for 10 swings total time/10 period squared(meters) (seconds) (seconds) (seconds) (seconds) (seconds) (seconds
Total time Period = Total time Period = Average Ave. period for 10 swings total time/10 for 10 swings total time/10 period squared(meters) (seconds) (seconds) (seconds) (seconds) (seconds) (seconds
Total time Period = Total time Period = Average Ave. period for 10 swings total time/10 for 10 swings total time/10 period squared(meters) (seconds) (seconds) (seconds) (seconds) (seconds) (seconds
Total time Period = Total time Period = Average Ave. period for 10 swings total time/10 for 10 swings total time/10 period squared(meters) (seconds) (seconds) (seconds) (seconds) (seconds) (seconds
As the Washer Swings3Activity

page 38 • PhysicsQuest • Challenge Report
Length Total time for 10 swings Period = total time/10(meters) (seconds) (seconds)
Discussion Question
Why was your prediction from the graph not exactly correct? How could you have made it better?
Results of Activity | How long was the yo-yo?
First predicted length from your graph: __________
Length of the yo-yo: __________
Total distance: __________
Distance on the map: __________
Location of the treasure: __________
Length Total time for 10 swings Period = total time/10(meters) (seconds) (seconds)Length Total time for 10 swings Period = total time/10(meters) (seconds) (seconds)

39
T e a c h e r G u i d e
VocabularyMagnets
Electrons
Magnetic Fields
Magnetic Forces
North and South Poles
Furry Magnets4ActivityIntroductionMagnets are everywhere. They are important components of electric motors, electric generators, transformers, and power supplies. Memory storage in computers makes use of very tiny magnetic bits, and information is coded in magnetic strips on IDs and credit cards. In this experiment, students will use iron fi lings to map out the magnetic fi eld due to different confi gurations of bar magnets.
ObjectivesStudents will be able to:
■ Use iron fi lings to identify the orientation of magnetic fi elds for given bar magnet confi gurations.
■ Obtain results that are suffi ciently accurate to match external sources of comparison.
■ Carefully complete a scientifi c investigation requiring attention to detail.
National Science Education Standard LinksAll standards addressed by this activity can be found in the table located at the end of this guide.
Background InformationMagnetic substances, like all materials, are made of atoms that have magnetic moments because of the spin of their electrons. If all the electrons in an atom are spinning in one direction, that atom has a very strong magnetic moment in that direction. If all the electrons in an atom are not spinning in the same direction, the atom may have a weak or nonexistent magnetic moment. Groups of atoms with magnetic moments in the same direction are called domains. In order for a material to be magnetized, it needs to have many domains aligned in the same

page 40 • PhysicsQuest • Teacher Guide
direction. The more domains that are aligned, the stronger the magnet will be. Domains can be forced to align (making a magnet) or they can be forced out of alignment (breaking a magnet).
Magnets are objects that attract certain metals. They have one north pole and one south pole — labeled so because one end always attracts the earth’s northern magnetic pole and the other attracts the earth’s southern magnetic pole. Since the earth has north and south magnetic poles, it too is a large magnet. Magnets may be permanent or temporary, depending on how long they hold their magnetic north and south poles.
Similar to how negative electric charges attract positive charges, north ends of magnets always attract south ends, and south ends attract north ends. There is a big difference between charges and magnets. Positive and negative charges can be isolated, but you can never isolate a north or south pole. Breaking a magnet in half only creates two new magnets, each with a north and south end.
Magnets establish magnetic fi elds that affect the behavior of objects within their range. Magnetic fi elds, such as the magnetic fi eld surrounding the earth, can exert forces on objects even without physical contact. These forces act over a distance to infl uence the motion of objects.
Magnetic fi elds and forces add together just like electric fi elds and forces. If several magnets are placed near each other, their fi elds add together to exert a net force on a nearby object. Some materials are strongly attracted to magnets and others are weakly attracted, some materials are strongly repelled and others weakly repelled, and some are not affected at all. Materials can be classifi ed and exploited based on how they respond to the presence of a magnetic fi eld.
There is a close relationship between electric charges and magnetic poles; moving electric charges create magnetic fi elds and feel the force of magnetic fi elds. Similarly, changing magnetic fi elds create electric currents.
Classroom Preparation■ Photocopy student worksheets and Challenge Reports.
■ Poke small holes in the top of the iron fi llings container so that students can shake them out like salt from a salt shaker.
N
S
Figure 4.1 Magnetic Field Lines of Bar Magnet

Teacher Guide • PhysicsQuest • page 41
Activity TimeStudents need 20 minutes to complete the basic activity.
Safety NotesReview these guidelines closely with students before the activity and outline consequences for failure to follow them. Students should avoid getting the iron fi lings in or near their eyes as it can cause major irritation and discomfort. Also warn students against allowing the iron fi lings to directly touch the magnets as the fi lings will not come off.
Notes on the Activity■ This activity must be done on a non-metal surface.
■ Be sure that students do not allow the magnets to touch when opposite ends are near one another. They will not get the proper pattern if this happens.
■ Be sure the magnets are close enough for their fi eld lines to interact. Otherwise, students will not get the proper pattern.
■ Getting the fi lings to create a pattern requires a gentle touch. You may want to demonstrate this process on the overhead before beginning the activity so students understand what to do. If tapping the paper does not work, try lightly shaking the paper from side to side.
■ If there is extra time, encourage the students to try additional arrangements of magnets. Have them predict the patterns before observing them.
Materials(bold items are
provided in the kit)
For each student:
Student Worksheet
Safety Goggles
For the group:
Challenge Report
Magnetic Field Line Pattern Guide
Two Bar Magnets
Iron fi lings
Blank White Paper


43
S t u d e n t A c t i v i t y
MaterialsTwo bar magnets
Iron fi lings
Blank white paper
Safety goggles
Magnetic Field Line Guide
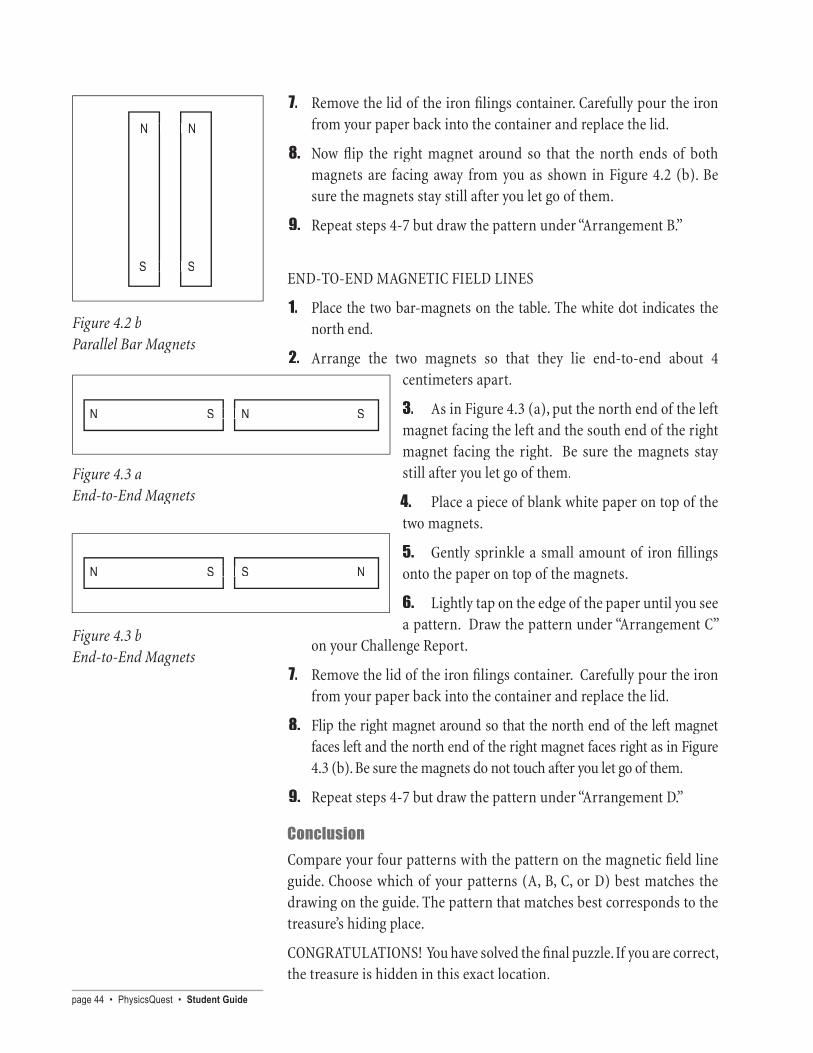
Figure 4.2 a Parallel Bar Magnets
N SN SN S
S NS NS N
Furry Magnets 4ActivityIntroductionHaving done the other three experiments to fi nd the location on the map where the treasure is hidden, you must now fi nd the specifi c hiding place. The place has been coded into a pattern that can be duplicated by an arrangement of magnets. As you may know, magnets are attracted to each other and to many other objects. You can map that attraction using iron fi lings.
In this activity, you will examine how two rectangular magnets interact by spreading small pieces of iron on top of them and observing the patterns that are made. You can make different patterns by arranging the magnets differently. Only one arrangement will match the pattern and tell you where to fi nd the treasure!
SafetySafety goggles should be worn to avoid any contact of the iron fi lings with your eyes! Iron fi lings can cause irritation and discomfort to your eyes!
ProcedurePARALLEL MAGNETIC FIELD LINES
1. Place the two magnets on the table. The white dot indicates the north end.
2. Arrange the two magnets so that they lie parallel about 4 centimeters apart.
3. As in Figure 4.2 (a), put the north end of the left magnet facing away from you and the south end of the right magnet facing away from you. Be sure the magnets do not touch after you let go of them.
4. Place a piece of blank white paper on top of the two magnets.
5. Gently sprinkle a small amount iron fi lings onto the paper. Do not let the iron fi lings touch the magnets!
6. Lightly tap down on the edge of the paper until you see a pattern. Draw the pattern under “Arrangement A” on your Challenge Report.
page 44 • PhysicsQuest • Student Guide
7. Remove the lid of the iron fi lings container. Carefully pour the iron from your paper back into the container and replace the lid.
8. Now fl ip the right magnet around so that the north ends of both magnets are facing away from you as shown in Figure 4.2 (b). Be sure the magnets stay still after you let go of them.
9. Repeat steps 4-7 but draw the pattern under “Arrangement B.”
END-TO-END MAGNETIC FIELD LINES
1. Place the two bar-magnets on the table. The white dot indicates the north end.
2. Arrange the two magnets so that they lie end-to-end about 4 centimeters apart.
3. As in Figure 4.3 (a), put the north end of the left magnet facing the left and the south end of the right magnet facing the right. Be sure the magnets stay still after you let go of them.
4. Place a piece of blank white paper on top of the two magnets.
5. Gently sprinkle a small amount of iron fi llings onto the paper on top of the magnets.
6. Lightly tap on the edge of the paper until you see a pattern. Draw the pattern under “Arrangement C”
on your Challenge Report.
7. Remove the lid of the iron fi lings container. Carefully pour the iron from your paper back into the container and replace the lid.
8. Flip the right magnet around so that the north end of the left magnet faces left and the north end of the right magnet faces right as in Figure 4.3 (b). Be sure the magnets do not touch after you let go of them.
9. Repeat steps 4-7 but draw the pattern under “Arrangement D.”
Conclusion Compare your four patterns with the pattern on the magnetic fi eld line guide. Choose which of your patterns (A, B, C, or D) best matches the drawing on the guide. The pattern that matches best corresponds to the treasure’s hiding place.
CONGRATULATIONS! You have solved the fi nal puzzle. If you are correct, the treasure is hidden in this exact location.
Figure 4.3 aEnd-to-End Magnets
Figure 4.2 bParallel Bar Magnets
N NN NN N
S SS SS S
Figure 4.3 bEnd-to-End Magnets
N S N SN S N SN S N S
N S S NN S S NN S S NN S S N

Challenge Report • PhysicsQuest • page 45Challenge Report • PhysicsQuest • page 45Challenge Report
Team Members
Class
Results of Activity
Make your drawings as precise as possible.
C h a l l e n g e R e p o r t
Furry Magnets4Activity
Arrangement A Arrangement BArrangement A Arrangement BArrangement A Arrangement B
The attic Behind a loose brick in the fireplace

page 46 • PhysicsQuest • Challenge Report
Each pattern has a code telling you where the treasure might be hidden. The pattern most like the pattern in the Magnetic Field Line Guide tells you which place is correct.
Which of your patterns BEST matches the fi gure from the guide? A B C D
Based on your choice, where is the treasure? ________________________________________
Discussion Question
Does the pattern change if you switch the direction of both the right and left magnets? Why or why not? Does your pattern change if you change the distance between the two magnets? Why or why not?
Arrangement C
Under the fl oorboard
Arrangement D
In a secret passage behind a revolving bookcase

Standard Links • PhysicsQuest • page 47
The objectives of the PhysicsQuest activities correspond directly to many of the National Science Education Standards. The tables below show the standards that are addressed by each of the PhysicsQuest activities.
S t a n d a r d L i n k s
National Science Education Standard Links
National Science Education Standards Activities
K-12 Unifying Concepts and Processes: Systems, Order, and Organization ........................................................... 1,2,4 There are physical laws governing the behavior of nature that exemplify its order, predictability, and regularity. Many seemingly anomalous occurrences can be better understood by analyzing their place in a larger system of phenom-ena. The behavior of the natural world is the same everywhere and is thus predictable and regular.
K–12 Unifying Concepts and Processes: Evidence, Models, and Explanation ................................................................ 3Scientifi c explanations incorporate existing scientifi c knowledge and new evidence from observations, experiments, or models into internally consistent, logical statements.
K–12 Unifying Concepts and Processes: Constancy, Change, and Measurement .................................................... 1,2,3Some properties of systems are characterized by constancy. Knowledge of mathematics is essential for accurate and commu-nicable measurement. Changes in systems can be quantifi ed. Mathematics is essential for accurately measuring change.
5–8 Science as Inquiry .............................................................................................................................................. 1,2,3,4Conduct a scientifi c investigation.
5–8 Science as Inquiry ............................................................................................................................................. 1,2,3,4Use appropriate tools and technology to gather, analyze, and interpret data.
5–8 Science as Inquiry ....................................................................................................................................................... 3Develop descriptions, explanation, predictions, and models using evidence.
5–8 Science as Inquiry ................................................................................................................................................ 1,2,3Use mathematics in all aspects of scientifi c inquiry.
5–8 Physical Science: Motion and Forces ........................................................................................................................ 3The motion of an object can be described by its position, direction of motion, and speed. That motion can be measured and represented on a graph. Objects not subjected to forces will move in straight lines.
5–8 Physical Science: Motions and Forces ...................................................................................................................... 1If more than one force acts on an object along a straight line, then the forces will reinforce or cancel one another.
5–8 Physical Science: Transfer of Energy ........................................................................................................................ 2Energy associated with light exists in a range of wavelengths. Light interacts with matter to produce a variety of phenomena.
5–8 Science and Technology: Implement a Proposed Design ........................................................................................ 1Use suitable tools and techniques to solve problems.
5–8 History and Nature of Science: Science as Human Endeavor ........................................................................5–8 History and Nature of Science: Science as Human Endeavor ........................................................................5–8 History and Nature of Science: Science as Human Endeavor 1,2,3,4Some scientists work in teams, and some work alone, but all communicate extensively with others.
5–8 History and Nature of Science: Nature of Science ........................................................................................... 1,2,3,4It is part of scientifi c inquiry to evaluate the results of scientifi c investigations, experiments, observations, theoretical models, and explanations proposed by other scientists.

page 48 • PhysicsQuest • References
R e f e r e n c e s
Soap Films
Gardner, Robert. Experiments with Bubbles: Getting Started in Science. Springfi eld, NJ: Enslow Publishers, Inc, 1995.
Zubrowski, Bernie. Bubbles: A Children’s Museum Activity Book. Boston, NY: Little, Brown and Company, 1979.
Ron Hipschman. Bubbles. http://www.exploratorium.edu/ronh/bubbles/bubbles.html.
Nave, Rod. Georgia State University. HyperPhysics. http://hyperphysics.phy-astr.gsu.edu/hbase/surten.html.
The Exploratorium. www.exploratorium.edu, http://www.exploratorium.edu/snacks/soap_bubbles.html.
Commonwealth of Australia. Questacon – Bubbles and Maths.http://www.questacon.edu.au/html/bubbles.html.
Doherty, Paul. Scientifi c Explorations and Adventures. http://www.exo.net/%7Epauld/activities/sweden/bubblebottle.html.
Light Diffraction
The Exploratorium. http://www.exploratorium.edu/snacks/diffraction.html.
NASA Quest. http://quest.arc.nasa.gov/lfs/tguide/a1b.html.
Alward, Joseph. Department of Physics, University of the Pacifi c. Light Waves. http://sol.sci.uop.edu/~jfalward/physics17/chapter11/chapter11.html.
Yo-Yos and Pendulums
Johnson, Dr. Porter. The Illinois Institute of Technology’s Science and Mathematics Initiative for Learning Enhancement (SMILE). http://www.iit.edu/~smile/physinde.html (various pendulum lessons under “mechanics” section).
Van Helden, Albert. Galileo’s Pendulum Experiments. http://galileo.rice.edu/sci/instruments/pendulum.html.
Marais, Susann and van Rensburg, Zack Jansen. Chronology. http://library.thinkquest.org/C006607F/index.html.
Magnets and Magnetism
Ardley, Neil. The Science Book of Magnets. New York: Harcourt Brace Jovanovich, Publishers, 1991.
DiSpezio, Michael. Awesome Experiments in Electricity and Magnetism. New York: Sterling Publishing Company, Inc, 1998.
The Exploratorium.
Circles of Magnetism I. http://www.exploratorium.edu/snacks/circles_magnetism_I.html.
Magnetic Suction. http://www.exploratorium.edu/snacks/magnetic_suction.html.
Motor Effect. http://www.exploratorium.edu/snacks/motor_effect.html.
Strange Attractor. http://www.exploratorium.edu/snacks/strange_attractor.html.
Stripped down motor. http://www.exploratorium.edu/snacks/stripped_down_motor.html.
Farndon, John. Magnetism. New York: Marshall Cavendish Corporation, 2002.
Gardner, Robert. Electricity and Magnetism. New York: Twenty-First Century Books, 1994.
Gardner, Robert. Science Projects About Electricity and Magnetism. Berkley Heights, NJ: Enslow Publishers, Inc, 1994.
Riley, Peter. Magnetism. New York: Franklin Watts, 1999.
Tocci, Salvatore. Experiments with Magnets. New York: Children’s Press: 2001.
VanCleave, Janice. Magnets: Mind-Boggling Experiments You Can Turn Into Science Fair Projects. New York: John Wiley & Sons, Inc, 1993.
Vecchione, Glen. Magnet Science. New York: Sterling Publishing Company, Inc, 1996.
Woodruff, John. Magnetism. New York: Raintree Steck-Vaughn Publishers, 1998.