don’t be too quick to judge the people and settlements …€™t be too quick to judge the people...
TRANSCRIPT


“Intermundis has become a frightening place, where the weak
suffer and the strong survive. A world in constant battle for
supremacy, infested by terrifying creatures fighting each other,
where concepts such as Order, Equality and Justice are hard to
come by and often replaced by cruelty, greed, and lust for power.
The morality of actions can no longer be applied by a set of
standard laws, for who’s to say when it’s unjust for a desperate
mother to kill the child of another in order to save her own and
prevent the same cruel fate from happening to her.
Don’t be too quick to judge the people and settlements you will
encounter on your journeys, for grief, loss and desperate times,
can change or corrupt the heart of even the strongest individual.
Can you truthfully say you will remain the same after years of
dark, cruel journeys through this accursed world, or would you
admit your survival and that of those you value most would take
priority over any sense of “good” and “evil” others might
perceive as your actions?
Are you ready to take responsibility?
It is time you make a choice: Live a long life and survive on a blood
drenched path built on the bones of others all the way to the top of
this cursed existence or wither and die alone, to be stepped on by
those with power and souls, your bones joining the countless
others in paving a chilling and macabre road of death.
-Accursed Guildmaster Ezokael.

Index
About Game ...................... 3 Accursed Class ................... 8 Accursed Dashboard .......... 5 Accursed Level .................. 8 Accursed Tokens ............... 4 Activating Events ............. 15 Agility ................................ 8 Archways .......................... 4 Attack Phase ................... 18 Attack Specials ................ 20 Attacks ............................ 19 Attribute Tests .................. 8 Attributes .......................... 8 Boss Cards ......................... 6 Boulder Marker ................. 6 Cast a Spell ...................... 21 Channel ........................... 21 Character Attributes .......... 8 Characters ......................... 7 Charisma ........................... 8 Chest Tokens ..................... 5 Cleave ............................. 20 Conditions ....................... 22 Consumable Tokens .......... 5 Consumables ................ 9, 20 Contents ........................... 4 Count Distances ................ 7 Creating am Accursed ........ 9 Critical Hits and Critical
Misses .............................. 20 Cursed Heart ..................... 9 Cursed Heart Healing ....... 23 Cursed Tokens ................... 5 d3 ...................................... 4 d6 ...................................... 4 Darkness Dice .................... 4 Darkness Roll .................. 14 Darkness Wheel ................ 5 Defeated Hero ................. 22 Defeated Monster ........... 22 Doors ................................ 4 Dual Wielding Attacks ..... 20 Dungeon Cards .................. 6
Dungeon Set Up .............. 11 Dungeon Tiles .................... 4 Elevated Squares ............. 17 Encounters Cards ............... 6 End of Combat ................. 26 Endurance ......................... 8 Equipment Slots .............. 10 Equipped Bonuses ........... 10 Escaping the Dungeon ..... 18 Event Cards ....................... 6 Events Phase ................... 15 Exorcist ............................. 9 Exploration Phase ............ 14 Faith Points ..................... 14 Faith Tokens ...................... 6 Gameplay Overview .......... 3 Health ............................... 8 Initiative ............................ 8 Insanity ........................... 22 Invoke a Miracle .............. 21 Junctions ......................... 15 Keywords ........................ 10 Large bases ...................... 17 Line of Sight..................... 18 Loot Round ...................... 24 Map Tile Reveal ............... 14 Map Tiles........................... 7 Melee ................................ 8 Mind ................................. 8 Miniatures ......................... 4 Miracle Cards .................... 6 Monster Card .................. 24 Monsters Attacks ............ 20 Monsters Behaviour ........ 25 Monsters Cards ................. 5 Move ............................... 16 Movement ........................ 8 Multiple Rolls .................... 7 Open/Close Doors ........... 16 Optional Rules ................. 26 Perception ......................... 8 Place Ambushing Monsters
......................................... 25
Place Prepared Monsters . 24 Playing Area .................... 11 Random Quest ................. 11 Ranged .............................. 8 Read the Objective .......... 11 Read the Prologue ........... 11 Recover Stamina .............. 16 Reference .......................... 6 Reference Sheet ................ 6 Re-rolls .............................. 7 Result to Beat .................... 7 Resurrection .................... 23 Roll Modifiers .................... 7 Room Treasure ................ 15 Rounds ............................ 13 Sanity ................................ 8 Search ............................. 23 Search Action .................. 23 Skill Cards ...................... 6, 9 Soulds and Crowns .......... 10 Source Burns ................... 21 Spawn a Boss Encounter .. 25 Special Spawning ............. 25 Spell Cards ......................... 6 Stamina Tokens ............. 5, 9 Start the Game ................ 12 Starting Equipment ............ 9 Strength ............................ 8 Terminology ...................... 7 The Quest Room .............. 11 Threat ............................. 16 Trade ............................... 16 Treasure Cards ............... 5, 6 Turns ............................... 16 Turns Phase ..................... 16 Tutorial Quest ................. 11 Unarmed Attacks ............. 20 Weight ............................ 10 Wounds and Hits ............. 20 Wounds and Insanity
Tokens ................................ 5

Introduction
About Game Set in the dark-gothic, fantasy world of Intermundis, Darklight: Memento Mori is a hybrid between a boardgame and a roleplaying game, which combine strategic combat and randomly generated dungeons in gruesome, dark settings. Up to four players assume the role of a dark hero known as an Accursed and adventures in the obscure depths of forgotten ruins, crypts, dungeons, and more, dodging traps, finding treasure, killing demons and all those standing in their way, to collect their Souls, a currency which can be used to purchase better equipment or pay for special services. Souls are Intermundis most valued currency, everyone is in danger to be called by the Grim Warden at any time, especially those carrying the Accursed, the only thing that can save them is offering the souls of others in exchange for their own. The Accursed will able to deal with the Warden and increase their combat powers by sacrificing large amount of Souls to the Warden, however the more they do this, the more they risk of losing their humanity and become insane, soul hungry creatures.
Gameplay Overview Darklight is divided within two main phases, the first takes place inside deadly dungeons where the Accursed explores intricate mazes filled with all sort of unholy abominations waiting for their next victims, while looting forgotten treasures and searching for the Quest Room which will allow them to complete their current mission. These are called Quests, and the locations they take place will always be referred by the rules as Dungeons even if they are not actually dungeons, like the forgotten ruins of an ancient temple, or a vast abandoned Keep.
The second phase, is called Survival and it starts the moment the Accursed steps out of the dungeon. It involves the dark, long Journeys they will have to undertake in order to search for settlements still standing in order to replenish their strength, trade with the locals and increase their powers. Once they are ready, or the locals have had enough of the outsiders, the Accursed will move on to their next location, usually a new quest. This Rulebook starts by explaining the Basic Rules on how to play Quests, and it is advised you get familiar with them before moving on to the Advanced Rules, which will explain the Survival section of the game, expanding your experience beyond the claustrophobic walls of a dungeon. As you continue reading this manual, you will be introduced to the basic concepts of terminology, then how to read Characters profiles. You will be then shown how to prepare your own Accursed, followed by the explanation on how to make them move, explore, attack, cast spells and so on. The game will be harsh to the players, especially to the poorly unprepared and inexperienced beginners, you are expected to be killed at any moment if your strategy and equipment is not good enough or if you push your luck too far, so if you keep failing don’t give up, make sure to experiment with different strategies until you and your friends have found a good balance. You do not play Darklight to become wealthy, famous Accursed, those are only the perks that come with surviving, you play it to see how long you can last its harsh, brutal world and being able to brag about it while telling others the epic stories of your adventures.

Contents The following chapter gives you a brief description of the component required to play Darklight with the Basic Rules.
Miniatures There are a total of 70 miniatures used to represent the Accursed and Monsters.
Dungeon Tiles Dungeon tiles or “Map Tiles” are used to represent the dungeon rooms and corridors. Each figures a grid of squares to help the players place the miniatures down.
Archways Map tiles are connected to each other by Archways, to do so, slide the thick cardboard within the archway under-slot and always make sure the two stone squares within are aligned with the rest of the room. Both squares of an archway are used just like any other map tile square and for the sake of rules they are considered to be part of both the map tiles they are connected to, so when a character stands within any Archway squares, they are also affected by the rules currently working in either of the adjoining rooms. Likewise if a rule says it takes places within the room an Accursed currently is and they are standing within the Archway, they get to decide in which of the 2 adjoining rooms the effect actually is.
Doors There are a variety of Doors which are used to represent the current status of an Archway. Any door except for the Standard Doors, are used only by specific events or rules which will detail how to use them. When an Archway is closed, slot a standard door within it, and take it out when open.
Six-sided dice (d6) There are Eight Six-sided dice within the box, known also as “d6”.
Three-sided dice (d3) The game does not come with three-sided dice so to roll a d3 when asked by the rules, roll a regular d6 and half the result (round up):
Darkness Dice
The darkness dice is a red, translucent, six faced dice used to measure the Cursed Heart current light intensity.
Accursed Tokens Every so often within the game you will find rules which will specifically state they affect one Accursed at Random, when this is the case, simply take the Accursed tokens of all the Accursed involved with the given situation and shuffle them upside down so you cannot see which is which (alternatively, put them in a cup), then take one out without looking and flip it to reveal the name and portrait, this will be the Accursed subject to the rule. This can also be a quick way to resolve disputes among players in case they cannot agree on a rule or event.
d6 Roll 1-2 3-4 5-6 d3 Result 1 2 3
Door
Wailing Wall
Guillotine
Broken Door
Portcullis

Wounds and Insanity Tokens Whenever an Accursed suffers Wounds or Insanity, they take one of these markers over their Dashboard to keep track of it. They are double sided, one for Wounds and the other for Insanity. The same markers come in a larger size with the number “5” on them used to reduce clutter, use them at your discretion. When applying wounds to monsters, place these markers besides their miniatures instead.
Source Tokens Source tokens are used to represent how much magical energy an Accursed currently holds. Source is used to cast spells and is gained at the start of every turn if a Catalyst is equipped.
Stamina Tokens These are used to represent the Accursed’s current energy level, they are spent and regained pretty easily so flip them accordingly as the rules demands.
Chest Tokens Some rooms have crates or chests containing valuables waiting for the Accursed to find them, these tokens are used to represent these chests. Shuffle them at the start of every dungeon by keeping the Closed side facing up so you do not know what’s beneath.
Consumable Tokens These are used to reference how many consumable items of each type, an Accursed is currently holding.
Accursed Dashboard There are a total of four Dashboards within the base game, used by the players to reference their own Accursed as they play. They feature two sides, one female and the other male, which have no impact on the rules and are there purely for the sake of personal preference. These will be used to keep track of each Accursed inventory, as well as featuring rules references.
Darkness Wheel The Darkness Wheel and the Darkness Marker are used to keep track of the current light intensity coming out of the Cursed Heart. The Wheel is double sided and features the Dread Wheel on the other side which is used only during the Advanced rules.
Monsters Cards Monster cards are used during combat as reference, to know everything about the current enemy. They feature a chart at the bottom for various difficulties (levels), but for the basic rules you will only need to reference the Level 1 row.
Treasure Cards These are divided between Rare and Standard, they are shuffled individually at the start of every dungeon.
Unspent
Spent
Closed
Open
Locked
Darkness Marker
Darkness Wheel
Rare

Equipment Cards These are the same as the treasure cards, except they are gained by the players when creating their characters. Each set has its back matching the Accursed they have chosen (so the Exorcist will gain every Equipment card with the Exorcist back).
Encounters Cards These are used to generate monsters encounters which will challenge the Accursed. Shuffle them all to create the Encounter deck at the start of a dungeon.
Boss Cards These cards are treated exactly like the Encounter cards but are used to create much more dangerous challenges, usually at the end of a Quest. Shuffle them at the start of every dungeon.
Event Cards Events are all those unexpected things that can happen during a dungeon. Shuffled them all before the start of every dungeon to create the Event deck.
Dungeon Cards Dungeon cards are set up specifically for each Quest. Cards names with a skull icon next to them and those which notes “Quest Room” are used only for specific set ups, so you can remove them until otherwise specified. Which Quest Room will be used is determined by the quest itself.
Skill Cards Each Accursed is associated with a unique skill deck. They do not need to be shuffled but chosen during the creation of an Accursed.
Spell Cards These will be used by those who can learn them in order to cast spells. The Blood Witch starts with two of these, there is no need to shuffle them or have them at hand for the basic rules.
Miracle Cards Miracle cards are divided within 3 categories: Healing, Offensive and Defensive, shuffle each deck individually at the start of each dungeon. Once the exorcist has taken one of each, they can go back in the box until the next dungeon.
Faith Tokens These tokens are used by the Exorcist to record how many Faith Points they currently have, which are needed to cast miracles. They come double sided with one side bearing the number “2” to reduce cluttering.
Reference Sheet There is a double sided reference sheet; one side contains Injuries and Source Burns information used by the Accursed from time to time while in the dungeon, and the other is used with the Advanced Rules, so you can disregard this for the basic rules.
Boulder Marker The Boulder Marker is used by some rules like Events, you will find written over these cards how to do so, just keep in mind it occupies 4 squares as if it was a large miniature with a base size of 2x2 squares. The white arrow is used for you to easily reference a “side”.

Terminology You will now read through some basic and unique concepts which often comes by having played Roleplaying games before, so if you haven’t do not worry, it will all become clearer with practice.
Characters The term “Accursed” will always be used by the rules to describe the characters impersonated by the players. Likewise the term “Monster” will always be referred to the enemies opposing the Accursed, even if they aren’t literally monsters. If the rules use the word “Character” they refer to both monsters and Accursed alike.
Map Tiles
A single room or corridor piece is always referred to as Map Tile, so if an Accursed stands within any of its squares (or adjacent Archway), it counts as being within that map tile. Each map tile is associated with a Dungeon card, so any rules that applies to that map tile will be written over the card itself.
Multiple Rolls Occasionally you will find a number preceding a dice roll, like 2d6 or 3d6, this simply means you must roll that number of dice and sum the result together, so for example a player rolls 3d6 and score 3, 2 and a 6, a total result of 11.
Re-rolls If a rule says you can re-roll a dice score, it means that unless specified otherwise, you can take every dice which has just been rolled by you in whatever situation and roll them again. If a rule specify you can re-roll only one or more dice, you may only re-roll up to that many number of dice instead. Regardless of how many rules allows you to re-roll one die, you can never re-roll the same more than once and must always accept the re-roll score even if it is worse than the first.
Roll Modifiers If there is a “+” or a “-” sign, followed by a number after a dice roll, like 1d6+1, it means you must roll a six faced
die and add 1 to the score, essentially giving you a scoring range between 2 and 7. Regardless of how many dice you roll, you will always use the bonus indicated once, so 2d6+1 gives you a range between 3 and 13 (you only add 1 to the result).
Result to Beat Most tasks in game have a numerical value to beat with a dice roll in order to be successful like when doing an Attribute Test to perform a specific task such as dodging a trap. If for example you read that only on a score of “4+” you will dodge a trap and score a 4 or more, you were successful, anything less and you would have failed in the attempt. If you read something like “3-5” it means that only if you score anything between 3 and 5 this outcomes apply.
Count Distances If you need to know the distance from a square to a square, like in the case you need to know if your ranged attack can reach its target, you will be always doing so by counting from the square adjacent to your character (or whatever you are counting the distance from), to the square you are trying to reach by tracing the shortest route, the resulting number is that distance. Example: The Black Knight (Blue) wants to use a Ranged Weapon attack against a Seeker (Red), he needs first to know how far from his target he currently is. He starts counting from the square adjacent to him all the way to the square where the Seeker currently is. The Seeker is 6 squares away from the Black Knight.

Character Attributes
Attributes are used to express how good a character is during certain situations, like how many wounds they can endure before they die or how fast they are at reacting to a given situation. This information can be found both over the Accursed Dashboards and Monster cards (Monsters Attributes are abbreviated to their starting letter for practicality).
Attributes
Attributes are used by the Accursed to perform specific tests and are not only used for combat situations. Regardless of how many modifiers applied to a character, none of these numbers can go below 1.
(S) Strength: Measures the physical strength of a character, mainly used to deal more damage during Melee Attacks. (P) Perception: Tells you how likely is a character to spot a trap, or damage their opponents with Ranged Attacks. (M) Mind: The intelligence and willpower of an individual are measured by the Mind, used to accumulate more Source powers during Channelling and learn more spells. (C) Charisma: Used during trading transactions or to persuade and coerce others. The Exorcist makes unique use of this attribute by powering their Miracles. (A) Agility: Needed to dodge attacks or to pass tests involving finesse or acrobatics. (E) Endurance: The constitution and resistance to pain of an individual, used to reduce incoming damage. If you ever find a dice roll followed by any of the above letters it means you must add the value of the attribute associated with that letter belonging to the character who’s rolling. So with Strength 3, a 1d6+S means 1d6+3.
Attribute Tests Some situation demands your Accursed to pass a test based on one of your attributes, like for example “Strength 5 Test” this means you must pass a test by using your Strength value, so the higher it is the more likely you will pass it. Both the condition of failing or succeeding the test will be written over the event or given situation. To solve an attribute test, roll a d6 for each point of your Accursed attribute required by the test, if you score at least one number with the same or higher score of that written within the test, you have succeeded otherwise you have failed.
Example: An Accursed has Perception 3, and steps close to a pressure plate given by an Event card which demands a “Perception 5 Test” to be spotted and avoided in time. The Accursed rolls 3d6 and scores 2, 3 and 6. He passes the test because he has scored at least 1 number equal or above 5.
The following do not classify as “attributes” but are still part of a character’s profile.
Initiative Initiative tells the player how fast a character is to react at a given situation. This is used to determine the turn order during a round, those with the highest value acts first.
Movement This tells the player how fast a character can move. For each point of Movement during a Move Action, a character may move by one square or open/close a door.
Health Health tells a player the tolerance to pain and injuries. The greater the Health value, the more wounds a character can take before they die.
Sanity This is the overall wellbeing of a character’s mental health, the lower this is, the more likely the will succumb to insanity.
Melee This tells how good a character is at attacking in close combat. There are two numbers divided by a “/” the first tells the number of melee attack that can be carried out each turn, the second will tell what the required score is for each of these attacks in order to hit their target.
Ranged Just like melee, this is used to express how good a character is at Ranged Attacks, with the first number telling how many ranged attacks they can deal per turn and the second will tell them the score required to hit.
Accursed Class An Accursed is defined by their class, like being trained as a Warrior or in the use of Witchcraft. In terms of rules a class simply tells you what skills they Accursed can learn during their development, required to become better in combat. This can be found right under their name.
Accursed Level An Accursed development is divided within milestones known as Levels. Every Accursed starts at Level 1, and may progress up to level 10 with the Advanced Rules.

Creating an Accursed
At the start of the game, each player creates their own Accursed by first selecting one of the 4 available Dashboards and then by taking their respective miniature.
Skill Cards Each Accursed Class is defined by a set of unique Skills, they all start with one and gain another with each new level and there are a total of 20 Skill cards. Each Accursed begin their adventures at Level 1 so they must choose one of the 4 eligible skill cards, the only requirement they all meet now are those with “Level 1” written under their names. Your Accursed may only learn from the Skill deck
matching your Class name (for example the Black Knight with the Skill Path: Warrior will use the Warrior Skill deck). Once they have chosen a card it will remain forever theirs and any rules written over it will always apply to the Accursed .
Starting Equipment Take all Equipment cards from the Equipment deck belonging to your class (those with the matching back) and keep them nearby for now. These cards will also be listed over your Accursed Dashboard under “Starting Equipment”. You will also find what spell cards must the Witch find within the deck and keep them close to herself for now.
Stamina Tokens Take a number of Stamina Tokens equal to your character Endurance value and keep them beside the Accursed Dashboard (so take 3 tokens if your Endurance is 3) You always begin a dungeon with your full amount of Stamina tokens unspent.
Cursed Heart The Accursed now decides which of them carries the Cursed Heart card, this Accursed becomes the group leader which means they will be rolling for the Darkness Roll, move monsters according to the rules and lay down the map tiles as the game progresses and provide limited healing. The ownership of the Cursed Heart
can be changed only before the start of a dungeon or when the Accursed who’s carrying it dies. Depending on how many players are currently in game, take a number of Cursed Uses tokens equal to what is written on the card and keep them beside it (4 player starts with 4 uses, 3 players starts with 5 and so on).
Exorcist The Exorcist, as mentioned on his Libro Veritas Equipment card, takes 3 Miracles at random at the start of every dungeon; one Healing, the other Offensive and the last from the Defensive deck, he will keep them until the start of a new dungeon, by which point he will be replacing them with new miracles chosen in the same manner.
Consumables
Accursed may only carry a number of Consumables items equal to what is written over their Dashboard within the Belt “slot”, even if these were cards (as you will find out consumables are tokens but can be cards as well). If they were to receive more than they can carry, they would either have to discard them or immediately give them to another Accursed on the same or adjacent map tile. A list of all consumables and how to use them can be found on the Reference Chart. As written within their Starting Equipment, every Accursed is entitled to start with a certain number of consumables (mostly one). You may choose from the following list which you can find referenced on your Dashboard:
Bandages: Remove 1d6 wounds from yourself or an adjacent ally.
Blessed Water: Target a square up to 6 from you and deal 1d6+2 wounds to each demon within an area of 2x2 squares. Serum: Remove all Poison from yourself.
Oil Flask: Target a square up to 6 from you and deal 2d6 Damage to each character within an area of 3x3 squares.
Lockpick: Discard to open a Locked Chest and receive 1 Rare Treasure Card just for yourself and the standard Treasure card for the group.
1. Name 2. Requirements 3. Description
Cursed Uses

Equipment Slots
Most of the items an Accursed owns needs to be Equipped in order to be used otherwise they are just placed within their Inventory and grants no bonus at all. Each item that can be equipped has a Slot icon beside its illustration. To equip an item find the corresponding Slot over your Dashboard as figured over the card and place the card within the rectangular shape to indicate when it’s equipped. A slot can only contain 1 item at the time unless a special rule specify otherwise. Be careful that some items such as heavy weapons requires to be placed in both hands Slots in order to be equipped as they will figure the 2 Hands for the equipment Icon, when this is the case you can place the card in either left or right hand slot but keep in mind both are being used.
Example: In the above illustration we see the Broken Sword figuring a Hand icon which means it can be equipped in either of the Hand Slot over the Dashboard. Any number of items can be equipped or unequipped at the start of the Accursed turn so long as they are not currently in combat, only items which are equipped over the hand slots can be changed even during combat. Cards with the belt icons are Consumables items are treated just like Consumable tokens and placed over the belt slot.
Weight
An Accursed may carry any number of item cards, but if they present the Weight icon followed by a number, they take up significant Weight regardless if they are equipped or not. An Accursed may only carry so much each time, this
limit is a number equal to their Strength value plus 10 (so at Strength 3 they can carry a total weight of 13). If they go above this limit they will immediately have to discard any item they own or give it to an ally on the same or adjacent map tile.
Keywords
Each item card has a series of words under its name known as “Keywords”. Keywords are identifying characteristics about an item, like for instance they tell you if a weapon is Melee or Ranged, or what materials it is made of. Not all keywords are relevant to the rules and some are in place for future expansions, you do not have to worry about these unless a rule asks you to reference them.
Equipped Bonuses
The point of equipping an item is to gain its full advantages, so from the moment you equip it all properties written on the card description box will take place, like if an armour grants +1 Armour when worn, this character’s Armour will be raised by 1. Always remember to keep your equipment rules into consideration. Item Requirement
Some items are particularly heavy and requires enough Strength to be equipped, if you do not have the matching number as found on the bottom of the equipment card, then you may not do so.
Souls and Crowns
Souls and Crowns are the currency of Intermundis, whenever you acquire souls make a note of how many, likewise when you are told you have gained Crowns do the same. Each soul is worth ten crowns and you may only gain souls from killing your foes while crowns are usually acquired when trading souls in a settlement, explained in the advanced rules.
Accursed Layout Example
1. Inventory. All items owned but not equipped.
2. All consumables are kept here.
3. Cursed Heart card and its tokens (only the leader).
4. Skill cards.
5. Stamina tokens.

Set Up Darklight is not a competition between players but a struggle to survive together from quest to quest, ultimately the real satisfaction of completing a Dungeon in Darklight is knowing you have survived it. The following paragraphs will explain you how to set up a quest.
Playing Area The Group Leader keeps the Darkness Wheel nearby and places the Darkness Marker over the Starting space (1). Take all shuffled Chest Tokens and place them face down near the Darkness Wheel. Next, takes all Encounter, Boss, Treasure and Event cards, and place them nearby the Darkness Wheel. The Monsters Cards do not require shuffling for they are taken from the deck as reference so place the entire deck beside the others.
Tutorial Quest At the start of every quest, you would normally go through the stages of preparing a Random Quest, but if this is your first time, it is advised you go through the steps to prepare the introductory quest entitled The Awakening, which will help you establish the game mood and give you an easier challenge to begin with. Tutorial: Open the Quest Book at <page#> and use this page for the following Set Up steps, place aside the Necrostream Quest Room dungeon card found within the Dungeon Deck.
Random Quest If you are doing The Awakening Quest, you may skip this section and move on to the Read the Prologue paragraph, but if you have completed it and wish to continue playing a different quest, keep reading. Take all of the available Quest Room cards from the Dungeon Deck (these cards clearly read “Quest Room” under their name, shuffle them and draw one at random, then roll 1d6. Next, take the Quest Book and find the chapter corresponding to the card you have just drawn (so if you picked the Chapel Quest Room card, find the Chapel chapter in the Quest Book), then find the quest number corresponding to the number you have rolled, so if you took the Crypt quest room card and rolled a 3, you will do the third quest for the Crypt which is entitled <Quest Name>.
Read the Prologue The first step of the Quest Set Up is to read the Prologue out loud for all players to hear it. This is very useful to set the players in the right mood for the Dungeon they are about to face but it doesn't contain any rules.
Read the Objective The paragraph listing the Quest rules must now be read, it will tell the players exactly what to do in order to reach the final stage of the dungeon and if there are any special rules which apply to them.
The Quest Room Read the Quest Room paragraph only once the Quest Room of this Dungeon has been revealed during the Exploration Phase, the instructions will tell exactly what the Accursed must do to prepare the room and complete this quest.
Dungeon Set up Dungeons are mostly random generated mazes thanks to the Dungeon Deck, how to prepare it is simple: 1. Take all available Dungeon Cards excluding all of the
Quest Room cards and those bearing a small Skull icon beside their names (these will be used for specific quests) and shuffle them together.
2. On the Dungeon Deck set up, you will find a number
beside the words Second Half, take that many cards without looking from the deck you’ve just shuffled and add them to the current Quest Room card (the Necrostream if this is your tutorial quest), before shuffling them together, this is the Dungeon Second Half.
3. Now take a number of Dungeon cards equal to the value written within the First Half. Finally place the whole of the First Half on top of the Second Half without further shuffling, this is your Dungeon Deck for this Quest (any remaining dungeon cards goes back in the box).
Example: The quest specifications reads as following; Second half: 5 + Sanctuary. First Half: 6. After shuffling the dungeon deck, minus the remaining Quest Rooms and cards bearing the skull icon, the player draws 5 cards and shuffles them together with the Sanctuary card, then take 6 more cards and place them on top of the first six, creating a Dungeon deck of 12 cards in total.

Suggested Set up layout
1. Monster Card Deck
2. Wounds and Insanity Tokens
3. Treasure Chest Tokens
4. Darkness Marker
5. Darkness Wheel
6. Accursed Miniatures
7. Stairway Up map tile with archway and door
8. Treasure Deck
9. Rare Treasure Deck
10. Event Deck
11. Encounter Deck
12. Boss Deck
13. Dungeon Deck – Note: This deck depends on the Quest Set up steps.
Start the Game If there are no more special conditions given by the Set Up rules for this Quest, you may now place the Stairway Up Map tile, at the centre of the table or area of play, then take a closed Door and place it directly opposite the stair squares and place the Dungeon Deck beside it. Lastly, each player in Initiative order from highest to
lowest, place their Accursed miniature within any of the four squares figuring the stairs, these are also the Dungeon Exit, used in case the Accursed wish to escape the Dungeon. The Set Up is now complete and you may begin playing the game.

1-3. Monsters: Spawn the
Prepared monsters as illustrated
over the card, within the
explored room.
Rounds The game is divided in rounds, each split into four different phases (colour coded down below as red, blue, green and orange), once all four are resolved, the Round ends then a new one begins. The four main phases are: Darkness Roll, Exploration, Events, and Turns. You may follow the progress of a turn by looking at the bottom of your Dashboard where you will find a reference arrow shaped diagram.
Round Start
Darkness Roll
Result is 1
Result is anything
but 1
Exploration Phase:
Are there
Unexplored
Archways open?
Move the Darkness
Marker forward by 1.
Has the marker
landed on an
Encounter space?
No
Yes. Roll 1d6.
5-6. Event: Choose
1 Accursed at
random and place
an Event card face
down by their
Map Tile.
1-3. Monsters:
Spawn the
monsters as
illustrated over the
card, Ambushing
all Accursed.
No
Event Phase: Are
there Event Cards
facing down within
rooms containing at
least 1 Accursed?
Move the
Darkness
Marker forward
by 1. Has the
marker landed
on an Encounter
space?
Reveal 1
Unexplored
Archway.
Yes. Roll
1d6.
5-6. Event:
Place an
Event card
face down by
the Explored
Map Tile.
Turn Phase: Every
Character in game
takes a turn (in
Initiative order).
Resolve every
Event within these
rooms (starting
from the top).
Round End
Yes
No
No
Yes

Darkness Roll The group leader rolls the Darkness Dice to check the light intensity of the Cursed Heart, keep the result on the darkness wheel to keep track of it, you might need to reference this number through the round. If the score is anything above 1, nothing happens and the Exploration Phase takes place, but if the score is 1, the Darkness Marker is moved forward by 1 space clockwise (follow the space numbers). The marker can end in either an Empty circle in which case nothing happens, an Encounter Circle or the Cursed Heart circle in which case 1 Cursed Dose is replenished (if any have been used at all). If it ends in an Encounter space (red spaces), a 1d6 must be immediately rolled: On a score of 1-3 You must draw an Encounter Card, on a 4-6 you must draw an Event Card. If
it is an Event, place it down beside the map tile where one Accursed chosen at random currently is. If it is a Monster card, they are Ambushing the Accursed; how to place Ambushing monsters will be explained within the Monsters paragraph. If the Darkness Marker lands on the first space featuring the “Cursed Heart icon +1” then place 1 Cursed Uses Token back on the Cursed Heart card, but only if you do not already have the number of uses you started with.
Faith Points The exorcist is constantly uttering and praying to the Goddess asking for her aid, the greater his devotion, the more likely she will listen. As written on his Dashboard special rules section, whenever the Darkness roll is between 1-4 the Exorcist immediately gains 1 Faith Point also known as FP, to mark these down use the Faith Tokens. The maximum number of Faith Points the exorcist can hold is equal to 2 for every point of their Charisma value, any extra FP received is wasted until room is made, so with Charisma 3, the Exorcist can have up to 6 FP at once.
Exploration Phase
If there are any Doors which have been opened in the previous round for the first time by an Accursed and have no other map tile connected to the other side, they require to be Explored as they are currently Unexplored. How to open these doors will be explained during the Move Phase.
Map Tile Reveal Take a card from the top of the Dungeon deck, look at the illustration then find the corresponding Map Tile. Check the red arrows over the card and place the new dungeon tile down and adjacent the archway you have just opened, by one of the illustrated red arrows, this becomes the Entrance. Finally take a new closed door and place it adjacent the squares marked by one of the other red arrows as far away as possible from the entrance, this is the Exit. If there are any special instructions on how to place the map tile, you will find them on the card itself as well as any unique rule or behaviour of that map tile (you may discard its card if you know all you need from it). You can only ever explore one archway per round, regardless of how many unexplored archways are currently present (the group leader decides in case of multiples). Lastly move the Darkness Marker 1 space forward the Darkness Wheel just as when you do for the Darkness Phase, except if it lands on an Encounter space and Monsters have appeared they are Prepared, and not Ambushing which means they must be placed within this room as explained within the monster section. Likewise, Event cards are placed face down beside the newly explored map tile and not randomly.
Revealing the Quest Room does not move the Darkness Marker forward, instead read the Quest specific instructions.
Example: A
Storage Room
has been
drawn from
the Dungeon
Deck.
The Storage Room
is placed down by
the explored
Archway.

Junctions When you draw a Dungeon card which specify you must place 2 or more Exits (normally you would only place one), it means the way is now split. First lay down the dungeon tile, by the entrance of your choice as you normally would, next place a closed archway by each of the red arrows until the number of Exits specified by the card is met (so up to two new archways if the card says to place 2 exists or three if it says 3 exits). Because the way it’s now split, so must the Dungeon deck; Slide the first card from the bottom of the current dungeon deck, face down, and place it near one of the newly unexplored archways, then slide another card in the same way and place it next to the second closed archway, do so until all unexplored archways have 1 card each, repeat the same steps in the same order, placing the new cards on top of the ones previously laid, until you have 2 or 3 new Dungeon decks, one by each unopened door.
When exploring these new archways, use the Dungeon deck closest to them, and progress every room after that, from this deck until it is depleted. If you draw the last card from a Dungeon deck, you will place no more archways, creating dead ends. Likewise if you draw the Quest Room card, you may discard any cards remaining from that deck as there won't be any archways to connect them with. Try always to lay down the dungeon tiles in a way so new pieces will not intersect with those already placed, and in the rare case this still happens, you are allowed to place the Entrance to this map tile anywhere else to avoid the next one intersecting.
Room Treasure Some map tiles will contain treasure (mainly the 6 rooms present in game), you will find this written over the Dungeon Card you’ve just drawn as a reminder. When this is the case, place a Chest Token showing the closed side, down by the room to remember it belongs to it (remember not to look at the other side yet). To open it and take what lies within you will need to use a Search action (as explained within the Search paragraph).
Events Phase
Events are all those unexpected things that may happen within the room of a dungeon, from traps to natural or unnatural phenomenon.
Activating Events
Regardless if drawn as result of the Darkness Roll or Exploration Phase, If an encounter card has made you lay down an Event beside a map tile, this card will remain there as Inactive. If you must place multiple event cards within the same map tile, place the newer events under those previously drawn, and resolve them one at the time starting from the top when activated. Events are Activated only at the start of the Event Phase if the following conditions are met: One or more Accursed are within a map tile containing one or more Inactive Events, those events are now all activated. Simply read the instructions on the event card itself to resolve them one at the time until are all resolved. Once an Event has been resolved, you may discard it unless it specifies otherwise.
Example: The Junction
requires 2 Exits, so 2 Archways
are placed down with a new
Dungeon Deck each.
Example: The player
places a Chest token
by the corner of the
room it’s in.
Above Example: The Accursed ends his movement
within a room containing an Inactive Event Card.
During the Event Phase of the following round, this
Accursed must take the Event and read it to resolve its
effects.

Turns Phase
Starting by the characters with the highest Initiative value, everyone has a turn, these values can be found on their respective Dashboard (for Accursed) and Monster card (for monsters). If Monsters and Accursed shares the same initiative value, the Accursed always goes first. If allies shares the same initiative value they can decide between themselves who goes first each round. Once every character completes their turn, the round is over.
Turns
A turn unfolds equally for Accursed and monsters: Turn Start, Move Phase, Attack Phase and Turn End.
Turn Start: Any rules and special effect that specifically states “At the start of the character’s turn”, takes place now. Accursed may also change their equipment or trade with other Accursed. Move Phase: Move your character up to their Movement value. You may give up your Move Phase to regain 1 spent Stamina Token.
Attack Phase: During this phase an Accursed may deal all their melee and ranged attacks available to them. They
may also give up their Attack Phase to do a Search action or Move. Spells and Miracles can be cast before or after a Move or Attack Phase, so long as they do not interrupt a dice roll or a character moving.
Turn End: An Accursed may now resolve any rules that specifies “At the end of the character’s turn” now.
Trade
During the start of their turn an Accursed may give or take any number of Souls, Crowns, Consumables or Item cards from one another Accursed on the same or adjacent map tile so long as this last agrees.
Movement
Move
When a character takes their Move Phase they can move up to their Movement value by placing their miniature in a Free adjacent square for each of those points. A character does not have to use their entire Movement allowance and can skip their Move Phase altogether. Squares are adjacent if they share the same corner or side. A square is Free when no other character is currently present in it, otherwise it becomes Blocked.
Open/Close Doors If a character encounters a closed door, they may open it by being adjacent to any of its squares and spending 1 Movement point from their move allowance.
Recover Stamina An Accursed may give up their Move Phase in order to regain 1 Spent Stamina (by flipping the token back to its full state).
Threat Whether an Accursed or Monster starts their turn
adjacent to one or more enemies, they are being
Threatened by them, meaning they cannot move. To
break free from being Threatened, an Accursed needs to
Above Example: The Accursed (Blue) can walk within
all the adjacent free squares (green), but cannot walk
in the red square because a column is blocking the
corner of that square from being adjacent (this is
highlighted on the map tile’s card in case you are
unsure).
Above Example: The Accursed starts on the Stair square
and moves up to his Movement value (4).

Tumble within any adjacent squares first (as later
explained) then they can move, Monsters cannot Tumble.
Large bases If a monster has a base size larger than 1 square, all the square it occupies are considered blocked and needed by the monster in order to move, but for the effects of rules, it always counts as one miniature/character. When moving large characters select one of its base squares and move it as if it was a 1x1 character, when their movement end, all of the squares which forms its base must end within Free squares or cannot be moved.
Elevated Squares Some squares clearly marked of their dungeon card (and visible over their map tile), are built on different levels which means they are too far up to be stepped on. To access a square situated higher than the character current position, the character has to first step over the stairs clearly marked over the map tile. Getting down from an elevated square does not require to pass through the stair, it is assumed the character jumps down. Characters standing on different elevations do not Threaten each other, also attacks made by those standing on higher ground receive a bonus of +1 To Hit if attacking characters on lower levels (explained in the combat section). Large bases completely ignore elevation rules and can even stand half over elevated squares, they receive nor grant combat bonuses.
Above Example: It is the start of the Black Knight Turn
(blue, left) which starts adjacent the Seeker (red) and so
within his Threat area (yellow), which means if the Black
Knight wishes to move he has to Tumble in any of the three
adjacent squares first. The Outcast (blue, right) starts her
turn out of the Seeker’s threat range so she can move
freely anywhere within the room, even though the
Threatened squares.
Above Example: The large Dreadworm
Starts in a 2x2 area at the far end of the
corridor (right). A the start of its turn
the Dreadworm decides to attack the
Blood Witch so it moves adjacent to her
by moving 6 squares (from the square
where it says “start”) past her friends
until it reaches a free 2x2 area of
squares.
Side Example: In
the first example,
the player
completely
disregard the
difference in
Elevation, this is
incorrect. In the
second example
the Accursed
moves over the
Stairs Squares first,
this is the correct
way to reach
higher elevation.
Above Example: The squares in yellow are the areas being
threatened by the monsters. Monster 1 cannot threaten the
Accursed beside it because he is at a higher elevation, also the
Accursed gains +1 To Hit toward it. Monster 2 cannot threaten
the Accursed beside it because she is at a lower elevation but
gains +1 To Hit when dealing attacks toward that Accursed .

Escaping the Dungeon If the Quest is proving to be too tough for the Accursed, or they wish to get out before it’s too late, they may do so by standing on any of the Dungeon Exit squares during their Movement and spend 1 Movement point to “step off” the map tile. Once an Accursed has successfully escaped, they cannot return to the same dungeon and once every Accursed escapes, the quest immediately ends (fails). You may keep any Souls or Treasure gained. Some dungeons set ups or events triggered will make it clear when you cannot escape the dungeon (like the tutorial Quest), the only option in this case is to complete the quest or die trying. As long as 1 person completes the quest, even if everybody else is out, the quest will be a success, but those who fled will not receive any rewards where applicable.
Attack Phase
During the Attack Phase an Accursed uses their currently equipped Weapon to perform attacks which can be either Ranged or Melee, while Monsters attacks are written within their own dedicated sections over their Monster Card under “Combat”.
Line of Sight Having Line of Sight (or LoS) simply means a character has a clear, uninterrupted view of their target, to know if this is the case, trace an imaginary line from the centre of that character square, to the centre of the square they wish to see, if this line is not interrupted by walls (the line of a wall starts with the edge of a square) or closed archways, they will have LoS to them, characters do not block each other LoS. Dungeons are dark, gloomy places, the Accursed only source of light comes from the Cursed Heart they carry, which means only the dungeon tile containing the Accursed carrying the cursed Heart and those tiles
adjacent will provide LoS for Accursed, any other dungeon tile after that is in total darkness and out of LoS. Most Monsters have a supernatural senses, or can see through the dark and do not suffer from the light limitation. All attacks requires LoS to their target in order to be made, no exceptions.
Above Example: The squares highlighted in yellow are
the Exit squares. The Accursed starts his turn over the
Archways square and moves up to 3 until he reaches
one of the Exit squares then spends his last movement
point to step off the board, successfully escaping.
Example: The Witch and the
Outcast are able to see the Seeker
while the Black Knight vision is
blocked by the wall.
Above Example: The Cursed
Heart Light comes from the
“L” shaped corridor where
the Accursed carrying the
Cursed Heart currently is.
The Map Tiles highlighted in
green are lit by the cursed
Heart, those in red are out
of its range and so out of
Line of Sight.

Attacks Attacks always have an Attacker (the one dealing the attack) and a Defender (the one suffering the attack). Attacks can be either Melee, Ranged or Magic as explained below. The Accursed will find of what type is their attack, as a Keyword on the weapon card they currently have equipped, while for monsters it will be written before the attack itself within their Combat field. All attacks requires the attacker to have Line of Sight to the Defender or they cannot be executed.
Melee Attack: To deal a melee attack, the character must be adjacent to the character they wish to attack (unless this weapon has any special rules which states otherwise). The character must check they have melee attacks available, this number is the first one found under their “melee” value, separated by a “/” such as “2/4+” which means this character has 2 attacks per turn, regardless of how many, only one attack at the time can be resolved and if this number is 0 or is reduced to such by an effect, then no attacks can be made. The number found beside the number of attacks is called the To Hit value and will tell you what number to score or surpass on a roll of 1d6 in order to Hit the target. The player making the attack rolls 1d6, and if they miss their target by not matching or surpassing their To Hit value, the attack immediately ends, but if they hit, then they will proceeded to see how much damage they have caused. Damage is written beside the attack description either on the weapon card or the monster attack in a manner such as “1d6 Damage” meaning this attack will deal a number of damage which can range from 1 to 6. All melee attacks will also get a damage bonus from the
Strength value of the attacker, so if their strength is 3, they will add 3 to the total damage scored. Damage will be turned into wounds, but before that we need to know how much resilient the defender is by subtracting their Armour value to the total damage scored. The Armour value of any individual is their Endurance value (the accursed might also have items which specifically states to add Armour, in which case you MUST include all armour value granted by equipment). Once armour is subtracted to damage, and remaining point of that damage becomes wounds and are placed as Wound tokens over the miniature (for monsters) or over the wounded Accursed Dashboard. Once the attack is completed the Accursed may do another if their number of melee attacks per turn will allow it. Example: The Black Knight has Melee 2/4+ and Strength 4 and decides to attack an adjacent Skorn with Endurance 4. The Black Knight rolls 1d6 and scores 3, missing his target and ending his first attack. He decides to attack with his second melee attack and this time scores a 4, enough to hit the Skorn. The damage of his weapon reads 1d6, so the Black Knight rolls 1d6 and adds his strength of 4, scoring a 7 (dice roll of 3 plus Strength of 4). After subtracting the Skorn Endurance, the total number of wounds deal is 3 (7-4), the player now applies 3 Wound markers next to the miniature. Ranged Attack: Ranged attacks works very much like melee attacks, except the defender must be within Range of the attacker and cannot have any enemy standing adjacent to themselves or it cannot be executed. To know the range of your weapon you will find a field above the attack specification such as “Range 4” meaning this weapon can attack up to 4 squares in LoS (monsters do not have this value because for simplicity they are always in range, but the non-adjacent enemy rule still applies). Use the Ranged field of the attacker instead of melee to know how many attacks can be executed and what number to score in order to hit, finally you will add Perception instead of strength for these attacks. Important: You may use all your melee and ranged attacks within the same turn, so long as they all follow the above rules. Magic Attacks: How to solve these are specified by the attack themselves as they always vary depending on the spell. To Hit bonuses: Some attacks, spells or effects will raise or lower the chances of an attack to hit, when this is the case you will find something like “+1 To Hit” or “-1 To Hit”, this means you must subtract this number to your dice roll when rolling to see if you Hit it.
Example: To the left, a weapon which deals melee
attacks and to the right a Monster card which specify
both Ranged and Melee attacks.
Right Example: On this
Accursed dashboard
we see that they can
deal 2 melee attacks
and each will hit on a
score of 4 or more.

Critical Hits and Critical Misses
Characters may end up hitting their targets with amazing results caused by thins like hitting a weak spot in their victim’s armour , likewise the can spectacularly miss their target even when a hit seems assured, these are called Critical Hits and Critical Misses. Whenever a dice is rolled for an attack to see if it hits and results is 6, it will automatically succeed, regardless of how many modifiers you must apply, and will cause the maximum amount of damage possible, so if a weapon’s damage is 1d6, you will automatically cause 6 (2d6 will score 12, and so on). Likewise if your dice scores a 1, no matter how many positive bonuses you must add to the result, you will always miss the attack.
Damage and Wounds
It is always important to keep in mind the difference between Damage and Wounds which can both be caused by attacks events or other. Damage must always be reduced by the affected character’s armour, while wounds are applied to the character itself. No character can suffer more wounds than their health value, any further wounds are simply wasted. When the total number of wounds is equal to the health value of the character suffering them, they will fall and die. How to deal with dead Accursed and dead monsters will be explained in the following paragraphs.
Attack Specials Some attacks features special rules written beside the attack type, how to solve them is always clearly written, for example “Ciritical Hits will cause 3 more damage” meaning you must add 3 to the result of your critical hits damage with this attack. The special rules must always take place when dealing with these attacks.
Cleave Cleave is one of the most important aspects of most Accursed melee attacks. When a weapon can cleave, you will read “Cleave” after the damage value, how to resolve this is simple: If the attack you have just dealt has killed your target, you will initiate a Cleave, must choose if the attack continues clockwise or anticlockwise and strike at the first adjacent target as if it was a new attack. If this is enough to also kill the next target, the blow can continue cleaving in the
same direction it started. The cleave stops if the attack misses, it comes against a wall/ally or does not deal enough wound to kill its target. Melee attacks are never spent when cleaving (only the one which initiated it). Left example: The Black Knight (A)
kills with his regular attack the Seeker number 1, this triggers a Cleave with the current weapon he is using, chosing to go clockwise. The square which comes directly after the first target is empty, so the blow continues and hits Seeker number 2, killing it. A new Cleave is triggered by this death so the blow continues to Seeker number 3 which also ends up dead by the attack. The cleave cannot continue to Seeker number 5 because his ally the Blood Witch (number 4), is in the way of his swinging arc, which means the Cleave ends.
Unarmed Attacks If for any reason an Accursed does not have a weapon equipped or wishes to use their own body to deal an attack, they will be performing a melee Unarmed attack by dealing a standard melee attack but will suffer -1 To Hit and will cause only 1d3 Damage. This information can be found on all Accursed Dashboard for quick reference.
Dual Wielding Attacks If an Accursed has a 1 handed weapon equipped in each hand, they have the choice to deal an attack action with either one of those weapons or they can use both of them at once with a Dual Wield attack, so long as it is declared before rolling. To deal a Dual wield attack, you will deal a single regular attack but it will suffer -1 To Hit, will not be able to use any Cleave, ignore extra melee attacks granted by either weapon and you must roll for Damage when scoring for Critical Hits, however the great advantage of this form of attack is that you may roll for both weapon damage at once summing the result (you will still add your attribute bonus once like regular attacks). If either weapon gives penalties to the Hit roll (like -1 To hit), you must only apply the score which adds the worst penalty.
Monsters Attacks Whenever a monster attacks an Accursed this last has the choice to Evade or Tumble so long as it is declared before the attack is rolled for. Evade: The character Evasion value is a number equal to their current Agility value plus any equipped item which specifically states it adds Evasion. To Evade an Accursed must spend 1 Stamina by flipping it upside down, then ignores 1 Damage point from the attack suffered for every 2 Evasion points they have, any damage left is applied to their armour value as usual. Tumble: Requires the Accursed to spend 2 Stamina. The Accursed moves to one adjacent free square even if currently Prone (prone effects will be explained later). Any monster which was meant to attack the Accursed automatically fails. Remember Tumble can be used to escape Threat areas at any point during your turn.

Consumables If a character has any of the Consumable tokens or a card with the “slot” type labelled as Consumable, it means it can be used once then discarded. How to use Consumables is written over the Dashboard, while how to use those specific to treasure cards will be written on the cards themselves (keep in mind both types take up the same Belt space). You may use any number of consumables per turn so long as it is done before or after your Movement and/or Attack phase.
Invoke a Miracle Before or after their Movement and/or Attack phase, the Exorcist may use a miracle by simply spending (discarding) a number of accumulated Faith Point equal to the Faith Cost found at the top right of the miracle card and then read the instructions written within it to resolve it. This can be repeated as many times as the Accursed wishes per turn either the same or with another miracle, so long as he meets the Faith Point requirement and one miracle is fully resolved before dealing another.
Channel A Channelling is automatically initiated right before the Move Phase, so long as the character whose turn is has an item equipped with the keyword “Catalyst” (the witch starts with the Cursed Skull which has this property). Anyone can channel if they own a Catalyst. When the character Channels they immediately gain a number of Source Tokens depending on the Darkness Roll: 1. None 2-5. Half their Mind Value (round up). 6. A number equal to their Mind value. A character may never gain more source than their Mind value, any new Source gained is added to the current pool until spent or until the Catalyst is unequipped. Example: The Witch has Mind 4 and the Darkness Roll is “5” that means she will gain 2 Source Tokens for this round.
Cast a Spell Casting a spell is not a simple or safe feat in the world of Intermundis, a dangerous energy known as the Source is taken from the atmosphere and passed through the caster’s body before it is unleashed as a powerful spell, a lot can go wrong.
Spell Card Breakdown: 1. Spell Name. 2. Symbol associated with the spell type. 3. Name of the Spell Type. 4. Source Cost. 5. Spell Description. Cast: A character with the knowledge of one or more spells, may choose among any of the cards available to them (the Blood Witch starts with 2 spell cards), to cast before or after their Move Phase and/or Attack Phase. To Cast the player must read the card description to know what the effect are and make sure they are currently eligible, for example the Sphere of Hate spell requires the Accursed to be at 5 or less squares from their target, so they must be within this range in order to cast this spell. Next the Accursed must equal or match the Source Cost of the spell by spending (flipping the token to their spent side) a number of Source Tokens of their choosing and rolling an equal amount of d6. So if they spend 2 Source tokens, they use 2d6, if they spend 4, they roll 4d6, it is entirely up to them how many, this roll is known as the Cast Roll. If the Cast roll matches or surpasses the Source Cost, the spell is a success and the player resolves its effects as written on the card, but if they score less the spell immediately fail and ends there. Example: The Witch wishes to Cast her Sphere of Hate against a monster nearby, she currently has 5 Source Tokens and decides to spend 2. She rolls 2d6 and scores 2 and 3, for a total of 5 which is not enough to reach the Source Cost of 6, meaning the spell has failed. The Witch immediately tries again, this time she uses her remaining 3 Source tokens and rolls 3d6, scoring a final result of 11, well above the required 6, so the spell is successful and she will now carry out the effects. Channelling Penalty: It is important to remember that some items interfere with the Source, effectively isolating the body from letting the energy flow freely, this is called Channelling Penalty. Each item currently equipped with the Keyword Medium Armour will lower the result of you Cast Roll by 2, while every item with the Heavy Armour keyword will lower it by 3.
Source Burns There is a danger in using too much Source at once, the result can be from injuring yourself to attracting the presence of a Devil Lord, when this happens it is called a Source Burn. Whenever you cast a spell, regardless if you failed or succeeded (so long as you resolve the spell effects first if any), count how many doubles you have scored with your Cast Roll. For every double you have scored 1 Level of Source Burn, add 1 for every dice with the same result.
You look at the Source Burn Chart at the back of this manual and the Spell Type matching your card, so if the spell type says “Odinash” you must look at the result for the Odinash source burns. In here you will find a list with a number associated with each entry (2, 3, 4 and 5). Find the list matching the number of Level Burn scored by your Cast and read what affects you must apply to your character. Example: The Blood Witch wishes to cast a Blood Type spell and rolls 5d6 scoring 2, 2, 6, 6 and 6. This is enough for her to cast the spell and resolve its effects she has scored a total of 3 Levels of Source Burns (2+2=1 Level, 6+6+6=2 Levels). The Witch now looks at the Source Burn chart and resolve the effects of number “3” found under the Spell type “Blood”. If the Witch had scored 2, 2, 2, 2, 2 she would have scored a total of Level 4 Burn (2+2=1 Level. +2=2 Levels. +2=3 Levels. +2= 4 Levels). Designer Note: A quick way to calculate this is to sum up all the doubles and subtract 1 from the result, so if you have scored 5 doubles the Source Burn Level is 4.
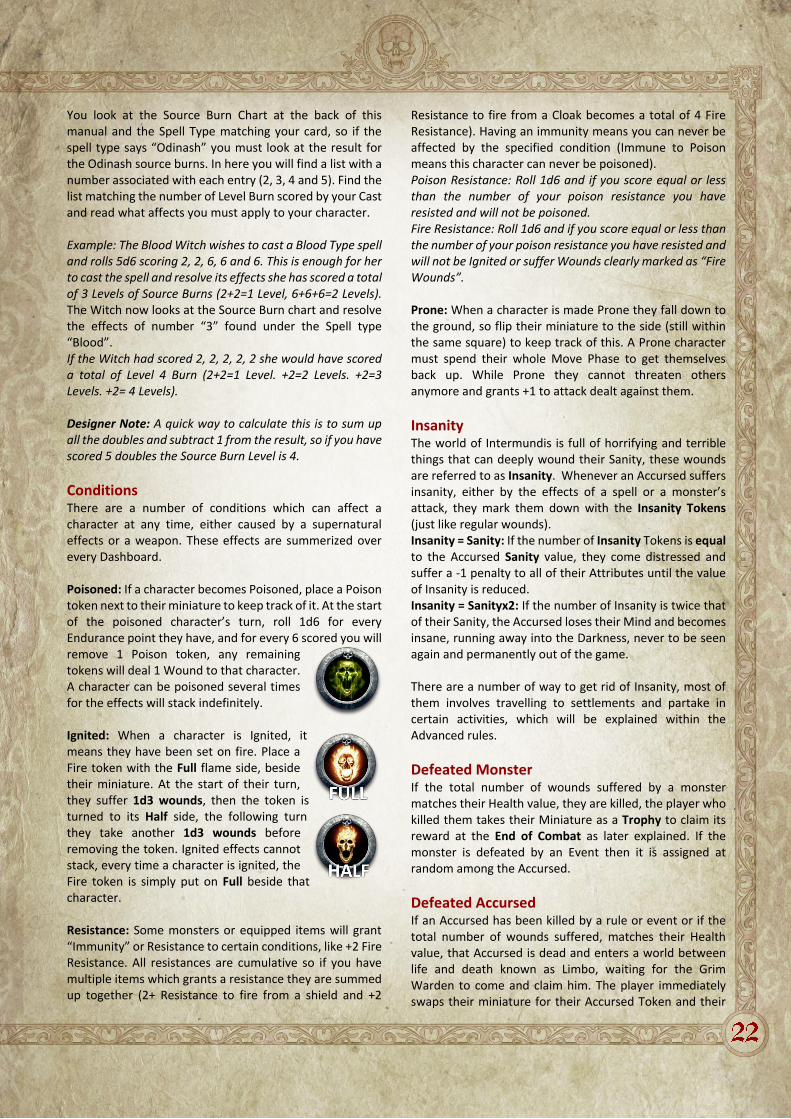
Conditions There are a number of conditions which can affect a character at any time, either caused by a supernatural effects or a weapon. These effects are summerized over every Dashboard. Poisoned: If a character becomes Poisoned, place a Poison token next to their miniature to keep track of it. At the start of the poisoned character’s turn, roll 1d6 for every Endurance point they have, and for every 6 scored you will remove 1 Poison token, any remaining tokens will deal 1 Wound to that character. A character can be poisoned several times for the effects will stack indefinitely. Ignited: When a character is Ignited, it means they have been set on fire. Place a Fire token with the Full flame side, beside their miniature. At the start of their turn, they suffer 1d3 wounds, then the token is turned to its Half side, the following turn they take another 1d3 wounds before removing the token. Ignited effects cannot stack, every time a character is ignited, the Fire token is simply put on Full beside that character. Resistance: Some monsters or equipped items will grant “Immunity” or Resistance to certain conditions, like +2 Fire Resistance. All resistances are cumulative so if you have multiple items which grants a resistance they are summed up together (2+ Resistance to fire from a shield and +2
Resistance to fire from a Cloak becomes a total of 4 Fire Resistance). Having an immunity means you can never be affected by the specified condition (Immune to Poison means this character can never be poisoned). Poison Resistance: Roll 1d6 and if you score equal or less than the number of your poison resistance you have resisted and will not be poisoned. Fire Resistance: Roll 1d6 and if you score equal or less than the number of your poison resistance you have resisted and will not be Ignited or suffer Wounds clearly marked as “Fire Wounds”. Prone: When a character is made Prone they fall down to the ground, so flip their miniature to the side (still within the same square) to keep track of this. A Prone character must spend their whole Move Phase to get themselves back up. While Prone they cannot threaten others anymore and grants +1 to attack dealt against them.
Insanity The world of Intermundis is full of horrifying and terrible things that can deeply wound their Sanity, these wounds are referred to as Insanity. Whenever an Accursed suffers insanity, either by the effects of a spell or a monster’s attack, they mark them down with the Insanity Tokens (just like regular wounds). Insanity = Sanity: If the number of Insanity Tokens is equal to the Accursed Sanity value, they come distressed and suffer a -1 penalty to all of their Attributes until the value of Insanity is reduced. Insanity = Sanityx2: If the number of Insanity is twice that of their Sanity, the Accursed loses their Mind and becomes insane, running away into the Darkness, never to be seen again and permanently out of the game. There are a number of way to get rid of Insanity, most of them involves travelling to settlements and partake in certain activities, which will be explained within the Advanced rules.
Defeated Monster If the total number of wounds suffered by a monster matches their Health value, they are killed, the player who killed them takes their Miniature as a Trophy to claim its reward at the End of Combat as later explained. If the monster is defeated by an Event then it is assigned at random among the Accursed.
Defeated Accursed If an Accursed has been killed by a rule or event or if the total number of wounds suffered, matches their Health value, that Accursed is dead and enters a world between life and death known as Limbo, waiting for the Grim Warden to come and claim him. The player immediately swaps their miniature for their Accursed Token and their

square becomes free for everyone to step in then rolls 2d6 and consults the Injury chart to find what would happen to the Accursed if they were to be revived, like suffer from a broken leg or a concussion. Right now make a note of which Injury you will be suffering from the moment you are resurrected (if you are resurrected). If an Accursed gains his fourth Injury, he will be taken by the Grim Warden and be out of the game permanently. While dead, an Accursed does not gain or grant any bonuses produced by items they are currently wearing such as the Censers of the Exorcist, and all conditions such as poison and ignited are removed. If all Accursed in game are killed the game immediately ends and their bodies are taken from the Grim Warden forever. When the group leader is killed, the Cursed Heart is immediately given to the next Accursed willing to take it and its responsibilities. Monsters completely ignore the presence of dead Accursed and cannot deal any more wounds or attacks (it is as if they are simply no longer there).
Resurrection Whenever an Accursed dies, their number of wounds will always be equal to their Health value, meaning their body will be too broken for their soul to return into it. Any effects that heals the body, gives the Accursed a chance to be resurrected, may it be the healing of the Cursed Heart or an item used by another player like Bandages. If a dead Accursed has at least 2 or more healed wounds, they may attempt to re-enter their body at the start of their turn, otherwise they will skip theirs entirely. To attempt re-entering their body, the Accursed must roll 2d6 and score a number equal or less than the current number of healed wounds. Example: The dead Accursed has been healed by 4 wounds. At the start of his turn he rolls 2d6 and scores 7, a number well above 4, meaning he has failed to resurrect (a 4 or less would have brought him back to life). His allies heals him of a further 6 wounds, meaning he has now been healed by a total of 10 wounds. At the start of his next turn he rolls 2d6 and score 9, which means he re-enters his body and is resurrected because it is a number equal to or less than 10.
When an Accursed is resurrected, swap the Accursed Token with the Accursed miniature and place them Prone. The resurrected Accursed then takes their turn as normal (meaning he has to spend their Move Phase to get back on their feet), remember to use the rules of any Injury gained upon their death. Any dead Accursed is automatically resurrected by the end of a Dungeon if at least one of them completes the quest successfully.
Cursed Heart Healing The Accursed have a powerful survival tool; the Cursed Heart which can provide miraculous limited Healing. The Group leader may at any point decide to use the Cursed Heart, even during a Monster’s turn, so long as it is done before or after a Move or Attack Phase. The whole group is immediately healed by a number of Wounds equal to the current Darkness Roll, and then discards Cursed Use Token. The Heart can be used multiple times at once, and there is no limit except for the uses remaining, how many times per round it is used. Example: The current Darkness Roll is of 4 and the Black Knight is holding the Cursed Heart, the Witch is in troubles and so the Black Knight decides to use the Cursed Heart. The Witch and all other Accursed removes 4 wounds from themselves and then the Black Knight discard 1 Cursed Use.
Replenish the Cursed Heart
The only way to replenish any used Cursed Heart uses, is to wait until the Darkness Marker reached the Cursed Heart Icon in which case the leader gains 1 discarded token), or hope to encounter some events during their exploration which will do the same.

Search
Search can be done to open chests which might contain valuables or sometimes to interact with the Events the Accursed will encounter.
Resolve a Search Search can be performed only outside of Combat, and are mainly used to open Chests, unless the rule of an Event tells you otherwise. If an Accursed wishes to search the Chest within a room to gain its treasure, they need to be anywhere on the same map tile containing the chest and swap their whole Attack Phase with a Search. When Searching, the player flips the chest token to reveal its open icon side keeping track it has been opened, then take 1 Treasure card which must be distributed with the Loot Round rules (as explained below).
Locked Chest: If when flipped the chest token reads it Locked, it means it cannot be opened and the Search is wasted unless the Accursed owns and discards a Lockpick consumable. When opening Locked chests
the Accursed gains 1 Rare Treasure card for themselves (which does not count toward the Round Loot) and another standard Treasure card which must be given with the standard Loot Round rules.
Rare Chest: If when flipped the chest token reads it “Rare!” it means it will award 1 Rare Treasure card which the group must distribute with Loot Round rules.
Loot Round Whenever an Accursed acquires a Treasure or Rare Treasure card which must be treated with the Loot Round rule, you will resolve it in the following manner: The player who picked it up must decide which of the present Accursed will receive it, even if it is himself, once an Accursed has received a treasure card with the Loot Round
rule, they may not receive another until every other Accursed in the group has received at least one. Once every Accursed present has been given one, the Loot Round restarts. Example: The Black Knight, Exorcist, Outcast and the Blood Witch are playing. The Exorcist finds a Treasure Card from a chest which decides to give to the Black Knight. A few turns later the Outcast finds another Treasure card, this time it can only be given to the Exorcist, Outcast or Blood Witch because the Black Knight has already been given one for this Loot Round, so she keeps it for herself. Later the group is awarded another treasure card, the choice is between the Exorcist and the Blood Witch only, so if the Exorcist is given the card, the following treasure will be automatically awarded to the Blood Witch. After the Blood Witch has received the next Treasure Card, the Loot Round starts from the beginning and everyone can be awarded treasure once again.
Above Example: The Black Knight can search the
treasure because he is in the room, the Witch
however cannot.

Monsters
Whenever Monsters are present in the dungeon the Accursed are in Combat, this is important to remember because some things cannot be done while in combat like a Search and some special powers or rules specifically lasts for the whole duration of combat (which means until it ends). Combat ends when all enemies are defeated.
Monster Card When you draw an Encounter card, you will find the corresponding Monster Card and keep it for reference until the combat is over. Depending on how many Accursed were alive at the start of the dungeon, look at the icons found on the four banners of the Encounter Card, these will picture 1, 2, 3 or 4 player icons, you only need to look at the
banner figuring the same number of player as there were when the dungeon started. What follows this icon might be a number or a dice roll, so take that many miniatures (or roll the dice if you must know how many) and place them aside for now. If all miniatures of the same type are already in the dungeon while you are asked to spawn more, ignore it. Some Encounter Cards will feature multiple monsters to fight so make sure to take each corresponding card and spawn the right amount of monsters for each depending on player numbers. Example: Above is the Skorn Savages Encounter card, it tells the player that if four Accursed is present in game, they must spawn 1d3+3 Skorn Savages, but if two players only are in the dunfeon, then they must spawn 1d3+1.
Place Prepared Monsters Now that you know how many monsters to place, you will
be placing (or “Spawning”) them. When placing Prepared
monsters (as result of exploring a new room) start by
placing first Monsters which are Ranged, then Melee (if
they have spawned together) and use their Initiative
number so those with the lowest initiative values are
placed first. To know if a Monster is Melee or Ranged, you
will find the corresponding Keyword over their Monster
card. Take a look at the room the monsters are meant to
spawn in, and pretend there is a pattern of black and
white squares like that of a chessboard. Start placing each
miniatures in the same square colour as the first, starting
with those furthest
from the most recently opened
archway. If you run out of space, start
using the other squares until the whole
room fills up. In the unlikely
circumstance that there is no more
room to place new monsters, they will
“spill” to adjoining map tiles starting from the square
closest to the entrance of
the room by
following the same
criteria of the chessboard.
In the example to the right, the Accursed will start placing each miniature they must spawn, in the number order until the whole room is full (up to 18 miniatures can fit within this room until they start spilling on the map tile where the Accursed is).
Place Ambushing Monsters Ambushing Melee monsters are not placed within a specific room, instead they must be placed within any free squares adjacent to all present Accursed as evenly as possible, so if 4 monsters must spawn and there are 4 Accursed, each Accursed must receive one, and if there are monsters which cannot be distributed evenly, they will get
Monster Card
1. Initiative.
2. Name.
3. Keywords.
4. Movement.
5. Miniature
illustration.
6. Combat
Specifications.
7. Behaviour
8. Monster
Attributes

assigned at random all present Accursed (by using the Accursed tokens). This rule is true per monster type, so if there are 2 different kind of monsters, like 4 Seekers, 2 Skorn Savages, and there are 4 Accursed in total, each Accursed receives 1 Seeker and 2 Accursed chosen at random will receive 1 Skorn each. Ambushing Ranged monsters are placed within squares as far as possible from the Accursed but still in LoS of at least one of them and no more than 2 Map Tiles away. Melee Ambushers Example: 5 Seekers must spawn, but there are only 2 Accursed, so an Accursed token is drawn at random; the black knight, which receives the extra Seeker. Melee Ambushers Example: In the next Round a wandering group of 3 Skorn Savages ambushes the Accursed, so once again an Accursed token is drawn at random, and it is the Black Knight so he ends up with 2 more Skorn while the Outcast only 1. Ranged Ambushers Example: Below the Black Knight (Blue) is ambushed by a group of 4 ranged monsters (red). They are placed as far as possible from him and no more than 2 map tiles away (the tile highlighted in red is too far).
Special Spawning Some Monsters have written on their Behaviour column that when they spawn, they follow a specific behaviour. The rules written on the cards take priority to those written within this manual. Always check within their Behaviour before spawning a monsters.
Spawn a Boss Encounter Most Quests will feature a final fight with a particular group of monsters or a very strong foe. Whenever you are asked to spawn a “Boss Encounter” treat
it the same you would treat prepared encounters but take 1 card from the Boss deck (instead of using the regular Encounters) and spawn all of the present monsters according to how many Accursed were present at the start of the dungeon).
Monsters Behaviour Monsters behaviour depends on whether they are Ranged or Melee (remember this can be found as a Keyword under their name), also they follow any rules written within their
Behaviour field (which always takes priority over any rules written here). They act in Initiative order like Accursed, except you must deal with the whole group of the same type of monster until every model is dealt with, then do the same for the next available group. The Group Leader must move them with the following rules in the manner they deem to be most beneficial to the monsters, it is ok to make mistakes, Monsters are not infallible in their tactics after all. Monsters follows the same turn structure as the Accursed, but they will do so as a group, so during the Move Phase, all the same type of Monster will move, then they all deal their attacks if any. They follow the same movement rules as the Accursed, rules as Accursed so if for example there are elevated squares, they will use the stairs in order to get to their targets. Targeting: Any Monster adjacent to a Accursed, regardless if they are melee or ranged, must Target them, to represent this turn their miniature so the Skull on their bases is facing the Accursed or simply make sure their head is turned to look at them. Monsters adjacent to Accursed can never be without a target, even during the turn of an Accursed if this last moves adjacent to them. Only one Accursed can be targeted at any time by a monster so if another Accursed approaches, the Monster remain facing its current target. If two or more Accursed are adjacent to a Monster and the one currently Targeted steps away or dies, the Monster immediately turns to target the remaining Accursed (choose one Accursed at random it there are multiple). If a Monster suffers a wound
from an adjacent Accursed which is not currently their target, that monster will immediately turn to Target them instead. Monsters without a target are Queuing. Melee: If a Monster is melee, their main priority is to engage the Accursed in close combat by acquiring a Target. During their Movement Action they must get adjacent to an Accursed in reach as evenly distributed as possible, so if there are 4 Skorn Savages and 4 Accursed in reach of their movement, each Skorn will get adjacent to an Accursed and target them, but if only 3 of those Accursed are in reach, they will each get a Skorn and the

remaining one will be assigned against one of the 3 Accursed chosen at random (just like when they ambush). If they cannot reach their target, they will try to get as close as possible.
Once the entire monster group has moved, those with a Target will deal their Attack Phase against their targeted Accursed by using the attack found on their Combat section until they have no more Melee Attacks remaining. Queuing melee monsters will obviously not be in the position to attack (unless these attacks can reach from a distance), so their turn will end. Ranged: Ranged monsters do not require to be Targeting an Accursed to deal their ranged attacks, instead during their Movement Phase a Ranged monster must move in order to get in Line of Sight of at least one Accursed by avoiding as much as possible, ending adjacent to any other Accursed. If they are already in Line of Sight of one or more Accursed or are targeting one of them in close combat, they will not move. Ranged monsters features both a Ranged and a Melee attacks on their cards, Melee Attacks are only used if they are forced into targeting an Accursed in close combat and will never use them otherwise (remember no character can use ranged attacks while being adjacent to an enemy), resolve all Melee attacks the same way you would for melee monsters. If they are not adjacent to their enemies, they will deal their Ranged attack against any Accursed in LoS. Ranged attacks are also distributed evenly among all Accursed in range, so if there are 4 Accursed in range and 4 ranged monsters which needs attacking, each Monster will attack one Accursed, in case of uneven numbers assign who gets the extra attacks randomly between all available Accursed. Use all the numbers of Ranged attacks a monster is allowed per turn.
End of Combat Once all monsters have been killed by the Accursed (taken as trophies), the combat is officially over so any rules that prevents Accursed from taking specific actions during combats can be done once more. The moment the combat is over the Accursed must claim their reward for this fight. Souls: First, each Accursed gains a number of Souls equal to the Soul Value found on the Monster Card for each trophy they own belonging to that type, so if they own 3 trophies and they are each worth 2 souls, they will gain and mark down “6 Souls”. If an Accursed is dead by the end of combat, their trophies are wasted. Treasure: Monsters may carry anything from junk to high valued treasure, to know if to draw Standard or Rare
Treasure card, check the Loot icon over the Encounter (or Boss) card, if it says “Loot” you will draw 1 Treasure card to assign with the standard loot rules, if it is a gold chest and says “Rare Loot” you must take a Rare Loot Card and also use the standard loot rules. After the rewards have been claimed, remove all trophies, place all the Monster cards back in their deck and discard the Encounter/Boss cards.
Optional Rules The following are a list of optional rules you can use, so long as every players agrees on before starting to play. Fair and Square: At the end of combat when the player are calculating how many souls they have gained from their trophies, calculate them all together instead and then divide the total amount of souls gained, equally among all present Accursed.
Need or Greed: Instead of the Loot Round rules use the following: Whenever the group must decide who gets the treasure card, each Accursed must declare either “Need” “Greed” or “Pass”. The treasure will be given to anyone who says “Need” and in case there are more than one who choses Need, pick one of them at random. If no player has chosen “Need” then choose one Accursed at random among those who have said “Greed” and assign them the treasure card. If everybody said “Pass”, assign the treasure to 1 Accursed at random. This concludes the basic rules on how to play Darklight, it is strongly recommended you play one or more games before moving on to the Advanced Rules. It is important you keep in mind these rules have been written for the purpose to help those who are interested in backing the Kickstarter or for those who already have. They will be rewritten in the future to be clearer to read and will include the “Advanced Rules” as well.