diy guide to soap, detergent and glue · there who claim they have the base for a lye-free soap;...
TRANSCRIPT


DIY Guide To Soap, Detergent And Glue
The history of soap
Personal hygiene has always been one of the main concerns of modern
man. Without it we would be constantly under direct threat of all sorts of
germs and pathogens that are found all around us. But a long time ago,
man discovered the wonders of cleaning products and has been improving
them ever since. Soap is not just a product that helps boost our levels of
cleanliness, but it’s also a way of life. It’s a cultural statement that helps tell
a lot about a person according to the rules of social behaviour nowadays.
Skip on water and soap for a few days and the people around you will
notice, won’t they?
The word soap is believed to be derived from Mount Sapo in Rome, and
has been used for a millennium now. Although it was the Romans that
came up with the name that stood the test of time, it was the Babylonians
who actually invented soap. The first official records of the wonder-product
date back as far as 2,800 B.C. and as anthropologists state, it was firstly
used in the medical field (as sterilizer and cleanser) or in the textile field (as
cleaner and softener). It was originally an all-natural product, made up from
plant and animal matter alike, such as fats, vegetable oil (castor, coconut or
olive oil), ash and various aromatic plants which were later added in order
to improve the scent and to increase its perfume.
Today’s soap is based on the same “primitive” principles, but because
science has been continuously progressing, so has the ability of soap to
counter pathogens and keep us healthy. The soap industry (like any other
serious industry) is gradually evolving, getting better and better with time. If
back in the old days soap was a multi-purpose tool, it now became a
“specialized tool” for every occasion: body hygiene soaps, laundry soaps,

dishwashing soaps, pet soaps, textile soaps etc.
The processes of soap making: hot vs. cold
Soap is a direct result of saponification, which is a combination of potent
fatty acids that can destroy pathogens which could harm human health.
Soap making is the result of 2 basic processes: the HOT process and the
COLD process. Different mixtures of water, lye and oils are used, because
there is a fundamental difference between the two:
● in the case of cold processing, the ingredients are all mixed together
(water, lye, oils etc.) and then poured into moulds that will be
insulated; the moulds should be deposited in cool surroundings (or
room temperature at least) for a couple of weeks, until the
saponificataion process is complete.
● when it comes to hot processing, things are not all that different,
apart from an extra step that makes a whole world of difference:
“cooking” the soap will speed up the saponification process, getting
your soap ready in a matter of days, rather than weeks; why wait
when you could get things done 3 or 4 times faster?

DIY lard soap
In order to go back to the roots as much as you possibly can, you have to
take the primitive approach. The way that stands the test of time is the most
efficient one, yet it still works in the present just as well. The first soaps
were based on animal fats. This is the perfect place to start as it is cheap,
easy to make and it might even turn out to be fun.
But be WARNED that you will be working with lye aka. caustic soda or soda
ash. This is an extremely alkaline substance that gives and extreme
chemical reaction when mixed with water, which can produce noxious
fumes and can burn skin on contact. Always add lye to water, not water to
lye as you might get and volcano-like erupting reaction. When handling the
lye, it is advisable advised to wear protective eye-wear and gloves and to
be in a ventilated room or outside, in order to prevent toxic fumes build-up.

It is imperative to understand the risk and to take the necessary measures
of precaution, as lye-related accidents can cause permanent damage to the
eyes and skin, and in unfavorable circumstances they might even be fatal.
Making lye-based soap should be taken seriously and if you have to do it,
do it while in the absence of children.
Equipment and ingredients
Before starting, there are a few things and materials one needs to make the
right soap. Here is a complete list of what you must have:
● a small pot (or Pyrex jug)
● a large pot (non-aluminum)
● accurate kitchen scales
● a wooden spoon
● a spatula
● a stick blender
● a kitchen thermometer
● a clean mold
● protective gear (glasses and gloves)
● fats or oils
● water
● lye (aka. caustic soda)
If you have everything ready, you will need to decide on the amount of soap
that you want to obtain. Considering the fact that the method is hybrid
between the cold and hot process (the fat will be heated only initially),
determining the right amounts of ingredients used is important; for accurate
measurements you can sue various calculators for soap-making on the
internet.
Once you have measured everything, you can start making the soap. Get
the moulds ready by greasing them up with a little lard. You can also throw
in some baking paper, just to play it safe; the lard will do just fine. If you do
not have wooden moulds, you can improvise some from milk cartons; juts
cut them up and clean them spotless before using them.
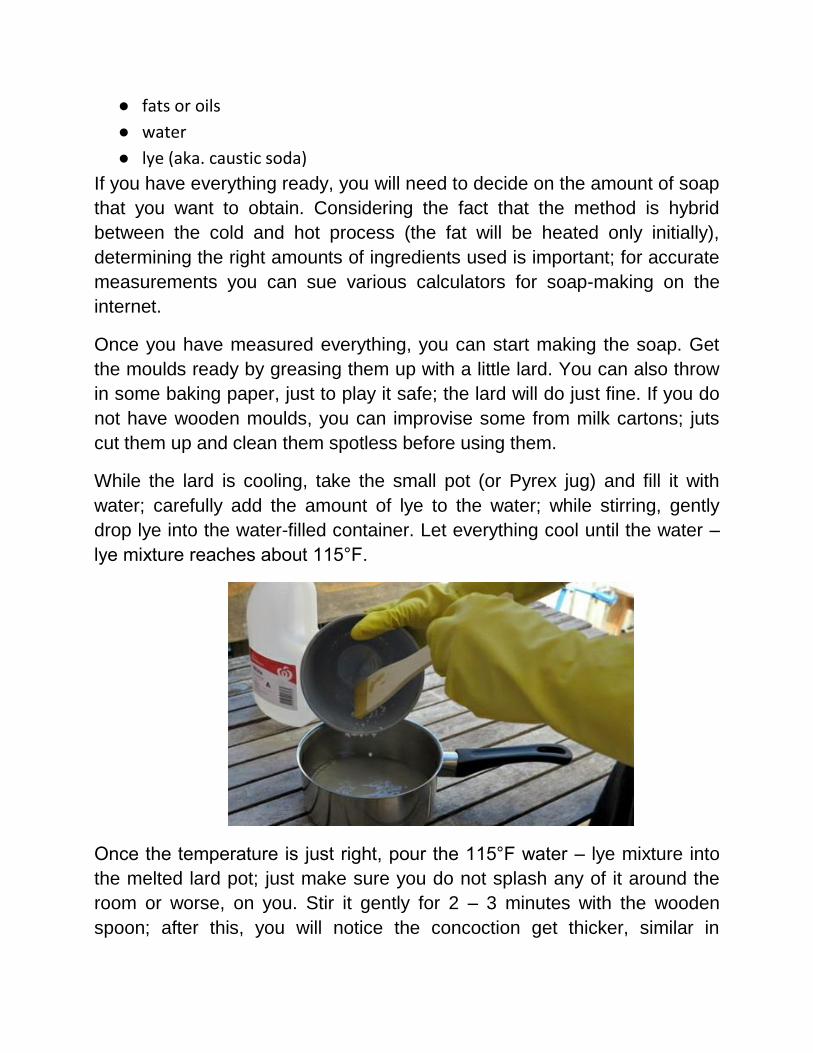
While the lard is cooling, take the small pot (or Pyrex jug) and fill it with
water; carefully add the amount of lye to the water; while stirring, gently
drop lye into the water-filled container. Let everything cool until the water –
lye mixture reaches about 115°F.
Once the temperature is just right, pour the 115°F water – lye mixture into
the melted lard pot; just make sure you do not splash any of it around the
room or worse, on you. Stir it gently for 2 – 3 minutes with the wooden
spoon; after this, you will notice the concoction get thicker, similar in

consistency to custard. Stir for about 15 minutes with a wooden spoon or 5
– 7 minutes with a mixer to get soap done. After a couple of minutes of
stirring you can add in aromatic fragrances at your choice. Once the stirring
time is up, scrap everything up with a spatula and pour it in the moulds.
Cover everything up with a towel and place it in a cool and dry place for 3 –
5 days. This should be more than enough for the mixture to harden. Once it
does, you can chop it into bars and start using it right away.
DIY coconut oil soap
The coconut oil-based soaps are lathery soaps, rich in natural fats.
These types of soaps are extra creamy and moisturizing for the skin and
also work great as bath soaps, for sponge or loofah washing. This is what
you will need:
● a crock pot
● a thermometer + PH test strips
● a digital scale
● a stick blender
● measuring cups (glass only)
● small glass bowls
● a wooden spoon (which should be sued for soap-making only)

● a spatula
● a soap mould
● baking paper
● protective gear (glasses and gloves)
● coconut oil
● lye (aka. caustic soda)
● water
● random fragrances (lavender oil works best)
The first thing to do is to weigh in the ingredients based on the amount of
soup you want to obtain. Once you have finished measuring everything, set
the crock pot to low. Add water to a bowl (ceramic preferably). Put your
protective gear on and go outside to gently pour the lye into the water bowl
(and NEVER the other way around). Stir gently until all the lye is poured
and let everything cool at room temperature for about 15 minutes.
Take the saucepan and add the coconut oil in it. Heat everything up to
about 130°F and let the oil melt; once it does, pour it into the crock pot and
set it to low. Add the water – lye mixture to the coconut oil in the crock pot
and stir gently for a minute or 2. Once everything is visibly starting to
homogenize, get the stick blender and mix everything until you get a
custard-like mixture.

Cover the crock pot and let everything cook on low (yes, coconut oil soap
should be done by hot processing) until the oil rises up on the sides of the
pot, like a wave formation. This should take 60 minutes, more or less. When
the soap is ready (or near-ready) it should become semi-translucent aspect,
with oil puddles in the middle. To test if the soap is ready or not, throw in a
PH test strip, if it fully changes color in under 10 minutes; the soap is done.
If not, let it cook some more, otherwise the soap would still be flammable.
Adding various fragrances should be done after the mixtures cools down a
bit, otherwise the aromas will be neutralized.
Place everything into the mould with the wooden spoon and let everything
cool at room temperature or in the fridge, in case you are in a hurry. Once
everything has hardened properly, take it out and slice the mixture into
proper bars. For maximum efficiency, let the bars out to mature for a couple
of weeks more in an aired place.
DIY lye-free soap – Tearing down the myth
If you look hard enough, you will find all sorts of “soap prophets” that will
promise the way to the lye-free soap. This would be extremely convenient,
as you would not have to expose yourself while handling a rather

dangerous substance, such as caustic soda (most commonly known as
lye). But to obtain saponfication you need two main ingredients:
1. a potent alkali which kills off bacteria and pathogens (like potassium
hydroxide or sodium hydroxide)
2. a fat-based binder to keep everything together (based on animal lard
or vegetable oils)
3. scents are optional
SOAP WOULDN’T BE SOAP WITHOUT LYE;
IT’D BE NOTHING BUT FAT AND AROMATIC
SUBSTANCES!
The so called wonder-soaps that are supposedly lye-free are just a myth
that should be debunked once and for all. There are many producers out
there who claim they have the base for a lye-free soap; that base in fact is
nothing more than a lye-based substance which will only spare you the
headache of mixing water and lye together. It still has to throw lie in the
mixture in order to make a proper soap with anti-bacterial properties.
The history of detergent
Cleaning detergents are derivatives of soap. Cleanliness is important, and
not only for the human body. The need of having clean possessions and
surroundings has driven modern man to take soap to a whole new level,
thus creating the first industrially-made cleaning detergent in the mid-1930s.
Asscience was offering new possibilities in manipulating fatty alcohols it
acted as a catalyst for the rise of many industrial detergent brands all over
the world: DEFT and Procter & Gamble (in the US), BASF (in Germany)
and many more.
It was the detergent boom in the 1930s that would have completely
replaced clothing soaps before the 1950s. Because the detergent business
had already become a self-sufficient and stable industrial giant, it has
improved and boosted other creations throughout the years, which would
contribute to the commodities of everyday life as we know it:
1950s – the creation of automatic dishwasher powders + fabric softeners
1960s – pre-wash stain removers + enzyme presoaks
1970s – multifunctional products (detergent / softener) + liquid soaps
1980s – detergents with support for cold water washing + concentrated washing
powders
1990s – aromatic gels + ultra-fabric softeners + super concentrated powders +
liquid detergents
2000s – biodegradable and eco-friendly products + water conservation washing
machines + laundry detergent "all in one" tablets
The lack of modern detergents is unimaginable in the context of the 21st
century. There are alternatives to making your very own house detergents,
in case of a SHTF situation that will make them unavailable on the market.
DIY laundry detergent (powdered)

Powder detergent might be a bit rougher on fabrics and certain surfaces
than liquid detergent, but it does have some undeniable advantages: it is by
far less expensive and complicated to make and it will store easier than its
liquid counterpart.
Making your very own laundry detergent might sound like serious business.
You will be pleased to know that it is not; as long as you have a handful of
ingredients so, making your DYI laundry detergent will be easier than
making a good cup of coffee. This is what you need for the job:
● a bar of soap (homemade preferably, as it’s easier to shave, but
industrial soap will do just fine)
● a cup of washing soda
● a hand grater
● a cup of borax
● a glass bowl
● a wooden spoon
The first thing you will want to do is to “take apart” the bar of soap. Get your
hands on the grater and start grating off as much of the soap as you
possibly can; the thinner the shavings, the better.
Next, place the soap shavings in the glass bowl. Add the cup of borax
first and let it sit for about a minute. There should be a chemical reaction

between the borax and the soap; nothing noticeable or dangerous. After
roughly a minute, throw in the washing soda as well.
Stir everything for at least 1 - 3 minutes, so that the mixture will homogenize
as well as possible. If you want to take DYI detergent making a step further
you could try adding to the mix a bunch of aromatic herbs and oils that
could personalize the scent as much as needed. Stir more until everything
is nice and homogenous as so.
Store the detergent in an air-tight container and keep it in a proper storage
space, away from sunlight that can deteriorate the cleaning agents. Use a

tablespoon / small load or 2 tablespoons / large load. If you want to grind
down the powder as fine as possible, use a blender or food processor.
DIY dish detergent (liquid)
Making liquid detergent (aka. liquid soap) requires more or less the same
base ingredients as powdered detergent. The main difference is the fact
that here you will need to add water to the mix, in order to liquefy the state
of the concoction prior to coming in contact with the water used for the
washing process. You will need the following stuff for DYI dish detergent;
once you have everything at your disposal, you can start “cooking”:
● a bar of soap (preferably homemade)
● a cup of washing soda
● a hand grater
● a cup of borax
● a saucepan + a large pot
● a wooden spoon
● a 5 gallon bucket
If you have everything at your disposal, you can start making the liquid
soap. Get the grater and the bar of soap and start processing until you are
left with the finest soap shavings you could possibly achieve.

Next, throw the soap flakes in the sauce pan, add 2 quarts of water and let
everything sit over low to medium heat. Continue stirring gently with a
wooden spoon until the soap is completely dissolved in the water.
Get 4 – 4.5 gallons of tap water and heat it up until its boiling point in a
large enough pot. When the water starts sizzling, turn off the heat and
immediately pour the hot water into the 5-gallon bucket. Throw in the 5
gallon bucket the cup of borax and the cup of washing powder and keep
stirring until everything gets completely dissolved.

Cover the bucket (put the lid on or throw in a tower over the mouth) so that
the ingredients can melt overnight. You can let it stand in the 5-gallon bottle
or transfer everything to a squirt bottle; if you want to personalize the scent,
throw in some aromatic oils to the mixture before using it.
The history of glue
Glue has become a major asset of modern civilization due to the ever-
present desire of man to fix or improve things. At first, primitive man had to
do with the cards he was dealing with, and used everything nature could
offer: be it animal mucus or tar. As time went by, man’s inquisitive nature
helped him develop and improve the natural elements which he already had
at his disposal.
The evidence for man-made glue was found by anthropologists and date as
back as 5,000 years ago (that’s 3,000 B.C.). Cave paintings were found,
and upon analysis, the paint used had a strange adhesive in its
composition; it was determined that most likely primitive man mixed raw
paint with the adhesive in question in order to make the paint stick faster
and last longer on the rock walls.
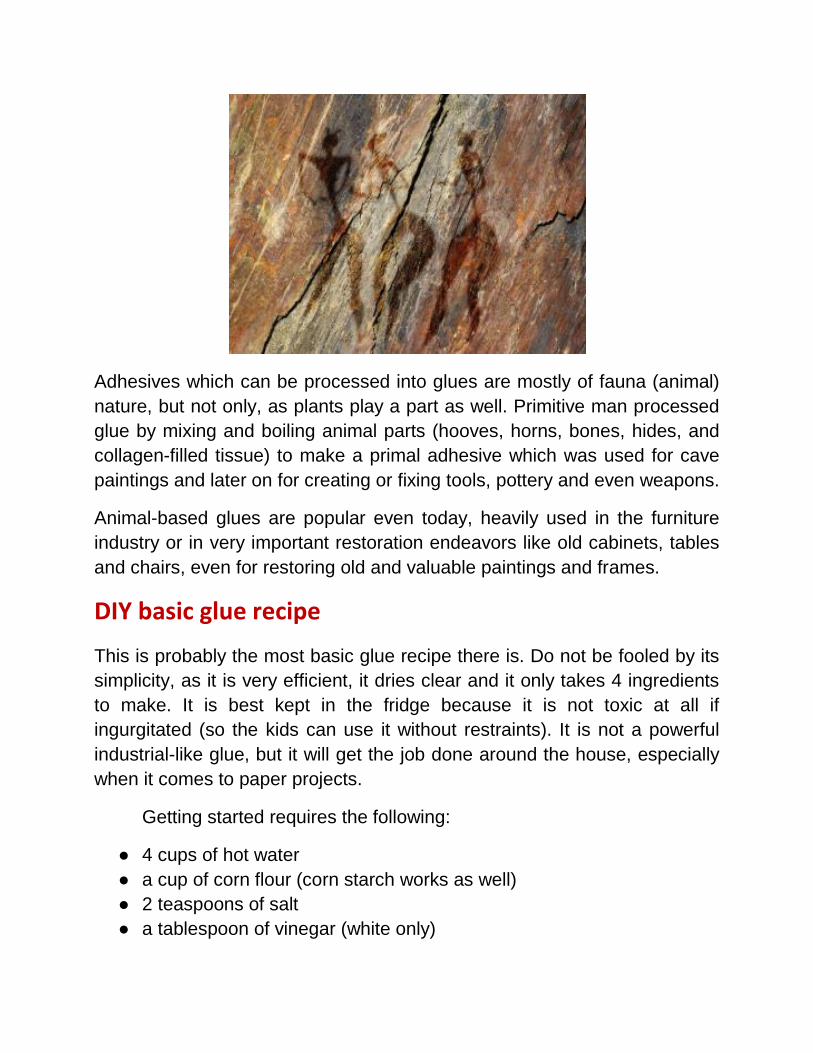
Adhesives which can be processed into glues are mostly of fauna (animal)
nature, but not only, as plants play a part as well. Primitive man processed
glue by mixing and boiling animal parts (hooves, horns, bones, hides, and
collagen-filled tissue) to make a primal adhesive which was used for cave
paintings and later on for creating or fixing tools, pottery and even weapons.
Animal-based glues are popular even today, heavily used in the furniture
industry or in very important restoration endeavors like old cabinets, tables
and chairs, even for restoring old and valuable paintings and frames.
DIY basic glue recipe
This is probably the most basic glue recipe there is. Do not be fooled by its
simplicity, as it is very efficient, it dries clear and it only takes 4 ingredients
to make. It is best kept in the fridge because it is not toxic at all if
ingurgitated (so the kids can use it without restraints). It is not a powerful
industrial-like glue, but it will get the job done around the house, especially
when it comes to paper projects.
Getting started requires the following:
● 4 cups of hot water
● a cup of corn flour (corn starch works as well)
● 2 teaspoons of salt
● a tablespoon of vinegar (white only)
● a saucepan
● a whisk
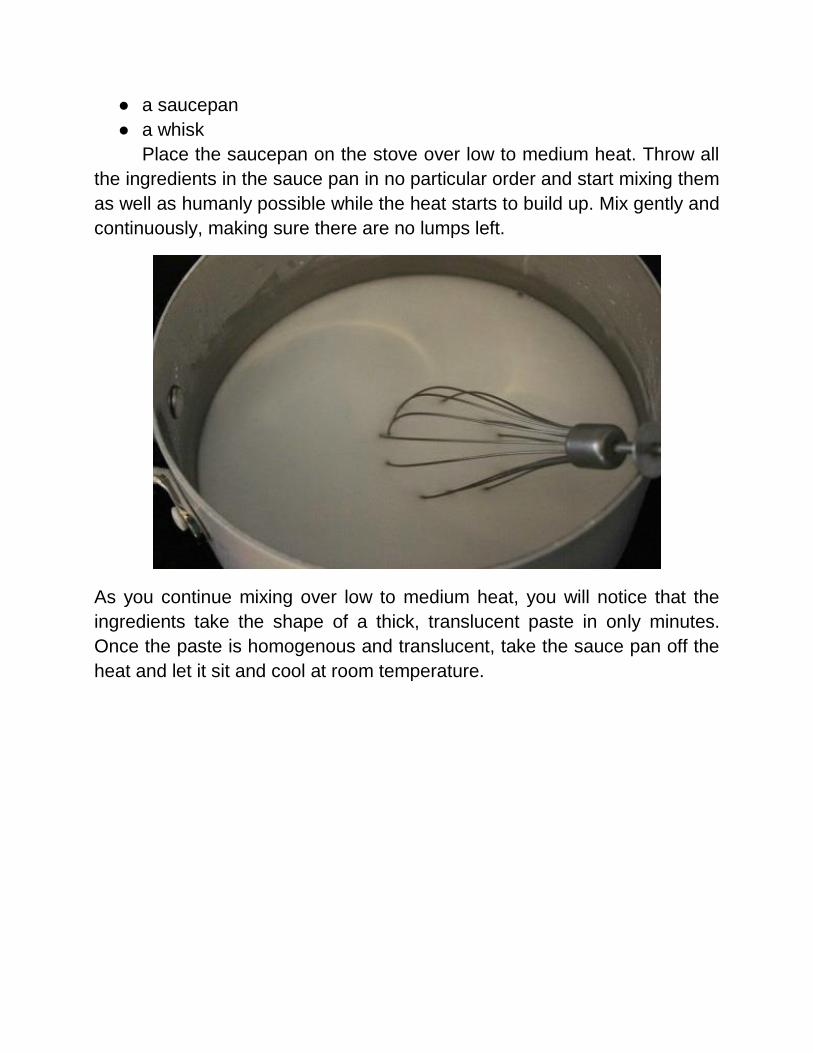
Place the saucepan on the stove over low to medium heat. Throw all
the ingredients in the sauce pan in no particular order and start mixing them
as well as humanly possible while the heat starts to build up. Mix gently and
continuously, making sure there are no lumps left.
As you continue mixing over low to medium heat, you will notice that the
ingredients take the shape of a thick, translucent paste in only minutes.
Once the paste is homogenous and translucent, take the sauce pan off the
heat and let it sit and cool at room temperature.

If it is cool enough for you to touch it, it is ready to be stored and
used. Based on the amount of ingredients used, you should have enough
glue to fill a small jar. Get a small glass jar with a good lid and transfer the
glue in it; seal it tightly and store it in the fridge. It should keep for about 3
months. The low temperature will jellify the paste, and reduce its adhesive
quality.
Luckily, the process is reversible. Just take the glue out of the fridge
and place as much as you are going to use in a container. Boil some water
and add it to the gel; use a whisk to mix everything together, until the gel
regains the consistency and translucence it had when you first made it.
DIY water resistant glue (milk-based)
This type of glue is aheavier duty than most DYI glues and it can just as
easily hold together metal, ceramics, porcelain or glass. It is also efficient
when it comes to porous surfaces, and it will hold extremely well in time.
Although it does seem to hold in water, its water resistance is not full proof.
It is advisable not to wash anything that you have just fixed with this type of
glue for about 20 – 24 hours, in order to give the glue enough time to do it
itself. Even after this margin, washing should be done carefully, by hand,
and never in the dishwasher. Also do not stick anything held together by the
glue in the microwave, either.
It does not require much (only 3 ingredients) and it is easy to prepare. You
will need the following:
● 2 teaspoons of skim milk
● 4 teaspoons of tap water
● a pack of gelatin (unflavored)
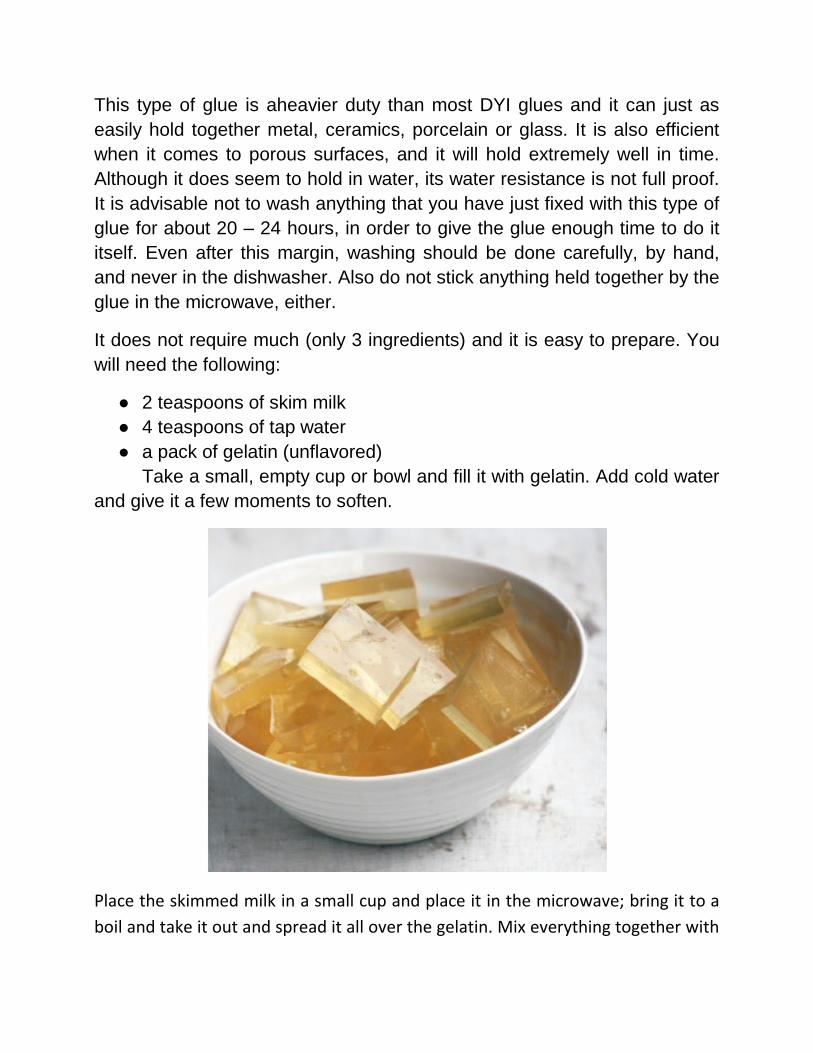
Take a small, empty cup or bowl and fill it with gelatin. Add cold water
and give it a few moments to soften.
Place the skimmed milk in a small cup and place it in the microwave; bring it to a
boil and take it out and spread it all over the gelatin. Mix everything together with

a small spoon until everything has homogenized nicely and there are no lumps
left.
The adhesive property is based on a particular chemical reaction which is
heat-dependent. So the warmer the paste, the better the glue will be.
However, its sticky properties are not ready right after completion; it is
advisable to store it in a small jar at room temperature first and then reheat
it for maximum efficiency. It should stay on stand-by for about 4 - 5 days
before using it.
The jar should be airtight for the paste to jellify properly and keep it as pure
as possible. Before using, simply warm it up over a pan of hot water.

DIY water resistant glue (vinegar-based)
This type of glue is not based on milk, but rather on vinegar, if anything.
The vinegar-based DYI glue is about as water resistant as a DIY glue can
get, but it is not as popular considering milk is more present in a regular
household than vinegar. But if you happen to have some vinegar around
the house, look no further!
Not only will it hold better when exposed to water, but it will also keep for
longer periods of time in storage. It is not strong enough to stitch back
together heavy pieces of china, but it will work nicely for regular plate.
These are the requirements for making the glue:
● 6 tablespoons of water
● 2 tablespoons of white vinegar
● 2 packs of gelatin
● a teaspoon of glycerin
● a saucepan + a wooden spoon, spatula or a whisk
Place the saucepan over low to medium heat on the stove and throw in the
6 tablespoons of water; bring the water to a boil. Once the water starts to
sizzle consistently take the sauce pan of the heat and let it cool. Throw the
2 packs of gelatin and stir gently until everything homogenizes properly.
Once the gelatin dissolves completely, add the teaspoon of glycerin and the
2 tablespoons of white vinegar and continue stirring until everything

homogenizes again. Let it cool and store it in an air-tight container
(preferably a glass jar) at room temperature.
DIY white glue
This is a milk-based glue that works a lot with a certain protein found in
milk, named casein. The protein is hydrophobic (meaning it repels water
molecules). They repeal even each other, but by adding an acid (vinegar in
this case) they will become adherent to each other. While clustered, they
can be easily filtered out. In this state they will resemble a hard, plastic-like
material, which you can “melt” again by adding a little water and a base; this
will separate the molecules and make them suspended in liquid again.
For DIY white glue you will need the following:
● a cup of skim milk
● 1 – 2 tablespoons of water
● half-a-tablespoon of baking soda
● 2 tablespoons of white vinegar (distilled only)
● a saucepan + a wooden spoon, spatula or a whisk
● cheese cloth
● a small bowl
Place the saucepan on the stove over low to medium heat and stir in the
milk and the 2 tablespoons of distilled white vinegar. Avoid boiling at all
costs, as this will ruin the molecules you are aiming to preserve. When the
milk has curdled, remove the pan from the heat and filter the milk through a
piece of cheese cloth. Scrape the curds and place them into a small bowl.

Take another small container (a jar or a bowl) and dissolve the half-a-
teaspoon of baking soda in some water. Once the baking soda becomes
undetectable to the human eye, you can add the milk curds to the mix as
well. Stir gently until you get the consistency of average glue; you can make
the concoction as thick or as thin as you like, depending on what you want
to use it for.
Once you achieve the desired consistency, store everything in an airtight
container. The faster you use the glue, the better, as it will lose its efficiency
in time. Store it in the fridge only, as the milk proteins will deteriorate rather

fast. Even in proper cold storage conditions, white glue will not last more
than 2 weeks.
DIY superglue (Gum Arabic-based)
The Gum Arabic based glues are really strong and efficient and will
probably hold glass, china and crockery together better than anything else.
It is not necessarily a fast drying glue, but once it sticks, it sticks for good.
Use it as you would its famous and commercial counterpart: apply coats of
glue on both sides of the broken pieces, hold them together in place for a
few minutes and then let the whole mixture sit for 24 hours before using it
again.
For one of the most potent homemade glues you will need the following:
● 3 tablespoons of Gum Arabic
● half-a-teaspoon of water
● a tablespoon of glycerin
● a bowl

It is really easy to make: just mix all the ingredients mentioned above (3
tablespoons of Gum Arabic, half-a-teaspoon of water and the tablespoon of
glycerin) in a bowl in no particular order. Stir everything gently until you are
left with a homogenized paste. Place the paste in an airtight container and
keep it at room temperature. If prepared correctly, it will resist for about a
year.

It is a lot of fun to belong the field of DIY. And while having fun you
can also become productive and self-sufficient. It is nothing greater
than a man able to provide everything for himself or his family with the
little resources he has left. It is also a lot of room left for
experimentation; just make sure you understand very well what you
deal with at all times and always wear the protective gear required.