disinfection and sterilization - navy bmr material/navedtra 14295b... · explain the disinfection...
TRANSCRIPT

CHAPTER 10
DISINFECTION AND STERILIZATION
INTRODUCTION
Concerns about transmitting infectious agents, such as hepatitis virus (HBV) and human immunodeficiency virus (HIV), have caused the health care community to become more aware of the need to disinfect and sterilize instruments, materials, and other equipment to protect providers and patients. This chapter will explain the disinfection and sterilization process with which Hospital Corpsmen (HMs) will be involved. It will also give an overview of the procedures so HMs can effectively carry out duties assigned. Many types of liquid chemical disinfecting agents are available and a variety of sterilization methods. The highest level of contamination control is sterilization because it results in the total destruction of all forms of microbial life. Sterilization and the availability of sterile products for use in healthcare delivery depend on many factors. The most critical factors are as follows:
Proper and efficient sterilization facility design
Sound infection control practices before, during, and after disinfection and sterilization
The effectiveness of the actual disinfection and sterilization processes
DISINFECTION
LEARNING OBJECTIVE: Explain the difference between disinfection and sterilization.
Disinfection is a less lethal process than sterilization, which kills disease causing micro-organisms. This does not include the destruction of resistant bacterial spores.
Disinfection is achieved by either chemical or heat means. Selecting an appropriate chemical germicide or heat disinfection method depends on what requirements need to be met for that particular product. The following are some of the criteria for effective chemical disinfection:
The degree of microbial kill or deactivation required
The composition and texture of the item being treated
The technical requirement and ease of use of the available agents
LEVELS OF DISINFECTION
LEARNING OBJECTIVES: Indentify the government agency responsible for registering disinfectants. Identify chemical products used for high, intermediate, and low-level surface disinfection and explain the advantages and disadvantages of each.
The Environmental Protection Agency (EPA) classifies disinfectants as high, intermediate, or low level, based on the effectiveness and contact time of the solution and the biocidal activity of an agent against bacterial spores, mycobacterium tuberculosis, lipid and nonlipid viruses, and vegetative bacteria.
10-1

Table 10-1 describes the level of disinfection required to kill the micro-organism named.
Table 10-1.—Micro-Organisms and Levels of Disinfection
FACTORS INFLUENCING GERMICIDAL PROCEDURES The factors associated with the micro-organisms, as well as those associated with the surrounding physical and chemical environment, influence the antimicrobial efficiency of the germicides. They are described next. Nature of the Material The easiest surface to disinfect is a smooth, nonporous, and cleanable one. If the materials are incompatible with disinfectant, damage and corrosion can occur. Bioburden Under a given set of circumstances, the higher the level of microbial contamination, the longer the required exposure to the disinfectant is needed. Additionally, resistant micro-organisms require longer exposure times.
Organic Debris Present Blood, saliva, and other organic material may contribute to the failure of a germicidal process by either direct inactivation of the disinfectant or the actual layering of the micro-organisms on the instruments or equipment, thereby preventing penetration of the germicide. Type and Concentration of the Germicide Generally, when all other variables are constant, the higher concentrations of a chemical agent are more effective and require a shorter time to disinfect. Use of dilutions other than those specified by the manufacturer adversely affects some intermediate-level disinfectants, specifically iodophors. In all instances, follow the manufacturer’s recommendations. GENERAL CATEGORIES OF LIQUID CHEMICAL AGENTS A large variety of liquid disinfectants are available today, and it is probable that many new ones will become available in the future. When selecting a product, make sure that the label has an EPA registration number on it. Table 10-2 is a guide to chemical agents for disinfection. They may be subject to change, be sure to read the manufacturer’s instructions before using. This section will discuss the four most commonly used chemical agents, glutaraldehyde and chlorine dioxide based solutions, iodophors, and phenolics.
Level of Bacterial Activity B
acte
rial
S
por
es
Tu
ber
cle
Bac
illu
s
Non
lip
id
Vir
use
s
Lip
id
Vir
use
s
Veg
etat
ive
Bac
teri
a
High Intermediate Low
Maybe No No
Yes Yes No
Yes Yes No
Yes Yes Yes
Yes Yes Yes
In the absence of gross organic contamination.
10-2

EPA-Registered Surface Disinfectants for Dentistry Category/Active Ingredient Contact* Pros Cons
Chlorines (sodium hypochlorite diluted in-office, chlorine dioxide, commercial preparations of sodium hypochlorite with added surfactants)
2–10 min 20ºC or 25ºC†
Economical; rapid, broad-spectrum activity; tuberculocidal; effective in dilute solution
Diluted solutions must be prepared daily; cannot be reused; are corrosive to some metals; may destroy fabrics; may irritate skin and other tissues; chlorine dioxide is a poor cleaner
Complex phenols (“synthetic phenols” containing multiple phenolic agents)
10 min 20ºC or 25ºC†
Broad-spectrum activity; residual activity; effective cleaner and disinfectant; tuberculocidal; compatible with metal, glass, rubber, and plastic
Extended exposure may degrade some plastics or leave etchings on glass; many preparations are limited to one day of use; may leave a residual film on treated surfaces
Dual/synergized quaternary ammonium compounds (alcohol and multiple quaternary ammonium compounds)
10 min 20ºC†
Broad-spectrum activity; tuberculocidal; hydrophilic virus claims; low toxicity; contains detergent for cleaning
Readily inactivated by anionic detergents and organic matter; can damage some materials
Iodophors (iodine, combined with a surfactant)
10 min 20ºC
Broad-spectrum activity; tuberculocidal; relatively nontoxic; effective cleaner and disinfectant; residual biocidal action
Unstable at higher temperatures; may discolor some surfaces; inactivated by alcohol and hard water; must be prepared daily; dilution and contact times are critical
Phenol-alcohol combinations (phenolic agent in an alcohol base)
10 min 20ºC or 25ºC†
Tuberculocidal; fast acting; residual activity; some inhibit the growth of mold, mildew, and other fungi
May cause porous surfaces to dry and crack; poor cleaning capabilities
Other halogens (sodium bromide and chlorine)
5 min 20ºC
Fast acting; tuberculocidal; supplied in tablet form for simple dilution; requires minimal storage space
For use on hard surfaces only; chlorine smell
EPA, Environmental Protection Agency. *Contact time/temperatures for tuberculocidal activity. †Varies by active ingredient or disinfectant brand. Note: Glutaraldehydes and simple quaternary ammonium compounds should not be used for surface disinfection in dentistry.
Table 10-2.—Guide to Chemical Agents for Disinfection
Image reprinted with permission from: Organization for Safety and Asepsis Procedures (non-profit organization) which provides information and education on dental infection control and office safety.
For more information, please call 1-800-298-OSAP (6727).
10-3
Glutaraldehyde Solutions These agents are available in several formulations differing in pH, concentration, and exposure time. They are classified as high-level disinfectants; any chemical agent used chiefly on inanimate objects to destroy or inhibit the growth of harmful organisms or sterilants . Always wear impermeable gloves and protective eyewear when handling these solutions. Irritation of the hands is common and personnel are always at risk of splashes occurring whenever liquids are being handled, so direct physical contact between glutaraldehyde solutions and human tissues should be avoided. When using these agents, they require proper ventilation because their vapors are extremely toxic. Immersed items must be rinsed with sterile water before using. Glutaraldehydes of 2 to 3.2 percent are FDA-registered. These solutions are not recognized as acceptable surface disinfectants because of the excessive amounts of exposure time required, corrosiveness, skin sensitization, and odor. Chlorine Dioxide Solutions Chlorine dioxide is an effective surface disinfectant or sterilant. These solutions may be used for high-level disinfection of semi-critical items that are not subject to corrosion. It has a rapid action of 3 minutes for disinfection or 6 hours for sterilization. As with sodium hypochlorite (bleach), there are several disadvantages: chlorine dioxide must be discarded daily; has a 24-hour use life as a sterilant; and does not readily penetrate organic debris. It must be used with protective eyewear and gloves because it is extremely irritating to the eyes and skin. It should always be placed in closed containers, and the HM must ensure adequate ventilation when using for surface disinfection. In addition, it corrodes aluminum containers.
Iodophors Iodophors are classified as intermediate-level disinfectants or can be used as antiseptics if the product label claims tuberculocidal (lethal to mycobacterium tuberculosis) activity. They are compounds consisting of iodine and usually detergents to which the iodine quickly binds. Iodophor preparations are less irritating to tissues, cause less allergies, and do not normally stain skin or clothing. They should not be used on white or pastel vinyls that are subject to staining from repeated exposure to iodine. Their biocidal activity is accomplished within 10 to 25 minutes of exposure. To ensure tuberculocidal activity, fresh solutions must be prepared daily. As iodophors lose effectiveness, the color changes from amber to clear. Iodophors become somewhat unstable at high temperatures and can have a rapid loss of antimicrobial activity when inactivated by hard water and alcohol. Distilled or at least softened water is recommended to dilute the iodophors before using. Iodophors are EPA-reg i s te red and American Dental Association-accepted as surface disinfectants. They may not be used as sterilants.
Iodophor antiseptics are useful in the preparation of oral mucosa for local anesthesia, surgical procedures, and hand washing. Not only does the Iodophor remove the microbial populations from the skin, but also a residual antimicrobial effect remains on the scrubbed areas. Although Iodophors are used as both antiseptics and disinfectants, the same product is never used for both. Antiseptics are applied to living tissue/skin to reduce the possibility of infection, sepsis, or putrefaction. Disinfectants destroy microorganisms found on non-living objects.
10-4
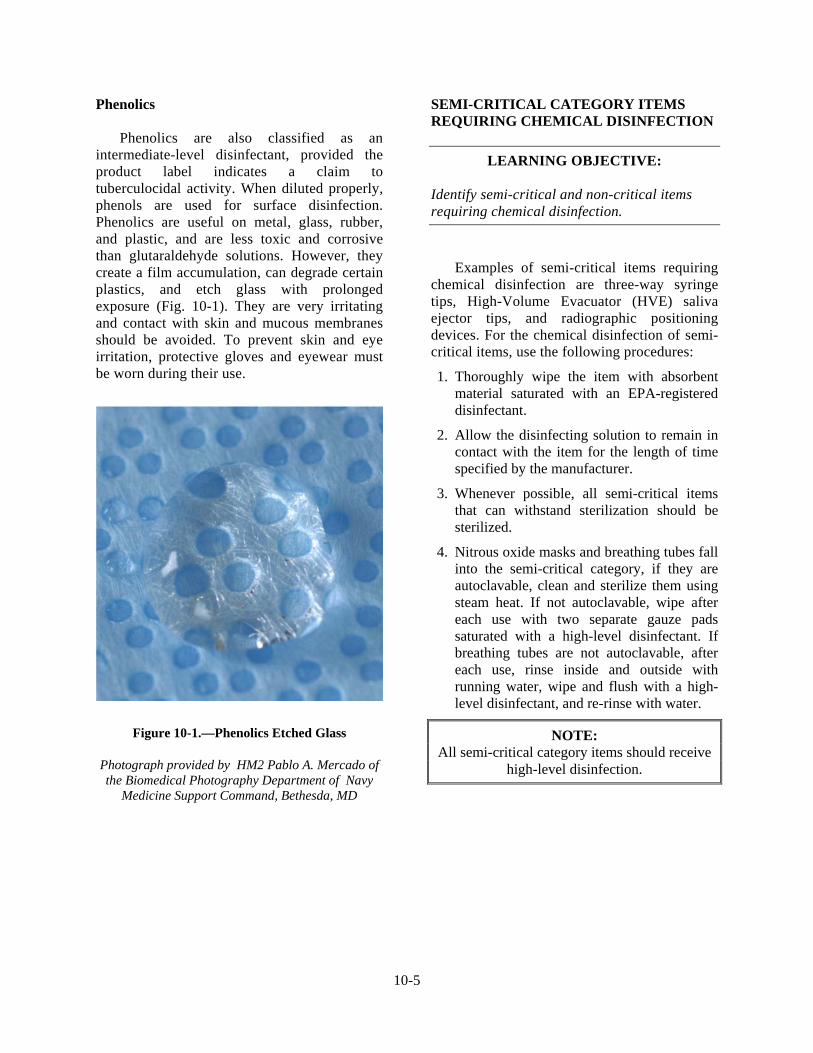
Phenolics Phenolics are also classified as an intermediate-level disinfectant, provided the product label indicates a claim to tuberculocidal activity. When diluted properly, phenols are used for surface disinfection. Phenolics are useful on metal, glass, rubber, and plastic, and are less toxic and corrosive than glutaraldehyde solutions. However, they create a film accumulation, can degrade certain plastics, and etch glass with prolonged exposure (Fig. 10-1). They are very irritating and contact with skin and mucous membranes should be avoided. To prevent skin and eye irritation, protective gloves and eyewear must be worn during their use.
SEMI-CRITICAL CATEGORY ITEMS REQUIRING CHEMICAL DISINFECTION
LEARNING OBJECTIVE: Identify semi-critical and non-critical items requiring chemical disinfection.
Examples of semi-critical items requiring chemical disinfection are three-way syringe tips, High-Volume Evacuator (HVE) saliva ejector tips, and radiographic positioning devices. For the chemical disinfection of semi-critical items, use the following procedures:
1. Thoroughly wipe the item with absorbent material saturated with an EPA-registered disinfectant.
2. Allow the disinfecting solution to remain in contact with the item for the length of time specified by the manufacturer.
3. Whenever possible, all semi-critical items that can withstand sterilization should be sterilized.
4. Nitrous oxide masks and breathing tubes fall into the semi-critical category, if they are autoclavable, clean and sterilize them using steam heat. If not autoclavable, wipe after each use with two separate gauze pads saturated with a high-level disinfectant. If breathing tubes are not autoclavable, after each use, rinse inside and outside with running water, wipe and flush with a high-level disinfectant, and re-rinse with water.
NOTE: Figure 10-1.—Phenolics Etched Glass Photograph provided by HM2 Pablo A. Mercado of the Biomedical Photography Department of Navy
Medicine Support Command, Bethesda, MD
All semi-critical category items should receive high-level disinfection.
10-5
NON-CRITICAL CATEGORY ITEMS REQUIRING CHEMICAL
DISINFECTION
LEARNING OBJECTIVE: Identify semi-critical and non-critical items requiring chemical disinfection.
Examples of non-critical category items
requiring chemical disinfection are the following: dental delivery systems (DDS), consisting of a chair, unit, and light; portable dental units; surgical table and chair; and X-ray apparatus. For the chemical disinfection of non-critical category items, use the following procedures:
1. Disinfect all equipment and table surfaces at least daily.
2. Use disposable barriers since they reduce the number of surfaces requiring disinfection.
3. Change paper or plastic headrest and bracket tray covers after each patient. If headrest covers are not available, disinfect the headrest after each patient.
4. Disinfect hand-operated controls, switches, and handles after each patient.
5. Follow the manufacturer’s instructions when disinfecting the lamp head and protective shield.
6. Flush HVE and saliva ejector tubing and cuspidor weekly with a central evacuation system cleaner. Use more often as needed. Follow the manufacturer’s instructions.
7. Anesthetic cartridges for nonsurgical use should be dispensed under unit dose guidelines to prevent contamination of bulk supplies. Use only individual dose dental carpules, discard them after use, and always follow the manufacturer’s instructions.
NOTE: All non-critical category items require at least
intermediate-level disinfection.
STERILIZATION
LEARNING OBJECTIVE:
Indentify the steps involved in processing instruments.
The highest level of contamination control is sterilization because it results in the total destruction of all forms of microbial life. Sterilization and the availability of sterile products for use in healthcare delivery depend on many factors. The most critical factors are as follows. PHYSICAL DESIGN Healthcare Treatment Facilities must have a Central Sterilization Room (CSR) or a central sterilization area. Centralization of sterilization activity is safer, provides more efficient use of materials and personnel, and standardizes execution and monitoring procedures. The following are the critical design elements that make up a CSR. Dedicated Work Areas
The design and outfitting of a sterilization area must include work areas for receiving, cleaning, processing, sterilizing, storing, and issuing of instruments and equipment. FUNCTIONAL FLOW OF THE STERILIZATION PROCESS Most large healthcare facilities will have a permanent CSR technician assigned to the sterilization area. As part of the HM’s indoctrination, temporary assignment in the CSR will enable learning of the command’s sterilization processes. All CSRs should have a functional flow system (Fig. 10-2) where equipment, instruments, and materials are first introduced into the receiving area, and work their way through to the issue area in a specific order.
10-6

Once physically in an area of the CSR, the HM must not go backwards or skip an area. This will compromise the entire sterilization process. Do not process contaminated instruments, materials, or equipment in an area that may contaminate the sterilized items. TRAFFIC CONTROL Controlled access to the sterilization areas minimizes the potential for transfer of micro-organisms between contaminated items, patients, and staff. These areas must be off limits to anyone not involved in the sterilization process. RECEIVING AND CLEANING Ideally, these areas will be physically separate from the remainder of the sterilization area. If physical separation is not obtainable, proper outfitting and equipment selection are critical. Commands should purchase equipment that minimizes the handling of contaminated materials and instruments.
There may also be an area equipped with the utilities necessary for operating dental hand pieces. Some commands require that the disinfection, cleaning, lubrication, and sterilization of dental hand pieces take place in the CSR instead of the medical treatment room (MTR) or dental treatment room (DTR). Check to see what the command’s policies are on where hand piece maintenance should take place. PROCESSING A processing space should have amble work surface for the volume of materials processed. All inspecting, sorting, wrapping, and packaging of contaminated materials occur here. STERILIZATION The space requirements for the sterilization process should be determined by the available size, the degree of sufficient access for the loading and unloading, and the ability to service the sterilizer.
Figure 10-2.—CSR Functional Flow Chart
STERILE STORAGE AND ISSUE
To protect and maintain all sterile items, the storage and issue areas should not be in the immediate vicinity of the contaminated processing areas. STERILIZATION PROCESS The sterilization process takes place in a CSR. There are many benefits to the centralized approach. Centralized instrument decontamination and sterilization are usually safer and more cost effective than instrument processing in the MTR/DTR. The elimination of large numbers of small capacity ultrasonic baths and tabletop sterilizers in each MTR/DTR can be replaced by the central sterilization approach that has larger capacity centralized equipment.
10-7

Whether a centralized or individual sterilization area is used, contaminated instruments and equipment must be processed as described next. MANAGEMENT OF CONTAMINATED INSTRUMENTS Following the completion of a patient’s treatment, the HM will take the contaminated instruments and equipment directly to the CSR technician in the receiving area of the CSR. Figure 10-3 illustrates a contaminated instrument pack that has been placed in the designated drop-off location in the receiving area. The CSR technician should take the contaminated instruments and equipment and set them in the receiving area that has been designated as a temporary holding area until they can be processed.
Do not rinse, scrub, or unnecessarily handle contaminated instruments or materials in MTRs/DTRs or other patient treatment areas. In the most extenuating circumstances, only the Commanding Officer (designee) or the Infection Control Officer (ICO) under written direction may make exceptions to this requirement. This does not include hand piece maintenance that will be performed in the CSR, main operating room (MOR), or DTR depending on the local policy.
INSTRUMENT CLEANING You should take contaminated instruments from the receiving area wearing heavy duty puncture-resistant gloves while handling all potentially contaminated items. Break down all packs and place disposable items and contaminated linens in appropriate containers. All contaminated, reusable items must be decontaminated by immersion in an EPA-registered disinfectant before further handling. This step can be eliminated if these items are cleaned in an ultrasonic cleaner (bath) with an EPA-registered disinfectant that also is approved as an ultrasonic cleaning solution. Process contaminated instruments using one of the following methods. They are discussed in order of preference. Automated Washer Processor The automated washer processor is the safest method and provides an effective cleaning process. Figure 10-4 illustrates an automated washer processor being loaded. It is commonly used in hospitals or very large dental clinics. Contaminated instruments are placed in cassettes or baskets. Then they are run through the unit’s cycle of cleaning, rinsing, and disinfecting at temperatures high enough to provide at least a high level of disinfection. This results in a “not touch” system in which the potential for injury during instrument processing is greatly reduced.
Figure 10-3.—Contaminated Instrument Pack Placed at the Entrance of the Receiving Area in
the CSR
Figure 10-4.—Loading an Automated Washer
Image reprinted with permission from: Torres & Ehrlich: Bird, D. L. & Robinson, D. S.
(2008). Torres and Ehrlich Modern Dental Assisting (9th ed.). St. Louis: Elsevier Health
Sciences.
10-8

Ultrasonic Cleaning This process is safer and more effective than manual scrubbing. The ultrasonic cleaner eliminates the possibility of accidental puncture wounds on the hands that frequently occur with manual scrubbing. It also eliminates the splatter of organism-laden debris generated by scrubbing with a brush. The ultrasonic cleaner uses electrical energy to generate sound waves. When the sound waves travel through the liquid, millions of tiny bubbles form and burst continuously. This process is called a “cavitation” effect. The bursting bubbles scrub everywhere the liquid can penetrate. Intricate surfaces and difficult access areas, such as burs, endodontic files, serrated instrument handles, and hinged instruments are cleaned more thoroughly and rapidly. The usage life of cutting instruments, such as burs and endodontic files, is extended by thoroughly removing debris that interferes with the cutting surfaces. There are several sizes of ultrasonic cleaning units. Figure 10-5 illustrates small and large size ultrasonic cleaners.
The ultrasonic cleaner should be located in the processing area of the CSR. The manufacturer’s instructions must be followed when using ultrasonic cleaners. These instructions should be posted or readily available in locations where the units are used.
The following general guidelines are common to the proper use of all ultrasonic cleaners:
Always keep the ultrasonic cleaner reservoir 1/2 to 3/4 full with ultrasonic solution at all times
The solution must completely cover the items for the ultrasonic action to occur
Avoid the use of disinfectants, plain water, and non-ultrasonic soaps or detergents
Cleaning solutions must be changed at least daily or sooner, if visibly contaminated
When using the ultrasonic cleaner follow these guidelines:
Place instruments into a perforated or wire mesh basket and rinse under water first
Place basket holding the instruments into the ultrasonic cleaner unit filled with solution
Never place items directly on the bottom of tanks. This would reduce the amount of ultrasonic waves produced and could damage the unit
Always close the lid or cover on the unit when in use to decrease aerosols and avoid splattering of the solution onto adjacent surfaces
Limit ultrasonic cleaning time to 5 minutes to avoid damage to instruments. Follow manufacturer’s instructions for exact cleaning times for different models
NOTE: Longer cleaning times may be required for
some nonmetallic instrument cassettes. Figure 10-5.—Small and Large Size Ultrasonic Cleaners
Never use a hand to remove instruments from the unit. Instead, use the basket to lift the
instruments from the solution, drain, and rinse them under running water.
Be sure to rinse the instruments thoroughly to
remove all the remaining solution.
Inspect the instruments for remaining blood or debris, and then dry thoroughly.
10-9

Manual Scrubbing Although manual scrubbing is time consuming and presents an increased potential for contamination injury, this method is effective for cleaning instruments when automated washer processors or ultrasonic cleaning units are not available. Triple-sink modules allow personnel to perform in an orderly sequence multiple functions such as pre-rinsing, soaking, washing, and final rinsing. While wearing heavy-duty utility gloves, face mask, plastic apron, and eye protection, place instruments in a disinfecting solution, allow them to soak, and then scrub them under water to avoid generating splatter. PRE-STERILIZATION PROCESSING
LEARNING OBJECTIVES:
Indentify the steps in pre-sterilization processing. Indentify methods of sterilization. Indentify types of sterilizers.
The HM is still in the processing area of
the CSR and has just finished cleaning the instruments using one of the three methods of cleaning discussed previously and letting them dry as shown in Figure 10-6.
Perform the following procedures in the sterilization process next. Inspection and Sorting of Instruments After drying, the HM must inspect items closely for wear, breakage, and cleanliness. Sort instruments according to sets or packs. This is the pre-staging area where the instruments are sorted before wrapping and packaging. Wrapping and Packaging Wrapping and packaging is the last step just before the sterilization process. Many different types of sterilizers, packaging, and wrapping materials are used in the CSR. Ensure to place consumable supplies that are required by the command in each particular pack before wrapping such items as needles, cotton rolls and pellets, gauze, aluminum foil for dental light handles, internal indicators, and towels. Instruments are usually placed in packs, on metal trays or perforated cassettes, before placing them into the sterilizer. The most common wrapping materials and containers are paper, paper/plastic, nylon tubing, and cloth. Wash rubber tubing in an antiseptic detergent solution. Pay attention to the inside of the tubing. Rinse all tubing well and place it flat or loosely coiled in a wrapper or container. When packing latex surgical drains for sterilization, place a piece of gauze in the lumen of the tray.
Never resterilize surgical drains
Never resterilize rubber catheters bearing a disposable label
Figure 10-6.—Instruments Drying in the Processing Area
Never resterilize surgical disposable (rubber) gloves
NOTE: These gloves are for one-time use only.
10-10
Do not place surgical knife blades or suture materials inside linen packs or on instrument trays before sterilization.
Modern manufacturing processes make all suture materials available in individual packages, pre-sterilized, with or without a surgical needle attached. Once opened, do not resterilize either the individual package or an individual strand of suture material.
NOTE: The only exception to this rule involves the use of surgical stainless steel. This material is often provided in unsterile packages or tubes. Individual strands or entire packages of surgical stainless steel must be sterilized before use.
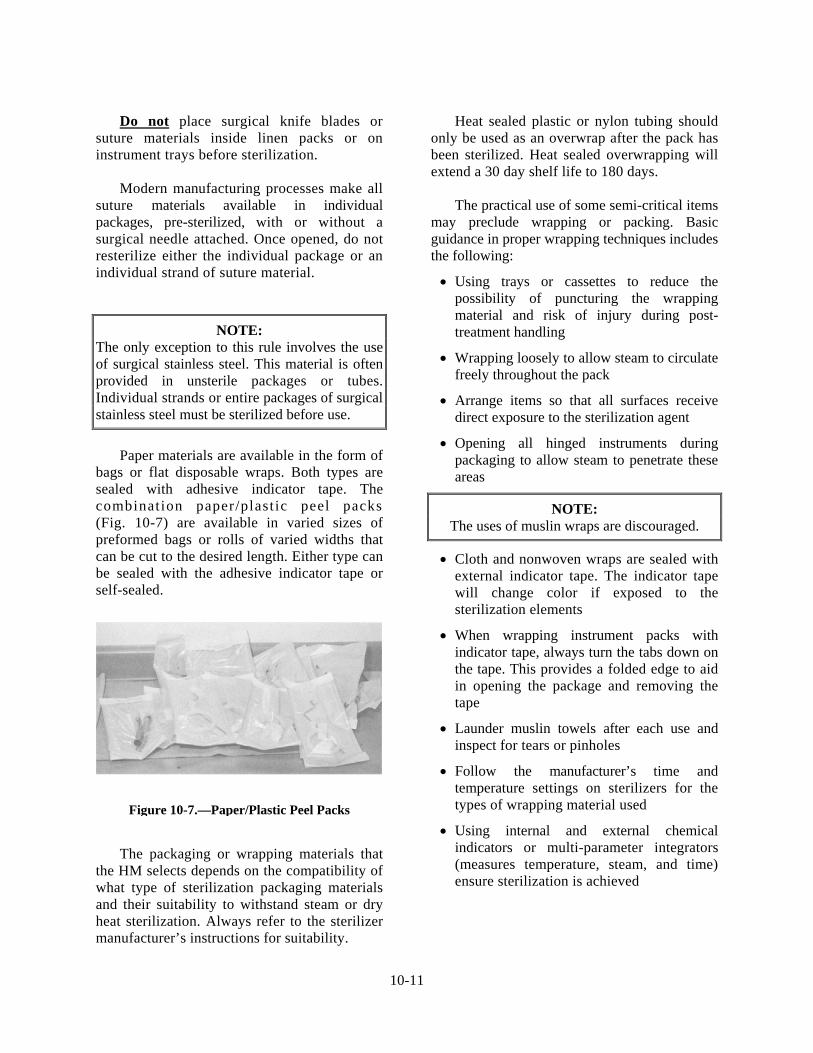
Paper materials are available in the form of bags or flat disposable wraps. Both types are sealed with adhesive indicator tape. The combination paper/plast ic peel packs (Fig. 10-7) are available in varied sizes of preformed bags or rolls of varied widths that can be cut to the desired length. Either type can be sealed with the adhesive indicator tape or self-sealed.
The packaging or wrapping materials that the HM selects depends on the compatibility of what type of sterilization packaging materials and their suitability to withstand steam or dry heat sterilization. Always refer to the sterilizer manufacturer’s instructions for suitability.
Heat sealed plastic or nylon tubing should only be used as an overwrap after the pack has been sterilized. Heat sealed overwrapping will extend a 30 day shelf life to 180 days. The practical use of some semi-critical items may preclude wrapping or packing. Basic guidance in proper wrapping techniques includes the following:
Using trays or cassettes to reduce the possibility of puncturing the wrapping material and risk of injury during post-treatment handling
Wrapping loosely to allow steam to circulate freely throughout the pack
Arrange items so that all surfaces receive direct exposure to the sterilization agent
Opening all hinged instruments during packaging to allow steam to penetrate these areas
NOTE: The uses of muslin wraps are discouraged.
Cloth and nonwoven wraps are sealed with external indicator tape. The indicator tape will change color if exposed to the sterilization elements
When wrapping instrument packs with indicator tape, always turn the tabs down on the tape. This provides a folded edge to aid in opening the package and removing the tape
Launder muslin towels after each use and inspect for tears or pinholes
Follow the manufacturer’s time and temperature settings on sterilizers for the types of wrapping material used Figure 10-7.—Paper/Plastic Peel Packs
Using internal and external chemical indicators or multi-parameter integrators (measures temperature, steam, and time) ensure sterilization is achieved
10-11
Expiration Dates After the packs, instruments, and supplies are wrapped or placed into containers and sealed, they must be labeled with the identification number of the sterilizer, the preparer’s initials, the dates of sterilization and expiration before they are placed in the sterilizer. To label, use an ink marker, preprinted indicator tape, or a marking device that won’t run or fade when exposed to sterilization.
The shelf life or expiration date of sterilized items is the period during which an item is considered safe for use. Shelf life can be time-related or event-related. The command’s ICO will determine what method the sterilization program will use. Time-Related Time-related shelf life is identified with an exact expiration date. After this date, the item is considered to be outdated and should not be used. Table 10-3 lists the different wrapping methods and their time-related shelf life in accordance with BUMEDINST 6600.10 series.
Event-Related Shelf Life The use of the event-related method presumes continued sterility until the package is damaged, wet, or torn. It is a well-recognized standard for items in good quality, self-sealed or hermetically (airtight) sealed, packaged in paper or plastic, or sequentially-wrapped and sealed in dust covers within a few hours after sterilization. If this method is used, the command policy must be clearly defined and consistently used throughout the healthcare facility. When using the event-related method, all sterilizers must be biologically monitored at least weekly. Sterile Storage Sterility of materials, instruments, and supplies is much harder to maintain than it is to achieve. There is little value in precise sterilization procedures if instruments are contaminated upon completion of the process. Items must be dry before they are handled or stored. The time required for drying depends on the type of packs in the load and the sterilizing agent used. Freshly sterilized items are never placed on metal or cold surfaces. Packages become damp from the condensation that occurs and become contaminated.
All sterile supplies, including sterile reusable dental items, must be stored in a manner that will preserve their sterility until used. The following factors affect this process:
Environmental conditions including cleanliness, proper ventilation, and control of excess heat and humidity are important
The location where sterile supplies are stored should not be in a manner that may contribute to the increased possibility of contamination
Sterile items should not be stored with items not intended for clinical use (e.g., office and cleaning supplies)
Items must not be stored on the deck, under sinks, in window sills, adjacent to heating and air conditioning vents, or in any area where undetected contamination may occur
WRAPPING METHOD
TIME-RELATED SHELF LIFE
Paper envelope (sealed with sterilization tape)
365 days
Nonwoven blue wrap
30 days
Nonwoven blue wrap, plastic covered, heat-sealed
365 days
Peel plastic packs, heat-sealed or self-sealed
365 days
Parchment paper or Dennison wrap
30 days
Glass test tubes with screw caps
Indefinite
Table 10-3.—Time-Related Shelf Life of Sterilized Items
10-12
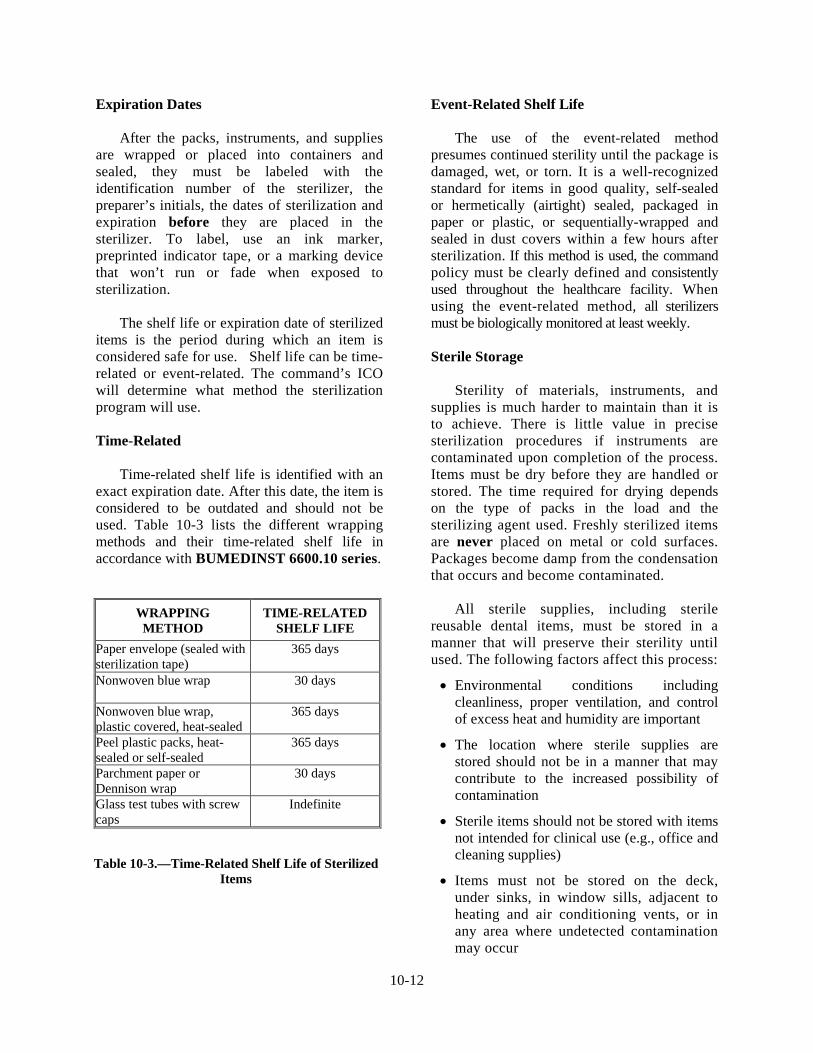
Figure 10-8 shows an acceptable sterile storage cabinet containing sterilized packs and instruments. Sterile items should not be stored in patient treatment or decontamination areas unless they are protected by enclosures, such as drawers or cabinets.
When storing sterilized items, arrange them according to expiration date; place items with later dates toward the rear. Check supplies periodically to determine any need for resterilizing. Items must be resterilized if the wrapper becomes wet, if the pack touches the deck, if there is any question of contamination, or if the safe storage period has expired.
STERILIZATION METHODS
LEARNING OBJECTIVES:
Indentify methods of sterilization. Indentify types of sterilizers. Indentify the three forms of sterilization monitoring. Indentify when and how biological monitoring is done.
The composition of many of the items used in healthcare is unique and no single sterilization method is suitable for all healthcare items. A HM will need to know several approved methods of sterilization. Methods of Sterilization Sterilization refers to the complete destruction of all living organisms, including bacterial spores and viruses. The word "sterile" means free from or the absence of all living organisms; any item to be sterilized must be thoroughly cleaned mechanically or by hand, using soap or detergent and water. When cleaning by hand, apply friction to the item using a brush. After cleaning, thoroughly rinse the item with clean, running water before sterilization. The appropriate sterilization method is determined according to how the item will be used, the material from which the item is made, and the sterilization methods available. The physical methods of sterilization are moist heat under pressure and dry heat. Chemical methods include gas and liquid solutions.
Figure 10-8.—Sterile Storage Cabinet
10-13

Physical Methods Steam under pressure (autoclave) is the most dependable and economical method of sterilization. It is the method of choice for metalware, glassware, most rubber goods, and dry goods. All articles must be correctly wrapped or packaged so that steam will come in contact with all surfaces of the article. To effectively sterilize items using saturated steam, the temperature of the steam throughout the load must be high enough to destroy the most resistant micro-organisms in the time allotted for sterilization. Similar items should be sterilized together, especially those requiring the same time and temperature exposure. Articles that will collect water must be placed so that the water will drain out of the article during the sterilization cycle.
Figure 10-9.—Gravity Displacement Steam Sterilizer
A sterilizer should be loaded in a manner that will allow the free flow of steam in and around all articles. Each item sterilized must be dated with the expiration of sterility. Sterilization indicators must be used in each load that is put through the sterilization process. This verifies proper steam and temperature penetration. The operating procedures for a steam sterilizer will vary according to the type and manufacturer. There are a number of manufacturers, but there are only two types of steam-under-pressure sterilizers. Steam sterilizers are available in many sizes, ranging from portable countertop to the fixed room-size sterilizer. Two of the most common types of steam sterilizers used in the Navy are the downward displacement (gravity) and pre-vacuum, high-temperature sterilizers. Downward Displacement Autoclave I n the downward (gravity) displacement autoclave, air in the chamber is forced downward from the top of the chamber. The temperature in the sterilizer gradually increases as the steam heats the chamber and its contents (Fig. 10-9). The actual timing does not begin until the temperature is above 245°F (118°C).
You should observe the following precautions when loading the sterilizer chamber:
Do not overload. The passage of steam from the top of the chamber to the bottom should not be blocked
Place all packages on edges, with large packs at the bottom of the chamber, and small packages in an upper layer crosswise to the lower layer. This allows free passage of steam
If mixed loads of metal items and linen are sterilized together, the linen is placed on the upper shelf and the metal items on the lower
Articles that require the same amount of time and the same final steps should be sterilized together
Enclosed fluids are sterilized separately because the pressure must be slowly released
Load all packages at the same time when they are ready to be sterilized
A standard operation chart for the correct exposure period of all supplies should be prepared and posted for easy reference. It is important to note that sterilizing conditions are based on temperature rather than on pressure.
10-14
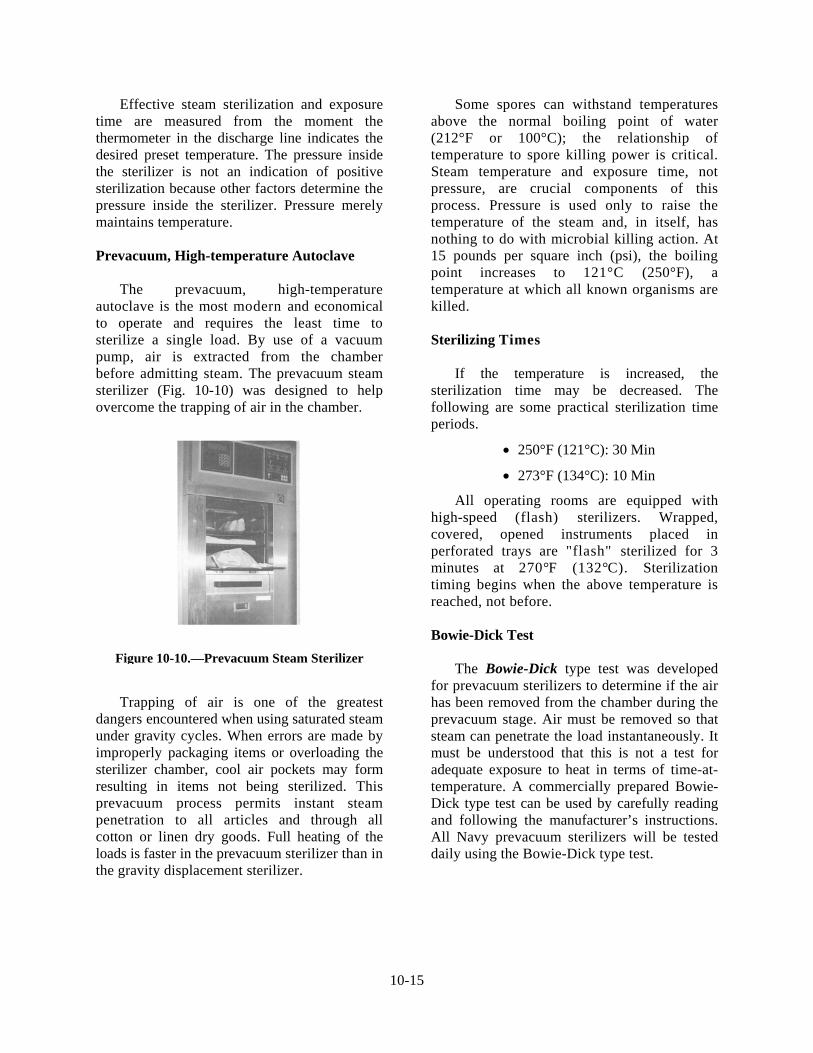
Effective steam sterilization and exposure time are measured from the moment the thermometer in the discharge line indicates the desired preset temperature. The pressure inside the sterilizer is not an indication of positive sterilization because other factors determine the pressure inside the sterilizer. Pressure merely maintains temperature. Prevacuum, High-temperature Autoclave The prevacuum, high-temperature autoclave is the most modern and economical to operate and requires the least time to sterilize a single load. By use of a vacuum pump, air is extracted from the chamber before admitting steam. The prevacuum steam sterilizer (Fig. 10-10) was designed to help overcome the trapping of air in the chamber.
Trapping of air is one of the greatest dangers encountered when using saturated steam under gravity cycles. When errors are made by improperly packaging items or overloading the sterilizer chamber, cool air pockets may form resulting in items not being sterilized. This prevacuum process permits instant steam penetration to all articles and through all cotton or linen dry goods. Full heating of the loads is faster in the prevacuum sterilizer than in the gravity displacement sterilizer.
Some spores can withstand temperatures above the normal boiling point of water (212°F or 100°C); the relationship of temperature to spore killing power is critical. Steam temperature and exposure time, not pressure, are crucial components of this process. Pressure is used only to raise the temperature of the steam and, in itself, has nothing to do with microbial killing action. At 15 pounds per square inch (psi), the boiling point increases to 121°C (250°F), a temperature at which all known organisms are killed. Sterilizing Times If the temperature is increased, the sterilization time may be decreased. The following are some practical sterilization time periods.
250°F (121°C): 30 Min
273°F (134°C): 10 Min
All operating rooms are equipped with high-speed (flash) sterilizers. Wrapped, covered, opened instruments placed in perforated trays are "flash" sterilized for 3 minutes at 270°F (132°C). Sterilization timing begins when the above temperature is reached, not before. Bowie-Dick Test Figure 10-10.—Prevacuum Steam Sterilizer The Bowie-Dick type test was developed for prevacuum sterilizers to determine if the air has been removed from the chamber during the prevacuum stage. Air must be removed so that steam can penetrate the load instantaneously. It must be understood that this is not a test for adequate exposure to heat in terms of time-at-temperature. A commercially prepared Bowie-Dick type test can be used by carefully reading and following the manufacturer’s instructions. All Navy prevacuum sterilizers will be tested daily using the Bowie-Dick type test.
10-15

Level One Maintenance The interior of the steam sterilizer should be cleaned each day before being heated. This simple procedure can easily be accomplished by using a mild detergent to wash the surfaces. Follow the wash with a thorough rinse of plain water. Unless this is done, the chamber walls will collect mineral deposits and may become greasy. Do not use wire brushes, steel wool, or any type of abrasive cleaning compounds on the sterilizer. The manufacturer’s directions must be followed to maintain a properly functioning sterilizer. If the sterilizer does not appear to function properly, Bio-Medical repair technicians should check it at once. Sterilizers should be spot checked frequently for leaks in lines and improperly functioning gauges, dials, thermometers, doors, drain strainers, and valves. Dry-Heat Sterilization The dry-heat sterilizer (Fig. 10-11) operates by heating up air and transferring that heated air into the chamber with the instruments. The dry heat sterilizer is the least expensive forms of heat sterilization. The use of dry heat as a sterilizing agent has limitations. It should be restricted to items that are unsuitable for exposure to moist heat like metal instruments that rust or dull in the presence of water vapor.
A disadvantage is that the high temperatures destroy many rubber and plastic based materials, melt the solder of most metal impression trays, and weaken some fabrics, as well as discolor other fabrics and paper materials.
High temperatures and extended time periods are required when using dry heat. In most instances, this method often proves impractical. The temperature must be 320°F to 375°F (160°C-190°C), and the time period depends on the manufacturer’s instructions. A typical dry heat cycle is 90 minutes at 320-345°F, plus the time required to preheat the chamber before beginning the sterilization cycle. A common misuse of the dry heat method occurs when the oven door is opened, and an instrument is quickly removed during the timed cycle. This interrupts the cycle and timing must begin all over again. Biological monitoring will be performed weekly. Consult the manufacturer’s instructions of each type of dry heat sterilizer for specific details on its operation and user maintenance. Chemical Vapor Sterilization This process uses a mixture of chemicals, including alcohol, formaldehyde, ketone, acetone, and water, that are heated under pressure to form a sterilizing gas. Sterilization requires 20-40 minutes at 270°F with 20 psi when instruments are either unwrapped or bagged following the manufacturer’s instructions. Advantages to chemical vapor sterilization are as follows:
No corrosion, rusting, and dulling of instruments since water content is only 15 percent (if instruments are dry when placed in chamber)
Prevents destruction of dental items such as endodontic files, orthodontic pliers, wires and bands, burs, and carbon steel instruments
Figure 10-11.—Dry Heat Sterilizer Instruments are dry at the end of the cycle
10-16

The major disadvantage of this sterilization method is the requirement for adequate ventilation. Chemical vapors, particularly formaldehyde, can be released when the chamber door is opened, leaving a temporary but unpleasant odor in the area. Chemical vapor sterilization is not routinely used in Navy dentistry. Consult the manufacturer’s instructions for specific details on operation and required user maintenance. STERRAD STERILIZATION PROCEDURE Sterilization using plasma state hydrogen peroxide (Fig. 10-12) will be accomplished for those products unable to withstand steam sterilization parameters and have been approved, in writing, for sterilization by this method by the medical device manufacturer.
Preliminary Requirements Power will remain on continuously in the ready mode.
Processing will be restricted to items approved for Sterrad that cannot be sterilized by steam
Items must be properly cleaned, dried and packaged according to the manufacturer’s guidelines
No absorbable materials such as cellulose, foam, or linen may be placed inside the Sterrad
Follow restrictions on items with lumens
Trays will be placed flat on the sterilizer rack. They should not come in contact with the sides of the chamber
Wrapping Materials
o Approved peel packs with plastic and tyvek backing
o Polypropylene materials must be used to wrap trays
o Approved containerized systems
Peel packs will be placed on their sides in a tray or resting against a tray
Figure 10-12.—ASP 100 STERRAD STERILIZER
Photograph provided by the Biomedical
Photography Department of Navy Medicine Support Command, Bethesda, MD
10-17

Operating Cycle
Vacuum Stage: Removes air molecules and lowers chamber pressure
Injection Stage: Introduces hydrogen peroxide into the chamber
Diffusion Stage: Hydrogen peroxide vapor to penetrate packages
Plasma Stage: A radio frequency creates the electromagnetic field that converts the hydrogen peroxide into low temperature gas plasma
Vent Stage: Permits air into the chamber to return to atmospheric pressure
At the end of a cycle, an alarm will indicate the completion of the process
o Verify proper parameters have been met
o Sign printout
Cassette
Each cassette holds ten (10) cells. At the end of each cycle the printout will indicate how many cells remain
After ten (10) cycles the printout message will read “insert new cassette”. It will also be displayed on the LED message screen
Empty cassette falls into retrieval box
Inspect new cassette before starting a new cycle
Biological Indicator Test
A biological test pack will be placed on top of an instrument set and placed on the bottom shelf to the rear of the chamber with each load
At the completion of the cycle, the test pack will be removed and processed according to manufacturer’s recommendation to include the use of Bacillus Subtilis var. niger biological control
After 48 hours, the results will be documented in the sterilization records and included in the monthly report to the Infection Control Officer
Sterrad sterilization records are stored for 36 months
Safety Issues for Aborted Cycles Follow the safety precautions when unloading incomplete cycles. Refer to the guidelines provided by the sterilizer manufacturer. PPE such as gloves may be required. Ethylene Oxide Sterilization Ethylene oxide (ETO) gas uses relatively low temperatures for sterilization. Using a heated unit, sterilization can be achieved in 4-12 hours at 120°F. However, a lengthy aeration time of at least 16 hours must follow each cycle. Materials such as suction tubing, hand pieces, radiographic film holders, and prosthetic appliances may be sterilized without adverse effects. Follow the manufacturer’s instructions for safety precautions, operation, and maintenance. Because of the serious Occupation Safety Health Agency (OSHA) problems with ETO gas, Healthcare facilities should not purchase new ETO equipment.
10-18
Chemical Sterilization
Only one liquid chemical, if properly used, is capable of rendering an item sterile. That chemical is glutaraldehyde. The item to be sterilized must be totally submerged in the glutaraldehyde solution for 10 hours. Anything shorter than 10 hours is disinfection. Before immersion, the item must be thoroughly cleansed and rinsed with sterile water or sterile normal saline. It should be noted that this chemical is extremely caustic to skin, mucous membranes, and other tissues. CRITICAL CATEGORY ITEMS REQUIRING STERILIZATION All critical category items require sterilization. It also lists methods that are effective and acceptable, effective but risk damage, and ineffective with risk of damage to materials. Sterilize critical category items before turning them in for service or repair. Following BUMEDINST 6600.10 series, sterilize critical category items as follows: Surgical instruments Effective and preferred methods of sterilization are the steam autoclave, dry heat oven, chemical vapor, or ethylene oxide. Hand pieces Hand pieces include: low-speed motor attachments, sonic scaler, and tips. Follow manufacturer’s instructions for the cleaning of the fiber optic bundle. Burs and diamonds Clean burs and diamonds and dry them before sterilizing. Many burs and diamonds are used only for single patient use. One accepted method of sterilization for burs and diamonds are to place them in a screw cap glass test tube or aluminum foil wrapped bur block and dry heat sterilize for 90 minutes at 320-345°F.
Place a chemical indicator in each tube or wrapped bur block. At least weekly, place a biological monitor in one tube or foil wrapped block during the first load of the day; retrieve and send for culture testing following the manufacturer’s recommendations. Endodontic files and Gates-Glidden burs Arrange sets in file blocks and seal in peel packs before autoclaving. When additional files or burs are necessary, take them from a new package or from a file storage box and sterilize them in a bead or salt sterilizer before use.
STERILIZATION MONITORING
LEARNING OBJECTIVES:
Indentify the three forms of sterilization monitoring. Indentify when and how biological monitoring is done.
Any number of factors can reduce the effectiveness of sterilizers. Overloading and improper wrapping can prevent adequate penetration into the instrument surface. Improper timing, temperature variations, worn gaskets and seals, and sterilizer malfunctions can prevent sterilization. Heat sterilization methods are generally reliable and effective. Nevertheless, regular monitoring of sterilization cycles is necessary to detect inadequate process conditions caused by human error or equipment malfunction. Types of Sterilization Monitors Commands should base selection of sterilization monitors on reliability, appropriateness to the process, safety, and cost effectiveness. Many types of monitors are available. The three most commonly used sterilization monitors in the Navy are physical, chemical, and biological monitors.
10-19

Physical Monitoring Physical monitoring involves looking at the gauges and readings on the sterilizer and recording the temperatures, pressure, and exposure time. Chemical Monitoring Chemical monitoring (internal and external) involves the use of a heat-sensitive chemical that changes color when exposed to certain conditions. Internal Indicators Internal indicators are chemical dyes that change color when exposed to steam, dry heat, or chemical vapor for a specified period of time. When placed inside an instrument pack, they determine whether the conditions necessary for sterilization have been met (Fig. 10-13).
External Indicators
External indicators are chemical dyes that change color upon short exposure to sterilizing conditions. They are generally printed on packaging materials or supplied in tape form and are necessary to distinguish processed packages from those that have not been cycled (Fig. 10-14). External indicators are not sensitive enough to be processed as an internal indicator and should not be used.
Figure 10-13.—Internal Indicator
Image reprinted with permission from: Torres & Ehrlich: Bird, D. L. & Robinson, D. S.
(2008). Torres and Ehrlich Modern Dental Assisting (9th ed.). St. Louis: Elsevier Health
Sciences.
Figure 10-14.— A: Unprocessed Instruments; B: Wrapped Instruments After Processing
Image reprinted with permission from:
Torres & Ehrlich: Bird, D. L. & Robinson, D. S. (2008). Torres and Ehrlich Modern Dental
Assisting (9th ed.). St. Louis: Elsevier Health Sciences.
10-20

Guidelines for Internal and External
Use internal indicators inside and external
Follow the manufacturer’s instructions
iological Monitoring
Biological monitors are designed to assess
After endospore tests are processed thro
Test Procedure
al monitoring systems are esigned for specific sterilization methods, the
folded
an area
nt of the
:
Indicators indicators on the outside of each instrument pack. When using glass test tubes during dry heat sterilization, ensure an internal indicator is in each test tube before the screw top is secured. When any indicator of a load test pack fails, sterilize it with a new test pack containing both chemical and biological monitors. Be sure to closely monitor the temperature, pressure, and sterilizing time of the load. Watch the timer to be sure it does not start before the correct temperature is reached. Watch for steam leaks from the sterilizer during the sterilization cycle. If the indicator again fails, notify the ICO and biomedical repair personnel. Log in the results from the failure and secure the sterilizer from use until the results of the biological monitor can be evaluated.
Figure 10-15.—Biological Incubator
when reading the indicators. Please be aware that internal and external indicators are not replacements for biological monitoring. Only biological monitoring can tell the HM whether or not sterilization has actually occurred. B whether sterilization actually occurred and to confirm that all bacteria and endospores have been killed. The Centers for Disease Control and Prevention (CDC), the ADA, and the Organization for Safety and Asepsis Procedures (OSAP) recommend at least weekly but preferably daily monitoring.
ugh a sterilization cycle, they must be incubated (Fig. 10-15) according to the manufacturer’s instructions. A pH indicator in the medium changes color when the ampules of endospores germinate and produce acids. This visually identifies a failure in the sterilization process.
The biologicdHM must be sure to use a system compatible with the sterilization method used. The following test procedures should be used to ensure effectiveness of the sterilization process:
The use of a “test pack” is most practical while processing an instrument pack
Biological spore strips or ampules should be placed between several layers ofwrapping material, and then the test pack is double-wrapped in the normal manner. Always follow the biological monitor manufacturer’s directions for the placement of the test pack within the sterilizer
As a general rule, the biological spore strips or ampules should be placed within of the sterilizer that is least accessible to the sterilizing agent that is being used
If using steam under pressure sterilizers, place the test pack in the lower frosterilization chamber
If using tabletop units, place the test pack in the center of the load
NOTEFor each test, use an unprocessed monitor for a
control.
10-21
10-22
Evaluation Criteria After the completion of the sterilization cycle, open the test pack, and evaluate the dosage indicator to see if it passes or fails the cycle. If it passes, the HM can distribute the sterile goods and continue the biological test procedure. If it fails, follow the procedures under guidelines for internal and external indicators. Positive Results When positive biological monitoring occurs, the HM must follow these guidelines:
Notify the ICO and record the test results in the sterilization log
If another sterilizer is available, perform the following actions:
o Retrieve and sterilize all items sterilized since the last negative test of that sterilizer tested positive
o Process a test pack with both a chemical and biological monitor and secure the sterilizer from further use until the results of the biological and chemical tests are read
If the results of the biological and chemical tests indicate negative growth or pass the sterilization test, the sterilizer can be placed into service. If the results from the test still indicate positive growth or failure of sterilization, the sterilizer must be secured and biomedical repair personnel notified. If another sterilizer is not available, perform the following actions:
Notify biomedical repair technicians
Retrieve and sterilize all items processed since the last negative test. Use a test pack with a biological and chemical monitor in each load when resterilizing all items that came up positive from the last test
If a chemical monitor in the test pack indicates a pass of the sterilization test, these loads can be distributed if necessary. The ideal situation is to have adequate instruments and equipment to be able to hold these items for 48 hours after a negative biological test and then distribute. If the biological test again fails, complete the following items:
Secure the sterilizer
Notify biomedical repair technicians and the ICO
Make a narrative entry in the log of each action taken and the results as they occur
Retest the sterilizer using biological monitors
Confirm exposure of the biological monitor to sterilization process
Review the sterilization log for recent repairs or maintenance
SUMMARY
As healthcare team members in treatment facilities HMs must understand the importance of proper disinfection and sterilization methods. Most importantly they need to maintain the highest level of safety for both patients and the healthcare team. As a healthcare team member the HM is legally and ethically responsible for performing the procedures described in this chapter in a thorough and careful manner. Proper instrument processing is necessary to prevent the transfer of microorganisms from a previous patient to the next patient or to the HM.