digital temperature controller - paragonweb.com · 2 ramp-hold introduction thank you for...
TRANSCRIPT

1
See pages 24 - 25 for instructions on upgrading your DTC100, 600, 800 or 1000 series board to the Sentry.
Program Review (pg 9)From IdLE or duringfiring, press 6.Shows the program that isloaded in memory and ready tofire, or the one that is firing.
Skip Segment (pg 13)During firing, press 9, thenEnter.Skips to the next ramp.
Stop/Back (pg 7)Press during firing orprogramming.
Stops a firing.In Options, takes you back
to .During programming, takesyou back one step eachtime key is pressed.
Options (pg 14-18)From IdLE, press 0. PressEnter for option displayed.
Change the thermocoupletemperature. (Pg 14)
(Pg 15)Se-
lect Type K, S or R. (Pg 15)
Select vent fan or alarm if yourkiln has an auxiliary output. Thisis a special-order feature. (Pg 16)
Shows the factory setting. (Pg 16)Enter the
rate shown on your electric bill.(Pg 16)
Enter your kiln’s wattage. (Pg 16)
Alarm (pg 12)From IdLE or duringfiring, press 7.Enter a temperature. Whenalarm sounds during firing,press Enter.
Present Status (pg 12)During firing, press 5.Shows the segment number thatis currently firing and whether thesegment is in ramp or hold.
Add Time (pg 11)During firing, press 2.Each additional key pressadds five minutes to a hold.
Enter/Start (pg 8)Press Enter/Start after each
step in programming a firing.Press Enter/Start once from
to begin firing.
Selectidentification number for output toa computer. (Pg 17)
Set temperature sensitivity forFTH, FTC & LTdE errors. (Pg 17)
(Pg 17)
Check for overheating. (Pg 18)Make a
program tamper-proof. (Pg 18)For
technicians. (Pg 18)
(Pg 18)Diagnos-
tics tool. (Pg 18)Removes thermo-
couple offset and returns theboard to factory defaults. (Pg 18)
Multiple-Zone Options(pg 14)
Largesttemperature difference be-tween any two zones. (Pg 14)
Shows temperature of eachzone. (Pg 14)
Complete Ramp-Hold Operating Instructions
IM-218/3-10
Firing Cost (pg 12)Press 8 after the kilnfires to completion.The cost of the last firingwill appear. (First enterelectrical cost in the
option and kilnwattage in the op-tion, pg 16.)
Delay (pg 11)From IdLE, press 3.Enter time in hours:minutes.Delays the start of firing.
Program (pg 8)From IdLE, press 4.Select stored program (1 - 4).Enter rate, temperature, andhold for each segment.Edit a Program (pg 13)During firing, press 4.Change the current segmenttemperature. Press Enter.Change the hold. Press Enter.The kiln will continue firing.
Sentry 2.0Digital Temperature Controller

2 Ramp-Hold
Introduction
Thank you for purchasing the Sentry micro processor, our most advanced generation of digi-tal temperature controllers. As you read the manual, have your controller in front of you sothat you can try out the keys.
The controller display messages are limited to four characters. For this reason, the messagesappear cryptic: IdLE instead of “Ready to begin,” CPLT instead of “Fired successfully tocompletion,” RA1 instead of “Enter rate for first segment.” If at any time you are confused bythese messages, turn to Appendix A: Display Messages on pages 22 - 23.
The front cover is a quick guided tour of the controller. The back cover is a quick guide toprogramming, to be used after you have learned the programming in-structions on page 8.
Do not worry if you hear a clicking noise during operation. Mechanicalrelays click as they turn the heating elements on and off. This is normal.
The warranty on your Sentry controller does not cover damage fromoverfiring, regardless of the circumstances. It is the operator’s responsi-bility to make sure the kiln turns off at the end of the firing.
If you purchased the TnF 2 portable controller, you should find a TnF 2installation instruction sheet in addition to these instructions.
Instructions for multiple-zone kilns are included in this manual on pages 13 - 14. If you arenot sure whether your kiln is multiple-zone, look into the firing chamber. If you see two orthree thermocouple tips, your kiln is multiple-zone. If you see only one thermocouple, skipmultiple-zone instructions.
New features introduced with Sentry software version 18D: The Rate option (page 16), rateshown in Present Status (page 12), firing cost calculation (page 16),TCL alarm (page 21), PF1 alarm (page 20), and 2 segments added tothe User 1 program for a total of 20 (page 7). To check the software ver-sion of your Sentry, press the OPTIONS key repeatedly until SOFT ap-pears. Press ENTER. Your controller’s software version will appear.18D and later versions include the new features.
Once you learn the basic features of the Sentry, you will be able tocontrol every stage of firing. This offers learning opportunities andconvenience difficult to imagine with a manual-controlled kiln.
©2001, by Paragon Industries, Inc. IM-218/3-10
Do not worry ifyou hear a click-ing noise duringoperation. Me-chanical relaysclick as they turnthe heating ele-ments on and off.
Do not leave thekiln unattended,especially nearthe expectedshut-off time. Bethere to makesure the kilnturns off.

3
Contents
Getting Started. . . . . . . . 5Room Temperatureand Humidity . . . . . . . . . . . . . . . . 5Thunder Storms andPower Surges . . . . . . . . . . . . . . . 5Time and Temperature Display. . 5The IdLE Display . . . . . . . . . . . . . 5Thermocouple Inspection . . . . . . 5Preventing an Overfire. . . . . . . . . 6Theory of Operation . . . . . . . . . . 6
ProgrammingInstructions . . . . . . . . . . 7
The Stop/Back Key . . . . . . . . . . . 7Correcting Entries . . . . . . . . . . . . 7Canceling a New Program . . . . . 7Storing “User” Programs . . . . . . 7Firing a Stored User Program. . . 7Rate . . . . . . . . . . . . . . . . . . . . . . . 7Hold . . . . . . . . . . . . . . . . . . . . . . . 8Programming Steps . . . . . . . . . . 8Repeat Firings . . . . . . . . . . . . . . . 9Program Review . . . . . . . . . . . . . 9Programming aCooling Segment . . . . . . . . . . . . 9CPLT Message . . . . . . . . . . . . . . 9Temperature Overshoot . . . . . . 10Starting a Firing in a Hot Kiln . . 10AOP Fan . . . . . . . . . . . . . . . . . . 10A Practice Program . . . . . . . . . . 10
Sample FiringPrograms . . . . . . . . . . . 10
Heat Treating D-2 Steel . . . . . 10Glass Fusing Firing Schedule 10Glass SlumpingFiring Schedule . . . . . . . . . . . 11
Other Features . . . . . . . 11The Add Time Key. . . . . . . . . . . 11Delay Fire . . . . . . . . . . . . . . . . . 11Present Status . . . . . . . . . . . . . . 12The Temperature Alarm . . . . . . 12Estimating the Firing Cost. . . . . 12
Skip Segment . . . . . . . . . . . . . . 13Editing the Current SegmentDuring Firing . . . . . . . . . . . . . . . 13
Multiple-Zone Kilns . . . 13An Overview of Multiple-Zone Firing . . . . . . . . . . . . . . . . 13Thermocouple FailureIn a Multiple-Zone Kiln . . . . . . . 13Power Output Lights . . . . . . . . . 13Testing Multiple-ZoneElements . . . . . . . . . . . . . . . . . . 14DIFF / Zone TemperatureDifference . . . . . . . . . . . . . . . . 14T123 / Zone TemperatureDisplay. . . . . . . . . . . . . . . . . . . . 14
The Options Key. . . . . . 14TCOS / Thermocouple Offset . . 14
Calibrating ThermocoupleOffset With aDigital Pyrometer . . . . . . . . . . 14Setting Thermocouple Offset . 15Multiple-ZoneThermocouple Offset . . . . . . . 15
CHG- / Selecting °F or °C . . . . . 15°F/°C TemperatureConversion Formula . . . . . . . . 15
TC / Thermocouple Type . . . . . 15AOP / Auxiliary Outlet . . . . . . . . 16RATE / Types of Rates . . . . . . . 16COST / Electric CostPer Kilowatt-Hour . . . . . . . . . . . 16KW / Kilowatts Used toCalculate Firing Cost. . . . . . . . . 16Id / Computer ID . . . . . . . . . . . . 17TEdE / Temperature Deviation . 17SFTY / Maximum Temperature . 17ELEC / ElectronicsTemperature . . . . . . . . . . . . . . . 18LOCK / Program Lock. . . . . . . . 18CFG / Configuration Code . . . . 18SOFT / Software Version. . . . . . 18TEST / Element Test . . . . . . . . . 18RST / Reset . . . . . . . . . . . . . . . . 18
Error Messages . . . . . . 19FTC / Failed to Cool . . . . . . . . . 19FTH / Failed to Heat . . . . . . . . . 19LTdE / Low TemperatureDeviation . . . . . . . . . . . . . . . . . . 19PF / Power Failure. . . . . . . . . . . 19TC with Lines / Multiple-ZoneKiln Thermocouple Failure . . . . 19- - - - / No Thermocouple. . . . . . 20BAdP / Bad Programming . . . . 20ETH / Electronics Too Hot . . . . 20FAIL / Thermocouple Failure . . 20FTL / Firing Too Long . . . . . . . . 20HTdE / High TemperatureDeviation . . . . . . . . . . . . . . . . . . 20PF1 / Power Failure. . . . . . . . . . 20PF 2 / Power Failure . . . . . . . . . 20PF 3 / Power Failure . . . . . . . . . 20TC 2 / Thermocouple Failure . . 20TCL / Thermocouple Lag . . . . . 21LId / Missing Connector Pin . . . 21TCdE / Uneven Multiple-ZoneTemperatures . . . . . . . . . . . . . . 21TCR / ThermocoupleLeads Reversed. . . . . . . . . . . . . 21Power Failures. . . . . . . . . . . . . . 21When the Kiln ShutsOff Too Soon . . . . . . . . . . . . . . . 21
Appendix A:Display Messages . . . . 22
Appendix B:Upgrading Instructions 24
Upgrading the DTC 100, 600, 800and 1000 Series to the Sentry
Appendix C:User Program Records 26
Appendix D:Quick Programming. . . 28

SafetyThe warranty on your Sentry controller does not cover
damage from overfiring, regardless of the circumstances.It is the operator’s responsibility to make sure the kilnturns off at the end of the firing.
Follow these safety rules in addition to the ones in yourkiln or furnace manual:
When the kiln is not inuse, disconnect the powerand keep the lid or doorclosed. (For larger kilnswith heavy cordsets, werecommend a powerdisconnect box near thekiln.)
Do not leave the kiln unattended, especiallynear the expected shut-off time. Do not leave akiln turned on at your studio while you are athome sleeping.
Wear firing safety glasses when looking into thepeephole of a hot kiln.
Do not touch hot sides of kiln or furnace. Keepunsupervised children away.
Install your kiln or furnace at least 12 inchesfrom any wall or combustible surface. (Seemanufacturer’s recommendation for yourmodel.)
Do not open lid or door until kiln or furnace hascooled and all switches are off.
Fire only in a well-ventilated, covered and pro-tected area away from flammable materials.Keep cordset away from hot sides of kiln or fur-nace.
DANGEROUS VOLTAGE! Do not touch heat-ing elements with anything. Disconnect kiln orfurnace before servicing.
Do not operate if the controller itself is hotterthan 158°F / 70°C. (See instructions on page 18for checking circuit board temperature.) Neverallow the firing room temperature to exceed110°F / 43°C. (Measure room temperaturethree feet from the kiln.)
Stop a firing by pressing the STOP button, notby disconnecting the power. In certain condi-tions, the controller will interpret a power inter-
ruption as a power failure and turn the kiln backon when you reconnect the power.
Place the kiln on the stand recommended by themanufacturer. When a kiln is safety tested byUL, the lab fires the kiln on the stand designedfor the kiln. Cinder blocks or bricks can inhibitthe flow of air under the kiln. They can alsochange the kiln’s heating characteristics.
Place the kiln on a non-combustible surface.
Keep the kiln lid or door closed when the kiln isnot in use. This keeps dust out of the kiln. Also,should someone turn on the kiln while you areaway, the closed lid will keep the heat safely in-side the firing chamber.
Never place anything on the kiln lid, even whenthe kiln is idle. If people become accustomed toplacing papers and other objects on the kiln,they may forget and do that while the kiln is fir-ing.
Remove all tripping hazards from around thekiln. Keep the kiln’s supply cord out of traffic ar-eas.
Avoid using extension cords.
Never fire tempered glass inside a kiln. It couldexplode.
Greenware, which is unfired clay, must be bonedry before firing. Moist greenware can explodeinside the kiln, damaging the ware and the kiln.Place a piece of greenware against the inside ofyour wrist. If it feels cool, it is too wet to fire.
Store kiln shelves in a dry area. Moist shelvescan explode inside a kiln.
If you smell burn-ing plastic, turnthe kiln off. Exam-ine the wall outletand supply cord forsigns of burning.
Never place extrainsulation aroundthe kiln in an attempt to conserve energy. Theextra insulation can cause the wiring and thesteel case to over-heat.
4 Ramp-Hold

Chapter 1
Getting StartedRoom Temperatureand Humidity
It is okay to store the Sentry at sub-zerotemperatures. But before operating, raise theroom temperature to at least 32°F / 0°C.
Note: The Sentry will register sub-zero °F / °Ctemperatures. However, 32°F / 0°C is the low-est recommended operating temperature.
The circuit board is rated for 176°F / 80°Cmaximum operating temperature. However,the maximum recommended temperature is158°F / 70°C, measured at the controller insidethe kiln switch box. To lower the temperature,open windows and use a fan to blow air across
the kiln’s switch box louvers. (See page 18 to check circuitboard temperature.)
High humidity will not adversely affect the Sentry unlesswater condenses on the circuit board. In this case, do notfire the kiln until the moisture has evaporated from theboard.
Thunder Storms andPower Surges
Unplug the kiln when not in use, especially during thun-der storms and in areas with frequent power surges. If thekiln is part way through a firing when a storm begins, it maybe okay to continue the firing. When the kiln shuts off, dis-connect the power.
CAUTION: When firing the kiln during a storm, donot leave the kiln unattended!
Time and TemperatureDisplayCenter Dot: Time
A center dot appears duringtime display. It separates hoursfrom minutes (i.e. 1 hour, 30minutes displays as 01.30). During temperature display,the dot disappears.Three-Light Display
The Sentry turns on theheating elements intermit-tently through relays. Poweroutput lights appear in theright side of the display when the Sentry sends a signal toturn on the relays.
� When the Sentry sends a signal tothe relays, all three lights appear.
� The top light indicates power tothe top section of the kiln, the middle light power to themiddle section, and the bottom light power to the bot-tom section. (Two-zone kilns: Ignore the center light.)
Note: Though power output lights are on, mechanicalproblems can prevent the relays from turning on.
Single Right-Hand Dot: °CWhen temperature is dis-
played in °C, a dot appears inthe lower right. In °F display, itdisappears. You can choosebetween Fahrenheit and Celsius display. See page 15.
Operation Begins from theIdLE Display
The controller displayswhen you first apply
power to the kiln. Operationbegins from . You can’tfire the kiln until ap-pears.� If you press during a firing, will appear.
To get back to , press .� If the display shows an error message such as in-
stead of , see pages 19 - 21.� (firing completed) appears at the end of a firing.
To make appear, press any key.� If you do not touch the keys for one minute during pro-
gramming, the controller will go back to . Thecontroller will also discard the program you were enter-ing and retain the previous program in memory.
Thermocouple InspectionThe small rod protruding into the firing chamber is the
temperature sensor, or thermocouple.
CAUTION: Bumping the thermocouple can push itout of the firing chamber. This could cause an overfire!The controller does not contain an alarm to detect thistype of failure. Bumping the thermocouple could alsocause inaccurate readings.
Thermocouples come in different widths. The wider thethermocouple, the farther it should extend into the firingchamber. A ½” - ¼” diameter thermocouple should extendinto the firing chamber about 1”. A 1
8” thermocoupleshould extend into the chamber ½” - 5
8”. (Do not be con-cerned if your thermocouple extends into the firing cham-ber even farther.)
Keep shelves, posts and ware 1” - 1 ½” away from thethermocouple. Keep an extra thermocouple on hand, es-pecially if you fire hotter than 2000°F / 1093°C.
5

If you are using a portable, separate controller, you willneed to install the thermocouple onto the kiln. See the sep-arate TnF 2 installation instructions.
Preventing an OverfireEven though a digital controller turns off the kiln auto-
matically, you should monitor the kiln during firing. This isto prevent a possible overfire.
Remain nearby while the kiln is firing.Check the kiln occasionally.
Set the temperature alarm (page 12) toremind yourself to check the kiln. If youare too far away to hear the alarm, youmight try using a baby monitor.
After the kiln fires to completion, dis-connect the power. It is okay to turn offthe power to the controller while thekiln cools to room temperature.
Theory of OperationThe temperature you are firing to is called
the target temperature. After the Sentry reaches the targettemperature, it can also hold that temperature.
The Sentry fires at a controlled heating rate. The rate isfigured in degrees per hour. If you selected a rate of 100°per hour, it would take 10 hours for the furnace to reach1000°. Rate is similar to miles per hour.
In summary, the Sentry does three basic tasks:
1) It fires at a controlled heating rate, or speed, mea-sured in degrees of temperature change per hour.
2) It fires to a target temperature.
3) It can hold the target temperature.
The Sentry fires in segments, or stages. A segment is acontrolled heating rate to a target temperature. A segment
can also have a hold. Shown in the chart in the left columnis a segment with a target temperature of 1250°, a rate of625°, and a hold of one hour.
The two parts of a segment:� : The temperature changes.� : The temperature remains the same.
Heating rate is figured in degrees per hour. The recom-mended heating rate for the material you are firing is usu-
ally available from your supplier. It also variesdepending on the thickness of the material.
A segment can have only one ramp andonly one hold. Therefore, if you need morethan one hold, you will have to add additionalsegments to the firing. Firing to a temperatureat a single rate would need only one segment.Reasons to add more segments:� To change the heating rate.� To add a hold somewhere below the
shut-off temperature.� To control the cooling rate.
The diagram below shows a 3-segment firing. Two seg-ments were used on the way up in temperature. Anothersegment was added for controlled cooling.
To figure how many hours a segment will take to fire,subtract the current temperature from the target tempera-ture and divide the result by the heating rate. In the dia-gram in the left column, the firing time is 1250° - 80° (roomtemperature) = 1170 ÷ 625 = 1.87 hours.
After the Sentry has finished firing the last segment, itwill turn off power to the heating elements.
6 Ramp-Hold
This segment will reach the target temperature of 1250° in 2 hours, thenhold that temperature for 1 hour.
Here is a simple 3-segment program. Segments 1 and 2 each havea hold. Segment 3 is a controlled cooling segment.
“Rate” is howmany degrees perhour the kiln willclimb in temper-ature. (Or howfast it coolsduring a con-trolled cooling.)

Chapter 2
ProgrammingInstructions
Before using your Sentry, read all of thischapter. Have your controller in front ofyou so that you can try out the keys as youread.
The Stop/Back KeyYou can stop a firing at any time by
pressing .
If you enter Options, you do not have to go through allthe prompts to get back out. Press to go to .
During programming, the key will takeyou back one programming step with each key press, so it iseasy to make corrections.
Correcting EntriesIf you enter the wrong temperature, rate, etc., while pro-
gramming, enter 0000. Then enter the correct numbers be-fore pressing .
Canceling a New ProgramIf you do not touch the keys for one minute during pro-
gramming, the controller will go back to the display.The controller will also discard the program you were en-tering and will retain the previous program in memory.
This is useful if you change your mind during program-ming and decide to keep the previous program. Instead ofcompleting the new program, wait a minute and let thecontroller return to .
Storing “User” ProgramsTo program the controller, must appear. From
press . will appear. The controller is readyfor you to choose a stored program or to enter a new one.(See next page for program-ming instructions.)
The controller can hold 9programs in memory. Theystay in memory even when thepower is turned off. Storedprograms are numbered 1through 9. User program 1 canhave up to 20 segments. Userprograms 2 - 9 can have 10 seg-ments each. You don’t have touse al l the segments
available—use only the number needed. Often one seg-ment is all you will need.
When you program a firing, you will be asked to enter arate for each segment. Step 7, Programming Instructions,next page, shows you how to zero out the segments youdon’t need.
When entering a program for the first time, press afterappears. Your first firing will be stored as Program
1.
Each time you store another program, select the nextavailable number, such as 2, at the prompt. Select-ing a number for a new program over-writes (erases) anyprogram stored there. Write down your user programs forquick reference. (Make copies of the blank form on page26.)
Note: For repeat firings that you don’t want to inad-vertently change, see Program Lock, page 18.
Firing a Stored User ProgramAfter you enter a new program and the display shows
, the new program is in memory and ready to fire.
Selecting a different stored program takes only seconds:
From press .
will appear. Enter the program number (1 -9).
If there are no changesto the program, press
twice. willappear. The controlleris ready to fire your se-lected program. To be-gin firing, pressonce.
Note: Use Program Re-view, page 9, before firing.See also “Repeat Fir-ings,” page 9.
RateEach segment must include a rate, which is the firing
speed of that segment. We measure rate as degrees perhour. This is similar to miles per hour; just replace mileswith degrees. During programming, enter the rate when
appears. ( will also include the segment num-ber: etc.)
The diagram on the next page shows three rates. A rateof 1000° per hour will reach 1000° in 1 hour. A rate of 500°will reach 1000° in 2 hours. A rate of 333° will reach 1000° in3 hours.
If you want the furnace to fire at full speed, enter a rateof 9999. See Programming Steps, step 3, next page.
7
When USER ap-pears, the con-troller is askingyou to select astored program.If you have nonein memory, press1 and enter yourfirst program.
Keep a record ofyour stored pro-grams and allyour firings.Write down theresults of eachfiring. This maybecome invalu-able later.

Note: In Program Review, a heating rate of 9999 isdisplayed as . When a kiln is heated at fullpower, it may overshoot the target temperature, espe-cially in the lower range. To avoid this, add an extrasegment with a slower rate for the last 50 degrees oftemperature rise.
CAUTION: The Sentry includes error messages towarn you when the kiln is at the wrong temperature.Firing the kiln at full rate turns off some of these warn-ings. See TEdE Temperature Deviation, page 17, andHTdE High Temperature Deviation, page 20.
If you are not sure how fast to fire, remember an old fir-ing adage: When in doubt, slow it down.
Note: At the time that you purchase the controller, thefactory can set up your controller to calculate rate inone of three ways: 1) degrees of temperature change perhour 2) degrees of temperature change per minute, or3) elapsed time needed to reach a temperature. Thenormal setting is degrees per hour. If you are havingproblems entering rate, check the RATE option to besure your controller is set for degrees per hour, page 16.(This note applies only to 18D and later software ver-sions. All pre-18D controllers figure rate only as de-grees per hour. See page 18, SOFT option, to look upsoftware version.)
HoldHold is the length of time that you want the kiln to re-
main at the target temperature. Hold is also called soak ordwell time. Hold gives the temperature time to becomemore even throughout the kiln. Hold can be used in eitherheating-up or cooling-down segments.
In programming step 5 (see next column), enter holdtime. When hold is set to 99.99 hours, the Sentry will re-main at that temperature indefinitely until you press
.
When the Sentry is in hold during a firing, the displaywill alternate between time left in hold and the tempera-ture.
8 Ramp-Hold
Programming StepsUse these instructions for your first firings. Later
you may prefer “Ramp-Hold Shorthand Instruc-tions,” back cover.
As you follow these steps, you will see values (tem-peratures, rates, etc.) from the last firing. To usethese again, press . To program a controlledcooling, set the segment to a lower target tempera-ture than that of the preceding segment.
To fire without Alarm or Delay: Follow steps 1through 7. Then press once.
Apply power to the kiln. thenwill appear. (Press if does notappear.)
Press . will appear. Enter a programnumber from 1 to 9.
Press . will appear. Enter firingrate for segment 1 (temperature change perhour: from 1° to 9999°).
Press . (or ) will appear. En-ter the target temperature of segment 1.
Press . will appear. Enter seg-ment 1 hold time in hours / minutes (e.g. 12hours, 30 minutes = 12.30). No hold = 00.00.
Press . If appears, and you havean AOP receptacle on your kiln, use the 1 or2 key to select ON or OFF. Press .(For more details on AOP, see page 16.)
Continue entering values for the segmentsneeded. When appears for the firstsegment you don’t need, press , then
. will appear. The kiln is readyto fire.
press . will appear.Enter alarm temperature. (Enter to turnalarm off.) Then press . will ap-pear.
press . will appear. En-ter delay time (i.e. 12 hours, 30 minutes =12.30). Then press . will ap-pear. (Delay zeroes out after each completedfiring.)
From pressonce. will appear, then kiln tempera-ture. If a delay was programmed, willappear, then time remaining until start. Tostop the firing at any time, press
We recommend using Program Review (page 9)before firing. When program fires to completion,
will appear. Press . will appear.

RepeatFirings
To repeat the last firing,press from .The kiln will begin firing.Make sure you are repeat-ing the correct firing by us-ing Program Review (nextpage). For repeat firingsthat you don’t want to inad-vertently change, see Pro-gram Lock, page 18.
Program ReviewWhen you press to begin firing, the controller
will fire the program that is in active memory. Program Re-view shows the values for that program. The program in ac-tive memory is—� The program that was fired last, or� The program that was selected since the last firing.
Start Program Review from , or while firing, bypressing .
Programming aCooling Segment
For controlled cooling, program a segment to a lowertarget temperature than that of the preceding segment.
Example: You fire at a rate of 500°F per hour to 1450°Fwith your first segment. Then you want the kiln to cool at arate of 100°F per hour down to 700°F. Here is how youwould program the two segments:
Rate Temp.Segment °F/°C °F/°C Hold
1 500 / 277 1450 / 788 00.00
2 100 / 55 700 / 371 00.00
The first segment is the heating segment. The secondone is the cooling segment. The controller does not use mi-nus numbers for cooling. Just enter a lower target tempera-ture than that of the previous segment.
If you prop the lid ordoor for a fast cooling, pro-gram a fast cooling rate forthat segment. If you lowerthe temperature quickly bypropping the lid but pro-gram a slow cooling rate, thecontroller will just raise thetemperature again.
Example: Some glass art-ists flash-cool the glass justafter it fuses. They open thedoor a few inches to remove
heat, then close it again.This takes the glass downrapidly through thedevitrification range. Toprogram a flash-cool, use arate of 9999. This shuts offthe heating elements duringthat segment, allowing thekiln to cool rapidly.
Note: During fast cool-ing, do not open the dooral l the way. Do notforce-cool the kiln with afan.
Note: See Temperature Deviation (TEdE), page 17,for information on error codes that may appear during“crash” cooling. To turn these codes off, program acrash cooling rate of 9999. This turns off TEdE errorcodes only for that particular segment. The TEdEcodes still work on the hold and the other segments.
Suppose you enter a cooling rate that is faster than thekiln can cool? Depending on the rate you enter, you mayget an alarm message. (Press to turn off the alarm.)
CPLT Message: FiringCompleted
When the firing has success-fully completed, the Sentry willshut off power to the elements.Then four messages will cycleone after the other:
(complete)
Firing time in hours and minutes
The temperature reached during the last segment
The current kiln temperature
Note: After the kiln fires to completion, disconnect thepower. It is okay to turn off the power to the controllerwhile the kiln cools to room temperature.
Note: (Seepage 18 to find software version) If appears im-mediately after you press , it is because all pro-grammed temperatures are lower than the current kilntemperature. If the alarm sounds (see page 12), andthen the kiln fires to completion, you will see in-stead of . Press . will appear.
9
It is easy to pro-gram a con-trolled cooling.Simply enter atarget tempera-ture that is lowerthan that of theprevioussegment.
If you repeat thesame firing pro-gram often, useProgram Lock sothat it cannot beinadvertentlychanged. Seepage 18.
CPLT means thekiln has fired tocompletion andthe heating ele-ments are turnedoff. To makeIdLE appear,press any key.

Temperature OvershootWhen a kiln is heated too fast, it may overshoot the tar-
get temperature, especially in small kilns at lower tempera-tures. To avoid this, add an extra segment to slow the firing.The segment with the slower rate should begin approxi-mately 40° - 60° below the final target temperature.
Starting a Firing in a Hot KilnSometimes a firing begins in a hot kiln after a power fail-
ure or other interruption. In this case, the Sentry will beginfiring from the first segment that matches the current tem-perature. See Power Failures, page 21.
AOP FanThe optional AOP (auxiliary output) is a special-order
electric receptacle mounted in the kiln’s switch box. Thisreceptacle can power a kiln vent or external alarm. (SeeOptions, page 16.) During programming, will appearfor each segment ( etc.). Use the 1 and 2keys to select On or Off for each segment. will ap-pear only if the AOP has been activated in the AOP Op-tion.
A Practice Program
To practice using the controller, we will enter a programthat includes three segments. The last segment is a coolingsegment.
Using the programming instructions on page 8, enterthis firing schedule. Then use Program Review to check foraccuracy.USER = 1RA1 = 250°F 1 = 750Hd 1 = 00.00RA2 = 900°F 2 = 1425Hd 2 = 00.30RA3 = 150°F 3 = 750Hd 3 = 00.00RA4 = 0
Note: Enter 0 for the rate in segment 4. This zeroesout all the segments past segment 3.
Chapter 3
Sample FiringPrograms
These sample firing schedules illustrate different waysto program the Sentry. When designing a firing schedulefor materials you are unfamiliar with, or when using one ofthese schedules, always test-fire samples first. This is be-cause these generalized schedules may not exactly suit thematerials that you fire in your kiln.
For practice, you might want to enter these programseven though you may never actually use them.
Heat Treating a Knife Made fromD-2 High Carbon Steel
Rate Temp.Segment °F / °C °F / °C Hold
1 9999 1800 / 982 00.20
2 9999 400 / 204 00.00
3 500 500 / 260 5.00
Wrap the knife blade in heat treating foil. (The foil pre-vents carbon scale from forming on the steel.)
Set the alarm to 1800°F / 982°C. Place the knife in thekiln. Heat at FULL rate to 1800°F / 982°C. When the alarmsounds, get ready to remove the knife. After 20 minutes ofhold time, open the furnace door, remove the knife, andleave the door half open.
CAUTION: Wear high temperature heat-resistantgloves when removing the knife blade from the furnace.
Remove the blade from the heat treating foil. Place theknife on knifeholders, which allow air to circulate aroundthe blade. Place a fan several feet from the blade. Point theblade toward the fan so the air flows parallel to the bladelength. Cool the blade rapidly to room temperature.
CAUTION: If the air hits the blades sideways, thechance of warpage increases.
Leave the kiln door half open until the temperaturedrops to 400°F / 204°C. Place the knife back inside the fur-nace. Segment 3 will heat the kiln to 500°F / 260°C. Leavethe knife in the kiln for 2 hours. Remove the knife. Let itcool to room temperature. Place it back inside the kiln foranother 2 hours. Then remove the knife.
Glass Fusing Firing ScheduleRate Temp.
Segment °F / °C °F / °C Hold
1 250 / 138 750 / 398 00.00
2 900 / 500 1425 / 773 00.30
3 9999 / 9999 1050 / 565 00.00
4 150 / 83 750 / 398 00.00
10 Ramp-Hold
If you fire at avery rapid rate,the kiln may mo-mentarily over-shoot the pro-grammed targettemperature. Toavoid that, use aslower rate.

Stained glass, 18", 2 layers, full fuse. The fusing tempera-
ture will vary depending on the brand of glass, the batch,and even on the color. Vent the lid. Set the alarm to 500°F.When the alarm sounds, close the lid from venting positionand insert peephole plugs.
Set the alarm again, this time to 1350°F. When it sounds,check the glass through the peephole. When the glass fusesto your satisfaction, write down the temperature and holdtime for future firings, and press , then (Skip Seg-ment).
This will advance the kiln to segment 3, a flash coolingsegment. Lift the kiln lid slightly or open the door ajar untilthe temperature drops to 1050° F. Then close the door / lid.The kiln will cool slowly through the annealing range, thenturn off.
Note: A cooling rate of 9999 (FULL) shuts off thewarning alarm (error message) that sometimessounds during rapid cooling. This turns off the alarmonly for that particular ramp. The alarm codes stillwork on the hold and the other programmed segments.For details about error messages, see pages 19 - 21.
Glass Slumping Firing ScheduleRate Temp.
Segment °F / °C °F / °C Hold
1 250 / 138 750 / 398 00.00
2 900 / 500 1250 / 676 00.30
3 9999 / 9999 1050 / 565 00.00
4 150 / 83 750 / 398 00.00
Stained glass, 18", 2 fused layers, 12" circular pieces,
slumped into a bowl. Set the alarm to 500° F. When thealarm sounds, close the lid from venting position and insertpeephole plugs.
Set the alarm again, this time to 1150° F. When itsounds, check the glass through the peephole. When theglass slumps into the bowl, write down the temperatureand hold time for future firings, and press , then(Skip Segment).
This will advance the kiln to segment 3, a flash coolingsegment. Lift the kiln lid slightly or open the door ajar untilthe temperature drops to 1050° F. Then close the door/lid.The kiln will cool slowly through the annealing range.Then it will turn off and cool to room temperature.
Note: A cooling rate of 9999 (FULL) shuts off thewarning alarm (error message) that sometimessounds during rapid cooling. This turns off the alarmonly for that particular ramp. The alarm codes stillwork on the hold and the other programmed segments.For details about error messages, see pages 19 - 21.
Chapter 4
Other FeaturesThe Add Time Key
This key adds 5 minutes to a hold. It isdesigned for ceramists who watch witnesscones and for glass artists who inspect theglass near the end of firing.
During a firing, press ., and time in
hold, will appear.
Press again. The timeshown will increase by 5minutes.
To return to the temper-ature display, press
or wait 1 minute.
Note: Add Time will add5 minutes to hold even ifno hold had been pro-grammed. After hold time displays, 5 minutes areadded with each press of the key.
Delay FireThis delays the start of the firing by the
amount of time entered. Use it to fit a fir-ing into your schedule or to take advan-tage of lower electric rates at night. Delay zeroes out aftereach firing. Therefore, it must be programmed again foreach firing. The maximum delay is 99 hours and 59 min-utes.
First, enter the program you are going to fire.
From press . Enter delay time (i.e., 5 ½ hours= 05.30). Press .
To begin Delay, press once from . ADelay count-down timer will appear.
Note: Press during delay to end the delay andbegin the firing. (You could also press to end thedelay and then to begin the firing.)
CAUTION: For safety, do not leave the kiln aloneduring a delay or a firing. We cannot guarantee yourkiln against overfiring even though the controller is au-tomatic. The operator assumes full responsibility forshutting the kiln off at the proper time.
11
With the AddTime button, youcan add time to ahold. With theediting feature,you can changeboth target tem-perature andhold.
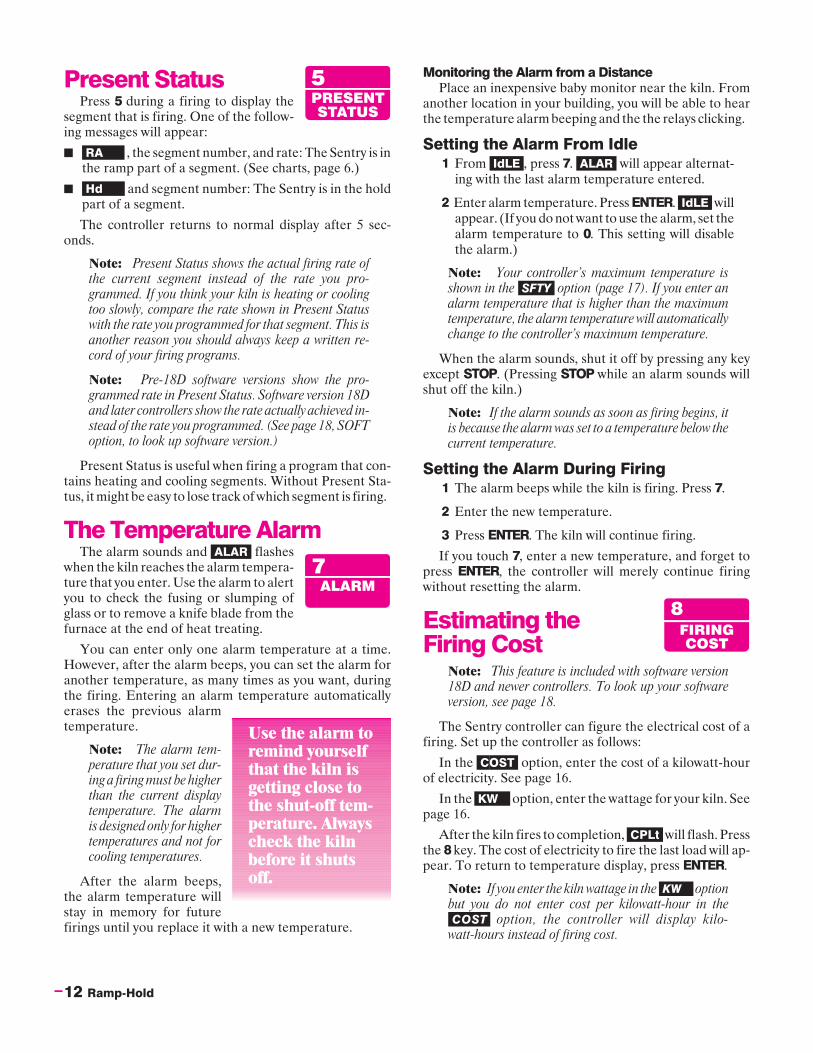
Present StatusPress during a firing to display the
segment that is firing. One of the follow-ing messages will appear:� , the segment number, and rate: The Sentry is in
the ramp part of a segment. (See charts, page 6.)� and segment number: The Sentry is in the hold
part of a segment.
The controller returns to normal display after 5 sec-onds.
Note: Present Status shows the actual firing rate ofthe current segment instead of the rate you pro-grammed. If you think your kiln is heating or coolingtoo slowly, compare the rate shown in Present Statuswith the rate you programmed for that segment. This isanother reason you should always keep a written re-cord of your firing programs.
Note: Pre-18D software versions show the pro-grammed rate in Present Status. Software version 18Dand later controllers show the rate actually achieved in-stead of the rate you programmed. (See page 18, SOFToption, to look up software version.)
Present Status is useful when firing a program that con-tains heating and cooling segments. Without Present Sta-tus, it might be easy to lose track of which segment is firing.
The Temperature AlarmThe alarm sounds and flashes
when the kiln reaches the alarm tempera-ture that you enter. Use the alarm to alertyou to check the fusing or slumping ofglass or to remove a knife blade from thefurnace at the end of heat treating.
You can enter only one alarm temperature at a time.However, after the alarm beeps, you can set the alarm foranother temperature, as many times as you want, duringthe firing. Entering an alarm temperature automaticallyerases the previous alarmtemperature.
Note: The alarm tem-perature that you set dur-ing a firing must be higherthan the current displaytemperature. The alarmis designed only for highertemperatures and not forcooling temperatures.
After the alarm beeps,the alarm temperature willstay in memory for futurefirings until you replace it with a new temperature.
Monitoring the Alarm from a DistancePlace an inexpensive baby monitor near the kiln. From
another location in your building, you will be able to hearthe temperature alarm beeping and the the relays clicking.
Setting the Alarm From IdleFrom , press . will appear alternat-ing with the last alarm temperature entered.
Enter alarm temperature. Press . willappear. (If you do not want to use the alarm, set thealarm temperature to . This setting will disablethe alarm.)
Note: Your controller’s maximum temperature isshown in the option (page 17). If you enter analarm temperature that is higher than the maximumtemperature, the alarm temperature will automaticallychange to the controller’s maximum temperature.
When the alarm sounds, shut it off by pressing any keyexcept . (Pressing while an alarm sounds willshut off the kiln.)
Note: If the alarm sounds as soon as firing begins, itis because the alarm was set to a temperature below thecurrent temperature.
Setting the Alarm During FiringThe alarm beeps while the kiln is firing. Press .
Enter the new temperature.
Press . The kiln will continue firing.
If you touch , enter a new temperature, and forget topress , the controller will merely continue firingwithout resetting the alarm.
Estimating theFiring Cost
Note: This feature is included with software version18D and newer controllers. To look up your softwareversion, see page 18.
The Sentry controller can figure the electrical cost of afiring. Set up the controller as follows:
In the option, enter the cost of a kilowatt-hourof electricity. See page 16.
In the option, enter the wattage for your kiln. Seepage 16.
After the kiln fires to completion, will flash. Pressthe key. The cost of electricity to fire the last load will ap-pear. To return to temperature display, press .
Note: If you enter the kiln wattage in the optionbut you do not enter cost per kilowatt-hour in the
option, the controller will display kilo-watt-hours instead of firing cost.
12 Ramp-Hold
Use the alarm toremind yourselfthat the kiln isgetting close tothe shut-off tem-perature. Alwayscheck the kilnbefore it shutsoff.

Skip SegmentSkip Segment works only during fir-
ing. It jumps the firing from the currentsegment to the next one.
Note: Skip Segment does not skip from a ramp to ahold. It skips to the next segment.
To skip a segment, press . will appear, then thecurrent segment. Press . (If you change your mindand don’t want to skip that segment, don’t press af-ter appears. Instead, press again. The firing willcontinue in the same segment.)
Skip Segment skips to the ramp of the next segmentfrom either a ramp or hold of the current segment.
Skip Segment ExampleFor more examples, see Chapter 3.
� You have pro-grammed 1425°F for glass fusing, followed by a segmentfor controlled cooling. Watching the glass through thepeephole, you notice that the glass edges have roundednicely at 1315°. Use Skip Segment to end the firing seg-ment and begin the one for slow cooling.
Note: Make a note of the temperature at which theglass fused. Program that temperature for the next fir-ing of that type of glass.
Editing the CurrentSegmentDuring Firing
While the kiln is firing, you can changethe target temperature and hold time of the current seg-ment. (You can edit only the segment that is firing. To editother segments, wait until the firing has progressed tothose segments.)
Even if the current segment has already started its holdtime, you can still edit the segment’s target temperature.You can raise or lower the target temperature. The con-troller will go back out of hold and fire to the new targettemperature at the original rate. (You cannot edit the rate,however.)
During firing, press .
The display will show the target temperature of thecurrent segment. Use the number keys to change thetemperature. Then press .
The display will then show the hold time (or 00.00 ifthere is no hold time) of the current segment.Change the time, if needed, and press . Thekiln will resume firing.
Chapter 5
Multiple-ZoneKilnsAn Overview of Multiple-Zone Firing
If you are not sure howmany zones your kiln has,look into the firing cham-ber. The number of thermo-couple tips indicates thenumber of zones.
In single-zone kilns, theSentry measures tempera-ture from one location.When the controller turnson the heat, all the elementsturn on.
With two- and three-zone kilns, the Sentry measurestemperature from each individual zone. It then adjusts theheat separately for each zone to improve temperature uni-formity.
To maintain even temperature, the Sentry calculatesnot only temperature difference between zones, but alsolength of time needed to change temperature. By carefullytiming heat output, it maintains even temperature with aminimal loss in firing speed.
Note: Multiple-zone kilns use the same programminginstructions as single-zone kilns.
Note: Firing a Ramp-Hold program at FULL rate(9999) shuts off multiple-zone control for that firing.The kiln then fires as a single-zone kiln.
Thermocouple FailureIn a Multiple-Zone Kiln
In a multiple-zone kiln, if a thermocouple fails, the fir-ing will continue as a single-zone kiln so long as one ther-mocouple still operates. will appear, alternatingwith the thermocouple that failed. (See page 19 for multi-ple-zone thermocouple error messages.)
Power Output LightsThe three lights on the right of the temperature display
turn on when the controller sends a signal to the relays.� When the Sentry sends a signal to
the relays, all three lights appear.� The top light indicates power to
the top section of the kiln, the middle light power to the
13
Look into thefiring chamber.The number ofthermocoupletips indicates thenumber of zones.

middle section, and the bottom light power to the bot-tom section. (Two-zone kilns: Ignore the center light.)
Note: Though power output lights are on, mechanicalproblems can prevent the relays from turning on.
� When a zone temperature is too low, its indicator lightwill flash rapidly. The heating elements in that zone willstay on continuously, and the controller will attempt tobalance the heat in the other two zones.
Testing Multiple-ZoneElements
When relays or thermocouples are connected to thewrong controller terminals, zones will show a wide temper-ature difference. To wire the kiln properly, trace the switchbox wiring with the kiln’s wiring diagram. Also, see “Ele-ment Test,” page 18.
Multiple-Zone OptionsThese options appear only on multiple-zone kilns. They
are accessed by pressing the Options key.
DIFF / Zone TemperatureDifferenceView Maximum Temperature Spread
For a two-zone kiln, this option shows temperature dif-ference between the zones. For a three-zone kiln, it showsthe highest temperature difference between any two zones.If the temperature shown is larger than expected, go to op-tion T123 to view the temperature of each zone.
Press repeatedly until appears.Press .
The maximum difference in temperature betweenany zones will display. (Example: = 3°)
T123 / Zone TemperatureDisplayView Temperature of Each Zone
Press repeat-edly until appears.Press .
The temperature for eachzone will display one af-ter the other, cycling for one minute. Then normaltemperature display will return. For example:
� Top zone:� Middle zone:� Bottom zone:
Chapter 6
The OptionsKey
The Options key gives you access to a list of special fea-tures. With each press of the Options key, you will see thedisplay code for the next option.
When you find the option you want to use, press.
Use the and keys to select changes within theoption.
After making a selection for an option, press. The display code for the option you just
changed will appear. You are then ready to go tothe next option.
Note: If you select a change for an option but don’tpress , the change will not go into effect.
There are two ways to get out of Options and back to:
Press .
Do nothing for 60 seconds in Options. You will au-tomatically be taken out of the Options display andback to .
Note: If you are firing the kiln while in Options, press-ing takes you out of Options and back to the fir-ing display. But it does not stop the firing.
TCOS / Thermocouple OffsetCalibrate the Thermocouple(s)
The thermocouple is the rod protruding into the firingchamber. It measures temperature. Thermocouples can“drift” as they age, causing a shift in temperature readings.Thermocouple Offset calibrates the controller to compen-sate for drift.
Note: The thermocouple must protrude into the firingchamber the correct distance: 1” for ½” - ¼”-widethermocouples, 1
2" for 58" - 1
8”-wide thermocouples.
Calibrating Thermocouple OffsetWith a Digital Pyrometer
You can calibrate Thermocouple Offset using a cali-brated digital pyrometer. One way to calibrate your pyrom-eter is to take it to a heat treater or other location that has acalibrated controller you can trust. Take a reading from afurnace with your pyrometer. Either zero it out to matchthe calibrated controller on the furnace, or write down thetemperature difference between your pyrometer and thereliable source. Store your pyrometer. Use it only for cali-
14 Ramp-Hold

brating controllers. Thus, it remains a reliable calibrationstandard.
Note: The temperature at which you calibrated yourdigital pyrometer should be the same temperature youuse to check the controller’s temperature readout. Ex-ample: If you took a reading from a reliable source at2000°F, you should check your controller reading ataround 2000°F.
Mount the thermocouple of the calibrated pyrometer inthe firing chamber near the Sentry’s thermocouple. Withthe Sentry on hold, compare readings between the Sentryand the calibrated pyrometer. Adjust Thermocouple Off-set to compensate for any temperature difference betweenthem.
Note: You can also return your controller to the fac-tory to have it calibrated on certified test equipment.
Setting Thermocouple OffsetYou can enter a temperature change up to 45°F / 25°C
higher or lower than the zero factory setting.
From , press repeatedly untilappears.
Press . , or a thermocouple offsetnumber, will appear.
Using the and keys, enter the new offset. (Seechart below.) Press . will appear. Toreturn to , press .
Thermocouple Offset Settings°F Setting °C Setting Result
C 0 C 0 No adjustmentH 1-45 H 1-25 Kiln will fire hotterC 1-45 C 1-25 Kiln will fire cooler
Thermocouple Offset ExamplesSetting ResultH 1 Kiln will fire 1° hotter
H 17 Kiln will fire 17° hotterC 12 Kiln will fire 12° cooler
Multiple-Zone Thermocouple OffsetFrom , press repeatedly until
appears.
Press . (top thermocouple) will ap-pear.
While displays, press . The otherthermocouple(s), then , will appear witheach press of the key:
Three-zone kilns:
Two-zone kilns:
When the correct thermocouple appears, press.
Using the and keys, enter the new offset. (Seecharts above.) Press . The thermocouple you
adjusted (i.e. ) will appear. Select anotherthermocouple by pressing or return to
by pressing .
CHG- / Selecting °F or °CThe controller operates in your choice of Fahrenheit or
Celsius temperature. In °C display, a lighted dot appears inthe lower right. In °F, it disappears. To switch from °F to °Cor vice versa:
From , press repeatedly untilappears.
Press . Use the and keys to select or.
After selecting one of the above, press . Pressto return to .
°F/°C Temperature Conversion FormulaBelow are formulas for converting temperature be-
tween °F and °C. Converting a firing rate requires a differ-ent formula than converting a firing temperature:
Firing Temperature(Example: “Fire to 1600°F.” 1600°F = 871°C)
(°C x 1.8) +32 = °F
(°F - 32) ÷ 1.8 = °C
Firing Rate and Temperature Change(Example: “Fire at 200°F per hour” or “Fire 200°F hotter.”200°F = 111°C)
°C x 1.8 = °F
°F ÷ 1.8 = °C
TC / Thermocouple TypeSelect Type-K, -S or -R Thermocouple
The Sentry can use Type-K, -S or -R thermocouples. Ifyou specialize in firings above 2200°F / 1204°C, you shoulduse the Type-S or -R. Type-K is best suited for tempera-
tures below 2200°F /1204°C.
The controller cannotdetect the type of thermo-couple installed in yourkiln. So if you change thethermocouple to a differ-ent type, be sure to selectthe new thermocoupletype in TC option.
Note: Ask your kiln supplier if you are not sure aboutthe type of thermocouple in your kiln.
CAUTION:If you select Type-S or -R,
but your kiln is wired with a Type-K, your kiln willunderfire. If you select Type-K and your kiln is wiredwith a Type-S or -R, your kiln will OVERFIRE. After
15
The S-Type thermocouple has a ce-ramic sheath. Most K-Typethermocouples have a metal sheath.
S-Type
K-Type

using the Reset (RST) option (page 18), use the TCoption to select the correct thermocouple. Resetchanges the thermocouple selection to Type-S.
From , press repeatedly untilappears.
Press . Use the and keys to selector .
After selecting one of the above, press .Press to return to .
AOP1, AOP2 /Auxiliary OutletsSelect Vent Fan or Alarm for the Auxiliary Outputs
The optional AOP1 and AOP2 (Auxiliary Outputs) arefor electrical receptacles mounted in the kiln’s switch box.The outlets can each power a kiln vent or an externalalarm, such as a bell. (The AOP outlet is a special-orderoption that might not be included on your kiln.)
The choices in the AOP1 and AOP2 options:� This choice sends power to the AOP re-
ceptacle whenever the alarm sounds. (See Tempera-ture Alarm, page 12.) Plug in a loud bell to alert you,from a distance, that the kiln has reached the alarmtemperature. (Controllers with pre-20A software: Se-lect .)
� Use this setting if your kiln does nothave the AOP outlet.
� This option adds aprompt for fan ( ) to each segment during pro-gramming (page 8). (Controllers with pre-20A soft-ware: Select or —whichever appears.)
From , press repeatedly untilor appears.
Press . Use the and keys to selector .
3 After selecting one of the above, press . Pressto return to .
RATE / Types of RatesNote: This feature is included on controllers withsoftware version 18D or newer. To look up your soft-ware version, see the SOFT option, page 18.
The standard method of programming firing rate isdegrees of temperature change per HOUR. At the factory,we can set up your controller to calculate rate instead as de-grees of temperature change per MINUTE, or asELAPSED TIME needed to reach a temperature. TheRATE option shows you which method your controlleruses:
From , press repeatedly untilappears.
Press . You will see one of the following:
(Degrees of temperature change per hour)
(Degrees of temperature change per minute)
(Elapsed time needed to reach a temperature)
Only the factory can change the type of rate used in yourcontroller.
Note: If your controller uses TIME rate, enter thehours/minutes that each segment will take to reach itstarget temperature. (Example: 1 hour, 30 minutes =01.30.)
COST / Electric Cost PerKilowatt-Hour
Note: This feature is included on controllers withsoftware version 18D or newer. To look up your soft-ware version, see the SOFT option, page 18.
The controller can figure the cost of a firing if you enterthe cost of electricity for your area (and kiln wattage—seenext option). The cost of electricity is figured in kilo-watt-hours (KWh). A kilowatt-hour is 1,000 watts of elec-tricity running for 1 hour. (10 – 100-watt light bulbs glow-ing for one hour consume 1 KWh of electricity.)
To find what the power company charges you for a kilo-watt-hour, look at your electric bill, call your power com-pany, or visit their website. The electric rate may vary de-pending on the time of year and amount of electricity youuse. In the summer, rates in some areas are higher. Also,add the other costs listed on your electric bill, such aspower transmission charges, taxes, etc.
From , press repeatedly untilappears. Press .
From an electric bill, enter the cost of a kilo-watt-hour. Place cents to the right of the decimal.Round off fractions. (Example: Enter 9.25 centsper kilowatt-hour as 00.09.) Press .
Press to return to .
Note: You can enter the cost in U. S., Canadian, orEuro cents, British pence, Indian paisas, or any othermoney system that is based upon 100 units (i.e. 100cents = 1 dollar.) If your system is based upon 1000units, such as the Libyan dirham, the Oman baiza, orthe Kuwait fil, divide the cost by 10. Example: Enter140 as 00.14. Then multiply by 10 the cost of a firingshown in the controller display.
KW / Kilowatts Used toCalculate Firing Cost
Note: This feature is included on controllers withsoftware version 18D or newer. To look up your soft-ware version, see the SOFT option, page 18.
To figure the cost to fire your kiln, the controller needsto know how many kilowatts your kiln uses. Look at your
16 Ramp-Hold

kiln’s electrical data plate. It is usually on the side of theswitch box. The data plate lists the watts, amps, and volts. Ifwatts are not listed, multiply amps x volts. (Example: 15amps x 240 volts = 3,600 watts.)
Divide the wattage of your kiln by 1000, which gives thekilowatts. (Move the decimal point 3 spaces to the left.)
Examples:
10,800 watts ÷ 1000 = 010.8
4,800 watts ÷ 1000 = 004.8
800 watts ÷ 1000 = 000.8
Enter that amount in the KW option:
From , press repeatedly untilappears. Press .
The controller shows 4 digits for entering kilowatts:. Enter kilowatts for your kiln.
Press .
Press to return to .
Note: Please do not confuse kilowatts with kilo-watt-hours. A kilowatt is 1,000 watts. A kilowatt-houris 1,000 watts powered for one hour.
To view the cost of a firing, press the key after the kilnhas fired to completion and flashes.
Id / Computer IDEnter an ID Number for Connection to a Computer
This feature is for assigning an identification number,from 1 to 15, to the controller. It is used only for hookup toa personal computer, which requires an optional kit.
From , press repeatedly untilappears.
Press . Use the and keys to select an IDnumber from 1 to 15. Press . Press toreturn to .
TEdE / Temperature DeviationAdjust Temperature Sensitivity of Error Codes
The temperature that the controller is trying to reach, atany given time, is called the set point. During heating orcooling, the set point changes at the rate you programmed.During a hold, the set point remains steady.
The Sentry shows error messages when it can’t maintainthe set point temperature. The cushion, or leeway, allowedbefore an error message flashes is called Temperature De-viation. When the temperature is off target by more thanthe Temperature Deviation setting, the alarm sounds.Temperature Deviation affects these error messages (seepage 19):
Fail to Heat
Fail to Cool
Low Temperature Deviation
Note: On controllers that have pre-18D software, theTEdE setting also affects the HTdE High TemperatureDeviation alarm (page 20). On 18D and later control-lers, the HTdE setting is always 100°F / 56°C.
Some people worry when , or ap-pears. They wonder if something is wrong with the kiln.Here are four ways to stop the alarm messages from ap-pearing during routine firings:
Test your kiln to find its fastest firing rate andits slowest cooling rate. Then program the controller usingrates within the range of the kiln’s heating/cooling capac-ity. Example: If your fastest heating rate is 600° per hour,enter a rate no faster than 600°.
Set the deviation temperature to a highernumber in the TEdE option. The higher the number, theless likely that an alarm message will appear.
Set the deviation temperature to 0 in theTEdE option. This turns off the FTH, FTC and LTdEalarms (page 19). We do not recommend a 0 setting.
Program a segment at FULL rate (9999°).This will shut off the deviation alarms for that segment.(However, deviation alarms will continue to work duringthe hold and all other segments with slower rates.)
CAUTION: The High Temperature Deviation(HTdE) alarm shuts off the kiln to prevent an overfire.On controllers with pre-18D software, entering a tem-perature deviation of 0 turns off this important alarm!On all controllers, entering a FULL rate also turns offthis alarm for the segment with the FULL rate.
Changing the Deviation TemperatureFrom , press repeatedly until
appears.
Press . Change the deviation temperature.The higher the number, the less likely you will acti-vate the alarms.
Press . Press to return to .
Note: The factory default TEdE setting is 100°F /56°C.
The Fail to Heat code appears duringa firing when the kiln cannot heat as fast as programmed.The Temperature Deviation is set to 100°F / 56°C.The Fail to Heat code will appear if the temperature is100°F / 56°C or more below the set point.
SFTY / MaximumTemperatureView the Kiln’s Maximum Operating Temperature
From , press repeatedly untilappears. Press . The temperature displayed is themaximum operating temperature programmed in the Sen-try for your kiln. (This temperature is also shown on thekiln’s electrical data plate.) It can be altered only at the fac-
17

tory. The controller will not fire hotter than that tempera-ture. Press . Press to return to .
ELEC / ElectronicsTemperatureCheck the Circuit Board Temperature
High temperatures in the switch box can damage thecontroller circuit board, which is rated for 176°F / 80°Cmaximum operating temperature. To lower board temper-ature, use a fan to blow air across the kiln switch box intothe louvers. (But do not blow air into the kiln’s peepholes.)When firing several kilns, position them at least three feetapart to allow adequate air circulation.
From or while firing, press repeatedlyuntil appears. Press . The temperature ofthe circuit board will appear. Press . Press toreturn to .
CAUTION: Do not operate the kiln if the ELECdisplay is above 158°F / 70°C.
LOCK / Program LockMake a Program Tamper-Proof
With Program Lock activated, stored programs cannotbe altered or removed from memory. Use Program Lockfor repeat firings that you don’t want to inadvertentlychange.
Note: Program Lock does not save a delay setting.While a program is locked, you can enter a new delay.
From , press repeatedly untilappears.
Press . (locked) or (unlocked)will appear.
To change the setting, press three times.
Press . Press to return to .
CFG / Configuration CodeInformation for Technicians
From , press repeatedly untilappears. Press . The factory configuration code willappear. Press . Press to return to . Theconfiguration code can be changed only at the factory.
SOFT / Software VersionFrom , press repeatedly until
appears. Press . The software version will appear.Press . Press to return to .
TEST / Element TestTest the Heating Elements and Relays
This test is useful when measuring the wall receptaclevoltage under load, and amperage with an ammeter. On amultiple-zone kiln, the test helps determine if the relaysand thermocouples are wired to the correct zones. If youtest thermocouples with a cigarette lighter or other heatsource, use this option.Single-Zone Kiln
From , press repeatedly untilappears.
Press . will appear, alternating withkiln temperature. The elements will turn on fortwo minutes. Press any key to abort the test.
Multiple-Zone KilnFrom press repeatedly until
appears.
Press . will appear, alternating withthe temperature of the top zone. The elements willturn on for two minutes. Then will appear,with temperature for the middle zone, andwith temperature for the bottom zone. (Atwo-zone kiln shows and displaysonly.)
During the two-minute test, press any key to end azone test. The controller will then begin to test thenext zone.
AOP OutletAfter the above test, kilns equipped with the AOP outlet
will display for two minutes to test power to theAOP outlet.
RST / ResetReset the Controller to Most Factory Defaults:Perform Only When Requested by a Technician
Reset does the following:� Selects Type-S thermocouple.� Selects °F.� Erases any thermocouple offset.� Erases User programs stored in memory.� Changes Temperature Deviation (TEdE) back to the
factory setting of 100°F / 56°C.
CAUTION: If your kiln uses a Type-K thermocouple,the Sentry will underfire after a reset! Use the Thermo-couple option (page 15) to select Type-K again.
From , press repeatedly untilappears.
Press . Use the or key to select or.
After selecting one of the above, press .Press to return to .
18 Ramp-Hold
Chapter 7
ErrorMessages� Error messages are accompanied by an alarm.� Non-interrupting messages do not stop the firing. Ter-
minating error messages do.� FTH, FTC, and LTdE error messages are based upon
the adjustable setting in the Temperature Deviation(TEdE) option (page 17).
Note: On controllers with pre-18D software, theHTdE error message is also based on the TEdE option.
Non-InterruptingError Messages
Press to silence the alarm. (Do not pressto silence the alarm.) The error message will remain butthe kiln will continue firing. Even though the following er-ror messages appear, the kiln will continue its normal oper-ation. The messages are only to alert you that the kiln couldnot cool or heat as fast as you had programmed. But theywill not shut off the kiln or affect the firing in any way.Definition of “Set Point”
The temperature that the controller is trying to reach, atany given time, is called the set point. During heating orcooling, the set point changes at the rate you programmed.During a hold, the set point remains steady.
FTC / Failed to Cool� During a cooling-down ramp, the programmed rate is
faster than the kiln can cool. The temperature is abovethe set point temperature by more than the deviationsetting. (See Temperature Deviation, page 17.) Pro-gram a slower cooling rate.
Note: On controllers with 18D and later software:Use Present Status to compare the actual rate of thecurrent segment with the rate you programmed. (Seepage 12.)
FTH / Failed to Heat� During a heating-up ramp, the programmed rate is
faster than the kiln can heat. The temperature is belowthe set point temperature by more than the deviationsetting. (See Temperature Deviation, page 17.)
Program a slower rate. Or check for worn or burned outelements, defective relays, low voltage and defective ther-mocouple.
Note: On controllers with 18D and later software:Use Present Status to compare the actual rate of thecurrent segment with the rate you programmed. (Seepage 12.)
LTdE / Low TemperatureDeviation� During a cooling-down ramp or a hold, the temperature
is below the set point temperature by more than the de-viation setting. (See Temperature Deviation, page 17.)Check for worn or burned out elements, defective re-lays, low voltage and defective thermocouple.
Note: During a firing, Present Status shows the ac-tual firing rate of the current segment instead of therate you programmed. If you think your kiln is heatingor cooling too slowly, compare the rate shown in Pres-ent Status with the rate you programmed for that seg-ment. This is another reason you should always keep awritten record of your firing programs. (Pre-18D soft-ware versions show the programmed rate in PresentStatus rather than the actual rate. See page 18, SOFToption, to look up the software version.)
PF / Power Failurealternating with normal display means the power
failed during firing. After power was restored, the firing re-sumed.
TC with Lines / Multiple-ZoneKiln Thermocouple Failure
The kiln will continue to fire as long as at least one ther-mocouple is working. The lines following “TC” representthe position inside the kiln of the thermocouple(s) thatfailed.
Top line = top thermocoupleMiddle line = middle thermocoupleBottom line = bottom thermocouple
Top thermocouple failed
Middle thermocouple failed
Bottom thermocouple failed
Top and middle thermocouples failed
Top and bottom thermocouples failed
Top, bottom and middle thermocouples failed
On Sentry controllers with pre-18D software, “TC” isfollowed by a number and a line. You can check the soft-ware version of your controller by using the SOFT Option.See page 18.
Multiple-zone controllers with 18D or earlier solftware:
TC 1¯ Top Thermocouple Failed
TC 2- Middle Thermocouple Failed
TC 3_ Bottom Thermocouple Failed
19

Terminating ErrorMessages
and error messagesturn off the kiln and flash the following:� Total firing time in hours and minutes� The kiln shutoff temperature� The current kiln temperature
- - - - / No ThermocoupleAfter the controller was plugged in, it could not detect a
thermocouple.
BAdP / Bad ProgrammingCauses:
� A program has been entered with 0 rate in the first seg-ment.
� When you press , all programmed temperaturesare below the current kiln temperature.
ETH / Electronics Too Hot� The circuit board temperature is above 176°F / 80°C.
To lower board temperature, use a fan to blow air acrossthe kiln switch box into the louvers. (But do not blow airinto the kiln’s peepholes.) If you have more than one kiln inthe room, place them at least 3 feet apart. Never allow thefiring room temperature to exceed 110°F / 43°C. (Measureroom temperature 3 feet away from the kiln.)
FAIL / Thermocouple FailureThe controller is no longer receiving voltage from the
thermocouple. Causes:� Defective thermocouple� Disconnected thermocouple lead wires� Defective board� Electrical noise
FTL / Firing Too Long� The temperature change is less than 27°F / 15°C per
hour and the firing time is two hours longer than thecurrent segment was programmed to fire. This messagecan appear during heating-up or cooling-down seg-ments. sometimes appears because the coolingsegment was programmed faster than the kiln couldnaturally cool down.
� will flash if you program a cooling segment tem-perature that is below room temperature. Whenappears, press .
Check for worn or burned out elements, defective re-lays, low voltage and defective thermocouple. Reprograma slower rate in heating-up and cooling-down segments.
Note: To avoid messages, try firing the kiln at aslower rate.
Note: During a firing, Present Status shows the ac-tual firing rate of the current segment instead of therate you programmed. If you think your kiln is heatingor cooling too slowly, compare the rate shown in Pres-ent Status with the rate you programmed for that seg-ment. This is another reason you should always keep awritten record of your firing programs. (Pre-18D soft-ware versions show the programmed rate in PresentStatus rather than the actual rate. See page 18, SOFToption, to look up the software version.)
HTdE / High TemperatureDeviation
Causes:� During a heating-up ramp or a hold, the temperature is
100°F / 56°C above the programmed temperature.� During a cooling-down segment, the temperature is
100°F / 56°C above the segment’s starting temperature.� A fast rate caused the controller to overshoot the target
temperature.� A relay is stuck in the closed position sending power to
the elements.
See “Power Failures,” next page.
Note: You can disable the HTdE alarm for a segmentby programming a FULL rate (9999°). HTdE will con-tinue to operate during the hold and in all other seg-ments that have slower rates.
PF1 / Power FailureThe power failed during a controlled cooling segment.
The kiln temperature was below the last active cooling seg-ment temperature when the power came back on. The kilnwill not resume firing. See “Power Failures,” next page.
PF 2 / Power FailureThe power failed. The kiln temperature was below
212°F / 100°C when the power came back on. The kiln willnot resume firing. See “Power Failures,” next page.
PF 3 / Power FailureThe power failed. The temperature dropped 72°F / 40°C
while the power was off. The kiln will not resume firing.See “Power Failures,” next page.
TC 2 / Thermocouple FailureThe thermocouple of a single-zone kiln failed while the
controller was at .
20 Ramp-Hold

TCL / Thermocouple LagThe heating rate is slower than 9°F / 5°C per hour and
the kiln temperature is more than 100°F / 56°C away fromthe programmed temperature. The TCL becomes inactiveabove 500°F/260°C.
Causes:� On kilns that use a portable controller, the thermocou-
ple fell out of the firing chamber.� A bare spot on the thermocouple lead wires has
touched a grounded object inside the kiln switch boxcausing the thermocouple to short out.
� will flash if you program a cooling segment tem-perature that is below room temperature. Whenappears, press .
� Check for worn or burned out elements, defective re-lays, low voltage and defective thermocouple.
Note: The TCL alarm is available only on softwareversion 18D or later. You can check the software ver-sion of your controller by using the SOFT Option. Seepage 18.
LId / Missing Connector PinOn the back of the Sentry circuit board, at the top right
side, is a small two-pin terminal. If the connector on thatterminal is missing, will appear in the display duringfiring. The elements will not turn on. (If the two-pin con-nector is missing, you can buy another from a computersupply store.)
TCdE / Uneven Multiple-ZoneTemperatures
The zones of a multiple-zone kiln are firing unevenly.Causes:� A burned out element or relay� The thermocouples and elements are improperly
wired. A thermocouple is turning on the elements to thewrong zone. For instance, if the top thermocouple turnson the bottom elements, the kiln will fire out of balance.When zones are out of balance by 180°F / 100°C,will appear in the display.
Visually compare the wiring of the thermocouples, re-lays and elements in your kiln to the kiln’s wiring diagram.Also, use the Element Test option shown on page 18.
TCR / Thermocouple LeadsReversed
Check that the thermocouple lead wires are connectedto the correct terminals. See your wiring diagram.
Power FailuresThe Sentry handles a power failure in two ways:
After a brief power failure, the controller continuesfiring as before. It shows a normal temperature dis-play alternating with .
After an extended power failure, orwill appear. The kiln will NOT resume firing.
The kiln will remain turned off after a power failure un-der these conditions:� The kiln will remain off if the temperature is below
212°F / 100°C when the power comes back on.� The kiln will remain off if the temperature dropped
72°F / 40°C or more.
When the Sentry aborts a firing after a power failure,the display will show the following:� or� Total firing time before power failed� Temperature at the time of power failure� Current kiln temperature
To resume firing, press . The kiln will begin fir-ing again from its present temperature. For example, thekiln reached 1000°F / 538°C when power failed. The tem-perature is 800°F / 426°C when you turn the kiln back on.Firing will resume from 800°F / 426°C. You need not coolthe kiln to room temperature before starting a ceramic fir-ing over unless you decide to use new witness cones.
When you resume firing by pressing , the con-troller begins firing in the first segment that has a highertarget temperature than the current kiln temperature.However, if the power failed during a ramping down (cool-ing) segment, the controller will resume firing from thesame cooling segment.
When the Kiln ShutsOff Too SoonCeramic Firings
If the kiln fires to completion before the pyrometric wit-ness cone bends, you can turn the kiln back on and keep fir-ing. Simply program a hotter temperature. Then from
, press . The kiln will begin firing, taking upwhere it left off.
Note: By looking at the witness cones through a peep-hole, you will know if the kiln shuts off too soon.
Wrong Thermocouple TypeIf a Type-K thermocouple is installed on your kiln, but
Type-S is selected in Options, the kiln will continuallyunderfire by a wide margin. (The kiln will overfire ifType-S is installed and Type-K is selected.) See page 15 tocheck the thermocouple type selected in Options.
21

22 Ramp-Hold
Appendix A: Display Messages
Abort 5The firing was stopped.
Alarm 8, 10, 11, 12ALAR appears either when you are entering an alarm tem-perature or when the alarm is sounding during a firing. Tostop an alarm, press any key except STOP. If the alarm goesoff when you first begin firing, it is because it was set for alower temperature than the present temperature.
Auxiliary Output 8, 10, 16The AOP option is for kilns equipped with a special-order kilnswitch box receptacle called the Auxiliary Output.
Bad Programming 20This message appears when a firing has been programmedwith 0 rate in the first segment or when all target tempera-tures are lower than the current kiln temperature.
Configuration Code 18This is an option that shows the factory configuration codefor your Sentry. This is for technicians who call the factory forsupport.
Change °F / °C 15Choose between operation in degrees F or degrees C.
Electrical Rate 12, 16Enter the electric rate shown on your electric bill. Example:10.25 cents per KWh is entered as 10.25.
Completed Firing 5, 9This means the firing completed normally as programmed.These three messages will also cycle one after the other:firing time in hours and minutes, the temperature of the lastsegment, and the current kiln temperature.
Delay 8, 11DELA is a timer that starts the kiln later. Delay time appearsin hours and minutes.
or Target Temperature 6This prompt is asking for a target temperature. The numberis the segment of the program.
Temperature Difference 14This option shows the maximum temperature spread be-tween zones in a multiple-zone kiln.
Electronics Temperature 18The Sentry circuit board is rated for operation at tempera-tures up to 176°F / 80°C. When the circuit board gets hotter,the Sentry shuts off. The ELEC option shows you the temper-ature of the circuit board.
Message Definition Page Reference
Electronics Too Hot 20The Sentry circuit board is too hot, so the kiln shut off.
Thermocouple Failed 5, 20The thermocouple failed. This can be due to a broken ther-mocouple, loose thermocouple connection on the back ofthe controller, disconnected thermocouple wire, or a defec-tive controller.
Vent Fan 16The Fan option, accessed through the OPTIONS key, is forkilns equipped with a special-order kiln switch box recepta-cle called the Auxiliary Output.
Fan 8If your kiln has the optional AOP outlet (for a kiln vent), the FNprompt will appear for each segment during programming.It is asking if you want the vent on or off for that segment.
Failed to Cool 17, 19This error message means the kiln cannot cool as fast as thecooling that you programmed.
Failed to Heat 17, 19The kiln cannot heat as fast as you programmed.
Firing Too Long 20The temperature rise is less than 27° / 15°C per hour and thefiring time is two hours longer than the current segment wasprogrammed.
Full Speed 7, 8, 17The rate, or temperature change per hour, is maximum.
Temperature Hold 8When this message appears during programming, it is ask-ing you if you want to hold, or maintain, the target tempera-ture of that segment. If so, enter the length of hold time inhours and minutes (Example: 1 hour 20 minutes = 01.20).The number after Hd is the segment number. Each segmentin a firing is numbered.
High Temperature Deviation 17, 20During a heating-up ramp or a hold, the temperature is100°F / 56°C above the programmed temperature.
Computer ID 17The ID option is for connecting the Sentry to a personal com-puter.
Ready to Begin 5The Sentry must display the IdLE message before you canbegin firing or programming.
Message Definition Page Reference

23
Kilowatts 12, 16The controller can figure the cost to fire your kiln if you supplyyour kiln’s wattage. (See the data plate on the switch box.)Divide wattage by 1000 to get kilowatts. Enter that amount:10,800 watts ÷ 1000 = 10.8
Missing Pin 21When LId appears, a two-pin connector on the back of theboard is missing.
Program Lock 18With this option activated, a stored program cannot be al-tered or removed from memory.
Low Temperature Deviation 19This message appears when the kiln is below thetemperature deviation setting in the TEdE option.
Power Failure 20The power failed during a controlled cooling segment. Thekiln temperature was below the last active cooling segmenttemperature when the power came back on.
Power Failure 20The power failed. When power came back on, the tempera-ture was below 212°F / 100°C.
Power Failure 20The power failed and the temperature dropped 72°F/40°C.
Power Failure 21There was a power failure during firing. The kiln continued fir-ing after the power came back on.
Rate 7RA 1, RA 2, RA 3, etc., appear during programming, in Pro-gram Review, and in Present Status. When RA 1, 2, 3, etc.appear during programming, the controller is asking you forfiring rate for each segment. Rate means how fast the firingprogresses, in degrees of temperature per hour. Every seg-ment must have a firing rate. The number after RA is the seg-ment number. Each segment in a firing is numbered. Pro-gram Review shows firing rate after RA 1, 2, 3, etc. In PresentStatus, RA 1, 2, 3, etc. means the segment that the firing is inat that moment.
Reset 18The RST option erases a thermocouple offset, selects °F op-eration, erases stored programs, and selects Type-S ther-mocouple. Note that if you use Reset, and your kiln isequipped with a Type-K thermocouple, you must use the TCoption to select Type-K. (Reset selects Type-S as a safetyprecaution. If you had a Type-S thermocouple and Reset se-lected Type-K, your kiln would overfire. On the other hand, ifyou had a Type-K thermocouple, Type-S selected wouldunderfire your kiln, which is better than overfiring it. TheK-Type thermocouple is standard on most kilns.)
Message Definition Page Reference
Safety 17This is the maximum temperature the Sentry is programmedfor your kiln. It can be altered only at the factory.
Skip Segment 13If you press the Skip Segment key during a firing, SKIP willappear. If you press the key again, the firing will skip to thenext segment.
Software Version 18This option shows the version of software loaded into yourSentry.
Firing Started 8This appears when firing begins. Do not be concerned if ittakes a moment for the relays to turn on. The Sentry is pro-cessing data.
Zone Temperatures 14This option shows temperatures in each zone.
Thermocouple Type 15Choose between types K, S, or R thermocouple. It is impor-tant to select the correct type, or the controller will not readtemperature accurately.
Uneven Temperature 21This is an error message for multiple-zone kilns. It means thetemperatures of the zones are out of balance by 180°F /100°C. This is usually caused by a miswired kiln or by a de-fective relay.
Thermocouple Lag 21The heating rate is slower than 9°F / 5°C per hour and the kilntemperature is more than 100°F / 56°C away from the pro-grammed temperature.
Thermocouple Offset 14Adjust the controller’s temperature to compensate for tem-perature drift, or aging, of a thermocouple.
Thermocouple Reversed 21The thermocouple wires are reversed.
Temperature Deviation 17The Sentry includes error messages to warn you that the kilnis not maintaining the programmed temperature. The sensi-tivity of the error messages is based on a temperature en-tered in the TEdE option.
Element Test 18This option is for testing the elements and thermocouples. Ifyou test a thermocouple with a lighter, the temperature dis-play responds faster during Test than during IdLE display.
User Program 7During programming, the USER prompt is asking you whereyou want to place the program in memory. The Sentry has 9spaces in memory. Keep a written record of the programs 1 -9 in memory.
Message Definition Page Reference

Unplug the kiln or disconnect the power. Removethe 4 screws holding the controller faceplate to theswitch box. Gently remove the old controller.
Disconnect the wires from the old controller.
If your ki ln istop-loading and origi-nally came with aDTC 100 or 600, theheat shield inside theswitch box may needto be moved to givemore clearance forthe new Sentry con-troller. Measure thespace between theheat shield and thefront of the box. If thespace is less than 1¾”,remove the screwsthat hold the bottom of the heat shield. Thesescrews are on the sides near the louvers. Drill newholes in the switch box next to the bottom 2 holesused for the heat shield. Move the bottom of theheat shield back and fasten screws in the newholes.
Thread the Sentrywiring harness intothe switch box by in-serting it in the open-ing where the control-ler goes. Let the endwith the plugs hangout of the box.
Remove the switchbox from the kiln byremoving the screwsholding the box to thekiln.
The red wire from theold controller con-nects to the relay(s).The red wire in theSentry wiring harness goes to the same relay termi-nal. (See diagram, facing page.) You will noticethat the red Sentry wire has 3 push-on connectorswith jumper wires. If your kiln has 3 relays, you willuse all 3 push-on connectors, 1 for each relay. Ifyou have 2 relays, cut off the last terminal andjumper wire. If your kiln has 1 relay, cut off 2push-on connectors. Cut the wire close to the ter-minal that remains (see next photo).
CAUTION: Cut off the extra terminal(s) and jumperwire(s) unless they attach torelays. Unconnected wiresthat touch a grounded objectcan damage your controller!
Attach the red wire termi-nal(s) to the relay(s). Fol-low steps 6 and 7 for theblack wire, which alsogoes to the relays.
Note how the white, orange, and blue wires of theold controller are connected to the transformer.Removing and replacing one wire at a time, con-nect the Sentry white, orange, and blue wires to thetransformer the same way. (See Transformers,next page. Cut off the extra blue wire terminal ifyour transformer doesn’t need it.)
Remove the old wiring harness from the switchbox. With the thermocouple wires and the Sentryconnection plugs hanging out of the front of theswitch box, move the box into place on the kiln. Ar-range the wires so that when the switch box is fas-tened to the kiln, the wires and wire nuts will nottouch an element connector or the kiln case. Installthe screws that hold the switch box to the kiln.
Straighten the ends of the thermocouple wires.
Attach them to the thermocouple terminals on thebottom of the Sentry. (Use the center connectors ifyour kiln has only one thermocouple.) Match thecolor coding. Make sure the thermocouple wiresare tight and that there is no short.
Attach the two plugsto the back of the Sen-try controller. Care-fully insert the Sentryinto the controlleropening on the switchbox. Install the 4 cor-ner screws.
24 Ramp-Hold
Appendix B: Upgrading InstructionsUpgrading the DTC 100, 600, 800 & 1000 Series to the Sentry
The extra wires tied to the harnessare for multiple-zone kilns and theoptional AOP electrical outlet. Thegreen grounding wire is connectedonly if you use a computer interface.
Lever type connectors: if the wire istoo thick, it will break the lever. Donot force the lever downward.
The button-type thermocoupleconnector: Press down, then insertwires.
Inserting the plugs on the back ofthe Sentry.

25

26 Ramp-Hold
Appendix C: User Program Records
rA1 1 Hd1 .
rA2 2 Hd2 .
rA3 3 Hd3 .
rA4 4 Hd4 .
rA5 5 Hd5 .
rA6 6 Hd6 .
rA7 7 Hd7 .
rA8 8 Hd8 .
rA9 9 Hd9 .
rA10 10 Hd10 .
rA11 11 Hd11 .
rA12 12 Hd12 .
rA13 13 Hd13 .
rA14 14 Hd14 .
rA15 15 Hd15 .
rA16 16 Hd16 .
rA17 17 Hd17 .
rA18 18 Hd18 .
rA19 19 Hd19 .
rA20 20 Hd20 .
Rate°/Hour
TargetTemperature
Hold TimeHours.Mins
OptionalFan On /
Off
User Program 1
rA1 1 Hd1 .
rA2 2 Hd2 .
rA3 3 Hd3 .
rA4 4 Hd4 .
rA5 5 Hd5 .
rA6 6 Hd6 .
rA7 7 Hd7 .
rA8 8 Hd8 .
rA9 9 Hd9 .
rA10 10 Hd10 .
Rate°/Hour
TargetTemperature
Hold TimeHours.Mins
OptionalFan On /
Off
User Program 2
rA1 1 Hd1 .
rA2 2 Hd2 .
rA3 3 Hd3 .
rA4 4 Hd4 .
rA5 5 Hd5 .
rA6 6 Hd6 .
rA7 7 Hd7 .
rA8 8 Hd8 .
rA9 9 Hd9 .
rA10 10 Hd10 .
Rate°/Hour
TargetTemperature
Hold TimeHours.Mins
OptionalFan On /
Off
User Program 3
rA1 1 Hd1 .
rA2 2 Hd2 .
rA3 3 Hd3 .
rA4 4 Hd4 .
rA5 5 Hd5 .
rA6 6 Hd6 .
rA7 7 Hd7 .
rA8 8 Hd8 .
rA9 9 Hd9 .
rA10 10 Hd10 .
Rate°/Hour
TargetTemperature
Hold TimeHours.Mins
OptionalFan On /
Off
User Program 4
Date_______________________________Date_______________________________
Date_______________________________
Date_______________________________

27
IndexAAbRT, 5, 22
Add Time, 1, 11
ALAR, 22
alarm, 1, 6, 8, 9, 10, 11, 12, 16, 17
AOP, 1, 8, 10, 16, 18, 22
Auxiliary Output, 16, 22
Bbaby monitor, 6, 12
bAdP, 20, 22
CCelsius, 5, 15
CFG, 1, 18, 22
CHG-, 1, 15, 22
clicking, 2, 12
controlled cooling, 8, 9, 13
COST, 1, 12
CPLT, 5, 9, 17, 22
DDELA, 8, 22
Delay, 1, 11, 18
DIFF, 1, 14
EELEC, 1, 18
electrical cost, 2, 12
Element Test , 1
ETH, 20
FFahrenheit, 5, 15
FAIL, 5, 13, 20
firing schedule, 10
FN, 10
FTC, 17, 19
FTH, 17, 19
FTL, 20
FULL, 8, 13, 17
Gglass, 9, 11, 12, 13
Hheat treating, 10, 12
hold, 6, 8, 11, 13
HTdE, 20
humidity, 5
IId, 1, 17
IdLE, 5, 22
JJ3-3, 18
Kkilowatt-hour, 16
kilowatts, 17
KW, 1, 12
LLId, 21
LOCK, 1, 18, 23
LTdE, 17, 19, 23
Mmemory, 7
multiple-zone, 1, 2, 13, 18
Oover-fire, 2, 4, 6
overshoot, 10
Ppeephole, 11
PF, 19, 23
PF 2, 20, 23
PF 3, 20, 23
PF1, 20
power failure, 4, 20, 21
Present Status, 1, 12, 19, 20
Program Lock, 7, 9, 18
Program Review, 1, 9, 10
programming, 8
pyrometer, 14
RrA 1, 7, 8
rate, 1, 7, 10, 12, 16, 17, 19, 20
relay, 24
Reset , 1
RST, 1, 18, 23
Ssafety, 4
segment, 1, 6, 7, 8, 9, 13
set point, 17, 19
SFTY, 1, 17, 23
SKIP, 13, 23
Skip Segment, 1, 13
SOFT, 1, 2, 18, 23
software version, 2
STOP, 4, 7, 8, 12, 14, 15
STRT, 23
TT123, 1, 14, 23
target temperature, 6, 8, 9, 10, 13
TC, 1, 23
TC 2, 20
TCdE, 20, 21, 23
TCL, 21
TCOS, 15, 23
TCR, 21, 23
TEDE, 17, 23
Temperature Deviation, 1, 9, 17
TEST, 1, 18, 23
thermocouple, 1, 2, 5, 13, 14, 15, 18,19, 20, 21, 23
Thermocouple Offset, 1, 14
thunder storms, 5
TnF 2, 2
UUSER, 7, 8, 23
Wwiring harness, 24

28 Ramp-Hold
Appendix D:
Sentry Ramp-Hold Shorthand InstructionsAfter you press the keys in the left column, the message to the right will appear.
KEYS TO PRESS DISPLAY COMMENTS
PROGRAM AND FIRE THE KILN.
Apply power to kiln Press Enter if IdLE does not appear.
4 Enter program number.
A number from 1 to 9 Program number appears.
ENTER Enter rate of segment 1.
Rate Rate appears.
ENTER Enter temperature of segment 1.
Temperature Temperature appears.
ENTER Enter hold time.
Hold time (0 if none) Hold time appears.
Repeat for other segments. Enter rate of 0 for 1st segment not needed.
ENTER The kiln is ready to fire.
ENTER Kiln is now firing.
SELECT AND FIRE A STORED USER PROGRAM.
Apply power to kiln Press Enter if IdLE does not appear.
4 Select a program number.
A number from 1 to 9 Displays the number you selected.
ENTER
STOP, STOP Selected program is ready to fire.
ENTER
The kiln is now firing. Press 6 for Program Review.