digital story photo_story
DESCRIPTION
TRANSCRIPT
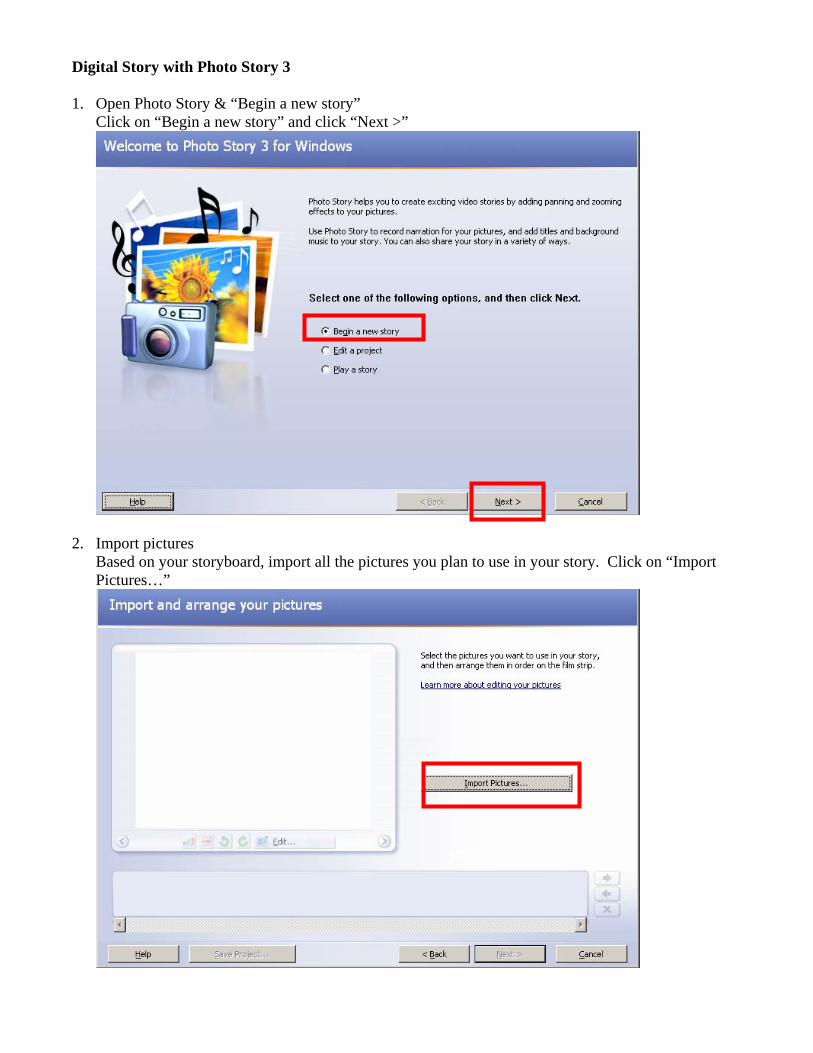
Digital Story with Photo Story 3 1. Open Photo Story & “Begin a new story”
Click on “Begin a new story” and click “Next >”
2. Import pictures Based on your storyboard, import all the pictures you plan to use in your story. Click on “Import Pictures…”

3. Then select what pictures you want to import and click “OK”.
4. Once you import your pictures, you can see them on the timeline. You can use the arrows or
click and drag a picture to move it in the timeline.
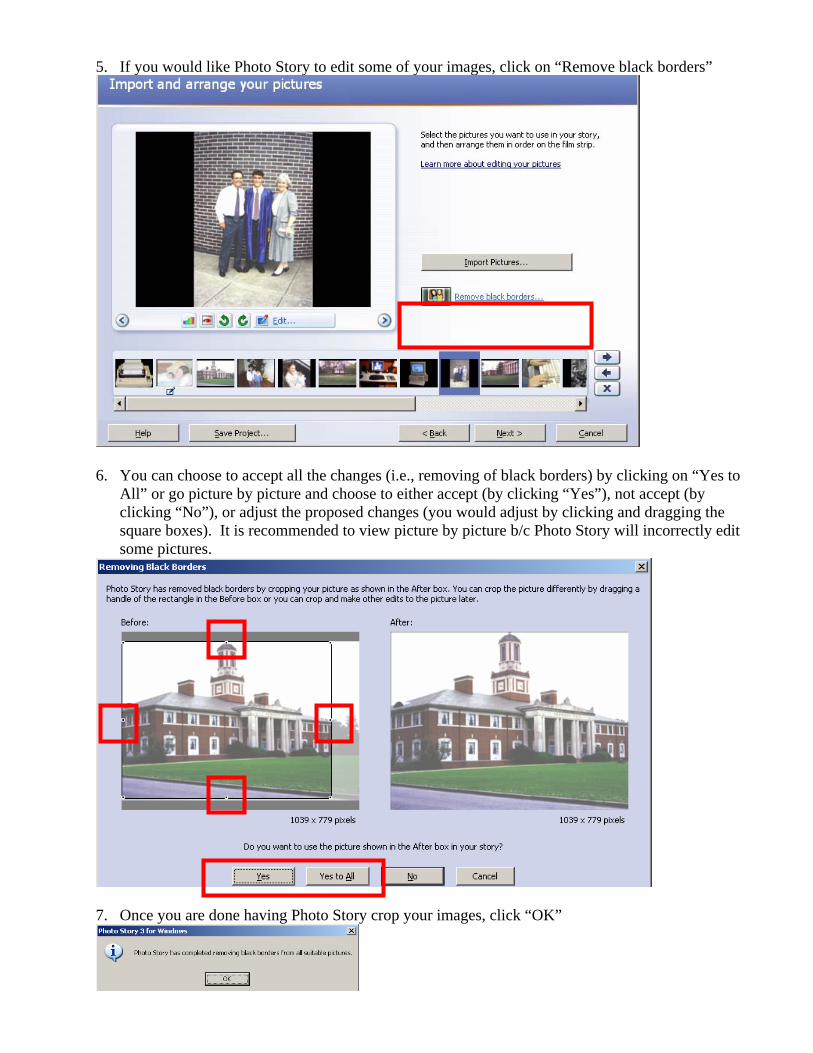
5. If you would like Photo Story to edit some of your images, click on “Remove black borders”
6. You can choose to accept all the changes (i.e., removing of black borders) by clicking on “Yes to
All” or go picture by picture and choose to either accept (by clicking “Yes”), not accept (by clicking “No”), or adjust the proposed changes (you would adjust by clicking and dragging the square boxes). It is recommended to view picture by picture b/c Photo Story will incorrectly edit some pictures.
7. Once you are done having Photo Story crop your images, click “OK”
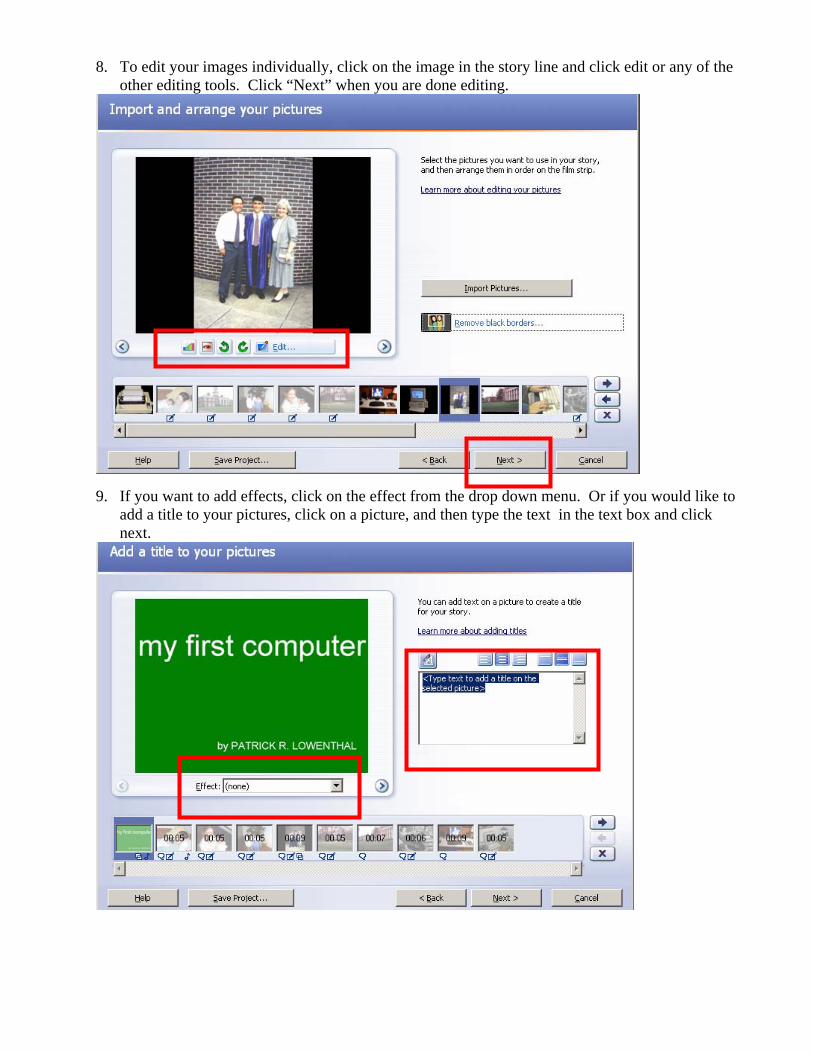
8. To edit your images individually, click on the image in the story line and click edit or any of the other editing tools. Click “Next” when you are done editing.
9. If you want to add effects, click on the effect from the drop down menu. Or if you would like to add a title to your pictures, click on a picture, and then type the text in the text box and click next.
However, I recommend creating a title page in a different program (e.g., PowerPoint—if you save it as a gif, Photoshop, or any basic paint program). Below I created a title page and imported it as a picture, and moved it to the front of the timeline.
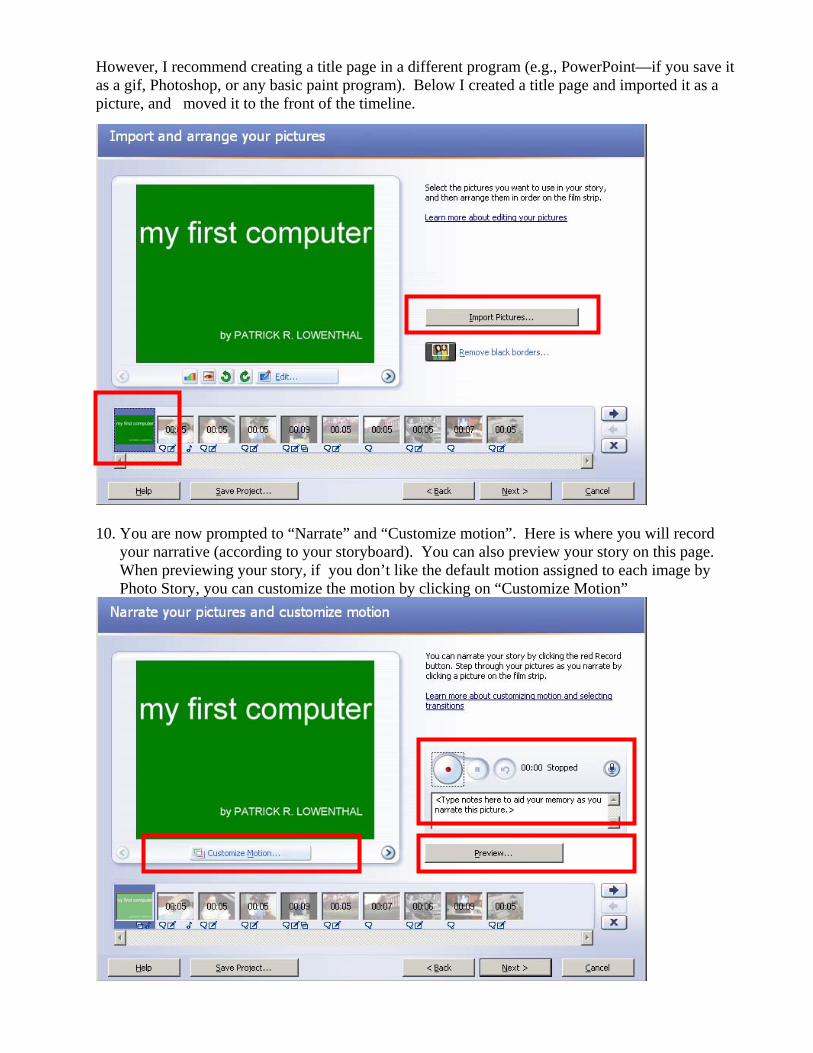
10. You are now prompted to “Narrate” and “Customize motion”. Here is where you will record
your narrative (according to your storyboard). You can also preview your story on this page. When previewing your story, if you don’t like the default motion assigned to each image by Photo Story, you can customize the motion by clicking on “Customize Motion”
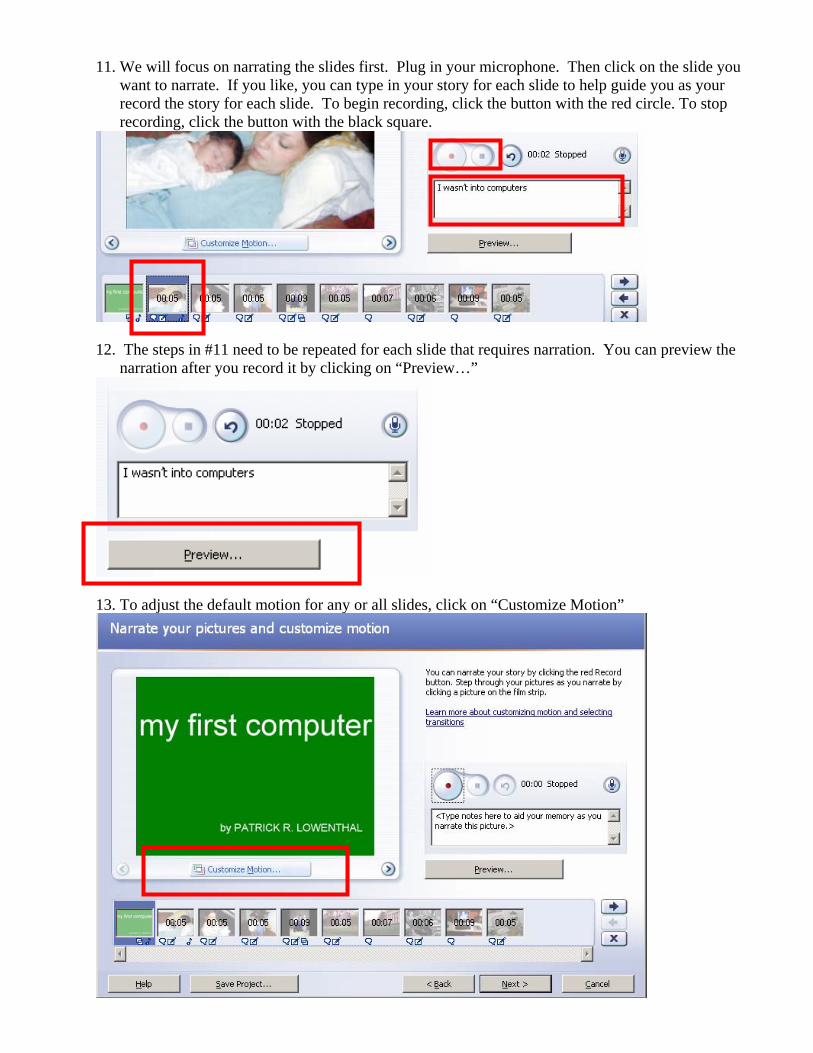
11. We will focus on narrating the slides first. Plug in your microphone. Then click on the slide you want to narrate. If you like, you can type in your story for each slide to help guide you as your record the story for each slide. To begin recording, click the button with the red circle. To stop recording, click the button with the black square.
12. The steps in #11 need to be repeated for each slide that requires narration. You can preview the
narration after you record it by clicking on “Preview…”
13. To adjust the default motion for any or all slides, click on “Customize Motion”
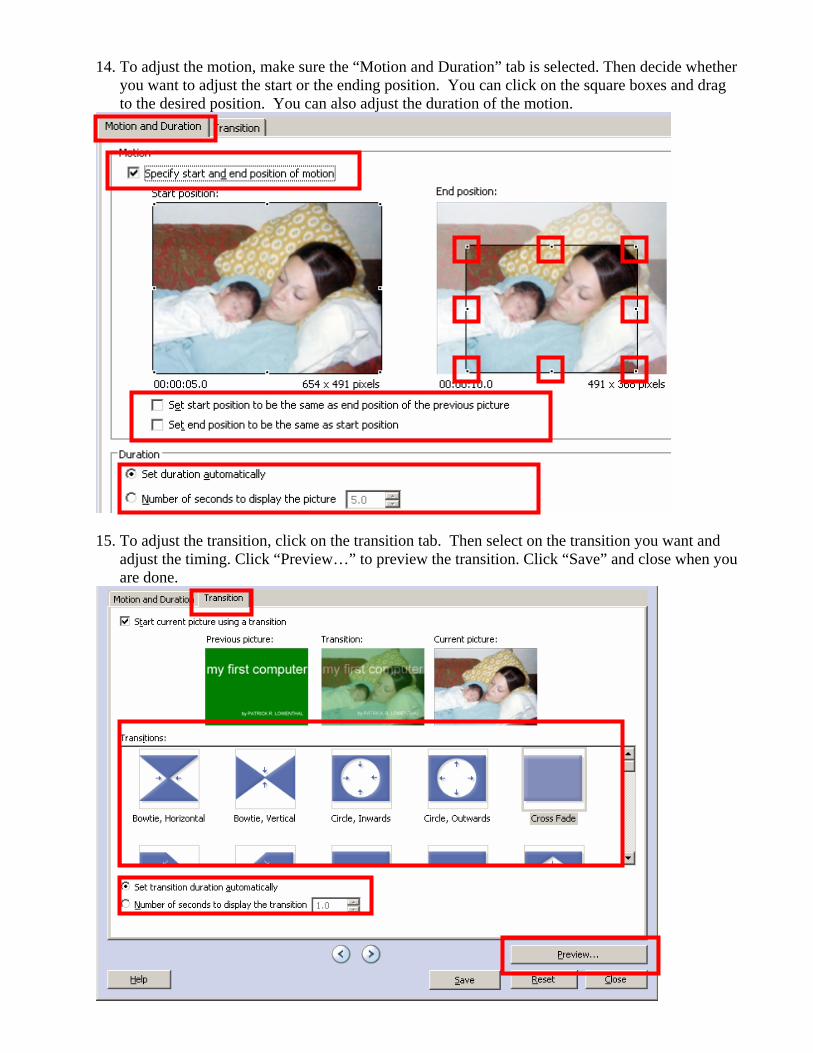
14. To adjust the motion, make sure the “Motion and Duration” tab is selected. Then decide whether you want to adjust the start or the ending position. You can click on the square boxes and drag to the desired position. You can also adjust the duration of the motion.
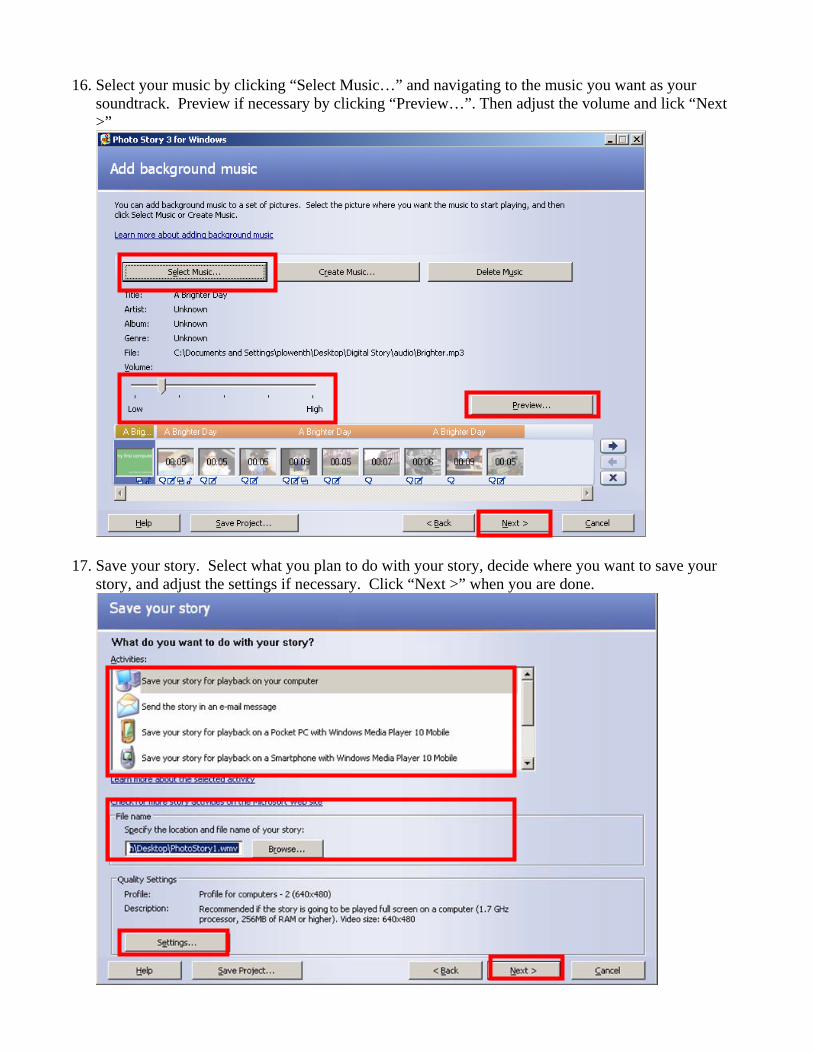
15. To adjust the transition, click on the transition tab. Then select on the transition you want and
adjust the timing. Click “Preview…” to preview the transition. Click “Save” and close when you are done.
16. Select your music by clicking “Select Music…” and navigating to the music you want as your
soundtrack. Preview if necessary by clicking “Preview…”. Then adjust the volume and lick “Next >”
17. Save your story. Select what you plan to do with your story, decide where you want to save your story, and adjust the settings if necessary. Click “Next >” when you are done.
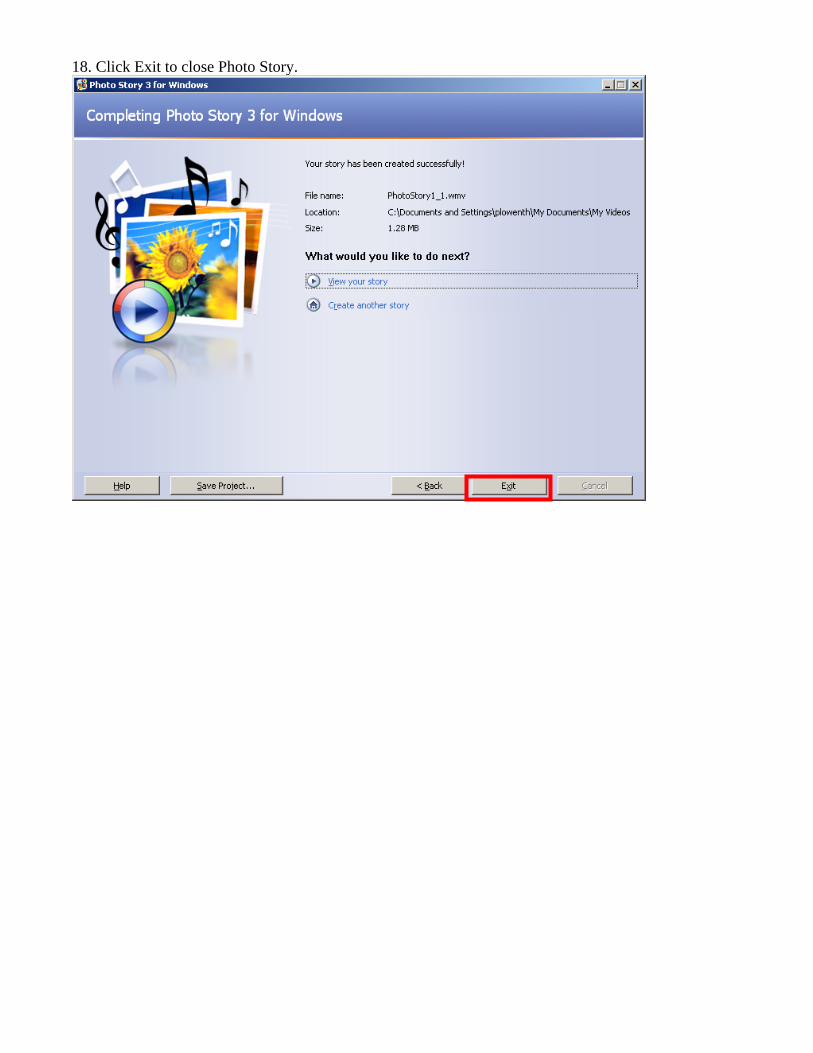
18. Click Exit to close Photo Story.