digital sound level meter - partydj · digital sound level meter 33-2055 user’s guide thank you...
TRANSCRIPT
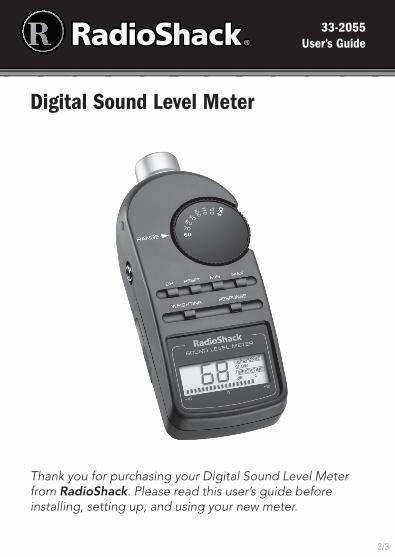
Digital Sound Level Meter
33-2055User’s Guide
Thank you for purchasing your Digital Sound Level Meter from RadioShack. Please read this user’s guide before installing, setting up, and using your new meter.
2/3

2
Setup Package contents • DigitalSoundLevelMeter • CarryCase
• User’sGuide • QuickStart
Features• Forhome/hobbyistuse:finetuneyourstereo,PAsystem,orhometheater
• Attachestoatripodwith¼inchconnector
• Selectableweightingfornoiselevelormusicalsound
• Displaysaverageormaximumsoundlevel
• Integratedaveragingfrom1to199seconds
1 Install batteryYourmeterrequiresone9Vbattery(notincluded)forpower.WhenBATTdisplaysorthemeterstopsoperatingproperly,replacethebattery.
1. SetRANGEtoOFF.
2. Removethebatterycompartmentcoverbypressingbothsideinandliftingthecover.
3. Installone9Vbattery(notincluded)asindicatedbythepolaritysymbols(+and–).
b Battery Notes:• After using the meter, set RANGE to OFF to save power.• Disposeofbatteriespromptlyandproperly.Donotburn
or bury them.• Useonlyfreshbatteriesoftherequiredsizeandtype.

3
Tripod Adapter
OUTPUT Jack
Microphone
RANGE Switch
WEIGHTING / RESPONSE
DH / RESET / MIN / MAX

4
• Ifyoudonotplantouseyourmeterforalongperiod,remove the battery. Batteries can leak chemicals that may damage electronic parts.
2 Mount and connect the meter (Optional)1.Mountthemeterona(¼–inch)tripodtoeliminatehandnoiseandminimizetheeffectsofsoundreflectedfromyourbody.Thismakesiteasytousethemeterwithauxiliaryrecordingortestequipment.
2. Useanaudiopatchcord(notincluded)toconnecttheOUTPUT Jacktoyourstereosystemortestequipment.
3 Set the sound rangeSetRANGE tothedesiredsoundrange.Ifyoucannotgetareading,tryotherrangesuntilyougetareading,referto“Continuous Average Measurements”onPage7.
4 Set the weightingPressWEIGHTINGtoselectAtodeterminethenoiselevelofanarea,orCtomeasuresoundlevelsofmusicalmaterial.Referto“Setting the Weighting”onPage5.
5 Set the response timePressRESPONSEtosettheresponsetoFASTorSLOW.Referto“Setting the Response Time”onPage5.
6 Read the measurementPointthemicrophoneatthesoundsource.Themeterdisplaysthecontinuousaveragesoundlevel.Afterthemeasurement,setRANGEtoOFF.
5
Setting the Meter
Setting the WeightingPressWEIGHTINGtoselectAorC.
Weightingdeterminesthemeter’sfrequencyresponsecurve.
A-weightinghasA-curvefrequencycharacteristicsandcausesthemetertorespondmainlytofrequenciesrangingfrom500to10,000Hz.Thisisthehumanear’smostsensitiverange.SelectAtodeterminethenoiselevelofanarea.
C-weightinghasC-curve(flat)frequencycharacteristicsandcausesthemetertorespondmainlytofrequenciesrangingfrom32to10,000Hz.SelectCtomeasuresoundlevelsofmusicalmaterial.
n Note: You can change the weighting setting only during a continuous average or maximum measurement.
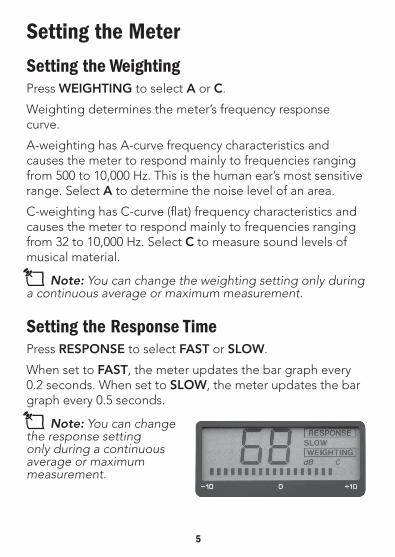
Setting the Response TimePressRESPONSEtoselectFASTorSLOW.
WhensettoFAST,themeterupdatesthebargraphevery0.2seconds.WhensettoSLOW,themeterupdatesthebargraphevery0.5seconds.
n Note: You can change the response setting only during a continuous average or maximum measurement.

6
Understanding Indications
Level IndicatorThemeterdisplayssoundlevelusinganumberandabargraph.ThenumbershowsthesoundlevelindBwithin±10dBoftheselectedrangeandisupdatedonceasecond.
Thebargraph’scenterpointrepresentsthemidpointoftheselectedrange,forexample,forRange70,thecenterpointrepresents70dB.Thebargraphupdatesevery0.2secondsor0.5seconds.
Overrange IndicatorWhenthesoundlevelishigherthanthehighestnumberintheselectedrange,thebargraphgoesto+10dBandboththebargraphandthenumberthatrepresentsthenextrangeflash.
Forexample,ifthemetermeasures91dBinRange80,thenthenumber90andthebargraphflash.Ifthemetermeasuresmorethan126dBinRange120,thenumber126andthebargraphflash.
Ifyougettheoverrangeindicator,tryahigherrangesettinguntilyougetareadingintheupperhalfoftherange(0to+10dB).
Underrange IndicatorWhenthemeasuredsoundlevelislowerthanthelowestsoundleveloftheselectedrange,LOappears
7
andthebargraphdisappears.Ifthishappens,trythenextlowerrange.
n Notes:• Theoverrangeorunderrangeindicatorcanalsoappear
when you recall a reading using the measurement holding function and the measurement is under or over the selected range.
• The meter can measure sound levels only from 50 to 126 dB.
Taking Measurements
Continuous Average MeasurementsFollowthesestepstomeasuretheaveragesoundlevel.
1. SetRANGEtothedesiredrangesetting.Ifthesoundlevelisveryhigh,startatthehighestrangesetting(120)andreducethesettinguntilyougetareading.
Therearesevenranges.Eachcovers20dB.Thenumberofarangerepresentsthecenteroftherange.Whenthemeasuredvalueislowerorhigherthanthesetrange,anunderrangeoroverrangeindicatorappears.See“Underrange Indicator”and“Overrange Indicator”onPage6.Takemeasurementsatseveraldifferentpointsintheareatogetagoodaverage.
n Notes:• IfyousetRANGE to 120, the meter measures sound
levels from 110 to 126 dB.• Ifyouchangetherangesettingduringa
measurement, you clear all the current data and a continuous average measurement resumes.

8
2. Settheweightingandresponse(see“Setting the Weighting”and“Setting the Response Time”onPage5).
3. Pointthemeter’smicrophoneatthesoundsource.Themeterdisplaysthecontinuousaveragesoundlevelduringaone-secondsamplingperiodandupdatesthenumberonthedisplayonceasecond.
4. Afterthemeasurement,setRANGEtoOFF.
Taking Maximum Measurements1. FollowSteps1-3in“Continuous Average Measurements”.
2. PressMAX;thewordMAX appears.
Themeterdisplaysonlytheloudestmeasuredsoundlevelduringtheone-secondsamplingperiod.Thebargraphshowsthemaximumlevelevery0.2or0.5seconds.
Thebargraphsegmentthatcorrespondstothepeakreadingstaysonthedisplayfor2secondsoruntilthemetermeasuresahighermaximumlevel.
3. PressMAXagaintocancelthecontinuousmaximummeasurement.Acontinuousaveragemeasurementresumes.
Integrated Average MeasurementsFollowthesestepstomonitorthesoundlevelandaveragethemeasurementoveraperiodof1to199seconds.Themeterstorestheaverage,maximum,andminimumsoundlevelsduringthesettime.

9
1. PressandholdDHforabout2secondsduringacontinuousaverageormaximummeasurement.Thedigit1appears.
2. Press(orpressandhold)MAXorMINtosetaperiodfrom1to199seconds;positionthemeterforthemeasurement.
3. PressRESETtostartthemonitoring.
Themeterupdatesthecurrentintegratedaveragedisplayonceasecond.MINandMAXflashuntilthesettimeisup.Whenthesettimeisup,DHappears,andMINandMAXgoonflashing.Themeterdisplaysthetotalintegratedaveragesoundlevel.
4. PressMAXtodisplaythemaximumsoundlevelforthesettime,pressagaintoreturntothetotalintegratedaveragesoundlevel.
PressMINtodisplaytheminimumsoundlevelforthesettime,pressagaintoreturntothetotalintegratedaveragesoundlevel.
5. PressRESETafteryouchecktheaverage,maximum,andminimumsoundlevels.Acontinuousaverageormaximummeasurementresumes.
n Notes: • IfyouchangetheRANGE setting during an integrated
average measurement, you clear any stored data and a continuous average or maximum measurement resumes.
• Youmustrepeattheprocedurefortakinganintegratedaverage measurement.

10
Taking Maximum and Minimum Measurements during an Undetermined Time Period1. PressRESETduringacontinuousaverageormaximummeasurement.Attheendofthedesiredtimeperiod,pressDH.DHdisplays.
2. PressMAXandMINrespectivelytochecktheaverage,maximum(MAXstopsflashing),andminimum(MINstopsflashing)soundlevelsduringthetimeperiod.
3. PressRESETtoresumeacontinuousaverageormaximummeasurement.
Checking Stereo System AcousticsTocheckthesoundofastereosystem,useanaudiosamplethatproducespuretones,oneatatime,atintervalsthatspantheentireaudiospectrum.UseC-weightingwitheithersloworfastresponse.
Makeagraphortabletoshowthesoundleveleachtoneproduces.Thisgivesyouaclearideaofthefrequencyresponseofthetotalaudiosystem,includingtheroom.Tosmoothouttheresponse,adjustthetonecontrol,changespeakerplacements,anduseafrequencyequalizer.
Holding MeasurementsYoucanstorethecurrentmeasurementsinmemoryandfreezemeasurementsonthedisplay.Themeterstorestheaverage,maximum,andminimumsoundlevelsforthelastonesecond.

11
1. PressDHduringacontinuousaverageormaximummeasurement.DHdisplaysandthelastaverageormaximummeasurementisfrozen.
2. Foranaveragemeasurement,whatisfrozenisthelastaveragereading.PressMAXtocheckthelastmaximummeasurement.MAXdisplays.PressMAXagaintoreturntotheaveragemeasurement.
Foramaximummeasurement,whatisfrozenisthelastmaximumreading.
3. PressMINtocheckthelastminimummeasurement.MINdisplays.PressMINagaintoreturntotheaverageormaximummeasurement.
4. PressRESETtoreturntothecontinuousaverageormaximummeasurement.
n Note: When you set RANGE to a different range during measurement holding, you disable the holding function and return to a continuous measurement.
Care and Service• Keepyourmeterdryandclean.Ifitgetswetordirty,wipeitdryorcleanimmediately.Donotuseharshchemicals,cleaningsolvents,orstrongdetergentstocleanthemeter.
• Useandstorethemeterinnormaltemperatureenvironmentsonly.Temperatureextremescanshortenthelifeofelectronicdevicesanddistortormeltplasticparts.
• Handlethemetergentlyandcarefully.Droppingitcandamagethecircuitboardsandcausethemetertoworkimproperly.
• Modifyingortamperingthemeter’sinternalcomponentscancausemalfunctionandmightinvalidateitswarranty.Ifyourmeterisnotperformingasitshould,takeittoyourlocalRadioShackstoreforassistance.

12
SpecificationsBattery.................................................................................. 9VAlkaline
Microphone............................................................ ElectretCondenser
Range..................................................................................50to126dB
Accuracy............................................................... ±2dBat114dBSPL
Reference........................................................ 0dB=0.0002MicroBar
Weighting.................................................................................. AandC
DisplayResponse........................................................... FastandSlow
Signal Output:
Voltage................................................................ 1VoltPeak-PeakMin.(OpenCircuit,FullScaleat1kHz)
Impedance.............................................................10KohmMin.Load
Distortion..............................Lessthan2%at1kHz,0.5Vp-pOutput(Input:MicOut,Output:10Kohm)
OperatingTemperature.................................32to122°F(0to50°C)
StorageTemperature................................ -40to149°F(-40to65°C)
Dimensions(HWD)....................6¼×2½×1¾inch(159×64×44mm)
Weight(includingbattery)...............................................6.7oz(190g)
Specificationsaresubjecttochangeandimprovementwithoutnotice.Actualproductmayvaryfromtheimagesfoundinthisdocument.
13
Limited WarrantyRadioShackwarrantsthisproductagainstdefectsinmaterialsandworkmanshipundernormalusebytheoriginalpurchaserforninety (90) days afterthedateofpurchasefromaRadioShack-ownedstoreoranauthorizedRadioShackfranchiseeordealer.RADIOSHACKMAKESNOOTHEREXPRESSWARRANTIES.
Thiswarrantydoesnotcover:(a)damageorfailurecausedbyorattributabletoabuse,misuse,failuretofollowinstructions,improperinstallationormaintenance,alteration,accident,ActsofGod(suchasfloodsorlightning),orexcessvoltageorcurrent;(b)improperorincorrectlyperformedrepairsbypersonswhoarenotaRadioShackAuthorizedServiceFacility;(c)consumablessuchasfusesorbatteries;(d)ordinarywearandtearorcosmeticdamage;(e)transportation,shippingorinsurancecosts;(f)costsofproductremoval,installation,set-upservice,adjustmentorreinstallation;and(g)claimsbypersonsotherthantheoriginalpurchaser.
Shouldaproblemoccurthatiscoveredbythiswarranty,taketheproductandtheRadioShack salesreceiptasproofofpurchasedatetoanyRadioShack storeintheU.S.RadioShack will,atitsoption,unlessotherwiseprovidedbylaw:(a)repairtheproductwithoutchargeforpartsandlabor;(b)replacetheproductwiththesameoracomparableproduct;or(c)refundthepurchaseprice.Allreplacedpartsandproducts,andproductsonwhicharefundismade,becomethepropertyofRadioShack.Neworreconditionedpartsandproductsmaybeusedintheperformanceofwarrantyservice.Repairedorreplacedpartsandproductsarewarrantedfortheremainderoftheoriginalwarrantyperiod.Youwillbechargedforrepairorreplacementoftheproductmadeaftertheexpirationofthewarrantyperiod.
RADIOSHACKEXPRESSLYDISCLAIMSALLWARRANTIESANDCONDITIONSNOTSTATEDINTHISLIMITEDWARRANTY.ANYIMPLIEDWARRANTIESTHATMAYBEIMPOSEDBYLAW,INCLUDINGTHEIMPLIEDWARRANTYOFMERCHANTABILITYAND,IFAPPLICABLE,THEIMPLIEDWARRANTYOFFITNESSFORAPARTICULARPURPOSE,SHALLEXPIREONTHEEXPIRATIONOFTHESTATEDWARRANTYPERIOD.
EXCEPTASDESCRIBEDABOVE,RADIOSHACK SHALLHAVENOLIABILITYORRESPONSIBILITYTOTHEPURCHASEROFTHE

14
PrintedinChinaAO0330AAB1
01A1133-2055
©2011.RadioShackCorporation.Allrightsreserved.RadioShackandRadioShack.comaretrademarksusedbyRadioShackCorporation.
Protecttheenvironmentbyrecyclingusedelectronics.GotoE-CyclingCentral.comtofindanelectronicrecyclingcenternearyou.
PRODUCTORANYOTHERPERSONORENTITYWITHRESPECTTOANYLIABILITY,LOSSORDAMAGECAUSEDDIRECTLYORINDIRECTLYBYUSEORPERFORMANCEOFTHEPRODUCTORARISINGOUTOFANYBREACHOFTHISWARRANTY,INCLUDING,BUTNOTLIMITEDTO,ANYDAMAGESRESULTINGFROMINCONVENIENCEANDANYLOSSOFTIME,DATA,PROPERTY,REVENUE,ORPROFITANDANYINDIRECT,SPECIAL,INCIDENTAL,ORCONSEQUENTIALDAMAGES,EVENIFRADIOSHACK HASBEENADVISEDOFTHEPOSSIBILITYOFSUCHDAMAGES.
Somestatesdonotallowlimitationsonhowlonganimpliedwarrantylastsortheexclusionorlimitationofincidentalorconsequentialdamages,sotheabovelimitationsorexclusionsmaynotapplytoyou.Thiswarrantygivesyouspecificlegalrights,andyoumayalsohaveotherrightswhichvaryfromstatetostate.YoumaycontactRadioShackat:
RadioShack CustomerRelations300RadioShackCircle,FortWorth,TX76102 04/08
www.RadioShack.com