digital imaging of printed text and optical character ...l392p7ec/spring2001/text/...in 1938,...
TRANSCRIPT
Digital Imaging of Printed Text and Optical Character
Recognition for Searchability
of
“The Wetback in the Lower Rio Grande Valley Of Texas”
by
LYLE SAUNDERS, University of New Mexico and
OLEN E. LEONARD, Vanderbilt University
2
Table of Contents Scope and Limitations …………………………………………………………… 2
Basic Definitions ………………………………………………………………… 2
A Brief History of Reformatting Printed Text …………………………………… 3
Digital versus Analog Preservation ……………………………………………… 5
Advantages of Digitization ………………………………………………………. 7
Issues in Using Digitization for Preservation ……………………………………. 8
Developing a Digitization Project ……………………………………………….. 9
Becoming Familiar with Current Practices in the Field …………………. 10
Selection of Materials and Methods ……………………………………... 10
Quality Control and Benchmarking ……………………………………… 11
Consideration of Technical Issues ……………………………………….. 14
Added Value ……………………………………………………………... 15
Bibliography ……………………………………………………………………... 17
Appendix A …………………………………………...………………………….. 21
Table – Summary of Digitization Projects ………………………………. 21
Survey of Digitization Projects …………………………………………... 22
Appendix B – Digitization of “The Wetbacks of the Lower Rio Grande Valley of Texas” ……………………………………. 29
Image Capture ……………………………………………………………. 30
Optical Character Recognition …………………………………………... 34
Markup …………………………………………………………………… 35
Conclusion 35
3
Scope and Limitations The paper presents a survey of the history, theory, and practice of printed text
reformatting. It further discusses digitization as a reformatting option and, in particular, the
digitization of Lyle Saunders and Olen Leonard’s “The Wetback in the Lower Rio Grande
Valley.” By comparing the different methods of reformatting, this paper evaluates the
advantages and disadvantages of digitization, its contribution to preservation and access, and
the value it adds to the original creation.
Basic Definitions Printed text refers to one of the major categories of the paper and film-based
document classification produced by printing press, photocopying, and microfilming
techniques, or by word processor. Digitization refers to the process of capture or conversion
of documents into digital form through use of a scanner or digital camera. A digital image is
a grid of sampled and mapped pixels, each assigned a unique code for a specific color or
shade, and stored as a string of binary codes, a series of zeros and ones. Digitization chain
refers to stages of the “life-cycle”1 of the digital product, i.e. benchmarking, management,
presentation, and digital preservation.2 Digital quality assessment is the attempt to ensure the
accuracy, quality, and integrity of the digital document.
1 Beagrie and Greenstein, A Strategic Policy Framework for Creating and Preserving Digital Collections, 1998, in Stuart Lee, Digital Imaging, p.7.

4
A Brief History of Reformatting Printed Text
The reformatting of printed text as we know it today is closely tied to the histories of
office copying technology and photography, the beginnings of which are rooted in the year
1839. In that year, Albrecht Breyer developed a process known as Breyertype, and John
Benjamin Dancer created the first micro-photograph. Advances and modifications in both
technologies continued, resulting in numerous alternative processes for office copying and
innovative uses of microphotography.
Breyer’s process, a “photographic method of reproducing documents without the help
of an optical system such as a camera,” involved pressing a silver gelatin paper face down on
printed materials and exposing it to light to achieve a negative copy.3 Later versions, known
as the Manual Process and the Typon process, were reportedly used in making facsimiles of
bound books in the 1920s. In 1909, the Photostat Corporation introduced the Photostat, “a
photographic camera that used photographic paper instead of film.”4 Although the process
originally produced a negative copy, the introduction of direct positive paper in 1953 made
positive facsimiles possible.
In 1938, Chester F. Carlson patented the electrostatic process later known as
xerography. Labor-intensive in its early days, the initial process involved three steps for
making copies that were then used as masters for multilith offset duplication. First marketed
in 1948, xerography did not become widespread until the three-step process was simplified,
allowing for development of the Xerox 914 which, when introduced in 1960, “became an
2 Peter Robinson, Digitization of Primary Textual Sources, in Lee, p.7. 3 Luis Nadeau. Encyclopedia of Printing, Photographic, and Photomechanical Processes, p.412. 4 Ibid, p.382
5
overnight success.”5 The Xerox 4000 was introduced in 1971 and featured an exposure platen
that reached the edge of the machine, making it well-suited for copying bound volumes.
Although the feature was not continued on future models, the development of double-sided
copies made reproducing a missing or mutilated leaf and tipping it into a volume possible.
The issue of full color reproduction through an electrostatic process was first met with
3M’s introduction of the Color-In-Color copier in the late 1960s. Xerox followed with its
Xerox 6500 Color Copier in 1973. The improvement and proliferation of color copiers
continues today in combination with the technology of the laser copier, introduced in 1985 by
Canon. The development of this technology now permits framing, repositioning, separate
horizontal and vertical dimensional changes, polarity control, automatic exposure, and frame
erasing.6
Arguments for the use of microphotography in the reformatting and preservation of
text began to surface as early as 1851. The first microfilm reader was patented in 1858,
although full-scale production did not begin until the 1920s. The United States Department of
Agriculture initiated the first “on demand” microfilm service in 1934, filming books and
periodicals by request. The first emulsions specifically designed for microfilm were
introduced in 1937, and the practice of using film produced for the motion picture industry
began to decline. The next year, Eugene Powers founded University Microfilms
International, and Harvard University Library began the Foreign Newspaper Microfilm
Project. Formal standards for microfilming materials and practices began to develop in the
1950s, the development of which continues today.
5 Howard White, “Gook Copiers: Past, Present, and Future.” Restaurator 8 (1987), p.19.
6
Digital versus Analog Preservation Digitization, microfilm, and preservation photocopying all enhance preservation
efforts by providing access without increasing physical handling of originals. In the 1930s, H.
G. Wells suggested that microfilm presented the possibility of democratizing knowledge with
a universally distributed microfilmed “world encyclopedia” containing all of mankind’s
accumulated knowledge.7 Today, many are making similar forecasts about the Internet, but
much anxiety and tension still surround “going digital.” Is digitization a means for
preservation? Does it provide a substitute for the original? The advent of microfilm and
preservation photocopying presented the same questions, and to some extent those questions
remain unanswered. Although not a comprehensive comparison, a few of the advantages and
disadvantages of microfilming and preservation photocopying as they relate to digitization are
outlined below.
Microfilm revolutionized library and preservation enterprises in the 1930s. Viewed as
insurance against accidental or intentional damage to irreplaceable originals, microfilming
projects highlighted longstanding questions about selection and appraisal of materials for
preservation. Many realized early on that the sheer volume of materials and the monetary
costs associated with large projects made collaboration an attractive option. As cooperative
projects began to flourish, the need for standardization of materials and techniques became
apparent.
Despite ease of reproduction for service copies and evolving standards, microfilm
possess inherent disadvantages as a means of preservation. Although recognized for
6 White, p.27. 7 Herbert George Wells, World Brain. (Freeport, N.Y.: Books for Libraries Press, 1938). See especially chapter 3, “The Idea of a Permanent World Encyclopaedia.”
7
longevity, prolonged existence is directly related to use of proper materials, procedures, and
storage. Locating individual materials on a reel is often problematic even with strict
documentation protocols and various finding aids. In addition, many users find readers
difficult to load and operate. Consequently, microfilm is rarely, if ever, described as “user
friendly.”
Preservation photocopying , like microfilming, is a method for preserving damaged
and/or brittle books. Whereas microfilm is often considered difficult to use and inappropriate
for reference and heavily used materials, photocopy facsimiles have the advantage of
replicating the paper format of the original. Preservation photocopying of entire volumes,
however, does not provide a convenient means for future reproductions or have the potential
to conserve space. Unlike microfilming in which a master, a print master, and a service copy
are generally produced, preservation photocopying often results in only one surrogate copy.
This does not allow for convenient future reproduction and does not provide additional
backup copies.
Digitization provides a means for avoiding some of the problems and disadvantages of
microfilming and photocopying for preservation purposes. The use of optical character
recognition software and/or markup languages allow a level of retrieval and searchability not
possible with analog formats. Metadata created for digital files can provide information about
the original material and method of digitization, and digital copies suffer no generational loss
in fidelity from copy to copy. Despite these advantages, digitization is continually evolving,
and much remains to be learned about best practices, standards, and preservation of electronic
files.
8
Advantages of Digitization
Digital copies are easily handled and have the potential to be widely accessible. This
flexibility allows users to manipulate information, creating “virtual unification” of images
and/or collections. In many cases, unification of materials requires institutional collaboration
on local, national, or even international levels.
In addition to virtual unification, digital files allow for creation of multiple identical
copies without loss of fidelity. A quality archival image can produce readily obtainable
derivative copies for preservation and access purposes. Such copies increase accessibility and
may therefore enhance the value of the original itself.
Along with the advantages discussed above, digitization allows for the creation of
added value through use of optical character recognition software (OCR) and/or markup
languages such as HTML, XML, or SGML. Columbia University, a pioneer in digital
reformatting, defines added value criterion as:
§ enhanced intellectual control through creation of new finding aids, links to bibliographic records, and development of indices and other tools; § increased and enriched use through the ability to search widely, manipulating
images and text, and to study disparate images in new contexts; § encouragement of new scholarly use through the provision of enhanced
resources in the form of widespread dissemination of local or unique collections; § enhanced use through improved quality of image, for example, improved
legibility of faded or stained documents; and § creation of a “virtual collection” through the flexible integration and synthesis
of a variety of formats, or of related materials scattered among many locations.8
8 The Columbia University Libraries, Columbia University Libraries Selection Criteria for Digital Imaging, (14 January, 2001). Available at http://www.Columbia.edu/cu/libraries/digital/criteria/htm.

9
Issues in Using Digitization for Preservation There is less argument today about the legitimacy of digitization as a means for
preservation and more about digital preservation itself. Ensuring the longevity of digital
images for retrieval into the future is of paramount importance. Funding, quality,
authenticity, technical obsolescence, and the handling of originals all have the potential to
negatively impact any digitization project.
Whether done in-house or contracted out, digital projects require trained staff and
sophisticated equipment. Recruiting skilled personnel, purchasing equipment, and keeping
hardware and software up-to-date is expensive. Creation, storage, and management of digital
files is costly as well. When digital projects are done in-house, project managers must
anticipate such expenses and secure adequate funding. When imaging is contracted out,
project managers must expect that such expenses will be factored into bids submitted by
vendors.
Ensuring accuracy, fidelity, and completeness of digital files involves implementation
of quality control measures. Factors such as calibration of equipment, file formats, image
processing, and differences in personal perceptions influence digital quality, making quality
control an inherently subjective process. Even with the most stringent quality control
measures, variables such as human fatigue and technical problems will impact quality.
One of the biggest advantages of digital files, ease of manipulation, is also one of the
biggest disadvantages. Although “[f]rom the creator’s point of view this kind of plasticity
may be ideal, …from the perspective of a library of archives that endeavors to collect a text
that is final and in one sense or another definitive, it can complicate things considerably.”9
9 Abby Smith, Why Digitize? (Washington, D.C.: Council on Library and Information Resources, 1999), p.3.
10
Digital images are vulnerable to unauthorized changes, omissions, and forgery. Authenticity
is therefore a concern, and yet the concept and context of the authenticity of digital files is
still evolving. Authenticity “connotes precise, yet disparate, things in different contexts and
communities [and] …can mean being original but also being faithful to an original. The word
has specific meaning to an archivist and equally specific but different meaning to a rare book
librarian…”10
Technical obsolescence constitutes another major problem for digital preservation.
Hardware and software can quickly become obsolete, rendering digital information
inaccessible. Many suggest migrating files as technology advances to counter obsolescence.
As the numbers of digital files increase, however, funding and staffing considerations may
make this an unrealistic option. Furthermore, changes in files as a result of migration may
compromise file, resulting in loss of information.
Consideration must also be given to the handling of original documents during
digitization. Exposure to light and heat during the capture process leaves the original open to
shrinkage and change in moisture content. Flattening to a platen can break or delaminate
fragile items and therefore raises the question of whether or not items should be disbound for
scanning. Appropriate conservation measures such as light filters and reduced exposure times
could mediate some of these problems.
Developing a Digitization Project
The process of digitization requires strategic long-term planning and careful
consideration of the advantages and disadvantages inherent in a digital product.
10 Abby Smith, Authenticity in a Digital Environment (Washington, D.C.: Council on Library and Information
11
Understanding a collection, its potential users, its resources, and its goals is also necessary in
developing an efficient and effective plan for a digitization project. The life cycle of a
digitization project generally consists of the following steps:
A Becoming Familiar with Current Practices in the Field B Selecting Materials and Methods C Controlling Quality and Benchmarking D Considering Technical Issues E Adding Value
A. Becoming Familiar with Current Practices in the Field
Leading institutions in the field of digitization have not yet reached agreement on building
a common standard or strategy for digital projects. Some libraries, including the University
of Michigan, strive to capture data and produce digital files of archival quality, considering
them a preservation master copy. Others, Cornell and Yale among them, digitize to provide
access, using a hybrid approach that recognizes the limitations of using digitization solely for
preservation. Similarly, Harvard currently employs digital versions for access while using
analog media for long-term storage. Columbia University and the University of North
Carolina at Chapel Hill scan primary sources to provide access, while Indiana University
employs digitization with the goal of producing acid-free paper copies. The various
approaches of several institutions are outlined in Appendix A.
B. Selecting Materials and Methods
Selection of materials for digitization involves careful consideration of both the physical
and intellectual characteristics of source materials. Copyright and privacy laws must be taken
into consideration, along with available resources such as funding, equipment, and staff. In
Resources, 2000), p. vi.
12
addition, the purpose of digitization (e.g., preservation versus access) must be taken into
account. Items of high demand, key historical or intellectual importance, those in an
extremely fragile state, or those that contribute to cooperative efforts and interests, are
generally prime candidates for digitization.
Selection of methods includes choosing the most appropriate mode of capture (e.g.,
flatbed scanner versus digital camera) and determining the level of detail required for the
digital image. The size and condition of original materials often influence the method of
capture; project budget and file storage capabilities frequently effect the level of resolution.
File formats should be specified during this stage of a project.
In general, current practices follow scanning at 8-bit depth with the highest possible
resolution (600 dpi). A file is usually saved as a compressed TIFF (Tagged Image File
Format) without interpolation or proprietary software or formats. The resulting “preservation
master copy,” allows digital access copies, printed copies, and Internet derivatives to be easily
produced.
C. Controlling Quality and Benchmarking
Benchmarking precedes image capture but is also part of the quality control procedure that
continues throughout the life cycle of the digital project. Kenney defines benchmarking as:
§ Assessing document attributes (detail, tone, and color). § Defining the needs of current and future users. § Objectively characterizing relevant variables (size of detail, desired quality,
resolving power of system). § Correlating variables to one another via formulas.
13
§ Confirming results through testing and evaluation.11 Preliminary “quality assurance” (QA) checks should be performed on digital files to assure
quality of digital capture until the best possible image is achieved after a series of calibrations
and resetting of the system. The term full information capture was coined by Kenney and
Chapman to describe capturing all significant information. Full information capture should
result in the full representation of an original, producing “high quality and functionality while
minimizing costs… [and matching] the conversion process to the information content of the
original.”12
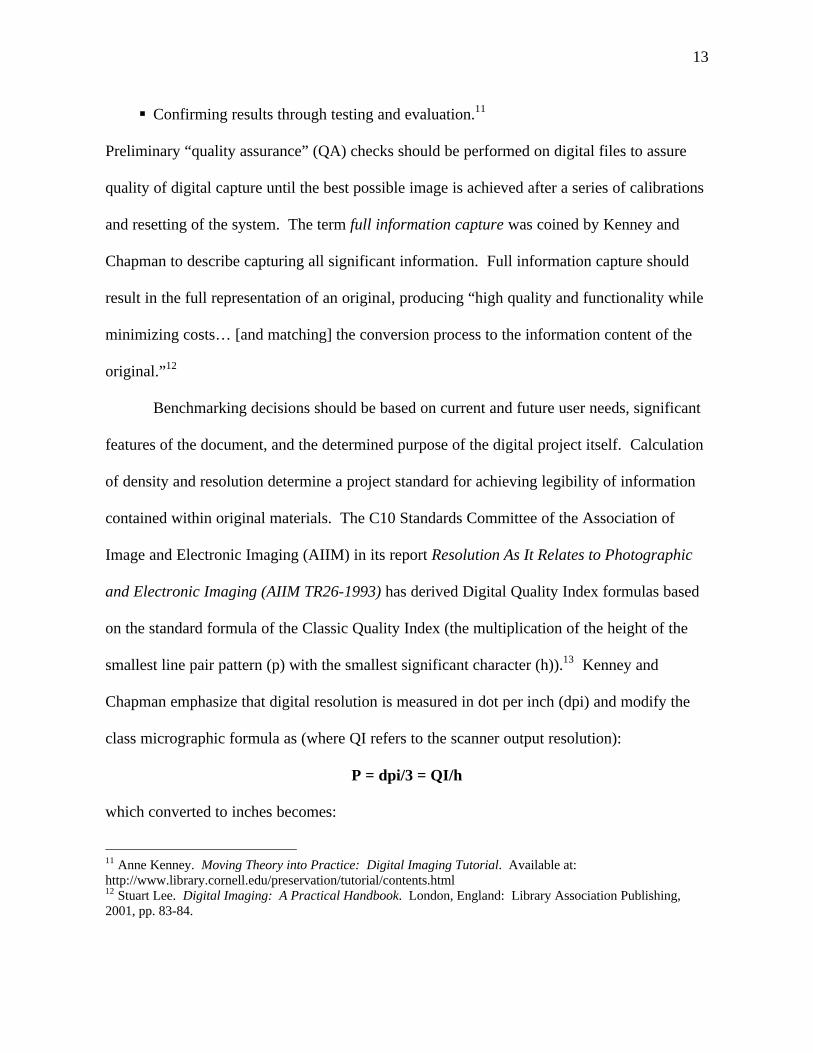
Benchmarking decisions should be based on current and future user needs, significant
features of the document, and the determined purpose of the digital project itself. Calculation
of density and resolution determine a project standard for achieving legibility of information
contained within original materials. The C10 Standards Committee of the Association of
Image and Electronic Imaging (AIIM) in its report Resolution As It Relates to Photographic
and Electronic Imaging (AIIM TR26-1993) has derived Digital Quality Index formulas based
on the standard formula of the Classic Quality Index (the multiplication of the height of the
smallest line pair pattern (p) with the smallest significant character (h)).13 Kenney and
Chapman emphasize that digital resolution is measured in dot per inch (dpi) and modify the
class micrographic formula as (where QI refers to the scanner output resolution):
P = dpi/3 = QI/h
which converted to inches becomes:
11 Anne Kenney. Moving Theory into Practice: Digital Imaging Tutorial. Available at: http://www.library.cornell.edu/preservation/tutorial/contents.html 12 Stuart Lee. Digital Imaging: A Practical Handbook. London, England: Library Association Publishing, 2001, pp. 83-84.
14
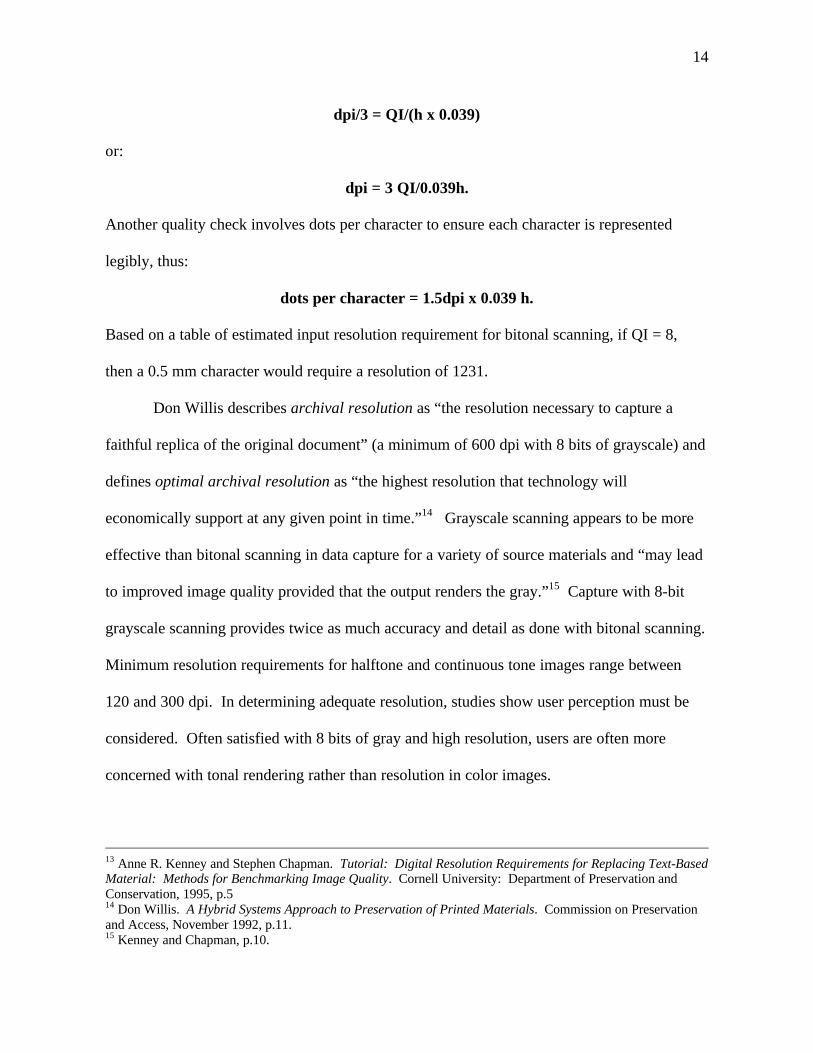
dpi/3 = QI/(h x 0.039)
or:
dpi = 3 QI/0.039h.
Another quality check involves dots per character to ensure each character is represented
legibly, thus:
dots per character = 1.5dpi x 0.039 h.
Based on a table of estimated input resolution requirement for bitonal scanning, if QI = 8,
then a 0.5 mm character would require a resolution of 1231.
Don Willis describes archival resolution as “the resolution necessary to capture a
faithful replica of the original document” (a minimum of 600 dpi with 8 bits of grayscale) and
defines optimal archival resolution as “the highest resolution that technology will
economically support at any given point in time.”14 Grayscale scanning appears to be more
effective than bitonal scanning in data capture for a variety of source materials and “may lead
to improved image quality provided that the output renders the gray.”15 Capture with 8-bit
grayscale scanning provides twice as much accuracy and detail as done with bitonal scanning.
Minimum resolution requirements for halftone and continuous tone images range between
120 and 300 dpi. In determining adequate resolution, studies show user perception must be
considered. Often satisfied with 8 bits of gray and high resolution, users are often more
concerned with tonal rendering rather than resolution in color images.
13 Anne R. Kenney and Stephen Chapman. Tutorial: Digital Resolution Requirements for Replacing Text-Based Material: Methods for Benchmarking Image Quality. Cornell University: Department of Preservation and Conservation, 1995, p.5 14 Don Willis. A Hybrid Systems Approach to Preservation of Printed Materials. Commission on Preservation and Access, November 1992, p.11. 15 Kenney and Chapman, p.10.
15
Cornell University has established that a bitonal input scanning resolution of 600 dpi
is sufficient to fully capture the monochrome information of brittle books. Texts illustrated
with line art and halftones can also be captured at 600 dpi bitonal scanning. The National
Archives and Records Administration recommends using 300 dpi scanning resolution for
office documents which will also allow using OCR technology. In cases of engineering
drawings and/or maps, however, 600 dpi may be necessary to resolve the fine lines and detail
often associated with these types of documents. In determining appropriate benchmarking
specifications, Kenney and Chapman recommend the following:
§ define requirements based on immediate and future applications, not on the basis of current technological capabilites; § scan at high resolution, sufficient to capture essential characteristics of the source
documents themselves, so as to avoid rescanning in the future; derive lower resolution images for current users; § set resolution requirements sufficiently high to avoid item-by-item decision
making; § conform estimated resolution requirements by a thorough testing of representative
samples of the source material and through curatorial and user review; § evaluate image quality on high resolution monitors and through printed text pages
of technical targets and actual source documents.16
D. Considering Technical Issues
The reasons behind a digitization project often influence decisions made about resolution,
compression, and file formats. When digitizing for the purpose of access and/or Internet
display, requirements for resolution are often lower, usually 72 dpi, due to the resolution of
computer monitors. Digitizing to create a digital archival master file generally requires
capturing the original with the highest possible resolution. Printer resolution must be
considered when digital files are to be printed.
16 Kenney and Chapmen, p.17.
16
Resolution has a direct affect on file size. The higher the resolution, the larger the file,
and large files are expensive to store and take longer to download. “The key to image quality
is not to capture at the highest resolution or bit-depth possible, but to match the conversion
process to the informational content of the original, and to scan at that level – no more, no
less.”17 One solution is creating a “rich digital master” to serve preservation purposes and
producing various derivatives to serve needs such as Internet viewing or printing.
One method of managing large files is compression, a process that involves encoding
algorithms to reduce file size, removing redundant information. There are two major types of
compression: lossy and lossless. TIFF Group IV compression is a lossless compression type
recommended for bitonal images achieving 400 dpi resolution and a 25:1 compression ratio.
File formats are crucial when it comes to storing and delivering images. Of most concern
is the invention and disappearance of file formats, especially those that are proprietary. Many
file formats are difficult or impossible to use across platforms and may affect the longevity of
digital files. TIFF, the most commonly used file format, is not platform dependant, is
accepted for archiving purposes, is lossless, and is easy to convert to other file formats for
delivery purposes.
E. Adding Value
Metadata, markup, and optical character recognition are all components of added value.
Used individually or in combination, they allow indexing, linking, searching, and
manipulation of digitized texts. Metadata is data about an image and can include everything
17 Kenney. Moving Theory into Practice.
17
from dimensions of the original document to technical information about the digital capture
method. Important in bibliographic control, metadata “facilitates both short-term and long-
term management and processing of digital collections.”18
Markup language uses embedded tags to create structure within a document, providing a
computer information about how to process and present the document. Examples of markup
languages include Hyper Text Markup Language (HTML), Standard Generalized Markup
Language (SGML), and Extensible Markup Language (XML). These languages allow for
formatting specifications such as titles, paragraphs, justification, and fonts, and they become
especially important if reproducing the formatting of an original is desired after application of
OCR software.
OCR software evaluates characters within an imaged document and translates them
into character codes, allowing a computer to recognize text. Character properties are
determined by algorithms and by comparison to a learned set. When OCR is applied,
searching of a text is made possible. OCR software is still limited in its application to non-
Arabic characters, variations in font, and use of symbols. It is often viewed as an alternative
to re-keying, but in cases of complex originals with variations in font and/or numerous tables,
re-keying may be more time and cost effective. The current level of OCR necessitates tedious
proofreading for evaluation of accuracy and correction of errors. In addition, most OCR
packages are limited in reproducing the formatting of an original. Font, justification, and
special characters must be reinserted through use of markup language. As OCR software
continues to develop, such obstacles may be overcome in the future.
18 Cornell University Library. Moving Theory into Practice Digital Imaging Tutorial. http://www.library.cornell.edu/preservation/tutorial/metadata/table5-1.html.
18
BIBLIOGRAPHY
HISTORY OF REFORMATTING
Bank, Jennifer and Pamela W. Darling. Options for Replacing and Reformatting Deteriorated Materials. Washington, D. C.: Association of Research Libraries, 1993.
Bourke, Thomas A. "The Reproduction of Library Materials in 1990." Library Resources and Technical Services 35 (3) 1991: 307-318.
Nadeau, Luis. Encyclopedia of Printing, Photographic, and Photomechanical Processes. New Brunswick, Canada: Atelier, 1990.
Norris, Terry O. "Preservation Photocopying Conference: Introductory Remarks and Historical Perspective." Restaurator 8 (1987): 3-8.
Pack, Thomas, et al. "UMI: History in the Making." Library Hi Tech 12 (3) 1994: 91-100.
White, Howard S. "Book Copiers: Past, Present, and Future." Restaurator 8 (1987): 18-28.
DIGITIZATION AND TECHNICAL ISSUES
Banks, Paul. "Conservation and Preservation," in Wayne Wiegand and Donald Davis, Encyclopedia of Library and Information Science. New York, N.Y.: Garland Publishing, 1994.
Child, Margaret S. "The Future of Cooperative Preservation Microfilming," Library Resources and Technical Services 29 (January/March 1985).
The Columbia University Libraries, Columbia University Libraries Selection Criteria for Digital Imaging. (14 January, 2001). Available at: http://www.Columbia.edu/cu/libraries/digital/criteria/htm.
Conway, Paul. Preservation in the Digital World. Washington DC: The Commission on Preservation and Access, 1996, p.4.
Cornell University. Moving Theory into Practice: Digital Imaging Tutorial. Available at: http://www.library.cornell.edu/preservation/tutorial/intro/intro-01.html.
Jackson, Joab. "The Guttenberg Age," Texas Technology, October 1999, p.37.
19
"Joint RLG and NPO Conference: Guidelines for Digital Imaging." Available at: http://www.bl.uk/services/preservation/gertz.html, p.2.
Kenney, Anne R. and Chapman, Stephen. Tutorial: Digital Resolution Requirements for Replacing Text-Based Material: Methods for Benchmarking Image Quality. The Commission on Preservation and Access, 1995.
Lee, Stuart D. Digital Imaging: A Practical Handbook. London, England: Library Association Publishing, 2001, pp.21-22.
Research Libraries Group and Commission on Preservation on Preservation and Access, Preserving Digital Information: Draft Report of the Task Force on Archiving of Digital Information. Version 1.0 August 23, 1995. URL: http://www.oclc.org:5046/~weibel/archtf.html. 10 Oct. 1999.
Russell, Kelly Russell, "Digital Preservation and the Cedar Project," Microfilm & Imaging Review 27:4, p.146.
Smith, Abby. Why Digitize? Washington D.C.: Council on Library and Information Resources, 1999.
Wells, Herbert George. World Brain. Freeport, N.Y.: Books for Libraries Press, 1938. See especially chapter 3, "The Idea of a Permanent World Encyclopaedia."
Willis, Don Willis. A Hybrid Systems Approach to Preservation of Printed Materials. Commission on Preservation and Access, November 1992, p.11.
Society of American Archivists. The Preservation of Digitized Reproductions. (9 June, 1997). Available at: http://www.archivists.org/governance/resolutions/digitize.html.
PROJECTS AVAILABLE ONLINE
The Australian Cooperative Digitization Project: University of Sydney Library,http://www.nla.gov.au/ferg/
The British Library Digital Library Program: Early Printed Collections: http://www.bl.uk/collections/epc/digipro/main.html
Cornell University: "Making of America Project" http://cdl.library.cornell.edu/moa
JSTOR: The Scholarly Journal Archive: www.jstor.org
Library of Congress: "American Memory" Historical Collections: http:// memory.loc.gov
New York Public Library: Digital Library Collection: http://digital.nypl.org/

20
----. "African American Women Writers of the 19th Century": http://digital.nypl.org/schomburg/writers_aa19/
Yale University: Project Open Book: http://www.library.yale.edu/preservation/pobweb.htm
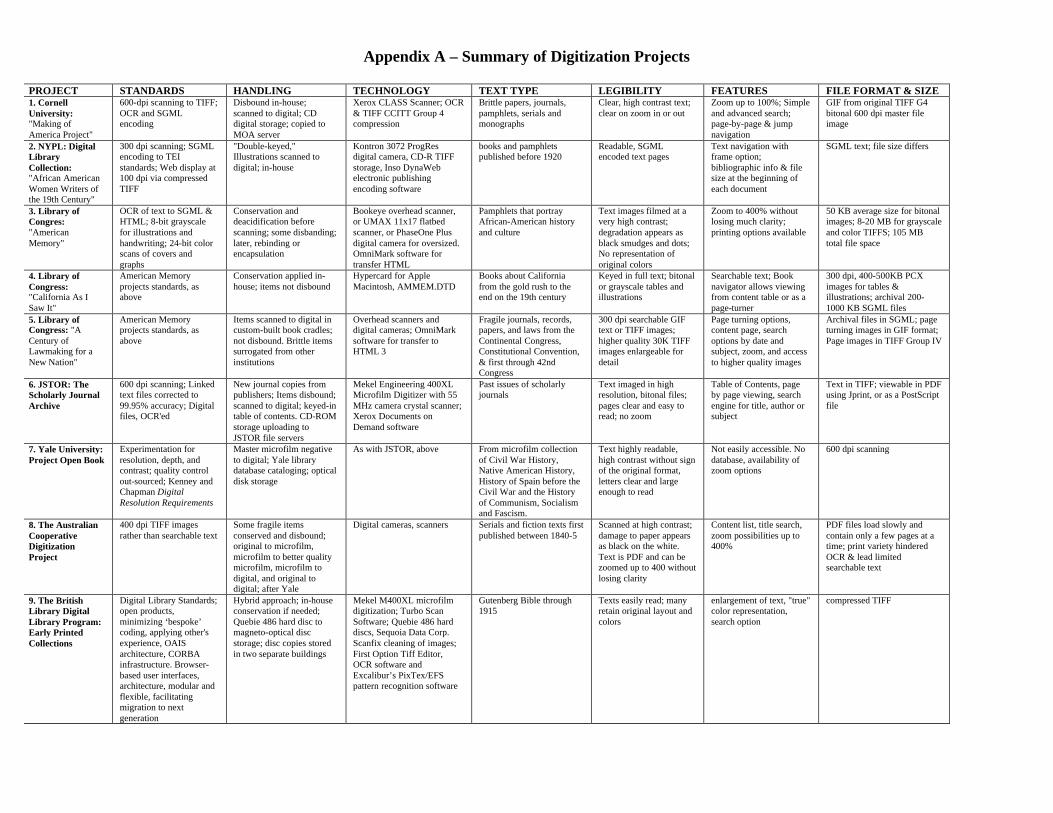
Appendix A – Summary of Digitization Projects
PROJECT STANDARDS HANDLING TECHNOLOGY TEXT TYPE LEGIBILITY FEATURES FILE FORMAT & SIZE 1. Cornell University: "Making of America Project"
600-dpi scanning to TIFF; OCR and SGML encoding
Disbound in-house; scanned to digital; CD digital storage; copied to MOA server
Xerox CLASS Scanner; OCR & TIFF CCITT Group 4 compression
Brittle papers, journals, pamphlets, serials and monographs
Clear, high contrast text; clear on zoom in or out
Zoom up to 100%; Simple and advanced search; page-by-page & jump navigation
GIF from original TIFF G4 bitonal 600 dpi master file image
2. NYPL: Digital Library Collection: "African American Women Writers of the 19th Century"
300 dpi scanning; SGML encoding to TEI standards; Web display at 100 dpi via compressed TIFF
"Double-keyed," Illustrations scanned to digital; in-house
Kontron 3072 ProgRes digital camera, CD-R TIFF storage, Inso DynaWeb electronic publishing encoding software
books and pamphlets published before 1920
Readable, SGML encoded text pages
Text navigation with frame option; bibliographic info & file size at the beginning of each document
SGML text; file size differs
3. Library of Congres: "American Memory"
OCR of text to SGML & HTML; 8-bit grayscale for illustrations and handwriting; 24-bit color scans of covers and graphs
Conservation and deacidification before scanning; some disbanding; later, rebinding or encapsulation
Bookeye overhead scanner, or UMAX 11x17 flatbed scanner, or PhaseOne Plus digital camera for oversized. OmniMark software for transfer HTML
Pamphlets that portray African-American history and culture
Text images filmed at a very high contrast; degradation appears as black smudges and dots; No representation of original colors
Zoom to 400% without losing much clarity; printing options available
50 KB average size for bitonal images; 8-20 MB for grayscale and color TIFFS; 105 MB total file space
4. Library of Congress: "California As I Saw It"
American Memory projects standards, as above
Conservation applied in-house; items not disbound
Hypercard for Apple Macintosh, AMMEM.DTD
Books about California from the gold rush to the end on the 19th century
Keyed in full text; bitonal or grayscale tables and illustrations
Searchable text; Book navigator allows viewing from content table or as a page-turner
300 dpi, 400-500KB PCX images for tables & illustrations; archival 200-1000 KB SGML files
5. Library of Congress: "A Century of Lawmaking for a New Nation"
American Memory projects standards, as above
Items scanned to digital in custom-built book cradles; not disbound. Brittle items surrogated from other institutions
Overhead scanners and digital cameras; OmniMark software for transfer to HTML 3
Fragile journals, records, papers, and laws from the Continental Congress, Constitutional Convention, & first through 42nd Congress
300 dpi searchable GIF text or TIFF images; higher quality 30K TIFF images enlargeable for detail
Page turning options, content page, search options by date and subject, zoom, and access to higher quality images
Archival files in SGML; page turning images in GIF format; Page images in TIFF Group IV
6. JSTOR: The Scholarly Journal Archive
600 dpi scanning; Linked text files corrected to 99.95% accuracy; Digital files, OCR'ed
New journal copies from publishers; Items disbound; scanned to digital; keyed-in table of contents. CD-ROM storage uploading to JSTOR file servers
Mekel Engineering 400XL Microfilm Digitizer with 55 MHz camera crystal scanner; Xerox Documents on Demand software
Past issues of scholarly journals
Text imaged in high resolution, bitonal files; pages clear and easy to read; no zoom
Table of Contents, page by page viewing, search engine for title, author or subject
Text in TIFF; viewable in PDF using Jprint, or as a PostScript file
7. Yale University: Project Open Book
Experimentation for resolution, depth, and contrast; quality control out-sourced; Kenney and Chapman Digital Resolution Requirements
Master microfilm negative to digital; Yale library database cataloging; optical disk storage
As with JSTOR, above From microfilm collection of Civil War History, Native American History, History of Spain before the Civil War and the History of Communism, Socialism and Fascism.
Text highly readable, high contrast without sign of the original format, letters clear and large enough to read
Not easily accessible. No database, availability of zoom options
600 dpi scanning
8. The Australian Cooperative Digitization Project
400 dpi TIFF images rather than searchable text
Some fragile items conserved and disbound; original to microfilm, microfilm to better quality microfilm, microfilm to digital, and original to digital; after Yale
Digital cameras, scanners Serials and fiction texts first published between 1840-5
Scanned at high contrast; damage to paper appears as black on the white. Text is PDF and can be zoomed up to 400 without losing clarity
Content list, title search, zoom possibilities up to 400%
PDF files load slowly and contain only a few pages at a time; print variety hindered OCR & lead limited searchable text
9. The British Library Digital Library Program: Early Printed Collections
Digital Library Standards; open products, minimizing ‘bespoke’ coding, applying other's experience, OAIS architecture, CORBA infrastructure. Browser-based user interfaces, architecture, modular and flexible, facilitating migration to next generation
Hybrid approach; in-house conservation if needed; Quebie 486 hard disc to magneto-optical disc storage; disc copies stored in two separate buildings
Mekel M400XL microfilm digitization; Turbo Scan Software; Quebie 486 hard discs, Sequoia Data Corp. Scanfix cleaning of images; First Option Tiff Editor, OCR software and Excalibur’s PixTex/EFS pattern recognition software
Gutenberg Bible through 1915
Texts easily read; many retain original layout and colors
enlargement of text, "true" color representation, search option
compressed TIFF
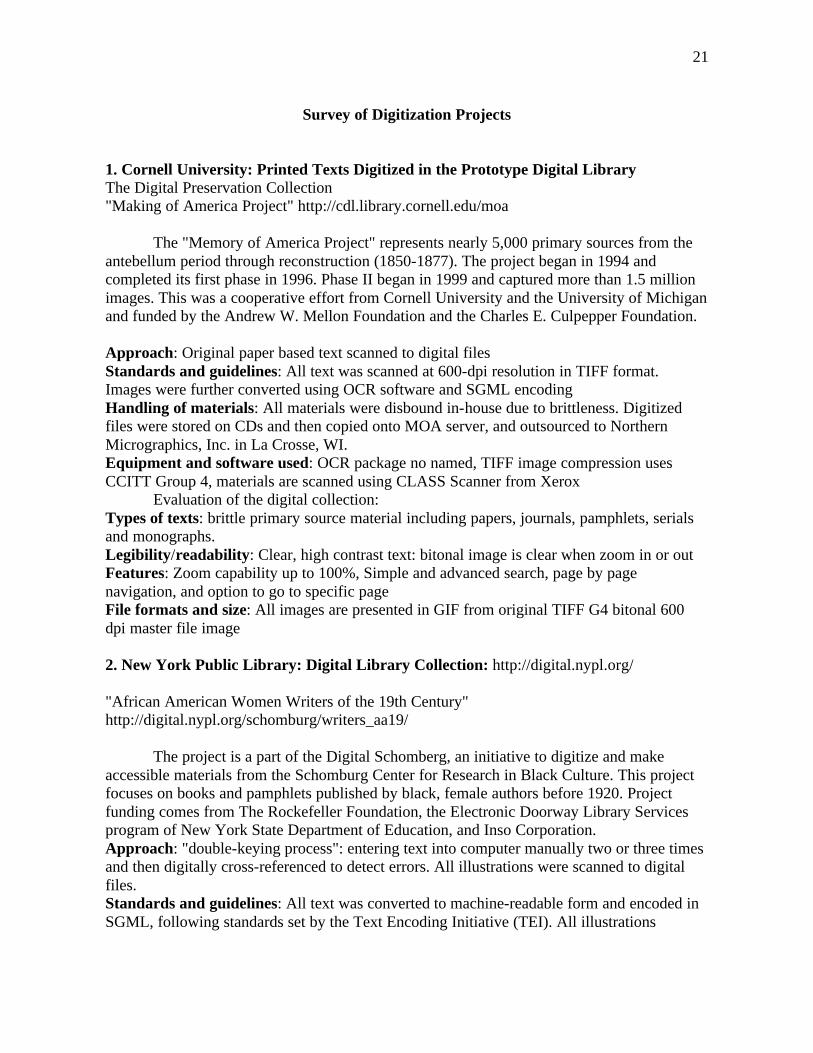
21
Survey of Digitization Projects
1. Cornell University: Printed Texts Digitized in the Prototype Digital Library The Digital Preservation Collection "Making of America Project" http://cdl.library.cornell.edu/moa The "Memory of America Project" represents nearly 5,000 primary sources from the antebellum period through reconstruction (1850-1877). The project began in 1994 and completed its first phase in 1996. Phase II began in 1999 and captured more than 1.5 million images. This was a cooperative effort from Cornell University and the University of Michigan and funded by the Andrew W. Mellon Foundation and the Charles E. Culpepper Foundation. Approach: Original paper based text scanned to digital files Standards and guidelines: All text was scanned at 600-dpi resolution in TIFF format. Images were further converted using OCR software and SGML encoding Handling of materials: All materials were disbound in-house due to brittleness. Digitized files were stored on CDs and then copied onto MOA server, and outsourced to Northern Micrographics, Inc. in La Crosse, WI. Equipment and software used: OCR package no named, TIFF image compression uses CCITT Group 4, materials are scanned using CLASS Scanner from Xerox Evaluation of the digital collection: Types of texts: brittle primary source material including papers, journals, pamphlets, serials and monographs. Legibility/readability: Clear, high contrast text: bitonal image is clear when zoom in or out Features: Zoom capability up to 100%, Simple and advanced search, page by page navigation, and option to go to specific page File formats and size: All images are presented in GIF from original TIFF G4 bitonal 600 dpi master file image 2. New York Public Library: Digital Library Collection: http://digital.nypl.org/ "African American Women Writers of the 19th Century" http://digital.nypl.org/schomburg/writers_aa19/ The project is a part of the Digital Schomberg, an initiative to digitize and make accessible materials from the Schomburg Center for Research in Black Culture. This project focuses on books and pamphlets published by black, female authors before 1920. Project funding comes from The Rockefeller Foundation, the Electronic Doorway Library Services program of New York State Department of Education, and Inso Corporation. Approach: "double-keying process": entering text into computer manually two or three times and then digitally cross-referenced to detect errors. All illustrations were scanned to digital files. Standards and guidelines: All text was converted to machine-readable form and encoded in SGML, following standards set by the Text Encoding Initiative (TEI). All illustrations
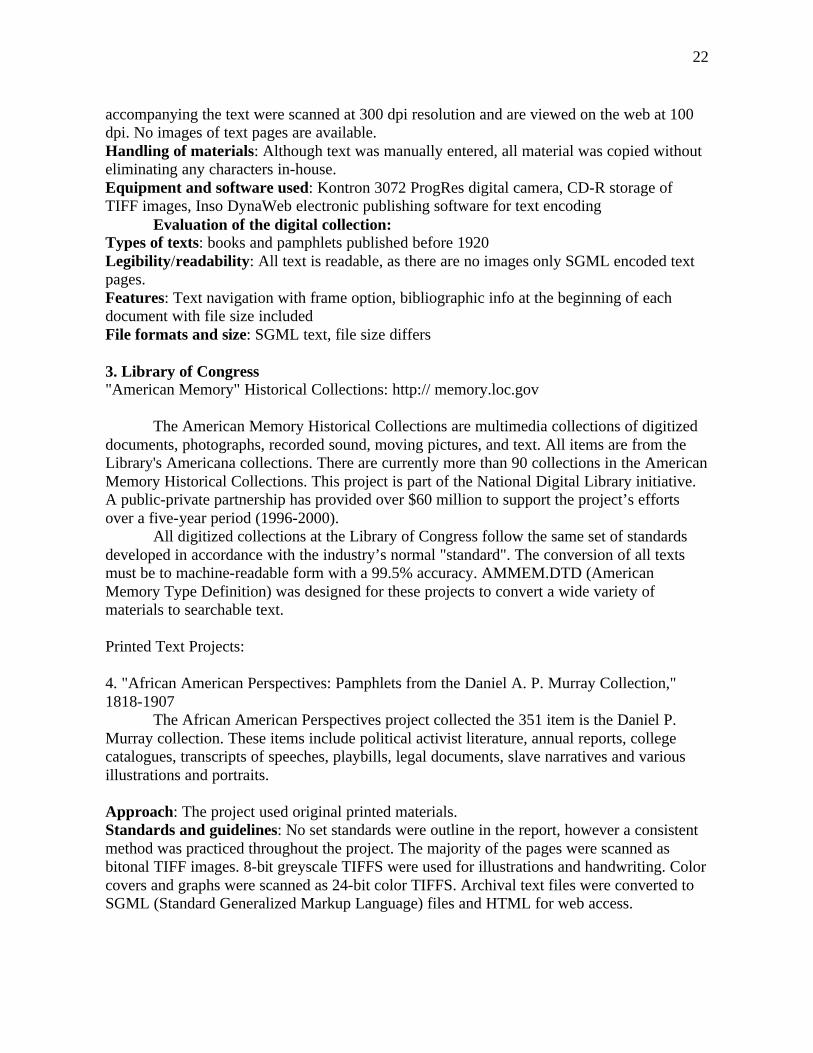
22
accompanying the text were scanned at 300 dpi resolution and are viewed on the web at 100 dpi. No images of text pages are available. Handling of materials: Although text was manually entered, all material was copied without eliminating any characters in-house. Equipment and software used: Kontron 3072 ProgRes digital camera, CD-R storage of TIFF images, Inso DynaWeb electronic publishing software for text encoding Evaluation of the digital collection: Types of texts: books and pamphlets published before 1920 Legibility/readability: All text is readable, as there are no images only SGML encoded text pages. Features: Text navigation with frame option, bibliographic info at the beginning of each document with file size included File formats and size: SGML text, file size differs 3. Library of Congress "American Memory" Historical Collections: http:// memory.loc.gov The American Memory Historical Collections are multimedia collections of digitized documents, photographs, recorded sound, moving pictures, and text. All items are from the Library's Americana collections. There are currently more than 90 collections in the American Memory Historical Collections. This project is part of the National Digital Library initiative. A public-private partnership has provided over $60 million to support the project’s efforts over a five-year period (1996-2000). All digitized collections at the Library of Congress follow the same set of standards developed in accordance with the industry’s normal "standard". The conversion of all texts must be to machine-readable form with a 99.5% accuracy. AMMEM.DTD (American Memory Type Definition) was designed for these projects to convert a wide variety of materials to searchable text. Printed Text Projects: 4. "African American Perspectives: Pamphlets from the Daniel A. P. Murray Collection," 1818-1907 The African American Perspectives project collected the 351 item is the Daniel P. Murray collection. These items include political activist literature, annual reports, college catalogues, transcripts of speeches, playbills, legal documents, slave narratives and various illustrations and portraits. Approach: The project used original printed materials. Standards and guidelines: No set standards were outline in the report, however a consistent method was practiced throughout the project. The majority of the pages were scanned as bitonal TIFF images. 8-bit greyscale TIFFS were used for illustrations and handwriting. Color covers and graphs were scanned as 24-bit color TIFFS. Archival text files were converted to SGML (Standard Generalized Markup Language) files and HTML for web access.

23
Handling of materials: This was the first opportunity for the items in this collection to have any sort of conservation treatment. Dirt, tears, losses and brittleness required that forty-two items underwent prescanning treatment. When pamphlets could not be opened to a 90-degree angle due to original sewing structure, the items were disbound and rebound. Polyester film encapsulation was used for extremely brittle pieces. Before scanning, all pieces were deacidified using aqueous and non-aqueous methods. Items were also mended, and rehoused when needed. Method: All scanning was performed onsite at the Library of Congress by Systems Integrated Group of Lanham, Maryland. Equipment and software: Most pages were scanned using a Bookeye overhead scanner. Smaller, disbound or single leaf items were scanned on a UMAX 11 x 17 flatbed scanner. Any items that could not be scanned due to size were scanned with a PhaseOne Plus digital camera mounted on an overhead Toyo 4 x 5-studio camera. OmniMark software was used to transfer all files to HTML 3.2. Evaluation of the digital collection: Types of texts: The text includes pamphlets that portray African-American history and culture. Legibility/readability: The pages that can be viewed as images of the original text are filmed at a very high contrast. The pages appear to be very white with dark, printed letters. All signs of degradation appear as black smudges and dots. No representation of the original colors can be seen. Features: The images offer a zoom capability of up to 400% without losing much clarity. Printing options are available File formats and size: The average file size for bitonal images was 50 KB, where as greyscale and color TIFFS range from 8-20 MB. The total file space for digital reproduction was 105 MB. Notes: When accessing the materials online, the user was able to view a rekeyed version of each document. This is presented with no reference to the original layout of the pamphlet. Only a few pages are available for viewing. 5. "California As I Saw It: First-Person Narratives of California's Early Years, 1849-1900" This program was initiated as part of the American Memory pilot program in 1990 and continued on through 1993. In 1996, a team returned to the California project and applied new technologies. Approach: Original printed matter to digitized files Standards and guidelines: This project followed the standards set for all American Memory projects. Handling of materials: Where needed, conservation treatment was undertaken. Items were not disbound and were filmed to respect the fragile nature of the materials all in-house. Equipment and software used: Hypercard for Apple Macintosh, AMMEM.DTD Evaluation of the digital collection: Types of texts: Books that represent the formation of California from the gold rush to the end on the nineteenth century.
24
Legibility/readability: No images are available for the text part of the pages. Keyed in full text is available for all items. Images of illustrations and tables are available as bitonal or in greyscale. Features: Searchable text; Book navigator allows viewing of content table or as a page-turner. File formats and size: 300 dpi for images of illustrations or tables in 400-500KB in PCX format. Archival file in SGML format with a size of 200-1000 KB 6. "A Century of Lawmaking for a New Nation: U.S. Congressional Documents and Debates, 1774-1873" The idea to digitize material from the Law Library of Congress was developed in 1995. Digital conversion of text began in 1997 and is still in progress. Approach: Printed material scanned or captured using digital cameras to convert information to digital SGML, TIFF and GIF files. Materials: Britle books, journals and papers Standards and guidelines: This project follows the standards outlined by the library of Congress for all digitization projects. Handling of materials: No items were disbound for this project. Every volume was examined to determine the condition. Custom-built book cradles were developed for problematic texts. When items were too fragile, volumes were borrowed from other institutions to complete the project. Equipment and software: Because items remain bound, equipment was chosen that placed minimum stress on the items. Overhead scanners and digital cameras were used to capture images. OmniMark software was used to translate text to HTML 3.2 Evaluation of the digital collection: Types of texts: Jouranals, records papers and laws from the first through the forty-second Congresses and records of the Continental Congress and the Constitutional Convention. Most items are fragile. Legibility/readability: All items are offered as searchable, GIF text or as TIFF images. In order to zoom, the higher quality, TIFF, 30K image must be accessed. The images are readable and can be enlarged for examining closer detail. Items are filmed at 300 dpi. Features: Page turning options, content page, search options by date and subject, zoom, and access to higher quality images File formats and size: Archival files are in SGML; page turning images are in GIF format and Page images are in TIFF Group IV format 7. JSTOR (Journal Storage): The Scholarly Journal Archive: www.jstor.org The JSTOR project was conceived by William Bowen of the Andrew W. Mellon Foundation to help combat the ever-depleting shelf space in libraries. The goal of the project was to convert back issues of paper journals into digital format. The pilot project included five universities and 750,000 pages. The project is now an ongoing effort and has expanded its collection. JSTOR is based out of offices in New York, New York, Ann Arbor, Michigan,
25
and Princeton New Jersey. The project started in 1995. Materials became available for access in 1997. Approach: paper originals scanned to digital image files, keyed in table of contents Standards and guidelines: 600 dpi resolution is required of all texts. All Linked text files must be corrected to a 99.95% accuracy level. Each items will generate a page image, an OCR text file and a table of contents file. Handling of materials: In many cases, physical copies are obtained from the publisher. Items are disbound and separated into units before scanning. Once file has been made, all information is downloaded to CD-ROM and then uploaded to the JSTOR file servers. Method: Coalition and preparation are accomplished in-house at the University of Michigan or at Princeton University and then shipped to an out of house contractor for scanning. Equipment and software used: OCR software (software package not named), Cartesian Perceptual Compression (CPC) TIFF reproduction format by Cartesian Products Evaluation of the digital collection:Types of texts: Past issues of scholarly journals Legibility/readability: All text is imaged in high resolution, bitonal files. Pages are clear and easy to read. Zoom options are not available. Features: Table of Contents, Page by page viewing, search engine allows detailed search of text, title, author or subject. File formats and size: Text files are presented in TIFF format and may be viewed in PDF format, using Jprint, or as a PostScript file 8. Yale University: Project Open Book Project open book is program that has set out in 1991, being still in progress, to develop and explore the cost and possibility of converting microfilm to digital images. Thus, the project was intended to act as a research opportunity while enhancing access. Both the Commission on Preservation and Access and the National Endowment for the Humanities have contributed financial support for the development of the project. Project Open Book is a cooperative effort with the Xerox Corporation. Approach: A three part phased sequence that captures microfilm to digital images. Standards and guidelines: The appropriate resolution, depth, and contrast were determined using experimentation and no formal standard guideline. In referencing quality criteria, the project staff consulted Ann Kenney and Stephen Chapman’s Digital Resolution Requirements for Replacing Text Based Material: Methods for Benchmarking Image Quality (Commission on Preservation and Access, 1995.). Handling of materials: Microfilm was collected from the Yale holdings and was converted from the master negative copy to digital images. Once this had been accomplished, digital images were catalogued in the Yale library database and all images were stored on optical disks and housed. The original microfilm was returned to its preservation storage. Method: The second phase of the project concentrating on developing and in-house conversion lab. All scanning and handling was performed in this lab.
26
Equipment and software used: A Mekel Engineering 400XL Microfilm Digitizer with 55 MHz camera crystal scanner was used for all image captures. Xerox Documents on Demand software. A further list of all software and hardware used along with a list of all of the technical manuals utilized in each part of the project can be found at: www.library.yale.edu/preservation/pobequip.htm Problems and challenges: Because of the frailty of the original books, many original volumes are gone. Thus, quality checks with the original are impossible. Technical problems due to the quality of the microfilm included skewed frames, significant density variation across a frame, internal film splices, irregular spacing of frames. Evaluation of the digital collection: Types of texts and Selection: Printed text selected from a large collection of preservation microfilm that included the Civil War History Collection, the Native American History Collection, History of Spain before the Civil War and the History of Communism, Socialism and Facism. Each of these collections was filmed for microfilm preservation as part of the National Endowment for the Humanities’ Brittle Book Program. Microfilm that was expected to receive a large amount of use was targeted for digitization. Legibility/readability: The samples that I accessed were very readable. The contrast was high and there was no sign of the original format. The letters were clear and large enough to read. File formats and size: Each item was scanned at a resolution of 600 dpi. Notes: At this time, Project Open Book is not easily accessible. In fact, samples are currently on the web, however, a database and general access sight has not been established. Thus, searching the text and zoom options are not available at this time, but are being planned for. 9. The Australian Cooperative Digitization Project: University of Sydney Library, the State Library of New South Wales, the National Library of Australia and Monash University Library The Australian Cooperative Digitization Project is also known as Ferguson 1840-45. The project looks to provide better access to the nineteenth century material listed in Fergusen’s Bibliography of Australia. The two parts of this program focus on: 1) All Australian serials and 2) All Australian fiction published during the stated years. The full content of text and images is to be fully accessible on the internet. Funding for the project is provided by an Australian Research Council Infrastructure Grant through the Department of Employment, Education and Training. Proposed as a microfilming project in the late 1980s but never realized, the project was rekindled in 1994 after the first National Preservation Office conference which explored the history of microfilming and digital conversion. Approach: hybrid: original to microfilm, microfilm to better quality microfilm, microfilm to digital, and original to digital; The Yale University method of filming and then scanning was used Standards and guidelines: It was decided that all items would be presented as TIFF images rather than searchable text. The resolution was decided as 400 dpi.

27
Handling of materials: All materials were kept in original binding when possible. Some items were extremely fragile and required some conservation treatment and, in a few cases, disbinding. Method: The process was carried out at the different participating institutions. Each institution worked in collecting and preparing the materials. For the fiction collection, Monash University Library is performing all OCRing. Equipment and software used: Digital cameras, scanners Evaluation of the digital collection: Types of texts: All serials and fiction texts first published between 1840-45. Legibility/readability: Scanned with high contrast. Image represents bright white background with black letters. All damage to the paper also appears as black on the white. Text is PDF format and can be zoomed without losing clarity up to 400%. Features: Content list, title search, zoom possibilities up to 400% File formats and size: User can access the images in PDF files. Notes: The PDF files load rather slowly and only contain a few pages at a time, Page turning is not an option. The project has taken longer and has cost quite a bit more than was originally forecast. The difficult nature of the variety of printed texts at the time has made the OCRing difficult and has lead to limitations in searchable text. 10. The British Library Digital Library Program: Early Printed Collections: http://www.bl.uk/collections/epc/digipro/main.html Year: The British Library launched its Digital Library in 2000. Approach: Hybrid Standards and guidelines: standards outlined by the digital Library system are:standard, open products should be used wherever possible, ‘bespoke’ coding should be minimised, experience and solutions from other, successful digital library solutions and projects should be reused, the architecture should conform to the OAIS model and exploite the Library's CORBA infrastructure; all user interfaces should be browser-based, the architecture should be modular and flexible, to facilitate migration to next generation hardware in due course, to support new object types and to interface to future British Library systems, the design must be extraordinarily scalable, data integrity must be guaranteed, with comprehensive logging of every system and user activity to help guide enhancement strategies. Handling of materials: materials were kept in original bindings. Treatment was given where needed. Images are stored on Quebie 486 hard disc for transfer to magneto-optical discs. Two disc copies are made and stored in separate buildings. Method: in-house Equipment and software used: Mekel M400XL for microfilm digitization, Turbo Scan Software to drive the system, Quebie 486 hard discs, Scanfix from Sequoia Data Corporation for cleaning up images and Tiff Editor designed for the British Library by First Option, OCR software and Excalibur’s PixTex/EFS pattern recognition software Evaluation of the collection: Types of texts: Early printed texts starting with the Gutenberg Bible through to 1915 Legibility/readability: texts are easily read and obtain a sense of the true because many retain original layout and colors

28
Features: enlargement of text, "true" color representation, search option File formats and size: Images are presented in compressed TIFF files
29
Digitization of “The Wetbacks in the Lower Rio Grande Valley of Texas”
“The Wetbacks in the Lower Rio Grande Valley of Texas” is a paper written by Lyle
Saunders and Olen Leonard. It appears in “Inter-American education: occasional papers”, a
collection of papers concerned with the Spanish speaking population of Texas. Once
completed this text will act as additional material for the digitized Sanchez photograph
collection.
The original consisted of one large gathering that was stapled in the folds. The paper
consists of ninety-two 6 ¾” x 10” pages and is printed on coated glossy white paper in black
letters The paper is still flexible but shows slight signs of discoloration due to mild
degradation. Together with eight other papers, it is bound in a brown pamphlet binder. Holes
have been punched into the margin and threaded with red and green string. Due to the
weakness of this binding method, some pages are loose in the middle of the paper, but no
pages are missing.
The condition of the paper is very good. Thus, the imaging, OCRing and markup of
the text are for access purposes only. The original will be returned to the stacks once the
project is completed.
30
Image Capture The Scanner and its settings:
For this project, we used the UMAX MagicScan flatbed scanner. We scanned at 400
dpi for printing purposes, remembering to reduce resolution later to 72 dpi for Internet
display. Data creators must consider monitor resolutions of end users (96 dpi) and printer
resolutions: 600 dpi for desktop laser printers and 300-600 dpi for ink-jet printers. Data
creators also must consider file size, proportional to the pixel dimensions of an image and
somewhat dependent on file format. Even though our document was not a brittle book, we
scanned at a higher resolution on grayscale mode because of the loss of contrast between the
image and the dark pages. Grayscale scanning captures images with greater fidelity than does
bi-tonal scanning.
The system:
The TWAIN multi-platform scanner interface serves as an intermediary between the
scanner and the "Photoshop" image manipulation program on a micro-computer. TWAIN
offers a predictable and user-friendly interface.
Scanning steps:
We put dark cardboard behind pages to avoid bleed-through of reverse side images,
scanned two pages at once, and then processed each page separately.
Scanning step 1: Evaluate the original image and determine its purpose: printing or Internet display.
Scanning step 2: Preview the image: This preliminary, low-resolution scan required about a minute and allowed adjustment of the position of the subject on the scanner glass.
Scanning step 3: Scan: To acquire the best image, we flattened the subject to the glass as much as was possible and safe. Scanning required about 2 minutes at 400 dpi.
Scanning step 4: Evaluate the scan: We examined the scanned image to verify that the scanner adequately captured the image.
31
Scanning step 5: Crop the page (through the tool-box of Photoshop): We used the marquee tool and placed the rectangle shape around the document. We cropped the left page first to adjust the angle of the page and then expanded the tool to include the right page.
Scanning step 6: Image - Adjust - Levels: The Photoshop histogram shows values of gray from white to black and their values, with the left at black (0 to 45 values) and the middle field controlling gamma. On the histogram, we adjusted the contrast by dragged the black range slider on the left to the starting point of histogram values. We adjusted the contrast -- grid range - middle-midrange -- to a value of 1,2 (usually it lies between 1,1 and 1,4). The Adjust command allowed re-mapping of pixel values to adjust the tones of the scanned image. The Adjust histogram plots the tonal range/distribution of brightness levels from black to white through 256 vertical lines.
Scanning step 7: Repair any image flaws: We removed elements that needed removing.
Scanning step 8: Save the file as: We saved this image as "page 4849.tif" to indicate pages 48 and 49 of the subject.
Scanning step 9: Starting a new scan: File: Import: MagicScan.
PHOTOSHOP ENHANCEMENT
Having captured the image of two pages, we then began the process of image
enhancement. Tim, our team's data creator, has used "Photoshop" for four years, and his
experience helped us to make the pages uniform, at exactly the same placement and with each
page looking as much like each other as possible.
Image enhancement has five major components:
Adjust image size, View guidelines, Rotate the image, Separate layers, Flatten layers, Save the image.
Executing all these components usually required six to eight minutes, with ten minutes being
the maximum and approximately 20 minutes being the required time while learning. First,
32
Tim separated the double pages and selected one with the marquee tool from the Photoshop
toolbar. He copied this page to a new file, processed it, and then processed the second page.
Component 1: Image size:
Tim used the same image size values for each page: width 2484 pixels; height 3944
pixels. According to Tim, size is subjective and comes with long experience. The change of
size automatically changes the resolution, e.g., a reduced image size means higher resolution.
If we change the values in the "image size dialog" table, this changes the size without
affecting the resolution.
Common errors: Too much up sampling. Photoshop might add pixels where none existed
(interpolation, or guessing). Photoshop guesses poorly, and the result could appear pixilated.
Component 2: Guidelines: View: hide/show guides: this command reveals all existing guides,
which are non-printing horizontal or vertical lines, similar to the blue lines drawn in
conventional page design. Clicking and dragging from the horizontal ruler can create this
guide.
Magnifying tool: image canvas: The magnification box in the lower left corner of the window
displays the current zoom percentages.
Component 3: Rotating: Image: Rotate canvas. This command rotates the entire canvas. The
transform options are by degrees (180, 90 CW, or 90 CCW) or arbitrary. The arbitrary option
allows the user to define any amount, adjusting until the blue guideline parallels the text. The
angle can be adjusted CW or CCW. Another method involves edit and rotate. Rotating an
image enlarges the canvas, so the image size should be verified after rotation.
Component 4: Layers: Background layer. See page: Go Layer: Background: Crop. Duplicate
background layer. This command, duplicate the background layer, allows hiding or deleting
33
the original background layer. Chose the background layer, and select the duplicate layer from
the Layers Palette submenu.
Layers organize and manage the various components of the image (background, text,
image, and graphics for instance). Placing elements on a separate layer allows editing and
arrangement without interfering with other layers. Thus, each image is a composite of
different layers or channels. For example, text can be moved against the background and the
guidelines to place it exactly as in other images.
Component 5: Flattening image: Layer: Flatten image. This step converts all layers to a single
layer.
Common error: Increasing the image dimensions using Image: Canvas size fills the new
pixels in the background layer with the current background color.
Component 6: Saving: File: save a copy: This command allows us to save a separate, flattened
copy of the open image into any available file format. We saved this image as Page 48.tif and
discarded the previous scan. At this time, the processed image could be duplicated, and the
duplicate saved at 72 dpi for Internet publishing. We then repeated the six components,
processing the second page of the original scan. Each page image required 9.3 MB, while
each 72 dpi image required 0.3 MB (a typical CD holds 650 MB). We chose CD as the
primary storage and access medium and magnetic tape as the backup medium.
Note: "Photoshop" works well with image manipulation but less well with text files because it
is pixel based and involves interpolation, the trade word for guessing. Interpolation creates
risks, for example, during over-adjusting the tonal range. Expanding the tonal range beyond
certain limits, does not create new values but spaces existing tones further apart to cover a
broader range. Visible shade stepping might occur. Many digital creators prefer the software
34
"Illustrator" for text-based documents because it is vector based and not as subject to errors of
interpolation.
Optical Character Recognition (OCR)
Once all pages were scanned and all images saved, the pages were run through OCR
software to make the text searchable. For the project we used Prime Recognition’s
PrimeOCR Software.
Considered one of the best programs for character recognition, the program is
advertised as 98% accurate. PrimeOCR uses “Voting” OCR technology. This runs various
OCR programs on unclear text and then produces the character voted on by the majority of
the programs. This allows for a consensus and reduces the number of errors. The software
also allows for output into ASCII, RTF, PDF, PRO and HTML formats.
Unfortunately, during the course of OCRing the text, we encountered many problems
with PrimeOCR. The text included a large number of tables, foreign characters, and
superscript. Each of these caused extreme problems once a page had been through the OCR
software and in many cases destroyed the original layout of the page. Maps symbols,
smudges, and the “%” were also always flagged. The program was unable to “learn” and
would mark the same character over and over again. As we worked with the program, we
realized just how far OCR still has before it can be an easy solution for producing searchable
text. In some cases, it may be easier and less time consuming to re-key a text rather than
battling the inability of an OCR program.
35
Markup
After applying the OCR software, we exported the files as HTML and opened them in
Internet Explorer. Unfortunately, PrimeOCR had very limited HTML exporting capabilities.
The resulting file was full of unnecessary tags and the software misinterpreted most of the
document’s formatting. We found it necessary to do the markup ourselves and re-exported
the files as text. Using Notepad, we began by adding standard HTML headers and identifying
the title and page number of the document. Although we had access to the scanned images
and could have used them as a reference source for formatting, we found ourselves using the
original document for this purpose.
Due to our very limited knowledge of HTML, we were unable to perfectly replicate
the formatting of the original document. Even attempting to approximate the general format
(i.e., paragraphing, font sizes, etc.) was difficult for us, and marking up just nine pages took
us 2 hour and 15 minutes. Due to time constraints, we were only able to view our document
in one browser, Internet Explorer.
Conclusion
Although we are satisfied with our end product, we realize that our work on this
project is far from what it would take to produce a product suitable for Internet access. Had
we had time, we would have rescanned a few pages (the Preface, for example), spent more
time modifying format during OCR verification, and we would have viewed our final product
with a variety of browsers to ensure usability. The most important lesson we take away from
this project is that adding value to printed text through OCRing and markup is time
36
consuming and complex. Any full-scale digitization project requires the commitment of
trained staff knowledgeable in several areas of computer applications, including file formats,
software and hardware capabilities, and markup languages.