diamond day - robert kaufman
TRANSCRIPT

Diamond Day
Designed by Robert Kaufman Fabrics
Finished quilt measures: 70” x 90”Shown in Spring Colorstory. For alternate colorstories see pages 5 & 6.
Pattern Level: Confident Beginner
“I have basic block construction down and would like to learn a new trick!”
Featuring
7” +seam allowance
page 2
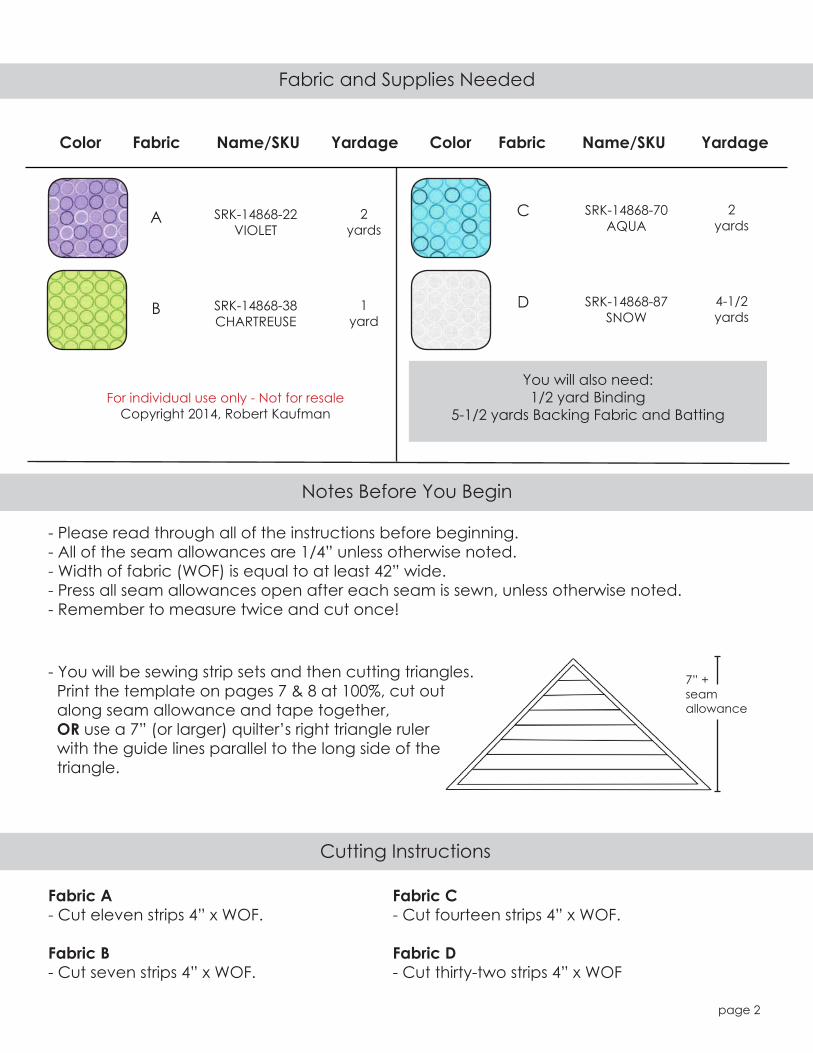
Color Fabric Name/SKU Yardage
C
B SRK-14868-38 CHARTREUSE
SRK-14868-70 AQUA
1yard
2yards
Color Fabric Name/SKU Yardage
Notes Before You Begin
- Please read through all of the instructions before beginning.- All of the seam allowances are 1/4” unless otherwise noted. - Width of fabric (WOF) is equal to at least 42” wide.- Press all seam allowances open after each seam is sewn, unless otherwise noted.- Remember to measure twice and cut once!
For individual use only - Not for resaleCopyright 2014, Robert Kaufman
You will also need:1/2 yard Binding
5-1/2 yards Backing Fabric and Batting
A SRK-14868-22 VIOLET
2yards
D SRK-14868-87 SNOW
4-1/2yards
Cutting Instructions
Fabric and Supplies Needed
Fabric A
- Cut eleven strips 4” x WOF.
Fabric B
- Cut seven strips 4” x WOF.
- You will be sewing strip sets and then cutting triangles. Print the template on pages 7 & 8 at 100%, cut out along seam allowance and tape together, OR use a 7” (or larger) quilter’s right triangle ruler with the guide lines parallel to the long side of the triangle.
Fabric C
- Cut fourteen strips 4” x WOF.
Fabric D
- Cut thirty-two strips 4” x WOF

- Using the assembly diagram on page 4 as a guide, sew two triangles, long sides together. Trim block to 10-1/2” if necessary.
- Repeat to make sixty-three blocks.
Step 1: Make Strip Sets
- Sew strips, long sides together, into sets of two strips each. Each Fabric A, B and C strip will be matched up with a Fabric D strip. Press seams open.
�7LS��3LQ�VWULSV�WRJHWKHU�ZKLOH�WKH\�DUH�OD\LQJ�ÁDW�RQ�D�WDEOH���7KLV�ZLOO�DYRLG�ZDUSLQJ������/LJKWO\�VWDUFK�WKH�VWULS�VHWV��RQFH�VHZQ��WR�PDNH�WKHP�HDVLHU�WR�FXW�LQWR�WULDQJOHV�
Fabrics A & DMake eleven strip sets
Fabrics B & DMake seven strip sets
Fabrics C & DMake fourteen strip sets
Step 2: Cut Triangles
- Using the template or a ruler, cut four triangles from each strip set. Make sure that the center horizontal line is lined up with the center seam as you cut.
A
D
B
D
C
D
Step 3: Make Blocks
page 3
Assembly Instructions

page 4
Your quilt top is complete! Baste, quilt, bind & enjoy.
Step 4: Assemble Quilt Top
- Sew blocks into nine rows of seven blocks each and then sew rows together to make the quilt top.

Color Fabric Name/SKU Yardage
C
B SRK-14868-10 PINK
SRK-14868-110 HOT PINK
1yard
2yards
Color Fabric Name/SKU Yardage
You will also need:1/2 yard Binding
5-1/2 yards Backing Fabric and Batting
A SRK-14868-3 RED
2yards
D SRK-14868-87 SNOW
4-1/2yards
Fabric and Supplies Needed
Sweetheart Colorstory
page 5
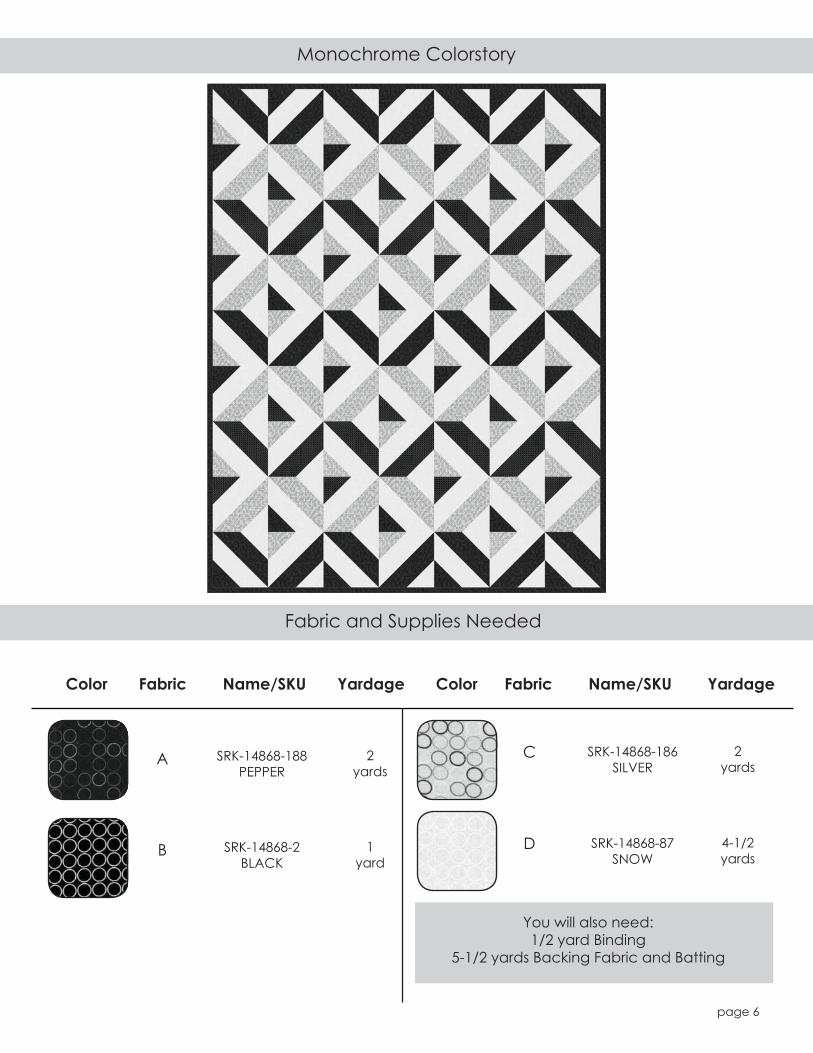
Color Fabric Name/SKU Yardage
C
B SRK-14868-2 BLACK
SRK-14868-186 SILVER
1yard
2yards
Color Fabric Name/SKU Yardage
You will also need:1/2 yard Binding
5-1/2 yards Backing Fabric and Batting
A SRK-14868-188 PEPPER
2yards
D SRK-14868-87 SNOW
4-1/2yards
Fabric and Supplies Needed
Monochrome Colorstory
page 6

