design for manufacturing - class 11 - design for manual assembly part 1: techniques
TRANSCRIPT

DRAGON INNOVATION, INC.
DESIGN FOR MANUFACTURING (AND ASSEMBLY)
COURSE 11: DESIGN FOR MANUAL ASSEMBLYPART 1: TECHNIQUES
SCOTT N. MILLER | CEO | @DRAGONINNOVATE | WWW.DRAGONINNOVATION.COM

Recommended References

Design for Assembly Goal
Reduce part count & assembly time to improve quality, reduce cost and accelerate schedule.

Why Is Reducing Part Count Important?•Reduced jigs and fixtures (lower cost)•Less documentation •Fewer number of different parts to keep in inventory •Fewer suppliers •Simplified production control •Fewer Inspections •Less Rework•Lower Tolerance stack-up•Lower overall material and tooling costs-Improved overall quality

Types of Assembly

Manual Assembly
• Operations performed with simple, general purpose tools (benches, screwdrivers, belts, etc.)
• Bins with typically un-oriented parts.
• Simple clamping fixtures.
• Flexible and adaptable.
• Cost is not a function of volume. Instead, function of labor rate.
• Good for low to high volume.
- Very low capital investment.
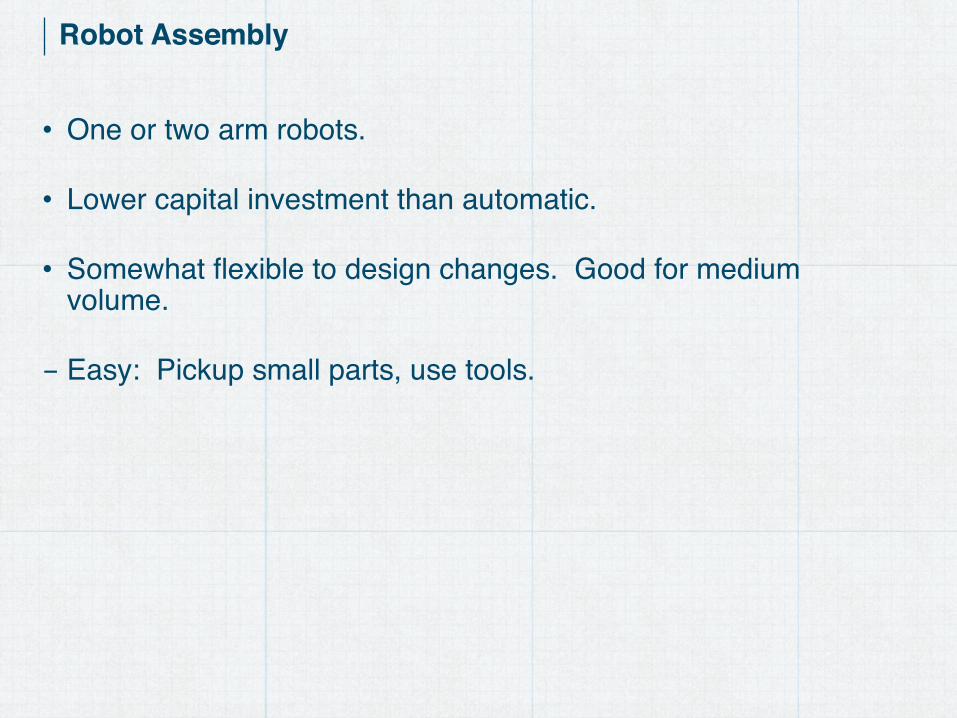
Robot Assembly
• One or two arm robots.
• Lower capital investment than automatic.
• Somewhat flexible to design changes. Good for medium volume.
- Easy: Pickup small parts, use tools.

Automatic Assembly
• Machines dedicated to a specific product.
• Automatic part feeders.
• Inflexible. Not tolerant of design changes.
• Parts transferred by machines.
• Require significant capital investment, engineering and schedule.
• Down time is disastrous.
• QC must be stringent.
- Cost decreases with volume. Used for high volume.
Integrated Fasteners

Common Assembly Methods•Screw Bosses (Self-locating)•Press Fit•Snap Clip•Ultra-sonic Welding•Cold / Heat Staking•Living Hinge•Solvent Bonding
•Adhesive•Hot Plate•Laser•Inductive Welding•Spin Welding-Vibration Welding
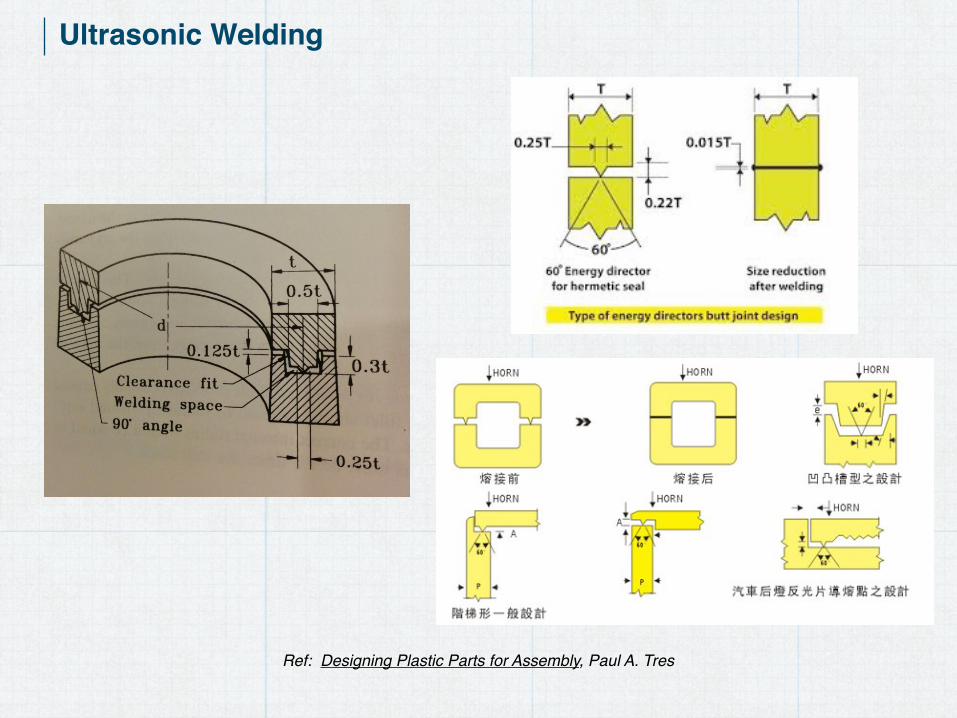
Ultrasonic Welding
Ref: Designing Plastic Parts for Assembly, Paul A. Tres
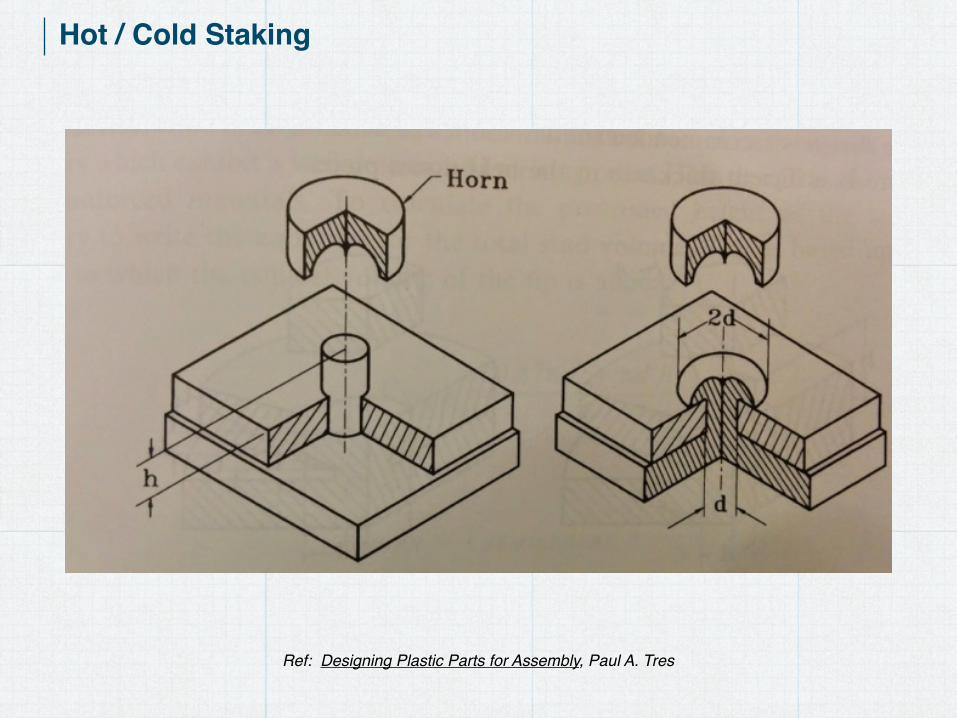
Hot / Cold Staking
Ref: Designing Plastic Parts for Assembly, Paul A. Tres

Hot Plate
Ref: Designing Plastic Parts for Assembly, Paul A. Tres

Living Hinge
Ref: Designing Plastic Parts for Assembly, Paul A. Tres

Snap Clip
Ref: Designing Plastic Parts for Assembly, Paul A. Tres

DFA Techniques for Manual Assembly

Manual Assembly Challenges
Ref: Product Design for Manufacture and Assembly, Geoffrey Boothroyd, Peter Dewhurst and Winston A. Knight.

Manual Challenges
Ref: Product Design for Manufacture and Assembly, Geoffrey Boothroyd, Peter Dewhurst and Winston A. Knight.

DFA Overall Design Guidelines•Determine if part is needed or can be combined with another:
•Relative Motion
•Different Material
•Required for Assembly
•Optimize to eliminate adjustments
•Design parts to be self-aligning and self-locating
•Use standardized parts across product.
•Design to be robust to sloppy tolerances.
•Ensure adequate access and unrestricted vision.
•Ensure the ease of handling of parts from bulk bins
-Minimize the need for reorientations during assembly

Design Parts So They Can Only Be Installed Correctly
•Provide features that force correct assembly.•Make mating features grossly asymmetric. •Make parts symmetrical so that orientation is unimportant. •If two parts can be assembled incorrectly, ensure that assembly of some subsequent part is impossible. •Mark part with assembly markers for identification. -Eliminate flexible parts that can be assembled incorrectly.

Best Practices
Ref: Product Design for Manufacture and Assembly, Geoffrey Boothroyd, Peter Dewhurst and Winston A. Knight.

Use a Base / Chassis
Ref: Product Design for Manufacture and Assembly, Geoffrey Boothroyd, Peter Dewhurst and Winston A. Knight.
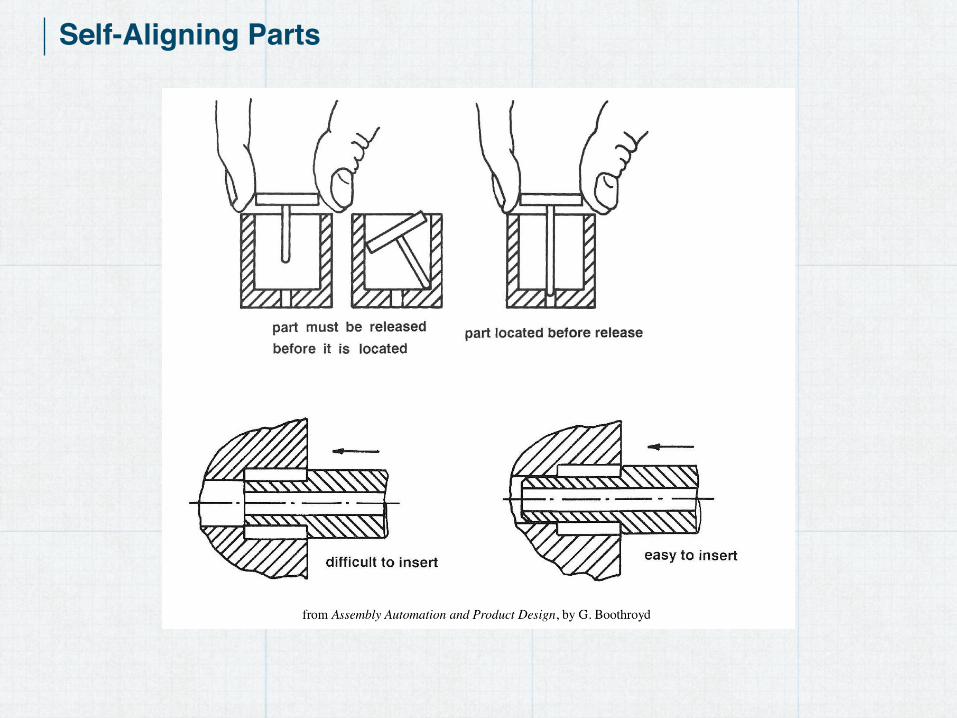
Self-Aligning Parts

Non-Jamming
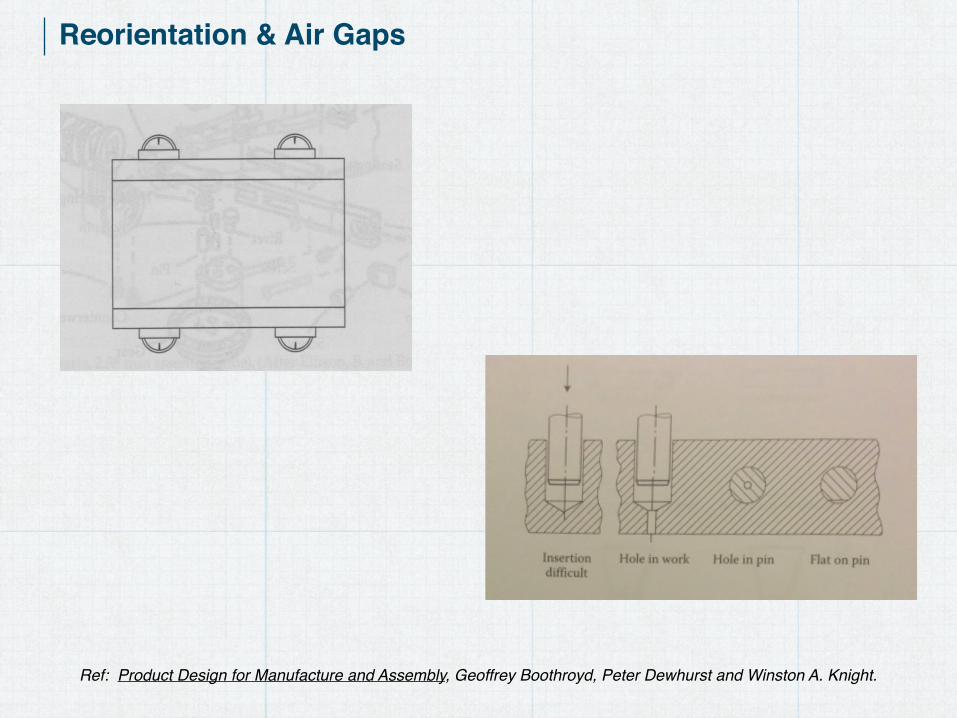
Reorientation & Air Gaps
Ref: Product Design for Manufacture and Assembly, Geoffrey Boothroyd, Peter Dewhurst and Winston A. Knight.

Examples

Which is Better?
Ref: Product Design for Manufacture and Assembly, Geoffrey Boothroyd, Peter Dewhurst and Winston A. Knight.

Which is Better?
Ref: Product Design for Manufacture and Assembly, Geoffrey Boothroyd, Peter Dewhurst and Winston A. Knight.

Which is Better?
Ref: Product Design for Manufacture and Assembly, Geoffrey Boothroyd, Peter Dewhurst and Winston A. Knight.

Which is Better?
Ref: Product Design for Manufacture and Assembly, Geoffrey Boothroyd, Peter Dewhurst and Winston A. Knight.

Which is Better?
Ref: Product Design for Manufacture and Assembly, Geoffrey Boothroyd, Peter Dewhurst and Winston A. Knight.

Which is Better?
Ref: Product Design for Manufacture and Assembly, Geoffrey Boothroyd, Peter Dewhurst and Winston A. Knight.

Which is Better?
Ref: Product Design for Manufacture and Assembly, Geoffrey Boothroyd, Peter Dewhurst and Winston A. Knight.