design and build your own paintbrush · pdf filedesign and build your own paintbrush a lesson...
TRANSCRIPT
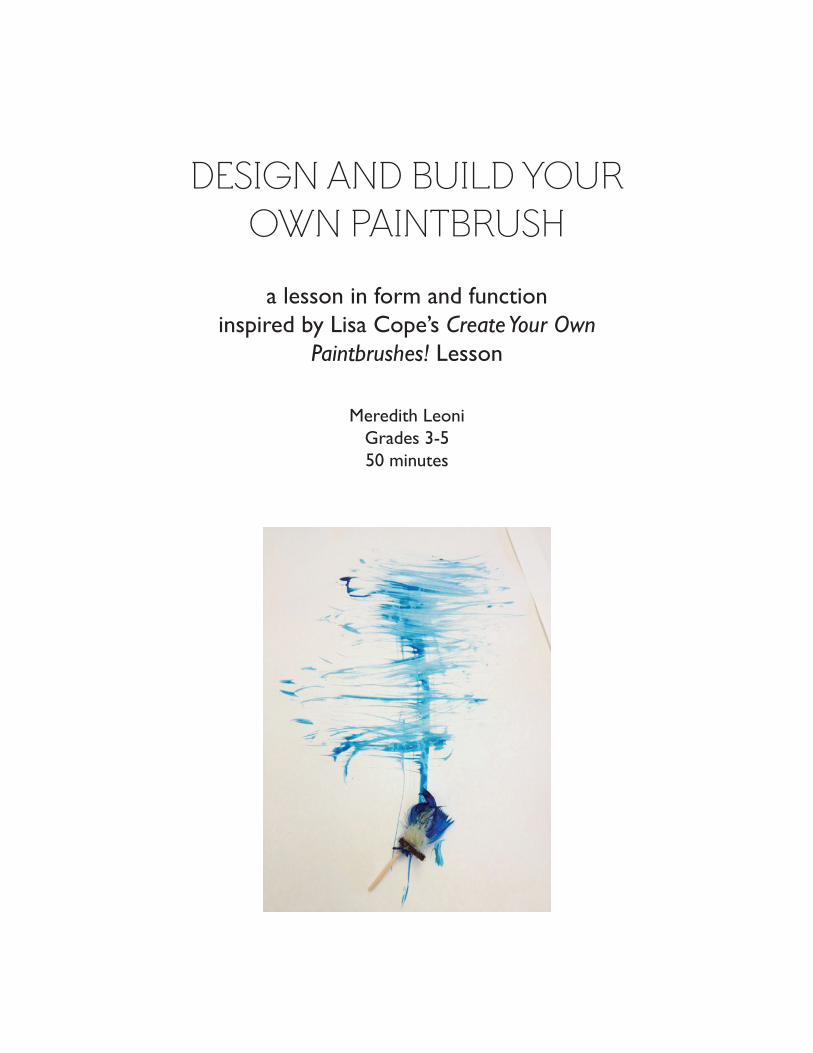
DESIGN AND BUILD YOUR OWN PAINTBRUSH
a lesson in form and functioninspired by Lisa Cope’s Create Your Own
Paintbrushes! Lesson
Meredith LeoniGrades 3-550 minutes

Background / Intent
When approaching a lesson, I naturally turn to my background in graphic design. I ask myself:
Who is the audience? What information do I want the audience to know? How am I going to get that
information across? How can I create the design in a fresh and exciting manner? In the classroom this
translates as: For whom am I designing a lesson? What information is the most important to share with
my students? What is the supporting information? How am I going to make this information accessible?
How can I structure the lesson to inspire students to use their own creativity?
I love the concept of building your own tools to then use and create art with them. So, a lesson
online by Lisa Cope inspired me to have students build and use their own paintbrushes. The
tool itself became a piece of art. Asking and answering my design questions the planning looked
something like this:
Who am I designing a lesson for? I created this lesson for third through fifth grades.
What information is the most important to share with my students? I wanted them to understand that
tools for art did not just appear, but someone designed and built them so that others could use
them as tools.
What is the supporting information? I wanted them to learn the components of a paintbrush and
why all the components are necessary to create a functional tool.
How am I going to make this information accessible? I allowed them to explore a variety of materials
to create a non-traditional paintbrush.
Through this exploration I wanted students to discover that they could build their own tools
if none were available. Students also needed to think about their designs and understand that
creating a paintbrush requires planning and problem solving. From using them, they would also learn
that form and function are interrelated.

Author(s): Meredith Leoni adapted from Lisa Cope
Grade Level(s): 3, 4, 5
Time Span: One 50 minute lesson
Essential QuestionsWhy are tools necessary?
Provoking Questions Why are there different types of paintbrushes?Before you could buy a paintbrush, what did people use to paint?Why is planning before execution important?What is the relationship between form and function?
Lesson ObjectivesLearners will use a variety of media to design an original paintbrush.Learners will generate and apply a variety of solutions for building their paintbrush.
Vocabulary and Visual ProvocationBrush handleBristlesFerrule
Existing brushes of various sizes and bristle types
MaterialsWooden dowels of various sizes and lengthsWooden blocks- smaller around 3”- any other wood scraps that could use for a handleVarious yarnFeathersFoam sheetsLeather strips and/or cordRubber bandsHot glueDuct tape (variety of colors and patterns)Any other material that would work for brush bristles.Drawing paper in roll to put out on tables for testing of brushes.Watercolors or watered down tempera paint in cups (4 or more colors)Colored sharpies
DESIGN AND BUILD YOUR OWN PAINTBRUSH!

Direct InstructionStudents will design and build a large and mini paintbrush. They will have the option of testing their paintbrushes on a communal piece of paper. This project is very open in terms of style or look of brush. The parameters are that they must have a handle, bristles, and two attachment methods for their bristles.1. Students gather around demonstration table. Teacher will have an
overview of the project and the materials that are available.2. Teacher discusses the basic parts of the paintbrush: handle, ferrule, and
bristles. For their ferrule, or part of brush that supports the bristles and handle, students will need 2 forms of attachment. Attachment material available are rubber bands, duck tape, and hot glue.
3. Teacher will demo some tricks for bristle making. Suggested talking points: If using yarn, cut pieces no shorter than 6 inches, to then fold in half and trim to size once attached. You can attach large pieces individually or tie a knot with all pieces of yarn and attach to handle. Attach with two different ways. Usually if using hot glue, use that first, then use either a rubber band or duct tape. You do not need to use just one material for the bristles, feel free to mix a few together.
4. Teacher shows teacher and student examples, if available. Teacher will test one of their paintbrushes for the students.
5. Students will have the rest of the class to design, build and test their paintbrushes.
6. Give 5 minute warning for clean up.
Clean UpStudents will clean up their work space, replace materials that can be used again, and throw away scraps. If they tested their brush, they will clean it before leaving. Teacher will unplug glue guns and put away once cooled. Communal testing paper can be hung up or recycled.
AssessmentsEmbedded Assessment: Are students designing an original paintbrush?Are they exploring materials and planning their design before execution?Are students adjusting their design to build a successful paintbrush?
Instructional ResourcesCope, Lisa. Create Your Own Paintbrushes! Retrieved from: http://www.education.com/activity/article/Make_your_own_paintbrushes/
Maine Learning ResultsB1: Media SkillsB3: Making meaningC1: Application of Creative Process

IMAGES


