derby server and administration guide - apache db … server and administration guide 3 apache...
TRANSCRIPT

Derby Server and Administration GuideVersion 10.13
Derby Document build:October 15, 2016, 9:09:14 AM (PDT)

Version 10.13 Derby Server and Administration Guide
i
ContentsCopyright................................................................................................................................4
License................................................................................................................................... 5
About this guide....................................................................................................................9Purpose of this guide................................................................................................9Audience..................................................................................................................... 9How this guide is organized.....................................................................................9
Part One: Derby Server Guide...........................................................................................11Derby in a multi-user environment........................................................................ 11
Derby in a server framework...............................................................................11About this guide and the Network Server documentation................................... 14
Using the Network Server with preexisting Derby applications..........................14The Network Server and Java Virtual Machines (JVMs).....................................14Installing required jar files and adding them to the classpath............................. 14Starting the Network Server................................................................................15Shutting down the Network Server..................................................................... 17Obtaining system information..............................................................................18Accessing the Network Server by using the network client driver.......................20Accessing the Network Server by using a DataSource object............................ 26XA and the Network Server................................................................................ 28Using the Derby tools with the Network Server.................................................. 29Differences between running Derby in embedded mode and using the NetworkServer.................................................................................................................. 29Setting port numbers...........................................................................................30
Managing the Derby Network Server.....................................................................31Overview of Derby Network Server management...............................................31Setting Network Server properties...................................................................... 32Verifying startup...................................................................................................37
Using Java Management Extensions (JMX) technology......................................38Introduction to the Derby MBeans...................................................................... 38Enabling and disabling JMX................................................................................39Using JConsole to access the Derby MBeans....................................................46Using custom Java code to access the Derby MBeans......................................47Troubleshooting JMX connection issues.............................................................50
Managing the Derby Network Server remotely by using the servletinterface.................................................................................................................... 51
Start-up page.......................................................................................................51Running page...................................................................................................... 52Trace session page.............................................................................................52Trace directory page........................................................................................... 52Set Network Server parameters..........................................................................52
Derby Network Server advanced topics................................................................52Configuring the Network Server to handle connections...................................... 53Controlling logging by using the log file.............................................................. 53Controlling tracing by using the trace facility...................................................... 54
Derby Network Server sample programs.............................................................. 55The NsSample sample program......................................................................... 55Network Server sample programs for embedded and client connections........... 57
Part Two: Derby Administration Guide.............................................................................60Maintaining database integrity............................................................................... 60Checking database consistency............................................................................ 60
Version 10.13 Derby Server and Administration Guide
ii
The SYSCS_CHECK_TABLE function................................................................60Sample SYSCS_CHECK_TABLE error messages............................................. 61Sample SYSCS_CHECK_TABLE queries.......................................................... 61
Backing up and restoring databases.....................................................................62Backing up a database....................................................................................... 62Restoring a database from a backup copy......................................................... 66Creating a database from a backup copy...........................................................67Roll-forward recovery.......................................................................................... 67
Importing and exporting data.................................................................................69Methods for running the import and export procedures...................................... 70Bulk import and export requirements and considerations................................... 70Bulk import and export of large objects.............................................................. 71File format for input and output...........................................................................72Importing data using the built-in procedures.......................................................73Exporting data using the built-in procedures.......................................................77Examples of bulk import and export................................................................... 79Running import and export procedures from JDBC............................................ 80How the import and export procedures process NULL values............................81CODESET values for import and export procedures.......................................... 81
Replicating databases............................................................................................. 81Starting and running replication.......................................................................... 82Stopping replication............................................................................................. 83Forcing a failover.................................................................................................83Replication and security...................................................................................... 84Replication failure handling................................................................................. 84
Logging on a separate device................................................................................86Using the logDevice=logDirectoryPath attribute..................................................86Example of creating a log in a non-default location............................................86Example of moving a log manually.....................................................................86Issues for logging in a non-default location........................................................ 87
Obtaining locking information................................................................................87Monitoring deadlocks...........................................................................................87
Reclaiming unused space.......................................................................................88
Trademarks.......................................................................................................................... 90

Derby Server and Administration Guide
3
Apache Software FoundationDerby Server and Administration GuideApache Derby
Derby Server and Administration Guide
4
Copyright
Copyright 2004-2016 The Apache Software Foundation
Licensed under the Apache License, Version 2.0 (the "License"); you may not use thisfile except in compliance with the License. You may obtain a copy of the License athttp://www.apache.org/licenses/LICENSE-2.0.
Related information
License
Derby Server and Administration Guide
5
License
The Apache License, Version 2.0
Apache License Version 2.0, January 2004 http://www.apache.org/licenses/
TERMS AND CONDITIONS FOR USE, REPRODUCTION, AND DISTRIBUTION
1. Definitions.
"License" shall mean the terms and conditions for use, reproduction, and distribution as defined by Sections 1 through 9 of this document.
"Licensor" shall mean the copyright owner or entity authorized by the copyright owner that is granting the License.
"Legal Entity" shall mean the union of the acting entity and all other entities that control, are controlled by, or are under common control with that entity. For the purposes of this definition, "control" means (i) the power, direct or indirect, to cause the direction or management of such entity, whether by contract or otherwise, or (ii) ownership of fifty percent (50%) or more of the outstanding shares, or (iii) beneficial ownership of such entity.
"You" (or "Your") shall mean an individual or Legal Entity exercising permissions granted by this License.
"Source" form shall mean the preferred form for making modifications, including but not limited to software source code, documentation source, and configuration files.
"Object" form shall mean any form resulting from mechanical transformation or translation of a Source form, including but not limited to compiled object code, generated documentation, and conversions to other media types.
"Work" shall mean the work of authorship, whether in Source or Object form, made available under the License, as indicated by a copyright notice that is included in or attached to the work (an example is provided in the Appendix below).
"Derivative Works" shall mean any work, whether in Source or Object form, that is based on (or derived from) the Work and for which the editorial revisions, annotations, elaborations, or other modifications represent, as a whole, an original work of authorship. For the purposes of this License, Derivative Works shall not include works that remain separable from, or merely link (or bind by name) to the interfaces of, the Work and Derivative Works thereof.
"Contribution" shall mean any work of authorship, including the original version of the Work and any modifications or additions to that Work or Derivative Works thereof, that is intentionally submitted to Licensor for inclusion in the Work by the copyright owner or by an individual or Legal Entity authorized to submit on behalf of the copyright owner. For the purposes of this definition, "submitted" means any form of electronic, verbal, or written communication sent to the Licensor or its representatives, including but not limited to communication on electronic mailing lists, source code control systems, and issue tracking systems
Derby Server and Administration Guide
6
that are managed by, or on behalf of, the Licensor for the purpose of discussing and improving the Work, but excluding communication that is conspicuously marked or otherwise designated in writing by the copyright owner as "Not a Contribution."
"Contributor" shall mean Licensor and any individual or Legal Entity on behalf of whom a Contribution has been received by Licensor and subsequently incorporated within the Work.
2. Grant of Copyright License. Subject to the terms and conditions of this License, each Contributor hereby grants to You a perpetual, worldwide, non-exclusive, no-charge, royalty-free, irrevocable copyright license to reproduce, prepare Derivative Works of, publicly display, publicly perform, sublicense, and distribute the Work and such Derivative Works in Source or Object form.
3. Grant of Patent License. Subject to the terms and conditions of this License, each Contributor hereby grants to You a perpetual, worldwide, non-exclusive, no-charge, royalty-free, irrevocable (except as stated in this section) patent license to make, have made, use, offer to sell, sell, import, and otherwise transfer the Work, where such license applies only to those patent claims licensable by such Contributor that are necessarily infringed by their Contribution(s) alone or by combination of their Contribution(s) with the Work to which such Contribution(s) was submitted. If You institute patent litigation against any entity (including a cross-claim or counterclaim in a lawsuit) alleging that the Work or a Contribution incorporated within the Work constitutes direct or contributory patent infringement, then any patent licenses granted to You under this License for that Work shall terminate as of the date such litigation is filed.
4. Redistribution. You may reproduce and distribute copies of the Work or Derivative Works thereof in any medium, with or without modifications, and in Source or Object form, provided that You meet the following conditions:
(a) You must give any other recipients of the Work or Derivative Works a copy of this License; and
(b) You must cause any modified files to carry prominent notices stating that You changed the files; and
(c) You must retain, in the Source form of any Derivative Works that You distribute, all copyright, patent, trademark, and attribution notices from the Source form of the Work, excluding those notices that do not pertain to any part of the Derivative Works; and
(d) If the Work includes a "NOTICE" text file as part of its distribution, then any Derivative Works that You distribute must include a readable copy of the attribution notices contained within such NOTICE file, excluding those notices that do not pertain to any part of the Derivative Works, in at least one of the following places: within a NOTICE text file distributed as part of the Derivative Works; within the Source form or documentation, if provided along with the Derivative Works; or, within a display generated by the Derivative Works, if and wherever such third-party notices normally appear. The contents of the NOTICE file are for informational purposes only and do not modify the License. You may add Your own attribution notices within Derivative Works that You distribute, alongside or as an addendum to the NOTICE text from the Work, provided that such additional attribution notices cannot be construed as modifying the License.
You may add Your own copyright statement to Your modifications

Derby Server and Administration Guide
7
and may provide additional or different license terms and conditions for use, reproduction, or distribution of Your modifications, or for any such Derivative Works as a whole, provided Your use, reproduction, and distribution of the Work otherwise complies with the conditions stated in this License.
5. Submission of Contributions. Unless You explicitly state otherwise, any Contribution intentionally submitted for inclusion in the Work by You to the Licensor shall be under the terms and conditions of this License, without any additional terms or conditions. Notwithstanding the above, nothing herein shall supersede or modify the terms of any separate license agreement you may have executed with Licensor regarding such Contributions.
6. Trademarks. This License does not grant permission to use the trade names, trademarks, service marks, or product names of the Licensor, except as required for reasonable and customary use in describing the origin of the Work and reproducing the content of the NOTICE file.
7. Disclaimer of Warranty. Unless required by applicable law or agreed to in writing, Licensor provides the Work (and each Contributor provides its Contributions) on an "AS IS" BASIS, WITHOUT WARRANTIES OR CONDITIONS OF ANY KIND, either express or implied, including, without limitation, any warranties or conditions of TITLE, NON-INFRINGEMENT, MERCHANTABILITY, or FITNESS FOR A PARTICULAR PURPOSE. You are solely responsible for determining the appropriateness of using or redistributing the Work and assume any risks associated with Your exercise of permissions under this License.
8. Limitation of Liability. In no event and under no legal theory, whether in tort (including negligence), contract, or otherwise, unless required by applicable law (such as deliberate and grossly negligent acts) or agreed to in writing, shall any Contributor be liable to You for damages, including any direct, indirect, special, incidental, or consequential damages of any character arising as a result of this License or out of the use or inability to use the Work (including but not limited to damages for loss of goodwill, work stoppage, computer failure or malfunction, or any and all other commercial damages or losses), even if such Contributor has been advised of the possibility of such damages.
9. Accepting Warranty or Additional Liability. While redistributing the Work or Derivative Works thereof, You may choose to offer, and charge a fee for, acceptance of support, warranty, indemnity, or other liability obligations and/or rights consistent with this License. However, in accepting such obligations, You may act only on Your own behalf and on Your sole responsibility, not on behalf of any other Contributor, and only if You agree to indemnify, defend, and hold each Contributor harmless for any liability incurred by, or claims asserted against, such Contributor by reason of your accepting any such warranty or additional liability.
END OF TERMS AND CONDITIONS
APPENDIX: How to apply the Apache License to your work.
To apply the Apache License to your work, attach the following boilerplate notice, with the fields enclosed by brackets "[]" replaced with your own identifying information. (Don't include the brackets!) The text should be enclosed in the appropriate comment syntax for the file format. We also recommend that a file or class name and description of purpose be included on the same "printed page" as the copyright notice for easier identification within third-party archives.

Derby Server and Administration Guide
8
Copyright [yyyy] [name of copyright owner]
Licensed under the Apache License, Version 2.0 (the "License"); you may not use this file except in compliance with the License. You may obtain a copy of the License at
http://www.apache.org/licenses/LICENSE-2.0
Unless required by applicable law or agreed to in writing, software distributed under the License is distributed on an "AS IS" BASIS, WITHOUT WARRANTIES OR CONDITIONS OF ANY KIND, either express or implied. See the License for the specific language governing permissions and limitations under the License.
Derby Server and Administration Guide
9
About this guide
For general information about the Derby documentation, such as a complete list of books,conventions, and further reading, see Getting Started with Derby.
For more information about Derby, visit the Derby website at http://db.apache.org/derby.The website provides pointers to the Derby Wiki and other resources, such as thederby-users mailing list, where you can ask questions about issues not covered in thedocumentation.
Purpose of this guideThis guide explains how to use Derby in a multiple-client environment. It also providesinformation that a server administrator might need to keep Derby running with a highlevel of performance and reliability in a server framework or in a multiple-client applicationserver environment.
When running in embedded mode, Derby databases typically do not need anyadministration.
To connect multiple clients with Derby, you can embed Derby in a server frameworkthat you choose, or you can use the Derby Network Server. This guide describes theseoptions.
AudienceThis guide has two parts, each for a different audience.
The first part of this guide is intended for developers of client/server and multiple-clientapplications. The second part of this guide is intended for administrators.
How this guide is organizedThis guide includes the following two parts.
Part One: Derby Server Guide
• Derby in a multi-user environment
Describes the different options for embedding Derby in a server framework andexplains the Network Server option.
• Using the Network Server with preexisting Derby applications
Describes how to change existing Derby applications to work with the NetworkServer.
• Managing the Derby Network Server
Describes how to use shell scripts, the command line, and the Network Server APIto manage the Network Server.
• Using Java Management Extensions (JMX) technology
Describes how to use the Derby MBeans and other JMX features.• Managing the Derby Network Server remotely by using the servlet interface
Describes how to use the servlet interface to manage the Network Server. (Theservlet interface should be used for testing purposes only, not in production.)
• Derby Network Server advanced topics
Derby Server and Administration Guide
10
Describes advanced topics for Derby Network Server users.• Derby Network Server sample programs
Describes several Derby Network Server sample programs for Network Serverusers.
Part Two: Derby Administration Guide
• Maintaining database integrity
Describes how to prevent Derby database corruption.• Checking database consistency
Describes how to check the consistency of Derby databases.• Backing up and restoring databases
Describes how to back up and restore a database.• Importing and exporting data
Describes how to import and export large amounts of data between files anddatabase tables.
• Replicating databases
Describes how to replicate databases.• Logging on a separate device
Describes how to put a database's log on a separate device, which can improve theperformance of large databases.
• Obtaining locking information
Describes how to get detailed information about locking status.• Reclaiming unused space
Describes how to identify and reclaim unused space in tables and related indexes.
Derby Server and Administration Guide
11
Part One: Derby Server Guide
This part of the guide explains the Derby Network Server and other server frameworks.
Derby in a multi-user environmentThis section describes how to use Derby in a multi-user (or "server") environment.
Derby in a server framework
In a sense, Derby is always an embedded product. You can embed it in an application inwhich users access the database from a single Java Virtual Machine (JVM), or you canembed it in a server framework (an application that allows users from different JVMs toconnect to Derby simultaneously).
When Derby is embedded in an application, the local JDBC driver calls the local Derbydatabase.
When Derby is embedded in a server framework, the server framework's connectivitysoftware provides data to multiple client JDBC applications over a network or the Internet.
For local or remote multi-user connectivity (multiple users who access Derby fromdifferent JVMs), use the Derby Network Server. If you require features that are notincluded in the Network Server, you can embed the basic Derby product in anotherserver framework.
Connectivity configurations
There are several ways to embed Derby in a server framework.
Use the Network ServerThis is the easiest way to provide connectivity to multiple users who are accessingDerby databases from different JVMs. The Derby Network Server provides this kindof connectivity to Derby databases within a single system or over a network.
Purchase another server frameworkYou can use Derby within many server frameworks, such as IBM WebSphereApplication Server.
Write your own frameworkDerby's flexibility allows other configurations as well. For example, rather thanembedding Derby in a server that communicates with a client that uses JDBC, youcan embed Derby within a servlet in a web server that communicates with a browserusing HTTP.
Multiple-client features available in Derby
Derby contains some features that are useful for developing multi-user applications.
Row-level locking:
To support multi-user access, Derby uses row-level locking.
However, you can configure Derby to use table-level locking in environments thathave few concurrent transactions (for example, a read-only database). Table-levellocking is preferable if there are few or no writes to the server, while row-level locking isessential for good performance if many clients write to the server concurrently. The Derbyoptimizer tunes lock choice for queries automatically.
Derby Server and Administration Guide
12
Multiple concurrency levels:
Derby supports the SERIALIZABLE (RR), REPEATABLE (RS), READ COMMITTED(CS), and READ UNCOMMITTED (UR) isolation levels.
CSCS (the default isolation level) provides the best balance between concurrency andconsistency in multiple-client environments.
RSRS provides less consistency than RR but allows more concurrency.
RRRR provides greatest consistency.
URUR provides maximum concurrency, if uncommitted values are allowed in the query.It is typically used if approximate results are acceptable.
See "Types and Scope of Locks in Derby Systems" in the Derby Developer's Guide formore information.
Multi-connection and multi-threading:
Derby allows multiple simultaneous connections to a database, even in embedded mode.
Derby is also fully multi-threaded, and you can have multiple threads active at the sametime. However, JDBC semantics impose some limitations on multi-threading. See theDerby Developer's Guide for more information.
Administrative tools:
Derby provides some tools and features to assist database administrators, including thefollowing.
• Consistency checker• Online backup• Procedures for importing and exporting data• Database replication• The ability to put a database's log on a separate device• Locking information monitoring• Reclaiming unused space
These tools and features are discussed in Part Two of this guide. See the sections in thatpart for more information.
The Derby Network Server
The Derby Network Server provides multi-user connectivity to Derby databases within asingle system or over a network.
The Network Server uses the standard Distributed Relational Database Architecture(DRDA) protocol to receive and reply to queries from clients. Databases are accessedthrough the Derby Network Server by using the Derby Network Client driver.
The Network Server is a solution for multiple JVMs that connect to the database, unlikethe embedded scenario where only one JVM runs as part of the system. When Derby isembedded in a single-JVM application, the embedded JDBC driver calls the local Derbydatabase. When Derby is embedded in a server framework, the server framework'sconnectivity software provides data to multiple client JDBC applications over a network orthe Internet.
To run the Derby Network Server, you need to install the following files:• On the server side, install derby.jar and derbynet.jar.• On the client side, install derbyclient.jar.
Derby Server and Administration Guide
13
There are several ways to manage the Derby Network Server, including:
• Through the command line• By using .bat and .ksh scripts• With your own Java program (written using the Network Server API)• By setting Network Server properties
By default a security manager will be installed with a basic security policy when aNetwork Server is started. This policy file is called server.policy and is partof derbynet.jar. For information about policy files, granting permissions, andproperty expansion, see "Default Policy Implementation and Policy File Syntax"at http://docs.oracle.com/javase/7/docs/technotes/guides/security/PolicyFiles.htmland "Policy File Creation and Management" athttp://docs.oracle.com/javase/7/docs/technotes/guides/security/PolicyGuide.html.
Using the Network Server with preexisting Derby applications explains how to changeexisting Java applications that currently run against Derby in embedded mode to runagainst the Derby Network Server.
Managing the Derby Network Server explains how to manage the Network Server byusing the command line, including starting and stopping it.
Derby Network Server advanced topics contains advanced topics for Derby NetworkServer users.
Because of the differences in JDBC drivers that are used, you might encounterdifferences in functionality when running Derby in the Network Server framework asopposed to running it embedded in a user application. Refer to Using the NetworkServer with preexisting Derby applications for a complete list of the differences betweenembedded and Network Server configurations.
Embedded servers
Because Derby is written in the Java programming language, you have great flexibility inhow you choose to configure your deployment.
For example, you can run Derby, the JDBC server framework, and another application inthe same JVM as a single process.
How to start an embedded server from an application
In one thread, the embedding application starts the local JDBC driver for its own access.
Connection conn = DriverManager.getConnection( "jdbc:derby:sample");
In another thread, the same application starts the server framework to allow remoteaccess. Starting the server framework from within the application allows both the serverand the application to run in the same JVM.
Embedded server example
You can start the Network Server in another thread automatically when Derby starts bysetting the derby.drda.startNetworkServer property, or you can start it by using aprogram.
See Setting Network Server properties for details on this property.
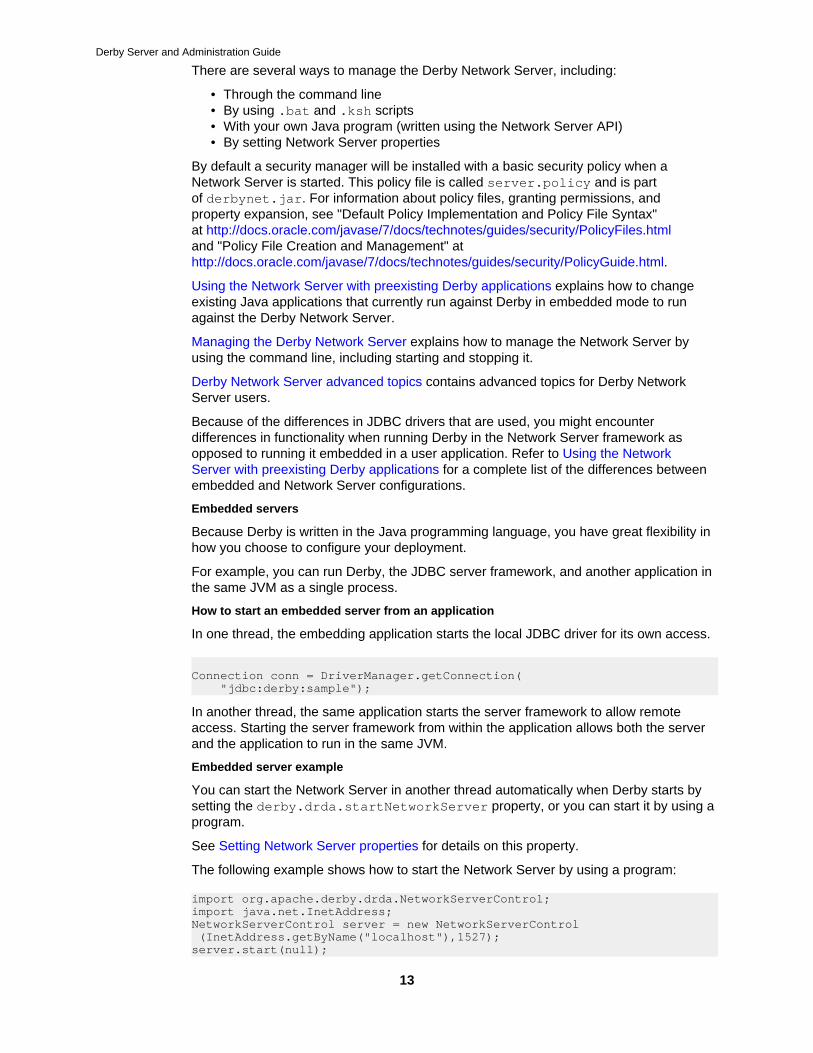
The following example shows how to start the Network Server by using a program:
import org.apache.derby.drda.NetworkServerControl;import java.net.InetAddress;NetworkServerControl server = new NetworkServerControl (InetAddress.getByName("localhost"),1527);server.start(null);
Derby Server and Administration Guide
14
The program that starts the Network Server can access the database by using eitherthe embedded driver or the Network Client driver. The server framework's attempt toboot the local JDBC driver is ignored because it has already been booted within theapplication's JVM. The server framework simply accesses the instance of Derby that isalready booted. There is no conflict between the application and the server framework.
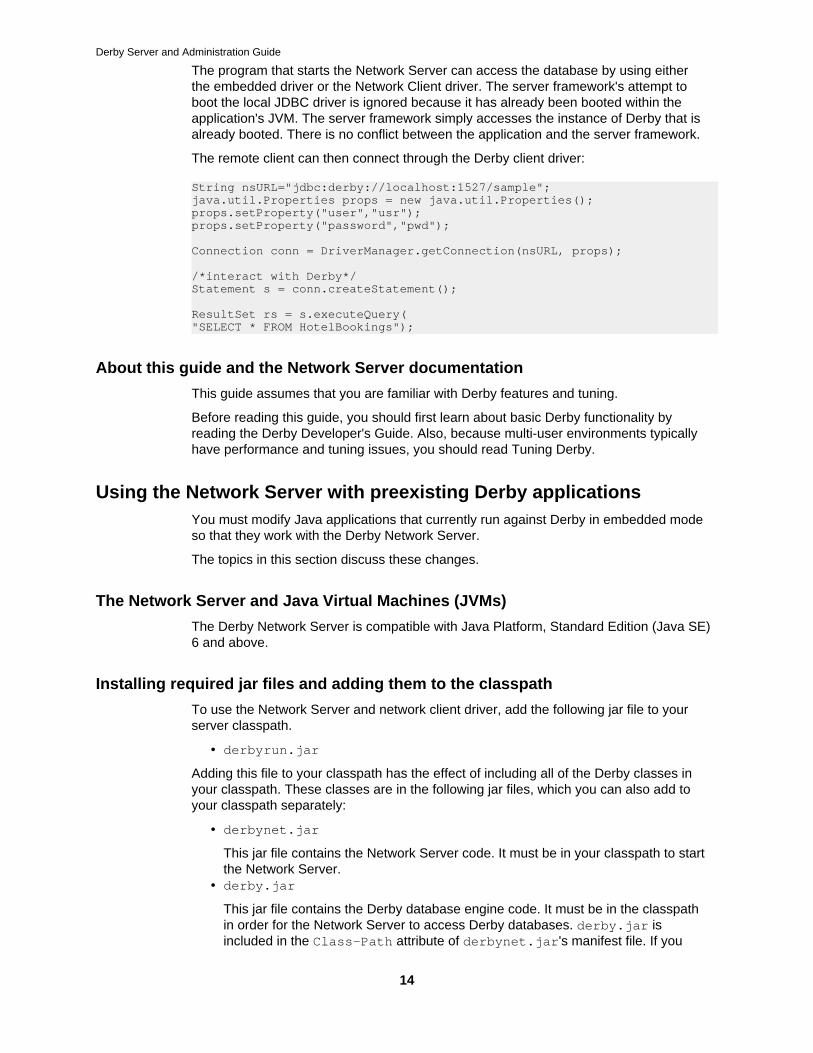
The remote client can then connect through the Derby client driver:
String nsURL="jdbc:derby://localhost:1527/sample"; java.util.Properties props = new java.util.Properties();props.setProperty("user","usr");props.setProperty("password","pwd");
Connection conn = DriverManager.getConnection(nsURL, props);
/*interact with Derby*/Statement s = conn.createStatement();
ResultSet rs = s.executeQuery("SELECT * FROM HotelBookings");
About this guide and the Network Server documentation
This guide assumes that you are familiar with Derby features and tuning.
Before reading this guide, you should first learn about basic Derby functionality byreading the Derby Developer's Guide. Also, because multi-user environments typicallyhave performance and tuning issues, you should read Tuning Derby.
Using the Network Server with preexisting Derby applicationsYou must modify Java applications that currently run against Derby in embedded modeso that they work with the Derby Network Server.
The topics in this section discuss these changes.
The Network Server and Java Virtual Machines (JVMs)
The Derby Network Server is compatible with Java Platform, Standard Edition (Java SE)6 and above.
Installing required jar files and adding them to the classpath
To use the Network Server and network client driver, add the following jar file to yourserver classpath.
• derbyrun.jar
Adding this file to your classpath has the effect of including all of the Derby classes inyour classpath. These classes are in the following jar files, which you can also add toyour classpath separately:
• derbynet.jar
This jar file contains the Network Server code. It must be in your classpath to startthe Network Server.
• derby.jar
This jar file contains the Derby database engine code. It must be in the classpathin order for the Network Server to access Derby databases. derby.jar isincluded in the Class-Path attribute of derbynet.jar's manifest file. If you
Derby Server and Administration Guide
15
have derbynet.jar in the classpath and derby.jar is in the same directory asderbynet.jar, it is not necessary to include derby.jar explicitly.
• derbyclient.jar
This jar file contains the Derby Network Client JDBC driver that is necessaryfor communication with the Network Server. It must be in the classpath of theapplication on the client side in order to access Derby databases over a network.
All of the jar files are in the $DERBY_HOME/lib directory.
Derby provides script files for setting the classpath to work with the Network Server. Thescripts are located in the $DERBY_HOME/bin directory.
• setNetworkClientCP.bat (Windows)• setNetworkClientCP (UNIX)• setNetworkServerCP.bat (Windows)• setNetworkServerCP (UNIX)
See Managing the Derby Network Server and Getting Started with Derby for moreinformation on setting the classpath.
Starting the Network Server
To start the Network Server, you can invoke a script, a jar file, or a class.
> Important: Always shut down the Network Server properly after use, because failureto do so might result in unpredictable side effects, such as blocked ports on the server.
You are strongly urged to enable user authentication and user authorization whenyou run a Network Server. For details on how to configure user authentication andauthorization, see "Configuring user authentication" and "Configuring user authorization"in the Derby Security Guide.
You are also urged to install a Java security manager with a customized securitypolicy. For details on how to do this, see "Configuring Java security," also in theDerby Security Guide. By default a security manager will be installed with a defaultsecurity policy when a Network Server is started. This default policy file is calledserver.policy and is part of derbynet.jar. There is also a template.policyfile in derbynet.jar which can be used as starting point for a customized serverpolicy file. For more information about policy files, granting permissions, andproperty expansion, see "Default Policy Implementation and Policy File Syntax"at http://docs.oracle.com/javase/7/docs/technotes/guides/security/PolicyFiles.htmland "Policy File Creation and Management" athttp://docs.oracle.com/javase/7/docs/technotes/guides/security/PolicyGuide.html.
If you are running Java SE 7 or later, and if you start the Derby Network Server fromthe command line as described here, access to databases and to other Derby files isby default restricted to the operating system account that started the Network Server. Itis possible to override this default behavior. For more information, see "Restricting filepermissions" in the Derby Security Guide.
You can start the Network Server in any of the following ways:
• If you are relatively new to the Java programming language, follow theinstructions in "Setting up your environment" in Getting Started with Derbyto set the DERBY_HOME and JAVA_HOME environment variables and to addDERBY_HOME/bin to your path. Then use the startNetworkServer.bat scriptto start the Network Server on Windows machines and the startNetworkServerscript to start the Network Server on UNIX systems. These scripts are located in$DERBY_HOME/bin, where $DERBY_HOME is the directory where you installedDerby.
Derby Server and Administration Guide
16
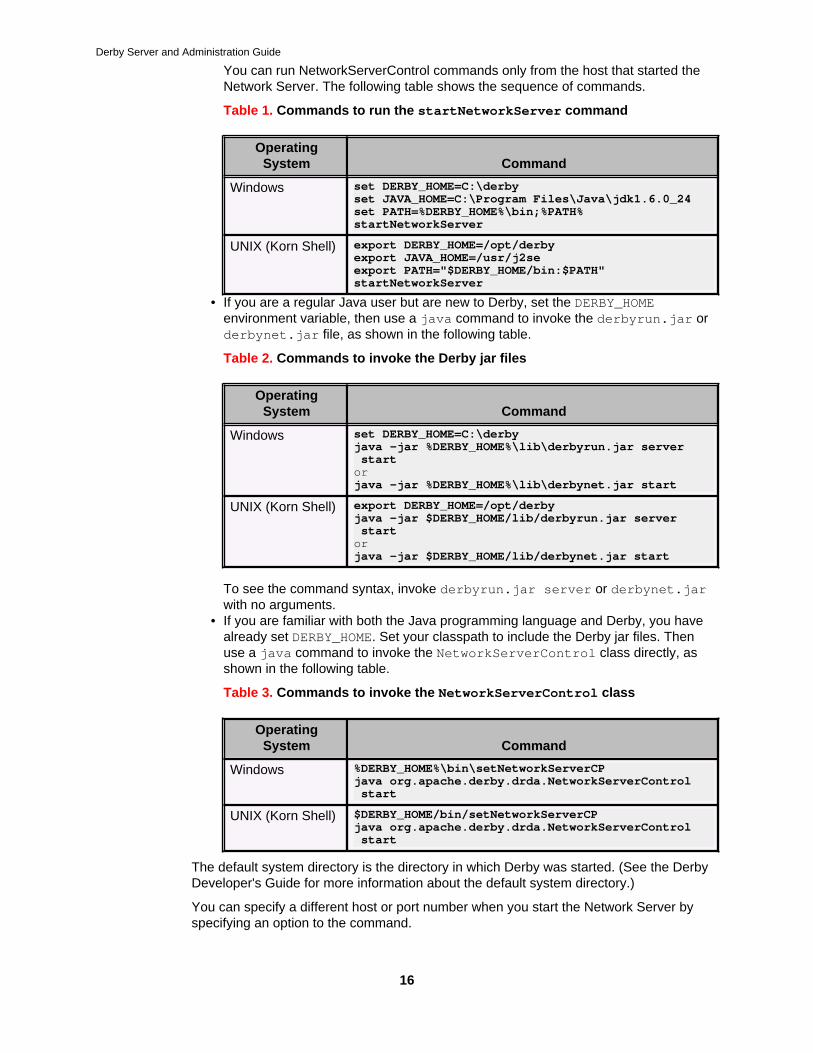
You can run NetworkServerControl commands only from the host that started theNetwork Server. The following table shows the sequence of commands.
Table 1. Commands to run the startNetworkServer command
OperatingSystem Command
Windows set DERBY_HOME=C:\derbyset JAVA_HOME=C:\Program Files\Java\jdk1.6.0_24set PATH=%DERBY_HOME%\bin;%PATH%startNetworkServer
UNIX (Korn Shell) export DERBY_HOME=/opt/derbyexport JAVA_HOME=/usr/j2seexport PATH="$DERBY_HOME/bin:$PATH"startNetworkServer
• If you are a regular Java user but are new to Derby, set the DERBY_HOMEenvironment variable, then use a java command to invoke the derbyrun.jar orderbynet.jar file, as shown in the following table.
Table 2. Commands to invoke the Derby jar files
OperatingSystem Command
Windows set DERBY_HOME=C:\derbyjava -jar %DERBY_HOME%\lib\derbyrun.jar server startorjava -jar %DERBY_HOME%\lib\derbynet.jar start
UNIX (Korn Shell) export DERBY_HOME=/opt/derbyjava -jar $DERBY_HOME/lib/derbyrun.jar server startorjava -jar $DERBY_HOME/lib/derbynet.jar start
To see the command syntax, invoke derbyrun.jar server or derbynet.jarwith no arguments.
• If you are familiar with both the Java programming language and Derby, you havealready set DERBY_HOME. Set your classpath to include the Derby jar files. Thenuse a java command to invoke the NetworkServerControl class directly, asshown in the following table.
Table 3. Commands to invoke the NetworkServerControl class
OperatingSystem Command
Windows %DERBY_HOME%\bin\setNetworkServerCPjava org.apache.derby.drda.NetworkServerControl start
UNIX (Korn Shell) $DERBY_HOME/bin/setNetworkServerCPjava org.apache.derby.drda.NetworkServerControl start
The default system directory is the directory in which Derby was started. (See the DerbyDeveloper's Guide for more information about the default system directory.)
You can specify a different host or port number when you start the Network Server byspecifying an option to the command.
Derby Server and Administration Guide
17
• Specify a port number other than the default (1527) by using the -p portnumberoption, as shown in the following example:
java org.apache.derby.drda.NetworkServerControl start -p 1368• Specify a specific interface (host name or IP address) to listen on other than the
default (localhost) by using the -h option, as shown in the following example:
$DERBY_HOME/bin/startNetworkServer -h myhost -p 1368
where myhost is the host name or IP address.
Remember: Before using the -h option, you should run under the Javasecurity manager with a customized security policy and you should enable userauthentication.
By default, the Network Server will listen to requests only on the loopback address, whichmeans that it will only accept connections from the local host.
Starting the Network Server from a Java application
Always shut down the Network Server properly after use, because failure to do so mightresult in unpredictable side effects, such as blocked ports on the server.
There are two ways to start the Network Server from a Java application.
• You can include the following line in the derby.properties file:
derby.drda.startNetworkServer=true
This starts the server on the default port, 1527, listening on localhost (allinterfaces).
To specify a different port or a specific interface in the derby.properties file,include the following lines, respectively:
derby.drda.portNumber=1110derby.drda.host=myhost
You can also specify the startNetworkServer and portNumber properties byusing a Java command:
java -Dderby.drda.startNetworkServer=true \-Dderby.drda.portNumber=1110 \-Dderby.drda.host=myhost yourApp
• You can use the NetworkServerControl API to start the Network Server from aseparate thread within a Java application:
NetworkServerControl server = new NetworkServerControl();server.start (null);
Starting the Network Server on IPv6/IPv4 dual stack Windows machines
Add the following JVM properties to the command when you start the server on anIPv6/IPv4 dual stack Windows machine.
-Djava.net.preferIPv4Stack=false-Djava.net.preferIPv6Addresses=true
Shutting down the Network Server
To shut down the Network Server, you can invoke a script, a jar file, or a class.
The scripts to shut down the Network Server are located in the $DERBY_HOME/bindirectory.
Derby Server and Administration Guide
18
> Important: If user authentication is enabled, you must specify a valid Derby username and password; if the user authentication check fails, you'll see an authenticationerror and the running server remains intact. Note that Derby does not yet restrict theshutdown privilege to specific users: the server can be shut down by any user on theserver machine who presents valid credentials.
• To shut down the Network Server by using the scripts provided for Windowssystems, use:
stopNetworkServer.bat [-h hostname] [-p portnumber] [-user username] [-password password]
• To shut down the Network Server by using the scripts provided for UNIX systems,use:
stopNetworkServer [-h hostname] [-p portnumber] [-user username] [-password password]
Shutting down by using the command line
From the command line, you can shut down the Network Server by invoking a jar file or aclass.
You must provide user credential arguments to shut down a server running with userauthentication.
• To shut down the Network Server by invoking a jar file from the $DERBY_HOME/libdirectory, use:
java -jar derbyrun.jar server shutdown [-h <hostname>] [-p <portnumber>] [-user <username>] [-password <password>]
or
java -jar derbynet.jar shutdown [-h <hostname>] [-p <portnumber>] [-user <username>] [-password <password>]
• To shut down the Network Server by invoking a class, use:
java org.apache.derby.drda.NetworkServerControl shutdown [-h <hostname>] [-p <portnumber>] [-user <username>] [-password <password>]
Shutting down by using the API
You can use the NetworkServerControl API to shut down the Network Server from withina Java application.
The name of the method that you use to shut down the Network Server is shutdown().
For example, the following command shuts down the Network Server running on thecurrent machine using the default port number (1527):
NetworkServerControl server = new NetworkServerControl();server.shutdown();
To shut down a server running with user authentication, you need to use aNetworkServerControl instance created with user credentials:
NetworkServerControl server = new NetworkServerControl(username, password);server.shutdown();
Obtaining system information
You can obtain information about the Network Server, such as version and currentproperty values, Java information, and Derby database server information, by using thesysinfo utility.
Derby Server and Administration Guide
19
The sysinfo utility is available from scripts, the command line, and theNetworkServerControl API.
The following scripts are located in the $DERBY_HOME/bin directory. Before runningthese scripts, make sure that the Derby Network Server is started.
• Run the following script to obtain information about the Network Server on aWindows system:
NetworkServerControl.bat sysinfo [-h hostname][-p portnumber]• Run the following script to obtain information about the Network Server on a UNIX
system:
NetworkServerControl sysinfo [-h hostname] [-p portnumber]
For more information on the sysinfo utility, see the Derby Tools and Utilities Guide.
You can also use Java Management Extensions (JMX) technology to obtain systeminformation. For details, see Using Java Management Extensions (JMX) technology.
Obtaining system information by using the command line
To run sysinfo from the command line, use a command like one of the following whilethe Network Server is running.
java -jar $DERBY_HOME/lib/derbyrun.jar server sysinfo [-h hostname][-p portnumber]
java org.apache.derby.drda.NetworkServerControl sysinfo [-h hostname][-p portnumber]
Administrative commands such as sysinfo can only execute on the host where theserver was started, even if the server was started with the -h option.
Obtaining system information by using the API
The getSysinfo method produces the same information as the sysinfo command.
The signature for this method is
String getSysinfo();
For example:
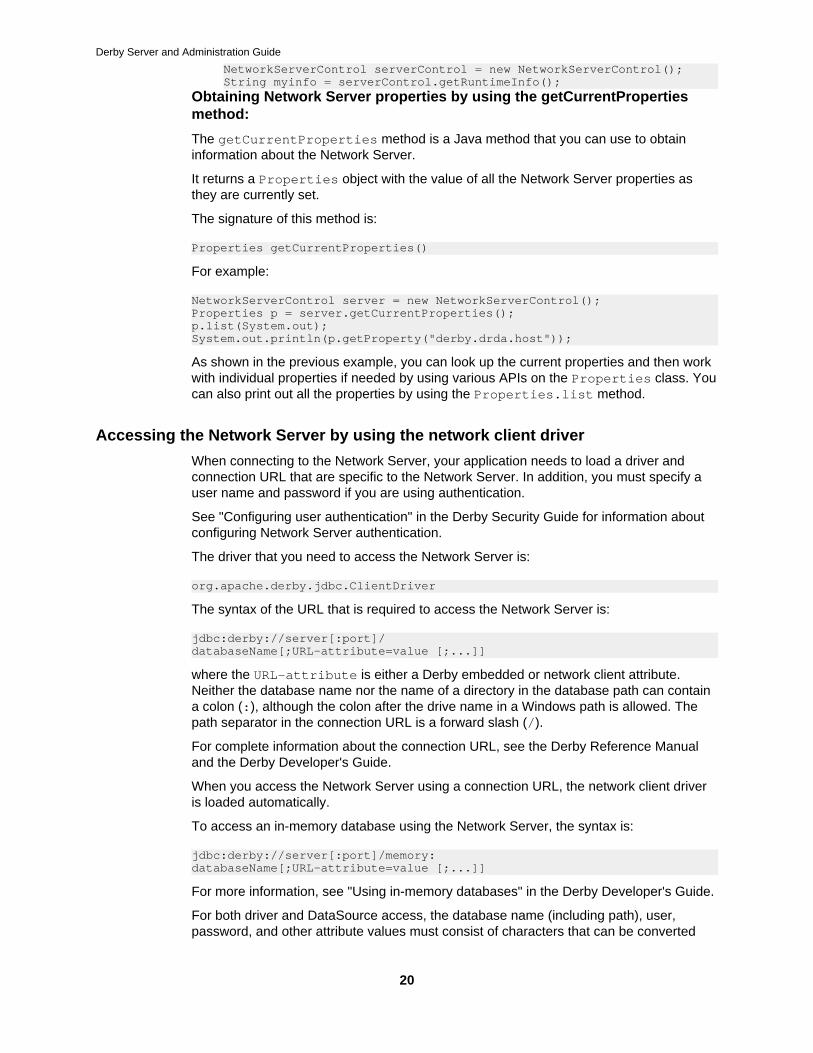
NetworkServerControl serverControl = new NetworkServerControl();String myinfo = serverControl.getSysinfo();
The getSysinfo method returns information about the Network Server that is runningon the current machine on the default port number (1527).
Obtaining Network Server runtime information:
Use the runtimeinfo command or the getRuntimeInfo method to get memoryusage and current session information about the Network Server, including user,database, and prepared statement information.
• To run runtimeinfo from the command line:
java org.apache.derby.drda.NetworkServerControl runtimeinfo [-h <hostname>][<-p portnumber>]
• The getRuntimeInfo method returns the same information as the runtimeinfocommand. The signature for the getRuntimeInfo method is
String getRuntimeInfo()
For example:
Derby Server and Administration Guide
20
NetworkServerControl serverControl = new NetworkServerControl();String myinfo = serverControl.getRuntimeInfo();
Obtaining Network Server properties by using the getCurrentPropertiesmethod:
The getCurrentProperties method is a Java method that you can use to obtaininformation about the Network Server.
It returns a Properties object with the value of all the Network Server properties asthey are currently set.
The signature of this method is:
Properties getCurrentProperties()
For example:
NetworkServerControl server = new NetworkServerControl();Properties p = server.getCurrentProperties();p.list(System.out);System.out.println(p.getProperty("derby.drda.host"));
As shown in the previous example, you can look up the current properties and then workwith individual properties if needed by using various APIs on the Properties class. Youcan also print out all the properties by using the Properties.list method.
Accessing the Network Server by using the network client driver
When connecting to the Network Server, your application needs to load a driver andconnection URL that are specific to the Network Server. In addition, you must specify auser name and password if you are using authentication.
See "Configuring user authentication" in the Derby Security Guide for information aboutconfiguring Network Server authentication.
The driver that you need to access the Network Server is:
org.apache.derby.jdbc.ClientDriver
The syntax of the URL that is required to access the Network Server is:
jdbc:derby://server[:port]/databaseName[;URL-attribute=value [;...]]
where the URL-attribute is either a Derby embedded or network client attribute.Neither the database name nor the name of a directory in the database path can containa colon (:), although the colon after the drive name in a Windows path is allowed. Thepath separator in the connection URL is a forward slash (/).
For complete information about the connection URL, see the Derby Reference Manualand the Derby Developer's Guide.
When you access the Network Server using a connection URL, the network client driveris loaded automatically.
To access an in-memory database using the Network Server, the syntax is:
jdbc:derby://server[:port]/memory:databaseName[;URL-attribute=value [;...]]
For more information, see "Using in-memory databases" in the Derby Developer's Guide.
For both driver and DataSource access, the database name (including path), user,password, and other attribute values must consist of characters that can be converted
Derby Server and Administration Guide
21
to UTF-8. The total byte length of the database name plus attributes when converted toUTF-8 must not exceed 1024 bytes; keep in mind that in UTF-8, a character may occupyfrom 1 to 4 bytes. You may be able to work around this restriction for long paths or pathsthat include multibyte characters by setting the derby.system.home system propertywhen starting the Network Server and accessing the database with a relative path that isshorter and does not include multibyte characters.
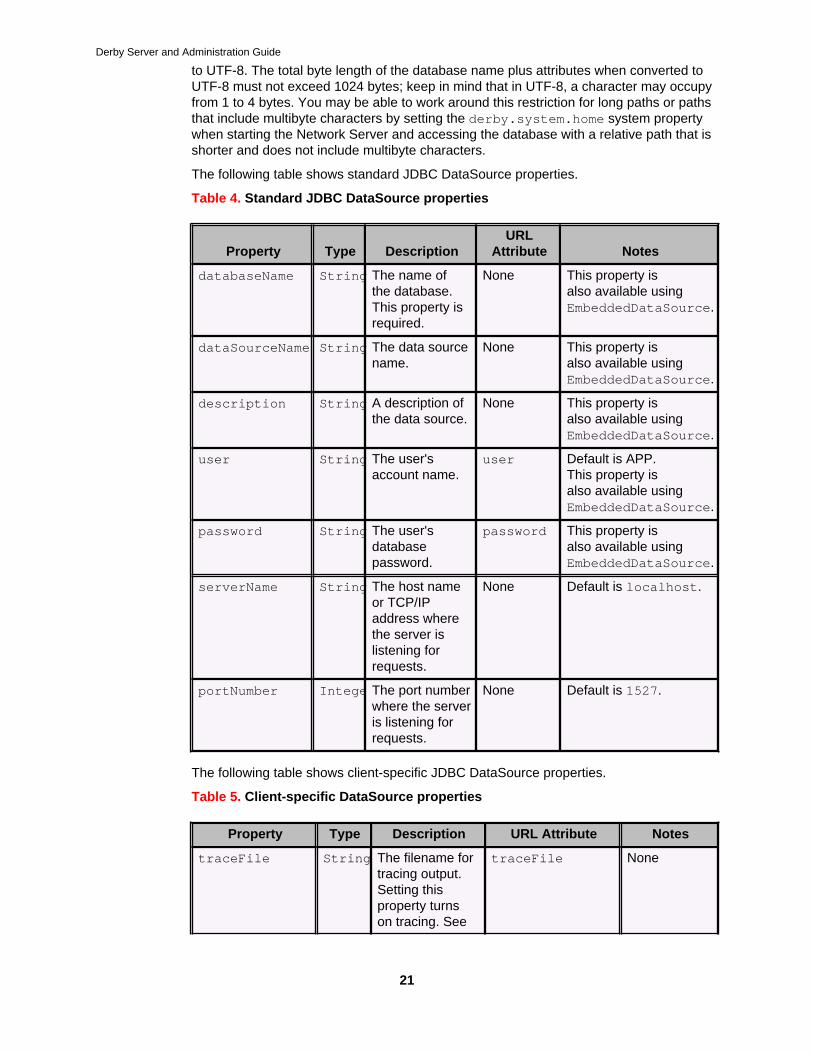
The following table shows standard JDBC DataSource properties.
Table 4. Standard JDBC DataSource properties
Property Type DescriptionURL
Attribute Notes
databaseName String The name ofthe database.This property isrequired.
None This property isalso available usingEmbeddedDataSource.
dataSourceName String The data sourcename.
None This property isalso available usingEmbeddedDataSource.
description String A description ofthe data source.
None This property isalso available usingEmbeddedDataSource.
user String The user'saccount name.
user Default is APP.This property isalso available usingEmbeddedDataSource.
password String The user'sdatabasepassword.
password This property isalso available usingEmbeddedDataSource.
serverName String The host nameor TCP/IPaddress wherethe server islistening forrequests.
None Default is localhost.
portNumber IntegerThe port numberwhere the serveris listening forrequests.
None Default is 1527.
The following table shows client-specific JDBC DataSource properties.
Table 5. Client-specific DataSource properties
Property Type Description URL Attribute Notes
traceFile String The filename fortracing output.Setting thisproperty turnson tracing. See
traceFile None
Derby Server and Administration Guide
22
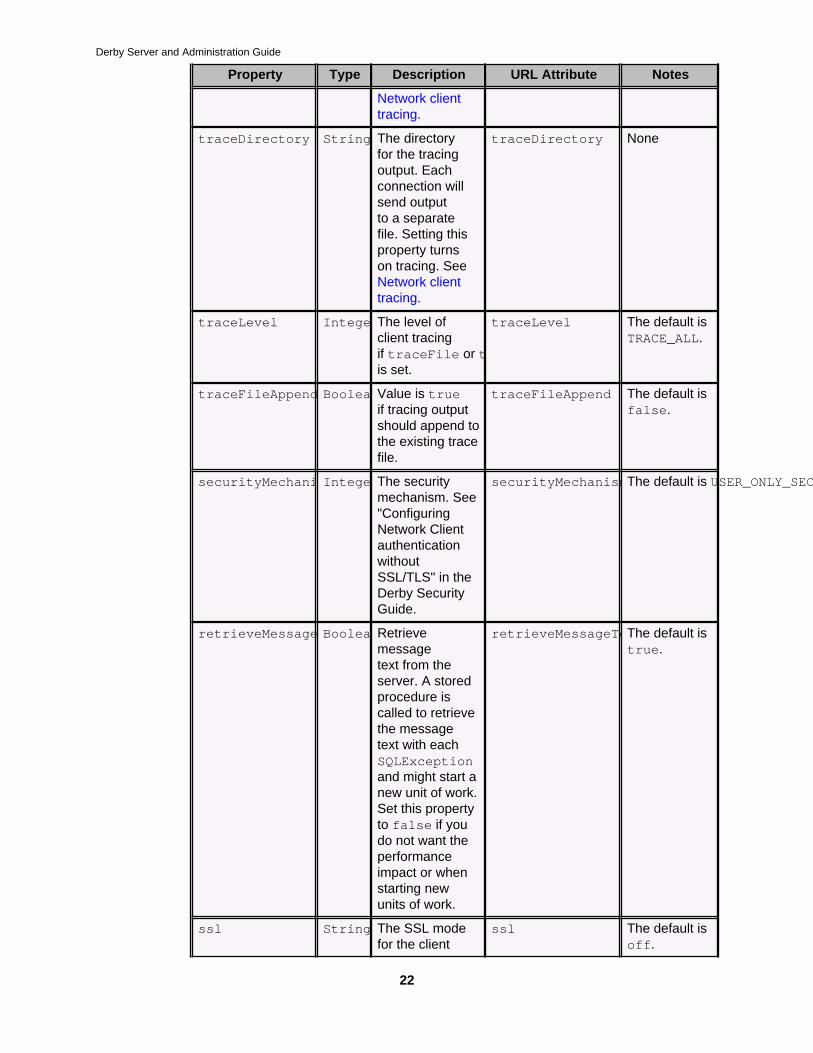
Property Type Description URL Attribute Notes
Network clienttracing.
traceDirectory String The directoryfor the tracingoutput. Eachconnection willsend outputto a separatefile. Setting thisproperty turnson tracing. SeeNetwork clienttracing.
traceDirectory None
traceLevel IntegerThe level ofclient tracingif traceFile or traceDirectoryis set.
traceLevel The default isTRACE_ALL.
traceFileAppend BooleanValue is trueif tracing outputshould append tothe existing tracefile.
traceFileAppend The default isfalse.
securityMechanismIntegerThe securitymechanism. See"ConfiguringNetwork ClientauthenticationwithoutSSL/TLS" in theDerby SecurityGuide.
securityMechanismThe default is USER_ONLY_SECURITY.
retrieveMessageTextBooleanRetrievemessagetext from theserver. A storedprocedure iscalled to retrievethe messagetext with eachSQLExceptionand might start anew unit of work.Set this propertyto false if youdo not want theperformanceimpact or whenstarting newunits of work.
retrieveMessageTextThe default istrue.
ssl String The SSL modefor the client
ssl The default isoff.
Derby Server and Administration Guide
23
Property Type Description URL Attribute Notes
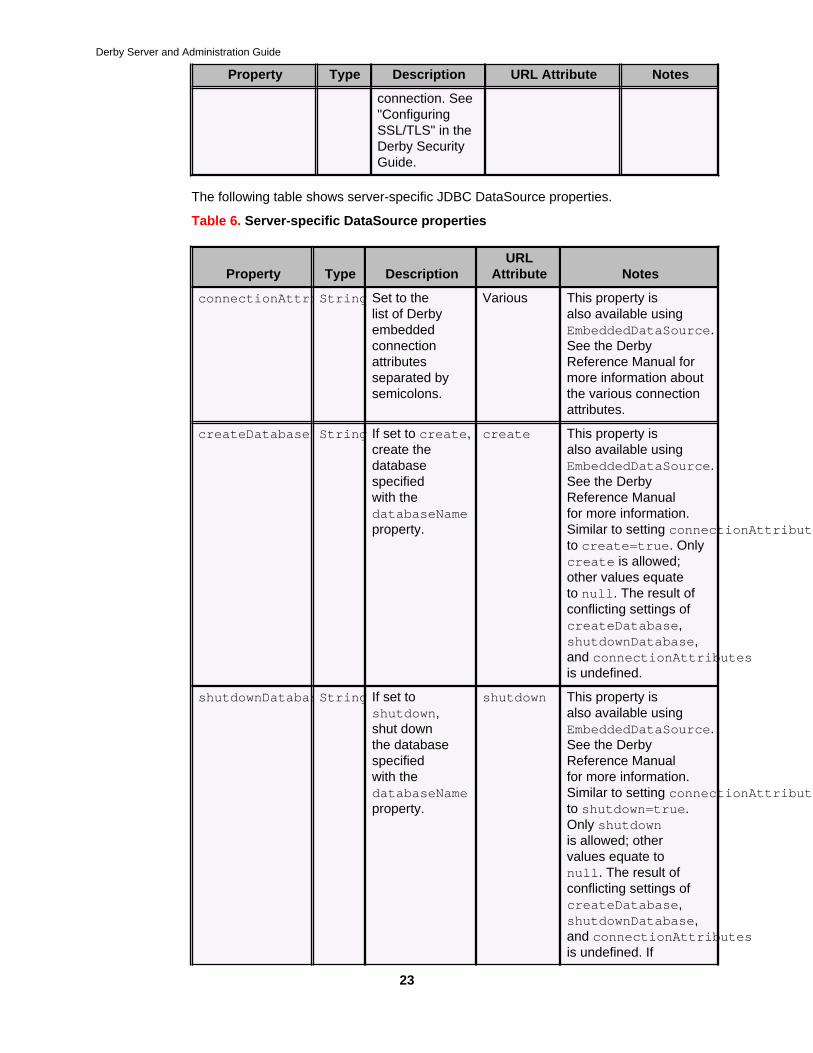
connection. See"ConfiguringSSL/TLS" in theDerby SecurityGuide.
The following table shows server-specific JDBC DataSource properties.
Table 6. Server-specific DataSource properties
Property Type DescriptionURL
Attribute Notes
connectionAttributesString Set to thelist of Derbyembeddedconnectionattributesseparated bysemicolons.
Various This property isalso available usingEmbeddedDataSource.See the DerbyReference Manual formore information aboutthe various connectionattributes.
createDatabase String If set to create,create thedatabasespecifiedwith thedatabaseNameproperty.
create This property isalso available usingEmbeddedDataSource.See the DerbyReference Manualfor more information.Similar to setting connectionAttributeto create=true. Onlycreate is allowed;other values equateto null. The result ofconflicting settings ofcreateDatabase,shutdownDatabase,and connectionAttributesis undefined.
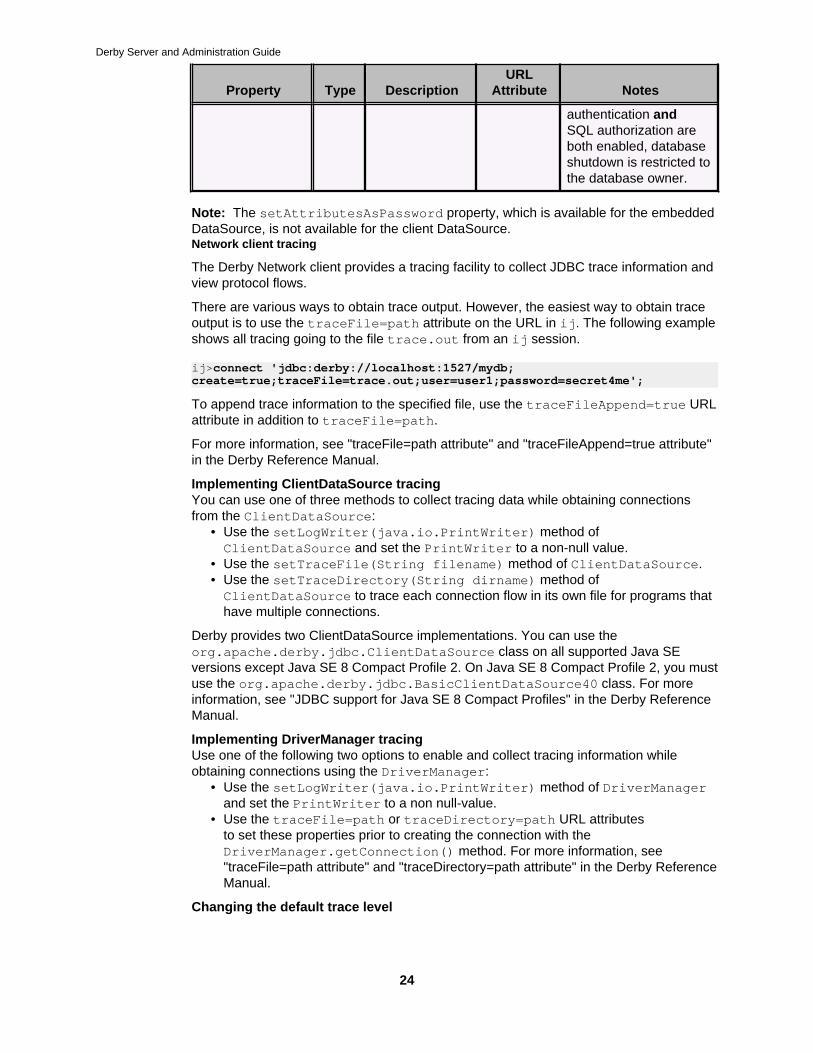
shutdownDatabaseString If set toshutdown,shut downthe databasespecifiedwith thedatabaseNameproperty.
shutdown This property isalso available usingEmbeddedDataSource.See the DerbyReference Manualfor more information.Similar to setting connectionAttributeto shutdown=true.Only shutdownis allowed; othervalues equate tonull. The result ofconflicting settings ofcreateDatabase,shutdownDatabase,and connectionAttributesis undefined. If
Derby Server and Administration Guide
24
Property Type DescriptionURL
Attribute Notes
authentication andSQL authorization areboth enabled, databaseshutdown is restricted tothe database owner.
Note: The setAttributesAsPassword property, which is available for the embeddedDataSource, is not available for the client DataSource.Network client tracing
The Derby Network client provides a tracing facility to collect JDBC trace information andview protocol flows.
There are various ways to obtain trace output. However, the easiest way to obtain traceoutput is to use the traceFile=path attribute on the URL in ij. The following exampleshows all tracing going to the file trace.out from an ij session.
ij>connect 'jdbc:derby://localhost:1527/mydb;create=true;traceFile=trace.out;user=user1;password=secret4me';
To append trace information to the specified file, use the traceFileAppend=true URLattribute in addition to traceFile=path.
For more information, see "traceFile=path attribute" and "traceFileAppend=true attribute"in the Derby Reference Manual.
Implementing ClientDataSource tracingYou can use one of three methods to collect tracing data while obtaining connectionsfrom the ClientDataSource:
• Use the setLogWriter(java.io.PrintWriter) method ofClientDataSource and set the PrintWriter to a non-null value.
• Use the setTraceFile(String filename) method of ClientDataSource.• Use the setTraceDirectory(String dirname) method ofClientDataSource to trace each connection flow in its own file for programs thathave multiple connections.
Derby provides two ClientDataSource implementations. You can use theorg.apache.derby.jdbc.ClientDataSource class on all supported Java SEversions except Java SE 8 Compact Profile 2. On Java SE 8 Compact Profile 2, you mustuse the org.apache.derby.jdbc.BasicClientDataSource40 class. For moreinformation, see "JDBC support for Java SE 8 Compact Profiles" in the Derby ReferenceManual.
Implementing DriverManager tracingUse one of the following two options to enable and collect tracing information whileobtaining connections using the DriverManager:
• Use the setLogWriter(java.io.PrintWriter) method of DriverManagerand set the PrintWriter to a non null-value.
• Use the traceFile=path or traceDirectory=path URL attributesto set these properties prior to creating the connection with theDriverManager.getConnection() method. For more information, see"traceFile=path attribute" and "traceDirectory=path attribute" in the Derby ReferenceManual.
Changing the default trace level
Derby Server and Administration Guide
25
The default trace level is ClientDataSource.TRACE_ALL. You can choose thetracing level by calling the setTraceLevel(int level) method or by setting thetraceLevel=value URL attribute:
String url = "jdbc:derby://samplehost.example.com:1528/mydb" + ";traceFile=/u/user1/trace.out" + ";traceLevel=" + org.apache.derby.jdbc.ClientDataSource.TRACE_PROTOCOL_FLOWS;DriverManager.getConnection(url,"user1","secret4me");
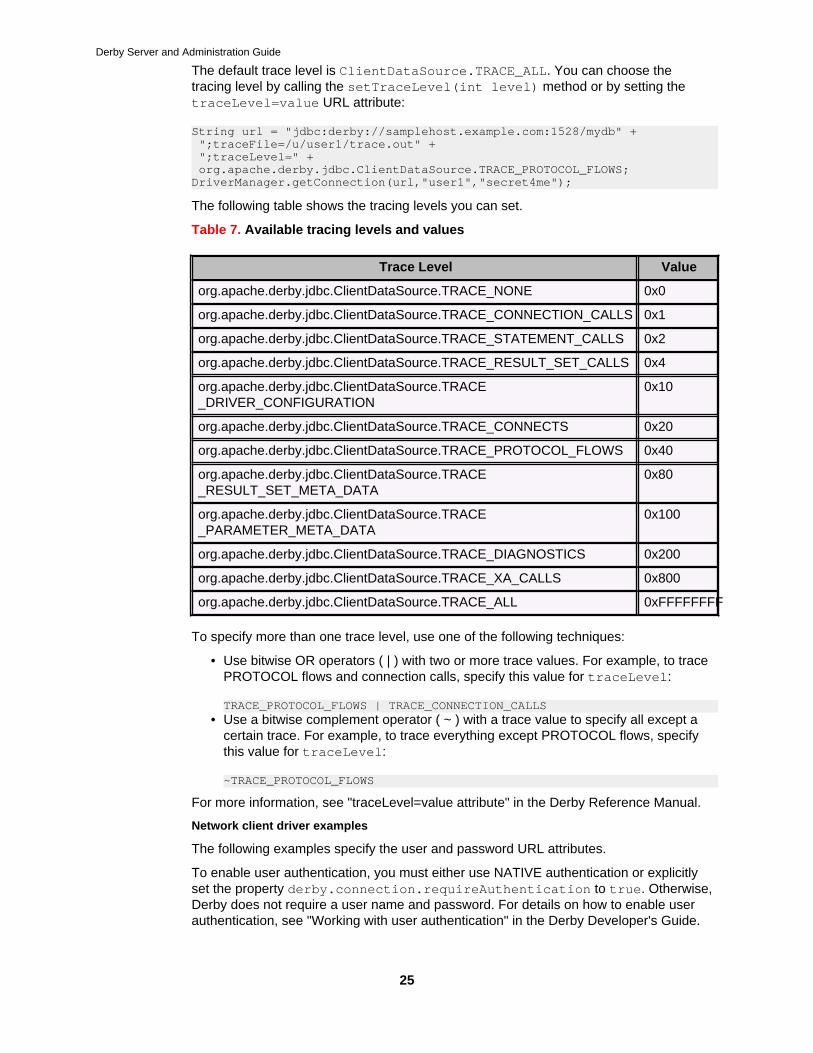
The following table shows the tracing levels you can set.
Table 7. Available tracing levels and values
Trace Level Value
org.apache.derby.jdbc.ClientDataSource.TRACE_NONE 0x0
org.apache.derby.jdbc.ClientDataSource.TRACE_CONNECTION_CALLS 0x1
org.apache.derby.jdbc.ClientDataSource.TRACE_STATEMENT_CALLS 0x2
org.apache.derby.jdbc.ClientDataSource.TRACE_RESULT_SET_CALLS 0x4
org.apache.derby.jdbc.ClientDataSource.TRACE_DRIVER_CONFIGURATION
0x10
org.apache.derby.jdbc.ClientDataSource.TRACE_CONNECTS 0x20
org.apache.derby.jdbc.ClientDataSource.TRACE_PROTOCOL_FLOWS 0x40
org.apache.derby.jdbc.ClientDataSource.TRACE_RESULT_SET_META_DATA
0x80
org.apache.derby.jdbc.ClientDataSource.TRACE_PARAMETER_META_DATA
0x100
org.apache.derby.jdbc.ClientDataSource.TRACE_DIAGNOSTICS 0x200
org.apache.derby.jdbc.ClientDataSource.TRACE_XA_CALLS 0x800
org.apache.derby.jdbc.ClientDataSource.TRACE_ALL 0xFFFFFFFF
To specify more than one trace level, use one of the following techniques:
• Use bitwise OR operators ( | ) with two or more trace values. For example, to tracePROTOCOL flows and connection calls, specify this value for traceLevel:
TRACE_PROTOCOL_FLOWS | TRACE_CONNECTION_CALLS• Use a bitwise complement operator ( ~ ) with a trace value to specify all except a
certain trace. For example, to trace everything except PROTOCOL flows, specifythis value for traceLevel:
~TRACE_PROTOCOL_FLOWS
For more information, see "traceLevel=value attribute" in the Derby Reference Manual.
Network client driver examples
The following examples specify the user and password URL attributes.
To enable user authentication, you must either use NATIVE authentication or explicitlyset the property derby.connection.requireAuthentication to true. Otherwise,Derby does not require a user name and password. For details on how to enable userauthentication, see "Working with user authentication" in the Derby Developer's Guide.
Derby Server and Administration Guide
26
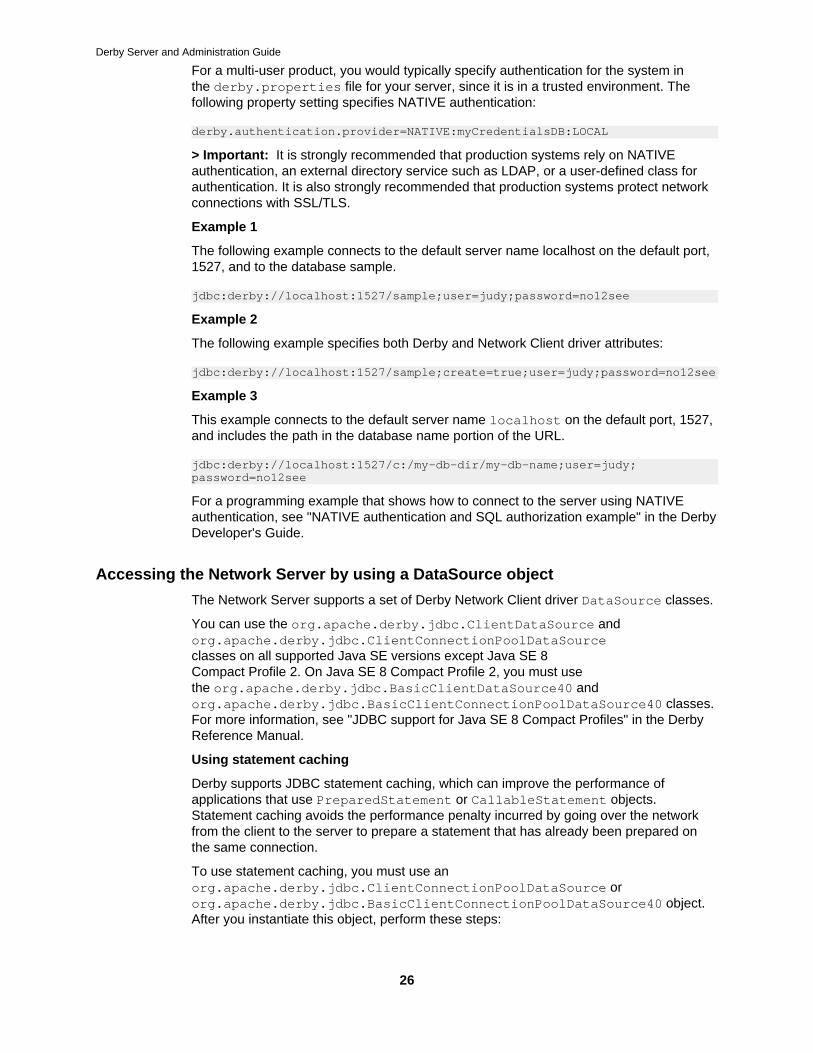
For a multi-user product, you would typically specify authentication for the system inthe derby.properties file for your server, since it is in a trusted environment. Thefollowing property setting specifies NATIVE authentication:
derby.authentication.provider=NATIVE:myCredentialsDB:LOCAL
> Important: It is strongly recommended that production systems rely on NATIVEauthentication, an external directory service such as LDAP, or a user-defined class forauthentication. It is also strongly recommended that production systems protect networkconnections with SSL/TLS.
Example 1
The following example connects to the default server name localhost on the default port,1527, and to the database sample.
jdbc:derby://localhost:1527/sample;user=judy;password=no12see
Example 2
The following example specifies both Derby and Network Client driver attributes:
jdbc:derby://localhost:1527/sample;create=true;user=judy;password=no12see
Example 3
This example connects to the default server name localhost on the default port, 1527,and includes the path in the database name portion of the URL.
jdbc:derby://localhost:1527/c:/my-db-dir/my-db-name;user=judy;password=no12see
For a programming example that shows how to connect to the server using NATIVEauthentication, see "NATIVE authentication and SQL authorization example" in the DerbyDeveloper's Guide.
Accessing the Network Server by using a DataSource object
The Network Server supports a set of Derby Network Client driver DataSource classes.
You can use the org.apache.derby.jdbc.ClientDataSource andorg.apache.derby.jdbc.ClientConnectionPoolDataSourceclasses on all supported Java SE versions except Java SE 8Compact Profile 2. On Java SE 8 Compact Profile 2, you must usethe org.apache.derby.jdbc.BasicClientDataSource40 andorg.apache.derby.jdbc.BasicClientConnectionPoolDataSource40 classes.For more information, see "JDBC support for Java SE 8 Compact Profiles" in the DerbyReference Manual.
Using statement caching
Derby supports JDBC statement caching, which can improve the performance ofapplications that use PreparedStatement or CallableStatement objects.Statement caching avoids the performance penalty incurred by going over the networkfrom the client to the server to prepare a statement that has already been prepared onthe same connection.
To use statement caching, you must use anorg.apache.derby.jdbc.ClientConnectionPoolDataSource ororg.apache.derby.jdbc.BasicClientConnectionPoolDataSource40 object.After you instantiate this object, perform these steps:
Derby Server and Administration Guide
27
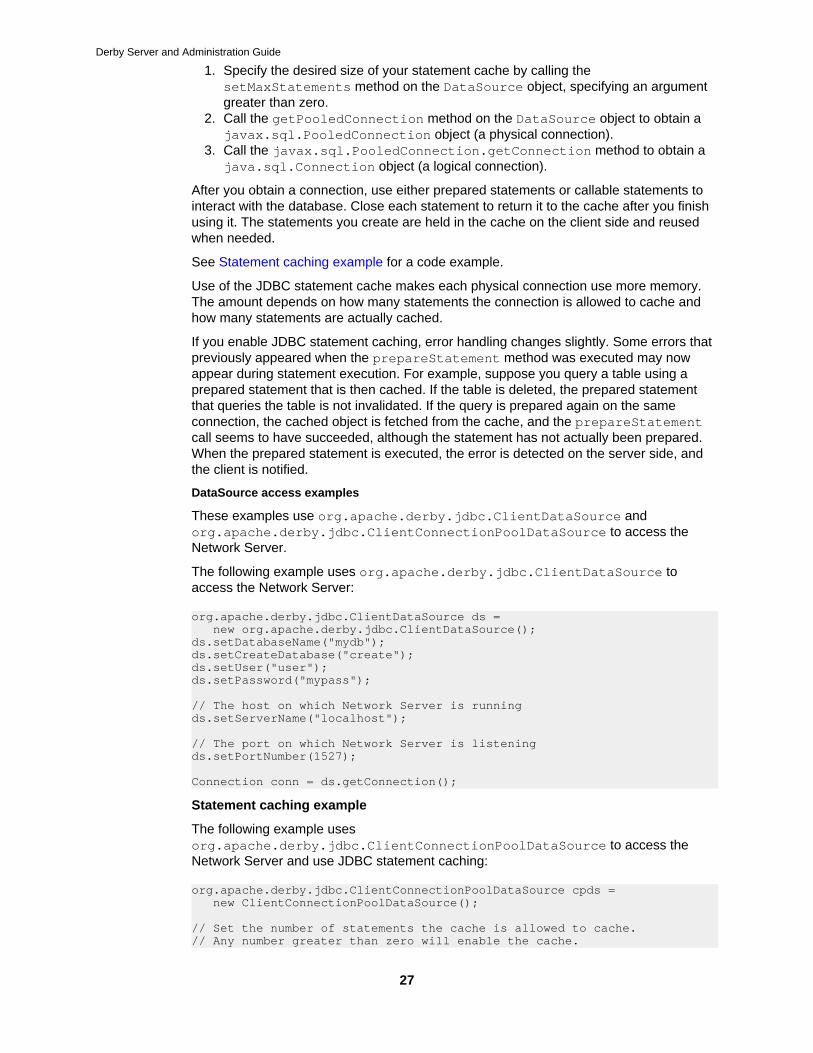
1. Specify the desired size of your statement cache by calling thesetMaxStatements method on the DataSource object, specifying an argumentgreater than zero.
2. Call the getPooledConnection method on the DataSource object to obtain ajavax.sql.PooledConnection object (a physical connection).
3. Call the javax.sql.PooledConnection.getConnection method to obtain ajava.sql.Connection object (a logical connection).
After you obtain a connection, use either prepared statements or callable statements tointeract with the database. Close each statement to return it to the cache after you finishusing it. The statements you create are held in the cache on the client side and reusedwhen needed.
See Statement caching example for a code example.
Use of the JDBC statement cache makes each physical connection use more memory.The amount depends on how many statements the connection is allowed to cache andhow many statements are actually cached.
If you enable JDBC statement caching, error handling changes slightly. Some errors thatpreviously appeared when the prepareStatement method was executed may nowappear during statement execution. For example, suppose you query a table using aprepared statement that is then cached. If the table is deleted, the prepared statementthat queries the table is not invalidated. If the query is prepared again on the sameconnection, the cached object is fetched from the cache, and the prepareStatementcall seems to have succeeded, although the statement has not actually been prepared.When the prepared statement is executed, the error is detected on the server side, andthe client is notified.
DataSource access examples
These examples use org.apache.derby.jdbc.ClientDataSource andorg.apache.derby.jdbc.ClientConnectionPoolDataSource to access theNetwork Server.
The following example uses org.apache.derby.jdbc.ClientDataSource toaccess the Network Server:
org.apache.derby.jdbc.ClientDataSource ds = new org.apache.derby.jdbc.ClientDataSource();ds.setDatabaseName("mydb");ds.setCreateDatabase("create"); ds.setUser("user"); ds.setPassword("mypass");
// The host on which Network Server is runningds.setServerName("localhost");
// The port on which Network Server is listeningds.setPortNumber(1527);
Connection conn = ds.getConnection();
Statement caching example
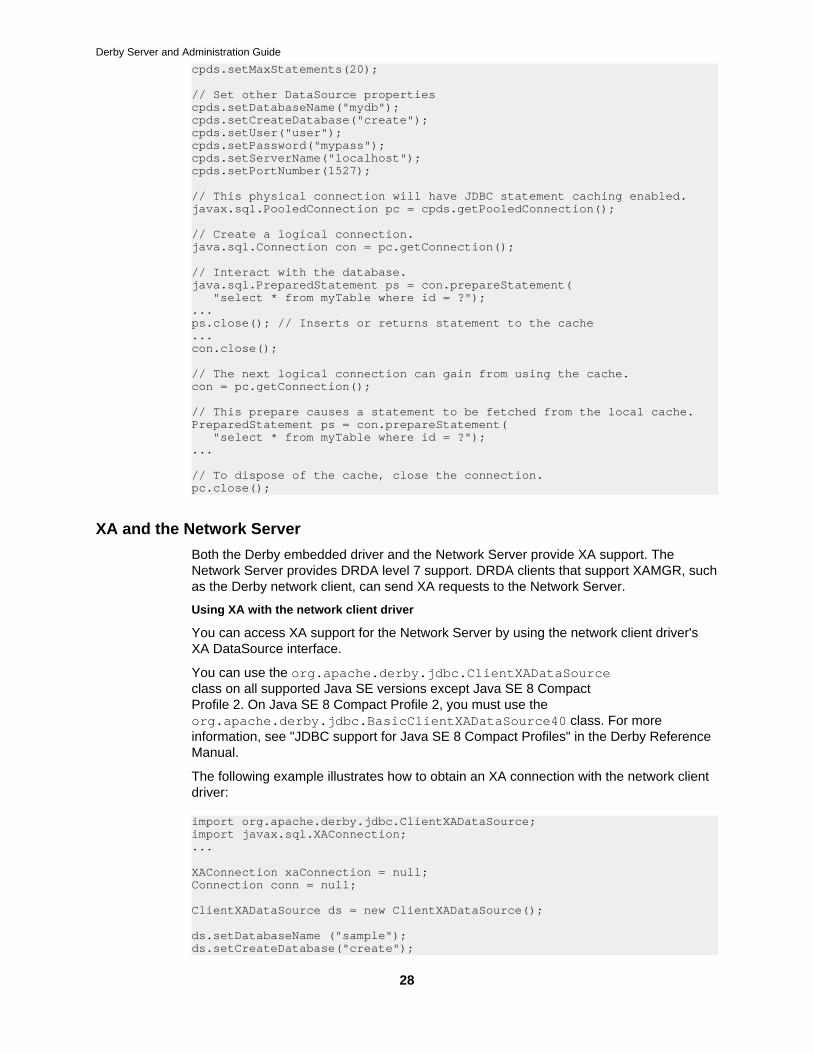
The following example usesorg.apache.derby.jdbc.ClientConnectionPoolDataSource to access theNetwork Server and use JDBC statement caching:
org.apache.derby.jdbc.ClientConnectionPoolDataSource cpds = new ClientConnectionPoolDataSource();
// Set the number of statements the cache is allowed to cache.// Any number greater than zero will enable the cache.
Derby Server and Administration Guide
28
cpds.setMaxStatements(20);
// Set other DataSource propertiescpds.setDatabaseName("mydb");cpds.setCreateDatabase("create");cpds.setUser("user");cpds.setPassword("mypass"); cpds.setServerName("localhost");cpds.setPortNumber(1527);
// This physical connection will have JDBC statement caching enabled.javax.sql.PooledConnection pc = cpds.getPooledConnection();
// Create a logical connection.java.sql.Connection con = pc.getConnection();
// Interact with the database.java.sql.PreparedStatement ps = con.prepareStatement( "select * from myTable where id = ?");...ps.close(); // Inserts or returns statement to the cache...con.close();
// The next logical connection can gain from using the cache.con = pc.getConnection();
// This prepare causes a statement to be fetched from the local cache.PreparedStatement ps = con.prepareStatement( "select * from myTable where id = ?");...
// To dispose of the cache, close the connection.pc.close();
XA and the Network Server
Both the Derby embedded driver and the Network Server provide XA support. TheNetwork Server provides DRDA level 7 support. DRDA clients that support XAMGR, suchas the Derby network client, can send XA requests to the Network Server.
Using XA with the network client driver
You can access XA support for the Network Server by using the network client driver'sXA DataSource interface.
You can use the org.apache.derby.jdbc.ClientXADataSourceclass on all supported Java SE versions except Java SE 8 CompactProfile 2. On Java SE 8 Compact Profile 2, you must use theorg.apache.derby.jdbc.BasicClientXADataSource40 class. For moreinformation, see "JDBC support for Java SE 8 Compact Profiles" in the Derby ReferenceManual.
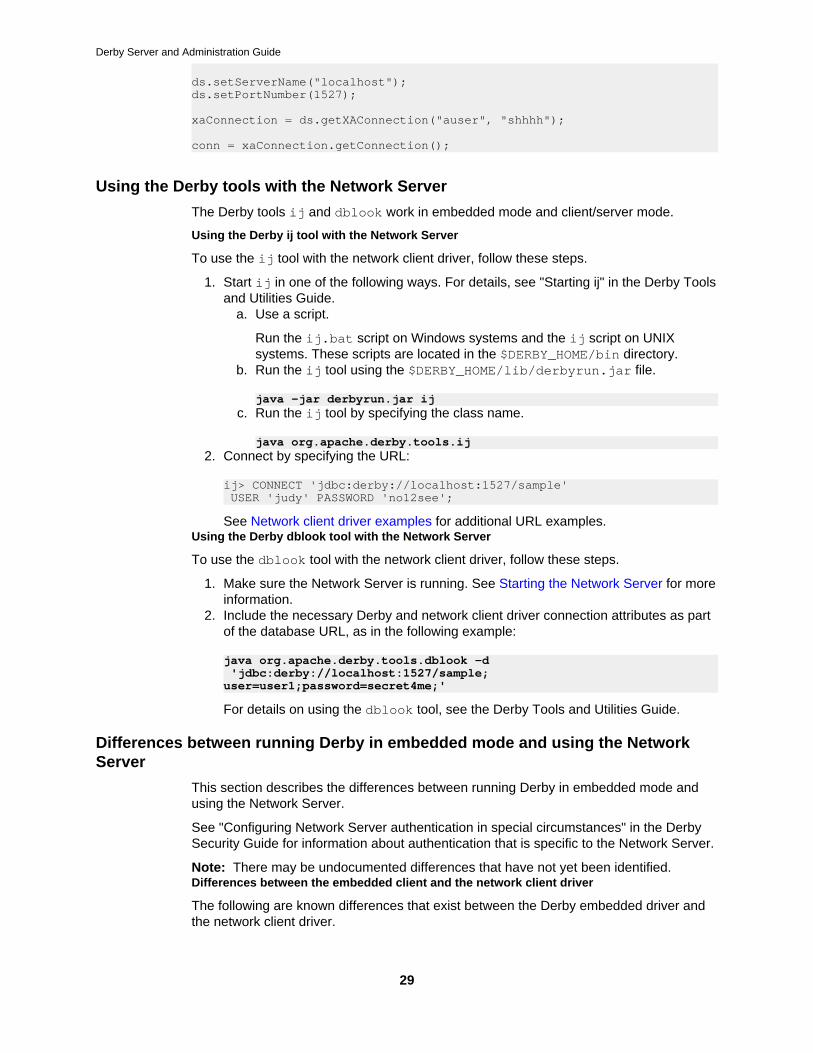
The following example illustrates how to obtain an XA connection with the network clientdriver:
import org.apache.derby.jdbc.ClientXADataSource;import javax.sql.XAConnection;...
XAConnection xaConnection = null;Connection conn = null;
ClientXADataSource ds = new ClientXADataSource();
ds.setDatabaseName ("sample");ds.setCreateDatabase("create");
Derby Server and Administration Guide
29
ds.setServerName("localhost");ds.setPortNumber(1527);
xaConnection = ds.getXAConnection("auser", "shhhh");
conn = xaConnection.getConnection();
Using the Derby tools with the Network Server
The Derby tools ij and dblook work in embedded mode and client/server mode.
Using the Derby ij tool with the Network Server
To use the ij tool with the network client driver, follow these steps.
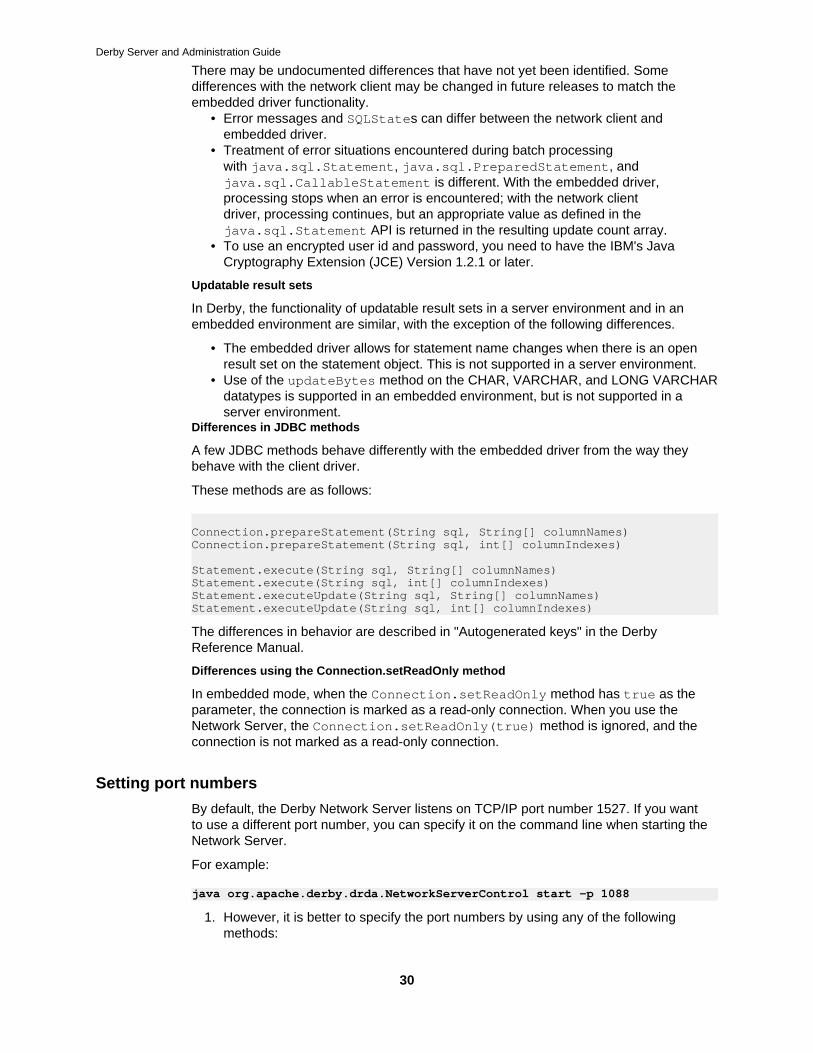
1. Start ij in one of the following ways. For details, see "Starting ij" in the Derby Toolsand Utilities Guide.
a. Use a script.
Run the ij.bat script on Windows systems and the ij script on UNIXsystems. These scripts are located in the $DERBY_HOME/bin directory.
b. Run the ij tool using the $DERBY_HOME/lib/derbyrun.jar file.
java -jar derbyrun.jar ijc. Run the ij tool by specifying the class name.
java org.apache.derby.tools.ij2. Connect by specifying the URL:
ij> CONNECT 'jdbc:derby://localhost:1527/sample' USER 'judy' PASSWORD 'no12see';
See Network client driver examples for additional URL examples.Using the Derby dblook tool with the Network Server
To use the dblook tool with the network client driver, follow these steps.
1. Make sure the Network Server is running. See Starting the Network Server for moreinformation.
2. Include the necessary Derby and network client driver connection attributes as partof the database URL, as in the following example:
java org.apache.derby.tools.dblook -d 'jdbc:derby://localhost:1527/sample;user=user1;password=secret4me;'
For details on using the dblook tool, see the Derby Tools and Utilities Guide.
Differences between running Derby in embedded mode and using the NetworkServer
This section describes the differences between running Derby in embedded mode andusing the Network Server.
See "Configuring Network Server authentication in special circumstances" in the DerbySecurity Guide for information about authentication that is specific to the Network Server.
Note: There may be undocumented differences that have not yet been identified.Differences between the embedded client and the network client driver
The following are known differences that exist between the Derby embedded driver andthe network client driver.
Derby Server and Administration Guide
30
There may be undocumented differences that have not yet been identified. Somedifferences with the network client may be changed in future releases to match theembedded driver functionality.
• Error messages and SQLStates can differ between the network client andembedded driver.
• Treatment of error situations encountered during batch processingwith java.sql.Statement, java.sql.PreparedStatement, andjava.sql.CallableStatement is different. With the embedded driver,processing stops when an error is encountered; with the network clientdriver, processing continues, but an appropriate value as defined in thejava.sql.Statement API is returned in the resulting update count array.
• To use an encrypted user id and password, you need to have the IBM's JavaCryptography Extension (JCE) Version 1.2.1 or later.
Updatable result sets
In Derby, the functionality of updatable result sets in a server environment and in anembedded environment are similar, with the exception of the following differences.
• The embedded driver allows for statement name changes when there is an openresult set on the statement object. This is not supported in a server environment.
• Use of the updateBytes method on the CHAR, VARCHAR, and LONG VARCHARdatatypes is supported in an embedded environment, but is not supported in aserver environment.
Differences in JDBC methods
A few JDBC methods behave differently with the embedded driver from the way theybehave with the client driver.
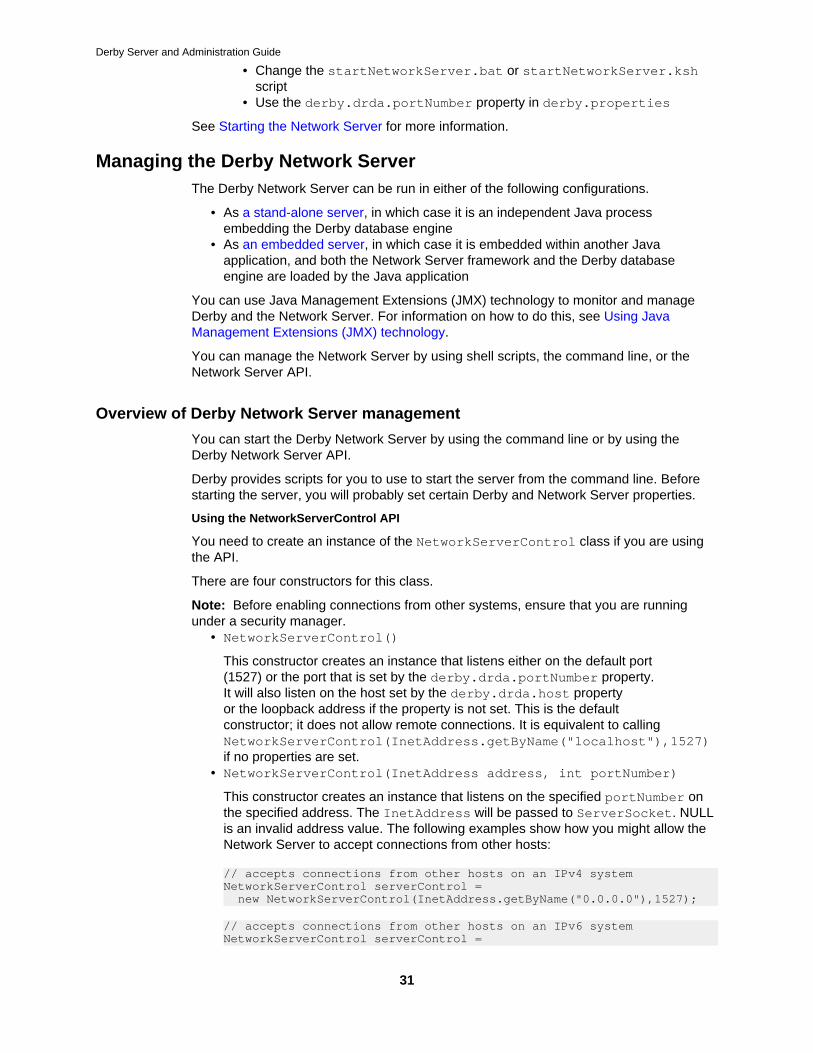
These methods are as follows:
Connection.prepareStatement(String sql, String[] columnNames)Connection.prepareStatement(String sql, int[] columnIndexes)
Statement.execute(String sql, String[] columnNames)Statement.execute(String sql, int[] columnIndexes)Statement.executeUpdate(String sql, String[] columnNames)Statement.executeUpdate(String sql, int[] columnIndexes)
The differences in behavior are described in "Autogenerated keys" in the DerbyReference Manual.
Differences using the Connection.setReadOnly method
In embedded mode, when the Connection.setReadOnly method has true as theparameter, the connection is marked as a read-only connection. When you use theNetwork Server, the Connection.setReadOnly(true) method is ignored, and theconnection is not marked as a read-only connection.
Setting port numbers
By default, the Derby Network Server listens on TCP/IP port number 1527. If you wantto use a different port number, you can specify it on the command line when starting theNetwork Server.
For example:
java org.apache.derby.drda.NetworkServerControl start -p 1088
1. However, it is better to specify the port numbers by using any of the followingmethods:
Derby Server and Administration Guide
31
• Change the startNetworkServer.bat or startNetworkServer.kshscript
• Use the derby.drda.portNumber property in derby.properties
See Starting the Network Server for more information.
Managing the Derby Network ServerThe Derby Network Server can be run in either of the following configurations.
• As a stand-alone server, in which case it is an independent Java processembedding the Derby database engine
• As an embedded server, in which case it is embedded within another Javaapplication, and both the Network Server framework and the Derby databaseengine are loaded by the Java application
You can use Java Management Extensions (JMX) technology to monitor and manageDerby and the Network Server. For information on how to do this, see Using JavaManagement Extensions (JMX) technology.
You can manage the Network Server by using shell scripts, the command line, or theNetwork Server API.
Overview of Derby Network Server management
You can start the Derby Network Server by using the command line or by using theDerby Network Server API.
Derby provides scripts for you to use to start the server from the command line. Beforestarting the server, you will probably set certain Derby and Network Server properties.
Using the NetworkServerControl API
You need to create an instance of the NetworkServerControl class if you are usingthe API.
There are four constructors for this class.
Note: Before enabling connections from other systems, ensure that you are runningunder a security manager.
• NetworkServerControl()
This constructor creates an instance that listens either on the default port(1527) or the port that is set by the derby.drda.portNumber property.It will also listen on the host set by the derby.drda.host propertyor the loopback address if the property is not set. This is the defaultconstructor; it does not allow remote connections. It is equivalent to callingNetworkServerControl(InetAddress.getByName("localhost"),1527)if no properties are set.
• NetworkServerControl(InetAddress address, int portNumber)
This constructor creates an instance that listens on the specified portNumber onthe specified address. The InetAddress will be passed to ServerSocket. NULLis an invalid address value. The following examples show how you might allow theNetwork Server to accept connections from other hosts:
// accepts connections from other hosts on an IPv4 systemNetworkServerControl serverControl = new NetworkServerControl(InetAddress.getByName("0.0.0.0"),1527);
// accepts connections from other hosts on an IPv6 systemNetworkServerControl serverControl =
Derby Server and Administration Guide
32
new NetworkServerControl(InetAddress.getByName("::"),1527);• NetworkServerControl(String userName, String password)
If a network server should run with user authentication, certain operations likeNetworkServerControl.shutdown() require that you provide user credentials.This constructor creates an instance with user credentials, which are then usedfor operations that require them. In all other aspects, this constructor behaves likeNetworkServerControl().
• NetworkServerControl(InetAddress address, int portNumber,String userName, String password)
This constructor creates an instance with user credentials, which are then usedfor operations that require them. In all other aspects, this constructor behaves likeNetworkServerControl(InetAddress address, int portNumber).
Setting Network Server properties
You can specify Network Server properties in the following ways.
• On the command line• In the .bat or .ksh files (load the properties by executing java -D)• In the derby.properties file
Properties specified on the command line or in the .bat or .ksh files take precedenceover the properties in the derby.properties file. Arguments included in commandsthat are issued on the command line take precedence over property values.
derby.drda.host property
Causes the Network Server to listen on a specific network interface.
This property allows multiple instances of Network Server to run on a single machine,each using its own unique host:port combination. The host needs to be set to enableremote connections.
By default, the Network Server will listen only on the loopback address. If the property isset to 0.0.0.0, the Network Server will listen on all interfaces.
Ensure that you are running under a security manager and that user authorization isenabled before you enable remote connections with this property.
Syntax
derby.drda.host=hostName
Default
If no host name is specified, the Network Server listens on the loopback address of thecurrent machine (localhost).
Example
derby.drda.host=myhost
Static or dynamic
Static. You must restart the Network Server for changes to take effect.
derby.drda.keepAlive property
Indicates whether SO_KEEPALIVE is enabled on sockets.
The keepAlive mechanism is used to detect when clients disconnect unexpectedly.A keepalive probe is sent to the client if a long time (by default, more than two hours)passes with no other data being sent or received. The derby.drda.keepAlive
Derby Server and Administration Guide
33
property is used to detect and clean up connections for clients on powered-off machinesor clients that have disconnected unexpectedly.
If the property is set to false, Derby will not attempt to clean up disconnected clients.The keepAlive mechanism might be disabled if clients need to resume work withoutreconnecting even after being disconnected from the network for some time. To disablekeepAlive probes on Network Server connections, set this property to false.
Syntax
derby.drda.keepAlive={true|false}
Default
True.
Example
derby.drdra.keepAlive=false
Static or dynamic
Static. You must restart the Network Server for changes to take effect.
derby.drda.logConnections property
Indicates whether to log connections.
This property also controls the logging of the connection number. Connection numbertracing, if enabled, goes to both the derby.log file and the Network Server console.
Syntax
derby.drda.logConnections={true|false}
Default
False.
Example
derby.drda.logConnections=true
Static or dynamic
Dynamic. You can change system values by using commands after the Network Serverhas been started.
derby.drda.maxThreads property
Sets the maximum number of connection threads that the Network Server will allocate.
If all of the connection threads are currently being used and the Network Server hasalready allocated the maximum number of threads, the threads will be shared by usingthe derby.drda.timeSlice property to determine when sessions will be swapped.
Syntax
derby.drda.maxThreads=numThreads
Default
0 (zero).
Example
derby.drda.maxThreads=50
Static or dynamic
Derby Server and Administration Guide
34
Static. You must restart the Network Server for changes to take effect.
derby.drda.minThreads property
Sets the minimum number of connection threads that the Network Server will allocate.
By default, connection threads are allocated as needed.
Syntax
derby.drda.minThreads=numThreads
Default
0 (zero).
Example
derby.drda.minThreads=10
Static or dynamic
Static. You must restart the Network Server for changes to take effect.
derby.drda.portNumber property
Indicates the port number to use.
Syntax
derby.drda.portNumber=portNumber
Default
If no port number is specified, 1527 is the default.
Example
derby.drda.portNumber=1110
Static or dynamic
Static. You must restart the Network Server for changes to take effect.
derby.drda.securityMechanism property
Restricts the client connections based on the security mechanism.
If the derby.drda.securityMechanism property is set to a valid mechanism, theNetwork Server accepts only connections which use that security mechanism. No othertypes of connections are accepted. If the derby.drda.securityMechanism propertyis not set, the Network Server accepts any connection which uses a valid securitymechanism.
Syntax
derby.drda.securityMechanism={ USER_ONLY_SECURITY | CLEAR_TEXT_PASSWORD_SECURITY | ENCRYPTED_USER_AND_PASSWORD_SECURITY}
Default
None.
Example
derby.drda.securityMechanism=USER_ONLY_SECURITY
Derby Server and Administration Guide
35
The server that runs with this setting accepts only client connections with theUSER_ONLY_SECURITY value.
Static or dynamic
Static. You must restart the Network Server for changes to take effect.
derby.drda.sslMode property
Indicates whether the client connection is encrypted or not, and whether certificate-basedpeer authentication is enabled.
Syntax
derby.drda.sslMode={ off | basic | peerAuthentication}
Default
off.
Example
derby.drda.sslMode=basic
The server that runs with this setting accepts client connections encrypted with SSL.
Static or dynamic
Static. You must restart the Network Server for changes to take effect.
derby.drda.startNetworkServer property
Indicates whether the Network Server will start automatically when you start Derby.
Use the derby.drda.startNetworkServer property to simplify embedding theNetwork Server in your Java application. When you set this property to true, the NetworkServer will automatically start when you start Derby (in this context, Derby will start whenthe embedded driver is loaded). Only one Network Server can be started in a JVM.
Note: If you start the Network Server with this property set to true, the Network Serverwill stop when your application ends or when you stop it by other means (for example,by using the Java API or the command line interface, or by shutting down the Derbysystem), whichever comes first.
Syntax
derby.drda.startNetworkServer={true|false}
Default
False.
Example
derby.drda.startNetworkServer=true
Static or dynamic
Static. You must shut down the Network Server and restart Derby for this change to takeeffect.
derby.drda.streamOutBufferSize property
Configures the size of the buffer for streaming blob/clob data from server to client.
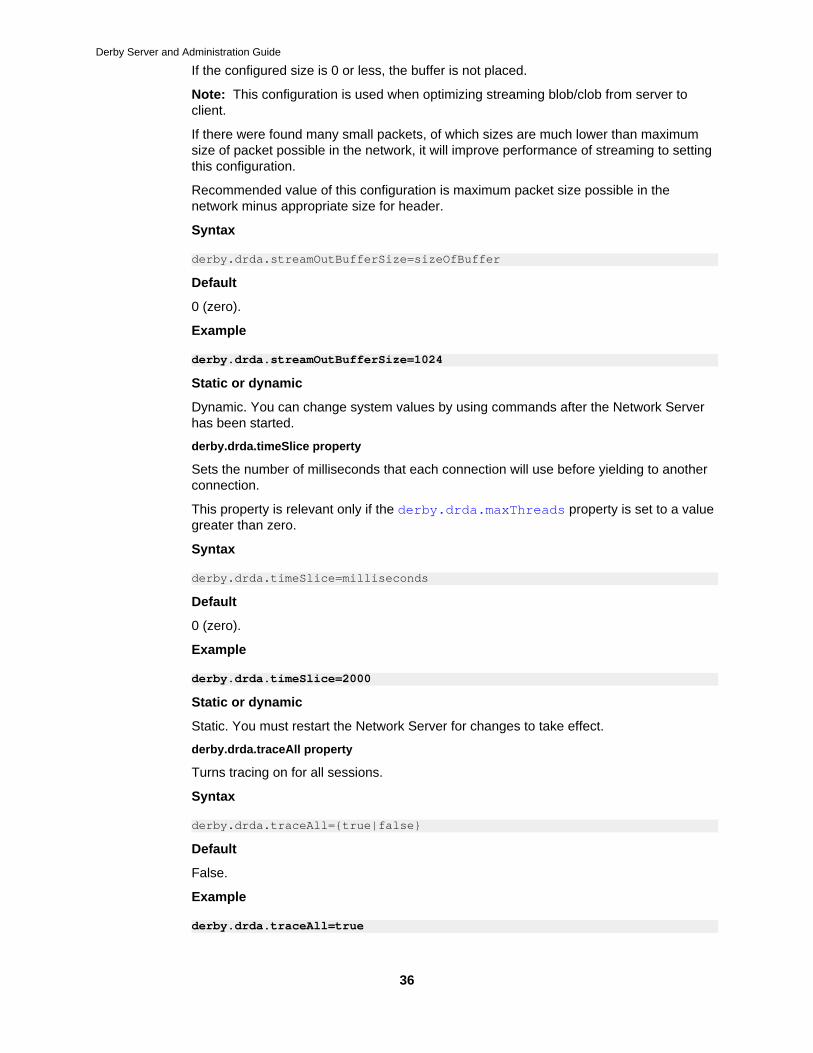
Derby Server and Administration Guide
36
If the configured size is 0 or less, the buffer is not placed.
Note: This configuration is used when optimizing streaming blob/clob from server toclient.
If there were found many small packets, of which sizes are much lower than maximumsize of packet possible in the network, it will improve performance of streaming to settingthis configuration.
Recommended value of this configuration is maximum packet size possible in thenetwork minus appropriate size for header.
Syntax
derby.drda.streamOutBufferSize=sizeOfBuffer
Default
0 (zero).
Example
derby.drda.streamOutBufferSize=1024
Static or dynamic
Dynamic. You can change system values by using commands after the Network Serverhas been started.
derby.drda.timeSlice property
Sets the number of milliseconds that each connection will use before yielding to anotherconnection.
This property is relevant only if the derby.drda.maxThreads property is set to a valuegreater than zero.
Syntax
derby.drda.timeSlice=milliseconds
Default
0 (zero).
Example
derby.drda.timeSlice=2000
Static or dynamic
Static. You must restart the Network Server for changes to take effect.
derby.drda.traceAll property
Turns tracing on for all sessions.
Syntax
derby.drda.traceAll={true|false}
Default
False.
Example
derby.drda.traceAll=true
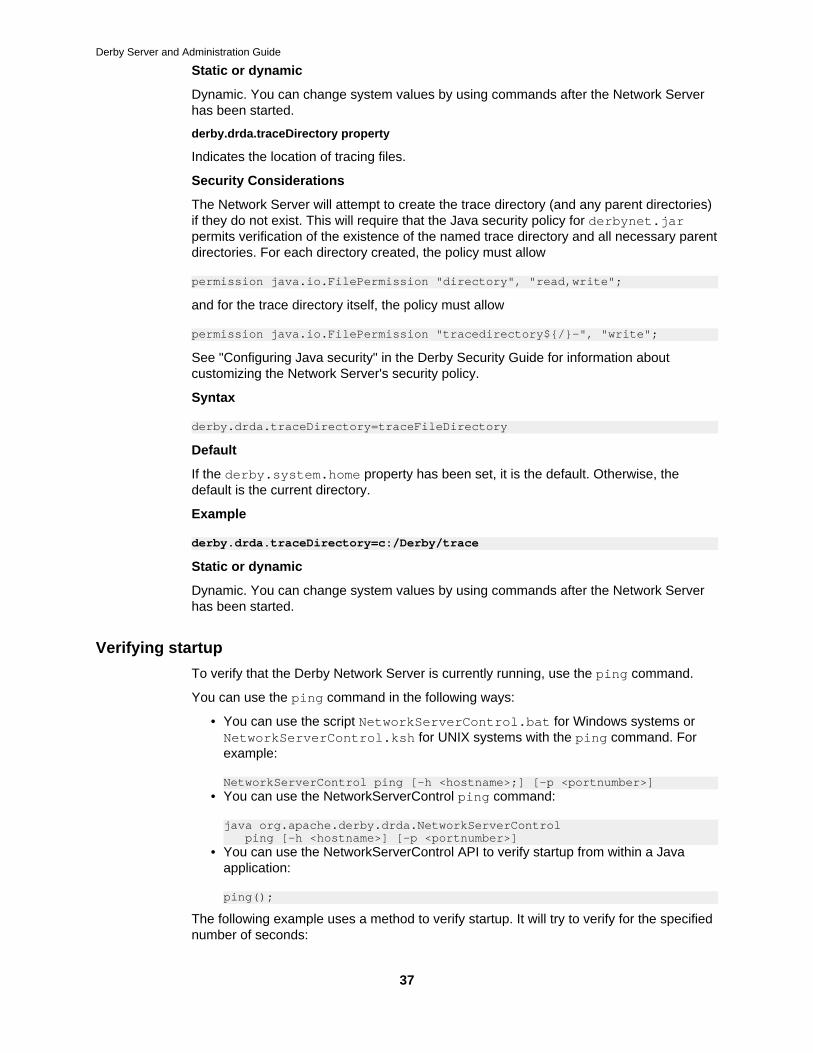
Derby Server and Administration Guide
37
Static or dynamic
Dynamic. You can change system values by using commands after the Network Serverhas been started.
derby.drda.traceDirectory property
Indicates the location of tracing files.
Security Considerations
The Network Server will attempt to create the trace directory (and any parent directories)if they do not exist. This will require that the Java security policy for derbynet.jarpermits verification of the existence of the named trace directory and all necessary parentdirectories. For each directory created, the policy must allow
permission java.io.FilePermission "directory", "read,write";
and for the trace directory itself, the policy must allow
permission java.io.FilePermission "tracedirectory${/}-", "write";
See "Configuring Java security" in the Derby Security Guide for information aboutcustomizing the Network Server's security policy.
Syntax
derby.drda.traceDirectory=traceFileDirectory
Default
If the derby.system.home property has been set, it is the default. Otherwise, thedefault is the current directory.
Example
derby.drda.traceDirectory=c:/Derby/trace
Static or dynamic
Dynamic. You can change system values by using commands after the Network Serverhas been started.
Verifying startup
To verify that the Derby Network Server is currently running, use the ping command.
You can use the ping command in the following ways:
• You can use the script NetworkServerControl.bat for Windows systems orNetworkServerControl.ksh for UNIX systems with the ping command. Forexample:
NetworkServerControl ping [-h <hostname>;] [-p <portnumber>]• You can use the NetworkServerControl ping command:
java org.apache.derby.drda.NetworkServerControl ping [-h <hostname>] [-p <portnumber>]
• You can use the NetworkServerControl API to verify startup from within a Javaapplication:
ping();
The following example uses a method to verify startup. It will try to verify for the specifiednumber of seconds:
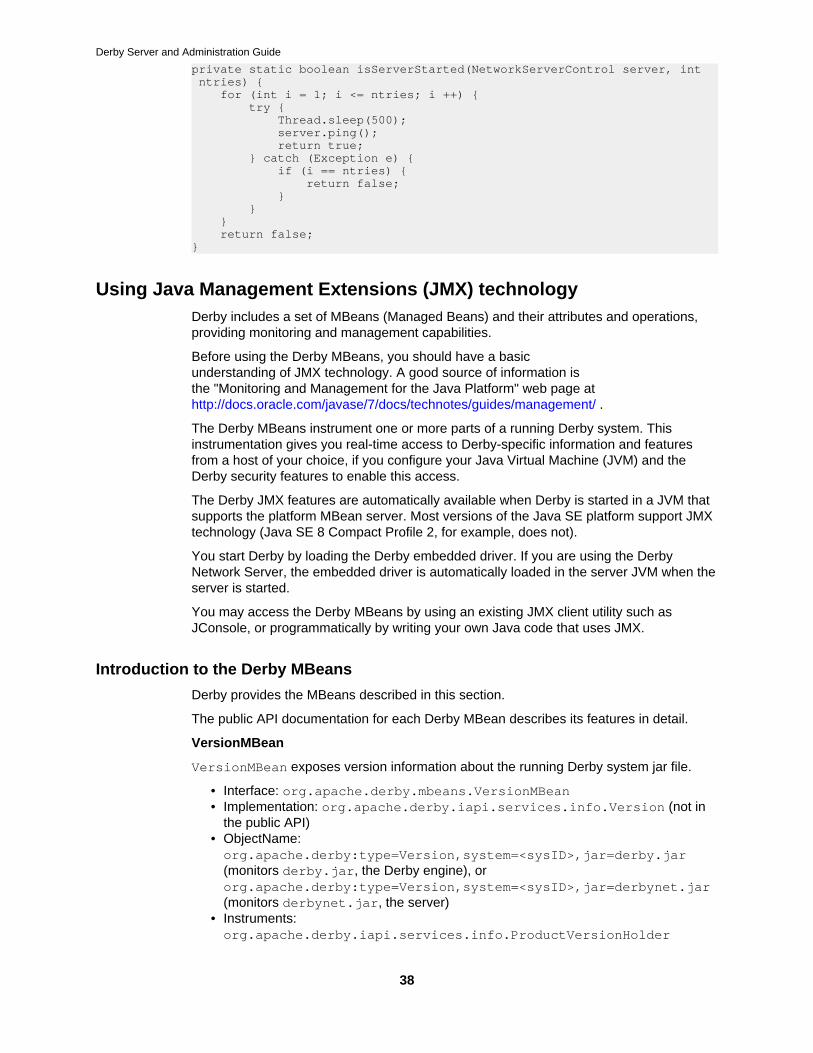
Derby Server and Administration Guide
38
private static boolean isServerStarted(NetworkServerControl server, int ntries) { for (int i = 1; i <= ntries; i ++) { try { Thread.sleep(500); server.ping(); return true; } catch (Exception e) { if (i == ntries) { return false; } } } return false;}
Using Java Management Extensions (JMX) technologyDerby includes a set of MBeans (Managed Beans) and their attributes and operations,providing monitoring and management capabilities.
Before using the Derby MBeans, you should have a basicunderstanding of JMX technology. A good source of information isthe "Monitoring and Management for the Java Platform" web page athttp://docs.oracle.com/javase/7/docs/technotes/guides/management/ .
The Derby MBeans instrument one or more parts of a running Derby system. Thisinstrumentation gives you real-time access to Derby-specific information and featuresfrom a host of your choice, if you configure your Java Virtual Machine (JVM) and theDerby security features to enable this access.
The Derby JMX features are automatically available when Derby is started in a JVM thatsupports the platform MBean server. Most versions of the Java SE platform support JMXtechnology (Java SE 8 Compact Profile 2, for example, does not).
You start Derby by loading the Derby embedded driver. If you are using the DerbyNetwork Server, the embedded driver is automatically loaded in the server JVM when theserver is started.
You may access the Derby MBeans by using an existing JMX client utility such asJConsole, or programmatically by writing your own Java code that uses JMX.
Introduction to the Derby MBeans
Derby provides the MBeans described in this section.
The public API documentation for each Derby MBean describes its features in detail.
VersionMBean
VersionMBean exposes version information about the running Derby system jar file.
• Interface: org.apache.derby.mbeans.VersionMBean• Implementation: org.apache.derby.iapi.services.info.Version (not in
the public API)• ObjectName:org.apache.derby:type=Version,system=<sysID>,jar=derby.jar(monitors derby.jar, the Derby engine), ororg.apache.derby:type=Version,system=<sysID>,jar=derbynet.jar(monitors derbynet.jar, the server)
• Instruments:org.apache.derby.iapi.services.info.ProductVersionHolder
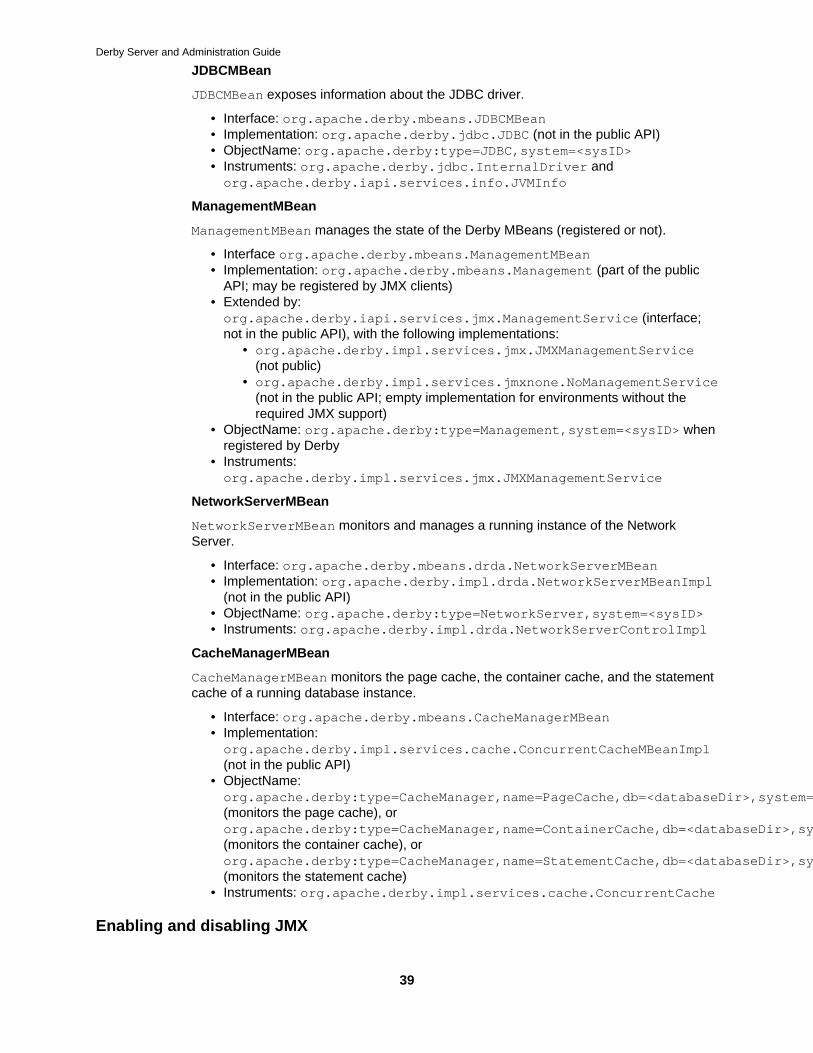
Derby Server and Administration Guide
39
JDBCMBean
JDBCMBean exposes information about the JDBC driver.
• Interface: org.apache.derby.mbeans.JDBCMBean• Implementation: org.apache.derby.jdbc.JDBC (not in the public API)• ObjectName: org.apache.derby:type=JDBC,system=<sysID>• Instruments: org.apache.derby.jdbc.InternalDriver andorg.apache.derby.iapi.services.info.JVMInfo
ManagementMBean
ManagementMBean manages the state of the Derby MBeans (registered or not).
• Interface org.apache.derby.mbeans.ManagementMBean• Implementation: org.apache.derby.mbeans.Management (part of the public
API; may be registered by JMX clients)• Extended by:org.apache.derby.iapi.services.jmx.ManagementService (interface;not in the public API), with the following implementations:
• org.apache.derby.impl.services.jmx.JMXManagementService(not public)
• org.apache.derby.impl.services.jmxnone.NoManagementService(not in the public API; empty implementation for environments without therequired JMX support)
• ObjectName: org.apache.derby:type=Management,system=<sysID> whenregistered by Derby
• Instruments:org.apache.derby.impl.services.jmx.JMXManagementService
NetworkServerMBean
NetworkServerMBean monitors and manages a running instance of the NetworkServer.
• Interface: org.apache.derby.mbeans.drda.NetworkServerMBean• Implementation: org.apache.derby.impl.drda.NetworkServerMBeanImpl
(not in the public API)• ObjectName: org.apache.derby:type=NetworkServer,system=<sysID>• Instruments: org.apache.derby.impl.drda.NetworkServerControlImpl
CacheManagerMBean
CacheManagerMBean monitors the page cache, the container cache, and the statementcache of a running database instance.
• Interface: org.apache.derby.mbeans.CacheManagerMBean• Implementation:org.apache.derby.impl.services.cache.ConcurrentCacheMBeanImpl(not in the public API)
• ObjectName:org.apache.derby:type=CacheManager,name=PageCache,db=<databaseDir>,system=<sysID>(monitors the page cache), ororg.apache.derby:type=CacheManager,name=ContainerCache,db=<databaseDir>,system=<sysID>(monitors the container cache), ororg.apache.derby:type=CacheManager,name=StatementCache,db=<databaseDir>,system=<sysID>(monitors the statement cache)
• Instruments: org.apache.derby.impl.services.cache.ConcurrentCache
Enabling and disabling JMX
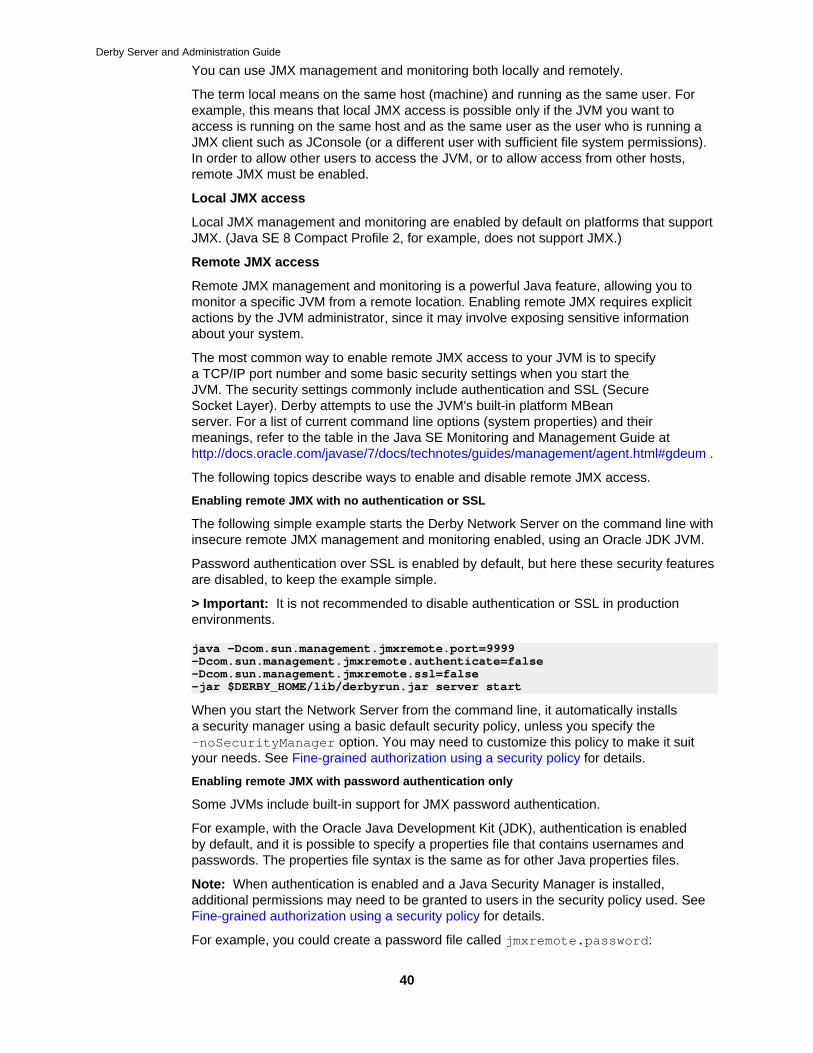
Derby Server and Administration Guide
40
You can use JMX management and monitoring both locally and remotely.
The term local means on the same host (machine) and running as the same user. Forexample, this means that local JMX access is possible only if the JVM you want toaccess is running on the same host and as the same user as the user who is running aJMX client such as JConsole (or a different user with sufficient file system permissions).In order to allow other users to access the JVM, or to allow access from other hosts,remote JMX must be enabled.
Local JMX access
Local JMX management and monitoring are enabled by default on platforms that supportJMX. (Java SE 8 Compact Profile 2, for example, does not support JMX.)
Remote JMX access
Remote JMX management and monitoring is a powerful Java feature, allowing you tomonitor a specific JVM from a remote location. Enabling remote JMX requires explicitactions by the JVM administrator, since it may involve exposing sensitive informationabout your system.
The most common way to enable remote JMX access to your JVM is to specifya TCP/IP port number and some basic security settings when you start theJVM. The security settings commonly include authentication and SSL (SecureSocket Layer). Derby attempts to use the JVM's built-in platform MBeanserver. For a list of current command line options (system properties) and theirmeanings, refer to the table in the Java SE Monitoring and Management Guide athttp://docs.oracle.com/javase/7/docs/technotes/guides/management/agent.html#gdeum .
The following topics describe ways to enable and disable remote JMX access.
Enabling remote JMX with no authentication or SSL
The following simple example starts the Derby Network Server on the command line withinsecure remote JMX management and monitoring enabled, using an Oracle JDK JVM.
Password authentication over SSL is enabled by default, but here these security featuresare disabled, to keep the example simple.
> Important: It is not recommended to disable authentication or SSL in productionenvironments.
java -Dcom.sun.management.jmxremote.port=9999-Dcom.sun.management.jmxremote.authenticate=false-Dcom.sun.management.jmxremote.ssl=false -jar $DERBY_HOME/lib/derbyrun.jar server start
When you start the Network Server from the command line, it automatically installsa security manager using a basic default security policy, unless you specify the-noSecurityManager option. You may need to customize this policy to make it suityour needs. See Fine-grained authorization using a security policy for details.
Enabling remote JMX with password authentication only
Some JVMs include built-in support for JMX password authentication.
For example, with the Oracle Java Development Kit (JDK), authentication is enabledby default, and it is possible to specify a properties file that contains usernames andpasswords. The properties file syntax is the same as for other Java properties files.
Note: When authentication is enabled and a Java Security Manager is installed,additional permissions may need to be granted to users in the security policy used. SeeFine-grained authorization using a security policy for details.
For example, you could create a password file called jmxremote.password:
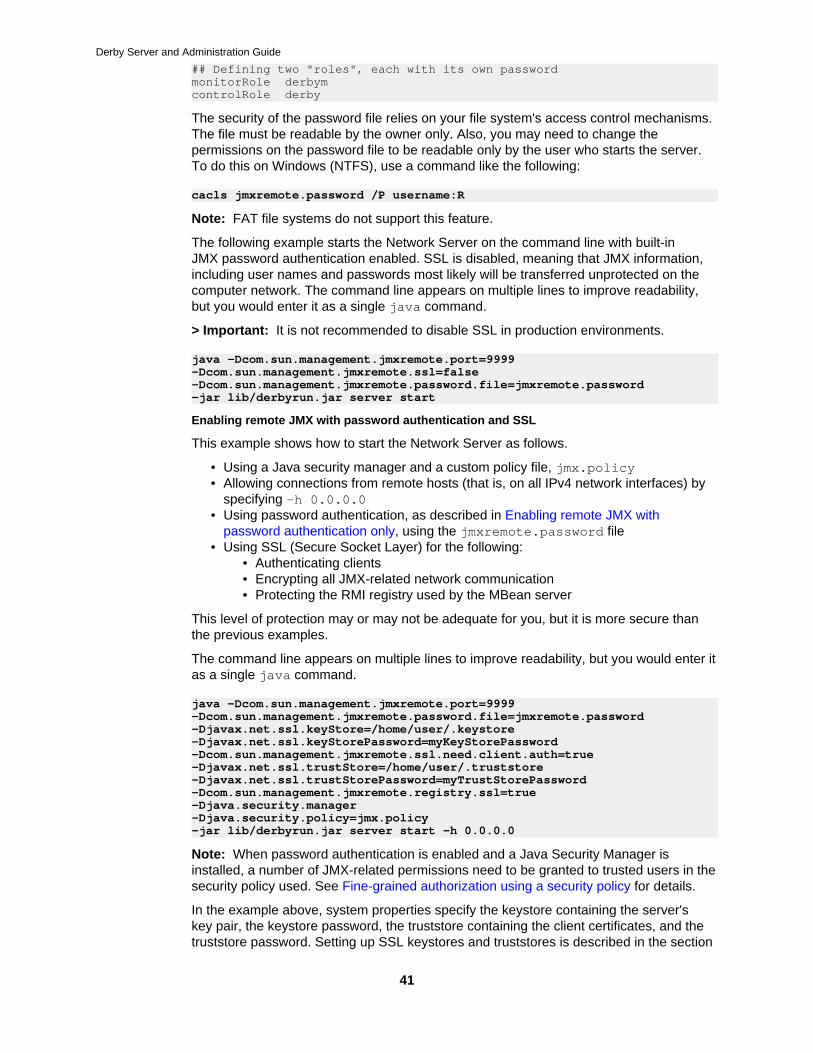
Derby Server and Administration Guide
41
## Defining two "roles", each with its own passwordmonitorRole derbymcontrolRole derby
The security of the password file relies on your file system's access control mechanisms.The file must be readable by the owner only. Also, you may need to change thepermissions on the password file to be readable only by the user who starts the server.To do this on Windows (NTFS), use a command like the following:
cacls jmxremote.password /P username:R
Note: FAT file systems do not support this feature.
The following example starts the Network Server on the command line with built-inJMX password authentication enabled. SSL is disabled, meaning that JMX information,including user names and passwords most likely will be transferred unprotected on thecomputer network. The command line appears on multiple lines to improve readability,but you would enter it as a single java command.
> Important: It is not recommended to disable SSL in production environments.
java -Dcom.sun.management.jmxremote.port=9999-Dcom.sun.management.jmxremote.ssl=false -Dcom.sun.management.jmxremote.password.file=jmxremote.password-jar lib/derbyrun.jar server start
Enabling remote JMX with password authentication and SSL
This example shows how to start the Network Server as follows.
• Using a Java security manager and a custom policy file, jmx.policy• Allowing connections from remote hosts (that is, on all IPv4 network interfaces) by
specifying -h 0.0.0.0• Using password authentication, as described in Enabling remote JMX with
password authentication only, using the jmxremote.password file• Using SSL (Secure Socket Layer) for the following:
• Authenticating clients• Encrypting all JMX-related network communication• Protecting the RMI registry used by the MBean server
This level of protection may or may not be adequate for you, but it is more secure thanthe previous examples.
The command line appears on multiple lines to improve readability, but you would enter itas a single java command.
java -Dcom.sun.management.jmxremote.port=9999 -Dcom.sun.management.jmxremote.password.file=jmxremote.password -Djavax.net.ssl.keyStore=/home/user/.keystore -Djavax.net.ssl.keyStorePassword=myKeyStorePassword -Dcom.sun.management.jmxremote.ssl.need.client.auth=true -Djavax.net.ssl.trustStore=/home/user/.truststore -Djavax.net.ssl.trustStorePassword=myTrustStorePassword -Dcom.sun.management.jmxremote.registry.ssl=true -Djava.security.manager -Djava.security.policy=jmx.policy -jar lib/derbyrun.jar server start -h 0.0.0.0
Note: When password authentication is enabled and a Java Security Manager isinstalled, a number of JMX-related permissions need to be granted to trusted users in thesecurity policy used. See Fine-grained authorization using a security policy for details.
In the example above, system properties specify the keystore containing the server'skey pair, the keystore password, the truststore containing the client certificates, and thetruststore password. Setting up SSL keystores and truststores is described in the section
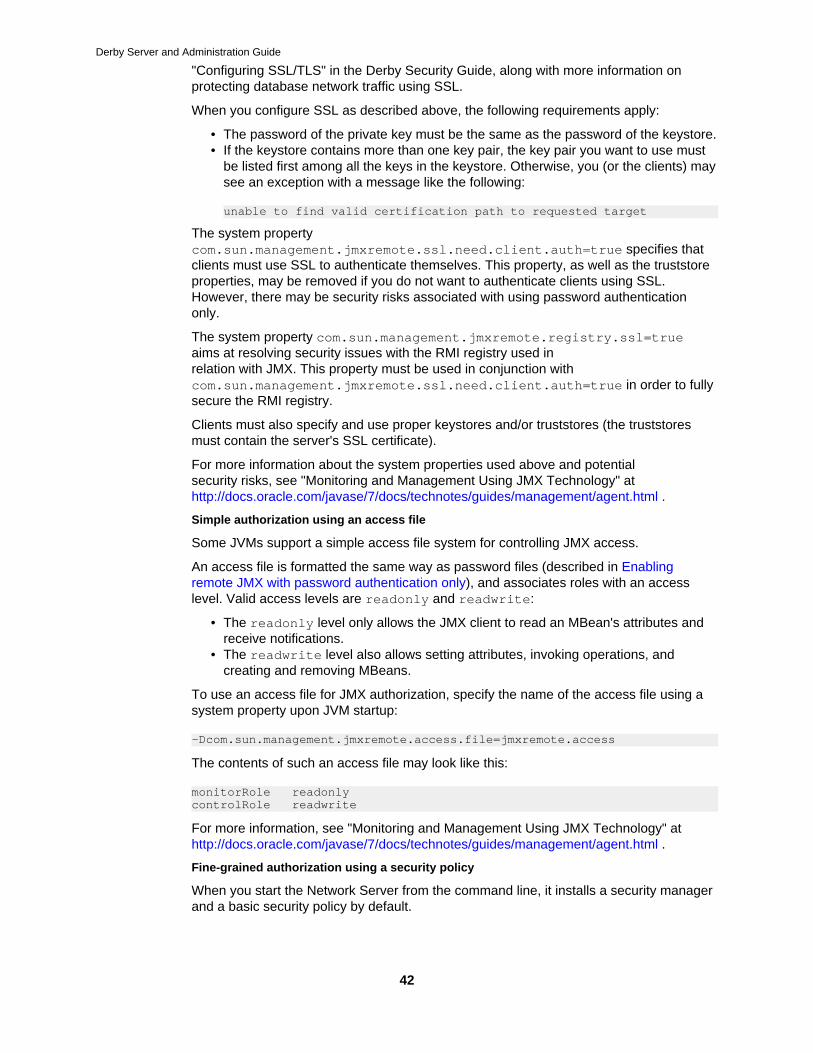
Derby Server and Administration Guide
42
"Configuring SSL/TLS" in the Derby Security Guide, along with more information onprotecting database network traffic using SSL.
When you configure SSL as described above, the following requirements apply:
• The password of the private key must be the same as the password of the keystore.• If the keystore contains more than one key pair, the key pair you want to use must
be listed first among all the keys in the keystore. Otherwise, you (or the clients) maysee an exception with a message like the following:
unable to find valid certification path to requested target
The system propertycom.sun.management.jmxremote.ssl.need.client.auth=true specifies thatclients must use SSL to authenticate themselves. This property, as well as the truststoreproperties, may be removed if you do not want to authenticate clients using SSL.However, there may be security risks associated with using password authenticationonly.
The system property com.sun.management.jmxremote.registry.ssl=trueaims at resolving security issues with the RMI registry used inrelation with JMX. This property must be used in conjunction withcom.sun.management.jmxremote.ssl.need.client.auth=true in order to fullysecure the RMI registry.
Clients must also specify and use proper keystores and/or truststores (the truststoresmust contain the server's SSL certificate).
For more information about the system properties used above and potentialsecurity risks, see "Monitoring and Management Using JMX Technology" athttp://docs.oracle.com/javase/7/docs/technotes/guides/management/agent.html .
Simple authorization using an access file
Some JVMs support a simple access file system for controlling JMX access.
An access file is formatted the same way as password files (described in Enablingremote JMX with password authentication only), and associates roles with an accesslevel. Valid access levels are readonly and readwrite:
• The readonly level only allows the JMX client to read an MBean's attributes andreceive notifications.
• The readwrite level also allows setting attributes, invoking operations, andcreating and removing MBeans.
To use an access file for JMX authorization, specify the name of the access file using asystem property upon JVM startup:
-Dcom.sun.management.jmxremote.access.file=jmxremote.access
The contents of such an access file may look like this:
monitorRole readonlycontrolRole readwrite
For more information, see "Monitoring and Management Using JMX Technology" athttp://docs.oracle.com/javase/7/docs/technotes/guides/management/agent.html .
Fine-grained authorization using a security policy
When you start the Network Server from the command line, it installs a security managerand a basic security policy by default.
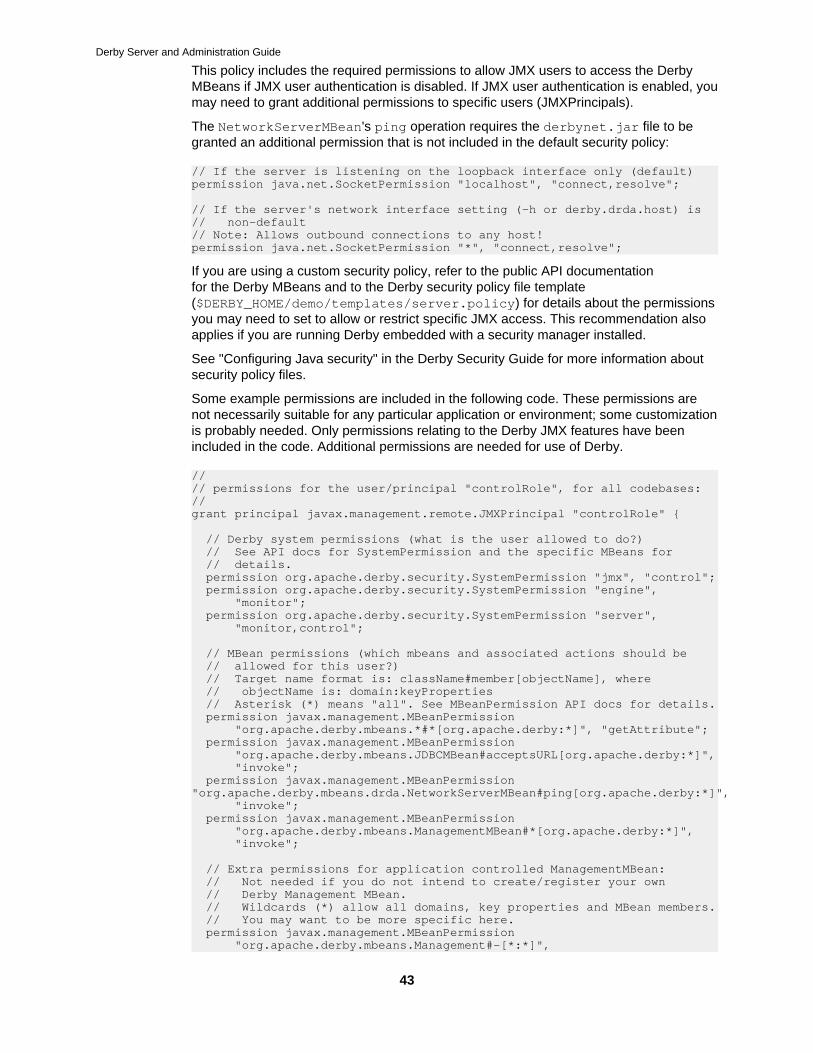
Derby Server and Administration Guide
43
This policy includes the required permissions to allow JMX users to access the DerbyMBeans if JMX user authentication is disabled. If JMX user authentication is enabled, youmay need to grant additional permissions to specific users (JMXPrincipals).
The NetworkServerMBean's ping operation requires the derbynet.jar file to begranted an additional permission that is not included in the default security policy:
// If the server is listening on the loopback interface only (default)permission java.net.SocketPermission "localhost", "connect,resolve";
// If the server's network interface setting (-h or derby.drda.host) is// non-default// Note: Allows outbound connections to any host!permission java.net.SocketPermission "*", "connect,resolve";
If you are using a custom security policy, refer to the public API documentationfor the Derby MBeans and to the Derby security policy file template($DERBY_HOME/demo/templates/server.policy) for details about the permissionsyou may need to set to allow or restrict specific JMX access. This recommendation alsoapplies if you are running Derby embedded with a security manager installed.
See "Configuring Java security" in the Derby Security Guide for more information aboutsecurity policy files.
Some example permissions are included in the following code. These permissions arenot necessarily suitable for any particular application or environment; some customizationis probably needed. Only permissions relating to the Derby JMX features have beenincluded in the code. Additional permissions are needed for use of Derby.
//// permissions for the user/principal "controlRole", for all codebases://grant principal javax.management.remote.JMXPrincipal "controlRole" {
// Derby system permissions (what is the user allowed to do?) // See API docs for SystemPermission and the specific MBeans for // details. permission org.apache.derby.security.SystemPermission "jmx", "control"; permission org.apache.derby.security.SystemPermission "engine", "monitor"; permission org.apache.derby.security.SystemPermission "server", "monitor,control";
// MBean permissions (which mbeans and associated actions should be // allowed for this user?) // Target name format is: className#member[objectName], where // objectName is: domain:keyProperties // Asterisk (*) means "all". See MBeanPermission API docs for details. permission javax.management.MBeanPermission "org.apache.derby.mbeans.*#*[org.apache.derby:*]", "getAttribute"; permission javax.management.MBeanPermission "org.apache.derby.mbeans.JDBCMBean#acceptsURL[org.apache.derby:*]", "invoke"; permission javax.management.MBeanPermission "org.apache.derby.mbeans.drda.NetworkServerMBean#ping[org.apache.derby:*]", "invoke"; permission javax.management.MBeanPermission "org.apache.derby.mbeans.ManagementMBean#*[org.apache.derby:*]", "invoke";
// Extra permissions for application controlled ManagementMBean: // Not needed if you do not intend to create/register your own // Derby Management MBean. // Wildcards (*) allow all domains, key properties and MBean members. // You may want to be more specific here. permission javax.management.MBeanPermission "org.apache.derby.mbeans.Management#-[*:*]",
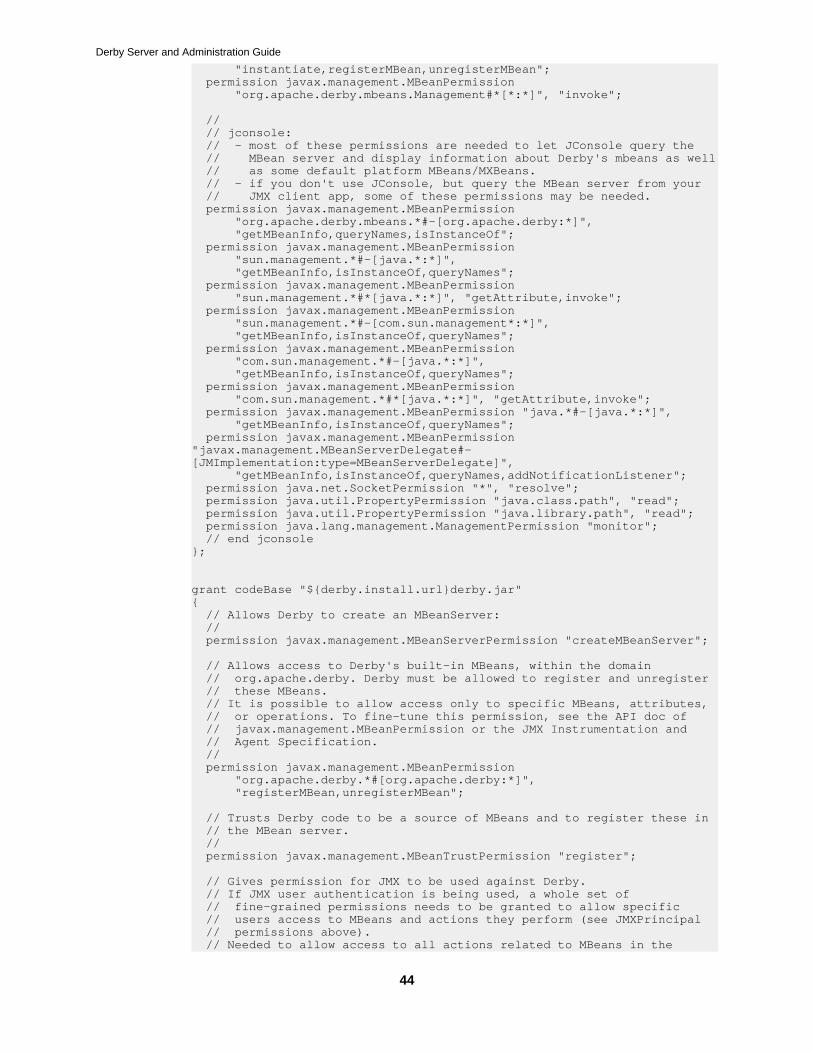
Derby Server and Administration Guide
44
"instantiate,registerMBean,unregisterMBean"; permission javax.management.MBeanPermission "org.apache.derby.mbeans.Management#*[*:*]", "invoke";
// // jconsole: // - most of these permissions are needed to let JConsole query the // MBean server and display information about Derby's mbeans as well // as some default platform MBeans/MXBeans. // - if you don't use JConsole, but query the MBean server from your // JMX client app, some of these permissions may be needed. permission javax.management.MBeanPermission "org.apache.derby.mbeans.*#-[org.apache.derby:*]", "getMBeanInfo,queryNames,isInstanceOf"; permission javax.management.MBeanPermission "sun.management.*#-[java.*:*]", "getMBeanInfo,isInstanceOf,queryNames"; permission javax.management.MBeanPermission "sun.management.*#*[java.*:*]", "getAttribute,invoke"; permission javax.management.MBeanPermission "sun.management.*#-[com.sun.management*:*]", "getMBeanInfo,isInstanceOf,queryNames"; permission javax.management.MBeanPermission "com.sun.management.*#-[java.*:*]", "getMBeanInfo,isInstanceOf,queryNames"; permission javax.management.MBeanPermission "com.sun.management.*#*[java.*:*]", "getAttribute,invoke"; permission javax.management.MBeanPermission "java.*#-[java.*:*]", "getMBeanInfo,isInstanceOf,queryNames"; permission javax.management.MBeanPermission "javax.management.MBeanServerDelegate#-[JMImplementation:type=MBeanServerDelegate]", "getMBeanInfo,isInstanceOf,queryNames,addNotificationListener"; permission java.net.SocketPermission "*", "resolve"; permission java.util.PropertyPermission "java.class.path", "read"; permission java.util.PropertyPermission "java.library.path", "read"; permission java.lang.management.ManagementPermission "monitor"; // end jconsole};
grant codeBase "${derby.install.url}derby.jar"{ // Allows Derby to create an MBeanServer: // permission javax.management.MBeanServerPermission "createMBeanServer";
// Allows access to Derby's built-in MBeans, within the domain // org.apache.derby. Derby must be allowed to register and unregister // these MBeans. // It is possible to allow access only to specific MBeans, attributes, // or operations. To fine-tune this permission, see the API doc of // javax.management.MBeanPermission or the JMX Instrumentation and // Agent Specification. // permission javax.management.MBeanPermission "org.apache.derby.*#[org.apache.derby:*]", "registerMBean,unregisterMBean";
// Trusts Derby code to be a source of MBeans and to register these in // the MBean server. // permission javax.management.MBeanTrustPermission "register";
// Gives permission for JMX to be used against Derby. // If JMX user authentication is being used, a whole set of // fine-grained permissions needs to be granted to allow specific // users access to MBeans and actions they perform (see JMXPrincipal // permissions above). // Needed to allow access to all actions related to MBeans in the

Derby Server and Administration Guide
45
// org.apache.derby.mbeans package. // permission org.apache.derby.security.SystemPermission "jmx", "control"; permission org.apache.derby.security.SystemPermission "engine", "monitor"; permission org.apache.derby.security.SystemPermission "server", "monitor";
// add additonal derby.jar related permissions here...};
grant codeBase "${derby.install.url}derbynet.jar"{ // Accept connections from any host (only localhost access is required // for JMX). // permission java.net.SocketPermission "*", "accept";
// For outbound MBean operations such as NetworkServerMBean's ping: // The wildcard "*" is to allow pings to both localhost and any other // server host. // permission java.net.SocketPermission "*", "connect,resolve";
// Gives permission for JMX to be used against Derby. // If JMX user authentication is being used, a whole set of // fine-grained permissions need to be granted to allow specific users // access to MBeans and actions they perform (see JMXPrincipal // permissions above). // Needed to allow access to all actions related to the // NetworkServerMBean. // permission org.apache.derby.security.SystemPermission "server", "control,monitor";
// add additonal derbynet.jar related permissions here...
In the example above, the system property derby.install.url is used to tell thesecurity manager/policy implementation where to find the codebases derby.jar andderbynet.jar. Using a property provides flexibility; however, you may avoid the use ofsuch a property by specifying the full codebase URLs directly in the policy file. The valueof this property may be specified on the command line, as shown below:
-Dderby.install.url=file:/home/user/derby/10.9.1/lib/
or
-Dderby.install.url=file:/C:/derby/10.9.1/lib/
For more information about policy files, granting permissions, and propertyexpansion, see "Default Policy Implementation and Policy File Syntax" athttp://docs.oracle.com/javase/7/docs/technotes/guides/security/PolicyFiles.htmland "Policy File Creation and Management" athttp://docs.oracle.com/javase/7/docs/technotes/guides/security/PolicyGuide.html.
Debugging permission issues
Dealing with security managers, policy files and permissions is not always easy.Sometimes an action you want to perform fails due to some security or permission issuethat you do not understand. The following tip may help.
When you start the JVM that is being protected by the security manager, add ajava.security.debug flag to see detailed output related to security policy andpermission usage. For a list of valid options, use the following command:
java -Djava.security.debug=help
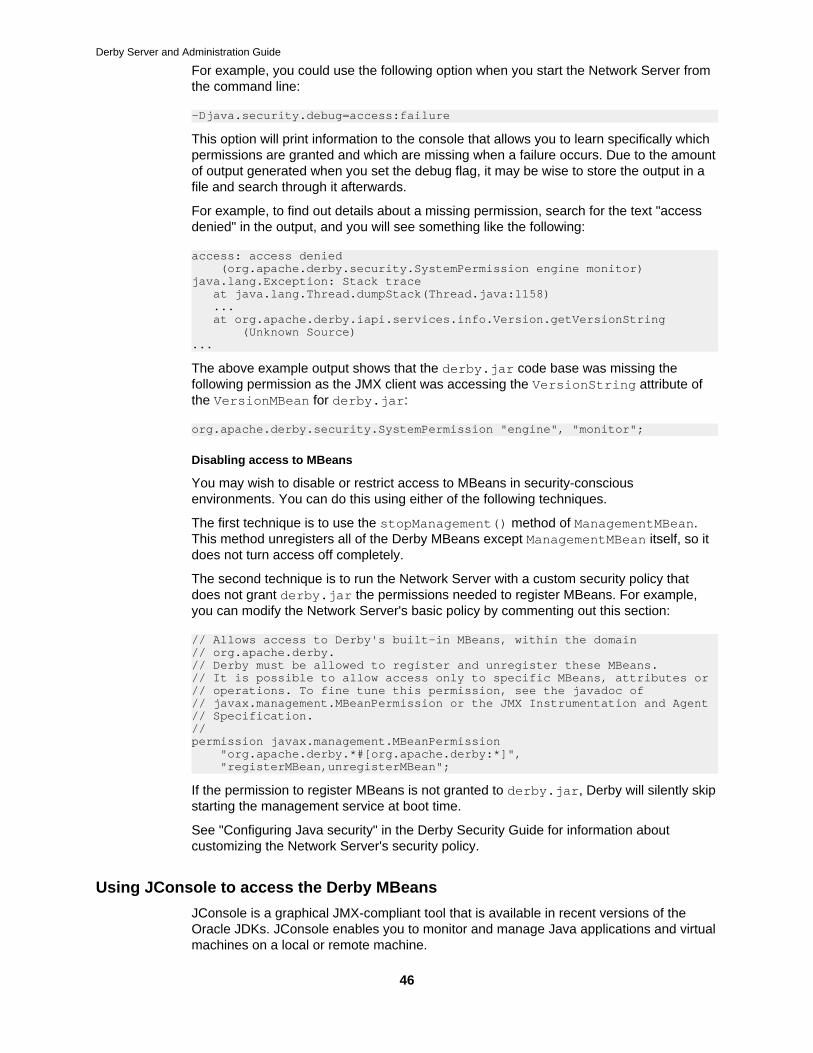
Derby Server and Administration Guide
46
For example, you could use the following option when you start the Network Server fromthe command line:
-Djava.security.debug=access:failure
This option will print information to the console that allows you to learn specifically whichpermissions are granted and which are missing when a failure occurs. Due to the amountof output generated when you set the debug flag, it may be wise to store the output in afile and search through it afterwards.
For example, to find out details about a missing permission, search for the text "accessdenied" in the output, and you will see something like the following:
access: access denied (org.apache.derby.security.SystemPermission engine monitor)java.lang.Exception: Stack trace at java.lang.Thread.dumpStack(Thread.java:1158) ... at org.apache.derby.iapi.services.info.Version.getVersionString (Unknown Source)...
The above example output shows that the derby.jar code base was missing thefollowing permission as the JMX client was accessing the VersionString attribute ofthe VersionMBean for derby.jar:
org.apache.derby.security.SystemPermission "engine", "monitor";
Disabling access to MBeans
You may wish to disable or restrict access to MBeans in security-consciousenvironments. You can do this using either of the following techniques.
The first technique is to use the stopManagement() method of ManagementMBean.This method unregisters all of the Derby MBeans except ManagementMBean itself, so itdoes not turn access off completely.
The second technique is to run the Network Server with a custom security policy thatdoes not grant derby.jar the permissions needed to register MBeans. For example,you can modify the Network Server's basic policy by commenting out this section:
// Allows access to Derby's built-in MBeans, within the domain// org.apache.derby.// Derby must be allowed to register and unregister these MBeans.// It is possible to allow access only to specific MBeans, attributes or// operations. To fine tune this permission, see the javadoc of// javax.management.MBeanPermission or the JMX Instrumentation and Agent// Specification.//permission javax.management.MBeanPermission "org.apache.derby.*#[org.apache.derby:*]", "registerMBean,unregisterMBean";
If the permission to register MBeans is not granted to derby.jar, Derby will silently skipstarting the management service at boot time.
See "Configuring Java security" in the Derby Security Guide for information aboutcustomizing the Network Server's security policy.
Using JConsole to access the Derby MBeans
JConsole is a graphical JMX-compliant tool that is available in recent versions of theOracle JDKs. JConsole enables you to monitor and manage Java applications and virtualmachines on a local or remote machine.
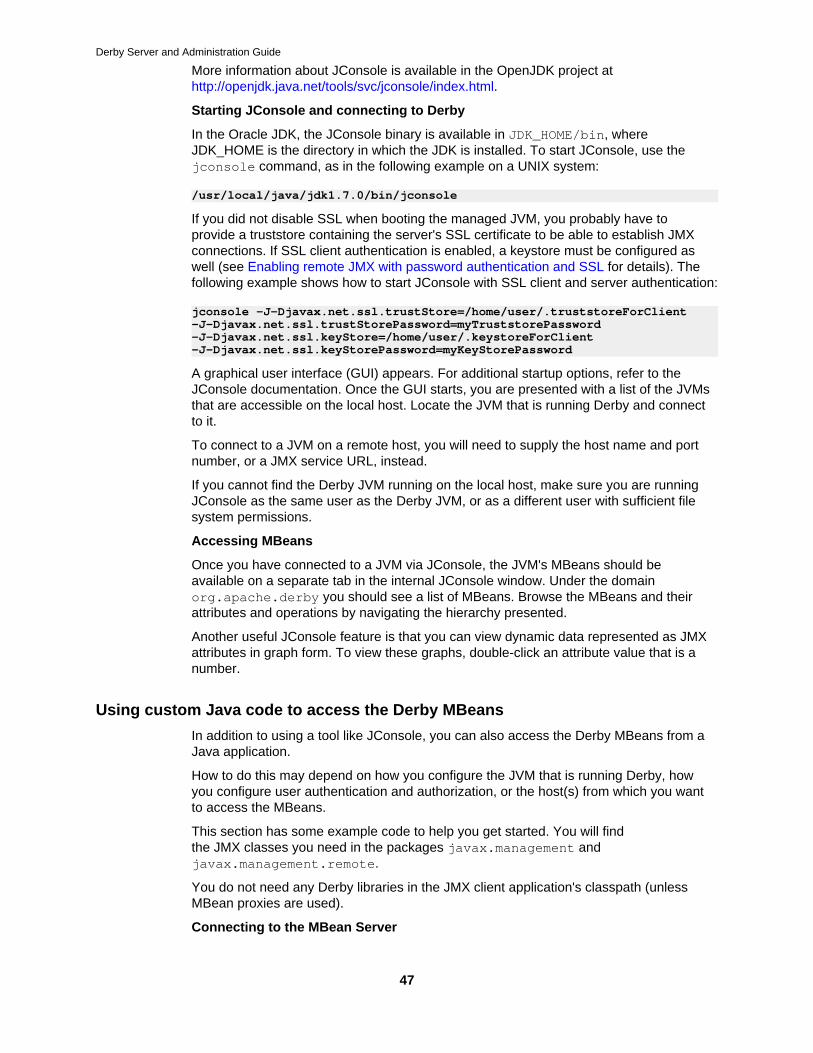
Derby Server and Administration Guide
47
More information about JConsole is available in the OpenJDK project athttp://openjdk.java.net/tools/svc/jconsole/index.html.
Starting JConsole and connecting to Derby
In the Oracle JDK, the JConsole binary is available in JDK_HOME/bin, whereJDK_HOME is the directory in which the JDK is installed. To start JConsole, use thejconsole command, as in the following example on a UNIX system:
/usr/local/java/jdk1.7.0/bin/jconsole
If you did not disable SSL when booting the managed JVM, you probably have toprovide a truststore containing the server's SSL certificate to be able to establish JMXconnections. If SSL client authentication is enabled, a keystore must be configured aswell (see Enabling remote JMX with password authentication and SSL for details). Thefollowing example shows how to start JConsole with SSL client and server authentication:
jconsole -J-Djavax.net.ssl.trustStore=/home/user/.truststoreForClient-J-Djavax.net.ssl.trustStorePassword=myTruststorePassword-J-Djavax.net.ssl.keyStore=/home/user/.keystoreForClient-J-Djavax.net.ssl.keyStorePassword=myKeyStorePassword
A graphical user interface (GUI) appears. For additional startup options, refer to theJConsole documentation. Once the GUI starts, you are presented with a list of the JVMsthat are accessible on the local host. Locate the JVM that is running Derby and connectto it.
To connect to a JVM on a remote host, you will need to supply the host name and portnumber, or a JMX service URL, instead.
If you cannot find the Derby JVM running on the local host, make sure you are runningJConsole as the same user as the Derby JVM, or as a different user with sufficient filesystem permissions.
Accessing MBeans
Once you have connected to a JVM via JConsole, the JVM's MBeans should beavailable on a separate tab in the internal JConsole window. Under the domainorg.apache.derby you should see a list of MBeans. Browse the MBeans and theirattributes and operations by navigating the hierarchy presented.
Another useful JConsole feature is that you can view dynamic data represented as JMXattributes in graph form. To view these graphs, double-click an attribute value that is anumber.
Using custom Java code to access the Derby MBeans
In addition to using a tool like JConsole, you can also access the Derby MBeans from aJava application.
How to do this may depend on how you configure the JVM that is running Derby, howyou configure user authentication and authorization, or the host(s) from which you wantto access the MBeans.
This section has some example code to help you get started. You will findthe JMX classes you need in the packages javax.management andjavax.management.remote.
You do not need any Derby libraries in the JMX client application's classpath (unlessMBean proxies are used).
Connecting to the MBean Server
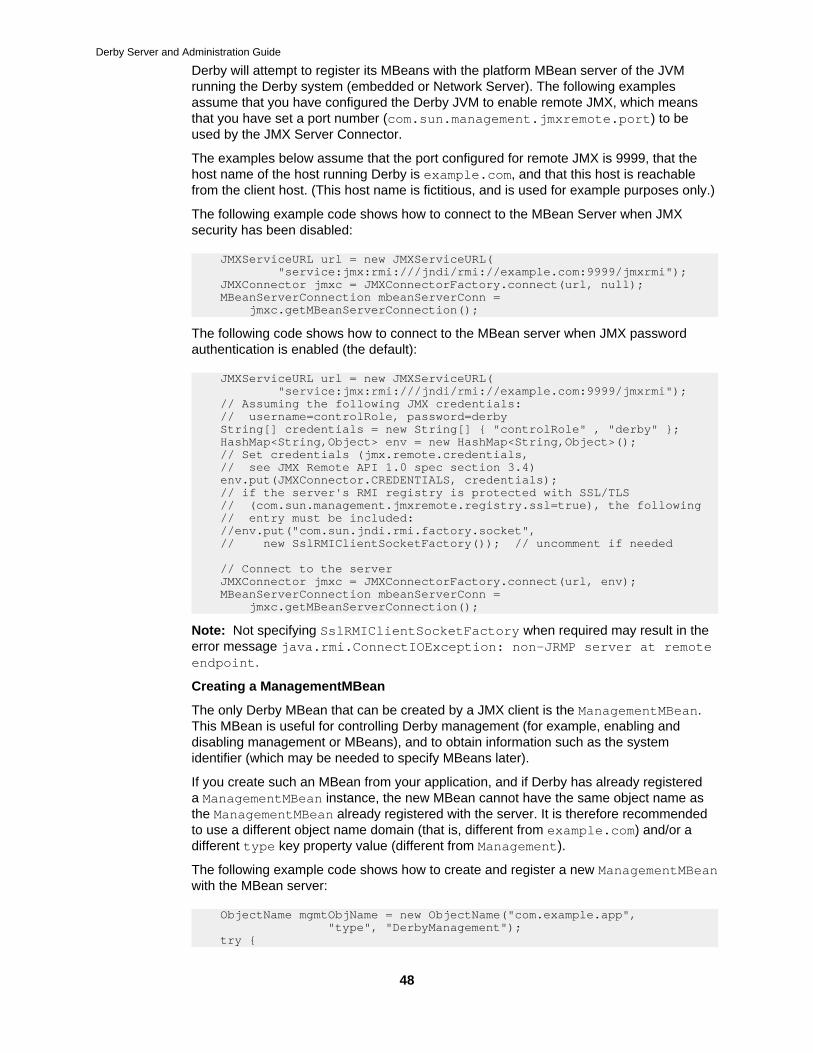
Derby Server and Administration Guide
48
Derby will attempt to register its MBeans with the platform MBean server of the JVMrunning the Derby system (embedded or Network Server). The following examplesassume that you have configured the Derby JVM to enable remote JMX, which meansthat you have set a port number (com.sun.management.jmxremote.port) to beused by the JMX Server Connector.
The examples below assume that the port configured for remote JMX is 9999, that thehost name of the host running Derby is example.com, and that this host is reachablefrom the client host. (This host name is fictitious, and is used for example purposes only.)
The following example code shows how to connect to the MBean Server when JMXsecurity has been disabled:
JMXServiceURL url = new JMXServiceURL( "service:jmx:rmi:///jndi/rmi://example.com:9999/jmxrmi"); JMXConnector jmxc = JMXConnectorFactory.connect(url, null); MBeanServerConnection mbeanServerConn = jmxc.getMBeanServerConnection();
The following code shows how to connect to the MBean server when JMX passwordauthentication is enabled (the default):
JMXServiceURL url = new JMXServiceURL( "service:jmx:rmi:///jndi/rmi://example.com:9999/jmxrmi"); // Assuming the following JMX credentials: // username=controlRole, password=derby String[] credentials = new String[] { "controlRole" , "derby" }; HashMap<String,Object> env = new HashMap<String,Object>(); // Set credentials (jmx.remote.credentials, // see JMX Remote API 1.0 spec section 3.4) env.put(JMXConnector.CREDENTIALS, credentials); // if the server's RMI registry is protected with SSL/TLS // (com.sun.management.jmxremote.registry.ssl=true), the following // entry must be included: //env.put("com.sun.jndi.rmi.factory.socket", // new SslRMIClientSocketFactory()); // uncomment if needed
// Connect to the server JMXConnector jmxc = JMXConnectorFactory.connect(url, env); MBeanServerConnection mbeanServerConn = jmxc.getMBeanServerConnection();
Note: Not specifying SslRMIClientSocketFactory when required may result in theerror message java.rmi.ConnectIOException: non-JRMP server at remoteendpoint.
Creating a ManagementMBean
The only Derby MBean that can be created by a JMX client is the ManagementMBean.This MBean is useful for controlling Derby management (for example, enabling anddisabling management or MBeans), and to obtain information such as the systemidentifier (which may be needed to specify MBeans later).
If you create such an MBean from your application, and if Derby has already registereda ManagementMBean instance, the new MBean cannot have the same object name asthe ManagementMBean already registered with the server. It is therefore recommendedto use a different object name domain (that is, different from example.com) and/or adifferent type key property value (different from Management).
The following example code shows how to create and register a new ManagementMBeanwith the MBean server:
ObjectName mgmtObjName = new ObjectName("com.example.app", "type", "DerbyManagement"); try {
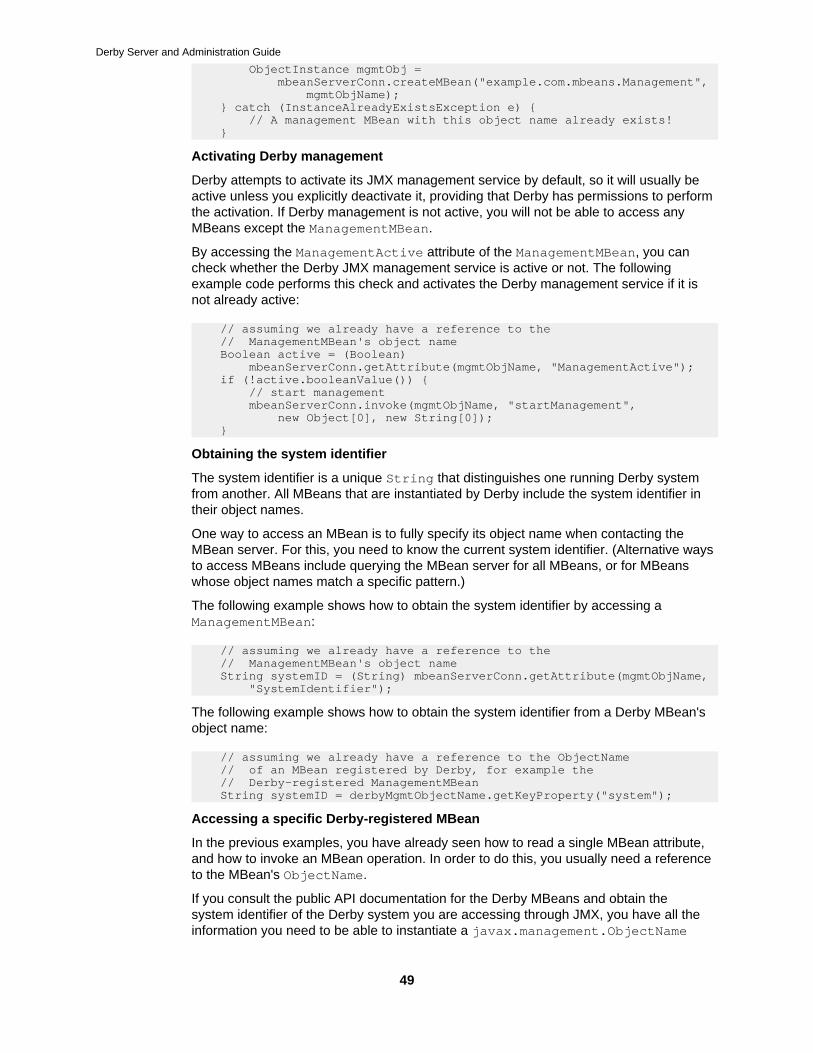
Derby Server and Administration Guide
49
ObjectInstance mgmtObj = mbeanServerConn.createMBean("example.com.mbeans.Management", mgmtObjName); } catch (InstanceAlreadyExistsException e) { // A management MBean with this object name already exists! }
Activating Derby management
Derby attempts to activate its JMX management service by default, so it will usually beactive unless you explicitly deactivate it, providing that Derby has permissions to performthe activation. If Derby management is not active, you will not be able to access anyMBeans except the ManagementMBean.
By accessing the ManagementActive attribute of the ManagementMBean, you cancheck whether the Derby JMX management service is active or not. The followingexample code performs this check and activates the Derby management service if it isnot already active:
// assuming we already have a reference to the // ManagementMBean's object name Boolean active = (Boolean) mbeanServerConn.getAttribute(mgmtObjName, "ManagementActive"); if (!active.booleanValue()) { // start management mbeanServerConn.invoke(mgmtObjName, "startManagement", new Object[0], new String[0]); }
Obtaining the system identifier
The system identifier is a unique String that distinguishes one running Derby systemfrom another. All MBeans that are instantiated by Derby include the system identifier intheir object names.
One way to access an MBean is to fully specify its object name when contacting theMBean server. For this, you need to know the current system identifier. (Alternative waysto access MBeans include querying the MBean server for all MBeans, or for MBeanswhose object names match a specific pattern.)
The following example shows how to obtain the system identifier by accessing aManagementMBean:
// assuming we already have a reference to the // ManagementMBean's object name String systemID = (String) mbeanServerConn.getAttribute(mgmtObjName, "SystemIdentifier");
The following example shows how to obtain the system identifier from a Derby MBean'sobject name:
// assuming we already have a reference to the ObjectName // of an MBean registered by Derby, for example the // Derby-registered ManagementMBean String systemID = derbyMgmtObjectName.getKeyProperty("system");
Accessing a specific Derby-registered MBean
In the previous examples, you have already seen how to read a single MBean attribute,and how to invoke an MBean operation. In order to do this, you usually need a referenceto the MBean's ObjectName.
If you consult the public API documentation for the Derby MBeans and obtain thesystem identifier of the Derby system you are accessing through JMX, you have all theinformation you need to be able to instantiate a javax.management.ObjectName
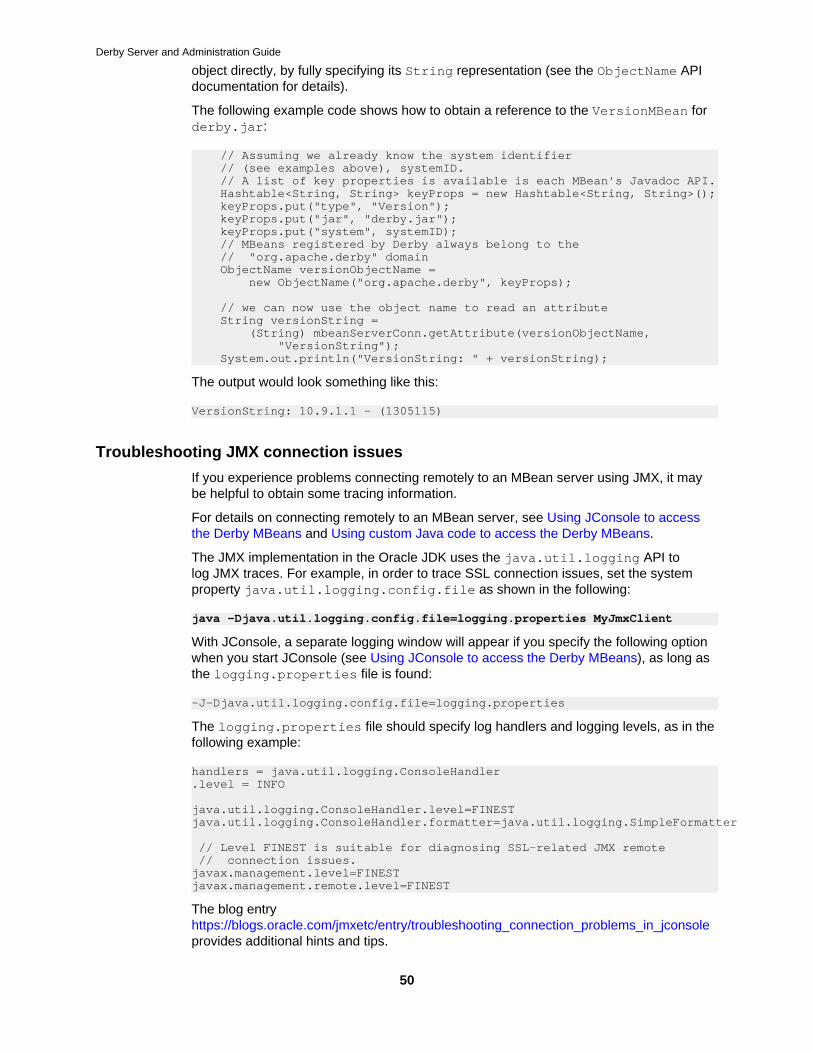
Derby Server and Administration Guide
50
object directly, by fully specifying its String representation (see the ObjectName APIdocumentation for details).
The following example code shows how to obtain a reference to the VersionMBean forderby.jar:
// Assuming we already know the system identifier // (see examples above), systemID. // A list of key properties is available is each MBean's Javadoc API. Hashtable<String, String> keyProps = new Hashtable<String, String>(); keyProps.put("type", "Version"); keyProps.put("jar", "derby.jar"); keyProps.put("system", systemID); // MBeans registered by Derby always belong to the // "org.apache.derby" domain ObjectName versionObjectName = new ObjectName("org.apache.derby", keyProps);
// we can now use the object name to read an attribute String versionString = (String) mbeanServerConn.getAttribute(versionObjectName, "VersionString"); System.out.println("VersionString: " + versionString);
The output would look something like this:
VersionString: 10.9.1.1 - (1305115)
Troubleshooting JMX connection issues
If you experience problems connecting remotely to an MBean server using JMX, it maybe helpful to obtain some tracing information.
For details on connecting remotely to an MBean server, see Using JConsole to accessthe Derby MBeans and Using custom Java code to access the Derby MBeans.
The JMX implementation in the Oracle JDK uses the java.util.logging API tolog JMX traces. For example, in order to trace SSL connection issues, set the systemproperty java.util.logging.config.file as shown in the following:
java -Djava.util.logging.config.file=logging.properties MyJmxClient
With JConsole, a separate logging window will appear if you specify the following optionwhen you start JConsole (see Using JConsole to access the Derby MBeans), as long asthe logging.properties file is found:
-J-Djava.util.logging.config.file=logging.properties
The logging.properties file should specify log handlers and logging levels, as in thefollowing example:
handlers = java.util.logging.ConsoleHandler.level = INFO
java.util.logging.ConsoleHandler.level=FINESTjava.util.logging.ConsoleHandler.formatter=java.util.logging.SimpleFormatter
// Level FINEST is suitable for diagnosing SSL-related JMX remote // connection issues.javax.management.level=FINESTjavax.management.remote.level=FINEST
The blog entryhttps://blogs.oracle.com/jmxetc/entry/troubleshooting_connection_problems_in_jconsoleprovides additional hints and tips.
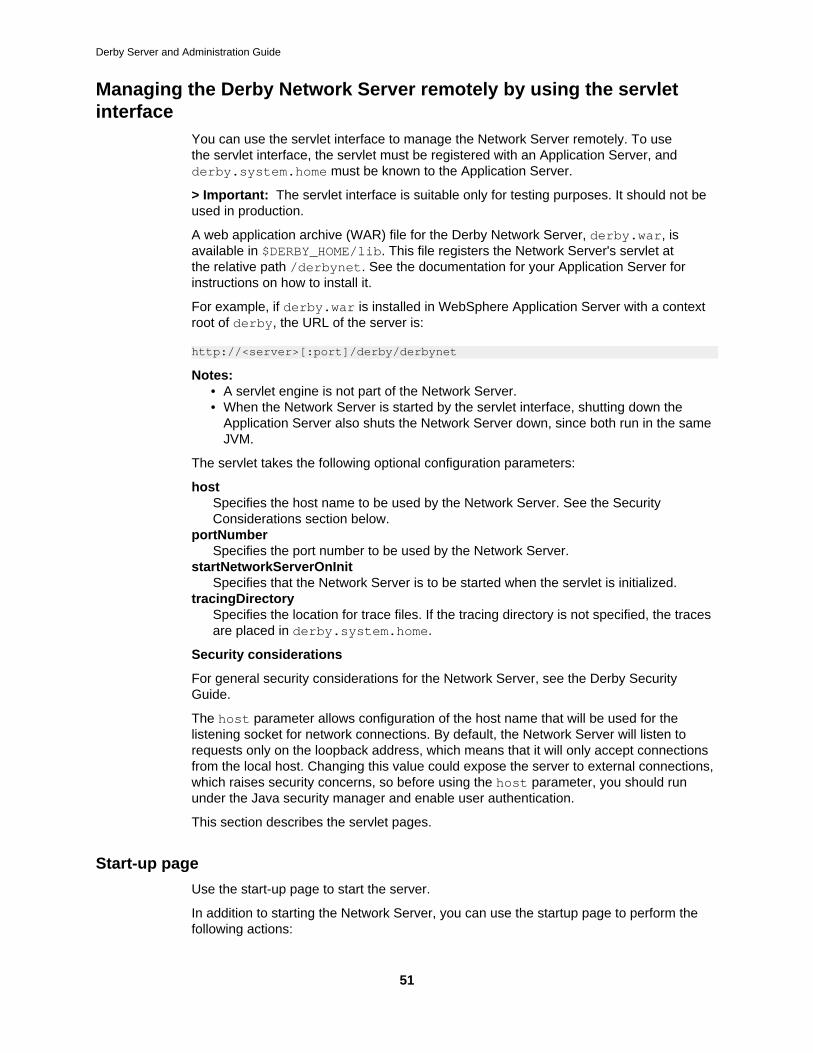
Derby Server and Administration Guide
51
Managing the Derby Network Server remotely by using the servletinterface
You can use the servlet interface to manage the Network Server remotely. To usethe servlet interface, the servlet must be registered with an Application Server, andderby.system.home must be known to the Application Server.
> Important: The servlet interface is suitable only for testing purposes. It should not beused in production.
A web application archive (WAR) file for the Derby Network Server, derby.war, isavailable in $DERBY_HOME/lib. This file registers the Network Server's servlet atthe relative path /derbynet. See the documentation for your Application Server forinstructions on how to install it.
For example, if derby.war is installed in WebSphere Application Server with a contextroot of derby, the URL of the server is:
http://<server>[:port]/derby/derbynet
Notes:• A servlet engine is not part of the Network Server.• When the Network Server is started by the servlet interface, shutting down the
Application Server also shuts the Network Server down, since both run in the sameJVM.
The servlet takes the following optional configuration parameters:
hostSpecifies the host name to be used by the Network Server. See the SecurityConsiderations section below.
portNumberSpecifies the port number to be used by the Network Server.
startNetworkServerOnInitSpecifies that the Network Server is to be started when the servlet is initialized.
tracingDirectorySpecifies the location for trace files. If the tracing directory is not specified, the tracesare placed in derby.system.home.
Security considerations
For general security considerations for the Network Server, see the Derby SecurityGuide.
The host parameter allows configuration of the host name that will be used for thelistening socket for network connections. By default, the Network Server will listen torequests only on the loopback address, which means that it will only accept connectionsfrom the local host. Changing this value could expose the server to external connections,which raises security concerns, so before using the host parameter, you should rununder the Java security manager and enable user authentication.
This section describes the servlet pages.
Start-up page
Use the start-up page to start the server.
In addition to starting the Network Server, you can use the startup page to perform thefollowing actions:
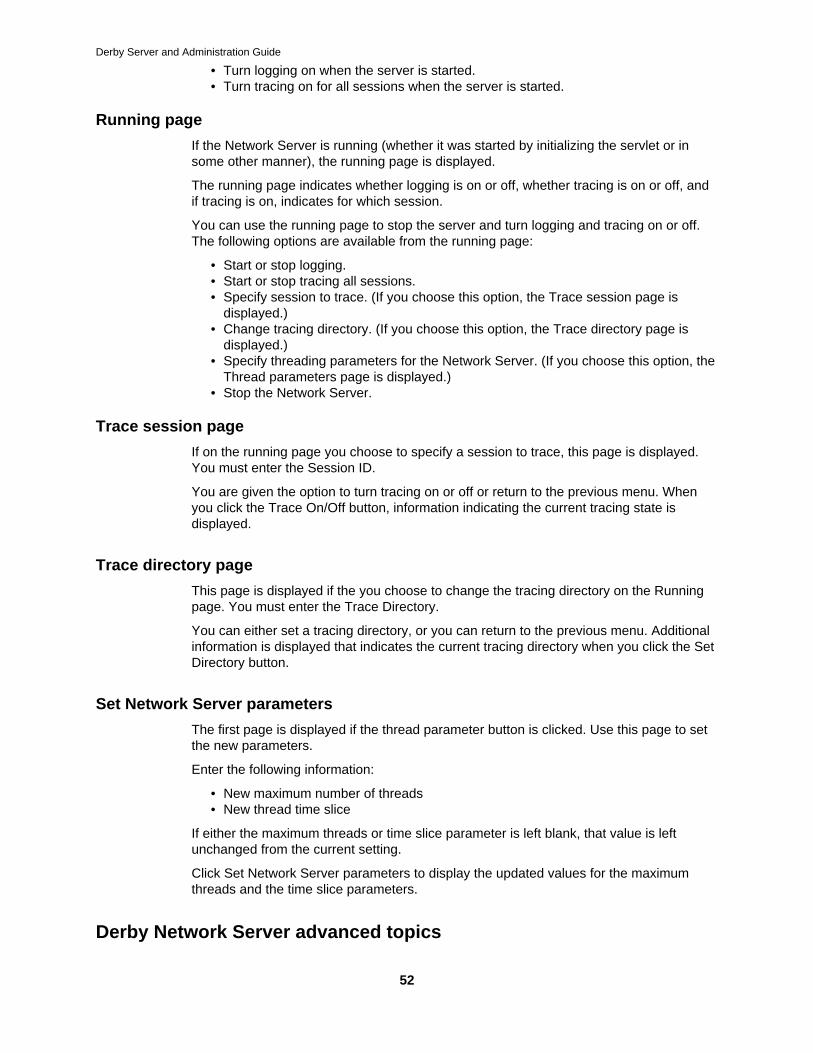
Derby Server and Administration Guide
52
• Turn logging on when the server is started.• Turn tracing on for all sessions when the server is started.
Running page
If the Network Server is running (whether it was started by initializing the servlet or insome other manner), the running page is displayed.
The running page indicates whether logging is on or off, whether tracing is on or off, andif tracing is on, indicates for which session.
You can use the running page to stop the server and turn logging and tracing on or off.The following options are available from the running page:
• Start or stop logging.• Start or stop tracing all sessions.• Specify session to trace. (If you choose this option, the Trace session page is
displayed.)• Change tracing directory. (If you choose this option, the Trace directory page is
displayed.)• Specify threading parameters for the Network Server. (If you choose this option, the
Thread parameters page is displayed.)• Stop the Network Server.
Trace session page
If on the running page you choose to specify a session to trace, this page is displayed.You must enter the Session ID.
You are given the option to turn tracing on or off or return to the previous menu. Whenyou click the Trace On/Off button, information indicating the current tracing state isdisplayed.
Trace directory page
This page is displayed if the you choose to change the tracing directory on the Runningpage. You must enter the Trace Directory.
You can either set a tracing directory, or you can return to the previous menu. Additionalinformation is displayed that indicates the current tracing directory when you click the SetDirectory button.
Set Network Server parameters
The first page is displayed if the thread parameter button is clicked. Use this page to setthe new parameters.
Enter the following information:
• New maximum number of threads• New thread time slice
If either the maximum threads or time slice parameter is left blank, that value is leftunchanged from the current setting.
Click Set Network Server parameters to display the updated values for the maximumthreads and the time slice parameters.
Derby Network Server advanced topics
Derby Server and Administration Guide
53
This section discusses several advanced topics for users of the Derby Network Server.
Configuring the Network Server to handle connections
You can configure the Network Server to use a specific number of threads to handleconnections. You can change the configuration on the command line.
The minimum number of threads is the number of threads that are startedwhen the Network Server is booted. This value is specified as a property,derby.drda.minThreads=min. The maximum number of threads is the maximumnumber of threads that will be used for connections. If more connections are activethan there are threads available, the extra connections must wait until the next threadbecomes available. Threads can become available after a specified time, which ischecked only when a thread has finished processing a communication.
• You can change the maximum number of threads by using the following command(all on one line):
java org.apache.derby.drda.NetworkServerControl maxthreads max [-h hostname] [-p portnumber
You can also use the derby.drda.maxThreads property to assign the maximumvalue. A max value of 0 means that there is no maximum and a new thread willbe generated for a connection if there are no current threads available. This is thedefault. The max and min values are stored as integers, so the theoretical maximumis 2147483647 (the maximum size of an integer). But the practical maximum isdetermined by the machine configuration.
• To change the time that a thread should work on one session's request and check ifthere are waiting sessions, use the following command (all on one line):
java org.apache.derby.drda.NetworkServerControl timeslice milliseconds [-h hostname] [-p portnumber]
You can also use the derby.drda.timeSlice property to set this value. A valueof 0 milliseconds indicates that the thread will not give up working on the sessionuntil the session ends. A value of -1 milliseconds indicates to use the default. Thedefault value is 0. The maximum number of milliseconds that can be specified is2147483647 (the maximum size of an integer).
For more information on these properties, see derby.drda.minThreads property,derby.drda.maxThreads property, and derby.drda.timeSlice property.
Controlling logging by using the log file
The Network Server uses the derby.log file to log problems that it encounters. It alsologs connections when the property derby.drda.logConnections is set to true.
See derby.drda.logConnections property for information on this property.
The derby.log file is created when the Derby server is started. The Network Serverthen records the time and version. If a log file exists, it is overwritten, unless the propertyderby.infolog.append is set to true.See "derby.infolog.append" in the DerbyReference Manual for information on this property.
When the Network Server is logging connections, it also logs the Connection Number;this log message is written both to the derby.log file and to the Network Serverconsole.
• To turn on connection logging, use the following command (all on one line):
java org.apache.derby.drda.NetworkServerControl
Derby Server and Administration Guide
54
logconnections on [-h hostname] [-p portnumber]• To turn off connection logging, use the following command (all on one line):
java org.apache.derby.drda.NetworkServerControl logconnections off [-h hostname][-p portnumber]
See the Derby Developer's Guide for more information about the derby.log file.
Controlling tracing by using the trace facility
Use the trace facility only if you are working with technical support and they requiretracing information.
Turning on the trace facility
Follow these steps to turn on the trace facility.
1. Turn on tracing for all sessions by specifying the following property:
derby.drda.traceAll=true
See derby.drda.traceAll property for information on this property.
Alternatively, while the Network Server is running, you can use the followingcommand (all on one line) to turn on the trace facility:
java org.apache.derby.drda.NetworkServerControl trace on [-s connection-number] [-h hostname][-p portnumber]
If you specify a connection-number, tracing will be turned on only for thatconnection.
2. Set the location of the tracing files by specifying the following property:
derby.drda.traceDirectory=directory-for-tracing-files
See derby.drda.traceDirectory property for information on this property.
Alternatively, while the Network Server is running, use the following command (allon one line) to set the trace directory:
java org.apache.derby.drda.NetworkServerControl traceDirectory directory-for-tracing-files [-h hostname] [-p portnumber]
You need to specify only the directory where the tracing files will reside. The namesof the tracing files are determined by the system. If you do not set a trace directory,the tracing files will be placed in derby.system.home.
The Network Server will attempt to create the trace directory (and any parentdirectories) if they do not exist. This will require that the Java security policy forderbynet.jar permits verification of the existence of the named trace directoryand all necessary parent directories. For each directory created, the policy mustallow
permission java.io.FilePermission "directory", "read,write";
For the trace directory itself, the policy must allow
permission java.io.FilePermission "tracedirectory${/}-", "write";
See "Configuring Java security" in the Derby Security Guide for information aboutcustomizing the Network Server's security policy.
Turning off the trace facility
Enter the following command (all on one line) to turn off tracing.
java org.apache.derby.drda.NetworkServerControl trace off
Derby Server and Administration Guide
55
[-s connection number] [-h hostname] [-p portnumber]
The tracing files are named ServerX.trace, where X is a connection number.
Derby Network Server sample programsDerby provides several sample programs for Network Server users.
The NsSample sample program
The NsSample demonstration program is a simple JDBC application that interacts withthe Network Server.
The NsSample program performs the following tasks:• Starts the Network Server.• Checks that the Network Server is running.• Creates the NsSampledb database if it has not already been created.• Checks to see if the schema is already created, and if not, creates the schema,
which includes the SAMPLETBL table and corresponding indexes.• Connects to the database.• Loads the schema by inserting data.• Starts client threads to perform database related operations.• Has each of the clients perform DML operations (select, insert, delete, update)
using JDBC calls. For example, one client thread establishes an embeddedconnection to perform database operations, while another client thread establishesa client connection to the Network Server to perform database operations.
• Waits for the client threads to finish the tasks.• Shuts down the Network Server at the end of the demonstration.
You must install the following files in the %DERBY_HOME%\demo\nserverdemo\directory before you can run the sample program:
• NsSample.java
This is the entry point into the sample program. The program starts up two clientthreads. The first client establishes an embedded connection to perform databaseoperations, and the second client establishes a client connection to the NetworkServer to perform database operations.
You can change the following constants to modify the sample program:
NUM_ROWSThe number of rows that must be initially loaded into the schema.
ITERATIONSThe number of iterations for which each client thread does database related work.
NUM_CLIENT_THREADSThe number of clients that you want to run the program against.
NETWORKSERVER_PORTThe port on which the Network Server is running.
• NsSampleClientThread.javaThis file contains two Java classes:
• The NsSampleClientThread class extends Thread and instantiates aNsSampleWork instance.
• The NsSampleWork class contains everything that is required to perform DMLoperations using JDBC calls. The doWork method in the NsSampleWorkclass represents all the work done as part of this sample program.
• NetworkServerUtil.java
This file contains helper methods to start the Network Server and to shut down theserver.
Derby Server and Administration Guide
56
The compiled class files for the NsSample program are:• NsSample.class• NsSampleClientThread.class• NsSampleWork.class• NetworkServerUtil.class
Running the NsSample sample program
To run the NsSample program, follow these steps.
1. Open a command prompt and change to the %DERBY_HOME%\demo\ directory,where %DERBY_HOME% is the directory where you installed Derby.
2. Set the CLASSPATH to the current directory ("."), and also include the following jarfiles in order to use the Network Server and the network client driver:
derbynet.jarThe Network Server jar file. It must be in your CLASSPATH to use any of theNetwork Server functions.
derbyclient.jarThis jar file must be in your CLASSPATH to use the Network Client driver.
derby.jarThe Derby database engine jar file.
3. Test the CLASSPATH settings by running the following Java command:
java org.apache.derby.tools.sysinfo
This command shows the Derby jar files that are in the classpath as well as theirrespective versions.
4. After you set up your environment correctly, run the NsSample program from thesame directory:
java nserverdemo.NsSample
If the program runs successfully, you will receive output similar to the following:
Using JDBC driver: org.apache.derby.jdbc.ClientDriverDerby Network Server createdApache Derby Network Server startedand ready to accept connections on port 1621[NsSample] Derby Network Server started.[NsSample] Sample Derby Network Server program demo starting.Please wait .....................Connection number: 2.[NsSampleWork] Begin creating table - SAMPLETBL and necessary indexes.[NsSampleClientThread] Thread id - 2; started.[NsSampleWork] Thread id - 2; requests database connection, dbUrl =jdbc:derby://localhost:1621/NSSampledb;create=true;[NsSampleClientThread] Thread id - 1; started.[NsSampleWork] Thread id - 1; requests database connection, dbUrl =jdbc:derby:NSSampledb;[NsSampleWork] Thread id - 1; inserted 1 row.[NsSampleWork] Thread id - 1; inserted 1 row.[NsSampleWork] Thread id - 1; deleted 1 row with t_key = 9372[NsSampleWork] Thread id - 1 selected 1 row [920,Derby50 ,951.7808,9216][NsSampleWork] Thread id - 1 selected 1 row [920,Derby50 ,951.7808,9216][NsSampleWork] Thread id - 1; inserted 1 row.[NsSampleWork] Thread id - 1 selected 1 row [920,Derby50 ,951.7808,9216][NsSampleWork] Thread id - 1; deleted 1 row with t_key = 9216[NsSampleWork] Thread id - 1 selected 1 row [824,Derby26 ,8.802546E22,9155][NsSampleWork] Thread id - 1; updated 1 row with t_key = 9155
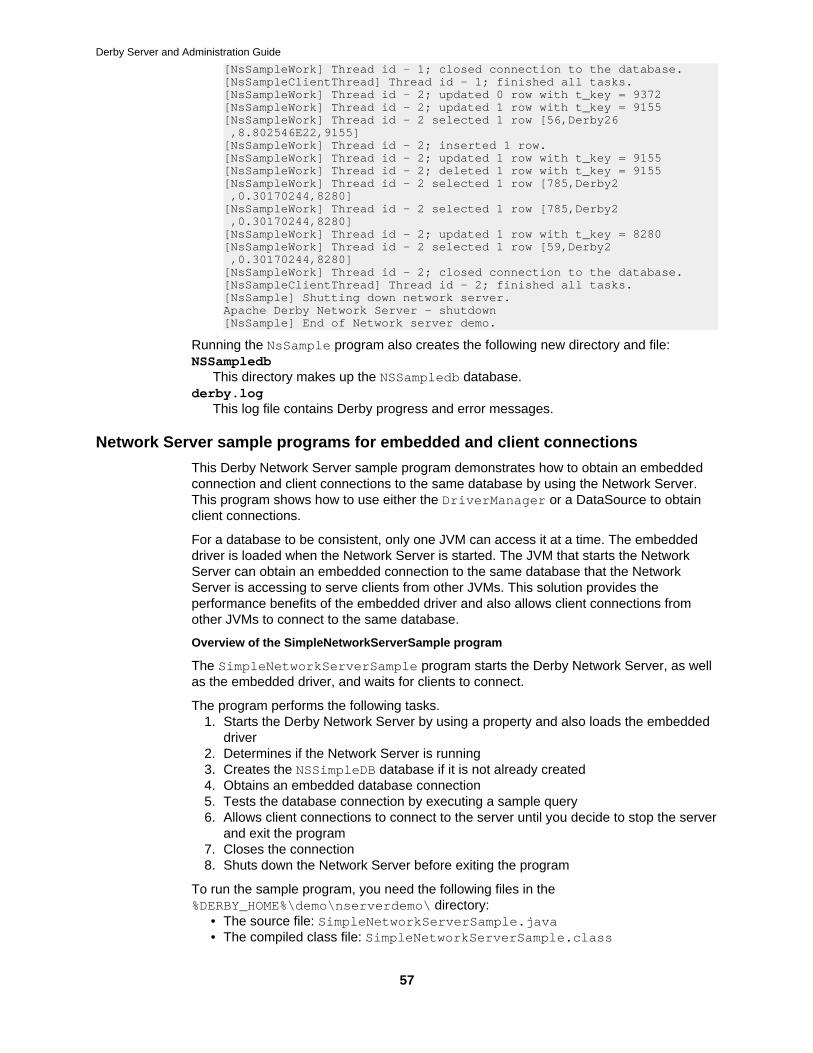
Derby Server and Administration Guide
57
[NsSampleWork] Thread id - 1; closed connection to the database.[NsSampleClientThread] Thread id - 1; finished all tasks.[NsSampleWork] Thread id - 2; updated 0 row with t_key = 9372[NsSampleWork] Thread id - 2; updated 1 row with t_key = 9155[NsSampleWork] Thread id - 2 selected 1 row [56,Derby26 ,8.802546E22,9155][NsSampleWork] Thread id - 2; inserted 1 row.[NsSampleWork] Thread id - 2; updated 1 row with t_key = 9155[NsSampleWork] Thread id - 2; deleted 1 row with t_key = 9155[NsSampleWork] Thread id - 2 selected 1 row [785,Derby2 ,0.30170244,8280][NsSampleWork] Thread id - 2 selected 1 row [785,Derby2 ,0.30170244,8280][NsSampleWork] Thread id - 2; updated 1 row with t_key = 8280[NsSampleWork] Thread id - 2 selected 1 row [59,Derby2 ,0.30170244,8280][NsSampleWork] Thread id - 2; closed connection to the database.[NsSampleClientThread] Thread id - 2; finished all tasks.[NsSample] Shutting down network server.Apache Derby Network Server - shutdown[NsSample] End of Network server demo.
Running the NsSample program also creates the following new directory and file:NSSampledb
This directory makes up the NSSampledb database.derby.log
This log file contains Derby progress and error messages.
Network Server sample programs for embedded and client connections
This Derby Network Server sample program demonstrates how to obtain an embeddedconnection and client connections to the same database by using the Network Server.This program shows how to use either the DriverManager or a DataSource to obtainclient connections.
For a database to be consistent, only one JVM can access it at a time. The embeddeddriver is loaded when the Network Server is started. The JVM that starts the NetworkServer can obtain an embedded connection to the same database that the NetworkServer is accessing to serve clients from other JVMs. This solution provides theperformance benefits of the embedded driver and also allows client connections fromother JVMs to connect to the same database.
Overview of the SimpleNetworkServerSample program
The SimpleNetworkServerSample program starts the Derby Network Server, as wellas the embedded driver, and waits for clients to connect.
The program performs the following tasks.1. Starts the Derby Network Server by using a property and also loads the embedded
driver2. Determines if the Network Server is running3. Creates the NSSimpleDB database if it is not already created4. Obtains an embedded database connection5. Tests the database connection by executing a sample query6. Allows client connections to connect to the server until you decide to stop the server
and exit the program7. Closes the connection8. Shuts down the Network Server before exiting the program
To run the sample program, you need the following files in the%DERBY_HOME%\demo\nserverdemo\ directory:
• The source file: SimpleNetworkServerSample.java• The compiled class file: SimpleNetworkServerSample.class
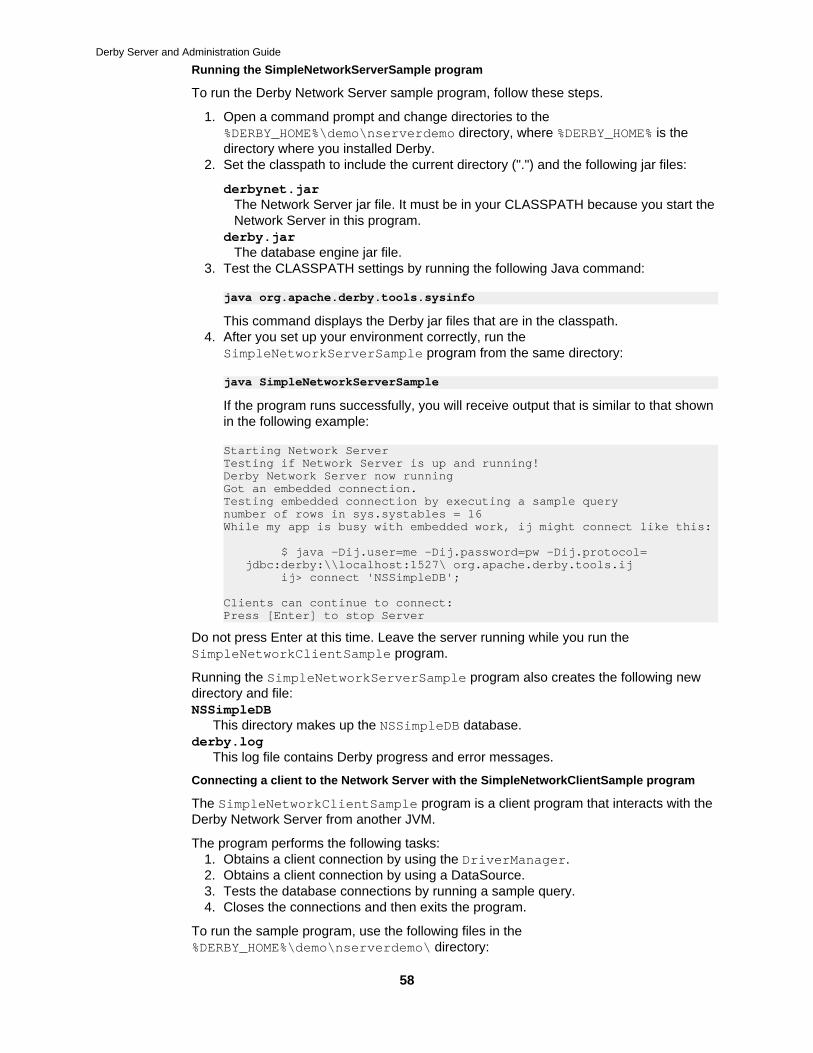
Derby Server and Administration Guide
58
Running the SimpleNetworkServerSample program
To run the Derby Network Server sample program, follow these steps.
1. Open a command prompt and change directories to the%DERBY_HOME%\demo\nserverdemo directory, where %DERBY_HOME% is thedirectory where you installed Derby.
2. Set the classpath to include the current directory (".") and the following jar files:
derbynet.jarThe Network Server jar file. It must be in your CLASSPATH because you start theNetwork Server in this program.
derby.jarThe database engine jar file.
3. Test the CLASSPATH settings by running the following Java command:
java org.apache.derby.tools.sysinfo
This command displays the Derby jar files that are in the classpath.4. After you set up your environment correctly, run the
SimpleNetworkServerSample program from the same directory:
java SimpleNetworkServerSample
If the program runs successfully, you will receive output that is similar to that shownin the following example:
Starting Network ServerTesting if Network Server is up and running!Derby Network Server now runningGot an embedded connection.Testing embedded connection by executing a sample querynumber of rows in sys.systables = 16While my app is busy with embedded work, ij might connect like this:
$ java -Dij.user=me -Dij.password=pw -Dij.protocol= jdbc:derby:\\localhost:1527\ org.apache.derby.tools.ij ij> connect 'NSSimpleDB';
Clients can continue to connect:Press [Enter] to stop Server
Do not press Enter at this time. Leave the server running while you run theSimpleNetworkClientSample program.
Running the SimpleNetworkServerSample program also creates the following newdirectory and file:NSSimpleDB
This directory makes up the NSSimpleDB database.derby.log
This log file contains Derby progress and error messages.
Connecting a client to the Network Server with the SimpleNetworkClientSample program
The SimpleNetworkClientSample program is a client program that interacts with theDerby Network Server from another JVM.
The program performs the following tasks:1. Obtains a client connection by using the DriverManager.2. Obtains a client connection by using a DataSource.3. Tests the database connections by running a sample query.4. Closes the connections and then exits the program.
To run the sample program, use the following files in the%DERBY_HOME%\demo\nserverdemo\ directory:

Derby Server and Administration Guide
59
• The source file: SimpleNetworkClientSample.java• The compiled class file: SimpleNetworkClientSample.class
Running the SimpleNetworkClientSample program
To connect to the Network Server that has been started with theSimpleNetworkServerSample program, follow these steps.
1. Open a command prompt and change directories to the%DERBY_HOME%\demo\nserverdemo directory, where %DERBY_HOME% is thedirectory where you installed Derby.
2. Set the classpath to include the following jar files:
• The current directory (".")• derbyclient.jar
3. After you set up your environment correctly, run theSimpleNetworkClientSample program from the same directory:
java SimpleNetworkClientSample
If the program runs successfully, you will receive output similar to that shown in thefollowing example:
Starting Sample client programGot a client connection via the DriverManager.connection from datasource; getDriverName = Apache Derby Network Client JDBC DriverGot a client connection via a DataSource.Testing the connection obtained via DriverManager by executing a sample querynumber of rows in sys.systables = 23Testing the connection obtained via a DataSource by executing a sample querynumber of rows in sys.systables = 23Goodbye!
4. After running the program, return to the command prompt where you ran theSimpleNetworkServerSample program and press Enter.

Derby Server and Administration Guide
60
Part Two: Derby Administration Guide
This section of the guide is divided into several administrative tasks.
Maintaining database integrityOne of the most important responsibilities of a database administrator is to maintain theintegrity of the database and prevent it from becoming corrupted.
Derby must be able to sync to disk. Some machine, disk, or operating system settingscan prevent a proper sync and cause unrecoverable database corruption in the event of apower failure, system crash, or software crash. To avoid database corruption, you can dothe following:
• Do not touch any files or directories in the database directory, including the logand seg0 directories and the service.properties file. Editing, adding, ordeleting files in this directory may cause data corruption and leave the database in anon-recoverable state.
• Do not enable disk write caching on the hard drive that holds the database. Disablewrite caching if it is turned on (it is enabled by default on many Windows systems).Disk write caching can increase operating system performance. However, it canalso result in the loss of information if a power failure, equipment failure, or softwarefailure occurs. Consult your operating system support documentation for informationon how to disable disk write caching.
• Run Derby on a local drive rather than on an NFS mounted, SMB mounted, or othernetwork mounted disk.
• Disable any other settings or options that might prevent a proper sync to disk whenDerby is writing its transaction logs or other data.
Many corruption issues can arise from improper backups or restores. Back up yourdatabase in a way that prevents it from becoming corrupted:
• Always make sure the database is shut down or frozen before using operatingsystem commands to back it up.
• Always back up the database to a fresh location rather than overwriting any existingdata.
After you perform a backup, check the consistency of the database. See Checkingdatabase consistency for details.
See Backing up and restoring databases for more information.
Checking database consistencyAfter you perform a backup, or if you experience hardware or operating system failure,you can use the SYSCS_UTIL.SYSCS_CHECK_TABLE system function to verify that thedatabase is still consistent.
It is recommended that you run SYSCS_UTIL.SYSCS_CHECK_TABLE on all the tables ina database offline after you back it up. Do not discard the previous backup until you haveverified the consistency of the current one. Otherwise, check consistency only if there areindications that such a check is needed, because a consistency check can take a longtime on a large database.
See the Derby Reference Manual for details about this system function.
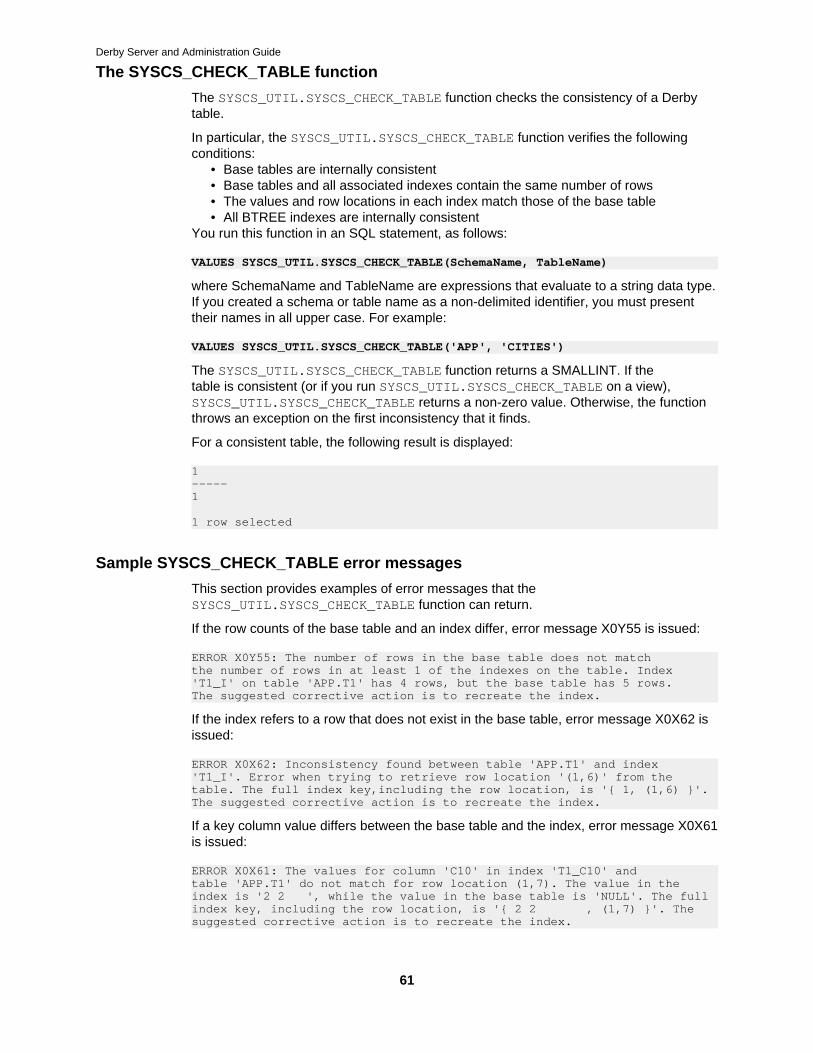
Derby Server and Administration Guide
61
The SYSCS_CHECK_TABLE function
The SYSCS_UTIL.SYSCS_CHECK_TABLE function checks the consistency of a Derbytable.
In particular, the SYSCS_UTIL.SYSCS_CHECK_TABLE function verifies the followingconditions:
• Base tables are internally consistent• Base tables and all associated indexes contain the same number of rows• The values and row locations in each index match those of the base table• All BTREE indexes are internally consistent
You run this function in an SQL statement, as follows:
VALUES SYSCS_UTIL.SYSCS_CHECK_TABLE(SchemaName, TableName)
where SchemaName and TableName are expressions that evaluate to a string data type.If you created a schema or table name as a non-delimited identifier, you must presenttheir names in all upper case. For example:
VALUES SYSCS_UTIL.SYSCS_CHECK_TABLE('APP', 'CITIES')
The SYSCS_UTIL.SYSCS_CHECK_TABLE function returns a SMALLINT. If thetable is consistent (or if you run SYSCS_UTIL.SYSCS_CHECK_TABLE on a view),SYSCS_UTIL.SYSCS_CHECK_TABLE returns a non-zero value. Otherwise, the functionthrows an exception on the first inconsistency that it finds.
For a consistent table, the following result is displayed:
1-----1
1 row selected
Sample SYSCS_CHECK_TABLE error messages
This section provides examples of error messages that theSYSCS_UTIL.SYSCS_CHECK_TABLE function can return.
If the row counts of the base table and an index differ, error message X0Y55 is issued:
ERROR X0Y55: The number of rows in the base table does not match the number of rows in at least 1 of the indexes on the table. Index 'T1_I' on table 'APP.T1' has 4 rows, but the base table has 5 rows. The suggested corrective action is to recreate the index.
If the index refers to a row that does not exist in the base table, error message X0X62 isissued:
ERROR X0X62: Inconsistency found between table 'APP.T1' and index'T1_I'. Error when trying to retrieve row location '(1,6)' from the table. The full index key,including the row location, is '{ 1, (1,6) }'.The suggested corrective action is to recreate the index.
If a key column value differs between the base table and the index, error message X0X61is issued:
ERROR X0X61: The values for column 'C10' in index 'T1_C10' and table 'APP.T1' do not match for row location (1,7). The value in the index is '2 2 ', while the value in the base table is 'NULL'. The fullindex key, including the row location, is '{ 2 2 , (1,7) }'. The suggested corrective action is to recreate the index.

Derby Server and Administration Guide
62
Sample SYSCS_CHECK_TABLE queries
This section provides examples that illustrate how to use theSYSCS_UTIL.SYSCS_CHECK_TABLE function in queries.
To check the consistency of a single table, run a query that is similar to the one shown inthe following example:
VALUES SYSCS_UTIL.SYSCS_CHECK_TABLE('APP', 'FLIGHTS')
To check the consistency of all of the tables in a schema, stopping at the first failure, runa query that is similar to the one shown in the following example:
SELECT tablename, SYSCS_UTIL.SYSCS_CHECK_TABLE( 'SAMP', tablename)FROM sys.sysschemas s, sys.systables tWHERE s.schemaname = 'SAMP' AND s.schemaid = t.schemaid
To check the consistency of an entire database, stopping at the first failure, run a querythat is similar to the one shown in the following example::
SELECT schemaname, tablename,SYSCS_UTIL.SYSCS_CHECK_TABLE(schemaname, tablename)FROM sys.sysschemas s, sys.systables tWHERE s.schemaid = t.schemaid
Backing up and restoring databasesDerby provides a way to back up a database while it is either offline or online. You canalso restore a full backup from a specified location.
To back up a database, you can do any of the following:
• Shut down the database and use operating system commands to copy it to abackup location, as described in Offline backups.
• Leave the database running and call one of four system backup procedures to copyit to a backup location, as described in Using the backup procedures to perform anonline backup.
• Leave the database running, but call a system procedure to freeze the database,use operating system commands to copy it to a backup location, then call a systemprocedure to unfreeze the database, as described in Using operating systemcommands with the freeze and unfreeze system procedures to perform an onlinebackup.
To restore a database from a backup copy, you must use one of three connection URLattributes:
• restoreFrom=path, described in Restoring a database from a backup copy• createFrom=path, described in Creating a database from a backup copy• rollForwardRecoveryFrom=path, described in Roll-forward recovery
Backing up a database
You can back up a database either offline (when it is shut down) or online (when it isrunning).
After you back up a database, make sure the backup copy is not corrupt. To do this, runthe SYSCS_UTIL.SYSCS_CHECK_TABLE system function on all the tables in the backupcopy. Do not discard the previous backup until you have verified the consistency of thecurrent one. See Checking database consistency for more information.
The topics in this section describe how to back up a database.

Derby Server and Administration Guide
63
Offline backups
To perform an offline backup of a database, use operating system commands to copy thedatabase directory.
> Important: You must shut down the database before you perform an offline backup.
For example, on Windows systems, the following operating system command backs upa (closed) database that is named sample and that is located in d:\mydatabases bycopying it to the directory c:\mybackups\2012-04-01:
xcopy d:\mydatabases\sample c:\mybackups\2012-04-01\sample /s /i
If you are not using Windows, substitute the appropriate operating system command forcopying a directory and all contents to a new location.
Note: On Windows systems, do not attempt to update a database while it is beingbacked up in this way. Attempting to update a database during an offline backup willgenerate a java.io.IOException. Using online backups prevents this from occurring.
For large systems, shutting down the database might not be convenient. To back up adatabase without having to shut it down, you can use an online backup.
After you back up a database, make sure the backup copy is not corrupt. To do this, runthe SYSCS_UTIL.SYSCS_CHECK_TABLE system function on all the tables in the backupcopy. Do not discard the previous backup until you have verified the consistency of thecurrent one. See Checking database consistency for more information.
Online backups
Use online backups to back up a database while it is running, without blockingtransactions.
You can perform online backups by using several types of backup procedures or by usingoperating system commands with the freeze and unfreeze system procedures.
Using the backup procedures to perform an online backup:
Use the SYSCS_UTIL.SYSCS_BACKUP_DATABASE procedure or one of the other systembackup procedures to perform an online backup of a database to a specified location.
The backup procedures are as follows:
• SYSCS_UTIL.SYSCS_BACKUP_DATABASE• SYSCS_UTIL.SYSCS_BACKUP_DATABASE_NOWAIT• SYSCS_UTIL.SYSCS_BACKUP_DATABASE_AND_ENABLE_LOG_ARCHIVE_MODE• SYSCS_UTIL.SYSCS_BACKUP_DATABASE_AND_ENABLE_LOG_ARCHIVE_MODE_NOWAIT
Use theSYSCS_UTIL.SYSCS_BACKUP_DATABASE_AND_ENABLE_LOG_ARCHIVE_MODEorSYSCS_UTIL.SYSCS_BACKUP_DATABASE_AND_ENABLE_LOG_ARCHIVE_MODE_NOWAITprocedure if you want to make it possible to perform a roll-forward recovery of a damageddatabase. See Roll-forward recovery for details.
The NOWAIT versions of the procedures do not wait for transactions in progress withunlogged operations to complete before proceeding with the backup; instead, they returnan error immediately.
See the Derby Reference Manual for details about these system procedures.
All four of these system procedures take a string argument that represents the locationin which to back up the database. Typically, you provide the full path to the backupdirectory. (Relative paths are interpreted as relative to the current directory, not to thederby.system.home directory.)

Derby Server and Administration Guide
64
For example, to specify a backup location of c:/mybackups/2012-04-01 for adatabase that is currently open, use the following statement (forward slashes are used aspath separators in SQL commands):
CALL SYSCS_UTIL.SYSCS_BACKUP_DATABASE('c:/mybackups/2012-04-01')
The SYSCS_UTIL.SYSCS_BACKUP_DATABASE orSYSCS_UTIL.SYSCS_BACKUP_DATABASE_NOWAIT procedure puts the database intoa state in which it can be safely copied. The procedure then copies the entire originaldatabase directory (including data files, online transaction log files, and jar files) to thespecified backup directory. Files that are not within the original database directory (forexample, derby.properties) are not copied. With the exception of a few casesmentioned in Unlogged Operations, the procedure does not block concurrent transactionsat any time.
A backup made with theSYSCS_UTIL.SYSCS_BACKUP_DATABASE_AND_ENABLE_LOG_ARCHIVE_MODEorSYSCS_UTIL.SYSCS_BACKUP_DATABASE_AND_ENABLE_LOG_ARCHIVE_MODE_NOWAITprocedure is not a full copy of the database, but depends on the log files created in thedatabase since the backup. An attempt to access the backup directly will invalidate thebackup. The result could include a corrupted database, missing data, errors during asubsequent attempt at restoring the database, or database corruption errors encounteredonly once the restored database is being used. The only supported way to access thiskind of backup is to restore the database as documented in Roll-forward recovery.
The following example shows how to back up a database to a directory with a name thatreflects the current date:
public static void backUpDatabase(Connection conn) throws SQLException { // Get today's date as a string: java.text.SimpleDateFormat todaysDate = new java.text.SimpleDateFormat("yyyy-MM-dd"); String backupdirectory = "c:/mybackups/" + todaysDate.format((java.util.Calendar.getInstance()).getTime());
CallableStatement cs = conn.prepareCall("CALL SYSCS_UTIL.SYSCS_BACKUP_DATABASE(?)"); cs.setString(1, backupdirectory); cs.execute(); cs.close(); System.out.println("backed up database to " + backupdirectory);}
For a database that was backed up on 2012-04-01, the previous commands copy thecurrent database to a directory of the same name in c:/mybackups/2012-04-01.
Uncommitted transactions do not appear in the backed-up database.
Note: Do not back up different databases with the same name to the same backupdirectory. If a database of the same name already exists in the backup directory, it isassumed to be an older version and is overwritten.
Unlogged Operations
For some operations, Derby does not log because it can keep the database consistentwithout logging the data.
The SYSCS_UTIL.SYSCS_BACKUP_DATABASE procedure will issue an error if there areany unlogged operations in the same transaction as the backup procedure.
Derby Server and Administration Guide
65
If any unlogged operations are in progress in other transactions in the system whenthe backup starts, this procedure will block until those transactions are complete beforeperforming the backup.
Derby automatically converts unlogged operations to logged mode if they are startedwhile the backup is in progress (except operations that maintain application jar files in thedatabase). Procedures to install, replace, and remove jar files in a database are blockedwhile the backup is in progress.
If you do not want backup to block until unlogged operations in other transactions arecomplete, use the SYSCS_UTIL.SYSCS_BACKUP_DATABASE_NOWAIT procedure.This procedure issues an error immediately at the start of the backup if there areany transactions in progress with unlogged operations, instead of waiting for thosetransactions to complete.
Unlogged operations include:
• Index creation.
Only CREATE INDEX is logged, not all the data inserts into the index. The reasoninserts into the index are not logged is that if there is a failure, it will just drop theindex.
If you create an index when the backup is in progress, it will be slower, because ithas to be logged.
Foreign keys and primary keys create backing indexes. Adding those keys to anexisting table with data will also run slower.
• Importing to an empty table or replacing all the data in a table.
In this case also, data inserts into the table are not logged. Internally, Derby createsa new table for the import, changes the catalogs to point to the new table, and dropsthe original table when the import completes.
If you perform such an import operation when backup is in progress, it will be slowerbecause data is logged.
Using operating system commands with the freeze and unfreeze systemprocedures to perform an online backup:
Typically, these procedures are used to speed up the copy operation involved in anonline backup.
In this scenario, Derby does not perform the copy operation for you. You use theSYSCS_UTIL.SYSCS_FREEZE_DATABASE procedure to lock the database, and then youexplicitly copy the database directory by using operating system commands.
For example, because the UNIX tar command uses operating system file-copyingroutines, and the SYSCS_UTIL.SYSCS_BACKUP_DATABASE procedure usesJava I/O calls with additional internal synchronization that allow updatesduring the backup, the tar command might provide faster backups than theSYSCS_UTIL.SYSCS_BACKUP_DATABASE procedure.
To use operating system commands for online database backups, callthe SYSCS_UTIL.SYSCS_FREEZE_DATABASE system procedure. TheSYSCS_UTIL.SYSCS_FREEZE_DATABASE system procedure puts the database intoa state in which it can be safely copied. After the database has been copied, use theSYSCS_UTIL.SYSCS_UNFREEZE_DATABASE system procedure to continue workingwith the database. Only after SYSCS_UTIL.SYSCS_UNFREEZE_DATABASE has beenspecified can transactions once again write to the database. Read operations canproceed while the database is frozen.
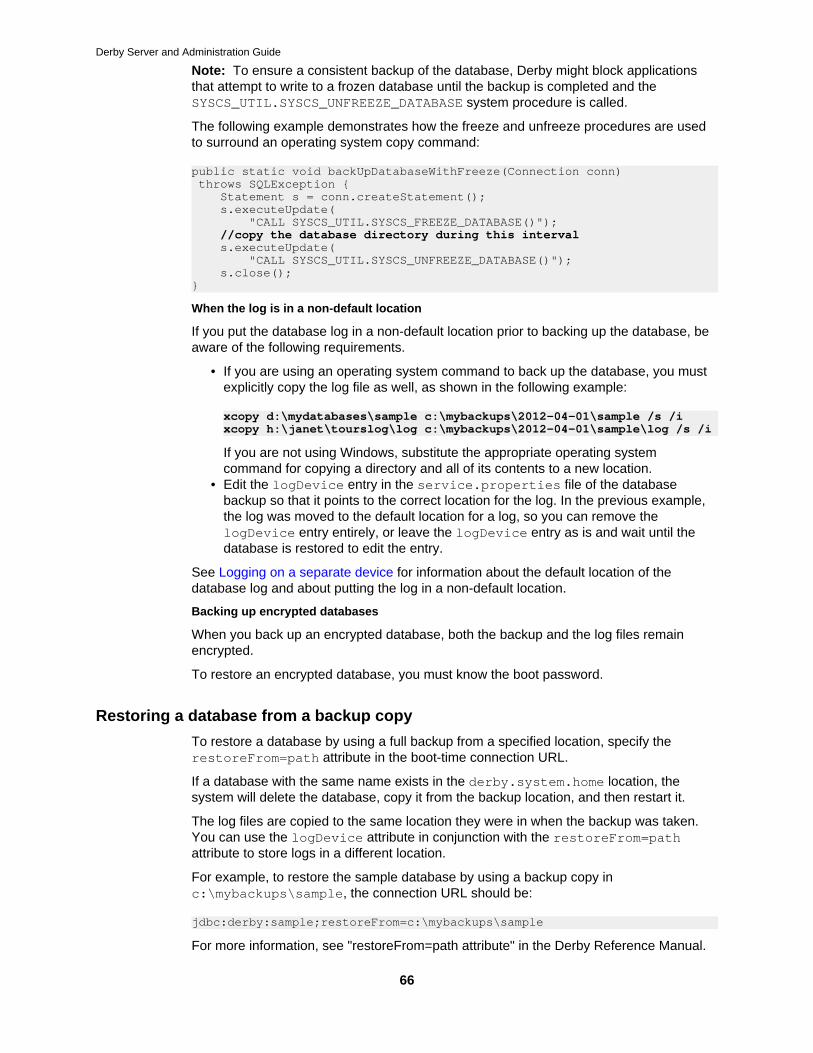
Derby Server and Administration Guide
66
Note: To ensure a consistent backup of the database, Derby might block applicationsthat attempt to write to a frozen database until the backup is completed and theSYSCS_UTIL.SYSCS_UNFREEZE_DATABASE system procedure is called.
The following example demonstrates how the freeze and unfreeze procedures are usedto surround an operating system copy command:
public static void backUpDatabaseWithFreeze(Connection conn) throws SQLException { Statement s = conn.createStatement(); s.executeUpdate( "CALL SYSCS_UTIL.SYSCS_FREEZE_DATABASE()"); //copy the database directory during this interval s.executeUpdate( "CALL SYSCS_UTIL.SYSCS_UNFREEZE_DATABASE()"); s.close();}
When the log is in a non-default location
If you put the database log in a non-default location prior to backing up the database, beaware of the following requirements.
• If you are using an operating system command to back up the database, you mustexplicitly copy the log file as well, as shown in the following example:
xcopy d:\mydatabases\sample c:\mybackups\2012-04-01\sample /s /ixcopy h:\janet\tourslog\log c:\mybackups\2012-04-01\sample\log /s /i
If you are not using Windows, substitute the appropriate operating systemcommand for copying a directory and all of its contents to a new location.
• Edit the logDevice entry in the service.properties file of the databasebackup so that it points to the correct location for the log. In the previous example,the log was moved to the default location for a log, so you can remove thelogDevice entry entirely, or leave the logDevice entry as is and wait until thedatabase is restored to edit the entry.
See Logging on a separate device for information about the default location of thedatabase log and about putting the log in a non-default location.
Backing up encrypted databases
When you back up an encrypted database, both the backup and the log files remainencrypted.
To restore an encrypted database, you must know the boot password.
Restoring a database from a backup copy
To restore a database by using a full backup from a specified location, specify therestoreFrom=path attribute in the boot-time connection URL.
If a database with the same name exists in the derby.system.home location, thesystem will delete the database, copy it from the backup location, and then restart it.
The log files are copied to the same location they were in when the backup was taken.You can use the logDevice attribute in conjunction with the restoreFrom=pathattribute to store logs in a different location.
For example, to restore the sample database by using a backup copy inc:\mybackups\sample, the connection URL should be:
jdbc:derby:sample;restoreFrom=c:\mybackups\sample
For more information, see "restoreFrom=path attribute" in the Derby Reference Manual.
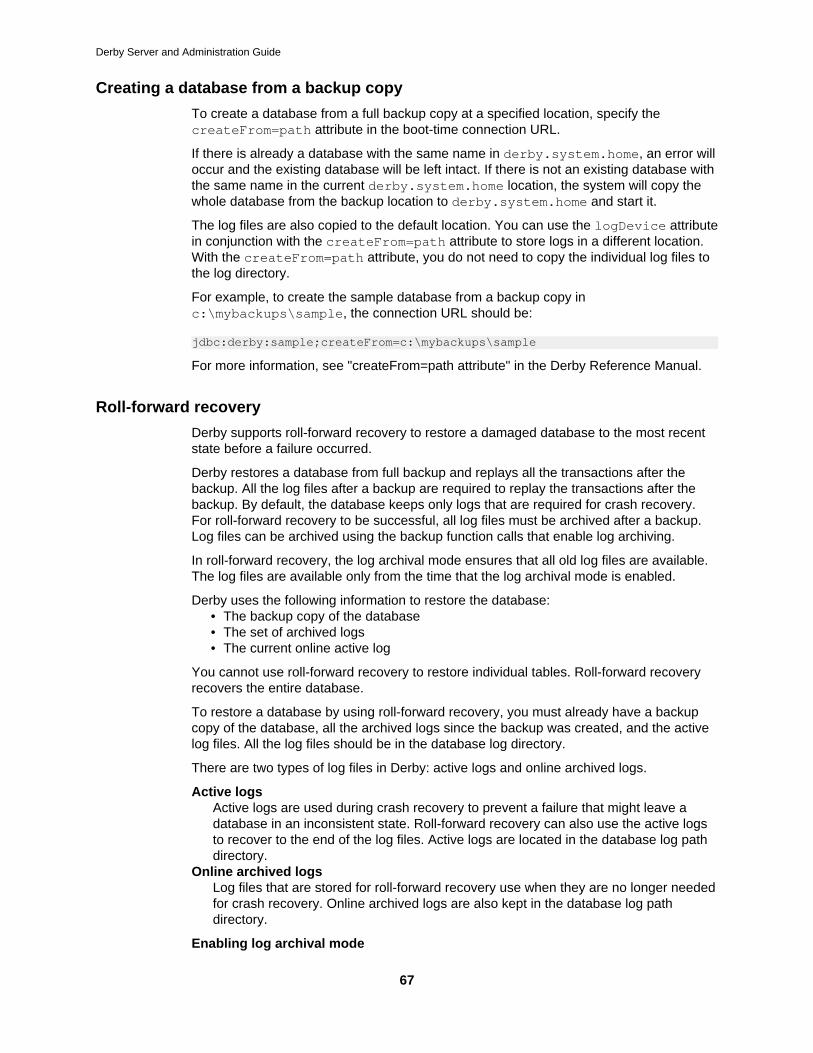
Derby Server and Administration Guide
67
Creating a database from a backup copy
To create a database from a full backup copy at a specified location, specify thecreateFrom=path attribute in the boot-time connection URL.
If there is already a database with the same name in derby.system.home, an error willoccur and the existing database will be left intact. If there is not an existing database withthe same name in the current derby.system.home location, the system will copy thewhole database from the backup location to derby.system.home and start it.
The log files are also copied to the default location. You can use the logDevice attributein conjunction with the createFrom=path attribute to store logs in a different location.With the createFrom=path attribute, you do not need to copy the individual log files tothe log directory.
For example, to create the sample database from a backup copy inc:\mybackups\sample, the connection URL should be:
jdbc:derby:sample;createFrom=c:\mybackups\sample
For more information, see "createFrom=path attribute" in the Derby Reference Manual.
Roll-forward recovery
Derby supports roll-forward recovery to restore a damaged database to the most recentstate before a failure occurred.
Derby restores a database from full backup and replays all the transactions after thebackup. All the log files after a backup are required to replay the transactions after thebackup. By default, the database keeps only logs that are required for crash recovery.For roll-forward recovery to be successful, all log files must be archived after a backup.Log files can be archived using the backup function calls that enable log archiving.
In roll-forward recovery, the log archival mode ensures that all old log files are available.The log files are available only from the time that the log archival mode is enabled.
Derby uses the following information to restore the database:• The backup copy of the database• The set of archived logs• The current online active log
You cannot use roll-forward recovery to restore individual tables. Roll-forward recoveryrecovers the entire database.
To restore a database by using roll-forward recovery, you must already have a backupcopy of the database, all the archived logs since the backup was created, and the activelog files. All the log files should be in the database log directory.
There are two types of log files in Derby: active logs and online archived logs.
Active logsActive logs are used during crash recovery to prevent a failure that might leave adatabase in an inconsistent state. Roll-forward recovery can also use the active logsto recover to the end of the log files. Active logs are located in the database log pathdirectory.
Online archived logsLog files that are stored for roll-forward recovery use when they are no longer neededfor crash recovery. Online archived logs are also kept in the database log pathdirectory.
Enabling log archival mode

Derby Server and Administration Guide
68
Online archive logs are available only if the database is enabled for log archival mode.You can use the following system procedure to enable the database for log archivalmode:
SYSCS_UTIL.SYSCS_BACKUP_DATABASE_AND_ENABLE_LOG_ARCHIVE_MODE(IN BACKUPDIR VARCHAR(32672), IN SMALLINT DELETE_ARCHIVED_LOG_FILES)
The input parameters for this procedure specify the location where the backup shouldbe stored and specify whether or not the database should keep online archived logs forthe backup. Existing online archived log files that were created before this backup will bedeleted if the input parameter value for the DELETE_ARCHIVED_LOG_FILES parameteris non-zero. The log files are deleted only after a successful backup.Note: Make sure to store the backup database in a safe place when you choose the logfile removal option.
The SYSCS_UTIL.SYSCS_BACKUP_DATABASE_AND_ENABLE_LOG_ARCHIVE_MODEprocedure will issue an error if there are any unlogged operations in the same transactionas the backup procedure.
If any unlogged operations are in progress in other transactions in the system whenthe backup starts, this procedure will block until those transactions are complete beforeperforming the backup. Derby automatically converts unlogged operations to loggedmode if they are started while the backup is in progress (except operations that maintainapplication jar files in the database). Procedures to install, replace, and remove jar files ina database are blocked while the backup is in progress.
If you do not want backup to block until unlogged operationsin other transactions are complete, use theSYSCS_UTIL.SYSCS_BACKUP_DATABASE_AND_ENABLE_LOG_ARCHIVE_MODE_NOWAITprocedure. This procedure issues an error immediately at the start of the backup if thereare any transactions in progress with unlogged operations, instead of waiting for thosetransactions to complete.
Disabling log archival mode
After you enable log archival mode, the database will always have the log archival modeenabled even if it is subsequently booted or backed up. The only way to disable the logarchive mode is to run the following procedure:
SYSCS_UTIL.SYSCS_DISABLE_LOG_ARCHIVE_MODE(IN SMALLINT DELETE_ARCHIVED_LOG_FILES)
This system procedure disables the log archive mode and deletes any existing onlinearchived log files if the input parameter DELETE_ARCHIVED_LOG_FILES is non-zero.
Performing roll-forward recovery
If you have a backup made by usingSYSCS_UTIL.SYSCS_BACKUP_DATABASE_AND_ENABLE_LOG_ARCHIVE_MODEorSYSCS_UTIL.SYSCS_BACKUP_DATABASE_AND_ENABLE_LOG_ARCHIVE_MODE_NOWAIT,you can restore it to its most recent state by using the full backup copy, archived logs,and active logs. You perform a roll-forward recovery by specifying the connection URLattribute rollForwardRecoveryFrom=path at boot time. All the log files should be inthe database log path directory.
The steps involved are as follows. They do not show the commands to start ij.
1. Back up the database with log archive mode enabled.
For example, you could back up a database named wombat to the /backupdirectory as follows. After many operations, the database crashes.
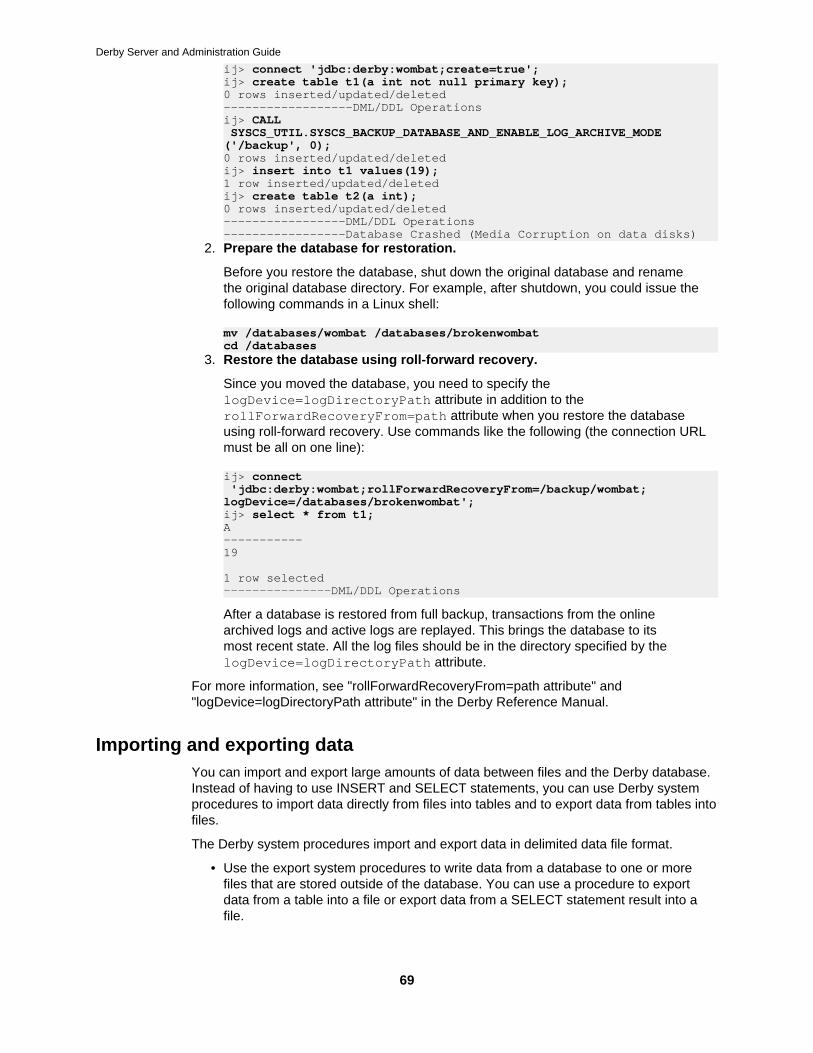
Derby Server and Administration Guide
69
ij> connect 'jdbc:derby:wombat;create=true';ij> create table t1(a int not null primary key);0 rows inserted/updated/deleted------------------DML/DDL Operationsij> CALL SYSCS_UTIL.SYSCS_BACKUP_DATABASE_AND_ENABLE_LOG_ARCHIVE_MODE('/backup', 0);0 rows inserted/updated/deletedij> insert into t1 values(19);1 row inserted/updated/deletedij> create table t2(a int);0 rows inserted/updated/deleted-----------------DML/DDL Operations-----------------Database Crashed (Media Corruption on data disks)
2. Prepare the database for restoration.
Before you restore the database, shut down the original database and renamethe original database directory. For example, after shutdown, you could issue thefollowing commands in a Linux shell:
mv /databases/wombat /databases/brokenwombat cd /databases
3. Restore the database using roll-forward recovery.
Since you moved the database, you need to specify thelogDevice=logDirectoryPath attribute in addition to therollForwardRecoveryFrom=path attribute when you restore the databaseusing roll-forward recovery. Use commands like the following (the connection URLmust be all on one line):
ij> connect 'jdbc:derby:wombat;rollForwardRecoveryFrom=/backup/wombat;logDevice=/databases/brokenwombat';ij> select * from t1;A -----------19
1 row selected---------------DML/DDL Operations
After a database is restored from full backup, transactions from the onlinearchived logs and active logs are replayed. This brings the database to itsmost recent state. All the log files should be in the directory specified by thelogDevice=logDirectoryPath attribute.
For more information, see "rollForwardRecoveryFrom=path attribute" and"logDevice=logDirectoryPath attribute" in the Derby Reference Manual.
Importing and exporting dataYou can import and export large amounts of data between files and the Derby database.Instead of having to use INSERT and SELECT statements, you can use Derby systemprocedures to import data directly from files into tables and to export data from tables intofiles.
The Derby system procedures import and export data in delimited data file format.
• Use the export system procedures to write data from a database to one or morefiles that are stored outside of the database. You can use a procedure to exportdata from a table into a file or export data from a SELECT statement result into afile.
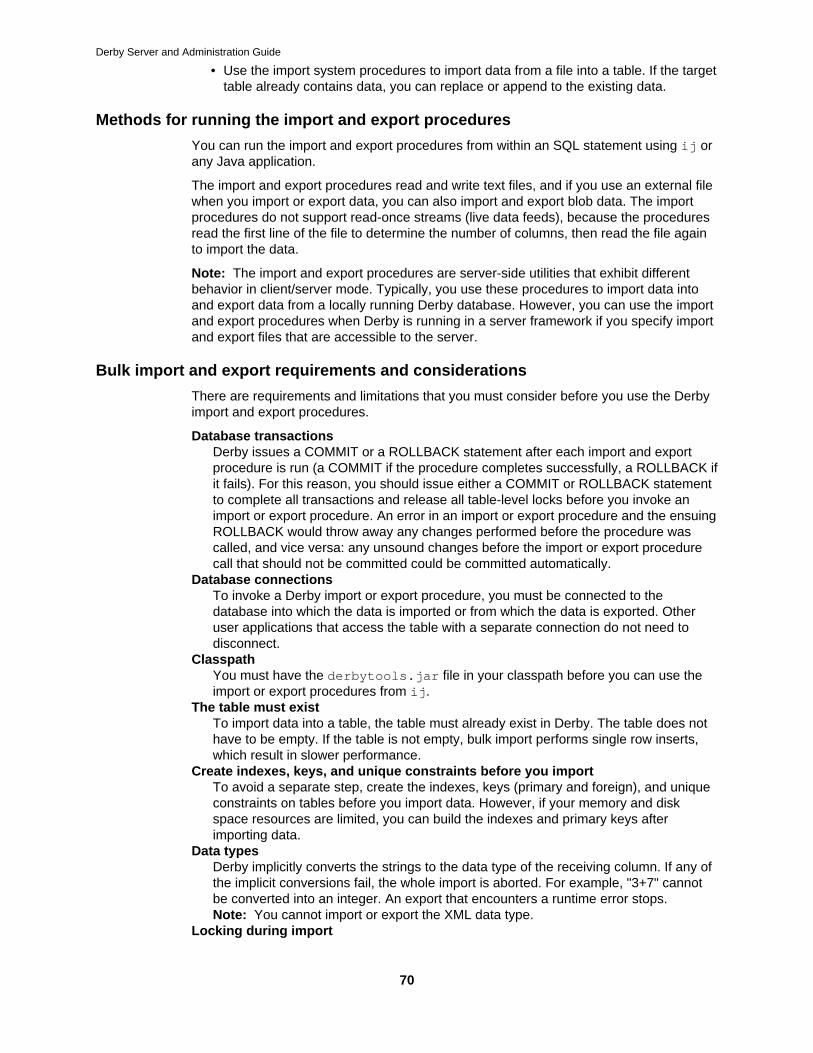
Derby Server and Administration Guide
70
• Use the import system procedures to import data from a file into a table. If the targettable already contains data, you can replace or append to the existing data.
Methods for running the import and export procedures
You can run the import and export procedures from within an SQL statement using ij orany Java application.
The import and export procedures read and write text files, and if you use an external filewhen you import or export data, you can also import and export blob data. The importprocedures do not support read-once streams (live data feeds), because the proceduresread the first line of the file to determine the number of columns, then read the file againto import the data.
Note: The import and export procedures are server-side utilities that exhibit differentbehavior in client/server mode. Typically, you use these procedures to import data intoand export data from a locally running Derby database. However, you can use the importand export procedures when Derby is running in a server framework if you specify importand export files that are accessible to the server.
Bulk import and export requirements and considerations
There are requirements and limitations that you must consider before you use the Derbyimport and export procedures.
Database transactionsDerby issues a COMMIT or a ROLLBACK statement after each import and exportprocedure is run (a COMMIT if the procedure completes successfully, a ROLLBACK ifit fails). For this reason, you should issue either a COMMIT or ROLLBACK statementto complete all transactions and release all table-level locks before you invoke animport or export procedure. An error in an import or export procedure and the ensuingROLLBACK would throw away any changes performed before the procedure wascalled, and vice versa: any unsound changes before the import or export procedurecall that should not be committed could be committed automatically.
Database connectionsTo invoke a Derby import or export procedure, you must be connected to thedatabase into which the data is imported or from which the data is exported. Otheruser applications that access the table with a separate connection do not need todisconnect.
ClasspathYou must have the derbytools.jar file in your classpath before you can use theimport or export procedures from ij.
The table must existTo import data into a table, the table must already exist in Derby. The table does nothave to be empty. If the table is not empty, bulk import performs single row inserts,which result in slower performance.
Create indexes, keys, and unique constraints before you importTo avoid a separate step, create the indexes, keys (primary and foreign), and uniqueconstraints on tables before you import data. However, if your memory and diskspace resources are limited, you can build the indexes and primary keys afterimporting data.
Data typesDerby implicitly converts the strings to the data type of the receiving column. If any ofthe implicit conversions fail, the whole import is aborted. For example, "3+7" cannotbe converted into an integer. An export that encounters a runtime error stops.Note: You cannot import or export the XML data type.
Locking during import

Derby Server and Administration Guide
71
Import procedures use the same isolation level as the connection in which they areexecuted to insert data into tables. During import, the entire table is exclusively lockedirrespective of the isolation level.
Locking during exportExport procedures use the same isolation level as the connection in which they areexecuted to fetch data from tables.
Import behavior on tables with triggersThe import procedures enable INSERT triggers when data is appended to the table.The REPLACE parameter is not allowed when triggers are enabled on the table.
Restrictions on the REPLACE parameterIf you import data into a table that already contains data, you can either replaceor append to the existing data. You can use the REPLACE parameter on tablesthat have dependent tables. The replaced data must maintain referential integrity;otherwise, the import operation will be rolled back. You cannot use the REPLACEparameter if the table has triggers enabled.
Restrictions on tablesYou cannot use import procedures to import data into a system table or a declaredtemporary table.
Bulk import and export of large objects
You can import and export large objects (LOBs) using the Derby system procedures.
Importing and exporting CLOB and BLOB data
CLOB and BLOB data can be exported to the same file as the rest of the column data, orthe LOB column data can be exported to a separate external file. When the LOB columndata is exported to a separate external file, reference to the location of the LOB data isplaced in the LOB column in the main export file.
Importing and exporting LOB data using a separate external file might be faster thanstoring the LOB data in the same file as the rest of the column data:
• The CLOB data does not have to be scanned for the delimiters inside the data• The BLOB data does not need to be converted to hexadecimal format
Importing and exporting other binary data
When you export columns that contain the data types CHAR FOR BIT DATA, VARCHARFOR BIT DATA, and LONG VARCHAR FOR BIT DATA, the column data is alwaysexported to the main export file. The data is written in hexadecimal format. To importdata into a table that has columns of these data types, the data in the import file for thosecolumns must be in hexadecimal format.
Importing LOB data from a file that contains all of the data
You can use the SYSCS_UTIL.SYSCS_IMPORT_TABLE andSYSCS_UTIL.SYSCS_IMPORT_DATA procedures to import data into a table that containsa LOB column. The LOB data must be stored in the same file as the other column datathat you are importing. If you are importing data from a file that was exported from anon-Derby source, the binary data must be in hexadecimal format.
Importing LOB data from a separate external file
You can use the SYSCS_UTIL.SYSCS_IMPORT_TABLE_LOBS_FROM_EXTFILE andSYSCS_UTIL.SYSCS_IMPORT_DATA_LOBS_FROM_EXTFILE procedures to import LOBdata that is stored in a file that is separate from the main import file. These proceduresread the LOB data using the reference that is stored in the main import file. If you areimporting data from a non-Derby source, the references to the LOB data must be in themain import file in the format lobsFileName.Offset.length/. This is the same
Derby Server and Administration Guide
72
method that the Derby export procedures use to export the LOB data to a separateexternal file.
Exporting LOB data to the same file as the other column data
You can use the SYSCS_UTIL.SYSCS_EXPORT_TABLE andSYSCS_UTIL.SYSCS_EXPORT_QUERY procedures to write LOB data, along with the restof the column data, to a single export file.
CLOB column data is treated same as other character data. Character delimiters areallowed inside the CLOB data. The export procedures write the delimiter inside the dataas a double-delimiter.
BLOB column data is written to the export file in hexadecimal format. For each byte ofBLOB data, two characters are generated. The first character represents the high nibble(4 bits) in hexadecimal and the second character represents the low nibble.
Exporting LOB data to a separate external file from the other column data
You can use the SYSCS_UTIL.SYSCS_EXPORT_TABLE_LOBS_TO_EXTFILE andSYSCS_UTIL.SYSCS_EXPORT_QUERY_LOBS_TO_EXTFILE procedures to writeLOB data to a separate external file. These procedures include the LOBSFILENAMEparameter, which specifies the name of the external file for the LOB data.
When you use these procedures, the location of the LOB data is written to the mainexport file. The format of the reference to the LOB stored in the main export file islobsFileName.Offset.length/.
• Offset is the position in the external file in bytes• length is the size of the LOB column data in bytes
If a LOB column value is NULL, length is written as -1. No data conversion is performedwhen you export LOB data to an external file. BLOB data is written in binary format, andCLOB data is written using the codeset that you specify.
See Examples of bulk import and export for examples using each of the import andexport procedures.
File format for input and output
There are specific requirements for the format of the input and output files when youimport and export data.
The default file format is a delimited text file with the following characteristics:
• Rows are separated by a newline• Fields are separated by a comma (,)• Character-based fields are delimited with double quotes (")
Restriction: Before you perform import or export operations, you must ensure thatthe chosen delimiter character is not contained in the data to be imported or exported.If you chose a delimiter character that is part of the data to be imported or exported,unexpected errors might occur. The following restrictions apply to column and characterdelimiters:
• Delimiters are mutually exclusive• A delimiter cannot be a line-feed character, a carriage return, or a blank space• The default decimal point (.) cannot be a character delimiter• Delimiters cannot be hexadecimal characters (0-9, a-f, A-F).
The record delimiter is assumed to be a newline character. The record delimiter shouldnot be used as any other delimiter.
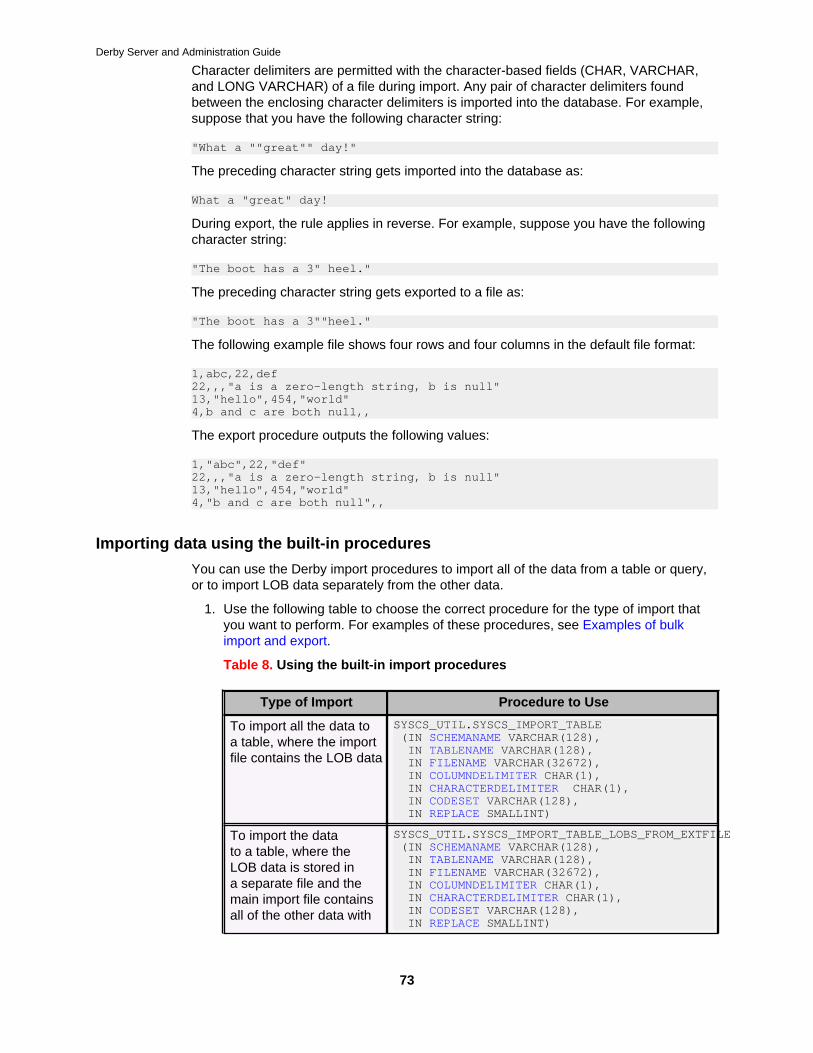
Derby Server and Administration Guide
73
Character delimiters are permitted with the character-based fields (CHAR, VARCHAR,and LONG VARCHAR) of a file during import. Any pair of character delimiters foundbetween the enclosing character delimiters is imported into the database. For example,suppose that you have the following character string:
"What a ""great"" day!"
The preceding character string gets imported into the database as:
What a "great" day!
During export, the rule applies in reverse. For example, suppose you have the followingcharacter string:
"The boot has a 3" heel."
The preceding character string gets exported to a file as:
"The boot has a 3""heel."
The following example file shows four rows and four columns in the default file format:
1,abc,22,def22,,,"a is a zero-length string, b is null"13,"hello",454,"world"4,b and c are both null,,
The export procedure outputs the following values:
1,"abc",22,"def"22,,,"a is a zero-length string, b is null"13,"hello",454,"world"4,"b and c are both null",,
Importing data using the built-in procedures
You can use the Derby import procedures to import all of the data from a table or query,or to import LOB data separately from the other data.
1. Use the following table to choose the correct procedure for the type of import thatyou want to perform. For examples of these procedures, see Examples of bulkimport and export.
Table 8. Using the built-in import procedures
Type of Import Procedure to Use
To import all the data toa table, where the importfile contains the LOB data
SYSCS_UTIL.SYSCS_IMPORT_TABLE (IN SCHEMANAME VARCHAR(128), IN TABLENAME VARCHAR(128), IN FILENAME VARCHAR(32672), IN COLUMNDELIMITER CHAR(1), IN CHARACTERDELIMITER CHAR(1), IN CODESET VARCHAR(128), IN REPLACE SMALLINT)
To import the datato a table, where theLOB data is stored ina separate file and themain import file containsall of the other data with
SYSCS_UTIL.SYSCS_IMPORT_TABLE_LOBS_FROM_EXTFILE (IN SCHEMANAME VARCHAR(128), IN TABLENAME VARCHAR(128), IN FILENAME VARCHAR(32672), IN COLUMNDELIMITER CHAR(1), IN CHARACTERDELIMITER CHAR(1), IN CODESET VARCHAR(128), IN REPLACE SMALLINT)
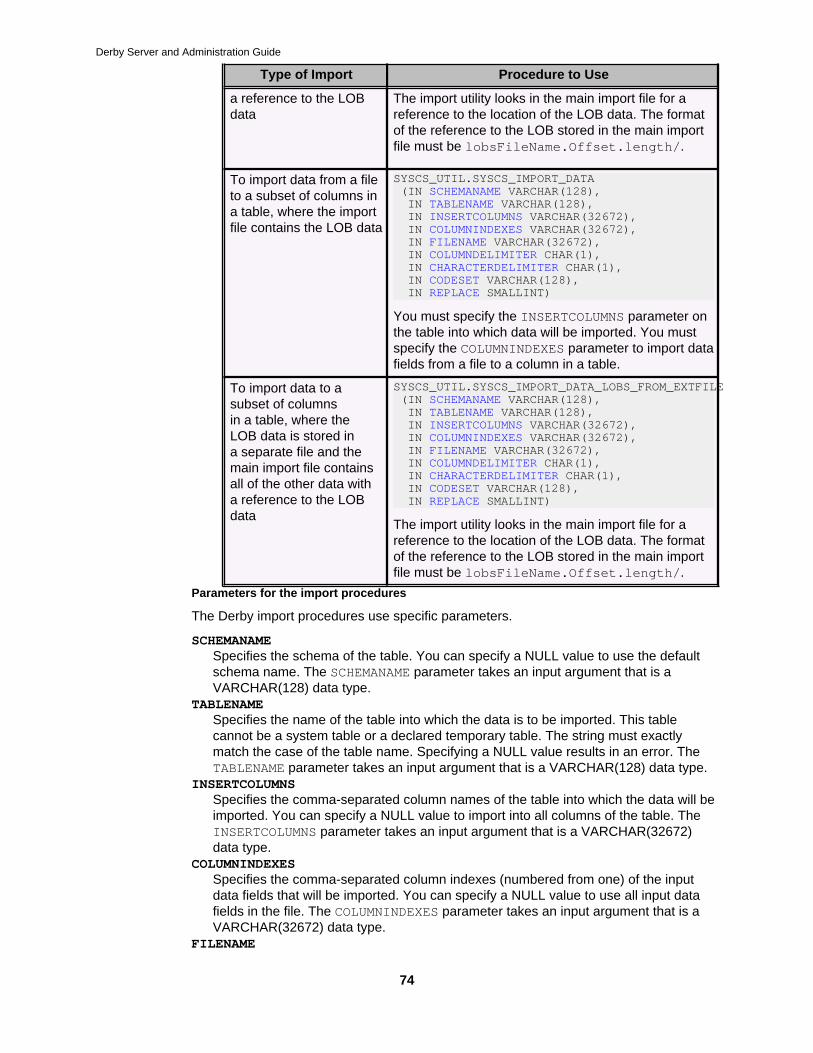
Derby Server and Administration Guide
74
Type of Import Procedure to Use
a reference to the LOBdata
The import utility looks in the main import file for areference to the location of the LOB data. The formatof the reference to the LOB stored in the main importfile must be lobsFileName.Offset.length/.
To import data from a fileto a subset of columns ina table, where the importfile contains the LOB data
SYSCS_UTIL.SYSCS_IMPORT_DATA (IN SCHEMANAME VARCHAR(128), IN TABLENAME VARCHAR(128), IN INSERTCOLUMNS VARCHAR(32672), IN COLUMNINDEXES VARCHAR(32672), IN FILENAME VARCHAR(32672), IN COLUMNDELIMITER CHAR(1), IN CHARACTERDELIMITER CHAR(1), IN CODESET VARCHAR(128), IN REPLACE SMALLINT)
You must specify the INSERTCOLUMNS parameter onthe table into which data will be imported. You mustspecify the COLUMNINDEXES parameter to import datafields from a file to a column in a table.
To import data to asubset of columnsin a table, where theLOB data is stored ina separate file and themain import file containsall of the other data witha reference to the LOBdata
SYSCS_UTIL.SYSCS_IMPORT_DATA_LOBS_FROM_EXTFILE (IN SCHEMANAME VARCHAR(128), IN TABLENAME VARCHAR(128), IN INSERTCOLUMNS VARCHAR(32672), IN COLUMNINDEXES VARCHAR(32672), IN FILENAME VARCHAR(32672), IN COLUMNDELIMITER CHAR(1), IN CHARACTERDELIMITER CHAR(1), IN CODESET VARCHAR(128), IN REPLACE SMALLINT)
The import utility looks in the main import file for areference to the location of the LOB data. The formatof the reference to the LOB stored in the main importfile must be lobsFileName.Offset.length/.
Parameters for the import procedures
The Derby import procedures use specific parameters.
SCHEMANAMESpecifies the schema of the table. You can specify a NULL value to use the defaultschema name. The SCHEMANAME parameter takes an input argument that is aVARCHAR(128) data type.
TABLENAMESpecifies the name of the table into which the data is to be imported. This tablecannot be a system table or a declared temporary table. The string must exactlymatch the case of the table name. Specifying a NULL value results in an error. TheTABLENAME parameter takes an input argument that is a VARCHAR(128) data type.
INSERTCOLUMNSSpecifies the comma-separated column names of the table into which the data will beimported. You can specify a NULL value to import into all columns of the table. TheINSERTCOLUMNS parameter takes an input argument that is a VARCHAR(32672)data type.
COLUMNINDEXESSpecifies the comma-separated column indexes (numbered from one) of the inputdata fields that will be imported. You can specify a NULL value to use all input datafields in the file. The COLUMNINDEXES parameter takes an input argument that is aVARCHAR(32672) data type.
FILENAME
Derby Server and Administration Guide
75
Specifies the name of the file that contains the data to be imported. If the path isomitted, the current working directory is used. The specified location of the file shouldrefer to the server side location if you are using the Network Server. Specifying aNULL value results in an error. The FILENAME parameter takes an input argumentthat is a VARCHAR(32672) data type.
COLUMNDELIMITERSpecifies a column delimiter. The specified character is used in place of a comma tosignify the end of a column. You can specify a NULL value to use the default valueof a comma. The COLUMNDELIMITER parameter takes an input argument that is aCHAR(1) data type.
CHARACTERDELIMITERSpecifies a character delimiter. The specified character is used in place of doublequotation marks to enclose a character string. You can specify a NULL value to usethe default value of a double quotation mark. The CHARACTERDELIMITER parametertakes an input argument that is a CHAR(1) data type.
CODESETSpecifies the code set of the data in the input file. The code set name should be oneof the Java supported character encoding sets. Data is converted from the specifiedcode set to the database code set (UTF-8). You can specify a NULL value to interpretthe data file in the same code set as the JVM in which it is being executed. TheCODESET parameter takes an input argument that is a VARCHAR(128) data type.
REPLACEA non-zero value for the REPLACE parameter will import in REPLACE mode, whilea zero value will import in INSERT mode. REPLACE mode deletes all existingdata from the table by truncating the table and inserts the imported data. The tabledefinition and the index definitions are not changed. You can import with REPLACEmode only if the table already exists. INSERT mode adds the imported data to thetable without changing the existing table data. Specifying a NULL value results in anerror. The REPLACE parameter takes an input argument that is a SMALLINT datatype.
If you create a schema, table, or column name as a non-delimited identifier, you mustpass the name to the import procedure using all uppercase characters. If you created aschema, table, or column name as a delimited identifier, you must pass the name to theimport procedure using the same case that was used when it was created.
Import into tables that contain identity columns
You can use the either the SYSCS_UTIL.SYSCS_IMPORT_DATA procedure or theSYSCS_UTIL.SYSCS_IMPORT_DATA_LOBS_FROM_EXTFILE procedure to import datainto a table that contains an identity column. The approach that you take depends onwhether the identity column is GENERATED ALWAYS or GENERATED BY DEFAULT.
Identity columns and the REPLACE parameter
If the REPLACE parameter is used during import, Derby resets its internal counter of thelast identity value for a column to the initial value defined for the identity column.
Identity column is GENERATED ALWAYS
If the identity column is defined as GENERATED ALWAYS, an identity value is alwaysgenerated for a table row. When a corresponding row in the input file already containsa value for the identity column, the row cannot be inserted into the table and the importoperation will fail.
To prevent such failure, the following examples show how to specifyparameters in the SYSCS_UTIL.SYSCS_IMPORT_DATA andSYSCS_UTIL.SYSCS_IMPORT_DATA_LOBS_FROM_EXTFILE procedures to ignore datafor the identity column from the file, and omit the column name from the insert column list.
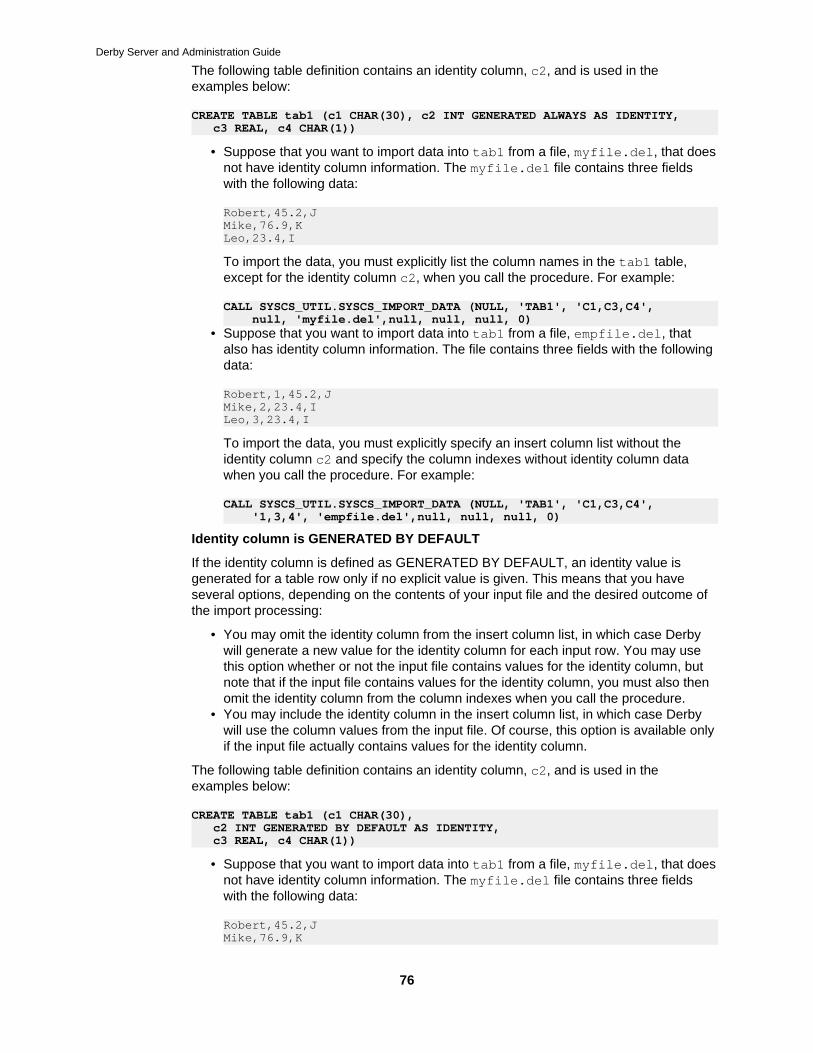
Derby Server and Administration Guide
76
The following table definition contains an identity column, c2, and is used in theexamples below:
CREATE TABLE tab1 (c1 CHAR(30), c2 INT GENERATED ALWAYS AS IDENTITY, c3 REAL, c4 CHAR(1))
• Suppose that you want to import data into tab1 from a file, myfile.del, that doesnot have identity column information. The myfile.del file contains three fieldswith the following data:
Robert,45.2,JMike,76.9,KLeo,23.4,I
To import the data, you must explicitly list the column names in the tab1 table,except for the identity column c2, when you call the procedure. For example:
CALL SYSCS_UTIL.SYSCS_IMPORT_DATA (NULL, 'TAB1', 'C1,C3,C4', null, 'myfile.del',null, null, null, 0)
• Suppose that you want to import data into tab1 from a file, empfile.del, thatalso has identity column information. The file contains three fields with the followingdata:
Robert,1,45.2,JMike,2,23.4,ILeo,3,23.4,I
To import the data, you must explicitly specify an insert column list without theidentity column c2 and specify the column indexes without identity column datawhen you call the procedure. For example:
CALL SYSCS_UTIL.SYSCS_IMPORT_DATA (NULL, 'TAB1', 'C1,C3,C4', '1,3,4', 'empfile.del',null, null, null, 0)
Identity column is GENERATED BY DEFAULT
If the identity column is defined as GENERATED BY DEFAULT, an identity value isgenerated for a table row only if no explicit value is given. This means that you haveseveral options, depending on the contents of your input file and the desired outcome ofthe import processing:
• You may omit the identity column from the insert column list, in which case Derbywill generate a new value for the identity column for each input row. You may usethis option whether or not the input file contains values for the identity column, butnote that if the input file contains values for the identity column, you must also thenomit the identity column from the column indexes when you call the procedure.
• You may include the identity column in the insert column list, in which case Derbywill use the column values from the input file. Of course, this option is available onlyif the input file actually contains values for the identity column.
The following table definition contains an identity column, c2, and is used in theexamples below:
CREATE TABLE tab1 (c1 CHAR(30), c2 INT GENERATED BY DEFAULT AS IDENTITY, c3 REAL, c4 CHAR(1))
• Suppose that you want to import data into tab1 from a file, myfile.del, that doesnot have identity column information. The myfile.del file contains three fieldswith the following data:
Robert,45.2,JMike,76.9,K
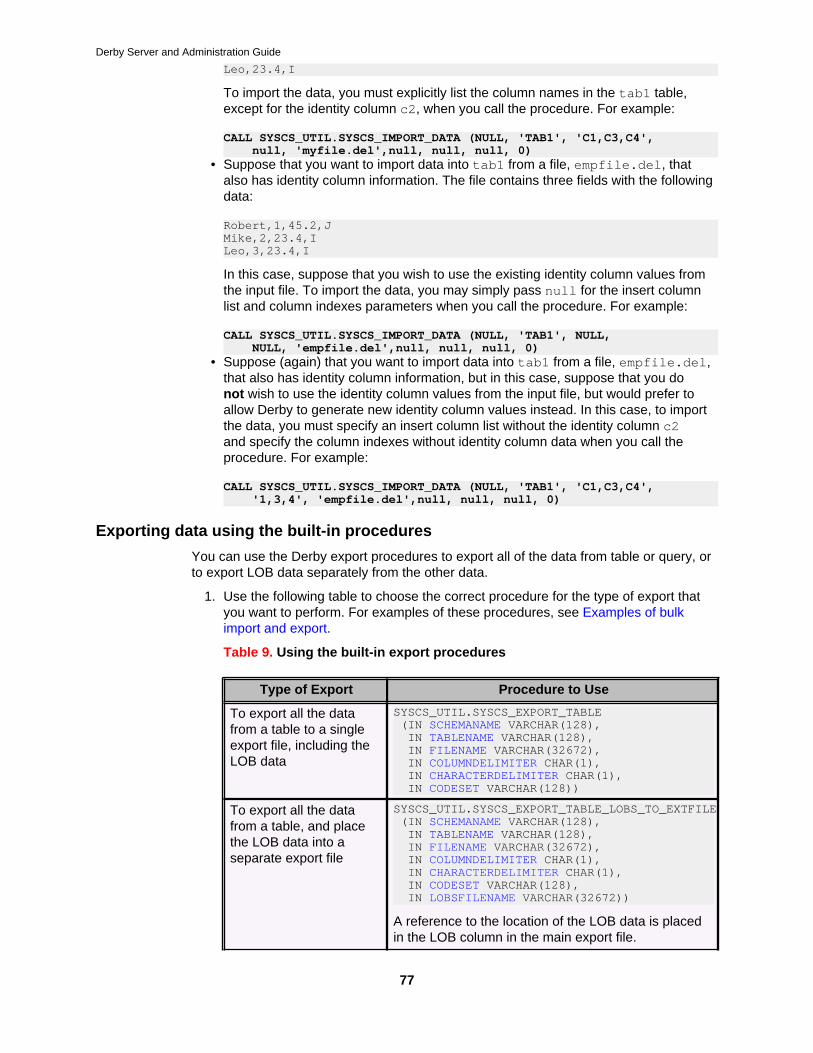
Derby Server and Administration Guide
77
Leo,23.4,I
To import the data, you must explicitly list the column names in the tab1 table,except for the identity column c2, when you call the procedure. For example:
CALL SYSCS_UTIL.SYSCS_IMPORT_DATA (NULL, 'TAB1', 'C1,C3,C4', null, 'myfile.del',null, null, null, 0)
• Suppose that you want to import data into tab1 from a file, empfile.del, thatalso has identity column information. The file contains three fields with the followingdata:
Robert,1,45.2,JMike,2,23.4,ILeo,3,23.4,I
In this case, suppose that you wish to use the existing identity column values fromthe input file. To import the data, you may simply pass null for the insert columnlist and column indexes parameters when you call the procedure. For example:
CALL SYSCS_UTIL.SYSCS_IMPORT_DATA (NULL, 'TAB1', NULL, NULL, 'empfile.del',null, null, null, 0)
• Suppose (again) that you want to import data into tab1 from a file, empfile.del,that also has identity column information, but in this case, suppose that you donot wish to use the identity column values from the input file, but would prefer toallow Derby to generate new identity column values instead. In this case, to importthe data, you must specify an insert column list without the identity column c2and specify the column indexes without identity column data when you call theprocedure. For example:
CALL SYSCS_UTIL.SYSCS_IMPORT_DATA (NULL, 'TAB1', 'C1,C3,C4', '1,3,4', 'empfile.del',null, null, null, 0)
Exporting data using the built-in procedures
You can use the Derby export procedures to export all of the data from table or query, orto export LOB data separately from the other data.
1. Use the following table to choose the correct procedure for the type of export thatyou want to perform. For examples of these procedures, see Examples of bulkimport and export.
Table 9. Using the built-in export procedures
Type of Export Procedure to Use
To export all the datafrom a table to a singleexport file, including theLOB data
SYSCS_UTIL.SYSCS_EXPORT_TABLE (IN SCHEMANAME VARCHAR(128), IN TABLENAME VARCHAR(128), IN FILENAME VARCHAR(32672), IN COLUMNDELIMITER CHAR(1), IN CHARACTERDELIMITER CHAR(1), IN CODESET VARCHAR(128))
To export all the datafrom a table, and placethe LOB data into aseparate export file
SYSCS_UTIL.SYSCS_EXPORT_TABLE_LOBS_TO_EXTFILE (IN SCHEMANAME VARCHAR(128), IN TABLENAME VARCHAR(128), IN FILENAME VARCHAR(32672), IN COLUMNDELIMITER CHAR(1), IN CHARACTERDELIMITER CHAR(1), IN CODESET VARCHAR(128), IN LOBSFILENAME VARCHAR(32672))
A reference to the location of the LOB data is placedin the LOB column in the main export file.
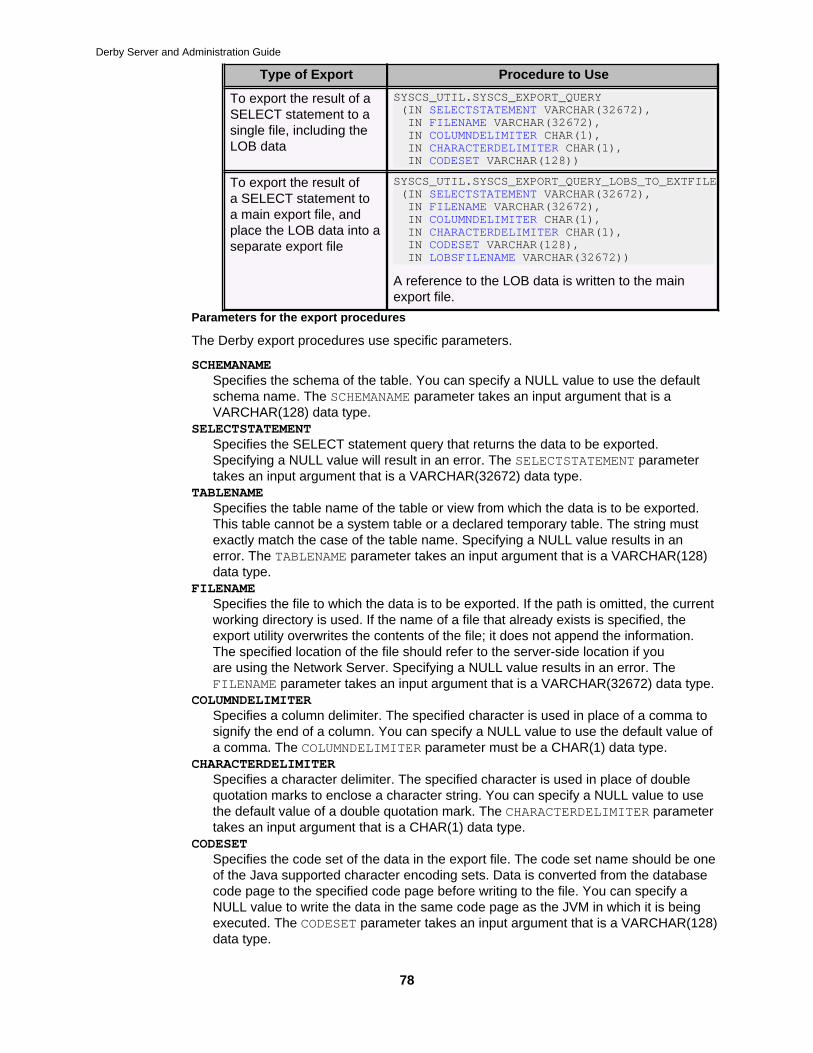
Derby Server and Administration Guide
78
Type of Export Procedure to Use
To export the result of aSELECT statement to asingle file, including theLOB data
SYSCS_UTIL.SYSCS_EXPORT_QUERY (IN SELECTSTATEMENT VARCHAR(32672), IN FILENAME VARCHAR(32672), IN COLUMNDELIMITER CHAR(1), IN CHARACTERDELIMITER CHAR(1), IN CODESET VARCHAR(128))
To export the result ofa SELECT statement toa main export file, andplace the LOB data into aseparate export file
SYSCS_UTIL.SYSCS_EXPORT_QUERY_LOBS_TO_EXTFILE (IN SELECTSTATEMENT VARCHAR(32672), IN FILENAME VARCHAR(32672), IN COLUMNDELIMITER CHAR(1), IN CHARACTERDELIMITER CHAR(1), IN CODESET VARCHAR(128), IN LOBSFILENAME VARCHAR(32672))
A reference to the LOB data is written to the mainexport file.
Parameters for the export procedures
The Derby export procedures use specific parameters.
SCHEMANAMESpecifies the schema of the table. You can specify a NULL value to use the defaultschema name. The SCHEMANAME parameter takes an input argument that is aVARCHAR(128) data type.
SELECTSTATEMENTSpecifies the SELECT statement query that returns the data to be exported.Specifying a NULL value will result in an error. The SELECTSTATEMENT parametertakes an input argument that is a VARCHAR(32672) data type.
TABLENAMESpecifies the table name of the table or view from which the data is to be exported.This table cannot be a system table or a declared temporary table. The string mustexactly match the case of the table name. Specifying a NULL value results in anerror. The TABLENAME parameter takes an input argument that is a VARCHAR(128)data type.
FILENAMESpecifies the file to which the data is to be exported. If the path is omitted, the currentworking directory is used. If the name of a file that already exists is specified, theexport utility overwrites the contents of the file; it does not append the information.The specified location of the file should refer to the server-side location if youare using the Network Server. Specifying a NULL value results in an error. TheFILENAME parameter takes an input argument that is a VARCHAR(32672) data type.
COLUMNDELIMITERSpecifies a column delimiter. The specified character is used in place of a comma tosignify the end of a column. You can specify a NULL value to use the default value ofa comma. The COLUMNDELIMITER parameter must be a CHAR(1) data type.
CHARACTERDELIMITERSpecifies a character delimiter. The specified character is used in place of doublequotation marks to enclose a character string. You can specify a NULL value to usethe default value of a double quotation mark. The CHARACTERDELIMITER parametertakes an input argument that is a CHAR(1) data type.
CODESETSpecifies the code set of the data in the export file. The code set name should be oneof the Java supported character encoding sets. Data is converted from the databasecode page to the specified code page before writing to the file. You can specify aNULL value to write the data in the same code page as the JVM in which it is beingexecuted. The CODESET parameter takes an input argument that is a VARCHAR(128)data type.
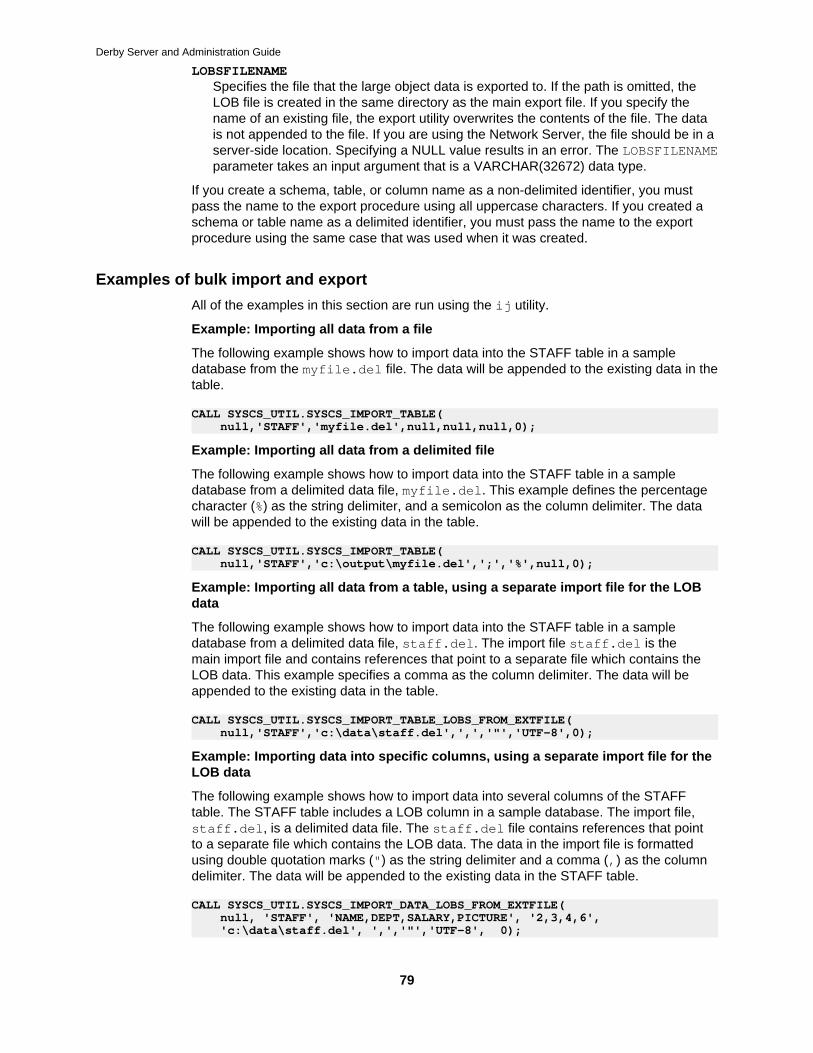
Derby Server and Administration Guide
79
LOBSFILENAMESpecifies the file that the large object data is exported to. If the path is omitted, theLOB file is created in the same directory as the main export file. If you specify thename of an existing file, the export utility overwrites the contents of the file. The datais not appended to the file. If you are using the Network Server, the file should be in aserver-side location. Specifying a NULL value results in an error. The LOBSFILENAMEparameter takes an input argument that is a VARCHAR(32672) data type.
If you create a schema, table, or column name as a non-delimited identifier, you mustpass the name to the export procedure using all uppercase characters. If you created aschema or table name as a delimited identifier, you must pass the name to the exportprocedure using the same case that was used when it was created.
Examples of bulk import and export
All of the examples in this section are run using the ij utility.
Example: Importing all data from a file
The following example shows how to import data into the STAFF table in a sampledatabase from the myfile.del file. The data will be appended to the existing data in thetable.
CALL SYSCS_UTIL.SYSCS_IMPORT_TABLE( null,'STAFF','myfile.del',null,null,null,0);
Example: Importing all data from a delimited file
The following example shows how to import data into the STAFF table in a sampledatabase from a delimited data file, myfile.del. This example defines the percentagecharacter (%) as the string delimiter, and a semicolon as the column delimiter. The datawill be appended to the existing data in the table.
CALL SYSCS_UTIL.SYSCS_IMPORT_TABLE( null,'STAFF','c:\output\myfile.del',';','%',null,0);
Example: Importing all data from a table, using a separate import file for the LOBdata
The following example shows how to import data into the STAFF table in a sampledatabase from a delimited data file, staff.del. The import file staff.del is themain import file and contains references that point to a separate file which contains theLOB data. This example specifies a comma as the column delimiter. The data will beappended to the existing data in the table.
CALL SYSCS_UTIL.SYSCS_IMPORT_TABLE_LOBS_FROM_EXTFILE( null,'STAFF','c:\data\staff.del',',','"','UTF-8',0);
Example: Importing data into specific columns, using a separate import file for theLOB data
The following example shows how to import data into several columns of the STAFFtable. The STAFF table includes a LOB column in a sample database. The import file,staff.del, is a delimited data file. The staff.del file contains references that pointto a separate file which contains the LOB data. The data in the import file is formattedusing double quotation marks (") as the string delimiter and a comma (,) as the columndelimiter. The data will be appended to the existing data in the STAFF table.
CALL SYSCS_UTIL.SYSCS_IMPORT_DATA_LOBS_FROM_EXTFILE( null, 'STAFF', 'NAME,DEPT,SALARY,PICTURE', '2,3,4,6', 'c:\data\staff.del', ',','"','UTF-8', 0);
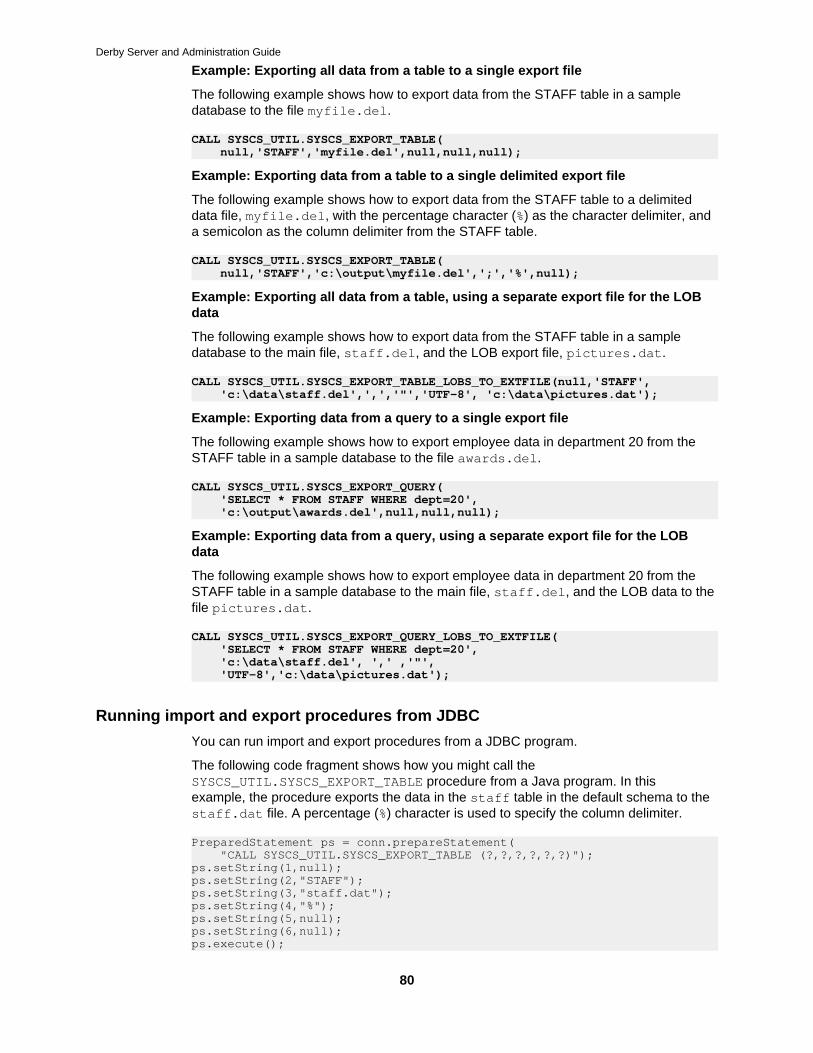
Derby Server and Administration Guide
80
Example: Exporting all data from a table to a single export file
The following example shows how to export data from the STAFF table in a sampledatabase to the file myfile.del.
CALL SYSCS_UTIL.SYSCS_EXPORT_TABLE( null,'STAFF','myfile.del',null,null,null);
Example: Exporting data from a table to a single delimited export file
The following example shows how to export data from the STAFF table to a delimiteddata file, myfile.del, with the percentage character (%) as the character delimiter, anda semicolon as the column delimiter from the STAFF table.
CALL SYSCS_UTIL.SYSCS_EXPORT_TABLE( null,'STAFF','c:\output\myfile.del',';','%',null);
Example: Exporting all data from a table, using a separate export file for the LOBdata
The following example shows how to export data from the STAFF table in a sampledatabase to the main file, staff.del, and the LOB export file, pictures.dat.
CALL SYSCS_UTIL.SYSCS_EXPORT_TABLE_LOBS_TO_EXTFILE(null,'STAFF', 'c:\data\staff.del',',','"','UTF-8', 'c:\data\pictures.dat');
Example: Exporting data from a query to a single export file
The following example shows how to export employee data in department 20 from theSTAFF table in a sample database to the file awards.del.
CALL SYSCS_UTIL.SYSCS_EXPORT_QUERY( 'SELECT * FROM STAFF WHERE dept=20', 'c:\output\awards.del',null,null,null);
Example: Exporting data from a query, using a separate export file for the LOBdata
The following example shows how to export employee data in department 20 from theSTAFF table in a sample database to the main file, staff.del, and the LOB data to thefile pictures.dat.
CALL SYSCS_UTIL.SYSCS_EXPORT_QUERY_LOBS_TO_EXTFILE( 'SELECT * FROM STAFF WHERE dept=20', 'c:\data\staff.del', ',' ,'"', 'UTF-8','c:\data\pictures.dat');
Running import and export procedures from JDBC
You can run import and export procedures from a JDBC program.
The following code fragment shows how you might call theSYSCS_UTIL.SYSCS_EXPORT_TABLE procedure from a Java program. In thisexample, the procedure exports the data in the staff table in the default schema to thestaff.dat file. A percentage (%) character is used to specify the column delimiter.
PreparedStatement ps = conn.prepareStatement( "CALL SYSCS_UTIL.SYSCS_EXPORT_TABLE (?,?,?,?,?,?)");ps.setString(1,null);ps.setString(2,"STAFF");ps.setString(3,"staff.dat");ps.setString(4,"%");ps.setString(5,null);ps.setString(6,null);ps.execute();
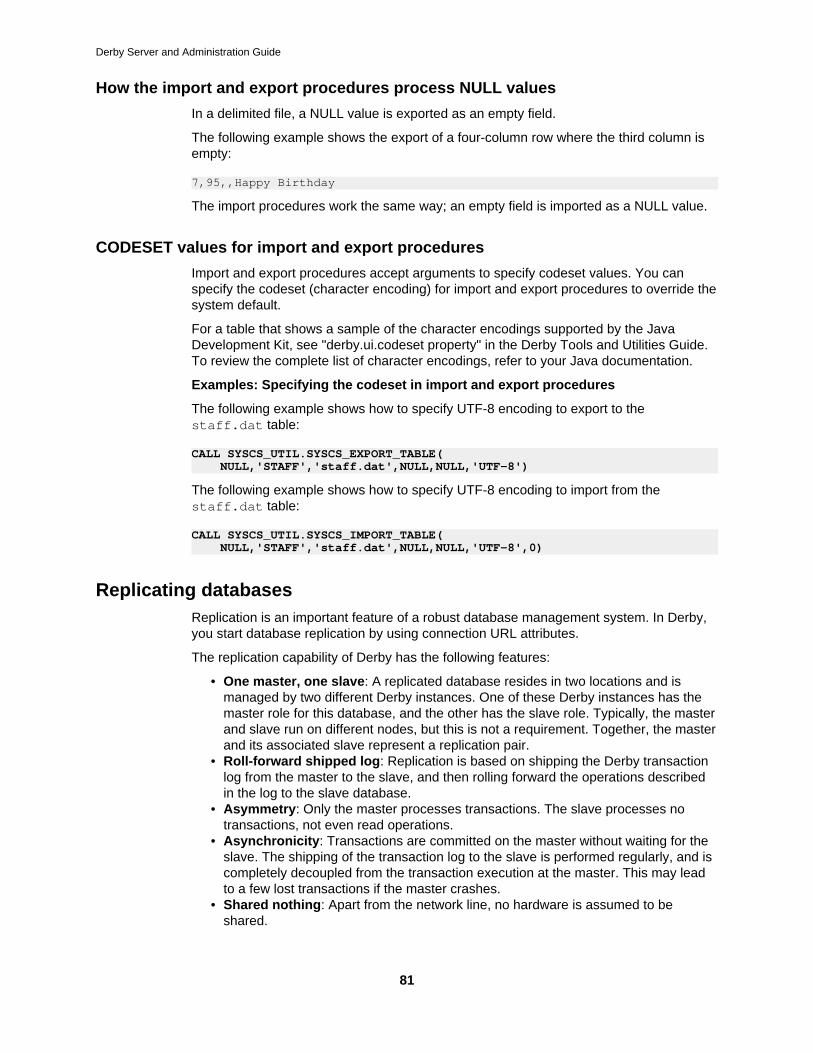
Derby Server and Administration Guide
81
How the import and export procedures process NULL values
In a delimited file, a NULL value is exported as an empty field.
The following example shows the export of a four-column row where the third column isempty:
7,95,,Happy Birthday
The import procedures work the same way; an empty field is imported as a NULL value.
CODESET values for import and export procedures
Import and export procedures accept arguments to specify codeset values. You canspecify the codeset (character encoding) for import and export procedures to override thesystem default.
For a table that shows a sample of the character encodings supported by the JavaDevelopment Kit, see "derby.ui.codeset property" in the Derby Tools and Utilities Guide.To review the complete list of character encodings, refer to your Java documentation.
Examples: Specifying the codeset in import and export procedures
The following example shows how to specify UTF-8 encoding to export to thestaff.dat table:
CALL SYSCS_UTIL.SYSCS_EXPORT_TABLE( NULL,'STAFF','staff.dat',NULL,NULL,'UTF-8')
The following example shows how to specify UTF-8 encoding to import from thestaff.dat table:
CALL SYSCS_UTIL.SYSCS_IMPORT_TABLE( NULL,'STAFF','staff.dat',NULL,NULL,'UTF-8',0)
Replicating databasesReplication is an important feature of a robust database management system. In Derby,you start database replication by using connection URL attributes.
The replication capability of Derby has the following features:
• One master, one slave: A replicated database resides in two locations and ismanaged by two different Derby instances. One of these Derby instances has themaster role for this database, and the other has the slave role. Typically, the masterand slave run on different nodes, but this is not a requirement. Together, the masterand its associated slave represent a replication pair.
• Roll-forward shipped log: Replication is based on shipping the Derby transactionlog from the master to the slave, and then rolling forward the operations describedin the log to the slave database.
• Asymmetry: Only the master processes transactions. The slave processes notransactions, not even read operations.
• Asynchronicity: Transactions are committed on the master without waiting for theslave. The shipping of the transaction log to the slave is performed regularly, and iscompletely decoupled from the transaction execution at the master. This may leadto a few lost transactions if the master crashes.
• Shared nothing: Apart from the network line, no hardware is assumed to beshared.

Derby Server and Administration Guide
82
• Replication granularity: The granularity for replication is exactly one database.However, one Derby instance may have different roles for different databases. Forexample, one Derby instance may have the following roles, all at the same time:
• The master role for one database D1 replicated to one node• The slave role for a database D2 replicated from another node• The normal, non-replicated, role for a database D3
Replication builds on Derby's ability to recover from a crash by starting with a backup androlling forward Derby's transaction log files. The master sends log records to the slaveusing a network connection. The slave then writes these log records to its local log andredoes them.
If the master fails, the slave completes the recovery by redoing the log that has notalready been processed. The state of the slave after this recovery is close to the statethe master had when it crashed. However, some of the last transactions performed onthe master may not have been sent to the slave and may therefore not be reflected.When the slave has completed the recovery work, it is transformed into a normal Derbyinstance that is ready to process transactions. For more details, see Forcing a failoverand Replication and security.
Several Derby properties allow you to specify the size of the replication log buffersand the intervals between log shipments, as well as whether replication messages arelogged. See the Derby Reference Manual for details.
You can perform replication on a database that runs in either embedded mode orNetwork Server mode.
Starting and running replication
Each replicated database is replicated from a master to a slave version of that database.
Initially there is no replication; a master database must be created before it can bereplicated. The database may, of course, be empty when replication starts. On the otherhand, replication does not need to be specified immediately after the database is created;it can be initiated at any time after the database is created.
Before you start replication, you must shut down the master database and then copy thedatabase to the slave location. Follow these steps to start replication:
1. Make sure that the database on the master system is shut down cleanly.2. Copy the database to the slave location.3. Start slave replication mode on the Derby instance that is acting as the slave for
the database. To start slave replication, use the startSlave=true attributeand, optionally, the slaveHost=hostname and slavePort=portValueattributes. For example, for a database named wombat, you might use the followingconnection URL:
jdbc:derby:wombat;startSlave=true4. Start master replication mode on the Derby instance that is acting as the
master for the database. To start replication, connect to the database on themaster system using the startMaster=true attribute in conjunction with theslaveHost=hostname attribute (and, optionally, the slavePort=portValueattribute). For example, you might use the following connection URL:
jdbc:derby:wombat;startMaster=true;slaveHost=myremotesystem
A successful use of the startMaster=true attribute will also start the database.
See the Derby Reference Manual for details about these attributes.
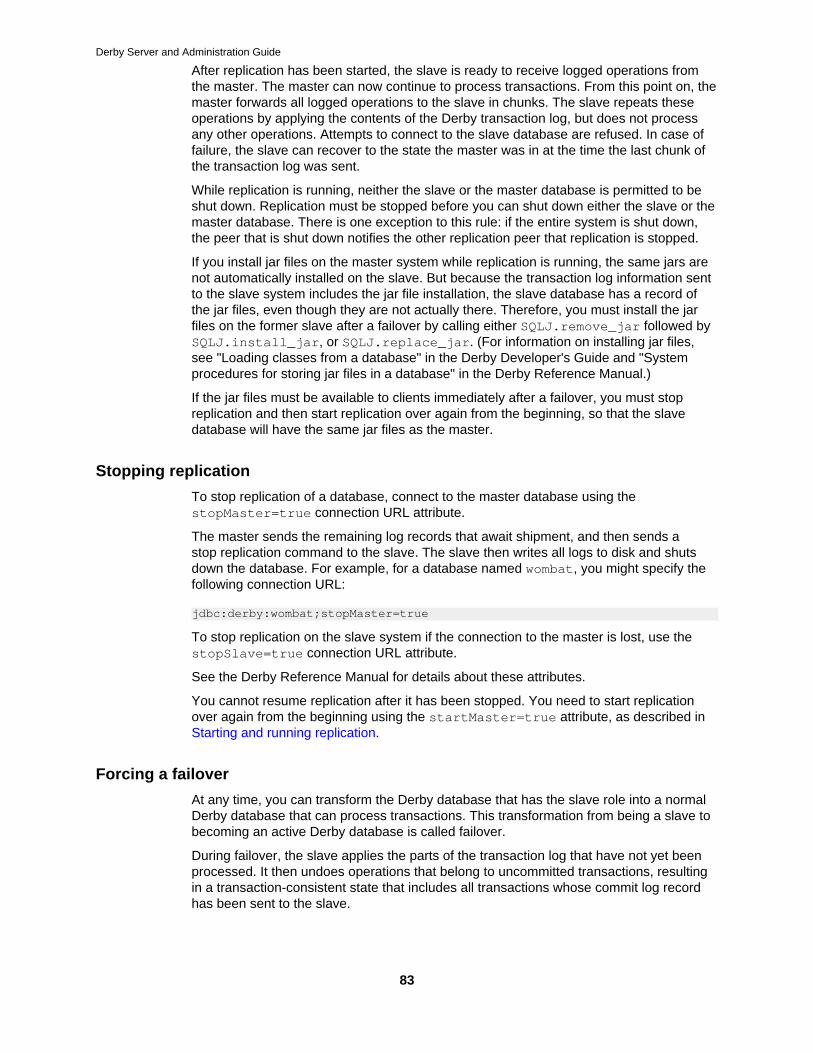
Derby Server and Administration Guide
83
After replication has been started, the slave is ready to receive logged operations fromthe master. The master can now continue to process transactions. From this point on, themaster forwards all logged operations to the slave in chunks. The slave repeats theseoperations by applying the contents of the Derby transaction log, but does not processany other operations. Attempts to connect to the slave database are refused. In case offailure, the slave can recover to the state the master was in at the time the last chunk ofthe transaction log was sent.
While replication is running, neither the slave or the master database is permitted to beshut down. Replication must be stopped before you can shut down either the slave or themaster database. There is one exception to this rule: if the entire system is shut down,the peer that is shut down notifies the other replication peer that replication is stopped.
If you install jar files on the master system while replication is running, the same jars arenot automatically installed on the slave. But because the transaction log information sentto the slave system includes the jar file installation, the slave database has a record ofthe jar files, even though they are not actually there. Therefore, you must install the jarfiles on the former slave after a failover by calling either SQLJ.remove_jar followed bySQLJ.install_jar, or SQLJ.replace_jar. (For information on installing jar files,see "Loading classes from a database" in the Derby Developer's Guide and "Systemprocedures for storing jar files in a database" in the Derby Reference Manual.)
If the jar files must be available to clients immediately after a failover, you must stopreplication and then start replication over again from the beginning, so that the slavedatabase will have the same jar files as the master.
Stopping replication
To stop replication of a database, connect to the master database using thestopMaster=true connection URL attribute.
The master sends the remaining log records that await shipment, and then sends astop replication command to the slave. The slave then writes all logs to disk and shutsdown the database. For example, for a database named wombat, you might specify thefollowing connection URL:
jdbc:derby:wombat;stopMaster=true
To stop replication on the slave system if the connection to the master is lost, use thestopSlave=true connection URL attribute.
See the Derby Reference Manual for details about these attributes.
You cannot resume replication after it has been stopped. You need to start replicationover again from the beginning using the startMaster=true attribute, as described inStarting and running replication.
Forcing a failover
At any time, you can transform the Derby database that has the slave role into a normalDerby database that can process transactions. This transformation from being a slave tobecoming an active Derby database is called failover.
During failover, the slave applies the parts of the transaction log that have not yet beenprocessed. It then undoes operations that belong to uncommitted transactions, resultingin a transaction-consistent state that includes all transactions whose commit log recordhas been sent to the slave.
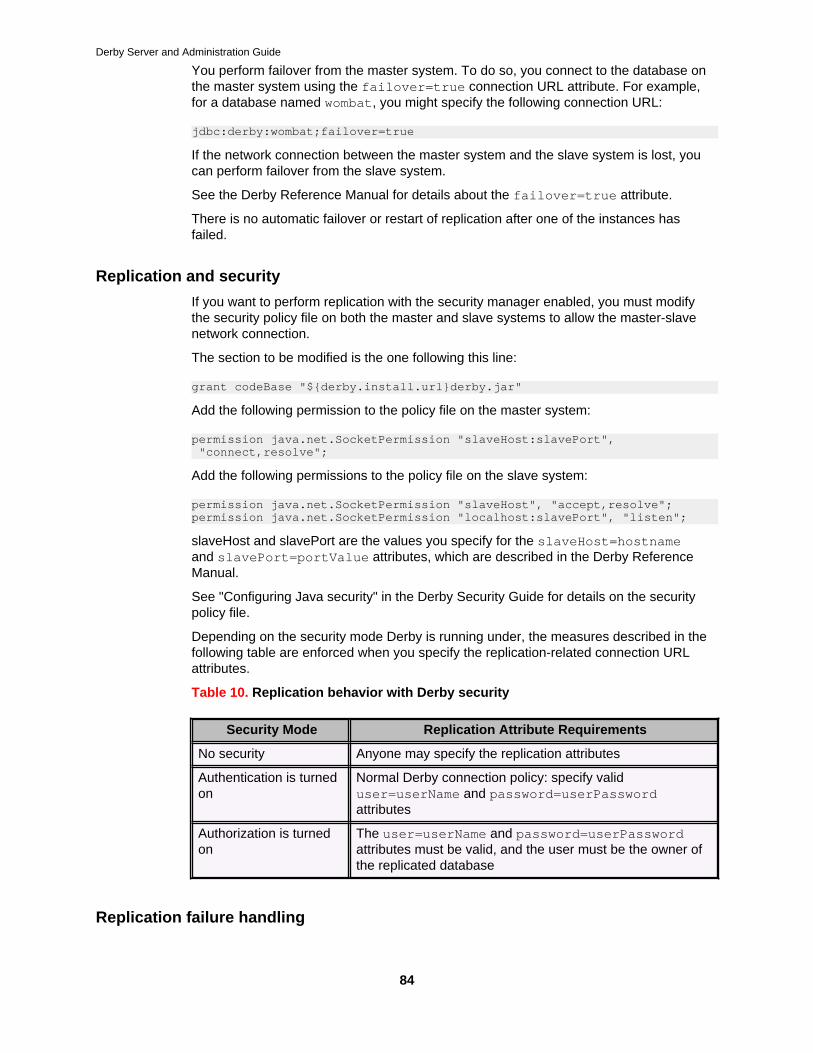
Derby Server and Administration Guide
84
You perform failover from the master system. To do so, you connect to the database onthe master system using the failover=true connection URL attribute. For example,for a database named wombat, you might specify the following connection URL:
jdbc:derby:wombat;failover=true
If the network connection between the master system and the slave system is lost, youcan perform failover from the slave system.
See the Derby Reference Manual for details about the failover=true attribute.
There is no automatic failover or restart of replication after one of the instances hasfailed.
Replication and security
If you want to perform replication with the security manager enabled, you must modifythe security policy file on both the master and slave systems to allow the master-slavenetwork connection.
The section to be modified is the one following this line:
grant codeBase "${derby.install.url}derby.jar"
Add the following permission to the policy file on the master system:
permission java.net.SocketPermission "slaveHost:slavePort", "connect,resolve";
Add the following permissions to the policy file on the slave system:
permission java.net.SocketPermission "slaveHost", "accept,resolve";permission java.net.SocketPermission "localhost:slavePort", "listen";
slaveHost and slavePort are the values you specify for the slaveHost=hostnameand slavePort=portValue attributes, which are described in the Derby ReferenceManual.
See "Configuring Java security" in the Derby Security Guide for details on the securitypolicy file.
Depending on the security mode Derby is running under, the measures described in thefollowing table are enforced when you specify the replication-related connection URLattributes.
Table 10. Replication behavior with Derby security
Security Mode Replication Attribute Requirements
No security Anyone may specify the replication attributes
Authentication is turnedon
Normal Derby connection policy: specify validuser=userName and password=userPasswordattributes
Authorization is turnedon
The user=userName and password=userPasswordattributes must be valid, and the user must be the owner ofthe replicated database
Replication failure handling

Derby Server and Administration Guide
85
Replication can encounter several failure situations. The following table lists thesesituations and describes the actions that Derby takes as a result.
Table 11. Replication failure handling
Failure Situation Action Taken
Master loses connectionwith slave.
Transactions are allowed to continue processing whilethe master tries to reconnect with the slave. Log recordsgenerated while the connection is down are bufferedin main memory. If the log buffer reaches its size limitbefore the connection can be reestablished, the masterreplication functionality is stopped. You can use the propertyderby.replication.logBufferSize to configure thesize limit of the buffer; see the Derby Reference Manual fordetails.
Slave loses connectionwith master.
The slave tries to reestablish the connection with the masterby listening on the specified host and port. It will not giveup until it is explicitly requested to do so by either thefailover=true or stopSlave=true connection URLattribute. If a failover is requested, the slave applies allreceived log records and boots the database as describedin Forcing a failover. If the stopSlave=true attribute isspecified, the slave database is shut down without furtheractions.
Two different mastersof database D try toreplicate to the sameslave.
The slave will only accept the connection from the firstmaster attempting to connect. Note that authentication isrequired to start both the slave and the master, as describedin Replication and security.
The master and slaveDerby instances arenot at the same Derbyversion.
An exception is raised and replication does not start.
The master Derbyinstance crashes, thenrestarts.
Replication must be restarted, as described in Starting andrunning replication.
The master Derbyinstance is not able tosend log data to theslave at the same paceas the log is generated.The main memory logbuffer gradually fills upand eventually becomesfull.
The master notices that the main memory log buffer isfilling up. It first tries to increase the speed of the logshipment to keep the amount of log in the buffer belowthe maximum. If that is not enough to keep the bufferfrom getting full, the response time of transactions mayincrease for as long as log shipment has trouble keepingup with the amount of generated log records. You canuse properties to tune both the log buffer size and theminimum and maximum interval between consecutivelog shipments. See "derby.replication.logBufferSize","derby.replication.maxLogShippingInterval", and"derby.replication.minLogShippingInterval" in the DerbyReference Manual for details.
The slave Derbyinstance crashes.
The master sees this as a lost connection to the slave. Themaster tries to reestablish the connection until the replicationlog buffer is full. Replication is then stopped on the master.

Derby Server and Administration Guide
86
Failure Situation Action Taken
Replication must be restarted, as described in Starting andrunning replication.
An unexpected failure isencountered.
Replication is stopped. The other Derby instance of thereplication pair is notified of the decision if the networkconnection is still alive.
Logging on a separate deviceYou can improve the performance of update-intensive, large databases by putting adatabase's log on a separate device, which reduces I/O contention.
By default, the transaction log is in the log subdirectory of the database directory. Useeither of the following methods to store this log subdirectory in another location:
• Specify the non-default location by using the logDevice=logDirectoryPathattribute on the database connection URL when you create the database.
• If the database is already created, move the log manually and update theservice.properties file.
Using the logDevice=logDirectoryPath attribute
To specify a non-default location for the log directory, set thelogDevice=logDirectoryPath attribute on the database connection URL.
This attribute is meaningful when you are creating a database or whenyou are restoring a database using roll-forward recovery. You can specifylogDevice=logDirectoryPath as either an absolute path or as a path that is relativeto the directory where the JVM is executed.
Setting logDevice=logDirectoryPath on the database connection URL whenyou create the database adds an entry to the service.properties file. If you evermove the log manually, you will need to alter the entry in service.properties. Ifyou move the log back to the default location, remove the logDevice entry from theservice.properties file.
To check the log location for an existing database, you can retrieve thelogDevice=logDirectoryPath attribute as a database property by using thefollowing statement:
VALUES SYSCS_UTIL.SYSCS_GET_DATABASE_PROPERTY('logDevice')
For more information, see Roll-forward recovery in this manual and"logDevice=logDirectoryPath attribute" in the Derby Reference Manual.
Example of creating a log in a non-default location
The following database connection URL creates a database in the directoryd:/mydatabases, but puts the database log directory in h:/janets/tourslog.
jdbc:derby:d:/mydatabases/toursDB; create=true;logDevice=h:/janets/tourslog
Example of moving a log manually
If you want to move the log to g:/bigdisk/tourslog, move the log with operatingsystem commands.
Derby Server and Administration Guide
87
For example, you could use the following command:
move h:\janets\tourslog\log\*.* g:\bigdisk\tourslog\log
Then, alter the logDevice entry in service.properties to read as follows:
logDevice=g:/bigdisk/toursLog
Note: You can use either a single forward slash or double back slashes for a pathseparator.
If you later want to move the log back to its default location (in this case,d:\mydatabases\toursDB\log), move the log manually as follows:
move g:\bigdisk\tourslog\log\*.* d:\mydatabases\toursDB\log
Then, delete the logDevice entry from service.properties.
Note: This example uses commands that are specific to the Windows operating system.Use commands appropriate to your operating system to copy a directory and all of itscontents to a new location.
Issues for logging in a non-default location
When the log is not in the default location, backing up and restoring a database canrequire extra steps.
See Backing up and restoring databases for details.
Obtaining locking informationDerby provides a tool to monitor and display locking information.
This tool can help you create applications that minimize deadlock. It can also help youlocate the cause of deadlock when it does occur.
To diagnose locking problems, constantly monitor locking traffic by logging all deadlocksby using the derby.locks.monitor property, which is described in the DerbyReference Manual.
Monitoring deadlocks
The derby.stream.error.logSeverityLevel property determines the level oferror that you are informed about.
By default, derby.stream.error.logSeverityLevel is set to 40000. Ifderby.stream.error.logSeverityLevel is set to display transaction-levelerrors (that is, if it is set to a value less than 40000), deadlock errors are logged to thederby.log file. If it is set to a value of 40000 or higher, deadlock errors are not loggedto the derby.log file.
The derby.locks.monitor property ensures that deadlock errors are loggedregardless of the value of derby.stream.error.logSeverityLevel. Whenderby.locks.monitor is set to true, all locks that are involved in deadlocks arewritten to derby.log along with a unique number that identifies the lock.
To see a thread's stack trace when a lock is requested, setderby.locks.deadlockTrace to true. This property is ignored ifderby.locks.monitor is set to false.
Derby Server and Administration Guide
88
Note: Use derby.locks.deadlockTrace with care. Setting this property can alterthe timing of the application, severely affect performance, and produce a very largederby.log file.
For information about working with properties, see the Derby Developer's Guide. Forinformation about the specific properties that are mentioned in this topic, see the DerbyReference Manual.
Here is an example of an error message when Derby aborts a transaction because of adeadlock:
--SQLException Caught--
SQLState: 40001 =Error Code: 30000 Message: A lock could not be obtained due to a deadlock,cycle of locks and waiters is: Lock : ROW, DEPARTMENT, (1,14)Waiting XID : {752, X} , APP, update department set location='Boise' where deptno='E21'Granted XID : {758, X} Lock : ROW, EMPLOYEE, (2,8)Waiting XID : {758, U} , APP, update employee set bonus=150 where salary=23840Granted XID : {752, X} The selected victim is XID : 752
Note: You can use the derby.locks.waitTimeout andderby.locks.deadlockTimeout properties to configure how long Derby waits fora lock to be released, or when to begin deadlock checking. For more information aboutthese properties, see "Controlling Derby application behavior" in the Derby Developer'sGuide.
Reclaiming unused spaceA Derby table or index (sometimes called a conglomerate) can contain unused spaceafter large amounts of data have been deleted or updated.
This happens because, by default, Derby does not return unused space to the operatingsystem. After a page has been allocated to a table or index, Derby does not automaticallyreturn the page to the operating system until the table or index is dropped, even if thespace is no longer needed. However, Derby does provide a way to reclaim unused spacein tables and associated indexes.
If you determine that a table and its indexes have a significant amount ofunused space, use either the SYSCS_UTIL.SYSCS_COMPRESS_TABLE orSYSCS_UTIL.SYSCS_INPLACE_COMPRESS_TABLE procedure to reclaimthat space. SYSCS_UTIL.SYSCS_COMPRESS_TABLE is guaranteed torecover the maximum amount of free space, at the cost of temporarilycreating new tables and indexes before the statement is committed.SYSCS_UTIL.SYSCS_INPLACE_COMPRESS_TABLE attempts to reclaim space withinthe same table, but cannot guarantee it will recover all available space. The differencebetween the two procedures is that unlike SYSCS_UTIL.SYSCS_COMPRESS_TABLE, theSYSCS_UTIL.SYSCS_INPLACE_COMPRESS_TABLE procedure uses no temporary filesand moves rows around within the same conglomerate.
You can use the SYSCS_DIAG.SPACE_TABLE diagnostic table to estimate the amountof unused space in a table or index by examining, in particular, the values of theNUMFREEPAGES and ESTIMSPACESAVING columns. For example:
SELECT * FROM TABLE(SYSCS_DIAG.SPACE_TABLE('APP', 'FLIGHTAVAILABILITY')) AS T
For more information about SYSCS_DIAG.SPACE_TABLE see "SYSCS_DIAG diagnostictables and functions" in the Derby Reference Manual.

Derby Server and Administration Guide
89
As an example, after you have determined that the FlightAvailability table andits related indexes have too much unused space, you could reclaim that space with thefollowing command:
call SYSCS_UTIL.SYSCS_COMPRESS_TABLE('APP', 'FLIGHTAVAILABILITY', 0);
The third parameter in the SYSCS_UTIL.SYSCS_INPLACE_COMPRESS_TABLEprocedure determines whether the operation will run in sequential or non-sequentialmode. If you specify 0 for the third argument in the procedure, the operation will run innon-sequential mode. In sequential mode, Derby compresses the table and indexessequentially, one at a time. Sequential compression uses less memory and disk spacebut is slower. To force the operation to run in sequential mode, substitute a non-zeroSMALLINT value for the third argument. The following example shows how to force theprocedure to run in sequential mode:
call SYSCS_UTIL.SYSCS_COMPRESS_TABLE('APP', 'FLIGHTAVAILABILITY', 1);
For more information about this command, see the Derby Reference Manual.
Derby Server and Administration Guide
90
Trademarks
The following terms are trademarks or registered trademarks of other companies andhave been used in at least one of the documents in the Apache Derby documentationlibrary:
Cloudscape, DB2, DB2 Universal Database, DRDA, and IBM are trademarks ofInternational Business Machines Corporation in the United States, other countries, orboth.
Microsoft, Windows, Windows NT, and the Windows logo are trademarks of MicrosoftCorporation in the United States, other countries, or both.
Oracle and Java are registered trademarks of Oracle and/or its affiliates. Other namesmay be trademarks of their respective owners.
UNIX is a registered trademark of The Open Group in the United States and othercountries.
Other company, product, or service names may be trademarks or service marks ofothers.