datacentre external manual - retroclinic.com · once on the usb drive, this is simply inserted into...
TRANSCRIPT
DataCentre-E External USB, RAMdisc and Dual
Compact Flash Hard Drive for the
BBC Model B, B+, and Master 128
From RetroClinic ©2009-2011

RetroClinic External DataCentre User Manual
Page 2
RetroClinic External DataCentre User Manual
Page 3
About this manual
You will notice that some letters, words and phrases in this manual have been
printed differently from the rest of the text. This is to help you to tell the difference
between explanatory text, words which appear on the computer screen (including
BASIC keywords), and certain keys on the computer keyboard.
• Ordinary text appears like this, or like this for emphasis.
• Text typed in at the computer or displayed on the screen or BASIC keywords
appear Like this.
• Words like <RETURN> mean that you press the key marked RETURN rather
than actually type the letters R E T U R N.
This manual is ©2009-2011 RetroClinic. It may not be copied, edited or distributed, and must not be hosted
on any web service or other storage medium without first obtaining permission from the author.
Rev 1.1 – For RamFS 1.00

RetroClinic External DataCentre User Manual
Page 4
Table of Contents Welcome to DataCentre ................................................................................... 6
1. Installing the DataCentre-E system ............................................................... 9
Software ...................................................................................................... 10
Getting Started – BBC Model B ................................................................... 11
Getting Started – BBC Master 128 .............................................................. 13
Reconfiguring the Software – BBC Master 128 only ................................... 14
Connecting the DataCentre-E ..................................................................... 15
Using the CF System .................................................................................... 15
Swapping Cards ........................................................................................... 16
Formatting a new card ................................................................................ 17
Things to note when using 2 cards ............................................................. 19
Using ADFS .................................................................................................. 20
2. What is a RAM Filing system? ..................................................................... 21
A disc drive .................................................................................................. 21
What the disc drive does ............................................................................ 22
Disc Filing System ........................................................................................ 23
Controlling the filing system ....................................................................... 24
Differences between a Disc and RAM Filing System ................................... 24
3. RAM Disc files .............................................................................................. 26
File specifications ........................................................................................ 26
Drive numbers ............................................................................................. 27
Directories ................................................................................................... 28
File names ................................................................................................... 28
Multi-file operations ................................................................................... 28
Auto-start facilities ...................................................................................... 30
Library directory .......................................................................................... 31
4. Using DataCentre ........................................................................................ 32

RetroClinic External DataCentre User Manual
Page 5
Loading a USB Pen Drive ............................................................................. 32
Importing an Image ..................................................................................... 34
Exporting an Image ..................................................................................... 35
Loading and Saving direct to USB ............................................................... 36
5. The filing system commands ....................................................................... 39
6. Random access files .................................................................................... 77
7. RamFS Utility Commands ............................................................................ 83
*DTRAP ........................................................................................................ 83
*MONITOR and *] ....................................................................................... 84
BBC Master Temporary Filing Systems ....................................................... 87
Library Commands ...................................................................................... 88
*RCOPY <src type><src drv><dest type><dest drv> ................................... 88
USBMSE ....................................................................................................... 88
Restoring the NVRAM Drive ........................................................................ 89
8. Updating the Firmware ............................................................................... 90
9. More on the USB System ............................................................................ 92
The USB Slave Port ...................................................................................... 92
10. The IDE Interface ....................................................................................... 94
11. Changing filing systems ............................................................................. 95
12. Using the filing system in assembler ......................................................... 96
APP1. DataCentre and RamFS Technical Information .................................... 99
Control Addresses ....................................................................................... 99
Jumper Settings ......................................................................................... 100
PCB Layout ................................................................................................ 101
DataCentre RamFS Memory MAP ............................................................. 101
RamFS Scratchram Workspace Memory MAP .......................................... 102

RetroClinic External DataCentre User Manual
Page 6
Welcome to DataCentre Thankyou for purchasing this product from me. This has been developed over the
best part of a year, and comes designed not only for ease of use for the novice user,
but for maximum flexibility for those with the experience.
The philosophy behind the DataCentre system was fourfold:
1. To make the transfer of programs and data between the PC and the BBC as
easy as possible.
2. To provide a USB interface that is capable of connecting to any USB device
on the market, with the correct driver software.
3. To provide an upgrade path for users who have the original RetroClinic IDE
CF Interface System.
4. To make a “Central Library” system, to allow users to copy, duplicate and
archive their entire floppy collection.
For 1, I had examined many of the current storage solutions on the marketplace for
the Beeb, and there are quite a few. Not only my own CF IDE interface, but others for
MMC cards as well, of varying complexity and ease of use. One thing these all have in
common, is that they need some sort of Transfer Software on the PC side, some sort
of “extra step” before the data can be used on the BBC. I wanted to create a system
that didn’t need that extra level of complexity, something where you could simply
download your data, and put it on your Beeb without any fuss or hassle of using
complex and unreliable software to manipulate the images.
I think I’ve achieved that with the DataCentre system. In essence, you simply use any
USB storage drive, of any capacity, be that a solid state Flash Drive, or a conventional
Hard Drive in a USB Enclosure, and as long as it is formatted with the FAT or FAT32
filing system, it will be recognised. Most modern PCs, Macintoshes and Linux based
machines will automatically recognise such a drive. You then download the software
you want directly to it, or onto your PC hard drive and then drag the files across.
Once on the USB drive, this is simply inserted into DataCentre, and the BBC can now
see all those files. With a single command, the image can be imported either to one
of the 4 available RAM Drives, or directly onto a Floppy Disk, if you have the
appropriate hardware.

RetroClinic External DataCentre User Manual
Page 7
You can then go on to modify that disk image whilst on floppy or in the RAM drive, or
even use your own floppy discs, and export them back to the USB drive in one of two
standard universal formats, known as SSD or DSD. These images can then be
immediately used on the PC by plugging the Drive back into the PC USB port, either
to upload to your website, or use in an emulator, or to archive on CD etc.
The External DataCentre system is also a natural upgrade path to those users who
already own one of my CF IDE boards. You can use the same Compact Flash cards as
you have previously been using, as well as the same patched ADFS – be it on a Model
B or Master 128, to give access to the Compact Flash Hard Drive. The unit has two
Compact Flash slots, so you can use either one or two CF cards simultaneously, giving
up to 2GB of online storage to ADFS alone, and that’s separate to what you can have
with the USB system.
The DataCentre board IDE Interface is a full 16 bit IDE capable port, as opposed to
the 8 bit interface of the first generation IDE CF kits. This is still fully backwards
compatible with the earlier models, but goes on to allow access to the full capacity of
CF cards, once software becomes available to make use of it. The CF Formatting
utility “HDINIT” reads the CF information in 16 bit, and this can be displayed on
screen so you can see the type, version, serial number etc. of the card you are using –
this was not previously possible on 8 bit systems.
Another core use of DataCentre is as a “Central Library” for all your data, and was
one of the reasons I chose the name of the board as I did. You can now take all your
home brew floppy disks, and image them onto the USB flash drive with ease, using a
single command. If you prefer to edit them first, you can transfer the data from
floppy direct to one of the RAM drives, change what you need, then Export the data
from there, so there is never any need to play with the data directly on that fragile 25
year old disk. As well as then being able to archive and back the data up quickly on a
PC, or upload your entire library to your website, you now have a master archive
from which to recreate floppies from your originals. No need to wear out an original
disk to make copies one at a time, just use the image stored on the USB flash drive,
or an image on one of the RAM drives, to make quick multiple copies of your disks.
Testing with both an 8271 and a 1772 Disk interface, with a modern drive running at
the highest speed, you can Import or Export the entire contents of a single side of an
80 track drive in around 22 seconds, much quicker than a disc to disc copy that would
be necessary otherwise.

RetroClinic External DataCentre User Manual
Page 8
If you have a library of ADFS disks, you can copy these to Compact Flash, each in a
separate directory of your hard drive, so they are always available to you. This can
also be backed up on a PC, with simple software tools supplied on the CD.
Finally, the USB port is not just for use with USB flash drives, it is a fully featured USB
2.0 device, and can host virtually any USB peripheral you care to plug into it. As with
any USB device, software is required to drive it, and this is the same for the Beeb, so
don’t expect to plug your DVB receiver in and get BBC 1 in Mode 7 immediately,
because that’s not going to happen, until someone decides to write some driver
software for it. But interfacing almost any device is possible, and some notes on the
communication protocols for the USB Host device are described in a later chapter in
this manual, as well as in several documents supplied on the CD.
As well as a USB Host port, your DataCentre-E box has a USB slave port. This is a USB
“B” type socket, and with this you can connect the DataCentre direct to your PC,
using the supplied USB A-B cable. Once connected, drivers will need to be installed,
as described in Chapter 9, then the slave port can communicate with the PC one of
two ways, either directly through API calls, or as a virtual COM port. You can also
connect to HyperTerminal on the PC, and use that for bi-directional communications.

RetroClinic External DataCentre User Manual
Page 9
1. Installing the DataCentre-E system Let’s first go through installing and connecting your DataCentre-E box to your
machine. The instructions differ slightly depending on if you’re putting it on a Model
B or a Master 128, so please follow the appropriate section when you get to it.
The External DataCentre is laid out as follows:
• USB Port 1 – Slave port, for direct connection to a PC
• USB Port 2 – Host port, for connecting USB Storage devices, and other USB
devices or hubs
• USB Activity LEDs – these show when the ports are being used. When
flashing, data is being transferred. When steady, it is okay to insert or
remove a device. They will also flash a few times alternately every time the
USB Host processor is reset, which is whenever the <BREAK> key is pressed,
or the Beeb is powered on.
• IDE Activity LED – When flashing, data is being transferred to or from the
Compact Flash cards.
• Power LED – When illuminated, power is supplied to the unit. Because the
devices in the DataCentre unit are based on CMOS low power technology, it
is possible for the Power LED to be dimly illuminated if the DataCentre-E is
connected to the Beeb when switched on, but no power is connected via
the power connector. The unit will not function in this mode, and it is not
recommended to leave it in this state for an extended period, although no
damage should result. Always make sure the DataCentre-E is powered up
when the Beeb is running.

RetroClinic External DataCentre User Manual
Page 10
And on the rear:
• Compact Flash Slots – These are where you can plug your Compact Flash
cards, for use as ADFS Hard Drives. If you only use one card at a time, ensure
it is plugged into the top port (0/1).
• 1MHz BUS – This connects to the 34 way 1MHz bus connector underneath
your Beeb. Ensure you do NOT connect it to the floppy drive, although no
damage should result if you do, I say “SHOULD”, so best not to try!
• Power – Please use only the power supply included. If it gets damaged and
you need to replace it, you’ll need one that supplies regulated +5v DC at
1.5A If using port powered Hard Drives (as supplied), or at 300mA if not,
with tip Positive, on a 2.1mm power jack. I can supply a replacement if you
have difficulty obtaining one.
DO NOT USE AN UNREGULATED POWER SUPPLY, OR ONE WITH THE POLARITY
REVERSED – YOU WILL BLOW YOUR UNIT UP!
Software Two ROMs are supplied with the system, both of 32k capacity, and each containing 2
ROM images. Because of the way these are programmed, they are fully compatible
with the Model B as well as the Master 128, but when used on the Model B, only one
of the ROM images in each chip will be available.
The first ROM contains RamFS and HDINIT. The RamFS is the filing system for use
with the USB Drive, and the internal 1MB RAMdrive. HDINIT is a program that is
designed to format IDE Drives (in our case, Compact Flash cards). HDINIT is also

RetroClinic External DataCentre User Manual
Page 11
supplied as standard on the NVRAM Drive 4, so if you’re using the System on a Model
B, you won’t have access to HDINIT on ROM. If using it on a Master 128, then you can
use it from ROM, and delete it from the NVRAM drive to free up space.
The second ROM contains ADFS 1.53 (For the Master 128) and ADFS 1.33 (For the
Model B). If used in a Model B, the ADFS 1.53 will not be seen by the system, only
ADFS 1.33 is compatible with the Model B.
There is also a CD containing a multitude of software, utilities, images, manuals etc.
Please take a look on the CD and have a browse to some of the readme files for more
information. I would suggest that you use ADFS Explorer on the PC for creating Hard
Drive images for loading onto the CF cards via the CFRESTORE program, which is
explained later.
Getting Started – BBC Model B Open the case of the Beeb by removing the 2 screws at the rear, and 2 screws
underneath. You will also need to remove the keyboard to gain access to the ROM
sockets. The standard Beeb has 4 ROM slots available, and their priority is from right
to left. Do not move the ROM on the far left of the bank of 5 – that is the Operating
System. (See photo below)
You now need to decide which filing system you wish to have boot priority. This is
the system that will be initialised on power-up. Normally, you would want DFS to
power up first, but you can select from either DFS (If you have a disk interface), ADFS
or RamFS.
If you wish RamFS to boot up first, make sure the RamFS ROM is in a higher priority
socket – IE more to the right – than the other ROMs. Ensure the little “chip” at one
end of the ROM faces in the same direction as all the other chips on the board – if
you put it in the wrong way round, it will get destroyed. Make sure that all the pins
are secured in the socket and that you haven’t accidentally bent one out of shape
while inserting it.
Fit the ADFS ROM in the same way. If you don’t wish to use the Compact Flash Hard
Drive system, you can leave the ADFS out, or if you have sideways RAM available, you
may want to use the ADFS 1.32 which is supplied on the utility CD, which makes use
of the Sideways memory to keep the system value of PAGE as it was before.

RetroClinic External DataCentre User Manual
Page 12
In the above example, ROM 15 is Basic and ROM 14 is the existing Disc Filing System.
We have inserted the RamFS in slot 13, and the ADFS in slot 12. With this
configuration, when you turn your machine on, the Disk Filing system will be the
default. If you prefer to have RamFS as the default, then swap 13 and 14 around.
If your machine has a ROM board fitted, please consult the board’s
manual as to what sockets are of higher priority, and choose where to put the ROMs
accordingly.
Refit the keyboard, and without connecting anything else, power up the machine.
Type
*HELP
And look to see if RamFS and ADFS (if you fitted it) is present. If you do not have a
1770/1772 type Disk Interface, you may not see the ADFS until you
DataCentre-E system. At this time, you should also see a red “Not Detected” message
underneath the RamFS Help section.
You can skip the next section on configuration as it doesn’t apply to the BBC Model B.
In the above example, ROM 15 is Basic and ROM 14 is the existing Disc Filing System.
We have inserted the RamFS in slot 13, and the ADFS in slot 12. With this
when you turn your machine on, the Disk Filing system will be the
default. If you prefer to have RamFS as the default, then swap 13 and 14 around.
board’s instruction
manual as to what sockets are of higher priority, and choose where to put the ROMs
, and without connecting anything else, power up the machine.
If you do not have a
ou may not see the ADFS until you connect the
E system. At this time, you should also see a red “Not Detected” message
on configuration as it doesn’t apply to the BBC Model B.

RetroClinic External DataCentre User Manual
Getting Started – BBC Master 128 NOTE: If you have purchased one of my DualOS boards for the BBC Master 128, then
you will not need to fit the ADFS ROM, as the DualOS already contains the correct
patched ADFS. In this instance, I recommend fitting the RamFS in socket 4&5
Open the Masters case with the 4 screws under the casing, and put the lid to one
side. Gently remove the plastic that contains the speaker and cartridge mount, and
place it to one side, being careful not to pull the speaker cable out. If you do dislodge
it, it is clearly marked where it should go back, but is under the keyboard, so a pain to
get to.
As both ROMs contain 2 images, it must be taken into consideration that only Socket
4&5 and Socket 6&7 are capable of reading both images. You will need to fit the
ADFS into either 4&5 or 6&7, as the ADFS 1.53 is the lower image in the ROM,
however, if you do not require the HDINIT in ROM (remember it is also stored in the
NVRAM Drive), then you may place the RamFS/HDINIT ROM as shown above, in
socket 8. Keeping Socket 6&7 free means we can dedicate those 2 banks to RAM,
which is required for ELITE, and is also useful to have available for loading other ROM
images into Sideways Ram.
RetroClinic External DataCentre User Manual
Page 13
f you have purchased one of my DualOS boards for the BBC Master 128, then
you will not need to fit the ADFS ROM, as the DualOS already contains the correct
fitting the RamFS in socket 4&5.
Open the Masters case with the 4 screws under the casing, and put the lid to one
side. Gently remove the plastic that contains the speaker and cartridge mount, and
ide, being careful not to pull the speaker cable out. If you do dislodge
it, it is clearly marked where it should go back, but is under the keyboard, so a pain to
As both ROMs contain 2 images, it must be taken into consideration that only Socket
are capable of reading both images. You will need to fit the
, as the ADFS 1.53 is the lower image in the ROM,
however, if you do not require the HDINIT in ROM (remember it is also stored in the
NVRAM Drive), then you may place the RamFS/HDINIT ROM as shown above, in
dicate those 2 banks to RAM,
le for loading other ROM
RetroClinic External DataCentre User Manual
Page 14
When fitting the ROMs, ensure the little “chip” at one end of the ROM faces in the
same direction as all the other chips on the board – if you put it in the wrong way
round, it will get destroyed. Make sure that all the pins are secured in the socket and
that you haven’t accidentally bent one out of shape while inserting it.
If you are fitting the ROMs as per the recommendation in the photo, ensure the links
near the ROM Sockets are set to the following configuration:
• LK19 – West. This selects banks 6 & 7 for RAM – If you’re fitting the
RamFS/HDINIT ROM to this socket, then put this link East, to select banks 6
& 7 for ROM
• LK18 – East (This selects banks 4 & 5 for ROM)
Reconfiguring the Software – BBC Master 128 only *If you have my DualOS, you may skip this section, as it’s not required.
Once the new ROMs are in place, first thing we need to do, is “unplug” the original
ADFS 1.50 from the system. As this is part of the Master single chip MOS, we can’t
physically do this, but we can do it in the configuration settings. Start by typing:
*UNPLUG 13
Now, we then tell the operating system to use ADFS 1.53 as our default filing system,
and to use Hard Drives:
*CONFIGURE FILE 4
*CONFIGURE HARD
ROM Image number 4 is the Acorn ADFS 1.53 (providing you followed my advice and
fitted the ROMs in the indicated sockets). The ADFS 1.33 is also available on the chip,
and is at location 5, and for the BBC Master 128, we must also disable this from the
system as follows, or it will eat into the main system memory:
*UNPLUG 5

RetroClinic External DataCentre User Manual
Page 15
Connecting the DataCentre-E Now you have the ROMs fitted to your machine, you can connect the external
DataCentre.
Ensure your Beeb is turned off and connect the flat ribbon cable to the 1MHz bus
port. DO NOT connect it to the Floppy Drive port! Plug the supplied mains adaptor
into the mains, but do not plug it into the DataCentre-E just yet.
A word of note here – as most Beebs are pushing 25+ years
old, it is very possible that the 1MHz connector on your
computer has tarnished, which will cause a bad connection.
Sometimes this can be resolved by repeatedly inserting and
removing the 1MHz connector half a dozen times, but in extreme circumstances,
the connector may need to be replaced. It’s also possible for the 1MHz bus port to
have failed on your machine, or have a bent or missing pin, but because you’ve
never used it before, you won’t have noticed.
If you have any connection issues, or “Not Detected” messages when the unit is
fully connected and powered, and the above does not cure the problem, feel free
to contact me for more options.
If at this point you have decided not to use the Compact Flash system, but solely wish
to use the USB, then you may skip onto the next chapter, which describes the USB
system and RamFS in more detail. Carry on reading here for an introduction to using
the CF system.
Using the CF System Ok, so now you can then insert a Compact Flash card into the top slot, marked 0/1.
Take care when inserting cards, do not use excessive force or you may bend the pins
in the receptacle, and they are easily damaged. Plug the unit it into its power supply,
and connect it to the mains. The Red LED should illuminate on the front of the drive.
Power the Beeb back on, and you should notice the Green USB lights alternate a few
times. If you have set ADFS to be the priority filing system, you will get the Acorn
ADFS message, with the Basic prompt. If not, hold down the <A> and <CTRL> keys,
then press and release <BREAK>. That should bring up the Acorn ADFS.

RetroClinic External DataCentre User Manual
Page 16
Now type:
*CAT
If you’re using a blank CF card, you should get the message “Broken Directory”. If the
card has ADFS data on it, you should see the catalogue. If you power the Beeb on
without a CF card in the drive, or only a CF in slot 2/3, then the Beeb may hang at the
ADFS message.
Swapping Cards THIS IS IMPORTANT
PLEASE READ CAREFULLY OR YOU WILL CORRUPT YOUR CF CARD
In order to swap cards on the interface, it’s simply a matter of plugging one out, and
plugging the other one in. The unit is semi-hot swappable – this means that you may
leave the Beeb and the DataCentre-E turned on, but in order to change card
correctly, you must follow this simple procedure.
1. Ensure the Beeb has finished writing data to the card, and the Orange
activity light is out.
2. Unplug the card you wish to change, and re-insert a replacement.
3. *MOUNT X, where X is the number of the first drive on the card you just
changed.
You must always use *MOUNT when you have changed a CF card while the Beeb
has been left on. This is vitally important. If you do not do this, and attempt to save a
program to a changed card, you will most likely corrupt the cards directory, as the
Beeb will think is still has the old card in the slot. This is not necessary if you have
turned the Beeb off during this process, as it will reinitialise when it is next turned
on. With some cards, you may need to power the interface off when changing cards,
otherwise the CF card will not initialise and the Beeb will hang when it tries to read it.
Please read the above paragraph again, so you’re 100% clear on its meaning.

RetroClinic External DataCentre User Manual
Page 17
Formatting a new card So you have a new card is in place? Time to format the card.
We shall load the HDINIT program from the NVRAM Drive, so type:
*RAM
CHAIN ”:4.HDINIT”
If you are using a BBC Master, and have installed the RamFS/HDINIT ROM in a socket
that can read both images, then you will also have HDINIT available through the ROM
filing system, and it can be loaded like this:
*ROM
CHAIN ”HDINIT”
After a brief delay, the HDInit screen should come up. HDInit is part of the HADFS
suite of software, kindly provided by Jonathan Harston. You may want to read up on
the program using the manual available on the Authors website, but I will give a brief
overview of formatting a card here.
At the top, will be the drive selected as “Current Drive”. This may default to Drive 4,
we want to use Drive 0. So if it is set to 4, press “D” to select drive, then type “0”.
Check that at the top, the drive is now “Current Drive 0 (IDE Device 0)”.
Take a look at the “Device Width” setting. It usually defaults to 16 bit, and with
DataCentre’s 16 bit IDE interface, can be left like this. Press <SHIFT><TAB> to bring
the detailed info screen up.
Now press “I” to investigate the drive. Information on the CF card should now be
displayed. Check that the indicated capacity of drive 0 looks about right, it should be
just under half of the total capacity of the CF card, for example, if the card is 1GB,
that is 1024MB, it should report around 495MB. If using a 2GB CF card, you will see
that drive 0 has 512MB available, and drive 1 should have just under that figure.
Now, we simply press “F” to Format the drive. Type “NO” when it asks you to leave
space for the HADFS system, and “YES” to confirm formatting. You must type the full
words “NO” and “YES” out, just doing a “Y” and “N” will not work. Once done, the
program resets, and you can then do a <CTRL><BREAK>, to reset the computer (or
<CRTL><A><BREAK> if ADFS is not the top priority filing system).

RetroClinic External DataCentre User Manual
Page 18
Now Type:
*CAT
And you should get a blank directory. Typing:
*FREE
Should confirm the free space you have available. Check this carefully, if HDInit has
somehow failed to write the correct values here, it will need to be rerun, but once
you start loading software, it can’t be changed, so best to check it before starting.
If you have a 2GB CF Card, you can format a second partition as Drive 1, by going
back to HDINIT and selecting drive 1 instead of 0, using the procedure above, but you
do not get asked the question about leaving space for HADFS. Once you’ve done that,
check the second partition by typing:
*MOUNT 1
And then
*CAT
And
*FREE
To check the second partition on the card is formatted correctly. The size of the
second partition may be slightly smaller than the first, this is normal, and is due to
slight differences in actual formatted cards between manufacturers.
When using 2 cards, simply select Drives 2 and 3, instead of 0 and 1 as above for
formatting the second card.
Any of the above procedures, be it the initialisation, investigation and formatting of a
card should take no longer than a few seconds. If any function takes more than 10
seconds, then something is wrong, and it has not completed correctly.

RetroClinic External DataCentre User Manual
Page 19
Things to note when using 2 cards I’ve tested this system with a range of different sizes and makes of CF card, but
obviously I can’t check every single one ever made. The interface “should” work just
fine with most cards that you use, and should be happy even with different
manufacturers and speeds of cards in the two slots. However, if you do experience
issues, try using two of the same type and size of cards in both the slots. The slots are
configured to run at around 4v, as I have found 5v causes problems when running
two cards together. All new cards on the market now should be compatible with 3.3v
to 5v systems, please check with your card manufacturer if you are unsure. Some
makes of card, even when using 2 of the same, can be “problematic” in initialisation,
in that you may need to repower the interface, the Beeb, or both before the cards
will mount correctly.
If you prefer, I can supply cards that I have extensively tested with this system and
found to run 100%. Cards made by Integral and Toshiba are usually fine for the
system, as are Fuji and SanDisk.
I recommend that if you are only using 1 card, that you use it in slot 0/1. On the IDE
bus, the top slot is the Master, and the lower slot the Slave. It is possible to use a
single card in slot 2/3, but apart from it being pointless, you will have to boot the
Beeb in FADFS mode (<CTRL><F><BREAK>) so that it does not mount a drive, then
manually type:
*MOUNT 2
(or 3) to get the CF directory mounted. The CF may not respond at all in this instance,
as there is effectively no Master drive on the IDE bus, only a slave, and some CF cards
may get confused by this.
When using 2 cards, you may notice that the Orange activity light is on as you power
the Beeb on. This is normal, and will extinguish as you mount the second card.

RetroClinic External DataCentre User Manual
Page 20
Using ADFS Details on the command structure and using ADFS can be found in the Acorn ADFS
User Guide, which is a .PDF document on the supplied utility CD. Just bear in mind
when reading it that the term “Winchester” is the original word for the “Hard Drive”,
and when it is mentioned, think “Compact Flash”! Also, it only refers to the Hard
Drive being accessible as drive 0, but with the CF system, you also can have hard
drives as 1, 2 and 3, if you have the appropriate Compact Flash cards fitted to the
system.
For owners of the Model B, you will also need to remember, that if you do not have a
disk interface, then of course, you can’t access floppy disks. Also, if your disk
interface is not a 1770/1772 based system, then you will not be able to access ADFS
floppy disks, but you will still be able to access your DFS disks as you did before.
If you wish to have a disk interface in your machine, or have your existing 8271 based
interface upgraded to the later and faster 1770/1772 system, I can supply the
necessary hardware as a kit for you to fit yourself.

RetroClinic External DataCentre User Manual
Page 21
2. What is a RAM Filing system? If you have only ever used the BBC Computer with a Cassette before, there are one
or two new concepts which you need to learn. Let’s start by taking a look at a regular
Disc Filing System.
A disc drive As you probably know, computers have internal memory called Random Access
Memory or RAM. When you type in your program it is stored in RAM.
However, when you switch off the computer, everything stored in RAM is lost, so if
you need the program again, you have to re-type it. To overcome this problem the
computer must be able to transfer the contents of RAM into some form of
permanent or 'non-volatile' storage before you switch it off. The User Guide which
comes with your BBC Microcomputer describes how to use a cassette recorder for
this purpose. Transferring a program from RAM to tape is called saving it,
transferring from tape back to RAM is called loading it. The disadvantages of using
tape are:
• The process of saving and loading is quite slow.
• You need to keep track of where on the tape each piece of information is, so
that you do not record over it.
• You have to wind the tape to the right place yourself.
• Winding from one end of the tape to the other is slow.
• It is not possible to wind the tape to a particular point accurately.
A disc system does not have these disadvantages. To help you to understand how a
disc system works, we shall draw some comparisons with a filing cabinet. A disc
system always includes at least one disc drive. The BBC Microcomputer's disc drives
come usually in 2 different sizes, either 5.25”, or the newer style 3.5”. On the front is
a small light and either a spring flap called the disc drive door, or an eject button. On
most 5.25” Drives, the door can be opened or closed, but must be closed while the
disc drive is supposed to be working. On a few 5.25” drives, and all 3.5” Drives, a disc
is simply pushed into the slot, and the eject button used when you need to remove
it. These are floppy disc drives, as distinct from Hard Drives, Compact Flash or MMC
based storage systems, which you may have heard of.

RetroClinic External DataCentre User Manual
Page 22
The disc drive can be compared to an empty filing cabinet with no drawers in it yet.
Just as a filing cabinet is pretty useless without drawers, so a disc drive cannot do
much without discs. The discs hold the information. Just as you can put different
cassettes in a cassette recorder, you can also put different discs into a disc drive; but
the computer can only read information from one disc at a time. A disc may have lots
of different groups of information on it, and these groups are called 'files'. Files can
have any information in them. Typical examples would be one of your programs or
some data generated by a program which you wish to keep.
Returning again to the comparison with a filing cabinet, opening a drawer and
throwing all the papers into it at random would make it difficult to find them again.
To solve this problem, people usually put dividers into a filing cabinet drawer, and
often these are labelled alphabetically. The result is that the information is grouped
so that you can find it again quickly. The same principle is followed when the
computer puts information on to a disc. When you first buy discs, they are blank, like
empty drawers. Before the computer can put any information on them, the discs
must first be prepared by having marks put on them, which divide the discs into
sectors. A 'sector' is the name given to a set of equal divisions created on the disc by
the computer. This operation is called `formatting'.
What the disc drive does When you insert the disc into the disc drive and close the drive door, a rotating boss
engages with the central hole in the disc and spins the magnetic disc inside its
protective jacket. In order to read or write information on to the disc the disc drive
has a 'read/write head'. This head is designed to move in and out along the 'head
slot' in the disc jacket. This head actually rests on the surface of the magnetic disc as
it rotates inside the jacket. When you want to read some of the information on the
disc, you give the computer the name of the file containing that information. The
computer will move the read/write head to the sector on the disc where the start of
the information in the named file is recorded. This is equivalent to you opening the
filing cabinet drawer, looking along the dividers until you find the one you want and
then preparing to remove the relevant file for reading.
At this point it is worth noting that your files may be too large to fit into the fixed size
of one sector. This is no problem. A file always begins in a new sector but may occupy
a number of sectors following the first. Each sector can hold up to 256 characters or
'bytes'.
RetroClinic External DataCentre User Manual
Page 23
Disc Filing System The main disadvantage of using a cassette recorder to store information is that you
have to control the cassette recorder and keep track of the information on it.
When using a disc this is all done for you by the 'Disc Filing System'. The Disc Filing
System is a machine-code program produced by the computer manufacturer. On the
BBC Microcomputer it is stored in a special kind of memory inside the computer
called 'Read Only Memory' or ROM. The program is not lost when you switch the
computer off. Once installed, it is always there. All the actions of the disc drive are
controlled by the computer using this program. When you prepare new discs by
formatting them this is done by the Disc Filing System. When you SAVE one of your
BASIC programs the Disc Filing System does the following:
• Starts the disc drive working.
• Finds a free place on the disc big enough for your program.
• Makes a note of where it put your program so as to be able to find it again.
• Moves the disc drive's read/write head accurately to the start of the first
sector in the free space.
• Transfers a copy of your program from the RAM to the disc.
• Stops the disc drive.
All this is done without you having to think about it and is quite a bit quicker than
saving a program on to a cassette tape.
When you save a program you have to give it a name. This is true for the disc system
as well as the cassette system. However, the Disc Filing System puts the name to
special use. The first two sectors on every disc are reserved for a 'catalogue' when
the disc is formatted.
The name of your program, referred to as a file name, is written into the catalogue
together with the number of the sector on the disc where the information starts.
(Note it may continue over several sectors.) When you want the file containing your
program back again you simply type LOAD "filename". The filing system checks the
catalogue to find out where on the disc to find the file, and then moves the
read/write head to that exact place on the disc.
RetroClinic External DataCentre User Manual
Page 24
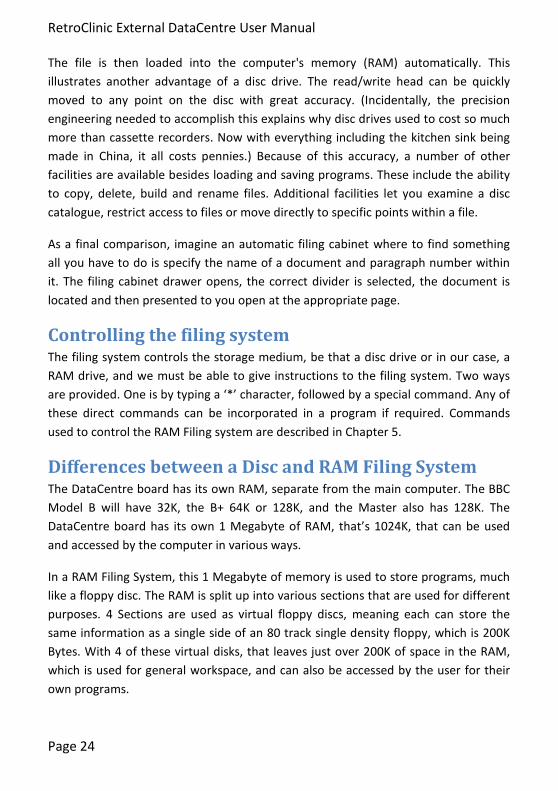
The file is then loaded into the computer's memory (RAM) automatically. This
illustrates another advantage of a disc drive. The read/write head can be quickly
moved to any point on the disc with great accuracy. (Incidentally, the precision
engineering needed to accomplish this explains why disc drives used to cost so much
more than cassette recorders. Now with everything including the kitchen sink being
made in China, it all costs pennies.) Because of this accuracy, a number of other
facilities are available besides loading and saving programs. These include the ability
to copy, delete, build and rename files. Additional facilities let you examine a disc
catalogue, restrict access to files or move directly to specific points within a file.
As a final comparison, imagine an automatic filing cabinet where to find something
all you have to do is specify the name of a document and paragraph number within
it. The filing cabinet drawer opens, the correct divider is selected, the document is
located and then presented to you open at the appropriate page.
Controlling the filing system The filing system controls the storage medium, be that a disc drive or in our case, a
RAM drive, and we must be able to give instructions to the filing system. Two ways
are provided. One is by typing a ‘*’ character, followed by a special command. Any of
these direct commands can be incorporated in a program if required. Commands
used to control the RAM Filing system are described in Chapter 5.
Differences between a Disc and RAM Filing System The DataCentre board has its own RAM, separate from the main computer. The BBC
Model B will have 32K, the B+ 64K or 128K, and the Master also has 128K. The
DataCentre board has its own 1 Megabyte of RAM, that’s 1024K, that can be used
and accessed by the computer in various ways.
In a RAM Filing System, this 1 Megabyte of memory is used to store programs, much
like a floppy disc. The RAM is split up into various sections that are used for different
purposes. 4 Sections are used as virtual floppy discs, meaning each can store the
same information as a single side of an 80 track single density floppy, which is 200K
Bytes. With 4 of these virtual disks, that leaves just over 200K of space in the RAM,
which is used for general workspace, and can also be accessed by the user for their
own programs.

RetroClinic External DataCentre User Manual
Page 25
The main advantage of a RAM Drive is speed. Programs load almost instantaneously,
much faster than even a floppy disk. Also, there is no wear and tear, you can keep
reading and writing to your heart’s content, as there are no heads to clog, or discs to
wear out.
However, one drawback you may realise straight away, is how do you change discs?
If the RAM drive is fixed to just 4 virtual discs, then that could be a bit limiting. Add
that to the fact that unlike a floppy, when you turn the power to the DataCentre
board off, just like normal RAM, all the data on the RAM Discs is lost, it seems to
have a disadvantage over its floppy cousins.
Not so. This is where the DataCentre system comes into its own. Once you’ve put
some programs or data onto a RAM drive, instead of taking a physical disk out, as you
would do a floppy, you create a virtual disk, called an image, onto an external storage
device, such as USB Flash Drive. This Flash Drive then stores the information even
with the power off, so you can come back later, and import that virtual image back
into your RAM drive. More information on how this works and how to do it is
explained in Chapter 4.
RetroClinic External DataCentre User Manual
Page 26
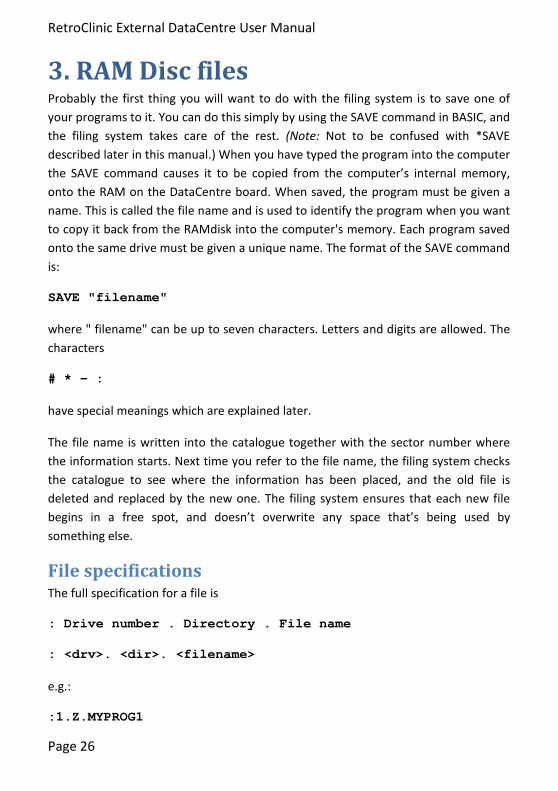
3. RAM Disc files Probably the first thing you will want to do with the filing system is to save one of
your programs to it. You can do this simply by using the SAVE command in BASIC, and
the filing system takes care of the rest. (Note: Not to be confused with *SAVE
described later in this manual.) When you have typed the program into the computer
the SAVE command causes it to be copied from the computer’s internal memory,
onto the RAM on the DataCentre board. When saved, the program must be given a
name. This is called the file name and is used to identify the program when you want
to copy it back from the RAMdisk into the computer's memory. Each program saved
onto the same drive must be given a unique name. The format of the SAVE command
is:
SAVE "filename"
where " filename" can be up to seven characters. Letters and digits are allowed. The
characters
# * - :
have special meanings which are explained later.
The file name is written into the catalogue together with the sector number where
the information starts. Next time you refer to the file name, the filing system checks
the catalogue to see where the information has been placed, and the old file is
deleted and replaced by the new one. The filing system ensures that each new file
begins in a free spot, and doesn’t overwrite any space that’s being used by
something else.
File specifications The full specification for a file is
: Drive number . Directory . File name
: <drv>. <dir>. <filename>
e.g.:
:1.Z.MYPROG1

RetroClinic External DataCentre User Manual
Page 27
Notice the drive number, directory and file name are separated by full-stops. These
are needed so that the computer can distinguish the separate parts of the file
specification.
Drive numbers Drive numbers for the 4 virtual discs must be in the range 0 to 3 and preceded by a :
(colon). The colon tells the computer: 'This is the start of a file specification, the drive
number follows.'
On RamFS, two additional drives are available, 4 and 5. Drive 4 is a non volatile
RAMdisk which can be used the same as any of the other drives 0 - 3, but it has some
limitations. It is only around 62K in size, and cannot be imaged in the same way as
the other 4 drives. It is also slower to access than the other RAM disks. However, its
main advantage is that it is non volatile. This means that it keeps its data even with
the computer switched off, so is useful for commonly used utilities, or for saving
programs you’re regularly working on.
The drives are numbered in the same way as for a Disc Filing system, but you do not
need to think of Drive 2 being the opposite side of Drive 0 for instance, as when using
double sided disk images, you can specify any drive for each side, as will be explained
later.
Drive 5 is used to access the USB Flash Drive. Not all functions of the RamFS filing
system are available on the USB drive, as it also performs other special functions. You
can SAVE and LOAD directly to Drive 5, but for other filing system housekeeping, you
need to use special commands that are described in Chapter 7, under the *MONITOR
command section.
The effect of including the drive number in the full specification is that
:1.$.MYPROG
is different from
:2.$.MYPROG
Although the file names are the same, they are on different drives.

RetroClinic External DataCentre User Manual
Page 28
Directories
The directory is a single character used to divide the catalogue into independent
sections. Files of the same name can be created on the same RAMdisc with different
directories. Although on the same drive,
:1.$.MYPROG
is a different file from
:1.A.MYPROG
because the directory is different.
File names The file name can be up to seven of most of the characters on the keyboard in any
combination, except # * : . as we mentioned earlier. When we need to refer to
the complete file specification in future we will use the abbreviation <fsp>
Typing:
SAVE "MYPROG"
Will automatically store your program in a file named
:0.$.MYPROG
Assuming you have not changed the current drive and directory.
Multi-file operations Another common term used to refer to multi-file operations is 'wild card' facilities.
Some of the filing system commands can operate on a number of files instead of just
one. These are all followed by the abbreviation <afsp> instead of <fsp> ( <afsp>
stands for 'ambiguous file specification'). *INFO is an example of such a command. It
provides information about a named file, eg:
*INFO :0.$.MYPROG RETURN
will display information about the file named MYPROG in directory $ on drive 0.

RetroClinic External DataCentre User Manual
Page 29
However, it is possible that you want information about a number of files. The 'wild
card' facilities enable you to specify several files for the command to operate on. The
wild cards are provided by the characters * and # which have special meanings when
they appear in the file specification, e.g.:
*INFO :0.#.MYPROG
means: 'Display information about files called MYPROG in any directory on drive 0'.
*INFO :0.$.MYPRO#
means: 'Display information about all files on drive 0 in directory $ with names
starting "MYPRO" followed by any single character.' eg: MYPROA, MYPROT and
MYPROG and so on.
*INFO ### RETURN
gives information on all files with three-letter file names in the current directory.
The character * means multiple # s to the end of the field, eg
*INFO :0.$.M*
will display information about any files on drive 0 and directory $ whose names begin
with M.
*INFO *A* RETURN
gives information on all files in the current directory with an A in them: for example,
A, AB, FREDA, PGRAM1 etc.
*INFO *.* RETURN
gives information on all files, in all directories.
Take a look at the *EX command, which is related to *INFO. It gives similar results,
but takes different arguments, and can be more useful for tracking the information
on groups of directories or drives.
RetroClinic External DataCentre User Manual
Page 30
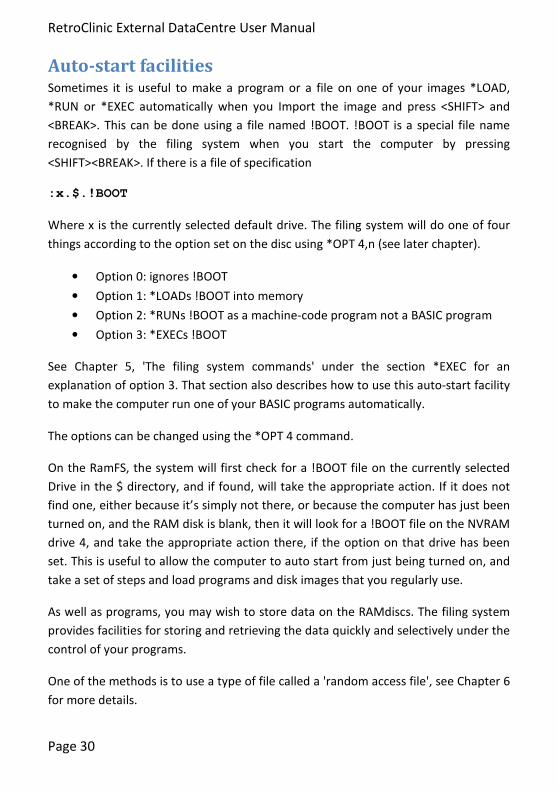
Auto-start facilities Sometimes it is useful to make a program or a file on one of your images *LOAD,
*RUN or *EXEC automatically when you Import the image and press <SHIFT> and
<BREAK>. This can be done using a file named !BOOT. !BOOT is a special file name
recognised by the filing system when you start the computer by pressing
<SHIFT><BREAK>. If there is a file of specification
:x.$.!BOOT
Where x is the currently selected default drive. The filing system will do one of four
things according to the option set on the disc using *OPT 4,n (see later chapter).
• Option 0: ignores !BOOT
• Option 1: *LOADs !BOOT into memory
• Option 2: *RUNs !BOOT as a machine-code program not a BASIC program
• Option 3: *EXECs !BOOT
See Chapter 5, 'The filing system commands' under the section *EXEC for an
explanation of option 3. That section also describes how to use this auto-start facility
to make the computer run one of your BASIC programs automatically.
The options can be changed using the *OPT 4 command.
On the RamFS, the system will first check for a !BOOT file on the currently selected
Drive in the $ directory, and if found, will take the appropriate action. If it does not
find one, either because it’s simply not there, or because the computer has just been
turned on, and the RAM disk is blank, then it will look for a !BOOT file on the NVRAM
drive 4, and take the appropriate action there, if the option on that drive has been
set. This is useful to allow the computer to auto start from just being turned on, and
take a set of steps and load programs and disk images that you regularly use.
As well as programs, you may wish to store data on the RAMdiscs. The filing system
provides facilities for storing and retrieving the data quickly and selectively under the
control of your programs.
One of the methods is to use a type of file called a 'random access file', see Chapter 6
for more details.
RetroClinic External DataCentre User Manual
Page 31
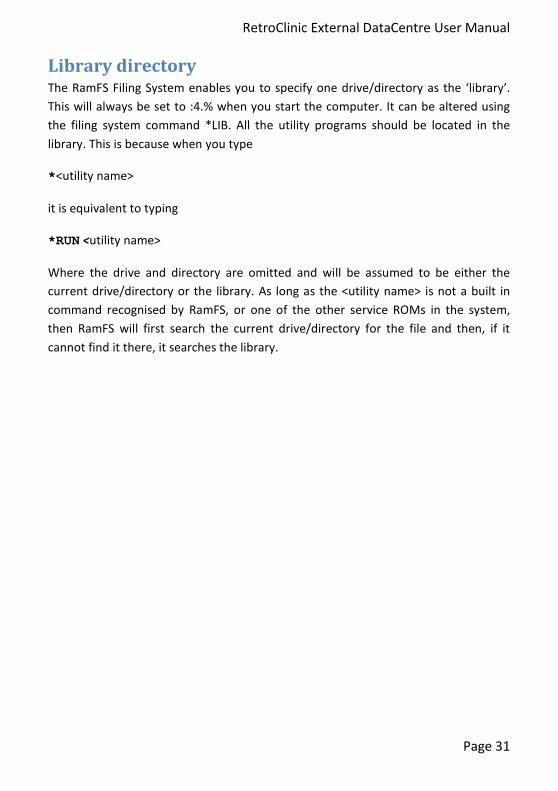
Library directory The RamFS Filing System enables you to specify one drive/directory as the ‘library’.
This will always be set to :4.% when you start the computer. It can be altered using
the filing system command *LIB. All the utility programs should be located in the
library. This is because when you type
*<utility name>
it is equivalent to typing
*RUN <utility name>
Where the drive and directory are omitted and will be assumed to be either the
current drive/directory or the library. As long as the <utility name> is not a built in
command recognised by RamFS, or one of the other service ROMs in the system,
then RamFS will first search the current drive/directory for the file and then, if it
cannot find it there, it searches the library.

RetroClinic External DataCentre User Manual
Page 32
4. Using DataCentre At this point, you may want to refer to the diagram at the end of App.1, along with
the pinout information, to familiarise yourself with the ports and connections on the
DataCentre board.
If you have not already done so, connect the DataCentre-E flat ribbon cable to the
1MHz bus port underneath your computer. Connect the mains adaptor to an outlet
and plug it into the socket on the back of the DataCentre-E box. The red power light
should illuminate. Turn on your Beeb, and you should see the 2 green USB lights
alternate for a second or so, to show the USB has initialised.
This chapter will take you through using the DataCentre board for a variety of tasks,
including Importing an image to the Ram Drive, Exporting an image back to the USB
Stick, and navigating around the USB catalog.
Loading a USB Pen Drive First thing you’re going to want to do, is get yourself to hand a USB Pen Drive, Flash
Drive, Memory Stick, or whatever the current terminology is for them! I would
recommend using either a new one, or one you have newly formatted to get started.
The Device must be formatted with the FAT or FAT32 DOS filing system. DataCentre
does not recognise the NTFS, or EXT type filing systems. I’m also going to assume
you’re using a Windows based PC, and let you work out the differences if you have a
Mac or Linux based system.
So, you’ve got your USB drive, and placed it in a USB socket on your PC. Now we
need some files to put on it. The DataCentre uses special BBC Image files that usually
have one of three file extensions – the three letters after the dot of a filename. These
files are the same type as those used by popular BBC Emulators, and current
programs such as Jon Welch’s DFS Explorer. They are:
SSD – Single Side Drive
DSD – Double Side Drive
IMG – Image
An IMG file and an SSD contain the entire contents of one side of a floppy disk –
that’s the Programs, Catalog and the Metadata (the information that tells the

RetroClinic External DataCentre User Manual
Page 33
computer where to load and execute the programs). A DSD image is one that
contains 2 sides of a floppy disk together, so both sides can be loaded at once.
You will need to now locate some image files to put on your USB Drive. The CD that
comes with the kit has some samples for you to use in the SAMPLES directory, or you
can download your own from various sites on the internet.
Take a few of these files, and copy them to the root directory of your USB Drive,
either by saving them there when you download them, or dragging them across from
the CD. Once you have about half a dozen or so, we can proceed to load them up on
the Beeb.
Fire up your Beeb, and make sure that RamFS is active. You can activate it, if it is not
the default filing system, by either holding down the <R> key when you do a
<CTRL><BREAK>, or typing *RAM.
If you try and catalog any of the Drives 0-3 at this point, you’ll notice that they are
blank, and pre-formatted as if they were each an 80 track single density floppy, of
320 sectors in length. The System automatically formats Drives 0-3 when it detects a
power on, or any corruption in the DataCentre RAM. If you find the drives are
corrupted, or you want to simply format them and start over, this can be done as
follows:
*RAM
!&FD80=0
Then do a <CTRL><BREAK>. This forces RamFS to initialise Drives 0-3, and its own
workspace.
You can insert and remove a USB drive while the Beeb is on without any harm, but
when you’re writing programs and images to it, you must make sure that the USB
access LED has stopped flashing, and is either on solid, or completely off, depending
on which operation has just been performed. A Flashing USB activity light means that
file access is still active, not necessarily that data is being exchanged, just that an
operation is in progress.
With the USB Drive plugged into Port 2, type:
*CAT 5

RetroClinic External DataCentre User Manual
Page 34
After a brief pause while the USB system is initialised, you should see a catalog of the
files and images you placed on the USB drive a moment ago. If the names of the files
on the PC are longer than 8 characters, you will notice that they have been
truncated, and a ~1, ~2 etc. has been added. The filenames have not been changed;
this is called the DOS 8.3 filename, and can be seen with the USB drive on a PC by
looking at the properties of a file. DataCentre can still load and use these files
perfectly well, but it cannot recognise the long filenames used by later versions of
Windows, so you may wish to rename your image files using only 8 characters
maximum, plus the 3 after the dot, then they will display properly.
Importing an Image We’re going to take, as an example; an image called GAMES.SSD, and load that into
the Ram Drive. You would use whatever filename of the image you wish to load in its
place.
*IMPORT GAMES.SSD
You should then see the image load into the Ram Drive 0. Once it’s completed, and
the prompt has returned, type:
*CAT
And you should now see a catalog of Drive 0, with the files that were contained in the
GAMES.SSD image, just as if it were on a floppy disk. If the image is bootable, as most
games are, then <SHIFT><BREAK> or <SHIFT><R><BREAK> if RamFS is not the default
filing system, will allow the image to boot, and run the game.
Now let’s say for example we have a Double Sided image, called UTILS.DSD. On a
floppy system, if you were to put the physical floppy that image came from into your
Drive 0, the data for the first side will be on Drive 0, and the second side will be Drive
2, so to load that in a similar manner in RamFS, we would use the command:
*IMPORT -02 UTILS.DSD
The -02 has introduced an option into the IMPORT command. It is telling RamFS that
the image is double sided, because we have specified two drives, and we have also
told it which drive to put the first and second sides onto. We could do the same as
RetroClinic External DataCentre User Manual
Page 35
putting it in floppy drives 1 and 3, but upside-down. You can’t do that with a physical
floppy, but you can with RamFS
*IMPORT -31 UTILS.DSD
Instead of the first side going to drive 1, it now goes to drive 3, and vice-versa. That
may confuse any program on the disk that uses side references, but gives an example
of the flexibility of the system.
Now, if you have a floppy drive (or two) attached to your computer, you don’t just
have to IMPORT it to RAM, you can also make a physical copy of the image onto your
Floppy. You will first need to format any floppy disk you wish to image onto.
The DFS must be selected before you can IMPORT or EXPORT to a floppy disk, or you
will get an error. Let’s assume you have a double sided 80 track drive, as Drives 0 and
2, and you’ve put in a blank disk, having formatted both sides. Type:
*DISK
*IMPORT –D02 UTILS.DSD
We’ve added the D option to the command line. By default, all IMPORTs and
EXPORTs go to and from the Ram Drive, but adding a D in the command, tells RamFS
to perform the operation to a physical floppy disk.
Exporting an Image Chapter 3 described how to use files, and save and load programs, so we won’t go
over that again here, but once you’ve had a play with the files on your Ram Drive,
you can then image it back to the USB Flash Drive, with the following command.
*EXPORT NEWDISK.SSD
Substituting NEWDISK for whatever filename you would like to call it. This will take all
the data on the current Ram Drive, 0 if you have not changed it, and create an image
of that data.
You can only use up to 8 characters for the filename, as described above. I would
recommend using the “accepted” extensions for images, in this case .SSD, although
the system will allow you to use any three letters, the image may then not get
recognised by other programs on the PC that use it, such as emulators.

RetroClinic External DataCentre User Manual
Page 36
The same is true for double sided disks, and for floppies. The EXPORT command uses
the same format for options as the IMPORT one, so for example, to create a double
sided image from the floppy disk in drive 0, the command would be:
*DISK
*EXPORT –D02 DBLDISK.DSD
Again using your filename in place of DBLDISK. Double sided images must always be
80 track and 320 sectors. Anything else may cause corruption. If you have an 80 and
40 track image on opposite sides of a floppy, use SSDs to create one image for each
side.
The IMPORT and EXPORT commands have one more option available, which is “Q”.
When used, this option will suppress all output from the commands, and make them
“quiet”, rather than their default of “verbose”. The operation will still proceed, but
will just return with a prompt, unless an error occurs. This is useful if you are
programming your own menu, and want to load images up without disturbing the
current screen.
Loading and Saving direct to USB The USB storage device, as we have already seen, is supported under RamFS as Drive
5. But it’s not just for Catalog purposes that we use this drive number. You can also
save and load files directly to the USB drive, without having to make an image or use
the RAM Drive at all. Doing this is extremely convenient for sharing single files, but
does have a few limitations.
In Basic, the system works just as it would for any other drive, so you can write a
Basic program, put a USB Storage drive in Port 2 and type:
SAVE “:5.PROGRAM”
Or
*DRIVE 5
SAVE “PROGRAM”
The filename is subject to the same restrictions for the other drives, but it cannot use
any directory, and must be only 7 characters long. The file can then be loaded in the
same way, and can also be seen in the catalog.

RetroClinic External DataCentre User Manual
Page 37
Machine code programs and data can also be used with *SAVE and *LOAD, however
one important limitation must be remembered. The FAT filing system does not
support Metadata, this is the information that includes the Load and Execution
address of a file. Therefore, when *LOADing a file, you must remember to give
RamFS an address to load to. Some examples:
*SAVE :5.SCREEN 7C00 7FFF
Will save the contents of the screen, if in Mode 7.
*LOAD :5.SCREEN 7C00
Will load the contents back in. If you omit the load address 7C00, the system will load
the file starting at address 0000, and most likely crash.
You can’t *RUN a file from Drive 5, because no execution address is stored, however,
you can still save a machine code program, you just need to call it manually. Say for
instance, a program exists with the following data:
$.GAME 00001900 00003156 00002A32 008
You could save this on the USB Drive as:
*SAVE :5.GAME 1900+2A32
When coming to run it, you could use a small Basic loader program, such as:
10 OSCLI ”LOAD :5.GAME 1900”
20 CALL &3156
SAVE “:5.GAMELD”
OSCLI is a safe way of executing a * command from Basic. Refer to the BBC User
Guide for more information on OSCLI.
Now, to run your game automatically, direct from the USB, you simply type:
CHAIN”:5.GAMELD”
And it should run.

RetroClinic External DataCentre User Manual
Page 38
The system effectively supports OSFILE commands &FF and &00, for direct access to
the USB. Refer to the Advanced Reference guide for more information on OSFILE and
the command supported.
The next two chapters describe the filing system and utility commands that RamFS
responds to, and give details on using Random Access Files. After that, we shall
discuss the other commands available to DataCentre through the RamFS.
RetroClinic External DataCentre User Manual
Page 39
5. The filing system commands The RAM Filing System is a 16K byte program. BASIC programs can be stored on a
disc, tape or memory card, but the filing system is stored in Read Only Memory
(ROM) inside the BBC Microcomputer. The filing system controls the reading and
writing of information to and from the DataCentre RAM, the NVRAM, and the USB
Flash Drive, and provides a number of useful facilities for maintaining that
information. It does not interact with the IDE Interface. The following pages describe
all the filing system commands. They are words which the filing system program will
recognise and act on. They can be typed directly on to the keyboard or embedded
within your BASIC program. They are all prefixed with the * character which signals
the computer that a filing system command follows.
Each command is first presented with a syntax abbreviation and a few words
explaining the derivation of the word.
<drv> = drive
<fsp> = file specification
<dir> = directory
<opt> = options
<afsp> = ambiguous file specification
Purpose
A description of the command using normal computer jargon.
Example
This section gives a few one-line examples of the use of the commands. These
examples are only intended to be illustrative.
Associated commands
This section lists commands which have similar functions or are normally used in
conjunction with this command, if any.
Notes
Particular points to watch for or special applications of the command are covered by
additional notes if necessary.

RetroClinic External DataCentre User Manual
Page 40
*ACCESS <afsp> (L)
Purpose
To prevent a file from being deleted or overwritten. The command `locks' or 'unlocks'
a file. You cannot delete, overwrite or write to a locked file until you unlock it again.
If you load a file which is locked, you will not be able to save it again with the same
name. This is because saving a file with the same name as one already on the
RAMdisc causes the one on the RAMdisc to be deleted and replaced with the new
file. A locked file cannot be deleted.
Example
*ACCESS HELLO L
This locks the file HELLO.
*ACCESS HELLO
Unlocks it again so that it can be deleted or overwritten.
Notes
Once locked, a file will not be affected by the following commands:
*SAVE
*DELETE
*WIPE
*RENAME
*DESTROY
If you attempt to use any of these commands on a locked file the message
Locked
Is produced.
Important: Locking a file does not prevent it from being removed from a RAMdisc
with *IMPORT or from being overwritten with *BACKUP.
RetroClinic External DataCentre User Manual
Page 41
*BACKUP (source drv) (dest.drv)
Purpose
To read all the information on one RAMdisc and write it to another, producing two
RAMdiscs with identical information.
Example
*ENABLE
*BACKUP 0 1
Copies all the information on drive 0 onto drive 1.
Associated commands
*COPY
*ENABLE
Notes
*ENABLE must be typed before the command will work, otherwise the system will
ask you Go (Y/N) ? You must reply with a Y to this, otherwise the message Not
enabled is displayed.
You cannot backup a RAMdisc onto itself, so the command
*BACKUP 0 0
Will result in an error being displayed.
All information previously on the destination RAMdisc is overwritten, so be careful
not to confuse the source and destination discs. If the source RAMdisc is blank, the
destination RAMdisc will end up blank as well.
Warning: The contents of memory may be overwritten by this command. If you have
a program or some data in memory that you want to keep, SAVE it before you use
the command.

RetroClinic External DataCentre User Manual
Page 42
*BUILD <fsp>
Purpose
To create a file directly from the keyboard. After typing this command everything
else entered will go into the named file. This is useful for creating EXEC files and the
!BOOT file described previously.
Example
*BUILD !BOOT
will cause everything subsequently typed in to be entered into a file called !BOOT.
Line numbers are displayed on the screen to prompt you to enter your text as
follows:
>*BUILD !BOOT
0001 FIRST LINE OF TEXT
0002 SECOND LINE
0003CAPE
Pressing the <ESCAPE> key on a line by itself terminates a *BUILD command.
Associated commands
*EXEC
*LIST
*TYPE

RetroClinic External DataCentre User Manual
Page 43
*CAT (<drv>) Catalog
Purpose
The command displays the catalogue of a RAMdisc on the screen, showing all the
files present on the disc. <drv> is the number of the drive you want displayed. If
<drv> is omitted, the current drive is assumed. This works also on Drive 5, where it
will produce a formatted catalog of the currently inserted USB Flash drive.
Example
*CAT 0 <RETURN>
Note that the heading part of the catalogue shows the drive number, the title of the
disc, the currently set auto-start option of the RAMdisc, and the currently selected
library and directory. The files are displayed in alphabetical order (Not for Drive 5)
reading across the columns.
A catalog can be generated from the USB drive directly using the USB Monitor, by
issuing the command
*]DIR
This is explained in more detail in Chapter 7.
Associated commands
*INFO
*ACCESS
*TITLE
*OPT 4, n
*DIR
*DRIVE
*EX
*]DIR

RetroClinic External DataCentre User Manual
Page 44
*COMPACT <drv>
Purpose
Attempting to SAVE a program or file on to a RAMdisc may produce the message Disk
full if there is no single space available on the RAMdisc big enough for the
information. It may be that there is enough space, but it is split into several small
sections. This command appends all spare space on the RAMdisc to the end of the
available memory.
When you delete a number of files, the spaces they had occupied will probably be
distributed over the RAMdisc with current files in between them. *COMPACT moves
all current files to the 'start' of the RAM occupied by that drive, leaving the space in
one continuous block at the end.
Example
*COMPACT 1
$.HELLO FFFF1700 FFFF801F 0003B 002
$.SUMS FFFF1700 FFFF801F 00098 003
As 'compacting' proceeds, all the current files are displayed in the order in which
they occur on the RAMdisc.
Notes
This facility will only do anything if there is space between the files. There will only be
such space if a file has been deleted from between two others. Compacting a
RAMdisc happens slightly faster if you select mode 7 beforehand, but is still very fast
compared to the same operation on Floppy Disc.
Warning: This command may overwrite the contents of memory. If you have a
program or data in memory that you want to keep, save it before you use this
command.
RetroClinic External DataCentre User Manual
Page 45
*COPY <source drv> <dest. drv> <afsp>
Purpose
To copy a named file or files from one RAMdisc to another.
Example
*COPY 0 1 HELLO
This copies a file called HELLO in the current directory on RAMdisc Drive 0 onto
RAMdisc Drive 1.
Associated commands
*BACKUP
Notes
The 'wild card' facilities may be used to specify a group of files to be copied, e.g.:
*COPY 0 1 #.MY*
Copies all files beginning MY irrespective of which directory they are in. Information
already on the destination disc is not affected.
You can copy between Drives 0-3, and the NVRAM drive 4, but not to Drive 5, the
USB. In order to copy an individual file to the USB, you must load it and save it
manually.
Warning: This command may overwrite the contents of memory. If you have a
program or data in memory that you want to keep, save it before you use this
command.

RetroClinic External DataCentre User Manual
Page 46
*DELETE <fsp>
Purpose
To remove a single named file from the catalogue of a RAMdisc. The space occupied
by the file becomes available for other information. Succeeding file names in the
catalogue are shuffled up, but not the files themselves. Once a file is deleted you
cannot get it back again.
Example
*DELETE FRED
Removes a file called FRED from the current directory on the current drive.
Associated commands
*WIPE
*DESTROY
*COMPACT
Notes
If the file is not found in the directory, the message
Not found
Is displayed. If the file is locked, the message
Locked
Appears. Once deleted, a file cannot be restored.
RetroClinic External DataCentre User Manual
Page 47
*DESTROY <afsp>
Purpose
To remove specified files from the RAMdisc in a single action. This command may
take the ambiguous file specification so that groups of files can be deleted. When
you use this command, a list of the files to be deleted is displayed. A single Yes/No
question appears at the end of the list offering you the choice to go ahead and delete
all the listed files or not.
Use this command with care, because its effect is not reversible. It will not attempt
to remove locked files. (See *ACCESS.)
Example
*ENABLE
*DESTROY *.H*
A.HELLO
$.HELLO
Delete (Y/N)
If you type Y in reply to the question all the named files will be deleted. The message
Deleted
Is displayed when the job is done. Typing anything else cancels the command.
Associated commands
*ENABLE
*WIPE
*DELETE
Notes
Once destroyed, files cannot be restored. *ENABLE must be typed before the
command will work, otherwise the system will ask you Go (Y/N) ? You must reply
with a Y to this, otherwise the message Not enabled is displayed.

RetroClinic External DataCentre User Manual
Page 48
*DIR (<dir>) Set current directory
Purpose
To change the current directory to <dir>. After a cold start, the current directory is
always set to `$'. To save files in a different directory in the catalogue, you must use
this command to change the current directory to the one you want and then SAVE
them.
Example
*DIR A
This sets the current directory to A. You now have access to any files in directory A in
the catalogue. Any files now saved using *SAVE, or BASIC's SAVE command, will be in
directory A.
Notes
Directory can be set to any character except these four exceptions
# * . :
This command does not alter the directories written in the catalogue. It merely states
which directory in the catalogue you have access to by default. You can change drive
at the same time, and this takes the form
*DIR :<drv>.<dir>
So if the current drive is drive 0, and the current directory is $, then
*DIR :2.A
Will set the drive to 2, and the directory to A. Alternatively, you can set the drive
separately using the *DIR command:
*DIR :2
RetroClinic External DataCentre User Manual
Page 49
*DRIVE <drv> Set current drive
Purpose
Changes the current drive to <drv>. Any commands which follow will work on <drv>
until another drive is specified.
Example
*DRIVE 1
Sets the current drive to 1 and
*CAT
Will produce a catalogue of drive 1.
*CAT 0
Will catalogue drive 0 , but the current drive is still drive 1 until you change it back to
0, or after a power on start.
Description
Sets the current drive, and leaves the current directory unchanged.

RetroClinic External DataCentre User Manual
Page 50
*DTRAP Toggle DiskTrap Function
Purpose
To allow the RamFS to take over the computer, and pretend to be a regular Disk
Filing System.
Example
*DTRAP
Activates or deactivates the DiskTrap function.
Associated commands
*RAM
*DISK
*DISC
Notes
DTRAP is a toggle command. Use it once to turn the DiskTrap feature on, and again to
turn it off.
When used, the machine will be automatically rebooted, and if active, a yellow (DT)
message will appear after RamFS, which will now be the default filing system. This
powerful command allows the RamFS to effectively “hijack” your system, and
pretend to be a Disk Filing System. When active, all other ROMs apart from Basic and
RamFS are disabled, and the *DISK (*DISC) commands are trapped by RamFS and
interpreted as *RAM, so any software that issues these commands should think it’s in
a DFS environment.
The Filing system ID is also adjusted to mimic a DFS, and is returned as 4 instead of
12. Also, OSWORD &7F calls are intercepted, and claimed as if they were &77.
See Chapter 7 for a more detailed description of DTRAP.

RetroClinic External DataCentre User Manual
Page 51
*DUMP <fsp>
Purpose
Produces a hexadecimal listing of a file on the screen.
Example
*DUMP SUMS
Associated commands
*LIST
*TYPE
Notes
It is useful to use this command in page mode so that the file is displayed one page at
a time on the screen. <CTRL>N selects page mode, <CTRL>O turns it off.

RetroClinic External DataCentre User Manual
Page 52
*ENABLE
Purpose
Some of the filing system commands produce irreversible effects. To prevent them
from being used accidentally, it is necessary to require a user confirmation of the
action. This is either with a Y response to the Go (Y/N) ? prompt produced, or
this can be omitted by using *ENABLE before they become operational. These
commands are:
*BACKUP
*DESTROY
Example
*BACKUP 1 0
Go (Y/N) ?
If any other response than Y is given, the error:
Not enabled
Is produced.
*ENABLE
*BACKUP 1 0
Will proceed without any further user intervention..
Notes
*ENABLE must be typed immediately before the command to be enabled.
Any * name command typed in between nullifies the *ENABLE.

RetroClinic External DataCentre User Manual
Page 53
*EX (<drv>)(<dir>) examine
Purpose
To display information about the specified directory. The information is displayed
across the screen (in hexadecimal) in the following order (reading from left to right):
<directory name>.<filename>, protection attribute, load address, execution address,
length in bytes, start sector number.
Example
*EX $
Might give
$.!BOOT L FF1900 FF8023 00003B 205
$.MENU L FF1900 FF1900 000332 008
*EX :1.D
Might give
D.ROB FF1900 FF8023 000695 07B
D.WORK 000000 000000 000015 2A9
If no <drv> or <dir> is given, the currently selected directory and drive is examined.
Associated commands
*CAT
*INFO

RetroClinic External DataCentre User Manual
Page 54
*EXEC <fsp> execute
Purpose
This command reads byte by byte all the information in a named file as if it was being
typed on the keyboard. This is useful when you find that you are repeatedly typing
the same sequence of commands. Instead you can build an EXEC file consisting of all
these commands and type *EXEC <fsp> each time you want this sequence of
commands. *BUILD <fsp> is an associated command used to create an EXEC file.
Example
*EXEC HELLO
takes the contents of file HELLO and reads it one character at a time as if it was being
typed at the keyboard.
Associated commands
*BUILD
Notes
One useful application of the *EXEC command is in association with the autostart
facilities described in Chapter 3, and in the section on *OPT 4 in this chapter. If you
create a !BOOT file containing the BASIC keyword CHAIN followed by the file name of
one of your BASIC programs, the effect of pressing <SHIFT><BREAK> will be to load
and run the BASIC program automatically.

RetroClinic External DataCentre User Manual
Page 55
*EXPORT (<opt>) <filename>
Purpose
To Export a disk image from either a floppy disk, or a RAM Drive, onto the USB
storage drive.
Example
*EXPORT GAMES.SSD
Exports the contents of the default RAM drive, onto the USB storage drive inserted,
using the filename ‘GAMES.SSD’.
*EXPORT –D13 PROGRAMS.DSD
Exports both sides of the contents of the floppy disk in drive 1, using Drive 1 as the
first side and Drive 3 as the second to the USB storage drive, using the filename
‘PROGRAMS.DSD’.
Associated commands
*IMPORT
*DISK
Notes
Valid options are Drives 0-3, D, and Q, and must be preceded by a ‘-‘. If no drive is
specified, the system will Export a single side from the default RAM drive, which was
previously selected with *DRIVE <drv>, or Drive 0 if no previous drive was selected.
Using the option will override the default drive, and Export from the drive(s)
specified. You cannot EXPORT from Drives 4 or 5, so you will get an error message if
you try.
If two drives are given in the option, a Double Sided Interleave Format image is
created, commonly known as a .DSD. It is usual to Export these types of images from
opposing sides of the same drive, as would be the case in a Disk System, IE 0 and 2,
or 1 and 3, but with RamFS, you can specify any drive in any order for the Export.
RetroClinic External DataCentre User Manual
Page 56
If the ‘D’ option is used, the Export will proceed from a Floppy Disk, providing one is
connected and a suitable Disk Interface installed. The disk interface must be capable
of obeying OSWORD &7F commands.
The DFS must be selected as the current filing system before you can EXPORT to a
floppy disk, or you will get an error message:
Disk System Not Selected
The ‘Q’ option will silence all output from the command, and is useful in programs
and menus where the track progress is not required. With this option active, a
successful export will simply return with a prompt, but any error will display as
normal.
Any existing file on the USB storage drive will be overwritten, if the same filename is
given.
When exporting from floppy disk, if a disk error is detected, the system will return
with either
Disk Error
Or
Drive Error
Depending on the fault detected. RamFS will then fill the remaining bytes of the
image with zeros, and leave the file on the USB drive. This is to allow you to rescue
any data that may have been recovered from the floppy before the error was
detected.

RetroClinic External DataCentre User Manual
Page 57
*FREE (<drive>)
Purpose
To display, for the specified drive, the number of files that can be added to the
catalogue together with the amount of space used and left to be used in terms of
sectors (in hexadecimal) and bytes (in decimal).
Example
*FREE
31 Files 31E Sectors 204,288 Bytes Free
0 Files 002 Sectors 512 Bytes Used
Displays free space in the current drive.
*FREE 1
4 Files 038 Sectors 14,336 Bytes Free
27 Files 2E8 Sectors 190,464 Bytes Used
Displays free space in drive 1.
Associated commands
*COMPACT
*MAP

RetroClinic External DataCentre User Manual
Page 58
*HELP (<keyword>)
Purpose
Displays useful information on the screen. In the disc system this consists of a list of
the filing system commands or the utilities depending on the <keyword> used. The
two keywords which produce a response in the RAM Filing System are UTILS and RFS.
If just *HELP is typed, the system produces a list of currently installed ROMs and a list
of the keywords which will produce further information.
Example
*HELP RFS
RetroClinic RamFS 1.00
ACCESS <afsp> (L)
BACKUP <src drve> <dest drv>
COMPACT (<drive>)
COPY <src drv> <dest drv> <afsp>
DELETE <fsp>
DESTROY <afsp>
DIR(<dir>)
DRIVE <drive>
ENABLE
EX (<drv>) (<dir>)
FREE (<drv>)
INFO <afsp>
LIB (<dir>)
RENAME <old fsp> <new fsp>
TITLE <title>
WIPE <afsp>
OS 1.20
Notes
*RUN, *SPOOL, *SAVE, *EXEC and *LOAD are not included in these lists because they
are Machine Operating System commands which operate outside the RAM Filing
System. *HELP is a Machine Operating System command.
RetroClinic External DataCentre User Manual
Page 59
*IMPORT (<opt>) <filename>
Purpose
To Import a disk image from the USB onto either Floppy disk or one of the RAM
drives.
Example
*IMPORT GAMES.SSD
Imports the image ‘GAMES.SSD’ on the USB storage drive inserted into port 2, onto
the default RAM drive.
*IMPORT –D02 PROGRAMS.DSD
Imports the contents of the file ‘PROGRAMS.DSD’ on the USB storage drive to floppy
disk drives 0 and 2.
Associated commands
*EXPORT
*DISK
Notes
Valid options are Drives 0-3, D, and Q, and must be preceded by a ‘-‘. If no drive is
specified, the system will Import the image to the default RAM drive, which was
previously selected with *DRIVE <drv>, or Drive 0 if no previous drive was selected.
Using the option will override the default drive, and Import to the drive specified.
You cannot import to Drives 4 or 5, so you will get an error message if you try.
If two drives are given in the option, the image is presumed to be in Double Sided
Interleave Format, commonly known as a DSD. It is usual to Import these types of
images to opposing sides of the same drive, as would be the case in a Disk System,
e.g. 0 and 2, or 1 and 3, but with RamFS, you can specify any drive in any order for
the Import.

RetroClinic External DataCentre User Manual
Page 60
If the ‘D’ option is used, the import will proceed to a Floppy Disk, providing one is
connected and a suitable Disk Interface installed. The disk interface must be capable
of obeying OSWORD &7F commands. The Floppy disk must be formatted and be of
the same or higher capacity, or the Import will fail.
The DFS must be selected as the current filing system before you can EXPORT to a
floppy disk, or you will get an error message:
Disk System Not Selected
The ‘Q’ option will silence all output from the command, and is useful in programs
and menus where the track progress is not required. With this option active, a
successful import will simply return with a prompt, but any error will display as
normal.
All existing files on the destination Ram Drive or floppy will be overwritten.
When importing to a floppy disk, if a disk error is detected, the system will return
with either
Disk Error
or
Drive Error
Depending on the fault detected. No further transfer will take place, and RamFS will
flush the USB buffer of the remaining data.

RetroClinic External DataCentre User Manual
Page 61
*INFO <afsp>
Purpose
Displays information about a file or group of files. It includes details not given by
*CAT such as the length of the file and its location. It is displayed in the following
order across the screen.
Directory/File name/Access/Load/Execution/Length/Start
addr addr bytes sector
Example
*INFO A.HELLO
displays
A.HELLO L 001900 00801F 00003B 003
Associated commands
*CAT
*EX
Notes
If the file is not found on the specified (or assumed) drive and directory the message
Not found
is produced. The command must be re-entered using the correct <afsp>. The wild
card facilities # and * may be used if you want information about a group of files.

RetroClinic External DataCentre User Manual
Page 62
*LIB :(<drv>) <dir> Selects the library
Purpose
Sets the library to the specified drive and directory. The default library and drive is
always set to :4.%, to allow command utilities to be stored on the NVRAM Drive.
Example
*LIB :1.A
sets the library to drive 1 directory A. After this typing:
*<filename>
Will search directory A on drive 1 for the named file and if it is found the file will be
loaded and executed just as if you had typed:
*RUN :1.A.<filename>
Associated commands
*RUN
Notes
The library can contain files which are utility programs, designed to act on other files
e.g. sorts, edits and merges are all common utility programs. It is then possible to
say:
*SORT FRED
Where SORT is the name of the file in the library and FRED is the name of another file
in the current drive and directory. This makes use of the fact that any text after the
<fsp> is stored in memory and is available to your machine code program for
interpretation. A pointer to the start address of this text is available to your program
via a call to OSARGS with Y=0, A=1 and X=the address of the byte block in page 0
where the text is stored. To read the text stored at this location you must use a call
to OSWORD with A=5.

RetroClinic External DataCentre User Manual
Page 63
*LIST <fsp>
Purpose
Displays a text file on the screen with line numbers.
Example
*LIST DATA
Displays the contents of the file called DATA on the screen, line by line with each line
numbered.
Associated commands
*TYPE
*DUMP
Notes
BASIC is tokenised, so listing a BASIC program file will display nonsense. (See the BBC
Microcomputer User Guide.) An ASCII text file of a BASIC program can be obtained
using the *SPOOL command.
Files written with BASIC keyword PRINT# can also be listed with this command.
In page mode the listing will stop after displaying each screenfull, until you press
either <SHIFT> key to make it continue. <CTRL>N turns page mode on, <CTRL>O turns
it off.

RetroClinic External DataCentre User Manual
Page 64
*LOAD <fsp> <address>
Purpose
Reads a named file from the disc into memory in the computer starting at either a
specified start address or the file's own load address.
Example
*LOAD HELLO
Reads the file HELLO into memory starting at location 1900 (hex), which is the load
address of the file when it was saved. (See example in *INFO.)
*LOAD HELLO 3200
Reads the file HELLO into memory starting at location 3200 (hex). Other examples are
*LOAD "HELLO"
*LOAD "HELLO" 3200
Associated commands
*SAVE
*RUN
Notes
All the above are valid commands. The quotation marks are optional; but either a
pair or none should be present. The named file must be in the current directory on
the current disc. If the file is not found, the message
Not found
is produced.
Please see a later chapter for information and limitations on loading and saving to
the USB storage drive 5.
RetroClinic External DataCentre User Manual
Page 65
*MONITOR
Purpose
To allow direct communication with the USB Host Controller monitor
Example
*MONITOR
Enters the USB Monitor mode.
Pressing <ESCAPE> will exit from the Monitor mode.
Associated commands
*]
Notes
Chapter 7 describes using the Monitor, and sending commands directly to the USB
controller with *]

RetroClinic External DataCentre User Manual
Page 66
*OPT 1 (n)
Purpose
This command enables or disables a message system which displays a file's
information (the same as *INFO). Every time a file on the disc is accessed, the
information is displayed. (n) can be any number greater than 0 to enable the feature.
(n) = 0 disables it.
Example
*OPT 1 1 or *OPT 1, 1
Enables the messages;
*OPT 1 0 or *OPT 1, 0
Disables the messages.
Associated commands
*INFO
Notes
A space or a comma between *OPT 1 and its argument (n) is essential.
RetroClinic External DataCentre User Manual
Page 67
* OPT 4 (n)
Purpose
Changes the auto-start option of the disc in the currently selected drive. There are
four options to choose from: 0, 1, 2 or 3. Each option initiates a different action when
you press <SHIFT> and <BREAK> on the computer. The computer will either ignore or
automatically *LOAD, *RUN or *EXEC a file called !BOOT which must be in the
directory $ on the currently selected default drive.
Example
*OPT 4 0 does nothing
*OPT 4 1 will *LOAD the file !BOOT (ie a machine-code file)
*OPT 4 2 will *RUN the file !BOOT (ie a machine-code file)
*OPT 4 3 will *EXEC the file !BOOT (ie a BASIC file)
When *OPT 4 2 is set, and a machine-code program (i.e. !BOOT) is executed, it is
important to remember that the interrupt flag is undefined (unlike *RUNning the
program, where the interrupt flag is cleared). It is suggested that your machine code
!BOOT files contain a CLI to clear the interrupt flag.
Notes
RamFS will first search the currently selected default drive, or drive 0 if this has not
been changed, for a valid !BOOT file, if this option is set. If the option is disabled, e.g.
set to 0, then it will search drive 4 (The NVRAM).
If the option 0 is set, the !BOOT file need not be there. With any other option the
message Not found or File not found is produced if !BOOT is not found in directory $
on the drive where the option is set.
If a valid !BOOT file is located, the default directory is changed to $ from whatever it
was set to previously. If no !BOOT is located, the default directory is left unchanged.

RetroClinic External DataCentre User Manual
Page 68
*RAM
Purpose
Activates the RAM Filing System, and ensures all future actions use the RAM filing
system by default.
Example
*RAM
Associated commands
*DTRAP
Notes
Whilst DiskTrap is active, the RAM Filing system will also respond to the *DISK and
*DISC commands, and execute them as if they were a *RAM command.

RetroClinic External DataCentre User Manual
Page 69
*RAMTEST
Purpose
To test the inbuilt RAM of the DataCentre board for errors.
Example
*RAMTEST
Performs a test on the DataCentre RAM.
Notes
This command will erase drives 0-3 of the RAMdisk, and leave them in a blank state,
as well as resetting all the workspace information for the RamFS. It does not test the
NVRAM Drive 4, and does not alter its contents in any way.
Once this test is complete, it is advisable to do a <CTRL><BREAK> to re-initialise the
system.

RetroClinic External DataCentre User Manual
Page 70
*RENAME (old fsp) (new fsp)
Purpose
Changes the file name and moves it to another directory if required.
Example
*RENAME SUMS B.MATHS
Assuming that the current directory is $, the file $.SUMS becomes B.MATHS.
Notes
*RENAME :0.$.SUMS :1.B.MATHS
Is not allowed. The file cannot be moved from drive 0 to drive 1 using *RENAME. You
must use the *COPY command to perform that function. Only the directory and file
name can be changed with *RENAME.
If the file does not exist the message
Not found
Is displayed. If the first file is locked
Locked
Is displayed. If the <new fsp> has already been used the message
Exists
Is displayed.

RetroClinic External DataCentre User Manual
Page 71
*RUN <fsp> (parameters to utility)
Purpose
This command is used to run machine-code programs. It loads a file into memory and
then jumps to the execution address of that file.
Example
*RUN PROG
Will cause a machine-code program in the file called PROG to be loaded and
executed starting at the execution address of the file.
Associated commands
*SAVE
*LIB (for an explanation of 'parameters to utility')
Notes
This command will not run a BASIC program.
Typing *<fsp> is accepted as being *RUN <fsp>, and results in the file being loaded
and executed if it is found in the currently selected drive/directory or the library.
However, if the program has the same name as a built in command from any of the
installed ROMs or operating system, then the built in command will be executed
instead. To run a program, for instance, called COMPACT, instead of issuing the
command *COMPACT, you would need to use either:
*RUN COMPACT
Or
*/COMPACT

RetroClinic External DataCentre User Manual
Page 72
*SAVE <filename> <start address> <finish
address> (<execute addr.>) (<reload
addr.>)
Purpose
It is important not to confuse this with the BASIC keyword SAVE, they are quite
different. This command takes a copy of a specified section of the computer's
memory and writes it on to the RAMdisc in the current drive/directory. It is put into a
file of the given name. You will mostly use this command to record your machine-
code programs.
Example
*SAVE PROG SSSS FFFF (EEEE) (RRRR)
*SAVE PROG SSSS + LLLL (EEEE) (RRRR)
SSSS = Start address of memory to be saved
FFFF = Finish address
EEEE = Execution address (see below)
RRRR = Reload address
LLLL = Length of information
Notes
RRRR and EEEE may be omitted in which case the reload address and the execution
address are assumed to be the same as the start address.
If enough space is available the information is written on to the RAMdisc and the file
name is entered on to the catalogue in the current directory.
16 Bit Start and Execution addresses may be specified, but for compatibility with a
Co-Processor, you may need to specify 32 bit addresses. Please see the reference
manual supplied with your Co-Processor for further information.

RetroClinic External DataCentre User Manual
Page 73
*SPOOL <fsp>
Purpose
Prepares a file of the specified name on the RAMdisc to receive all the information
subsequently displayed on the screen. This is a very useful command particularly for
producing a text file of one of your BASIC programs. (See notes below.)
Example
You can obtain a text file of one of your BASIC programs by loading it into memory
and typing:
*SPOOL FRED
Opens a file called FRED on the RAMdisc ready to receive information from the
screen. You can then LIST the program, which causes the BASIC program to be
displayed on the screen and also written onto the file called FRED.
*SPOOL
Turns off the 'spooling' and closes the file called FRED.
Associated commands
*BUILD
*EXEC
*LIST
*TYPE
Notes
BASIC on the BBC Microcomputer is 'tokenised'. This means that the lines which you
type in your program are abbreviated inside the computer's memory and on the
RAMdisc. A program file will contain these abbreviated 'tokens' rather than your
original program text.
RetroClinic External DataCentre User Manual
Page 74
*TITLE <disc name>
Purpose
Changes the title of the RAMdisc in the current drive to the first 12 characters after
the command. It fills in with spaces if there are less than 12 characters. Any
characters are allowed.
Example
*TITLE "MY DISC"
This sets the title to "MY DISC" with five spaces added on the end.
*TITLE "A DIFFERENT TITLE"
This changes the title to A DIFFERENT. Anything after the first 12 characters is
ignored. The quotation marks are only required if the title includes spaces.

RetroClinic External DataCentre User Manual
Page 75
*TYPE <fsp>
Purpose
Displays a text file on the screen without line numbers.
Example
*TYPE HELLO
Associated commands
*LIST
*DUMP
Notes
BASIC programs are not stored on the RAMdisc as text files when you SAVE them, so
this command will display nonsense if you try to display a BASIC program.
Page mode is selected with <CTRL>N and turned off by <CTRL>O. Page mode allows
you to see a screenfull of text at a time. When the screen has filled up, instead of
immediately scrolling, the computer waits until you press the <SHIFT> key. The next
screenfull then appears.

RetroClinic External DataCentre User Manual
Page 76
*WIPE <fsp>
Purpose
Removes specified files from the catalogue and rearranges the catalogue. This
command differs from *DESTROY in that it asks for confirmation that each file
conforming to the specification is to be deleted, rather than a whole list of files at
once.
Example
*WIPE *.SU*
is a request to delete all files on the current drive beginning with the letters SU. As
each file is found the file name is displayed like this:
A.SUM
At this point only type Y if you want to delete the file. Typing anything else leaves the
file intact.
Associated commands
*DESTROY
*DELETE
Notes
Once deleted using *WIPE, a file cannot be restored. Locked files are not removed.
(See *ACCESS)
RetroClinic External DataCentre User Manual
Page 77
6. Random access files One of the major advantages of a disc filing system over a cassette tape is that the
read/write head of the disc drive can be moved to a specific place on the disc quickly
and accurately. A RAM filing system goes one step further, as it has no read/write
heads, and can access any portion of the data at any time, without having to wait for
heads to step into the right place. This is one reason why RAM filing systems are so
much quicker than their disc counterparts.
Imagine you have a data file on cassette tape consisting of 'Names' and 'Telephone
numbers'. To find a specific telephone number the file must be loaded and read from
the beginning until the required record is found. If the file is long this will take some
time. On the other hand, the RAM Filing System allows you to move to the required
record instantly and just read that one. Clearly this is much quicker.
To make this possible the RAM Filing System provides a pointer. The pointer points to
a particular character in the file. It is the next character on the file to be read or
written. In BASIC the pointer is controlled by the keyword PTR#. The other
keywords in BASIC which are used in connection with disc files are EXT# and EOF#.
EXT# tells you how long a file is, EOF# returns a value of TRUE (-1) if the end of
file has been reached and FALSE (0) if not. All the BASIC keywords used to
manipulate disc files are explained in the User Guide.
They are:
OPENOUT
OPENIN
PTR #
EXT #
INPUT#
PRINT#
BGET#
CLOSE#
BPUT#
EOF#
To prepare a file to receive data the OPENOUT keyword is used. In the User Guide
the following example is given:

RetroClinic External DataCentre User Manual
Page 78
330 X=OPENOUT ("cinemas")
The effect of this line in a BASIC program is as follows:
1. If a file called 'cinemas' exists it is deleted.
2. A file called 'cinemas' is entered on to the RAMdisc catalogue of the
currently selected drive, in the current directory.
3. The filing system reserves 16K of memory (the equivalent of 64 sectors, or
the length of the previous file called 'cinemas' if there was one) on the
RAMdisc for the exclusive use of the file 'cinemas'. If 16K is not available,
the file is not created and an error is produced.
4. Evaluating PTR# and EXT# at this point will reveal that they are both set
to zero.
5. The filing system will have loaded into memory the first 256 bytes of the
file. This area of memory is specially reserved by the filing system for this
purpose and is referred to as the 'buffer'.
Notice that the first action of the keyword OPENOUT is to delete any existing file of
the specified name. If there were no files on the RAMdisc previously, the effect can
be illustrated as follows:
Nothing has been written on the file, so the value of EXT# (extent) is zero. We can
now use the BASIC keyword PRINT# to write three cinema names into these slots of
ten characters each, as follows:
340 A = PTR#X
350 PRINT# X, "VICTORIA"
360 PTR#X = A+10

RetroClinic External DataCentre User Manual
Page 79
370 PRINT# X,"REGAL"
380 PTR# X = A+20
390 PRINT# X, "ODEON"
400 PTR# X = A+30
In practice you can do it much more elegantly than shown above. Nevertheless the
result immediately after line 400 is:
Notice that the cinema names (in this illustration, VICTORIA) are in the file
backwards. They are preceded by two bytes, represented in the diagram by 't' and 'l'
. 't' specifies the type of data which follows. In this case the type is 'string' so the first
byte will contain &00 in hex, as indicated in the table below.
't' = &00 = String type, followed by T, followed by the string.
't' = &40 = Integer type, followed by four bytes containing the integer.
't' = &FF = Real type, followed by five bytes containing the real number.
In our example the second byte, represented by 'l', gives the length of the string in
hex. The integer and real number types are of fixed length as indicated above so they
do not require the byte represented by 'l' to give the length. Real numbers are stored
in exponential format, integers are stored with the high order bytes first in the file.
In the example we have used only the first 26 bytes of the file, so everything written
to the file fits into the first sector which is in a 'buffer' in memory. If we had gone on
writing names, the filing system would eventually have move the information in the
memory buffer to sector 02 of the RAMdisc and load sector 03 into the buffer to
continue. This is still assuming that there are no other files on the drive, otherwise
different sectors would be used. Remember that sectors 00 and 01 are reserved by
RamFS for the disc catalogue.
Clearly then, at the end of a sequence of writing actions, we are left with a buffer in
memory which may be partly filled with information. We must make sure that this
information is written to the disc. This is done with the CLOSE# keyword in BASIC.

RetroClinic External DataCentre User Manual
Page 80
This empties the buffer and frees the channel on which we opened the file (X in the
example).
We can now read the information back from the RAMdisc if we want to. OPENIN is
the BASIC keyword used to do this, e.g.:
5 DIM cine$(3)
10 X = OPENIN("cinemas")
20 B = 1
30 FOR A = 0 TO 20 STEP 10
40 PTR#X = A
50 INPUT#X,cine$(B)
60 B = B+1
70 NEXT A
Line 10 of the example opens the file 'cinemas', loads the first sector into the buffer
and sets PTR# to zero and EXT# to the length of the file.
Lines 30 to 50 of the example read each cinema name into an element of the array
cine$, advancing the pointer to the start of the next name after reading each one.
Now you can see why we stored each name in its own '10-byte record'. This makes it
much easier to write a program to find the names again.
The important principle about using random access files is that you must keep track
of where each item of information is written. You can then set PTR# to point to it
again when you want to read or change it. The examples illustrate the basis of a very
simple technique. There are a number of others which you can devise.
Note 1: As shown earlier in this discussion, OPENOUT reserves 64 sectors for a file.
Other files opened may reserve sectors which immediately follow,
e.g.:

RetroClinic External DataCentre User Manual
Page 81
X = OPENOUT ("cinemas”)
Y = OPENOUT ("clubs")
The statements reserve 32K (128 sectors) consecutively if the RAMdisc was
otherwise empty. It may be that you require more than 64 sectors for the first file
'cinemas'. If so, you will need to write 'dummy' records to the file to extend it to the
required length before you open the second file, e.g.:
10 X = OPENOUT ("cinemas")
20 FOR A = 1 TO 200
30 PRINT#X, "DUMMY NAME FIELD"
40 PRINT#X, "DUMMY ADDRESS LINE ONE"
50 PRINT#X, "DUMMY ADDRESS LINE TWO"
60 PRINT#X, "ADDRESS LINE THREE"
70 PRINT#X, "POST CODE 123"
80 NEXT A
This program creates a file 79 sectors long with the dummy name and address
written every 100 bytes.
By writing beyond the reserved area in this way you can effectively reserve as many
sectors as you like. You can then open other files in the remaining space on the
RAMdisc. EXT# will give the position of the '3' after the last dummy address on the
file (20000).
The above method will only work consistently if you start with an empty RAMdisc. If
you want to create a random access file larger than 64 sectors on a RAMdisc with
other files already on it, there is another method.
First save the file with the name you want and with the number of bytes required.
Use the address parameters of the *SAVE command to specify the number of bytes,
e.g.:
*SAVE "DATA" 00000 08000
Will create a file of 128 sectors (32K) called DATA. You can then open the file later in
your program. The file will contain miscellaneous data which you can overwrite with
the information you actually want. This second method causes the filing system to

RetroClinic External DataCentre User Manual
Page 82
search the RAMdisc for a free space large enough to hold the file. Existing files will be
skipped over if they would otherwise overlap with the new file.
Note 2: Up to five files may be open at any one time. Each open file buffer is stored in
the DataCentre memory, rather than in conventional memory as the Disc Filing
system would do. This allows for more free memory for your programs.

RetroClinic External DataCentre User Manual
Page 83
7. RamFS Utility Commands As well as the filing system commands, RamFS has a few utility commands that may
prove useful. Those commands that are built into RamFS are all mentioned in the list
of commands in Chapter 5, and we will not go over all of them here, but just take a
look at a few that need a little more explanation, as well as those that form part of
the Library.
*DTRAP DTRAP is short for DiskTrap. It is a powerful command that drastically changes the
configuration of your machine. In normal everyday use of RamFS and DataCentre,
you may find that you never need it, but it has been included for a specific purpose.
Back in the day when the software for the BBC was first being written, 1MB of RAM
like that supplied on DataCentre was not available to the average user without
spending thousands of pounds. As time went on, the price for memory started to fall,
and hardware like the Opus Challenger, which has a 256K or 512K RAM Drive started
to appear.
But for all intents and purposes, most software that was being written for the BBC,
was written to be either used from Tape or Disk, with just a small proportion written
for other storage mediums, such as the ADFS, ROM Filing system, or the Doomsday
system. As such, all software that ran from disk, expected to see a disk drive. A lot of
programs were compatible with all mediums, and so ran faultlessly no matter if they
were on DFS, ADFS, or ROM. But some, mostly games, tend to be a bit picky, and can
issue calls such as *DISK during loading, look for a specific filing system ID number, or
use direct access commands through a call known as OSWORD to access the disk
direct. This is all fine if running from a Disk system, but if you try running that
program from a RAM drive, then issue a *DISK command, it will fail – as the Ram
Filing system has been deselected, or the *DISK command may not even exist if you
don’t have a disk drive and the hardware to go with it.
This is where the DiskTrap command comes in. In effect, it “hijacks” your system, and
turns off all other ROMs and filing systems (apart from the ones built into the OS,
which are *TAPE and *ROM) and utility ROMs, and just leaves RamFS and Basic
active. It also signals to RamFS that is can now accept the *DISK command, as well as
*RAM, so when a program issues a *DISK, the Ram Filing system accepts that, to

RetroClinic External DataCentre User Manual
Page 84
ensure it is still active. RamFS will also “lie” when it is asked for its Filing System ID
with DiskTrap active. Normally, it will respond with 12, but a Disk Filing System has
an ID of 4, and this is what will be reported when this command is active.
Once last thing DiskTrap does is to capture most calls made through OSWORD &7F,
and process them as if it were a Disk. Details on OSWORD calls can be found in
Chapter 12, or in the Advanced User Guide.
These three things combined serve to fool the program into thinking it is still on a
Disk Filing system, so most programs will continue and not know any difference.
*DTRAP
Is a toggle command. Use it once to turn the DiskTrap feature on, and again to turn it
off.
When used, the machine will be automatically rebooted (Some co-processors do not
respond correctly to the reboot command, and may need to be reset manually with a
<CTRL><BREAK> after a *DTRAP has been issued), and if active, a yellow (DT)
message will appear after RamFS, which will now be the default filing system. The
system will remember that DiskTrap is active, even if a program wipes the BBCs main
memory. This is because the flag used to identify the status of DiskTrap is stored in
the DataCentre RAM, not on the main RAM of the BBC.
*MONITOR and *] The *MONITOR command is similar to starting another language, but in effect, it
doesn’t do that. What is does it allow direct communications with the USB Monitor
program on the Host Chip, the VNC1L. To start the monitor, simply type:
*MONITOR
The USB system will initialise, if it’s not already done so, and the monitor will be
ready to use when you see a prompt.
The full command set for the monitor can be found on a PDF on the CD supplied
(VNC1L Firmware Manual.pdf), so I won’t go through all the commands again here,
just a few that we may need for diagnosis, and navigating around the USB catalog.
Pressing <ESCAPE> will flush the USB buffer, and return you to the current language.

RetroClinic External DataCentre User Manual
Page 85
DIR <filename>
When used with no filename, this command will produce a catalog of the files and
directories on the USB drive. They are listed as one file or directory per line, not
formatted like the *CAT 5 command is, so may be a touch harder to read.
When used with a filename, the command returns the filename, with 4 hexadecimal
digits after it, which specify the size of the file, in bytes. So for example:
D:\>DIR GAMES.SSD
Providing the file GAMES.SSD exists, will return something like:
GAMES.SSD $00 $20 $03 $00
D:\>
The 4 digits are a 32 bit file size, returned in LSB -> MSB order, so in this case, the file
is &32000 bytes long, equivalent to 200K, or a single 80 track side of a floppy.
CD <directory>
This is used in the same way as the DOS command to navigate through directories.
Specifcy a directory after the command, and the Host will move to that directory,
then issuing another DIR will show you the files and directories available there. Two
special directories are available once you navigate into a sub-directory.
. (single dot)
Means the current directory, and effectively does nothing, as it keeps you in the
same directory. IT is included for compatibility.
.. (two dots)
Means the parent directory, so in effect takes you back one level in the directory
structure. So as an example of navigation:
D:\>DIR
GAMES.SSD
PROGRAMS.SSD
UTILS DIR

RetroClinic External DataCentre User Manual
Page 86
D:\>CD UTILS
D:\>DIR
.
..
UTILS1.SSD
UTILS2.SSD
D:\>CD ..
D:\>DIR
GAMES.SSD
PROGRAMS.SSD
UTILS DIR
D:\>
FWV
This returns the current firmware version of the USB Host controller. This firmware
maybe upgraded by the user, as described in a Chapter 8.
MKD <directory>
This command will create a subdirectory, which you can then store files in. Ideal for
separating out different images with different uses, e.g. utilities, games, music etc.
DLD <directory>
This command will delete a subdirectory. The subdirectory in question must be
empty before it can be deleted.
DLF <filename>
Deleted the named file from the directory. Useful if you have an error while creating
a file, or need to clear unwanted files or images from your USB Drive. You need to
specify the exact filename including extension, or you may get a “Command Failed”
error message.

RetroClinic External DataCentre User Manual
Page 87
Commands can also be sent to the monitor one at a time, without having to have the
monitor active. For example, we can issue a DIR command by using:
*]DIR
Or move to the GAMES subdirectory on the USB drive by:
*]CD GAMES
Or delete a specific file:
*]DLF UTILS.SSD
This is useful for manipulating through the directory structure of a USB drive, without
having to enter the monitor every time.
Note that in Mode 7 on a BBC, the ] character looks like a → Right hand Arrow
character.
If any command gets stuck, you can use <ESCAPE> to exit from it. There are a few
small instances where a command may get stuck because either something has
crashed, or you have asked for some data from the USB drive, and the system is
unable to process it, or you may have loaded a file into a critical part in the
computer’s memory. In this instance, the only way around the problem maybe to do
a <CTRL><BREAK>.
Doing a <CTRL><BREAK>, or even a regular <BREAK> always sends a reset to the USB
Host controller. This means that after any Break, the USB system will be reset to the
main root directory, and will need a few seconds to initialise after a command is
given before file transfer can begin.
BBC Master Temporary Filing Systems RamFS Also supports the Temporary Filing System supported by the BBC Master OS
3.20 onwards. Commands such as this:
*MOVE –DISK-:0.$.UTILPRG –RAM-:0.$.UTIULPRG
Are supported. Please read the Master User Guide for more information on this
function.

RetroClinic External DataCentre User Manual
Page 88
Library Commands A few commands also available are not stored on the RamFS filing system ROM, but
have been pre-loaded onto the NVRAM Drive, for use as library commands. We shall
go through these now.
*RCOPY <src type><src drv><dest type><dest drv> This command allows you to copy between RAM and Floppy drive directly, without
having to use the USB system. So for instance, if you wanted to copy the floppy that
is in drive 0, onto the RAM drive 0, you would use the command:
*RCOPY D0R0
The D in the command line stands for Disk, and the R for RAM. Similarly, to copy the
Ram drive 3 to Floppy drive 2:
*RCOPY R3D2
Any floppy copied onto must be formatted first, or an error will result.
You cannot use this command to copy Disk to Disk, or RAM to RAM, use the
*BACKUP command for the appropriate filing system to do that. This command does
not require the Disk Filing System to be the current filing system, but it must at some
point have been initialised with *DISK, or be in a higher priority socket, so that it
boots up first.
If using the system on a Master 128 with MOS 3.50, the DFS will not respond if it is
not selected, so in this case, you must use the command as follows, for instance:
*-RAM-:4.%.RCOPY R3D0
USBMSE This is a short demonstration program written in Basic, which allows you to connect a
USB type mouse to the system, and draw pictures on the screen. Not particularly
useful for budding artists, but it shows how to access the mouse as a generic HID
device.
Other utilities may be supplied that were created after this manual was printed.
Please refer to any documentation that came with those.

RetroClinic External DataCentre User Manual
Page 89
Restoring the NVRAM Drive If you accidentally corrupt the NVRAM drive, or delete some of the supplied library
files and need to restore it to as it was shipped, it’s possible to do this.
In the “Samples” directory on the utility CD is an image called NVREST.SSD. Put this
onto the root directory of your USB storage drive, then plug it into DataCentre and
import it:
*RAM
*DRIVE 0
*IMPORT NVREST.SSD
Once imported, you can <SHIFT><R><BREAK> to run the utilitiy. It will ask for you to
confirm that you want to proceed, to which you must reply with “YES” in capital
letters.
Once confirmed, it will prompt you to again press “Y” to begin the procedure. Allow
the program to run, which will first Format the NVRAM drive, then copy and organise
the basic utilities and library files onto it. The process takes about 45 seconds, and
once complete, you will get a printout of the catalog.

RetroClinic External DataCentre User Manual
Page 90
8. Updating the Firmware As time goes on, FTDI, the company that produces the Vinculum chip will supply
updates to the chips firmware. These updates may be applied by the user if you feel
they will be of benefit. If the system is working fine as it is, then the old adage “If it
ain’t broke then don’t try to fix it” is always a good one to stand by, as whilst
Firmware Updates are usually very reliable, there is always the off chance that
something will go wrong, and render your DataCentre board unusable, in which case
you will need to return it to me for repair. However, if you feel the need for an
update, this is how it’s done.
Firstly, you will need to go to the Vinculum website, and download the latest version
of Firmware. This is currently located at:
http://www.vinculum.com/downloads.html#vfirmware
The version you need will be dependent on what type of board you have, so make
sure you download the VDPS or VDAP version, as per the label on your board. You
must also use the Reflash (FTD) version, and NOT the Bootloader (ROM) version.
Once you have that file, it will be called something like:
ftrfb_main_03_68VDPS.ftd
This file must be renamed to:
ftrfb.ftd
And then placed in the root directory of a USB Flash drive that you are going to use
with your system.
Now on the Beeb, power it up but do not plug the USB drive in yet. Make sure RamFS
is the default filing system by issuing a
*RAM
Command, and then type:
*MONITOR

RetroClinic External DataCentre User Manual
Page 91
Press return a few times, and you should get the:
No Disk
Message. This confirms that the monitor on the VNC1L is awake, and ready for you to
insert a USB device.
Now you have that message, insert the USB Drive. The VNC1L will look at the drive,
and should find the firmware file. If it does, then you will get the message:
Device Detected P2
Change Main
At this point DO NOT TURN OFF YOUR COMPUTER OR PRESS ANY KEY. Doing so may
corrupt the upgrade, and render your board useless. Let this proceed, it takes about
10 seconds, after which it should come back with a few lines of message, stating the
new version of firmware, and a “No Upgrade” message. You can now type:
FWV
To confirm the firmware is in place. Remember to remove the ftrfb.ftd file from the
USB drive once you have done the upgrade, as it is no longer needed.
If for some reason the upgrade fails, then please contact me for assistance. If you
have put the wrong version of firmware on by accident, then you can just proceed to
put the correct version on in its place.
RetroClinic External DataCentre User Manual
Page 92
9. More on the USB System The USB System on DataCentre revolves around a host chip called “Vinculum”. It is an
intelligent USB controller that allows simple communications between computer
systems and virtually any USB Device.
DataCentre is provided in one of two configurations. The first, and most commonly
used will be with one USB host port, and one slave port. This is called a VDPS system.
The host port, with a USB A type connector is known as port 2 to the system. This is
where you can plug your USB devices into. The slave port is port 1. This has a USB B
type connector, and can be used to connect the BBC directly to a PC via the USB
interface. We will go over a brief outline of how to use the slave port in a moment,
but more information can be found in the Vinculum Firmware datasheet supplied on
the CD.
The other version of DataCentre will have 2 USB type A connectors, and is known as a
VDAP system. It simply allows you to connect 2 devices directly, without having to go
through a hub, but does not have the slave port function. You cannot use a hub when
connecting USB storage devices, they must be attached directly to Port 2. So if you
wanted to use many other devices at the same time, the VDAP system is better
suited for that purpose. We will discuss the VDPS version here.
The DataCentre kit comes with two USB cables. One is a USB A Plug to USB A socket,
this is used to extend the Port 2 host socket so when the board is fitted internally,
you can still connect devices to it easily. The other is a USB A plug to USB B plug, it is
this one we will use now.
The USB Slave Port Plug the B type end into Port 1 on the DataCentre, and plug the other end into a USB
socket on your PC. Before we can communicate, we must install drivers. For
Windows machines running Windows 2000 up to Windows XP, these are located on
the CD supplied, in the drivers folder. For other machines and operating systems
where the driver is not supplied on the CD, please download the required driver and
supporting documentation from the FTDI Website:
For programming access through a DLL - http://www.ftdichip.com/Drivers/D2XX.htm
For use through a Virtual COM Port - http://www.ftdichip.com/Drivers/VCP.htm
RetroClinic External DataCentre User Manual
Page 93
Initially, the PC will not see the USB device you’ve connected, so we must first
activate the slave port. On the BBC, type:
?&FCF9=1
*MONITOR
This will allow us to setup a direct link. Your PC should now have detected a new
device. When asked, browse to the appropriate drivers on the CD, and install them.
Once the drivers have been installed, you should have a new serial port device on
your computer, but you may need to look in device manager to get the COM number
assigned. The BBC should display the message:
Slave Enabled
When you get this, you know that the initial setup is complete. Load a program such
as HyperTerminal on the PC, and set it up to communicate with the new USB Virtual
COM Port that has just been installed. When connection is established, type
something on the PC keyboard, and it should come out on the BBC, conversely, type
something on the BBC and it should appear on the PC HyperTerminal Window. You
may need to play with the configuration settings on HyperTerminal, for instance the
Communication settings need to be the default of 9600,8,N,1.
This is the limit of connectivity included with the basic system. It is up to third parties
to develop software to utilise this feature.
Port 2 on the system can take virtually any USB device that has been invented, but as
with any USB device, drivers are also needed. RamFS along with the host firmware on
the USB chip handles USB flash and hard drives which are formatted with the FAT16
or FAT32 file system. Other devices will require their own drivers. Some
demonstration programs are included on the utilities disk supplied for connecting
other devices to the USB port.
NOTE: After rigorous testing of the slave port in various configurations, I have found
that very infrequently, if a USB flash drive is left in port 2 at the same time as port 1 is
being used as a slave, then the flash drive may get corrupted. For maximum security,
remove any flash drive from the system whilst using the slave port.
RetroClinic External DataCentre User Manual
Page 94
10. The IDE Interface The IDE interface included on the DataCentre board is a fully functional 16 bit
interface. This is in contrast to the 8 bit only interface that supply with the CF
Interface Kit, or is available from some other vendors. The BBC is an 8 bit computer,
and so are its filing systems, including the ADFS which makes use of it. So currently,
any access which goes through the IDE interface will be in 8 bit mode.
But because the system is capable of 16 bit communication, it opens up the door for
fitting other IDE devices, such as CD and DVD ROM drives, and also being able to use
other PC and Archimedes Hard drives directly. Again, full functionality for the 16 bit
capability will rely on third party developers, but it is fully backwards compatible, and
you can continue to use it as an 8 bit system.
In your DataCentre-E box, the IDE interface is connected to a Dual Compact Flash
adaptor, so you can use Compact Flash cards as ADFS based Hard Drives, or
“Winchesters” as they used to be known.
For details on using the ADFS system, please refer to the Acorn ADFS User Guide,
which is a .PDF document supplied on the utility CD.

RetroClinic External DataCentre User Manual
Page 95
11. Changing filing systems
Your computer can have several filing systems available other than the RamFS Filing
System. The following commands are all used to exit from the current filing system
into the one named.
*TAPE3 - 300 baud cassette
*TAPE12 - 1200 baud cassette
*TAPE - 1200 baud cassette
*NET - Econet filing system, if fitted.
*TELESOFT - The Prestel and Teletext system, if fitted.
*ROM - The cartridge ROM system
*DISC or *DISK - Enters the Disk filing system, if fitted.
*RAM - Enters the Ram filing system
*ADFS - Enters the Advanced Disk Filing System, if fitted.
Typing the command to enter the system you are already in has no effect.

RetroClinic External DataCentre User Manual
Page 96
12. Using the filing system in
assembler Section 43 of the Advanced User Guide is essential reading for anyone wanting to
write assembler programs on the BBC Microcomputer. Most of the necessary
information for using the filing system in assembler is presented there. In this
chapter, only the main differences between the DFS Filing System and the RamFS
filing system will be mentioned. The main points are summarised and a particular use
of OSWORD is described in detail.
OSARGS
This routine enables a file's attributes to be read from file or written to file. The
routine is entered at &FFDA and indirects via &214. Some functions have changed
with Y=0. They are:
A=0 will return, in A, the type of file system in use. The value of A on exit has the
following significance.
0 - No file system
1 - 1200 baud cassette file system
2 - 300 baud cassette file system
3 - ROM file system
4 - Disc file system, or RamFS with DiskTrap active
5 - Econet file system
6 - Teletext/Prestel Telesoftware file system
12 - RamFS Filing System, unless DiskTrap active
A=1 will return the address of the rest of the command line in the zero page
locations.
A=3 will read the LibFS, same action as A=0
A=4 will read the used space on the currently selected RAMdisc
A=5 will read the free space on the currently selected RAMdisc

RetroClinic External DataCentre User Manual
Page 97
OSFSC
A=9 will process the *EX command. This is implemented through the OS on the BBC
Master OS 3.20, and it is the MOS that makes this call. In OS 1.20, the *EX command
is implemented manually.
A=10 will process the *INFO command. *INFO is processed directly with OS 1.20, but
on a BBC Master with OS 3.20 it is caught by the operating system and processed by
calling OSFSC with A=10, hence this call has been added.
OSWORD with A =&7F and &77
Call address at &FFF1
A=&7F indicates that a general read/write operation is required to the floppy disc.
This remains unchanged.
A=&77 does the same process as &7F, but using the RAMdisc instead. It is valid for
Drives 0-4, so that includes the NVRAM Drive, but not the USB. Only Commands &53
to read and &4B to write are supported in RamFS.
On entry X (low byte) and Y (high byte) point to the instruction block:
Offset
0
1-4
5
6
7
onwards

RetroClinic External DataCentre User Manual
Page 98
Example:
Number of parameters = 3
Command =&53 to read or &4B to write
Parameter 1 = Track number
Parameter 2 = Sector number
Parameter 3 = &21 (specifies sector length of 256 bytes and 1 to be acted upon)
Parameter 3 can be between &21 for 1 sector, and &2A for 10 sectors, IE a full track.
Do not use numbers outside this range, as this may cause data corruption.
On exit, 0 in the last parameter address +1 indicates a successful transfer. On a disc
system, a failure is indicated by a disc error number, however, since a transfer from a
RAMdisc cannot fail, this is always 0.
Note that with DiskTrap active, the RamFS will capture OSWORD &7F, and process
them as if they were &77. It will still continue to capture &77 as well, so any routine
that uses &77 and &7F to copy between RAM and Disk, may fail, or provide
unexpected results if DiskTrap is active.
OSFILE
OSFILE is supported fully with Drive 0-3 and the NVRAM Drive 4 under RamFS. Refer
to the advanced user guide for more information.
For Drive 5, the USB, only &FF and &00 commands are supported. This is to provide
load and save functions for Basic and the *SAVE command direct to the USB drive.
Metadata is not stored because it is not supported by the FAT filing system. This is
not an issue for Basic programs, but for machine code and data, a load address must
be supplied, or the file will start loading from 0000 (the default load address supplied
by the Operating System), and will most likely crash the machine.

RetroClinic External DataCentre User Manual
Page 99
APP1. DataCentre and RamFS
Technical Information
Control Addresses
• &FCF8 - VNC1L Data Port
o Data In/Out to the VNC1L. A Read or write to this address
automatically strobes one byte in or out of the Monitor
• &FCF9 – VNC1L Control Port
o READ
� Bit 0 - !DACK – When low, connection is established on
slave port 1. Not implemented on Issue 1 boards.
� Bit 6 - !TXE – When High, do not write data into FIFO
� Bit 7 - !RXF – When Low, data is available from FIFO
o WRITE – (Issue 2 boards only)
� Bit 0 - !DREQ – (Inverted in CPLD) When high, Monitor set
to data mode. In this mode, a direct to PC USB connection
can be established from Port 1, using the correct drivers
on the PC to act as a COM port. Any data sent to the COM
port will appear as data on the monitor, and any data sent
to the monitor will be transmitted to the PC COM port.
� Bit 7 – IRQEN – When high, this sets a latch that links the
!RXF line to the !IRQ line of the CPU, via an open collector
buffer. This is used when it is necessary to interrupt the
CPU every time data is available at the USB host port. A
read from &FCF8 will clear this latch, so to set the system
to read another byte once the first one has been read, this
bit will need setting again. This is so that a single interrupt
can notify the computer that a device has been inserted,
without tying the computer up until the Host buffer is
empty.
• &FCFA – NVRAM Data Port
o Bit 0 - Data In/Out to the 24LCxx NVRAM. Direction is controlled by
&FCFB.
• &FCFB – NVRAM Data Direction Register

RetroClinic External DataCentre User Manual
Page 100
o Bit 0 – When low, data can be read, when high, data can be
written. If data is read when this is high, it will reflect previous data
bit sent, and not NVRAM Data bit.
• &FCFC – NVRAM Clock
o Pulse this clock for each bit to be written/read from NVRAM
• &FCFD – NVRAM Write Protect (Issue 1 boards only)
o When set high, NVRAM is protected. Not implemented on Issue 2
boards, use JP3 on PCB for write protect.
• &FCFE – PAGE RAM MSB
o MSB 4 bits of page ram register, ADR16-ADR19 of SRAM IC.
o This register does not have feedback.
• &FCFF – PAGE RAM LSB
o LSB 8 bits of page ram register, ADR8-ADR15 of SRAM IC.
o This register has feedback and can be read to check contents, and
can use the [INC] etc. command.
Jumper Settings
J1 – Power
1. N/C
2. GND
3. GND
4. +5v
J2 – Aux connections (All LED outputs have current limiting resistors on the main
PCB)
1. GND
2. 4v Supply to Dual CF Adaptors
3. Power LED Cathode
4. Power LED Anode
5. IDE Activity LED Cathode
6. IDE Activity LED Anode
7. USB Port 1 LED Cathode
8. USB Port 1 LED Anode
9. USB Port 2 LED Cathode
10. USB Port 2 LED Anode

RetroClinic External DataCentre User Manual
Page 101
JP1 – Closed = Supply +5v to Power pin 20
JP2 – Closed = IDE Interrupt to CPLD – Not supported in JTAG 1.01
JP3 – Closed = NVRAM Write Protect
PCB Layout
DataCentre RamFS Memory MAP
&00000 Start of Memory
ADFS Workspace (Allocated for future use)
&01000 Drive 0 Storage
&33000 End of Drive 0 Storage
Reserved for future use
&40000 Reserved for RamFS String Processing
&40100 RamFS Scratch Workspace
&40200 RamFS Catalog
&40400 RamFS Filing Workspace
&41000 Drive 1 Storage
&73300 End of Drive 1 Storage
Reserved for future use

RetroClinic External DataCentre User Manual
Page 102
&80000 DFS Workspace (Allocated for future use)
&81000 Drive 2 Storage
&B3300 End of Drive 2 Storage
Unallocated – For User
&C0000 Unallocated – For User Filing System
&C1000 Drive 3 Storage
&F3300 End of Drive 3 Storage
Unallocated – For User
&FFF00 Error Page
&FFFFF End of Memory
RamFS Scratchram Workspace Memory MAP
&00-&7F General workspace
&80-&8E Identification String used for detection and
startup - Do Not Overwrite
&8F DTRAP Status 00=Disabled, FF=Active
&90 00=Quiet/FF=Verbose flag for IMPORT/EXPORT
&91 First Drive for IMP/EXP - &FF if not valid
&92 Second Drive for IMP/EXP - &FF if not valid
&93 00=Target RAM/FF=Target Disk
&94 Option counter
&A0-&A3 32 number to convert to decimal
&A4 decimal printing pad character, 0 for none
&A5-&D5 Reserved for future use
&D6 Default Directory
&D7 Default Drive
&D8 Bootup Option
&D9 &FF if *RAM, &00 if service call 3
&DA Initialisation flag - &12 if power on boot
&56 if regular boot
&DB Monitor Prompt Counter
&DC Binary to decimal source number
&DE-&DF Binary to decimal converted number
&E0-&EB USB Disk Volume Label
&EC-&EF USB Disk Volume Serial Number
&F0 Number of files in USB directory
&F1 Number of directories in USB directory
&F2-&F3 Temp copy of &F2 and &F3
&F4-&F7 Extracted image filesize
&F8-&FF Save BEC5 routine
These addresses are subject to change without notice.