cycle stall basic - dero bike racks
TRANSCRIPT

©2021
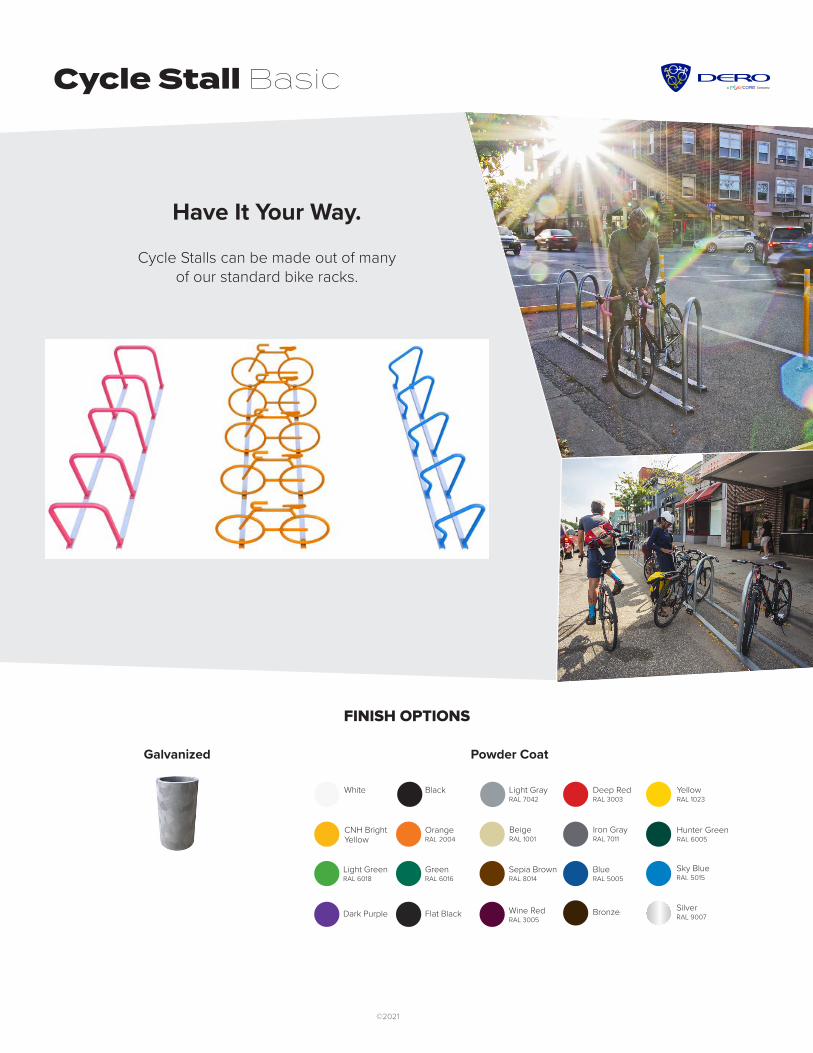
One car or ten bikes? Maximize parking for customers at your business with on-street bike parking. The Cycle Stall Basic kit covers the needs of cities and businesses that want to provide an on-street bike corral at a low cost and minimal changes to infrastructure. Kit includes parking delineators.
Cycle Stall Basic
©2021
FINISH OPTIONS
Powder Coat
Black Light GrayRAL 7042
Deep RedRAL 3003
YellowRAL 1023
White
Hunter GreenRAL 6005
CNH BrightYellow
OrangeRAL 2004
Light GreenRAL 6018
GreenRAL 6016
Sepia BrownRAL 8014 RAL 5005
Bronze SilverRAL 9007Dark Purple Flat Black Wine Red
RAL 3005
BeigeRAL 1001
Iron GrayRAL 7011
Blue Sky BlueRAL 5015
Cycle Stall Basic
Have It Your Way.
Cycle Stalls can be made out of many of our standard bike racks.
Galvanized

©2021
Submittal SheetCycle Stall Basic
18’
36’
Traffic delineators are included in either yellow (standard) or white.
Single
Double
CAPACITY Single: 10 BikesDouble: 22 Bikes
MATERIALS Hoop Racks: 1.5” schedule 40 pipe (1.9” OD)Wheel Stops: Recycled plastic.
FINISHES GalvanizedAn after fabrication hot dipped galvanized finish is our standard option.
Powder Coat (Racks Only)Our powder coat finish assures a high level of adhesion and durability by following these steps:1. Sandblast2. Epoxy primer electrostatically applied3. Final thick TGIC polyester powder coat
MOUNT OPTIONS
RailRail Mounted Racks are bolted to two parallel rails which can be left freestanding or anchored to the ground. Rails are heavy duty 3”x1.4”x3/16” thick galvanized mounting rails. Specify rail mount for this option.
RACK OPTIONS
Arc Rack
Bike Bike Rack
Downtown Rack
Hoop Rack
Hoop Rack Heavy Duty
Swerve Rack
RACK ANGLE
90 45A 45B 60A 60B
©2021
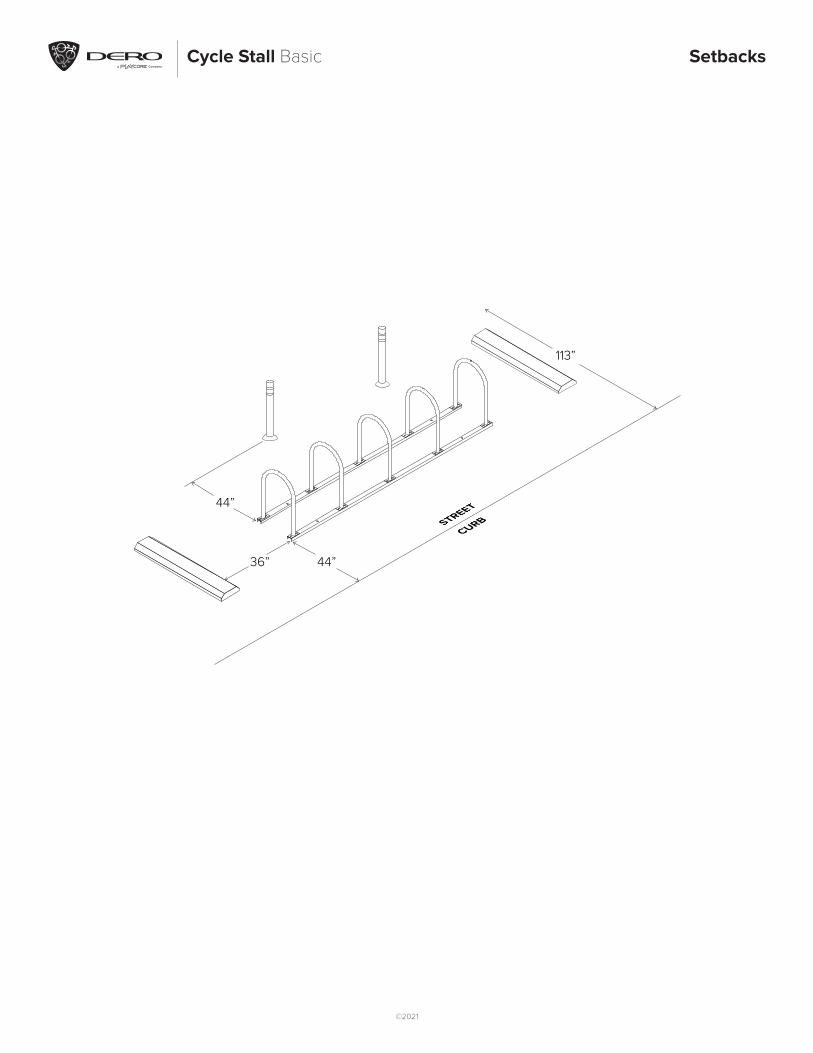
Cycle Stall Basic Setbacks
36” 44”
113”
44”
©2021
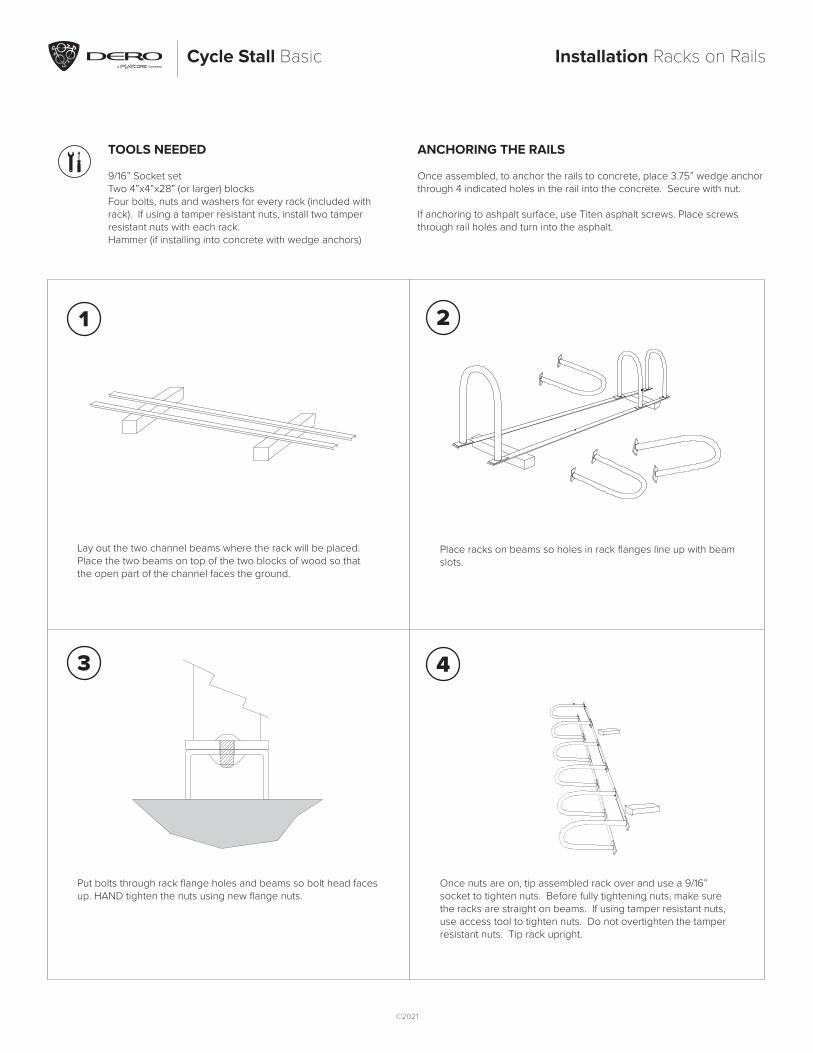
Installation Racks on RailsCycle Stall Basic
ANCHORING THE RAILS
Once assembled, to anchor the rails to concrete, place 3.75” wedge anchor through 4 indicated holes in the rail into the concrete. Secure with nut.
If anchoring to ashpalt surface, use Titen asphalt screws. Place screws through rail holes and turn into the asphalt.
TOOLS NEEDED
9/16” Socket setTwo 4”x4”x28” (or larger) blocksFour bolts, nuts and washers for every rack (included with rack). If using a tamper resistant nuts, install two tamper resistant nuts with each rack.Hammer (if installing into concrete with wedge anchors)
Place racks on beams so holes in rack flanges line up with beam slots.
Once nuts are on, tip assembled rack over and use a 9/16” socket to tighten nuts. Before fully tightening nuts, make sure the racks are straight on beams. If using tamper resistant nuts, use access tool to tighten nuts. Do not overtighten the tamper resistant nuts. Tip rack upright.
Lay out the two channel beams where the rack will be placed. Place the two beams on top of the two blocks of wood so that the open part of the channel faces the ground.
Put bolts through rack flange holes and beams so bolt head faces up. HAND tighten the nuts using new flange nuts.
1
3
2
4
©2021
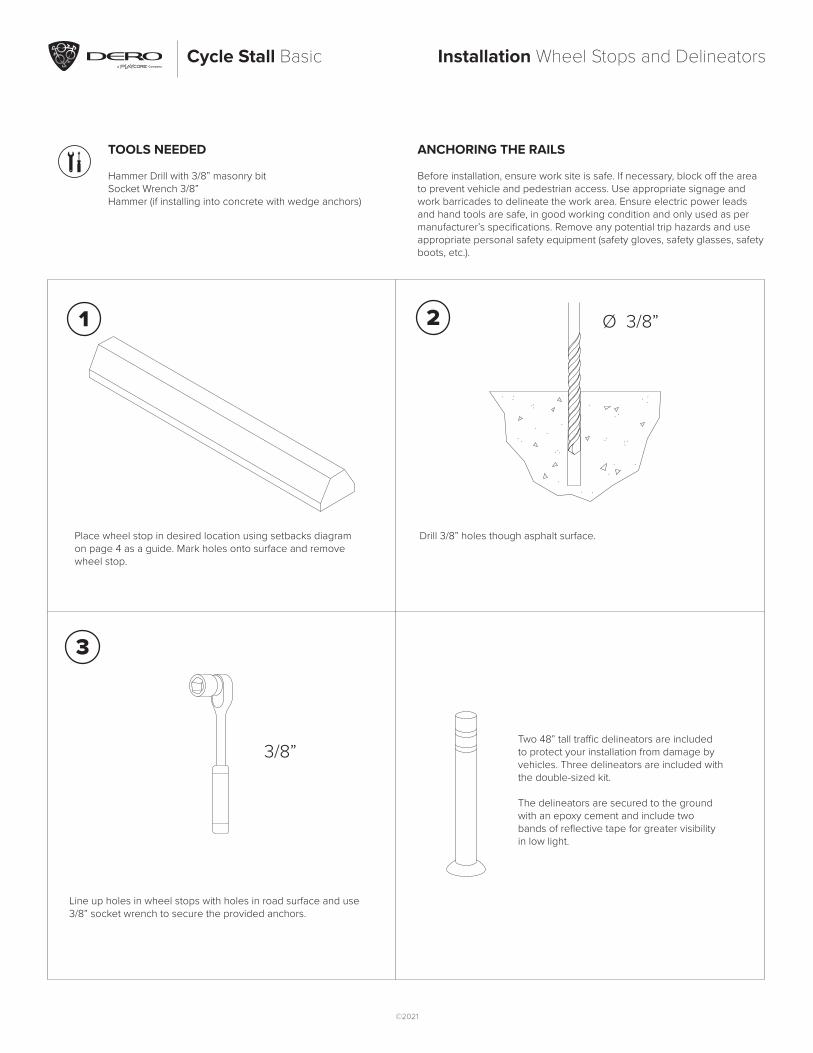
Installation Wheel Stops and DelineatorsCycle Stall Basic
ANCHORING THE RAILS
Before installation, ensure work site is safe. If necessary, block off the area to prevent vehicle and pedestrian access. Use appropriate signage and work barricades to delineate the work area. Ensure electric power leads and hand tools are safe, in good working condition and only used as per manufacturer’s specifications. Remove any potential trip hazards and use appropriate personal safety equipment (safety gloves, safety glasses, safety boots, etc.).
TOOLS NEEDED
Hammer Drill with 3/8” masonry bitSocket Wrench 3/8”Hammer (if installing into concrete with wedge anchors)
Drill 3/8” holes though asphalt surface.Place wheel stop in desired location using setbacks diagram on page 4 as a guide. Mark holes onto surface and remove wheel stop.
Line up holes in wheel stops with holes in road surface and use 3/8” socket wrench to secure the provided anchors.
Two 48” tall traffic delineators are included to protect your installation from damage by vehicles. Three delineators are included with the double-sized kit.
The delineators are secured to the ground with an epoxy cement and include two bands of reflective tape for greater visibility in low light.
1
3
2 Ø 3/8”
3/8”