creation and detection of arbitrary and simultaneous phase
TRANSCRIPT

Creation and detection of arbitrary and simultaneous phase and amplitude modulation of laser light
Jeremy Pigeona, Volker Quetschkeb David Reitzeb David Tannerb
aBloomsburg University, Bloomsburg, PA bUniversity of Florida, Gainesville, FL
ABSTRACT
An experimental setup capable of simultaneous amplitude and phase modulation
through the electro-optic effect was theoretically planned and constructed. In addition,
the capability of modulation with arbitrary waveforms was implemented and
experimentally tested.
1. INTRODUCTION
Gravitational wave detectors [1] have very strict requirements on their optical
components. The current control scheme for Advanced LIGO [2] requires phase
modulation of the interferometer input light at two frequencies Ω1 and Ω2. Some of the
length sensing error signals that are required to operate the detector can be detected at the
beat frequencies Ω1 ± Ω2. The signals with these frequency components are generated
inside the interferometer, and thus every signal that enters the interferometer at these
frequencies compromises the accuracy of the detector. As pure phase modulation with
two frequencies on one carrier always produces sidebands on sidebands, other ways to
impose the two frequencies on the incoming laser beam are investigated.
One method is to use a parallel approach, that is, to split the laser light in a Mach-
Zehnder interferometer and impose the two modulations separately on the two arms.
After recombining the beams, two sidebands without mixing terms will be present but
also some amplitude modulation will be present.
2
On the other hand, another method is to simultaneously apply phase and
amplitude modulation to artificially generate sidebands without mixing terms. This is
often called complex modulation and will be briefly discussed in the theory section.
To realize and investigate complex modulation, one must impose arbitrary phase
and amplitude modulations on laser light and measure the effect. This paper will explain
how electro-optic modulators can be used to realize both types of modulations even
though the use of an electooptic modulator (EOM) to generate amplitude modulation also
produces a certain amount of phase modulation. Therefore, in this paper we show that a
programmable function generator can be used to create arbitrary waveforms for both
modulation types. In addition, we also demonstrate how an optical cavity can be used as
an element to analyze the frequency components that are generated by the phase
modulation. Direct measurement of the amplitude modulation is done using a fast
photodiode.
2. THEORY
2.1 Complex Modulation
Complex Modulation is the long-term goal of this project and explained
mathematically here. An amplitude- and phase-modulated light field can be described as
E(t) = E0/2 exp(iωt + if(t)) + c.c. (1)
where f(t) is the modulation function which is defined as
f(t) = φ(t) + iα(t) (2)
where φ(t) is the real part of the function, the amplitude modulation and α(t) is the
imaginary part of the function, the phase modulation.

3
Extending the representation of the electromagnetic Field to complex values provides an
easy way to calculate the modulation function f(t) for arbitrary new fields in the
following equation:
Enew(t) = Eold(t)exp(if(t)). (3)
After some algebra we can identify our functions as
)(
)(ln)(
tE
tEt
old
new=α (4)
and
=
)(
)(arg)(
tE
tEt
old
newφ . (5)
For example, imagine that we want to modulate the laser light in order to create a
sideband without higher order sidebands. We define what we want Enew to be (using the
above mentioned complex representation):
( ) ( )( )timtimatiE
tEnew 11110 expexp)exp(
2)( Ω−−Ω+⋅= ω (6)
This leads to
( )( )timatf 11 sin2ln)( Ω+= , (7)
which defines )(tα and )(tφ . In principle all values for a are possible, but as most
amplitude modulators are only able to reduce the amplitude a should be chosen small
enough. The same considerations apply for m1; they have to be small enough so that the
original carrier can provide the energy. Figure 1 shows )(tα (red) and )(tφ (green) for
a=0.975 and m1=0.1.

4
Using complex modulation, it is in principle possible to create an arbitrary number of
sidebands.
Figure 1: The phase and amplitude modulation necessary for Eq. (6): )(tα (red) and )(tφ
(green).
2.2 The Electro-optic Effect – Electro-optic Retardation
Electro-optic retardation is the foundation upon which light modulation works.
Therefore, it is appropriate to provide an introduction to this theory. Imagine an optical
field that is incident normally upon an electro-optic crystal. We resolve the input field
into two mutually orthogonal components as
..]))/([exp()(
..]))/([exp()(
ccznctiAz
ccznctiAz
yy
xx
+−=+−=
ωωωω
E
E
(8)

5
where n is the index of refraction of the medium. The phase difference at the output
plane, z=L if L is the crystal length, is called the retardation. The retardation is given by
the difference of the exponents in Eq. (4) and is understood symbolically as
c
Vnyx
r0ωφφτ =−= (9)
where r is the electro-optic tensor for the crystal in question and V=EL, the product of the
electric field and the length of the crystal. This phenomenon, when applied, leads us to
our next topic, modulation [3].
2.3 The Electro-optic Effect – Phase Modulation
The change in the output phase of an electromagnetic wave incident
upon an electro-optic crystal is given by
∆φ = (-ωL/c)∆n (10)
where c is the speed of light, L is the length of the crystal and ∆n is the change in the
index of refraction due to the applied field [3]. If the voltage creating the electric field E
is sinusoidal, then
E = Emodulation sin(ωmodulationt) (11)
Therefore, if an incident electromagnetic field varies as Eincident = Acos (ωt), then the
output field will emerge modulated such that
Eout = Acos[ωt + δsin(ωmodulationt)]. (12)
In this case, δ is known as the phase modulation index, which characterizes the phase
modulation. The phase modulation index is given by
δ = ω∆n EmodulationL/2c = (π Emodulation∆nL) /λ. (13)

6
If we now look at the Bessel function identities
cos(δsinωmt) = J0(δ) + 2 J2(δ)cos2ωmt + 2 J4(δ)cos4ωmt + … (14)
and
sin(δsinωmt) = 2J1(δ)sinωmt + 2J3(δ)sin3ωmt + … (15)
then we can rewrite Eq, (12) in the following fashion:
...])4cos()()4cos()(
)3cos()()3cos()(
)2cos()()2cos()(
)cos()()cos()(cos)([
44
33
22
110
+−+++−−++
−++−−++=
tJtJ
tJtJ
tJtJ
tJtJtJA
mm
mm
mm
mmout
ωωδωωδωωδωωδ
ωωδωωδωωδωωδωδE
(16)
which gives us the distribution of energy in the sidebands as a function of the modulation
index [3]. Unfortunately, phase changes cannot be measured directly with a photodiode.
Therefore, a more elegant and indirect method must be invoked, an optical resonator.
2.4 Phase Modulation on a Cavity
An optical resonator or cavity (Fig. 2) offers an indirect method for measuring phase
modulation on laser light and is crucial to the experiment. To measure the effect of phase
modulation directly there would have to be a change in the intensity of the light.
Consider Eq. (16), remembering that ∗=∝ outoutoutEEI 2E , so if you were to calculate
Figure 2: An asymmetric cavity.

7
the intensity you would notice that the phase effects drop out due to the nature of the
complex conjugate. Regrettably, photodiodes can only measure intensity and are useless
for measuring phase unless we combine them with a cavity. To explain this method we
consider how the frequency of the light determines whether or not the cavity will
resonate. For the light to resonate within the cavity, the frequency of the electromagnetic
wave must be an integer number times the cavity’s free spectral range [4], which is given
by
d
cfsr 2
=∆υ (17)
where d is the length of the cavity. When near resonance, the cavity acts as a filter by
selectively transmitting the light that it is resonant with. Thus, if we use a photodiode to
measure the transmitted intensity from the cavity then we will see tjat we are near
resonance by observing a sharp peak in the intensity. Therefore, the free spectral range
can be thought of as a spectrum of transmission lines spaced evenly in frequency for
every cycle [3]. Consequently, this means that when the cavity is on resonance the
intensity of the reflected light should drop to zero. To elaborate, the beam that reflects
from the cavity is actually the coherent sum of two separate beams, the promptly
reflected beam and the leakage beam. The leakage beam is composed of light that
escapes from the cavity due to imperfect mirrors. These two beams have the same
frequency and, if near resonance, have nearly the same intensity. The phases of the two
beams, on the other hand, differ depending on the situation. On resonance, the phases of
the leakage and reflected beam differ by π radians. Therefore, when on resonance, both
beams will constructively interfere and completely cancel each other out, dropping the

8
intensity to zero [3]. To summarize, since the cavity is only resonant at one frequency
and when on resonance transmits nearly all of its light, it can be used as an optical
spectrum analyzer.
2.5 The Electro-optic Effect – Amplitude Modulation
Figure 3: Amplitude modulation setup.
The setup in Fig. 3 is one needed for amplitude modulation and is very similar to
the setup we used in this experiment. To explain amplitude modulation, we consider an
incident field that is vertically polarized (parallel to x) when entering the optical crystal.
Therefore, the field must have equal and in-phase components along the x’ and y’ axis
(the axis of the electro-optic crystal in Fig. 3) such that
tA
tA
y
x
ωω
cos
cos
'
'
==
E
E (18)
After emerging from the output face of the crystal, the x’ and y’ components have
obtained a phase shift, which in complex form is

9
)exp()(
)(
'
'
τiAL
AL
y
x
−==
E
E (19)
where τ is the retardation and L is the crystal length. After the second polarizer, the total
field is the sum of the y components of Ex’ and Ey’ at the position z = L, or
)1(2
−= − τiy e
AE
(20)
Notice how the phase is also changed from amplitude modulation. This is due to the fact
that the amplitude modulation is in fact a special case of phase modulation, and is what
makes simultaneous amplitude and phase modulation problematic [3]. By changing the
set-up and aligning the second polarizer with y’, we create an amplitude modulation that
is proportional to e-iτ.
2.6 Paraxial Ray Theory and Ray Matrices
Paraxial theory, although not applicable to this experiment, provides an excellent
path to understanding the theory that was invoked in order to plan the set-up. A paraxial
ray of an optical system is characterized by its distance x from the optical axis and its
slope x’ with respect to that axis. The ray path through any optical structure is dependent
only upon these two parameters and the optical qualities of the structure. This is
conveniently written as
x2 = Mabcd X x1 (21)
or expanded as
'' 2
2
1
1
x
x
DC
BA
x
x×= (22)

10
where x is a two by one determinant containing x and x’, and Mabcd is what is known as
the ray transfer matrix. This matrix is unique for the optical material and provides an
easy way to calculate beam propagation. In this experiment we will only need two
transfer matrices, the matrix to describe a thin lens and a transfer matrix for the beam
propagating through air.
10
1 dprop =M (22)
is the transfer matrix for the beam propagating in air, where d is the distance between the
two points.
11
01
flens −=M (23)
is the transfer matrix to describe the effect of a thin lens, where f is the focal length of the
lens [5]. The true beauty of the transfer matrix is realized when looking at a cascade of
optical elements. If you start with ray ro, which travels through three optical systems
described by, M1, M2, and M3, then to calculate the final ray, 01233 rMMMr = . Now that
we have defined the transfer matrix and have refreshed our memory on geometric optics,
it is time to learn how this same transfer matrix can be used to calculate Gaussian
propagation.
3.6 Transfer Matrices and Complex Gaussian Propagation

11
A Gaussian mode, sometimes referred to as the fundamental mode, has a
Gaussian distribution of energy in its spot size. The following applies to only the
Gaussian mode, similar equations can be used to explain higher order modes but these are
not necessary for our experiment. Moving away from paraxial ray analysis, we begin
imagining light as an electromagnetic wave, ψ described by a slowly varying complex
wave function explaining the nonuniform intensity distribution of the laser spot,
expansion of the beam, and the curvature of the phase front of the beam. A solution for ψ
can be written in complex form as [5]
2
(exp 2rq
kPi
+−=ψ (24)
In the above, P is known as the complex phase shift of the wave, k is the propagation
constant in the medium, and q is the complex beam parameter which explains the
Gaussian beam at a distance r from the optical axis [5]. The complex q value contains
information regarding the waist or radius of the laser spot, w, along with the radius of
curvature of the wavefront, R. Another very useful equality is:
−=
2)(
11
wi
zRq πλ
(25)
where λ is the wavelength of the light. What is called the “waist” of the laser beam,
where the beam is collimated the most; the wavefront is completely planar, which means
that the radius of curvature will approach infinity. Therefore, at the waist q is completely
imaginary and is given by
q0 = i π w02/ λ (26)
In addition, an useful equation to describe the waist changing through time is given by [5]
w2(z) = w02[1 + (λz/ π w0
2)2]. (27)

12
The light traveling through an optical system is given by the product of the transfer
matrix
DC
BA=M (28)
for every single element, as we have seen in Section (3.5).
Then, the transfer from a laser spot, q1, to a laser spot after the matrix, q2 is given by
q2 = (A q1 + B)/(C q1 + D), (29)
a value referred to as the complex beam parameter. This concept is incredibly important
for our experiment because most of the above equations are used to mode match the laser
beam to our cavity. Mode matching is the name given to the theoretical planning needed
to transform the laser light’s mode to that of the cavity. Therefore, it is the cavity that
defines the mode of the laser. In order to resonate within the cavity, the mode of the laser
must be transformed via optics so that it matches the cavity in question. Referring to
equation (25), to mode match to a cavity one must ensure that the radius of the phase
front matches that of the mirrors, the waist matches the cavity, and that the waist location
matches the ideal location within the cavity. Refer to Figure 2 to help visualize this
concept.

13
3. EXPERIMENTAL PROCEDURE
To begin with, the first step in our experiment was to learn how to program an
arbitrary function into the Stanford Research Model DS345 function generator. The
program used to communicate with the function generator was the Arbitrary Waveform
Composer (AWC), provided by Stanford Research Systems (SRS). The hardware used to
communicate with the function generator was the National Instruments Remote
Connector, which provides USB-GPIB communication. Through the GPIB port, the
programmability of the function generator was tested by feeding it sample functions and
observing that the functions were represented accurately through an oscilloscope (see
Appendix I for more thorough directions in programming the DS345). After
ascertaining that the function generator was working properly, the optical set-up of the
experiment began.
The first step was to measure the initial beam parameters of the laser. The laser
we used was Lightwave’s Non-planar ring oscillator (NPRO) YAG Laser, with a
wavelength of 1064 nm. This laser was chosen because it provides a light source with
high spatial, frequency, and intensity stability. The measurement of the initial parameters
was completed using the WinCamB, which is a camera capable of detecting infrared
light. We placed the WinCamB at incremental distances from the laser and at each
distance the diameter of the beam spot was measured. Afterwards, the square of the
radius versus the distance from the laser was plotted (see Figure 4) and fit to Equation
(27). Next, using the fit and some algebra, we calculated the waist of the laser and the
position of the waist (Fig. 4).

14
The second step was to use Equations (22), (23), and (25) in order to calculate the
lens positioning in the apparatus. This needed to be done in order to transform the mode
of the light to fit the cavity at the end of the laser path. Only two lenses were used, of
focal lengths 250 mm and 200 mm. A computer program was developed in Maple to
numerically solve for the separation of the lenses (see Appendix II). In addition, the
coding was done such that Maple would plot the beam waist versus distance (refer to
Figure 5).
Finally, after the theoretical planning was complete, the final apparatus (Fig. 6)
was built. Three photo-diodes are included within the apparatus, one to measure the
reflected light from the cavity, the transmitted light from the cavity, and one to measure
the effects of the amplitude modulation. In addition, a simple LCD camera is placed
behind the cavity to monitor the modes of the light inside. Examples of the output on the
camera when close to resonance can be found in Fig. 7. A cavity mirror is mounted on a
piezoelectric transducer, which varies the length of the cavity when connected to a
function generator, allowing us to scan the cavity resonant frequency [see Eq. (20)].
After the apparatus was built, the set-up was tested in order to ensure that it was
capable of detecting the effects of complex modulation. First, the amplitude modulation
and function generator programmability were tested. To test this, the amplitude
modulator was fed a dampened sine wave of the form )exp()(sin)( bttxf ω= . The value
b was arbitrarily chosen to be -5, the amplitude was set at 10 V and the frequency was set
to 1 MHz. The waveform sent from the computer to the function generator included
16,300 amplitude points. The result was the same dampened sine wave, which appeared
as a fluctuation in intensity. A hardcopy of the oscilloscope’s readout is shown in Fig 8.

15
Next, we tested the phase modulation capability. A phase modulation was
imposed upon the laser. Modulation frequency was set at 12 MHz with a peak-to-peak
amplitude of 5 V. The result was observed using the photodiode receiving the
transmitted light from the cavity, which displayed the large carrier signal along with the
two resonant sidebands created by the modulation (see Fig 9). Afterwards, the time scale
on the oscilloscope was increased in order to measure a free spectral range (Figure 10).
This was measured to verify that the alignment was good within the cavity.
4. RESULTS
Our results are summarized in Figs. 4–10 below.
Distance from starting point (m) 0.2 0.3 0.4 0.5 0.6 0.7 0.8 0.9
Wai
st S
quar
ed (
m 2 )
0.0000000
0.0000002
0.0000004
0.0000006
0.0000008
0.0000010 Figure 4: Gaussian fit of laser beam expansion.
Equation of the Line:w 2 = 2.39928661e-06*Z^2 -1.21852574e-06*Z +1.85039843e-07Wo=214um ; Zo(distance from zero point to beam waist) = 26.6cm

16
Figure 5: Maple plot of beam waist vs. distance. L is the length from our zero point to the
front face of the cavity and f1 and f2 are our focal lengths of our lenses. In addition, d1 is
the distance from the zero point to the first lens, and d2 is the distance between the two
lenses. From the left, the first two vertical lines are lenses and the last two are the cavity.
The largest vertical line in the middle of the cavity is the theoretical waist location.

17
Figure (6): The experimental apparatus. BS stands for beam splitter; PBS polarizing
beam splitter; M a mirror; L a lens; HWP a half wave plate; PD photodiode; AR anti
reflection plate; QWP quarter wave plate.

18
Figure 7: Sample pictures from the camera near resonance. The first image is the
TEM 00 mode, otherwise known as the fundamental mode. This cavity mode is what
defines a Gaussian beam.
Figure 8: The dampened sine wave appearing as amplitude modulation.

19
Figure 9: Phase modulation demonstrating resonant sidebands.

20
Figure 10: Free spectral range of the cavity. The free spectral range is the distance
in between the two middle peaks. Smaller peaks in between these two would be an
indication of higher order modes, which is an indication of bad alignment. The reason
that the two peaks are not the same size is most probably due to limitations in the
resolution of the oscilloscope.
5. DISCUSSION
5.1 Error Analysis
Considering that the entire purpose of this experiment was to create an experimental
set-up, it is not useful to discuss uncertainties at this point. However, there are definitely
improvements that can be made to this procedure. Namely, one aspect of the experiment
that was forgotten was the influence of the modulators in the optical path length. Each

21
modulator has an index of refraction, which is greater than that of air, so each modulator
increases the optical path length by a few centimeters. This increase in optical path
length was not taken into consideration when computing the lens spacing, providing
room for a small error. Similarly, the polarizing beam cubes and beam splitters also add
to the optical path length. The effect from the cubes, however, is small when compared to
the effect from the crystals.
5.2 Conclusion
To summarize, an apparatus to measure and characterize arbitrary phase and
amplitude modulation has been built and experimentally tested. This setup will be used
in the future to investigate the possibilities of complex modulation.
Acknowledgments
We thank Muzammil A. Arain, Wan Wu, Aaron Worley, Ramsey Lundock, Stacy Wise
for assistance with this project. In addition, Jeremy Pigeon would personally like to
thank the NSF and the University of Florida for hosting the physics REU program.
22
REFERENCES
[1] B. Abbott et al. (LIGO Science Collaboration), Nucl. Instrum. Meth. A517,
154-179 (2004).
[2] E. Gustafson, D. Shoemaker, K. Strain, R. Weiss, “LSC White Paper on Detector
Research and Development”, LIGO Technical Note T990080-00,
<http://www.ligo.caltech.edu/docs/T/T990080-00.pdf>.
[3] Yariv, Quantum Electronics, 3nd Edition (Wiley and Sons, New York, U.S., 1989).
[4] Black, Erik D., “An Introduction to Pound-Drever-Hall Laser frequency
Stabilization,” Am. J. Phys. 69, 79-87, (2001).
[5] H. Kogelnik and T. Li, “Laser Beams and Resonators,” Applied Optics
5, 1550-1566 (1966).
23
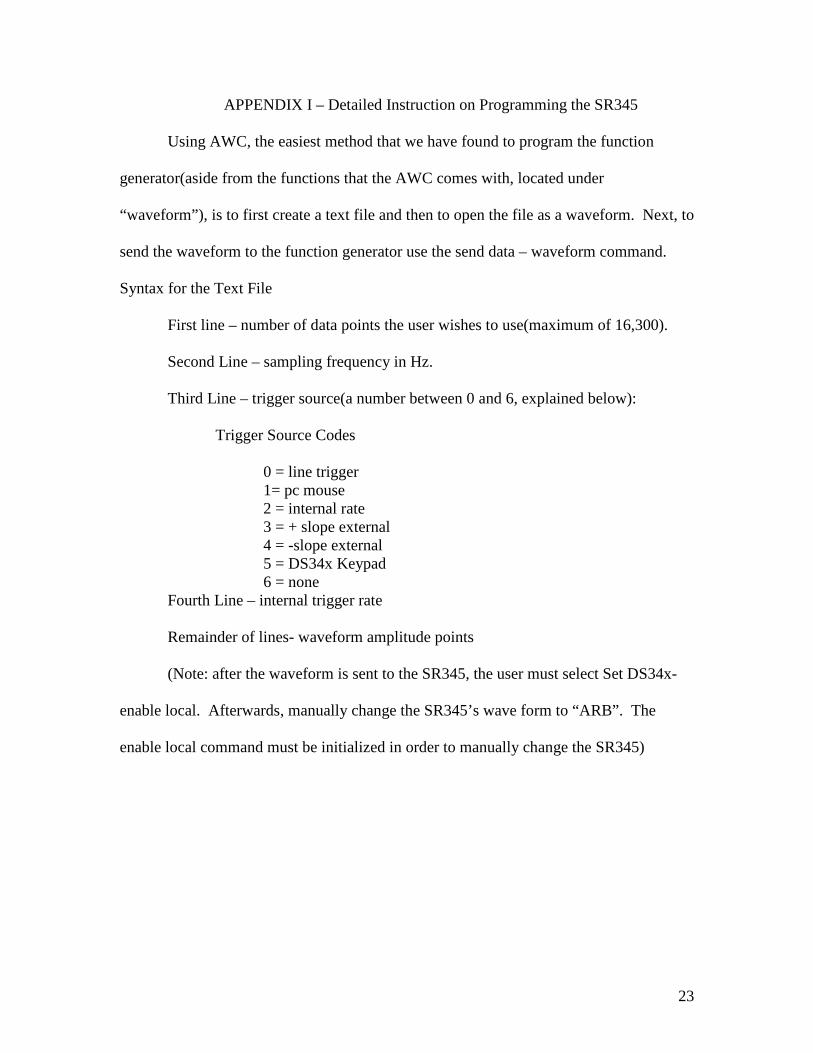
APPENDIX I – Detailed Instruction on Programming the SR345
Using AWC, the easiest method that we have found to program the function
generator(aside from the functions that the AWC comes with, located under
“waveform”), is to first create a text file and then to open the file as a waveform. Next, to
send the waveform to the function generator use the send data – waveform command.
Syntax for the Text File
First line – number of data points the user wishes to use(maximum of 16,300).
Second Line – sampling frequency in Hz.
Third Line – trigger source(a number between 0 and 6, explained below):
Trigger Source Codes
0 = line trigger 1= pc mouse 2 = internal rate 3 = + slope external 4 = -slope external 5 = DS34x Keypad 6 = none
Fourth Line – internal trigger rate
Remainder of lines- waveform amplitude points
(Note: after the waveform is sent to the SR345, the user must select Set DS34x-
enable local. Afterwards, manually change the SR345’s wave form to “ARB”. The
enable local command must be initialized in order to manually change the SR345)

24
APPENDIX II – Maple Code Written to Mode-Match The Laser to the Cavity
#Copyright 1998 Oliver Brozek #Copyright 2001-2006 Volker Quetschke #Copyright 2006 Jeremy Pigeon > restart:with(linalg,multiply): > with(plots,display): > with(plottools,line): > Digits:=18; > pi:=evalf(Pi); > lambda:= 1064e-9; #Wavelength of Laser > Mtrans := proc(d) matrix(2,2,[1,d,0,1]) end; > Mlens := proc(f) matrix(2,2,[1,0,-1/f,1]) end; > qABCD := proc(q,M) (q*M[1,1]+M[1,2])/(q*M[2,1] + M[2,2]) end; > Rq := proc(q) (1/Re(1/q)) end; #Real Part of Comp lex 'q' parameter > IRq := proc(q) Re(1/q) end; #1/real part of para meter > Iq := proc(q) 1/q end; #1/q = 0 -> focus > wq := proc(q) sqrt(-lambda/Im(1/q) / pi) end; > # fixed parameters > L := 2.26; #Distance to cavity > f1 := .25; > f2 := .2; > w[las]:= 200e-6; # beam waist at start > #R[las]:= .4; # Distance from laser waist to ar b. position 0 > R[las]:= -0.266; > q[las]:=evalf(1/( -I*lambda/(Pi * (w[las])^2))); > # Calculate cavity parameter arbitrary resonator > R1:=0.3; R2:=0.5; #Radius of curved mirror > Lcav:=.16; #distance between mirrors > z1:=Lcav*(R2-Lcav)/(R1+R2-2*Lcav); z2:=Lcav*(R1-L cav)/(R1+R2-2*Lcav); > z1+z2; > #z1 is the distance from the first mirror to wais t, z2 is the distance > #from the waist to the second lens, the second co mmand is a test line > w[cav]:=evalf( ((lambda/Pi)^2*Lcav*(R1-Lcav)*(R2- Lcav)*(R1+R2-Lcav)/(R1+R2-2*Lcav)^2)^(1/4) ); > # The entry mirror might form a lens (for fused s ilica): > f[cav]:=-R1/(1.4492-1); > #Clear these variables > unassign('d1','d2'); > Mlasz:=Mtrans(R[las]+z): # matrix for the laser moving down z [-R[las],0] > #Def.: M1z for z axis [0,d1], distance before Len se 1 > M1z := multiply(Mtrans(z),Mtrans(R[las])): > #Def.: M2z forr z axis [d1,d1+d2], dist. after Le nse 1 before Lense 2 > M2z := multiply(Mtrans(z-d1),Mlens(f1),Mtrans(d1) ,Mtrans(R[las])): > #Def.: M3z for z axis [d1+d2,L], dist. after Lens e 2 before Cavity > M3z := multiply( Mtrans(z-d1-d2), Mlens(f2), Mtra ns(d2), Mlens(f1), Mtrans(d1), Mtrans(R[las]) ): > # Define Mcavmirr to either "nothing" or the lens formed by the > # curved mirror, depending from which side the li ght is coming. > Mcavmirr:=Mlens(f[cav]); > #Mcavmirr:=Mtrans(0); > #Def.: M3cz for z axiss [L,...], in Cavity > M3cz := multiply( Mtrans(z-L), Mcavmirr, Mtrans(L -d1-d2), Mlens(f2), Mtrans(d2), Mlens(f1), Mtrans(d1), Mtrans(R[las]) ): > #Def.: M3 for Position L > M3 := multiply( Mtrans(L-d1-d2), Mlens(f2), Mtran s(d2), Mlens(f1), Mtrans(d1), Mtrans(R[las]) ): > qlas:=qABCD(q[las],Mlasz): > wq(qlas): > Rq(qlas): > q1:=qABCD(q[las],M1z): > wq(q1): > Rq(q1): > q2:=qABCD(q[las],M2z): > wq(q2): > Rq(q2): > q3z:=qABCD(q[las],M3z): > wq(q3z): > Rq(q3z):

25
> q3cz:=qABCD(q[las],M3cz): > wq(q3cz): > Rq(q3cz): > q3:= (d1,d2) -> qABCD(q[las],M3 ); > unassign('d1', 'd2');assume(d1, real);assume(d2,r eal); > d1_help:=d1; > # cmplex beam parameter for cavity waist > q[cav]:=I*pi*(w[cav])^2/lambda; > # Either we couple through the curved mirror (cas e 1.) or have > # the waist on the 1st mirror (case 2.) > # case 1: propagation trough cavity and mirror > qX:=qABCD(q[cav],multiply( Mlens(f[cav]), Mtrans( z1) )); > # case 2: waist on plane mirror > #qX:=q[cav]; > # reverse the real part to get the beam "left" of the waist. > qX:=-conjugate(qX); > > # Laser and cavity beam parameters must match > GL_q:=-q3(d1,d2) + qX; > > #_EnvExplicit:=true;_EnvAllSolutions:=true;_EnvTr yHard:=true; > dsols:=solve(Re(GL_q),Im(GL_q));_SolutionsMayBe Lost; > dsols; > i:=0:for x in dsols do > d1_temp:=subs(x,d1);d2_temp:=subs(x,d2); > if ( 0 < d1_temp and d1_temp < L and 0 < d2_tem p and d2_temp < L) then; > i:=i+1; > print(d1_temp,d2_temp); > d1_temp2:=d1_temp;d2_temp2:=d2_temp; > fi; > od:print(i); > d1:=d1_temp2;d2:=d2_temp2; > #dsol:=dsols[8]; > #d1:=subs(dsol,d1); > #d2:=subs(dsol,d2); > #plotsetup('window'); > plot1:=plot(wq(q1),z=0..d1): > plot2:=plot(wq(q2),z=d1..d1+d2): > plot3:=plot(wq(q3z),z=d1+d2..L+0.5): > plot_waist:=plot(IRq(q3cz),z=d1+d2..L+0.5): > plot5:=plot(wq(q3cz),z=L..L+0.5,color=green): > l1:=line([d1,0], [d1,0.0005], color=red, linestyl e=1): > l2:=line([d1+d2,0], [d1+d2,0.0005], color=red, li nestyle=1): > l3:=line([L,0], [L,0.0005], color=blue, linestyle =1): > l4:=line([L-0.05,w[cav]], [L+Lcav+0.05,w[cav]], c olor=cyan, linestyle=1): > lcav:=line([L+Lcav,0], [L+Lcav,0.0005], color=blu e, linestyle=1): > ### WARNING: sprintf now outputs strings; nprintf can be used if names are wanted > heading:= sprintf(`L = %d, f1 = %d, f2 = %d, d1 = %.1f, d2 = %.1f [mm]`,round(L*1000),round(f1*1000),round(f2*1000),d 1*1000,d2*1000); > display(plot1,plot2,plot3,plot5, > l1,l2,l3,l4, > plot_waist,lcav, > view=[0..L+0.7,0..0.001],title=heading); > #display(plot4,view=[-R[las]..L+0.3,-0.03..0.03]) ;