creating map images for commenting in regulations.gov
TRANSCRIPT

1 | P a g e
Creating map images for commenting in Regulations.gov - using MarineCadastre.gov
This is not a set of instructions for using Regulations.gov. These instructions will show you how to create a map using MarineCadastre.gov which you can submit within Regulations.gov as an image to make a point or inform the agency you are commenting to. Information on How to Use Regulations.gov is found here: http://www.regulations.gov/#!help Before you choose one of the two methods, determine if you are able to create a screen image on your computer. The easiest built in method to do this is to simply press the Prnt Scrn button on your computer which will make an image of your entire computer monitor’s visual contents and save it to the copy queue. You can then paste this into another document such as MS Word or MS Paint, and save the file. You may also have other tools such as Snipping Tool found with MS Windows, or other special screen grab tools. If you don’t have any of these tools available, you can always create a pdf file of your map using the , or in National Viewer using the ArcGIS.com
MarineCadastre.gov Data Registry.
Regulations.gov allows a user to attach a file along with your comments. You may attach multiple files. There are a variety of file formats that Regulations.gov will accept. You will need to attach all files individually. Do not try to attach a .zip file. Below is an image of what the Regulations.gov file upload portion of the screen looks like.
Now that you’ve established that you can create an image from your computer screen, we can continue with learning how to make the map you want. ---------------------------------------------------------------- The has over 270 map layers available. The viewer layers will not always MarineCadastre.gov National Viewerdisplay in the order that you would like. However, most layers can be rearranged in the order you desire, however symbols and colors are not editable. If you are a little more ambitious and willing to play with the layers, you can use arcgis.com through MarineCadastre.gov’s Data Registry. This guide will cover both options.
Tutorial: Using the National Viewer to create an image file
In your URL window type: http://marinecadastre.gov/nationalviewer/Now the basic map is loaded. If you would like a different background layer, you can choose your Basemap of choice from the tools bar. Nautical Charts is a separate layer found among the other available layers in the dataset list and can be turned on along with the basemaps. Using the transparency slider allows you to see other basemap information through the charts.
Other tools on the toolbar will be covered later.
Zoom or Pan to your area of interest: Use the +/- buttons in the lower left corner of the map, or just zoom in or out using your mouse wheel. Place your cursor anywhere on the map to drag the map around in the window.

2 | P a g e
Choose layers of interest: When you first open the National Map Viewer, the layers can be turned on or off by clicking on the eyeball icon to the left of each layer. Layers are listed in alphabetical order. There are over 275 layers available, so searching for your layers by layer title or words within the layer description may be helpful. You may also search by keyword tags so you could type in the word West Coast for instance and find all the layers that cover all or part of the West Coast. The image below has found all layers that contain the words oil and gas in the descriptive text or title. You can see in the small grey box above the layers that it has found 14 layers. Clicking on the eyeball on any of these layers will add the layer into the Active Layers tab. You may continue to search and add layers to the active layers tab as you find those of interest.
Note: Not all layers have national coverage. Read the information found in each layer description to determine if it is available in your area of interest. There is a trashcan icon available in the Active Layers tab that you can use to get rid of layers you do not care to include. simply means that you need to zoom in further to see the layer. OUT OF SCALE
Notice below that all my active layers are turned on (there are currently 7), but some are sitting on top of others and I would like to see the wells and platforms above the lease blocks. You may reorganize the layers in the order you want so the one that you want on top is listed first. You may also drag the layer opacity bar so that you can see through some of the layers.

3 | P a g e
At any time you can go back to the All Layers tab to add more available layers to your map.

4 | P a g e
There are a number of tools available to you – the first in the toolbox is the Draw Tool. You can draw points, circles, lines, polygons and text. These are only available during your current session, but they can be useful if printing or screen grabbing a map.
Just choose the type of draw item you would like, and start drawing, naming, measuring, and change the style of anything you choose. By clicking on the red tools menu to the right of the word LABEL, you can edit the items you have already placed.
Below, I’ve drawn a line, a measurement, and a label. I’ve also drawn a polygon with a buffer and a label.

5 | P a g e
To know more about the layers you are viewing, you can click the Legend tool to the right of the Basemap tool. This simply creates a visual scrollable legend to show you the classifications of the map items you have chosen to view. To turn it off, simply click on the legend tool again.
You can also investigate each layer individually by clicking on one of the many information items found in the All Layers, or Active Layers tab.

6 | P a g e
Another tool to be aware of is the Share URL tool.
Simply click on this tool, and then copy the link it returns and paste it into an email to yourself or save it in a document, and any time you want to see this map or share it with others, all you need to do is click on the link and MarineCadastre.gov will rebuild the map. It can only rebuild the layers you had turned on and keep your zoom window extent. It does not keep graphics and text that you draw on the screen. If you are happy with the map as is, this may be the time to save it as a pdf using the , or use your own Print toolscreen capture tool and go back to the instructions on including a file in Regulations.gov.
Using the Print Tool

7 | P a g e
Make sure you have all your layers open and you have your map centered so that you can see everything you want to make into a pdf file. The amount of map space you will see is dependent on your printer settings, but in general it is better to zoom out a bit more than needed to capture the whole area.
You will be presented with a map, an editable title, and ability to turn off specific legend items, if you choose for simplicity. Below, I have turned off the seismic anomalies legend items, but the map will still contain the features. I also give the map a name. I will then hit the “Print My Map” button at the bottom.
Below I’ve chosen Adobe PDF instead of a printer, and picked Tabloid size for the paper size equivalent to my display size.
8 | P a g e
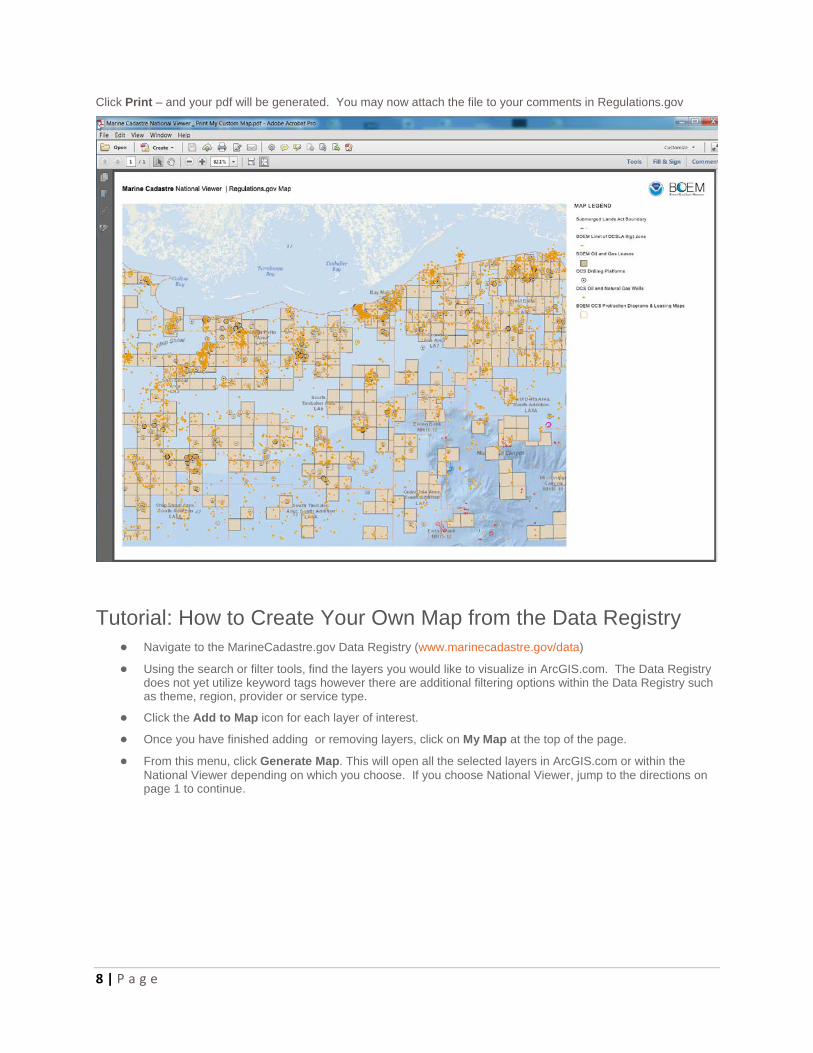
Click Print – and your pdf will be generated. You may now attach the file to your comments in Regulations.gov
Tutorial: How to Create Your Own Map from the Data Registry
● Navigate to the MarineCadastre.gov Data Registry (www.marinecadastre.gov/data) ● Using the search or filter tools, find the layers you would like to visualize in ArcGIS.com. The Data Registry
does not yet utilize keyword tags however there are additional filtering options within the Data Registry such as theme, region, provider or service type.
● Click the Add to Map icon for each layer of interest. ● Once you have finished adding or removing layers, click on My Map at the top of the page. ● From this menu, click Generate Map. This will open all the selected layers in ArcGIS.com or within the
National Viewer depending on which you choose. If you choose National Viewer, jump to the directions on page 1 to continue.

9 | P a g e
Items of Note:
● If there are performance issues (layer not drawing, partial layer drawing, slow draw speed, etc.) with a particular layer it is best to add the entire whole map service and turn on the layers you would like to view from there.
o From within ArcGIS.com click MODIFY MAP. o Click Add Layer From Web
Copy the service URL in the entry prompt and remove the number at the end of the service URL. • For instance, if interested in Aids to Navigation within this service URL‒
https://coast.noaa.gov/arcgis/rest/services/MarineCadastre/NavigationAndMarineTransportation/MapServer/0
• Add the URL minus the trailing number ‒ https://coast.noaa.gov/arcgis/rest/services/MarineCadastre/NavigationAndMarineTransportation/MapServer/
More information on the use of REST services within ArcGIS Online can be found here.
If you want to add text or draw features, you will need to go to Add Icon , and pick Map Notes. Once added to the map, it will present a number of options for you to draw features or add text. Choosing the option for just “Map Notes” gives you general polygon, circle, point, and line drawing options. Other Map Notes option choices provides a menu of symbols to choose from.

10 | P a g e
When you have completed your additions, you can use your screen capture tool to make a copy of the image on your screen. You can also use the Print option in ArcGIS.com, but we have found that using the print option from your browser actually works better. Just set up the adobe pdf as your printer option and pick the page size that will include your entire screen area.
Note: The MarineCadastre.gov REST services are routinely updated every three months. This often includes adding new layers, which renumbers the layers depending on where the new layers are placed within the services. This will affect any maps saved with the layers found in the altered service. We send out notifications to our users before

11 | P a g e
these updates take effect. If you would like to be placed on this email list, please fill out the form located here: http://marinecadastre.gov/subscribe/ Fill out the form, be sure to check the box for Data Services . Notification, and click Subscribe.