creating false color rgb images using infrared data from wise · pdf filecreating false color...
TRANSCRIPT
Creating False Color RGB Images Using Infrared Data from WISEPurpose: To teach high school astronomy students how to use the IRSA Finder Chart in the NASA/IPAC data-base to locate and download infrared data files from WISE and other missions, then use IR images of various wavelengths to create false color RGB images.
Part 1: Using IRSA to Locate and Download Infrared Images
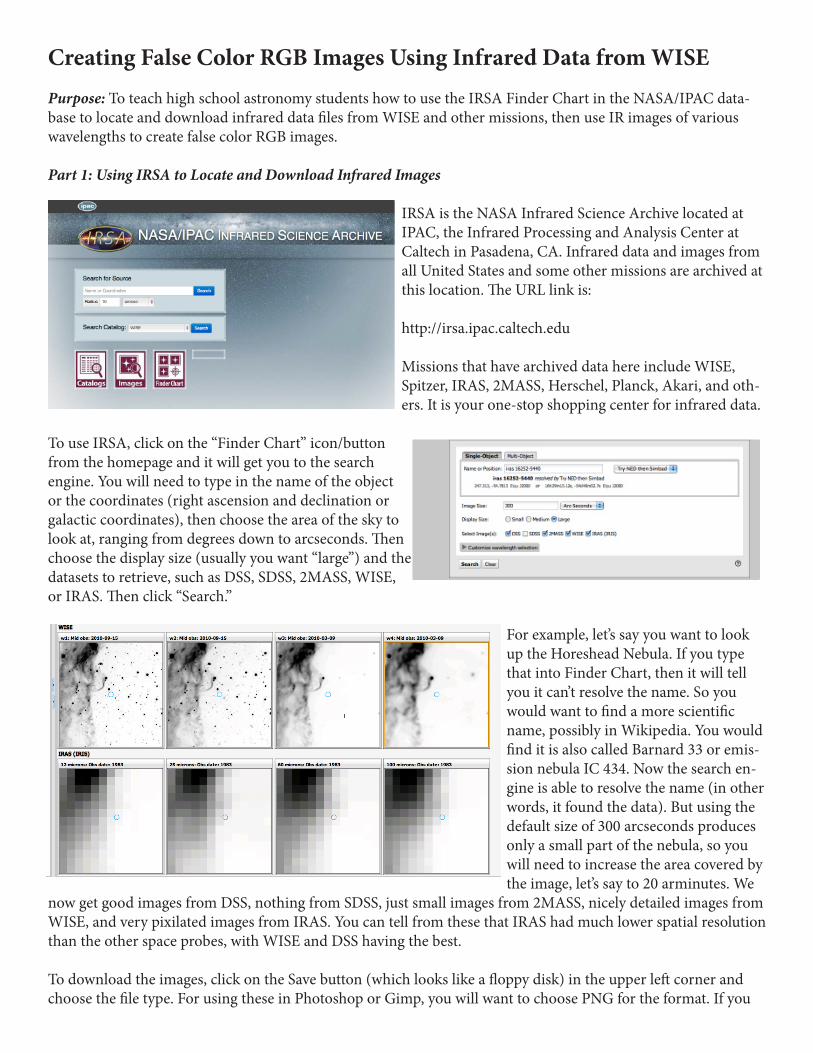
IRSA is the NASA Infrared Science Archive located at IPAC, the Infrared Processing and Analysis Center at Caltech in Pasadena, CA. Infrared data and images from all United States and some other missions are archived at this location. The URL link is:
http://irsa.ipac.caltech.edu
Missions that have archived data here include WISE, Spitzer, IRAS, 2MASS, Herschel, Planck, Akari, and oth-ers. It is your one-stop shopping center for infrared data.
To use IRSA, click on the “Finder Chart” icon/button from the homepage and it will get you to the search engine. You will need to type in the name of the object or the coordinates (right ascension and declination or galactic coordinates), then choose the area of the sky to look at, ranging from degrees down to arcseconds. Then choose the display size (usually you want “large”) and the datasets to retrieve, such as DSS, SDSS, 2MASS, WISE, or IRAS. Then click “Search.”
For example, let’s say you want to look up the Horeshead Nebula. If you type that into Finder Chart, then it will tell you it can’t resolve the name. So you would want to find a more scientific name, possibly in Wikipedia. You would find it is also called Barnard 33 or emis-sion nebula IC 434. Now the search en-gine is able to resolve the name (in other words, it found the data). But using the default size of 300 arcseconds produces only a small part of the nebula, so you will need to increase the area covered by the image, let’s say to 20 arminutes. We
now get good images from DSS, nothing from SDSS, just small images from 2MASS, nicely detailed images from WISE, and very pixilated images from IRAS. You can tell from these that IRAS had much lower spatial resolution than the other space probes, with WISE and DSS having the best.
To download the images, click on the Save button (which looks like a floppy disk) in the upper left corner and choose the file type. For using these in Photoshop or Gimp, you will want to choose PNG for the format. If you
will be using DS9, then choose FITS format. When the PNG file pops up in your Preview window, you will need to resave it under a better name, such as the name of the object and which mission/wavelength the image is, such as WISE 4 or 2MASS H band. Save them in a folder other than the downloads folder for easier access.
Part 2: Combining Images in RGB
You will want to open Adobe Photoshop and choose “File-Open” and open three of the four WISE im-ages or all three of the 2MASS bands. For WISE, I recommend either the WISE 1 or 2 (3.4 or 4.6
microns) for the blue channel, WISE 3 (12 microns) for the green channel, and WISE 4 (22 microns) for the red channel.
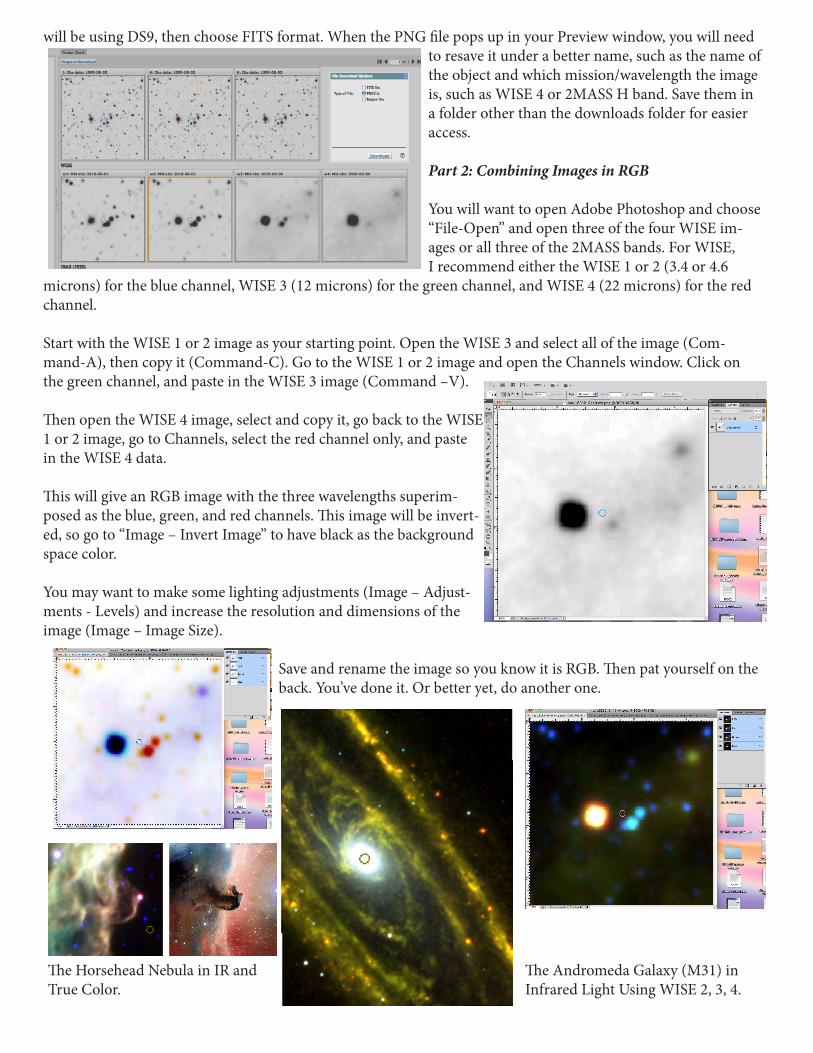
Start with the WISE 1 or 2 image as your starting point. Open the WISE 3 and select all of the image (Com-mand-A), then copy it (Command-C). Go to the WISE 1 or 2 image and open the Channels window. Click on the green channel, and paste in the WISE 3 image (Command –V).
Then open the WISE 4 image, select and copy it, go back to the WISE 1 or 2 image, go to Channels, select the red channel only, and paste in the WISE 4 data.
This will give an RGB image with the three wavelengths superim-posed as the blue, green, and red channels. This image will be invert-ed, so go to “Image – Invert Image” to have black as the background space color.
You may want to make some lighting adjustments (Image – Adjust-ments - Levels) and increase the resolution and dimensions of the image (Image – Image Size).
Save and rename the image so you know it is RGB. Then pat yourself on the back. You’ve done it. Or better yet, do another one.
The Horsehead Nebula in IR and True Color.
The Andromeda Galaxy (M31) in Infrared Light Using WISE 2, 3, 4.