creating a free trial azure subscription · if you already have a microsoft account that has not...
TRANSCRIPT
Creating a Free Trial Azure Subscription
If you already have an Azure subscription, you can skip this section. Otherwise, follow these
steps to create a free trial subscription. You will need to provide a valid credit card number for
verification, but you will not be charged for Azure services.
Note: Trial subscriptions grant access only for a limited time. You may want to initiate your
free trial when you are ready to begin your first lab assignment. The free trial is not available in
all regions.
For more information, visit the Azure free trial FAQ page at https://aka.ms/edx-dat217-faq-az.
If you already have a Microsoft account that has not already been used to sign up for a free
Microsoft Azure trial subscription, you’re ready to get started. If not, don’t worry—just create a
new Microsoft account at https://signup.live.com.
After you’ve created a Microsoft account, browse to https://aka.ms/edx-dat217-az and click the
Start now button. Then follow the instructions to sign up for a free trial subscription to
Microsoft Azure. You’ll need to sign in with your Microsoft account if you’re not already signed
in. Then you’ll need to:
Enter your cellphone number and have Microsoft send you a text message to verify your
identity
Enter the verification code sent to you
Provide valid payment details—don’t worry, your credit card won’t be charged for any
services you use during the trial period, and the account is automatically deactivated at
the end of the trial period, unless you expressly request to keep it active.

Provisioning an Azure VM
In this exercise, having signed in to the Azure Portal by using your Azure subscription, you will
provision an Azure VM to support all three labs for this course.
Note: The Azure VM will should be stopped (deallocated) at the end of each lab so that your
subscription is not charged (for free trial subscriptions, this will ensure you will have sufficient
credits left to complete the labs over the duration of the course).
Provisioning an Azure VM In this task, you will sign in to the Azure Portal, and then provision an Azure VM.
1. Sign in to the Azure Portal by using your subscription.
2. In the left pane, select Virtual Machines—do not select Virtual Machines (Classic).
3. In the Virtual Machines blade, click Add.
4.

5. In the Marketplace blade, in the search box, enter SQL Server 2016, and then press Enter.
6. Select the SQL Server 2016 RTM Enterprise on Windows Server 2012 R2 image.
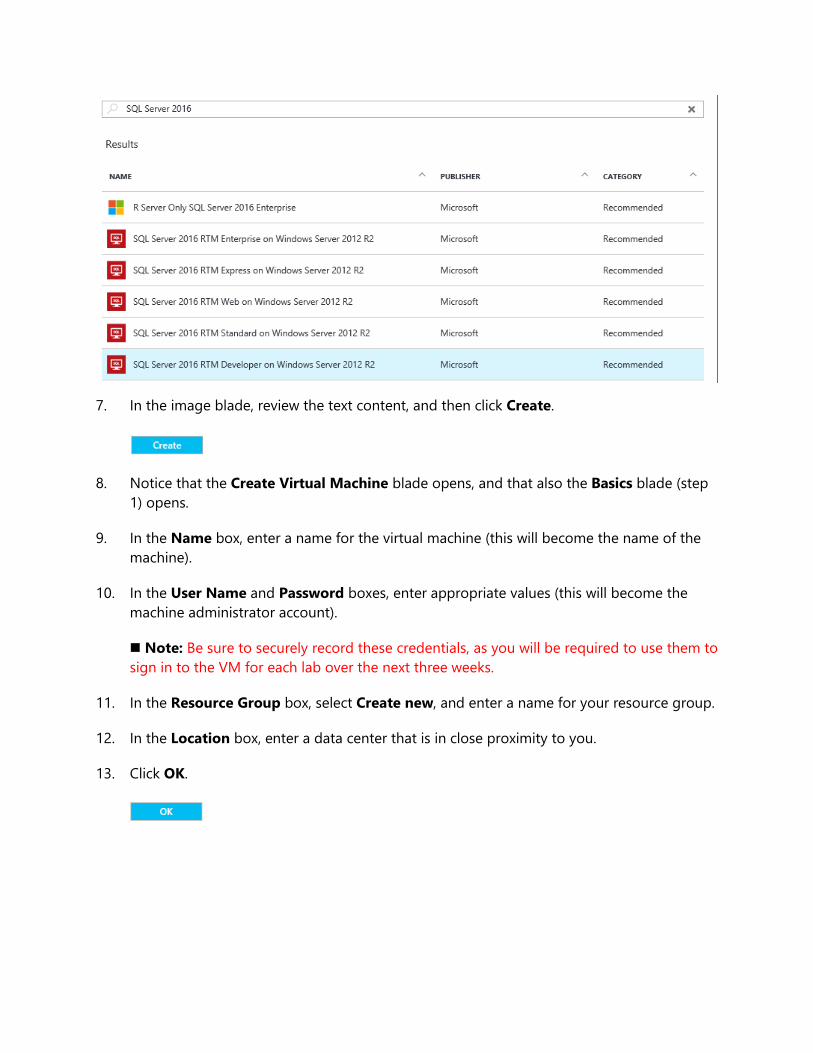
7. In the image blade, review the text content, and then click Create.
8. Notice that the Create Virtual Machine blade opens, and that also the Basics blade (step
1) opens.
9. In the Name box, enter a name for the virtual machine (this will become the name of the
machine).
10. In the User Name and Password boxes, enter appropriate values (this will become the
machine administrator account).
Note: Be sure to securely record these credentials, as you will be required to use them to
sign in to the VM for each lab over the next three weeks.
11. In the Resource Group box, select Create new, and enter a name for your resource group.
12. In the Location box, enter a data center that is in close proximity to you.
13. Click OK.
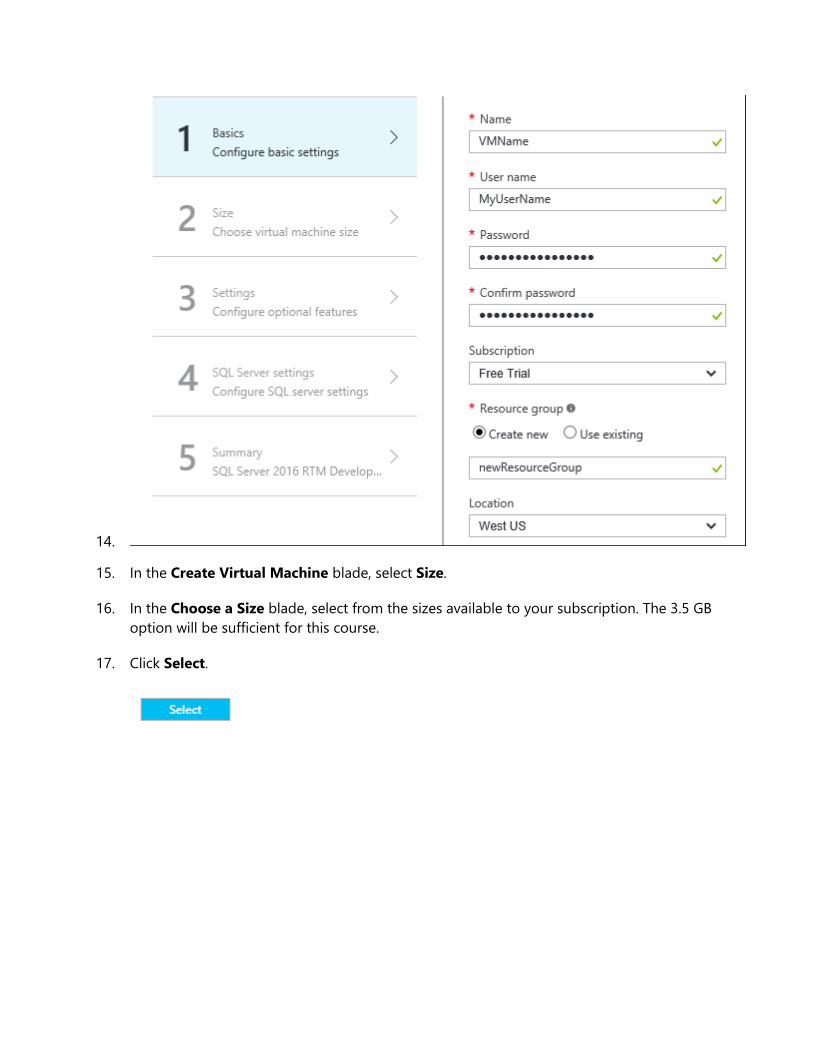
14.
15. In the Create Virtual Machine blade, select Size.
16. In the Choose a Size blade, select from the sizes available to your subscription. The 3.5 GB
option will be sufficient for this course.
17. Click Select.

18.
19. In the Settings blade, set the Storage, Disk type to Standard.
20. Set Monitoring, Diagnostics to disabled.
21. Click OK.
22. In the Create Virtual Machine blade, set SQL Authentication to Enable.
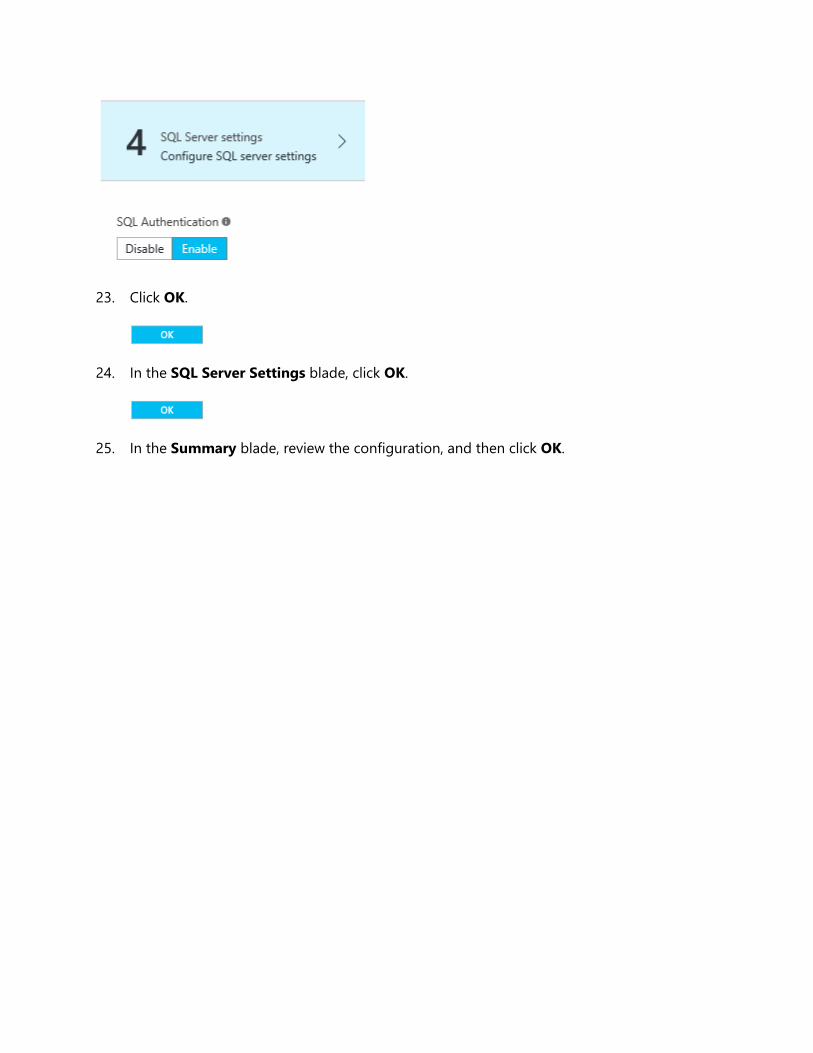
23. Click OK.
24. In the SQL Server Settings blade, click OK.
25. In the Summary blade, review the configuration, and then click OK.

26. On the Azure Portal dashboard, notice the tile providing status of the deployment
process.
The deployment usually takes 15-20 minutes to deploy, and this time depends largely on the
VM size selected. The VM blade will open when the deployment completes.
You cannot proceed to the next task until the deployment completes.
27. Leave the Azure Portal dashboard open.
Connecting to the VM Once the VM has successfully deployed, you will connect to the VM.
NOTE: You are charged when the VM status is Running, but you are not charged when the
VM status is Stopped (Deallocated). The labs will include steps to remind you to stop the VM.
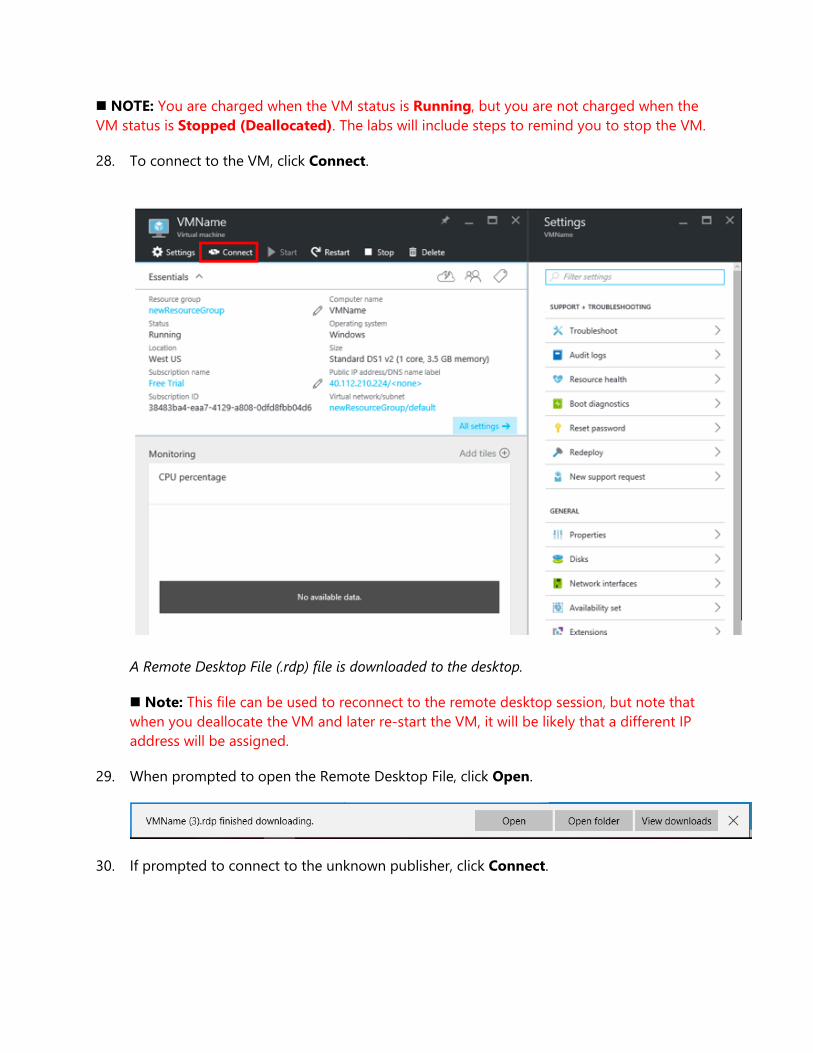
28. To connect to the VM, click Connect.
A Remote Desktop File (.rdp) file is downloaded to the desktop.
Note: This file can be used to reconnect to the remote desktop session, but note that
when you deallocate the VM and later re-start the VM, it will be likely that a different IP
address will be assigned.
29. When prompted to open the Remote Desktop File, click Open.
30. If prompted to connect to the unknown publisher, click Connect.
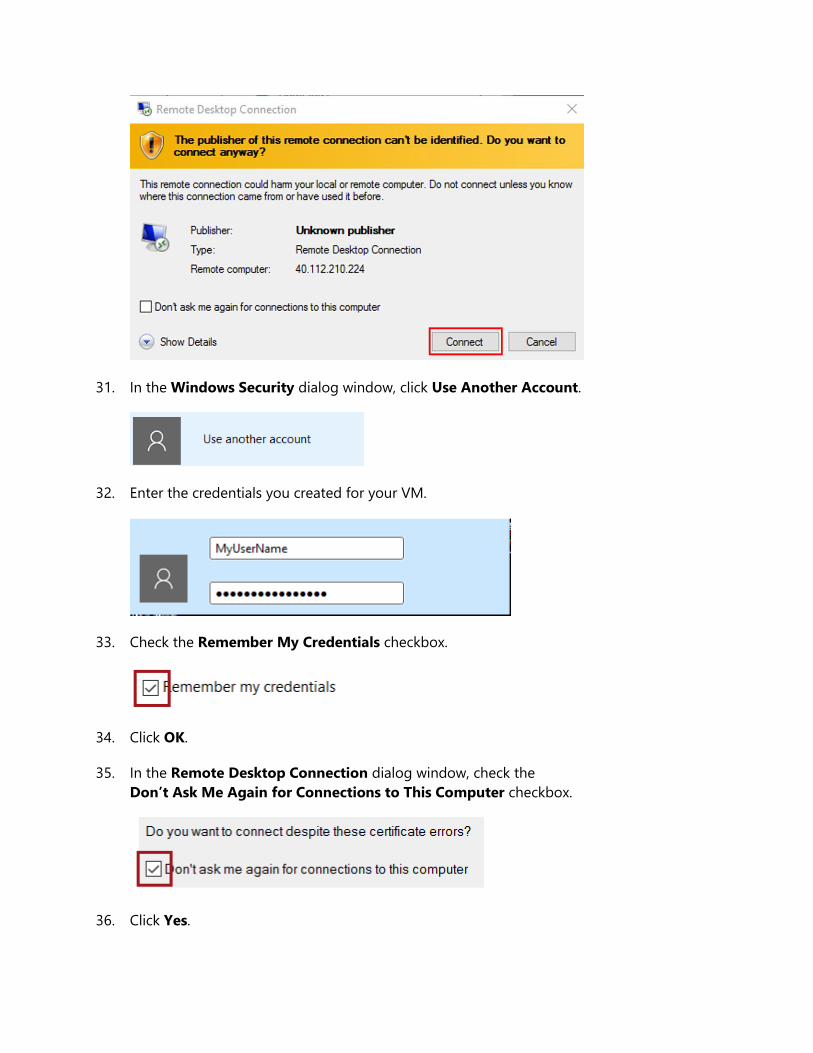
31. In the Windows Security dialog window, click Use Another Account.
32. Enter the credentials you created for your VM.
33. Check the Remember My Credentials checkbox.
34. Click OK.
35. In the Remote Desktop Connection dialog window, check the
Don’t Ask Me Again for Connections to This Computer checkbox.
36. Click Yes.

37. If you have a second monitor, maximize the Remote Desktop window inside a single
monitor.

Setting Up the Azure VM
In this exercise, having connected to the VM, you will complete several setup tasks.
Configuring the Server In this task, you will configure the server to support the lab experience.
1. Notice that Server Manager has automatically opened.
2. In the left pane, select Local Server.
3. In the Properties pane, notice the IE Enhanced Security Configuration is set to On.
4. Click the On link.
5. In the dialog window, for Administrators, select the Off option.
6. Click OK.
7. Located at the top-right corner, select Manage, and then select
Server Manager Properties.
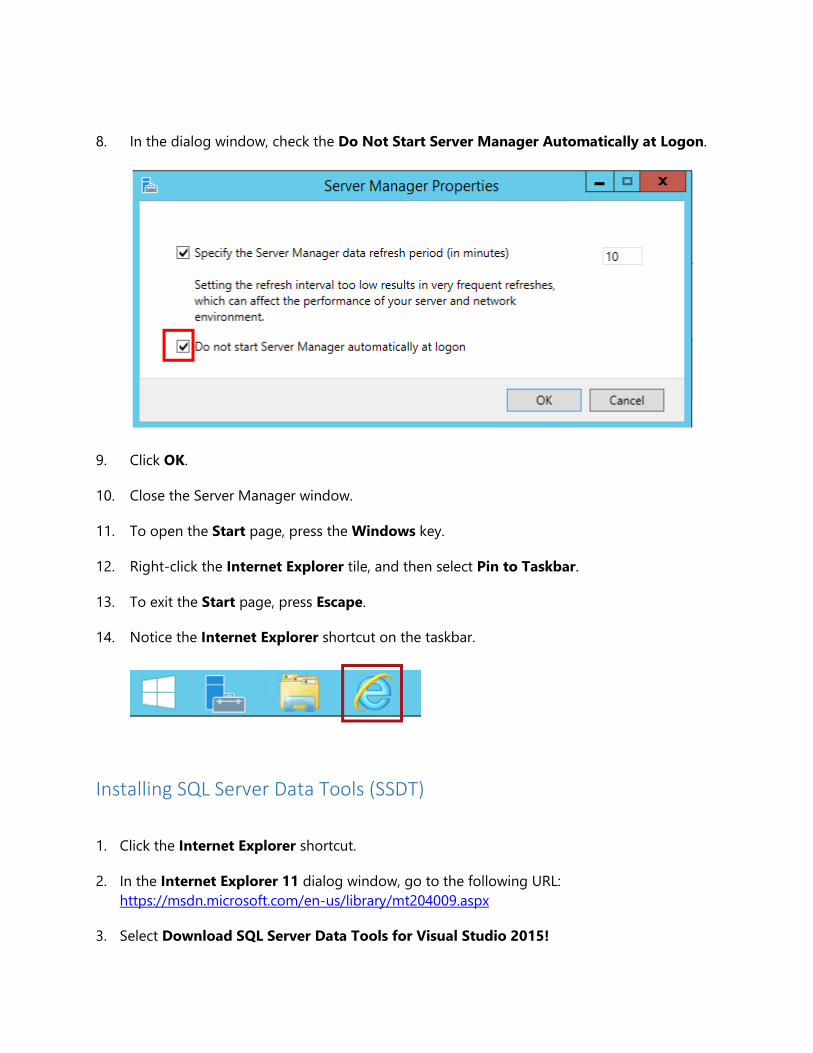
8. In the dialog window, check the Do Not Start Server Manager Automatically at Logon.
9. Click OK.
10. Close the Server Manager window.
11. To open the Start page, press the Windows key.
12. Right-click the Internet Explorer tile, and then select Pin to Taskbar.
13. To exit the Start page, press Escape.
14. Notice the Internet Explorer shortcut on the taskbar.
Installing SQL Server Data Tools (SSDT)
1. Click the Internet Explorer shortcut.
2. In the Internet Explorer 11 dialog window, go to the following URL:
https://msdn.microsoft.com/en-us/library/mt204009.aspx
3. Select Download SQL Server Data Tools for Visual Studio 2015!
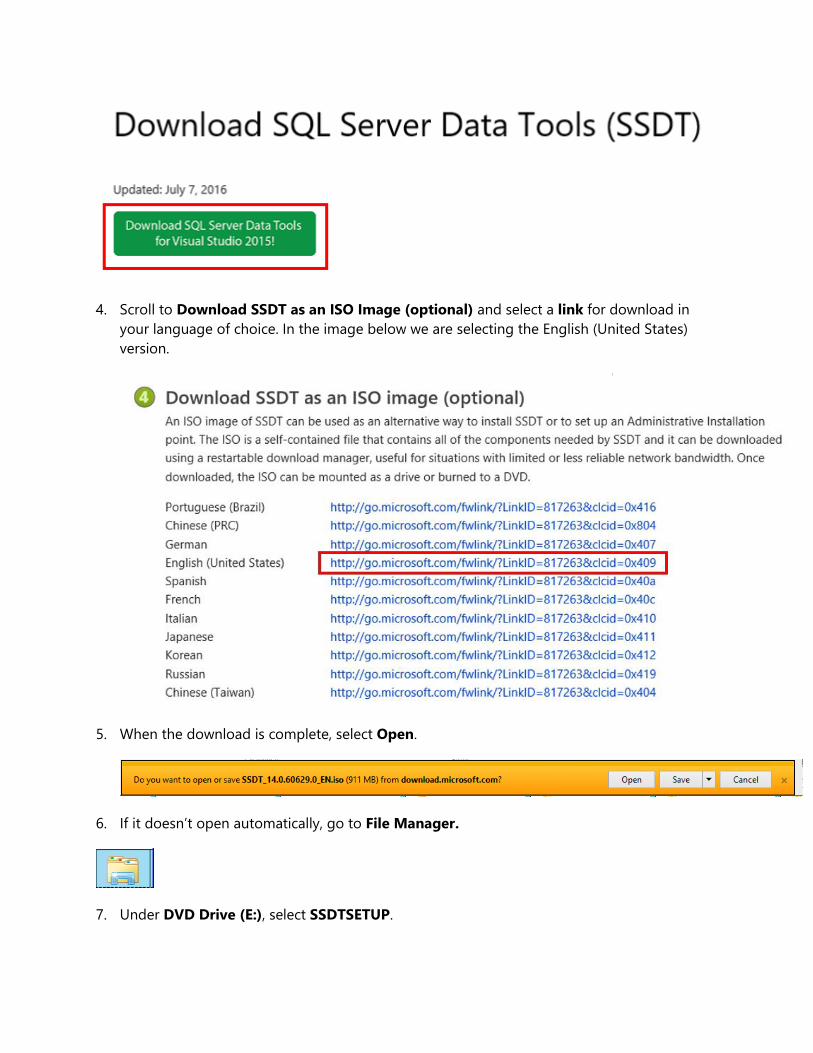
4. Scroll to Download SSDT as an ISO Image (optional) and select a link for download in
your language of choice. In the image below we are selecting the English (United States)
version.
5. When the download is complete, select Open.
6. If it doesn’t open automatically, go to File Manager.
7. Under DVD Drive (E:), select SSDTSETUP.
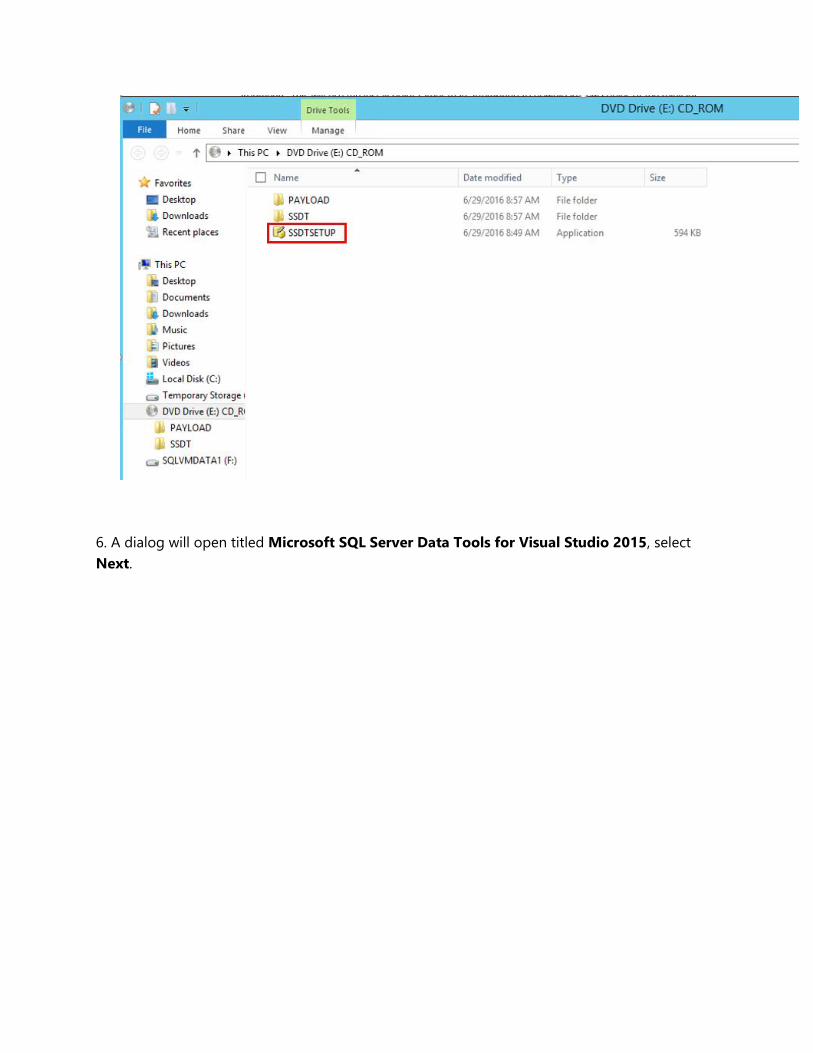
6. A dialog will open titled Microsoft SQL Server Data Tools for Visual Studio 2015, select
Next.
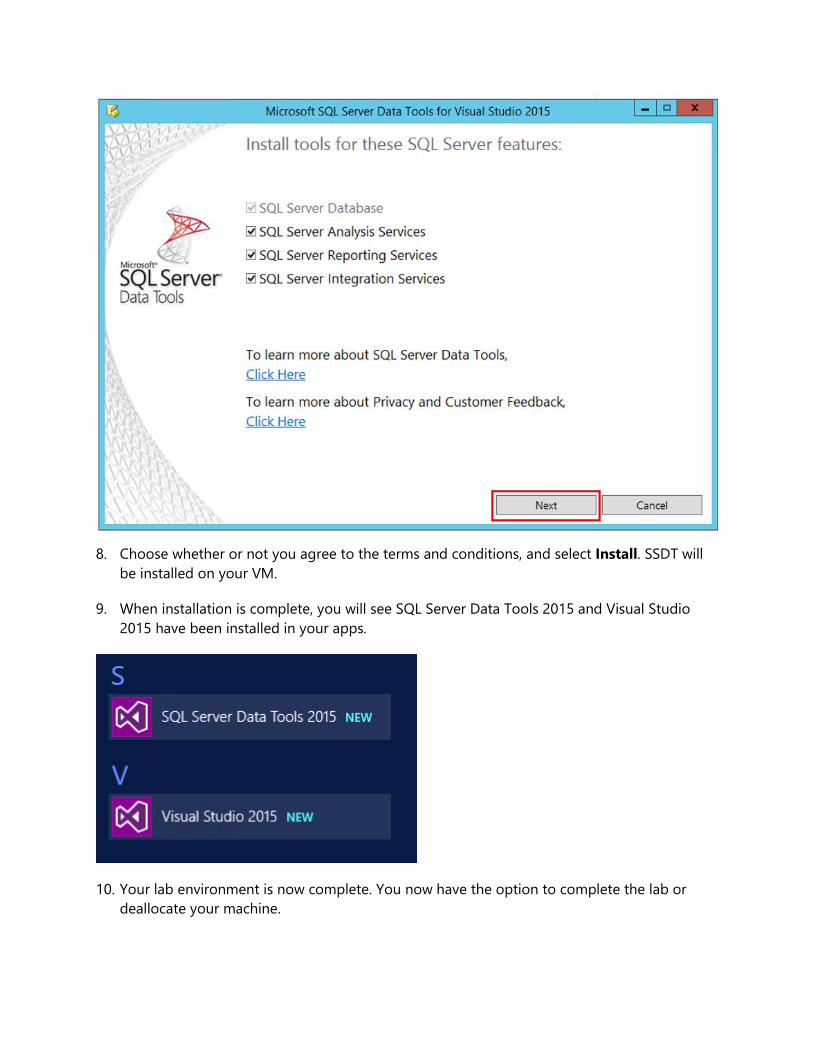
8. Choose whether or not you agree to the terms and conditions, and select Install. SSDT will
be installed on your VM.
9. When installation is complete, you will see SQL Server Data Tools 2015 and Visual Studio
2015 have been installed in your apps.
10. Your lab environment is now complete. You now have the option to complete the lab or
deallocate your machine.
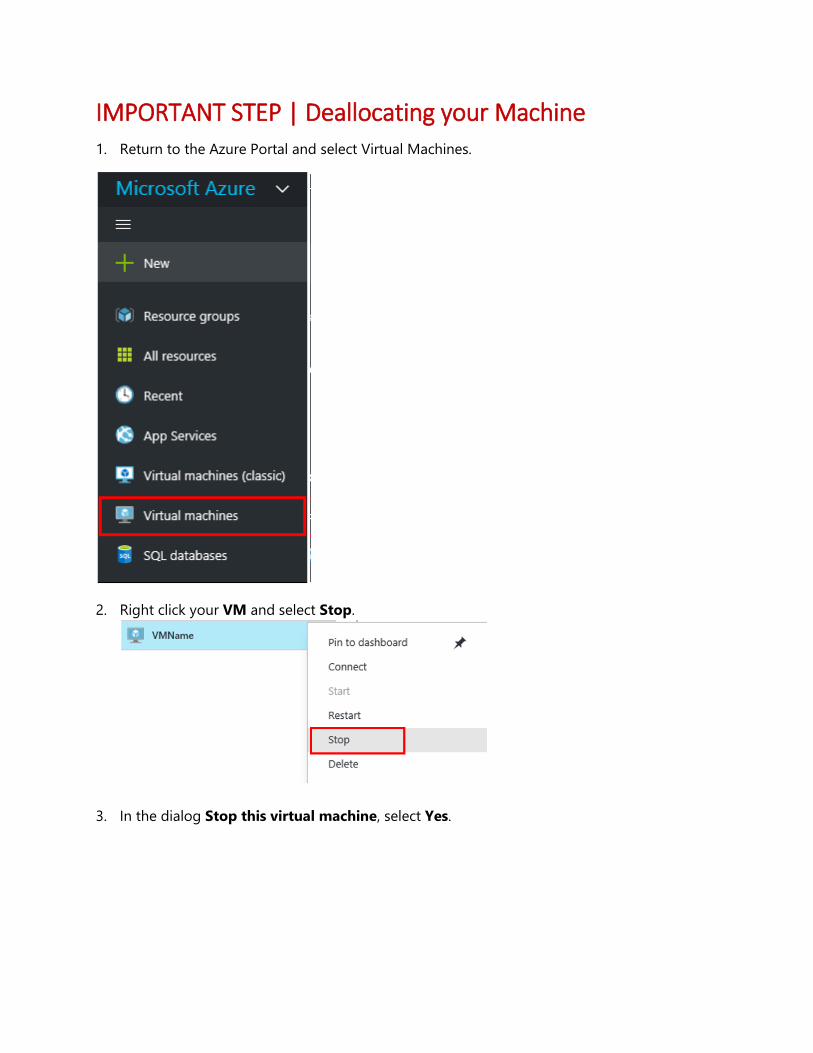
IMPORTANT STEP | Deallocating your Machine
1. Return to the Azure Portal and select Virtual Machines.
2. Right click your VM and select Stop.
3. In the dialog Stop this virtual machine, select Yes.
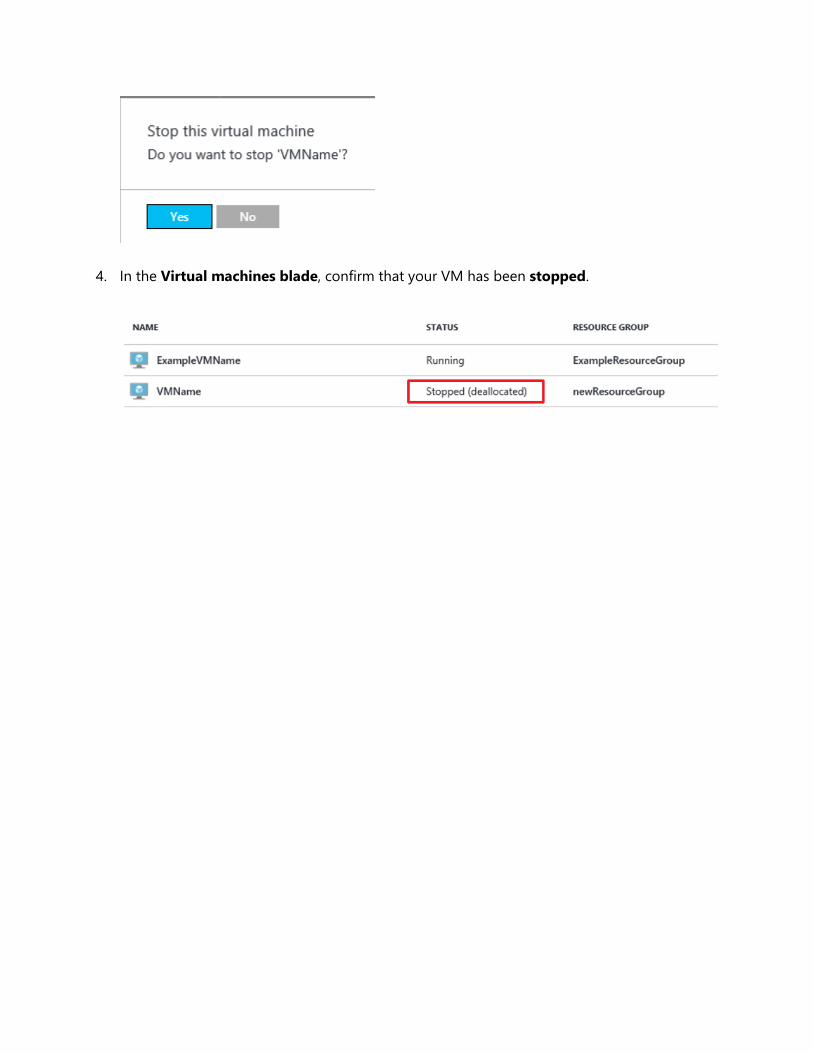
4. In the Virtual machines blade, confirm that your VM has been stopped.