craft the bag making bible aall reasonsll reasons m l a m
TRANSCRIPT
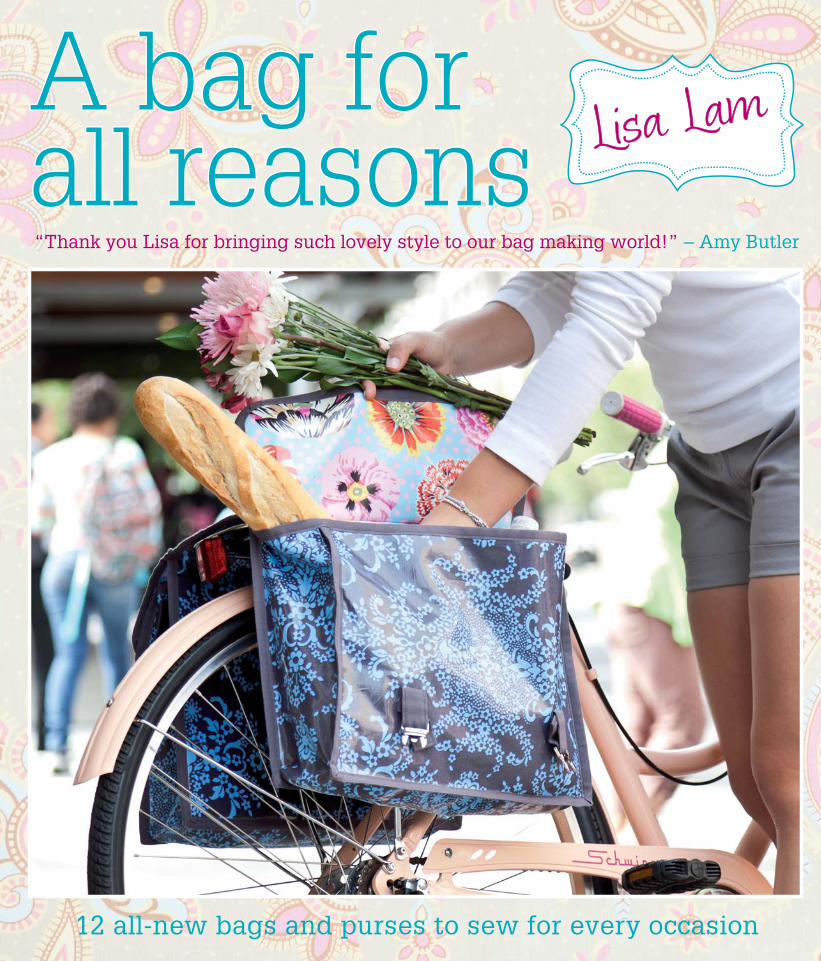
12 all-new bags and purses to sew for every occasion
A bag for A bag for all reasonsall reasons L� a LamL� a Lam
“Thank you Lisa for bringing such lovely style to our bag making world!” – Amy Butler
From the author of the bestselling The Bag Making Bible
(over 70,000 copies sold) comes an outstanding collection
of 12 inspiring bags for you to make at home.
✧ 12 bags and purses for every occasion
✧ Full-size pull-out patterns to use right away
✧ Fully photographed step-by-step instructions
CRAFT
A bag for all reasons
A bag for all reasons
L� a LamL� a Lam
“This information-rich book will elevate your sewing know how with versatile techniques and inspiring suggestions
for making these bags your own.” Amy Butler, fabric designer“A must have for beginners and experienced bag-makers alike.” Anna Stassen, UK Handmade
“Lisa is the fi rst lady of handmade bag patterns.”Perri Lewis, craft journalist and author“It is an excellent resource for all your bag and purse making needs.”Kathreen Ricketson: whipup.net and author
UK £17.99US $27.99(Can $29.50)W8876
ISBN-13: 978-1-4463-0185-2ISBN-10: 1-4463-0185-0
Other titles from Lisa Lam
Lisa Lam is the founder and owner of u-handbag,
the dedicated online store and blog for bag makers.
BFAR_COVER_ARTWORK.indd 1BFAR_COVER_ARTWORK.indd 1 2/16/12 9:11:41 AM2/16/12 9:11:41 AM

The Pleated Purse-Frame PurseThis darling purse looks as cute with jeans as it looks ‘knockout
glamorous’ at a swish wedding. The secret to the different looks lies
in your choice of fabrics. For a sweet daytime look, plump for your
favourite cotton brights and a pretty fl ower brooch. For a special
occasion go for luscious satins, silks and a sparkling brooch.
Design details Pleats, a pretty brooch and the shiny metal frame will make you belle of the ball!
Interior view Use a contrasting lining and it will be a nice surprise each time you open your purse.
Flat bottom A slightly fl attened bottom gives the purse more defi nition and a pleasing 3D shape.
Finished size: 25 x 11cm (97∕8 x 43∕8in)
Features you’ll love
Purse frames l� k oh-so professional – the metal frame will i� tantly bring your purse to the next level. No one will believe you made it!
Quicker than you think to make – fix � one of these clutches in under an hour
Lea� how to glue fabric purses into purse frames and never l� k back!
78
Frame closure sn� s shut and � s� er secure
R� my enough for your essentia while still l� king glamoro and chic
BAGS_P70_91.indd 78BAGS_P70_91.indd 78 1/18/12 2:50 PM1/18/12 2:50 PM

BAGS_P70_91.indd 79BAGS_P70_91.indd 79 1/18/12 2:50 PM1/18/12 2:50 PM

80 The Pleated Purse-Frame Purse
You will need • 1 piece of fabric for exterior,
45.5cm (18in) x 56cm (22in) wide (1 fat quarter)
• 1 piece of fabric for lining, 45.5cm (18in) x 56cm (22in) wide (1 fat quarter)
• Sewing threads to match the fabrics
• 1 piece of woven fusible interfacing, 50cm (½yd) x 90cm (35½in) wide
• 1 piece of single-sided fusible fl eece, 50cm (½yd) x 90cm (35½in) wide
• Rectangular purse frame, 8 x 15cm (3 x 6in) (see Need to know)
• Brooch, approximately 4cm (1½in) square
• Paper cord or cotton piping, 61cm (24in) (optional, see Step 15)
• Good-quality fabric glue (such as Gutermann Texbond)
• Disappearing marker
• Pointy (but not sharp) tool such as small scissors or Clover Hera/Appliqué marker
• Ruler
• Pressing cloth
• Masking tape (optional, see Step 10)
Preparation
Cut the fabric pieces as follows (see pull-out section for pattern pieces):From the Pleated Purse-Frame Purse (Main Body)
pattern piece
• 2 x exterior fabric
• 2 x lining fabric
• 2 x woven fusible interfacing
• 2 x fusible fl eece
Transfer all pattern notches and markings to the fabric
with a disappearing marker
Also cut:• 1 piece of woven fusible interfacing, 4cm (1½ in) square,
for the brooch reinforcement
Need to know• For this project, I recommend quilt-weight cotton, baby cord, laminated
cloth, home dec weight cotton, silk/satin, denim and canvas.
• If you are using delicate fabrics such as satin or silk for your exterior, I
suggest you double up on the fusible interfacing. Also, only pin in the
seam allowance to avoid scarring the fabric with pinholes.
• The fusible interfacing is applied to the WS of the exterior fabric.
• The fusible fl eece is applied to the WS of the lining.
• All seam allowances are 1cm (3⁄8in) unless stated otherwise.
• The main body pattern piece is given in the pull-out section and
includes the seam allowance.
• The pattern will only work for a 15cm (6in) wide x 8cm (3in) high
rectangular frame. This is a classic shape that is quite easy to obtain
(see Suppliers).
BAGS_P70_91.indd 80BAGS_P70_91.indd 80 1/18/12 2:50 PM1/18/12 2:50 PM
The Pleated Purse-Frame Purse 81
The exterior
1 Interface the pattern pieces – iron the woven
fusible interfacing pattern pieces to their
respective WS exterior pattern pieces. If you are
working with satin/silk, iron on two layers of
woven fusible interfacing (one layer at a time).
Iron the brooch reinforcement interfacing square
to the WS centre top edge of one of the exterior
pattern pieces.
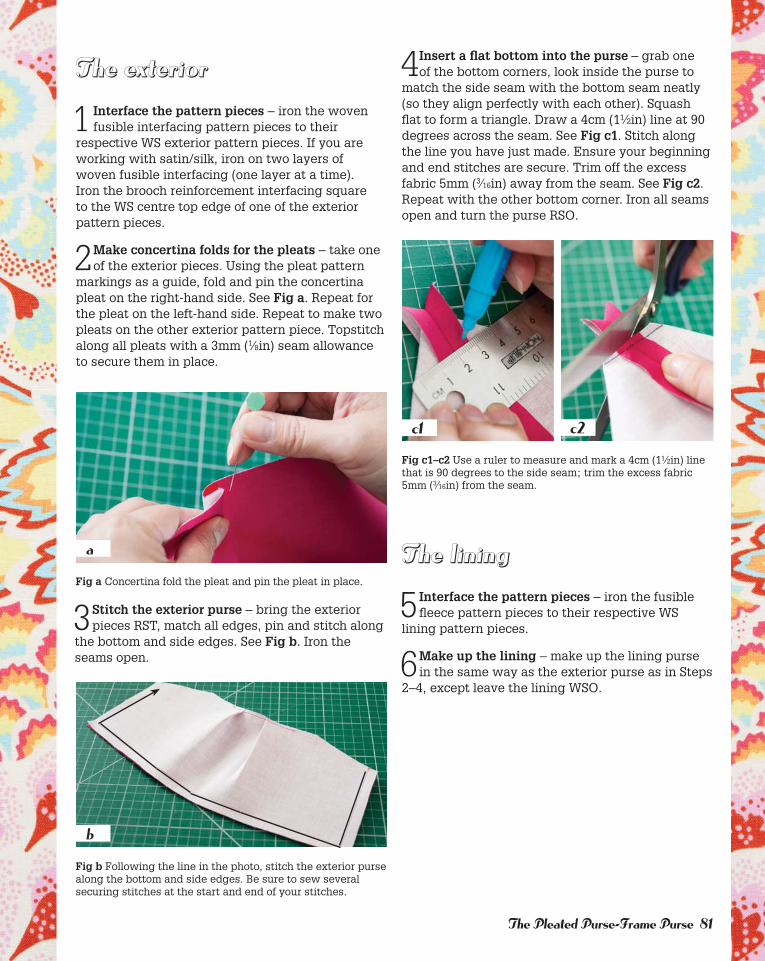
2 Make concertina folds for the pleats – take one
of the exterior pieces. Using the pleat pattern
markings as a guide, fold and pin the concertina
pleat on the right-hand side. See Fig a. Repeat for
the pleat on the left-hand side. Repeat to make two
pleats on the other exterior pattern piece. Topstitch
along all pleats with a 3mm (1∕8in) seam allowance
to secure them in place.
Fig a Concertina fold the pleat and pin the pleat in place.
a
4 Insert a fl at bottom into the purse – grab one
of the bottom corners, look inside the purse to
match the side seam with the bottom seam neatly
(so they align perfectly with each other). Squash
fl at to form a triangle. Draw a 4cm (1½ in) line at 90
degrees across the seam. See Fig c1. Stitch along
the line you have just made. Ensure your beginning
and end stitches are secure. Trim off the excess
fabric 5mm (3⁄16in) away from the seam. See Fig c2.
Repeat with the other bottom corner. Iron all seams
open and turn the purse RSO.
3 Stitch the exterior purse – bring the exterior
pieces RST, match all edges, pin and stitch along
the bottom and side edges. See Fig b. Iron the
seams open.
Fig b Following the line in the photo, stitch the exterior purse
along the bottom and side edges. Be sure to sew several
securing stitches at the start and end of your stitches.
b
c1 c2
Fig c1–c2 Use a ruler to measure and mark a 4cm (1½ in) line
that is 90 degrees to the side seam; trim the excess fabric
5mm (3∕16in) from the seam.
The lining
5 Interface the pattern pieces – iron the fusible
fl eece pattern pieces to their respective WS
lining pattern pieces.
6 Make up the lining – make up the lining purse
in the same way as the exterior purse as in Steps
2–4, except leave the lining WSO.
BAGS_P70_91.indd 81BAGS_P70_91.indd 81 1/18/12 2:51 PM1/18/12 2:51 PM
82 The Pleated Purse-Frame Purse
Stitching the exterior to the lining
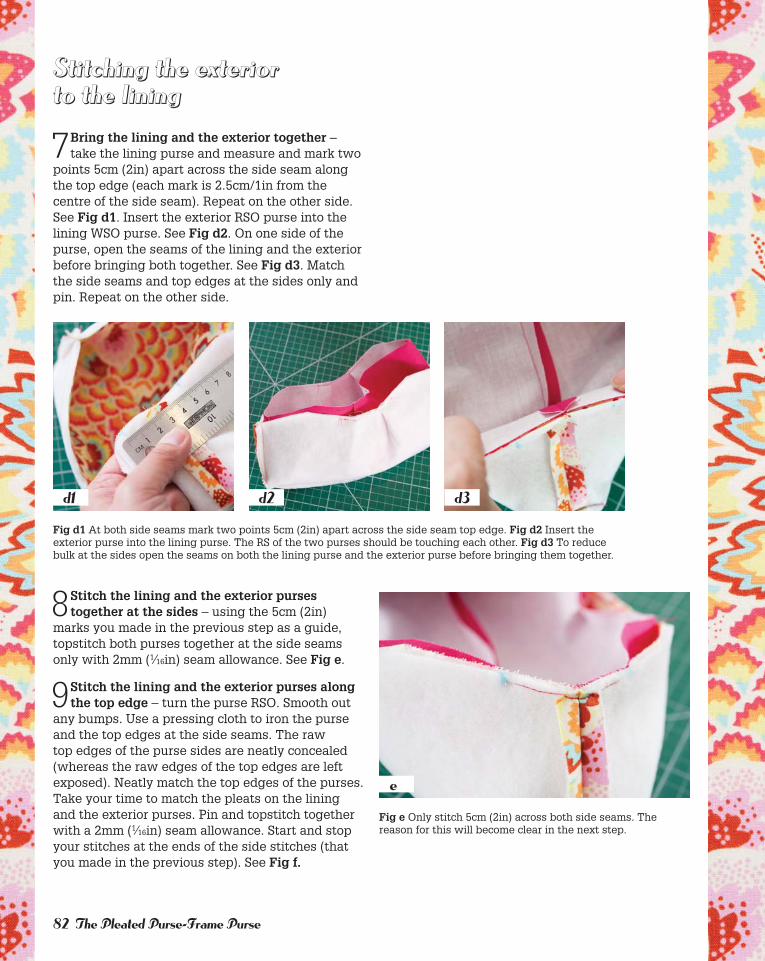
7 Bring the lining and the exterior together –
take the lining purse and measure and mark two
points 5cm (2in) apart across the side seam along
the top edge (each mark is 2.5cm/1in from the
centre of the side seam). Repeat on the other side.
See Fig d1. Insert the exterior RSO purse into the
lining WSO purse. See Fig d2. On one side of the
purse, open the seams of the lining and the exterior
before bringing both together. See Fig d3. Match
the side seams and top edges at the sides only and
pin. Repeat on the other side.
Fig d1 At both side seams mark two points 5cm (2in) apart across the side seam top edge. Fig d2 Insert the
exterior purse into the lining purse. The RS of the two purses should be touching each other. Fig d3 To reduce
bulk at the sides open the seams on both the lining purse and the exterior purse before bringing them together.
d1 d2 d3
8 Stitch the lining and the exterior purses together at the sides – using the 5cm (2in)
marks you made in the previous step as a guide,
topstitch both purses together at the side seams
only with 2mm (1⁄16in) seam allowance. See Fig e.
9 Stitch the lining and the exterior purses along the top edge – turn the purse RSO. Smooth out
any bumps. Use a pressing cloth to iron the purse
and the top edges at the side seams. The raw
top edges of the purse sides are neatly concealed
(whereas the raw edges of the top edges are left
exposed). Neatly match the top edges of the purses.
Take your time to match the pleats on the lining
and the exterior purses. Pin and topstitch together
with a 2mm (1⁄16in) seam allowance. Start and stop
your stitches at the ends of the side stitches (that
you made in the previous step). See Fig f.
Fig e Only stitch 5cm (2in) across both side seams. The
reason for this will become clear in the next step.
e
BAGS_P70_91.indd 82BAGS_P70_91.indd 82 1/18/12 2:51 PM1/18/12 2:51 PM

The Pleated Purse-Frame Purse 83
Raw edges …Raw edges …The side seam will be v� ible on the
fin� hed purse so you n� d to hide the raw side top edges. The top edges will be i� e� ed into the purse frame so leave
them exposed at th� stage.
Fig f To start, place the needle into the fi nal stitch of the side
seam stitches.
f
Gluing the purse into the frame
10 Mask the fabric purse (optional) – if you
are a bit nervous about glue oozing all over
your purse when you come to insert it into the
frame, you can mask the areas that will not be
inserted into the frame. (This is optional – I’ve
made hundreds of these purses so I’m quite happy
to work without the masking tape.) Measure the
height of the purse-frame channel (they are usually
approximately 1cm/3⁄8in high) and apply masking
tape all around the purse 1cm (3⁄8in) (or the height of
your purse-frame channel) down from the top edge
of the fabric purse. See Fig g.
Fig g To prevent gluing disasters, apply a band of masking
tape all around the fabric purse if desired.
g
11 Glue the purse frame – when gluing the
fabric purse to the purse frame it’s best to
work with one side of the purse at a time. Apply
glue to the channel of one side of the frame.
Work from one hinge of the frame to the other.
Be reasonably generous with the glue, but don’t
overdo it (you don’t want glue all over the place!).
See Fig h. Set aside and immediately begin gluing
the fabric purse as described in the next step.
Fig h When applying glue to the purse frame, ensure that you
do not miss any parts inside the channel. I like to ‘bunny hop’
the nozzle of the glue tube all along the frame as this pushes
the glue into place along the frame.
h
Spread the love …Spread the love …If you like, you can � e a loll � op stick
or skewer to spread the glue evenly i� ide the cha el of the purse frame.
BAGS_P70_91.indd 83BAGS_P70_91.indd 83 1/18/12 2:51 PM1/18/12 2:51 PM

84 The Pleated Purse-Frame Purse
12 Glue the fabric purse – apply glue to the very
top edge of one side of the fabric purse. Start
and stop applying the glue 1cm (3⁄8in) away from the
side seams (so you don’t see dried glue on the sides
of the fi nished purse). See Fig i. To prevent the glue
going everywhere during the next step, allow the
glue on both the purse frame and the fabric purse
to go touch-dry for approximately eight minutes (I
suggest you go and make yourself a nice cup of tea
at this point!).
i
Fig i Begin (and end) gluing 1cm (3⁄8in) away from the side
seams; use the same bunny-hopping action with the glue
nozzle on the fabric purse.
13 Insert the fabric purse into the purse frame – start by inserting the sides of the fabric
purse into the purse frame, then work along the
top edge. Use a pointy tool to poke and stuff the
fabric purse into the channel of the purse frame.
To ensure a strong bond between the fabric and
the metal, fi rmly push the top edge of the fabric
purse right into the channel of the frame. See Fig j. Finally, check that the fabric pleats are positioned
centrally along the top edge of the purse frame. If
they aren’t, use the pointy tool to slide the fabric
purse into a central position. Leave the glue to dry
for 10 minutes.
j
Fig j The purse sides go into the frame fi rst. If any glue from
the fabric ends up on the frame, don’t worry – you can pick
it off later. Work on the lining side fi rst. Use your pointy tool
to stuff the fabric fi rmly inside the metal frame. As you work,
turn your purse over several times to check that both the
exterior and lining side is fi rmly inserted into the frame.
14 Insert the other side of the fabric purse into the purse frame – work on the other side
of the purse in the same way as in Steps 11–13.
Leave everything to dry for 10 minutes. Remove the
making tape (if using) and if necessary pick off any
stray bits of glue from the frame. Pin the brooch to
the centre top of the pleats on one side of the purse.
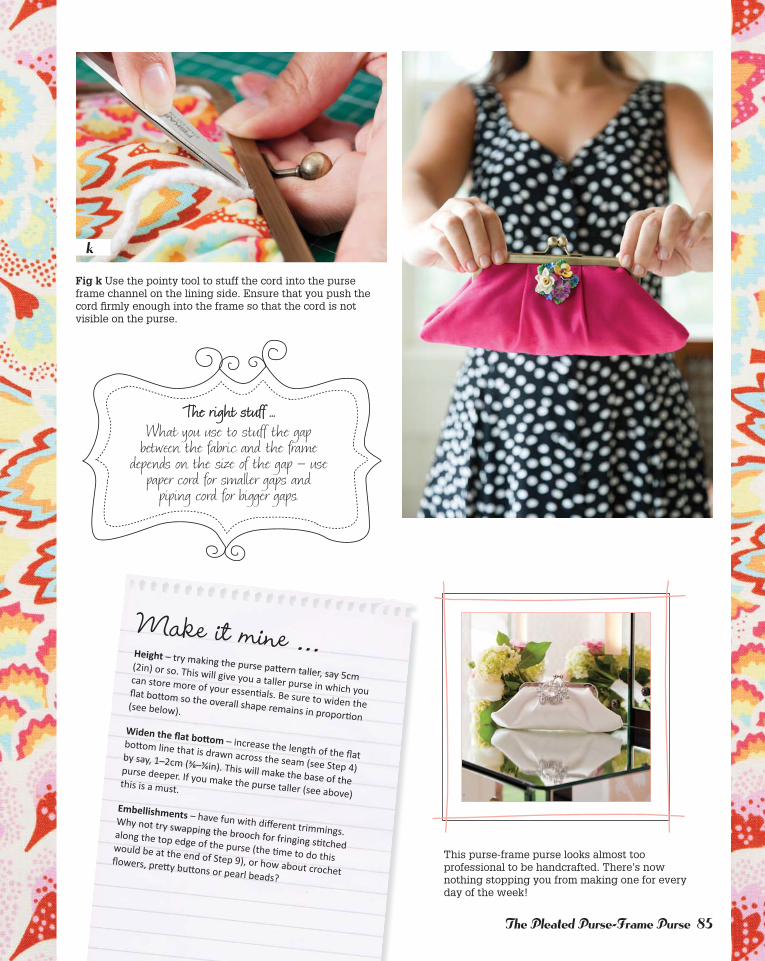
15 Insert cord into the channel of the purse frame (optional) – look at the lining side of
the purse. If there is a sizable gap between your
fabric purse and the channel of the frame it is a
good idea to stuff the gap. This will strengthen the
bond between the fabric and the metal frame. For
each side of the purse, cut a length of cord that
is 2.5cm (1in) shorter than the length of the sides
and the top edge (combined) of the purse frame.
Working from the lining side, use the pointy tool
to stuff the cord into the channel of the purse
frame. See Fig k. All done! Now to enjoy that
glow when you take your new purse out of your
bag (with a fl ourish) and tell your friends that you
made it yourself!
BAGS_P70_91.indd 84BAGS_P70_91.indd 84 1/18/12 2:52 PM1/18/12 2:52 PM
The Pleated Purse-Frame Purse 85
This purse-frame purse looks almost too
professional to be handcrafted. There’s now
nothing stopping you from making one for every
day of the week!
Fig k Use the pointy tool to stuff the cord into the purse
frame channel on the lining side. Ensure that you push the
cord fi rmly enough into the frame so that the cord is not
visible on the purse.
k
The right stuff …The right stuff …What you � e to stuff the g�
betw� n the fabric and the frame depen� on the size of the g� – � e
p� er cord for small er g� s and p� ing cord for bi er g� s.
Make it mine …Height – try making the purse patt ern taller, say 5cm (2in) or so. This will give you a taller purse in which you can store more of your essenti als. Be sure to widen the fl at bott om so the overall shape remains in proporti on (see below).
Widen the fl at bott om – increase the length of the fl at bott om line that is drawn across the seam (see Step 4) by say, 1–2cm (⅜–¾in). This will make the base of the purse deeper. If you make the purse taller (see above) this is a must.
Embellishments – have fun with diff erent trimmings. Why not try swapping the brooch for fringing sti tched along the top edge of the purse (the ti me to do this would be at the end of Step 9), or how about crochet fl owers, prett y butt ons or pearl beads?
BAGS_P70_91.indd 85BAGS_P70_91.indd 85 1/18/12 2:52 PM1/18/12 2:52 PM

Pleated Purse-Frame Purse(Main Body)
1 of 1
Top
Place on
fold
Pleat Markings