cos 125 day 15. agenda assignment 4 posted corrected –4 a’s, 3 b’s, 2 c’s and 1 mia...
Post on 20-Dec-2015
214 views
TRANSCRIPT

COS 125
DAY 15

Agenda• Assignment 4 Posted Corrected
– 4 A’s, 3 B’s, 2 C’s and 1 MIA• Assignment 5 posted
– Due April 4
• Left to do– 4 Assignments (9 total)
• One per week– 2 Quizzes– Capstone projects
• Second Capstone Progress Report Due April 4• Exam #3 will be on April 4
– Castro Chaps 1-7– One Hour, 20 M/C and 4 short essay
• Review Using Links– http://perleybrook.umfk.maine.edu/classes/cos125/HTML6ed_example
s/localindex.html#c6– http://perleybrook.umfk.maine.edu/samples/links.htm
• Lecture/Discuss Creating and Applying Styles

Assignment #4
Work in CODE mode not design!!• A Title of “assignment #4”
– <head>……<title>assignment #4</title>…..</head>• A least 3 of the 6 possible Section headers
– Give each header a name and a title• <h1 id=”name” title=”name” ></h1>
• A division, a paragraph and an in-line span– <div></div>– <p></p>– <span></span>
• Add some comments – Your name– Date you created this web page
• <!—Tony Gauvin March 25 2008 -->
Assignment #4
• Bold– <b></b>
• Italic– <i></i>
• Preformatted text– <pre></pre>
• Big and small text– <big></big>– <small></small>
• Monospaced text– <tty></tty>– <kbd></kbd>
• Quoted text (with reference)– <blockquote cite=”url”></blockquote>
• Superscript and subscript– <sub></sub>– <sup></sup>

Assignment 4
• A transparent gif of your name (Image 1)• A animation of your name (Image 2)• A photorealistic image downloaded from the web
(Image 3)• Recompress to smaller file size but the same
image size (Image 4)– Page 100 of text
• Resize to half the original size (Image 5)– Use PSP
Assignment 4
• Make sure each image has alternate text and a title– <img src=”apicture.gif” alt=”aPicture” id=”name/>
• Make sure you specify size for each image– <img src=”apicture.gif” alt=”aPicture” id=”name” width=”x” height=”y”/>
• Rescale image 3 to 50% of Browser viewable width– <img src=”apicture.gif” alt=”aPicture” id=”name width=”50%” />
• Create some text describing Image 3 and create the following– float the text to the right of image 3
• <img src=”apicture.gif” alt=”aPicture” align=”left” id=”name width=”50%” /> <p></p>
– float the text to the left of image 4• <img src=”apicture.gif” alt=”aPicture” align=”right” id=”name width=”50%” />
<p></p>• Make sure you have a background color or image
– <body bgcolor="#CCCCCC">

Adding Images in Dreamweaver
Problem

Links
• 3 parts– Destination
• Where to go• URLs, Anchors, Files
– Label• The part the user sees• Can be text or an image or both
– Target• Where the destination will be displayed• In same browser window, a new browser window or a certain browser
window

Creating a link to another webpage
• Destination– <a href=“somepage.url >
• Value for href MUST be in “quotes”
• Label– Label text
• End of link </a>
<a href=“somepage.url’”> label text</a>

Creating a Web Link
• Use relative URLS if the destination is on the same server (see Chap 1)– “/bios/tonyg.htm”
• Use absolute URLs if the destination is on a different server (see Chap 1)– “http://www.somewhere.com/page.htm”
• DO NOT use “click here” as a label– Tacky!!
• Label CANNOT contain block-level elements

Creating Anchors
• An anchor is a labeled place on a Web Page that can be a destination for a Link
• <a name=“daName”>text or image</a>• Any element can be a anchor using the “id”
attribute– <h1 id=“daName”>A header</h1>
• Name and id value MUST be in “quotes”• For long documents create anchors for top,
bottom and important sections

Linking to a Specific Anchor
• Link to “daName” on same page– <a href=“#daName”>Go to daName</a>
• Link to “daName” on another page– <a href=“page.url#daName”>Go to
daName</a>

Target Links to a Specific Browser Windows
• You can have the destination appear in a new Browser window so that you may view both the source and destination pages
• Same Window (default)– <a href=“some.url” target=“_self”>label</a>
• New window– <a href=“some.url” target=“_blank”>label</a>
• Existing Windows– <a href=“some.url” target=“daWindow”>label<.a>– If the named window isn’t open it will be created

Setting a default Target
• By default a link opens in the same window that contains the link
• To change default– In head section– <base target=“daWindow” />
• If you set a target in a link it will override default

More links
• Links can be created to many things– FTP
• href=“ftp://perleybrook.umfk.maine.edu”
– E-mail• href=“mailto:[email protected]”
– Telnet• href=“telnet://allagash.umfk.maine.edu”
– Files• href=“url/file.ext”• If the browser does have a plug-in for the file it will
attempt to download the file
Keyboard shortcuts for Links
• Keyboard shortcuts or Hotkeys– Ctrl-C for copy– Ctrl-V for paste
• For a link– <a href=“some.url” accesskey=“t”>label</a>– In IE type alt-t– In Netscape ctrl-t
• Make sure you don’t override an existing hotkey

Setting Tab Order
• In many application you can use the tab key to move around from section to section
• To change how the TAB key works on your web page set a tabindex=“n” attribute– <a href=“some.url” tabindex=“10”>label</a>– N can be 1 to 32767– Smaller N’s will be TAB’ed to first– Negative N’s will be skipped
Using an Image to Label a Link
• Simply replace the label text with an image• <a href=“some.url”><img src=“image.gif”
alt=“aPicture”/></a>• Border
– Most browsers will create a blue border around an image that is a link
– You can add a border to any image• <img src=“image.gif” alt=-”aPicture” border=“10” />

Image Maps
• An Image map is an image with regions that link to different destinations
• Two types– Client Side Image Maps
• Faster• Most common• Users can see the HTML that creates the map and the
possible destinations– Server Side Image Maps
• Require a special program running on the server• Hides the destinations from “View Source”
Creating an Image Map
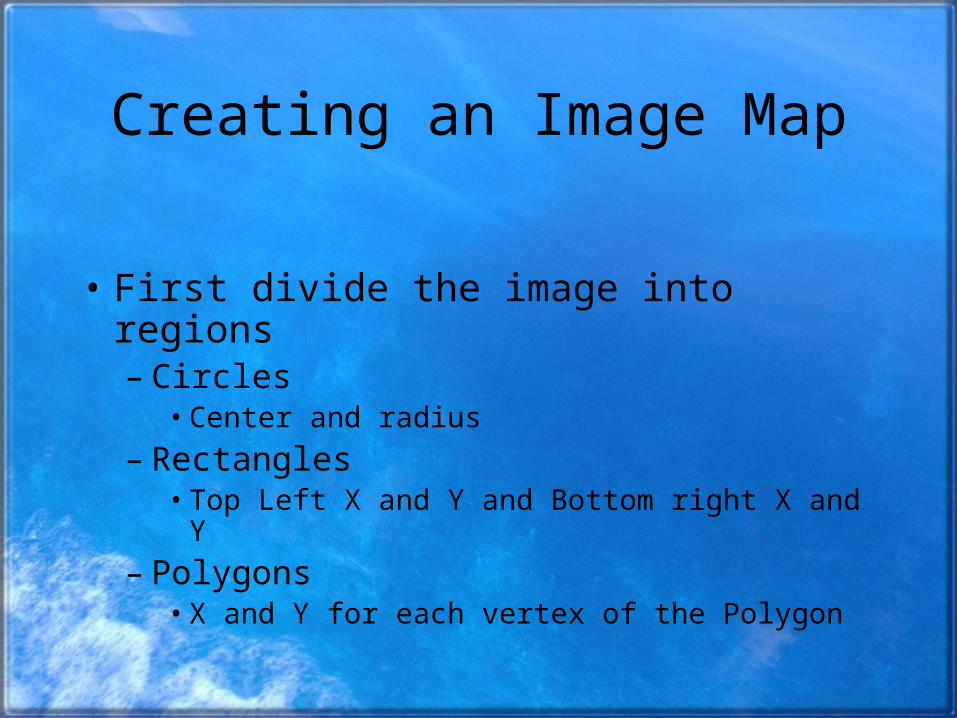
• First divide the image into regions – Circles
• Center and radius
– Rectangles• Top Left X and Y and Bottom right X and Y
– Polygons• X and Y for each vertex of the Polygon

Finding regions

Creating a Client Side Image Map
• Divide your images into a regions• Create a “map” of the regions
– <map name=“daMap” id=”daMAP”>– Add regions & destinations
• <area alt=“region1” shape=“rect or circle or poly” cords=“100,100,220,200” href=“http://some.url” />
• Create a default• <area shape=“default” href=”http://someother.url” />
– Add closing tag </map>• Associate map with the image
– <img src=“picture,gif” alt=“a Picture” usemap=“daMap” />

Using Dreamweaver for maps
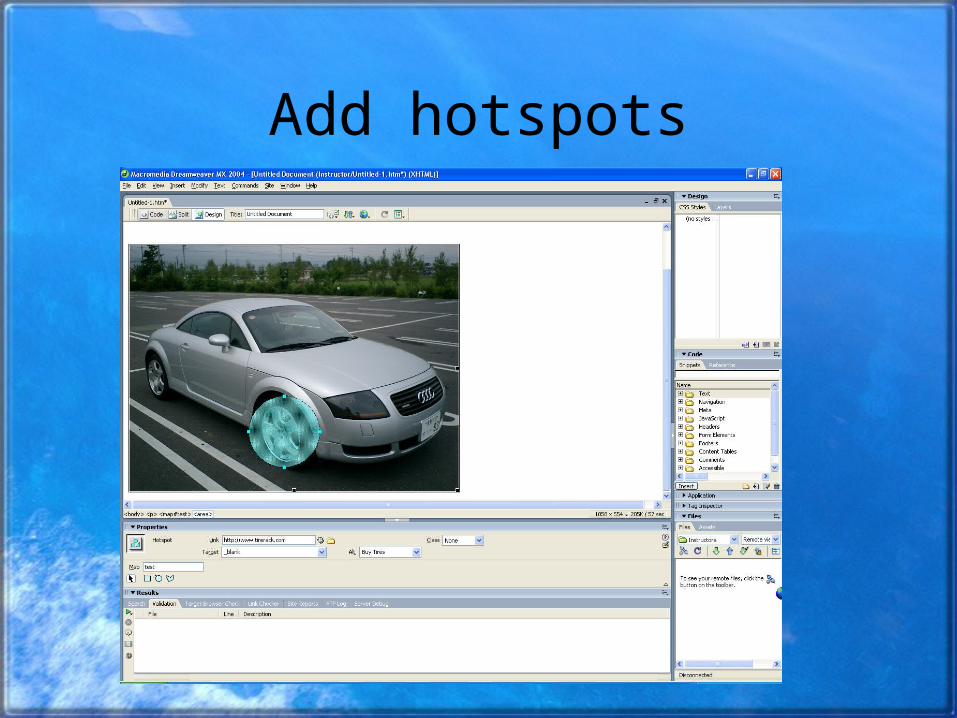
Add hotspots

The Code<p><img src="audi.tt.1.jpg" width="640" height="480"
border="0" usemap="#test" /> <map name="test" id="test"> <area shape="circle" coords="301,363,69"
href="http://www.tirerack.com" target="_blank" alt="Buy Tires" />
<area shape="rect" coords="90,83,420,210" href="http://www.crutchfield.com" target="_blank" alt="Buy Stereo" /><area shape="default" href="http://www.audi.com" target="_blank" alt="Buy a TT"/>
</map></p>

Assignment # 5
• Examples– http://perleybrook.umfk.maine.edu/samples/links.htm
• In Blackboard• Linking Exercise• Due April 4• Click on icon to see Assignment
Microsoft Word Document

Learning Objectives
Understand the syntax of a CSS rule Write CSS rules Assign the same style rule to more than one element Create style rules for link states Understand how to create an external style sheet Understand how to link to an external style sheet Understand how to use internal style sheets Understand how to import an external style sheet Understand how to apply styles locally Explore how to use comments in style rules
Style Sheet Examples
Examples of applying style sheets– http://perleybrook.umfk.maine.edu/samples/styles.htm
Formatting– http://perleybrook.umfk.maine.edu/samples/StyleFormat.htm– http://perleybrook.umfk.maine.edu/classes/cos125/HTML6ed_exa
mples/localindex.html#c7

Introduction
The CSS1 specification was developed in 1996 CSS2 was released in 1998 CSS3 is on its way CSSs provide the means to control and change presentation of HTML
documents CSS is not technically HTML, but can be embedded in HTML documents Style sheets allow you to impose a standard style on a whole document, or
even a whole collection of documents Style is specified for a tag by the values of its properties
http://www.w3.org/TR/REC-CSS2/

Levels of Style Sheets
There are three levels of style sheets• Inline - specified for a specific occurrence of a tag and apply only to
that tag– This is fine-grain style, which defeats the purpose of style sheets - uniform style
• Document-level style sheets - apply to the whole document in which they appear This is what happens when you modify xHTML in Dreamweaver using deign mode
• External style sheets - can be applied to any number of documents When more than one style sheet applies to a specific tag in a
document, the lowest level style sheet has precedence– In a sense, the browser searches for a style property spec, starting
with inline, until it finds one (or there isn’t one)– http://www.w3.org/TR/1998/REC-CSS2-19980512/cascade.html#c
ascade

Levels of Style Sheets
Inline style sheets appear in the tag itself Document-level style sheets appear in the
head of the document External style sheets are in separate files,
potentially on any server on the Internet– Written as text files with the MIME type text/css

Styles
Use to format XHTML documents Separate Content from Format Allows consistent “Look and Feel” to all web
pages in a web site

Constructing A Style Rule
Selector {property:value; property:value} Examples
– h1 {color:red;background:yellow;}– h2 {color:white;background:black;}– p {color:blue;}
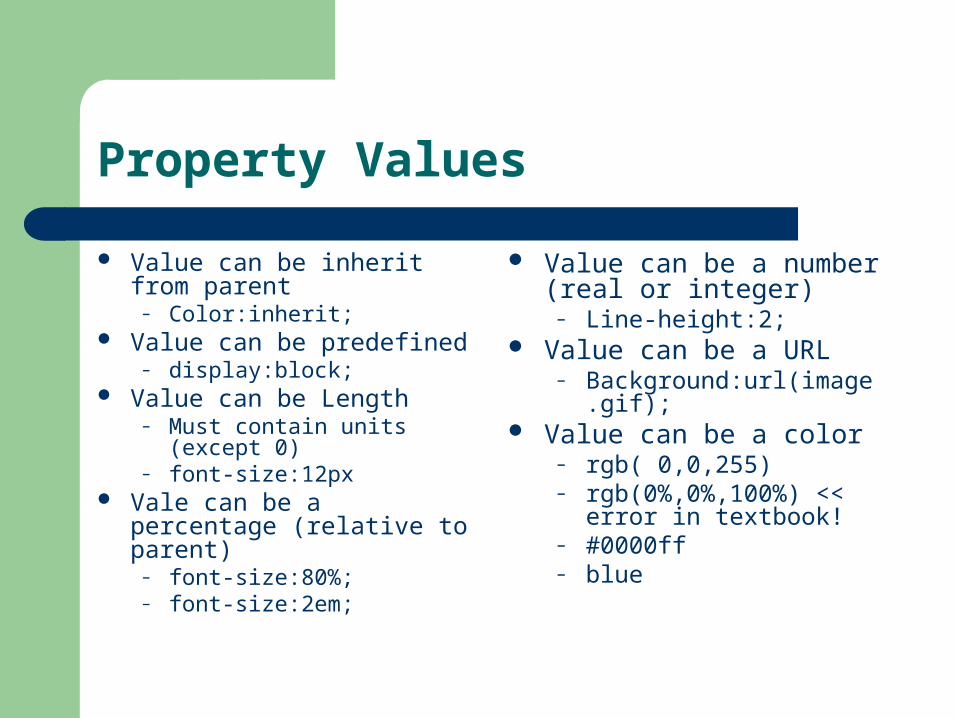
Property Values
Value can be inherit from parent
– Color:inherit; Value can be predefined
– display:block; Value can be Length
– Must contain units (except 0)
– font-size:12px Vale can be a percentage
(relative to parent)– font-size:80%;– font-size:2em;
Value can be a number (real or integer)
– Line-height:2; Value can be a URL
– Background:url(image.gif); Value can be a color
– rgb( 0,0,255)– rgb(0%,0%,100%) << error
in textbook!– #0000ff– blue

Adding comments to a style rule
Why??– So that you remember
/* comments */ Cannot be nested
– /* this /*doesn’t*/ work */

Constructing Selectors
A selector determines which elements will be formatted
A selector can contain up to 5 criteria (any combination)
– The type or name of the element– The context in which the element is found– The class or id of an element– The pseudo-class of an element or a pseudo-element itself– Whether or not an element has certain attributes and values
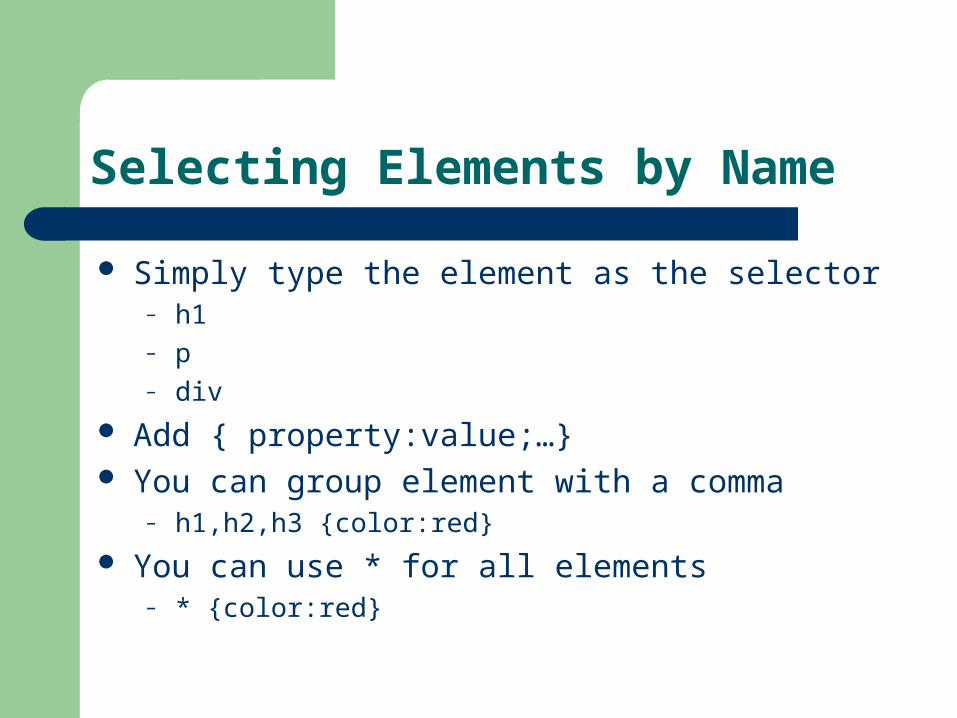
Selecting Elements by Name
Simply type the element as the selector– h1– p– div
Add { property:value;…} You can group element with a comma
– h1,h2,h3 {color:red}
You can use * for all elements– * {color:red}

Selecting Elements by Class or ID
If your elements is labeled with id or class, it can be formatted via a selector
If you used class– <h1 class=“bigheader”></h1>– .bigheader {property:value}
If you used id– <h1 id=“firstheader”></h1>– #firstheader { property :value}
Can be used with element name– h1.bigheader {color:red}– h1#firstheader {color:red}

Selecting Elements by Context
Selecting elements based on parent/child relationship between elements
<div> <h1>header</h1><p>paragraph <big>BIG</big><small>small</small></p></div>
div is ancestor of all the above elementsh1 is child of divdiv is parent (ancestor) of h1big is a sibling of smallh1 is a sibling of p big is descendent of div and child of p

Selecting Elements by context
To select an element based on the context (relationship) do the following
For a any descendant element– Ancestor descendant {…}– Div.class p {color:red}
For only the child of a parent element (only some browsers)
– Ancestor > descendent {…}– Div#label > p {color:red}

Selecting Elements by Context
To select elements that are the first child of a parent element– div p:first-child {color-red}
To select element based on siblings– div p+p {color:red}

Selecting Links elements based on their state (pseudo-class)
State means visited, mouse is over link.. etc– a:link {color:red}– a:visted{color:blue}– a:focus{color:yellow}– a:hover{color:green}– a:active{color:white}

Selecting part of an element (pseudo-element)
You can select just the first letter or first line of an element to be formatted
h1:first-letter {color:red} p:first-line {color:blue} Does not work with all browsers

Selecting elements based on attributes of the element
element[attribute]{…}Or element[attribute=“value”] {…} (must have)Or element[attribute~=“value”]{…} (can have)Or element[attribute|=“value”]{…} (must have “value”)
Does not work in Internet Explorer
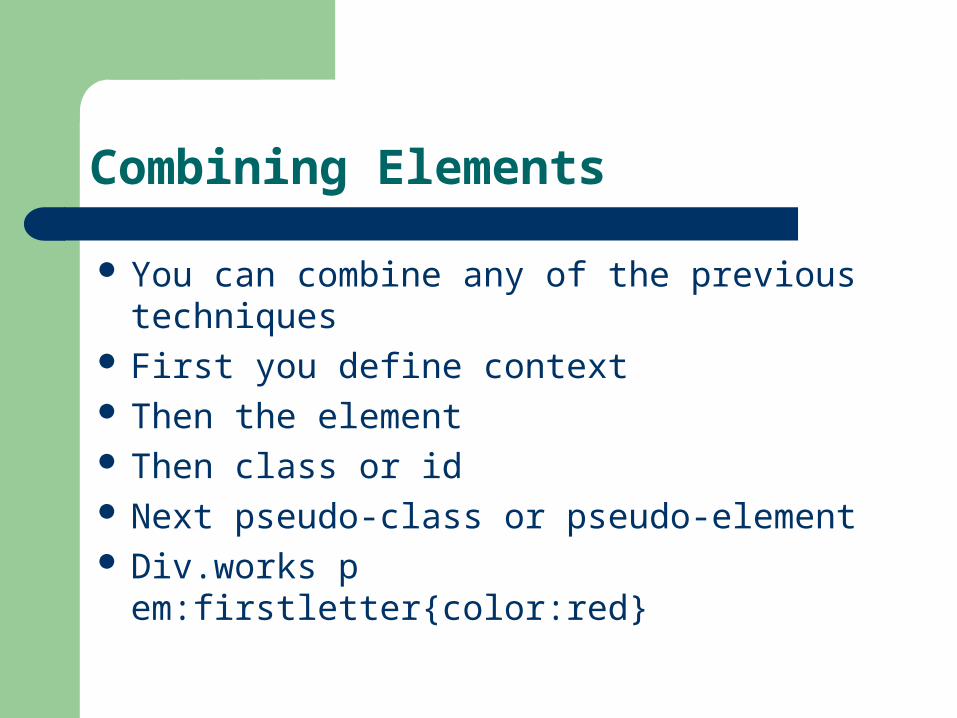
Combining Elements
You can combine any of the previous techniques
First you define context Then the element Then class or id Next pseudo-class or pseudo-element Div.works p em:firstletter{color:red}

Creating an external Style Sheet
Create a new text doc Define rules Save as “anyname.css File must be “text only” In Dreamweaver
– File>New>”CSS Style Sheets” – then select one of the already begun style sheets


Linking an external style sheet
In head section– <link rel=“stylesheet” type=“text/css”
href=“url.css”/>– url.css is the location and filename of your
external CSS style sheets

Creating an Internal Style Sheet
Internal style sheet will only effect the one web page
In head section <style type=“text/css”>
selector{property:value}
….
</style>

Importing External Style Sheets
Used with internal style sheet commands <style type=“text/css”>
@import “external.css”;
selector{property:value}
….
</style>

Applying styles locally
Use style attribute in the element you wish to format
Will only effect that occurrence of the element
Example– <img style=“color:red;border:solid” src
=“image.gif” height=“250” alt=“image”>

Cascade: When Rules Collide
Based on1. Inheritance
Style attribute may be inherited from parent element
2. SpecificityThe more specific the selector the stronger the rule
ID is the most specific selector
3. Location The later the rule the stronger it is
4. Declaration!important added to end of rule
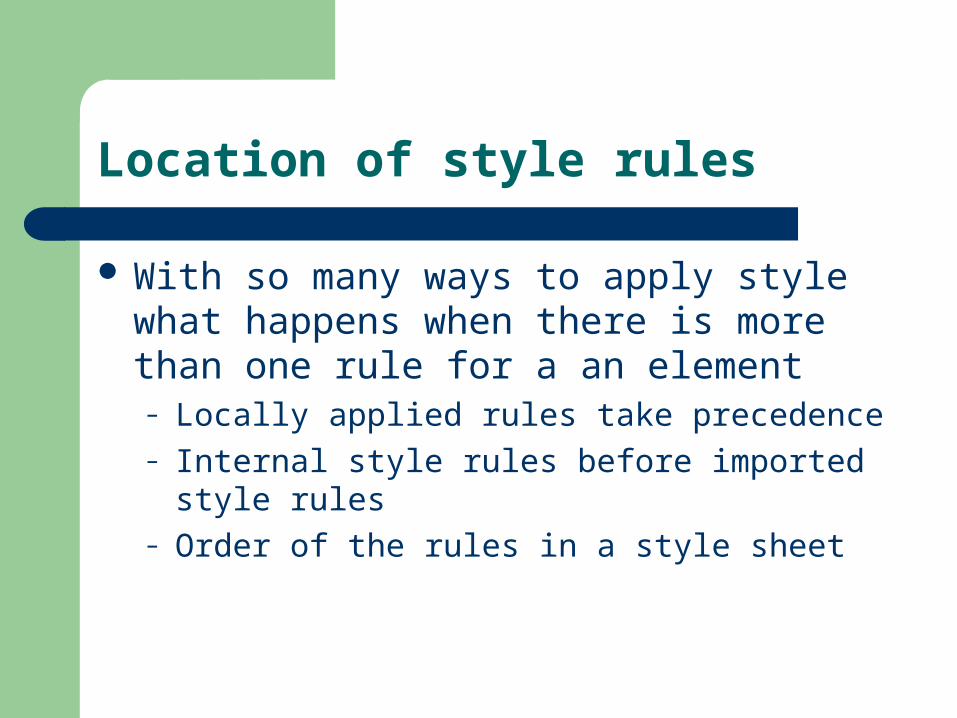
Location of style rules
With so many ways to apply style what happens when there is more than one rule for a an element– Locally applied rules take precedence– Internal style rules before imported style rules– Order of the rules in a style sheet