copyrirth © 2000 by olympia · pdf filethank you for volunteering to help with the...
TRANSCRIPT

THE MOUNTAINEERS Olympia Branch
January, 2013
BASIC CLIMBING COURSE FIELD TRIP INSTRUCTOR'S MANUAL
PLEASE BRING THIS
MANUAL WITH YOU ON EVERY
FIELD TRIP

Basic Course Field Trip Instructor's Manual Rev: 2013 The Mountaineers, Olympia Branch
Olympia Basic Climbing Course Instructors: Thank you for volunteering to help with the Mountaineers Olympia Branch Basic Climbing Course. The committee members and basic students truly appreciate your assistance with this course, the cornerstone of our club's climbing program. Attached is the latest revised edition of the "Olympia Field Instructors Manual". Please consider it a permanent addition to your personal climbing library. The basic instructional standards for each field trip described in this manual are consistent with the Minimum Club wide Standards adopted by the Mountaineers in March 2007. This manual is divided into sections, each one dedicated to a particular field trip. Each section contains information and instructions for the topics to be covered at the field trips, coordinated to the student's Basic Climbing Course manual. Appendices include suggested performance standards and illustrations. Prior to instruction at any field trip, it is important that you review all the material that will be covered on that trip. This helps to maintain both uniformity and quality of instruction. Nothing erodes a student's confidence faster than a confused or uncertain instructor. Since we want to make this manual as useful as possible, we would like to have your suggestions for improving it and making it more useful. Please discuss your recommendations with Basic Course Chair, any member of the Climbing Committee, or the appropriate field trip leader. If you have any questions, please call the appropriate field trip leader, one of the Basic Course committee members. Basic Climbing Chair Olympia Mountaineers Climbing Committee PLEASE PRINT THE CHAPTER CORRESPONDING TO THE FIELD TRIP FOR WHICH YOU WILL VOLUNTEER. GO OVER THAT CHAPTER BEFORE THE FIELD TRIP, AND BRING A COPY WITH YOU.

Basic Course Field Trip Instructor's Manual Rev: 2013 The Mountaineers, Olympia Branch
Revisions from 2010 Instructors Manual
Basic Skills Field Trip All references will be to Freedom 7 and Freedom 8
Sitting Hip Belay is no longer taught at Basic Skills Field Trip One handed tie off is no longer taught, it has been replaced with the Mule
knot
Weight Drop is done with Belay Device not sitting hip belay Belay Practice Field Trip
Sitting Hip is introduced but not a critical skill Standing Carabiner Ice Axe Belay will be done as shown in Freedom 8 Leader Tie off will be done with both a leg wrap and the Mule knot A Rappel Setup-Backup Station has been added
Standing Carabiner Ice Axe Belay will be done as shown in Freedom 8 Snow Travel and Self-Arrest
Standing Carabiner Ice Axe Belay will be done as shown in Freedom 8 Snow Overnight
Leader Tie off will be done with both a leg wrap and the Mule knot Rock Fundamentals
Rappel backup may be done with either prusik above belay device(old method) or Autoblock
Leader Tie off will be done with both a leg wrap and the Mule knot Rock Weekend
Rappel backup may be done with either prusik above belay device(old method) or Autoblock
Z-Pulley per Freedom 8 Glacier Travel
Standing Carabiner Ice Axe Belay will be done as shown in Freedom 8 Appendix references updated
TABLE OF CONTENTS

Basic Course Field Trip Instructor's Manual Rev: 2013 The Mountaineers, Olympia Branch
General Field Trip Teaching Instructions
1.General ................................................................................................................................... 1 2.Instructor Standards ................................................................................................................ 2 3.Teaching Methods .................................................................................................................. 2 4.Critical Skills .......................................................................................................................... 3 5.Student Evaluation .................................................................................................................. 3 6.Suggestions For Checking Knot Skill .................................................................................... 5
Field Trip 1: Basic Skills 1.General ................................................................................................................................... 6 2.Knots ....................................................................................................................................... 7 3.Harnesses and Chest Slings .................................................................................................... 7 4.Prusik and Prusik Cutting Station ........................................................................................... 7 5.Belaying Station ..................................................................................................................... 8 6.Rope Coiling ......................................................................................................................... 11 7.Map and Compass ................................................................................................................ 11 8.Ten Essentials ....................................................................................................................... 11 9.Student Performance Comments .......................................................................................... 12
Field Trip 2: Belay Practice 1.General ................................................................................................................................. 13 2.Knots (Critical Skill) ............................................................................................................ 14 3.Ten Essentials ....................................................................................................................... 14 4.Station 1 – Weight-Drop (Critical Skill) .............................................................................. 14 5.Station 2 – Standing Carabiner Ice-Axe Belay ..................................................................... 15 6.Station 3 – Boot-Axe Belay .................................................................................................. 15 7.Station 4 – Fixed Line and Leader Tie-Off .......................................................................... 16 8.Station 5 – Prusik Station ..................................................................................................... 17 9.Station 6 – Belay Device and Münter Hitch Practice (Critical Skills) ................................. 17 10.Station 7 – Navigation ........................................................................................................ 17 11.Station 8 – Sitting Hip Belay (Critical Skill) ...................................................................... 17 12.Station 9 – Rappel Station .................................................................................................. 18 13.Student Performance Comments ........................................................................................ 19
Field Trip 3: Snow Travel and Self-Arrest
1.General ................................................................................................................................. 20 2.Snow Travel .......................................................................................................................... 21 3.Self-Arrest Practice (Critical Skill) ...................................................................................... 21 4.Sitting Hip Belay (Critical Skill) .......................................................................................... 22 5.Standing Carabiner Ice-Axe Belay ....................................................................................... 22 6.Boot-Axe Belay .................................................................................................................... 22 7.Snow Anchors ...................................................................................................................... 23 8.Fixed Line ............................................................................................................................. 23 9.Descending ........................................................................................................................... 23 10.Knots (Critical Skill) .......................................................................................................... 24 11.Map and Compass .............................................................................................................. 24 12.Roped Travel and Team Arrests ......................................................................................... 24 13.Student Performance Comments ........................................................................................ 24

Basic Course Field Trip Instructor's Manual Rev: 2013 The Mountaineers, Olympia Branch
Field Trip 4: Snow Camp (Overnight Weekend) 1.General ................................................................................................................................. 25 2.Snow Shelter /Snow Camp ................................................................................................... 26 3.Snow and Glacier Travel ...................................................................................................... 27 4.Avalanche Awareness........................................................................................................... 27 5.Self Arrest Practice (Critical Skill) ....................................................................................... 27 6.Knots (Critical Skill) ............................................................................................................ 27 7.Map and Compass ................................................................................................................ 28 8.Snow Anchors ..................................................................................................................... 28 9.Student Performance Comments .......................................................................................... 28
Field Trip 5: Rock Fundamentals 1.General ................................................................................................................................. 29 2.Rock Climbing ...................................................................................................................... 30 3.Carabiner Brake Rappel........................................................................................................ 30 4.Device Rappel ...................................................................................................................... 31 5.Belaying (Critical Skill)........................................................................................................ 31 6.Cleaning Protection .............................................................................................................. 31 7.Map and Compass ................................................................................................................ 31 8.Ten Essentials ....................................................................................................................... 32 9.Knots (Critical Skill) ............................................................................................................ 32 10.Leader Tie-off ..................................................................................................................... 32 11.Student Performance Comments ........................................................................................ 32
Field Trip 6: Rock Weekend 1.General ................................................................................................................................. 33 2.Knots (Critical Skill) ............................................................................................................ 34 3.Both Rappel Stations ............................................................................................................ 34 4.Map and Compass ................................................................................................................ 34 5.Belaying (Critical Skill)........................................................................................................ 34 6.Rock Climbing ...................................................................................................................... 35 7.Leader Tie-off ....................................................................................................................... 35 8.Ten Essentials ....................................................................................................................... 35 9.Student Performance Comments .......................................................................................... 35
Field Trip 7: Glacier Travel 1.General: ................................................................................................................................ 36 2.Glacier Travel Hazard Awareness ........................................................................................ 37 3.Roped Glacier Travel............................................................................................................ 37 4.Crampon Techniques (if conditions allow) .......................................................................... 38 5.Z-Pulley Crevasse Rescue ............................................................................................... 38-40 6.Single-Pulley Crevasse Rescue ............................................................................................ 41 7.Belaying (Critical Skill)........................................................................................................ 41 8.Demonstration of Direct Pull Rescue Method ...................................................................... 41 9.Ten Essentials ....................................................................................................................... 41 10.Knots (Critical Skill) .......................................................................................................... 42 11.Self Arrest Practice (Critical Skill) ..................................................................................... 42 12.Student Performance Comments ........................................................................................ 42
APPENDIX A: Student Performance Comments - Examples
APPENDIX B: Illustrations
APPENDIX C: Critical Skills Guide

General Field Trip Teaching Instructions
Basic Course Field Trip Instructor's Manual Rev: 2013 1 The Mountaineers, Olympia Branch
Copyright © 2000 by The Mountaineers, Olympia Branch 0.
General Field Trip Teaching Instructions
1. General General comments on the use of this manual: or, a reading guide for those who hate to read manuals!
This manual isn’t designed to be read like a novel. It might be helpful to at least review the introduction chapter. Then you need only read about the field trip(s) you wish to volunteer for. Even on those, you don’t need to read about every station set up for that trip. Just cover the general introduction information at the beginning of that field trip, and then the detail about the station you will be assisting on. If your job will be chaperoning students, it might be helpful to briefly review the full field trip, and also see what is in the student’s Basic Climbing Course manual. Keep this guide forever (well, at least don’t throw it away at the end of this year’s Basic Climbing Course). The idea will be for the Climbing Committee to only send changes to the volunteer instructors each new climbing season.
Many of our students are here to see if they would like mountaineering. The Basic Course can go a long way toward making that happen. While we must maintain the high standards that have been set in the past, at the same time we don't want to forget that all of us - - students and instructors alike - - are in this to have fun. As an instructor, you are the key to making the course enjoyable and rewarding and to bringing new climbers into the club.
Please Get to know the students - Introduce yourself and take time to talk to them and
acquaint them with Mountaineering activities. Share your experience and knowledge.
Help the students feel comfortable – Help them learn by your example. Remember how you felt learning these skills for the first time.
Be patient - Most of the students will have had little or no mountaineering experience. It's easy to make false assumptions about their knowledge and ability. If they take longer to learn a skill, it doesn't mean that the student will be any less able to apply it in the long run.
Be supportive and instill confidence- We ask our students to do some pretty scary things. Let them know that safety is a prime consideration and that field trip activities are run under tightly controlled conditions.
Maintain high standards - If you condone substandard performance in your area, you debase the entire course. Even worse, you may release an unsafe climber on the community.
Challenge the students - Push the students to their limits; encourage pride in their accomplishments.
Provide lots of written comments – Your students want to learn and want to know how to improve their skills. Liberal use of comments in the student Field Trip Record Books will help them reach their goal. Several of the field trip chapters in

General Field Trip Teaching Instructions
Basic Course Field Trip Instructor's Manual Rev: 2013 2 The Mountaineers, Olympia Branch
this guide include suggested “comments” to assist you in providing the students this important feedback.
Be outgoing, friendly and always open – Respond to questions or clarification. You are the "expert" and are trusted by the students.
Have Fun - If you have fun as the teacher, so will the students.
2. Instructor Standards 2.1 Be responsible
2.2
- Remember that the things you teach will be the foundation on which all of a student's future climbing is supported. How well you do your job will be a major factor in determining how good and safe a climber he or she will be and how well you are belayed on the climbs you lead. Be an example
2.3
- As an instructor you are a representative of the Mountaineers. All instructors should set an example by meeting or exceeding the standards expected of the students. Be prepared
2.4
- On some field trips you will be assigned a group of students to stay with all day. On others, you will be assigned a topic(s) to teach and may be rotated to other stations during the day. Therefore, you must be prepared to teach any and all the material to be covered on that field trip. Please take time before the trip to review pertinent material in this manual and in Freedom of the Hills; 8th Edition. Remember that things, such as the Ten Essentials, may have changed since you took the Basic Climbing Course. Teach approved methods
2.5
- The Basic Climbing Course teaches a set of standard skills that can be safely used by all climbers under a wide range of conditions. Please do not teach shortcuts or tricks-of-the-trade to basic students - teach only the approved methods. While you have the experience and judgment to know when one can safely deviate from standard procedures, few, if any, of the students possess this knowledge. In addition, teaching standardized methods makes it easier for the students to learn and reduces confusion. Teach safety
3. Teaching Methods
- Most, if not all, of the students are new to climbing and may be unaware of the consequences of their actions. Be alert for unsafe acts and use every opportunity to stress safety. Check the students frequently and stress that they must check and double-check both themselves and their fellow climbers.
3.1 Starting Out a. Learn everyone's name and make sure they know yours, especially if you are with
them all day. b. Review each student's Field Trip Record Book to ensure the completion and sign-
off of prerequisite skills. c. Keep your words and actions clear, simple and short.
• Teach by demonstration and participation. Use a student model when appropriate.
• Teach one concept at a time until everyone has mastered it. Continuously check and test progress. Back up and re-teach if necessary.
• Plan your words and keep them concise. • If students don't ask questions, ask questions of them.

General Field Trip Teaching Instructions
Basic Course Field Trip Instructor's Manual Rev: 2013 3 The Mountaineers, Olympia Branch
3.2 In the Trenches a. Adjust each situation to the individual student's speed and ability to learn each skill.
Have students help each other. b. Be informative without boring them. c. Be patient; let students learn from their mistakes and successes. d. Describe the task to be learned and monitor student progress. Provide constructive
feedback as they are proceeding, stressing the key points and proper techniques. e. Make sure everyone has something to work on if possible. f. Make sure everyone has learned the same techniques.
4. Critical Skills A few of the essential skills have been identified as “critical skills” to successful climbing and to safety. Critical skills, if not performed properly, present an immediate risk of serious injury or death to the student and/or other climbers. Pay particular attention to critical skills during field trips. Each student must perform proficiently all of the critical skills or they will not be permitted to continue to subsequent field trips or climbs. Reference Appendix C for the critical skill process.
The expectation for each critical skill is summarized at the beginning of each field trip section. If a student is having difficulty in learning one or more of the critical skills, you must note the problem in the Field Trip Record Book, and tell the field trip leader. Be specific in your written comments about critical skills. Once a student is expected to be performing a critical skill proficiently and cannot, write in the Field Trip Record Book “see mentor” and add specific comments about areas of difficulty. Offer the student an opportunity to discuss your comments with you prior to the end of the field trip. At that time remind the student to contact the assigned mentor for assistance. Further, the field trip leader will be responsible for notifying the Critical Skills Coordinator of students who are having difficulty with any of the critical skills.
5. Student Evaluation 5.1 The following performance standards are used to let the students know how they are
progressing, and to help the Climbing Committee and the basic climb leaders identify those students that may need additional assistance or who should not be permitted on basic climbs.
The student’s Field Trip Record Book, including performance evaluations and instructor comments, is used to monitor a student’s progress. Student evaluations should be carefully considered, and comments should be complete and specific.
To give instructors latitude and to better identify those students that might require help, a two point rating scale – “Satisfactory? Yes” or “Satisfactory? No” has been adopted. All “No” marks must be accompanied by a comment explaining the mark. “See Mentor” is used when a student doesn’t perform a critical skill proficiently. To help instructors apply the ratings consistently, a set of standards has been developed for each field trip.
5.2 Rating Standards
a. Satisfactory? Yes – Critical Skill
Means the student performs the skill proficiently.

General Field Trip Teaching Instructions
Basic Course Field Trip Instructor's Manual Rev: 2013 4 The Mountaineers, Olympia Branch
b. Satisfactory? Yes – Other (non critical) Skills
The student is able to perform the task without assistance or undue hesitation. If the student is adequately proficient and is able to perform the skill but requires some instruction or is hesitant, the instructor may write a comment suggesting the student practice.
c. Satisfactory? No – Critical Skill
The student is unable to perform the critical skill proficiently. “See Mentor” with supporting comments must be written in the student’s Field Trip Record Book.
d. Satisfactory? No – Other (non critical) Skills
The student is unable to perform the skill. Instructor should write specific comments on what is wrong in the student’s Field Trip Record Book.
5.3 See Mentor
This comment is reserved for critical skills.
5.4 Other Comments
Be specific. Provide meaningful information for the student, the student’s mentor, and the Climbing Committee.
5.5 Rating Considerations
Consider the following when applying the ratings and standards.
a. Definition of “Proficiently” (Critical Skills) This means the student is able to perform the skill properly without help from the instructor. The instructor should consider the following questions: “Would I trust this student if I was on the end of the rope? Would I trust this student to belay me, arrest and stop me in a fall, and tie knots that will hold?”
b. The performance standards are guidelines and are not intended to replace an instructor's judgment. The instructor and field trip leader have the final say on a student's rating.
c. The performance ratings should reflect the student’s knowledge or ability at the end of each activity during the field trip. Evaluate each student and enter your performance ratings and comments in the Field Trip Record Book immediately following each activity or phase of the field trip. Don’t wait until the end of the day when you can’t recall how each student performed in each activity.
d. For rating of “Satisfactory? Yes”, the student is expected to require minimum supervision on a basic climb and should neither cause delay nor endanger the party. You should have no qualms about taking this student on a basic climb where you are the climb leader.
e. Comments are required in the student’s Field Trip Record Book for all “see mentor” evaluations. Please provide enough detail for the mentor to determine how to help the student. Discuss all “see mentor” evaluations and comments with the student and the field trip leader at the end of the day. Field trip leaders are to report all “see mentor” ratings to the Climbing Committee, and alert the Mentor Coordinator. Have the courage to stand behind and explain your evaluations. Tell

General Field Trip Teaching Instructions
Basic Course Field Trip Instructor's Manual Rev: 2013 5 The Mountaineers, Olympia Branch
the student to contact the mentor (Reference Appendix C that describes the process for critical skills.).
f. Comments are appropriate at any time, the more the better. Include comments about the student’s attitude and judgment. Be especially free with comments recognizing students with positive attitude or outstanding performance.
g. Be sure to include your name with any notes you make in the student Field Trip Record Books in case questions come up later.
6. Suggestions For Checking Knot Skills
After the Basic Skills Field Trip, the student must, without further instruction, correctly tie all the knots and know the principal uses(s) of each. A student may be given at two tries to tie a knot. However, other than saying that a knot has not been properly tied, the instructor should not provide any assistance or guidance prior to the retry. The student should be able to correct errors in the knots.
KNOT LIST
1. Single Bowline * 7. Grapevine (double fisherman's knot) 2. Double Bowline * 8. Prusik Knot 3. Mule Knot 9. Bachmann knot 4. Water Knot 10. Münter Hitch 5. Figure-eight Loop 11. Clove Hitch 6. Rewoven Figure-eight 12. Girth Hitch *NOTE: Tie off or clip off these knots

Field Trip 1 Basic Skills
Basic Course Field Trip Instructor's Manual Rev: 2013 6 The Mountaineers, Olympia Branch
1.
Field Trip 1: Basic Skills Date: See Basic Course schedule Time: To be announced. Place: TBD Duration: Approximately 7 hours.
Purposes: Teach proper belay techniques. Teach mountaineering knots. Teach map and compass skills. Tie and demonstrate Texas prusiks. Check ten essentials (remember, there is a new list) Teach rope-coiling techniques. Check harnesses and chest slings.
Instructor's Equipment: Lunch and liquid Pen or pencil Technical gear you will need for your station (examples follow) • Slings • Seat harness • Carabiners • Belay device • Compass • Belay gloves
Critical Skills: None at this first field trip.
Instructions:
1. General 1.1 Arrive earlier than the time set for the students to arrive. 1.2 Make yourself a name tag. 1.3 Each station will be assigned a lead instructor responsible for coordinating activities. 1.4 Discuss demonstrations, equipment, etc. before the first students arrive. 1.5 Discuss how to fill out the Field Trip Record Book. 1.6 Students will be rotating through the stations in pairs. 1.7 Instructors at individual stations:
a. Introduce yourself to students who come to your station and briefly explain what you and they will be doing.
b. Make sure that the students are at the correct station, and see that they sign the sign-in sheet.
c. Check in the student's Field Trip Record Book that all the activities at each station are complete. If a student is having a problem, work with the student until you are satisfied they can do the required skill.
d. Write constructive comments in the student's Field Trip Record Book. Be specific on what they need to work on. The students must see the Field Trip Record Books and comments. Be encouraging.
e. Direct students to another station when they are finished at yours. f. If you have a problem with a student, tell the field trip leader.

Field Trip 1 Basic Skills
Basic Course Field Trip Instructor's Manual Rev: 2013 7 The Mountaineers, Olympia Branch
2. Knots 2.1 This skill has the potential for frustration for both the instructor and students. The
students will go through the station twice with different instructors each time. 2.2 The knots:
1. Single Bowline * 7. Grapevine (double fisherman's knot) 2. Double Bowline * 8. Prusik Knot 3. Mule Knot (Demo/Practice at Belay Station)
9. Bachmann knot
4. Water Knot 10. Münter Hitch 5. Figure-eight Loop 11. Clove Hitch 6. Rewoven Figure-eight 12. Girth Hitch *NOTE: Tie off or clip off these knots
2.3 First, demonstrate each knot and explain its advantages and use(s), and then have the students practice. Be realistic (e.g., tie the bowline around something.) Also show how the knots may come loose.
2.4 Stress the need to “dress” the prusik, both figure-eight, the double bowline and water knot (e.g., 2-inch tails; strands aren't crossed; strands are parallel, not twisted, kinked or crossed). Explain that failing to dress knots weakens them.
2.5 Be aware of left-handed students. If you are right handed, they may do things in a mirror image to your way.
2.6 Remind students that knots will be a critical skill at belay practice, and they will be required to tie all knots and know the principle use of each.
3. Harnesses and Chest Slings 3.1 This station must be completed prior to Belaying Station. It is important to get at least
six students through this fairly quickly so that the belay instructors can get started (If necessary, have some of the belay instructors help initially.).
3.2 Demonstrate the emergency seat harness. Explain under what circumstances this harness might be used. Note: The simple harness is taught as described on page 196 of Freedom of the Hills; 7th Edition; page 8th Edition. This is also covered in the student's Basic Climbing Course student manual.
3.3 Check that each student has a commercial climbing harness. Discuss and have them practice the proper method of wearing it, stressing doubling the strap back through the buckle.
3.4 Have students tie a chest harness from the sling material that they have brought with them. Check their water knots. Have the students try the chest harnesses on, with a carabiner, for size.
4. Prusik and Prusik Cutting Station 4.1 Material for the Texas prusiks will be supplied. 4.2 Make Texas prusiks. Help students tie a leader tie-off sling with their own materials. 4.3 Assist students in tying and sizing their prusiks (see page 366, Freedom of the Hills;
7th Edition; page 8th Edition). 4.4 When your group is ready, move to the demonstration rope and show them how to
attach the prusiks. An instructor will make a few moves to demonstrate ascending and descending movements on the rope.
Field Trip 1 Basic Skills
Basic Course Field Trip Instructor's Manual Rev: 2013 8 The Mountaineers, Olympia Branch
4.5 Briefly discuss how the prusiks are worn and used for glacier travel.
5. Belaying Station
5.1 Students will demonstrate competent belaying with a belay device and Münter hitch belaying techniques to the satisfaction of the instructor. Instructor will also demonstrate leader tie-off techniques.
5.2 Teach one way to be consistent. The students have enough to learn without being subjected to multiple ways of doing things safely. If you have a question on belay method, consult with the station leader.
5.3 Adjust your instruction to match the individual student’s speed and ability to learn belay skills.
5.4 Teach the belay device first to cover the basics. 5.5 Teach in pairs. One instructor should work with the “climber” and the other with the
belayer. 5.6 Students will be in two-person teams; teams will go through the belay station twice,
each time with different instructors. 5.7 Suggested routine first time through
: a. Demonstrate the belay device from start to finish. As you do this, discuss each of
the key factors in competent belaying (see Section 5.9). b. Student practices / demonstrates belay device only (This first session focuses on
setting up, rope handling, rhythm, calls etc., so keep it simple by covering belay device only.) Teach a four-count method or similar if a student needs help with rhythm.
c. Tell students they will use a device and Münter hitch as well as practice leader tie-off during the second session.
d. Comment constructively in students’ books – write more the “good” or “needs work” – be specific. Discuss with students.
5.8 Suggested routine second time througha. Review the student’s Field Trip Record Book for comments on the first session -
customize your instruction to help students improve.
:
b. Student practices / demonstrates belay device. Remind students about key factors of competent belaying (see Section 5.9).
c. Demonstrate use of the Münter hitch. d. Students practices / demonstrates Münter hitch belay. e. Demonstrate use of leader tie-off using both the Leg Wrap and the Mule knot
methods with the belay device (Assist student by trying prusik, helping with leg wrap, clipping to anchor etc.) See “Station 4 Fixed Line and Leader Tie-Off” under Field Trip #2 for the leader tie-off procedure.
f. Sometime during the session discuss the advantages and disadvantages of the belay device and Münter hitch.
g. Give a copy of “Key Factors in Competent Belaying” to each student. Remind students that belay is a critical skill at the Belay Practice Field Trip, at which time they must show proficiency. The instructor will be asking “Do I trust this student to belay me on a climb?”
h. Comment in students’ Field Trip Record Books. Suggest students’ call their mentors if you feel additional work is needed before the next field trip (Although belay is not a “critical skill” at this first field trip.).

Field Trip 1 Basic Skills
Basic Course Field Trip Instructor's Manual Rev: 2013 9 The Mountaineers, Olympia Branch
5.9 Key Factors in Competent Belaying
a. The belay device is the preferred and primary method on rock; the Münter hitch can be used when a device is unavailable. The sitting-hip belay is backup only on rock and is preferred in some cases where the anchor is questionable (e.g. some snow situations).
b. The anchor is solid; two anchors are better than one. c. The belayer is as close to the anchor as possible, with a tight anchor chain (no
slack). d. The anchor chain includes the clove hitch tied to a locking carabiner. e. The braking hand is on the same side as the anchor chain using a belay device;
with the Münter it doesn’t make a difference. The braking hand is opposite the anchor side with the sitting hip belay.
f. Position is as comfortable as possible, away from rock fall. Legs should be braced (especially the leg on the feeling hand side) using a three point stance.
g. The belay is aimed toward the direction of fall so that the pull of the falling climber comes between the belayer’s legs.
h. Haul in slack before passing the rope around back or into device. i. The belay rope is under the anchor chain for sitting-hip belay (keeps rope down
and off rib cage area during arrest). j. The rope passes through the guiding carabiner on the feeling-hand side for
sitting-hip belay (to keep rope from slipping under the climber and out-of-control). The guiding carabiner gate is down and out for ease of clipping rope in. Have a guiding carabiner on both sides of the harness to be prepared regardless of which hand is the braking hand.
k. The belayer is wearing gloves on both hands for all belay methods. l. The climber and belayer check each other’s knots and setup whenever possible. m. Test every belay. n. Use proper belay signals:
Climber . . . . . . . .On Belay (optional) Climber . . . . . . . . . . . . . . . . . . . Up Rope Belayer . . . . . . . . . . . . . . . . .Belay On Climber . . . . . . . . . . . . . . . . . . . . Falling Climber . .Test Belay (test every belay) Climber . . . . . . . . . . . . . . . . . . . . . . Slack Belayer . . . . . . .Testing or Test Belay Climber . . . . . . . . . . .. . . . . . . . . Tension Climber . . . . . . . . . . . . . . . . .Climbing Climber . . . . .Off Belay (after anchoring) Belayer . . . . . . . . . . . . . . . . . . .Climb Belayer . . Belay Off (after out of system)
o. Use the commands in a loud and crisp manner; don’t embellish them. They need
to be easily understood under adverse conditions. Some points to remember: • "Belay off” is given by the belayer when the belay system has been broken
down and the climber can begin pulling up the excess rope. • "Feet-one-five" is used in response to climber's "How much rope?" Amount is
given by stating the individual digits to make the response more understandable.
• "On belay" (climber) is unnecessary unless there's been excessive delay. Belayer will give "belay on" when ready.
• Respond to "slack" by feeding out one arm length of rope. If climber wants more, he'll ask.

Field Trip 1 Basic Skills
Basic Course Field Trip Instructor's Manual Rev: 2013 10 The Mountaineers, Olympia Branch
• Climber says “climbing” after “tension” and “falling”; it’s also a good idea to use “climbing” after “up rope” and “slack”.
• “That’s me” can be called by the climber whenever the belayer pulls the rope taught with the climber (e.g. initial set up, after “up rope”, etc.).
• Add climber’s and belayer’s names to signals if others are climbing in the area.
p. Good rope handling technique includes using both the right and left hands for braking (There are many times one hand or the other must be used); laying slack rope neatly to the braking hand side, untangled and away from feet; using the feeling hand as well as the braking hand to pull in rope, so as not to tire the braking hand; smooth rhythm.
q. Maintain an upright braking position. The tendency is to move the bracing (feeling) hand out so far that the belayer ends up in a near prone position - a common mistake (sitting-hip); brace with the feeling hand arm straight out to the side, with a locked elbow. Ideally only the arms move; the torso remains stationary.
r. In the sitting hip braking position, wrap the braking arm around the lower torso, keeping the braking hand above and away from the climbing rope (to prevent burning the wrist). Bend the wrist for added friction. When using a device the direction of pull during braking is back, toward the anchor. For the Münter hitch brake, pull the braking hand in the direction of the fall.
s. Never let go of the rope with the braking hand. All fingers on the braking hand should remain wrapped around rope.
t. Have all equipment needed for leader tie-off handy. u. Remember dynamic vs. static belay situations. v. Concentration!! Pay attention from “Belay On” to “Belay Off” signals; avoid idle
talk.
Advantages of Belay Device Disadvantages of Belay Device Most devices also suitable for rappelling Burns on body possible Less grip required than sitting-hip to stop
fall Greater chance of loss of control if stance
collapses
Advantages of Münter Hitch Disadvantages of Münter Hitch
Less specialized equipment than device Requires large “pear” carabiner Most braking friction Follower fall is a least 6” as knot reverses
Advantages of Hip Belay
Can twist rope Disadvantages of Hip Belay
Less specialized equipment than device Burns on body possible Fastest method of belay for taking in rope Greater chance of loss of control if stance
collapses Can preserve questionable anchors (least
braking friction) such as those on snow Precautions against unwrapping and
failure are required Easy to do dynamic belay (least friction) Weaker strength than belay with device
(requires stronger grip / least friction)

Field Trip 1 Basic Skills
Basic Course Field Trip Instructor's Manual Rev: 2013 11 The Mountaineers, Olympia Branch
6. Rope Coiling 6.1 Demonstrate to the students the mountaineer coil (as done in Olympia), and the
butterfly coil. 6.2 Discuss the pros and cons of each type of coil. The students should have opportunity
to practice each type of coil at least once. 6.3 Demonstrate to students how to let out a rope. 6.4 Stress that students should not step on the rope; explain why. 6.5 Demonstrate the methods of carrying the coiled rope. 6.6 If there is time, demonstrate the fireman's coil.
7. Map and Compass 7.1 General: This is a slow station, so be patient. Maps confuse many people.
Additionally, be aware that the metal in the building may affect the compasses. 7.2 Students will be provided a printed exercise containing a number of problems to be
completed. The exercise will use pre-established points set up in advance by the lead instructor coordinating this station.
7.3 Each student should perform the exercise independently, filling in all the answers on the exercise sheet.
7.4 Instructors will circulate among the students working on the exercise, assisting and responding to questions, as appropriate.
7.5 Upon completion, the students will bring their exercise to an instructor for correction and discussion. If the student has the wrong answer, be as informative as possible. Talk about the correct answer and how to get it.
8. Ten Essentials 8.1 Go through the list, item by item, checking what each student has. Remember, the
Ten Essentials has been modified as of 2004. 8.2 Not all students will have a complete set at this time. 8.3 Discuss with the student the adequacy of what they have assembled, and suggest
improvements where appropriate. 8.4 Note what is missing in the student's Field Trip Record Book. Tell students that they
should have a complete set by the next field trip. 8.5 The first aid kit may not be complete, unless the student has gone through MOFA. 8.6 Do not let your own tastes intrude on the student's choice of emergency food, unless
it is really a poor choice. Emphasize lots of calories. 8.7 The Ten Essential; Freedom of the Hills; 7th Edition
1. Navigation 2. Sun Protection 3. Insulation (Extra Clothing) 4. Illumination 5. First-Aid Supplies 6. Fire 7. Repair Kit and Tools 8. Nutrition (Extra Food) 9. Hydration (Extra Water) 10. Emergency Shelter

Field Trip 1 Basic Skills
Basic Course Field Trip Instructor's Manual Rev: 2013 12 The Mountaineers, Olympia Branch
9. Student Performance Comments
See Appendix A.
Field Trip 2 Belay Practice
Basic Course Field Trip Instructor's Manual Rev: 2013 13 The Mountaineers, Olympia Branch
2.
Field Trip 2: Belay Practice Date: See Basic Course schedule Time: To be announced. Place: Rose Garden Shelter, Priest Point Park, Olympia, WA. Duration: Approximately 9 hours.
Purposes: Check belaying techniques. Check students’ knot-tying ability. Teach standing carabiner ice-axe and boot-axe belays. Teach use of prusiks. Teach map and compass skills. Teach fixed rope travel and leader tie-off techniques. Teach Rappel Setup and Backup Check ten essentials and test students’ knowledge about their purpose.
Instructor's Equipment: Seat and chest harness Ice axe Belay device Ten essentials (optional – for demo only) Carabiners Outdoor clothing as appropriate to weather Rope and webbing (club equipment) Lunch and liquid Pen/pencil Post hole diggers Insulation pad Belay gloves
Critical Skills: Knots Student must show proficiency at this field trip. If not, then before next field
trip and before any climb. .5
Belaying with Device and Münter Hitch
Student must show proficiency at this field trip. If not, then before next field trip, and must show proficiency before Rock Fundamentals field trip and before any alpine, rock or glacier climb.
Personally notify the field trip leader about any students needing to see their mentors.
Instructions:
1. General 1.1 The students will be divided into groups of 6-8 students each. Group leaders will be
assigned a group of students and will work with those students throughout the day. The field trip will begin with a gathering at the Rose Garden shelter (time to be announced). The groups of students will then go off with their respective group leaders to check the ten essentials and knots for the first hour. This hour will give each station leader and the assistant instructor’s time to set up and get ready for the rotations to begin. The groups will continue with 55-minute rotations and should be finished and cleaned up at the designated time.
1.2 Group leaders are to keep the groups moving from one station to the next quickly, and to offer the station leaders assistance.

Field Trip 2 Belay Practice
Basic Course Field Trip Instructor's Manual Rev: 2013 14 The Mountaineers, Olympia Branch
1.3 Students are to keep their packs with them at all times. 1.4 Check all harnesses to ensure the students are wearing them properly. Remind them
to re-weave through all buckles. 1.5 Report any student who is making insufficient progress to the field trip leader.
2. Knots (Critical Skill) 2.1 Students should know all of the knots. 2.2 Have each student tie each knot and explain its use(s).
The knots: 1. Single Bowline * 7. Grapevine (double fisherman's knot) 2. Double Bowline * 8. Prusik Knot 3. Mule Knot ** 9. Bachmann knot 4. Water Knot 10. Münter Hitch 5. Figure-eight Loop 11. Clove Hitch 6. Rewoven Figure-eight 12. Girth Hitch * NOTE: Tie off or clip off these knots ** Demo/Practice at Leader Tie off Station
2.3 If student is unable to tie a knot, note “see mentor” in the Field Trip Record Book. 2.4 Stress the need to “dress” knots such as the prusik, figure-eight, and water knot:
a. Use two-inch tails. b. Be sure strands aren't crossed. c. Check that strands are parallel, not twisted or kinked. d. Explain that failing to dress knots weakens them.
3. Ten Essentials 3.1 The students will have a complete set at this time. 3.2 Discuss with the students the adequacy of what they have assembled, and suggest
improvements where appropriate. 3.3 Note what is missing in the student’s Field Trip Record Book. Tell students that they
must have a complete set by the next field trip.
4. Station 1 – Weight-Drop (Critical Skill) Students will belay with both right and left hands.
4.1 Students will need the following equipment for the weight-drop station (All other equipment and devices should be removed from their harnesses): a. Gloves that fit. Instructor leading each group should include this as part of an
equipment check before bringing the group to the weight-drop station. b. One locking carabiner. c. Two non-locking carabiners. d. One sling for leader tie-off.
4.2 Other students will take turns operating the winch to lift the weight. 4.3 Station lead instructor will review belay device steps with student prior to weight-
drop and explain what will happen. 4.4 Review the Student’s Field Trip Record Book for comments on belay skills at
previous stations (Belay Device and Münter Hitch, and Leader Tie-off). Customize your instruction to help students improve.

Field Trip 2 Belay Practice
Basic Course Field Trip Instructor's Manual Rev: 2013 15 The Mountaineers, Olympia Branch
4.5 This is a critical skill station; therefore an instructor demonstration is not necessary. Go easy the first few minutes to allow the student to “acclimatize”; treat the remainder of the session as a check of belay skills. Remind the students they must perform the belay proficiently (See definition of “proficiently” in the “General Field Trip Teaching Instructions”.).
4.7 Important
5. Station 2 – Standing Carabiner Ice-Axe Belay
: refer to “Key Factors in Competent Belaying” in Section 5, Belaying Station, and Basic Skills Field Trip. Check all of the Key Factors as the students progress from the initial belay set-up to the “belay off” signal.
This station will be equipped with at least two retired branch ropes. Station 2 must be set up in advance with two or more holes to simulate burying the ice axe in snow.
5.1 Tell students what equipment they will need (ice axe, carabiner, short sling). 5.2 Explain when and why the standing carabiner ice-axe belay is used:
a. Fast set-up in snow; b. Relatively strong and comfortable position for belayer.
5.3 Demonstrate set-up and show how incorrect positioning can cause ice axe to come loose when sling is too long (See illustration in Freedom 8 for correct position.).
5.4 Have each student practice set-up using both right and left hands, with climber ascending and descending.
5.5 Emphasize a. Establishing a level stance. b. Sinking ice axe as deep as possible with head perpendicular to fall line
(remember to compact snow beside Ice Axe where foot is placed). c. Attaching sling with girth hitch at snow line. d. Standing perpendicular to fall line facing the route of the climber. e. Standing over sling, leaving carabiner exposed, bracing axe with boot (Keep
crampons off sling.). f. Keeping legs straight and weight evenly balanced. g. Take rope from climber then route it through carabiner across body and around
hip to brake hand. h. Using dynamic belay; letting some rope slip.
6. Station 3 – Boot-Axe Belay This station will be equipped with at least two retired branch ropes. Station 3 must be set up in advance with two or more holes to simulate burying the ice axe in snow.
6.1 Explain when and why the boot-axe belay is used: a. When there is need for an immediate belay on snow. b. For a short time period, and c. Use only when belaying someone where the fall line is away from belayer for
example, downhill or when belaying someone crossing a crevasse above you. 6.2 Explain disadvantages:
a. Not a strong belay. b. Uncomfortable position for belayer if required to hold position for a long period
of time. 6.3 Demonstrate set-up using the “sweep” technique.

Field Trip 2 Belay Practice
Basic Course Field Trip Instructor's Manual Rev: 2013 16 The Mountaineers, Olympia Branch
6.4 Have each student practice set-up using both right and left hands, with climber moving both toward and away from belayer (See illustration in Freedom 8 page---).
6.5 Emphasize a. Downhill leg must be locked. b. Ice-axe pick is facing toward toe. c. When braking, uphill hand braces head of ice axe.
d. Downhill hand is brake hand. e. The belay is dynamic.
7. Station 4 – Fixed Line and Leader Tie-Off 7.1 Fixed Line
This station is intended to be a quick introduction to moving along a line. The station leader should have one set up in advance, and have students practice moving along it. a. Tell students that they will need to have two prusiks ready for use at this station. b. The fixed rope will be best if it can include obstacles requiring students to:
• Pass through two carabiner/sling positions securing the fixed line, and • Use a second prusik to pass around an obstacle where the fixed line is secured
in such a way that the prusik cannot be passed through. c. Instructor should
• Demonstrate the correct method to pass the prusik through a retaining carabiner on the fixed line.
• Demonstrate use of a second prusik to pass around an obstacle. Discuss that the second prusik must be secure before the first prusik is removed.
• Discuss potential that prusik will not hold properly if guiding hand is not released from the prusik during a fall.
7.2 Leader Tie-Off 7.2.1 This station is not a critical skill station. Belaying critical skills will be covered
at the belay stations. If a student needs assistance in setting up the belay, make a comment in the Field Trip Record Book.
7.2.2 Have students use the device or Münter hitch belays (less time than sitting-hip belay).
7.2.3 Discuss the need for a leader tie-off (injured climber, others unavailable to help).
7.2.4 Demonstrate and have students practice two methods: Mule knot and Leg Wrap methods. a. Have students go through the following steps for Mule Knot method:
• Have the leader tie-off sling accessible during belay. • Brake! • Tie off belay device (or Münter Hitch belay) with Mule knot backed up
with an overhand knot. The load is now on the belayer’s harness and belayer’s hands are free.
• Tie leader tie-off sling to climbing rope with prusik knot. • Clip other end of leader tie-off sling to the anchor. It may be necessary
to attach an additional sling.

Field Trip 2 Belay Practice
Basic Course Field Trip Instructor's Manual Rev: 2013 17 The Mountaineers, Olympia Branch
• Untie the Device-Mule and then slowly release weight from braking hand to the anchor system. (Note: Prusik knot should not extend beyond reach after weight is applied.)
• Connect the rope to the anchor with a Figure 8 on a bight as a backup, and then remove the belay device.
b. Have students go through the following steps for the Leg Wrap method : • Have the leader tie-off sling accessible during belay. • Brake! • While in the braking position, using the feeling hand bring loose part of
rope around belayer’s back then wrap the rope around the leg on the feeling hand side (2 or 3 double wraps) thread rope under wraps and pull tight.
• After bending the leg toward the body, slowly release the weight until all weight is held by the leg wraps.
• Use both hands to tie the prusik knot and continue as with the one-handed method.
8. Station 5 – Prusik Station Students must wear a CEN, CE or UIAA-approved climbing helmet.
8.1 Explain prusiking principles and uses and show how to attach prusiks to rope. Ensure prusik knots go in opposite directions.
8.2 Explain how prusik slings are carried for glacier travel and what a fallen climber must do (drop pack, don foot loops, etc.).
8.3 Have the students attach the prusiks; check them before the student climbs. 8.4 Students are to drop their packs, and must climb up and down one time with their
pack suspended from the rope. 8.5 Make any necessary adjustments to the prusiks to fit them to the student.
9. Station 6 – Belay Device & Münter Hitch Practice (Critical Skills) 9.1 Students will go from this Station to the Weight Drop. Instructors will demonstrate
various mechanical belay devices, and have students use a belay device of their choice. This station also includes set-up and use of the Münter hitch.
9.2 Review the student’s Field Trip Record Book for comments on belay skills at previous stations (Weight Drop, Sitting-Hip Belay, and Leader Tie-off). Customize your instruction to help students improve.
9.3 This is a critical skill station; therefore an instructor demonstration (other than showing various devices) is not necessary. Go easy the first few minutes to allow the student to “acclimatize”; treat the remainder of the session as a check of belay skills. Remind the students they must perform the belay proficiently (See definition of “proficiently” in the “General Field Trip Teaching Instructions”.).
9.4 Important
9.5 Explain how to rig each device. Point out that a locking carabiner is used to attach the device and that the rope passes through the device and through the locking
: refer to “Key Factors in Competent Belaying” in Section 5, Belaying Station, and Basic Skills Field Trip. Check all of the Key Factors as the students progress from the initial belay set up to the “belay off” signal.

Field Trip 2 Belay Practice
Basic Course Field Trip Instructor's Manual Rev: 2013 18 The Mountaineers, Olympia Branch
carabiner. With the correct braking hand movement the device will do the work and provide the friction to slow and then stop a fall.
10. Station 7 – Navigation This practice should begin at the previous station, with directions to navigate to the actual station where we will then practice triangulation.
11. Station 8 – Sitting Hip Belay 11.1 Review the student’s Field Trip Record Book for comments on belay skills at
previous stations (Weight Drop, Belay Device and Münter Hitch, and Leader Tie-Off). Customize your instruction to help students improve.
11.2 Important: refer to “Key Factors in Competent Belaying” in Section 5, Belaying Station, and Basic Skills Field Trip. Check all of the Key Factors as the students progresses from the initial belay set up to the “belay off” signal.
11.3 Discuss and have students practice dynamic belays, let rope slip to simulate the dynamic belay. Explain that we use the dynamic belay when the anchor is not always solid, particularly on snow.
12. Station 9 – Rappel Setup and Backup
Rappel Setup • Anchor
a) Must be solid (Minimum 5” and alive for trees) backup existing anchor if needed.
b) Check existing anchors for UV, rodent damage or friction damage from rappelling without a rap ring. (Show how to back up a suspect rap ring with a piece of webbing).
• Rope a) Check rope or ropes for damage as you setup rappel b) Demo knots for tying ropes together if double rope rappel is needed
• Rappel Method for applying friction a) Belay Device b) Carabiner Brake c) Münter hitch
• Rappeler
Check your and your climbing partners harness, rappel setup, backup, every time!
Rappel Backup
• Show prusik backup above device as done in the past • Show autoblock / prusik attached to leg loop
a) Explain advantages of old vs. new
1) Old
Disadvantage
: Old method locks off with full body weight, making it difficult to release and can lock off by accident, must not hang onto knot for it to work.

Field Trip 2 Belay Practice
Basic Course Field Trip Instructor's Manual Rev: 2013 19 The Mountaineers, Olympia Branch
Advantage
: Old method doesn’t need an exact length to work.
2) New Disadvantage
: New method requires correct length to work, too long and belay device will “mind” the cord stopping it from locking on the rope. Must take care with leg loops too insure it will not load plastic buckles, or loosen quick release buckles. Can make it difficult to feed rope through belay device when starting out on long rappel.
Advantage
: New method only needs enough grip to lock belay device, can easily be released after locking off.
b) Explain that you can use cord or “nylon” sling, but no spectra or similar slings should be used.
c) Show proper place to attach to leg loop
• Talk about the specific problems with using BD Alpine harnesses (Autoblock can be too close to belay device unless length is exact). Explain why it may be better to use the old method or extend the belay device so auto block can be attached to belay loop.
• Demo rappel setup with belay device extended • Talk about different ways to back up a rappel on a climb to make rappelling
faster. ( Fireman’s pull from below except for first person rappelling) • Why you would back up a rappel
a) Rock fall danger b) Unknown route c) Darkness, hard to see d) Tangled ropes e) Icy rope
Show Carabiner Brake setup
Students setup rappel and backup
• Set up practice area on approximately a 45 degree slope, not a drop off. • All student rappels must be backed up during course and climbs • Help student setup Autoblock and adjust accessory cord to length • Setup Carabiner Brake
13. Student Performance Comments
See Appendix A.
Field Trip 3 Snow Travel and Self Arrest
Basic Course Field Trip Instructor's Manual Rev: 2013 20 The Mountaineers, Olympia Branch
12.
Field Trip 3: Snow Travel and Self-Arrest Date: See Basic Course schedule Time: To be announced. Place: Mount Rainier National Park; meet at Longmire parking lot. Duration: Nine to ten hours. Carpooling: Check with field trip leader. Special Note: All cars must carry chains and a shovel.
Purposes: Teach students how to carry and use an ice axe. Teach self-arrests. Teach snow travel techniques, including plunge step, rest step, step-kicking, and
glissading. Teach fixed-line travel. Check sitting hip belay. Practice standing carabiner ice-axe belay and boot-axe belay. Demonstrate snow anchor placement. Check knots and ten essentials. If time allows, teach roped travel and team-arrests.
Instructor's Equipment: Seat and chest harness Ice axe Belay device Ten essentials Carabiners Outdoor clothing as appropriate to weather Shovel Flukes/pickets (If you own them) Rope and webbing (to demo knots) Leader tie-off prusiks Slings (for snow anchors) Extra prusiks Texas prusik Lunch and liquid Pen or pencil
Critical Skills: Belaying Sitting hip belay: must show proficiency on this field trip or see
mentor and show proficiency before next field trip, or before any alpine, glacier, or rock climb.
Ice-Axe Arrests: Must show proficiency at this field trip, or see mentor and demonstrate proficiency before any climb on snow.
Knots: Must show proficiency at this field trip, or see mentor and show proficiency before next field trip, or before any climb.
Personally notify the field trip leader about any students needing to see their mentors.
Field Trip 3 Snow Travel and Self Arrest
Basic Course Field Trip Instructor's Manual Rev: 2013 21 The Mountaineers, Olympia Branch
Instructions:
1. General 1.1 Instructors will be assigned to a group of up to 12 people (including instructors), that
will work together all day. Each group will have a lead instructor, and one or more assistant instructors.
1.2 Check ten essentials of all students before leaving the parking lot. Report any student who does not have a complete set to the field trip leader.
1.3 Emphasize arrests, belay, and snow travel. 1.4 Stress safety. Ensure all ice axe adzes are taped and students use sunscreen and
sunglasses. Be alert for evidence of hypothermia. Monitor avalanche conditions.
2. Snow Travel 2.1 Handling and Carrying Ice Axe
Before leaving the parking lot: a. Discuss the parts of the ice axe. b. Demonstrate the different ways to carry it (self-belay, self-arrest, trail, on a pack)
and discuss when each is appropriate. c. Stress that the ice axe is held in the uphill hand or held in the cross-body position
when traversing. 2.2 Snow Travel with the Ice Axe
a. Demonstrate and have the students practice self-belaying. Show them how to use the axe to change direction when traversing on a steep slope, and have students practice.
b. Discuss and demonstrate how to carry an ice axe under various situations. c. Explain when the wrist loop/leash should and should not be used. d. Explain difference between self-belay and self-arrest carry position. e. Demonstrate and have students practice the rest step. f. Demonstrate and have the students practice step-kicking. Emphasize the need to
kick in and down and to trade the lead. Subsequent climbers also kick to further pack the step.
g. Practice ascending and descending on steep terrain.
3. Self-Arrest Practice (Critical Skill) 3.1 An effective approach is to integrate instruction on glissading, step-kicking, rest step,
ice axe self-belay, and self-arrests. Have the students form a chute for subsequent arrests by glissading and, at the end of the glissade, arrest. They can then practice step-kicking, rest steps and self-belays when climbing up.
3.2 Demonstrate and fully explain all ice-axe arrest positions. The arrest positions will be taught in the following sequence:
a. Feet first, face down. b. Feet first, face up (on back). c. Head first, face down. d. Head first, face up.
(See illustrations in Freedom 8 page //)

Field Trip 3 Snow Travel and Self Arrest
Basic Course Field Trip Instructor's Manual Rev: 2013 22 The Mountaineers, Olympia Branch
3.3 Key points of arrest positions: ice axe across chest held at head and near spike; ice axe head at shoulder, pick down; spike close to body; feet spread; back arched placing weight on axe and toes (See illustrations in Freedom 8 page //).
3.4 Have students practice. Each student must successfully do two arrests in each position with each hand.
3.5 Stress that they roll to the right when holding the ice-axe head in the right hand, and roll to the left when holding the ice-axe head in the left hand.
3.6 Stress the need to arrest rapidly and to keep on trying.
3.7 Practice arresting while wearing a pack and without an ice axe.
4. Sitting Hip Belay (Critical Skill) 4.1 Refer to material in Section 5.9 Basic Techniques Field Trip; and Station 8, Sitting
Hip Belay, Belay Practice Field Trip. 4.2 Demonstrate proper set-up of sitting hip belay in snow. Students must be proficient at
performing sitting hip belay at this stage of their training. 4.3 Explain when this belay would be used instead of a boot-axe belay or a standing
carabiner ice-axe belay. 4.4 Have students practice dynamic belays. Tell the students why all snow anchor belays
should be dynamic.
5. Standing Carabiner Ice-Axe Belay 5.1 Demonstrate and have the students practice setting up and using a standing carabiner
ice-axe belay. (See illustrations in Freedom 8 page___) 5.2 Explain when and why the standing carabiner ice-axe belay is used:
a. Fast set-up in snow, b. Relatively strong and comfortable position for belayer.
5.3 Emphasize a. a. Establishing a level stance. b. Sinking ice axe as deep as possible with head perpendicular to fall line
(remember to compact snow beside Ice Axe where foot is placed). c. Attaching sling with girth hitch at snow line. d. Standing perpendicular to fall line facing the route of the climber. e. Standing over sling, leaving carabiner exposed, bracing axe with boot (Keep
crampons off sling.). f. Keeping legs straight and weight evenly balanced. g. Take rope from climber then route it through carabiner across body and around
hip to brake hand. h. Using dynamic belay; letting some rope slip.
6. Boot-Axe Belay 6.1 Explain when and why the boot-axe belay is use:
a. Need for an immediate belay on snow, b. Used for a short time, and c. Only when belaying someone on the same or a lower level than the belayer.

Field Trip 3 Snow Travel and Self Arrest
Basic Course Field Trip Instructor's Manual Rev: 2013 23 The Mountaineers, Olympia Branch
6.2 Explain disadvantages: a. Not a strong belay, and b. Uncomfortable position for belayer.
6.3 Demonstrate set-up using the “sweep” technique. 6.4 Have each student practice using both right and left hand set-up, with climber
moving both toward and away from belayer. (See illustrations in Freedom 8 page__) 6.5 Emphasize:
a. The downhill leg must be locked. b. The ice-axe pick is facing toward toe. c. When braking, uphill hand braces head of ice axe. d. The downhill hand is the brake hand. e. The belay is dynamic.
7. Snow Anchors 7.1 Show how to use flukes, pickets, deadman, and how to construct and use a bollard.
7.2 Demonstrate the strength of the anchors by having the students pull on them. (Make certain students are out of the way in case an anchor pops out.). a. Flukes - Explain they are good for soft snow; angled back from direction of pull;
don't attach rope or webbing to cable - use a carabiner; channel for rope. Explain that a hard layer under surface may deflect fluke and force it out.
b. Pickets - Explain pickets are best for harder snow; angled approximately 15° away from perpendicular to direction of pull. Don’t attach rope or webbing directly to hole; use a carabiner. If not fully buried, girth hitch sling at snow level, not top of picket (may lever out).
c. Deadman – Explain need of burying the “deadman” object sufficiently deep; packing the snow; and creating a channel for the rope.
d. Bollard - Explain undercut needed to prevent rope riding out; proper size for snow conditions; channel for rope leading from bollard; smooth curves; padding rear of bollard; and need to periodically check for the rope cutting through it.
8. Fixed Line 8.1 Instructors will take their groups through one of the fixed-line stations.*
8.2 Tell students that they will need to have two prusiks ready for use at this station.
8.3 The fixed line will include obstacles requiring students to: a. Pass through two carabiner/sling positions securing the fixed line, and b. Use a second prusik to pass around an obstacle where the fixed line is secured in
such a way that the prusik cannot pass through.
8.4 Instructor will review with each group at the fixed-line station: a. The correct method to pass the prusik through a retaining carabiner on the fixed
line. b. Use of a second prusik to pass around an obstacle. Remind students that the
second prusik must be secure before the first prusik is removed. c. Explain that prusik will not hold properly if guiding hand is not released from the
prusik during a fall.
* Field trip leader may establish several fixed-line “stations”.

Field Trip 3 Snow Travel and Self Arrest
Basic Course Field Trip Instructor's Manual Rev: 2013 24 The Mountaineers, Olympia Branch
9. Descending 9.1 Glissades (sitting and standing).
Discuss safety considerations: • Don't wear crampons. • Be able to see entire route. • Explain that there is limited directional control when glissading. • Need for run-out. • Use of ice-axe arrest to stop. • Holding ice axe so pick won't cause injury. (In sitting positions the pick faces
out.).
9.2 Demonstrate the proper technique and have students practice. Tell them that snow conditions may not allow standing glissades.
9.3 Plunge step - Demonstrate and have students practice. Emphasize driving heel into snow and need to lean slightly forward (This keeps the center of gravity over the feet). Caution about dangers of post-holing in crusty or soft snow.
9.4 Uphill Tracks - Demonstrate and have students practice descending using the uphill tracks.
10. Knots (Critical Skill) 10.1 Check all knots and have students explain the major use(s) of each. Have students tie
the knot under realistic conditions. Students must be proficient in all knots and not require any assistance.
10.2 Ensure they dress the knots so strands of rope are parallel and not kinked or crossed and that they tie off if required.
11. Map and Compass Have students use the map to recognize terrain features. There will be a handout on route planning. Have students practice taking bearings in the field.
12. Roped Travel and Team Arrests Roped travel and team arrests will be practiced if time allows.
12.1 Have students rope up and travel as rope teams (instructors need not be roped). 12.2 Conduct the initial portion like a glacier climb. 12.3 Have students travel over various types of terrain. Stress rope management; rope on
downhill and ice axe on uphill side; talking to other team members and pacing to slowest person.
12.4 Discuss and have them practice traversing and switch-backing. 12.5 Integrate team arrests with snow travel.
13. Student Performance Comments
See Appendix A.

Field Trip 4 Snow Camp (Overnight Weekend)
Basic Course Field Trip Instructor's Manual Rev: 2013 25 The Mountaineers, Olympia Branch
13.
Field Trip 4: Snow Camp (Overnight Weekend) Date: See Basic Course schedule Time: To be announced: roll call at Longmire. Place: Mount Rainier National Park; meet at Longmire parking lot. Duration: Saturday morning to Sunday afternoon. Carpooling: Check with field trip coordinator or field trip leader.
Special Note: All cars must carry chains and a shovel.
Purposes: Teach students to build an emergency shelter and spend the night in the shelter or
on the snow. Teach the students to manage a snow camp. Teach students to prepare for a glacier climb, rising before dawn, roping up, and
traveling roped with crampons. Teach students to identify avalanche terrain and conditions. Check self-arrests and team-arrests. Teach roped snow travel. Check snow belays (Sitting hip belay, standing carabiner ice-axe belay, and boot-
axe belay.). Check knots and ten essentials. Teach map and compass. If time allows, demonstrate/teach snow anchor techniques and check glissade skills
Instructor's Equipment: Snow wands Seat and chest harness Rope and webbing (to demo knots) Carabiners Crampons Snow-shoes (depending on weather) Alarm clock Ten essentials Outdoor clothing as appropriate to weather Shovel Tent and sleeping bag Flukes/pickets (if you own them) Pen/pencil Extra prusiks Food and liquid for two days Texas prusik Stove, fuel and cookware Extra slings (for snow anchors) Ice axe Leader tie-off prusik
Critical Skills: Knots Must demonstrate proficiency at this field trip or see mentor and
show proficiency before next field trip and any climb. Belaying Sitting hip, boot-axe, and standing carabiner-ice-axe belays; must
show proficiency on this field trip or see mentor and show proficiency before next field trip, and before any climb.
Ice-Axe Arrests Must demonstrate proficiency at this field trip in all ice axe positions, or see mentor and show proficiency before Glacier Travel field trip, and before any climb.
Personally notify the field trip leader about any students needing to see their mentors.
Field Trip 4 Snow Camp (Overnight Weekend)
Basic Course Field Trip Instructor's Manual Rev: 2013 26 The Mountaineers, Olympia Branch
Instructions:
1. General 1.1 Each group will have a lead instructor, and one or more assistant instructors. You
will be assigned to one of the groups that will have up to 12 people, including instructors. These groups will work together both days.
1.2 The field trip leader will provide instructions to each group for the Mount Rainier National Park check-in process.
1.3 Each group will set up camp at least ½ mile from other groups. Field trip leader will assign the areas where each group is to camp.
1.4 Each group will build emergency shelters and spend the night in the shelters or in a tent as directed by field trip leader.
1.5 Stress safety. Ensure all ice axe adzes are taped and students use sunscreen and sunglasses. Be alert for evidence of hypothermia. Be sure that each shelter is safe to inhabit. Monitor avalanche conditions.
1.6 Schedule
Day 1 Set up camp Build shelter Practice individual arrests (day 1 and day 2) Ten essentials Knots Map and compass (or on day 2) Sitting hip belay practice (day 1 and day 2) Climb preparation instructions
Day 2 Rope-up (in dark) with crampons, ready for glacier climb Practice roped travel Team arrests Practice individual arrests (day 1 and day 2) Boot-axe and standing carabiner ice-axe belay practice Sitting hip belay practice (day 1 and day 2) Snow travel (rest step, ice-axe usage, plunge step, step-kicking, etc.) Knots Map and compass (or on day 1) Recognition of avalanche terrain, snow pits If time allows: ♦ Glissades ♦ Anchors

Field Trip 4 Snow Camp (Overnight Weekend)
Basic Course Field Trip Instructor's Manual Rev: 2013 27 The Mountaineers, Olympia Branch
2. Snow Shelter /Snow Camp 2.1 Help students choose the right shelter (snow cave, ranger trench, or igloo) and
designate areas for tent set-up, safe use of stoves, etc. Give hints on how to make their camp more comfortable.
2.2 Priorities in camp are a. Build a shelter. b. Melt snow for water (Have them melt at least one pot of water to experience how
time consuming it is.). c. Prepare meal.
2.3 After setting up camp, discuss what has to be done to prepare for the next day. Conduct this as if you are leading a glacier climb. a. Discuss what personal gear they are to carry. b. Assign rope teams. c. Allocate group gear among the rope team members. d. Practice putting on and walking with crampons. e. Practice laying out rope and tying in. f. Discuss morning preparations (including options for breakfast.).
3. Snow and Glacier Travel
3.1 Get students up between 3 AM and 4 AM a. Prepare and eat breakfast.
b. Prepare for glacier travel. 3.2 Practice roped travel, crampon technique, and team arrests. Don’t practice arrests
with crampons on. See Field Trip 3, Roped Travel and Team Arrests and illustrations in Freedom 8 page___.
3.3 Practice sitting-hip, boot-axe and standing carabiner ice-axe belays. (See Field Trip 3, Sitting-Hip Belay, Boot-Axe Belay, and Standing Carabiner Ice-Axe Belay and illustrations in Freedom 8 page__).
3.4 Practice snow travel techniques (See Field Trip 3, Snow Travel and Descending and illustrations in Freedom 8 page ___).
4. Avalanche Awareness
4.1 Discuss avalanches and avalanche conditions. Have the students look for indicators of avalanche slopes and avalanches.
4.2 Discuss avalanche equipment (shovel, probes, and beacons). 4.3 Instruct technique for crossing a questionable slope, and what to do if they are caught
by an avalanche while crossing. 4.4 Dig a snow pit and review with the students the structure and stability of snow layers
exposed.
5. Self Arrest Practice (Critical Skill)
See Field Trip 3, Self-Arrest Practice and illustrations in Freedom 8 page ____

Field Trip 4 Snow Camp (Overnight Weekend)
Basic Course Field Trip Instructor's Manual Rev: 2013 28 The Mountaineers, Olympia Branch
6. Knots (Critical Skill)
6.1 Check all knots and have students explain the major use(s) of each. Have students tie the knot under realistic conditions. Students must be proficient in all knots and not require any assistance.
6.2 Ensure they dress the knots so strands of rope are parallel and not kinked or crossed and that they tie off if required.
7. Map and Compass
Have students use the map to recognize terrain features. There will be a handout on route planning. Have students practice taking bearings in the field.
8. Snow Anchors (If there is time)
8.1 Demonstrate how to use flukes, pickets, or deadman, and how to construct and use a bollard.
8.2 Include a demonstration of how to equalize anchors.
8.3 Demonstrate the strength of the anchors by having the students pull on them. (Make certain students are out of the way in case an anchor pops out.). a. Flukes - Explain they are good for soft snow; angled back from direction of pull;
don't attach rope or webbing to cable - use a carabiner; channel for rope. Explain that a hard layer under surface may deflect fluke and force it out.
b. Pickets - Explain pickets are best for harder snow; angled approximately 15° away from perpendicular to direction of pull. Don’t attach rope or webbing directly to hole; use a carabiner. If not fully buried, girth hitch sling at snow level, not top of picket (may lever out).
c. Deadman – Explain need of burying the “deadman” object sufficiently deep; packing the snow; and creating a channel for the rope.
d. Bollard - Explain undercut needed to prevent rope riding out; proper size for snow conditions; channel for rope leading from bollard; smooth curves; padding rear of bollard; and need to periodically check for the rope cutting through it.
9. Student Performance Comments
See Appendix A.

Field Trip 5 Rock Fundamentals
Basic Course Field Trip Instructor's Manual Rev: 2013 29 The Mountaineers, Olympia Branch
14.
Field Trip 5: Rock Fundamentals Rock Practice Date: See Basic Course schedule Time: To be announced. Instructors will be assigned to groups or pitches before
roll call. Place: Spire Rock Spanaway. Duration: Approximately 10 hours. Carpooling: Check with field trip coordinator or field trip leader. Purposes: Teach rock climbing techniques. Teach carabiner brake rappel. Teach rappelling with a device. Check map and compass skills. Check belaying skill using student’s own device. Check knots. Teach leader tie-off techniques.
Instructor's Equipment:
Seat harness Rappel device Lunch and liquid Slings (lots of them for anchors) Pen/pencil Carabiners Locking carabiner(s) Belay device CEN, CE or UIAA-approved climbing helmet
Critical Skills: Knots Must show proficiency at this field trip or see mentor and show
proficiency before next field trip and any climb. Belaying Students must show proficiency on this field trip or see mentor and
show proficiency before next field trip or any climb.
Personally notify the field trip leader about any students needing to see their mentors.
1. General
Instructions
1.1 You will be assigned a station at the beginning of the trip and may be rotated during the day.
1.2 All students and instructors will wear a CEN, CE or UIAA-approved climbing helmet when climbing or rappelling.
1.3 Only individuals climbing, belaying, rappelling or instructing are allowed on the rock.
1.4 All climbing and rappelling will be done with anchored, overhead belays. An instructor will check both the belayer and climber/rappeller prior to permitting a student to climb/rappel.

Field Trip 5 Rock Fundamentals
Basic Course Field Trip Instructor's Manual Rev: 2013 30 The Mountaineers, Olympia Branch
1.5 Gloves must be worn for all rappels and belays. 1.6 Other climbers may be in the area. If other climbers become a problem, notify the
field trip leader. 1.7 Mountaineering boots are required (no rock shoes).
2. Rock Climbing The purpose of this field trip is to introduce the students to rock climbing and show them the proper techniques. Students must attempt at least nine (9) pitches, including at least one chimney, one traverse, and one crack. While they do not have to complete a pitch to receive a passing evaluation, they should give it a good try. Instructors should comment in the student’s Field Trip Record Book what areas the student had difficulty with. Remember that the students are new to rock climbing. Please be encouraging and patient. Insist all students use commands correctly.
2.1 Rib
2.2
- Anchored, overhead belay required. Have students both ascend and descend the rib. A rib calls for up-right, dynamic posture and delicate hand and foot climbing. Don't let students sit on the rock except to rest. Stress friction holds for feet and down-pressure holds for hands. In addition, point out opportunities for cross-pressure or counter-force holds. Keep the belay rope on the inside of rib.
Crack
2.3
- Anchored, overhead belay required. Practice layback and jam holds. Layback depends on tension of both arms pulling against one side of crack while feet push against other. Stress keeping arms straight so the skeletal system, not the muscles, takes the weight. This station can also be used to practice jams. Time permitting, a student may try to climb using hand and foot jams.
Chimney
2.4
- Anchored, overhead belay required. Practice stemming using some form of counter-force (arm vs. arm, back vs. legs. etc.). Down-pressure holds are also used. Look for braced position, smooth, coordinated movement, use of legs.
Face
2.5
- Anchored, overhead belay required. Practice balanced climbing. Emphasize weight over feet, use of small holds, "climbing with the eyes", testing holds, 3-point suspension, and smooth motion. A common problem is "hugging the rock". Suggest appropriate holds (e.g., down-pressure, counter-force, pinch, jam, etc.).
Friction Climb
2.6
- Anchored, overhead belay required. Start on lower angled slabs so students gain confidence. Have them go up and down facing both in and out. Go to steeper slabs until they can't stay on without using hands, and then try with hands. Stress the need to keep weight over feet and not lean into rock.
Traverse
3. Carabiner Brake Rappel
- Anchored, overhead belay required. Points to emphasize: weight over the feet; hands for balance; climb with the eyes; and three-point suspension. Point out different techniques that can be used (e.g., pinch, counter-force, jam, etc.).
Each student will be given a chance to set up the rappel and descend.
3.1 Have student assemble brake (see illustration in Climbing Course Manual) and tie into belay rope. Check for proper set-up and locked carabiner.
3.2 Check the rappeller and check the knots. Stress need for a systematic check of all components from the anchor to the end of rope. Key elements: secure anchor;

Field Trip 5 Rock Fundamentals
Basic Course Field Trip Instructor's Manual Rev: 2013 31 The Mountaineers, Olympia Branch
harness straps rewoven; brake properly assembled; knots in end of rope; knife on a lanyard and accessible; and no loose clothing or hair that can get caught in brake.
3.3 As the student descends, correct any problems with position or technique. Feet should be flat on rock surface, knees flexed, and legs spread and approximately perpendicular to the rock. A common mistake is to position feet too high or too low. Stress that the brake hand never leaves the rope.
3.4 Have the students tie off part way down. You may have to talk them through this. Key points: • Brake hand stays on rope during tie off. • Minimum of three wraps on leg opposite braking hand. • Rope tucked under all wraps. • Hold end of rope in the tuck while releasing the braking hand and release
other hand when the leg wrap holds. • Assume braking position prior to untying leg wrap.
4. Device Rappel 4.1 Use approved devices such as ATC, stitch plate, tuber, or figure-eight (Münter hitch
may not be used for rappelling.). All student rappels will be done with a top-rope belay.
4.2 Have the student use a prusik or Autoblock on the rappel to practice “self-belay.” Remember however, the student must be top-belayed.
4.3 Discuss the three methods of rappel back-ups to be used on experience climbs (top belay, self-belay with prusik or autoblock and pulling the rope taut from the bottom of the pitch).
4.4 The student must make one descent using the device. Answer any questions the student may have about use of the device. Then have the student rig it and do one rappel. No tie-off is required.
5. Belaying (Critical Skill) 5.1 Each student must be able to set up a belay without assistance, and safely belay a
climber (Refer to material in Section 5, Belaying Station, Basic Techniques Field Trip, and particularly “Key Factors in Competent Belaying”.). An instructor must check the belayer prior to each climb or rappel.
5.2 Require both climber and belayer to use commands correctly. 5.3 Each student must do one belay with the Münter hitch
6. Cleaning Protection Demonstrate to students the general methods used by the second climber to clean the
pitch by removing protection while ascending toward the belayer. Emphasize the importance of cleaning from the rock to the rope to minimize the chances of dropping gear. Using this method, the gear and slings used in the protection remain clipped to either the climbing rope or the second’s gear sling while being removed from the rock. Demonstrate how to organize the gear and slings and transfer them efficiently to the belayer at the end of the pitch.

Field Trip 5 Rock Fundamentals
Basic Course Field Trip Instructor's Manual Rev: 2013 32 The Mountaineers, Olympia Branch
7. Map and Compass Students will be given the problem sheets when they report to the station. Ensure that all calculations are correct prior to permitting them to continue with the problem.
8. Ten Essentials Check these as time permits. Students should have a complete set, so be critical.
9. Knots (Critical Skill) Throughout the day Instructors should check students proficiency with several knots. Also check that the seat harness is properly worn.
10. Leader Tie-off Student must successfully perform leader tie-off at least once. See Station 4, Fixed Line and Leader Tie-Off, Belay Practice Field Trip for a description of the two leader tie-off methods.
11. Student Performance Comments See Appendix A.

Field Trip 7 Glacier Travel
Basic Course Field Trip Instructor's Manual Rev: 2013 33 The Mountaineers, Olympia Branch
Field Trip 6: Rock Weekend Dates: See Basic Course schedule Time: To be announced. Place: McCleary Cliffs, north side of Lake Cushman. Duration: 8 to 9 hours each day. Carpooling: Check with field trip coordinator or field trip leader.
Purposes: Teach basic rock climbing skills. Check belay techniques. Check rope handling. Teach rappel techniques. Check knots. Check map and compass skills. Check ten essentials. Explain and demonstrate anchoring techniques.
Instructor’s Equipment: Seat harness CEN, CE or UIAA-approved climbing helmet Belay device Outdoor clothing as appropriate for the weather Slings Lunch and liquid Carabiners Pen/pencil Ten essentials
Critical Skills: Knots Students must demonstrate proficiency in all required knots. Report any
student who is not proficient in knots to the field trip leader. Belaying Must be proficient in belay. If not, immediately escort student to the field
trip leader.
Personally notify the field trip leader about any students needing to see their mentors.
1. General
Instructions:
1.1 Roving instructors will be assigned a group to take around to the various rock pitches. Roving instructors will also check ten essentials and map and compass. Roving instructors helping for both Rock 1 and Rock 2 will be assigned a different group of students for their second day.
1.2 Rappel instructors will be assigned to their station for the day. 1.3 At the start of each day two specific groups will be assigned to be first at the rappel
stations (one at each station). Two other groups (again, one at each station) will be assigned to be "in the wings" waiting to go next.
1.4 Roving instructors will review carabiner brake set-up with students while waiting at the rappel stations.
1.5 Students are to wear belay gloves while belaying and rappelling. 1.6 Watch out for poison oak on the approach to the Open Book Rappel Station. 1.7 Ticks are a problem throughout the area.

Field Trip 7 Glacier Travel
Basic Course Field Trip Instructor's Manual Rev: 2013 34 The Mountaineers, Olympia Branch
1.8 Instructors and students must wear helmets while on the rock. 1.9 Students are to keep their packs with them except on pitches. 1.10 Stress safety and use of belay commands. Check all harnesses. Check rope tie-in. 1.11 Students will be allowed to use rock shoes on friction pitches on Rock 1 and all day
for Rock 2. 1.12 The roving instructors will make all entries in student Field Trip Record Books, and
should include their name with any notes in case questions come up later.
2. Knots (Critical Skill) Students must know all required knots by these field trips. Check several knots as well as seat harness throughout the day. If student is unable to tie any of the knots, immediately report student to the field trip leader.
3. Both Rappel Stations 3.1 Roving instructors should check students’ seat and chest harnesses, rappel devices
and carabiner brake set-ups. Also review anchoring for rappel with the students. 3.2 Roving instructor should discuss the three methods of rappel back-ups to be used on
experience climbs (top-belay, self-belay, and pulling the rope taut at the bottom of the pitch).
3.3 A rappel instructor will belay students on the rappels. 3.4 All student rappels will be top belayed. 3.5 A second instructor will help the student with rappel set-up. 3.6 Both the carabiner brake and the device rappel will be done with a double rope. 3.7 Student will complete the second rappel at each station with a pack on. Climbing
boots will be worn at both stations. 3.8 A third rappel instructor will accompany the student part way down the rappel pitch
to observe, make suggestions, tell student when to do mid-rappel stop, and encourage the student on the rappel.
3.9 On the Big Wall the student is to use a prusik or autoblock to practice self-belay (Remember, all
3.10 One roving instructor will be at the bottom of the Big Wall to demonstrate a third method of rappel back-up; pulling rope taut from below.
rappels are to be top belayed.).
4. Map and Compass A map and compass exercise will be supplied. The exercise must be completed on one of the two days.
5. Belaying (Critical Skill) 5.1 Each student must be able to set up a belay without assistance, and safely belay a
climber. An instructor must check the belayer prior to each climb or rappel. If student is unable to belay correctly, immediately escort the student to the field trip leader (Note: instructor may set up or assist set up of anchor on this station.).
5.2 Refer to “Key Factors in Competent Belaying” in Section 5, Belaying Station, Basic Techniques Field Trip.
5.3 All belays must be anchored. 5.4 All belays at this field trip will be done with a device.

Field Trip 7 Glacier Travel
Basic Course Field Trip Instructor's Manual Rev: 2013 35 The Mountaineers, Olympia Branch
6. Rock Climbing
The purpose of this field trip is to improve the student’s rock climbing skills introduced at Field Trip 5.
6.1 Pitches
Students must attempt a number of basic pitches. This should include a chimney, a friction climb, a crack, a layback, and a traverse. The roving instructors will provide additional opportunities for the students to hone their climbing skills on the variety of pitches throughout the McCleary Cliffs climbing area. Students do not have to complete a pitch to receive a passing evaluation, but they should give it a good try. Instructors should comment in the student’s Field Trip Record Book what areas the student had difficulty with. Insist all students use commands correctly.
6.2 Climbing Techniques
a. Friction (e.g., slab climb) • Maintain balance by keeping weight over feet. • Liberal use of smearing holds.
b. Balance • Maintain balance by keeping weight over feet. • Use three-point suspension. • Use the hand and foot holds without using arms excessively.
c. Stemming • Use counterforce. • Use down-pressure and friction.
d. Jamming • Maintain balance by keeping weight over feet. • Use torquing or camming the hands and feet in constrictions in the crack for
holds. e. Layback
• Use counterforce with hands pulling and feet pushing in opposition. • Keep arms straight allowing the skeletal structure to carry weight. • Move steadily.
7. Leader Tie-off Student must successfully perform leader tie-off at least once each day. See Station 4, Fixed Line and Leader Tie-Off, Belay Practice Field Trip for a description of the two leader tie-off methods.
8. Ten Essentials Check this as time permits. Students should have a complete set, so be critical.
9. Student Performance Comments See Appendix A.

Field Trip 7 Glacier Travel
Basic Course Field Trip Instructor's Manual Rev: 2013 36 The Mountaineers, Olympia Branch
Field Trip 7: Glacier Travel Date: See Basic Course schedule Time: To be announced. Place: Mount Rainier National Park; meet at Paradise parking lot. Duration: 10 hours. Carpooling: Check with field trip coordinator or field trip leader. Special Note: All cars must carry chains and a shovel. Purposes: Teach roped glacier travel. Teach crampon techniques. Discuss glacier travel hazard awareness. Teach Z-pulley crevasse rescue system. Teach direct pull crevasse rescue system. Practice prusiking. Check belaying skills. Check knots. Check self-arrest skills.
Recommended Instructor Equipment: Ten essentials Locking carabiners Carabiners Belay gloves Crampons Leader tie-off sling Slings Wands Texas prusiks Seat and chest harness Shovel Pen/pencil Rescue pulley Ice axe Pickets CEN, CE or UIAA approved climbing helmet
NOTE: The Climbing Committee strongly recommends that instructors attend the Z-Pulley practice evening session.
Critical Skills: Knots Students must demonstrate proficiency in all required knots. Belaying Must be proficient in belay. If not, contact the field trip leader as soon as
possible.
Personally notify the field trip leader about any students needing to see their mentors.
1. General:
Instructions:
1.1 Instructors will work with partners. One instructor who has previously taught at the Glacier Travel Field Trip will be designated the lead instructor, the other(s) as the assistant instructor(s). Instructors will be assigned a group of students (ideally 6) and will work with them all day.
1.2 Each group will need at least three climbing ropes, enough for two rope teams of students and one for the instructors.
1.3 Check that each student has all necessary clothing and required equipment before leaving the Paradise parking lot. Students who do not have adequate clothing and equipment will not be permitted to participate in the field trip.
Field Trip 7 Glacier Travel
Basic Course Field Trip Instructor's Manual Rev: 2013 37 The Mountaineers, Olympia Branch
1.4 When instructed by the field trip leader, your group may proceed from the Paradise parking lot. Keep your group together. All groups will meet at Glacier Vista before descending to the Nisqually moraine. All groups will travel together onto the Nisqually Glacier and will return to Glacier Vista together.
1.5 Before leaving Glacier Vista check all harnesses. Students should double check harness tie-in for themselves as well as others. Remind them to re-weave all buckles.
1.6 Stress safety: while on the glacier, everyone will be on a rope team. 1.7 Students and instructors will wear a CEN, CE or UIAA-approved climbing helmet
during roped glacier travel, crevasse rescue, and when belaying. 1.8 A Münter hitch or belay device will be used for all crevasse rescue belays during this
field trip. 1.9 Students will wear gloves for belays. 1.10 Students are to keep their packs with them at all times. 1.11 Monitor the students to ensure they use sunscreen and sunglasses. Be alert for
indications of hypothermia. 1.12 Report to the field trip leader any student who is unprepared, making insufficient
progress, or delaying the group.
2. Glacier Travel Hazard Awareness 2.1 Prior to starting out across the Nisqually Glacier, discuss the hazards of glacier travel
and point out how to recognize them. 2.2 Point out surface indicators of hazards above and below.
a. Hairline cracks or depressions which indicate wider crevasses below. b. Seracs and fresh debris which indicate active icefalls or rock fall above. c. Sagging trenches where gravity has pulled surface snow down into crevasse. d. Where there is one crevasse, there are normally many more.
3. Roped Glacier Travel 3.1 Rope up at the designated point. Consider letting students lead the ropes. 3.2 Prior to going onto the glacier:
a. Review the standing carabiner ice-axe belay and the boot-axe belay. b. Have students check each other’s harness, tie-in, prusiks, and crampons. c. Remind students not to step on a climbing rope, especially when wearing
crampons. 3.3 Check the student’s ability to put on crampons (i.e., both that they fit and work with
the student’s boots, and that the student knows how to get them on): a. Discuss proper fit of straps and bales. b. Discuss the importance of proper sizing to boots without cutting off circulation
and readjustment as feet swell during the climb. c. Students should be able to put on crampons in a timely manner. Check that the
strap buckles are on the outside of their feet and that any loose ends are secured. d. If conditions are not suitable for crampon use, have students put them on just
long enough to ensure proper fit. 3.4 Check the student’s ability to tie in:
a. Correctly puts on seat harness and chest harness. b. Attaches climbing rope to seat harness. c. Attaches prusiks to climbing rope.
Field Trip 7 Glacier Travel
Basic Course Field Trip Instructor's Manual Rev: 2013 38 The Mountaineers, Olympia Branch
3.5 While traveling, take the opportunity to continue to point out glacier features to the students and discuss glacier travel techniques and considerations. Monitor and correct errors. Common errors includea. Rope on up-hill side of climber.
:
b. Ice axe on downhill side. c. Too much or too little slack in rope. d. Not using rest step or step-kicking when appropriate. e. Edging with crampons (rather than maximum contact of crampon points). f. Not using the ice axe for self-belay on steep terrain.
3.6 Monitor the student’s ability to move about in-balance: a. Coordinates foot movement with ice axe placements (e.g., not moving until ice
axe is placed). b. Uses proper foot movements and remains in balance while changing directions.
3.7 Discuss and have students practice different rope-team travel formations: a. Keeping the rope extended, without slack. b. Keeping the rope at right angles to crevasse. c. Using echelon formation when traveling at right angle to the crevasse is not
possible. 3.8 Check student’s knowledge, use and technique of self-belay:
a. Keeps ice axe on uphill side of body. b. Places ice axe as an anchor before moving. c. Remains self-belayed when changing directions.
3.9 Monitor individual student’s and the rope team’s switch backing techniques: a. Leader spaces switchbacks far enough apart to prevent rope management
problems. b. Rope team communicates and works together to keep rope taut while turning
corners. c. Leader sets a pace that others can follow. d. All rope team members adjust speed to assure proper rope tension.
3.10 Practice standing carabiner ice-axe belays and boot-axe belays while stepping or jumping over small crevasses.
4. Crampon Techniques (if conditions allow) 4.1 Discuss self-arrest with crampons (i.e., using knees instead of feet). 4.2 Emphasize keeping feet flat on the surface of the snow for maximum point
penetration.
5. Z-Pulley Crevasse Rescue 5.1 General
5.1.1 You are responsible for the safety of the students while on the glacier: a. When not on a rope team, everyone must be attached to an anchor or
within a probed and wanded area. b. When unroped, students should limit their movements within the wanded
area and always carry an ice axe. c. Students should stay clear of the rescue, belay ropes, and the crevasses
when not directly involved with the instruction in progress.

Field Trip 7 Glacier Travel
Basic Course Field Trip Instructor's Manual Rev: 2013 39 The Mountaineers, Olympia Branch
d. Students will be on an anchored belay when in the crevasse. All belay anchors will be backed-up. Check them frequently since they will be subjected to repeated loads during the course of the day.
e. Instructors near the edge of the crevasse will be on anchored safety rope. f. A Münter hitch or belay device will be used for all belays during this
rescue practice.
5.1.2 Prior to lowering the first “victim” into the crevasse, review the basic steps in a crevasse rescue: a. Arrest the fall. b. Set up an anchor. c. Check the fallen climber. d. Devise a rescue plan. e. Carry out the rescue plan.
5.1.3 For the crevasse rescue scenarios, assume that the students are on a normally equipped rope team of three persons, which is alone on a glacier and that the lead climber has fallen into a crevasse out of sight. All rope team members should be fully tied in with prusiks and chest harness, carrying an ice axe and pack, but not wearing crampons.
5.1.4 The victim will be belayed at all times and be fully clothed with rain gear, hat and gloves and have a knife accessible.
5.1.5 Belay rope must be tied into harness (Bowline on a coil will not be used
5.1.6 Have the students rotate through each position once including victim and belayer.
.).
5.2 Belay Anchor Set-up Prior to beginning the rescue scenario: a. Have the students set up an anchor for use by a student to belay the crevasse
rescue victim. b. Mention equalization and backing up anchors.
5.3 Team Ice-Axe Arrest For the following crevasse rescue scenario: Climber A = rope team lead person and victim. Climber B = person on the middle of the rope. Climber C = person on the end of the rope.
a. With the rope team in position and prior to lowering climber A (victim) into the crevasse, have him yell, “falling”.
b. Other rope team members, climbers B and C, shall react by immediately assuming proper arrest position.
c. Have the belayer lower the victim into the crevasse and transfer the load to climbers B and C.
5.4 Self-Rescue a. Climber A (victim) clips ice ax to seat harness with a short sling, removes pack,
girth hitches a short sling to the pack haul loop and clips the sling with a carabiner to the rope between seat harness and prusik attachments.
b. Climber A (victim) removes prusik slings’ foot loops from pocket and slips one of the two adjustable loops over each boot.

Field Trip 7 Glacier Travel
Basic Course Field Trip Instructor's Manual Rev: 2013 40 The Mountaineers, Olympia Branch
c. Climber A (victim) begins prusiking partway to the top of the crevasse using the Texas prusik technique.
5.5 Communications a. Climber C should ask climber B about the status of climber A. “Does climber A
require rescue?” b. Climber B and C should yell for help from other rope teams that might be in the
vicinity. They should proceed as if there were no response. c. Climber C should ask if Climber B can hold the load so that Climber C can
transfer the load to climber B and begin the rescue. 5.6 Self-belay (with rope)
Climber C approaches climber B prusiking along the rope as a self-belay while probing the snow with ice axe and glancing from side to side for indications of more crevasses.
5.7 Z-Pulley Anchor Set-up The following is under revision. a. Climber C places picket as an anchor between climber B and the victim Climber
C attaches the climbing rope to the anchor with slings, a carabiner, and Bachmann knot.
b. Climber C attaches to the anchor, and unties from the climbing rope. 5.8 Anchor Tending
a. While Climber C is tending the anchor, Climber B releases the weight of the victim (Climber A) onto the anchor.
b. Climber B attaches with a prusik to the free end of the climbing rope, and unties from the climbing rope.
c. Climber B probes to the lip of the crevasse using the prusik on the climbing rope as a self-belay.
d. While Climber B is going to the crevasse, Climber C (who is tending the anchor) sets up pulley #1 (See illustration in Freedom 8 page___)
5.9 At the Lip of the Crevasse a. Climber B first communicates with the victim, and then uses an ice axe at the
crevasse lip to prevent the rope from cutting deeper into the lip. Climber B also places an anchor for this axe (See illustration in Freedom 8 page_____).
b. Climber B then places pulley #2 and its accompanying prusik knot on the climbing rope (See illustration in Freedom 8 page __).
5.10 Retrieving Victim a. Climber B, already attached to the free end of the climbing rope, walks back
toward the anchor. This pulls the rope through the pulley system hauling the victim out of the crevasse.
b. Climber C must continue to tend the anchor. Climber C may assist Climber B by pulling on the free end of the climbing rope. Caution: Anchor could pop out if anchor is not carefully attended.
c. After climber B and C have begun to haul out the victim, other students may assist.
d. Climber B may need to self-belay back toward the crevasse in order to reset the pulley before it gets too close to the anchor and the other pulley.
e. When the victim nears the lip of the crevasse, Climber B will self-belay to victim in order to remind victim to unclip chest harness from the climbing rope and to

Field Trip 7 Glacier Travel
Basic Course Field Trip Instructor's Manual Rev: 2013 41 The Mountaineers, Olympia Branch
assist the victim over the lip as the other students continue to pull. For this step in order to bypass pulley #2, Climber B will tie a second prusik to the taut rope going to victim (on the crevasse side of pulley #2) prior to untying from first prusik, or after reaching pulley #2, Climber B can add to the existing prusik loop to extend its length.
6. Single-Pulley Crevasse Rescue__________________________
Before Climber A (victim) is extracted from the crevasse, demonstrate how a single pulley system can be used for crevasse rescue. This requires a separate rope at least twice as long as the distance from the anchor to the fallen climber. Attach one end of the rope to an anchor, and double the rescue rope into a large loop. Affix a pulley to the loop and attach a locking carabiner to the pulley. Lower the pulley and carabiner dangling from the loop down to Climber A. Instruct the fallen climber to clip and lock the carabiner to the seat harness. Make sure Climber A clips the rope leading to the rescuers through the chest harness. Assign a student to pull slack in the original climbing rope through the friction knot in case the pullers slip or need a rest. When everything is ready, instruct the students to start pulling on the unanchored end of the rescue rope until the fallen climber is removed from the crevasse.
7 Belaying (Critical Skill) An instructor must check the belayer prior to each crevasse rescue scenario. Each student must be proficient at setting up belays, and safely belaying a climber. Require both climber and belayer to use commands correctly. All belays must be anchored. Remind students that all snow belays should be dynamic. If student is unable to belay correctly, immediately contact the field trip leader.
7.1 Münter Hitch and Device Belay Refer to material in Section 5, Belaying Station, Basic Techniques Field Trip (particularly “Key Factors in Competent Belaying”), and in Station 6,,Belay Device and Münter Hitch Practice,, Belay Practice Field Trip.
7.2 Boot-Axe Belay a. Review use and advantages: used when there is a need for an immediate belay on
snow and normally used for a short time period only. Not a strong belay, and an uncomfortable position for belayer if required to hold position for a long period of time (See illustration in Freedom 8 page____).
b. Check set-up using the “sweep” technique, that downhill leg is locked and that the ice axe pick is facing toward toe.
c. Also check when student is braking: uphill hand braces head of ice axe and downhill hand brakes.
7.3 Standing Carabiner Ice Axe Belay a. Review when and why the standing carabiner ice-axe belay is used, including fast
set-up in snow and that it is a relatively strong and comfortable position for belayer (See illustration in Freedom 8 page ____)
b. Check set-up making sure the sling is not too long.

Field Trip 7 Glacier Travel
Basic Course Field Trip Instructor's Manual Rev: 2013 42 The Mountaineers, Olympia Branch
Because the direct pull method is the most commonly used crevasse rescue method, the instructors will set up a demonstration.
8 Demonstration of Direct Pull Rescue Method
a. One of the instructors will go into the crevasse as the victim. b. A second instructor will perform a belay for the victim. c. All the students will participate in pulling the victim out of the crevasse.
9 Ten Essentials Check this as time permits. Students should have a complete set, so be critical.
Students must know all required knots. Check several knots as well as seat harness throughout the day. If student is unable to tie any of the knots, immediately report student to the field trip leader.
10 Knots (Critical Skill)
11. Self Arrest Practice (Critical Skill) Practice self arrest, if time allows. See Field Trip 3, Self-Arrest Practice and illustrations in Freedom 8 page___.
12. Student Performance Comments See Appendix A.

APPENDIX A
Basic Course Field Trip Instructor's Manual Rev: 2013 Appendix A-1 The Mountaineers, Olympia Branch
15.
Note: Examples are listed to show the level of detail the climbing committee and mentors would like to see. General comments that apply to all stations are included throughout.
Student Performance Comments - Examples
KNOTS
(i.e., Basic Techniques Field Trip) Non-Critical Skills “Satisfactory? - yes” • ties all knots correctly, however needed some coaching at first on clove hitch and
munter; give the bowline a little more practice • quick learner and good spatial skills; wonderful attitude • knows knots well along with their uses “Satisfactory? - no” • needs much practice; could not tie most knots
(all field trips except Basic Techniques and on all climbs) Critical Skills “Satisfactory? - yes” • ties all knots proficiently; knows all uses “Satisfactory? - no” • see mentor
: needs help tying the bowline and double fisherman’s • see mentor
: does not know uses of most knots
• see mentor
: ties knots correctly, but with hesitation • see mentor
: tied all knots correctly, but needed coaching for clove hitch and munter
BELAY SKILLS (sitting-hip, munter, and belay device)
(i.e., Basic Techniques field trip) Non-Critical Skills “Satisfactory? - yes” • by the end of the session, performed all belay skills well • high incentive and positive attitude; conceptual problem. . .doesn’t understand
the physics involved that will stop the fall • needs a little extra time, but otherwise belay set up is good - practice quicker set
up before next field trip • needs a little practice to improve rhythm; knows all knots well “Satisfactory? - no” • refuses to use Olympia belay methods; will not cooperate • needs to practice set up, rope handling, and all calls
(all field trips except Basic Techniques and on all climbs) Critical Skills “Satisfactory? - yes” • performs all aspects of belay proficiently • I’d climb on the same rope with. . . anytime; very competent belayer, performing
all belay skills proficiently “Satisfactory? - no” • see mentor:
understands all correct belay techniques, but needs to correct self too many times
• see mentor
: lets go of rope with braking hand; also, must concentrate and avoid talking with friends during belay
• see mentor
: still (at Rock II) does not have own belay device; must have before first rock climb
• see mentor
: needs to improve strength/ technique; cannot stop fall at weight drop
• see mentor
: doesn’t know most of the belay commands, particularly when to use them; also, cannot tie munter hitch correctly without help
• see mentor
: needs to practice setting up belay, particularly anchor chain and correct braking hand side for sitting-hip belay

APPENDIX A
Basic Course Field Trip Instructor's Manual Rev: 2013 Appendix A-2 The Mountaineers, Olympia Branch
SELF ARREST
(at Snow Travel field trip unless a climb on snow is scheduled) Non-Critical Skills “Satisfactory? - yes” • can arrest but is tentative; needs a little practice to be proficient • eager to absorb anything new; remember to arrest immediately • is capable of traveling and arresting safely on steep snow • always rolled the right way and is able to effectively arrest “Satisfactory? - no” • needs much practice; will not try head down positions • needs to improve strength; cannot hold onto ice ax during arrests
(Snow Travel, Snow Camp, Glacier Travel and all climbs) Critical Skills “Satisfactory? - yes” • arrests in all positions proficiently; I’d trust on my rope • I feel confident could stop me in a team arrest “Satisfactory? - no” • see mentor
: needs practice with head down on back position • see mentor
: reacts hesitantly to fall; needs to arrest immediately
• see mentor
: consistently rolls toward spike of ice ax • see mentor
: cannot hold onto ax during arrests
SNOW BELAYS (sitting-hip, standing carabiner ice-ax, and boot-ax)
(i.e., Belay Practice and Snow Travel field trips) Non-Critical Skills “Satisfactory? - yes” • by the end of the session, set up standing carabiner ice ax (SCIA) belay well • great attitude; eager to learn everything about snow belays • OK, but remember to carry short sling for SCIA belay • needs a little coaching, but otherwise set up is good - practice SCIA belay set up
at home before next field trip • can rapidly set up SCIA and boot-ax belays and performs all rope handling
smoothly “Satisfactory? - no” • practice both snow belays at home before next FT; takes excessive time and
coaching to set up • needs to practice set up, rope handling, and all calls
(Snow Camp, Glacier Travel and on all climbs) Critical Skills “Satisfactory? - yes” • performs all aspects of snow belays proficiently • I’d climb on the same rope with. . . anytime; very competent belayer, performing
all snow belay skills proficiently “Satisfactory? - no” • see mentor:
understands all the techniques, but needs to correct self too many times; practice so as not to confuse braking hand with feeling hand on boot-ax belay
• see mentor
: lets go of rope with braking hand with boot-ax belay; also practice pulling in rope with climber approaching you using boot-ax
• see mentor
: practice boot-ax; takes excessive time to set up • see mentor
: learn and practice all commands, particularly when to use them; also, practice double bowline knot
• see mentor
: practice setting up both the SCIA and boot-ax belays

APPENDIX A
Basic Course Field Trip Instructor's Manual Rev: 2013 Appendix A-3 The Mountaineers, Olympia Branch
ROPE COILING “Satisfactory? - yes” • coils rope quickly; both methods • OK, but watch stepping on rope “Satisfactory? - no” • insulted instructor and refuses to use such a “stupid” coil CLIMBING HARNESS
“Satisfactory? - yes” • commercial harness OK, but remember to always double strap back • fast with emergency harness; has new commercial harness “Satisfactory? - no” • does not have commercial harness • needs practice tying emergency harness; • commercial harness is too old (12 years); needs to obtain new harness. .. doesn’t
want to and referred to Climbing Committee PRUSIK “Satisfactory? - yes” • prusiked up rope smoothly and efficiently; great attitude, even in the rain • a little slow, but technique is good on prusik • made it to top!. . . recommend retying prusiks longer “Satisfactory? - no” • difficulty ascending rope, and not able to get off log; recommend working with
other student or mentor before Glacier field trip • will not prusik up rope; fear of heights. Recommend working with mentor.
Referred to field trip leader • did not have prusiks; also, needs to think about attitude toward instructors MAP & COMPASS “Satisfactory? - yes” • interprets map well; need to improve compass skills • excellent route finding skills; knows map and compass • having trouble but willing to learn and making satisfactory progress; recommend
working with other student, mentor or instructor “Satisfactory? - no” • does not have compass; obtain before next field trip • has map, however wrong quad; remember to check all equipment and essentials
before leaving home

APPENDIX A
Basic Course Field Trip Instructor's Manual Rev: 2013 Appendix A-4 The Mountaineers, Olympia Branch
TEN ESSENTIALS “Satisfactory? - yes” • flashlight with lanyard will do; recommend headlamp for glacier travel • great idea for extra food! • has all ten essentials • now has all ten essentials including previously missing extra clothing; now has
sufficient clothing to survive all weather conditions “Satisfactory? - no” • needs liquid filled compass; otherwise satisfactory • does not have extra food, map and compass • still no effort to acquire ten essential items • does not have adequate clothing for field trip under existing conditions (student
cannot participate in field trip; referred to field trip leader) • clothing is adequate for existing sunny conditions, but does not provide for
deteriorating weather FIXED LINE “Satisfactory? - yes” • all fixed-line techniques satisfactory; remember not to pass prusik through biner
without removing rope • excellent work on fixed line; remember to release grip on knot when falling • well prepared, quick tie-in and efficient movement along line “Satisfactory? - no” • had to borrow prusik loops for fixed line; also, attach 2nd prusik before
untying 1st. . . . must be attached to fixed line at all times LEADER TIE-OFF “Satisfactory? - yes” • excellent; able to brake fall and do one-handed leader tie-off quickly • good brake & fast leader tie-off; remember to use figure 8 back up • after instruction, able to perform both methods of leader tie-off without a hitch;
super attitude too! “Satisfactory? - no” • needs practice on leader tie off; required continuous assistance after
demonstration. . . more time with mentor or other student should take care of it SNOW ANCHORS “Satisfactory? - yes” • great job, but remember to dig sufficiently deep channel for rope (deadman) • can construct safe snow anchors; familiar with all safety issues “Satisfactory? - no” • inattentive during demonstration of snow anchor and didn’t follow instructions SNOW TRAVEL “Satisfactory? - yes” • knows different ways to carry ice ax; knows self-belay and when to use it • good step-kicking technique (uses momentum of foot swing); very good pace for
snow conditions (rest step) • consistently rolls correct direction when arresting to control glissade “Satisfactory? - no” • think about slowing down pace; need to keep up pace for an hour or so and use
rest step. Also, work on conditioning so you can enjoy your climbs • made inappropriate remarks to instructor; uncooperative
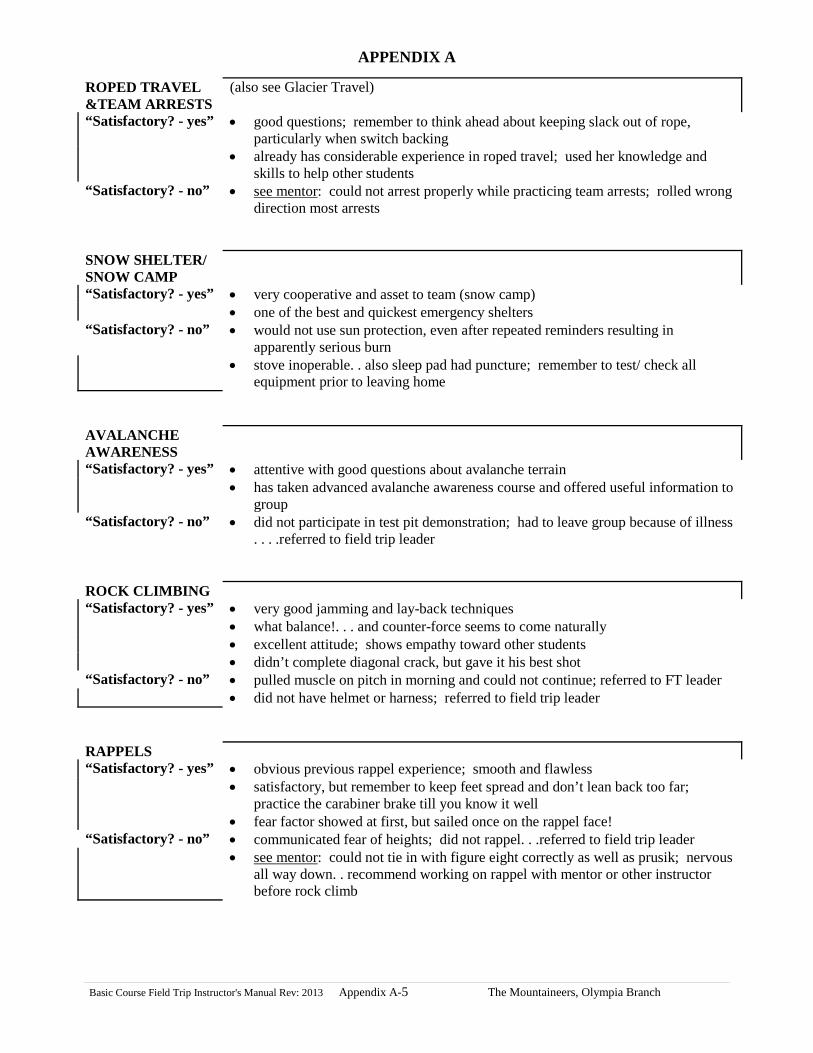
APPENDIX A
Basic Course Field Trip Instructor's Manual Rev: 2013 Appendix A-5 The Mountaineers, Olympia Branch
ROPED TRAVEL &TEAM ARRESTS
(also see Glacier Travel)
“Satisfactory? - yes” • good questions; remember to think ahead about keeping slack out of rope, particularly when switch backing
• already has considerable experience in roped travel; used her knowledge and skills to help other students
“Satisfactory? - no” • see mentor
: could not arrest properly while practicing team arrests; rolled wrong direction most arrests
SNOW SHELTER/ SNOW CAMP
“Satisfactory? - yes” • very cooperative and asset to team (snow camp) • one of the best and quickest emergency shelters “Satisfactory? - no” • would not use sun protection, even after repeated reminders resulting in
apparently serious burn • stove inoperable. . also sleep pad had puncture; remember to test/ check all
equipment prior to leaving home AVALANCHE AWARENESS
“Satisfactory? - yes” • attentive with good questions about avalanche terrain • has taken advanced avalanche awareness course and offered useful information to
group “Satisfactory? - no” • did not participate in test pit demonstration; had to leave group because of illness
. . . .referred to field trip leader ROCK CLIMBING “Satisfactory? - yes” • very good jamming and lay-back techniques • what balance!. . . and counter-force seems to come naturally • excellent attitude; shows empathy toward other students • didn’t complete diagonal crack, but gave it his best shot “Satisfactory? - no” • pulled muscle on pitch in morning and could not continue; referred to FT leader • did not have helmet or harness; referred to field trip leader RAPPELS “Satisfactory? - yes” • obvious previous rappel experience; smooth and flawless • satisfactory, but remember to keep feet spread and don’t lean back too far;
practice the carabiner brake till you know it well • fear factor showed at first, but sailed once on the rappel face! “Satisfactory? - no” • communicated fear of heights; did not rappel. . .referred to field trip leader • see mentor
: could not tie in with figure eight correctly as well as prusik; nervous all way down. . recommend working on rappel with mentor or other instructor before rock climb

APPENDIX A
Basic Course Field Trip Instructor's Manual Rev: 2013 Appendix A-6 The Mountaineers, Olympia Branch
GLACIER TRAVEL
(also see roped travel and team arrests)
“Satisfactory? - yes” • excellent belays and rope management • good knowledge of when to use echelon formation vs. perpendicular travel;
attentive and a team player • well prepared; first to put on crampons, then helped others. . . one of few to come
with short sling for SCIA belay • excellent communication (for rope management, slack etc.) “Satisfactory? - no” • borrowed crampons that do not fit; remember to check all equipment before
leaving home • see mentor
: unable to set up boot-ax or SCIA belay
CREVASSE RESCUE
“Satisfactory? - yes” • well prepared; had the routine for z-pulley down pat • strong spatial skills; understands the pulley system and encouraged other
students to think it through • came with all the right equipment including correct length slings for Z-pulley set
up; obviously practiced before FT “Satisfactory? - no” • practice the set up on dry land before you go on glacier climb; call your mentor
or work with another student • refused to use our procedure and insisted on “better” way; referred to FT leader

APPENDIX B
Illustrations
Basic Course Field Trip Instructor's Manual Rev, 2013 Appendix B-1 The Mountaineers, Olympia Branch

APPENDIX C
Basic Course Field Trip Instructor's Manual Rev: 2013 Appendix C-1 The Mountaineers, Olympia Branch
Critical Skills Field Trip
Critical Skill (Must be proficient at this field trip)
What to do if not(All skills must be demonstrated proficiently to your mentor)
proficient:
#2 Belay Practice
Knots Must demonstrate proficiency before next field trip and before any climb. Belaying, all aspects (sitting hip, device and Münter hitch)
Must show proficiency before next field trip. Must show proficiency before Rock Fundamentals field trip and before any alpine, rock, or glacier climb.
#3 Snow Travel & Self Arrest
Arrests Must demonstrate proficiency before any climb on snow (Must see mentor if scheduled for a climb on snow prior to Snow Camp; otherwise can demonstrate proficiency with instructor at Snow Camp.).
Sitting Hip Belay Must show proficiency before next field trip. Must show proficiency before Rock Fundamentals field trip and before any Alpine, Rock or Glacier climb.
Knots Must demonstrate proficiency before next field trip and before any climb. #4 Snow Camp
Arrests and Team Arrests
Must demonstrate proficiency before Glacier Travel field trip and before any climb.
Knots Must demonstrate proficiency before next field trip and before any climb. Standing Carab-Ice Axe and Boot Axe Belay
Must demonstrate proficiency before Glacier Travel field trip and before any climb.
Sitting Hip Belay Must show proficiency before Rock Fundamentals field trip and before any climb.
#5 Rock Fund Knots Must demonstrate proficiency before next field trip and before any climb. Belaying Must demonstrate proficiency before next field trip. Cannot participate in
Rock I field trip or any climb without safe belaying skills. #6 Rock 1 Knots Must demonstrate proficiency before next field trip and before any climb.
Belaying Must demonstrate proficiency before next field trip. Cannot participate in Rock II field trip or any climb without safe belaying skills.
#7 Rock II Knots Must demonstrate proficiency before next field trip or before any climb. Belaying Must demonstrate proficiency before next field trip. Cannot participate in
Glacier Travel field trip or any climb without safe belaying skills. #8 Glacier Travel
Knots Must demonstrate proficiency before any climb. Belays Must show proficiency before any climb. Cannot participate in any climb
without safe belaying skills. Arrests Must demonstrate proficiency before any climb.
Any Climb Knots, Belays Arrests
Must demonstrate proficiency before next field trip and before any climb.
Critical Skills Coordinator_________________________ Tele. #__________________

APPENDIX C
Basic Course Field Trip Instructor's Manual Rev: 2013 Appendix C-2 The Mountaineers, Olympia Branch
Critical Skills
Critical Skills Problem on Climb
Critical Skills Problem on Field Trip
Leader Confers with
student Field Trip
Leader/Instructor confers with student
Leader Contacts Critical Skills Coordinator
Student Contacts Mentor
Leader/Instructor contacts Critical Skills Coordinator
More Practice/Help
Student Demonstrates
Critical Skills Continued Problem with
Critical Skills
Mentor Contacts Critical
Skills Coordinator Student is Unable to Perform
Critical Skill Satisfactorily
Critical Skills Coordinator “OKs”
next Field Trip or climb Student is Dropped from
course.