copyright © by brownberry ovens, inc.,breadbaking.homestead.com/bread.pdfone of the great worries...
TRANSCRIPT
Copyright © by Brownberry Ovens, Inc., a Division of Peavey Company
Published October 1, 1976 Bulfin Printers, Inc., Milwaukee
Cover illustration courtesy of International Paper Co. Chapter illustrations and book design by Sister Peter Julian Werner


This book is dedicated to
the Newspaper Food Editors of America
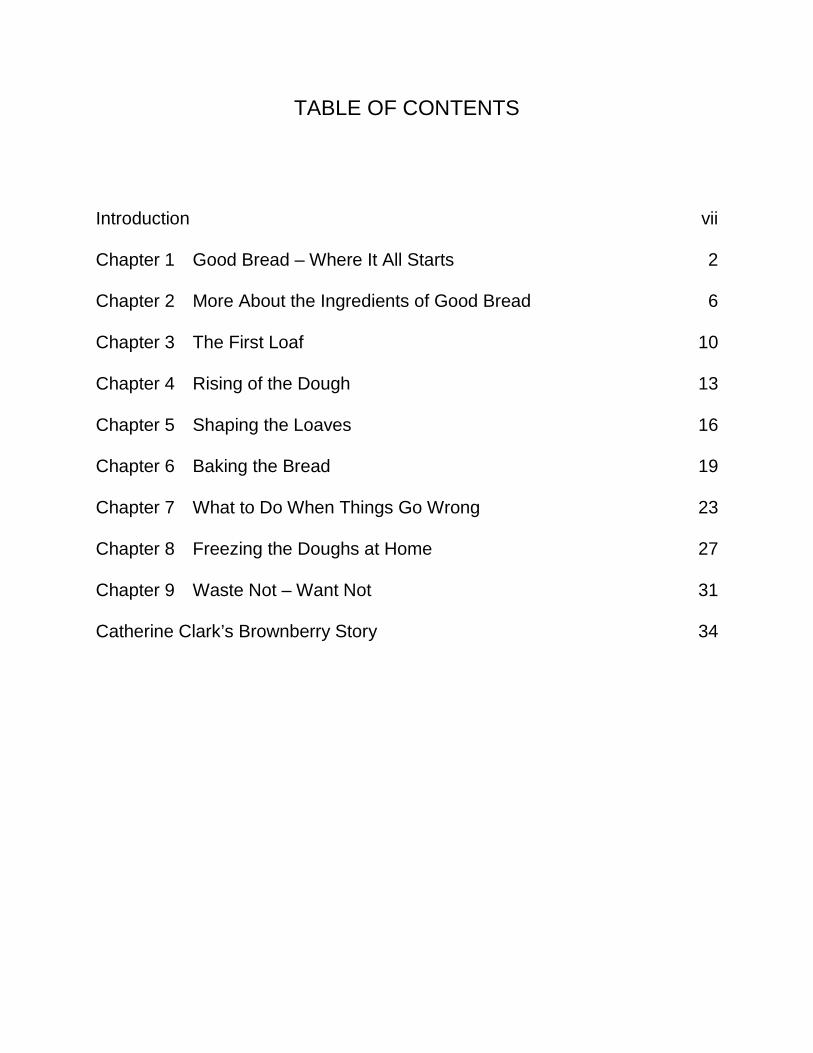
TABLE OF CONTENTS
Introduction vii
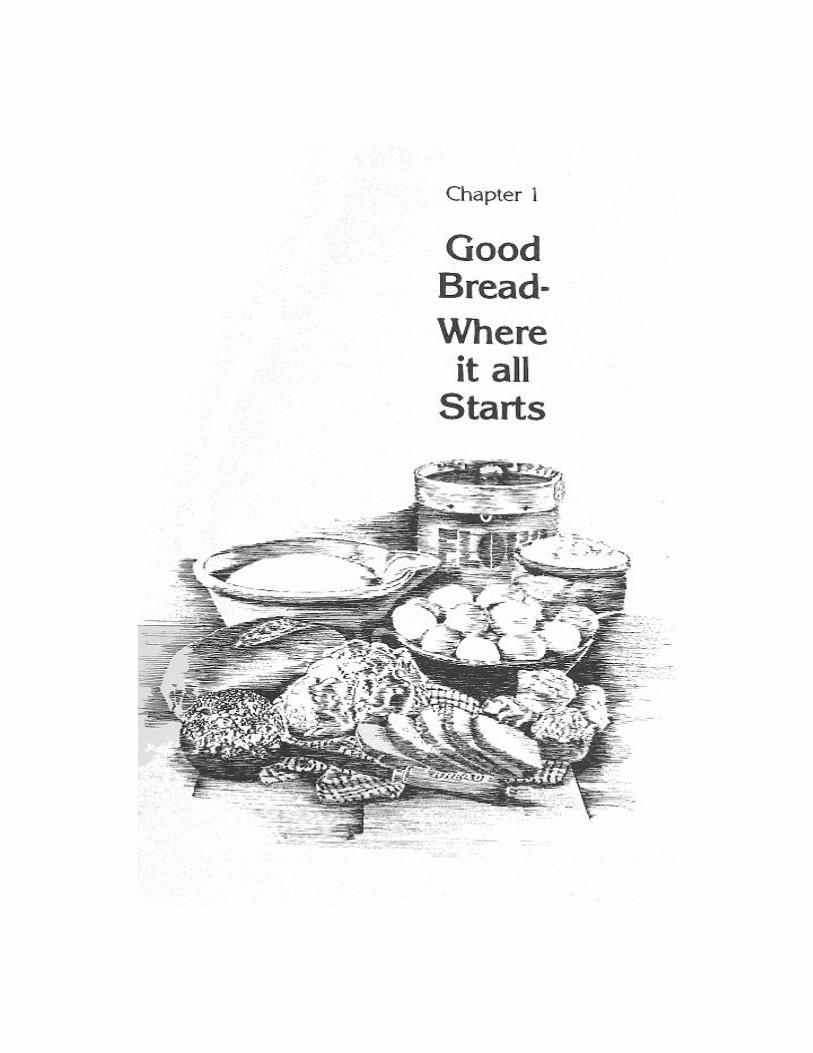
Chapter 1 Good Bread – Where It All Starts 2
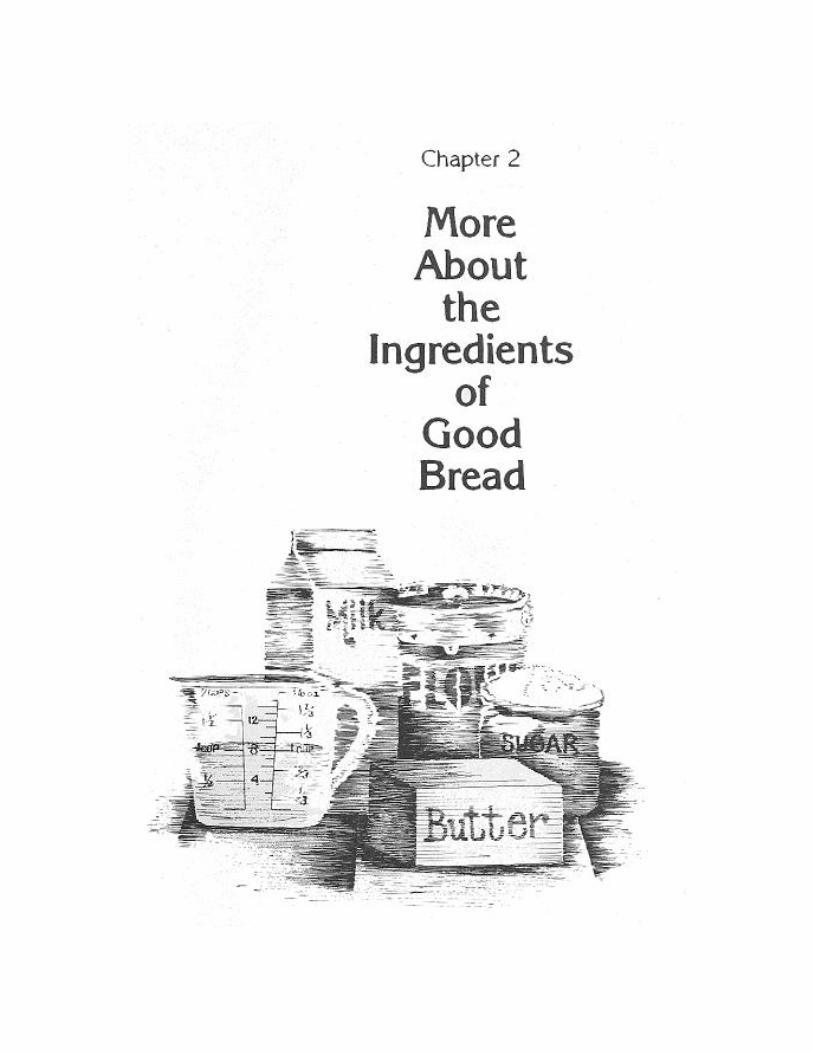
Chapter 2 More About the Ingredients of Good Bread 6
Chapter 3 The First Loaf 10
Chapter 4 Rising of the Dough 13
Chapter 5 Shaping the Loaves 16
Chapter 6 Baking the Bread 19
Chapter 7 What to Do When Things Go Wrong 23
Chapter 8 Freezing the Doughs at Home 27
Chapter 9 Waste Not – Want Not 31
Catherine Clark’s Brownberry Story 34
INTRODUCTION
ONE OF THE GREAT WORRIES OF MY LIFE, which might surprise you, considering my choice of careers, has been that the art of home bread baking might be lost. I am, in fact, herewith launching my personal crusade to preserve the art of home baking. I've never looked on home baking as competition, but rather as a means of training young palates to know and appreciate the marvelous difference between bread over which poets once rhapsodized, and bread as it all too often has become - just a conveyor of peanut butter and jelly, or something to keep egg salad off the fingers. I've also anguished over the fact that, if the art of home bread baking continued to decline, millions of people were going to be deprived of the creative joy that baking one's own bread can bring to both the cook and her or his family.
And there was a time, not so very long ago, when it nearly was lost. Some of us still remember when "baker's bread" heralded the liberation of women - the way the laundromat did much later - from a time-consuming, sometimes burdensome task. At least one whole generation grew up, except for a few lucky farm kids, adequately, but certainly unimaginatively, nurtured on storebought bread. Almost no one in urban areas baked bread, even ten years ago, certainly not twenty or twenty five years ago. The children of that generation were never welcomed home after school by the glorious aroma of freshly-baked bread, never knew that heavenly taste sensation of butter melting into thick slabs of fragrant homemade bread warm from the oven. But if l'm any guesser, a lot of young'uns - and older ones too - are going to recapture that old rapture.
I couldn't have been more delighted when, about five years ago, I saw the resurgence of home baking, first among quite young people, then the young marrieds. For hundreds of years the art of bread baking was passed along from mother to daughter. But then the chain was broken. Thank goodness for cookbooks and food editors! The fairly recent efforts of beginners were often

successful, or at least were accompanied by just enough success and a strong enough desire to keep new bread bakers interested.
I can, and will, give you a good elementary recipe for flavorful homemade white bread. But that's really not enough. Consequently. I'm eager to share with you some of the tricks, the nuances, the fine points that recipes and cookbooks seldom cover. In twenty- five years of going contrary to the major bakeries in the marketplace, always approaching our own small piece of the market from a kitchen like yours, I've managed to assemble a good many little techniques, along with the whys and wherefores of bread baking, inexact science though it is. It's a great pleasure to share them with you here.
Catherine Clark
This chapter will cover the story behind some of the principal ingredients used in bread, in the hope that by knowing more about them, the home baker will have a better understanding and command of the art of bread baking.
To start off, I will discuss only the three essentials occuring in all types of bread - flour, yeast and salt, which, with the addition of water, are all that are needed to make that classic and most enduring of all favorites, the crisp-crusted French loaf. The principles apply, of course, to all breads.
Flour
In this discussion of basics, this means white flour made from wheat. No other grain is so well suited to bread baking for flavor, nutrition and its ability to achieve lightness through its uniquely high gluten content. The less complex the recipe, the more wheaty and delightful the aroma and taste. Taken a few hours from the oven, classic, lean French bread, made only of flour, water, yeast and salt, cannot be surpassed for joyous eating. Admittedly, it's a one-day bread, drying out before another day dawns.
The quality and type of bread flour varies from high protein, with a strong gluten content, often referred to as "Northern Hard Spring" and used for the best quality breads, to the softer, less expensive flours grown in the southwestern United States. Gluten is the operative word, so I want to explain its function in bread.
If you made a small, stiff, doughy ball of flour and water, held it under a running cold water faucet, working and washing out the starch which makes up the greater part of flour, you would end up with only the elastic bit of gum called "gluten" in your fingers. In bread mixing we "develop" the gluten by

kneading and working the dough, a most important step. When I give a recipe I usually say "knead vigorously -at least 10 minutes by the clock."
We continue to develop the gluten after kneading the dough by allowing an hour or more fermentation (or rising) time in contact with the action of yeast and salt. By so doing, we accomplish that which will bring about our goal of a light and palatable loaf of bread. The gluten, well distributed throughout the dough, has become ready to receive and hold the gases generated by the yeast-induced fermentation. Imagine the dough now as composed, in addition to the starch cells, of tiny gas-filled gluten balloons. After baking, during which the oven heat has expanded these balloons even more, our loaf of bread is light on the inside, crusty and flavorful outside, embodying all the nutrition of the good wheat plus the unrivalled pleasures of a beautiful taste and texture.
"AIl-purpose flour", sometimes referred to as "family flour", is the type offered by millers to the grocery trade. It seeks to fill all needs satisfactorily - cakes, pies, muffins, gravies and bread. It is a medium-strong flour of about 10 percent protein. Bread flour (or "Bakers' Patent") is much stronger, ranging from 11 percent to 12 percent protein, and is beloved by the professional baker. It is not easy to come by for the average city housewife. If home baking continues to grow, however, we may see bread flour offered to the housewife in manageable-sized packages.
By the way, cake and pastry flour tests about 9 percent protein and makes terrible bread; but, as its name implies, creates tender cakes and piecrust.
Yeast
Yeast is alive! When dealing with yeast, one must be alert and observant, because it is a living organism, affected by temperature, time, and the kind and quantity of the ingredients around it. Under a microscope you can watch
the cells of yeast multiply with amazing rapidity. For this to take place, however, conditions must be right. As a matter of fact, it's not difficult at all to kill the action completely if conditions are wrong.
The production of yeast itself follows an incredibly complicated series of steps, including carefully and precisely preparing a medium called "wort", in which the pure culture of yeast is sown and grown. Compressed yeast is finally formed into the little 5/8 oz. packets designed for household use, as well as into much larger units (and even in crumbled form) for the baker's use. This moist cake of compressed yeast, being perishable when subjected to temperature changes or extended time in storage, has a drawback or two, such as perishability and drying around the edges. The manufacturers of yeast solved these problems by finding a way to preserve it through drying. The addition of warm water and a little sugar for the dry yeast to feed upon produces a bubbling yeast liquid of equal effectiveness. The home baker can keep small packets of dry yeast on hand at all times with less danger of deterioration, though they, too, have a time limit within which they must be used (note date printed on your package of yeast). It will keep almost indefinitely under refrigeration.
As a rule of thumb, one package of compressed yeast or one package of dry yeast is used for raising dough made from six cups of flour. If you must speed up the whole process (though the best bread is not produced this way), double the amount of yeast called for in your recipe.
If you bake often and want to buy dry yeast in bulk at a health food store, remember that one tablespoon of dry yeast equals a cake of compressed yeast or one package of dry yeast.
The function of yeast in bread is an important one. In combination with moisture and something for it to feed upon (sugar), it brings about a fermentation within the dough. The gases so created cause the dough to rise

and expand. Usually sugar, in varying amounts, is part of the recipe, but there is also some sugar in flour, naturally, in sufficient quantity to feed the yeast in making lean, French-type bread. During the baking phase, after having performed it's first task of raising the bread, the yeast is busy converting the sugars in the dough to alcohol and thereby contributing to its flavor. If you have been baking bread, you must have noticed the eye-watering, nose-jolting blast of alcohol fumes as you open the oven door when the baking is finished.
Don't Forget the Salt
Salt is a uniform and stable commodity available in grocery stores under several brands. Salt comes from three sources: the sea, salt lakes, and natural brines and deposits in the earth, in the form of rock salt. Salt from the sea or lakes is created by evaporation, while rock salt, if pure, is brought to the surface, crushed and ground. A pure salt taste characterizes the best salt, while there is a noticeably bitter aftertaste in less pure products.
Children looking at ordinary table salt through a strong magnifying glass are fascinated to discover that the grains have the appearance of perfect, tiny ice cubes. This, of course, is the result of the crystallization that has taken place during its processing and refining.
Salt has a stabilizing influence which helps control the development of the yeast in doughs. If you have ever forgotten to include salt in a bread dough, you will remember the undue speed with which it raised. You may also have experienced the disconcerting fall it took before you could get it into pans. The reason for these phenomena is that salt has the effect of strengthening and tightening the gluten so that it can hold those fermentation gases. Without

salt, the gluten is weak. The third, and very important, function of salt is the improvement in flavor of the finished bread.
If you have a gram scale and want to be quite scientific about it, the usual amount of salt proper for a simple French bread recipe is 2 percent of the total flour weight. To interpret this for the home baker, I recommend one teaspoon salt to two cups of flour.

H20
YOU MAY NOT THINK OF WATER as a very important ingredient, but it does, of course, play an essential role in putting the other ingredients together. Water or milk are second only to flour in the ingredient list. The degree of hardness, softness, or alkalinity of water can have an effect on yeast activity. Almost all good drinking water will make acceptable bread. A medium degree of hardness, as you might expect, is considered most suitable for baking purposes. Excessively hard water slows down the rising of the dough, but to some extent strengthens the gluten. Excessively soft water is apt to produce a soft and sticky dough, necessitating the reduction of water content until a workable dough is achieved. Extra salt with soft water will strengthen the gluten and produce a better loaf of bread. Alkaline water is undesirable for bread making because of its depressing effect on fermentation or rising. This can be offset somewhat by adding a tablespoon of vinegar to 2 cups of water. There is normal and beneficial acidity developed in the dough during fermentation which is neutralized by highly alkaline water. The vinegar helps correct the situation.
I'd like to add that the temperature of the water (or milk) used offers the best opportunity we have to modify or adjust the final dough temperature. The best average temperature for dough when it has been mixed, kneaded and set to rise is 82°. Cold flour should be offset by the use of quite warm milk or water.
Sweet Stuff
A sweetening agent, whether it be granulated white sugar (cane), brown sugar, molasses (all sucrose), malt sugar (maltose), corn sugar (dextrose), or honey (fructose), plays several roles in bread making. First, it provides a sweeter flavor than we find in a completely sugarless French bread, and for most persons this is an enhancement one expects in loaf or pan bread.
Molasses has the most penetrating flavor and seems to overshadow all other flavors in the bread. Brown sugar flavor can be detected by those with perceptive taste buds. Orange blossom and clover honey contribute a far more delicate flavor than wildflower, buckwheat and sage honeys. Malt sugar flavor is subtly evident, but also has a more important effect on bread doughs, that of beneficially mellowing the dough. Malt syrup, unfortunately, is not readily available to the home baker. Sugar in milk (lactose) has relatively little sweetening power, although it helps to improve flavor and crust color.
When the yeast in a dough has been supplied with sugar in some form, its growth and development is accelerated. Conversely, a very high percentage of sugar, as in sweet roll dough, inhibits the rising unless compensated for by extra yeast. You'll notice that recipes for bread doughs call for one-half as much yeast as sweet doughs.
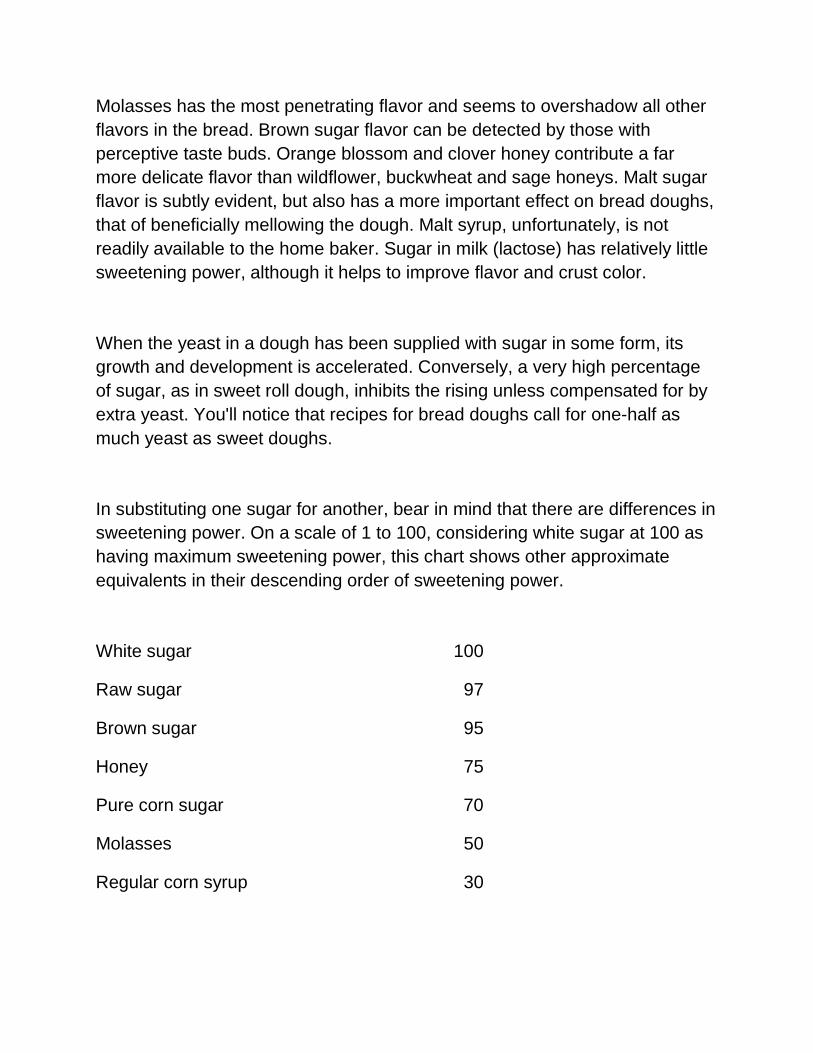
In substituting one sugar for another, bear in mind that there are differences in sweetening power. On a scale of 1 to 100, considering white sugar at 100 as having maximum sweetening power, this chart shows other approximate equivalents in their descending order of sweetening power.
White sugar 100
Raw sugar 97
Brown sugar 95
Honey 75
Pure corn sugar 70
Molasses 50
Regular corn syrup 30

The Tenderizing Fats
The kinds of shortening available to the home bread baker are mainly butter, hydrogenated vegetable shortening, vegetable oils, margarine and lard. Fats other than oils are most conducive to success because of their plasticity, which aids air entrapment and prevents too rapid absorption of fat by the gluten in the flour. To explain gluten which has become fat-saturated becomes insulated, so to speak, from the all-important action of the yeast.
A very acceptable procedure, as a matter of fact, is to add shortening after all other ingredients have been incorporated into the dough. This procedure is believed to accelerate the rising of the dough due to a lubricating effect that takes place.
To my way of thinking, lard makes the best bread of all, but lard has fallen out of favor as the development of vegetable shortenings has proliferated. Butter may not supply the optimum in shortening properties, but has the advantage of contributing flavor not to be duplicated even by the "butter flavored" margarines.
An interesting ingredient, lecithin, available in health food stores, has a number of properties of interest to the home baker. Lecithin derives from corn or soybeans, and used in conjunction with the fats, acts as a "dough improver". Used in a proportion of 1 oz. (about 4 T) to6cups flour, it makes the dough easier to handle and produces a nice, uniform texture. In the finished loaf the crust color is improved and there is a noticeable improvement in "keeping" quality. Recent discoveries, as yet not totally 'substantiated, indicate that lecithin may function as a beneficial agent in reducing cholesterol deposits in the arteries.

Milk and Whey
Old time recipes called for milk that had been scalded. I asked a chemist for the reason, and he thought that possibly the process of scalding caused a certain viscosity or thickening to take place that was beneficial to the dough. Actually, I believe scalding took care of impurities in pre-pasteurization days and has been repeated in today's recipes as something not necessarily understood, but a notion not to be tampered with. I heat pasteurized milk (which has already been heated and held at 140°) as a means of achieving a warm dough - but that's all.
Whole milk, skimmed milk or whey in bread supply food for the yeast - and nutrition for the consumer. A high percentage of milk powder, while increasing the protein content of the bread, tends to break down the dough, preventing it from making a lively dough and bringing about less volume in the finished loaf.
I believe one creates better bread by using half milk and half water, though for nutrition's sake you may prefer to use all milk. While whole milk makes a richer bread, of course, skimmed milk, or even whey, behave satisfactorily in bread.
In you prefer to use powdered milk, and the recipe calls for liquid milk, add water in the proportion of 7 parts water to 1 part powdered milk by weight The best way to use dry milk, since it has a tendency to lump and stick together, is to disperse it well in the flour rather than reconstituting it as a liquid.
The stouthearted bread baker is persevering. Practice will make perfect, but understanding helps too.


MOST BREAD RECIPES ARE BASICALLY ALIKE, so use the one below or pick one from your favorite cookbook and begin following the procedures described in Chapters 4, 5, and 6. Here are my own proportions and ingredients that you might wish to use for your flavorful first loaf. Move precisely, your efforts using these proportions, will give you a bonus of three loaves - the number this recipe yields.
1 cup sweet milk
1 cup water
2 tablespoons sugar
1 tablespoon salt
1 tablespoon shortening
1 tablespoon butter or margarine
1 package dry yeast
5 1/2 to 6 cups all-purpose flour
Now, if you're an old hand or an about-to-be new expert, this is all you need. Here's where I hope to speed you new bakers on your way to bread baking confidence. All breads in this book deal with "straight" doughs.
The simple "straight dough" technique seems to me much more practical for today's home baker than the old" sponge method" which required setting a sponge (soft dough) at night, letting it rise overnight, knocking it down in the morning, kneading in more flour, another rising in the bowl, and finally a rise in the bread pans.

For starters, let's take a closer look at the art of mixing and kneading.
No gentle, namby-pamby, pat-a-cake motions will do. Show some real muscle. Or perhaps put your husband or son to work - he'll love it!
White flour consists almost entirely of starch and gluten. Gluten is a tenacious elastic protein substance found especially in wheat flour. The miracle lies in the gluten which, when combined with water, yeast and salt, begins to take on its elastic characteristics. In order to create strong enough cell walls (you can see them plainly as the texture in a slice of baked bread), the dough must be stretched and worked. Why do we need strength and elasticity? To catch, and hold the gases that are released while the dough is fermenting and rising. These cells are like tiny balloons and they make bread light and fit to eat.
Need to Knead
Now for the actual kneading. Mixing the ingredients together with a big. strong spoon (I use a straight wooden one) brings it to the stage where even stronger measures are indicated. Since flour varies from sack to sack in how much moisture it will absorb, you must use judgment now in deciding if a little more flour must be added before tipping the dough out onto a well-floured board or counter. You'll get the hang of it after a time or two. The kneading process actually "dries up" the dough by encouraging moisture to be absorbed. When you start the dough will still be a little sticky. It helps to put shortening or oil on your hands for this first stage of handling the dough. You can even work in additional flour as you knead if it doesn't dry up enough. The more vigorous you are, the less time the drying up will take.
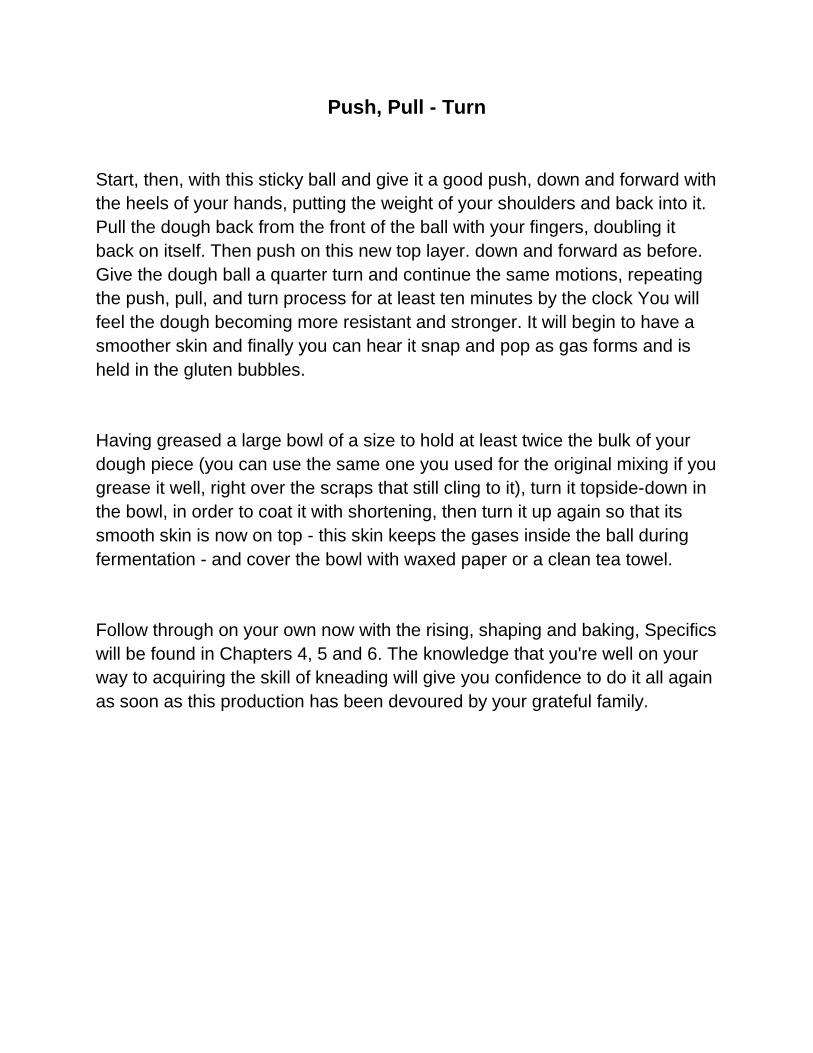
Push, Pull - Turn
Start, then, with this sticky ball and give it a good push, down and forward with the heels of your hands, putting the weight of your shoulders and back into it. Pull the dough back from the front of the ball with your fingers, doubling it back on itself. Then push on this new top layer. down and forward as before. Give the dough ball a quarter turn and continue the same motions, repeating the push, pull, and turn process for at least ten minutes by the clock You will feel the dough becoming more resistant and stronger. It will begin to have a smoother skin and finally you can hear it snap and pop as gas forms and is held in the gluten bubbles.
Having greased a large bowl of a size to hold at least twice the bulk of your dough piece (you can use the same one you used for the original mixing if you grease it well, right over the scraps that still cling to it), turn it topside-down in the bowl, in order to coat it with shortening, then turn it up again so that its smooth skin is now on top - this skin keeps the gases inside the ball during fermentation - and cover the bowl with waxed paper or a clean tea towel.
Follow through on your own now with the rising, shaping and baking, Specifics will be found in Chapters 4, 5 and 6. The knowledge that you're well on your way to acquiring the skill of kneading will give you confidence to do it all again as soon as this production has been devoured by your grateful family.
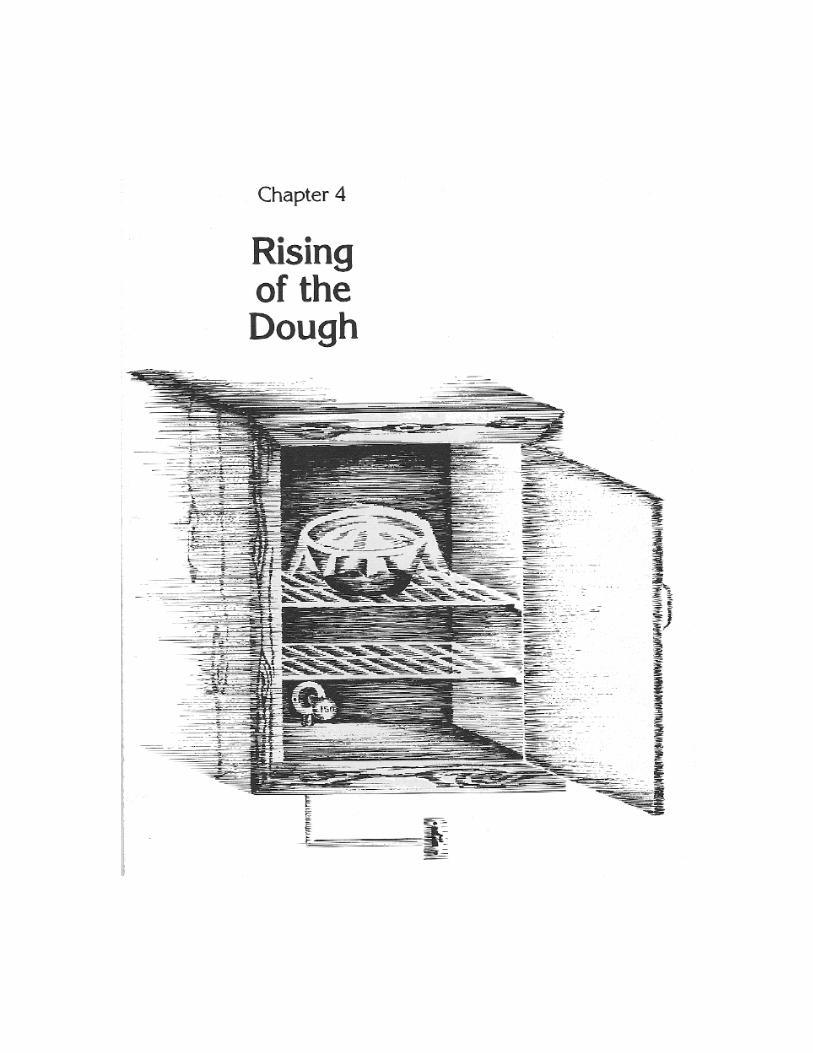
MY RECIPES USUALLY SAY, "Place dough in warm place to rise." I have a neat solution to finding a warm place for the dough to rise that beats even the old-time overnight method of placing it in bed with the children! Of course, if you're going to bake only once in a blue moon, my system may not be practical. But when you become hooked on baking, and you will, and you'd rather not have your doughs delayed by a cold snap, drafts, or finding that they've become too warm on the bottom and not warm enough on the top, or vice versa, from sitting on asserted radiators and stove tops or in the sun, or taking up space in your oven when you need it for something else, then you may be ready for my system.
Give up a cupboard, preferably in your kitchen and preferably one in which you store seldom-used items, and have it wired for the installation of a light bulb, placed low in the back of the cupboard. An on-and-off switch outside the cupboard is a convenience, though my first one was on a cord which I plugged into an existing appliance outlet just below the cupboard. A small hole in the cupboard allowed the wire to go through. It was necessary to remove the plug, run the wire through the hole, and then re-install the plug, so the only work required was in mounting the fitting to receive the light bulb.
The size of your cupboard will determine the wattage of the light bulb you use. The cupboard which I converted to a "proofing" (rising) cabinet is 23 inches deep, 16 wide, and 20 in height. A 150-watt bulb works beautifully. Depending on the size of your cabinet, you will want to experiment with bulbs of 100 to 150 wattage in order to maintain a 95 to 105 degree temperature inside the cupboard.
I found and installed a couple of surplus oven shelves from an old outmoded stove (refrigerator shelves will do too). The top shelf, at least, should be removable so that you can also use the cabinet for the first rising in a large bowl, then later for the bread pans. Dough should be covered with waxed paper or a sheet of plastic for both risings to minimize crusting. Equip your

proofing cabinet with a thermometer so you can maintain this 95 to 105 degree temperature inside the cupboard by turning the light on and off once or twice during the rising. Between baking days, this cabinet is a fine place to store all your bread making utensils and such.
Now you're ready for the first rising, which takes place in the bowl after you have kneaded the dough thoroughly. (See Chapter 3) When you are ready for the second rising, which takes place in the bread pans after you have molded the loaves into shape, replace the top shelf in the cabinet to give yourself more shelf space.
A refinement of this simple proofing cupboard involves the installation of a small humidifier (we used to call them "croup kettles"), to be set below the bottom shelf of the cabinet A humidifier eliminates the need to cover the dough to keep it from drying and causing a crust during rising. Such crusting slows down the rising process as well as inhibiting a good oven-spring during baking, to say nothing of detracting from eating pleasure later. However, if moisture is used in the cabinet, a glass protector must cover the light bulb - such as one finds in shower lights for safety reasons. Provision for plugging in the humidifier must be made.
How do you know when the dough has risen high enough?
Assuming that you have not only lightly greased the top of your dough ball but covered the bowl suitably as well, you'll now need to apply a little judgment to determine when you think the dough has doubled in bulk Take into consideration that the dough has spread out, that the bowl is usually smaller in circumference at the bottom and your eye will tell you when you're there. Approximate is good enough. A reassuring and additional test is to plunge your middle finger to the knuckle into the risen dough, then observe that it is very, very slow to fill in the hole you created. When "all systems are go" - right

amounts of ingredients and right temperature - it will take from an hour to an hour and a quarter for the first rising.
However, if, upon plunging in your finger, the risen dough collapses and falls ignominiously to the bottom of the bowl, you have grossly overdone things - worn out the yeast, over-softened the gluten in the flour and generally fouled it up. I'll tell you how to save doughs that have been neglected and some remedies for mistakes later on in Chapter 7. But let's assume that your dough behaves just as it should - and it probably will. Not only is it reluctant to fill the hole poked into its middle, but the dough remains firmly risen. It's time now to put the dough into pans.


THE FIRST RISING OF THE DOUGH in the bowl is technically called the "primary fermentation". The second rising in the bread pan preparatory to baking is called "proving" or "proofing". Having completed the first rising, we are now ready to make the dough into neat rolls to be placed in bread pans preparatory to the second rise or "proof'.
Turn the risen dough out onto a floured board or counter. Knock out as much gas as you can by pounding on it with your hands. I sometimes go over it with a rolling pin to squeeze out the gas. Take a large chefs or butcher knife in hand for cutting off the dough pieces.
If you have a kitchen scale, the pieces can be weighed so as to achieve loaves of equal weight However, once you determine the right amount of dough for your pan size, and learn how many loaves can be made from one batch of dough, a scale is not essential. My method is to form a large roll of the dough, measure by eye into equal portions, then slice it with the knife.
Next, form each piece into a smooth ball and allow about a five-minute rest, during which the bread pans can be greased.
Now, taking the balls of dough in the order you shaped them, flatten the ball into an oval, pick up the ends, shake the piece a little to lengthen it, and fold the ends over so they lap a little in the center. Press the lapped ends down firmly, Pat out to a little less than pan length. Next, rolling from the top, bring the top edge toward you halfway, pressing it into the center; roll the newly-formed top edge toward you again to meet the bottom edge, pinching and sealing it together firmly with your fingertips. Place this seam on the bottom as you place loaf in pan.

How does one know, after the dough has been molded and panned, when to put it into the oven? Once more, the loaf you have made must double in bulk If you let it rise too high the picture-book loaf you were anticipating will have become an enormous balloon, or spilled over the pan at the top, or become squarish and sunken on top, large-holed and loose-textured inside - any or all. What I refer to as "oven-spring" is a last jump the dough takes after it's in the oven, so we must allow for this to happen by letting it
rise at the crown or top only about an inch above the rim of the bread pan.
Besides bringing about, in the oven, a fairly even texture inside the loaf, you should expect to see that most appetizing and attractive break along one side of the loaf above the top of the pan, known in baker's parlance as "the shred". The shred is plain evidence that you used the right proportions of ingredients, that your dough was kneaded enough, you put it into the oven at the right time in a pan of the proper size for the amount of dough in the loaf, you let it rise just enough, and the oven was at the right temperature.
You have a little leeway this way and that on all those factors, so don't be intimidated. Once you nail down some of these prerequisites, a quick look is all you'll need to tell you when to bake. In the meantime, a light pressure on the top of the risen loaf with the tip of one finger should not leave a permanent

dent If the loaf appears to have doubled and there's no dent from the finger test, into the oven with it, but gently.

IT WAS IN THE LATE 1880's that women began to really enjoy their cooking and baking, These were the days of the magnificent kitchen range, all black and nickel-trimmed, which ushered in what I call the Era of Great Baking. Large volumes of recipes and household hints flourished and encouraged the housewife to cook and bake more creatively and with better assurance of success. Thousands of women went to cooking schools held in the small towns as well as in the cities. I have the cooking school notes that my mother wrote, which indicate that baking breads and rolls was no small part of her newfound versatility.
Today's ovens, equipped with fancy controls and well insulated, are as revolutionary an improvement as was the move from outdoor brick ovens to kitchen ranges, and a far cry from the clay ovens of Roman Times, to say nothing of the hole in the ground lined with hot stones and covered with leaves and earth, wherein were baked crude cereal cakes in days before recorded history, The ovens of my mother and grandmother were regulated by playing with the various dampers and drafts and stoking the firepot with different kinds and sizes of firewood to obtain fast, intense heat or slow, steady heat. And although you might not think this activity a source of enjoyment and satisfaction, happiness is relative after all, isn't it?
Now back to our modern ovens. Most cookbooks recommend the initial temperature for baking bread at 375° and then reducing the heat after the first 15 minutes to 350°. For the home baker, this is the best method. In professional baking, since it is impractical to jockey temperatures up and down in our big ovens, we very successfully bake bread at one temperature, varying it only from Variety to variety of bread. For standard loaves, 360° throughout will work for you at home too, if you prefer not to adjust the temperature during baking.
Hearth breads (French, Italian, Vienna, etc.), which are baked flat on a cookie sheet (lacking a real brick hearth), bombarded on all sides by the same

temperature, are baked at 400°. But watch out for sweet breads! Raisin, cinnamon, honey, nut breads, etc., will brown much more quickly and can over brown before you know it. 340° or a little less is better for these. The sugar in the bread is the browning agent, as well as a flavor factor. If your bread appears to be browning too quickly and it seems that by the time the loaf is baked through it will be a charcoal brown on top, just slip a piece of aluminum foil, shiny side up, over the loaf for the rest of the baking period. Actually, a piece of brown wrapping paper will do just as well.
It's very important to remember that the rising process continues after the bread is in the oven, so put it in before it has risen to its zenith, thus allowing for the important oven-jump which creates that beautiful shred. Measure the rise with your eye, one- half inch at the top or crown above the rim of the bread pan, providing that the pan is about 8" x 4" x 2 ½” and the dough weighs about a pound! This is an area of variables, so bring your judgment to bear using these general rules. Experience will soon teach you that the size of the pan, in proportion to dough weight, is an important factor.
What about French and other European crusty breads? These are traditionally baked on a hearth made from either metal or bricks. One very good reason for this is that strong bottom heat tends to bring about the oven spring or burst so much desired in breads of this type. To duplicate it as best you can in today's home oven, use a cookie sheet or, if you can find one, a slab of thin tile, transite or slate, which, when preheated in your oven, gives the effect of a hearth.
Another helpful adjunct to the burst and crustiness of European and peasant breads is steam which is often piped into a baker's oven and controlled by valves. The best approximation we can achieve in our own kitchen is to set a shallow pan of water on the bottom-most shelf of the oven and bake the bread on the rack above.

When I watched the bakers in one of the 6,000 retail bakeshops in Paris a few years ago, not only did the baker toss a dipperful of water onto the hearth in the brick oven as soon as he had loaded it with risen loaves, but upon removing the baked bread he instantly brushed the tops with water, thereby giving the crust a high shine and additional crispness. Try it!
Both pan and hearth breads should be baked on the middle shelf of your oven, thus receiving about equal heat from above and below.
If you are baking in a Pyrex glass bread pan, reduce oven heat by 25° (unless the recipe specifically calls for Pyrex bread pans), since heavy glass conducts and holds heat especially well.
Your oven thermometer isn't always on the same beam as the recipe author's, though a home baker soon learns to know her own equipment and makes an adjustment if necessary. The oven temperatures given in recipes can usually be followed; however, if you care to, purchase a small oven thermometer at the housewares store and check out your oven readings with it.
The baking time given in a recipe is, at best, just a general guide. A rule of thumb: 30 minutes at 375 deg for a one pound loaf. Two tests that tell you for sure when the bread is sufficiently baked are:
1) a good healthy color on all sides of the loaf; and
2) what I call the "thump test". If the bread is in a pan, turn it out or lift it up at one end, or if the loaf is of the hearth type, turn it over, and at the center of the bottom tap it or thump it with the end of your forefinger. If it sounds hollow and the crust feels firm, it is baked.


THE HOME BAKER OF BREAD sooner or later falls prey to mistakes. Some major, some minor. It occurs to me that you might like to know what to do when disaster strikes, outside of throwing the whole thing out.
It is possible to save a dough, if one knows how to take proper steps.
Ingredients Omitted.
One of the commonest errors is to forget to put in the YEAST. After proceeding with the bread mixing process all the way to where we are watching expectantly for the dough to rise, we either suddenly remember that yeast was omitted, or we patiently let it sit an hour or two during which time it doesn't budge at all. Then recollection hits full force.
Take the dough back to the counter and turn it out on the floured surface, patting it out into a flat piece. Soften the yeast in a minimum amount of liquid - for instance, 1 oz. of yeast (depending on the size of your recipe) in about 2 tablespoons of milk, cream or water. Stir until it becomes a creamy paste. Distribute over the surface of the flattened dough piece; roll up the dough a la Jelly roll; fold it over, too, and start kneading again as you did in the beginning. It will be a little sticky and will ooze out until you start working it in well, but in a few minutes you will have incorporated the yeast into the dough. You must be sure to knead sufficiently well to distribute it thoroughly throughout the dough. It shouldn't take longer than five minutes.
If you suddenly realize that you omitted the SUGAR, or the SALT before you set the dough to rise, these ingredients can be kneaded in dry the same way as the yeast paste was, being sure to knead it enough to get good disbursement However, if your dough has already risen, the omission of salt

will be more apparent to you because unsalted dough rises much more quickly and higher in a given time. Salt acts as a moderate inhibitor of fermentation, while at the same time it strengthens the gluten in the dough, making it better able to hold the gas necessary to achieve a light loaf of bread.
Forgetting the sugar will not be as apparent visually, but if you make it a point to always taste a little piece of dough, its omission will be noticeable. If the dough does seem to rise more slowly (you may not have provided the yeast with sugar, upon which it must feed during fermentation), try the taste test.
If you have omitted some of the flour or some of the liquid, it should be quite apparent to you because of stickiness in the first instance and extreme stiffness in the second. It's not too late to add those missing ingredients.
Too Much of Something
If the flour has been mis- measured and you find the dough too stiff to knead, it is possible to achieve the texture desired by slowly adding more moisture. It takes about a half cup of liquid to bring one cup of extra flour to the right consistency. If you wish at this point to bring the other ingredients into line, follow this rule of thumb when you have an unwanted extra cup of flour in your dough: For each cup of extra flour add 1/2 tsp. salt, 1 tsp. sugar, and 1 tsp. shortening.
To correct a batch of bread in which too much liquid has been used by mistake, follow this rule: For half-cup of unwanted liquid, add 1 cup of flour, 1 tsp. sugar, 1/2 tsp. salt, 1 tsp. shortening.
If you're sure you put in too much salt - say, double the intended amount - the best you can do, if you don't want to put in a double amount of everything else to catch up with the salt, is to compromise by adding half again as much of
everything. But remember, the extra salt will slow the rising. Acceptable bread will result, however.
Dough That's Over-risen - Or That Refuses to Rise
If you didn't get back from your errands in time, over-risen dough can be saved by adding the following ingredients, estimating as best you can the degree of over-fermentation. If you catch it at the point when it has risen to three times its original size instead of two, it will have consumed much of the sugar that you originally put in, as well as having spent some of its yeasting power. Therefore, mix in half the amount of yeast with half the total amount of sugar and add it to the dough, using the following method.
Take the dough back to the counter and dump it out on the floured surface, patting it out into a flat piece. Soften the yeast in a minimum amount of liquid - for instance, 1 oz. of yeast depending on the size of your recipe, to about 2 tablespoons of milk, cream or water. Add the sugar - stir until it becomes a creamy paste. Distribute over the surface of the dough piece: roll up the dough and start kneading again as you did in the beginning. It will be a little sticky and will ooze out until you start working it in well, but in a few minutes you will have incorporated the yeast into the dough. You must be sure to knead sufficiently well to distribute it thoroughly throughout the dough. It shouldn't take longer than 5 minutes. You're ready to start the rising process once more.
The dough will probably come up more quickly this time and you will, having learned your lesson, catch it at the point when it has slightly less than doubled in size. It will be very lively.
If the over-fermentation has carried on for so long that it has risen way up and then collapsed and just lies there, your only hope is to start by replacing the full amount of yeast and sugar, plus from \12 to 1 additional cup of flour, since both yeast and sugar have been completely consumed at this point and the over-fermentation has begun to liquefy the protein in the flour.
Over-risen Dough in the Bread Baking Pan
You can either overlook it and bake a loaf of balloon bread or drop the bread out of the pan onto the counter, remold it into a loaf shape and allow it to rise once more, baking it off this time at the right moment, which will be a little sooner than usual.
When the Dough Refuses to Rise
If bread does not rise at all in the bowl, check by taste for omissions of yeast or sugar, or the possibility that you doubled the salt inadvertently - which would really hold it down. If you've doubled the salt, see previous section on "Too Much of Something" . If, recollection tells you that the yeast or sugar has been omitted, correct, using the method described under "Ingredients Omitted".
Be sure the dough is warm enough. Cold dough moves so slowly as to be; imperceptible. In other words, always use warm milk and water (about like the baby's bath water) to give the dough a headstart. Sometimes in winter it is worth warming the flour in the oven a bit before making up the dough. Placing the dough to rise in a warm, but not hot, place is essential to activating the yeast.
But suppose. you have, unfortunately, mixed a cold dough, and the prospect of waiting it out is too depressing to contemplate. Try setting the whole bowl in a large pan of quite warm water (200°), turning and kneading it as the outer edges warm up. Another method is to turn on the oven, set at 200°, cover bowl, turn off oven, and continue the rising in the oven.
If dough does not rise the first time in the bowl, it's no use making it up into loaves hoping something miraculous will happen in the bread pan. Too late!
But usually, when disaster strikes, all is not lost, if we learn the corrective measures to take.
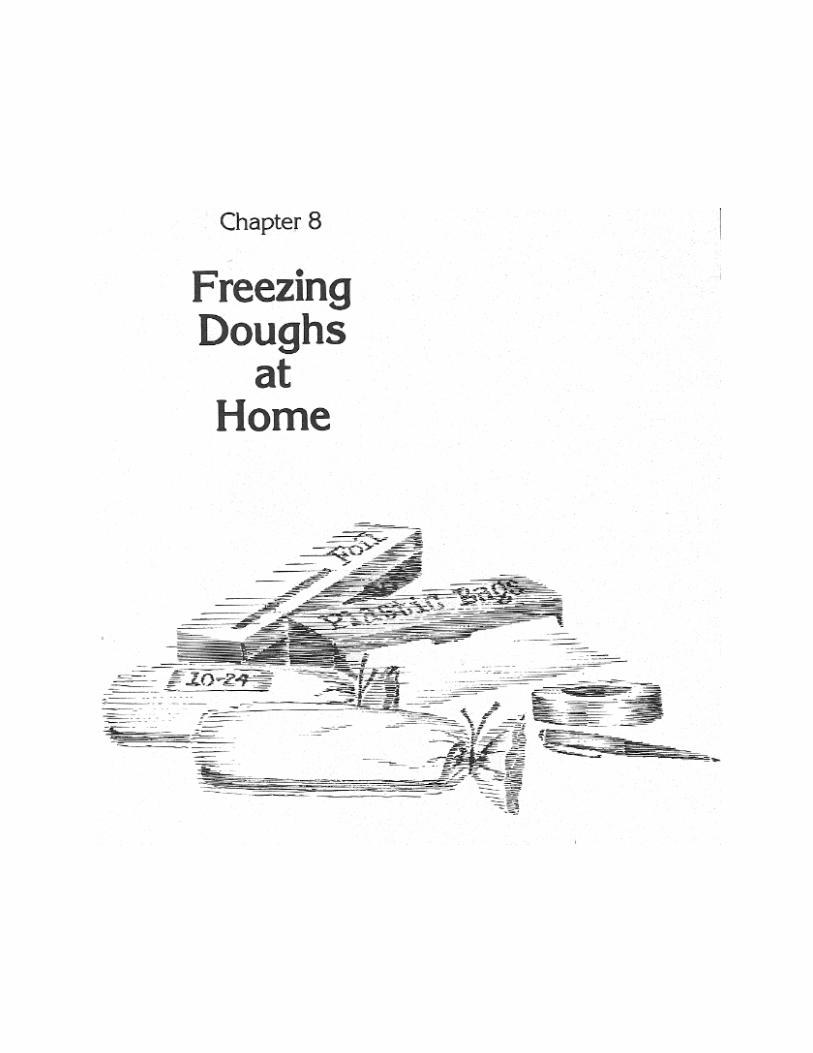
IT GIVES ONE A NICE SQUREL-LY FEELING, doesn't it, to have a supply of frozen dough in the freezer, all ready for unexpected guests. It can lighten the load, too, if one would like fresh hot rolls or bread of one's own baking when planning a party or family gathering.
The home baker has a few interesting advantages over the manufacturers of the frozen doughs found today in the grocer's deepfreeze, though they, too, have proved to be a great convenience to all of us. The first advantage in making your own is that you have complete control over the dough's age; and secondly, you have the opportunity to make richer doughs, particularly when BRIEF storage is planned.
After making a dough for future use (your favorite recipe, or mine as given below), be sure to date the package so that you will use it within one month's time. Insure airtight protection by wrapping the dough with a double thickness of plastic material, plastic bags (use 2) or aluminum foil in preparation for freezing your dough.
The following formula makes two loaves of dough for freezing:
5 cups all purpose flour
1 ¾ cups whole milk
3 pkg. compressed yeast
¾ tbsp. salt
¼ cup granulated sugar
3 tbsp. shortening
Thoroughly knead the dough (refer to Chapter 3). This dough can be held in the freezer as long as four weeks before baking off.
Additional tips for the home baker of dough for freezing include using cool liquids in the recipe so that during mixing and kneading it does not become as warm as in regular bread making. Since it is to be frozen, it makes sense to start with cool dough in order to speed up the freezing process - an important element in your success.
Then, quickly form the dough into bricks or loaf shapes and immediately freeze in the coldest part of your freezer. The object is to allow no rising to take place at this stage.
As for the proportion of ingredients, use one and a half times as much yeast as usual in order to compensate for damage to the yeast cells during frozen storage. Keep the salt and sugar content on the low side, but no lower than is consistent with good flavor. Too much salt and sugar inhibit yeast action when the time comes to thaw, rise and bake the bread. However, this factor is not as important if you plan to bake off the bread in a week or two.
When ready to bake your bread or rolls, observe these methods and principles: Slow thawing gives best results (overnight in the refrigerator is a good way). Quicker thawing can be accomplished by placing the dough in a greased bowl or pan submerged to the top in hot water. This takes about two hours. If you have a microwave oven with a thaw cycle, this may be used. Thawing time depends on the size of dough piece, so experiment and watch closely.
If time and speed are of first importance, form loaves (or individual rolls); as soon as dough has doubled in size, place in greased baking pan, allow to rise until double once more, and bake in a 350 oven. Or place frozen dough in bread pan to thaw and rise, baking immediately when double in size.

However, to improve the quality, I suggest that after dough is thawed you rework or knead it briefly by hand. Then, after allowing the ball of dough to rise once in a warm place until double in bulk, punch it down, form into a ball again for a second rising, which will take only about half as long as the first. Form into loaves or rolls, placed in greased pans for final rising and baking. The reason for three risings instead of the normal two is to compensate for omitting fermentation (rising) BEFORE freezing. This is an important difference when working with dough that has been frozen.
A great deal of bread flavor comes from the fermentation that takes place during rising, so we mustn't shortcut this process if we wish to achieve the very best results. The other flavor factors are the ingredients (chiefly sugar and salt), and finally, the caramelizing of the crust, sadly missing in breads that have paper-thin crusts. A good, solid bake builds a crust with an aroma that permeates the entire loaf.
How to Freeze Home Baked Bread
The growing numbers of home bread bakers are sure to find the freezer to be a great time-saver, as well as a food conserver.
One of the best ways to preserve bread which has already been baked is to wrap it well and freeze it. Refrigeration keeps it from molding, but tends to make it seem dry, a condition which quickly disappears after toasting. Some people claim that bread tastes even better after a sojourn in the freezer. In any case, slices of frozen bread can be popped into the toaster for thawing only, or by repeating the cycle, for toasting.
But if you bake bread to be frozen yourself, I recommend that you guard against baking too dark a crust, which seems to encourage peeling after the freeze-thaw process. Golden brown is best.

Be sure, when freezing already baked bread, that you wrap it thoroughly in double plastic material or bag or foil, marking the date it went into freezer so you will always be sure to use the oldest first.
Here's a good trick when you freeze you own un-sliced bread. Wrap it tightly in foil while it is still quite hot and freeze it immediately. When the occasion arises to serve bread that will appear to be fresh from your oven, put the foil-wrapped loaf into a 350° oven for a half-hour. Now you must open up the package for the last 5 minutes to take care of the excess moisture trapped inside. Allow loaf to cool on a rack before trying to slice it.
An electric carving knife is useful for slicing all un-sliced loaves. especially when warm. In the latter case, avoid applying pressure - let the blades do the work.

AS WE BECOME MORE AWARE of the travesty on nutrition found in the sugar-loaded, vitamin and nutrition-depleted dry cereals decorating miles of breakfast cereal shelves in the food markets, many of us are looking once more to the fundamental goodness of cooked breakfast cereals for the values we have a right to expect in feeding our families.
Women of the late 19th century still cooked up cereals and grains on their beautiful, big black and nickel kitchen ranges; in fact, they did so, well into the 20th century, feeling content that their nutritional duty to children and husbands was being admirably discharged at the breakfast table. The terminology may sound a little odd to today's young housewife - graham mush, cornmeal mush, porridge, farina, oatmeal gruel - but the principle of the thing is being better understood and agreed with every day. There are available to us today, in spite of the hoopla surrounding sugared dry flakes, puffs and pops, a respectable variety of cereals to be cooked and served hot.
Yesterday's housewife sometimes had a cup or two of cereal left over for which she had an interesting use - by adding it to her bread dough she achieved an extra dimension of flavor, and then, of course, she felt a bit of satisfaction in artfully using up a leftover which might otherwise have been fed to the chickens. Since you, too, may be serving cooked cereals today, or surely tomorrow, I'm going to give you the key to making good use of your leftover "mush", through a basic recipe and rule for adaptation to bread dough.
I realize that your children are probably the victims of so much hard sell on TV commercials for sugared dry breakfast foods that it becomes mighty hard for a mere mother to prevail against the charms of cutouts and premiums, and the TV visions of athletic prowess that can be achieved so easily. Yet, if we can guard against breaking the chain between pablum (which infants seem to enjoy so much) and cooked breakfast cereal, it's my contention that addiction to porridge could be extended throughout life.

The one bright spot in view, currently, is the acceptance of granolas among the dry cereal eaters - if only it weren't for the sugar and, for my taste, the ubiquitous raw or uncooked oatmeal flakes!
But now, we'll make some fine, moist bread, using any kind of cooked cereal you happen to be stuck with. This recipe makes three average loaves:
Basic Cereal Bread
1 cup cooked cereal
1 ½ cups milk, scalded
2 ½ tbsp. sugar
3 tbsp. shortening
1 pkg, yeast, dry or compressed
5 1/2 cups flour
3 tsp. salt
While milk is hot, combine with the cereal, milk, sugar and shortening; mix well and cool to lukewarm. Dissolve compressed yeast in the lukewarm milk mixture. If you use dry yeast, mix dry with the flour and salt, then combine with liquids.
It is possible to use a little more cereal, if you have it, but not more than 1 1/2 cups, in which case, add enough extra flour to make it possible for you to knead the dough without stickiness. If, on the other hand, you have only ½ cup of cereal instead of a full cup, simply add it to the dough and again, if
necessary, add a few tablespoons of flour should it seem sticky. Follow the procedure of kneading and allowing the dough to rise a first time until double in size. Knockdown, mold into loaves and pan, allowing to double again for the second rise in the pans. Bake in a 375 deg. oven for 30 to 35 minutes.
I think I've made such a good case for cooked cereal in bread that you may just want to cook up some, whether your family eats it at breakfast or not. I may even have convinced myself that I ought to have a try at putting together such an irresistible combination of grains and flavors in a new cooked cereal that there will be not one spoonful left for the bread!
There are literally hundreds of recipes for bread. If we multiply each of the world's myriad ethnic groups by at least twenty-five favorites, we may begin to approach the mouth-watering choices available to creative home bakers. The purpose of these chapters has been to share basic knowledge that will allow you to skillfully take your choice of any of them.


The Brownberry Story
In 1946, Catherine Clark, founder and Chairman of the Board of Brownberry Ovens, Inc., sold her first loaf baked in her own kitchen in Oconomowoc, Wisconsin. Her initial output of 25 loaves a day came from a prized wheat bread recipe. Serving the Milwaukee market and the small towns around Oconomowoc in the beginning with only two kinds of bread, a coarse, fresh-ground wheat and a white, she succeeded in turning a profit of $68 the first year. While the varieties of products and the sales and profits increased over the next 26 years, Catherine Clark piloted Brownberry's ship through the usual mix of stormy seas and smooth sailing to a point in December, 1972, when a sale was consummated with the people at Peavey Company. Taking a $16,000 investment to a $5 1/2 million sale in 26 years is not exactly a record accomplishment, she says, and swears that in those pre-women's lib days, a man, given her taste buds, could have done it in half the time! \ Today, three years later, Brownberry Ovens' two plants - at Oconomowoc and a new one near Cleveland, Ohio - are at capacity, reporting current sales of about $16,000,000. Catherine Clark became the first woman to become a member of Peavey's Board of Directors, is Chairman of Brownberry's Board of Directors and is actively involved of a full-time basis developing new ideas and new products, contributing her special flair for style and taste in many areas of the business. She is a successful blend of businesswoman, wife/mother and active citizen. Her husband, Russell J. Clark, served in the founding years as Brownberry's financial counselor, a capacity for which he was well suited because of his career as an investment banker. The Clarks are the parents of two daughters, Penelope and Sue. They have a home on San Francisco's Russian Hill and spend weekends at their ranch in the vineyard country of Sonoma County, where they oversee the development of their recently-planted vineyard. Catherine Clark commutes regularly to Brownberry Ovens' office in Oconomowoc, to the Twinsburg, Ohio, plant opened in the Fall of 1973, and to Peavey Offices in Minneapolis, maintaining an active role in the business she founded.

She is also active in civic, cultural and governmental roles. These include a two-term past presidency of the Oconomowoc Chamber of Commerce. She is currently president of Oconomowoc Tomorrow, Inc., a voluntary citizens regional planning group of seven Milwaukee suburbs, and has served on the Wisconsin Governor's Task Force on Small Business and Council on Economic Development.
In June, 1974, Catherine Clark received an honorary Doctorate of Law Degree from Beloit College, Beloit, Wisconsin, for her contributions to industry, education and her concerns with human relations and community affairs. Her role as an authority on bread baking and foods, however, is the one which enables her to share what she has learned in her own kitchen over the past 30 years with other women throughout America. Catherine Clark announced her intentions of sharing that experience at the 1975 Newspaper Food Editors Conference in Chicago. During the following year, spurred by the encouragement of the nation's food editors, Catherine Clark wrote down the knowledge about bread baking which she had acquired over the years. It has been shared with the readers of more than eighty daily newspapers throughout the country, primarily as a monthly column, "BREAD BAKING by Catherine Clark". It is to the newspaper food editors who made that sharing possible that Catherine Clark dedicates this book, a compilation of that material.