copy connect for mac software installation guide
TRANSCRIPT
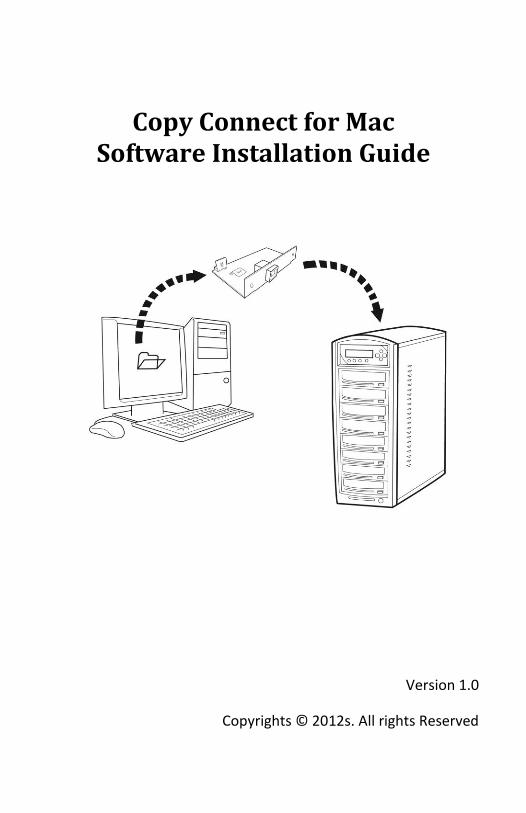
Copy Connect for Mac Software Installation Guide
Version 1.0
Copyrights © 2012s. All rights Reserved
1
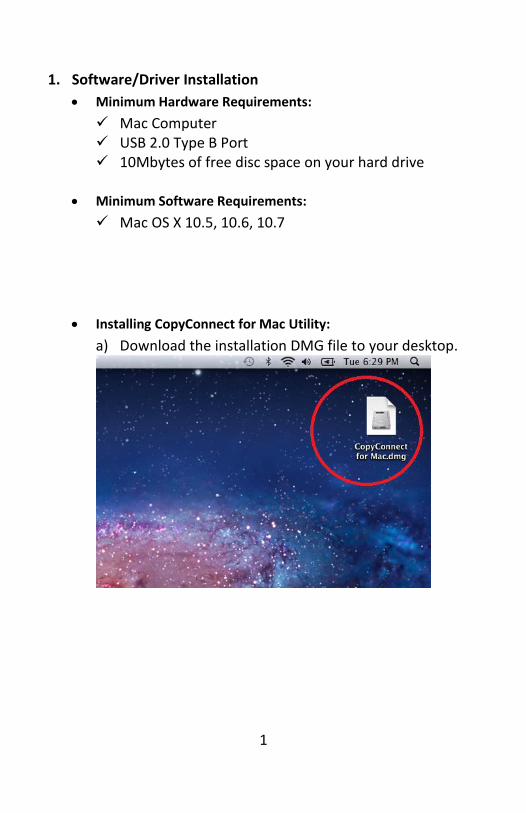
1. Software/Driver Installation
Minimum Hardware Requirements:
Mac Computer USB 2.0 Type B Port 10Mbytes of free disc space on your hard drive
Minimum Software Requirements:
Mac OS X 10.5, 10.6, 10.7
Installing CopyConnect for Mac Utility:
a) Download the installation DMG file to your desktop.
2
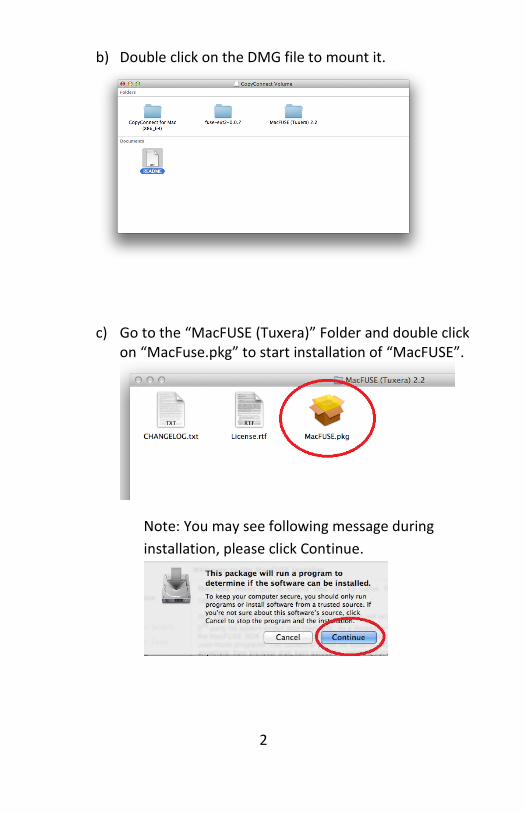
b) Double click on the DMG file to mount it.
c) Go to the “MacFUSE (Tuxera)” Folder and double click on “MacFuse.pkg” to start installation of “MacFUSE”.
Note: You may see following message during
installation, please click Continue.
3
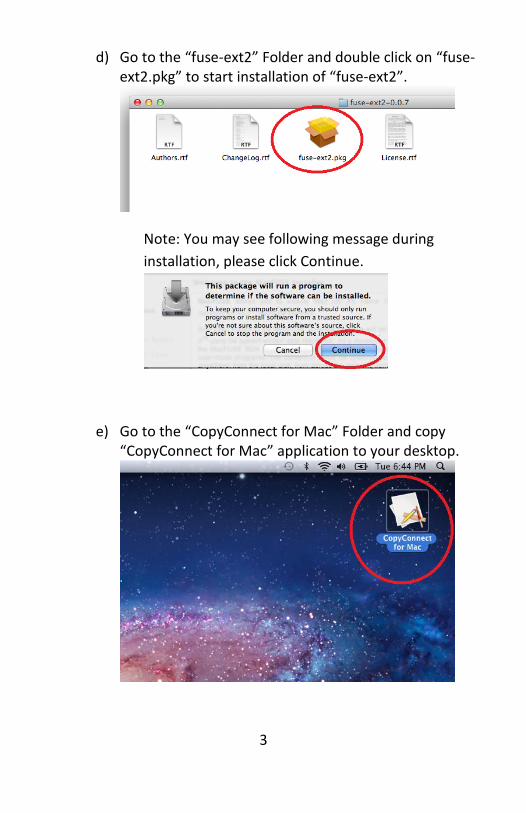
d) Go to the “fuse-ext2” Folder and double click on “fuse-ext2.pkg” to start installation of “fuse-ext2”.
Note: You may see following message during
installation, please click Continue.
e) Go to the “CopyConnect for Mac” Folder and copy “CopyConnect for Mac” application to your desktop.
4
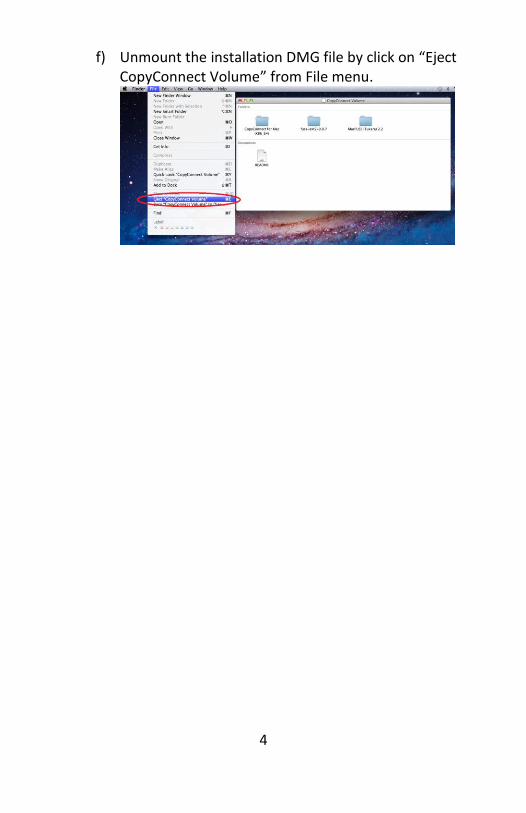
f) Unmount the installation DMG file by click on “Eject CopyConnect Volume” from File menu.

5
2. Establish a connection between your PC and the Duplicator’s
Hard Drive:
a) Power On the Duplicator and your PC
b) Go to the Duplicator’s Setup menu by pressing the UP or DOWN arrow button, then press the ENT/Enter button to enter the “Setup” menu.
c) Navigate to the “External Connection” submenu by pressing the UP or DOWN arrow button.
d) Press the ENT/Enter button to enter the “External Connection” setting and you shall see a screen similar to below:
e) Use the up or down arrow button to change the value to “On”.
DUPLICATOR 3.35
11. Setup
Setup
15.External Connection
External Connection
Off
External Connection
On
6
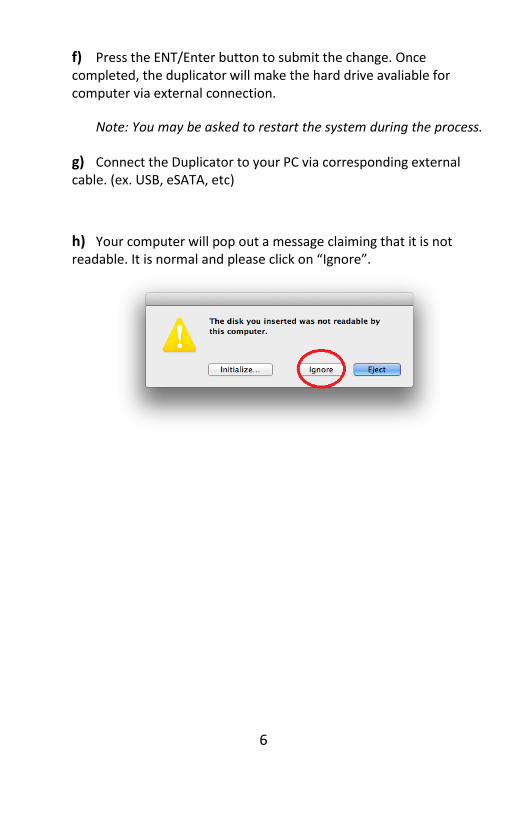
f) Press the ENT/Enter button to submit the change. Once completed, the duplicator will make the hard drive avaliable for computer via external connection.
Note: You may be asked to restart the system during the process.
g) Connect the Duplicator to your PC via corresponding external cable. (ex. USB, eSATA, etc)
h) Your computer will pop out a message claiming that it is not readable. It is normal and please click on “Ignore”.
7
3. Using CopyConnect for Mac to transfer image file to the
duplicator:
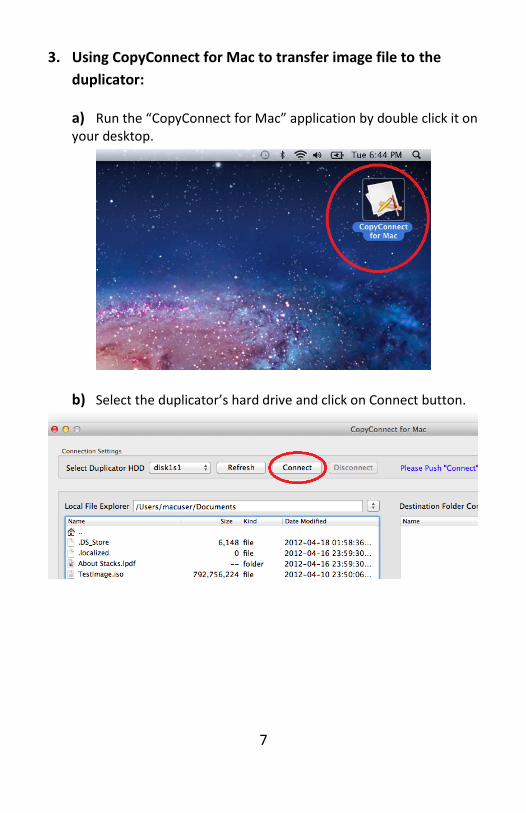
a) Run the “CopyConnect for Mac” application by double click it on your desktop.
b) Select the duplicator’s hard drive and click on Connect button.
8
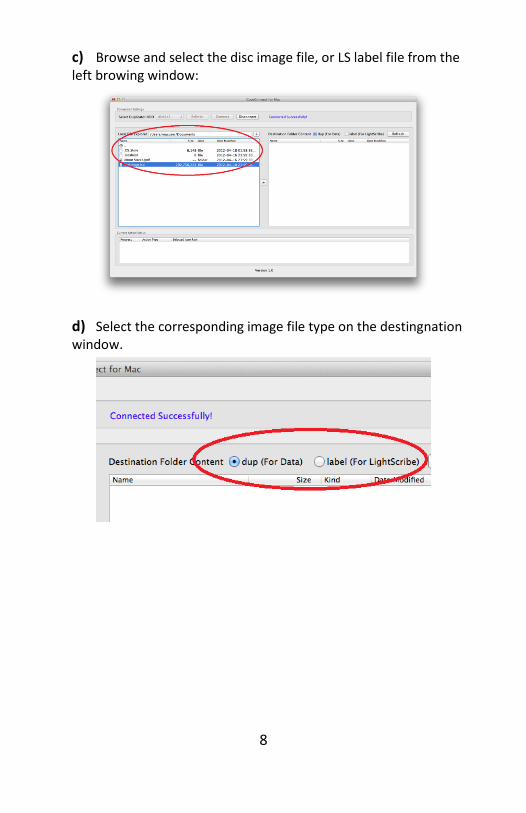
c) Browse and select the disc image file, or LS label file from the left browing window:
d) Select the corresponding image file type on the destingnation window.
9
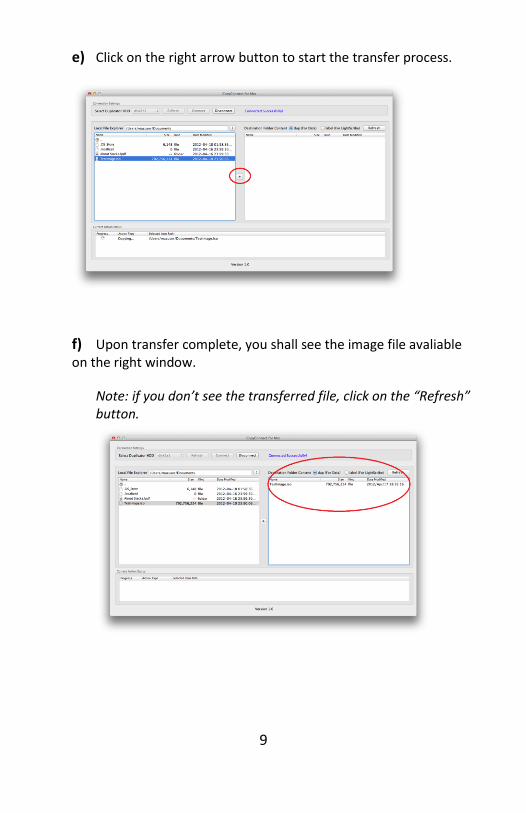
e) Click on the right arrow button to start the transfer process.
f) Upon transfer complete, you shall see the image file avaliable on the right window.
Note: if you don’t see the transferred file, click on the “Refresh” button.
10
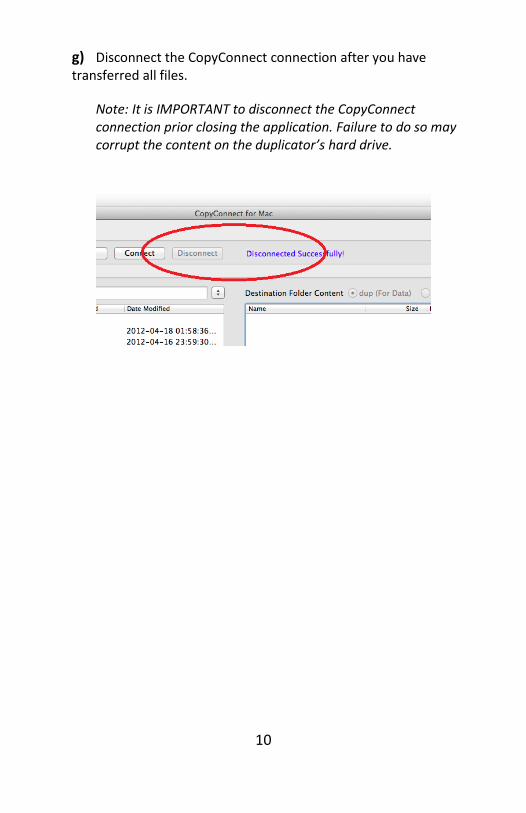
g) Disconnect the CopyConnect connection after you have transferred all files.
Note: It is IMPORTANT to disconnect the CopyConnect connection prior closing the application. Failure to do so may corrupt the content on the duplicator’s hard drive.
11
4. Disconnect the connection between your PC and the
Duplicator’s Hard Drive.
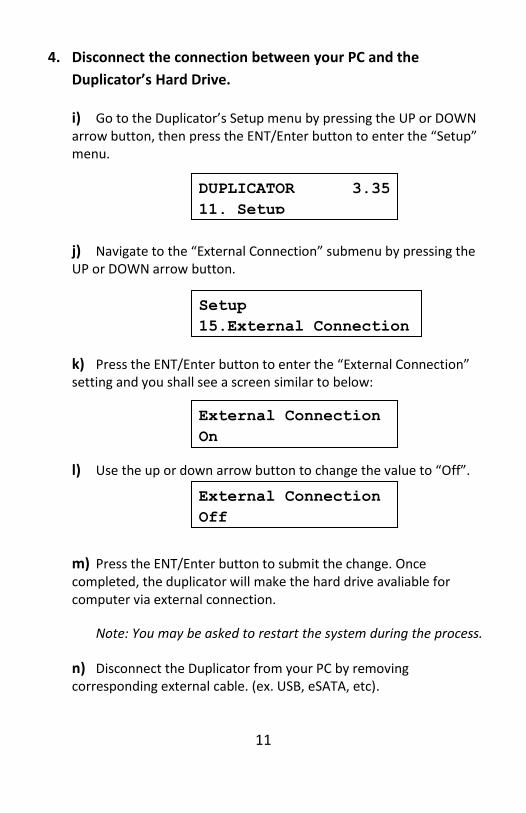
i) Go to the Duplicator’s Setup menu by pressing the UP or DOWN arrow button, then press the ENT/Enter button to enter the “Setup” menu.
j) Navigate to the “External Connection” submenu by pressing the UP or DOWN arrow button.
k) Press the ENT/Enter button to enter the “External Connection” setting and you shall see a screen similar to below:
l) Use the up or down arrow button to change the value to “Off”.
m) Press the ENT/Enter button to submit the change. Once completed, the duplicator will make the hard drive avaliable for computer via external connection.
Note: You may be asked to restart the system during the process.
n) Disconnect the Duplicator from your PC by removing corresponding external cable. (ex. USB, eSATA, etc).
DUPLICATOR 3.35
11. Setup
Setup
15.External Connection
External Connection
On
External Connection
Off