configuring the device - gubloos.comgubloos.com/pdf/configuring the device new.pdf · aircel...
TRANSCRIPT

CONFIGURINGyour GPS Tracker

Step 0
Ensure the SIM Card is activated and has Talk-Time + SMS + 2G Data plan ready !
Insert Micro SIM into the SIM Card Slot and switch on the GPS Tracker.
Check for GPS (Blue LED) and GSM (Green LED) status. Refer to User Manual
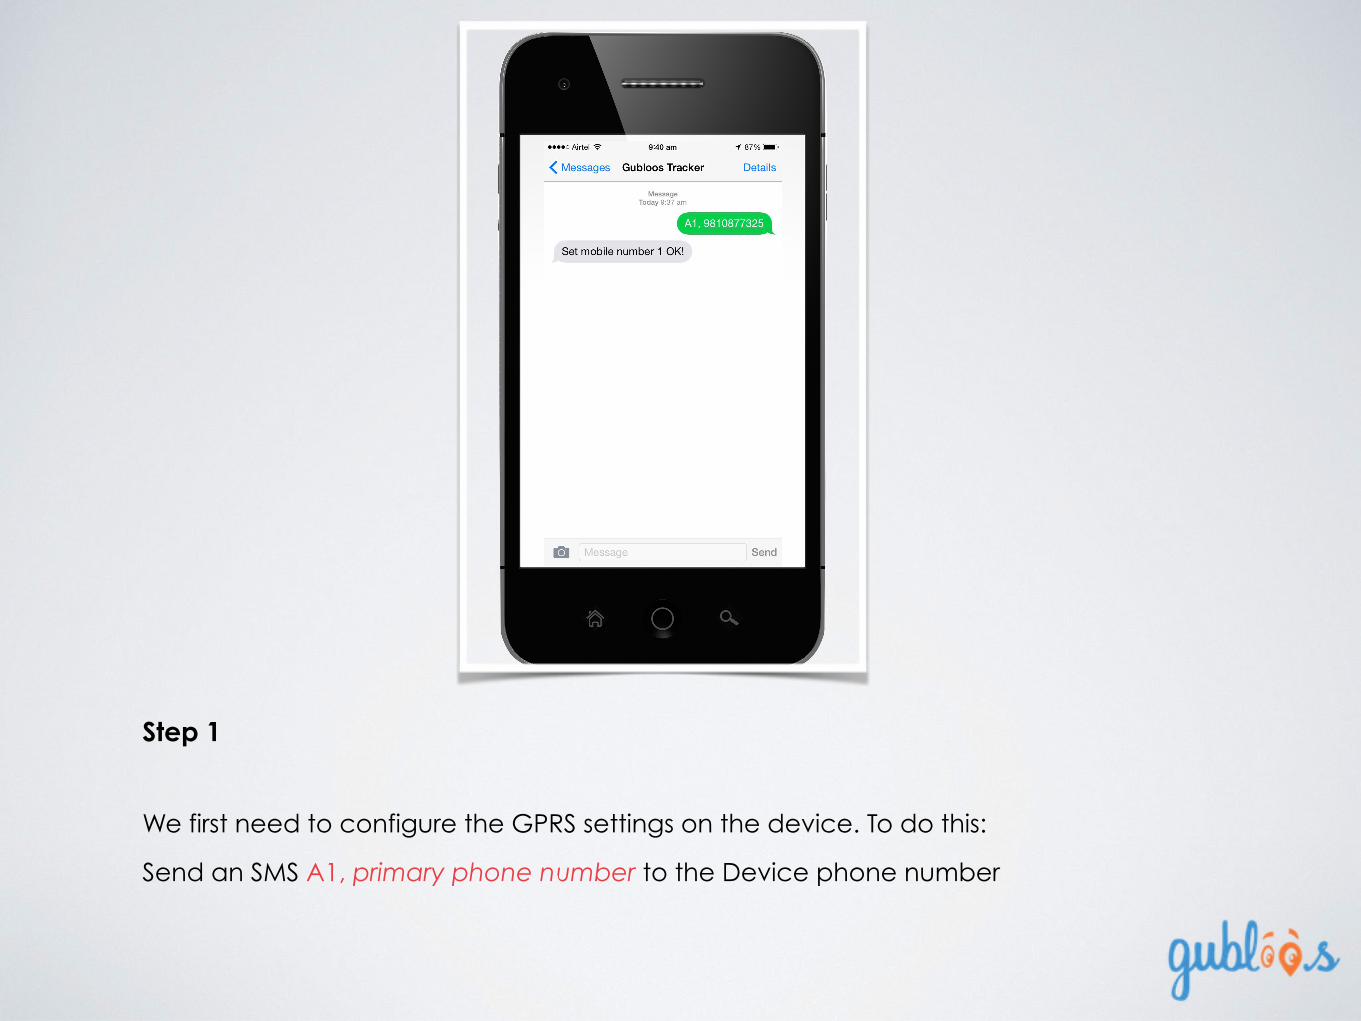
Step 1
We first need to configure the GPRS settings on the device. To do this:
Send an SMS A1, primary phone number to the Device phone number
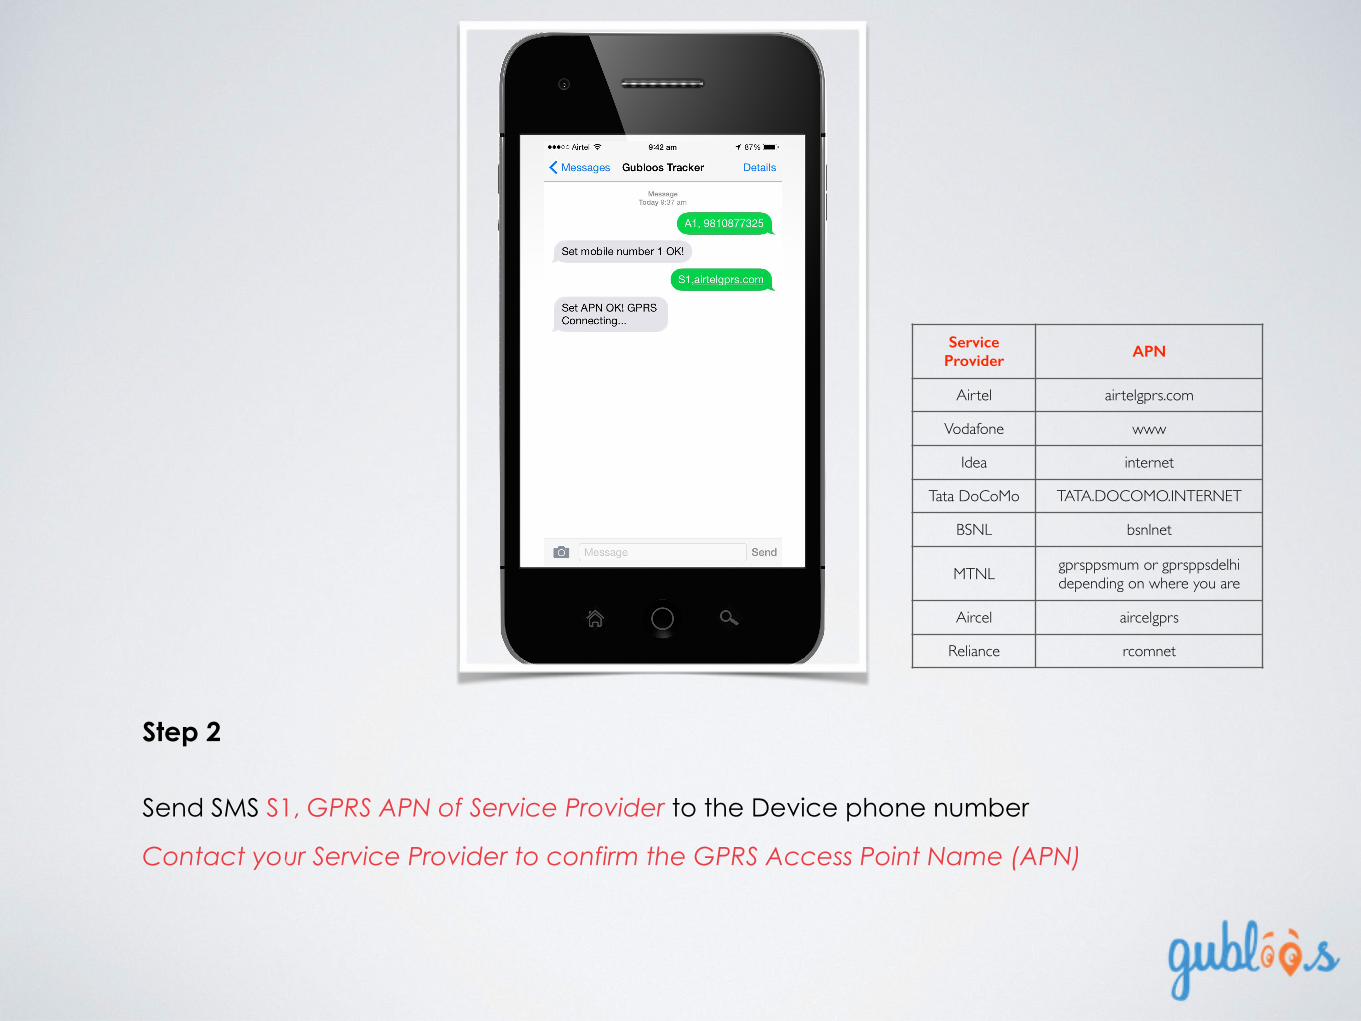
Step 2
Send SMS S1, GPRS APN of Service Provider to the Device phone number
Contact your Service Provider to confirm the GPRS Access Point Name (APN)
Service Provider APN
Airtel airtelgprs.com
Vodafone www
Idea internet
Tata DoCoMo TATA.DOCOMO.INTERNET
BSNL bsnlnet
MTNL gprsppsmum or gprsppsdelhi depending on where you are
Aircel aircelgprs
Reliance rcomnet

Step 3
To validate the GPRS settings
Send SMS G1 to the Device phone number
If all settings are correct, your GPS Tracker is now functional !
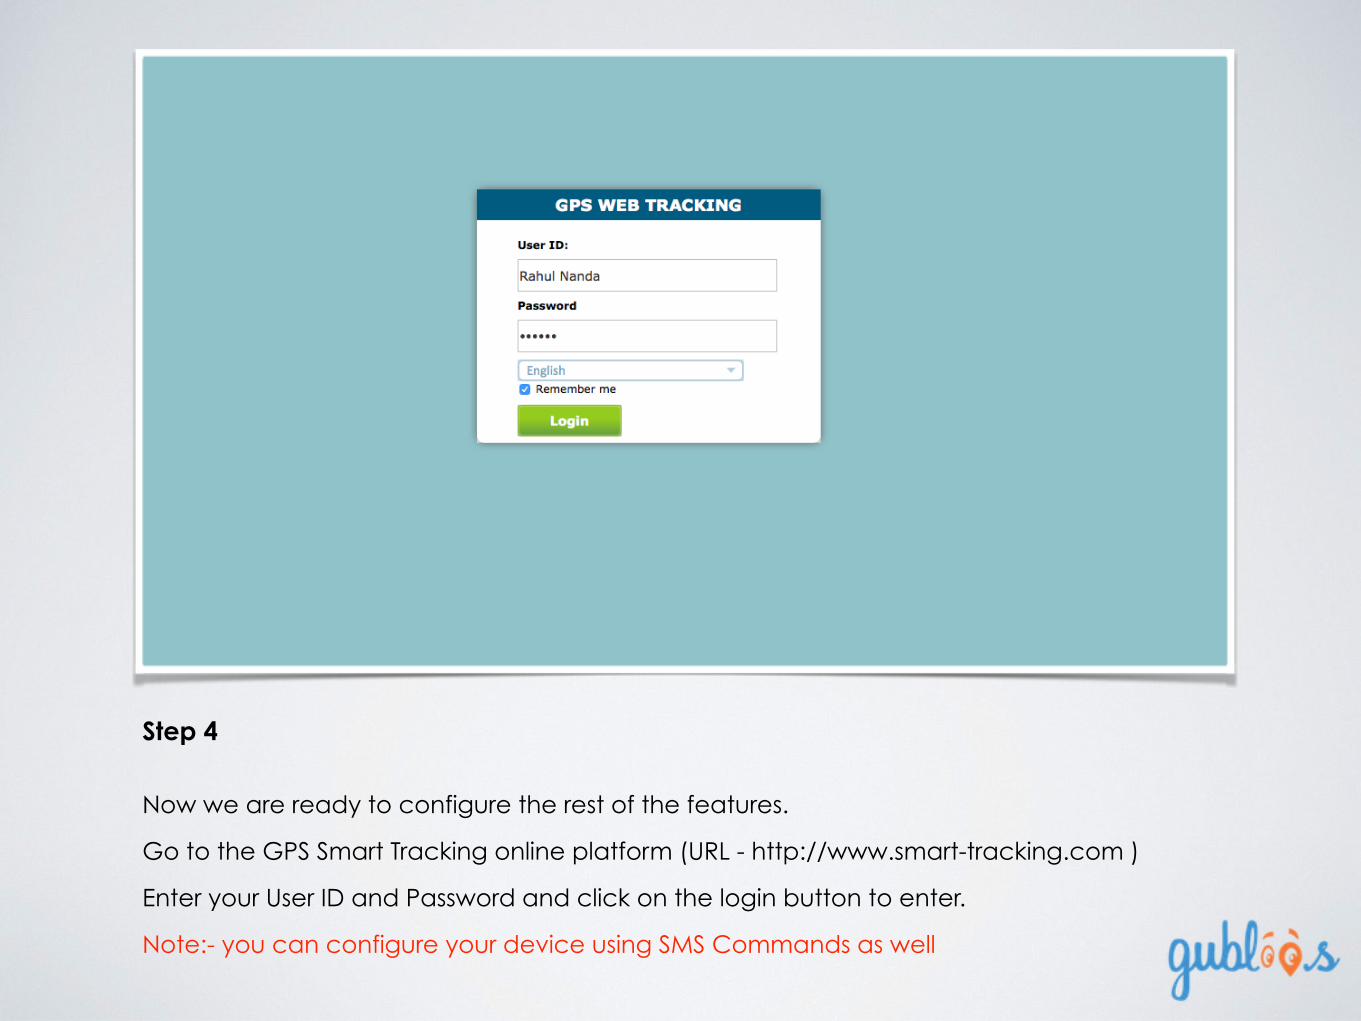
Step 4
Now we are ready to configure the rest of the features.
Go to the GPS Smart Tracking online platform (URL - http://www.smart-tracking.com )
Enter your User ID and Password and click on the login button to enter.
Note:- you can configure your device using SMS Commands as well

Step 5
Select the Tracker from top left side of the screen
Click on the “Settings” link on bottom left side of the screen

Step 6
Configuring your Device is as simple as filling up this form with the relevant values. We advise you to read the User Guide once before, to familiarise yourself with the terminologies.

Step 7
Ensure the GPS Tracker is switched on !
Fill in the values in the fields and click on “Apply” for each of the functions individually to save them.

Step 8
There are more functions hidden below in the scroll.
Switch them “on/off” from here. To configure the Sensitivity of Fall Detection refer to the User Guide and send command via SMS.

Step 9
Each time you “Apply” the value you will get an intimation of its success or failure.

Step 10
After completing all, click on the last Function ”Request Status”.
This will confirm all the values you have entered

Step 11
Scroll down to see the Status of the rest of the Functions.
Your device is now successfully configured !
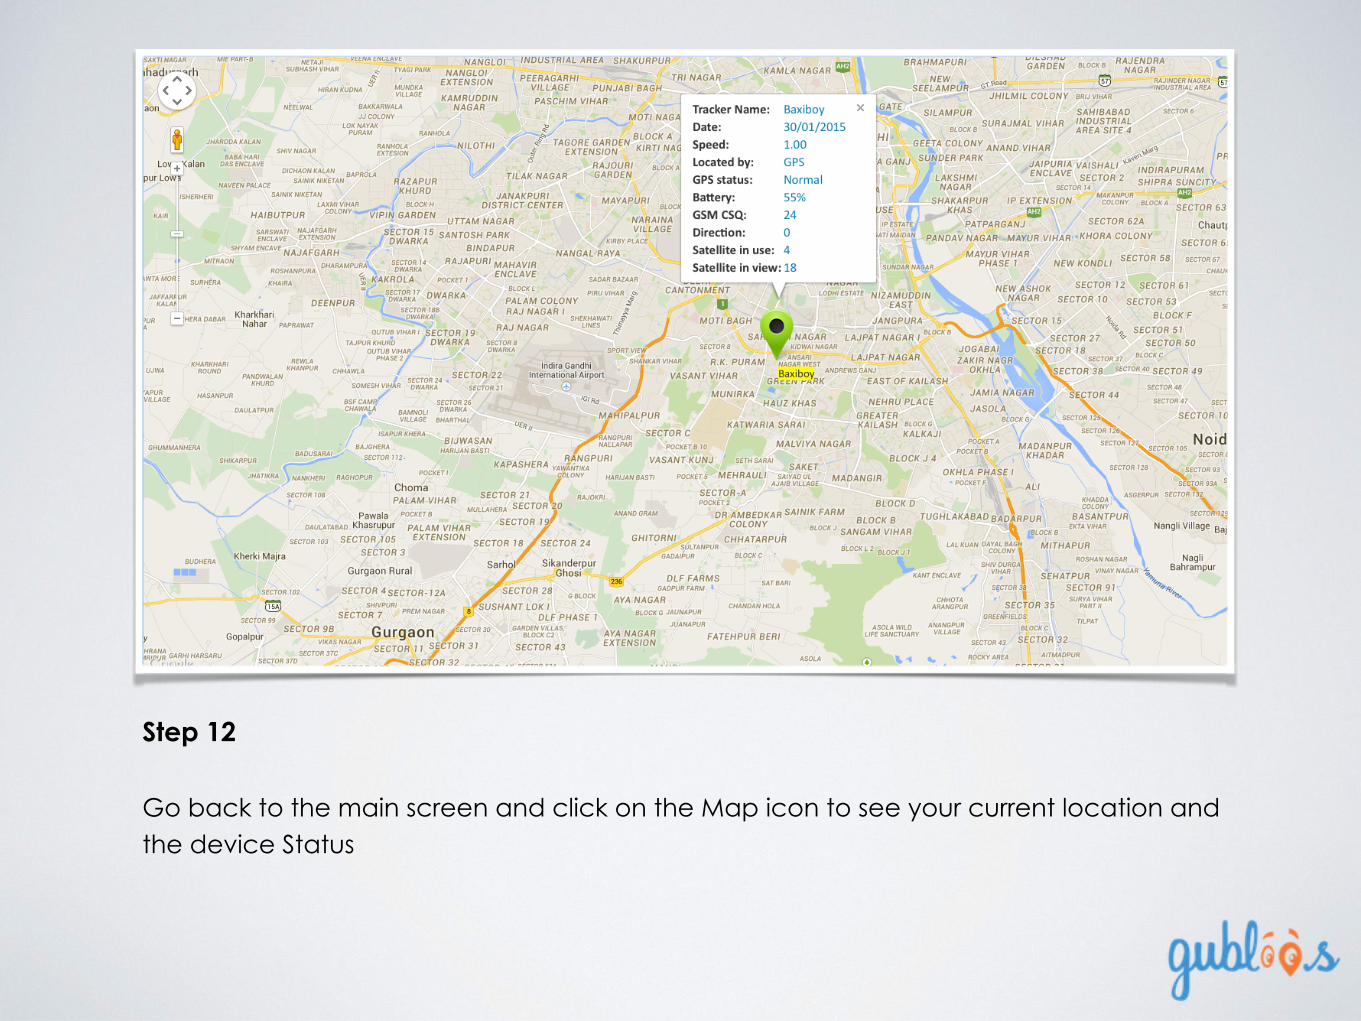
Step 12
Go back to the main screen and click on the Map icon to see your current location and the device Status

THANK YOU