configuring opencv
TRANSCRIPT
8/8/2019 Configuring Opencv
http://slidepdf.com/reader/full/configuring-opencv 1/10
8/8/2019 Configuring Opencv
http://slidepdf.com/reader/full/configuring-opencv 2/10
4. Choose "Show directories for: Source files"1. Add "$openCVDir\src\cv"2. Add "$openCVDir\src\cvaux"3. Add "$openCVDir\src\cxcore"4. Add "$openCVDir\src\highgui"
Configure your Project
After you've created a project you'll need to add the OpenCVdependencies.
1. Open Project Properties: Project > %projectName%Properties...
2. Open Linker Input properties: Configuration Properties > Linker > Input
3. Open the "..." window to edit "Additional Dependencies" and oneach line put:
1. "cv210.lib"2. "cxcore210.lib"3. "highgui210.lib"4. And any other lib file necessary for your project
4. Your project should now build. If you get any errors tryrestarting Visual Studio and then doing a clean Rebuild.
OpenCV 1.x with Visual Studio 2003
• The set of instructions below is tested with Visual C++ 2003. Itwill also work with some modification under Visual C++ 6.0 andVisual C++ 2005, 2008 Express Edition.
To create your own OpenCV-based project in Visual Studio do the
following:
Linking DLLs:
• To permanantly include necessary dll files, add "C:\ProgramFiles\OpenCV\bin" to PATH by visiting Advanced tab in Systemof Windows (the locate of directory might be different).

8/8/2019 Configuring Opencv
http://slidepdf.com/reader/full/configuring-opencv 3/10
• One can just copy necessary dll files into project directory withsource files.
• It might be required to restart Visual C++ when execution of instance failes after successful build.
Customize Global Options:
• Open the Visual C++ .Net Application. In the menu bar,select Tools->Options
• In the listing, choose Projects->VC++ Directories.
• First, select Library files from the "Show Directories for " ListBox.
• Click the Insert New icon, and locate the folder where you haveinstalled opencv.
• Consider that it is installed in "C:/Program Files/OpenCV".
• In the Library files list, locate and add:
"C:\Program Files\OpenCV\lib"
8/8/2019 Configuring Opencv
http://slidepdf.com/reader/full/configuring-opencv 4/10
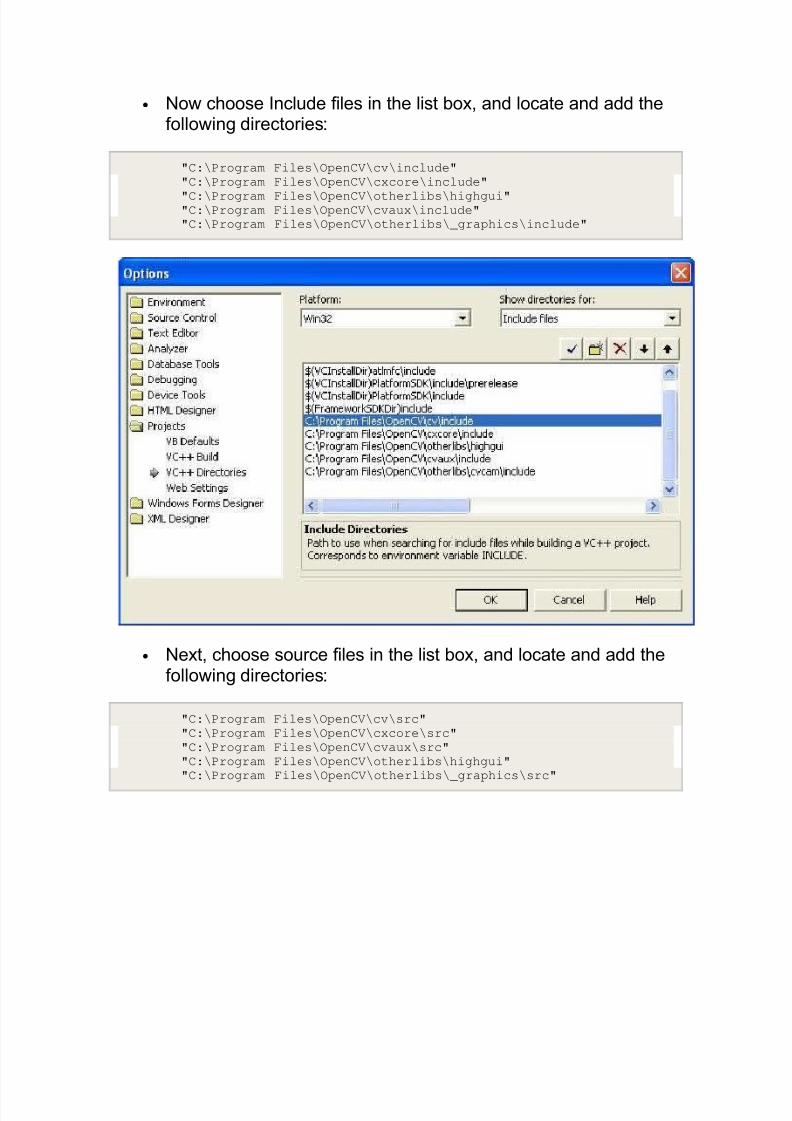
• Now choose Include files in the list box, and locate and add thefollowing directories:
"C:\Program Files\OpenCV\cv\include"
"C:\Program Files\OpenCV\cxcore\include"
"C:\Program Files\OpenCV\otherlibs\highgui""C:\Program Files\OpenCV\cvaux\include"
"C:\Program Files\OpenCV\otherlibs\_graphics\include"
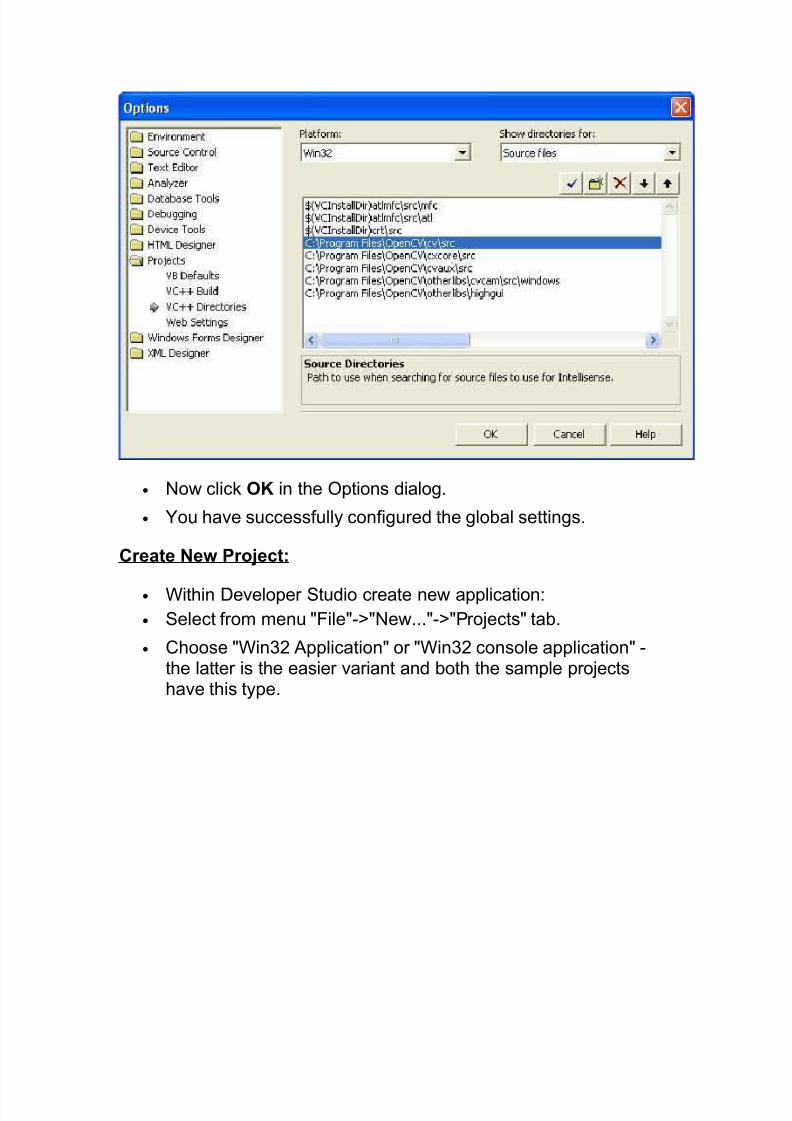
• Next, choose source files in the list box, and locate and add thefollowing directories:
"C:\Program Files\OpenCV\cv\src"
"C:\Program Files\OpenCV\cxcore\src"
"C:\Program Files\OpenCV\cvaux\src"
"C:\Program Files\OpenCV\otherlibs\highgui"
"C:\Program Files\OpenCV\otherlibs\_graphics\src"
8/8/2019 Configuring Opencv
http://slidepdf.com/reader/full/configuring-opencv 5/10
• Now click OK in the Options dialog.
• You have successfully configured the global settings.
Create New Project:
• Within Developer Studio create new application:• Select from menu "File"->"New..."->"Projects" tab.
• Choose "Win32 Application" or "Win32 console application" -the latter is the easier variant and both the sample projectshave this type.
8/8/2019 Configuring Opencv
http://slidepdf.com/reader/full/configuring-opencv 6/10
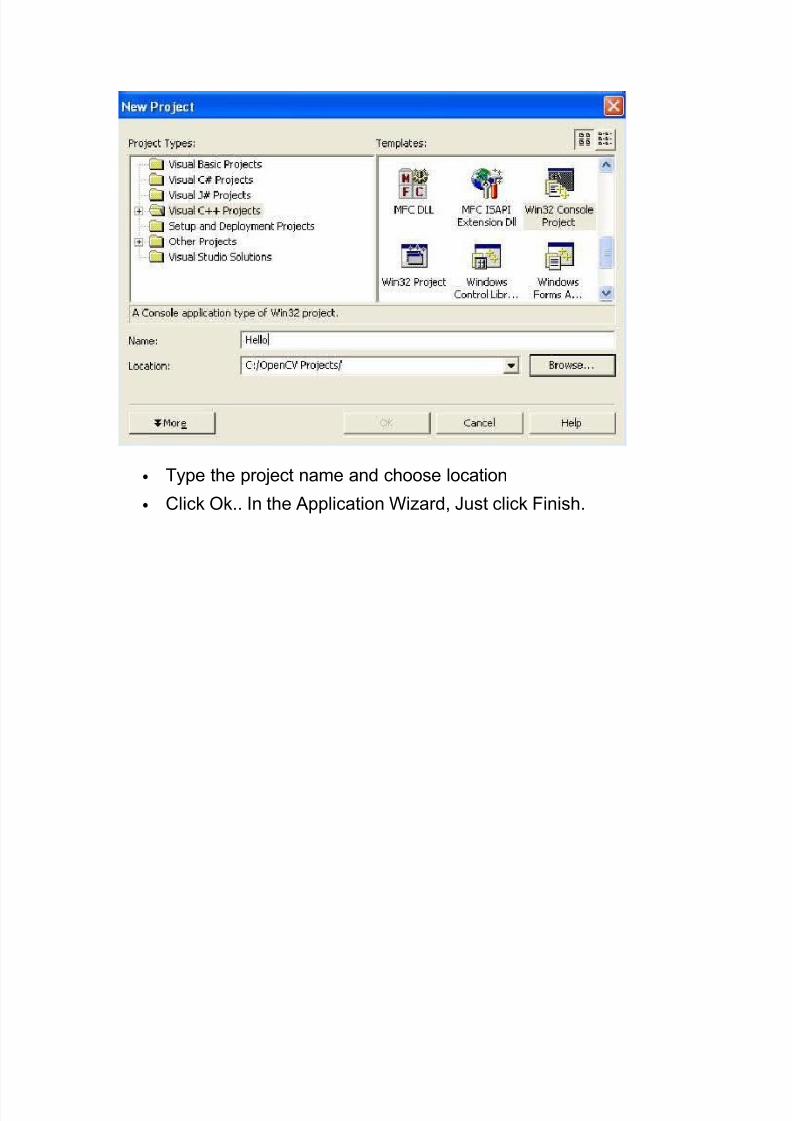
• Type the project name and choose location
• Click Ok.. In the Application Wizard, Just click Finish.
8/8/2019 Configuring Opencv
http://slidepdf.com/reader/full/configuring-opencv 7/10
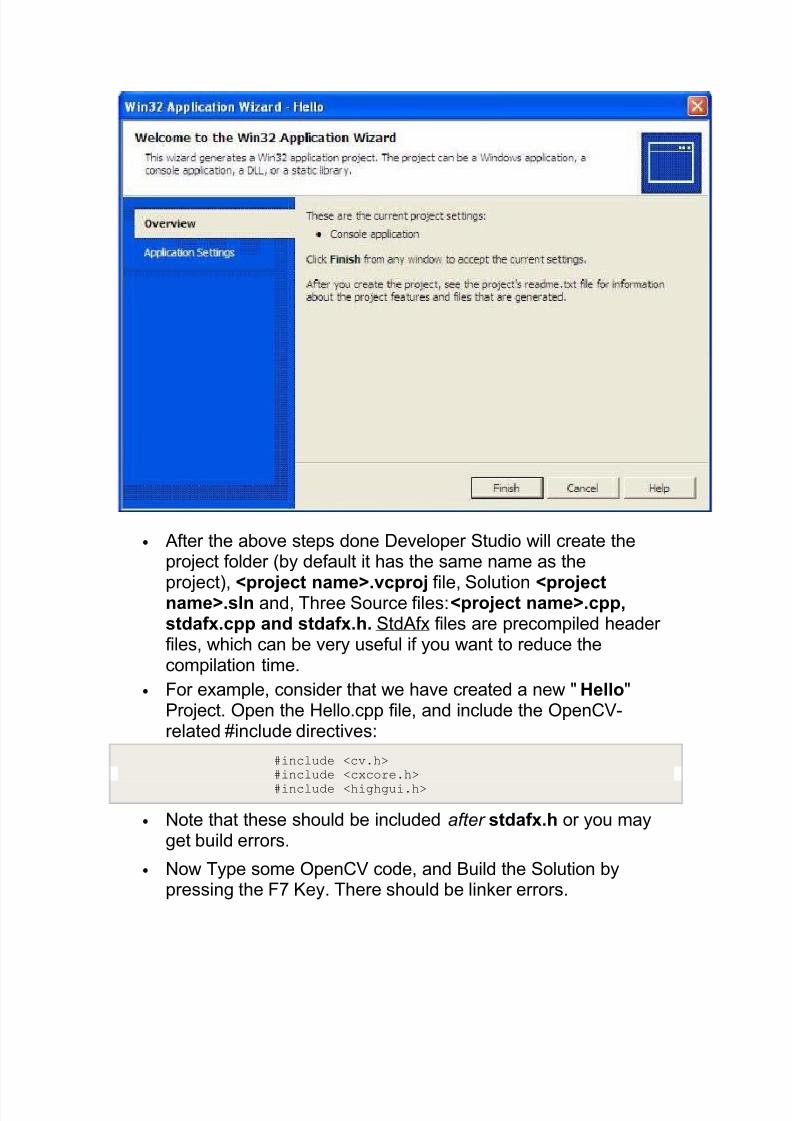
• After the above steps done Developer Studio will create theproject folder (by default it has the same name as the
project), <project name>.vcproj file, Solution <projectname>.sln and, Three Source files:<project name>.cpp,stdafx.cpp and stdafx.h. StdAfx files are precompiled header files, which can be very useful if you want to reduce thecompilation time.
• For example, consider that we have created a new "Hello"Project. Open the Hello.cpp file, and include the OpenCV-related #include directives:
#include <cv.h>
#include <cxcore.h>
#include <highgui.h>
• Note that these should be included after stdafx.h or you mayget build errors.
• Now Type some OpenCV code, and Build the Solution bypressing the F7 Key. There should be linker errors.
8/8/2019 Configuring Opencv
http://slidepdf.com/reader/full/configuring-opencv 8/10
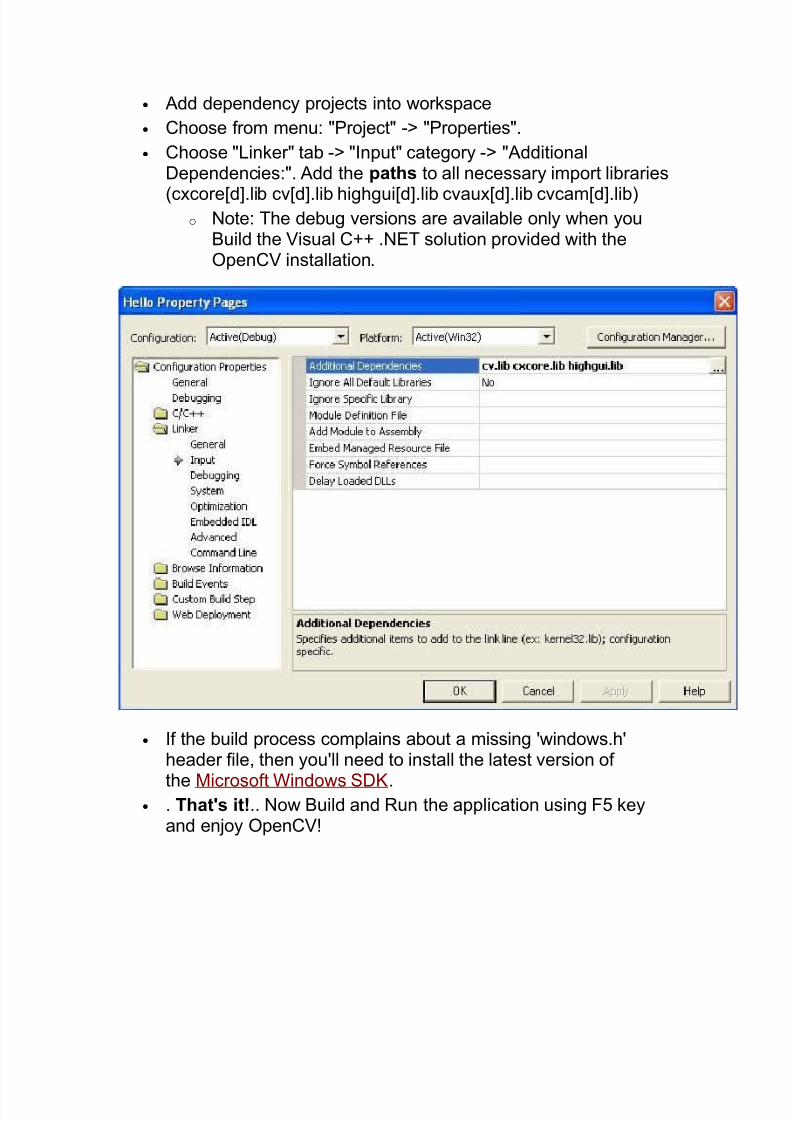
• Add dependency projects into workspace
• Choose from menu: "Project" -> "Properties".
• Choose "Linker" tab -> "Input" category -> "AdditionalDependencies:". Add the paths to all necessary import libraries
(cxcore[d].lib cv[d].lib highgui[d].lib cvaux[d].lib cvcam[d].lib)o Note: The debug versions are available only when you
Build the Visual C++ .NET solution provided with theOpenCV installation.
• If the build process complains about a missing 'windows.h'header file, then you'll need to install the latest version of
the Microsoft Windows SDK.• . That's it!.. Now Build and Run the application using F5 key
and enjoy OpenCV!
8/8/2019 Configuring Opencv
http://slidepdf.com/reader/full/configuring-opencv 9/10
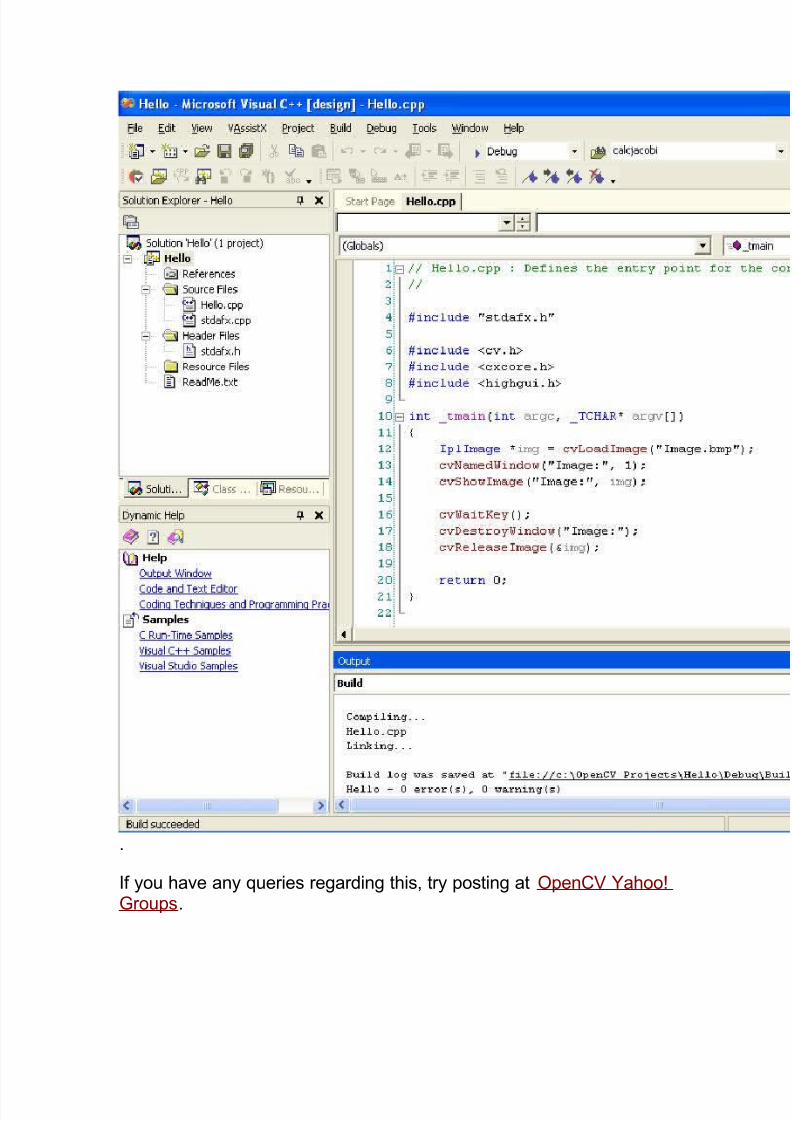
.
If you have any queries regarding this, try posting at OpenCV Yahoo!Groups.

8/8/2019 Configuring Opencv
http://slidepdf.com/reader/full/configuring-opencv 10/10
• .
• All the Best!
•
Paramesh.• Modified by Seongjoo 2008-06-13
OpenCVWiki: VisualC++_VS2008 (last edited 2010-07-21 16:25:51 by SamuelToepke)
• MoinMoin Powered• Python Powered• GPL licensed
• Valid HTML 4.01
Download the OpenCV 2.1.0 Windows installer from SourceForge
http://sourceforge.net/projects/opencvlibrary/files/opencv-win/2.1/