configuring a weblogic domain and server
TRANSCRIPT

8/6/2019 Configuring a WebLogic Domain and Server
http://slidepdf.com/reader/full/configuring-a-weblogic-domain-and-server 1/13
Configuring a WebLogic Domain and Server
What this Setup is about
A domain is an interrelated set of WebLogic Server resources managed as a unit. A
domain includes one or more administration servers and managed servers. Variousclients use the administration server to configure the system. The managed server is used
to run actual applications.
We will use the Domain Configuration wizard to create a new domain called mydomain.
What You Should Be Able to Do
Following this setup, you should be able to configure a new domain using theConfiguration Wizard.

8/6/2019 Configuring a WebLogic Domain and Server
http://slidepdf.com/reader/full/configuring-a-weblogic-domain-and-server 2/13
Instructions
1. Create a Domain
From the Start menu select Programs -> BEA WebLogic Platform 8.1 ->
Configuration Wizard. This will launch the tool.
From the first screen, select Create a new WebLogic configuration and then click Next.
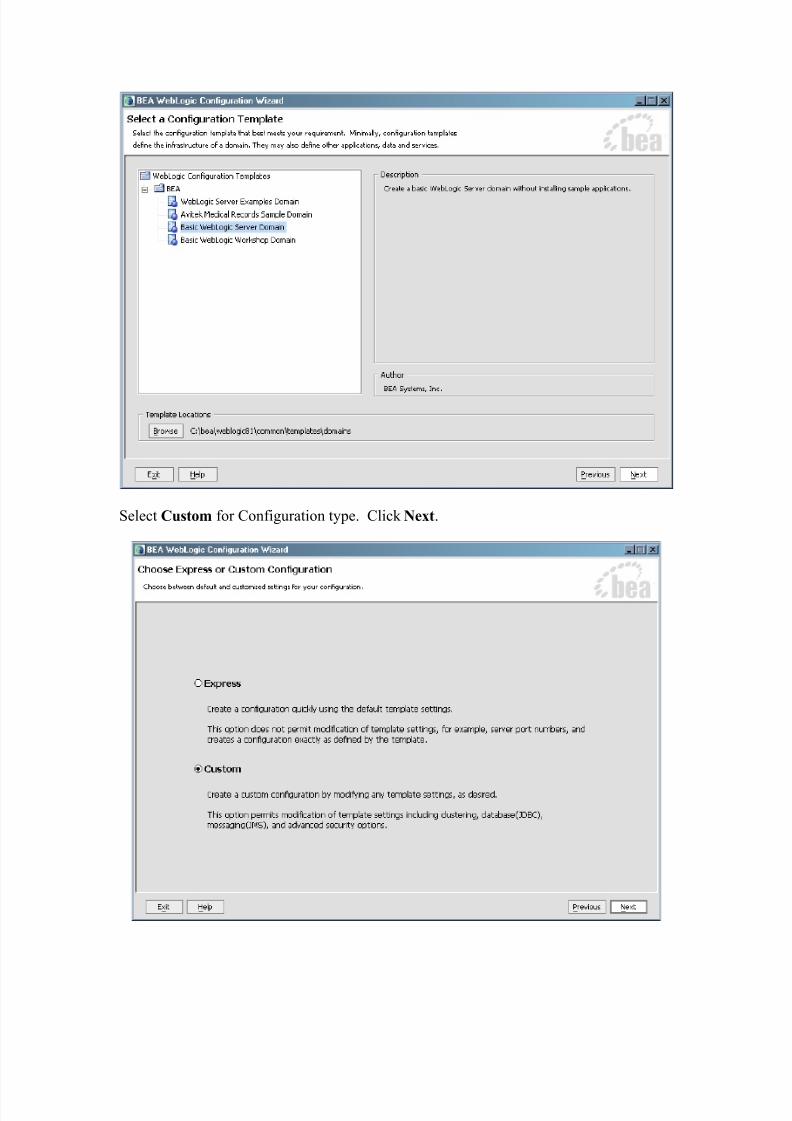
From the list of Configuration Templates select Basic WebLogic Server Domain.
8/6/2019 Configuring a WebLogic Domain and Server
http://slidepdf.com/reader/full/configuring-a-weblogic-domain-and-server 3/13
Select Custom for Configuration type. Click Next.
8/6/2019 Configuring a WebLogic Domain and Server
http://slidepdf.com/reader/full/configuring-a-weblogic-domain-and-server 4/13
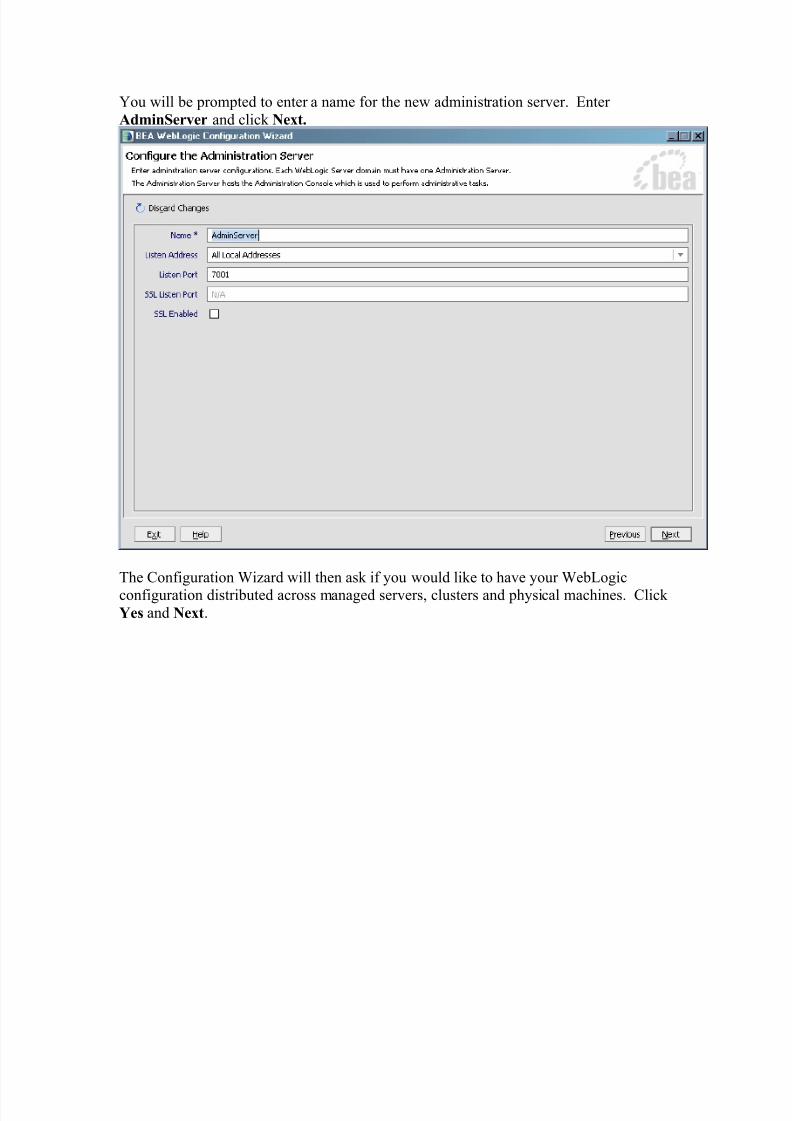
You will be prompted to enter a name for the new administration server. Enter
AdminServer and click Next.
The Configuration Wizard will then ask if you would like to have your WebLogic
configuration distributed across managed servers, clusters and physical machines. Click
Yes and Next.

8/6/2019 Configuring a WebLogic Domain and Server
http://slidepdf.com/reader/full/configuring-a-weblogic-domain-and-server 5/13
You will now specify the creation of a Managed Server. Click the Add button in the top
right corner, and specify the name of the new server to be myserver. Change the Listen
Port to 7005 and then click Next.

8/6/2019 Configuring a WebLogic Domain and Server
http://slidepdf.com/reader/full/configuring-a-weblogic-domain-and-server 6/13
We will not configure a Cluster at this time, so simply click Next on the Configure
Clusters screen.
Machines will not be configured at this time, so click Next on the Configure Machines
screen.
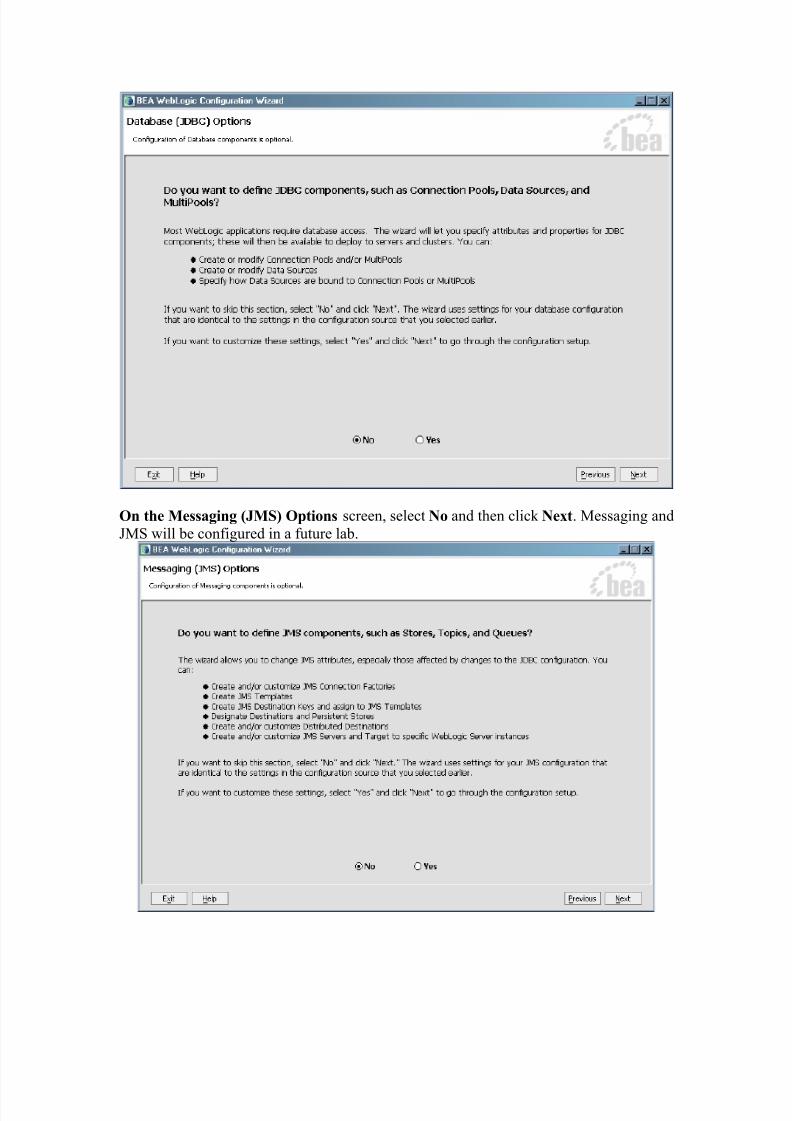
Similarly, Database Options will also be configured in a later lab, so for now simply
select No and then click Next on the Database (JDBC) Options screen.
8/6/2019 Configuring a WebLogic Domain and Server
http://slidepdf.com/reader/full/configuring-a-weblogic-domain-and-server 7/13
On the Messaging (JMS) Options screen, select No and then click Next. Messaging and
JMS will be configured in a future lab.

8/6/2019 Configuring a WebLogic Domain and Server
http://slidepdf.com/reader/full/configuring-a-weblogic-domain-and-server 8/13
You will then be asked to specify the administrative username and password for the new
domain. Enter weblogic for both username and password. Click Next.
You will now have the option to Configure Windows Options. Select Yes in the left
pane (so we can have a start menu shortcut) and select No in the right pane so that
WebLogic Server will not run as a service. Click Next.

8/6/2019 Configuring a WebLogic Domain and Server
http://slidepdf.com/reader/full/configuring-a-weblogic-domain-and-server 9/13
The Configuration Wizard will ask you to Build Start Menu Entries. Accept the
defaults by clicking Next.

8/6/2019 Configuring a WebLogic Domain and Server
http://slidepdf.com/reader/full/configuring-a-weblogic-domain-and-server 10/13
You will then be asked to Configure Server Start Mode and Java SDK . Set theWebLogic Configuration Start Mode to be Development Mode by selecting it in the left
pane, and select the Sun SDK 1.4.1_03-ea @ C:\bea\jdk141_03 in the right pane. Click
Next.

8/6/2019 Configuring a WebLogic Domain and Server
http://slidepdf.com/reader/full/configuring-a-weblogic-domain-and-server 11/13
You will now be asked to Create the WebLogic Configuration. Here you will specify
the new domain’s name and install path. We will name the domain mydomain (by
entering it in the Configuration Name field in the bottom right corner) and choose thedefault location (which should automatically be set to c:\bea\user_projects\domains\
mydomain). Click Create when done.
Congratulations! You have created a WebLogic Server 8.1 domain. The domain has an
administrative server called AdminServer and one managed server called myserver.
Click Done on the Creating Configuration screen to exit the Configuration Wizard.

8/6/2019 Configuring a WebLogic Domain and Server
http://slidepdf.com/reader/full/configuring-a-weblogic-domain-and-server 12/13
2. Verify domain creation.
Using the file explorer, verify that the domain directoryC:\bea\user_projects\domains\mydomain was created. Verify the existence of the
config.xml file and the startWebLogic.cmd file. The latter is used to launch the AdminServer.
Start the Admin Server by selecting Start -> Programs -> BEA WebLogic Platform
8.1 -> User Projects -> mydomain -> Start Server. Wait until you see a Server
started in RUNNING mode message.
Next, we will launch the admin console. Using a Web browser, open the AdministrationConsole with the URL:
http://localhost:7001/console
You should be presented with a login page. Specify username and password to beweblogic and then click on Sign In to login. This will bring up the administration
console or adminconsole.
In the left pane of the administration console, click on Servers to view the status of the
two servers we have created. Note that the status of AdminServer is RUNNING while
the status of myserver is UNKNOWN. This is because myserver has not been startedyet.

8/6/2019 Configuring a WebLogic Domain and Server
http://slidepdf.com/reader/full/configuring-a-weblogic-domain-and-server 13/13
Next, launch the managed server myserver. Open another DOS command window.Change to c:/bea/user_projects/domains/mydomain. Enter:
startManagedWebLogic myserver http://localhost:7001
Note the syntax of the command:
StartmanagedWebLogic SERVER_NAME ADMIN_SERVER_ADDRESS
MainServer server will begin to boot. Wait until you see the message “Server Started in
RUNNING mode”. In the admin console, click on Servers again to refresh the status.
Congratulations! You have finished creating a domain complete with an administration
server and a single managed server. Now shutdown each server from the console and
close the browser.