concorde timing belt; and water pump? - tvmoparclub.comtvmoparclub.com/files/tech/concorde timing...
TRANSCRIPT

2000 Chrysler Concorde Timing
Belt; and Water Pump?
Presented by:
Ben, Grant and Bob Glover
18 August 2007

What Clutter!
What do you have to remove to get to the T-belt?

Evaluate task at hand
• Read factory service manual or Chiltons/Haynes manual
• Note: Chilton and Haynes do not cover all tasks required, you must read between the lines
• Make sure you have all parts on hand to complete task without interruptions, and TOOLS
• Follow torque specifications
• Have adequate catch cans and dry sweep on hand
– Anti freeze must be drained

Water Pump during a timing belt
change?
• The “Haynes Manual” we were using suggested
replacing the water pump.
• Why?
• The water pump is buried under the timing belt
system, and since this is a 100,000 mile service
requirement the recommendation may be a good
one considering the amount of work required! I
opted to replace the pump as it is a normal wear
out item.

Header panel and hood latch
removal
Core support panel and hood latch must go!

Headlight removal
Headlight must come out to remove radiator bolts and fittings

Radiator removed
Radiator drained, removed and now we can get to the front of the engine

Radiator out of car
Check radiator for leaks, seeps, cracks and corrosion trouble spots
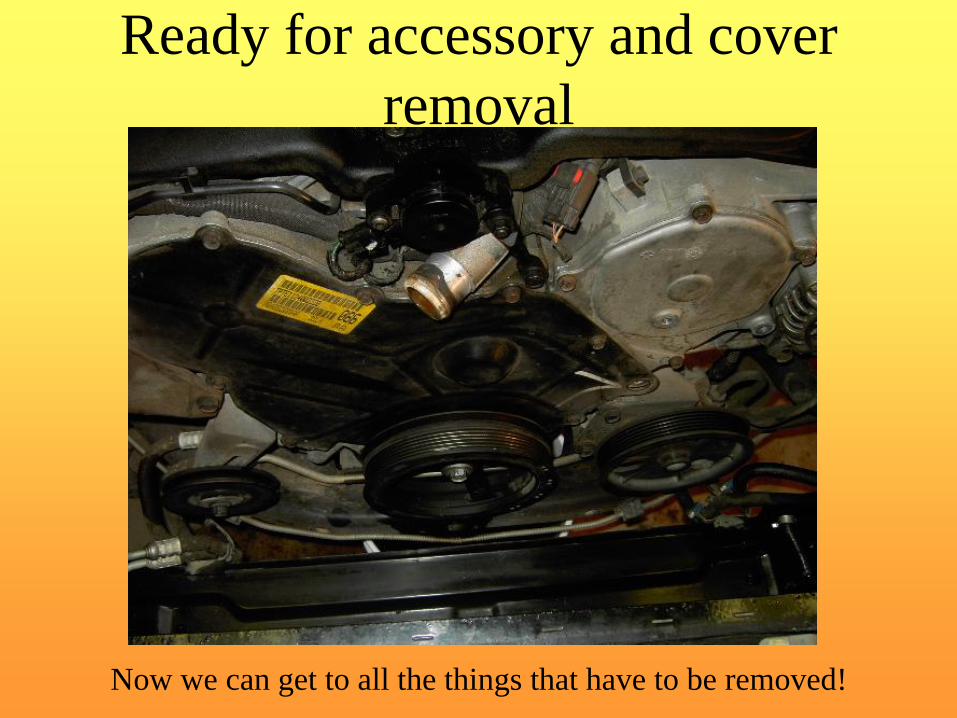
Ready for accessory and cover
removal
Now we can get to all the things that have to be removed!

Oops, socket buggered up the
threads!
Required running a tap down the bore of the crank to clean it up

Crank snout detail

Old Water Pump and belt
Old water pump still installed in the block, Note: Chrysler markings on the pump

Marking TDC on crank
Using the crank bolt to turn engine and locate TDC

Cracks and fissures in old belt
Belt was worn and deteriorated, may or may not have lasted another 10K

Water pump removed, cleaning
housing
Clean O-ring groove and pump bore, block interior looks “good to go”

New pump installed
Don’t forget the new O-ring

Head on view of new pump
Note absence of Chrysler markings on a Chrysler replacement relative to original pump

T-belt tensioner, must set in vice
to reuse
Compress the tensioner in a vice and insert an allen key or grenade pin

Wrong tool for right Job!!
This is a Toyota tool but the angles were wrong and the shaft too short to fit the Chrysler mill

New belt, not under tension
New pump and belt installed, ready to reinstall tensioner
Tensioner
goes here

Pulling grenade pin from
tensioner
Tensioner installed and removing the pin to apply tension to the belt

New belt now under tension
Tensioner plunger applies pressure to follower bracket and tightens belt

New belt on, ready to reassemble
Lets get this thing back together!
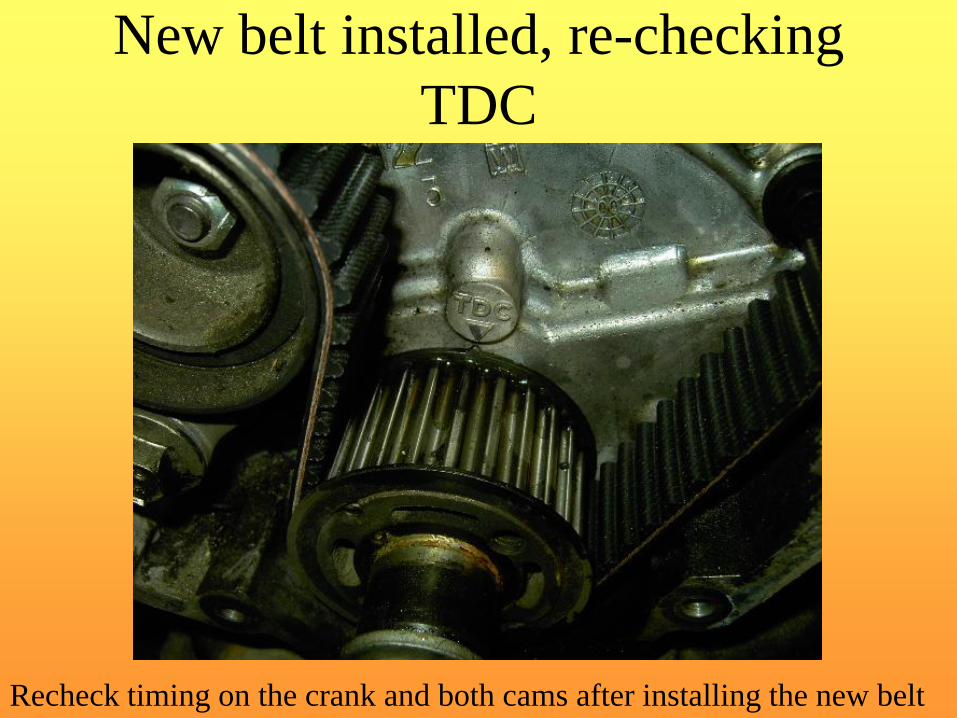
New belt installed, re-checking
TDC
Recheck timing on the crank and both cams after installing the new belt

Both cams timed with crank
Good here and on the other!

Reassembly
Applying torque to the crank bolt

Reassembly of cover plates
Drivers side cam cover plate installed

Going back together
Engine covers and pulleys going back on the block

Cover plate reassembly

Covers and pulleys in place
Covers and pulleys installed, ready to put the radiator back in

Radiator installed and all
connections back on, except one!

Radiator view #2

Pulleys and brackets back on
Pulleys and idlers going back in place
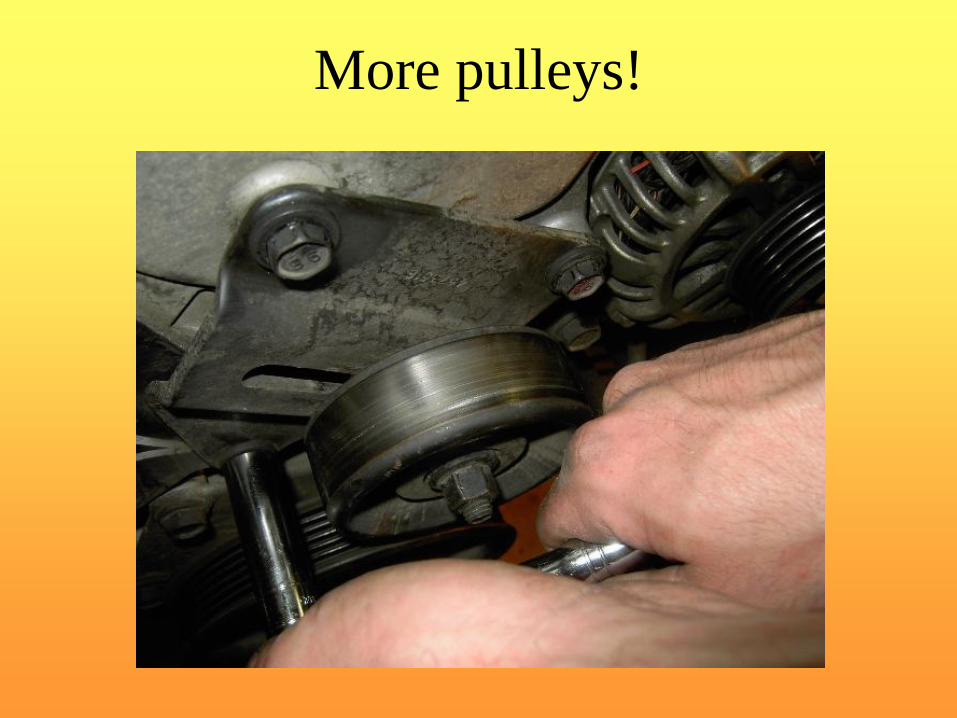
More pulleys!

Almost done and ready to test

Buttoned up, and good to go!

Questions?