complex editing
TRANSCRIPT

COMPLEX EDITINGLO4 // ZMINA HAWTHORNE
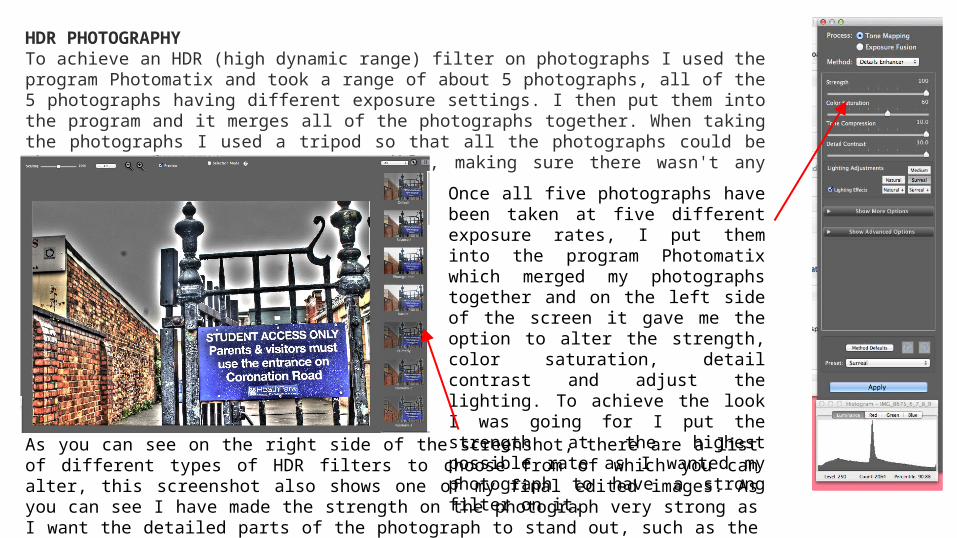
HDR PHOTOGRAPHYTo achieve an HDR (high dynamic range) filter on photographs I used the program Photomatix and took a range of about 5 photographs, all of the 5 photographs having different exposure settings. I then put them into the program and it merges all of the photographs together. When taking the photographs I used a tripod so that all the photographs could be the same and as accurate as possible, making sure there wasn't any unnecessary shadowing.
Once all five photographs have been taken at five different exposure rates, I put them into the program Photomatix which merged my photographs together and on the left side of the screen it gave me the option to alter the strength, color saturation, detail contrast and adjust the lighting. To achieve the look I was going for I put the strength at the highest possible rate as I wanted my photograph to have a strong filter on it.
As you can see on the right side of the screenshot, there are a list of different types of HDR filters to choose from of which you can alter, this screenshot also shows one of my final edited images. As you can see I have made the strength on the photograph very strong as I want the detailed parts of the photograph to stand out, such as the bricks and the peeling paint on the fence.
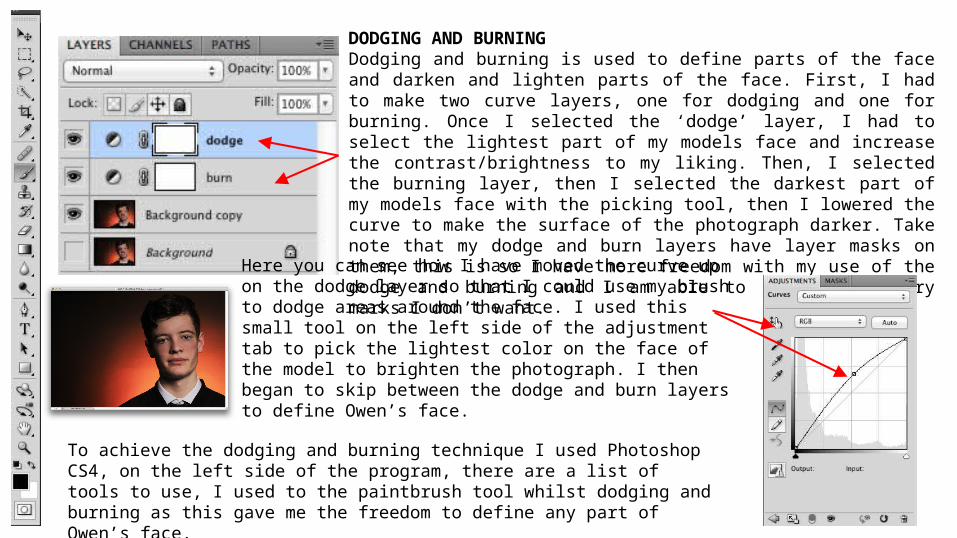
DODGING AND BURNINGDodging and burning is used to define parts of the face and darken and lighten parts of the face. First, I had to make two curve layers, one for dodging and one for burning. Once I selected the ‘dodge’ layer, I had to select the lightest part of my models face and increase the contrast/brightness to my liking. Then, I selected the burning layer, then I selected the darkest part of my models face with the picking tool, then I lowered the curve to make the surface of the photograph darker. Take note that my dodge and burn layers have layer masks on them, this is so I have more freedom with my use of the dodge and burning and I am able to undo unnecessary marks I don’t want.
Here you can see how I have moved the curve up on the dodge layer so that I could use my brush to dodge areas around the face. I used this small tool on the left side of the adjustment tab to pick the lightest color on the face of the model to brighten the photograph. I then began to skip between the dodge and burn layers to define Owen’s face.
To achieve the dodging and burning technique I used Photoshop CS4, on the left side of the program, there are a list of tools to use, I used to the paintbrush tool whilst dodging and burning as this gave me the freedom to define any part of Owen’s face.
BEFORE AFTER
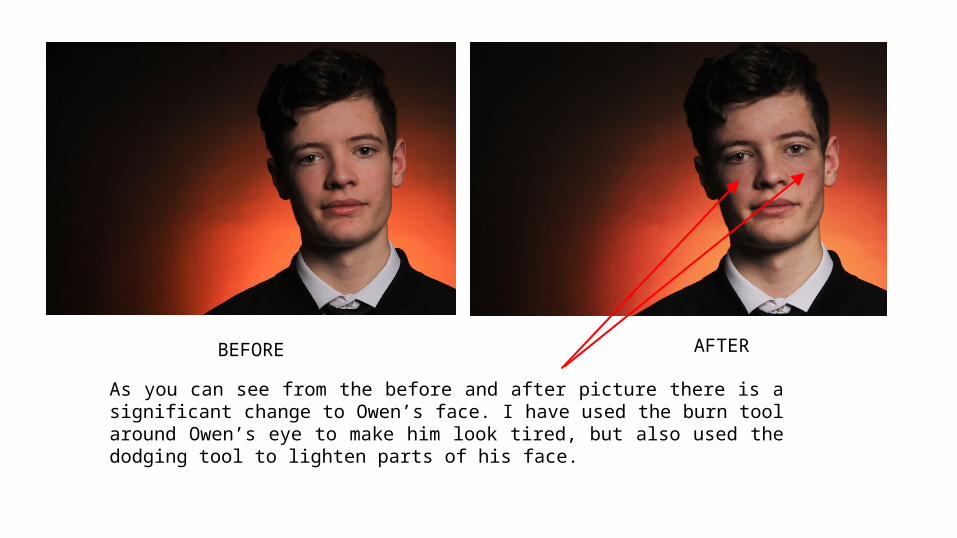
As you can see from the before and after picture there is a significant change to Owen’s face. I have used the burn tool around Owen’s eye to make him look tired, but also used the dodging tool to lighten parts of his face.
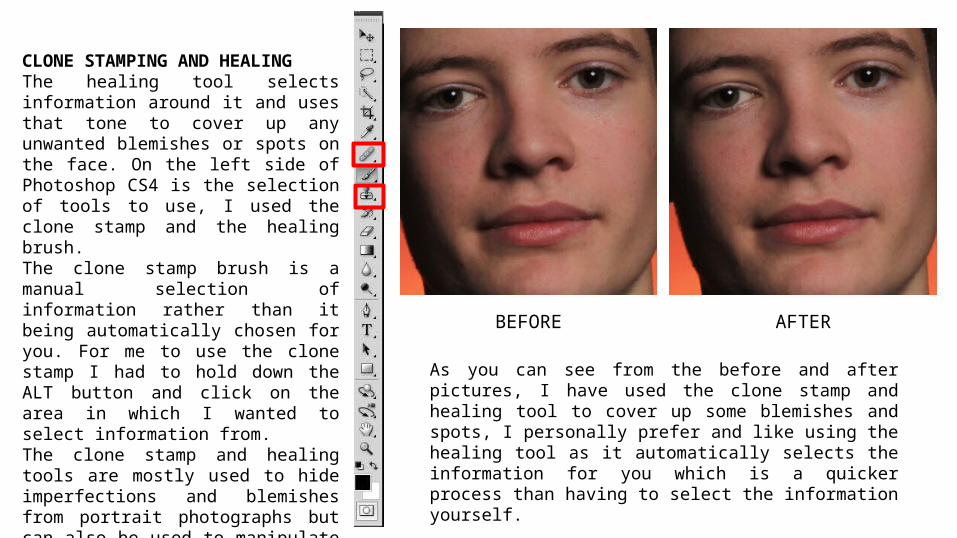
CLONE STAMPING AND HEALINGThe healing tool selects information around it and uses that tone to cover up any unwanted blemishes or spots on the face. On the left side of Photoshop CS4 is the selection of tools to use, I used the clone stamp and the healing brush. The clone stamp brush is a manual selection of information rather than it being automatically chosen for you. For me to use the clone stamp I had to hold down the ALT button and click on the area in which I wanted to select information from. The clone stamp and healing tools are mostly used to hide imperfections and blemishes from portrait photographs but can also be used to manipulate photographs in other ways too.
BEFORE AFTER
As you can see from the before and after pictures, I have used the clone stamp and healing tool to cover up some blemishes and spots, I personally prefer and like using the healing tool as it automatically selects the information for you which is a quicker process than having to select the information yourself.