compact ics / modular ics with call pilot 100 voicemail administration guide€¦ · ·...
TRANSCRIPT

Page 1 of 8
Compact ICS / Modular ICS with
Call Pilot 100 Voicemail Administration Guide
Service: 604 -856- 9155
Email: [email protected]
Page 2 of 8
Service: 604 -856- 9155
Email: [email protected]
Table of Contents
Phone System Programming ......................................................................................................................... 3
Change the Name of a Set ........................................................................................................................................................ 4
Change the Time and Date ...................................................................................................................................................... 4
Program System Speed Dials .................................................................................................................................................. 4
Common Feature Codes: .......................................................................................................................................................... 4
Voicemail Programming .................................................................................................................................. 5
Log Code: ........................................................................................................................................................................................ 5
Record Introduction Greeting ................................................................................................................................................ 5
Record Instructions: .................................................................................................................................................................. 5
CCR Tree Setup and Changes ................................................................................................................................................. 6
Path Choices .................................................................................................................................................................................. 7
Holiday Greeting Activation/Deactivation ....................................................................................................................... 7
Delete a Mailbox: ......................................................................................................................................................................... 8
Add a Mailbox: ............................................................................................................................................................................. 8
Reset the Password of a Mailbox: ......................................................................................................................................... 8
Change the Name on a Mailbox ............................................................................................................................................. 8
IMPORTANT NOTE: The extension and mailbox numbers referenced in this guide are the most commonly used configuration. It does not guarantee that your company will use the same extension and mailbox numbers due to each systems customized configuration. If you are unsure of what numbers were used in your configuration, please call or email the NATG service department.
Page 3 of 8
Service: 604 -856- 9155
Email: [email protected]
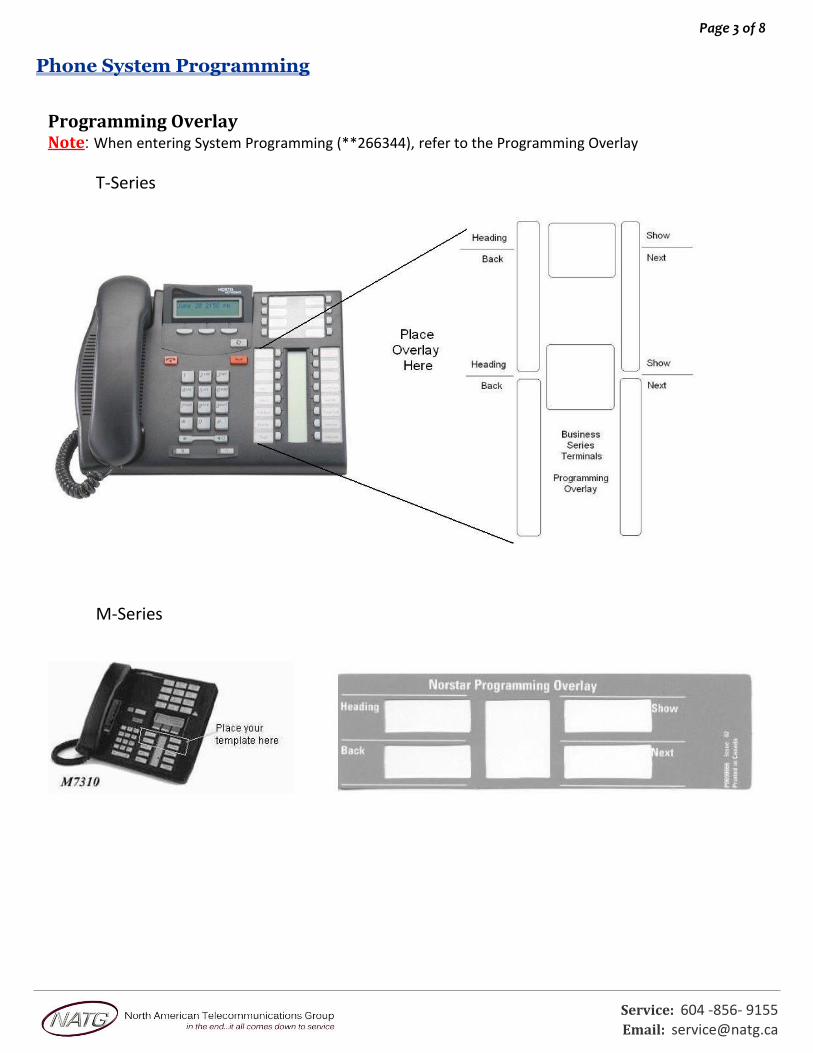
Phone System Programming
Programming Overlay Note: When entering System Programming (**266344), refer to the Programming Overlay
T-Series
M-Series

Page 4 of 8
Service: 604 -856- 9155
Email: [email protected]
Change the Name of a Set
1. Press Feature * * 266344
2. Password: 266344
3. See Terminals and Sets: press Show (top right arrow(by where your lines are))
4. Enter Extension Number
5. Press Show (top right arrow)
6. Press Next (bottom right arrow) until you see the current name
7. Press Chng (on display), then Spell Name press # after each letter
8. Press Next (bottom right arrow)
9. Press Rls when finished to exit programming
Change the Time and Date
1. Press Feature * * 266344
2. Password: 266344
3. Press Next until you see time and date on display
4. Press Show, then Follow prompts on display
5. Press Rls when finished to exit programming
Program System Speed Dials
1. Press Feature * * 266344
2. Password: 266344
3. Press Next until you see SYS Speed Dial
4. Press Show
5. Enter a speed dial code: 001-255 or press Next to scroll through, then press Show
6. Press Chng on display and enter the phone number, then press OK
7. Press Next, then Chng until you see Pool, and then enter 9
8. Press Next then press Chng, spell out name ( press # after each letter), then press Next
9. Then Heading to enter another speed dial or press Rls to exit programming
Common Feature Codes:
FEATURE CODE: DESCRIPTION: FEATURE CODE: DESCRIPTION: Feature *0 Button Inquiry Feature *80 Ring Volume
Feature 4 Call Forward Feature 0 Speed Dial
Feature 74 Call Park Voicemail Required
Feature 82 Camp On Feature 989 Record Call
Feature 3 Conference Call Feature 871 Ringing Service
Feature 5 Last Number Redial Feature 983 System Administration
Feature 71 Link Feature 70 Transfer
Feature 630 Page – External & Internal Feature 986 Transfer to Mailbox
Feature 620 Page – External Feature 981 Voicemail
Feature 610 Page – Internal Feature 980 Leave Message
Feature 76 Pick up Feature 85 Do Not Disturb
Feature *6 Ring Type
Page 5 of 8
Service: 604 -856- 9155
Email: [email protected]
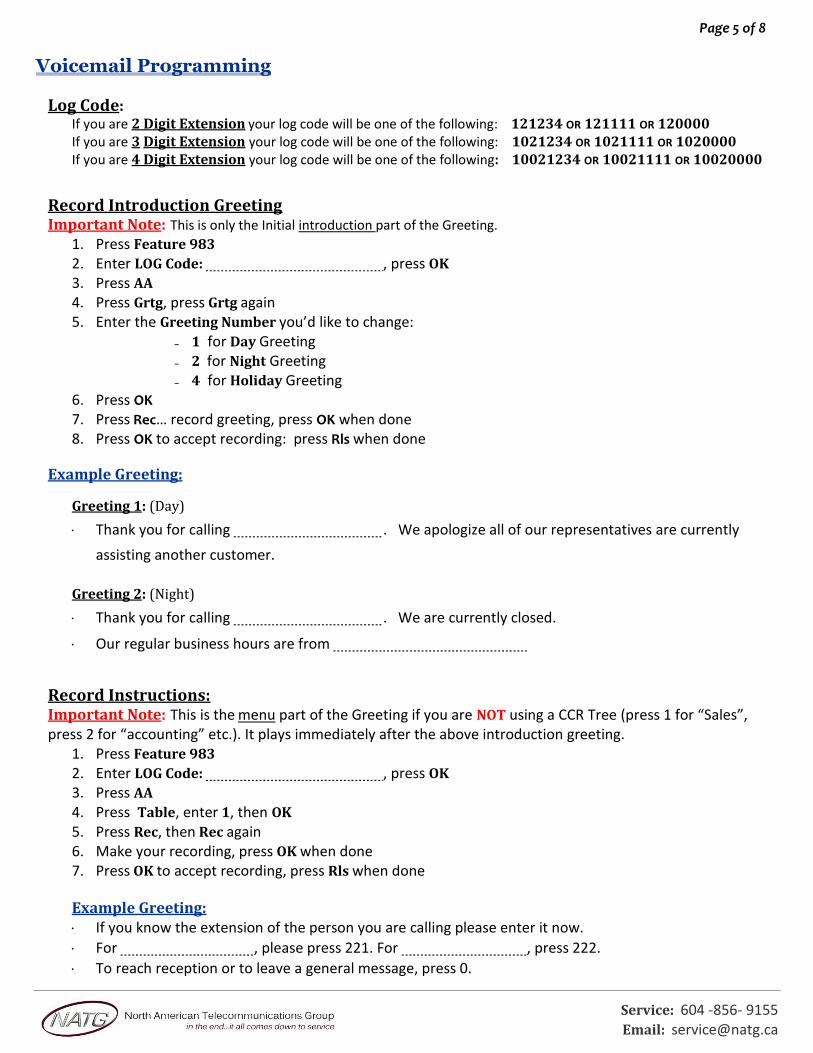
Voicemail Programming
Log Code: If you are 2 Digit Extension your log code will be one of the following: 121234 OR 121111 OR 120000 If you are 3 Digit Extension your log code will be one of the following: 1021234 OR 1021111 OR 1020000 If you are 4 Digit Extension your log code will be one of the following: 10021234 OR 10021111 OR 10020000
Record Introduction Greeting Important Note: This is only the Initial introduction part of the Greeting.
1. Press Feature 983 2. Enter LOG Code: , press OK 3. Press AA 4. Press Grtg, press Grtg again 5. Enter the Greeting Number you’d like to change:
▬ 1 for Day Greeting ▬ 2 for Night Greeting ▬ 4 for Holiday Greeting
6. Press OK 7. Press Rec… record greeting, press OK when done 8. Press OK to accept recording: press Rls when done
Example Greeting:
Greeting 1: (Day)
Thank you for calling . We apologize all of our representatives are currently
assisting another customer.
Greeting 2: (Night)
Thank you for calling . We are currently closed.
Our regular business hours are from
Record Instructions: Important Note: This is the menu part of the Greeting if you are NOT using a CCR Tree (press 1 for “Sales”, press 2 for “accounting” etc.). It plays immediately after the above introduction greeting.
1. Press Feature 983 2. Enter LOG Code: , press OK 3. Press AA 4. Press Table, enter 1, then OK 5. Press Rec, then Rec again 6. Make your recording, press OK when done 7. Press OK to accept recording, press Rls when done
Example Greeting: If you know the extension of the person you are calling please enter it now.
For , please press 221. For , press 222.
To reach reception or to leave a general message, press 0.
Page 6 of 8
Service: 604 -856- 9155
Email: [email protected]
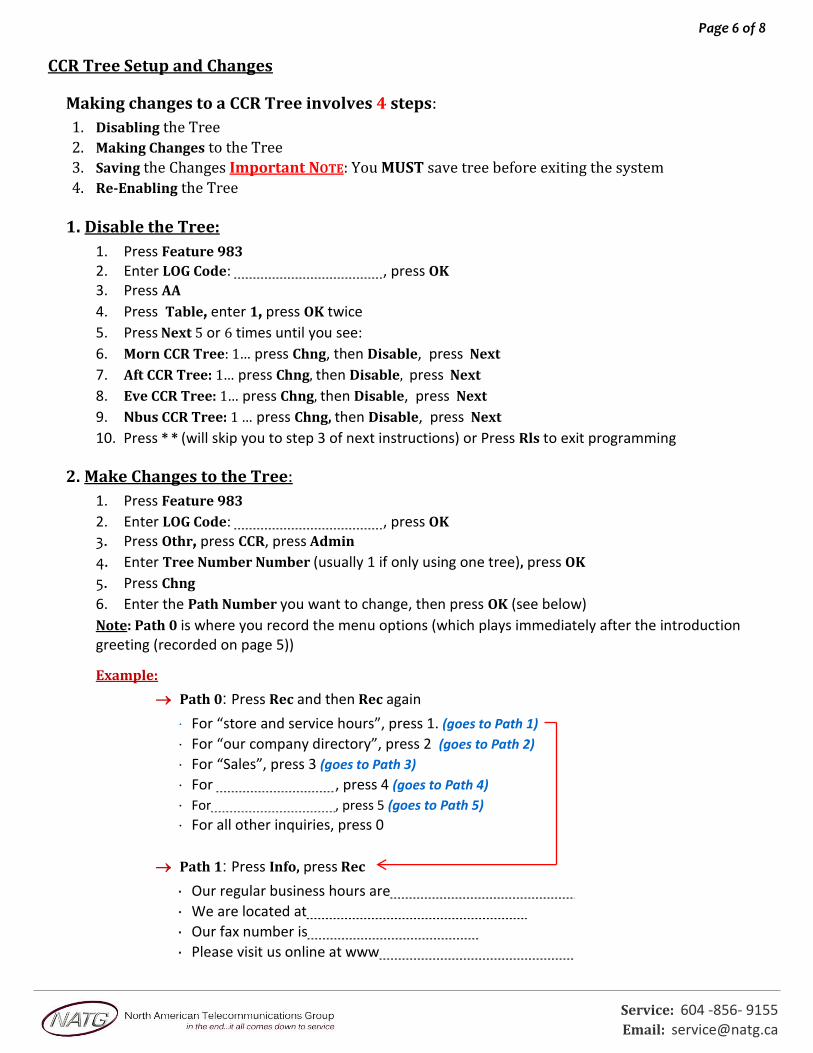
CCR Tree Setup and Changes
Making changes to a CCR Tree involves 4 steps:
1. Disabling the Tree
2. Making Changes to the Tree
3. Saving the Changes Important NOTE: You MUST save tree before exiting the system
4. Re-Enabling the Tree
1. Disable the Tree:
1. Press Feature 983 2. Enter LOG Code: , press OK 3. Press AA
4. Press Table, enter 1, press OK twice
5. Press Next 5 or 6 times until you see:
6. Morn CCR Tree: 1… press Chng, then Disable, press Next
7. Aft CCR Tree: 1… press Chng, then Disable, press Next
8. Eve CCR Tree: 1… press Chng, then Disable, press Next
9. Nbus CCR Tree: 1 … press Chng, then Disable, press Next
10. Press * * (will skip you to step 3 of next instructions) or Press Rls to exit programming
2. Make Changes to the Tree:
1. Press Feature 983
2. Enter LOG Code: , press OK 3. Press Othr, press CCR, press Admin
4. Enter Tree Number Number (usually 1 if only using one tree), press OK
5. Press Chng
6. Enter the Path Number you want to change, then press OK (see below)
Note: Path 0 is where you record the menu options (which plays immediately after the introduction greeting (recorded on page 5))
Example:
Path 0: Press Rec and then Rec again
For “store and service hours”, press 1. (goes to Path 1)
For “our company directory”, press 2 (goes to Path 2)
For “Sales”, press 3 (goes to Path 3)
For , press 4 (goes to Path 4)
For , press 5 (goes to Path 5) For all other inquiries, press 0
Path 1: Press Info, press Rec
Our regular business hours are
We are located at
Our fax number is
Please visit us online at www
Page 7 of 8
Service: 604 -856- 9155
Email: [email protected]
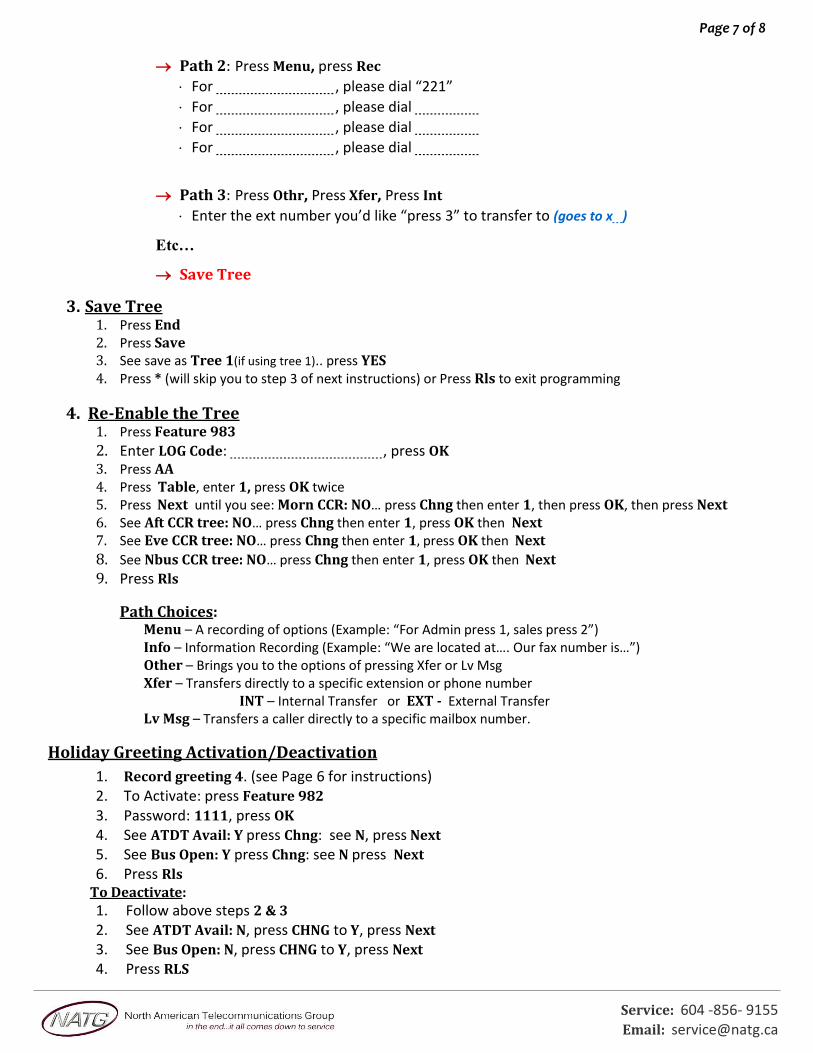
Path 2: Press Menu, press Rec
For , please dial “221”
For , please dial
For , please dial
For , please dial
Path 3: Press Othr, Press Xfer, Press Int
Enter the ext number you’d like “press 3” to transfer to (goes to x )
Etc…
Save Tree
3. Save Tree 1. Press End 2. Press Save 3. See save as Tree 1(if using tree 1).. press YES 4. Press * (will skip you to step 3 of next instructions) or Press Rls to exit programming
4. Re-Enable the Tree 1. Press Feature 983
2. Enter LOG Code: , press OK 3. Press AA 4. Press Table, enter 1, press OK twice 5. Press Next until you see: Morn CCR: NO… press Chng then enter 1, then press OK, then press Next 6. See Aft CCR tree: NO… press Chng then enter 1, press OK then Next 7. See Eve CCR tree: NO… press Chng then enter 1, press OK then Next
8. See Nbus CCR tree: NO… press Chng then enter 1, press OK then Next 9. Press Rls
Path Choices: Menu – A recording of options (Example: “For Admin press 1, sales press 2”) Info – Information Recording (Example: “We are located at…. Our fax number is…”) Other – Brings you to the options of pressing Xfer or Lv Msg Xfer – Transfers directly to a specific extension or phone number INT – Internal Transfer or EXT - External Transfer Lv Msg – Transfers a caller directly to a specific mailbox number.
Holiday Greeting Activation/Deactivation
1. Record greeting 4. (see Page 6 for instructions) 2. To Activate: press Feature 982 3. Password: 1111, press OK 4. See ATDT Avail: Y press Chng: see N, press Next 5. See Bus Open: Y press Chng: see N press Next 6. Press Rls
To Deactivate: 1. Follow above steps 2 & 3
2. See ATDT Avail: N, press CHNG to Y, press Next
3. See Bus Open: N, press CHNG to Y, press Next
4. Press RLS

Page 8 of 8
Service: 604 -856- 9155
Email: [email protected]
Delete a Mailbox:
1. Press Feature 983
2. Enter LOG Code: , press OK
3. Press MBOX, then DEL
4. Enter Mailbox Number
5. Press DEL
6. To re-add the a new mailbox, Press * (will skip you to step 3 of next instructions) or Press Rls to exit programming
Add a Mailbox:
1. Press Feature 983
2. Enter LOG Code: , press OK 3. Press Mbox, then Add
4. Enter Extension Number, press OK to Subscriber
5. Enter Extension Number again,
6. See Class of Service: enter 1, press OK
7. Spell name of Employee (last name first, press # after each letter (# # to enter first name)),
8. Press OK
9. See Directory: Y press Yes
10. See Message waiting: Y press Yes
11. See Outdial: press Chng unit you see Pool,
12. Press Next, enter 1, press OK then OK again
13. Press Rls
Reset the Password of a Mailbox:
1. Press Feature 983
2. Enter LOG Code: , press OK 3. Press Mbox, press Chng, enter mailbox number
4. See Password: press Reset to reset password to the system default: 0000
5. Press Rls
Change the Name on a Mailbox
1. Press Feature 983
2. Enter LOG Code: , press OK 3. Press Mbox, press Chng, enter mailbox number
4. Press Next until you see Name 5. Press Chng 6. Spell New Name (last name first), press # after each letter (# # to enter the first name) 7. Press OK when finished 8. Press Rls