college of the canyons: makerspace: introduction …...pipettes made of plastic, to multi-channel...
TRANSCRIPT

1
College of the Canyons: MakerSpace: Introduction to Pipetting!
Volumetric Techniques: Theory and Practice:
Serological and Micropipettes, Accuracy verse Precision • In biology, there exists a range of metric measurements that must be made from time to time. • Of the metric units, volume is perhaps the most crucial as most of biotechnology (and
biology) is water (or solution) based concepts and chemistry. • Solutions can be measured and transferred with a range of “volumetric glassware” including:
flasks, beakers, graduated cylinders and pipets. • Small volumes and expensive reagents make pipets the most commonly seen devices in a
biotechnology laboratory. This lab will clarify the roles of serological and micropipette in biotechnology by focusing on techniques designed to improve techniques associated with both serological and micropipettes.
• Subsequent lab activities will focus of choosing what pipet to choose and the impact this
For information on: How to restock items from accompanying lab equipment box in MakerSpace. Obtain electronic copies of this protocol. Access other biology and MakerSpace related resources. Contact: Prof. Jim Wolf, Biology Faculty (661) 362-3092 or [email protected]
• These lab protocols can be reproduced for educational purposes only. They have been developed by Jim Wolf and/or those individuals or agencies mentioned in the references.

2
1. Objectives: 1. Introduce students to the concept of volume transfer and use of micropipettes and serological pipettes. 2. Refine theory and technique associated with using serological pipettes by practicing volume transfer using both mechanical and electrical pumps. 3. Understand effect of serological pipette volume on accuracy by calculating and comparing errors associated with transfer. 4. Review micropipette general technique and practice. 5. Refine micropipette technique and verify pipette accuracy and precision using a variety of exercises designed to clarify both the theory and practice of micropipette use. 6. Use the self-contained kits and associated resources to refine key elements of both technique and theory of volumetric transfer.
2. Background: There is perhaps no greater icon of biotechnology than the pipette. This device invokes up images of technology and is found in science (and biotechnology) labs around the world. There are range of pipettes and applications, from simple transfer pipettes and disposable pipettes made of plastic, to multi-channel pipettes that allow for automated devices to transfer small volumes with incredible accuracy and precision. The range of pipettes can be partially viewed by looking at the lab coversheet and related key on the last page of the lab manual. There are a number of pipettes and pipette parts shown. If you have a minute, revisit the cover and try to identify the items shown. There is a list of equipment and supplies used in this lab that has some modest images that may help you to identify some of the pipets. If the image is too poor, try using the on-line version of the lab to better view these devices. The on-line version of the coversheet can be viewed at: http://www.canyons.edu/Faculty/wolfj/Documents/230/LabFiles/PipetingAccuracyPrecis
ion6-28-12.pdf Please note that the lab is a somewhat different version of the MakerSpace lab, and the contents are different. This lab will introduce you to serological and micropipettes. These two types of devices are used in almost every biotechnology lab application and thus, a fundamental working awareness of these apparatus is essential. Lastly, pipet or pipette are both correct spellings FYI.
How to Use this Handout: Depending on your background, you may want to spend some time going over the other three documents that are part of this lab. It includes a list of equipment with accompanying description, uses, etc. An inventory sheet that highlights the aforementioned equipment, as well as how many items are present and restocking and other related issues. Finally, these is a set of “pipet nevers” that should be reviewed (even by experience lab folks) as this issue affect not only accurate technique, but also the long-term use and wear and tear on the devices. So…consider giving these documents a review to help you better understand the scope of the equipment and activities that can be accomplished in the “MakerSpace” / Biology Outreach lab.
Once you have looked over these handouts, reference the below noted table of contents. The labs have been divided in such a way so that budding technicians can decide what technique / equipment is needed for review, and then completing the accompanying activity, only need to review a fraction of the lab. If you are just starting in your budding Biology / Technician Career, you may want to consider doing the lab in its entirety. With

3
this in mind, the table of contents should be flowed in order, and you may need to come back to the MakerSpace facility few times to ensure all items are addressed / completed. Additionally, you may want to print up multiple copies of the core activities so that you can practice them to a level that you feel comfortable with. Sadly, many biology labs allow only a very short amount of time to learn, review and hopefully master a set of techniques that may be central to your long-term career goals. If this is the case, the the equipment in this box, may prove more useful to you that the equipment available in the lab setting. Remember, theory can be referenced, but technique is hands-on and requires ours, sometimes weeks to completely refine. So consider keeping this reference handy, dog earring a page of two, and even returning to MakerSpace to gain access to this equipment that for mare that one College of the Canyons student has helped mold the future success of their career in burgeoning field including biotechnology, medical lab technology and even other science labs where technique is required, but sadly often take for granted!
Topic: Page # A. Volumetric Determination and Error: Serological Pipets: Introduction… 4 B. Dimensional Analysis, 1,5,10 and 25 ml Serological Pipets / Data 5-6 C. Micropipette Practice: General Overview 7 D. Micropipette Practice Exercises: The 2,3,5 Exercise 8 E. Micropipette Practice Exercises: The 2,3,5 additional practice 9 F. Micropipette Practice Exercises: Volume Assessment: “Drops” 10 G. Micropipette Practice Exercises: Volume Assessment: Microfuge Tubes 11 H1. Micropipette Practice Exercises: “Chasing the Sample” Low Viscosity 12 H2. Micropipette Practice Exercises: “Chasing the Sample” High Viscosity 13 I. Accuracy Vs. Precision: Filter Paper Standard Operating Procedure (SOP) 14?
How to use this handout: Depending on your comfort level with the material presented so far, you may want to spend sometime going over the three other documents in this box. One is a review of the equipment contained with in this box. The list briefly describes the item and points out how the items may be used in a lab protocol. The second is a packing list of items. The list has some accompanying images that may be helpful in identifying these items, so you may want to read document one and two concurrently. The packing list also includes amounts, hints on storage and how/when to get key items “restocked”. Finally, there is a list of micropipette “nevers”. This list should be closely reviewed and consider even keeping the list visible if/when you are working with the micro-pipets. The devices are very accurate and precise, but require that the operator (you!) keep in mind some basic rules to help ensure they keep on working for years to come. After giving these documents a once over (and perhaps unpacking and examining key equipment items, you may want to revisit the table of contents. This will direct you to the key technique or skill set part of the lab. If you are not sure what to do next, consider starting at the beginning and just go forward from here. The first few labs are easy and only after some time following protocols are the more robust labs on micropipettes discussed. Using Serological Pipettes. Serological pipets are made of glass or plastic. Glass ones are rare and are often saved and autoclaved to conserve the resource. Typical volumes range from 1-25 mls with lots of specialized versions available. The pipet is used in concert with a pump of some type, as pipetting by mouth is a cardinal sin! While the pipets are sterile and or autoclaved, the pumps are usually sterilized with a simple alcohol wipe. They range from simple hand pumps (color coded to help identify different sizes) to electric hand-held devices and automated, multichannel gizmo associated with high through-put automation.

4
A. Volumetric Determination and Error Analysis During many procedures, scientists and technicians often must transfer a given amount of solution from one container to another. Accuracy and time management are often essential, so sophisticated machines have been developed to facilitate quick and accurate transfer. The accuracy of the pipette is related to the size of its smallest unit of measure. Transfer pipettes are made of plastic, and have the bulb fused to the column. The column usually has demarcations on it that allow for measurement as low as 10 microliters (although they are often not as accurate as serological micropipettes.) A micropipette is a calibrated device that can measure liquid down to fractions of a microliter and typically has a range from 1 ml to 0.01 microliters. When first learning to work with a serological pipette, take some time to familiarize yourself with the following pointers. 1. Take a few minutes to note the range of volumes, various sizes of BOTH the pipets and the pumps. 2. If the technique involves sterility issues, always remove the pipet from the container, sheath, etc. by
pressing it into the pipet pump and try to avoid touching it. FYI, today’s activity does not observe sterile technique, so the pipets are probably not wrapped and should be saved for later use.
3. Take a few minutes to note the scale. They come in variety of forms that can tell the user how much the aspirated (sucked up), or expelled (pushed out). Some pipets have both scales to accommodate technician preference. So, DO NOT naively assume that the pipet volume is obvious. Take a minute to review the scale and its implications.
4. For SAFETY sake, be careful when pushing pipet into pump. Hold the pipet near the end that goes into the pump. Holding it too far away could snap the pipet and drive the broken pipet into your hand!
5. As you work with the pipet scale, this rule will change, but when you are just getting used to the pipet, ONLY ASPIRATE WHAT YOU INTEND TO DELIVER! To put this another way, say you want to deliver 3 mls of volume using a 5 ml pipet. You could aspirate 5 mls and then slowly release the liquid, stopping when 3 mls have been delivered. This said, you may make a mistake and overshoot the volume being delivered. A safer technique is to aspirate the 3 mls, fine tuning the amount while the pipet is still in contact with original sample. Returning some of the un-needed sample to the container will not contaminate anything, and when ready, a quick release of the pipet’s entire volume will deliver the needed 3 mls. So you will only aspirate what you want to deliver! The only drawback with this technique is the extra time spent fine tuning the 3 mls taken from the stock bottle.
For the following exercise you will be using a serological pipette.
Use a 5 ml serological pipette and a 100 ml beaker. Before you begin, weigh the empty beaker and record your results below.
Now take the 5 ml pipette and transfer the following volumes of water to the beaker: 5.0, 4.5, 4.3, 4.2, 4.0, 3.5, 3.3, 3.2, 3.0, 2.0, 1.5, 1.0, 0.5 ml
These volumes should be transferred to the beaker individually and remember BOTH points 3 and 5 above as they can really impact the volume! The total volume of the 13 combined volumes should be 40 ml. How close you came to the theoretical result can be defined on the basis of the total weight of the water in your beaker. The density of water at 23° C (room temperature) is 0.9976 gm/ml and so 40 mls of water weighs about 39.9 grams.

5
B. Use dimensional analysis to determine the theoretical weight of 40 mls of water.
Weight of beaker and water = _________________
Weight of empty beaker = _________________
Weight of water (experimental) = __________________
Calculated weight of water (theoretical) = __________________
Deviation from expected = __________________
To determine the amount of your error (your deviation, as expressed as a percent of the expected value), you subtract the expected or theoretical weight of the water from the weight of the water that you actually transferred (experimental value). This first step gives you information as to how much weight your sample was over or under (deviation from) the expected weight. To find how acceptable this deviation is, you simply divide the value above by the theoretical value to find out what fraction of the expected your deviation represented. Normally error is expressed in percent and to convert your value to a percent, simply multiply by 100. While this sounds confusing, the equation below illustrates the calculation. Note, % error is the absolute value, so a negative value would be made positive as a negative percent is possible via calculations, but not logical thus the absolute value.
% Error = Experimental value – theoretical value X 100%
Theoretical value
Here is the above equation expressed in terms of our specific experiment % Error = Measured wt. of H2O – calculated wt. of H2O
Calculated wt. of % H2O % Error = ______________________________________ X 100%
% Error from your experiment ________________________
A deviation of 1-2 % is not unusual. If 5 % is seen, practice your technique again. Note the percent error is expressed as an absolute number, (no negative percent please!) How would you explain the error in your experiment? List at least three possible causes. 1. 2. 3. Reflect on the idea brought up on the last page, step 5. Only aspirate what you want to deliver and how this can affect the accuracy of your techniques. Once you have mastered volumetric transfer with the 5 ml pipette. Repeat the above process with 25 ml 10 ml and 1 ml pipettes (with some adjustments). Please note: for the purpose of the serological pipettes, you can use the mechanical pipette aids. If you want to, you can also try out the electric pipette pumps. If you choose to try these devices, make sure you try all of the transfers with the same type of device. Do not do one transfer with a mechanical pipette pump and three with an electric, etc., as this will make technique assessment more difficult. Record your information in the following table:

6
Pipette volume: 1 ml: The numbers should be less by a factor of ten for this exercise, so…0.5 ml, 0.45 ml, 0.43 ml, etc… and weigh about 4 grams.
Trial One: Weight of beaker and Water ________ Weight of beaker ____ Weight of water, exp. ____ Weight of water, calc. ____ Deviation ___________
Trial Two: Weight of beaker and Water ________ Weight of beaker ____ Weight of water, exp. ____ Weight of water, calc. ____ Deviation ___________
Trial Three: Weight of beaker and Water ________ Weight of beaker ____ Weight of water, exp. ____ Weight of water, calc. ____ Deviation ___________
Pipette volume: 10 ml (use volumes from 5 ml SOP) 5.0, 4.5, 4.3, 4.2, 4.0, 3.5, 3.3, 3.2, 3.0, 2.0, 1.5, 1.0, 0.5 ml
Trial One: Weight of beaker and Water ________ Weight of beaker ____ Weight of water, exp. ____ Weight of water, calc. ____ Deviation ___________
Trial Two: Weight of beaker and Water ________ Weight of beaker ____ Weight of water, exp. ____ Weight of water, calc. ____ Deviation ___________
Trial Three: Weight of beaker and Water ________ Weight of beaker ____ Weight of water, exp. ____ Weight of water, calc. ____ Deviation ___________
Pipette volume: 25 mls: (uses same volumes from 5 ml SOP for your information) 5.0, 4.5, 4.3, 4.2, 4.0, 3.5, 3.3, 3.2, 3.0, 2.0, 1.5, 1.0, 0.5 ml
Trial One: Weight of beaker and Water ________ Weight of beaker ____ Weight of water, exp. ____ Weight of water, calc. ____ Deviation ___________
Trial Two: Weight of beaker and Water ________ Weight of beaker ____ Weight of water, exp. ____ Weight of water, calc. ____ Deviation ___________
Trial Three: Weight of beaker and Water ________ Weight of beaker ____ Weight of water, exp. ____ Weight of water, calc. ____ Deviation ___________
Final Thought on Serological Pipets: Serological pipets allow for quick and accurate transfer of liquids for a variety of applications. While all of the pipets used in this lab cold measure 1 ml, the general rule of thumb is that a pipet is most accurate at the top of its range. So, a 25 ml pipet is likely to be the least accurate based on this idea. Conversely, while you could measure 25 mls with a 5 ml pipet (do 5 transfers) this will likely result in error associated with the multiple transfers. So, use the pipet that has a range will permit a single transfer, and that has a maximum volume that is as close to the desired volume being transferred.

7
C: Micropipette Practice: (NOTE: Read this portion of the lab completely prior to starting work with the micropipette and delegate accordingly). GENERAL TECHNIQUE OVERVIEW…. Getting familiar with the micropipette:
A. The pipettes used in these experiments come in three different ranges: 2-20 ul, 20-200 ul and 100-1000ul. The volumes measured are very small since there are one million microliters in a liter!
B. Try to visualize these volumes (you will note that this is difficult as these are
very small volumes, and on the pipette scale at first glance they can look identical.) Note the diagram listed (of the scale panel for a 2-20 µl pipet) below to become familiar with the approximate volumes as they appear on the pipette.
NOTE…(XXXX) If the pipette were to be forced to this volume (0.2 ul) it would destroy the device (and this is clearly outside of the 2-20 ul range for the device)
20.0ul --- (tens) 2 2.6ul--- 0 0.2 ul 0 0 2 ones 0 Red decimal line_____________________________________________ 0 6 tenth 2XX! Broken! Out of range Become familiar with the function of the volume adjuster (the black dial in the
handle of the device, just below the colored button you depress to operate the device.)
o With the numbered display facing you: o --------> increases volume o <-------- decreases volume
Memorize these “pipette nevers”
o Always check the pipet range on the top of the colored button at the top of the handle (yellow, blue or white / grey).
o Never rotate volume adjuster below 2 or above 20 microliters (or outside the range, or the pipette may jam / applied to a 2-20 ul micropipette)
o Never use a micropipette without a tip in place. o Never lay the pipette down with fluid in it. o Never let the pipette button (the colored button with the range printed on it)
snap back. Become familiar with how to add and eject a tip. Insert pipette tip into disposable tip and twist to snugly fit into to place. Press the ejector
button to remove the tip. Try this a few times until you are comfortable with the process.
o Loading and emptying: The yellow button has two stops. The first stop is for filling and dispensing the sample (and the button is about 3-4 millimeters from

8
the top of the handle). The second stop is to "blow out" the last little bit of the sample and occurs when the button is flush with the handle. Find these stops and make sure you are very familiar with these stops. Take a minute to “doodle” this idea in the margin of tis handout so that the idea is clear in your head!
Loading:
o Depress button to first stop. Dip pipette tip into sample and draw fluid up by gradually releasing button. Make sure you keep the tip submerged in the fluid during this step.
o Remove the pipette tip from the sample and examine the sample. It should extend all the way to the pipette tip. There should be no air at the tip or anywhere along the length of the fluid in the tip.
o Make certain that you understand the importance of depressing the button to the first stop for filling. If you depress to the second stop, you may get 5 or more extra microliters of sample in a 2-20 ul micropipette (often a catastrophic amount!)
B. Emptying:
o Take a clean microfuge tube and touch the pipette tip to the bottom of the microfuge tube.
o Depress the button to the first stop to expel the sample. o Depress the button to the second stop to "blow out." Try stirring / moving the
pipet / tip / sample while the button is still depressed (to aid in delivery of any sample remaining in the tip.)
o Keep the button depressed to the second stop while removing the pipette from the sample
o Gently release the button. Change the tip if needed. FYI, for practice activities pipet tip changing is not really required and should be done just a few times to familiarize yourself with the technique. Excessive tip changing would be wasteful and not needed.
Micropipette Practice Exercises (D-I): The following exercises (D-I) are all designed to challenge your micropipette technique in some specific way. Micropipette skills in any biology lab are VERY important and by PRACTICING these activities to a level of competence, you can feel more confident that labs that use such volumetric devices will give you better results. Do not read, do once and say…OK what is next? On the other hand, we do not have time for you to take hours for each activity…So, try each one activity at least once and preferably, two or more times (as time permits). Consider doing 1 or 2 activities at a time, and noting your progress in this handout. This gives you a great excuse to come back and check out the MakerSapce again! After going through all of the activities you should return to those activities that you feel you need the most work on. Again, do not change tips unless really necessary. For practice activities, the tips can be reused unless damaged or changing between solutions of different make-up, composition.
9
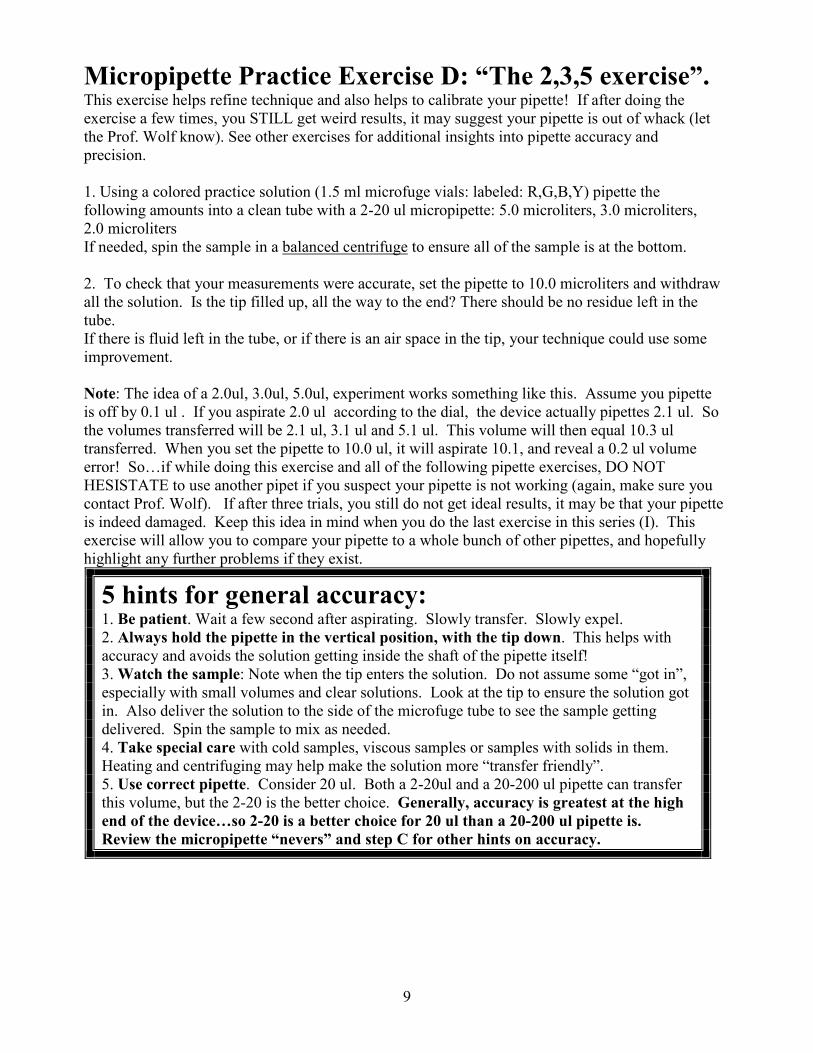
Micropipette Practice Exercise D: “The 2,3,5 exercise”. This exercise helps refine technique and also helps to calibrate your pipette! If after doing the exercise a few times, you STILL get weird results, it may suggest your pipette is out of whack (let the Prof. Wolf know). See other exercises for additional insights into pipette accuracy and precision. 1. Using a colored practice solution (1.5 ml microfuge vials: labeled: R,G,B,Y) pipette the following amounts into a clean tube with a 2-20 ul micropipette: 5.0 microliters, 3.0 microliters, 2.0 microliters If needed, spin the sample in a balanced centrifuge to ensure all of the sample is at the bottom. 2. To check that your measurements were accurate, set the pipette to 10.0 microliters and withdraw all the solution. Is the tip filled up, all the way to the end? There should be no residue left in the tube. If there is fluid left in the tube, or if there is an air space in the tip, your technique could use some improvement. Note: The idea of a 2.0ul, 3.0ul, 5.0ul, experiment works something like this. Assume you pipette is off by 0.1 ul . If you aspirate 2.0 ul according to the dial, the device actually pipettes 2.1 ul. So the volumes transferred will be 2.1 ul, 3.1 ul and 5.1 ul. This volume will then equal 10.3 ul transferred. When you set the pipette to 10.0 ul, it will aspirate 10.1, and reveal a 0.2 ul volume error! So…if while doing this exercise and all of the following pipette exercises, DO NOT HESISTATE to use another pipet if you suspect your pipette is not working (again, make sure you contact Prof. Wolf). If after three trials, you still do not get ideal results, it may be that your pipette is indeed damaged. Keep this idea in mind when you do the last exercise in this series (I). This exercise will allow you to compare your pipette to a whole bunch of other pipettes, and hopefully highlight any further problems if they exist.
5 hints for general accuracy: 1. Be patient. Wait a few second after aspirating. Slowly transfer. Slowly expel. 2. Always hold the pipette in the vertical position, with the tip down. This helps with accuracy and avoids the solution getting inside the shaft of the pipette itself! 3. Watch the sample: Note when the tip enters the solution. Do not assume some “got in”, especially with small volumes and clear solutions. Look at the tip to ensure the solution got in. Also deliver the solution to the side of the microfuge tube to see the sample getting delivered. Spin the sample to mix as needed. 4. Take special care with cold samples, viscous samples or samples with solids in them. Heating and centrifuging may help make the solution more “transfer friendly”. 5. Use correct pipette. Consider 20 ul. Both a 2-20ul and a 20-200 ul pipette can transfer this volume, but the 2-20 is the better choice. Generally, accuracy is greatest at the high end of the device…so 2-20 is a better choice for 20 ul than a 20-200 ul pipette is. Review the micropipette “nevers” and step C for other hints on accuracy.

10
Micropipette Practice Exercise E: “2,3,5 more challenging! For the following pipettes, try 2,3,5 exercise with noted volumes and use the R,G,B,Y vials. 2-20 ul pipette: Put in: 1.7 ul **, 3.4 ul and 4.9 ul, take out 10 ul (** 1.7 is out of range, but if you carefully twist the pipet into this range, you can be properly transfer this volume). Put in 12.3 ul, 3.4 ul and 4.3 ul, take out 20 ul. Put in 2.0 ul, ten times…. take out 20 ul…. 20-200 ul pipette: Put in 23 ul, 127 ul and 50 ul take out 200 ul. Put in 145 ul, 26 ul and 29 ul take out 200 ul. Put in 20 ul, 10 times and take out 200 ul once 100-1000 ul pipette: Put in 165 µl, 610ul and 225 ul take out 1000ul. Put in 334 ul, 121 ul and 545 ul take out 1000 ul. Put is 100 ul, ten times, take out 1000 ul once
Micropipette Practice Exercise F. Volume assessment: “Drops”. To help you develop a intrinsic sense of small volumes, please complete the following exercises. NOTE: The small pieces of wax paper easily blow away (NOOOOOOOOO!..so be careful)…and you will want to be careful with the dye. It will stain, but washes out with regular detergent and is just harmless food coloring, water and /or glycerol FYI.. Take 8 pieces of Parafilm (a wax paper / plastic used for sealing containers) and tape the very edge of the paper, leaving plenty of room to work with, onto a larger piece of paper of notebook paper or paper towel. Check to make sure the squares are Parafilm side up, as there is paper backing (with printing on it) that should not be used for any protocol, as it is usually removed to allow the Parafilm to stretch, etc. This will make it easier to handle the individual squares. Next to each square of wax paper, write one of the noted volumes: 2 µl, 5 µl, 10 µl, 50 µl 100 µl, 500 µl and 1000 µl. Onto these separate pieces of wax paper, place 2 µl,5 µl, 10 µl, 50 µl 100 µl, 500 µl and 1000 µl of a similar colored solution using appropriate micropipettes. Transfer the entire amount in one load and try to make it a single drop. IF YOU GET MULTIPLE DROPS, do not worry. You can push the drops together using the pipette tip, thanks to hydrophobic, hydrophilic expulsion! Place side by side and compare volumes visually. If you are working in pairs, try the following. Have one person pick up the individual squares (be careful as you peel them free to not dislodge the droplet) and show them to each the other person. Can you visually ID the volume? Now switch off. Try placing smaller volumes side by side (3 different volumes) and see if it is easier than seeing the squares one at a time to determine the volume. If working by oneself, still spend a minute visually inspecting the volumes. Once you have completed the “Parafilm” square exercise, SAVE YOUR DROPS for the next experiment (if time permits, if you have to leave, the entire set up can be safely discarded in the trash FYI).

11
Micropipette Practice Exercise G: Volume Assessment: Microfuge tubes: Next, get one of the PCR tube strips and repeat the above sequence. If you want to be frugal, use the old droplet to get the volume you need! Provided it has not been too long (and the drops have not evaporated much) you should have just the right volume. Check the pipette tip to see if it is full? If it is NOT full, then get some “fresh dye” from the sample tubes and work with this. Add the volumes, left to right into the PCR tube strip: 2 µl, 5 µl, 10 µl, 50 µl 100 µl, 500 µl and 1000 µl. NOTE: Depending on the PCR tubes and the other resources provided, you may not be able to complete the series, as the tubes only hold so much volume, or there are only 6 tubes in a strip of PCR tubes. Pipet and place lid strip on tube strip and proceed to next step! Using a pair of scissors (or brute force if you prefer), pull the tubes apart and try the volume comparison exercise with your lab partner. If working in pairs, hold up the tubes and ask each other what the volume is. If not with a partner, move to next step. Once you have completed exercises F and G, take a minute to clean up the lab. All of the waste is garbage friendly FYI. Be sure to save your colored dye tubes (the “stock” tube with all of the liquid (R,G,B,Y) , not the PCR tubes) as you will need the R,G,B,Y tubes later, so place them back in the appropriate rack.

12
Micropipette Practice Exercise H: Chasing the sample. Sometimes a large sample is pulled from a very full microfuge tube. If you were to simply insert the pipette tip into the solution, the microfuge tube would overflow! So you have a dilemma! You can solve this by learning the following technique. We will repeat it twice to see the effects of viscosity on pipetting samples of this type. Make sure you have a few paper towels as you may need them for this part of the lab!
Micropipette Practice Exercise H1: “Chasing the sample”, low viscosity: To complete this exercise, get a microfuge tube and fill it to the brim using a transfer pipet (these pipets are molded out of plastic and have a bulb at one end FYI). Depending on what microfuge tubes you are using, you may need to add 1.5 or 2 mls (1.5 ml microfuge tubes have a tapered bottom and 2.0 ml microfuge tubes have a rounded bottom FYI). Get the colored water from one of the 50 ml falcon tubes (AKA centrifuge tubes) and get the amount you need. Please return the stock 50 ml tube(s) when done collecting your sample(s). Once the microfuge tube is full, set the pipette to 1000 ul and try to get a full load out of the tube without spilling any. To do with, you will need to closely watch the tip and have careful thumb control. Depress the pipette to the first stop. Insert the tip just barely under the surface of the solution. Be careful to watch for overflow (and prevent it). As you release the tip…SLOWLY… you will notice the solution level in the microfuge tube is dropping. As this is happening, you will need to push the pipette tip further and further into the sample, again taking care to not cause overflow. Ideally, the solutions will be pulled into the micropipette tips at the same time that it is leaving the vial. So use a slow, controlled thumb action and carefully observe the tip on the pipet while aspirating. If done correctly, you will aspirate the sample with no overflow. As you release the thumb, you will be pushing the tip into the solution, making sure you always have the tip under the solution level (to avoid sucking in air). This way, you are effectively “chasing the sample”. Double check the volume transferred by inspecting the tip. Is it full to the tip? Has any of the solution spilled out? Is the amount remaining in the tube what you expect it to be? Practice this activity until you are clear on both the technique behind it and the rational for it!
Micropipette Practice Exercise H2: Chasing the sample, high viscosity solution. Repeat the basic experiment outlined in 5A, except this time, start with the very viscous solutions. These are in special 50 ml Falcon tubes labeled viscous or glycerin: RV,GV,BV,YV. A viscous solution is one that resists the ability to flow. Water flows relatively readily, where as honey flows less so. So, honey is more viscous than water. As you complete this exercise, please be aware of two things: 1. Note the effect the viscosity has on accuracy and technique. 2. Be more aware of where this solution ends up. It is essentially colored, dyed “sugar syrup” and as a result, it can get REALLY STICKY. Please remember to clean up every spill and to exercise caution so that none of this stuff gets in or on the micropipette. Lastly, if you have more time, you can make this process more challenging if you put the smaller samples of the viscous solutions (RV, GV,BV,YV ) on ice for a few minutes prior to starting the activity. The food services folks next store may give you a small cup of ice if you ask nicely).….

13
Micropipette Practice Exercise I: Accuracy verses precision: Filter paper SOP: This lab addresses the idea of accuracy verses precision. Assuming that your pipettes up to now have been working OK, then this final test will validate the micropipette for subsequent lab work. This test looks at the idea of accuracy verses precision. Hopefully by now, your technique is getting better (although your thumb may be getting tired!). NOTE: The following SOP may use different sized filter paper. The size of the filter paper may affect the size of the drops you can add to the paper. To get an idea as to how far to place the drops (especially the larger drops) please note the image on the second to the last page of this standard operating procedure (SOP). It shows the drops smearing together (in the larger volumes) so…note the scale bar (ruler) and place your drops an appropriately large amount apart. Additionally, consider doing few drops overall and even omitting some of the larger volumes (500 and 1000 ul). Be sure to read all of the following before starting the lab. Also…this lab exercise can be VERY MESSY! The dye will bleed through the filter paper (so place some paper towels under the filter paper). he larger volumes tend to saturate the filter paper while the sample is being added. The effect is to create a small volume of liquid that may “burp” when any air is introduced. This volume of air is often associated with the end of the delivery stroke on the pipet, when the operator is trying to get the last bit of liquid out by depressing the pipet to the second stop. In a nutshell…think ahead and be prepared to some leaking, splashing and smearing…. In the end, it is just food coloring, but it can make a mess. Please remember: Be sure to label everything clearly. As result of reviewing your data, we may decide to possibly calibrate and/or fix a pipette. So, do not just review your results. Remember which pipette gave you which results, and label the paper with information tat will help you identify which pipet it was. We have some Ziploc bags to store the sample if needed and attach the Ziploc bag to the pipet and let Prof. Wolf know that the results were suspect. This way, a repair or replacement can be conducted. Lastly, put a few sheets of paper towels under the filter paper as the dye may bleed and color the lab bench! Using a piece of provided filter paper and colored solution, label the filter paper in the lower right corner with your name and contact information (email is good). Also note the pipette number or any other identifying information (volume, type, etc.). For the sake of time management, have one member of your team do the 2-20 pipet series first and the other volumes / pipets as time permits. Depending on the size of the paper and number of runs, you may have more than one piece of paper. Use a pencil to place a series of ticks 1 cm apart, left to right along the bottom of the filter paper. Repeat the 1 cm ticks on the left side, top to bottom. The figure at the end of the lab protocol does not show these tick FYI, but their placement will help enormously with centering and lining up of various samples. Using a 2-20 ul pipette place ten drops of 2 ul from left to right. Space them out evenly lining up near the ticks. At the far right of the series of dots, label them accordingly: 2 ul, 2-20 pipette. On the next line, repeat the above steps, but set the pipette for 5 ul. Repeat again for 10 ul and 20 ul amounts and LABEL EACH ROW ACCORDINGLY. With larger samples, allow a few minutes for the first sample to diffuse into the filter paper so that you can gauge the final size of the dots. Once the size in determined, place the dots a

14
logical distance apart so as to prevent overlap. Also, try to avoid pushing the tip of the pipet into the filter paper or otherwise forcing the solutions into the filter paper as this may skew results: For the 20-200 pipette, try the process with 20, 50, 100 and 200 ul. As needed, get more filter paper, add scale ticks (cm marks) and label with name, misc. information, etc. Please note, as the volumes get larger, you will need to space the dots out further apart. Also, be careful to not disturb the dots in ANY way while they are drying. This could distort the dot shape and the subsequent evaluation. While we could use this process for 100-1000 ul pipettes, the amount of dye, soaking through the paper, etc. can all affect the quality of the dot. Fortunately, as the volume gets larger, there are other ways to assess the accuracy of the transfer technique (see labs for details on this topic). Once you have completed the pipette exercises, let the sheet dry on continue reading. So….what about accuracy and precision? Well, the definitions are as follows: Accuracy: Indication of how close a measurement is to the actual value. Using volumetric devices to assess volumetric devices can reveal this (2,3,5 exercise idea). Another technique involves using water and its unique relationship in the metric system. Recall that 1 ml of water weighs 1 gram, which takes up 1 cubic centimeter of space. This is assessed by comparing the pipetting amounts to the actual amount that should have been transferred. In a planned later MakerSpace lab, we will assess this by comparing the mass of water transferred to the volume of water transferred and figuring out the accuracy of the volume transferred using micropipettes and some very accurate scales. The previous procedure with serological pipettes is also an example of this idea FYI. Precision: How reproducible is the measurement? This is a reflection of technique (for the most part). Sometimes the device is damaged, but for the damage in micropipettes, the effect is such that they may be very precise but not accurate. What usually happens is a device gets damaged and does not deliver the correct amount, but this damage is not random. The device usually always under or over delivers the exact same amount. So, if off by 0.1 ml, it will very precisely always give you 0.1 ul too much, every measurement, every time. In other words, it will very precisely give you the same volume, but it will not be accurate. Assuming your technique is good, the dots should all be the same size (with in a given “volume series). If this is this case, your technique has good precision. Also, your dots should be the same size as compared to other replicates (the technique repeated a second or third time). If this is the case it is likely, your device is very accurate. If not, it is possible there is some issue with your pipette. Notify professor Wolf if this appears to be the case. Later labs will revisit the idea of accuracy and precision as needed / pending.

15
Figure A: Image of dye added to filter paper. Note size of dots and try to add your samples far enough apart to avoid overlap (note scale bar/ ruler demarcations in cm). The 50 ul sample were not added to this sample for your information. Lab Resetting: Take a few minutes to review this information and help to ensure the lab is put back together and all of the needed items are in place for the next group of students who wish to use the lab. In the lab is a binder, and inside is a stocking list of all of the items contained with in the lab. Please not if all the items are in, and were noted, if the item count is getting low, to notify Prof. Wolf, so that key resources can be restocked. So items on the restock list are in the MakerSpace area and can be accessed if you ask the MakerSpace staff.

16
Key to cover picture. Remember to look at on-li ne picture as this may make seeing the equipment easier. 1. Micropipette (one of three) in a free standing Plexi-glass rack. 2. Serological pipet and pump. Electronic device that allows for aspirating and expelling of samples by pressing buttons. Good for reducing fatigue, repetitive stress injuries, etc. 3. Sterile (wrapped) serological pipettes. Different volumes. 4. Box of pipette tips. Note autoclave tape suggesting they were once sterile. Autoclave tape goes from clear to black stripes, indicating the sample has been autoclaved. 5. Multi-channel pipet. The device is oriented vertically, and it appears that a multi-channel pipet is being used by a technician to the left of the image; to load samples that are on the computer screen (just to the left of #9). Note the large, “off white” base partially obscured by the other items. 6. Micropipette, with tip, full view. 7. Beaker with a few transfer pipettes. Not wrapped, so not sterile. Come in a HUGE variety of shapes, volumes, etc. Bulbs of transfer pipettes are visible about the micropipette. 8. Electronic micropipette. Likely has a rechargeable battery and a digital display (lying sideways FYI). 9. Multi-channel pipette on computer screen. Not an especially safe place to keep the device! Two trays of 96 wells are apparently being loaded by a device being held by a technician just to the left of the image. See point 5 above. The previous lab protocol can be reproduced for educational purposes only. It has been developed by Jim Wolf and/or those individuals or agencies mentioned in the references (when present). Jim Wolf can be reached @ 661-362-3092 or emailing him @ [email protected]