class 5 coverall core 4 products, tools and cleaning tasks training/volume... · class 5 coverall...
TRANSCRIPT

45
In This Section
Introduction to the Core 4® Process
Hospital-Grade Disinfectants
Color-Coded Microfiber
No-Dip Microfiber Flat Mopping System
HEPA Backpack Vacuum
Cleaning Tasks and Coverall Service Plans
Carpet and Floor Care Tasks
Trash Removal
Other Cleaning Equipment in Starter Kit
CLASS 5
Coverall Core 4® Products, Tools and Cleaning Tasks
Version: 02.16.15
This material is proprietary data developed and owned by Coverall North America, Inc., and this Coverall Franchised Business Training material is strictly limited to current authorized Coverall employees and active Coverall Franchised Businesses. Unauthorized access to or use of this material is strictly prohibited. Coverall North America, Inc. will prosecute to the fullest extent permitted by law any unauthorized access to or use of this material and will seek injunctive and/or civil monetary damages.


47© 2015 Coverall North America, Inc. Confidential information.FRANCHISE OWNER OPERATIONS TRAINING MANUAL - VOLUME 2FS-FOOTM-1211_IntVer0215
CORE 4® PROCESS TRAINING
Introduction to the Core 4® Process
The Coverall® Program is based on the correct use of 4 core tools:
Hospital-grade Disinfectants
Color-coded Microfiber
No-dip Microfiber Flat Mopping System
HEPA Backpack Vacuum
WHY THESE 4 TOOLS?
When we developed the Coverall® Program, we set 3 goals:
1. CLEAN. Remove the most soil (dirt) possible.
2. DISINFECT. Kill and remove the most germs possible.
3. BE EFFICIENT. Create a process that delivers excellent results as efficiently as possible.
Each tool in the Coverall® Program meets these 3 goals. The Coverall Team evaluates the latest tools and cleaning technologies to ensure it includes use of the best of the best.

48© 2015 Coverall North America, Inc. Confidential information.
FRANCHISE OWNER OPERATIONS TRAINING MANUAL - VOLUME 2FS-FOOTM-1211_IntVer0215
CORE 4® PROCESS TRAINING
Introduction to the Core 4® Process
Happy Customers are Your Business!
The Core 4® separates your business from others. It makes your business valuable because you provide your customers with a cleaner, healthier workplace while most “janitors” do not.
When your customers choose the Coverall® System as their cleaning service, they expect a cleaning program that helps reduce the risk of illness and infection while creating an exceptionally clean facility. Through consistent use of the Core 4® Process, you will be prepared to deliver on that promise and create happy customers.
What your customers expect: How the Core 4® helps:
Less dust and soil
Cleaner carpets
HEPA Backpack Vacuum captures up to 99.97% of airborne particles, reducing dust and improving air quality.
No spreading of germsHospital-grade disinfectants kill germs, and color-coded microfiber removes 99% of contaminants and helps reduce cross-contamination by using a specific color microfiber towel for each specific area.
Cleaner floorsNo-dip microfiber flat mop means that floors are never mopped with filthy water, and that a specific color mop pad is used for each specific area to avoid spreading germs.
Cleaner restroomsCore 4® Process kills and removes germs, cleans floors and reduces odor-causing bacteria.
Are the Core 4® Tools in the Coverall Starter Kit?
The Coverall Initial Equipment and Supplies Package, often called the “Starter Kit,” includes the Core 4 tools, as well as other tools and safety items commonly used in commercial cleaning.
Coverall National Vendor Program
Coverall has relationships with industry-leading suppliers and negotiates national pricing, so we can offer professional equipment and supplies to you at a competitive cost.
Your Coverall Support Center stocks many products and equipment for you to try and buy. In addition to the Core 4, Coverall offers floor and carpet care equipment, safety products and other tools, as well as quarterly equipment specials and vendor demonstrations.

49© 2015 Coverall North America, Inc. Confidential information.FRANCHISE OWNER OPERATIONS TRAINING MANUAL - VOLUME 2FS-FOOTM-1211_IntVer0215
CORE 4® PROCESS TRAINING
Introduction to the Core 4® Process
What are the Cleaning Tasks?
Cleaning tasks are the actions that you will take to clean a customer’s facility. The following are examples of cleaning tasks:
Damp dust and disinfect
High and low dusting
Clean and disinfect high touch points
Clean internal glass or mirrors
Clean microwave(s)
Wall-to-wall vacuum carpet
Damp mop hard surface floors
Empty cans and remove trash
Clean and disinfect restrooms
Each of these tasks uses one or more of the Core 4 tools. For example, to “damp dust and disinfect,” you will use a hospital-grade disinfectant and color-coded microfiber. For “high and low dusting,” you will use your HEPA backpack vacuum with a brush attachment. To “clean internal glass or mirrors” you will use glass cleaner and your squeegee or Unger SpeedCleanTM Kit. To “clean and disinfect restrooms,” you will use all of the Core 4 tools.
In this training program you will learn the Core 4 tools and how to correctly use them together for each cleaning task.
What is a Coverall Service Plan?
A Coverall Service Plan is a schedule of cleaning tasks, or “work specifications,” you will need to complete for each customer. When you walk through a customer’s facility, Coverall will provide you with the customer’s Service Plan, so you understand the customer’s expectation and how to properly clean their facility using the Core 4® Process.
Is Every Customer’s Service Plan the Same?
No. They are based on what the customer wants done in their facility (cleaning tasks) and how often they want it cleaned (frequency). For example, most office buildings need a standard set of cleaning tasks, but customers such as daycares, dentist operatories, dialysis centers, car dealerships, restaurants and fitness facilities might need some extra cleaning tasks.

50© 2015 Coverall North America, Inc. Confidential information.
FRANCHISE OWNER OPERATIONS TRAINING MANUAL - VOLUME 2FS-FOOTM-1211_IntVer0215
CORE 4® PROCESS TRAINING
Introduction to the Core 4® Process
Who Decides What is on the Service Plan?
A Coverall salesperson, or you (if you sell your own accounts), will talk with the customer to understand their “pain points” (what bothers them about their current cleaning program). Using that information you or the salesperson will propose a Service Plan to meet their needs. This Service Plan is part of your proposal to the customer. When the customer accepts the Service Plan and signs a Franchise Owner Service Agreement, then the next task is to clean their facility as they expect it to be cleaned.
Sample Coverall Service Plan:
Dusting and Disinfecting
Included Tasks Frequency
Detail Dust and Clean 3x per week
High Touch Points 1x per week
Spot Clean Internal Glass 3x per week
High and Low Dusting 1x per month
Carpet and Floor Care
Included Tasks Frequency
Wall-to-Wall Vacuum 1x per week
Spot Vacuum High Traffic Areas 2x per week
Damp Mop Hard Surface Floors 3x per week
Restrooms
Included Tasks Frequency
Clean and Disinfect Restrooms 3x per week
Trash and Miscellaneous
Included Tasks Frequency
Empty Cans and Remove Trash 3x per week
Clean and Disinfect Telephones 1x per week

51© 2015 Coverall North America, Inc. Confidential information.FRANCHISE OWNER OPERATIONS TRAINING MANUAL - VOLUME 2FS-FOOTM-1211_IntVer0215
CORE 4® PROCESS TRAINING
Coverall Core 4®: Hospital Grade Disinfectants
People use different cleaning products for different purposes in their homes. For example, you might use one product to dust, another to wash the floor, and another to clean toilets. The same is true with commercial cleaning, except the cleaning products in the Core 4 were intended to be used by trained professionals. The hospital-grade disinfectants you will use are stronger than home-cleaning products, because they kill more kinds of germs.
What Does “Disinfect” Mean?
“Disinfect” means to kill germs. Different disinfectants kill different kinds of germs.
“Disinfecting” is different than “cleaning,” “sanitizing” or “deodorizing.”
Disinfect = kill germs
Clean = remove soil
Sanitize = reduce bacteria, but not viruses, fungus or mold
Deodorize = get rid of odors (unpleasant smells)
What Makes a Disinfectant “Hospital-Grade”?
According to the Environmental Protection Agency (EPA) a hospital-grade disinfectant kills three specific types of germs and is effective against a variety of viruses and bacteria as required by hospital and healthcare facilities.
Staph
Pseudomonas
Salmonella
Different Kinds of Disinfectants
There are several kinds of disinfectants used in cleaning products. “Quats” are common in the commercial cleaning industry. Coverall recommends Accelerated Hydrogen Peroxide (AHP) because it is most effective at removing germs in combination with microfiber.
AHP (ACCELERATED HYDROGEN PEROXIDE)
• Stronger and more stable than household hydrogen peroxide
• Often used to clean higher risk areas in healthcare facilities
• Faster “dwell time” (time it takes to kill germs)
• Broader kill claim (the number of germs it kills)
• Not corrosive
• Does not bind to microfiber towels or cotton cloths (no Quat Binding)

52© 2015 Coverall North America, Inc. Confidential information.
FRANCHISE OWNER OPERATIONS TRAINING MANUAL - VOLUME 2FS-FOOTM-1211_IntVer0215
CORE 4® PROCESS TRAINING
Coverall Core 4®: Hospital Grade Disinfectants
QUATS (QUATERNARY COMPOUNDS)
• The most common disinfectant used for general facilities
• Used on non-critical surfaces such as clean floors, furniture, and walls
• Fast “dwell time” (time it takes to kill germs)
• Broad kill claim (the number of germs it kills)
• Not corrosive
• Bind to microfiber towels and cotton cloths (Quat Binding), reducing the chemical strength
What About Bleach?
We do not use bleach in the Coverall program. While it is a disinfectant, it does not clean soil, so it must be used with another cleaning product. Bleach is corrosive (damaging) and can remove color, dull floor finish, and damage hard surfaces. Also, mixing bleach with other chemicals can produce a gas that is toxic (poisonous) to humans.
Cheap to use
Disinfects but does not clean
Reacts with other chemicals to create poisonous gases
Emit unpleasant odors
Damages hard surfaces
Discolors fibers and colored surfaces
Damages floor finishes
Loses its chemical strength quickly
53© 2015 Coverall North America, Inc. Confidential information.FRANCHISE OWNER OPERATIONS TRAINING MANUAL - VOLUME 2FS-FOOTM-1211_IntVer0215
CORE 4® PROCESS TRAINING
Coverall Core 4®: Hospital Grade Disinfectants
Buying Hospital-Grade Disinfectants
Your Coverall Support Center stocks hospital-grade disinfectants approved for use in the Coverall program. You can also buy disinfectants on your own, but you must get them approved by your Support Center before you use them with your customers. Give the product name, manufacturer and your intended use of the product to your Support Center for approval.
If you decide to buy disinfectants on your own, then follow these general criteria to select a product. Depending on your intended use, other criteria may apply.
EPA-registered hospital-grade disinfectant
Broad kill claim as required by healthcare facilities
Compatible with microfiber cleaning tools
Excellent cleaning performance
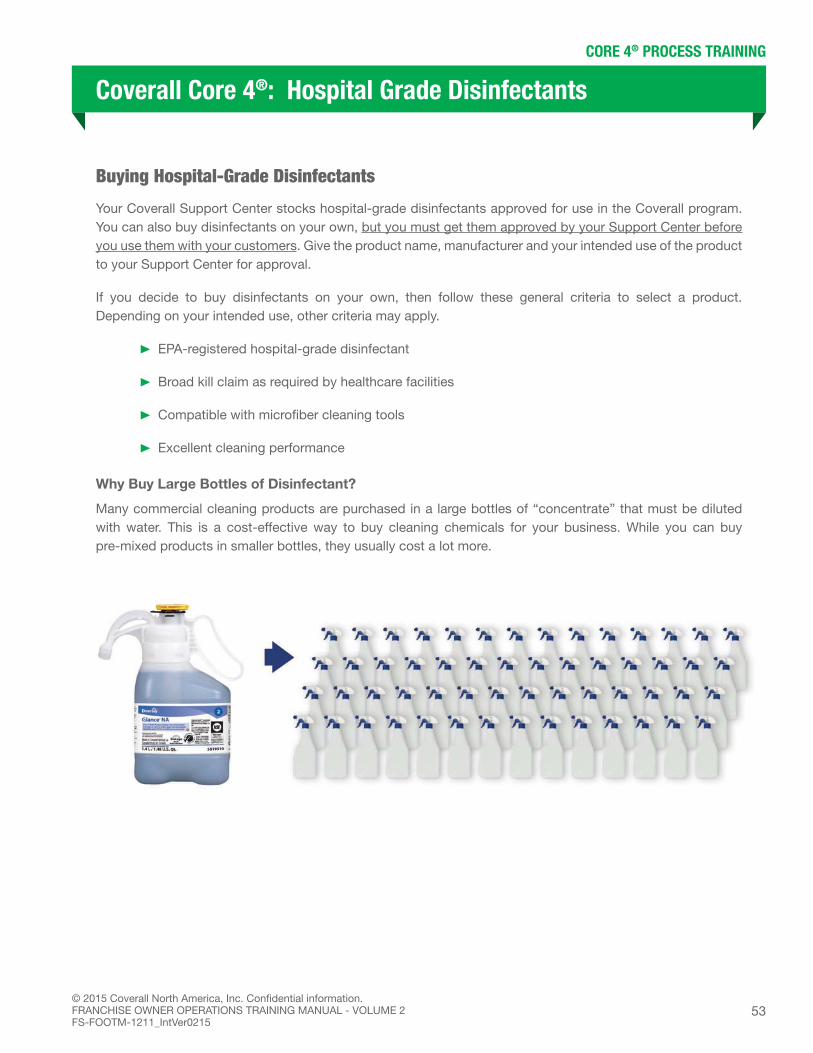
Why Buy Large Bottles of Disinfectant?
Many commercial cleaning products are purchased in a large bottles of “concentrate” that must be diluted with water. This is a cost-effective way to buy cleaning chemicals for your business. While you can buy pre-mixed products in smaller bottles, they usually cost a lot more.

54© 2015 Coverall North America, Inc. Confidential information.
FRANCHISE OWNER OPERATIONS TRAINING MANUAL - VOLUME 2FS-FOOTM-1211_IntVer0215
CORE 4® PROCESS TRAINING
Coverall Core 4®: Hospital Grade Disinfectants
Diluting Disinfectants
Concentrated disinfectants must be diluted (mixed with water) before you can use them. If you use a concentrated disinfectant without diluting it, the chemical will be too strong and could damage the surface you are cleaning. If you mix it with too much water, the chemical will become too weak and might not kill germs.
Before You Dilute, Learn Chemical Safety
Every disinfectant has dilution instructions on the label that tell you how to use it safely. These instructions are also found on Safety Data Sheet (SDS) and are required by the U.S. Environmental Protection Agency (EPA). You need a copy of the SDS for every chemical you use.
What to do when handling chemicals:
Read the SDS before use.
Wear chemical-resistant gloves.
Wear eye protection. If you get chemical in your eye, follow the instructions on the SDS or label of the chemical container.
Work with chemicals on a flat surface.
Work in a ventilated area (fresh or circulated air; not in a small, closed space).
Measure all chemicals before diluting them.
Dilute chemicals and water in the exact order stated on the SDS.
Put the cap back on bottles immediately after using them.
Run clear water through a drain if you dump disinfectants down it.
What NOT to do when handling chemicals:
Do NOT mix cleaning products together.
Do NOT mix bleach with anything. It can create a poisonous gas.
Do NOT leave children unsupervised around cleaning products.
Do NOT store disinfectant cleaning products in your vehicle.

55© 2015 Coverall North America, Inc. Confidential information.FRANCHISE OWNER OPERATIONS TRAINING MANUAL - VOLUME 2FS-FOOTM-1211_IntVer0215
CORE 4® PROCESS TRAINING
Coverall Core 4®: Hospital Grade Disinfectants
Diluting Disinfectants
The instructions on each bottle of concentrate tell you how to dilute it. Dilutions are shown as two numbers separated by a colon (:). The first number is how many parts of concentrate to use, and the second number is how many parts of water to use.
Common dilution ratios
1:256 Half ounce disinfectant to Gallon water
1:128 1 ounce disinfectant to Gallon water
1:64 2 ounces disinfectant to Gallon water
1:32 4 ounces disinfectant to Gallon water
The bigger the second number, the weaker the mix, because it has less disinfectant and more water. For example, a 1:64 dilution is stronger than a 1:256 dilution.
Dilutions Made Easy
A pump dispenser is a useful tool for dilutions. Pull the pump up to the correct line to get the amount of concentrate you need, then push the pump down to get the concentrate into your bucket, buddy jug or spray bottle. Wash the dispenser after use.
Some bottles of concentrate have a pump dispenser built in.

56© 2015 Coverall North America, Inc. Confidential information.
FRANCHISE OWNER OPERATIONS TRAINING MANUAL - VOLUME 2FS-FOOTM-1211_IntVer0215
CORE 4® PROCESS TRAINING
Coverall Core 4®: Hospital Grade Disinfectants
Label Bottles Correctly
When you make a dilution, you must label it right away. OSHA requires you to correctly label the bottle or you could be charged a fine. Do NOT use a bottle that doesn’t have a label on it, even if you think you know what’s in it. If there’s no label, don’t use it!
OSHA requires you to put the PRODUCT NAME, the HAZARDOUS CHEMICALS it contains, and words or pictures that show the KEY HAZARDS. This information can be found on the chemical’s container or on the Safety Data Sheet (SDS).
Buckets – You do NOT have to label a bucket of disinfectant and water that you will use immediately. However, you need to get rid of whatever you don’t use. You cannot save it and use it later. Tip: if you have solution left in your bucket, then pour it down restroom floor drains once a week to prevent potential sewer gas odors in the restroom. Otherwise, pour it down the janitor’s closet wash drain or other designated drain.
Bottles – You must label all spray bottles whether you use the mix immediately or not.
Where to Get Labels
The manufacturer usually provides label stickers for spray bottles. If you need label stickers or empty spray bottles, you may order them from your Support Center or Coverall-approved supplier. Note you can put a manufacturer’s label sticker on a spray bottle and use the same bottle again for the same cleaning product, but not for other cleaning products. Use a correctly labeled spray bottle for each cleaning product.
Hand-Written Label
If no printed labels are available, you can hand write a label on the bottle. Below is the basic information you would have to write on the label (more is better):
Name of disinfectant
Dilution ratio
Chemicals it contains
Hazards of the disinfectant
57© 2015 Coverall North America, Inc. Confidential information.FRANCHISE OWNER OPERATIONS TRAINING MANUAL - VOLUME 2FS-FOOTM-1211_IntVer0215
PRACTICE EXERCISE
Disinfectants
EXERCISE #1
Read a Safety Data Sheet (SDS)
Your Coverall instructor will give you a sample SDS. Discuss the following:
• Product name
• Type of Personal Protective Equipment (PPE) needed
• Recommended use
• Types of hazards it can cause
• How and where to store the product

58© 2015 Coverall North America, Inc. Confidential information.
FRANCHISE OWNER OPERATIONS TRAINING MANUAL - VOLUME 2FS-FOOTM-1211_IntVer0215
EXERCISE #2
Compare the cost
Concentrated disinfectant costs less than buying smaller bottles. Calculate the cost per
quart for the following:
• Glance
– $19.16 per container
– Makes 60 quarts
– $______________________ per quart (19.16 ÷ 60)
• Crew Heavy Duty
– $26.79 per container
– Makes 190 quarts
– $______________________ per quart (26.79 ÷ 190)
• Stride
– $24.99 per container
– Makes 277 gallons
– $______________________ per quart (24.99 ÷ 277)
PRACTICE EXERCISE continued
59© 2015 Coverall North America, Inc. Confidential information.FRANCHISE OWNER OPERATIONS TRAINING MANUAL - VOLUME 2FS-FOOTM-1211_IntVer0215
EXERCISE #3
Common dilution ratios
Fill in the missing information in the chart below.
Common dilution ratios
1:256 _____ ounce disinfectant to Gallon water
1:128 _____ ounce disinfectant to Gallon water
1:64 _____ ounces disinfectant to Gallon water
1:32 _____ ounces disinfectant to Gallon water
Which diluted disinfectant is strongest? Why?
• 1:256
• 1:128
• 1:64
• 1:32
EXERCISE #4
Dilute disinfectants
When you dilute a disinfectant, you 1) determine the ratio, 2) add concentrate, and 3) add
water. Your instructor will give you a disinfectant to dilute in the following containers:
• Bottle
• Solution bin
• Bucket
PRACTICE EXERCISE continued

60© 2015 Coverall North America, Inc. Confidential information.
FRANCHISE OWNER OPERATIONS TRAINING MANUAL - VOLUME 2FS-FOOTM-1211_IntVer0215
EXERCISE #5
Hand-write a label
All bottles must be properly labeled. If you do not have a pre-printed label, you can
hand-write one. Create a label for one of the disinfectants used in EXERCISE #4.
Use this template:
Name of disinfectant:
_________________________________________________________
Dilution radio: _________:____________________
Chemicals it contains:
_________________________________________________________
_________________________________________________________
Hazards:
_________________________________________________________
_________________________________________________________
PRACTICE EXERCISE continued

61© 2015 Coverall North America, Inc. Confidential information.FRANCHISE OWNER OPERATIONS TRAINING MANUAL - VOLUME 2FS-FOOTM-1211_IntVer0215
REVIEW
Disinfectants
1. “Disinfect” means to kill ___________________.
2. According to the Environmental Protection Agency (EPA) a hospital-grade disinfectant
kills ____________ (how many?) specific types of germs as required by hospital and
healthcare facilities.
3. Coverall recommends Accelerated _________________________ Peroxide (AHP),
because it is most effective at removing germs in combination with microfiber.
4. We do not use _________________________ in the Coverall Program. While it is a
disinfectant, it does not clean soil, so it must be used with another cleaning product.
5. You can also buy disinfectants on your own, but you must get them
_________________________ by your Support Center before you use them
with your customers.
6. Do NOT store disinfectant cleaning products in your _________________________.
7. If you use a concentrated disinfectant without diluting it, the chemical will be too
_________________________ and could damage the surface you are cleaning. If you mix
it with too much water, the chemical will become too _________________________ and
might not kill germs.

62© 2015 Coverall North America, Inc. Confidential information.
FRANCHISE OWNER OPERATIONS TRAINING MANUAL - VOLUME 2FS-FOOTM-1211_IntVer0215
REVIEW continued
8. Every disinfectant has instructions that tell you how to use it safely. These instructions
are called ___________________________ ___________________________Sheets (SDS).
9. Dilutions are shown as two numbers separated by a colon (:). The first number is how
many parts of _____________________________ to use, and the second number is how
many parts of _____________________________ to use.
10. A 1:64 dilution is _________________________ (stronger or weaker?) than a
1:256 dilution.
11. TRUE or FALSE: You do NOT have to label a bucket of disinfectant and water that you
will use immediately. However, you need to get rid of whatever you don’t use.
12. TRUE or FALSE: You must label all spray bottles whether you use the mix immediately
or not.
Answers: 1) germs 2) 3 3) Hydrogen 4) bleach 5) approved 6) vehicle – car, truck 7) strong, weak 8) Safety Data 9) concentrate, water 10) stronger 11) True 12) True.
63© 2015 Coverall North America, Inc. Confidential information.FRANCHISE OWNER OPERATIONS TRAINING MANUAL - VOLUME 2FS-FOOTM-1211_IntVer0215
CORE 4® PROCESS TRAINING
Coverall Core 4®: Color-Coded Microfiber
Microfiber towels might look like regular towels, but they’re not. If you looked at them closely with a microscope, you’d see channels that are hundreds of times smaller than a strand of hair. Those tiny channels have the amazing ability to grab and hold a lot of dirt, germs and water.
Paper towels and cloth rags cannot clean as well as microfiber because they push most of the soil instead of grabbing and holding it, leaving dirt and germs behind.
Paper towels also are thrown away after use, while microfiber towels can be washed and reused hundreds of times making them environmentally friendly.
Types of Microfiber
There are many kinds of microfiber. The professional microfiber approved by Coverall has loops that are split in the manufacturing process. These splits, or channels, are electrically charged so they grab and hold more dirt and germs.
Microfiber is available in many colors. The Coverall Color-Coding for Health® Method uses specific colors for specific cleaning tasks.
Some microfiber is thicker than others. The thickness is measured in grams per square meter (GSM). The heavier the GSM the more durable and softer the microfiber and better its cleaning power.
Buying Microfiber
Your Coverall Support Center stocks color-coded microfiber towels approved for use in the Coverall Program. You can also buy microfiber on your own, but you must get it approved by your Support Center before you use it with your customers. Give the product name, manufacturer and your intended use of the product to your Support Center for approval.
If you decide to buy microfiber on your own, then follow these general criteria to select a product. Depending on your intended use, other criteria may apply.
100% microfiber (80% polyester and 20% polyamide)
Thickness/weight of at least 285 GSM
Color-coded
16" towel (minimum)
18" floor pad (minimum)
64© 2015 Coverall North America, Inc. Confidential information.
FRANCHISE OWNER OPERATIONS TRAINING MANUAL - VOLUME 2FS-FOOTM-1211_IntVer0215
CORE 4® PROCESS TRAINING
Coverall Core 4®: Color-Coded Microfiber
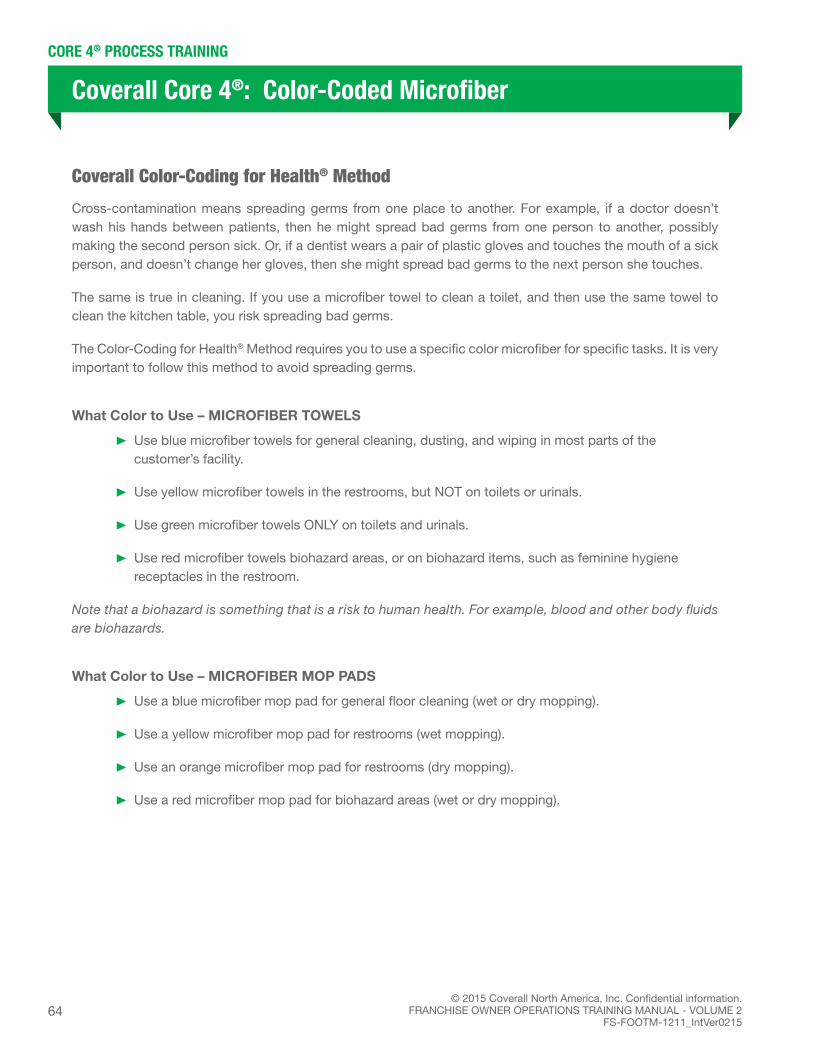
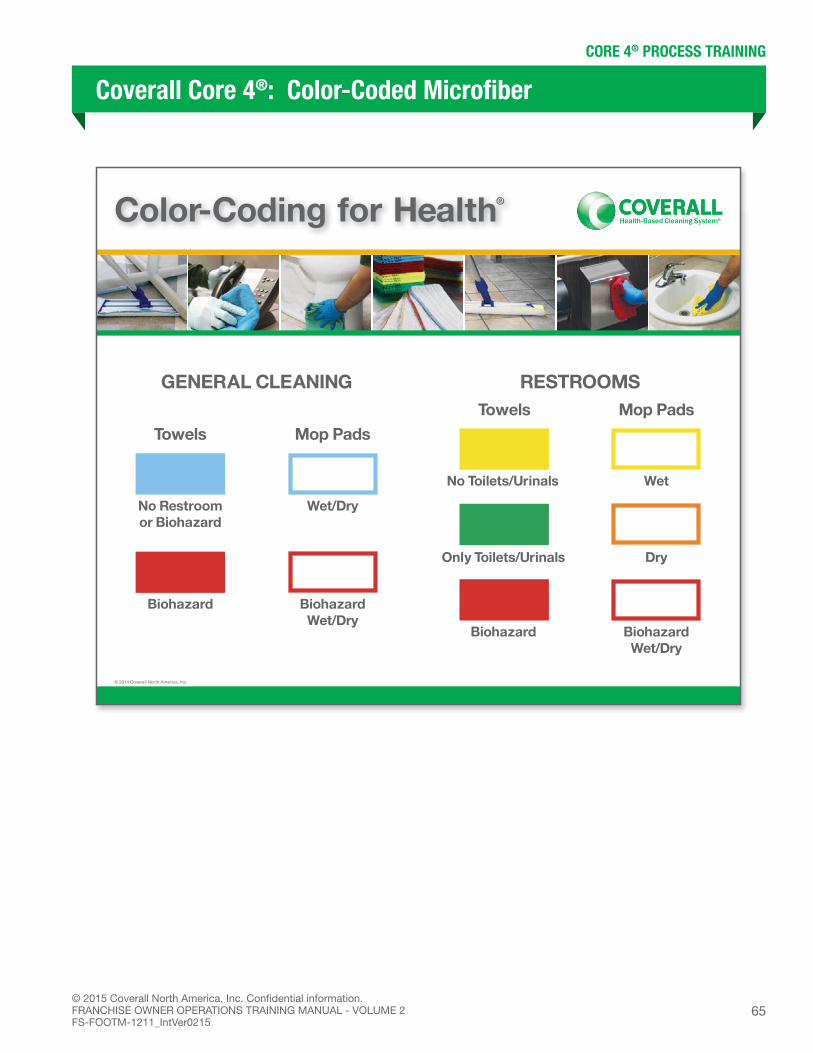
Coverall Color-Coding for Health® Method
Cross-contamination means spreading germs from one place to another. For example, if a doctor doesn’t wash his hands between patients, then he might spread bad germs from one person to another, possibly making the second person sick. Or, if a dentist wears a pair of plastic gloves and touches the mouth of a sick person, and doesn’t change her gloves, then she might spread bad germs to the next person she touches.
The same is true in cleaning. If you use a microfiber towel to clean a toilet, and then use the same towel to clean the kitchen table, you risk spreading bad germs.
The Color-Coding for Health® Method requires you to use a specific color microfiber for specific tasks. It is very important to follow this method to avoid spreading germs.
What Color to Use – MICROFIBER TOWELS
Use blue microfiber towels for general cleaning, dusting, and wiping in most parts of the customer’s facility.
Use yellow microfiber towels in the restrooms, but NOT on toilets or urinals.
Use green microfiber towels ONLY on toilets and urinals.
Use red microfiber towels biohazard areas, or on biohazard items, such as feminine hygiene receptacles in the restroom.
Note that a biohazard is something that is a risk to human health. For example, blood and other body fluids are biohazards.
What Color to Use – MICROFIBER MOP PADS
Use a blue microfiber mop pad for general floor cleaning (wet or dry mopping).
Use a yellow microfiber mop pad for restrooms (wet mopping).
Use an orange microfiber mop pad for restrooms (dry mopping).
Use a red microfiber mop pad for biohazard areas (wet or dry mopping).
65© 2015 Coverall North America, Inc. Confidential information.FRANCHISE OWNER OPERATIONS TRAINING MANUAL - VOLUME 2FS-FOOTM-1211_IntVer0215
CORE 4® PROCESS TRAINING
Coverall Core 4®: Color-Coded Microfiber
Color-Coding for Health®
GENERAL CLEANING RESTROOMS
Towels
No Restroom or Biohazard
Biohazard
Mop Pads
Wet/Dry
Biohazard Wet/Dry
Towels Mop Pads
No Toilets/Urinals Wet
Only Toilets/Urinals Dry
Biohazard Biohazard Wet/Dry
© 2014 Coverall North America, Inc.

66© 2015 Coverall North America, Inc. Confidential information.
FRANCHISE OWNER OPERATIONS TRAINING MANUAL - VOLUME 2FS-FOOTM-1211_IntVer0215
CORE 4® PROCESS TRAINING
Coverall Core 4®: Color-Coded Microfiber
Using a Microfiber Towel – Fold and Flip
The microfiber towels recommended for use in the Coverall Program can be folded and used 8 times. One side has 1 thru 4 on it, and the other side has 5 thru 8. To use the towel correctly, fold it so “1” is showing and then begin cleaning. When “1” is dirty, flip the towel and fold it so “2” is showing. Continue folding and flipping until you have used all 8 sides. This method helps you get the most use from each microfiber towel.

67© 2015 Coverall North America, Inc. Confidential information.FRANCHISE OWNER OPERATIONS TRAINING MANUAL - VOLUME 2FS-FOOTM-1211_IntVer0215
CORE 4® PROCESS TRAINING
Coverall Core 4®: Color-Coded Microfiber
What To Do With Soiled (Dirty) Microfiber
Use a trash bag (liner) as your “soil bag” for microfiber. Put dirty microfiber towels and mop pads into your soil bag immediately when they are soiled.
It’s okay to put all colors of soiled microfiber into the same soil bag. You do not need a separate soil bag for red microfiber.
Do NOT re-use soiled towels or mop pads until washed. Once the dirty towels are in your soil bag, they are cross-contaminated. The germs have spread.
How to Wash Microfiber
Wash soiled microfiber separate from other laundry. Do NOT wash with other laundry, especially cotton or other cloth rags and towels.
If very soiled, soak microfiber in a general-purpose hospital-grade disinfectant for 30 minutes before washing.
Use mild laundry detergent, such as OxyClean, for best whitening results on mop pads. Do NOT use bleach, as it will degrade the microfiber’s channels.
Use warm water. Do NOT use hot water.
Wash on a high-speed spin cycle for 15 minutes at 180°F.
How to Dry Microfiber
Do NOT use heat. Use “Air Dry” setting. This is VERY important! Heat destroys the fibers.
If the fibers get destroyed or worn down, they can’t hold as much water and soil, and you’ll have to replace your microfiber sooner.
Do NOT use fabric softener or dryer sheets. They clog the fibers so they can’t hold as much water and soil.
Wash your hands before you take microfiber out of the dryer, so you don’t get harmful germs on them.

68© 2015 Coverall North America, Inc. Confidential information.
FRANCHISE OWNER OPERATIONS TRAINING MANUAL - VOLUME 2FS-FOOTM-1211_IntVer0215
Microfiber Towel
EXERCISE #1
Fold a Kaivac SmartTowelTM
Practice folding and flipping a SmartTowel.
• Fold the towel so side 1 is showing.
• Flip it over to side 2.
• Repeat for sides 3 through 8.
EXERCISE #2
Use a microfiber towel
• Spray disinfectant onto a paper towel and clean several surfaces with it. How did it work? Was it easy to use?
• Spray disinfectant onto side 1 of a blue microfiber towel.
• Wipe a flat surface (desk, table, shelf, etc.) by wiping the shape of a box and filling it in.
• Wipe other surfaces as directed by your instructor.
PRACTICE EXERCISE

69© 2015 Coverall North America, Inc. Confidential information.FRANCHISE OWNER OPERATIONS TRAINING MANUAL - VOLUME 2FS-FOOTM-1211_IntVer0215
Color-Coded Microfiber
1. ________________________ towels and cloth rags cannot clean as well as microfiber,
because they push most of the soil instead of grabbing and holding it, leaving dirt and
germs behind.
2. The professional microfiber approved by Coverall has loops that are split in the
manufacturing process. These splits, or channels, are ________________________
charged so they grab and hold more dirt and germs.
3. Your Coverall Support Center stocks color-coded microfiber towels approved for use
in the Coverall program. You can also buy microfiber on your own, but you must get it
______________________ by your Support Center before you use it with your customers.
4. Cross-________________________ means spreading germs from one place to another.
5. Use ________________________ microfiber towels for general cleaning, dusting, and
wiping in most parts of the customer’s facility.
6. Use ________________________ microfiber towels in the restrooms, but NOT on toilets
or urinals.
7. Use ________________________ microfiber towels ONLY on toilets and urinals.
REVIEW

REVIEW continued
70© 2015 Coverall North America, Inc. Confidential information.
FRANCHISE OWNER OPERATIONS TRAINING MANUAL - VOLUME 2FS-FOOTM-1211_IntVer0215
8. Use ________________________ microfiber towels biohazard areas, or on biohazard
items, such as feminine hygiene receptacles in the restroom.
9. Put dirty microfiber towels and mop pads into your ________________________ bag
immediately when they are soiled.
10. Once the dirty towels are in your soil bag, they are cross-contaminated. The
________________________ have spread.
11. When washing microfiber, use mild laundry detergent and warm water. Do NOT use
________________________ or ________________________ water.
12. When drying microfiber, do NOT use ________________________.
Answers: 1) Paper 2) electrically 3) approved 4) contamination 5) blue 6) yellow 7) green 8) red 9) soiled 10) germs 11) bleach, hot 12) heat.

71© 2015 Coverall North America, Inc. Confidential information.FRANCHISE OWNER OPERATIONS TRAINING MANUAL - VOLUME 2FS-FOOTM-1211_IntVer0215
CORE 4® PROCESS TRAINING
Coverall Core 4®: No-Dip Microfiber Flat Mopping System
The Coverall Core 4® process uses a no-dip flat mopping system:
No Dip means that the mop is never dipped in a bucket. The bucket dispenses clean solution onto the floor. The water does not get dirty.
Microfiber reduces the number of bacteria by 99%; other cloths reduce germs by only 33%.
Where is a Mop Used?
A mop is used on hard surface floors, and it can be used to clean baseboards, walls and other surfaces. Common types of hard surface floors include:
Vinyl – most common
Ceramic
Granite
Linoleum
Marble
Concrete
You will learn more about hard surface floors in the Introduction to Special Services.

72© 2015 Coverall North America, Inc. Confidential information.
FRANCHISE OWNER OPERATIONS TRAINING MANUAL - VOLUME 2FS-FOOTM-1211_IntVer0215
CORE 4® PROCESS TRAINING
Coverall Core 4®: No-Dip Microfiber Flat Mopping System
Why is No-Dip Important?
If a mop is used on a floor, then dipped into a bucket, all of the germs and soil from the floor are carried into the bucket. Cross-contamination occurs when the germs are spread around the floor and from room to room. Imagine if germs were spread from the restroom to the kitchen?
Coverall’s No-Dip Flat Mopping System ensures the mop is never dipped into dirty water. Instead, the bucket has a spigot that dispenses clean solution onto the floor, and the mop is used to wipe the solution from the floor. This significantly reduces cross-contamination.
No-Dip Mopping System Vs. String Mops
String mops and other old-fashioned mops that are dipped into dirty water buckets spread germs and fail to get the floor clean.
Cotton mops only remove 30% of soil and germs.
String mops and other old-fashioned mops are heavier than a No-Dip Flat Mop.
The handle on a No-Dip Flat Mop is ergonomic, which means it is easier on your body.
String mops and other old-fashioned mops make it difficult to clean in corners. The No-Dip Flat Mop head swivels 360 degrees and has edges that help you get into corners and tight areas.
You can clean about 3,200 square feet per hour with a string mop and about 7,000 square feet per hour with a No-Dip Flat Mop, which means you get more cleaning done in less time.
NO-DIP MOPPING SYSTEM VS. STRING MOP COMPARISON
String mop, bucket and wringer
No-Dip microfiber flat mop with self-dispensing bucket
Production Rate:
3,200square feet per hour
Production Rate:
7,000square feet per hour
73© 2015 Coverall North America, Inc. Confidential information.FRANCHISE OWNER OPERATIONS TRAINING MANUAL - VOLUME 2FS-FOOTM-1211_IntVer0215
CORE 4® PROCESS TRAINING
Coverall Core 4®: No-Dip Microfiber Flat Mopping System
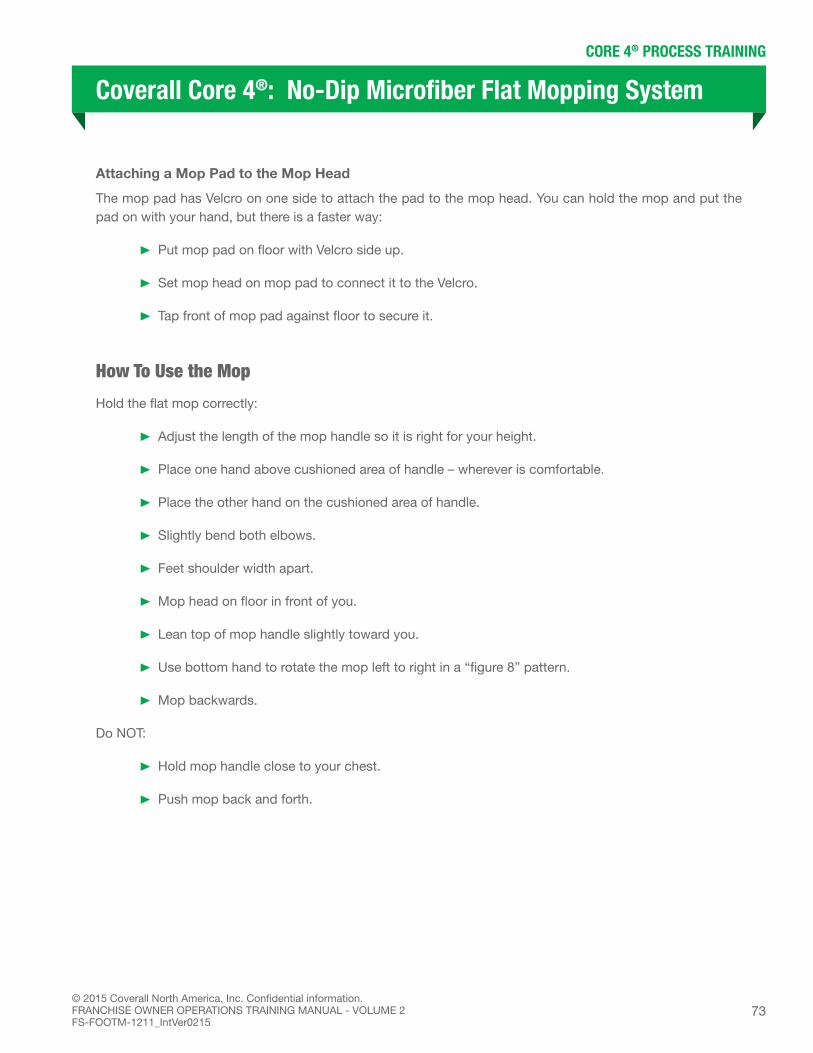
Attaching a Mop Pad to the Mop Head
The mop pad has Velcro on one side to attach the pad to the mop head. You can hold the mop and put the pad on with your hand, but there is a faster way:
Put mop pad on floor with Velcro side up.
Set mop head on mop pad to connect it to the Velcro.
Tap front of mop pad against floor to secure it.
How To Use the Mop
Hold the flat mop correctly:
Adjust the length of the mop handle so it is right for your height.
Place one hand above cushioned area of handle – wherever is comfortable.
Place the other hand on the cushioned area of handle.
Slightly bend both elbows.
Feet shoulder width apart.
Mop head on floor in front of you.
Lean top of mop handle slightly toward you.
Use bottom hand to rotate the mop left to right in a “figure 8” pattern.
Mop backwards.
Do NOT:
Hold mop handle close to your chest.
Push mop back and forth.

74© 2015 Coverall North America, Inc. Confidential information.
FRANCHISE OWNER OPERATIONS TRAINING MANUAL - VOLUME 2FS-FOOTM-1211_IntVer0215
CORE 4® PROCESS TRAINING
Coverall Core 4®: No-Dip Microfiber Flat Mopping System
When is mop pad soiled (dirty)?
Mop pads have 4 parts or “channels.” When you mop, the 1st channel will get dirty first, then the 2nd, 3rd and 4th. When 3 channels are dirty, then it’s time to change your mop pad because it will not hold any more liquid or soil and will leave streaks on the floor.
Wet Mopping Using Beading Method
Use the beading method for areas larger than about 20 feet in length or width:
Put wet floor signs at beginning and end of area that will be wet.
Use line markers inside the bucket to add the right amount of water and disinfectant.
Start mopping at the back of the room and work your way to the front.
Put your bucket where you want to start mopping.
Open the spigot a little bit and immediately roll the bucket about 20 feet to get a stream or “bead” of solution on the floor.
Close the spigot.
Starting at the top of bead, mop through the bead of solution in a “figure 8” pattern.
Repeat until you finish mopping the entire bead.
Put another bead of solution next to the area you just mopped.
Repeat process until entire floor is mopped.
NOTES:
– If you make a puddle of solution on the floor instead of a bead, mop it up.
– To avoid streaks, change your mop pad when it is dirty or very wet.

75© 2015 Coverall North America, Inc. Confidential information.FRANCHISE OWNER OPERATIONS TRAINING MANUAL - VOLUME 2FS-FOOTM-1211_IntVer0215
CORE 4® PROCESS TRAINING
Coverall Core 4®: No-Dip Microfiber Flat Mopping System
Using the Bins to Pre-Moisten (Soak) Mop Pads
For smaller facilities, using pre-moistened pads or a tool such as a “speed mop” can be very productive. Use the bins on your bucket to store supplies or to pre-moisten mop pads.
Put wet floor signs at beginning and end of area that will be wet.
Fold each mop pad in half and place it in the bin.
Pour diluted disinfectant (using ratio on label) into the bin.
Allow mop pads to soak up the solution.
When ready to mop, get pre-moistened mop pad from solution bin and wring it out.
Attach mop pad to mop head.
Start mopping at the back of the room and work your way to the front.
Mop in a “figure 8” pattern. Walk backwards.
Spot Mopping
Spot mopping means clean spills, scuffs or other dirt on days when you do not mop the entire floor.
Put wet floor signs at beginning and end of area that will be wet.
Use pre-moistened mop pad.
Mop in a “figure 8” pattern. Walk backwards.
Dry (or Dust) Mopping
You will need to dry (dust) mop before damp mopping a floor.
Use lobby broom and dust pan to pick up larger debris (garbage).
If floor is dry, then use HEPA backpack vacuum to dry (dust) mop the floor.
If floor is wet, then use a dry mop pad and your mop to dry (dust) mop the floor.

76© 2015 Coverall North America, Inc. Confidential information.
FRANCHISE OWNER OPERATIONS TRAINING MANUAL - VOLUME 2FS-FOOTM-1211_IntVer0215

77© 2015 Coverall North America, Inc. Confidential information.FRANCHISE OWNER OPERATIONS TRAINING MANUAL - VOLUME 2FS-FOOTM-1211_IntVer0215
Mop
EXERCISE #1
Adjust mop to your height
• Twist below the cushioned handle until it is loose.
• Lengthen or shorten the handle so it is at your chest level.
• Tighten to secure in place.
EXERCISE #2
Attach mop pad to mop head
Practice attaching the mop pad both ways:
• Floor
– Put mop pad face down on floor.
– Put mop head on mop pad.
– Tap mop pad against floor several times to secure.
• Hands
– Hold mop head in one hand.
– Put mop pad on mop head with the other hand.
– Press mop pad with hand to secure.
• Which method do you like better?
– Floor
– Hands
PRACTICE EXERCISE

78© 2015 Coverall North America, Inc. Confidential information.
FRANCHISE OWNER OPERATIONS TRAINING MANUAL - VOLUME 2FS-FOOTM-1211_IntVer0215
PRACTICE EXERCISE continued
EXERCISE #3
Mop using the beading method
Lay down a bead of solution along a hallway or floor.
• Put wet floor signs at beginning and end of area that will be wet.
• Add concentrate to the self-dispensing bucket.
• Add the correct amount of water.
• Start working at the back of the room and work your way to the front.
• Turn the spigot slightly and walk the bucket down the hallway or floor.
• After about 20 feet, close the spigot.
• Move the bucket off to the side.
Mop the bead of solution you just laid down.
• Start at the end of the beaded solution you just made.
• Mop in a “figure 8” pattern. Walk backwards.
• Keep making a figure 8 until the entire bead of solution is mopped up.
EXERCISE #4
Mop with pre-moisten pads
• Put mop pads into the solution bin.
• Add concentrate to the solution bin.
• Add the correct amount of water.
• Allow mop pads to soak up the solution.
• When ready to mop, get pre-moistened mop pad from solution bin and wring it out.
• Attach mop pad to mop head.
• Start mopping at the back of the room and work your way to the front.
• Mop in a “figure 8” pattern. Walk backwards.
79© 2015 Coverall North America, Inc. Confidential information.FRANCHISE OWNER OPERATIONS TRAINING MANUAL - VOLUME 2FS-FOOTM-1211_IntVer0215
REVIEW
No-Dip Flat Mopping System
1. No Dip means that the mop is never dipped in a bucket. The bucket
dispenses __________________ solution onto the floor. The water does not get
__________________.
2. You can clean about 3,200 square feet per hour with a string mop and about
__________________ square feet per hour with a No-Dip Flat Mop, which means you get
more cleaning done in less time.
3. The handle on a No-Dip Flat Mop is ergonomic which means it is __________________
on your body.
4. With the No-Dip Flat Mop, you can adjust the length of the mop __________________,
so it is right for your height.
5. The mop pad has __________________ on one side to attach the pad to the mop head.
6. Put wet floor signs at the __________________ and __________________ of the area that
will be wet.
7. When mopping, use your bottom hand to rotate the mop left to right in a figure
__________________ pattern.

REVIEW continued
80© 2015 Coverall North America, Inc. Confidential information.
FRANCHISE OWNER OPERATIONS TRAINING MANUAL - VOLUME 2FS-FOOTM-1211_IntVer0215
REVIEW continued
8. Use the __________________ method for areas larger than about 20 feet in length
or width.
9. Use the __________________ on your bucket to store supplies or to pre-moisten
mop pads.
Answers: 1) clean, dirty 2) 7000 3) easier 4) handle 5) Velcro 6) beginning, end 7) 8 8) beading 9) bins.
81© 2015 Coverall North America, Inc. Confidential information.FRANCHISE OWNER OPERATIONS TRAINING MANUAL - VOLUME 2FS-FOOTM-1211_IntVer0215
CORE 4® PROCESS TRAINING
Coverall Core 4®: HEPA Backpack Vacuum
The Coverall Core 4® process uses a HEPA backpack vacuum. Unlike a traditional upright vacuum or canister vacuum, you wear the vacuum on your back allowing you to move quickly with less strain on your body.
Where is a Vacuum Used?
A vacuum is used primarily on carpets, although it can also be used to clean rugs, hard surface floors, baseboards, vents, light fixtures and other things. Common types of carpeting include:
Nylon – most common
Wool or wool blends
Polyester
Polypropylene
You will learn more about carpeting in the Introduction to Special Services.
What is the Difference Between a Carpet and a Rug?
Carpet covers the floor from wall to wall and is permanently attached to the floor.
A rug covers part of a floor and can be easily moved.
What is HEPA?
HEPA stands for High Efficiency Particulate Air.
A HEPA vacuum uses a filter that captures very small particles.
Removing dust and other very small particles helps improve air quality.
Removing almost 100% of particles means that there is less dust.
Traditional upright or canister vacuums only remove about half of the particles, so they leave a lot of dust in the air which settles back on furniture, fixtures and floors.

82© 2015 Coverall North America, Inc. Confidential information.
FRANCHISE OWNER OPERATIONS TRAINING MANUAL - VOLUME 2FS-FOOTM-1211_IntVer0215
CORE 4® PROCESS TRAINING
Coverall Core 4®: HEPA Backpack Vacuum
HEPA Backpack Vacuum Vs. Upright Vacuum
Canister or upright vacuums are heavy and difficult to move. Backpack vacuums are designed to help professionals work quickly and safely, with less strain on your body.
HEPA filtration captures up to 99.97% of airborne particles as small as 0.3 microns (too small to see with your eyes), so it helps improve air quality by removing dust and allergens, and creates a healthier environment.
Professional backpack vacuums are designed to be used for many purposes, such as floors, vents, blinds, baseboards, edges, corners, and other high or difficult to reach places. You can get more done with a backpack vacuum.
You can clean about 2,800 square feet per hour with an upright vacuum and about 7,400 square feet per hour with a backpack vacuum, which means you get more cleaning done in less time.
HEPA BACKPACK VACUUM VS. UPRIGHT VACUUM COMPARISON
Upright vacuum HEPA backpack vacuum
Production Rate:
2,800square feet per hour
Production Rate:
7,400square feet per hour

83© 2015 Coverall North America, Inc. Confidential information.FRANCHISE OWNER OPERATIONS TRAINING MANUAL - VOLUME 2FS-FOOTM-1211_IntVer0215
CORE 4® PROCESS TRAINING
Coverall Core 4®: HEPA Backpack Vacuum
Vacuum Accessories
The Core 4® process uses a brush attachment. Other attachments, such as an upholstery tool and crevice tool, are also helpful.
Consider buying a Sidewinder tool for your backpack vacuum. It helps you to clean large open areas quickly and is excellent for vacuuming in tight places, around furniture, along edges, floorboards, vents and crevices.
Putting the Vacuum On
Adjust the upper and lower back metal plates to fit your body comfortably.
Lower back plate should rest on your hips, not on your lower back.
Upper back plate should rest between shoulder blades in upper back.
Wear the vacuum correctly:
Put each arm in a strap.
Fasten the belts (listed below) so they are snug around waist and shoulder straps are slightly loose (use the 2-finger rule). There should be no weight on shoulders; your hips should carry the load.
• Waist belt
• Shoulder straps
• Sternum strap (across chest)
Loop the extension cord through the cord wrap. The cord wrap lets you know when you are at the end of your cord so you don’t accidentally pull it out of the outlet.
Connect power supply cord to the extension cord.
Plug the extension cord in to a power source.
On/off switch is in the pocket of the waist belt.
84© 2015 Coverall North America, Inc. Confidential information.
FRANCHISE OWNER OPERATIONS TRAINING MANUAL - VOLUME 2FS-FOOTM-1211_IntVer0215
CORE 4® PROCESS TRAINING
Coverall Core 4®: HEPA Backpack Vacuum
How to Use the Vacuum
Safety First
Do NOT vacuum wet surfaces. Water or other liquids could damage the motor and void your warranty.
Do NOT block walkways with the cord. People could trip on it.
Do NOT move quickly around wall corners with cords because cords can rub on corners and remove paint or dry wall.
Do NOT bump into or knock things over with the vacuum on your back.
DO fasten the belts so the vacuum doesn’t swing side to side on your back.
DO vacuum with the cord on one side of your body so you always know where it is.
DO pick up loose debris, such as paper clips and pens, before you vacuum.
Vacuum in a W Pattern
Turn the vacuum on.
Vacuum in a W pattern to cover the most area as quickly as possible.
Vacuum edges of walls, desks or other objects.
Use a heel-to-toe motion to work faster and keep your body in the right position.
Remove Small Carpet Spots
A few spots on a carpet can make the rest of the carpet look bad. Use your Encapsulation Carpet Spotting Kit to remove spots that are less than 3 inches in diameter. Also, look for opportunities to offer a Special Service carpet cleaning program to your customer, or contact your Coverall Support Center if you would like them to propose carpet service to your customer.
Before cleaning:
If wet, blot with a dry microfiber towel.
If dry, vacuum to remove as much soil as possible.
For ordinary soil removal (soil, clay, etc.):
Spray solution lightly on spot and at least 6 inches around the spot.
Agitate with manual carpet roamer brush.

85© 2015 Coverall North America, Inc. Confidential information.FRANCHISE OWNER OPERATIONS TRAINING MANUAL - VOLUME 2FS-FOOTM-1211_IntVer0215
CORE 4® PROCESS TRAINING
Coverall Core 4®: HEPA Backpack Vacuum
Rinse with water to remove chemical residue and prevent rapid re-soiling.
Vacuum when dry or at the next scheduled service time.
For red food and drink or coffee stains:
Liberally apply the solution to the spot.
Blot with a dry microfiber towel.
Reapply solution and blot until no more color comes out of the spot.
Follow steps for ordinary soil removal.
Repeat if needed.
For organic stains (urine, vomit, feces, etc.):
This spot may be a biohazard, so follow precautions for Bloodborne and Airborne Pathogens.
Follow steps for red food and drink or coffee stains.
Maintaining Your Vacuum
When your vacuum filters are dirty, the air flow and suction will lose their strength and the vacuum will not clean properly. Refer to your user’s manual for the maintenance procedure.
The rule of thumb is to empty the paper micro filter after every 2 hours of use. Replace when worn or if you can no longer see light through the bag. A hot motor (heat felt on your back) is an indicator than the air-cooled motor is not getting enough air; there is too much soil in the bag and it needs to be emptied.
Other maintenance:
Wash cloth bags monthly.
Disinfect and wipe inside vacuum weekly to eliminate odors.
Clean Intercept micro filter every day.
Clean Micro cloth filter once a week.
Clean Exhaust filter once a month.
Replace HEPA Dome filter every six months.

86© 2015 Coverall North America, Inc. Confidential information.
FRANCHISE OWNER OPERATIONS TRAINING MANUAL - VOLUME 2FS-FOOTM-1211_IntVer0215
87© 2015 Coverall North America, Inc. Confidential information.FRANCHISE OWNER OPERATIONS TRAINING MANUAL - VOLUME 2FS-FOOTM-1211_IntVer0215
PRACTICE EXERCISE
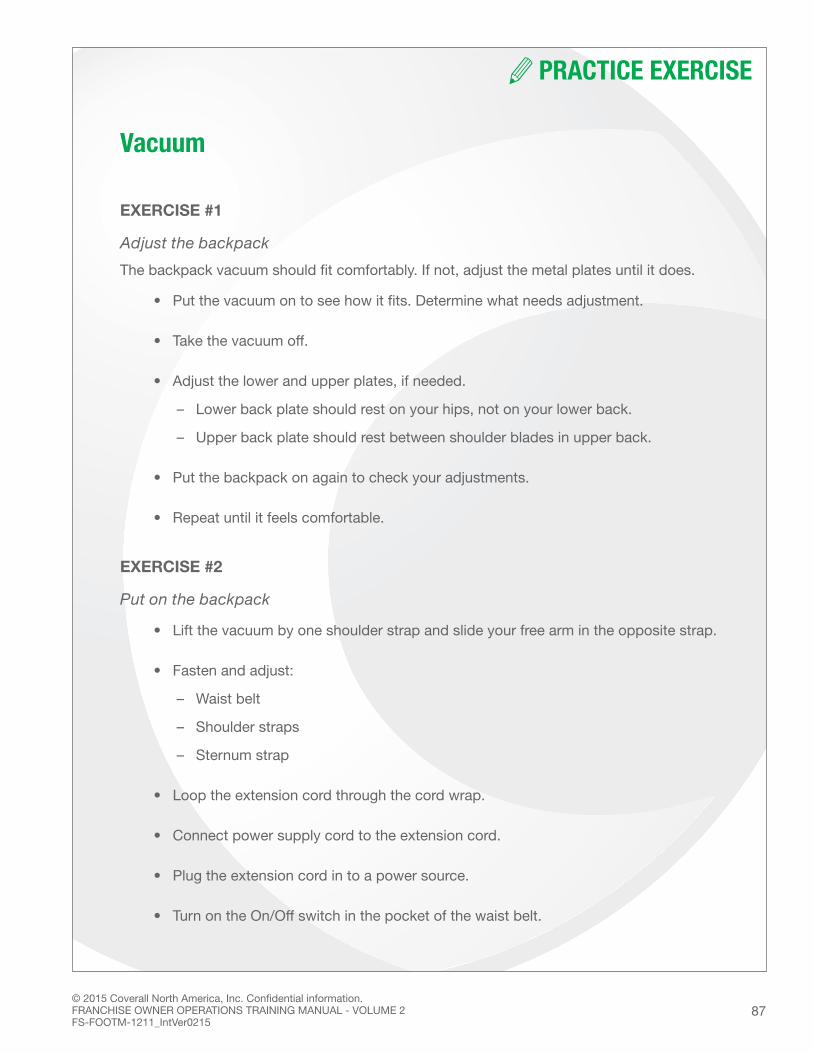
Vacuum
EXERCISE #1
Adjust the backpack
The backpack vacuum should fit comfortably. If not, adjust the metal plates until it does.
• Put the vacuum on to see how it fits. Determine what needs adjustment.
• Take the vacuum off.
• Adjust the lower and upper plates, if needed.
– Lower back plate should rest on your hips, not on your lower back.
– Upper back plate should rest between shoulder blades in upper back.
• Put the backpack on again to check your adjustments.
• Repeat until it feels comfortable.
EXERCISE #2
Put on the backpack
• Lift the vacuum by one shoulder strap and slide your free arm in the opposite strap.
• Fasten and adjust:
– Waist belt
– Shoulder straps
– Sternum strap
• Loop the extension cord through the cord wrap.
• Connect power supply cord to the extension cord.
• Plug the extension cord in to a power source.
• Turn on the On/Off switch in the pocket of the waist belt.

88© 2015 Coverall North America, Inc. Confidential information.
FRANCHISE OWNER OPERATIONS TRAINING MANUAL - VOLUME 2FS-FOOTM-1211_IntVer0215
PRACTICE EXERCISE continued
EXERCISE #3
Vacuum carpet and floor
Practice vacuuming carpet and hard floor with two different wands:
• Aluminum bend wand
– Bring the top of the wand toward your waist.
– Walk in a heel-to-toe motion.
– Vacuum in a repetitive W-motion.
– Vacuum along edges of walls, desks, or other large stationary objects.
– Where could you use the aluminum bend wand?
• Telescoping wand
– Stand in one place to vacuum. This wand can extend up to 12 ft.
– Keep your arm partially extended and slightly bend your elbow.
– Swing your arm side-to-side, about a 45-degree angle to either side.
– Where could you use the telescoping wand?
EXERCISE #4
Remove a carpet spot
Use the Encapsulation Carpet Spotting Kit to remove a spot.
• Vacuum to remove as much soil as possible.
• Spray solution lightly on spot and at least 6 inches around the spot.
• Agitate with manual carpet roamer brush.
• Rinse with water.
• Vacuum when dry.

89© 2015 Coverall North America, Inc. Confidential information.FRANCHISE OWNER OPERATIONS TRAINING MANUAL - VOLUME 2FS-FOOTM-1211_IntVer0215
REVIEW
HEPA Backpack Vacuum
1. A vacuum is used primarily on ________________________, although it can also be used
to clean rugs, hard surface floors, baseboards, vents, light fixtures and other things.
2. A ________________________ vacuum uses a filter that captures very small particles.
3. Traditional upright only remove about _________________________ of the particles, so
they leave a lot of dust in the air, which settles back on furniture, fixtures and floors.
4. You can clean about 2,800 square feet per hour with an upright vacuum and about
_________________________ square feet per hour with a backpack vacuum, which
means you get more cleaning done in less time.
5. When your vacuum filters are _________________________ the air flow and suction will
lose their strength and the vacuum will not clean properly.
6. A rug covers part of a floor surface and can be easily moved.
_________________________ covers the floor from wall to wall and is permanently
attached to the floor.
7. The _________________________ tool helps you to clean large open areas quickly and
is excellent for vacuuming in tight places, around furniture, along edges, floorboards,
vents and crevices.

REVIEW continued
90© 2015 Coverall North America, Inc. Confidential information.
FRANCHISE OWNER OPERATIONS TRAINING MANUAL - VOLUME 2FS-FOOTM-1211_IntVer0215
8. Vacuum in a _________________________ pattern to cover the most area as quickly as
possible.
9. Never vacuum _________________________ surfaces. Water or other liquids could
damage the motor and void your warranty.
10. Use your Encapsulation Carpet Spotting Kit to remove spots that are less than
_________________________ inches in diameter.
Answers: 1) carpets 2) HEPA 3) half 4) 7,400 5) dirty 6) carpet 7) sidewinder 8) W 9) wet 10) 3.
91© 2015 Coverall North America, Inc. Confidential information.FRANCHISE OWNER OPERATIONS TRAINING MANUAL - VOLUME 2FS-FOOTM-1211_IntVer0215
CORE 4® PROCESS TRAINING
Coverall Core 4®: Cleaning Tasks and Coverall Service Plans
A Coverall Service Plan lists all of the cleaning tasks your customer expects to get. Creating a Service Plan, also called a “Work Spec,” “Scope of Work” or “Cleaning Schedule,” is part of the sales process. When the customer signs a Service Agreement to do business with the Coverall System, they also agree to the Service Plan.
Are All Service Plans the Same?
Service Plans can differ from customer to customer:
Different types of facilities will have some special cleaning tasks. For example, in a daycare you might need to remove additional trash; or, in a doctor’s office, you might need to clean exam tables.
Some customers have special needs. For example, you might have customers who want you to clean their blinds once a week, and other customers who don’t want blinds cleaned at all.
In this class, we will discuss the most common cleaning tasks for General Offices. Later in your training we will discuss cleaning tasks for other types of facilities.
What is a General Office?
A General Office is a facility with desks, offices, conference rooms, restrooms, kitchen areas, storage areas, a lobby, and a general office environment. The Coverall Support Center is a good example of a General Office facility. Many of your customers’ facilities will be General Offices.
Other types of facilities require cleaning tasks beyond a General Office cleaning. For example, medical, fitness, and childcare facilities will have other cleaning tasks in their Service Plans. We will discuss other types of facilities later in your training.

92© 2015 Coverall North America, Inc. Confidential information.
FRANCHISE OWNER OPERATIONS TRAINING MANUAL - VOLUME 2FS-FOOTM-1211_IntVer0215
CORE 4® PROCESS TRAINING
Coverall Core 4®: Cleaning Tasks and Coverall Service Plans
4 sets of cleaning tasks
There are 4 main sets of cleaning tasks:
1. Dusting and Disinfecting
2. Carpet and Floor Care
3. Restrooms
4. Trash Removal
Dusting and disinfecting uses hospital-grade disinfectant and color-coded microfiber towels to clean surfaces. Unlike dusting at home, you will use a damp microfiber towel to remove soil. Sometimes you will use your vacuum with a brush attachment to remove dust from vents and other high or low places.
Carpet and floor care uses your HEPA backpack vacuum and no-dip microfiber flat mop to remove soil from carpets or hard surface floors.
Restrooms require all Core 4® tools. In a restroom, you will be using disinfectant and various colors of microfiber to clean surfaces, remove trash, mop floor, as well as other tasks unique to restrooms.
For trash removal you will remove garbage and replace the old liner (trash bag) with a new one. Use disinfectant and color-coded microfiber to wipe and disinfect the trash cans as needed.
93© 2015 Coverall North America, Inc. Confidential information.FRANCHISE OWNER OPERATIONS TRAINING MANUAL - VOLUME 2FS-FOOTM-1211_IntVer0215
CORE 4® PROCESS TRAINING
Coverall Core 4®: Cleaning Tasks and Coverall Service Plans
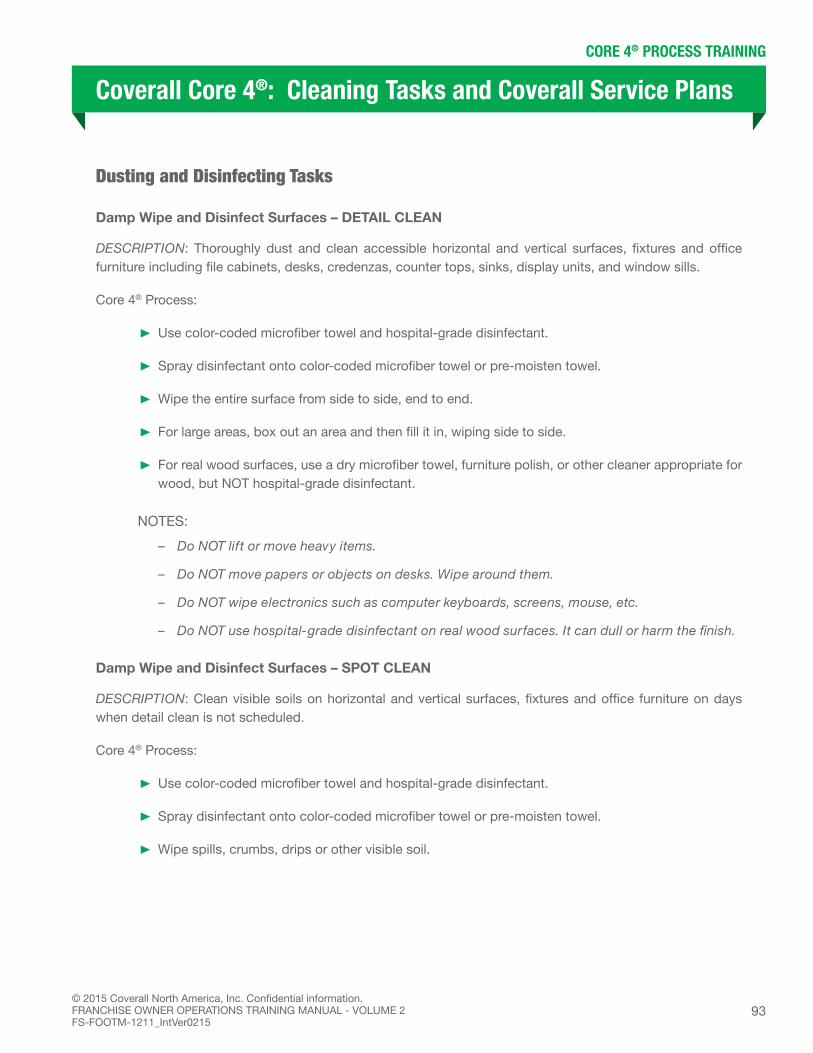
Dusting and Disinfecting Tasks
Damp Wipe and Disinfect Surfaces – DETAIL CLEAN
DESCRIPTION: Thoroughly dust and clean accessible horizontal and vertical surfaces, fixtures and office furniture including file cabinets, desks, credenzas, counter tops, sinks, display units, and window sills.
Core 4® Process:
Use color-coded microfiber towel and hospital-grade disinfectant.
Spray disinfectant onto color-coded microfiber towel or pre-moisten towel.
Wipe the entire surface from side to side, end to end.
For large areas, box out an area and then fill it in, wiping side to side.
For real wood surfaces, use a dry microfiber towel, furniture polish, or other cleaner appropriate for wood, but NOT hospital-grade disinfectant.
NOTES:
– Do NOT lift or move heavy items.
– Do NOT move papers or objects on desks. Wipe around them.
– Do NOT wipe electronics such as computer keyboards, screens, mouse, etc.
– Do NOT use hospital-grade disinfectant on real wood surfaces. It can dull or harm the finish.
Damp Wipe and Disinfect Surfaces – SPOT CLEAN
DESCRIPTION: Clean visible soils on horizontal and vertical surfaces, fixtures and office furniture on days when detail clean is not scheduled.
Core 4® Process:
Use color-coded microfiber towel and hospital-grade disinfectant.
Spray disinfectant onto color-coded microfiber towel or pre-moisten towel.
Wipe spills, crumbs, drips or other visible soil.

94© 2015 Coverall North America, Inc. Confidential information.
FRANCHISE OWNER OPERATIONS TRAINING MANUAL - VOLUME 2FS-FOOTM-1211_IntVer0215
CORE 4® PROCESS TRAINING
Coverall Core 4®: Cleaning Tasks and Coverall Service Plans
Dust Vertical or Horizontal Blinds
DESCRIPTION: Clean vertical or horizontal blinds, not to exceed 12 feet from the floor, to remove dust and visible soil.
Core 4® Process:
Use HEPA backpack vacuum with brush attachment or color-coded microfiber towel and hospital-grade disinfectant.
Spray disinfectant onto color-coded microfiber towel or pre-moisten towel.
Close blinds.
Wipe blinds from top to bottom, not side to side.
Adjust the blinds so the other side is facing you; clean the other side.
NOTES:
– Do NOT wipe side to side because you could bend the blinds or damage the slats.
Damp Wipe and Disinfect High Touch Points
DESCRIPTION: Damp wipe and disinfect high touch points, such as light switches and door knobs. Clean both sides of main entrance glass doors.
Core 4® Process:
Use color-coded microfiber towel and hospital-grade disinfectant.
Spray disinfectant onto color-coded microfiber towel or pre-moisten towel.
Wipe door knobs (including back side), light switch plates, push plates on doors, railings, etc.

95© 2015 Coverall North America, Inc. Confidential information.FRANCHISE OWNER OPERATIONS TRAINING MANUAL - VOLUME 2FS-FOOTM-1211_IntVer0215
CORE 4® PROCESS TRAINING
Coverall Core 4®: Cleaning Tasks and Coverall Service Plans
High and Low Dusting
DESCRIPTION: Clean items up to 12 feet from the floor (high dusting), such as ceiling vents, light fixtures, high window sills and corners not cleaned as part of normal wiping; and items near floor (low dusting), such as vents, corners, outlets, etc.
Core 4® Process:
Use HEPA backpack vacuum with brush attachment.
Option: Color-coded microfiber towel and hospital-grade disinfectant if soil is caked onto surface and vacuum will not remove it, or vacuum will not easily reach the area to be cleaned.
For lighting fixtures, turn light off and make sure bulb is cool before you clean it.
NOTES:
– Do NOT put a wet towel on a hot bulb, because it could crack in addition to the hot bulb possibly burning you.
– Use a Type 1 A-frame ladder to reach up to 20 feet above the floor.
Clean Internal Glass or Mirrors – DETAIL CLEAN
DESCRIPTION: Thoroughly clean internal partition glass (2 sides) or mirrors. Does not include windows.
Core 4® Process:
Use Unger SpeedCleanTM Indoor Window Cleaning Kit and glass cleaner.
Spray glass cleaner lightly onto the speed-clean pad, use overlapping stroke on the glass/mirror to be cleaned. Spray pad as needed when the pad starts to dry. Using less cleaner is MORE productive. The more product that is applied to glass, the more difficult it is to remove.
Repeat on other side of partition glass.
Option: Color-coded microfiber towel and glass cleaner for small glass or mirrors.
NOTES:
– Use telescopic pole for mirrors or glass up to 12 feet from the floor.
– For outside windows, consider proposing a Special Service to your customer.

96© 2015 Coverall North America, Inc. Confidential information.
FRANCHISE OWNER OPERATIONS TRAINING MANUAL - VOLUME 2FS-FOOTM-1211_IntVer0215
CORE 4® PROCESS TRAINING
Coverall Core 4®: Cleaning Tasks and Coverall Service Plans
Clean Internal Glass or Mirrors – SPOT CLEAN
DESCRIPTION: Spot clean internal partition glass (2 sides) or mirrors to remove smudges and fingerprints. Does not include windows.
Core 4® Process:
Use color-coded microfiber towel and glass cleaner to spot clean visible soil.
Lightly spray glass cleaner onto color-coded microfiber towel or pre-moisten towel.
Repeat on other side of partition glass.
Vacuum or Wet Wipe Furnishings
DESCRIPTION: Vacuum fabric-covered furnishings and or wet wipe other furniture to remove visible dust or soil.
Core 4® Process:
Use HEPA backpack vacuum and crevice tool attachment as needed.
For spills or spots, use color-coded microfiber towel and hospital-grade disinfectant.
Remove visible soil and spots.
NOTES:
– For very soiled furniture, consider proposing a Special Service to your customer.
Damp Wipe and Disinfect Drinking Fountains and Water Coolers
DESCRIPTION: Damp wipe and disinfect exterior (outside) of drinking fountains and water coolers.
Core 4® Process:
Use color-coded microfiber towel and hospital-grade disinfectant.
Spray disinfectant onto color-coded microfiber towel or pre-moisten towel.
Touch up with dry microfiber towel as needed.
Tip: If hard water spots remain in drinking fountains or sinks, use proper chemical to remove hard water spots (e.g., Emerel® Multi-Purpose Creme Cleanser).

97© 2015 Coverall North America, Inc. Confidential information.FRANCHISE OWNER OPERATIONS TRAINING MANUAL - VOLUME 2FS-FOOTM-1211_IntVer0215
CORE 4® PROCESS TRAINING
Coverall Core 4®: Cleaning Tasks and Coverall Service Plans
Damp Wipe and Disinfect Telephones
DESCRIPTION: Damp wipe and disinfect desktop telephones.
Core 4® Process:
Use color-coded microfiber towel and hospital-grade disinfectant.
Spray disinfectant onto color-coded microfiber towel or pre-moisten towel.
Clean the phone receiver and the base.
NOTES:
– Do NOT clean cell phones.
Damp Wipe and Disinfect Microwave(s) – DETAIL CLEAN
DESCRIPTION: Thoroughly damp wipe and disinfect inside and outside of microwave to rinse food contact surfaces.
Core 4® Process:
Use color-coded microfiber towel and hospital-grade disinfectant.
Spray disinfectant onto color-coded microfiber towel or pre-moisten towel.
Wipe inside of microwave first, pushing soil onto floor (to be vacuumed or swept later).
Wipe outside of microwave.
Touch up with dry microfiber towel as needed.

98© 2015 Coverall North America, Inc. Confidential information.
FRANCHISE OWNER OPERATIONS TRAINING MANUAL - VOLUME 2FS-FOOTM-1211_IntVer0215
CORE 4® PROCESS TRAINING
Coverall Core 4®: Cleaning Tasks and Coverall Service Plans
Damp Wipe and Disinfect Counters, Tables and Sinks – DETAIL CLEAN
DESCRIPTION: Thoroughly damp wipe and disinfect counters, tables and sinks.
Core 4® Process:
Use color-coded microfiber towel and hospital-grade disinfectant.
Spray disinfectant onto color-coded microfiber towel or pre-moisten towel.
Wipe the entire surface from side to side, end to end.
For large counters and tables, box out an area and then fill it in, wiping side to side.
Wipe sink including area around faucet and handles.
Use dry microfiber towel to polish sink faucet and handles.
Damp Wipe and Disinfect Refrigerator(s) – SPOT CLEAN
DESCRIPTION: Spot clean exterior (outside) of refrigerator to remove smudges and fingerprints.
Core 4® Process:
Use color-coded microfiber towel and hospital-grade disinfectant.
Spray disinfectant onto color-coded microfiber towel or pre-moisten towel.
Wipe smudges, fingerprints, splashes and other visible soil.
Wipe all sides of door handle, including the back of handle which can get sticky.
NOTES:
– If customer wants inside of refrigerator cleaned, consider proposing a Special Service.

99© 2015 Coverall North America, Inc. Confidential information.FRANCHISE OWNER OPERATIONS TRAINING MANUAL - VOLUME 2FS-FOOTM-1211_IntVer0215
Dusting and Disinfecting Tasks
Use the correct Core 4® Process to complete the following tasks.
Dusting and Disinfecting Task Completed
Damp Wipe and Disinfect Surfaces – Detail Clean
Damp Wipe and Disinfect Surfaces – Spot Clean
Dust Vertical or Horizontal Blinds
High and Low Dusting
Damp Wipe and Disinfect High Touch Points
Clean Internal Glass or Mirrors – Detail Clean
Clean Internal Glass or Mirrors – Spot Clean
Vacuum Furnishings or Wet Wipe
Damp Wipe and Disinfect Drinking Fountains and Water Coolers
Damp Wipe and Disinfect Telephones
Damp Wipe and Disinfect Microwave(s) – Detail Clean
Damp Wipe and Disinfect Counters, Tables and Sinks – Detail Clean
Damp Wipe and Disinfect Counters, Tables and Sinks – Spot Clean
Damp Wipe and Disinfect Refrigerator – Spot Clean
Notes:
PRACTICE EXERCISE

100© 2015 Coverall North America, Inc. Confidential information.
FRANCHISE OWNER OPERATIONS TRAINING MANUAL - VOLUME 2FS-FOOTM-1211_IntVer0215
101© 2015 Coverall North America, Inc. Confidential information.FRANCHISE OWNER OPERATIONS TRAINING MANUAL - VOLUME 2FS-FOOTM-1211_IntVer0215
REVIEW
Dusting and Disinfecting
1. Sometimes you will use your vacuum with a ________________________ attachment to
remove dust from vents and other high or low places.
2. Do NOT move ________________________ or objects on desks. Wipe around them.
3. Do NOT wipe ________________________ such as computer keyboards, screens,
mouse, etc.
4. Do NOT use hospital-grade disinfectant on real ________________________ surfaces.
It can dull or harm the finish.
5. Damp wipe and disinfect high ________________________ points, such as light switches
and door knobs. Clean both sides of main entrance glass doors.
6. Clean items up to 12 feet from the floor (________________________ dusting), such
as ceiling vents, light fixtures, high window sills and corners not cleaned as part of
normal wiping; and items near floor (________________________ dusting), such as vents,
corners, outlets, etc. Clean both sides of main entrance glass doors.
7. Use ________________________ SpeedCleanTM Indoor Window Cleaning Kit and glass
cleaner to clean glass or mirrors.

102© 2015 Coverall North America, Inc. Confidential information.
FRANCHISE OWNER OPERATIONS TRAINING MANUAL - VOLUME 2FS-FOOTM-1211_IntVer0215
8. Wipe blinds from top to ________________________, not side to side. Do NOT wipe side
to side because you could bend the blinds or damage the slats.
9. Thoroughly damp wipe and disinfect ________________________ and outside of
microwave to rinse food contact surfaces.
10. For lighting fixtures, turn light off and make sure bulb is _________________ before you
clean it.
Answers: 1) brush 2) papers 3) electronics 4) wood 5) touch 6) high, low 7) Unger 8) bottom; 9) inside 10) cool.
REVIEW

103© 2015 Coverall North America, Inc. Confidential information.FRANCHISE OWNER OPERATIONS TRAINING MANUAL - VOLUME 2FS-FOOTM-1211_IntVer0215
CORE 4® PROCESS TRAINING
Coverall Core 4®: Carpet and Floor Care Tasks
Damp Mop Hard Surface Floors – DETAIL CLEAN
DESCRIPTION: Damp mop hard surface floors using a no-dip protocol and changing pad often to ensure removal of dirt.
Core 4® Process:
Put wet floor signs at beginning and end of area that will be wet.
Use line markers inside the bucket to add the right amount of water and disinfectant.
Start mopping at the back of the room and work your way to the front.
Put your bucket where you want to start mopping.
Open the spigot a little bit and immediately roll the bucket about 20 feet to get a stream or “bead” of solution on the floor.
Close the spigot.
Starting at the top of bead, mop through the bead of solution in a “figure 8” pattern.
Repeat until you finish mopping the entire bead.
Put another bead of solution next to the area you just mopped.
Repeat process until entire floor is mopped.
NOTES:
– If you make a puddle of solution on the floor instead of a bead, mop it up.
– To avoid streaks, change your mop pad when it is dirty or very wet.
Damp Mop Hard Surface Floors – SPOT CLEAN
DESCRIPTION: Spot mop visible soil on hard surface floors on days when detail mopping is not scheduled.
Core 4® Process:
Look for soiled areas of floor, such as spills, splashes, dirt and other messes.
Use pre-moistened mop pad.
Mop the soiled area(s) in a “figure 8” pattern.

104© 2015 Coverall North America, Inc. Confidential information.
FRANCHISE OWNER OPERATIONS TRAINING MANUAL - VOLUME 2FS-FOOTM-1211_IntVer0215
CORE 4® PROCESS TRAINING
Coverall Core 4®: Carpet and Floor Care Tasks
Wall-To-Wall Vacuum Carpet – Detail Clean
DESCRIPTION: Detail vacuum accessible carpeted areas with approved HEPA backpack units.
Core 4® Process:
Vacuum in a W pattern to cover the most area as quickly as possible. (If using Sidewinder tool, use a side-to-side motion.)
Vacuum edges of walls, desks or other objects.
Vacuum behind doors, under tables, chairs and desks, and from wall to wall.
Use a heel-to-toe motion to work faster and keep your body in the right position.
Wall-To-Wall Vacuum or Dust Mop Hard Surface Floors
DESCRIPTION: Dry mop hard surface floors using a dust mop, vacuum or dry/wet mop.
Core 4® Process:
Use lobby broom and dust pan to pick up larger debris.
If floor is dry, use HEPA backpack vacuum to clean the hard floor.
– Vacuum in a W pattern to cover the most area as quickly as possible.
– Vacuum behind doors, under tables, chairs and desks, and from wall to wall including floor window sills.
– Vacuum edges of walls, desks or other objects.
– Use a heel-to-toe motion to work faster and keep your body in the right position.
If floor is wet, use a dry mop pad and mop to dry (dust) mop the floor.
Vacuum Carpet – Spot Clean
DESCRIPTION: Spot vacuum visible soil from carpets on days when wall-to-wall vacuuming is not scheduled.
Core 4® Process:
Look for soiled areas of carpet, such as crumbs, scraps of paper, dirt and other messes.
Vacuum soiled areas in a W pattern to remove visible dirt from the carpet.

105© 2015 Coverall North America, Inc. Confidential information.FRANCHISE OWNER OPERATIONS TRAINING MANUAL - VOLUME 2FS-FOOTM-1211_IntVer0215
CORE 4® PROCESS TRAINING
Coverall Core 4®: Carpet and Floor Care Tasks
Remove Carpet Spots
DESCRIPTION: Remove spots under 3-inch diameter from carpeted areas using encapsulation carpet spotting tools. Does not include carpet extraction.
Core 4® Process:
If wet, blot with a dry microfiber towel.
If dry, vacuum to remove as much soil as possible.
Spray solution lightly on spot and at least 6 inches around the spot.
Agitate with manual carpet roamer brush.
Vacuum when dry or at the next scheduled service.
For stains:
Liberally apply the solution to the spot.
Blot with a dry microfiber towel.
Reapply solution and blot until no more color comes out of the spot.
Agitate with manual carpet roamer brush.
Vacuum when dry or at the next scheduled service.
NOTES:
– Use precautions for Bloodborne and Airborne Pathogens, as needed.
– If the carpet has many spots or is spilled on often, consider proposing a Special Service.
106© 2015 Coverall North America, Inc. Confidential information.
FRANCHISE OWNER OPERATIONS TRAINING MANUAL - VOLUME 2FS-FOOTM-1211_IntVer0215
Carpet and Floor Care
Use the correct Core 4® Process to complete the following tasks.
Carpet and Floor Care Task Completed
Damp Mop Hard Surface Floors - Detail Clean
Damp Mop Hard Surface Floors - Spot Clean
Wall-to-Wall Vacuum or Dust Mop Hard Surface Floors
Wall-to-Wall Vacuum Carpet - Detail Clean
Vacuum Carpet - Spot Clean
Remove Carpet Spots
Notes:
PRACTICE EXERCISE
107© 2015 Coverall North America, Inc. Confidential information.FRANCHISE OWNER OPERATIONS TRAINING MANUAL - VOLUME 2FS-FOOTM-1211_IntVer0215
Carpet and Hard Floor Care
1. Vacuum in a _________________ pattern to cover the most area as quickly as possible.
2. Vacuum __________________ doors, under tables, chairs and desks, and from wall
to wall.
3. Remove spots under __________________ -inch diameter from carpeted areas using
encapsulation carpet spotting tools.
4. If the carpet has many spots or is spilled on often, consider proposing a
___________________ Service.
5. Damp mop hard surface floors using a _________-_____________ protocol and changing
pad often to ensure removal of dirt.
6. Start mopping at the __________________ of the room and work your way to the
__________________.
Answers: 1) W 2) behind 3) 3 4) Special 5) no-dip 6) back, front.
REVIEW

108© 2015 Coverall North America, Inc. Confidential information.
FRANCHISE OWNER OPERATIONS TRAINING MANUAL - VOLUME 2FS-FOOTM-1211_IntVer0215
109© 2015 Coverall North America, Inc. Confidential information.FRANCHISE OWNER OPERATIONS TRAINING MANUAL - VOLUME 2FS-FOOTM-1211_IntVer0215
CORE 4® PROCESS TRAINING
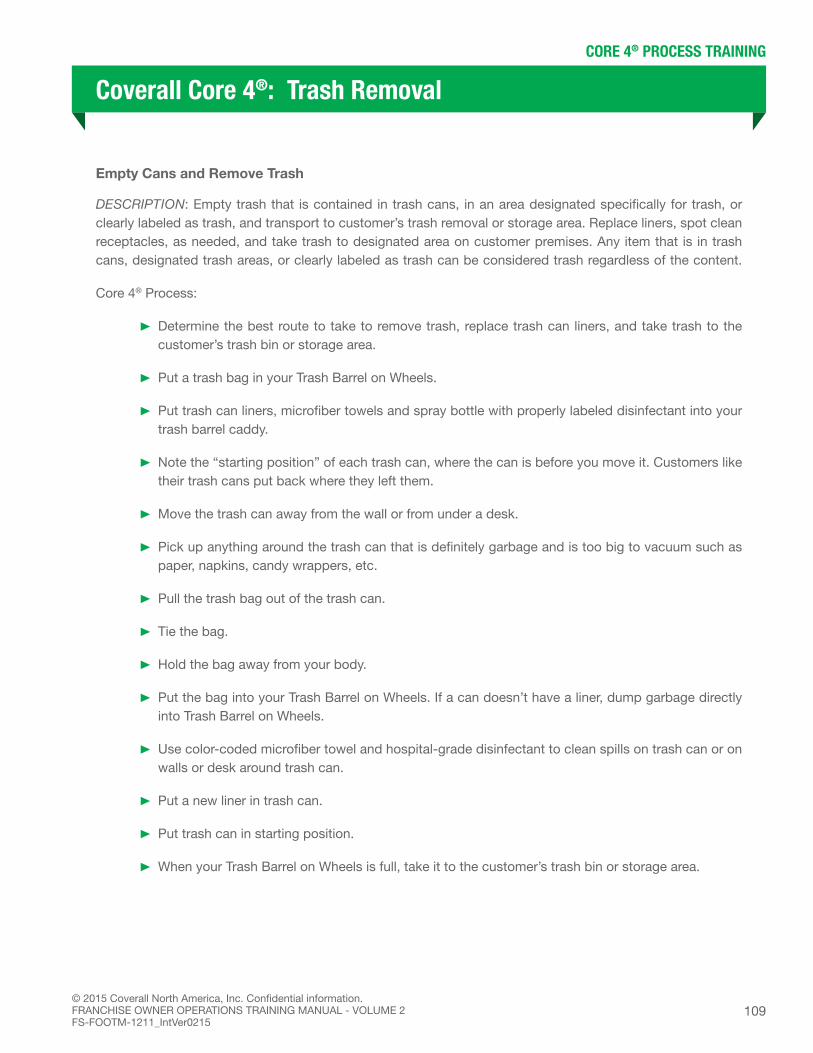
Coverall Core 4®: Trash Removal
Empty Cans and Remove Trash
DESCRIPTION: Empty trash that is contained in trash cans, in an area designated specifically for trash, or clearly labeled as trash, and transport to customer’s trash removal or storage area. Replace liners, spot clean receptacles, as needed, and take trash to designated area on customer premises. Any item that is in trash cans, designated trash areas, or clearly labeled as trash can be considered trash regardless of the content.
Core 4® Process:
Determine the best route to take to remove trash, replace trash can liners, and take trash to the customer’s trash bin or storage area.
Put a trash bag in your Trash Barrel on Wheels.
Put trash can liners, microfiber towels and spray bottle with properly labeled disinfectant into your trash barrel caddy.
Note the “starting position” of each trash can, where the can is before you move it. Customers like their trash cans put back where they left them.
Move the trash can away from the wall or from under a desk.
Pick up anything around the trash can that is definitely garbage and is too big to vacuum such as paper, napkins, candy wrappers, etc.
Pull the trash bag out of the trash can.
Tie the bag.
Hold the bag away from your body.
Put the bag into your Trash Barrel on Wheels. If a can doesn’t have a liner, dump garbage directly into Trash Barrel on Wheels.
Use color-coded microfiber towel and hospital-grade disinfectant to clean spills on trash can or on walls or desk around trash can.
Put a new liner in trash can.
Put trash can in starting position.
When your Trash Barrel on Wheels is full, take it to the customer’s trash bin or storage area.
110© 2015 Coverall North America, Inc. Confidential information.
FRANCHISE OWNER OPERATIONS TRAINING MANUAL - VOLUME 2FS-FOOTM-1211_IntVer0215
CORE 4® PROCESS TRAINING
Coverall Core 4®: Trash Removal
NOTES:
– Do NOT throw away anything that is not in a trash can, in the trash area, or marked as trash. When in doubt, do NOT throw it out!
– Do NOT push trash down with your hands or feet.
– Do NOT drag full trash bags across carpets or floors.

111© 2015 Coverall North America, Inc. Confidential information.FRANCHISE OWNER OPERATIONS TRAINING MANUAL - VOLUME 2FS-FOOTM-1211_IntVer0215
Trash Removal
EXERCISE #1
Prepare the Trash Barrel on Wheels
Before you empty the trash, prepare the Trash Barrel on Wheels so you have the tools you need.
• Get an empty trash bag and put it in your Trash Barrel on Wheels.
• Load your barrel with the following supplies:
– Trash can liners
– Blue microfiber towels
– Disinfectant spray
– Gloves
– Broom and dustpan (in case garbage spills on the floor)
• Roll the Trash Barrel on Wheels to the area you want to begin removing trash
EXERCISE #2
Empty trash cans
Find a row of offices that needs their trash taken out. Starting with the first trash can:
• Remove the liner with the trash in it
• Keep the trash at arm’s length, away from your body
• Put trash into the Trash Barrel on Wheels
• Spray and wipe the trash can, if needed
• Replace liner
• Repeat for remaining trash cans
PRACTICE EXERCISE

112© 2015 Coverall North America, Inc. Confidential information.
FRANCHISE OWNER OPERATIONS TRAINING MANUAL - VOLUME 2FS-FOOTM-1211_IntVer0215
EXERCISE #3
Empty the Trash Barrel on Wheels
When the Trash Barrel on Wheels gets full, take it out do the dumpster. Do NOT push the
contents down with your hands or feet to make room for more trash.
• Take the Trash Barrel on Wheels to the exit nearest to the dumpster
• Remove the trash bag from the Trash Barrel on Wheels
• Take the trash bag out to the dumpster
• Put a new trash bag in the Trash Barrel on Wheels
PRACTICE EXERCISE continued
113© 2015 Coverall North America, Inc. Confidential information.FRANCHISE OWNER OPERATIONS TRAINING MANUAL - VOLUME 2FS-FOOTM-1211_IntVer0215
REVIEW
Removing Trash
1. Any item that is in trash cans, designated trash areas, or clearly labeled as trash can be
considered ________________________,regardless of the content.
2. Determine the best __________________ to take to remove trash.
3. Note the “________________________ position” of each trash can, where the can is
before you move it. Customers like their trash cans put back where they left them.
4. Pick up anything around the trash can that is definitely garbage and is too big to
________________________ such as paper, napkins, candy wrappers, etc.
5. Use color-coded microfiber and hospital-grade disinfectant to clean spills on the trash
can or on ________________________ or desk around trash can.
6. When you empty the trash, hold the bag ________________ from your body.
7. When your Trash Barrel on Wheels is full, take it to the customer’s trash
__________________ or storage area.

114© 2015 Coverall North America, Inc. Confidential information.
FRANCHISE OWNER OPERATIONS TRAINING MANUAL - VOLUME 2FS-FOOTM-1211_IntVer0215
8. When in doubt, do __________________ throw it out!
9. Do NOT push trash down with your ____________________ or feet.
10. Do NOT drag full trash bags across carpets or ____________________.
Answers: 1) trash 2) route 3) starting 4) vacuum 5) walls 6) away 7) bin 8) NOT 9) hands 10) floors.
REVIEW continued

115© 2015 Coverall North America, Inc. Confidential information.FRANCHISE OWNER OPERATIONS TRAINING MANUAL - VOLUME 2FS-FOOTM-1211_IntVer0215
CORE 4® PROCESS TRAINING
Coverall Core 4®: Other Cleaning Equipment in Starter Kit
A Coverall Starter Kit may include the following items.
Disinfectants, Spray Bottles, Spray Nozzle Triggers, Labels, Safety Data Sheets
Labels provided by the manufacturer of the disinfectant.
Spray bottles for diluted disinfectants.
Nozzle triggers attach to the neck of the spray bottle.
Safety Data Sheets inform you about chemicals and their safe use.
Encapsulation Carpet Spotting Kit
Remove carpet spots smaller than 3 inches.
HEP-AID Body Fluid Disposal Kit
Clean up bodily fluid spills such as urine, feces, blood and vomit.
Absorb the fluid spill so it can be swept up and flushed down a toilet.
Lobby Broom/Lobby Dust Pan
Collect trash before mopping.
Pick up debris from hard surface floors.
Safety Equipment: Nitrile Rubber Gloves, Eye Wear, Wet Floor Signs
Protect hands while you clean.
Protect eyes from splashes and injury.
Floor signs warn people that the floor is wet, as required by OSHA.
Scratch-less Bowl Brush
Plunges water from toilets prior to cleaning.
Scrubs toilets and urinals.

116© 2015 Coverall North America, Inc. Confidential information.
FRANCHISE OWNER OPERATIONS TRAINING MANUAL - VOLUME 2FS-FOOTM-1211_IntVer0215
CORE 4® PROCESS TRAINING
Coverall Core 4®: Other Cleaning Equipment in Starter Kit
Trash Barrel on Wheels / Caddy
Collect trash.
Transport trash to customer’s trash bin or storage area.
Hold supplies.
Window Squeegee with Handle
Clean glass or windows.
Can be used on restroom stalls and walls.
Window Scrubber
Scrub debris from windows.