cisco sx10.pdf
TRANSCRIPT

TEST RESULTS FOR CISCO SX10 Manufacturer: Cisco Model: SX10 Software Version: TC7.2.1 Optional Features and None Modifications: Date of Test: 5th – 12th November 2015
CODEC Front View
CODEC Rear View
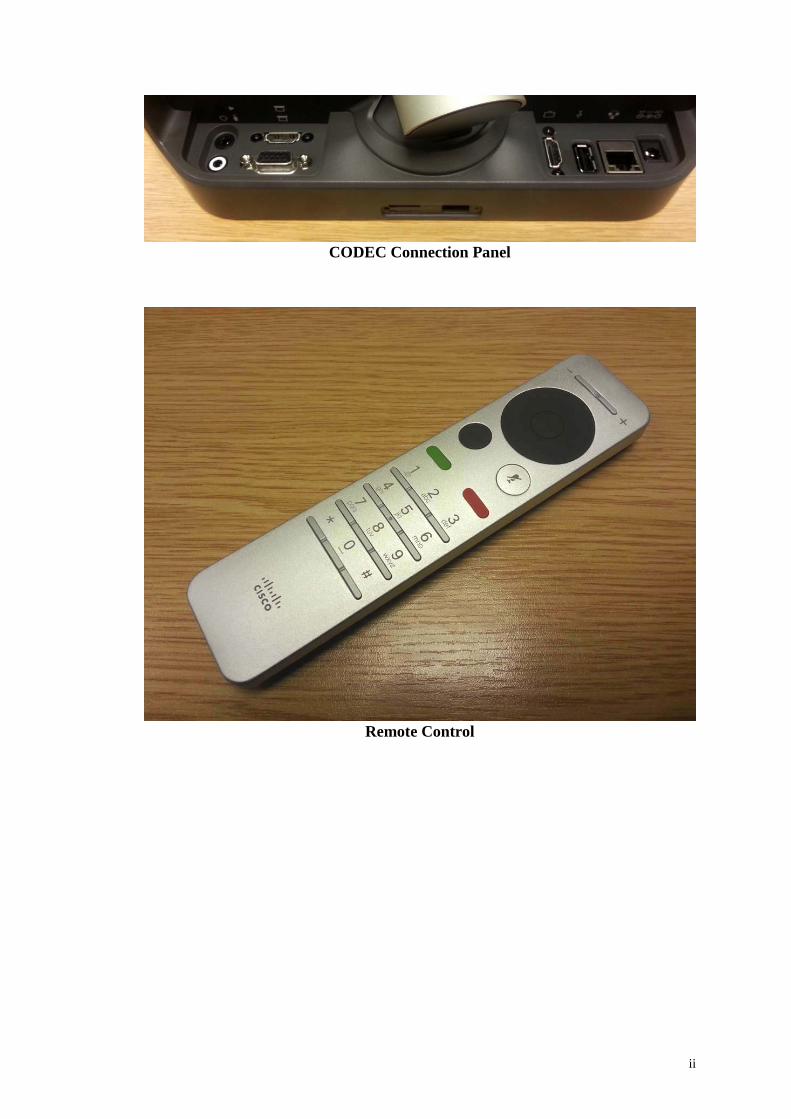
CODEC Connection Panel
Remote Control
ii

C O N T E N T S Page No. A: EXECUTIVE SUMMARY ...........................................................1 B: SETUP PROCEDURE ...........................................................2 C: HARDWARE DESCRIPTION .............................................. 2 D: SYSTEM OPERATION ...................................................... 4 E: VIDEO TESTS SUMMARY ..................................................11 F: AUDIO TESTS SUMMARY ............................................11 G: INTEROPERABILITY ............................................................11
iii

A: EXECUTIVE SUMMARY The Cisco SX10 SIP high definition conferencing system is a compact single monitor one piece system designed to be installed either in a small to medium sized conference room, or as part of a roll-about unit. The system supports a maximum image resolution of 1920x1080p @30fps on the main video channel and 1280x768 (WXGA) @5fps on the presentation channel. This one piece system includes an integrated high definition (HD) camera and microphone, an infra-red remote control and PC connectivity completes the package. One option is available: desktop microphone pod.
The maximum point to point connection speed is 3 Mbit/s; compatibility with other H.323 CODECS is achieved across a range of resolutions from QCIF (176x144) to 1080p (1920x1080) pixels. The quality of the conference is dependent upon the capability of the remote CODEC and the connection speed.
Pros: • Compact one piece system • Simple user interface • Power over Ethernet (PoE) support Cons: • Low frame rate on the presentation channel • Camera performance • No analogue presentation audio input
Feature Summary: Video standards H.263, H.263+, H.264, Supported video resolutions
176 x 144 @ 30 fps (QIF) 352 x 288 @ 30 fps (CIF) 512 x 288 @ 30 fps (w288p) 576 x 448 @ 30 fps (448p) 768 x 448 @ 30 fps (w448p) 704 x 576 @ 30 fps (4CIF) 1024 x 576 @ 30 fps (w576p) 640 x 480 @ 30 fps (VGA) 800 x 600 @ 30 fps (SVGA) 1024 x 768 @ 30 fps (XGA) 1280 x 768 @ 30 fps (WXGA) 1280 x 720 @ 30 fps (HD720p) 1920 x 1080 @ 30 fps (HD1080p)
Communications SIP Only, 128Kbps ~ 3Mbps Audio standards G.711mu, G.711a, G.722, G.722.1, G.729ab, G.729,
AAC-LD Camera 5x zoom camera (2.65 optical and digital), PTZ function,
wide 83° Horizontal field of view. Video inputs One HDMI and one VGA Video outputs One HDMI
1
Audio inputs Integrated Microphone, Desk microphone pod 4 pin 3.5mm mini-jack, HDMI
Audio outputs HDMI, 3.5mm mini-jack Auxiliary features BFCP (SIP) second video channel up to WXGA
resolution @5fps. Far-end camera control.
Encryption AES Encryption B: SETUP PROCEDURE
Setting up the Cisco SX10 system was straightforward. The compact one piece CODEC with integrated camera and microphone is designed to be mounted above a picture monitor using a wall or optional VESA bracket. An infrared remote control and an external power supply completed the package. The connections for basic operation were clearly illustrated on the quick installation guide and in the online documentation and involved:
• Mounting the camera above the monitor using the supplied wall or optional VESA brackets
• Connecting the supplied HDMI-HDMI cable between the CODEC and the monitor
• Establishing an Ethernet IP network connection through the RJ45-RJ45 cable
• Connecting the external power unit to the CODEC Initial system setup was configured through the “on-screen” setup assistant via the hand held remote control. IP address, IP Gateway and Subnet mask were all entered through this assistant. The main setup and configuration menus are only available via the web interface once the system is online. Approximate set-up time: 15 minutes Documentation quality: The concise Installation and User Guides were all easy
to follow. C: HARDWARE DESCRIPTION
General This compact CODEC may be mounted above a picture monitor using a wall mount or optional VESA brackets. Provided with one auto switching 10/100 Ethernet connection and capable of conferencing up to a bandwidth of 3 Mbit/s, the system can display a maximum image resolution of 1080p @ 30 frames/second on the main video channel. Power over Ethernet (PoE) may be also used to power the system, simplifying the installation. The Cisco SX10 CODEC was silent in operation. The main HDMI video output connection carries the digital audio, a separate 3.5mm analogue audio output connection is also provided. The monitor output auto selects resolution and aspect ratio. When not in a call the monitor displays the main menu interface with access to:
2
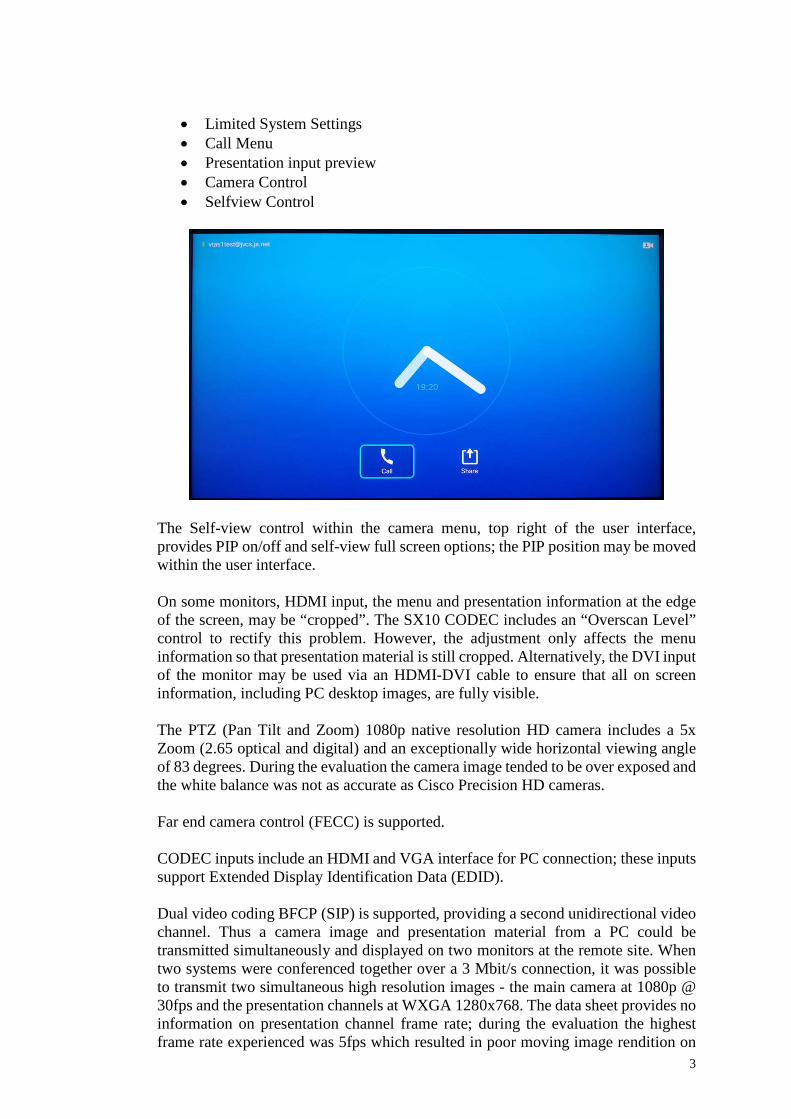
• Limited System Settings • Call Menu • Presentation input preview • Camera Control • Selfview Control
The Self-view control within the camera menu, top right of the user interface, provides PIP on/off and self-view full screen options; the PIP position may be moved within the user interface. On some monitors, HDMI input, the menu and presentation information at the edge of the screen, may be “cropped”. The SX10 CODEC includes an “Overscan Level” control to rectify this problem. However, the adjustment only affects the menu information so that presentation material is still cropped. Alternatively, the DVI input of the monitor may be used via an HDMI-DVI cable to ensure that all on screen information, including PC desktop images, are fully visible. The PTZ (Pan Tilt and Zoom) 1080p native resolution HD camera includes a 5x Zoom (2.65 optical and digital) and an exceptionally wide horizontal viewing angle of 83 degrees. During the evaluation the camera image tended to be over exposed and the white balance was not as accurate as Cisco Precision HD cameras. Far end camera control (FECC) is supported. CODEC inputs include an HDMI and VGA interface for PC connection; these inputs support Extended Display Identification Data (EDID). Dual video coding BFCP (SIP) is supported, providing a second unidirectional video channel. Thus a camera image and presentation material from a PC could be transmitted simultaneously and displayed on two monitors at the remote site. When two systems were conferenced together over a 3 Mbit/s connection, it was possible to transmit two simultaneous high resolution images - the main camera at 1080p @ 30fps and the presentation channels at WXGA 1280x768. The data sheet provides no information on presentation channel frame rate; during the evaluation the highest frame rate experienced was 5fps which resulted in poor moving image rendition on
3
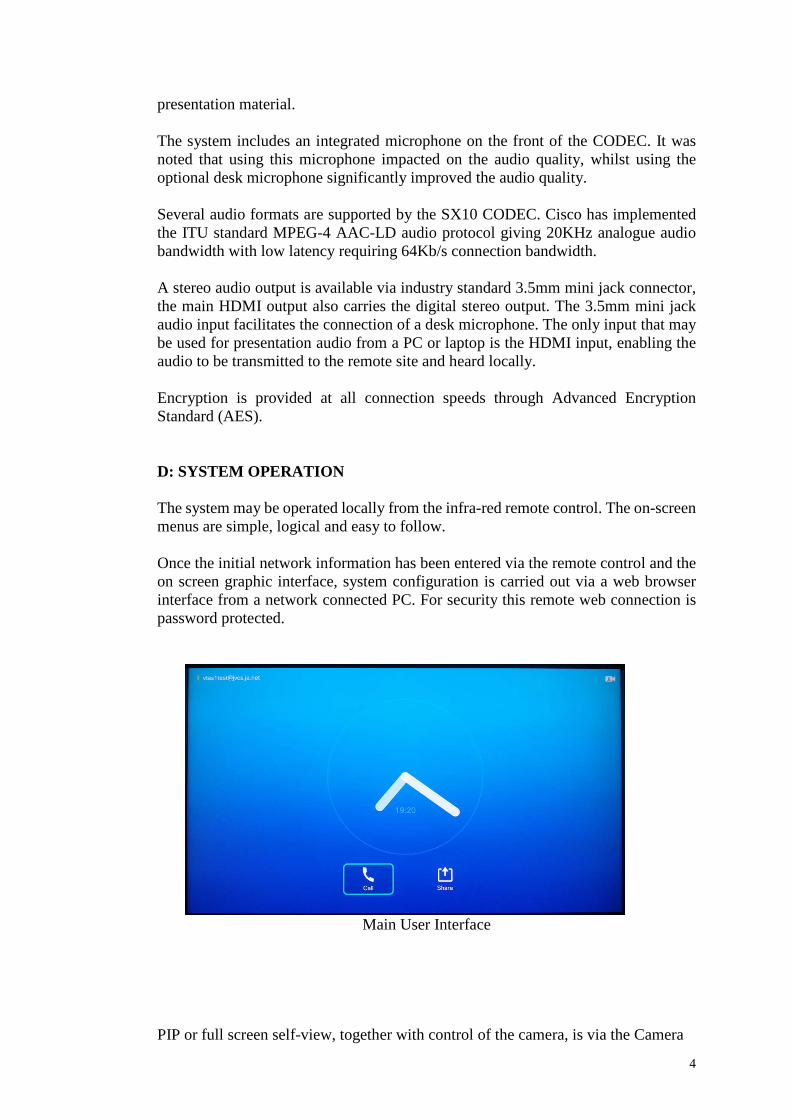
presentation material. The system includes an integrated microphone on the front of the CODEC. It was noted that using this microphone impacted on the audio quality, whilst using the optional desk microphone significantly improved the audio quality. Several audio formats are supported by the SX10 CODEC. Cisco has implemented the ITU standard MPEG-4 AAC-LD audio protocol giving 20KHz analogue audio bandwidth with low latency requiring 64Kb/s connection bandwidth. A stereo audio output is available via industry standard 3.5mm mini jack connector, the main HDMI output also carries the digital stereo output. The 3.5mm mini jack audio input facilitates the connection of a desk microphone. The only input that may be used for presentation audio from a PC or laptop is the HDMI input, enabling the audio to be transmitted to the remote site and heard locally. Encryption is provided at all connection speeds through Advanced Encryption Standard (AES). D: SYSTEM OPERATION The system may be operated locally from the infra-red remote control. The on-screen menus are simple, logical and easy to follow. Once the initial network information has been entered via the remote control and the on screen graphic interface, system configuration is carried out via a web browser interface from a network connected PC. For security this remote web connection is password protected.
Main User Interface
PIP or full screen self-view, together with control of the camera, is via the Camera
4

Control Icon on the top right of the user interface.
Camera Control Menu
Dial Menu
5

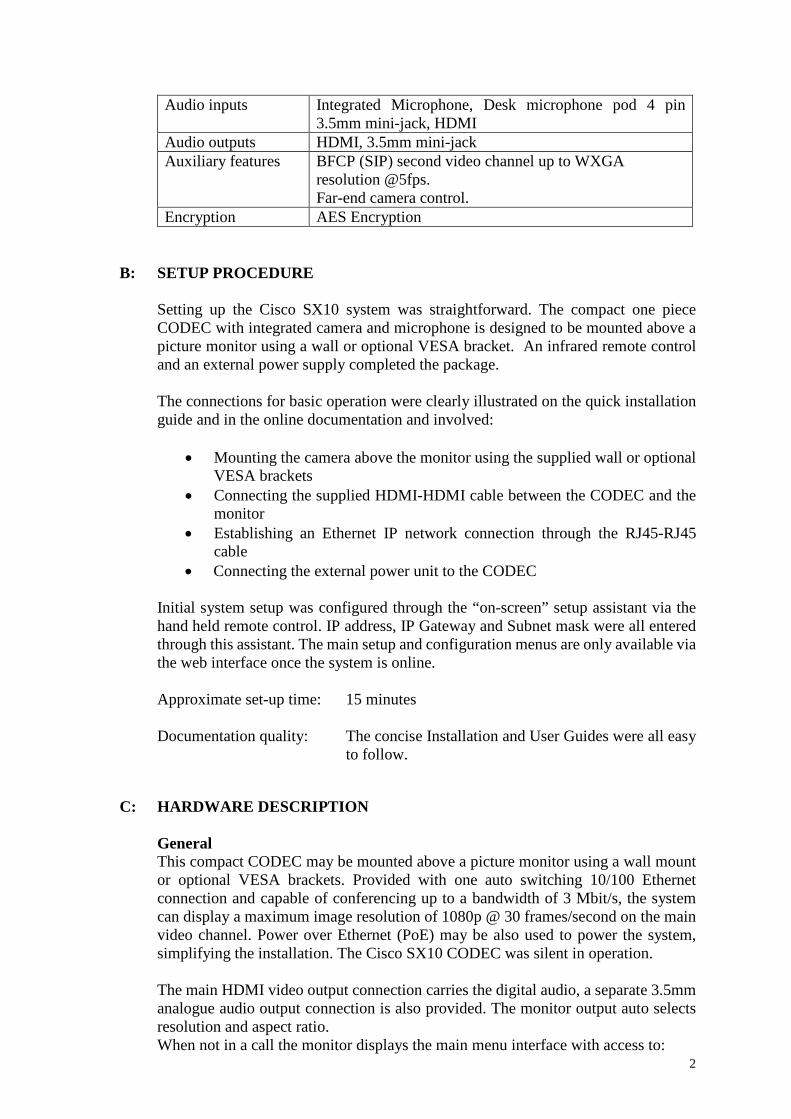
Remote Control
The remote control includes a limited number of control buttons:
• Call • Hang Up • Mic Mute • Menu Navigation, Enter and Return • Context Sensitive +/- for Camera Zoom and Volume
In a call the monitor displays the following layout selection:
• Large far image, small near image PIP
A dual stream connection is initiated and terminated on the remote control via the graphic interface by:
• To open the dual stream connection: Press the enter button to display the menu then select Share from the on screen graphic interface.
• To close the dual stream connection: Press the enter button again to display the menu, then select Stop Sharing from the on screen graphic interface
The camera occupies one channel and the source connected to the VGA or HDMI input occupies the second channel - normally this is a PC or laptop. At the remote site these two images may either be viewed on two separate monitors or using POP displayed on a single screen. When dual stream presentation material is either transmitted or received the monitor displays the following layout selections:
• Large presentation image, small far image POP (Prominent) • Presentation image full screen (Single) • Presentation image and far image equal size POP (Equal) • Full screen of the presentation image, far image PIP (Overlay)
6

Layout Selection
A small near image PIP may be turned on/off via the Camera Control Menu and added to the layouts above. The screen position of both near and far image PIPs may be moved via the user interface. While the position of the near image PIP may be moved it will always overlap some of the presentation image. The most useful “Prominent” layout is shown in the example below. The near end PIP is the same size as the far end POP and it cannot be set in a position that does not cover some of the presentation image.
7

The system takes a significant period to boot up from cold (~80 seconds). When not in a call the system automatically goes into screen saver mode after a user-definable period of time. An incoming call, button press, or simply picking up the remote control will return the system to active mode. Connection statistics are not available via the remote control and graphic interface, however the system may also be configured, controlled and monitored via a password protected web interface from a network-connected PC. This facility provides configuration, control and monitoring facilities, including low frame rate video of the main video and presentation images together with detailed call statistics.
8

Web interface Camera Configuration Menu
Web interface Call Control Menu
9

Web interface Call Statistics
10

E: VIDEO TESTS SUMMARY
The video quality experienced from the Cisco SX10 system at 1080p @ 30fps was good. However the restriction on the presentation channel frame rate to 5fps resulted in poor moving image rendition on presentation material. During the evaluation the camera image tended to be slightly over exposed and the white balance was not as accurate as Cisco Precision HD cameras.
F: AUDIO TESTS SUMMARY
Setup The echo canceller is fully automatic in operation. The quality of echo cancellation and doubletalk from the system was very good.
Room Audio levels adequate? (Yes/no) Yes Audio quality acceptable? (Yes/no) Yes Echo cancellation acceptable? (Yes/no) Yes
Quality of double talk Very Good It was noted that use of the integrated microphone had an adverse impact on the audio quality, whilst use of the optional desk microphone significantly improved the audio quality.
G: INTEROPERABILITY There were no problems connecting from the Cisco SX10 unit.
Time to Connect with encryption On
All speeds 4 seconds
Connectivity with Other Machines (models listed with comments) Due to the Cisco SX10 being SIP only we were unable to test interoperability with our full standard list of systems as many of them are configured H.323 only. Successful connections were made in each direction with the CODECs below; dual stream presentation material was also shared.
11

Connectivity with the JANET Videoconferencing Service (v-scene) SIP The Cisco SX10 connected successfully to the v-scene Codian MCU at high definition using H.264 video, 720p resolution and AAC-LD audio with video and audio in both directions. Dual Stream also interoperated correctly. The received audio level was measured as peaking to -4dBm. Procedure for making a call 1. Press the “Call” button on the remote control 2. Input the SIP address 3. Press the “Call” button Or use the Directory, Favourites or Recent Calls list available from the user interface.
CODEC Call Bandwidth
Resolution Transmitted by The Cisco SX10
Resolution Received by The Cisco SX10
Cisco SX20 S/W TC7.2.0 (Premium Res)
3 Mbit/s 1080p @ 30
1080p @ 30
Cisco C40 S/W TC7.2.0 (No Premium Res)
3 Mbit/s 720p @ 30 720p @ 30
Lifesize Express 220 S/W 5.0.3
3 Mbit/s 720p @ 30 720p @ 60
12