chim’s guide to dissecting a buckmark
TRANSCRIPT

Chim’s Guide to Dissecting a Buckmark From time to time, shooters have asked questions that could have been answered better with some pictures. So tonight I grabbed the camera and a few Buck Marks. Only one pistol is completely stripped down, a Contour I picked up a while back. I did partially disassemble a couple others to illustrate some differences, mostly the variations in Buck Mark slides and a newer pistol with a magazine disconnect. The “innards” are pretty much the same otherwise. Remove the barrel/rib assembly. All you need to do is make sure the gun is empty and lock the slide back, remove the mag, remove the rearmost screw of the rear sight (or rib if so equipped). Note the locations of the washers. Now loosen the screw in the front of the trigger guard. The barrel will lift off. Carefully release the slide to relieve most of the tension on the spring. Looking at the top of the pistol with the slide removed, you will see something that looks like either the top pistol (a newer Buck Mark with the plastic firing pin guide) or the lower pistol (IIRC, a pre-2001 model) in the picture below:
If it is an older one, the slide will pretty much just lift off at this point. Unless you’re missing the “C” clip retainer for the slide return spring, no parts will fly off. (NEW MODELS W/ PLASTIC FIRING PIN GUIDE - To remove the slide, take a dental pick or something else thin and insert it between the recoil buffer and the recoil post. The guide rod protrudes through the buffer slightly and locks into a small hole in the post. Gently pry between the buffer and post to disengage it. The slide will then lift off with all its parts. Here’s a picture just in case:

To remove the plastic firing pin guide, use a dental pick to get under it and pry it up and out. There's space between the plastic and the slide to work the hook of a dental pick in below the plastic housing. The housing needs to come straight up so it doesn't bind. So don't try to get it out without moving the pick to the front and rear to keep it even on the way out.) Here’s a shot of that:
Place the pistol flat on a table and remove the right grip. Note where the parts are located. The “T”-shaped flat mag button spring is installed so it humps up in the middle. It and the button are only held in by gravity at this point. The disconnector is held in place (not

securely with the grips off) with the “V” shaped spring. Here is a picture of a “pre-mag safety” Buck Mark. Nothing special, but for those of you with very recently built guns, here’s what the previous ones look like:
For those of you with older Buck Marks, here’s how the newer ones look. My mag disconnect “accidentally” came off right after getting the pistol. I reinstalled it for the series of pictures.

Lift the loose parts off of the grip frame, pull the disconnector spring out and lift the disconnector. Turning the pistol over will dump the mag button. Here’s a shot of the disconnector being lifted off with a dental pick:
When the disconnector is raised a bit, it can be unhooked from the mag safety link. The link itself can be easily removed by using a mag to depress the spring plunger that the lower end of the mag link engages:
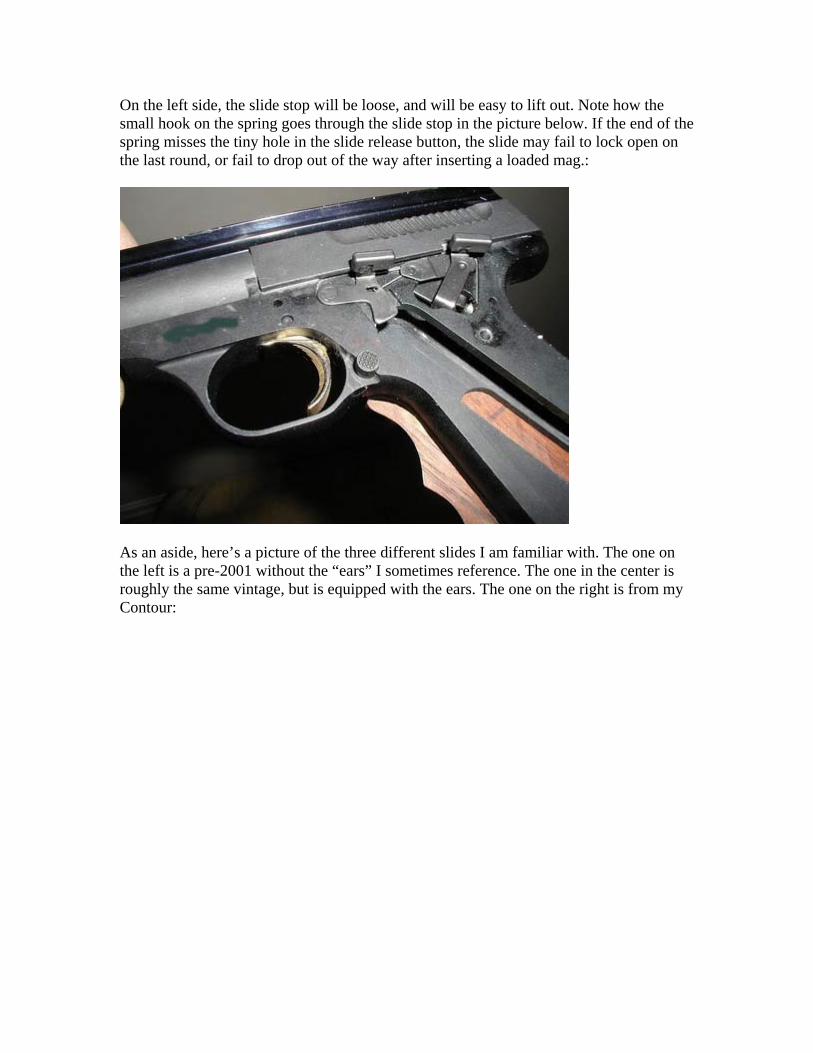
On the left side, the slide stop will be loose, and will be easy to lift out. Note how the small hook on the spring goes through the slide stop in the picture below. If the end of the spring misses the tiny hole in the slide release button, the slide may fail to lock open on the last round, or fail to drop out of the way after inserting a loaded mag.:
As an aside, here’s a picture of the three different slides I am familiar with. The one on the left is a pre-2001 without the “ears” I sometimes reference. The one in the center is roughly the same vintage, but is equipped with the ears. The one on the right is from my Contour:

Next, push the sear spring pin out with a small punch. There’s little tension, and it should come out easily:
With that out of the way, the sear pin needs to be removed. On most pistols I have been in, it is peened very slightly on the end that sticks out through the safety click plate, and most have the frame staked slightly on the right side. I have a small awl and a very light hammer for this. The pin comes out by tapping the smaller end that sticks through the click plate. This end is almost hidden by the safety lever. See the picture below:
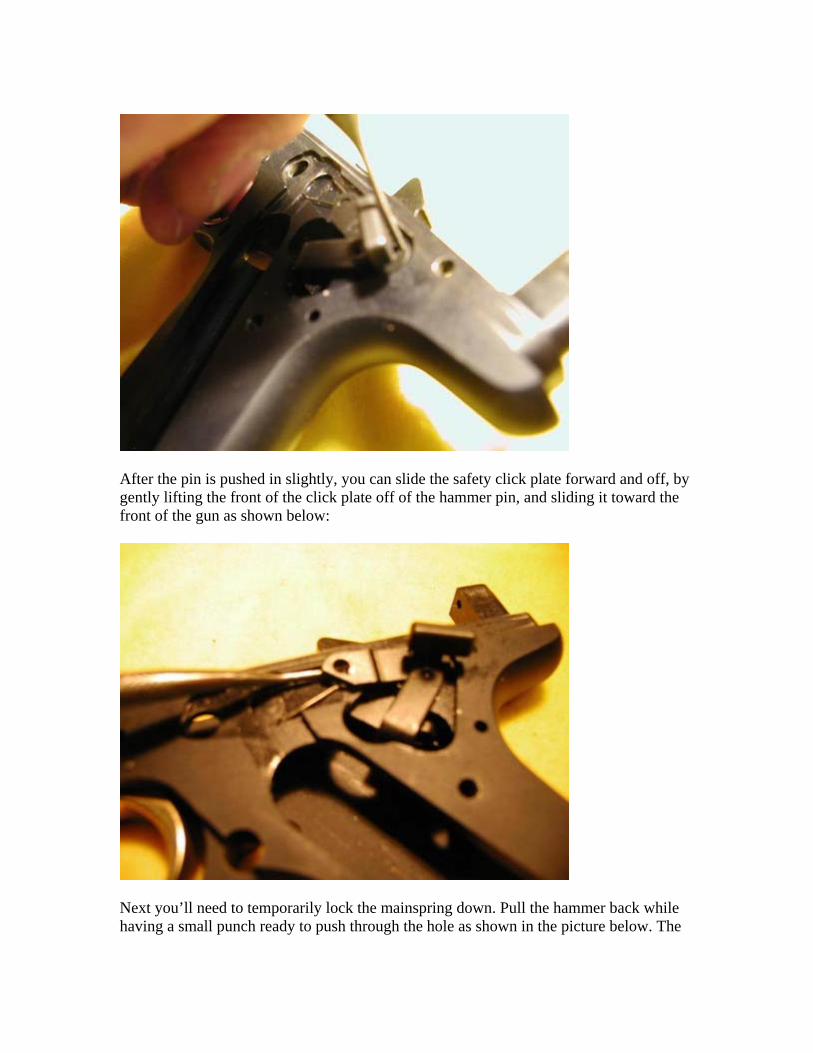
After the pin is pushed in slightly, you can slide the safety click plate forward and off, by gently lifting the front of the click plate off of the hammer pin, and sliding it toward the front of the gun as shown below:
Next you’ll need to temporarily lock the mainspring down. Pull the hammer back while having a small punch ready to push through the hole as shown in the picture below. The

idea is to get the punch through the frame with the spring and plunger held captive below it. This will remove all tension from the hammer:
If you wish to remove the mainspring and plunger, simply use another punch as shown in the photo below to depress the plunger. The punch in the picture that is sticking up is lined up in the cupped end of the plunger. It takes quite a bit of force to depress the plunger so the first punch can be removed. “Don’t shoot your eye out, kid”.

Now the hammer pin can be pushed out from right to left without removing the hairpin-shaped slide stop spring:
The safety lever rotates for removal and reinsertion. Absolutely no force is required. The original owner of my first Buck Mark didn't understand this concept, and I was never able to get the safety to operate smoothly. The picture below shows approximately how far the safety needs to be rotated for easy removal:

If you want to remove the trigger, the pins should be driven left-to-right. Start with the top pin first. Note that on reinstallation, the depth that this pin is driven in is important. Not far enough and it will drag on the grip. Too much, and it may allow the disconnector to slip off, or it could act as a crossbolt safety by sticking so far to the left that it goes into the hole the factory left for the punch. See photo:
Here’s a shot of the disassembled Contour, although I didn’t bother to remove the trigger:

Here’s the part of the hammer that I polished. Note the word “polish”. Not “grind”. Very little material should be removed. Simply removing tool marks and polishing:
Here’s the part of the sear I polished. Again, it is important to simply polish, and not change the shapes or angles of the parts:

A few things to note for reassembly: The hammer strut generally doesn't cooperate, and sometimes you need to try a couple of times to get it. The sear spring will try your patience also. The one leg of the spring has a habit of slipping out of position and getting tied up between the frame and the sear. I think certain planets must be perfectly aligned to have this go together the first attempt ;-) Here’s how it was done tonight. A hemostat on the spring, a punch to assist with alignment and the pin started:
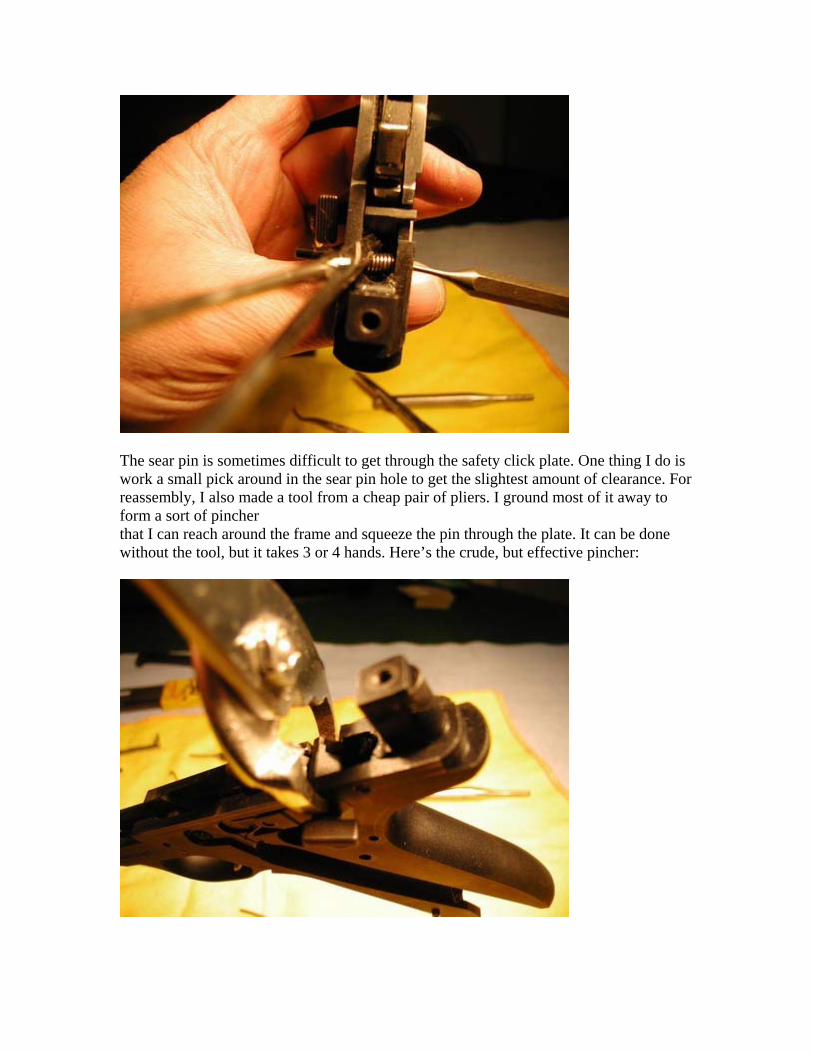
The sear pin is sometimes difficult to get through the safety click plate. One thing I do is work a small pick around in the sear pin hole to get the slightest amount of clearance. For reassembly, I also made a tool from a cheap pair of pliers. I ground most of it away to form a sort of pincher that I can reach around the frame and squeeze the pin through the plate. It can be done without the tool, but it takes 3 or 4 hands. Here’s the crude, but effective pincher:

After reassembly, the sear pin should be peened again where the small end sticks through the safety click plate. Otherwise, it can shift out of position. This is fairly easy if you have access to a vise. I clamp one flat-ended punch with a diameter the same size (or slightly smaller than the large end of the sear pin) in the vise and position the gun over the punch so the large end of the sear pin is square on the end of the punch. I then take another (smaller) flat-ended punch and gently tap the small end of the sear pin so it fills and binds in the hole of the safety click plate. This is something that is easier to do with some help from a friend. It can be done without assistance, but it's hard to hold the gun and the second punch where it needs to be with just one hand so the other hand is free for the hammer. I should note at this point that I didn’t peen the pin on the Contour just yet. I thought I’d try it out for a while to see how it felt. I guess that was about a year ago. When I disassembled it tonight, everything was fine. It has had quite a few rounds through it since it was reassembled the last time