chassis & attachments 101 - roboplex
TRANSCRIPT

Chassis & Attachments 101Part 1: Chassis Overview
20181

Introductions
• Rest rooms location.
• Food and Drink.
• Cell phones.
2
http://www.roboplex.org/fll
Today presentation available at:

Equipment
FLL EV3 Robot Set
• EV3 Core Set • EV3 “brick”• EV3 Electronics• Technic LEGO components
• EV3 Expansion Set
• EV3 Programming Software and License
• Robot Educator Bot• Recommended first build• Directions and tutorials in EV3 Software Education
version
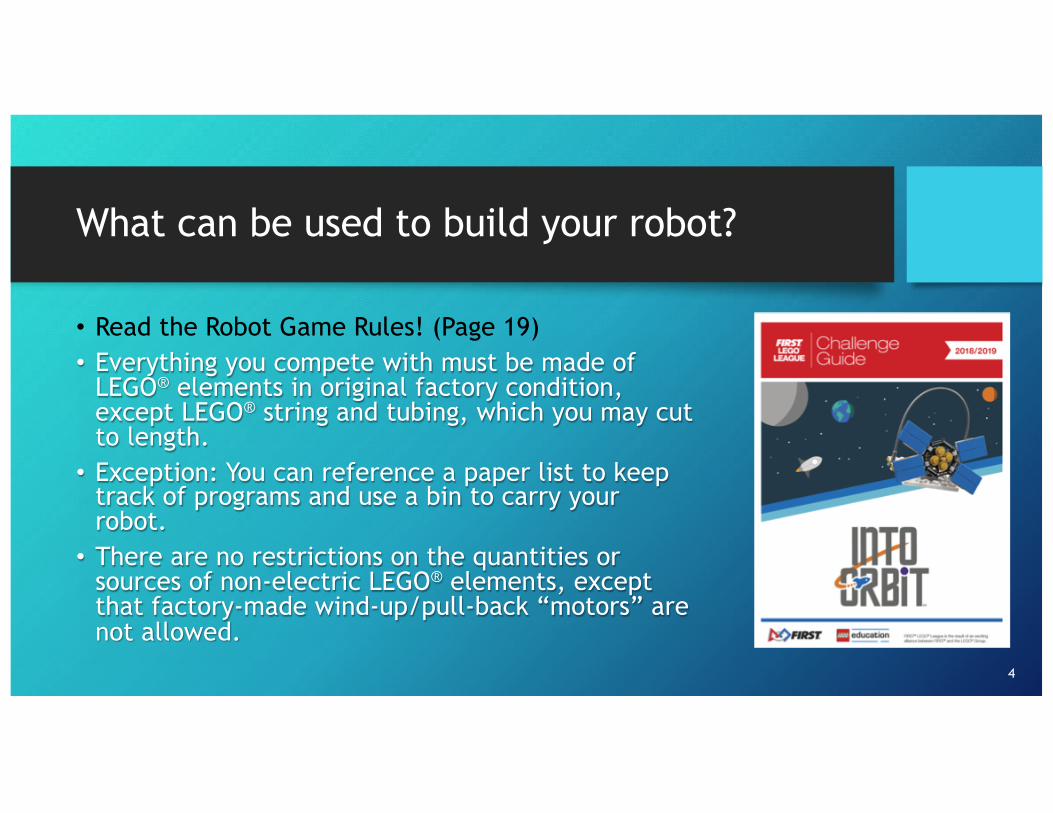
What can be used to build your robot?
• Read the Robot Game Rules! (Page 19)• Everything you compete with must be made of
LEGO® elements in original factory condition, except LEGO® string and tubing, which you may cut to length.
• Exception: You can reference a paper list to keep track of programs and use a bin to carry your robot.
• There are no restrictions on the quantities or sources of non-electric LEGO® elements, except that factory-made wind-up/pull-back “motors” are not allowed.
4

What can be used to build your robot?
• LEGO® pneumatic elements are allowed.
• On the robot, marker may be used for owner identification in hidden areas only.
• Paint, tape, glue, oil, dry lubrication, etc. are not allowed.
• Stickers are not allowed except LEGO® stickers applied per LEGO® instructions.
5

What can be used to build your robot?
• The electric elements used must be the LEGO® MINDSTORMS® type, and the total number of electric elements you may use in one match is limited as follows:
• One Controller (RCX, NXT, or EV3)
• Four Motors - Must be MINDSTORMS® motors
• A fifth motor is not permitted in the competition area (you may have unlimited spare motors at the pit area)
• Unlimited Sensors• Must be Touch, Light, Color, Rotation, Ultrasonic, or Gyro sensor
• Must be LEGO® manufactured MINDSTORMS® sensors
6
Rule Changes for 2018
MAJOR• If you interrupt the Robot while it’s transporting something it took from
Base during the most recent launch, you can now keep that object.
MINOR• Border lines are always part of the area they define.
• Disputes related to the thickness of thin lines (such as the border of Base) always settle in favor of the team.
• You need to conform to local event standards regarding the style and size of your Storage trays and carts.
• It’s OK to shut off the Robot and leave it in place wihtouth penalty if it’s done with intended Missions. 7
F
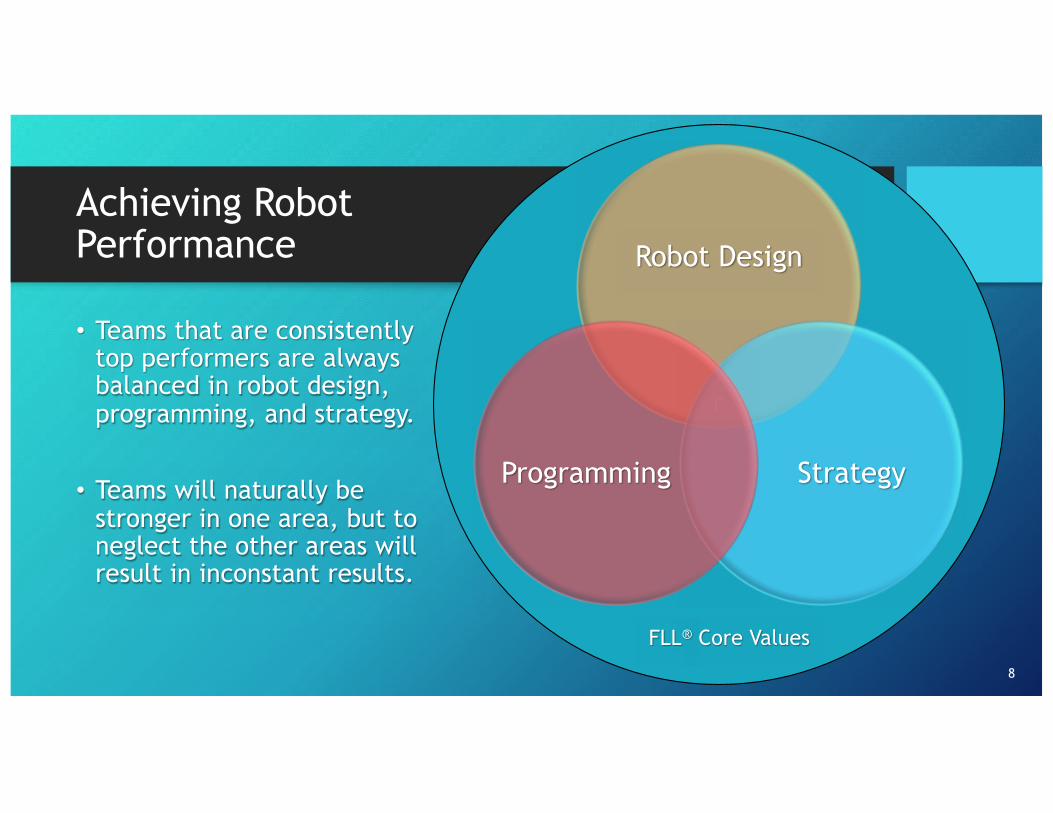
Robot Design
StrategyProgramming
Achieving Robot
Performance
8
• Teams that are consistently
top performers are always
balanced in robot design,
programming, and strategy.
• Teams will naturally be
stronger in one area, but to
neglect the other areas will
result in inconstant results.
FLL® Core Values

Strategy
Great robot design + poor strategy =
inconsistent scores
Fair robot design + good strategy = consistent
scores
9

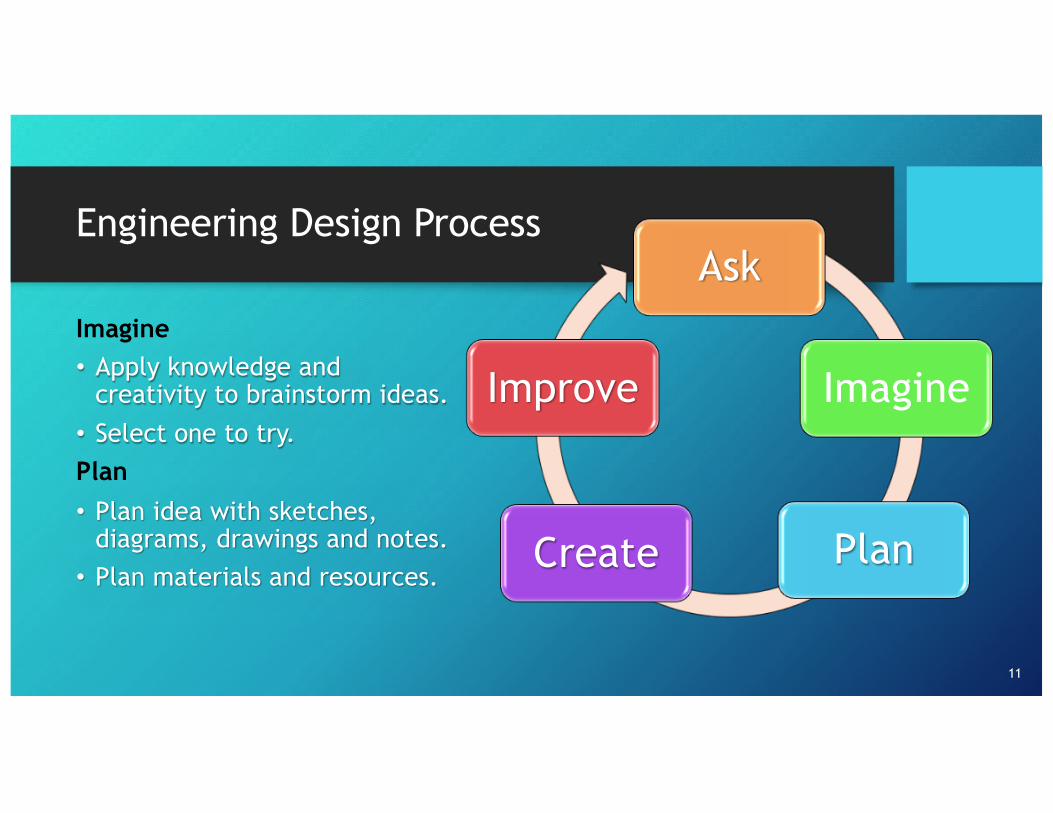
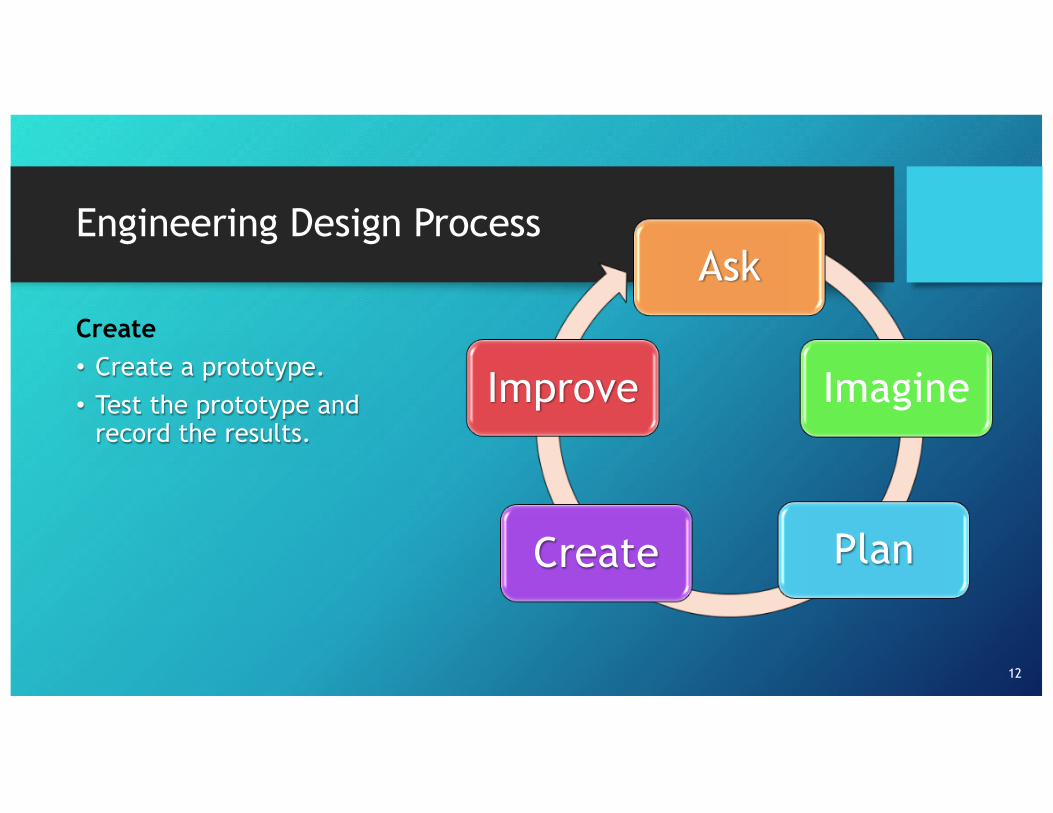
Engineering Design ProcessAsk
Imagine
PlanCreate
Improve
Ask• What is my design supposed
to do?
• How will I test my design?
• How will I know it is doing what I want?
• What could keep me from making it do that?
10
Engineering Design Process
Ask
Imagine
PlanCreate
Improve
Imagine• Apply knowledge and
creativity to brainstorm ideas.
• Select one to try.
Plan• Plan idea with sketches,
diagrams, drawings and notes.
• Plan materials and resources.
11
Engineering Design Process
Ask
Imagine
PlanCreate
Improve
Create• Create a prototype.
• Test the prototype and
record the results.
12

Design Process
Ask
Imagine
PlanCreate
Improve
Improve
• Analyze design and test
results.
• What change would make the
biggest impact on meeting
the goal?
• Apply knowledge and
creativity to brainstorm
ideas.
13

Common Attributes of FLL® Robots
• Two motors are used for the drive wheels, one on each
side for turning
• The third and fourth motors for attachments such as a
vertical lift, arm mechanism, or attachments
• Multiple attachments for different missions
• Robots must fit inside the base
Attachments are removable – Mechanisms are not
14

Robot Design Tip
• Coach Mike shared a pretty cool story with us about a simple innovation on his team:
• “Pretty good” design can get in the way of innovation. For our FIRST® LEGO® League team Avian Allies (24879) that was sometimes the case. We didn’t want to take apart or change already working attachments. Until recently when one of our team members had a simple, but inspired idea. He said, “I wish there was an undo button for robot/attachment design.”
• I asked the team how we might create an “undo button.” They suggested taking photos at each stage of deconstruction and development. Now there is nothing earth shattering about the idea of taking photos of the team’s designs. However, branding the process as an UNDO button encourage them to actually do it consistently. It has helped to spawn more innovation and risk taking on our team. They discovered that naming something matters and that sometimes innovation in right in front of you.
15

Robot Design Executive Summary
and FLL® Robot Design Rubric
16
The Robot Design Executive Summary and Robot Design Rubrics
are available at http://www.firstinspires.org
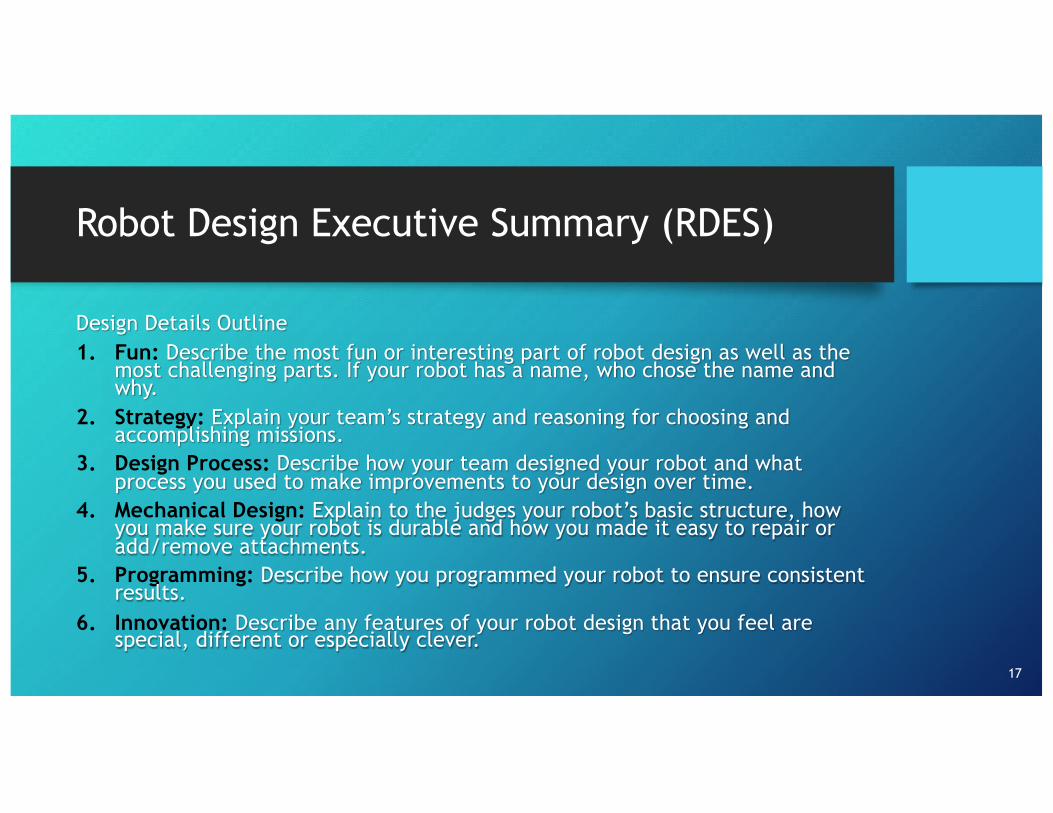
Robot Design Executive Summary (RDES)
Design Details Outline1. Fun: Describe the most fun or interesting part of robot design as well as the
most challenging parts. If your robot has a name, who chose the name and why.
2. Strategy: Explain your team’s strategy and reasoning for choosing and accomplishing missions.
3. Design Process: Describe how your team designed your robot and what process you used to make improvements to your design over time.
4. Mechanical Design: Explain to the judges your robot’s basic structure, how you make sure your robot is durable and how you made it easy to repair or add/remove attachments.
5. Programming: Describe how you programmed your robot to ensure consistent results.
6. Innovation: Describe any features of your robot design that you feel are special, different or especially clever.
17

FLL® Robot Design Rubrics
18
http://www.firstinspires.org/resource-library/fll/judging-rubrics

Chassis Durability
Evidence of structural integrity; ability to withstand rigors of
competition
Accomplished: Rare faults/Repairs
Exemplary: Sound Construction; No Repairs
• Things to ask about your robot:
• Does my robot stay together during routine handling?
• Does my robot have excessive flex when moving?
• Does my robot wheels remain in contact with the mat?
19
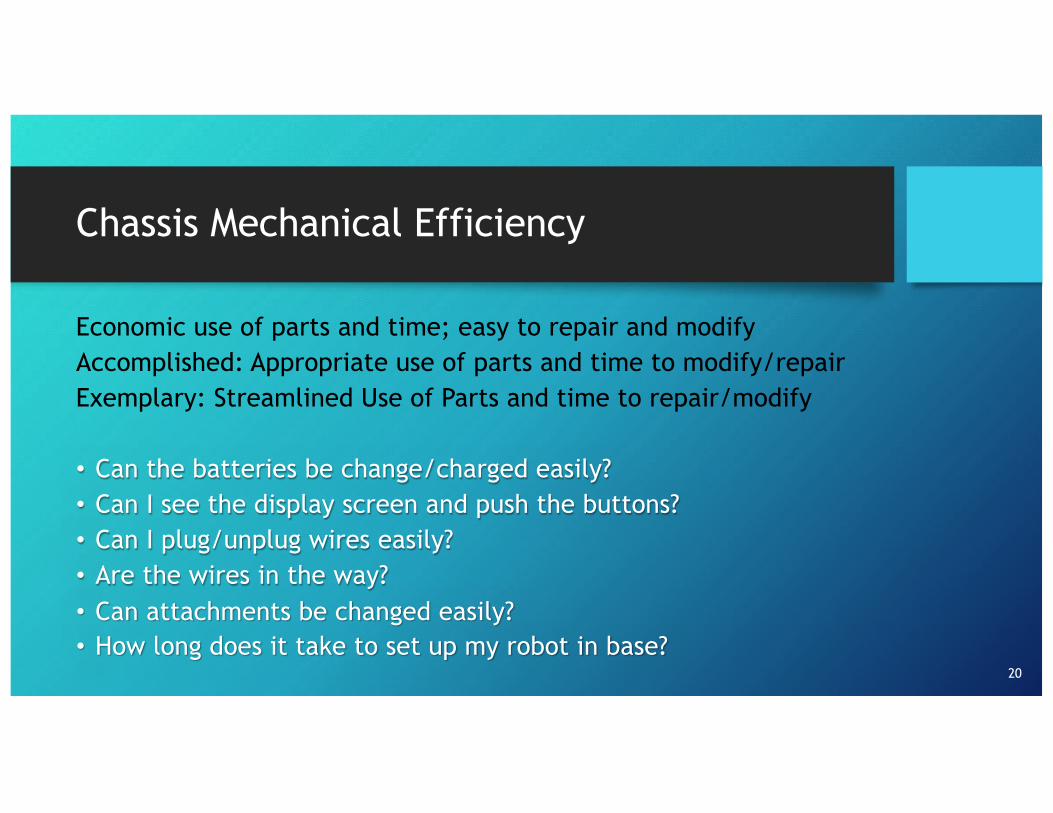
Chassis Mechanical Efficiency
Economic use of parts and time; easy to repair and modify
Accomplished: Appropriate use of parts and time to modify/repair
Exemplary: Streamlined Use of Parts and time to repair/modify
• Can the batteries be change/charged easily?
• Can I see the display screen and push the buttons?
• Can I plug/unplug wires easily?
• Are the wires in the way?
• Can attachments be changed easily?• How long does it take to set up my robot in base?
20

Chassis Mechanical Efficiency
• Robot Setup – Know Where to Start!
• The base is bigger than it appears, where does the robot go?
• When positioning the robot, the angle the robot is heading is very
important. If the heading is off by 1 degree, four feet (half the
length of the field) from the start, the robot will be off course by
over 1 ½ inches
21

Chassis Mechanical Efficiency
• Even robots that self correct position need to have a
consistent starting point
• Proper starting position includes powered mechanisms
and attachments, everything must start within base
• Alignment tools, such as robot bumpers and jigs help if
built properly and consistently used
22

Chassis Mechanization
Ability of robot mechanisms to move or act with appropriate speed,
strength and accuracy for intended tasks (propulsion and execution)
Accomplished: Appropriate balance of speed, strength, and
accuracy on most tasks.
Exemplary: Appropriate Balance of Speed and Strength on Every
Task
23

Chassis Mechanization
• Does the robot have the right wheels?• Big wheels are faster, can move over obstacles, but
can be less accurate.• Wider tires have more friction than skinny tires
making turning less repeatable.
• How does the battery charge effect the robot movement?• The theoretical output speed of the EV3 large motor is
52.5 RPM at 9V, but at 7V only 39 RPM.
24

Chassis Mechanization
• Where is the Center of Gravity (CG) of the robot?• Is the robot top heavy?• How will the robot’s CG change when the robot picks
up something?• Does the robot tip over on slopes, sharp turns, stops,
or in collisions
• What happens when the robot backs up?
25

Chassis Basics
26
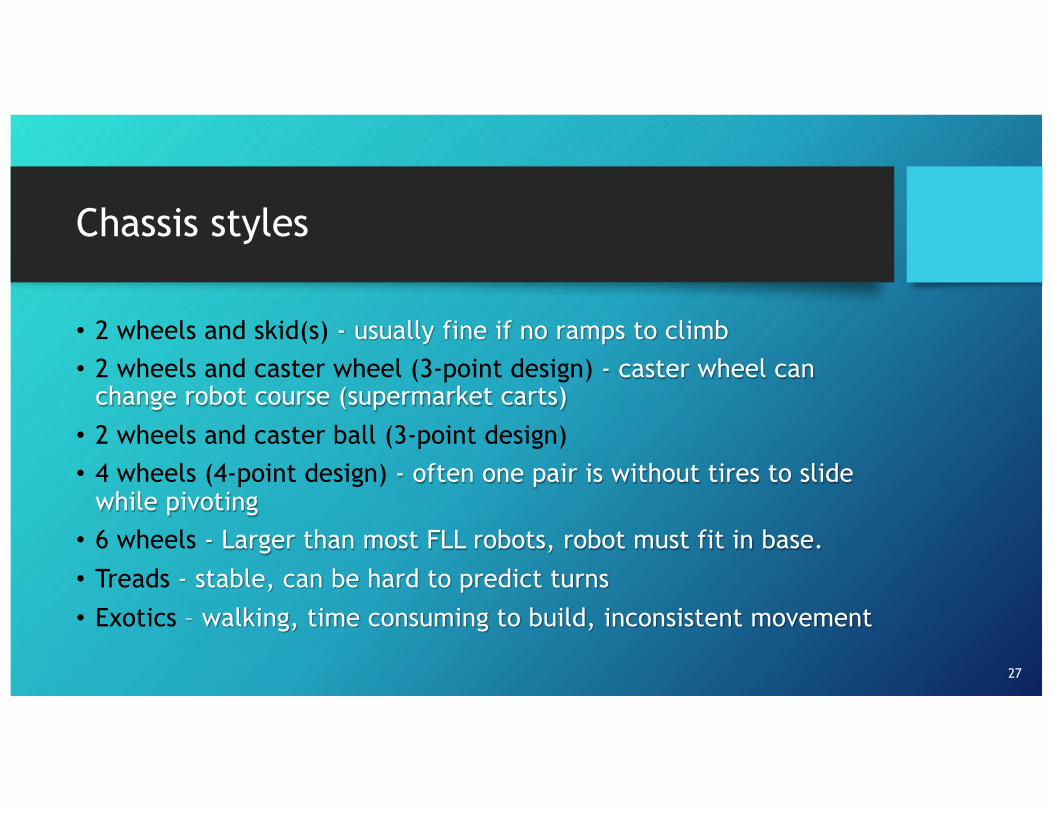
Chassis styles
• 2 wheels and skid(s) - usually fine if no ramps to climb
• 2 wheels and caster wheel (3-point design) - caster wheel can
change robot course (supermarket carts)
• 2 wheels and caster ball (3-point design)
• 4 wheels (4-point design) - often one pair is without tires to slide
while pivoting
• 6 wheels - Larger than most FLL robots, robot must fit in base.
• Treads - stable, can be hard to predict turns
• Exotics – walking, time consuming to build, inconsistent movement
27

Chassis mobility
28
Size of chassis: the
robot has to
navigate around
the obstacles on
robot field
Chassis mobility
• A bigger chassis require more motor power draining
batteries quicker
• Remember, after the robot is built, you still need to get
to the battery compartment or charging plug on the brick
• Chassis will need places for attachments to attach
• Wires from brick to motor and sensors should be tucked
away so they don’t catch on anything
29
Chassis mobility
Will gears help?
• Small gear on motor and big gear on attachment or
wheel
• Slower, More precise, More torque (power)
• Big gear on motor and small gear on attachment or
wheel
• Faster, Less precise, Less torque
30
http://gears.sariel.pl/

Navigation
31

Wheels, Tracks and Axle tips
• Tracks• Low Friction/High Slippage• Motion and Turns not repeatable
• Large wheels go further per revolution• Friction varies with different wheels• Consider how they pivot turn and go straight
• Wheel Axle Support• More support, less wiggle/sag• Support from both sides is best
32
Building to go straight
• Straight motion
• Wheel balance
• Wheel alignment
33
http://wheels.sariel.pl/
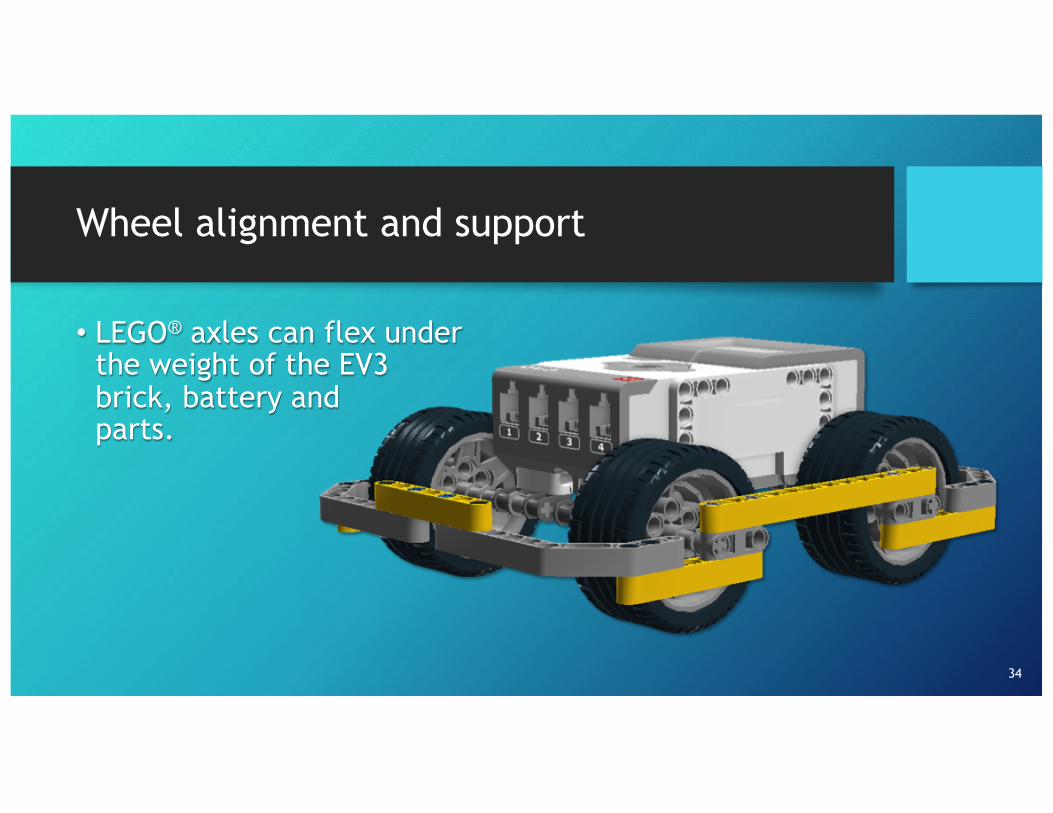
Wheel alignment and support
34
• LEGO® axles can flex under the weight of the EV3 brick, battery andparts.

Wheel Support - Poor
35
2 full bushings
and 1 half bushing
• Wheels should be mounted
close to supporting beam,
but not rubbing against it

Wheel Support - Better
36
1 halve bushing
3M Beam with 2
black friction pegs

Wheel Support - Best
37
• Beams on both sides
provides the best
support
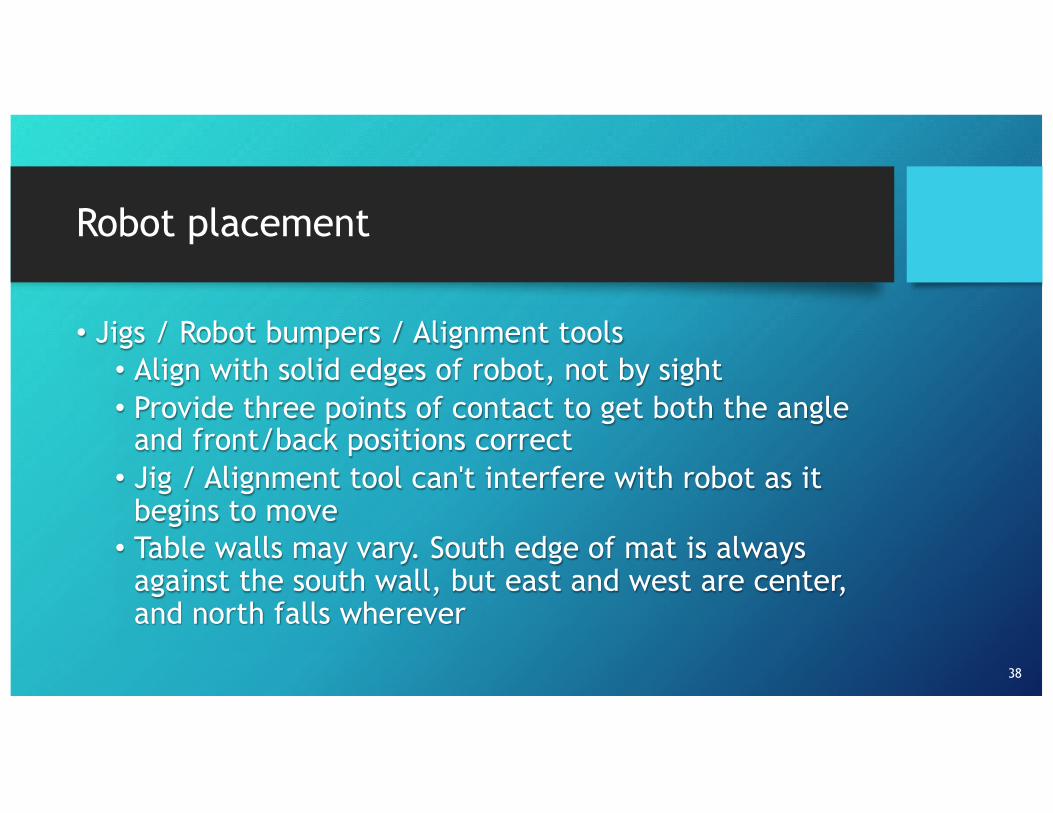
Robot placement
• Jigs / Robot bumpers / Alignment tools
• Align with solid edges of robot, not by sight
• Provide three points of contact to get both the angle
and front/back positions correct
• Jig / Alignment tool can't interfere with robot as it
begins to move
• Table walls may vary. South edge of mat is always
against the south wall, but east and west are center,
and north falls wherever
38

Three types of turns
• The robot will turn when one wheel moves at a different
speed from the other
• The greater the difference in wheel speeds, the tighter
the turn
• Pinpoint - robot spins around a point (tank turn)
• Pivot - robot turns about a fixed wheel
• Curved - robot turns about an arc
39

Pivot turn left
BREAK
40
Powering the right wheel
while breaking the left
will cause the robot to
turn right.

Pivot turn right
BREAK
41
Powering the left wheel
while breaking the right
will cause the robot to
turn right.

Consistent Steering Tips
• Reduce friction
• Remove tires from rims
• Use EV3 caster in place of
non-powered wheels
• Brake stationary wheel on
pivot turns
42
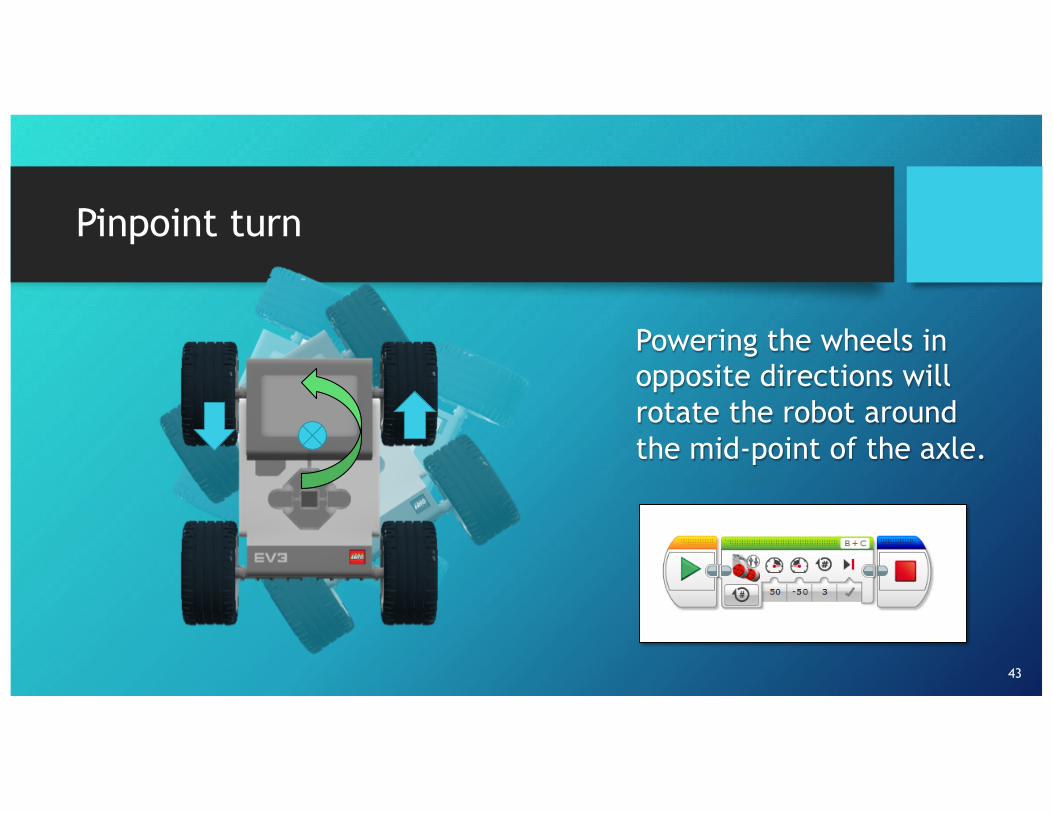
Pinpoint turn
43
Powering the wheels in
opposite directions will
rotate the robot around
the mid-point of the axle.

Curved turn
44
Powering one wheel less
will turn the robot in the
direction of that wheel.
The great the difference in
power the more the turn.

Navigation methods
• Wall following
• Horizontal guide wheels
• Approach wall at shallow angle
• Mounting sensors covered in Attachments and Sensors.
• Programming sensors covered in Programming Workshops including countering gyro drift.
45
Navigation methods
• Line following
• For greatest accuracy, box light sensors to eliminate (as
much as possible) ambient light. Use the light generated
by the light sensor itself
• Calibration can help to reduce the effect of changes in
external lighting, but is hard to eliminate
• Light sensors tend to hunt – pivoting on one wheel (instead
of two) tends to be less jittery and make faster progress
• Take advantage of knowing the proper course for the
mission – not a general – purpose line follower
46
Online – References and Tools
• EV3 Lessons: http://ev3lessons.com/index.html
• Techbrick: http://www.techbrick.com/
• Wheels: http://wheels.sariel.pl/
• Gears: http://gears.sariel.pl/
CAD for LEGOS®
• LEGO® Digital Designer: http://ldd.lego.com/en-us/
47

Online - Parts
• Lego Educational: http://legoeducation.us/Go to the "SHOP" menu and then select "LEGO Spare Parts and Accessories”
• Brick Owl: http://www.brickowl.com/
• Techbrick: http://www.techbrick.com/• BrickSet: http://brickset.com/browse
48