charting and scanning blood transfusions in the bridge ... · userhandouts/blood administration...
TRANSCRIPT
UserHandouts/Blood Administration 12.21.15 Page 1
Charting and Scanning Blood Transfusions in the Bridge Medical Application This handout reviews how to scan and chart the following in the Bridge Medical Application:
Accessing the Bridge Medical Application
Starting the Transfusion
Charting Vital Signs
Holding a Transfusion
Ending a Transfusion
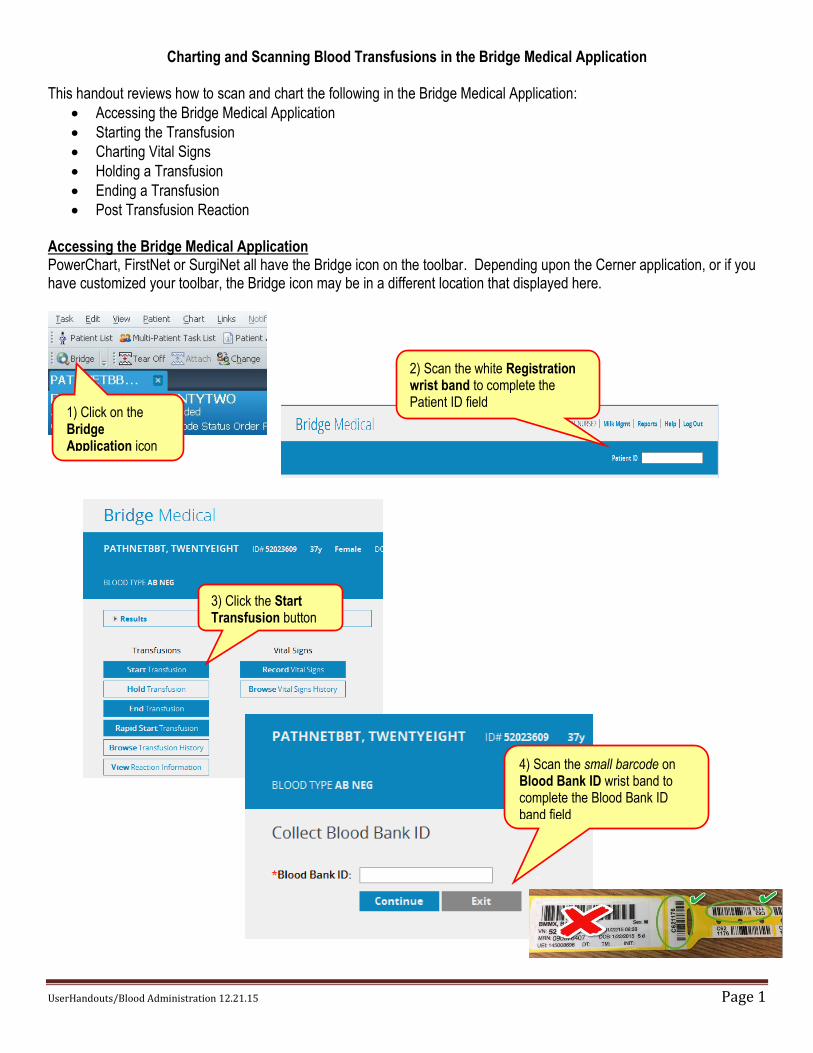
Post Transfusion Reaction Accessing the Bridge Medical Application PowerChart, FirstNet or SurgiNet all have the Bridge icon on the toolbar. Depending upon the Cerner application, or if you have customized your toolbar, the Bridge icon may be in a different location that displayed here.
1) Click on the Bridge Application icon
4) Scan the small barcode on Blood Bank ID wrist band to complete the Blood Bank ID band field
3) Click the Start Transfusion button
2) Scan the white Registration wrist band to complete the Patient ID field
UserHandouts/Blood Administration 12.21.15 Page 2
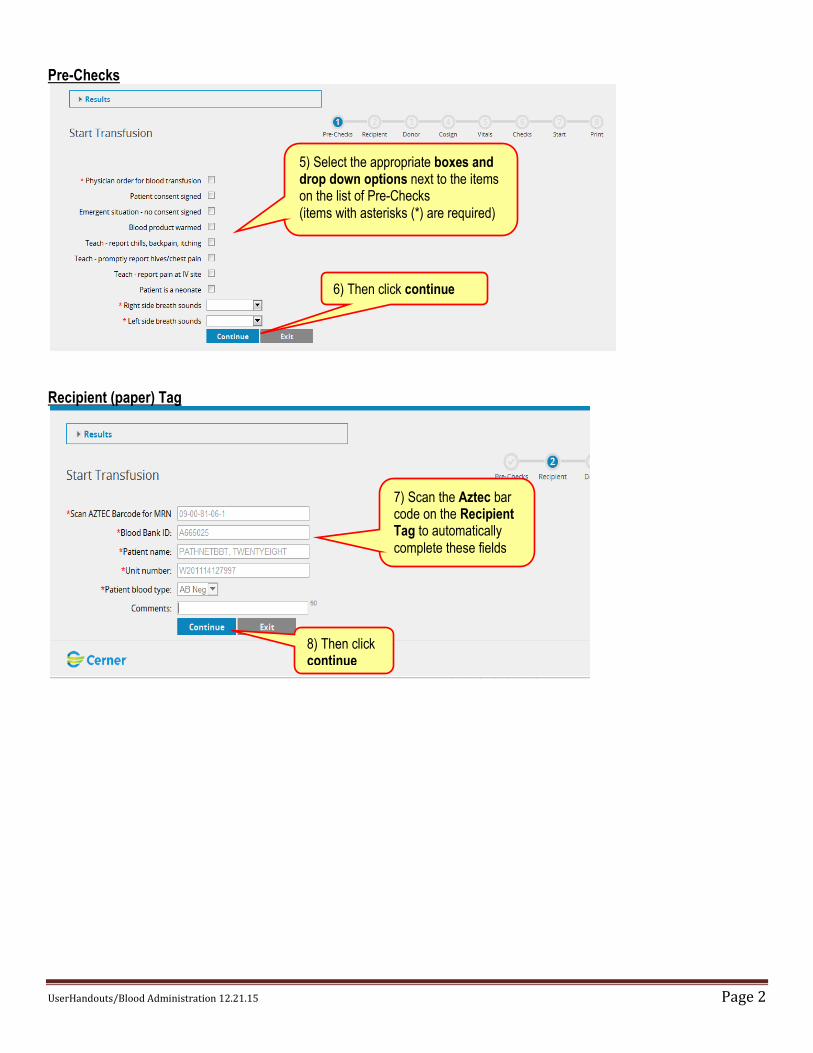
Pre-Checks
Recipient (paper) Tag
5) Select the appropriate boxes and drop down options next to the items on the list of Pre-Checks
(items with asterisks (*) are required)
6) Then click continue
8) Then click continue
7) Scan the Aztec bar code on the Recipient Tag to automatically
complete these fields
UserHandouts/Blood Administration 12.21.15 Page 3
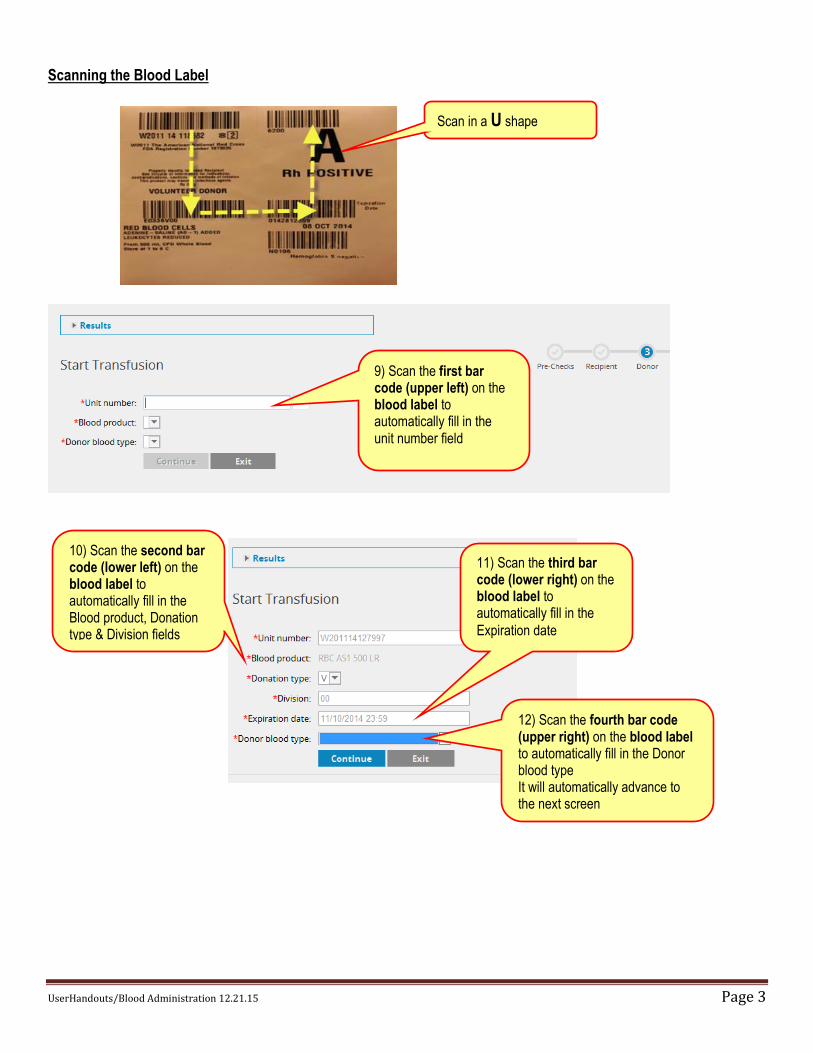
Scanning the Blood Label
9) Scan the first bar code (upper left) on the blood label to automatically fill in the unit number field
10) Scan the second bar code (lower left) on the blood label to automatically fill in the Blood product, Donation type & Division fields
11) Scan the third bar code (lower right) on the blood label to automatically fill in the
Expiration date
12) Scan the fourth bar code (upper right) on the blood label to automatically fill in the Donor blood type It will automatically advance to the next screen
Scan in a U shape

UserHandouts/Blood Administration 12.21.15 Page 4
13) Complete the Vital Signs (items with asterisks (*) are required)
14) Then click Continue
15) Click Start to begin the transfusion
The date and the time the transfusion was started is now displayed
The date and time that the next set of vitals needs to be documented will display here
UserHandouts/Blood Administration 12.21.15 Page 5
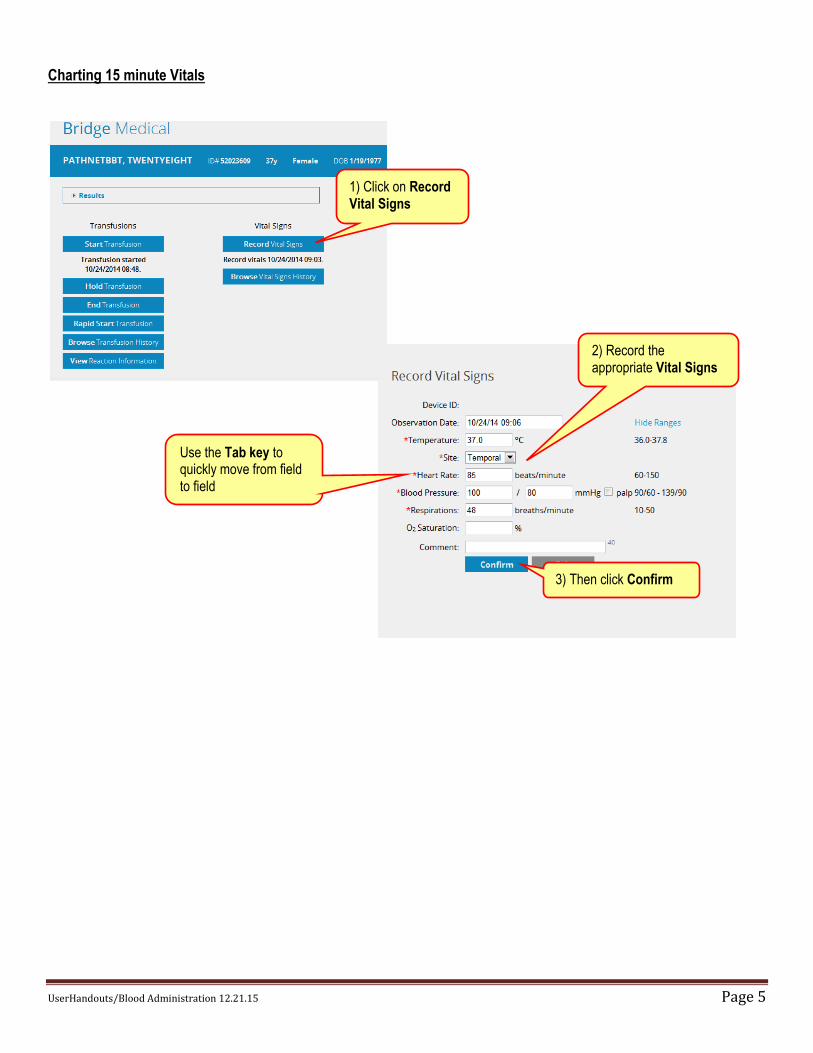
Charting 15 minute Vitals
1) Click on Record Vital Signs
2) Record the appropriate Vital Signs
3) Then click Confirm
Use the Tab key to quickly move from field to field

UserHandouts/Blood Administration 12.21.15 Page 6
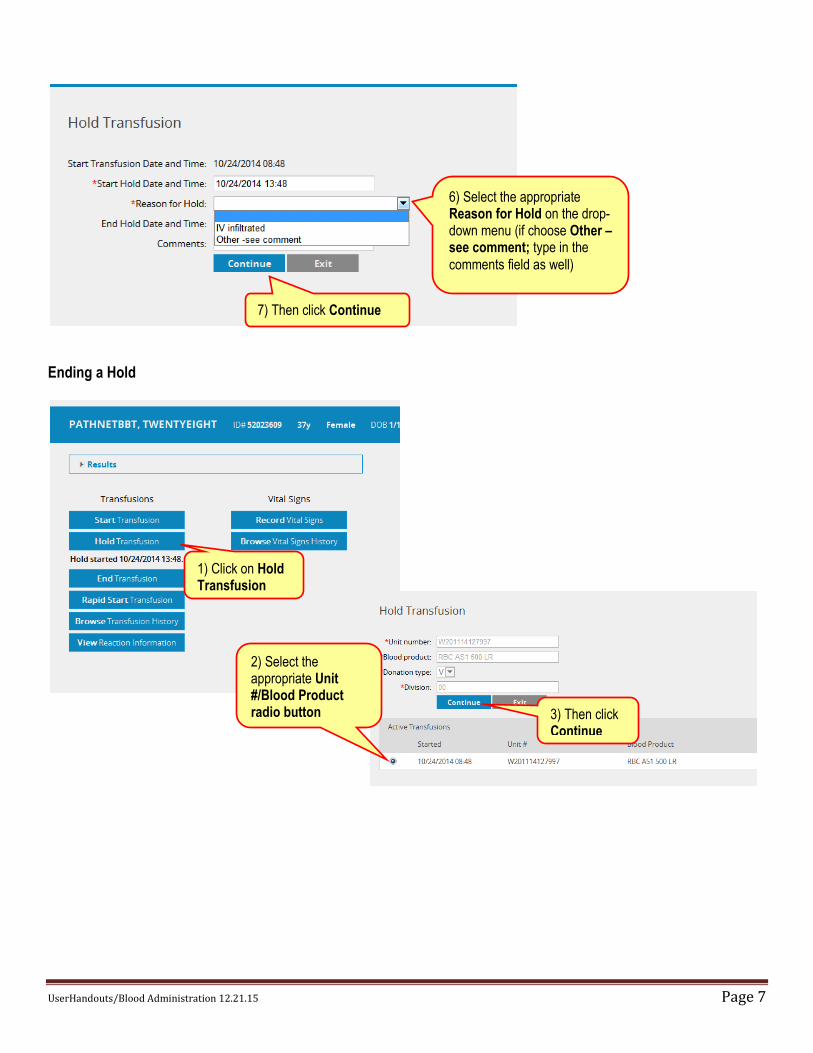
Charting a Hold Starting a Hold
1) Click Hold Transfusion
2) Select the appropriate Unit #/Blood Product radio button
3) Then click Continue
4) Click in the Start Hold Date & Time field to open the calendar
All active units being transfused will be listed
on the screen
5) Click on the current date and the current time will automatically record
UserHandouts/Blood Administration 12.21.15 Page 7
Ending a Hold
6) Select the appropriate Reason for Hold on the drop-down menu (if choose Other – see comment; type in the
comments field as well)
7) Then click Continue
1) Click on Hold Transfusion
3) Then click Continue
2) Select the appropriate Unit #/Blood Product radio button
UserHandouts/Blood Administration 12.21.15 Page 8
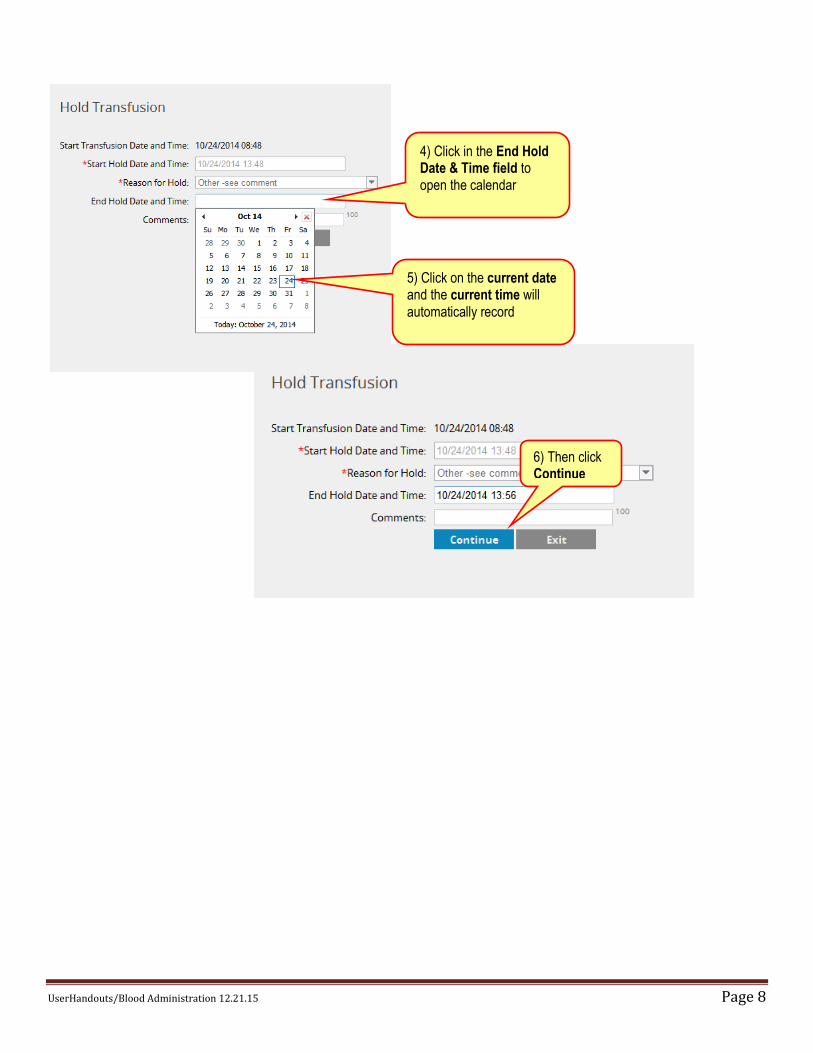
6) Then click Continue
4) Click in the End Hold Date & Time field to open the calendar
5) Click on the current date and the current time will automatically record
UserHandouts/Blood Administration 12.21.15 Page 9
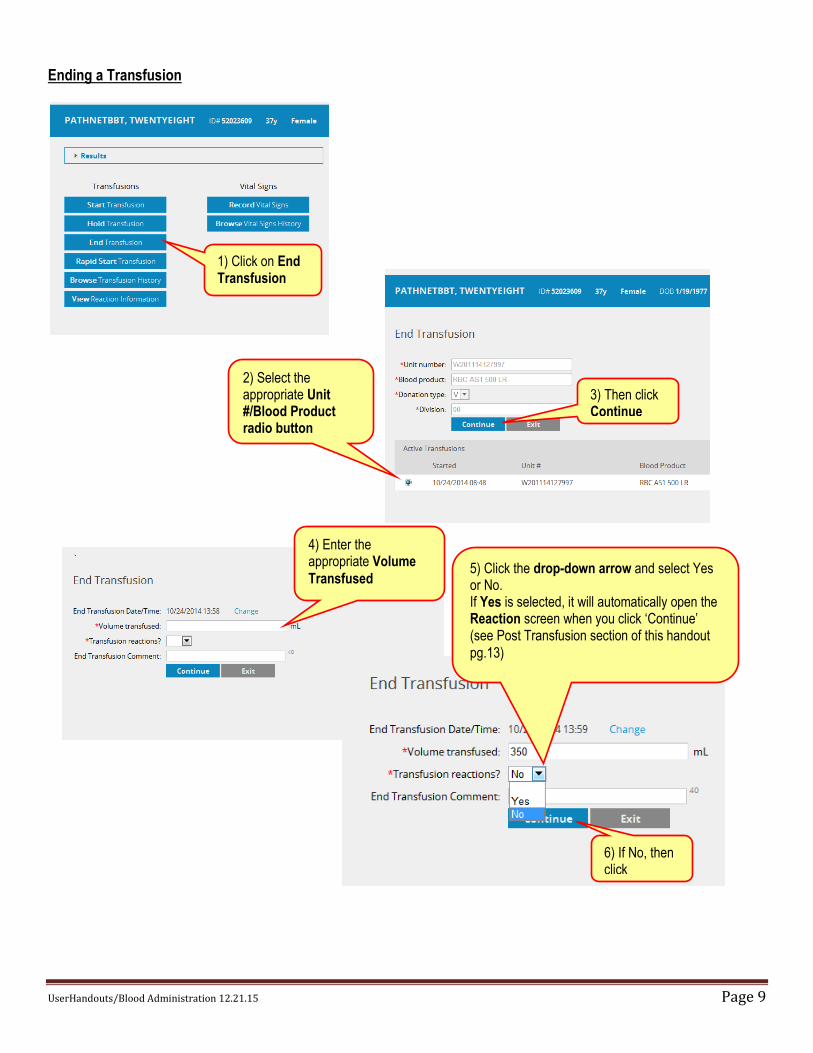
Ending a Transfusion
4) Enter the appropriate Volume
Transfused
3) Then click Continue
1) Click on End Transfusion
2) Select the appropriate Unit #/Blood Product radio button
6) If No, then click Continue
5) Click the drop-down arrow and select Yes or No. If Yes is selected, it will automatically open the Reaction screen when you click ‘Continue’ (see Post Transfusion section of this handout
pg.13)
UserHandouts/Blood Administration 12.21.15 Page 10
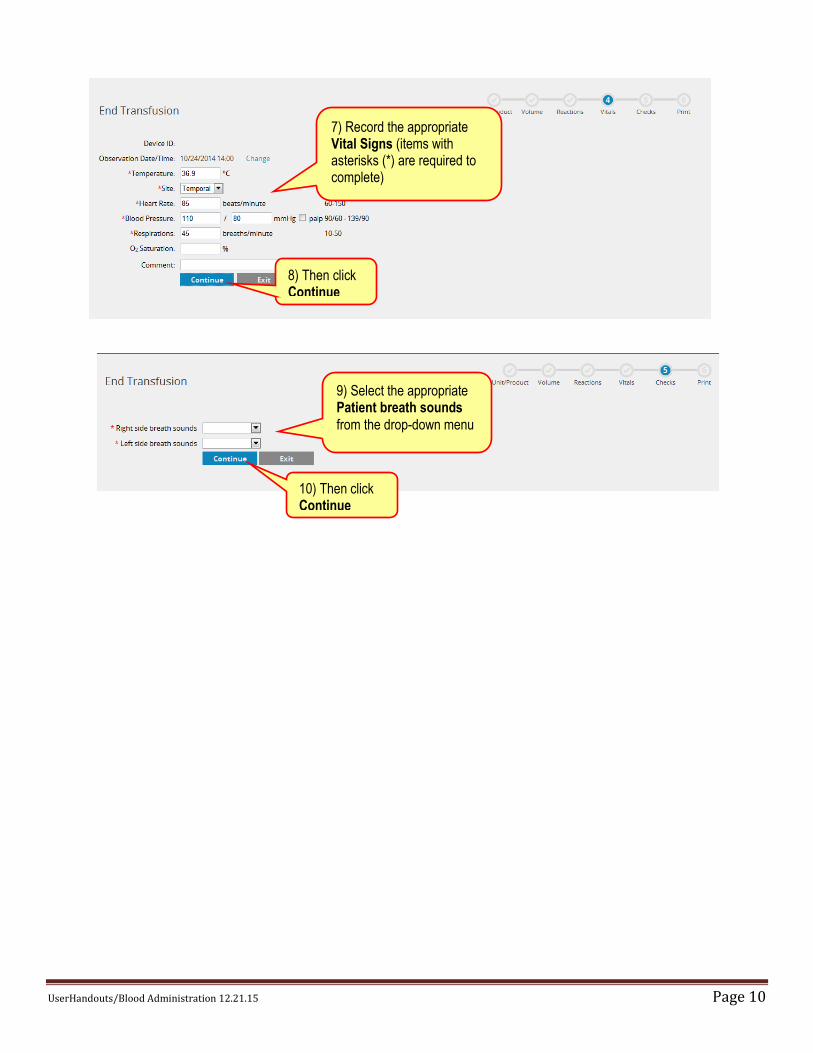
7) Record the appropriate Vital Signs (items with asterisks (*) are required to complete)
8) Then click Continue
10) Then click Continue
9) Select the appropriate Patient breath sounds
from the drop-down menu
UserHandouts/Blood Administration 12.21.15 Page 11
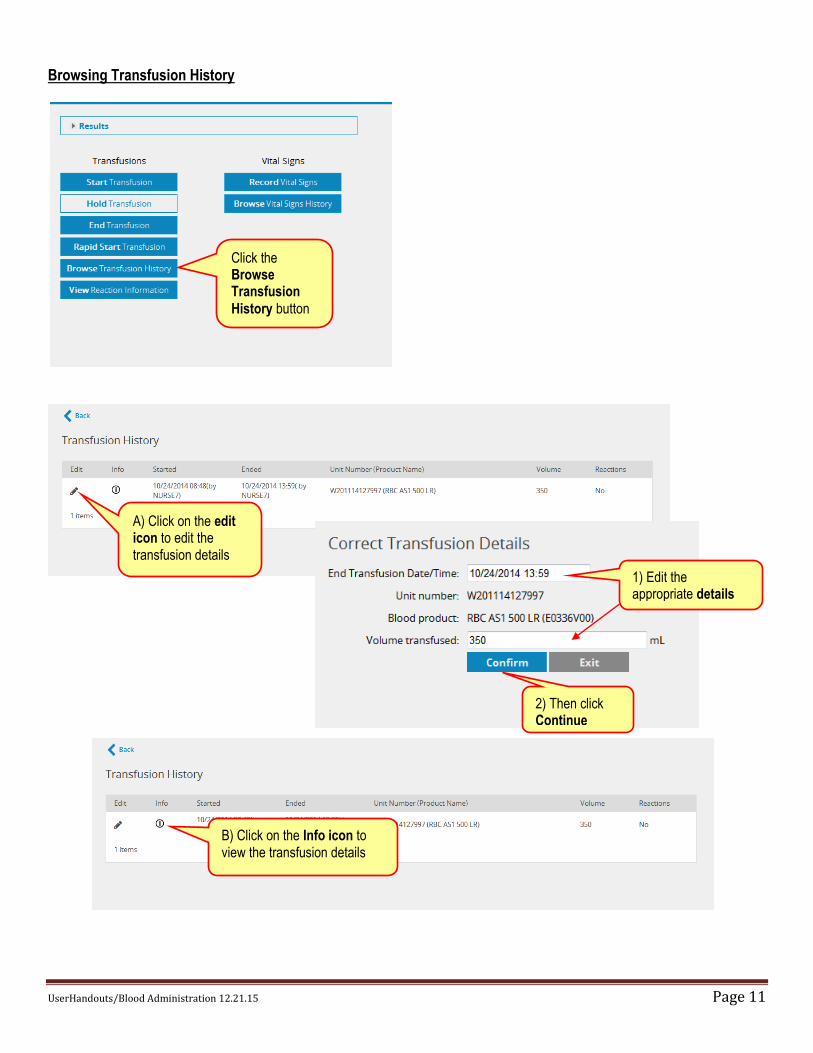
Browsing Transfusion History
A) Click on the edit icon to edit the transfusion details
Click the Browse Transfusion
History button
B) Click on the Info icon to view the transfusion details
1) Edit the appropriate details
2) Then click Continue
UserHandouts/Blood Administration 12.21.15 Page 12
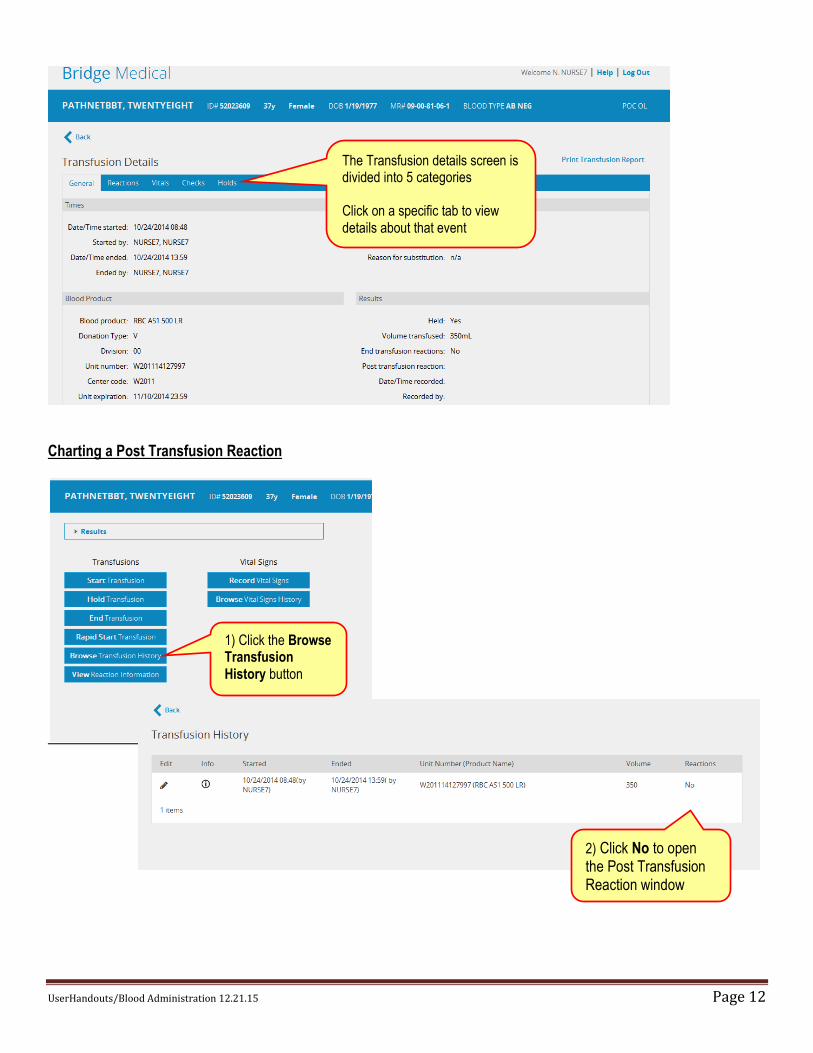
Charting a Post Transfusion Reaction
The Transfusion details screen is divided into 5 categories Click on a specific tab to view details about that event
1) Click the Browse Transfusion History button
2) Click No to open the Post Transfusion Reaction window
UserHandouts/Blood Administration 12.21.15 Page 13
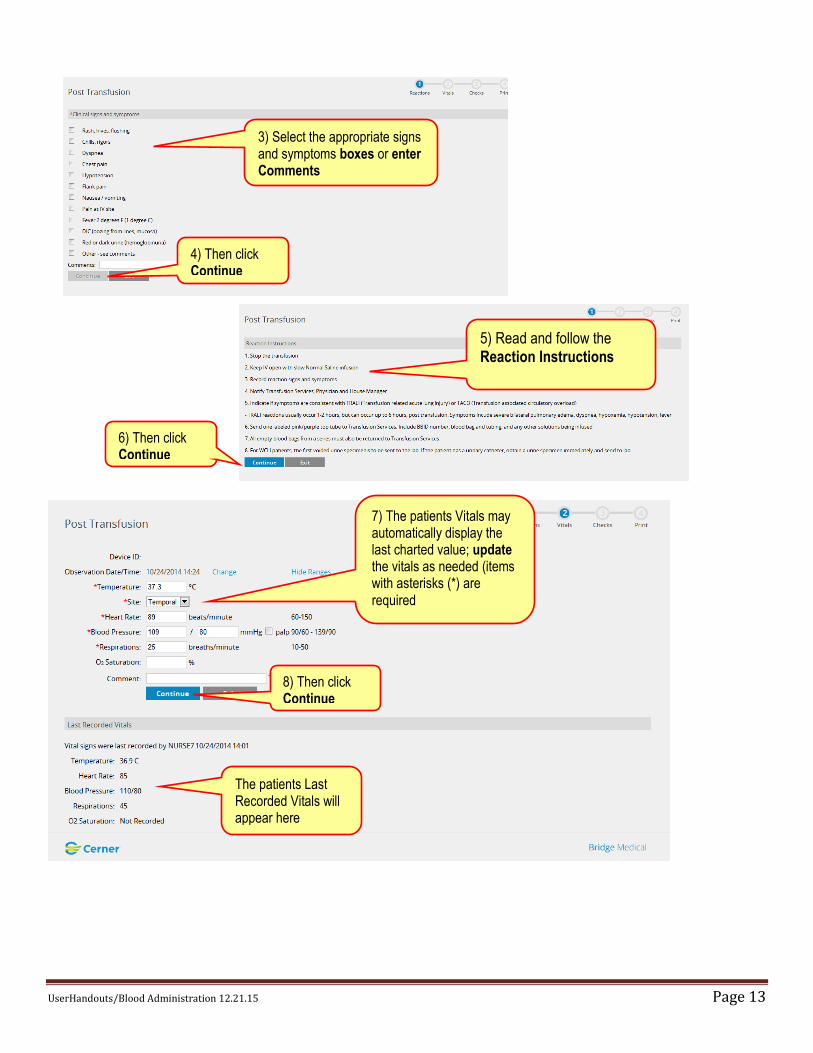
3) Select the appropriate signs and symptoms boxes or enter Comments
5) Read and follow the Reaction Instructions
4) Then click Continue
6) Then click Continue
7) The patients Vitals may automatically display the last charted value; update the vitals as needed (items with asterisks (*) are required
8) Then click Continue
The patients Last Recorded Vitals will appear here
UserHandouts/Blood Administration 12.21.15 Page 14
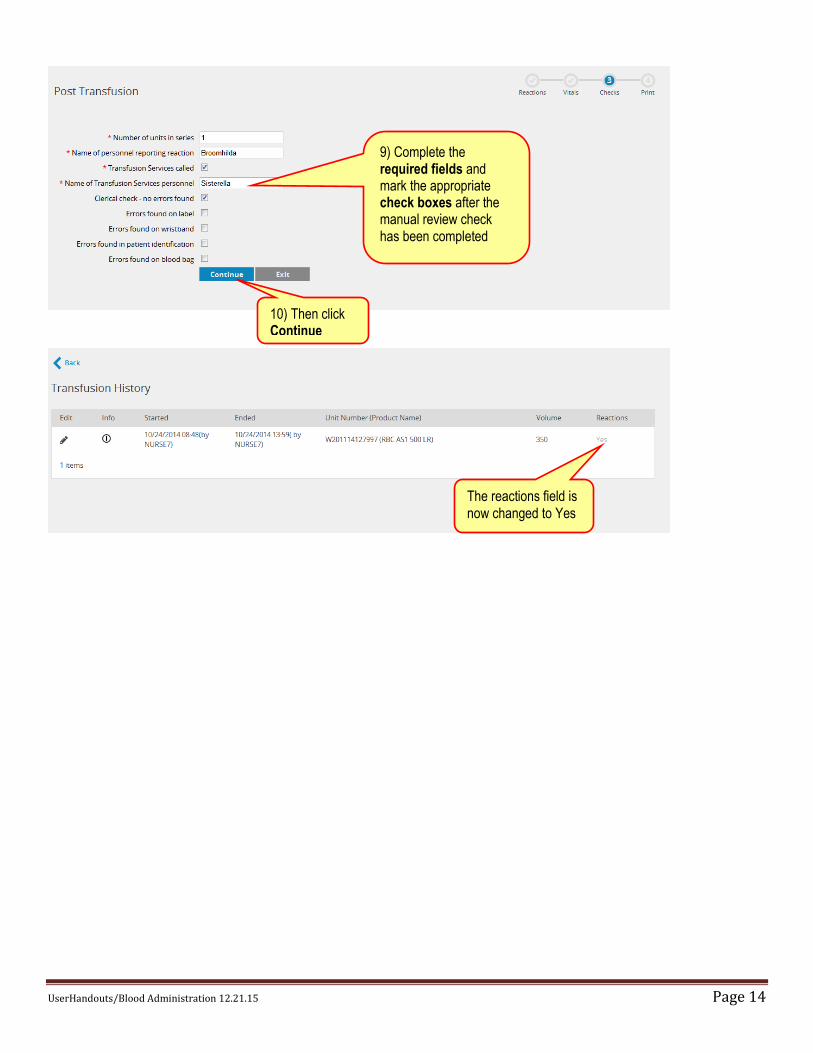
9) Complete the required fields and mark the appropriate check boxes after the manual review check has been completed
The reactions field is now changed to Yes
10) Then click Continue