chapter 3—chain saw tasks and techniques saw tech.pdf · the first step in proper bucking ......
TRANSCRIPT

28
Tension area
Compression area
Chapter 3—Chain Saw Tasks and Techniques (Suggested time: 2 hours)
Figure 3-1—When a bind occurs, pressure areas result. Theseareas are called tension (pulling apart) and compression (push-ing together) areas.
In this chapter:
• Students will learn the importance of a thorough sizeup forfelling, limbing, and bucking operations.
• Students will acquire the skills to operate a chain saw safelyand efficiently.
Safe Chain Saw Use
Proper Use of Bumper Spikes (Dogs)
Learn to use the saw’s bumper spikes (dogs) as a pivot pointwhen felling or bucking. This technique will enhance your controlof the saw and improve the saw’s efficiency while reducingfatigue.
Cutting with the bottom of the bar pulls the chain saw awayfrom the sawyer. Cutting with the top of the bar pushes the sawback at the sawyer. Cutting with the bottom of the bar increasesefficiency and decreases the sawyer’s fatigue.
Always protect the saw chain from becoming dull. This willreduce unnecessary fatigue and lessen chances of kickbacksand barber chairs. Barber chairs will be addressed later. Keepthe chain out of the dirt and rocks. When cutting uprooted treeswith dirt and rocks in the bark, use an ax to trim the bark awayfrom the area to be cut.
Bucking
Situational Awareness
• Never buck a tree that exceeds your ability.• Consider overhead hazards.• Is the guide bar long enough for the tree that is being bucked?• Establish good footing.• Swamp out bucking areas and escape routes. Anticipate
what will happen when the log is cut.• Plan the bucking cut carefully after considering:
—Slope: People and property in the cutting zone.—Tension: Spring poles.—Compression: Falling or rolling root wads.—Rocks and foreign objects on the log: The log’s tendency
to roll, slide, or bind.—Pivot points: Broken off limbs hidden underneath the log
that can roll up and grab the sawyer.
The Forest Service Health and Safety Code Handbookemphasizes the following points.
• Assess the area for overhead hazards before beginningbucking.
• Size up the log for possible reaction after the release cut hasbeen completed.
• Establish escape routes and clear any obstacles that mightinhibit your escape.
• Cut slowly and observe the kerf for movement that will indicatewhere the bind is. A log can have different types of binds atdifferent places.
Safe and Efficient Bucking Techniques
In most situations it is safest to buck logs from the uphill sideunless the log may move uphill when bucked. This could occurbecause of the log’s position, weight distribution, and pivotpoints. Always consider binds and pivot points. Consult anothersawyer if you have questions.
Begin bucking by cutting the offside first. This is the side the logmight move to when it is cut, normally the downhill side. Cutstraight down until you have space for a wedge.
Insert a wedge or wedges to prevent the cut (kerf) from closingtightly and pinching your bar.
Understanding directional pressures—or binds—is importantfor safe and efficient cutting. These binds determine buckingtechniques and procedures. Look for landforms, stumps, blow-down, and other obstacles that prevent a log from lying flat,causing binds. When a bind occurs, different pressure areasresult. The tension area is the portion of the log where thewood fibers are being stretched apart. In this portion of the log,the chain saw’s cut (kerf) opens as the cut is made. The otherpressure area is called the compression area. Here the woodfibers push together. In this portion of the log, the kerf closesas the cut is made (figure 3-1).

29
Tension area
Compression area
BOTTOM BIND
TOP BIND Compression area
Tension area
END BIND
SIDE BIND
Tension areaCompression area
Chapter 3—Chain Saw Tasks and Techniques
Figure 3-2–There are four types of binds. A log can have a combinationof two or more binds.
It is extremely important to determine what will happen to thelog when it is cut. Inspect the log for all binds, pivot points,and natural skids. Various bucking techniques can be used tolower a suspended tree to the ground.
Determining Bind
The four types of bind are: top, bottom, side, and end. Theremay be a combination of binds. Normally, logs have a combina-tion of two or more binds (figure 3-2).
• Top bind—The tension area is on the bottom of the log. Thecompression area is on the top.
• Bottom bind—The tension area is on the top of the log. Thecompression area is on the bottom.
• Side bind—Pressure is exerted sideways on the log.
• End bind—Weight compresses the log’s entire cross section.
It is best to start bucking at the top of the log and work towardthe butt end, removing the binds in smaller material first. Lookfor broken limbs and tops above the working area. Never standunder an overhead hazard while bucking.
Look for small trees and limbs (spring poles) bent under thelog being bucked. They may spring up as the log rolls away. Ifyou can safely do so, cut these hazards before the log is bucked(figure 3-3). Otherwise, move to a new cutting location and flagthe hazard.
Determine the offside. It is the side the log might move to whenit is cut—normally the downhill side. Watch out for possiblepivots. Clear the work area and escape paths. Allow more than8 feet of room to escape when the final cut is made. Establishsolid footing and remove debris that may hinder your escape(figure 3-4).
Cut the offside first. If possible, make a cut about one-third thediameter of log. This allows the sawyer to step back from thelog on the final cut. Do not let the tip of the bar hit any object.
Watch the kerf to detect log movement. Position yourself so youcan detect a slight opening or closing of the kerf. There is nobetter indicator of the log’s reaction on the release cut. If thebind cannot be determined, proceed with caution. It may benecessary to move the saw back and forth slowly in the kerf

30
CUTTING SEQUENCE
Offside cut
Pie-shaped cut
HAZARDOUSSPRING POLES
Chapter 3—Chain Saw Tasks and Techniques
Figure 3-3—Look for spring poles. They can release and causeaccidents.
Figure 3-4—Determine and stay clear of the offside (downhill side)when you are bucking.
Figure 3-5—Watch the kerf for movement that will indicate a bottombind (kerf opens) or top bind (kerf closes).
Figure 3-6—Determine the cutting sequence before beginning to cut.
(about 3 seconds for each chain revolution) to prevent the sawfrom getting bound as the kerf closes behind the guide bar. Cutonly deep enough to place a wedge. Continue cutting. Watchthe kerf (figure 3-5). If the kerf starts to open, there is a bottombind; if the kerf starts to close, there is a top bind.
Reduce remaining wood. Visually project the kerf’s location tothe bottom of the log. Reduce the amount of wood for the finalcut by cutting a short distance into the log along this line. Beprepared for kickback.
Determine the cutting sequences (figure 3-6).

31
Chapter 3—Chain Saw Tasks and Techniques
The following example shows theimportance of following proper pro-cedures when bucking blowdown.
A 30-inch d.b.h. fir tree was lying across a steep slope;the butt end was still anchored by a few roots. About 30 feetfrom the roots, the tree was balanced on a small stump. Thisstump supported the small end of the tree above some logchunks and debris.
The first step in proper bucking procedure is to inspect thelog for all binds, pivot points, and skids. The sawyer failed toproperly estimate the log’s reaction when the log was cut.He chose downhill as his offside, expecting both the tree androots to roll down the slope. He stood 12 feet from the rootsand to the left of his saw.
When the sawyer made his release cut, the log rolled slightlyuphill, off the small stump. The tree’s top came to rest on thelog chunks and debris, then slid rapidly downhill on thesenatural skids. With the stump as a pivot, the butt end swunguphill, killing the sawyer.
If the small log had been inspected thoroughly, the sawyercould have:• Bucked the tree at or near the pivot.• Started bucking at the small end of the tree first, leaving
the roots for last.• Stood to the right of his saw so he would be in the clear.
The sequence of the remaining cuts depends on the type ofbind. Generally the next cut will be a small, less than 11⁄2 inches,pie-shaped cut removed from the compression area. The logcan settle slowly into this space, preventing dangerous slab-bing and splintering. This practice is extremely important whencutting large logs.
The final cut, or release cut, will be made through the tensionarea. Because the offside has been cut, the sawyer only hasto use enough bar to finish cutting the remaining wood. Thisallows the sawyer to stand back, away from the danger. Thelocation of the pie-shaped section and the release cut varydepending on the type of bind.
Top Bind: Remove the pie-shaped section from the top, thenmake the release cut from the bottom.
Bottom Bind: Remove the pie-shaped section from the bottom,then make the release cut from the top.
Side Bind: If you are not certain the job is safe, do not makethe cut. Normally, the offside is the side with tension; the tensionside is usually bowed out (convex). Look for solid trees with nooverhead hazards or other objects that you can stand behindfor protection while cutting. Remove a pie-shaped section fromthe compression area, then make the release cut in the tensionarea.
End Bind: Cut from the top down, inserting a wedge as soonas possible. Finish by cutting down from the top. Watch thewood chips to make sure that the chain is not cutting in the dirt(look for dark chips).
Pay special attention when bucking in blowdown. Blowdown isa result of strong winds that have uprooted the trees. At anytime while the bucking cuts are made, the roots can drop backinto place or roll. Consider the following points when buckingblowdown.
Small trees growing on the roots of blowdown could be forcedinto the sawyer’s position if the roots drop or roll. Cut the smalltrees off first. Limbs may be preventing the roots from rolling.Don’t cut those limbs.
The roots can move in any direction. Avoid standing directlybehind or downhill from them.
Safe Bucking Practices
Warn workers that are working in and below an active cuttingarea. Allow workers time to move to a safe location. Verify theirsafety visually and verbally. Announce when a bucking operationhas been completed.
Buck small sections that will be easy to control when they beginmoving. Removing a single section of log may require thatother binds be eliminated first. Angle bucking cuts, wide on topand made on the offside, allow a single section of log to beremoved. Angled cuts will permit the bucked section of log tobe rolled away from the remaining log.

32
OVERREACHING
UNDERREACHING
Figure 3-7—Avoid overreaching and underreaching kickbacks byusing the bar properly.
All logs must be completely severed when bucked. Flaggingshould be used to mark an incompletely bucked log as ahazard.
Never approach a cutting operation from below until the sawhas stopped running, you have established communicationwith the sawyer, and the sawyer has granted permission toproceed.
Points to Remember
• Do a complete sizeup. Identify the hazards, and establishyour escape routes and safety zones.
• Use objects such as rocks, stumps (if they are tall enough),and sound standing trees with no overhead hazards forprotection in the event the tree springs sideways toward thesawyer when the release cut is made.
• Binds change with log movement. Reevaluate as necessary.
Limbing
Any of the following situations could result in a fatality or seriousinjury.
• Check for overhead hazards before any limbing begins. If aspecific portion of the tree you are limbing has any overheadhazards, leave that portion of the tree unlimbed.
• Check for objects on the ground such as stumps, logs, andspring poles that may be hidden by the limbs of the felled tree.If the tip of the bar unintentionally strikes an object, the sawmay kick back.
• Maintain a firm grip on the saw with your thumb wrappedaround the handlebar during all limbing activities, regardlessthe direction the saw is turned.
• Be sure you have firm footing as you walk down the tree thatyou are limbing. Calked boots are strongly recommended forwalking on felled trees.
• Do not attempt to cut limbs that are supporting a tree off theground if there’s a chance the tree could roll on the sawyer.Always plan and clear an escape route.
• When limbing on top of a log, right-handed sawyers shouldlimb the right side out to the top before turning around andlimbing the other side on their way back. Another option is tolimb a tree out in sections. It is not advisable for a right-handedsawyer to limb on the left side (or for a left-handed sawyer tolimb on the right side). Crossing over when limbing could resultin an injury.
—The bar length should be appropriate for the sawyer’sheight. Proper bar length reduces bending at the waist,decreasing back strain.
—To increase the distance between the saw chain and yourleg, bend at the waist and reach out with the saw to cut thelimb. This increased distance allows you more reaction timeif a kickback occurs.
• Overreaching kickbacks occur when too much bar is usedwhen cutting a limb and the bar tip contacts an object, propel-ling the bar up and back (figure 3-7).
• Underreaching kickbacks occur when too little of the bar tipis used and the tip contacts any object, propelling the bar backand down.
• Spring poles are limbs or small trees that are bent over andunder extreme tension. Spring poles are encountered frequentlywhen limbing. They can cause serious injury. If spring poles arenot cut properly, they can spring back and strike the sawyer orthrow the chain saw back into the sawyer. Sawyers must recog-nize spring poles and use the proper technique when cuttingthem. Stand back at a safe distance and make a series ofshallow cuts on the portion of the spring pole that is being com-pressed. Make your release cut in the top side of the portionof the spring pole that will fall to the ground.
Chapter 3—Chain Saw Tasks and Techniques
33
Chapter 3—Chain Saw Tasks and Techniques
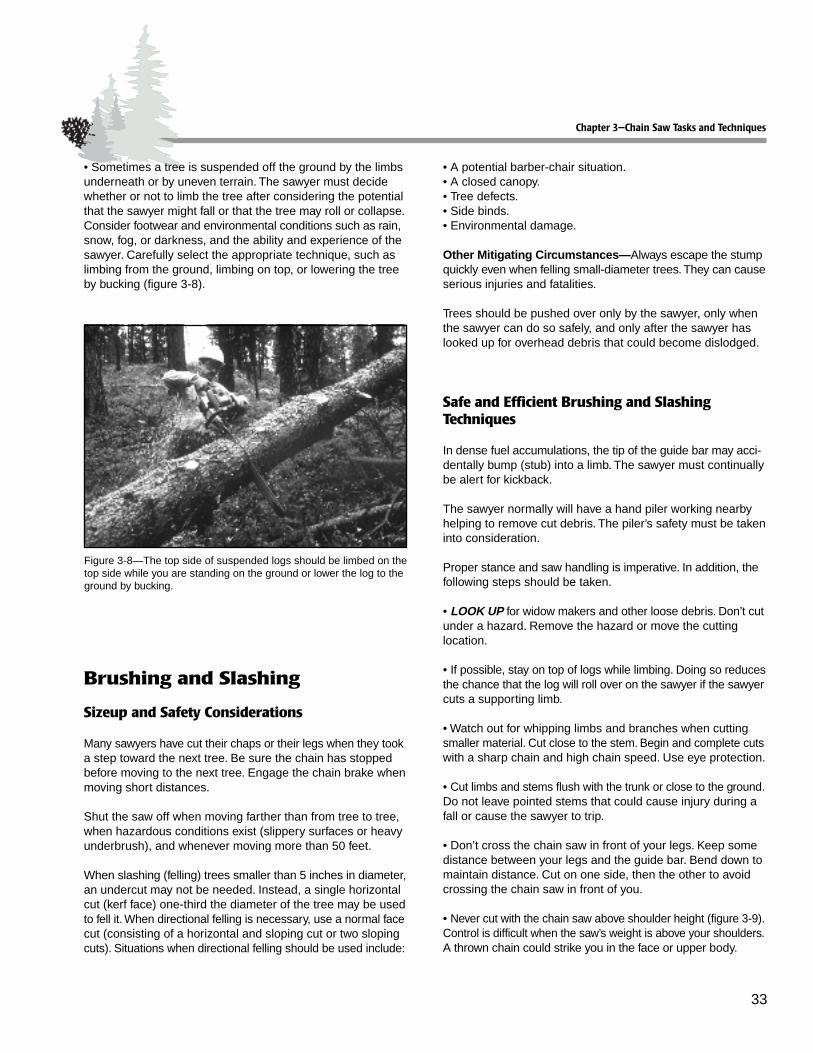
Figure 3-8—The top side of suspended logs should be limbed on thetop side while you are standing on the ground or lower the log to theground by bucking.
• Sometimes a tree is suspended off the ground by the limbsunderneath or by uneven terrain. The sawyer must decidewhether or not to limb the tree after considering the potentialthat the sawyer might fall or that the tree may roll or collapse.Consider footwear and environmental conditions such as rain,snow, fog, or darkness, and the ability and experience of thesawyer. Carefully select the appropriate technique, such aslimbing from the ground, limbing on top, or lowering the treeby bucking (figure 3-8).
Brushing and Slashing
Sizeup and Safety Considerations
Many sawyers have cut their chaps or their legs when they tooka step toward the next tree. Be sure the chain has stoppedbefore moving to the next tree. Engage the chain brake whenmoving short distances.
Shut the saw off when moving farther than from tree to tree,when hazardous conditions exist (slippery surfaces or heavyunderbrush), and whenever moving more than 50 feet.
When slashing (felling) trees smaller than 5 inches in diameter,an undercut may not be needed. Instead, a single horizontalcut (kerf face) one-third the diameter of the tree may be usedto fell it. When directional felling is necessary, use a normal facecut (consisting of a horizontal and sloping cut or two slopingcuts). Situations when directional felling should be used include:
• A potential barber-chair situation.• A closed canopy.• Tree defects.• Side binds.• Environmental damage.
Other Mitigating Circumstances—Always escape the stumpquickly even when felling small-diameter trees. They can causeserious injuries and fatalities.
Trees should be pushed over only by the sawyer, only whenthe sawyer can do so safely, and only after the sawyer haslooked up for overhead debris that could become dislodged.
Safe and Efficient Brushing and SlashingTechniques
In dense fuel accumulations, the tip of the guide bar may acci-dentally bump (stub) into a limb. The sawyer must continuallybe alert for kickback.
The sawyer normally will have a hand piler working nearbyhelping to remove cut debris. The piler’s safety must be takeninto consideration.
Proper stance and saw handling is imperative. In addition, thefollowing steps should be taken.
• LOOK UP for widow makers and other loose debris. Don’t cutunder a hazard. Remove the hazard or move the cuttinglocation.
• If possible, stay on top of logs while limbing. Doing so reducesthe chance that the log will roll over on the sawyer if the sawyercuts a supporting limb.
• Watch out for whipping limbs and branches when cuttingsmaller material. Cut close to the stem. Begin and complete cutswith a sharp chain and high chain speed. Use eye protection.
• Cut limbs and stems flush with the trunk or close to the ground.Do not leave pointed stems that could cause injury during afall or cause the sawyer to trip.
• Don’t cross the chain saw in front of your legs. Keep somedistance between your legs and the guide bar. Bend down tomaintain distance. Cut on one side, then the other to avoidcrossing the chain saw in front of you.
• Never cut with the chain saw above shoulder height (figure 3-9).Control is difficult when the saw’s weight is above your shoulders.A thrown chain could strike you in the face or upper body.

34
Figure 3-9—Do not cut with the chain saw above shoulder height. Keepthe chain saw below your shoulders to maintain control when cutting.
Figure 3-10—Hazard trees, such as leaners, need to be removed toprevent anyone from working under them.
• Clear debris from the cutting location to prevent the guide bartip from stubbing it accidentally. When you are removing debris,engage the chain brake or turn off the ignition.
• Watch out for spring poles. Do not cut spring poles if you canavoid doing so. If you must cut a spring pole, make your releasecut in the top side of the portion of the spring pole that will fallto the ground. Be careful not to stand in the path of the polewhen tension is released.
• When cutting a heavy limb, consider using a small cut oppositethe final cut to prevent the material from slabbing or peeling off.
• Pay special attention if you are working in close quarters withother workers in an area with steep slopes and thick brush orlogging slash. First, stop and size up the situation. Make a planand talk it over with all workers in the area. A well thought-outplan saves time and reduces the risk of accidents. After you’ve
discussed the plan, work systematically from the outside inand from downhill up. This reduces the chance that materialwill hang up. Maintain a space between workers that is at leasttwo-and-one-half times the height of the tallest tree.
• You need one or more escape routes, even when felling smalltrees.
• Begin to develop a felling and bucking pattern as you work intothe area. As you down more material, be increasingly carefulof your footing and continually identify new escape routes.
• Special hazards like leaners and snags need to be taken careof right away. Get hazard trees on the ground so no one hasto work under them (figure 3-10).
• Double stumps (figure 3-11) are hazardous because theyhave a high potential for causing kickback. Watch that bar tip!
• When felling small trees, cut the stumps as close to the groundas possible without hitting the dirt with your chain. Stumps arecut low so they will not be as noticeable and will present fewerhazards for people and wildlife.
Chapter 3—Chain Saw Tasks and Techniques

35
Figure 3-11—Double stumps have a high potential to cause kickback.
• Small trees can be limbed while they are standing. Don’t cutwith the chain saw above shoulder height. Limbing the bottomof small trees allows the sawyer to move in closer to the bolewhen felling it and will help the sawyer watch the tip of the barto prevent kickbacks.
• The chain is more likely to be thrown when you are workingwith small material. Check your chain tension often. Sawingclose to the ground increases the chances of kickback anddamage to the chain. Watch out for rocks and other debris.
• Remember, when you saw up from the bottom (using the topof the bar) the saw will push back rather than pull away. Thisincreases the risk of kickback and loss of control. Be aware ofsigns of fatigue like more frequent kickbacks, bar pinches, andnear misses. Take a break when you show signs of fatigue.
• Cut pieces small enough so they are easy to lift and handle.Lift properly using the legs and keeping the back straight. Handpilers must be aware of their footing and watch out for flyingdebris.
Basic Felling
Situational Awareness
Analyze the felling job by considering:• Species (live or dead). • Heavy snow loading.• Size and length. • Bark soundness.• Soundness or defects. • Direction of lean.• Twin tops. • Degree of lean (slight or great).• Widow makers and or hangups. • Head lean or side lean.• Frozen wood. • Nesting or feeding holes.• Rusty (discolored) knots. • Splits and frost cracks.• Punky (swollen and sunken) knots. • Deformities, such as those caused• Frozen wood. by mistletoe.• Footing. • Heavy branches or uneven weight• Damage by lightning or fire. distribution.• Spike top.
Analyze the base of the tree for:• Thud (hollow) sound when struck. • Insect activity.• Conks and mushrooms. • Feeding holes.• Rot and cankers. • Bark soundness.• Shelf fungi or “bracket”. • Resin flow on bark.• Wounds or scars. • Unstable root system or root• Split trunk. protrusions.
Examine surrounding terrain for:• Steepness. • Stumps.• Irregularities in the ground. • Loose logs.• Draws and ridges. • Ground debris that can fly• Rocks. or kick up at the sawyer.
Examine immediate work area for:• People, roads, or vehicles. • Reserve trees.• Powerlines. • Structures.• Hang ups and widow makers. • Openings to fall trees.• Other trees that may be affected. • Snags.• Fire-weakened trees. • Other trees that may have to be• Hazards such as trees, rocks, felled first. brush, low-hanging limbs.
Walk out and thoroughly check the intended lay or bed wherethe tree is supposed to fall. Look for dead treetops, snags, andwidow makers that may cause kickbacks, allow the tree to roll,or result in another tree or limb becoming a hazard. The escaperoute and alternate routes must be predetermined paths wherethe sawyer can escape once the tree is committed to fall or hasbeen bucked. Safe zones should be no less than 20 feet fromthe stump, preferably behind another tree that is sound andlarge enough to provide protection. Escape routes and safezones should be 90 to 135 degrees from the direction of fall.Sawyers must select and prepare the work area and clearescape routes and alternate routes before starting the first cut.
Chapter 3—Chain Saw Tasks and Techniques

36
Head lean
ASSESSLEAN
Side
Actuallean
Figure 3-12—Assess the tree for head lean and side lean.
Sizeup
Before starting the saw, the chain saw operator must be ableto evaluate if a tree is safe to cut. Other options are alwaysavailable. IF FELLING A PARTICULAR TREE IS DANGER-OUS, DON’T DO IT!
Debris falling from above causes most accidents. Practicewatching overhead while cutting, with occasional glances atthe saw, the kerf, and the top of the tree.
Observe the Top—When you approach the tree to be felled,observe the top. Check for all overhead hazards that may comedown during felling.
Look at the limbs. Are they heavy enough on one side to affectthe desired felling direction? Do the limbs have heavy accumu-lations of ice and snow?
Are the limbs entangled with the limbs of other trees? If so, theywill snap off or prevent the tree from falling after it has been cut.
Is the wind blowing strong enough to affect the tree’s fall?Wind speeds higher than 15 miles per hour may require thatfelling be stopped. Strong winds could also blow over othertrees and snags in the area. Switching or erratic winds requirespecial safety considerations.
Check For Snags—Check all snags in the immediate areafor soundness. A gust of wind may cause snags to fall at anytime, as may the vibration of a tree fall. If it is safe to do so,begin by falling any snag in the cutting area that poses a threat.
Swamp Out the Base—Clear small trees, brush, and debrisfrom the base of the tree. Remove all material that could causeyou to trip or lose your balance. Also remove material that willinterfere with the saw, wedges, and ax. Look for small treesand brush that could accidentally stub the guide bar. Be carefulnot to fatigue yourself with unnecessary swamping. Removeonly what is needed to work safely around the base of the tree.
Assess the Tree’s Lean (figure 3-12) and the Soundnessof the Holding Wood—Most trees have two natural leans; thepredominant head lean and the secondary side lean. The lean-ing weight of the tree will be a combination of these two leans.Both must be considered when determining the desired fellingdirection. The desired felling direction can usually be chosenwithin 45 degrees of the combined lean, provided there isenough sound holding (hinge) wood to work with, especiallyin the corners of the undercut. Evaluate the tree’s lean. Witha plumb bob or ax, project a vertical line up from the center ofthe tree’s butt and determine if the tree’s top lies to the right orleft of the projected line.
A pistol-grip tree may appear to be leaning in one directionwhile most of the weight is actually in another direction (figure3-13).
Look at the tree top from at least two different spots at rightangles to each other. This will be done again in the sizeupprocess.
The importance of the holding wood cannot be overemphasized.Determine the condition of the holding wood by sounding itwith an ax. Look up for falling debris while doing so.
Boring is an important technique, but it must be done properlybecause it has the potential for kickback. Using the guide bartip, bore vertically into the area immediately in front of and be-hind the holding wood (figure 3-14). Do not weaken the holdingwood by boring into or across any of the holding wood. Thecolor of the sawdust and ease with which the saw enters thewood will be your indication of the tree’s soundness. Begin theboring cut with the power head lower than the tip of the bar.After the tip is in the tree deep enough to prevent it from kickingback, apply full throttle. The thumb should be wrapped securelyaround the handlebar. Maintain full throttle throughout theboring cut.
Chapter 3—Chain Saw Tasks and Techniques

37
DETERMINING YOURESCAPE ROUTE
20-footescape route
20-foot
escape route
Felling direction
Holdingwood
Boreholes
TOPVIEW
Figure 3-13—The lean of a pistol-grip tree is hard to determine.
PISTOL-GRIP TREE
Figure 3-14—Do not weaken the holding wood by boring into oracross any of the holding wood.
Figure 3-15—Keep the felling direction in mind when planningescape routes.
Check for frost cracks or other weak areas in the holding wood.The desired felling direction can be adjusted to eliminate weak-nesses in the holding wood. The depth of the undercut can alsobe adjusted (less than one-third the tree’s diameter or greaterthan one-third) so that the holding area takes advantage of thesoundest wood available.
Escape Routes
With the desired felling direction in mind, determine your escaperoute (figure 3-15). Consider which side of the tree you will bemaking your final cut on and select a path that will take you atleast 20 feet behind the stump when the tree begins to fall. Don’tchoose a path directly behind the tree. It is best to prepare twoescape routes in case you switch your location on the final cut.
Look for a large solid tree or rock for protection. The tree or rockmust be at least 20 feet away from the stump and not be directlybehind it. Make sure that debris that could trip you is clearedfrom the escape route. Practice the escape.
Walk out the intended lay of the tree (figure 3-16). Look for anyobstacles that could cause the tree to kick back over the stumpor cause the butt to jump or pivot as the tree hits the ground.Look for any small trees or snags that could be thrown into yourescape route. Check to be sure the cutting area is clear ofpeople.
Chapter 3—Chain Saw Tasks and Techniques

38
Using the observations you made walking out the lay, reexaminethe escape route. Be sure that your chosen route will be thesafest escape—before you begin to cut.
Felling the Tree
“Face” the tree (figure 3-17). The face is made in the directionyou want the tree to fall. Estimate one-third of the tree’s diameter,shout a warning if necessary, and proceed with the undercut.When finished, check the direction the tree is faced. If the faceis not in the desired felling direction, correct the cut.
Figure 3-16—Check the intended lay of the tree for unwantedobstacles.
Figure 3-17—Check the direction the tree is faced.
Figure 3-18—Shout a warning to make sure the cutting area issecure.
Figure 3-19—Complete the backcut.
Shout a warning (figure 3-18). Shut off the saw and shout tobe sure that the cutting area is secure. Reexamine your primaryand secondary escape routes before beginning the backcut.
Complete the backcut (figure 3-19). Remembering the impor-tance of holding wood, stump shot (see glossary), and wedging,complete the backcut.
Escape the stump. When the tree commits to the fall, rapidlyfollow your escape route. Do not hesitate at the stump. If yoursaw becomes stuck, leave it. If carrying the saw prevents youfrom escaping quickly enough, drop it!
Keep your eyes on your predetermined escape route. If thefelled tree strikes other trees, they may still be moving after thetree has fallen. Watch for flying limbs and tops. Remain in yoursafety zone until it is safe to approach the stump.
Chapter 3—Chain Saw Tasks and Techniques

39
Figure 3-20—Look at the stump when critiquing a felling operation.
Analyze the operation (figure 3-20). The stump gives the bestcritique of the felling operation. Before approaching the stump,look in the tops of the surrounding trees for new overheadhazards.
Take a moment or two to look at the stump. Does the tree havethe desired lay? How much holding wood is left on each corner?Is the stump shot sufficient? Were the cuts level? Take timeto analyze the felling operation. Check stump height and lookfor stump or root pull and dutchman cuts.
Felling Details
Proper evaluation of a felling operation requires a thoroughunderstanding of the mechanics of the undercut, holding wood,backcut, and the felling procedure. In addition, the sawyer needsto consider the various tree problems. Every tree should beevaluated or sized up using techniques discussed in SituationalAwareness—Evaluating the Complexity of the Assignment inchapter 1.
The Undercut, Holding Wood, and Backcut
The three basic cuts are the conventional undercut, the Hum-boldt, and the open face. We are only going to discuss theconventional undercut because of its broad application for alltimber types and because it provides a solid foundation fromwhich to learn additional cutting techniques.
It takes three cuts to fell a tree. Two cuts form the undercut (orface cut) and the third forms the backcut (figure 3-21). Thecorrect relationship of these cuts results in safe and effectivetree felling. Before discussing the felling procedure we willanalyze the mechanics of the felling cuts. Undercutting and
Figure 3-21—An undercut and a backcut are required to fell a tree. Ahorizontal cut and a sloping cut make up the undercut. The backcut isthe third cut needed to fell a tree.
UNDERCUTBACKCUT
backcutting construct the hinge that controls the direction andfall of the tree.
The undercut serves three purposes. First, it allows the tree tofall in the chosen direction by removing the tree’s support inthe direction of the face. Second, it enables control becausethe tree slips off the stump, rather than jumping off. Third, whenthe tree is breaking the holding wood, the undercut preventsthe tree from kicking back.
The undercut consists of two cuts, a horizontal cut and a slopingcut. Observe overhead hazards and look up often during theundercut. You should either be down on one knee or standingall the way up.
The tree is faced in the general direction of the tree’s lean.Ideally, the undercut is made in the same direction as the tree’slean, but because of structures, roads, other trees, or trails,the desired felling direction may be to one side or the other ofthe lean. Normally, the desired direction is less than 45 degreesfrom the lean.
The horizontal cut is a level cut. This cut is made close to theground unless a snag is being felled or another factor createsspecial hazards for the sawyer. The horizontal cut dictates thedirection of fall if the relationships of the three cuts are main-tained. If there is any danger from above, such as snags, thecutting should be done while standing so the sawyer can watchthe top and escape more quickly. After selecting the desiredfelling direction, estimate one-third the tree’s diameter, set thesaw’s bumper spikes at this point, and begin the horizontal cut.
The specific direction of the undercut is determined by “gunning”the saw. Look down the gunning marks on the saw and alignthem with the desired felling direction. After the cut has been
CUTS TO FELL A TREE
Horizontal cut
Sloping
cut
Chapter 3—Chain Saw Tasks and Techniques

40
made level to at least one-third of the tree’s diameter, the hori-zontal cut is complete. Short snags sometimes require anundercut deeper than one-third the tree’s diameter to offset thetree’s balance. Felling short snags will be addressed later. Treeswith heavy leans may not allow the sawyer to make the hori-zontal cut as deep as one-third of the tree’s diameter withoutpinching the guide bar.
When the horizontal cut is complete, remove the bark from anarea on both sides of the kerf. The bark can be removed withyour ax or with the tip of the guide bar (figure 3-22). Watch outin case the ax glances off the bole or the saw kicks back.
Figure 3-22—Bark can be removed with the tip of the bar.
The sloping cut needs to be angled so that when the face closesthe tree is fully committed to the planned direction of fall. Asthe face closes, the holding wood breaks. If this happens andthe tree is still standing straight, the tree could fall away fromthe desired direction.
As a general rule, make the sloping cut at a 45-degree angle(figure 3-23). Remember that it is important that the face notclose until the tree is fully committed to the planned directionof fall.
Line up the sloping cut with the horizontal cut so that they meet,but do not cross. When the cuts cross, a “dutchman” (figure 3-24) is formed. If the tree were felled with a dutchman, first thedutchman would close, then the tree would split vertically (barber-chair), or the holding wood would break off. Felling controlwould be lost. A weak tree might snap off somewhere alongthe bole or at the top. It is difficult to make the sloping cut andthe horizontal cut meet correctly on the opposite side of thetree. This is because the point of intersection is not immediatelyvisible to the sawyer.
Figure 3-23—The sloping cut is a 45-degree angle.
Figure 3-24—When the sloping cut and the horizontal cut cross, adutchman is formed.
After making a short sloping cut, leave the saw in the cut. Goaround to the other side of the tree and see if the guide bar isin the correct plane to intersect the back of the horizontal cut.Keep your hands away from the throttle trigger. Engage thechain brake.
Practicing on high stumps will help you become skilled at liningup these cuts.
The holding wood is the wood immediately behind the undercut.The most important portion of the holding wood is in the verycorners of the cut, in the first 4 to 8 inches inside the bark. Thehorizontal and sloping cuts must not overlap in this region. Ifthey do, the undercut must be cleaned up so no dutchman is
Chapter 3—Chain Saw Tasks and Techniques

41
2" Widthis the
holdingwood
Heightis thestumpshot
Backcut
2 to
5"
left in these corners. Care must be taken not to cut the undercuttoo deeply while cleaning up. This reduces the amount of roomavailable for wedges.
If cleaning up the sloping cut will create too deep an undercut,stop the sloping cut directly above the end of the horizontal cut.
The undercut needs to be cleaned out. Any remaining woodwill cause the face to close prematurely and the holding woodwill be broken behind the closure.
Once the face has been cleaned, recheck the felling direction.Place the saw in the face and check the gunning marks (figure3-25) or stick an ax head into the face and look down the handle.The back of the undercut should be perpendicular to the desiredfelling direction.
Figure 3-25—Use the gunning marks to check the felling direction.
If the tree is not aimed in the direction that you want it to fall,extend the horizontal and sloping cuts as needed, maintaininga single plane for each of the two cuts.
Backcut and Wedging Procedures—The third cut neededto fell a tree is the backcut. The relationship of this cut to theface is important for proper tree positioning and the sawyer’ssafety. The backcut can be made from either side of the treeif the saw has a full-wrap handlebar, as recommended in theHealth and Safety Code Handbook. Choose the safest sideto cut on (figure 3-21).
In the area where you have removed the bark behind the hori-zontal cut, place the bumper spikes so the chain will cut nocloser than 2 inches from the face and 2 to 5 inches, depending
on tree size, above the face’s horizontal cut. You may placethe bumper spikes closer than 2 inches on smaller trees withlightweight tops.
The best way to envision these cuts is by the use of a rectangle(figure 3-26). The bottom corner is the back of the face’s hori-zontal cut. The opposite upper corner will be the back of thebackcut.
The height of the rectangle is referred to as the stump shot. Itis an antikickback device to prevent the tree from kicking backover the stump if it hits another tree during its fall. This is espe-cially important felling trees through standing timber.
Figure 3-26—An imaginary rectangle can help thesawyer understand the importance of the backcut.
Chapter 3—Chain Saw Tasks and Techniques

42
The width of the rectangle is the holding wood. As the backcut ismade, the sawyer must be careful not to cut this wood. Main-taining the holding wood is the key to safe and effective felling.
Start the backcut with the bumper spikes placed so the chainwill end in the upper corner of the rectangle. Hold the saw levelso that the backcut will be level when the cut is complete. Youwant to be sure that when the cut is finished it will line up withthe top corner of the opposite rectangle. If the cut is angled,wedging power and/or the stump shot’s height will be altered.
It may be helpful to cut or chop the bark to help level the bar. Donot cut deeper than the bark. Cuts into the wood will eliminateor reduce wedging lift. Once the cut has been made into thewood, do not change the cut’s location.
Keep at least three wedges and an ax readily accessible whilemaking the backcut. The wedges should be in a wedge holsterworn on the waist or in pants pockets. Keep the ax within arm’sreach. The size of the wedge depends on the tree’s diameter.For a 24-inch tree, two 10- to 12-inch wedges and one 4- to6-inch wedge is a good combination.
If there is any wind at all, at least two wedges are recommended.The second wedge adds stability. With only one wedge, thetree can set up a rocking action between the holding wood andthe wedge. If a strong wind begins to blow, the holding woodcan be torn out.
Remove thick bark immediately above and below the backcut’skerf where wedges will be placed. The bark will compress,lessening the lifting power of the wedges. The wedges shouldbe spread to better stabilize the tree in case of erratic winds.
Directional Felling
Place wedges in the kerf in each area as soon as the chain willpermit. Place the wedges parallel to the desired felling direction.Do not drive the wedges too hard. They will interfere with thebackcut or cause the tree to become a heavy leaner.
Watch for droop in the wedges and occasionally try to pushthem in with your hands. Retighten them with an ax every 4 to6 inches of cutting. Be careful not to drive the wedges too hard.The wedges are there in case the lean was incorrectly estab-lished, the wind causes the tree to set back, or the sawyerintends to fell the tree in a different direction from the tree’snatural lean.
As you cut, continually look above for possible hazards and atthe kerf for movement. Do not cut the holding wood.
The gunning sights can be used in reverse to help determinethe guide bar’s position. With the correct lean established andthe proper relationship between the three cuts, the face willbegin to close and the tree will fall in the planned direction.
Wedges must be used for all felling operations. Small trees limitthe sawyer’s use of wedges, even when small wedges are used.A technique can be employed where half of the back cut ismade at a time. This allows for wedges to be placed withoutinterfering with the guide bar.
After making the undercut, cut half of the backcut using the guidebar’s tip. Make this cut from the tree’s offside. Watch out forkickback and be careful not to cut the holding wood. Finish thebackcut from the other side. Leave 1 to 11⁄2 inches of holdingwood.
After removing the saw, place a small wedge in the kerf an inchor more from the remaining wood to be cut. Remember to keepthe wedge tight but do not drive the wedge too hard. Finishthe backcut using the tip of the guide bar, being prepared forkickback from the wedge. The wedge will be in position if thetree sits back. If two wedges are needed to lift the tree into theundercut, spread them as wide as possible (figure 3-27). Fortrees that have a moderate amount of side lean, two wedgesmay be inserted on the side of the backcut that has been cutfirst. As with other wedging operations, it is essential to tightenthe wedges often, especially on trees that are attempting tosit back.
Figure 3-27—Wedges need to be parallel to the desired felling direction.
A sitback is a tree that settles back opposite the intended direc-tion of fall during the backcut. This normally happens becausethe lean was incorrectly established or the wind changed. If thesawyer has been following the proper felling procedure (thereis a wedge in the backcut and the holding wood has beenmaintained), a sitback can be dealt with readily. If the properfelling procedure has not been followed, the sawyer will needassistance because the tree has probably pinched the bar(figure 3-28).
Chapter 3—Chain Saw Tasks and Techniques
TOP VIEW
Und
ercu
t
Hol
ding
woo
d
Bac
kcut

43
SITBACK
Pinchedsaw blade
Figure 3-28—A tree settles back opposite the intended direction offall.
Immediately notify your supervisor in the case of sitbacks andother felling difficulties. Before you leave a hazardous tree, besure to clearly mark the area with flagging (figure 3-29) or witha written warning. Give a verbal warning to others working inthe area.
Figure 3-29—Clearly mark a hazard tree before leaving the area.Notify your supervisor of the hazard.
A snag is a standing dead tree, or portion of a tree, whosewood is decomposing.
Shout a warning. Before working on a snag, everyone in thearea must be notified. Remember a snag can fall in any directionat any time.
Observe the top. Pay special attention to overhead hazards,branches, and the snag’s top. Upper limbs may be weak andready to come down at the least vibration. Never cut directlybelow a hazard. Look up while driving wedges.
Swamp out the base. Carefully check the condition of the barkon the snag. Loose bark can come sliding down the side of thesnag and presents an extreme hazard to the sawyer. Standingback with room to escape, remove loose bark at the snag’sbase by prying it with an ax or a pole. Do not chop the bark,because this would set up vibration in the snag.
Size up. Check the condition of wood by boring into it with thebar tip. Maintain the integrity of the holding wood. When sound-ing with an ax, look up while striking the tree. Check for frostcracks and other splits in the holding wood.
Determine two escape routes. Since the holding wood is rottento some degree, you must establish two routes of escape.
Make the undercut. Do not fell a snag against its lean. Make theundercut and the backcut while standing upright. You are in aposition where you can easily look up. In addition, you are ina position that allows immediate escape.
When you are cutting the face, be alert for the snag pinchingthe bar. Previous boring in the undercut area during sizeupshould alert you to this possibility. Moving the bar back andforth will minimize the possibility of pinching. If the snag startsto sit on the bar, finish the undercut just to that depth. It is criticalthat the undercut has a wide opening and that it be cleaned outfrom corner to corner.
A short snag, with few or no limbs to give it lean, may need aface up to one-half the snag’s diameter to offset the balance.
Felling Observers and Spotters
The use of personnel other than swampers in felling operationshas been controversial. The Health and Safety Code Handbookstates that if you choose to have additional personnel (suchas during training), justification for the additional personnel andthe implementation process shall be documented in the JHA.
Chapter 3—Chain Saw Tasks and Techniques