chapter 11 using gallerypro with quickbooks pro - artsystems
TRANSCRIPT
U S E R G U I D E U S I N G Q U I C K B O O K S P R O A N D G A L L E R Y P R O C H A P T E R 1 1
187
Chapter 11 Using Galler yPro with
QuickBooks Pro
Using GalleryPro with QuickBooks Pro Linking GalleryPro Data to an Accounting Program
Artsystems GalleryPro and Intuit QuickBooks Pro can be easily linked to provide a robust accounting solution for any art business needs. Post Invoices, Cash Sales, Credit Memos and Receipts from GalleryPro to QuickBooks Pro, Quickbooks Premier, Quickbooks Premier Accountant or Canadian QuickBooks Pro 6.0.
Note: GalleryPro does not link with Intuit Quicken or QuickBooks standard. QuickBooks Standard does not have the ability to utilize live networking.
Before Setting up:
Please consult an accountant regarding configuring the QuickBooks Pro Chart of Accounts. It is suggested to use the guidelines documented in the following pages. (See Appendix IV, p. 225 in this guide for a sample Chart of Accounts and other Quickbook references.)
If there already is existing data in QuickBooks Pro, Technical Support can assist
your setting up the link with GalleryPro to ensure the combining of contact data as stated in the Contacts section of this document.
Convert data from other Intuit or non-Intuit applications to QuickBooks Pro
before starting the process comparing data with GalleryPro. Please refer to Intuit web site for more information regarding the transfer of data.
Once the link between GalleryPro has been established with QuickBooks Pro, it is
also highly recommended to continue making payments to consignors in BOTH GalleryPro and QuickBooks Pro. This practice allows aged accounts and financial reports to be used for comparison.
(Please refer to Appendix IV, p. 225 with Helpful Terms supplied by Intuit.)

U S E R G U I D E U S I N G Q U I C K B O O K S P R O A N D G A L L E R Y P R O C H A P T E R 1 1
188
In this Chapter there are two sets of instructions: the Quick Setup and the Detailed Setup. The Quick Setup instructions allow individuals who have a working knowledge of both GalleryPro and QuickBooks Pro to expedite the process of establishing the link.. If you are not familiar with one or both of the software programs, please refer to the Detailed Setup section. The Detailed Setup instructions detail every aspect of the link between GalleryPro and QuickBooks Pro. It is recommended that most users refer to the Detailed Setup section for best results.
Quick Setup: GalleryPro / QuickBooks Pro Link
Before Beginning
1. First establish the company file in QuickBooks Pro including the Chart of Accounts. Consult with your accountant if necessary to determine which accounts are needed for a proper Chart of Accounts.
2. Next, establish the connection between GalleryPro and QuickBooks Pro. To do this, launch GalleryPro and select Tools >Administrative Options >General tab. Select the Link to the QuickBooks Pro box and browse to find the company file. Select OK.
3. Now, import your Chart of Accounts from QuickBooks Pro into GalleryPro. (*Note: You must have a file installed that corresponds to your Quickbooks version in order to import the Chart of Accounts see p. 205.) When the correct file is installed, in GalleryPro, with QuickBooks Pro CLOSED, select Tools > Import Chart of Accounts. A prompt will appear to verify the import of the Chart of Accounts from the company file selected in Tools > Adminstrative Options. Select OK. The Chart of Accounts has been successfully imported.
4. Next, open the Works module and enable viewing the QuickBooks Pro account information. From the menu in GalleryPro select View > QB Accounts.
5. Lastly, ensure that all accounts are filled in correctly. Specifically, for two distinct areas;; Item Types (which are the miscellaneous items on Invoices) and the Tax Jurisdictions. To fill in the accounts for either of these items, Launch Transactions, select File >Edit Related Files and select the drop-down arrow to select Item Types. For each Item Type, make sure the account is filled out. Next, select the drop-down arrow, and select Tax Jurisdictions. Make sure each Tax Jurisdiction has its account and vendor information filled out. You are now ready to begin using QuickBooks Pro with Artsystems.

U S E R G U I D E U S I N G Q U I C K B O O K S P R O A N D G A L L E R Y P R O C H A P T E R 1 1
189
Quick Setup: Posting to QuickBooks Pro
QuickBooks Pro must be opened (in the background), in Single User Mode, and the user must be logged in with administrative privileges in order to post your account information.
1. Before posting to QuickBooks Pro, make sure the QuickBooks Pro account information is filled out for EACH work. Check the Financial/Owner tab for the individual items in Works and select the appropriate accounts.
2. Also, on the Invoice transaction, select an account (Accounts Receivable) to post to.
3. Once this information has been properly inserted, post to QuickBooks Pro by selecting Tools > Post to QuickBooks Pro.
4. Additionally, QuickBooks requires Invoices to have a Tax Jurisdiction selected whether tax is charged or not. Select the appropriate Tax Jurisdiction or, if you are in a jurisdiction that does not charge sales tax
Tax Jurisdiction that has a 0.00% tax rate. Remember to apply the appropriate account and vendor information.
5. A Posting chart will appear with the information that is to be posted into QuickBooks Pro. Select Post Records. A prompt will appear to ensure that a back-up is made prior to posting. Select OK.
6. A prompt will appear when the information is successfully posted into QuickBooks Pro. View the newly posted information in QuickBooks Pro by selecting Lists > Chart of Accounts > Accounts Receivable.
Posting to Quickbooks Pro

U S E R G U I D E U S I N G Q U I C K B O O K S P R O A N D G A L L E R Y P R O C H A P T E R 1 1
190
TImportant Note about Tax Jurisdictions: The QuickBooks Sales Tax Item list must EXACTLY match the GalleryPro tax item dropdown list. If you add a new tax item in QuickBooks you must also add the new tax item in GalleryPro and then re-import your chart of accounts into GalleryPro.
Detailed Setup: Configuring QuickBooks Pro
Contacts in QuickBooks Pro
When starting, the link using existing data in QuickBooks Pro and GalleryPro, contact records already exist as Customers and Vendors in QuickBooks Pro. GalleryPro will try to match the respective client records by comparing the names and addresses. It is important that the spelling be identical.
If Customers/ Vendors in QuickBooks Pro are not in your GalleryPro database, they will not be automatically transferred from QuickBooks Pro to the GalleryPro Contacts Module when you activate the link. Contact Artsystems Technical Support (see p. 211) to convert the contacts from Quickbooks Pro to GalleryPro. After importing the CoA from QuickBooks Pro, the link consists of exporting data from GalleryPro to QuickBooks Pro.
When entering a new contact in GalleryPro, the contact will be added automatically to QuickBooks Pro in the Customer Job List upon posting a Sale.
If there are no sales related to the contact, the contact will not be entered into your QuickBooks Pro database through GalleryPro. Simply enter the contact manually into QuickBooks Pro if needed.
Linking Customers from GalleryPro to QuickBooks Pro is automatic, there is no need to add these new records in QuickBooks Pro the link does it for you when you post.
Works in QuickBooks Pro
Owned Inventory Values As the inventory is saved in GalleryPro and not in QuickBooks Pro, the value and
details of the inventory assets (owned works) are kept in GalleryPro (along with, though distinguished from, consigned inventory).

U S E R G U I D E U S I N G Q U I C K B O O K S P R O A N D G A L L E R Y P R O C H A P T E R 1 1
191
To ensure a proper and complete balance sheet in QuickBooks Pro, enter each owned inventory value as a Journal Entry in the General Ledger, and increase inventory value by making payments to Inventory.
When making changes to the Artsystems owned inventory values, the Journal Entry in QuickBooks Pro will not update automatically.
Artsystems can only send new information to QuickBooks Pro upon posting a sale, and will not change the existing records within the QuickBooks Pro database (i.e.., GalleryPro can create new transactions, but not alter existing QuickBooks Pro records).
Sales Accounts, Liability Accounts and Cost of Goods Sold Accounts Each work must be identified with a Sales Account, a Cost of Goods Sold
Account (COGS), and a Liability Account (if the work is consigned) or an Inventory AssetAccount (if the work is owned) from the CoA.
With a COGS Account, the Source of the work posts as the Vendor in QuickBooks Pro.
The amount due to the consignor, or Other Current Liability, is posted outside of the Accounts Payable feature in QuickBooks Pro. This separates the amounts owed to consignors from the Accounts Payable, *(Please refer to the Sample Chart of Accounts below).
Sample Artist/Consignor Chart of Accounts
Below is a sample Artist as Consignor section of an ideal Chart of Accounts for linking QuickBooks Pro with GalleryPro. (See also Appendix IV, p. 225).
310-000 Due Gallery Artists Other Current Liability 310-100 John Smith Other Current Liability 310-100A Due John Smith Other Current Liability 310-100B Due From John Smith Other Current Liability 310-150 Ann Davey Other Current Liability 310-150A Due Ann Davey Other Current Liability 310-150B Due From Ann Davey Other Current Liability 310-200 Alice Anderson Other Current Liability 310-200A Due Alice Anderson Other Current Liability 310-200B Due From Alice Anderson Other Current Liability 320-000 Due to Consignors Other Current Liability 320-100 Due to AA Fine Art Other Current Liability 320-150 Due to BB Fine Art Other Current Liability 320-200 Due to Jane Doe Other Current Liability 320-250 Due to CC Gallery Other Current Liability

U S E R G U I D E U S I N G Q U I C K B O O K S P R O A N D G A L L E R Y P R O C H A P T E R 1 1
192
Transactions Created in QuickBooks Pro
Payments Made and Received When the link is activated, all payments received can be entered into GalleryPro and posted over to QuickBooks Pro. A Make Payment transaction should be created in GalleryPro to provide a cross-reference for the payment that was posted into QuickBooks Pro from the Work Form CoGs (Cost of Goods Sold) account. To issue a payment to the consignor/artist from QuickBooks Pro, one method would be to create a Bill and on the Bill Stub select the Item tab. In the Item Column, click and select the item that the payment is being issued for. This practice allows the amount due to auto-fill with the amount due the Consignor/Artist.
Establishing the Link to Quickbooks in GalleryPro
A connection between GalleryPro and the QuickBooks Pro company file (QBW) must be established by clicking on the Tools Menu>Administrative Options section of GalleryPro and checking the QuickBooks check box. Then click on the Browse button and navigate and select the .QBW file. Once this link has been established the two programs will remain linked unless the location or name of the QBW file changes.

U S E R G U I D E U S I N G Q U I C K B O O K S P R O A N D G A L L E R Y P R O C H A P T E R 1 1
193
1. From the menu in GalleryPro, select Tools>Administrative Options> General.
2. Click the Link to QuickBooks Pro check box.
3. Browse to the QuickBooks Pro company file (qbw).
4. Select OK.
Importing Chart of Accounts
Import the Chart of Accounts from the QuickBooks company file into GalleryPro
1. Select Tools >Import Chart of Accounts in GalleryPro.
2. A message appears confirming the file to be imported:
*NOTE: You must have the correct dll file that corresponds to your Quickbooks version in order to import the Chart of Accounts see p. 205 for additional information.

U S E R G U I D E U S I N G Q U I C K B O O K S P R O A N D G A L L E R Y P R O C H A P T E R 1 1
194
Note: QuickBooks Pro v2006 through v2008 will see the following during importing.
3. Select OK. The Chart of Accounts has been successfully imported.
Whenever you make changes to the Chart of Accounts in QuickBooks Pro, it is recommended that you reimport the Chart of Accounts to GalleryPro.
Viewing the QuickBooks Pro Accounts in Works
Activate the display of the QB Account information in Works. In GalleryPro, from the menu select View> QB Accounts.
Works Accounts associated with QuickBooks Pro
Complete the QuickBooks Pro account information for EACH work. Enter these values while adding a new work or whenever you sell an existing work.
1. In Works, click on the Financial tab (also labeled as Owner tab for Owned works) and select the button initiating the choices from the Chart of Accounts.
2. Select the appropriate account for Cost of Goods Sold, Sales, and Account. The accounts chosen will depend on the QuickBooks Pro Chart of Accounts setup by the Administrator.

U S E R G U I D E U S I N G Q U I C K B O O K S P R O A N D G A L L E R Y P R O C H A P T E R 1 1
195
3. Verify that consigned works have the Base Cost or the Net as Percent fields completely and properly filled out. If these fields are not filled out correctly, the Invoice or Credit Memo in which the work is included will not post successfully.
4. Click Save
Typos such as unintentional carriage returns in the title of works can prevent invoice, cash sales, credit memos, and receipts from posting.
Transaction Accounts Associated with QuickBooks Pro
In Transactions, on an Invoice Form, the Tax Jurisdiction, Item Type (found on the Misc Tab), and Transaction Account fields must be appropriated to the proper QuickBooks Pro accounts to allow GalleryPro to successfully post the information to QuickBooks Pro.,This also applies to Credit Memos, Cash Sales and Receipts.
Accounts Receivable and Undeposited Funds
The proper account selection for Invoices and Credit Memos is Accounts Receivable.
The applicable accounts for Cash Sale and Receipt transactions are accounts such as Undeposited Funds, Bank Accounts, or other similar Asset accounts. Utilizing a

U S E R G U I D E U S I N G Q U I C K B O O K S P R O A N D G A L L E R Y P R O C H A P T E R 1 1
196
staging account such as Undeposited Funds provides the most flexibility when posting cash related transactions.
Sales Tax
QuickBooks Pro requires all Invoices to have a Sales Tax Jurisdiction assigned to Invoices. If sales tax is NOT charged on an Invoice No Sales Tax
To Add a New Tax Jurisdiction / Account / Vendor and Rate:
1. Click in the Tax Jurisdiction field and type the name of the new Jurisdiction.
2. Click to another transaction field and the Dialogue Caption box appears asking the user to add the Jurisdiction to the Table. Assign the proper accounts to the Account and Vendor fields. Afterward type in the relative tax rate.
3. Click Yes to save changes.
To make sure the proper Account and Vendor are attached to the Tax Jurisdiction, or to edit the Tax Rate select File > Edit Related files from the menu (see page 60). Note: If you update the tax rate for an existing jurisdiction, it will NOT update the tax rate on existing invoices.

U S E R G U I D E U S I N G Q U I C K B O O K S P R O A N D G A L L E R Y P R O C H A P T E R 1 1
197
Item Types in the Miscellaneous Tab
Miscellaneous Items on an Invoice can be posted to QuickBooks Pro. These Items require a properly assigned income account from the Chart of Accounts and need to be properly entered into the QuickBooks Pro Item List prior to posting.
Adding a new Miscellaneous Item Type:
1. Click in the Miscellaneous Type field so the cursor appears.
2. Type the name of the new Type and then click to the next field.
3. The Add Item box will appear asking to add the Type to the Item Table. Assign the proper income account to the Account field.
4. Click Yes.
Editing a new Miscellaneous Item Type:
Edit the existing Miscellaneous Types through the Edit Related Files option.
5. In Transactions, select File>Edit Related Files from the menu.
6. Select Item Types from the drop-down list.
7. Remove or edit the existing Item Types in this window.

U S E R G U I D E U S I N G Q U I C K B O O K S P R O A N D G A L L E R Y P R O C H A P T E R 1 1
198
8. When finished, click the Close button. A prompt will appear asking to update records. Click Yes
Saving Invoice, Cash Sale and Credit Memo Transactions
Once all relavent fields are filled for the Invoice, Cash Sale or Credit Memo transactions, click Save. Check the following for successful posting:
A common error when saving an Invoice, Cash Sale or Credit Memo all account information must be entered Accounts Receivable field and Miscellaneous Items on the transaction (bottom left), as well as the QuickBooks Pro fields in Works (Financials/Owner tab).
When creating an Invoice, make sure the Invoice is NOT marked as Historical.
Contact has a displayed name or institution. Transactions without contact names can not post successfully.
Posting
It is optional to prepare for posting to QuickBooks Pro by creating a view set in Transactions for Invoices, Cash Sales, and Credit Memos including a range of dates that reflect the records you are posting. Print a GalleryPro transaction report for comparison with the QuickBooks Pro transaction report after posting.
1. QuickBooks Pro must be opened and must be in Single User Mode and logged in with administrative privileges in order to Post correctly. It is

U S E R G U I D E U S I N G Q U I C K B O O K S P R O A N D G A L L E R Y P R O C H A P T E R 1 1
199
suggested to leave QuickBooks Pro open in the background and, it may be helpful to have at least one QuickBooks Pro window open, for example, Reminders or Invoices.
2. From any module in GalleryPro select Tools>Post to QuickBooks Pro.
3. The Post to QuickBooks Pro window will appear. Review the related account information to make certain everything has been filled out correctly. When finished, click Post Records.
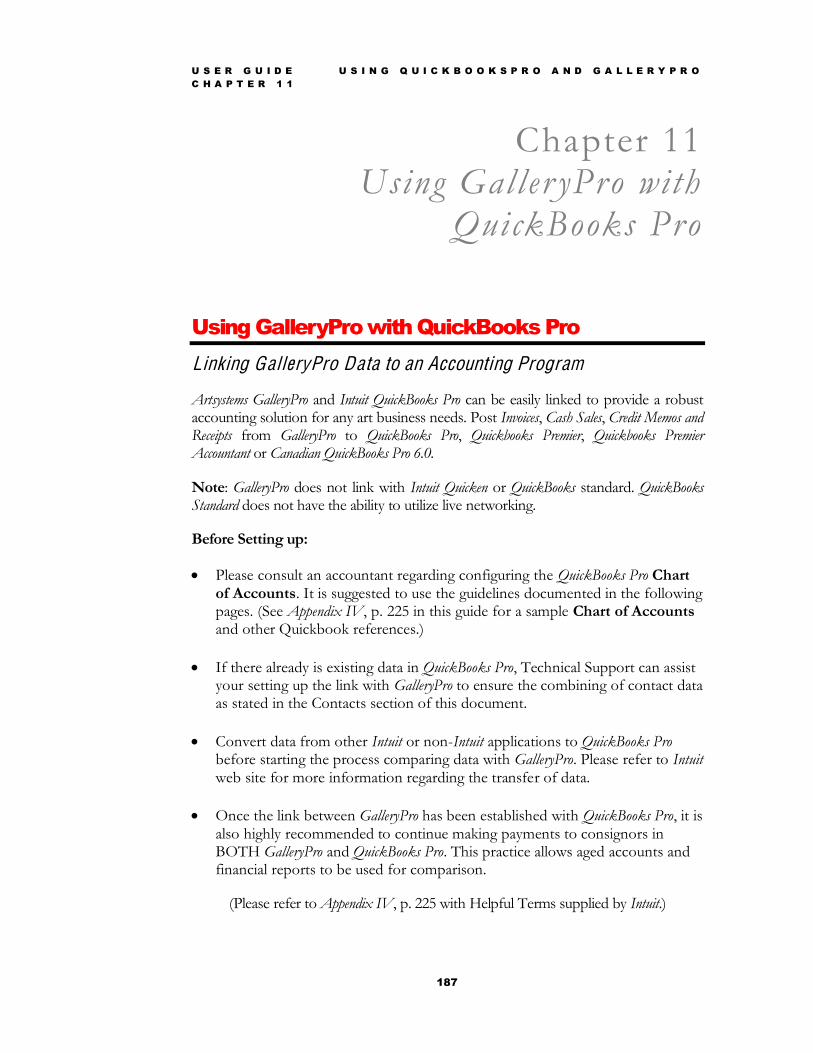
4. A prompt will appear to open QuickBooks Pro and import the artsys.iif file from the GalleryPro program folder.
5. Next, minimize GalleryPro. Please do NOT press OK to the question Would you like to clear your posting file?
into QuickBooks Pro successfully.
U S E R G U I D E U S I N G Q U I C K B O O K S P R O A N D G A L L E R Y P R O C H A P T E R 1 1
200
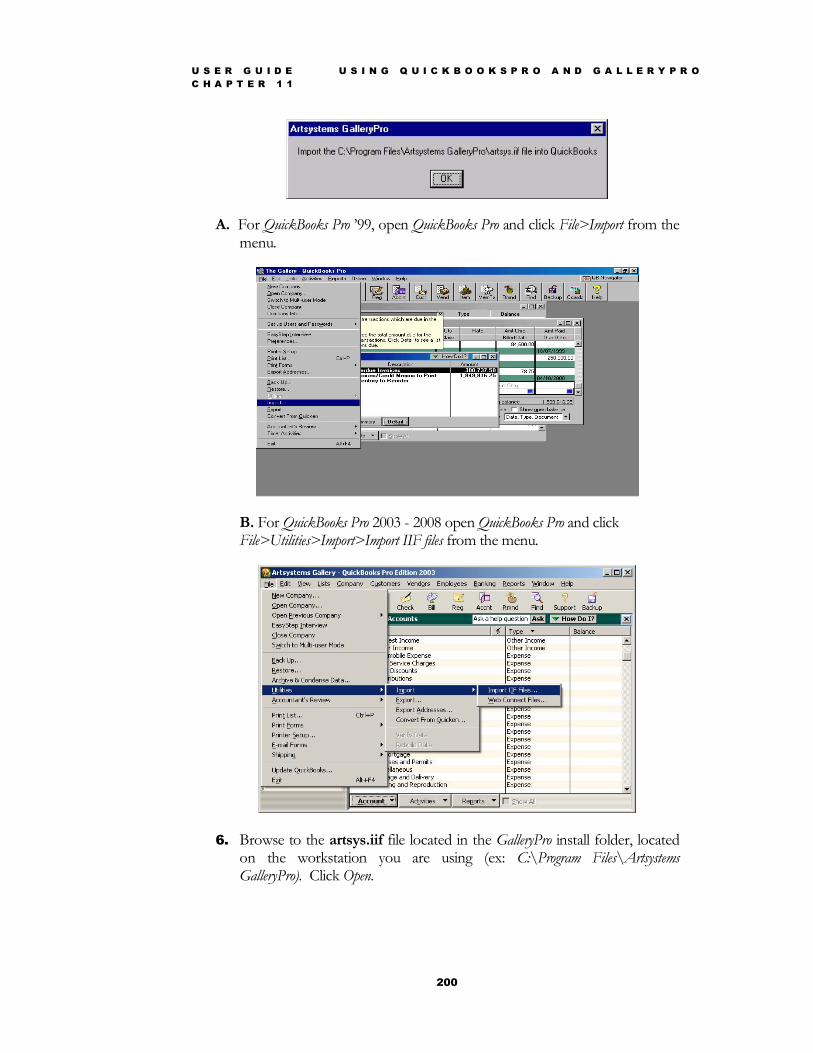
A. For QuickBooks Pro QuickBooks Pro and click File>Import from the menu.
B. For QuickBooks Pro 2003 - 2008 open QuickBooks Pro and click File>Utilities>Import>Import IIF files from the menu.
6. Browse to the artsys.iif file located in the GalleryPro install folder, located on the workstation you are using (ex: C:\Program Files\Artsystems GalleryPro). Click Open.

U S E R G U I D E U S I N G Q U I C K B O O K S P R O A N D G A L L E R Y P R O C H A P T E R 1 1
201
7. A prompt will then appear verifying that the file was imported.
The artsys.iif file (or the artsys file when file extensions are not displayed) is the temporary posting file GalleryPro uses to export to QuickBooks Pro. Select the artsys.iif file within this program folder, click OPEN or click ENTER.
Verifying Successful Data Import
In QuickBooks Pro, review the imported invoices, cash sales, credit memos and receipts before returning to GalleryPro. Find Invoices in QuickBooks Pro by creating a Transaction Detail Report or by opening the Accounts Receivable List.
In QuickBooks Pro, run a Transaction Detail Report for the range of transaction dates that were posted. Compare this with the Transaction Report created in GalleryPro in Posting from GalleryPro to QuickBooks Pro section above.
Open Lists > Chart of Accounts and double click Accounts Receivable. Locate the Invoice in question, double-click the entry to open the Invoice directly. Here review the Invoice details.

U S E R G U I D E U S I N G Q U I C K B O O K S P R O A N D G A L L E R Y P R O C H A P T E R 1 1
202
For Consigned works, verify that Accounts Payable accounts are correctly reflecting the consignment amounts due to the proper consignors.
Client contact names in GalleryPro that are identical to Vendor contacts in QuickBooks Pro will cause a duplicate name error. To work around this, add a unique character to one of the names such as an Asterisk (*) after the last character of the name within QuickBooks Pro.
Please do not edit items in the item list. A loss of data integrity may occur in QuickBooks Pro when editing the items
Returning To GalleryPro after Posting
After Successfully Posting After verifying GalleryPro has successfully posted to QuickBooks Pro, return to GalleryPro. A window will be open with a prompt to clear the Temporary Posting file. Click on Yes to clear the file;; then continue working in GalleryPro as usual.
Historical Invoices Notice when scrolling on and off the posted transaction, the transaction is now marked
Historical transactions are marked as such to prevent accidental posting.
If invoices have not been successfully posted but the posting file has been cleared, uncheck the Historical mark and resave the transaction to attempt to post again.

U S E R G U I D E U S I N G Q U I C K B O O K S P R O A N D G A L L E R Y P R O C H A P T E R 1 1
203
Unsuccessful Posting If any Invoices were not posted successfully, there are two options: (1) Clear the Temporary Posting File in GalleryPro: Go to each un-posted Invoice and uncheck the Historical Invoice and Save, thus creating a new Posting file of un-posted Invoices. (2) Do NOT clear the Temporary Posting File and restore the backup of QuickBooks Pro that was made prior to posting. Adjust each un-posted Invoice, re-save and try the Posting process again.
Note Editing Invoices after Posting to Quickbooks In QuickBooks , entering additional items on to an invoice that has been imported from GalleryPro will render a miscalculation of the Tax amount for that invoice. This miscalculation occurs on any Invoice that has been imported and then edited in QuickBooks. In order to correctly edit imported Invoices in QuickBooks you must first open the Item List from the List Menu in QuickBooks, locate the Tax Jurisdiction in question and edit by replacing the percent character (%) to the Tax Value. When this is complete, go back to the Invoice and click on to another Tax Jurisdiction in the Tax field and then click back to the desired Tax Jurisdiction. This action allows QuickBooks to update the Tax amount and the invoice calculations. Artsystems has discovered this to be an issue with QuickBooks version 2002 - 2008.
QUICKBOOKSPRO AND GALLERYPRO
Import the Chart of Accounts To import the QuickBooks Chart of Accounts into GalleryPro you will need to download and install the qbofcp.dll file that corresponds to your version of QuickBooks. Please browse the list below to find the correct dll file and then install the correct file into C:\Program Files\Artsystems GalleryPro folder (or contact Artsystems Technical Support): For: Download and Install from: QuickBooks v2008 qbofcp.dll is installed with GalleryPro version 2.8.0 or higher QuickBooks v2007 qbofcp.dll is installed with GalleryPro version 2.8.0 or higher QuickBooks v2006 qbofcp.dll is installed with GalleryPro version 2.8.0 or higher QuickBooks v2004 TUhttp://www.artsystems.com/qbdll/2004/qbofcp.dllUT QuickBooks v2003 TUhttp://www.artsystems.com/qbdll/2003/qbofcp.dllUT QuickBooks v2002 TUhttp://www.artsystems.com/qbdll/2002/qbofcp.dllUT QuickBooks v2001 TUhttp://www.artsystems.com/qbdll/2001/qbofcp.dllUT Note: Quickbooks versions v2006 through v2008 now uses an officeq6.exe which is installed with new installs or updates to GalleryPro v2.8.0 or higher.

U S E R G U I D E U S I N G Q U I C K B O O K S P R O A N D G A L L E R Y P R O C H A P T E R 1 1
204
QuickBooks Item List and GalleryPro SalesTax Items In QuickBooks, in the Item List, the Sales Tax Items must be identical to the Sales Tax Items entered into GalleryPro. Once the GalleryPro and QuickBooks links are established, and the Chart of Accounts is imported, ensure that each Sales Tax item in the Sales Tax dropdown list has the correct Vendor and Sales Tax Account associated with each. Check this in the Transactions module by selecting from the menu File>Edit Related Items>Sales Tax Jurisdictions.
Note: If Sales Tax items have not been added in GalleyPro after establishing the QuickBooks link and importing the Chart of Accounts, a prompt will appear to add these accounts when entering any new tax.