chapter 1 – great plains installation and...
TRANSCRIPT
Errata for Introduction to Microsoft Great Plains 8.0 Focus on Internal Controls / ISBN 0-13-186064-X
Updated on August 17, 2006 Page 1 of 33
The information that follows lists corrections to the text as well as helpful hints and additional exercise guidance. You should place a notation in your text on the pages referenced below. You will then know to refer to this document for additional information.
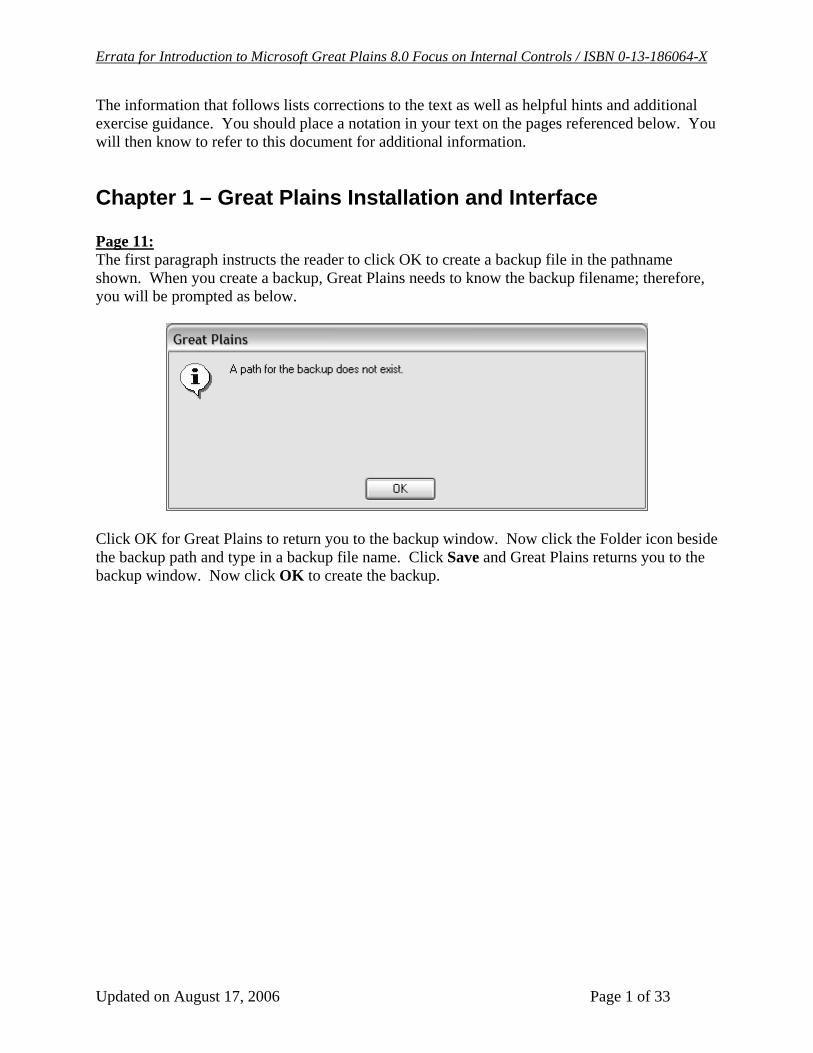
Chapter 1 – Great Plains Installation and Interface Page 11: The first paragraph instructs the reader to click OK to create a backup file in the pathname shown. When you create a backup, Great Plains needs to know the backup filename; therefore, you will be prompted as below.
Click OK for Great Plains to return you to the backup window. Now click the Folder icon beside the backup path and type in a backup file name. Click Save and Great Plains returns you to the backup window. Now click OK to create the backup.

Errata for Introduction to Microsoft Great Plains 8.0 Focus on Internal Controls / ISBN 0-13-186064-X
Updated on August 17, 2006 Page 2 of 33
Page 5: Under Stage 2 instructions at the bottom, the text states that the database files are located on the CD named GP Data Files. The correct name of the CD is Student CD: Introduction to Microsoft Great Plains 8.0 Focus on Internal Controls. Page 6: Figure F1:9 CD Data shows files contained on the CD. Depending on the view properties of the window, these files may display with a database icon as shown below.

Errata for Introduction to Microsoft Great Plains 8.0 Focus on Internal Controls / ISBN 0-13-186064-X
Updated on August 17, 2006 Page 3 of 33
Furthermore, the CD contains three informational files (readme.txt, start.html, and top-banner.gif) that are not copied to your computer. Page 7: Figure 1:13 Dynamics.mdf file displays the data files copied to your computer. Once again, the display properties for the window may change the icons to database symbols, thus the window will appear as below.
Errata for Introduction to Microsoft Great Plains 8.0 Focus on Internal Controls / ISBN 0-13-186064-X
Updated on August 17, 2006 Page 4 of 33
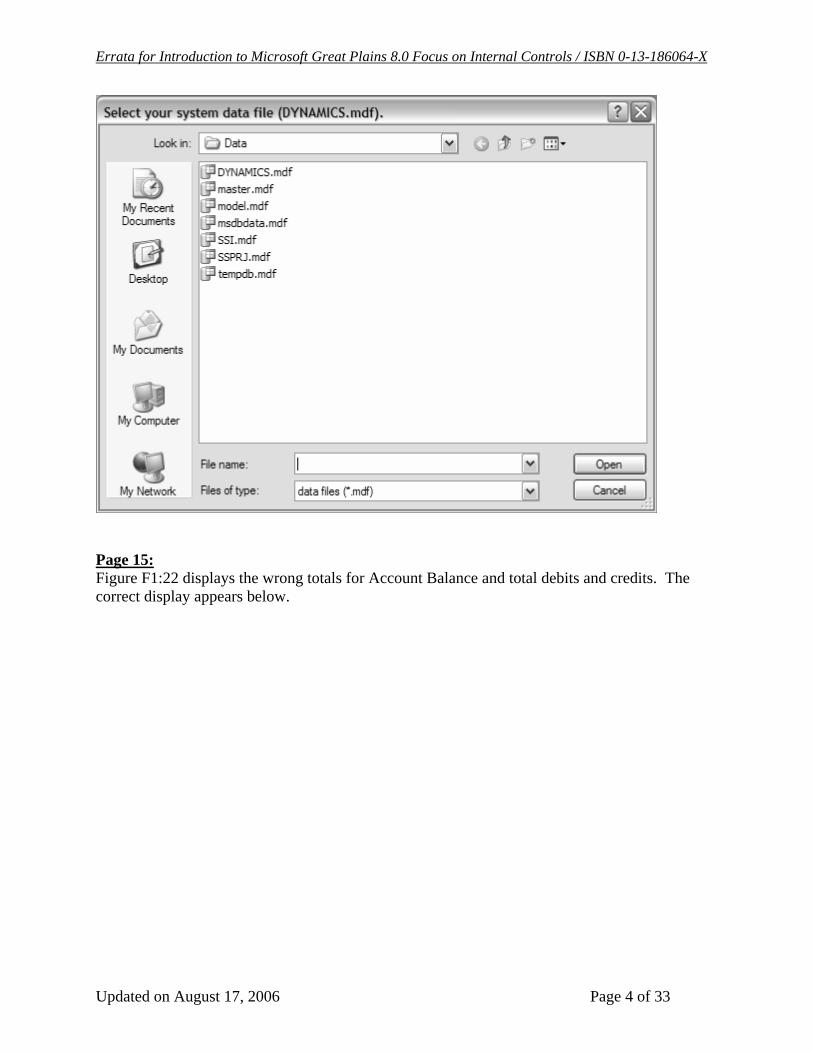
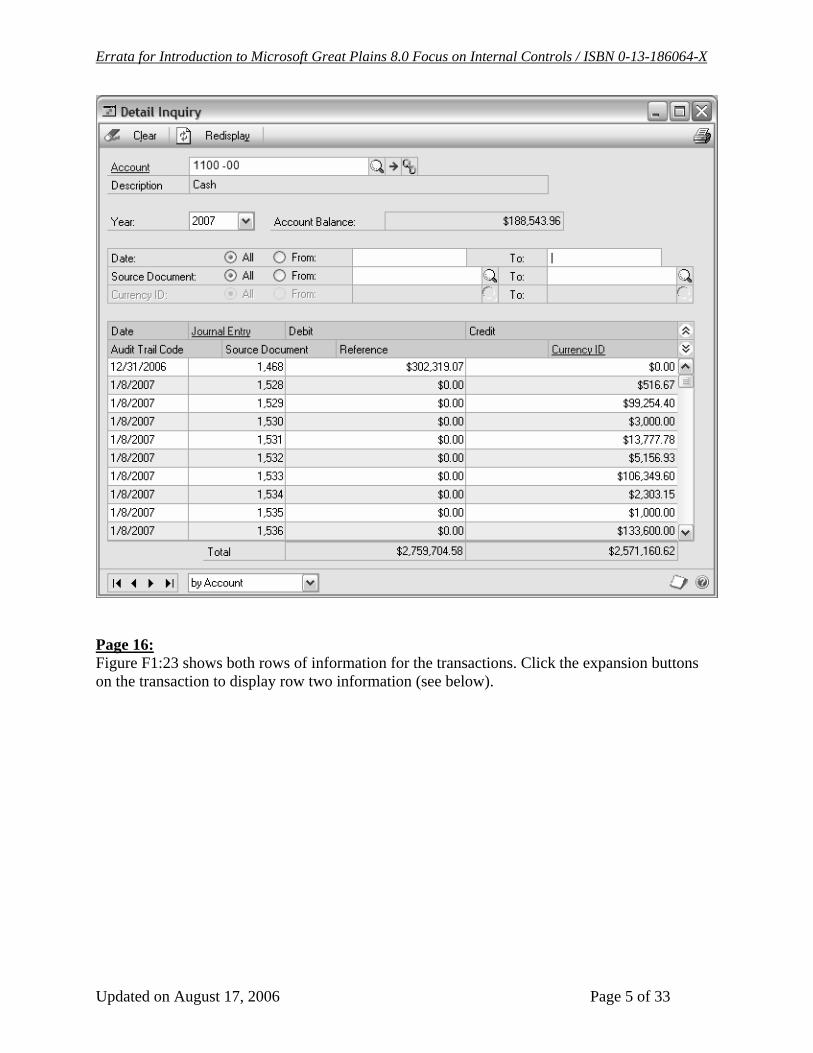
Page 15: Figure F1:22 displays the wrong totals for Account Balance and total debits and credits. The correct display appears below.
Errata for Introduction to Microsoft Great Plains 8.0 Focus on Internal Controls / ISBN 0-13-186064-X
Updated on August 17, 2006 Page 5 of 33
Page 16: Figure F1:23 shows both rows of information for the transactions. Click the expansion buttons on the transaction to display row two information (see below).

Errata for Introduction to Microsoft Great Plains 8.0 Focus on Internal Controls / ISBN 0-13-186064-X
Updated on August 17, 2006 Page 6 of 33
Expansion buttons

Errata for Introduction to Microsoft Great Plains 8.0 Focus on Internal Controls / ISBN 0-13-186064-X
Updated on August 17, 2006 Page 7 of 33
Chapter 2 – The S&S Company Database Page 34: The last full paragraph on this page states there can be a maximum of 5 segments of 15 characters each "(i.e., 65 divided by 5)". This is not correct since 65 divided by 5 is 13. Therefore, one or two of the segments must be less than five. Page 45: The last sentence on the page refers the reader to Appendix A for instructions on correcting batches with posting errors. The text should read Appendix C and the instructions are under the COMMON ERRORS topic. This error occurs when attempting to post to a closed period. You will need to release the transaction using Tools>>Routines>>Batch Recovery. After releasing, you need to reopen the batch using the batch window of the originating Series. For example, if the batch was posted under Invoicing Batches, then return to this window and reopen the batch. After reopening, change the date, resave the batch, and then post again. Page 48: Figure 2:16 Checkbook Maintenance Record displays the checking account with an incorrect balance. The corrected image is shown below. The negative amount under Current Checkbook Balance appears because the account is not reconciled; therefore, deposits are not reflected in the balance. The Cash Account Balance displays the general ledger amount for the 1100-00 Cash account.
Page 49:

Errata for Introduction to Microsoft Great Plains 8.0 Focus on Internal Controls / ISBN 0-13-186064-X
Updated on August 17, 2006 Page 8 of 33
Figure F2:17 Smart List Window shows a report named Trial Balance under the Account Summary folder. This is a customized Smart List report created by the authors, but omitted from the database accompanying the text. You will get the same results displayed to the right under the Account Summary pane by clicking on the * report under Account Summary.
Errata for Introduction to Microsoft Great Plains 8.0 Focus on Internal Controls / ISBN 0-13-186064-X
Updated on August 17, 2006 Page 9 of 33
Chapter 3: Internal Controls and Great Plains Security Page 63: The first full sentence states that the “Inventory Register” prints. It should state that the “Inventory Sales Register” prints. Page 65 and 66: The first paragraph refers the reader to Figure F3:9 on page 66. To clarify, the Status column in this figure does not differentiate between pending and suspended batches. This column merely indicates whether or not a batch is available for posting. You must look to the name in the Batch ID column to identify the suspended invoice batch. Notice that the suspend invoice batch’s ID begins with INVCE. You will learn later in the chapter that this prefix corresponds to invoice transactions. The remaining batches store pending recurring journal entries and will be discussed in Chapter 8. The second paragraph shows the reader how to open the suspended invoice batch. The following clarifies these instructions.
1. In the Master posting window, click the Batch ID hyperlink. When the Go To window opens, highlight “General Ledger Batch Entry” and click Go to.
2. Using the lookup button, highlight Batch ID “INVCE00000001” and click Select to reopen the batch.
3. Click the Transactions button. 4. In the Transaction Entry window, use the Journal Entry lookup button to locate
“INVCE00000001”. (Note: You will need to move the right scroll bar up in this window to see the transaction.) Highlight the transaction and click Select.
5. You are now in the transaction. Click the Expand Details icon to see addition information.
6. You can close the Transaction and Batch windows without making changes by clicking X at the top of each window.
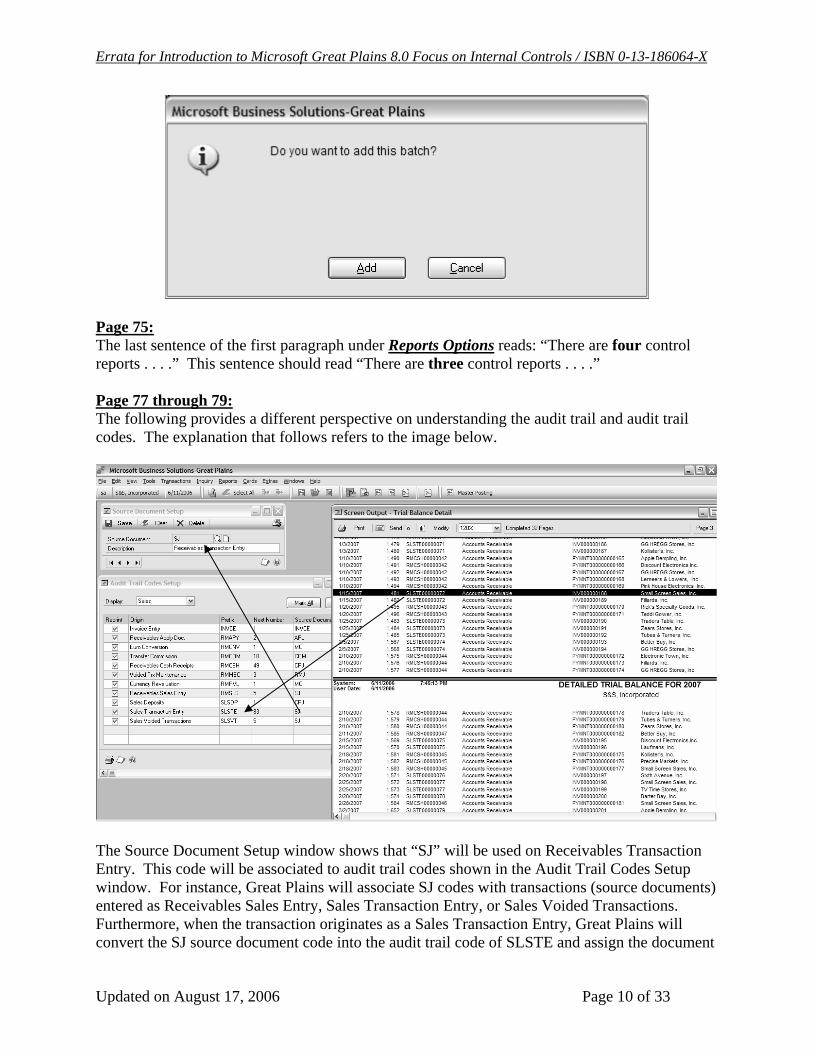
Page 68: The footnote refers the reader to page 195 in Romney and Steinbart’s Accounting Information Systems text. The footnote should read that page 195 of the text begins the discussion on COSO’s ERM Framework. Page 69: After typing BATCHCONTROL in the Batch ID field, press Tab and Great Plains prompts you to add the batch (see below). Click Add and the batch window will open for you to proceed with the remaining directions.
Errata for Introduction to Microsoft Great Plains 8.0 Focus on Internal Controls / ISBN 0-13-186064-X
Updated on August 17, 2006 Page 10 of 33
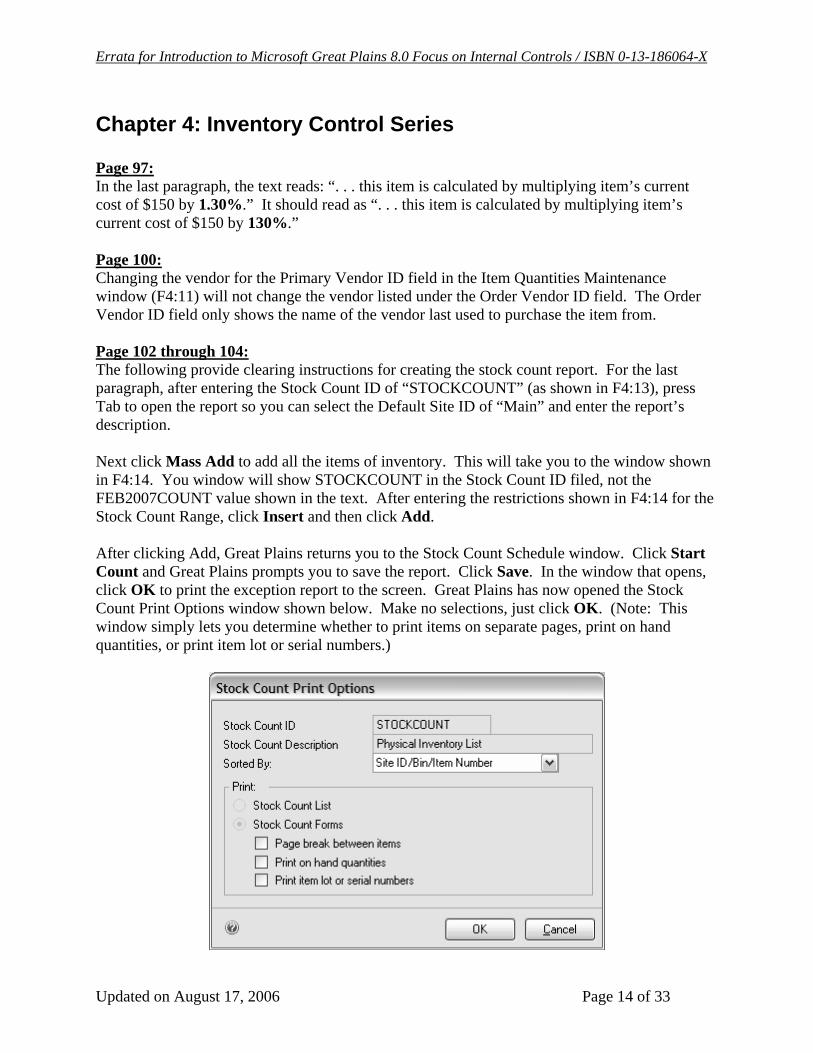
Page 75: The last sentence of the first paragraph under Reports Options reads: “There are four control reports . . . .” This sentence should read “There are three control reports . . . .” Page 77 through 79: The following provides a different perspective on understanding the audit trail and audit trail codes. The explanation that follows refers to the image below.
The Source Document Setup window shows that “SJ” will be used on Receivables Transaction Entry. This code will be associated to audit trail codes shown in the Audit Trail Codes Setup window. For instance, Great Plains will associate SJ codes with transactions (source documents) entered as Receivables Sales Entry, Sales Transaction Entry, or Sales Voided Transactions. Furthermore, when the transaction originates as a Sales Transaction Entry, Great Plains will convert the SJ source document code into the audit trail code of SLSTE and assign the document

Errata for Introduction to Microsoft Great Plains 8.0 Focus on Internal Controls / ISBN 0-13-186064-X
Updated on August 17, 2006 Page 11 of 33
number shown in the Next Number column. (Note: Document numbers are automatically incremented after posting a transaction.) However, when the source document originates as a Receivables Sales Entry, the SJ code will be converted to RMSLS plus the Next Number for that prefix. Thus, the transaction highlighted on the Detailed Trial Balance report shown above gives you the following information:
1. The entry posted to accounts receivable for customer Small Screen Sales, Inc. 2. The SLSTE prefix shows that the transaction was entered as a Sales
Transaction, i.e., by using the Sales Transaction Entry or Sales Batches menu.
3. The journal entry number for the transaction is 1481 and can be used as a filter for printing the Reports>>Financial>>Cross-Reference>>Journal Entry report. The example below shows using this number as a filter. This report is useful for locating all general ledger accounts affected by a transaction.
4. The source document for the transaction is “SLSTE00000072” and can be used
as an Audit Trail Code filter for printing the Reports>>Sales>>Sales Posting

Errata for Introduction to Microsoft Great Plains 8.0 Focus on Internal Controls / ISBN 0-13-186064-X
Updated on August 17, 2006 Page 12 of 33
Journals>>Sales Posting Journal report. The example below shows using this filter. The report is useful for reprinting the Sales Posting Journal.
5. Finally, the customer’s transaction posted as INV000000188. You can use this
invoice number to locate the transaction under Inquiry>>Sales>> Transaction by Document with the filter below. (Note: After entering the document number in From and To, click Redisplay.) From here, you can highlight the transaction and click the Document Number hyperlink to reopen the original invoice.

Errata for Introduction to Microsoft Great Plains 8.0 Focus on Internal Controls / ISBN 0-13-186064-X
Updated on August 17, 2006 Page 13 of 33
Page 89: Question 2 asks the reader to print the security report for the APCLERKS class. This report is printed using the Reports>>System>>Users menu. The reports type selected is “User Classes Report.” You will need to click New to create the report. The report is created using the following options.
User defined name for the report.
Errata for Introduction to Microsoft Great Plains 8.0 Focus on Internal Controls / ISBN 0-13-186064-X
Updated on August 17, 2006 Page 14 of 33
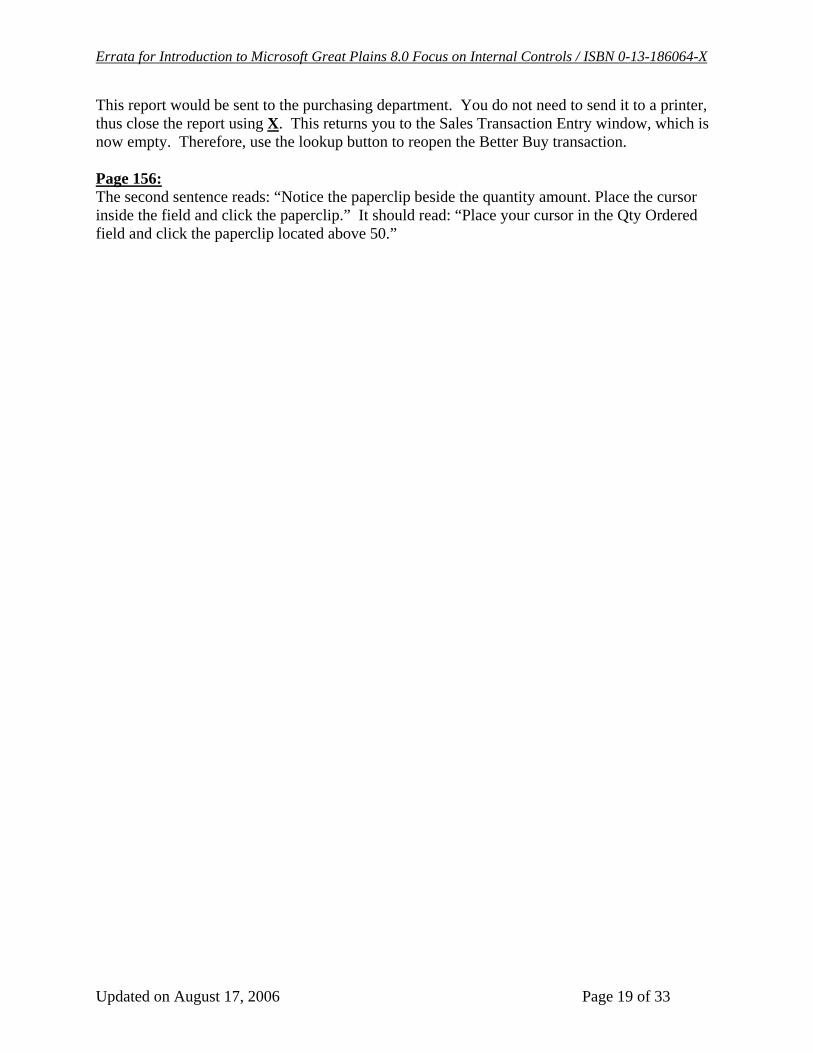
Chapter 4: Inventory Control Series Page 97: In the last paragraph, the text reads: “. . . this item is calculated by multiplying item’s current cost of $150 by 1.30%.” It should read as “. . . this item is calculated by multiplying item’s current cost of $150 by 130%.” Page 100: Changing the vendor for the Primary Vendor ID field in the Item Quantities Maintenance window (F4:11) will not change the vendor listed under the Order Vendor ID field. The Order Vendor ID field only shows the name of the vendor last used to purchase the item from. Page 102 through 104: The following provide clearing instructions for creating the stock count report. For the last paragraph, after entering the Stock Count ID of “STOCKCOUNT” (as shown in F4:13), press Tab to open the report so you can select the Default Site ID of “Main” and enter the report’s description. Next click Mass Add to add all the items of inventory. This will take you to the window shown in F4:14. You window will show STOCKCOUNT in the Stock Count ID filed, not the FEB2007COUNT value shown in the text. After entering the restrictions shown in F4:14 for the Stock Count Range, click Insert and then click Add. After clicking Add, Great Plains returns you to the Stock Count Schedule window. Click Start Count and Great Plains prompts you to save the report. Click Save. In the window that opens, click OK to print the exception report to the screen. Great Plains has now opened the Stock Count Print Options window shown below. Make no selections, just click OK. (Note: This window simply lets you determine whether to print items on separate pages, print on hand quantities, or print item lot or serial numbers.)

Errata for Introduction to Microsoft Great Plains 8.0 Focus on Internal Controls / ISBN 0-13-186064-X
Updated on August 17, 2006 Page 15 of 33
After clicking OK in the window above, the Report Destination window appears (see below). Click OK to print the report to the screen.
The first report to print is the exception report. This report should be empty, so click X to close it. The next report that prints is shown in F4:16 on page 104 of the text. Page 105: The following are cautions to use when posting the stock count. First, make sure to expand the rows in the Stock Count Entry window as shown in F4:17. Second, you must post a Counted Qty for ALL items; otherwise, you will get an exception report. Third, be sure to select the Autopost Stock Count Variances option, otherwise, the variance transactions are suspended in the Master Posting window. Therefore, the balance on the Stock Status report will not agree to the balance in the general ledger inventory account. If you did not check this option before clicking Process, then post the suspended transaction using the Master Posting window. Finally, the date symbol reminds you to change the system date to 3/1/2007. This is done so that the Count Date of 3/1/2007 will be automatically inserted each time you enter the quantity counted for an item. (Note: You can override the date by typing in a new one.) The Count Date will be used by Great Plains to post variances in the general ledger to the correct period; therefore, it is important to use the correct date.

Errata for Introduction to Microsoft Great Plains 8.0 Focus on Internal Controls / ISBN 0-13-186064-X
Updated on August 17, 2006 Page 16 of 33
Chapter 5: Revenue Cycle and Great Plains Sales Series Page 115: The first paragraph under Sales Series: Customer Master Records reads: “The Cards>>Sales>>Account menu . . . .” The sentence should read: “The Cards>>Sales>>Customers menu . . . .” Page 119: The fourth sentence in Exercise E5:2 reads: “Discount wants shipments . . . .” This sentence should read: “Electronic Connections wants shipments . . . .” Also, to clarify, the address for shipments is in a different city from the company’s headquarters. This illustrates Great Plain’s flexibility in choosing different locations for invoices and for merchandise shipments. Page 126: After entering the quantity for the BetterBuy transaction shown in F5:7, you may encounter a shortage in quantity on hand to fill the order depending on your activity in the software. This shortage is encountered when Great Plains issues the message below.
First, check to make sure that the quantity entered is correct. (Note: The illustration below shows that the user entered 300 when the transaction calls for 30. Thus, with 76 as the quantity available, the shortage does not occur when entering a sales order for 30.) However, if the quantity is correct, then highlight the Quantity Shortage Option of “Override Shortage” and click OK to continue entering the transaction. This selection tells Great Plains to disregard the shortage for this order. Table T5:4, page 154, provides an explanation for each Quantity Shortage Option that may be selected. Page 132: For exercise E5:4, the reader is instructed to print the control report for the transaction in exercise E5:3. First, batch and edit lists are control reports over saved transactions. Therefore, if you select File>>Print before placing the order in a batch, these reports will not be listed as print

Errata for Introduction to Microsoft Great Plains 8.0 Focus on Internal Controls / ISBN 0-13-186064-X
Updated on August 17, 2006 Page 17 of 33
options in the Sales Document Print Options window. If you have already finished E5:3, thus have saved and closed the batch containing the order, then you will print the control reports by reopening the batch and then selecting File>>Print. Page 138: The reader is instructed to print the sales invoice to Tubes & Turner by reopening the batch and then selecting the Invoices option. Since this batch contains just one invoice, you do not need to reopen the transaction to print one invoice to Tubes & Turner. However, if the batch contained multiple sales invoices, you would need to reopen the batch and the transaction before using File>>Print. Otherwise, you will print every invoice since the Sales Document Print Options window does not provide a way for filtering customers. Page 151: The second paragraph refers the reader back to F5:20 to notice the write-off field on the second row. You will need to use the Expand Rows button to open up additional rows in this window, however, you can see on the figure that the “Writeoffs” field appears at the end of the second row of the column headings. Page 153: When entering the order for Better Buy be sure to add the Batch ID of “SO03282007”. You can do this by using the menu Sales>>Sales Batches to create the batch first, then use the Transactions button to create the order. However, you can also use the Sales>>Sales Transaction Entry menu to open the transaction window. When you enter the name of the batch to the Batch ID field, Great Plains will prompt you to create the batch (see below).
Click Add and Great Plains creates the batch folder shown below.

Errata for Introduction to Microsoft Great Plains 8.0 Focus on Internal Controls / ISBN 0-13-186064-X
Updated on August 17, 2006 Page 18 of 33
Click Save and then use X to close the batch window. You will be returned to the Better Buy order in the transaction window. Page 155: After clicking the Generate button, the Report Destination window opens. Click OK to print the purchase order to the screen.
Errata for Introduction to Microsoft Great Plains 8.0 Focus on Internal Controls / ISBN 0-13-186064-X
Updated on August 17, 2006 Page 19 of 33
This report would be sent to the purchasing department. You do not need to send it to a printer, thus close the report using X. This returns you to the Sales Transaction Entry window, which is now empty. Therefore, use the lookup button to reopen the Better Buy transaction. Page 156: The second sentence reads: “Notice the paperclip beside the quantity amount. Place the cursor inside the field and click the paperclip.” It should read: “Place your cursor in the Qty Ordered field and click the paperclip located above 50.”
Errata for Introduction to Microsoft Great Plains 8.0 Focus on Internal Controls / ISBN 0-13-186064-X
Updated on August 17, 2006 Page 20 of 33
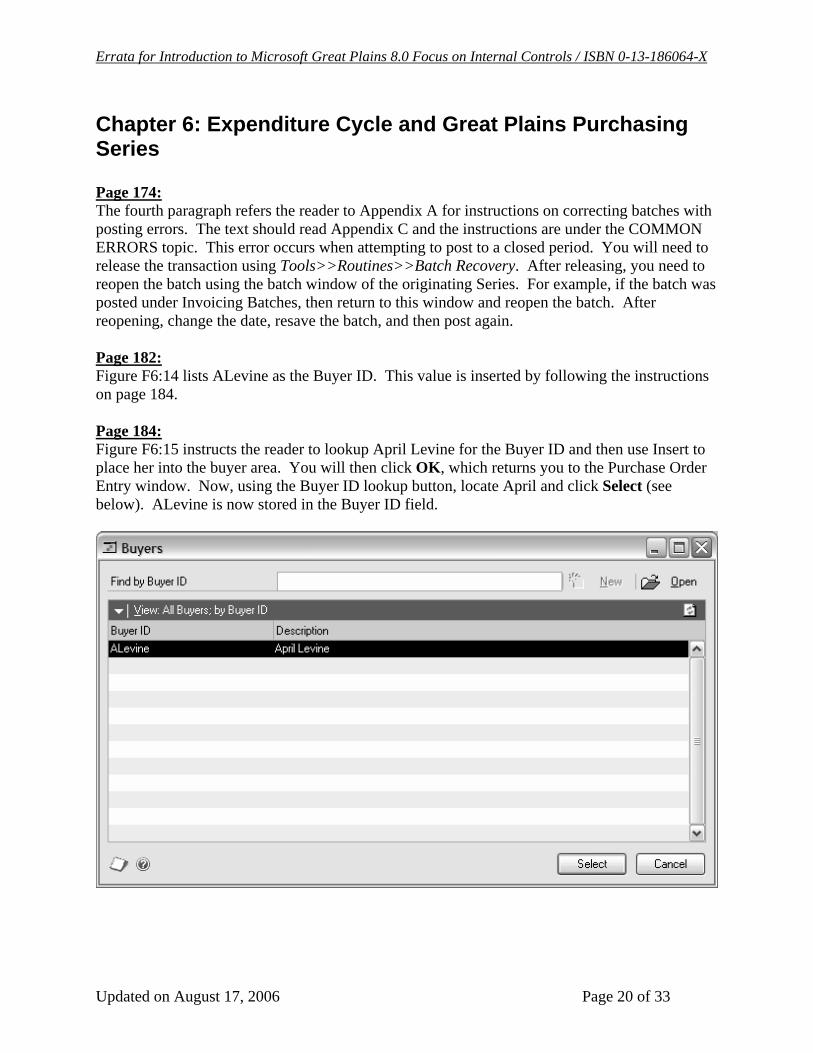
Chapter 6: Expenditure Cycle and Great Plains Purchasing Series Page 174: The fourth paragraph refers the reader to Appendix A for instructions on correcting batches with posting errors. The text should read Appendix C and the instructions are under the COMMON ERRORS topic. This error occurs when attempting to post to a closed period. You will need to release the transaction using Tools>>Routines>>Batch Recovery. After releasing, you need to reopen the batch using the batch window of the originating Series. For example, if the batch was posted under Invoicing Batches, then return to this window and reopen the batch. After reopening, change the date, resave the batch, and then post again. Page 182: Figure F6:14 lists ALevine as the Buyer ID. This value is inserted by following the instructions on page 184. Page 184: Figure F6:15 instructs the reader to lookup April Levine for the Buyer ID and then use Insert to place her into the buyer area. You will then click OK, which returns you to the Purchase Order Entry window. Now, using the Buyer ID lookup button, locate April and click Select (see below). ALevine is now stored in the Buyer ID field.

Errata for Introduction to Microsoft Great Plains 8.0 Focus on Internal Controls / ISBN 0-13-186064-X
Updated on August 17, 2006 Page 21 of 33
Page 185: The paragraph refers the reader to the figure in F6:20. Remember that your quantities may not agree with those illustrated. Field quantities will be based on your purchase and sales activity in the software. Also, the last sentence states: “The paperclip shows purchase order commitments for outstanding sales orders.” This is referring the figure in F:6:19. If you click the paperclip on this PO, the Sales Commitments for Purchase Order window will be empty, meaning there are no PO commitments for sales orders.
However, remember on Page 156 of Chapter 5 that you automatically generated a PO for backordered televisions on Better Buy’s order. This PO was for 30 items and was placed with Sunyung Home, Inc. Therefore, if you lookup this PO in the Purchase Order Entry window, you will see a paperclip beside the quantity of 30 (see below). (Note: Your PO number may be different than illustrated.)

Errata for Introduction to Microsoft Great Plains 8.0 Focus on Internal Controls / ISBN 0-13-186064-X
Updated on August 17, 2006 Page 22 of 33
Now, place your cursor in the Quantity Ordered filed and click the paperclip above 30. The window below opens and you will see that 15 of these items are committed to Better Buy.

Errata for Introduction to Microsoft Great Plains 8.0 Focus on Internal Controls / ISBN 0-13-186064-X
Updated on August 17, 2006 Page 23 of 33
Page 186: The second sentence reads: “Instead, Pos are . . . .” The sentence should read as: “Instead, POs are . . . .” Also, the last sentence in this paragraph reads: “Save the PO, then print while inside the entry window.” The sentence should read: “Save the PO, reopen the PO with the lookup button, and then print while inside the entry.” Page 188: The fourth sentence instructs the reader, “Now click the printer icon in the PO window and the Purchase order Print Options window opens as show in F6:25.” However, after clicking the printer icon, you will be prompted to save the PO first (see below). You must click Save before the Print Options window opens. Page 189: The test in the fourth sentence of the first paragraph reads: “Move to Line Item 2 and select the Edit>>Delete command . . . .”. The text should read: “Move to Line Item 2 and select the Edit>>Delete Row command . . . .”.
Errata for Introduction to Microsoft Great Plains 8.0 Focus on Internal Controls / ISBN 0-13-186064-X
Updated on August 17, 2006 Page 24 of 33
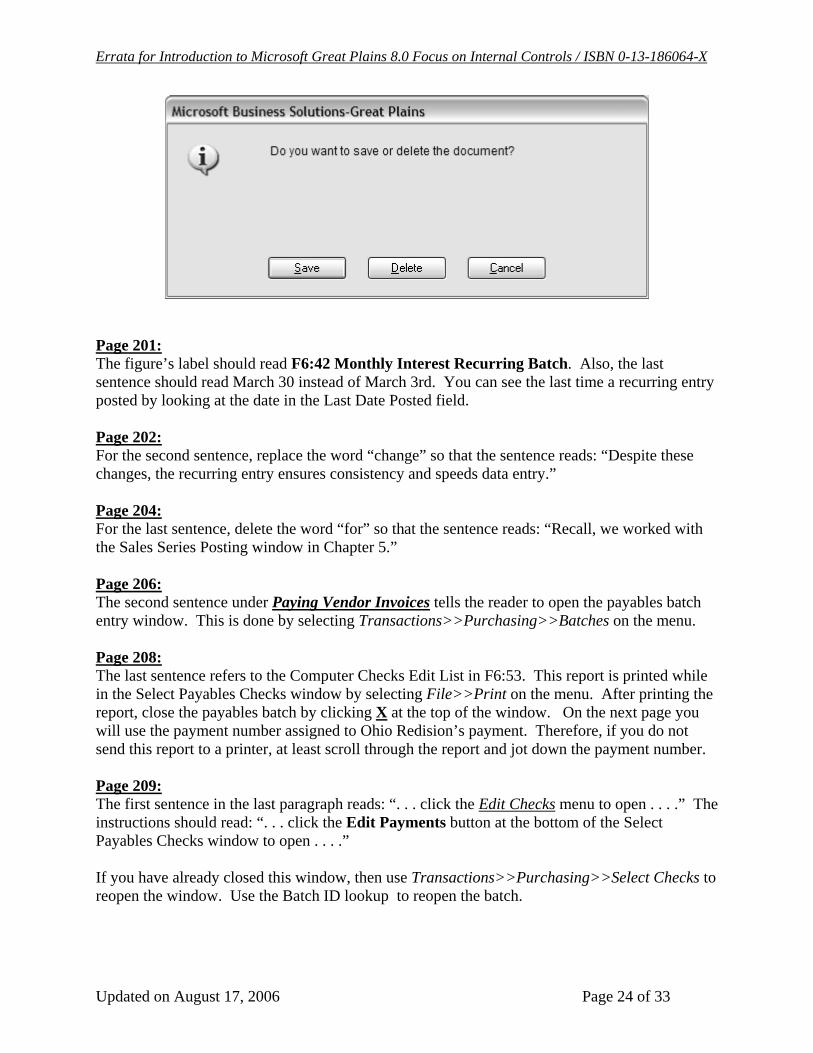
Page 201: The figure’s label should read F6:42 Monthly Interest Recurring Batch. Also, the last sentence should read March 30 instead of March 3rd. You can see the last time a recurring entry posted by looking at the date in the Last Date Posted field. Page 202: For the second sentence, replace the word “change” so that the sentence reads: “Despite these changes, the recurring entry ensures consistency and speeds data entry.” Page 204: For the last sentence, delete the word “for” so that the sentence reads: “Recall, we worked with the Sales Series Posting window in Chapter 5.” Page 206: The second sentence under Paying Vendor Invoices tells the reader to open the payables batch entry window. This is done by selecting Transactions>>Purchasing>>Batches on the menu. Page 208: The last sentence refers to the Computer Checks Edit List in F6:53. This report is printed while in the Select Payables Checks window by selecting File>>Print on the menu. After printing the report, close the payables batch by clicking X at the top of the window. On the next page you will use the payment number assigned to Ohio Redision’s payment. Therefore, if you do not send this report to a printer, at least scroll through the report and jot down the payment number. Page 209: The first sentence in the last paragraph reads: “. . . click the Edit Checks menu to open . . . .” The instructions should read: “. . . click the Edit Payments button at the bottom of the Select Payables Checks window to open . . . .” If you have already closed this window, then use Transactions>>Purchasing>>Select Checks to reopen the window. Use the Batch ID lookup to reopen the batch.

Errata for Introduction to Microsoft Great Plains 8.0 Focus on Internal Controls / ISBN 0-13-186064-X
Updated on August 17, 2006 Page 25 of 33
The following clarifies the instructions in the last paragraph on locating Ohio Redision’s payment to delete it from the batch of selected checks. In the Payment Number field, you can either type in Ohio Redision’s payment number that was listed on the Computer Checks Edit list or use the lookup on the Payment Number field to select Ohio Redision. (Note: When using the lookup, you will need to use the scroll bar to the right to move the list backwards.) After selecting the Payment Number, the Vendor ID will show OHIOREDI001. Click Delete at the top of the window to remove the payment from the batch. Page 213: Exercise E6:6 instructs the reader to enter a credit memo from Channel Oxe, Inc. You can use “CMFEB07ADS” as the document number. Also, the credit memo will be applied to the “PAPERADS” invoice. Note: There are also additional instructions for page 328 in Appendix D that relate to this exercise. Page 218: To reconcile the accounts payable aging report to the general ledger, you must add together the balances in both 2100-00 and 2105-00. Account 2100-00 stores the total of vendor invoices that have been posted while 2105-00 stores the total of vendor receipts posted without a vendor invoice.

Errata for Introduction to Microsoft Great Plains 8.0 Focus on Internal Controls / ISBN 0-13-186064-X
Updated on August 17, 2006 Page 26 of 33
Chapter 7: Payroll Cycle and Great Plains Payroll Series Page 226: Table T7:2 provides an explanation on the types of employer and employee payroll taxes. This table is for background information and does not relate to fields in Great Plains. Page 228: The first paragraph explains that April’s employee card is linked to the AKR local tax code. The instructions below clarify locating this link.
1. Use Cards>>Payroll>>Local Tax to open the Employee Local Tax Maintenance window. 2. Look up April’s Employee ID. 3. Click the right arrow button located beside the Local Code field and Great Plains shows
AKR as the code.
Page 234: The second sentence in the second paragraph reads: “This code deducts $10 (Fixed Amount) from Adam’s check each pay period . . . .” However, Adam’s payroll deduction card is setup incorrectly. The Pay Period field under Maximum Deduction should contain zero. It is recommended that you not correct this error because your results will not match solutions for the text. Lookup Curtis Warner’s card and scroll to the CONTR record (see below). This is the correct way to setup the contribution deduction.
Right arrow button

Errata for Introduction to Microsoft Great Plains 8.0 Focus on Internal Controls / ISBN 0-13-186064-X
Updated on August 17, 2006 Page 27 of 33
As a result of the error on Adam’s card, you will not see a contribution deduction coming out of his paycheck. However, you will find one for Curtis. Note the occurrence of this error after printing the Check File Report on page 245. Page 236: Figure F7:17 displays the completed Payroll Mass Transaction Entry window that was used to create the Hourly batch. You do not need to Build this batch since an Hourly batch already exists. Furthermore, the steps below provide guidance on explaining the purpose of each field in this window.
1. The Code lookup button is used to select the HOURLY pay code. This tells Great Plains to only select employees that are paid on an hourly basis.
2. Entering the dates of 3/17/2007 to 3/30/2007 sets the two-week pay period. 3. Entering 80.00 as the Amount, instructs Great Plains on the regular number of hours for
the pay period. 4. Entering 10.00 in Days Worked sets the base number of days in the pay period. 5. Entering 2.00 in Weeks Worked sets the base weeks in the pay period. 6. Clicking the Insert button with All select, instructs Great Plains to query all employee
records.

Errata for Introduction to Microsoft Great Plains 8.0 Focus on Internal Controls / ISBN 0-13-186064-X
Updated on August 17, 2006 Page 28 of 33
After reviewing the Payroll Mass Transaction window, use X to close the window without adding to or building a new batch. Page 237: The first sentence on the second paragraph reads: “Now click on the Batches menu . . . .” The sentence should begin as: “Now click the Transactions>>Payroll>>Batches menu . . . .” Page 238: You will need to enter the pay period dates, days worked and weeks worked that are shown on Figure F7:21. Further, this figure displays overtime hours (OVER codes) for James Richmond and Matthew Mapley. These amounts did not transfer when the authors created the database for the text, thus are not present. Consequently, the first sentence in the last paragraph is incorrect. You do not need to change the overtime hours for employees Richmond and Mapley to zero. Page 239: The second sentence in the last paragraph reads: Great Plains prompts to print the Payroll Transaction Audit List . . . .” Since you did not make changes to the OVER codes on page 238, Great Plains will not prompt to print this report. This report prints only after you make changes to the bottom section of the Payroll Transaction Entry window. Page 247: To clarify, the second sentence in the last paragraph tells the reader that only the Check Register reports. However, there are several other reports that also print. These reports are filed in the Payroll department. Page 250: The first paragraph tells the reader to complete figure F7:41 as shown and then click Process. After clicking Process, Great Plains prompts as to whether the company files Schedule B (see below). This is a supporting schedule that companies must print when payroll liabilities exceed as specific amount. Click Yes to print the schedule. You can print both reports to the screen.

Errata for Introduction to Microsoft Great Plains 8.0 Focus on Internal Controls / ISBN 0-13-186064-X
Updated on August 17, 2006 Page 29 of 33
Chapter 8: Financial Reporting and Great Plains Financial Series Page 270: For figure F8:11, change the Monthly Depreciation amount for Office Furniture and Fixtures to $1,979.17 instead of $1,964.29. This will also change the Total to $14,684.05 instead of $14,669.17. With these changes, your results will match the solution shown on page 334 of Appendix D. Page 274: Change the word “read” to “ready” so that the first sentence reads “We are now ready to print financial statements.”

Errata for Introduction to Microsoft Great Plains 8.0 Focus on Internal Controls / ISBN 0-13-186064-X
Updated on August 17, 2006 Page 30 of 33
Appendix A Page 283: The second paragraph instructs the reader to click OK to create a backup file in the pathname shown. When you create a backup, Great Plains needs to know the backup filename; therefore, you will be prompted as below.
Click OK for Great Plains to return you to the backup window. Now click the Folder icon beside the backup path and type in a backup file name. Click Save and Great Plains returns you to the backup window. Now click OK to create the backup.

Errata for Introduction to Microsoft Great Plains 8.0 Focus on Internal Controls / ISBN 0-13-186064-X
Updated on August 17, 2006 Page 31 of 33
Appendix D Page 312: The middle paragraph tells the reader to click the hyperlink to the Salesperson ID. After clicking, you will also need to select the pop-up description of “Salesperson Maintenance” to open the window below.
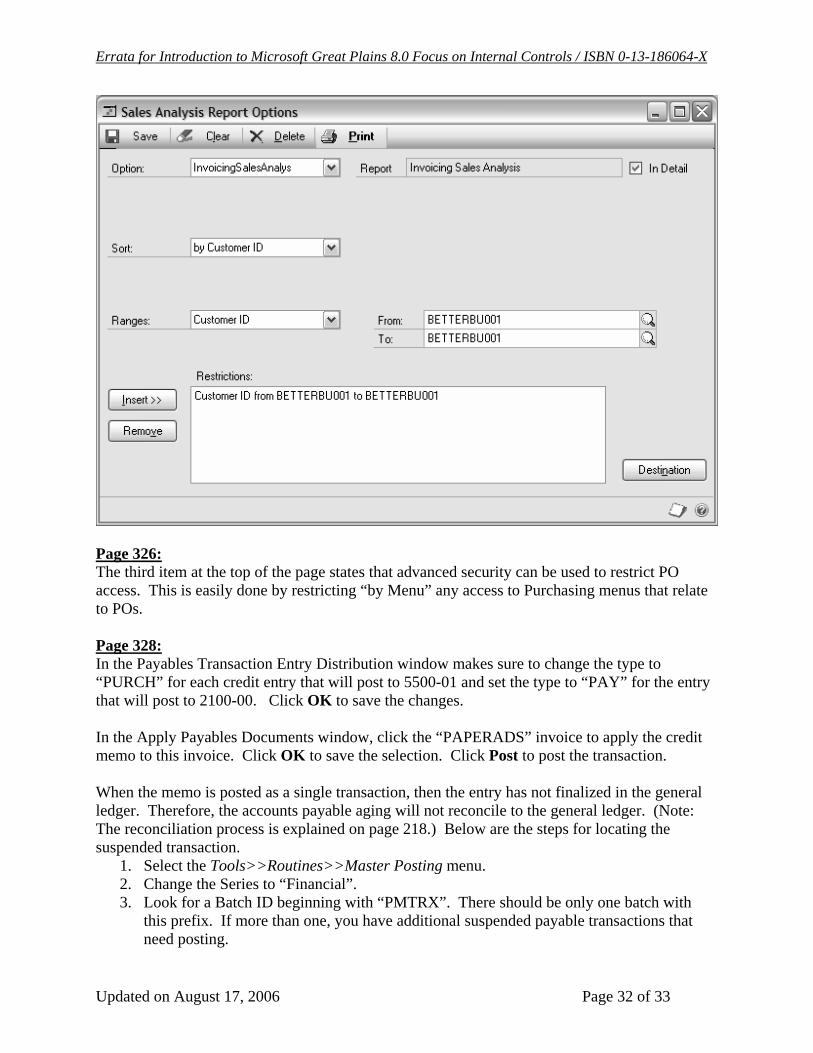
Page 323 The exercise solution for E5:7 omits instructions for printing the report that analyzes gross profit on sales to customers. This report is printed using the Reports>>Sales>>Analysis>>Invoicing Sales Analysis menu. You will need to create a new report and then filter for each customer separately (see below). (Note: If you enter a filter for the customer range of From: BetterBU001 To: GGHREGGS001, you will also get all customers between Better Buy and GG HREGG.)
Errata for Introduction to Microsoft Great Plains 8.0 Focus on Internal Controls / ISBN 0-13-186064-X
Updated on August 17, 2006 Page 32 of 33
Page 326: The third item at the top of the page states that advanced security can be used to restrict PO access. This is easily done by restricting “by Menu” any access to Purchasing menus that relate to POs. Page 328: In the Payables Transaction Entry Distribution window makes sure to change the type to “PURCH” for each credit entry that will post to 5500-01 and set the type to “PAY” for the entry that will post to 2100-00. Click OK to save the changes. In the Apply Payables Documents window, click the “PAPERADS” invoice to apply the credit memo to this invoice. Click OK to save the selection. Click Post to post the transaction. When the memo is posted as a single transaction, then the entry has not finalized in the general ledger. Therefore, the accounts payable aging will not reconcile to the general ledger. (Note: The reconciliation process is explained on page 218.) Below are the steps for locating the suspended transaction.
1. Select the Tools>>Routines>>Master Posting menu. 2. Change the Series to “Financial”. 3. Look for a Batch ID beginning with “PMTRX”. There should be only one batch with
this prefix. If more than one, you have additional suspended payable transactions that need posting.
Errata for Introduction to Microsoft Great Plains 8.0 Focus on Internal Controls / ISBN 0-13-186064-X
Updated on August 17, 2006 Page 33 of 33
4. Mark the batch and click Post to finalize posting to the general ledger. Note: If there is more than one batch beginning with PMTRX, you should mark all batches before clicking Post. Furthermore, you can check the contents of batches by clicking the Batch ID hyperlink at the top of the Master Posting window. This link launches the Go To window. Highlight “General Ledger Batch Entry” and click Go to open the Batch Entry window. With this window open, look up one of the batches and use the Transactions button to open the Transaction Entry window. In the Transaction Entry window, use the Journal Entry lookup button to open each transaction beginning with PMTRX and review the journal entries that will post.