ce 061 255 author mcmahon, robert w. title an … · title an introduction to greenhouse...
TRANSCRIPT
DOCUMENT RESUME
ED 346 253 CE 061 255
AUTHOR McMahon, Robert W.TITLE An Introduction to Greenhouse Production.INSTITUTION Ohio State Univ., Columbus. Agricultural Curriculum
Materials Service.
SPONS AGENCY Ohio State Dept. of Education, Columbus. AgriculturalEducation Service.
REPORT NO ISBN-1-56502-002-2PUB DATE 92
NOTE 331p.; This manual replaces "The Greenhouse WorkerStudent Manual." Photographs may not reproducewell.
AVAILABLE FROM Ohio Agricultural Curriculum Materials Service, 254Agricultural Administration Bldg., 2120 Fyffe Road,Columbus, OH 43210-1010.
PUB TYPE Guides - Classroom Use - Instructional Materials (ForLearner) (051)
EDRS PRICE MF01/PC14 Plus Postage.
DESCRIPTORS *Floriculture; *Greenhouses; *InstructionalMaterials; Mathematics Skills; Nurseries(Horticulture); Nursery Workers (Horticulture);Ornamental Horticulture; Pests; Plant Growth;Postsecondary Education; Science Education
IDENTIFIERS Irrigation
ABSTRACTThis studelt manual provides a basic text for those
preparing for greenhouse and floriculture work. At the beginning ofeach chapter, competencies are listed, along with related math andscience concepts, and a list of "terms to know"; figures, tables, andphotographs may be included. At the end of each chapter, a self-checkcan be made of the information learned by using the review questions.There are 13 chapters in this manual: (1) overview of the greenhouseindustry; (2) greenhouse structures; (3) controlling the greenhouseenvironment; (4) greenhouse equipment and lighting; (5) greenhouse
irrigation systems; (6) root media and containers; (7) nutrition; (8)integrated pest management; (9) plant height control by day-nighttemperature regulation; (10) bedding plant production (includinggeraniums); (11) flowering potted plant production; (12) minor pottedcrops; and (13) cut flower production. Sixteen references and aglossary are included. (NLA)
***********************************************************************
Reproductions supplied by EDRS are the best that can be madefrom the original document.
**********x************************************************************

.A1
U.S. DEPARTMENT OP EDUCATIONOffce Educatronal Research and Improvement
ED ATIONAL RESOURCES INFORMATIONCENTER (ERIC)
atm document has been reproduced asreceived from the person or organizationoriginating it
C Minor changes have been made to Improvereproduction quality
Points of vie* or opinions slated in this doeu-ment do not necessarily represent officialOE RI positron or policy
"PERMISSION TO REPRODUCE THISMATERIAL HAS BEEN GRANTED BY
TO THE EDUCATIONAL ESOURCESINFORM 4TION CENTER (ERIC)."
COPY AVAI LE
t t.
.4-11
-
ok.z_
'Nor
APor
sQuar....P
-
40,11.
'41"111141w
__AgrAW.;
mett,L,
:>=1: 4'441tV;_:,`-
rot.:
A`
AN INTRODUCTION TO
GREENHOUSE PRODUCTION
ROBERT W. McMAHON
Ohio Agricultural Education Curriculum Materials Service

FOREWORD
This student manual, An Introduction to Greenhouse Production, is intended to provide a veryreadable basic text for those preparing for greenhouse and floriculture work. This manual replaces TheGreenhouse Worker Student Manual with comprehensive, current material and statistics about green-house production.
At the beginning of each chapter, competencies are listed that can be achieved as the result ofstudying information in that chapter. These competencies have been suggested by the author and verifiedby industry experts. At the end of each chapter, a self-check can be made of the information learnedby using the review questions. Page references are included for locating information that answers thequestions. Related math and science concepts are also included at the beginning of each chapter. Thelist of terms to know provides familiarity with the industry terms used in that chapter and thus improvescommunication. The terms are included in a glossary at Ile end of the manual that gives fairly simpledefinitions relating to greenhouse production.
Robert D. Sommers II, Assistant DirectorVocational and Career EducationAgricultural Education ServiceOhio Department of Education
ISBN Number: 1-56502-002-2
Roger D. Roediger, Project ConsultantOhio Agricultural Education
Curriculum Materials ServiceThe Ohio State University
Copyright 0 1992
Ohio Agricultural Education Curriculum Materials ServiceThe Ohio State University
All rights reserved
Ohio Agricultural Education Curriculum Materials ServiceThe Ohio State University
Room 254, 2120 Fyffe RoadColumbus, Ohio 43210-1010
1992
The Ohio Agricultural Education Curriculum Materials Service, as a part of The Ohio State University, is an equal opportunity employer and does not discriminateagainst any individual for reasons of race, color, creed, religion, national origin, sex, or haneicap. All instructional materials are availab'e to all potential clienteleon a non-discriminatory basis without regard to race, color, creed, reHglon, national origin, sex, Of handicap.

ACKNOWLEDGMENTS
The author is grateful to the many individuals and greenhouse businesses who assisted in thepreparation of this book. Foremost is the horticultural advisory committee that helped to develop thetext outline and contributed suggestions to the final draft of the I.:xi These advisory committee members(who met with the author) and the organizations in Ohio that they represent, either in the greenhouseindustry or in academia, are the following:
Ms. Lily Felder, Helm's Wholesale Greenhouse, AkronMr. Tom Machamer, Cedar Lane Farms, Inc., WoosterMr. Erik Mayer, Ashland High School, AshlandMr. Danny Miss ler, Green Circle Growers, Inc., OberlinMr. Erik Munson, Montgomery County JVS, ClaytonDr. Roger Roediger, Curriculum Materials Service, ColumbusMr. James Scott, Agricultural Education Service, ColumbusMr. Jeffrey Schaffstall, Hehn's Wholesale Greenhouse, AkronMr. Richard Waggoner, Penta County JVS, PerrysburgMr. Rick Webb, Tri-County JVS, Nelsonville
Most of the photographs used in this book were taken by the author. There are, however, somephotographic contributions from other individuals and businesses. Their cooperation in supplying photo-
graphs is sincerely appreciated.
Dr. Gary AndersonBlackmore Company, Inc. (Belleville, Michigan)Mr. Dale BradshawPaul Ecke Poinsettias (Encinitas, California)Mr. Michael FultonMs. Janet KellnerDr. Richard LindquistMr. Timothy PfaffelMs. Marilyn RieseDr. Roger RoedigerDr. Ted ShortMr. Thomas TaylorMs. Alison WittYoder Brothers, Inc. (Barberton, Ohio)
Photographs were taken in the following businesses or organizations. Their cooperation is also
acknowledged.
The Ohio State University Agricultural Technical Institute, Wooster, OhioArchitectural Greenery, Akron, OhioBernecker's Nursery, Homestead, FloridaCedar Lane Farms, Inc., Wooster, OhioCosta Nursery, Homestead, FloridaEndres Floral Company, New Philadelphia, OhioEpcot Center and Walt Disney World, Lake Buena Vista, FloridaGreen Circle Growers, Oberlin and Columbia Station, Ohio
Wholesale Greenhouse, Akron, OhioInterior Plant Specialists, Inc., Westlake, OhioMoore's Greenhouse, Shreve, Ohio (continued)
Acknowledgments (continued)
Natural Beauty of Florida/Greiling Farms, Inc., Apopka, FloridaOhio Agricultural Research and Development Center, Wooster, OhioPhil's Greenhouse, Homeworth, OhioPlantasia, Canal Winchester, Ohio
The author would also like to thank the following individuals for their important and variedcontributions.
Dr. Gary AndersonMr. Dale BradshawMs. Teresa LankerDr. Ted ShortMs. Ladonna Whitt
Dr. Roger Roediger, Director of the Ohio Agricultural Education Curriculum Materials Service ofThe Ohio State University, was Project Director. Dr. Roediger's many helpful comments and suggestionsare greatly appreciated. Muriel N. King, project editor, did an outstanding job of editing the text andimplementing the layout of the book. The cover design was by Eric D. King.
About the Author
Robert W. McMahon is an assistant professor in the Horticultural Industries Division of The OhioState University's Agricultural Technical Institute (ATI). He teaches courses in floriculture production,commercial interior plantscaping, greenhouse environment control, and practicum. He also managesATI's five green ouses and the conservatory.
McMahon did his undergraduate work at St. Olaf College (Minnesota) in biology. He received theM.S. and Ph.D. degrees from Iowa State University (Ames, Iowa) in horticulture. McMahon holdsmembership in the Ohio Florists' Association and the International Carnivorous Plant Society. Severalresearch publications and presentations bear his name as author and presenter.
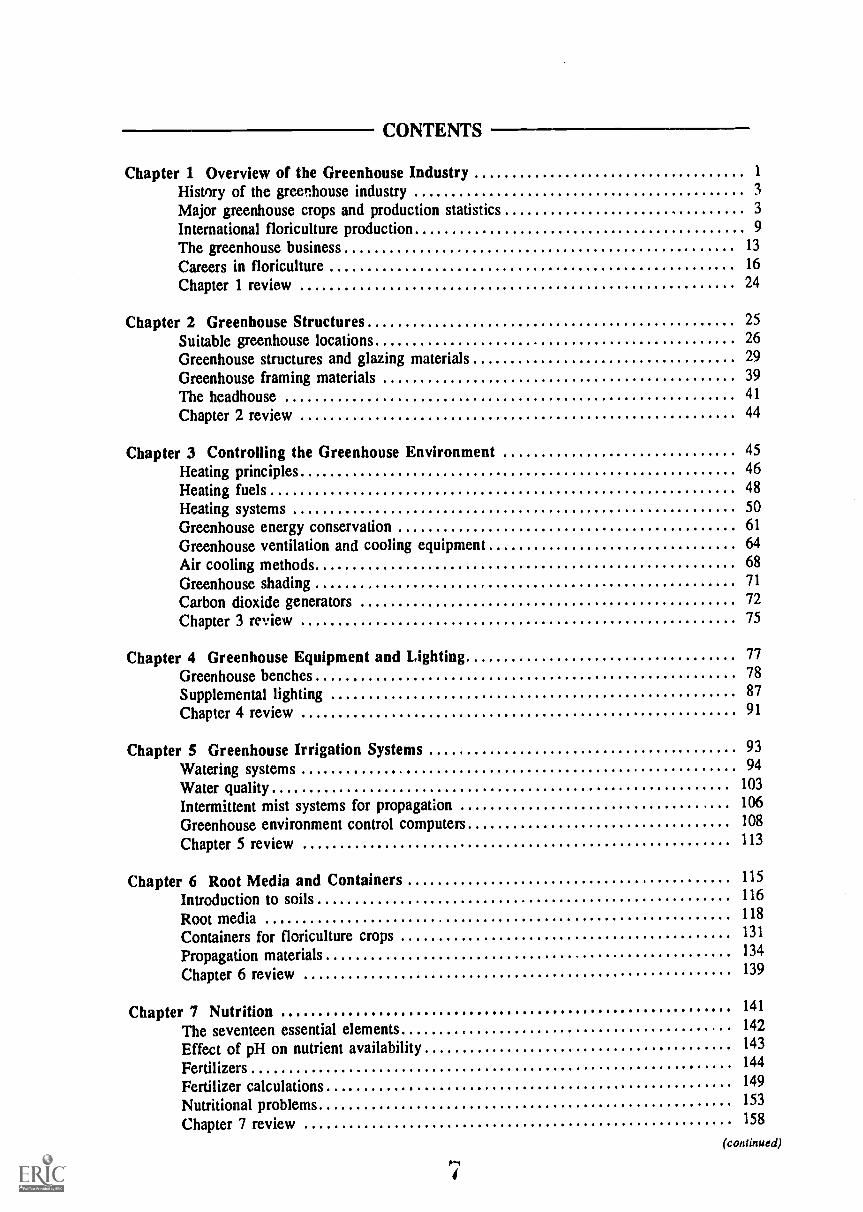
CONTENTS
Chapter 1 Overview of the Greenhouse Industry 1
History of the greenhouse industry 3
Major greenhouse crops and production statistics 3
International floriculture production 9
The greenhouse business 13
Careers in floriculture 16
Chapter 1 review 24
Chapter 2 Greenhouse Structures 25
Suitable greenhouse locations 26
Greenhouse structures and glazing materials 29
Greenhouse framing materials 39
The headhouse 41
Chapter 2 review 44
Chapter 3 Controlling the Greenhouse Environment 45
Heating principles 46
Heating fuels 48
Heating systems 50
Greenhouse energy conservation 61
Greenhouse ventilation and cooling equipment 64
Air cooling methods 68
Greenhouse shading 71
Carbon dioxide generators 72
Chapter 3 review 75
Chapter 4 Greenhouse Equipment and Lighting 77
Greenhouse benches 78
Supplemental lighting 87
Chapter 4 review 91
Chapter 5 Greenhouse Irrigation Systems 93
Watering systems 94
Water quality 103
Intermittent mist systems for propagation 106
Greenhouse environment control computers 108
Chapter 5 review 113
Chapter 6 Root Media and Containers 115
Introduction to soils 116
Root media 118
Containers for floriculture crops 131
Propagation materials 134
Chapter 6 review 139
Chapter 7 Nutrition 141
The seventeen essential elements 142
Effect of pH on nutrient availability 143
Fertilizers 144
Fertilizer calculations 149
Nutritional problems 153
Chapter 7 review 158
(continued)
7

Contents (continued)
Chapter 8 Integrated Pest Management 159Definition of IPM 160Principles of IPM 160Setting up hn IPM program 165Chapter 8 review 167
Chapter 9 Plant Height Control by DIF 169Definition of DIF 170Effects of DIF on plant growth 170Applications of DIF 173Charer 9 review 175
Chapter 10 Bedding Plant Prodaction (including Geraniums) 177Bedding plants 178Overview of the bedding plant industry 178Seed germination in flats and plug trays 181
Seedling growth stages 189Finishing the crop 191
Schedules for bedding plant crops 201Marketing bedding plants 203Geraniums 205Chapter 10 review 217
Chapter 11 Flowering Potted Plant Production -Poinsettias, Chrysanthemums, and Easter Lilies 219Introduction - Statistics 220Poinsettia production 222Poinsettia review 238Potted chrysanthemum production 239Chrysanthemum review 260Easter lily production 261Easter lily review 270
Chapter 12 Minor Potted Crops 271African violets 273Cineraria 274Cyclamen 275Holiday cacti 276Kalanchoe 277Foliage plants 279Chapter 12 review 294
Chapter 13 Cut Flower Production 297Introduction and statistics 298Roses 298Carnations 300Alstroemeria 303
Freesia 304
Snapdragons 305
General cultural guidelines 306
Harvesting 307
Chapter 13 review 309
References 311
Glossary 312

CHAPTER 1
OVERVIEW OF THE GREENHOUSE INDUSTRY
Competencies for Chapter 1As a result of studying this chapter, you should be able to do the following:
I. Describe the history of the floriculture industry worldwide.2. Describe the impact of international trade policies on floriculture
products worldwide.3. Describe the economic importance of floriculture.4. Identify the major segments of the floriculture industry.5. Name the leading states in floriculture production in the U.S.6. Categorize the major costs of a greenhouse business.7. Describe available careers in floriculture.8. Identify continuing education opportunities.9. Summarize the trends in cut flower production.
10. Consult reference manuals and reports that relate to the greenhouseindustry.
Related Math Concepts1. Read, interpret, and construct charts, graphs, and tables.2. Apply basic operations to whole numbers, decimals, and fractions.
Terms to Know
environmentalfertilizefloriculturefoliage plantgreenhousegrowing mediairrigationlinerspesticidepropagationquarantine

2
INTRODUCTION
Welcome to the exciting an,' dynamic floriculture industry! By choosinga career in the floriculture industry, you are stepping into a field that isgrowing and constantly changing. Exciting new technologies have been de-veloped; they enable the industry to bring new and improved floricultureproducts to the American consumer. You will be involved in new methods ofproduction and marketing. You will experience changing trends in consumerdemands. This will always be challenging, but you will reap great rewardsas you meet each challenge, and you will grow with the industry.
Floriculture is defined as the growing and marketing of bedding plants,flowering potted plants, cut flowers, and foliage. The floriculture industryfills a basic need in people. It supplies us with beautiful plants and flowers.In our often "sterile" world of concrete, plaster, and limited yard space, weneed something living and beautiful to lift our spirits and satisfy the desiremany of us have to grow something. For these reasons, gardening is thenumber one hobby in the United States, and indoor foliage plants are verypopular.
Therefore, floriculture is an important part of the agriculture industry.Greenhouse workers, growers, shippers, wholesalers, and retail florists are allinvolved in the floriculture industry (Figure 1.1). Your choosing to studyfloriculture greenhouse production is a sound career decision for your future.
Figure 1.1Organization of the commercial greenhouse industry
.....;r.e.e.74r.1111116-
-le-GREENHOUSE""'444111411114 PRODUCER
41-41111111111111111
'101Mum
Potted p ants,bedding plants,cut flowers
Cut flowers, few potted plants,few bedding plants
WHOLESALER
SUPERMARKETFLOWERS *
I LAWN & GARDEN
3
HISTORY OF THE GREENHOUSE INDUSTRY
The modem greenhouse industry had its origins in the Netherlands in the1600s. At that time, dormant lilac bushes were first dug and brought in fromthe field. Lilacs thus became the first crop to be forced into bloom in lean-to glass greenhouses. The industry prospered in the Netherlands. Today thissmall country has the largest greenhouse industry in the world, due to auto-mation and efficient production techniques.
The greenhouse industry in the United States was started in the early1700s mainly to serve the wealthy. At a time when this country's populationwas concentrated in the original thirteen colonies, the greenhouse industrywas located in the population centers of Boston, New York, and Philadelphia.Fresh flowers were a luxury; only the upper class could afford them. As thepopulation of the United States expanded west, the floriculture industryfollowed. Before the 20th century, the industry was located in or near themajor population centers. At that time, perishable flowers and plants couldnot be shipped long distances because of slow transportation and no refrig-eration.
The 1800s saw the floriculture industry expand virtually across the country,thanks in part to the transcontinental railroad. It opened the West to settlementand greatly improved the transportation of floriculture products. No longerwere wealthy people the sole recipients of flowers and plants. The marketexpanded to include the average citizen, thanks to more efficient productiontechniques. Also, improved transportation lowered production costs.
In the 1900s the floriculture industry has mushroomed into a multibillion-dollar industry. Refrigerated trucks and jet transportation arc two techno-logical advancements that have enabled the floriculture industry to ship itsproduct virtually anywhere in the United States or around the world within24 heat's. (See Figure 1.2.) Thus, growers do not have to locate in or neartheir market. They can build their greenhouses in locations that arc the mostfavorable not only for the crops they want to grow, but also for tax rates, waterquality, etc. Today, many wholesale greenhouses arc located in rural areas asmuch as hundreds or thousands of miles from their markets. They rely on therapid transportation systems that arc available.
MAJOR GREENHOUSE CROPS AND PRODUCTION STATISTICS
Floriculture is one of thc largest parts of the horticulture industry. There
arc four major segments of the floriculture industry bedding plants, floweringpotted plants, cut flowers and foliage plants. The Floriculture Crops 1990Summary produced by the USDA (United States Department of Agriculture)surveys all commercial growers that produce and sell at least $10,000 worthof floticulture crops in the top 28 states. This summary reports that thewholesale value of the 28 crops included in the survey totalled an impressive$2.77 billion, an increase of 10 percent from 1989.
I 1
4
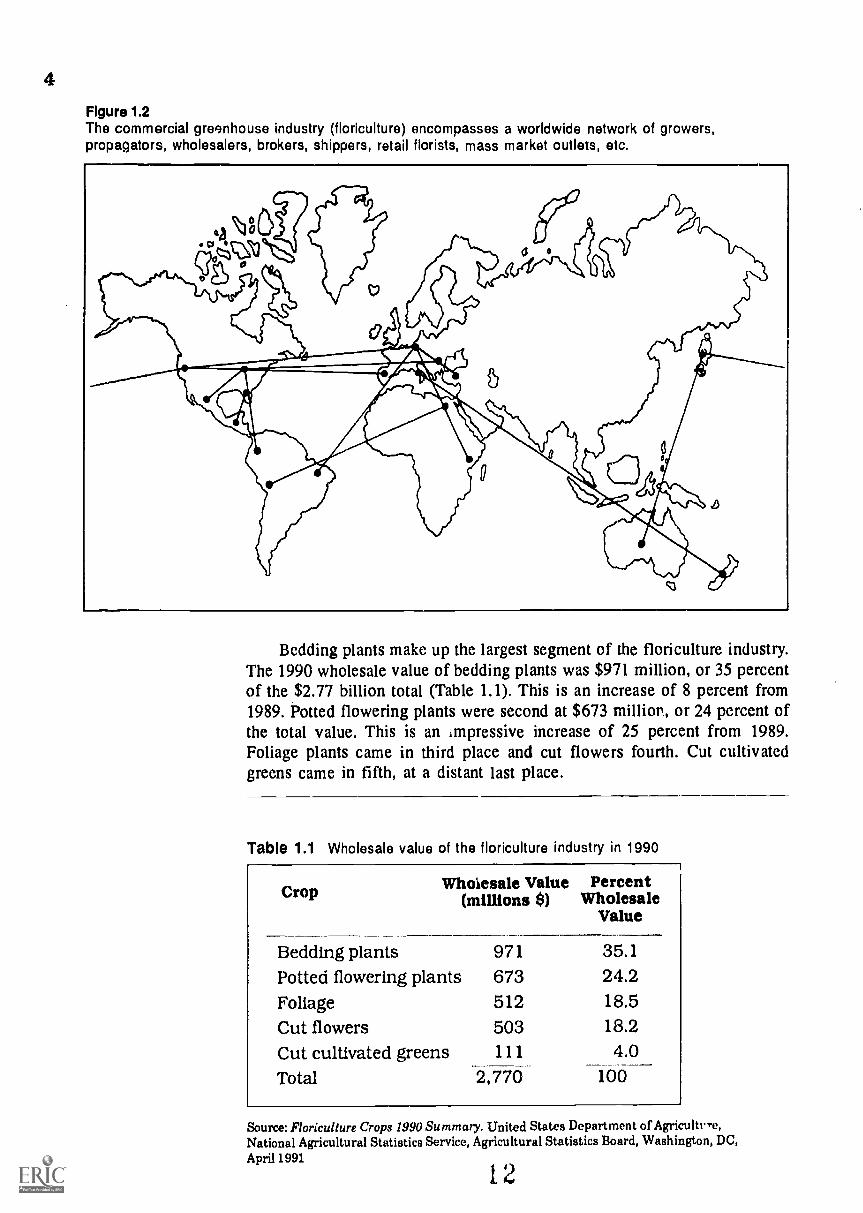
Figure 1.2The commercial greenhouse industry (floriculture) encompasses a worldwide network of growers,propagators, wholesalers, brokers, shippers, retail florists, mass market outlets, etc.
Bedding plants make up the largest segment of the floriculture industry.The 1990 wholesale value of bedding plants was $971 million, or 35 percentof the $2.77 billion total (Table 1.1). This is an increase of 8 percent from1989. Potted flowering plants were second at $673 million, or 24 percent ofthe total value. This is an anpressive increase of 25 percent from 1989.Foliage plants came in third place and cut flowers fourth. Cut cultivatedgreens came in fifth, at a distant last place.
Table 1.1 Wholesale value of the floriculture industry in 1990
Wholesale ValueCrop (millions 8)Percent
WholesaleValue
Bedding plants 971 35.1Potted flowering plants 673 24.2Foliage 512 18.5
Cut flowers 503 18.2
Cut cultivated greens 11 1 4.0Total 2,7 70 100
Source: Floriculture Crops 1990 Summary. United States Department of Agricultrre,National Agricultural Statistics Service, Agricultural Statistics Board, Washington, DC,April 1991
12
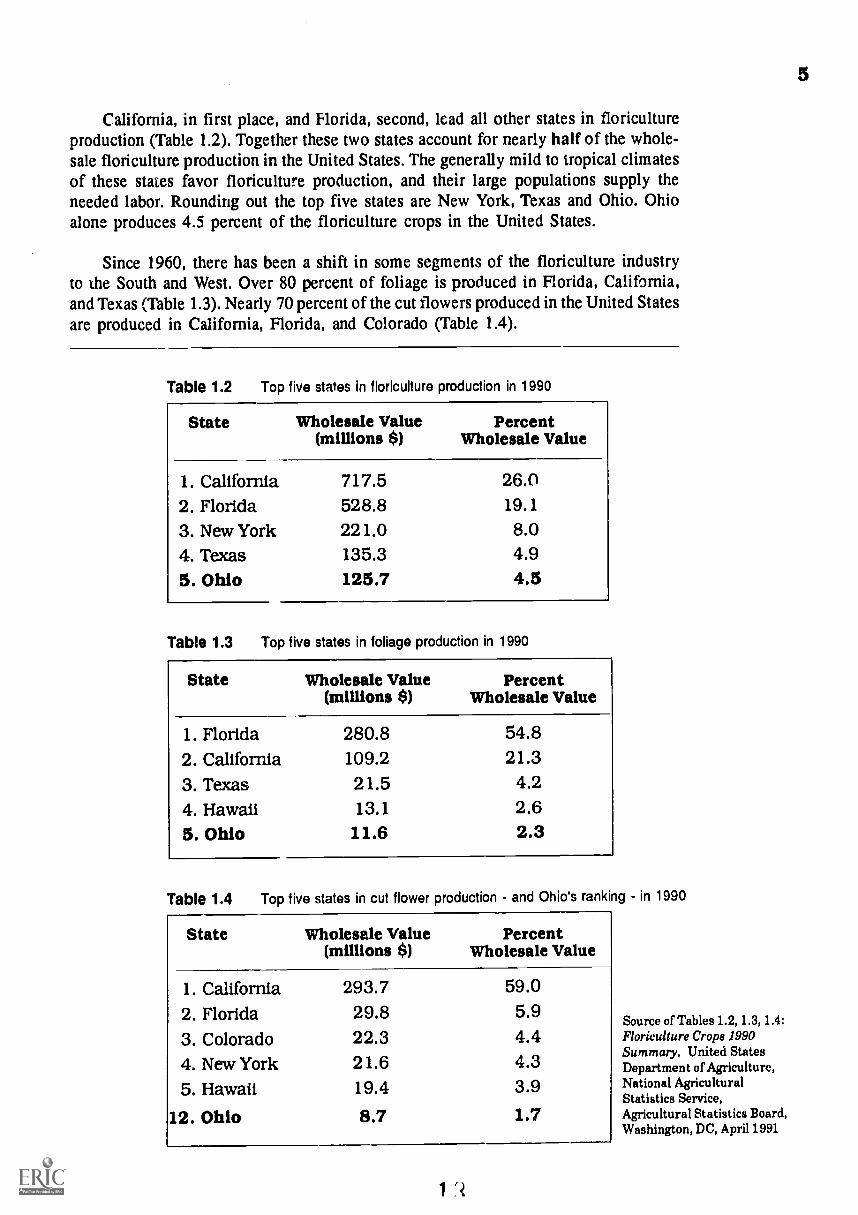
California, in first place, and Florida, second, lead all other states in floricultureproduction (Table 1.2). Together these two states account for nearly half of the whole-sale floriculture production in the United States. The generally mild to tropical climatesof these states favor floriculture production, and their large populations supply theneeded labor. Rounding out the top five states are New York, Texas and Ohio. Ohioalone produces 4.5 percent of the floriculture crops in the United States.
Since 1960, there has been a shift in some segments of the floriculture industryto the South and West. Over 80 percent of foliage is produced in Florida, California,and Texas (Table 1.3). Nearly 70 percent of the cut flowers produced in the United Statesare produced in California, Florida, and Colorado (Table 1.4).
Table 1.2 Top five states in floriculture production in 1990
State Wholesale Value(millions $)
PercentWholesale Value
1. California 717.5 26.02. Florida 528.8 19.1
3. New York 221.0 8.04. Texas 135.3 4.95. Ohio 125.7 4.5
Table 1.3 Top five states in foliage production in 1990
State Wholesale Value(millions $)
PercentWholesale Value
1. Florida 280.8 54.82. California 109.2 21.33. Texas 21.5 4.24. Hawaii 13.1 2.65. Ohio 11.6 2.3
Table 1.4 Top five states in cut flower production - and Ohio's ranking - in 1990
State Wholesale Value(millions $)
PercentWholesale Value
1. California 293.7 59.0
2. Florida 29.8 5.9
3. Colorado 22.3 4.44. New York 21.6 4.3
5. Hawaii 19.4 3.9
12. Ohio 8.7 1.7
Source of Tables 1.2, 1.3, 1.4:Floriculture Crops 1990Summary. United StatesDepartment of Agriculture,National AgriculturalStatistics Service,Agricultural Statistics Board,Washington, DC, Apri11991
5
6
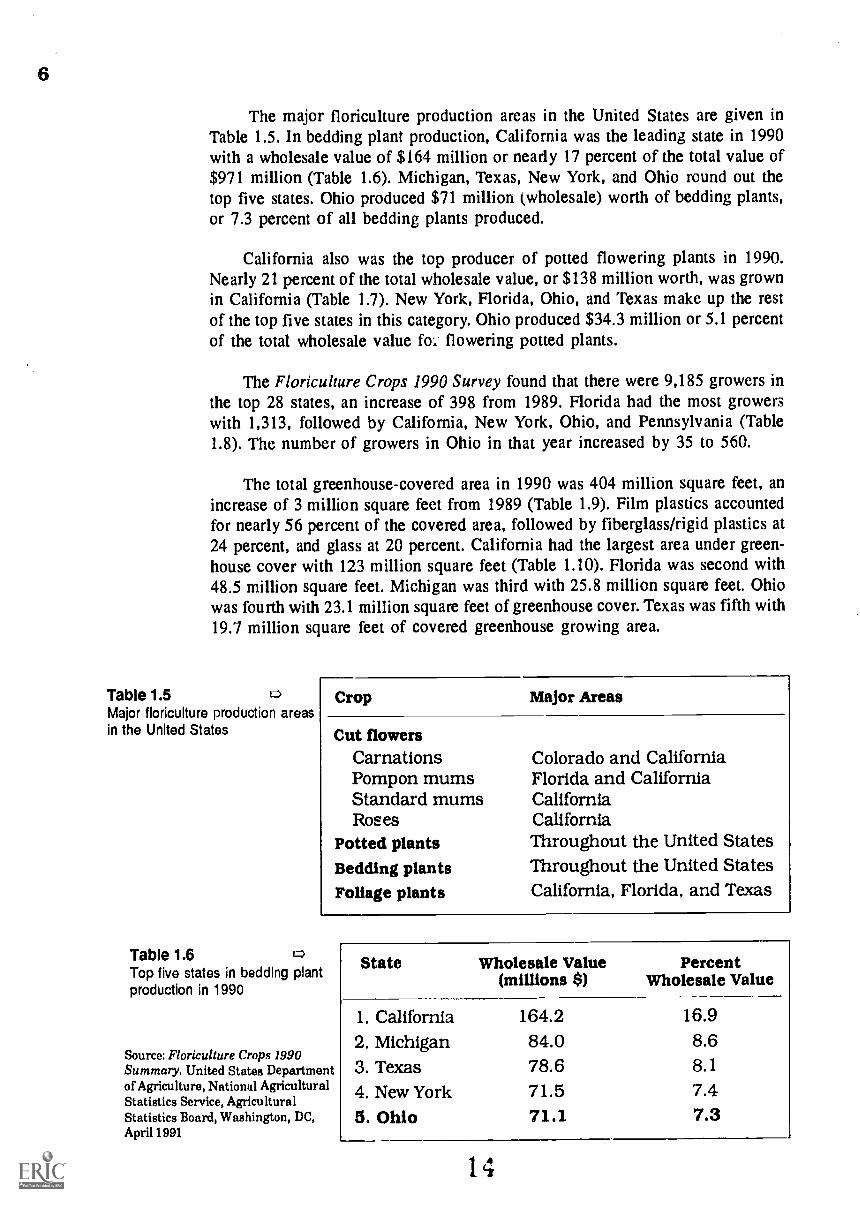
The major floriculture production areas in the United States are given inTable 1.5. In bedding plant production, California was the leading state in 1990with a wholesale value of $164 million or nearly 17 percent of the total value of$971 million (Table 1.6). Michigan, Texas, New York, and Ohio round out thetop five states. Ohio produced $71 million (wholesale) worth of bedding plants,or 7.3 percent of all bedding plants produced.
California also was the top producer of potted flowering plants in 1990.Nearly 21 percent of the total wholesale value, or $138 million worth, was grownin California (Table 1.7). New York, Florida, Ohio, and Texas make up the restof the top five states in this category. Ohio produced $34.3 million or 5.1 percentof the total wholesale value fol flowering potted plants.
The Floriculture Crops 1990 Survey found that there were 9,185 growers inthe top 28 states, an increase of 398 from 1989. Florida had the most growerswith 1,313, followed by California, New York, Ohio, and Pennsylvania (Table1.8). The number of growers in Ohio in that year increased by 35 to 560.
The total greenhouse-covered area in 1990 was 404 million square feet, anincrease of 3 million square feet from 1989 (Table 1.9). Film plastics accountedfor nearly 56 percent of the covered area, followed by fiberglass/rigid plastics at24 percent, and glass at 20 percent. California had the largest area under green-house cover with 123 million square feet (Table 1.10). Florida was second with48.5 million square feet. Michigan was third with 25.8 million square feet. Ohiowas fourth with 23.1 million square feet of greenhouse cover. Texas was fifth with19.7 million square feet of covered greenhouse growing area.
Table 1.5Major floriculture production areasin the United States
Crop Major Areas
Cut flowersCarnationsPompon mumsStandard mumsRoses
Potted plantsBedding plantsFoliage plants
Colorado and CaliforniaFlorida and CaliforniaCaliforniaCaliforniaThroughout the United StatesThroughout the United StatesCalifornia, Florida, and Texas
Table 1.6Top five states in bedding plantproduction in 1990
Source: Floriculture Crops 1990Summary. United States Departmentof Agriculture, National AgriculturalStatistics Service, AgriculturalStatistics Board, Washington, DC,April 1991
State Wholesale Value(millions $)
PercentWholesale Value
1. California 164.2 16.9
2. Michigan 84.0 8.63. Texas 78.6 8.1
4. New York 71.5 7.45. Ohio 71.1 7.3
14

Table 1.7 Top five states in flowering potted plant production in 1990
Wholesale Value PercentState (millions $) Wholesale Value
1. California 138.3 20.62. New York 122.6 18.2
3. Florida 68.1 10.1
4. Ohio 34.3 5.15. Texas 34.1 5.1
Table 1.8 Top five states in number of growers in 1990
State Number of Growers
1. Florida 1,313
2. California 1,130
3. New York 6754. Ohio 5605. Pennsylvania 551
Table 1.9 Greenhouse-covered area' in 1991 by covering material
Covering Square Feet(millions)
Percent of Total
Glass 79.6 19.7
Fiberglass/Rigid plastic 98.6 24.4
Film plastic(single and double layer)
226.0 55.9
Total covered area 404.2 100.0
* This does not include shade and temporary cover
Table 1.10 Top five states in 1990 in greenhouse-covered growing area*
State Covered Growing Area Percent(millions of square feet) of Total
1. California 123.0 30.4
2. Florida 48.5 12.0
3. Michigan 25.8 6.4
4. Ohio 23.1 5.75. Texas 19.7 4.9
* This does not include shade and temporary cover
Source of Tables 1.7, 1,8, 1.9, 1.10:Floriculture Crops 1990 Summary.United States Department of Agriculture,National Agricultural Statistics Service,Agricultural Statistics Board,Washington, DC, April 1991
1. 5
7
8
Ohio Production Statistics
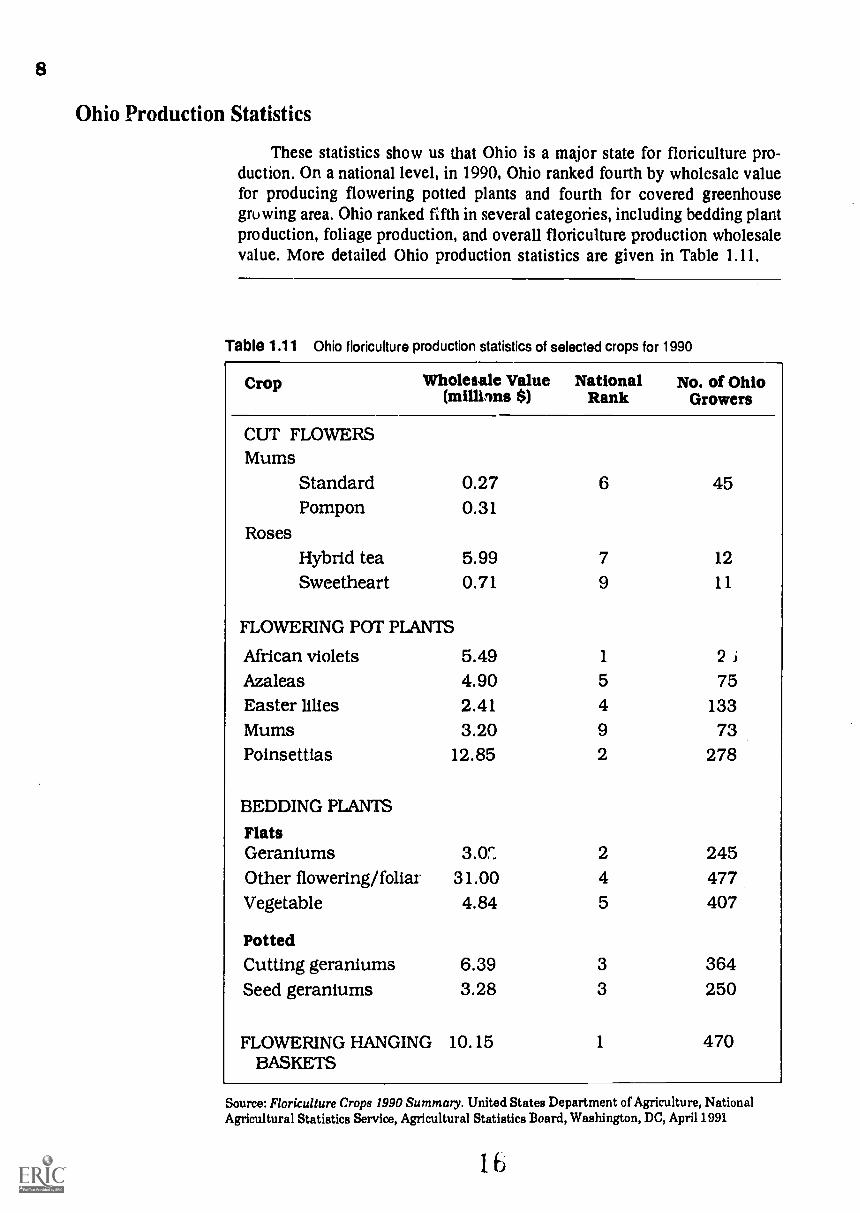
These statistics show us that Ohio is a major state for floriculture pro-duction. On a national level, in 1990, Ohio ranked fourth by wholesale valuefor producing flowering potted plants and fourth for covered greenhousegru wing area. Ohio ranked fifth in several categories, including bedding plantproduction, foliage production, and overall floriculture production wholesalevalue. More detailed Ohio production statistics are given in Table 1.11.
Table 1.11 Ohio floriculture production statistics of selected crops for 1990
Crop Wholesale Value National No. of Ohio$) Rank Growers
CUT FLOWERSMums
Standard 0.27 6 45Pompon 0.31
RosesHybrid tea 5.99 7 12
Sweetheart 0.71 9 11
FLOWERING POT PLANTS
Mrican violets 5.49 1 2 iAzaleas 4.90 5 75Easter lilies 2.41 4 133Mums 3.20 9 73Poinsettias 12.85 2 278
BEDDING PLANTS
FlatsGeraniums 3.O 2 245Other flowering/folio' 31.00 4 477Vegetable 4.84 407
PottedCutting geraniums 6.39 3 364Seed geraniums 3.28 3 250
FLOWERING HANGING 10.15 1 470BASKETS
Source: Florkulture Crops 1990 Summary. United States Department of Agriculture, NationalAgricultural Statistics Servioe, Agricultural Statistics Board, Washington, DC, Apri11991
lb

9
Other impressive statistics of Ohio's floriculture industry are as follows.Ohio produces more African violets and flowering hanging baskets than anyother state. Ohio is second in production of geraniums in flats (behind Texas)and behird only California in poin:.z. tia production. Ohio ranked third forseed and cutting geraniums and ranked in the top ten for the other crops listedin Table 1.11. Note that potted poinsettias, flowering/foliar bedding plants inflats, and flowering hanging baskets were the three most valuable crops grownin Ohio. These accounted for nearly $54 million in wholesale value. Thesmallest segment of Ohio's floriculture industry is cut flower production,which had a wholesale value of $7.3 million for mums and roses.
INTERNATIONAL FLORICULTURE PRODUCTION
The United States certainly is not the only country in the world with athriving floriculture industry. Worldwide, the floriculture industry is linkedtogether by modern, intercontinental jet transportation. Delivery anywhere onearth in a refrigerated environment is possible within 24 hours. Thus, cutcarnations harvested in Colombia, South America can be delivered to theUnited States in excellent condition in a matter of hours. This is also true forcut orchids harvested in Thailand and cut roses harvested in Israel.
The United States floriculture industry is obviously no longer isolated.Its market here is greatly influenced by foreign floriculture markets, espe-cially LA regards to cut flower production. Our floriculture industry is in-fluenced from abroad, not only economically but also technologically andculturally. For example, much of our new greenhouse technology came fromthe Netherlands. Also, new cultivar introductions have come from abroad. Itis to our advantage to interact and even compete with foreign countries toimprove our floriculture industry at home.
Examples of greenhouses from Europe and the Middle East are shownin Figure 1.3, A-E. Parts of the Netherlands, for example, are literally coveredwith greenhouses (Figure 1.3A). Other countries too have a thriving green-house industry. In Egypt, greenhouses or "tunnels" are built in the desert andused ..uccessfully to raise crops (Figure 1.3B). Even where greenhouses aremore primitive in structure, fine crops can be produced, such as shown inPortugal (Figure 1.3C, D) and in Turkey (Figure 1.3E). Every country has itsown methods for greenhouse production, but the end result is the same: a highquality, beautiful product that adds beauty and joy to our lives.
Centers of floriculture production are found throughout the world. In thenorthern hemisphere, major producing areas are in Europe, Japan, and theUnited States. In the southern hemisphere, dominant producing areas arelocated in Central and South America, Africa, Australia and New Zealand.Table 1.12 lists the major floriculture-producing countries by continent.
1 '7

10
A Aerial view of greenhouses in the Netherlands B "Tunnel" greenhouses of Egypt
f4 a,,,.
-4ta**14
-AK
C & D Greenhouses in Portugal - wooden frames before and after covering with single-layer polyethylene
.44
Figure 1.3
Greenhouses of Europeand the Middle East
Photos courtesy of Ted Short,Agricultural Engineering Department,OARDC, Wooster, Ohio
E Ridge and furrow greenhouses in Turkey
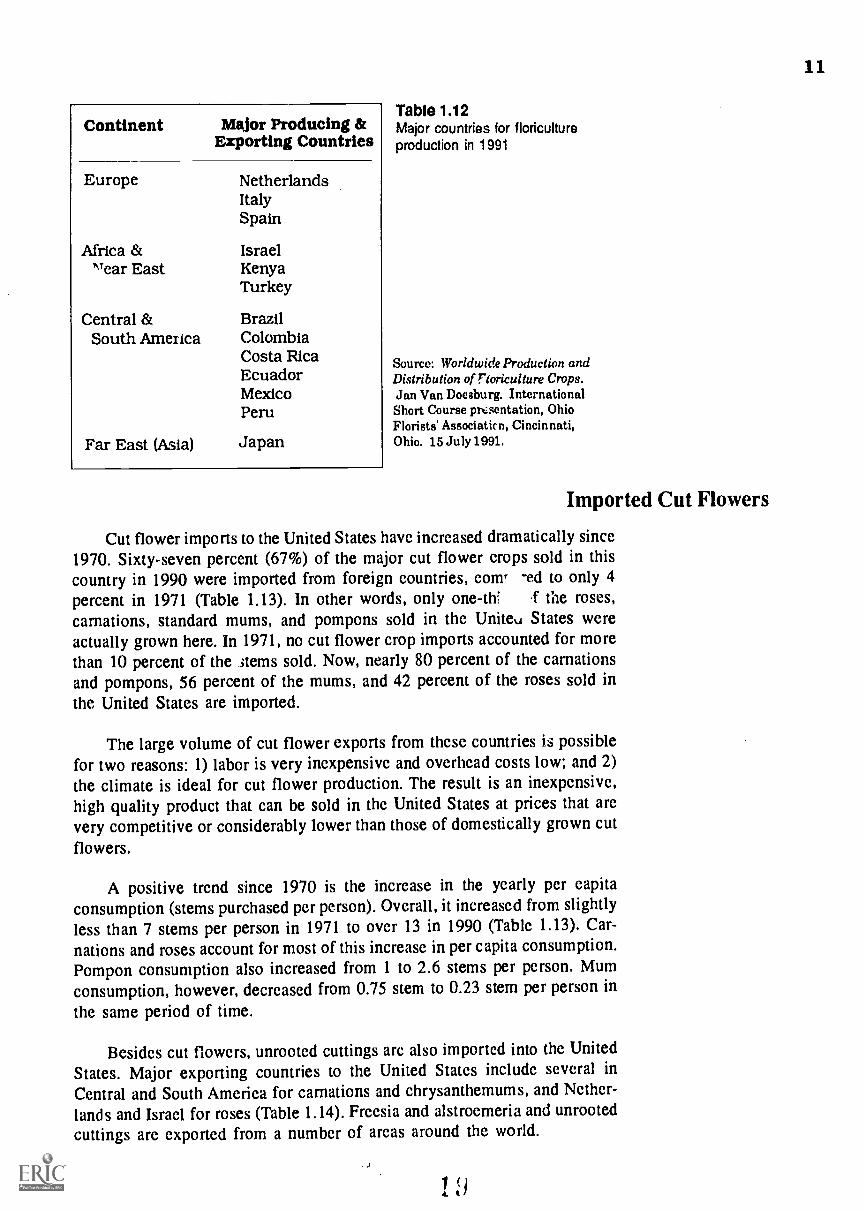
Continent Major Producing &Exporting Countries
Europe NetherlandsItalySpain
Afric a & Israelvear East Kenya
Turkey
Central & BrazilSouth America Colombia
Costa RicaEcuadorMexicoPeru
Far East (Asia) Japan
11
Table 1.12Major countries for floricultureproduction in 1991
Source: Worldwide Production andDistribution of norkulture Crops.Jan Van Doeaburg. InternationalShort Course pmsentation, OhioFlorists Associaticn, Cincinnati,Ohio. 15 July 1991.
Imported Cut Flowers
Cut flower imports to the United States have increased dramatically since1970. Sixty-seven percent (67%) of the major cut flower crops sold in thiscountry in 1990 were imported from foreign countries, cow -ed to only 4percent in 1971 (Table 1.13). In other words, only one-tlf .f the roses,carnations, standard mums, and pompons sold in the United States wereactually grown here. In 1971, no cut flower crop imports accounted for morethan 10 percent of the stems sold. Now, nearly 80 percent of the carnationsand pompons, 56 percent of the mums, and 42 percent of the roses sold in
the United States are imported.
The large volume of cut flower exports from these countries is possiblefor two reasons: 1) labor is very inexpensive and overhead costs low; and 2)the climate is ideal for cut flower production. The result is an inexpensive,high quality product that can be sold in the United States at prices that arevery competitive or considerably lower than those of domestically grown cutflowers.
A positive trend since 1970 is the increase in the yearly per capitaconsumption (stems purchased per person). Overall, it increased from slightly
less than 7 stems per person in 1971 to over 13 in 1990 (Table 1.13). Car-nations and roses account for most of this increase in per capita consumption.Pompon consumption also increased from 1 to 2.6 stems per person. Mumconsumption, however, decreased from 0.75 stem to 0.23 stem per person in
the same period of time.
Besides cut flowers, unrooted cuttings arc also imported into the United
States. Major exporting countries to the United States include several inCentral and South America for carnations and chrysanthemums, and Nether-
lands and Israel for roses (Table 1.14). Frccsia and alstroemeria and unrootedcuttings are exported from a number of areas around the world.
H

12
Table 1.13 Cut flower import statistics of selected crops
Crop Year % imported % U.S. grown Stems purchasper person
Carnations 1971
1981
1990
Mums
Pompons
Roses
Totals
197119811990
197119811990
1971
19811990
197119811990
5.258.278.9
7.319.956.0
5.654.880.5
0.214.641.7
4.044.567.2
94.841.821.1
92.780.144.0
94.445.219.5
99.885.458.3
96.055.532.8
3.083.986.19
0.750.470.23
1.062.122.61
2.082.154.10
6.978.72
13.13
Source: Flower Marketing Information newsletter, June 1991. Alvi 0. Voigt, Agricultural Economist,The Pennsylvania State University. - Cooperative Extension Service
Table 1.14 Major floriculture crops imported from other countries
Crops Imported Exporting Countries
CUT FLowERs
CarnationsPompon mumsStandard mumsRoses
UNROOTED FOLIAGE PLANTCUITINGS
Central and South AmericaColombiaEcuadorGuatemala
NetherlandsIsrael
Central and South AmericaEuropeAfricaJapanAustraliaNew Zealand
2U
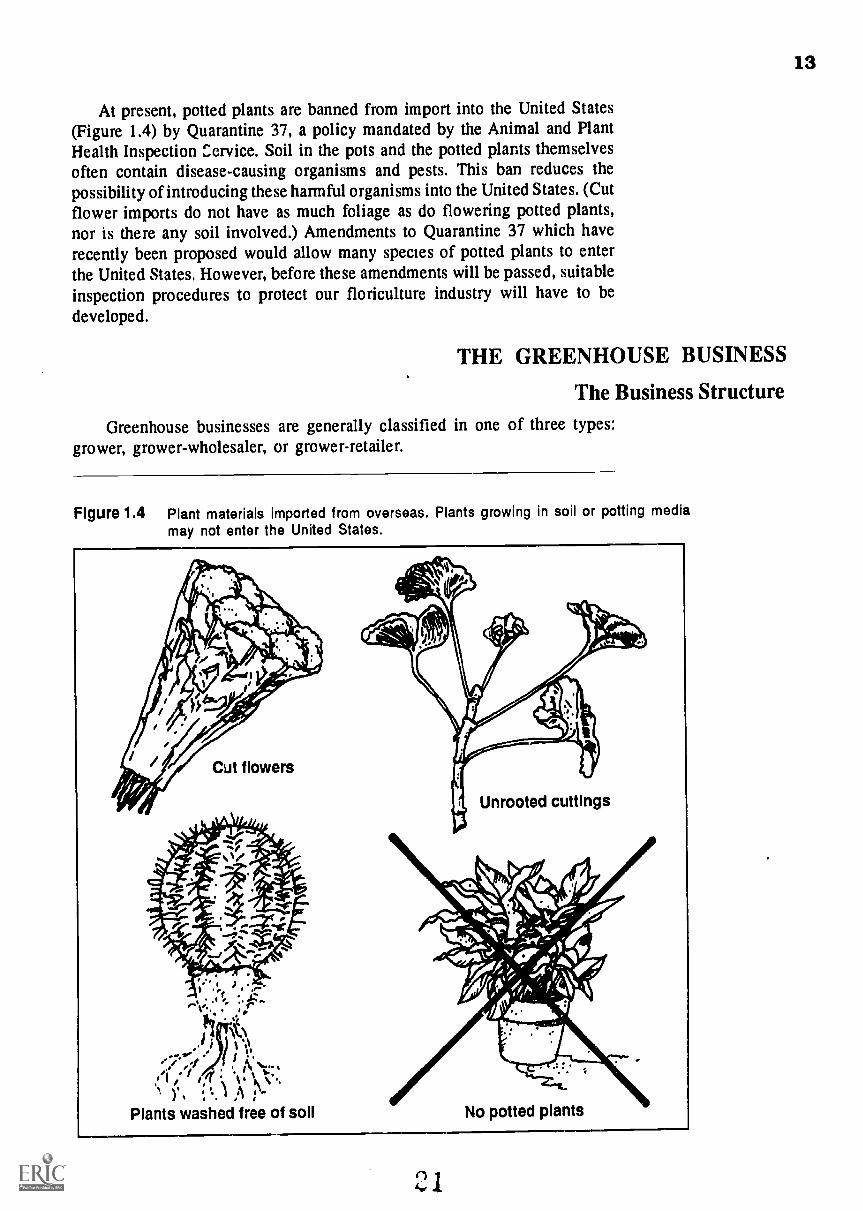
At present, potted plants are banned from import into the United States(Figure 1.4) by Quarantine 37, a policy mandated by the Animal and PlantHealth Inspection Cervice. Soil in the pots and the potted plants themselvesoften contain disease-causing organisms and pests. This ban reduces thepossibility of introducing these harmful organisms into the United States. (Cutflower imports do not have as much foliage as do flowering potted plants,nor is there any soil involved.) Amendments to Quarantine 37 which haverecently been proposed would allow many species of potted plants to enterthe United States, However, before these amendments will be passed, suitableinspection procedures to protect our floriculture industry will have to bedeveloped.
THE GREENHOUSE BUSINESS
The Business StructureGreenhouse businesses are generally classified in one of three types:
grower, grower-wholesaler, or grower-retailer.
Figure 1.4 Plant materials imported from overseas. Plants growing in soil or potting media
may not enter the United States.
Cut flowers
I .'f
' , 0"-rL's ' ,.
,...../. y 1),i /I . i,.....,(c/ I ,ir :,-,;%
.s. )., .... 1
Plants washed free of soil
Unrooted cuttings
No potted plants
,
13

14
Growers usually produce crops which are marketed by a wholesale orretail florist outlet. They often specialize in one crop or a limited number ofcrops. Growers concentrate on production. They leave the marketing of theircrops to wholesalers.
Grower-wholesalers also specialize in a limited number of crops. How-ever, they purchase products from other producers in order to provide retailerswith a full line of floral products (Figure 1.5). In addition to plant material,grower-wholesalers may provide a line of "hard goods" such as vases, pots,planters, ribbon, florist tape, etc.
Grower-retailers generally produce a variety of crops for sale throughtheir own retail outlets (Figure 1.6). Some of their crops may be sold to otherwholesale or retail florists. In effect, grower-retailers eliminate the "middleman" to increase profits. However, they are then responsible for growingmany crops expertly.
Some growers specialize in the production of seeds, bulbs, cuttings, smallplants, or "liners," which they market through brokerage firms or directly toother growers. Propagation of disease-free plant material requires specialexpertise. Plant propagators are the experts in the early part of the productionprogram. They provide growers with the "clean" plant material that is essen-tial for quality production.
Brokerage firms function as "middle men" between greenhouse produc-ers and customers. Brokers usually handle only the marketing transaction, notthe product. They collect a commission (percentage of the profit) for actingas sales agents. Brokers take orders from greenhouse customers. Productsordered are shipped directly from the producer to the customer. In many cases,brokers also provide greenhouse customers with valuable advice, such asinformation on crop scheduling, cultivars, etc.
Figure 1.5This large grower-wholesaler produces a wide rangeof potted plants.
ai
Figure 1.6This grower-retailer produces many of the pottedplants sold through this retail store.
2 2
nrci NM AVM APJ F

Greenhouse CostsGreenhouse costs are extremely variable. They are influenced by many
factors, including climate, size and location of the business, and strength ofthe local economy. It is difficult, therefore, to make broad generalizations.However, when determining costs of production, four categories should beconsidered (Figure 1.7).
1. Direct materials costs. These include the cost of plant materials, pots,growing media, chemicals, and other items that are directly related to theproduction of the crop.
2. Direct labor costs. These costs are based on production activities suchas preparing growing media, planting crops, spaf.;ing crops, sprayingpesticides, and watering and fertilizing. The cost of labor should includenot only wages, but also benefits, such as health insurance, paid vacations,and sick leave.
3. Overhead costs. These are the indirect costs of production, such asheating fuels, secretarial support and office management, depreciation,taxes, insurance, and utility services.
4. Marketing costs. These costs include advertising, packing the productfor shipping, shipping, and billing.
Figure 1.7 diagrams the cost of a typical bedding plant producer. Rangesare given for each category because production costs vary considerably across
Figure 1.7 Relationship of major costs to the total cost in the greenhouse bedding plant industry
AdvertisingPackingShippingBilling Markeing
5-151r,V
Heating fuelUtility servicesTaxesInsuranceDepreciation
Adapted from Tips on Growing BeddingPlants, Ohio Cooperative Extension Service,The Ohio State University, Columbus, OH,pages 70-71, 1989
Plant materialsContainersPesticidesFertilizersGrowing mediaLabels
WagesBenefitsSick leavePaid holidaysSocial Security
15

16
the country and even within Ohio. Labor is still the largest single cost fora greenhouse operator. For bedding plant production, labor can account for10 to 25 percent of the total production costs. Heating fuel makes up asignificant portion of the overhead costs, usually from 15 to 20 percent. Innorthern climates with severe winters, the cost of heating fuel can be as highas 25 percent of the production costs. Costs for crops other than beddingplants will vary from these figures because of different environmental require-ments, labor required, etc. However, these figures will give you a general ideaof the production costs that are involved.
CAREERS IN FLORICULTURE
Greenhouse Careers
Regardless of the size of a greenhouse operation, there are certain specificjobs that must be done for the operation to run smoothly. Someone must beassigned the responsibility of seeing that these jobs are done when necessaryand as efficiently as possible. In a large operation, one person may be respon-sible exclusively for propagating plants, another for scheduling crops, anotherfor watering and fertilizing, and so on. In a small operation, the same personmay have all of these responsibilities and others.
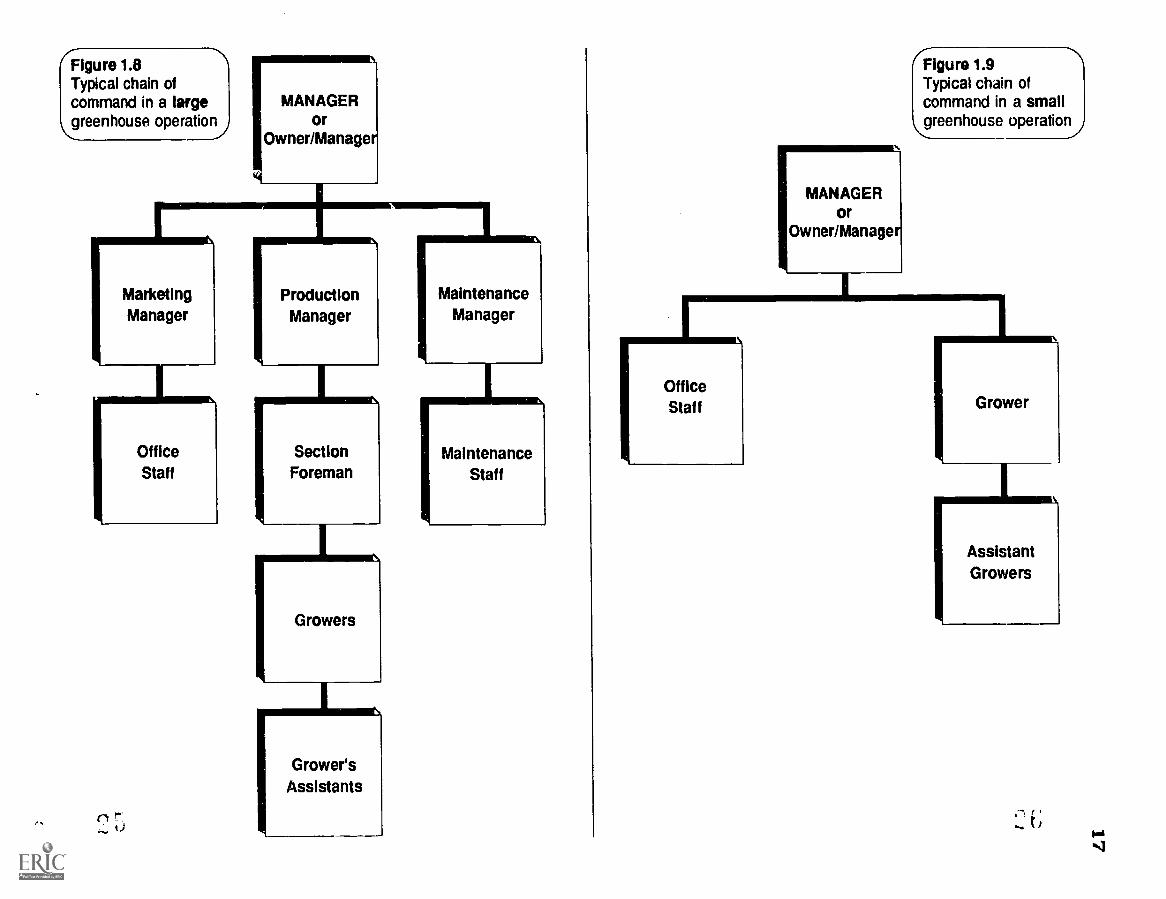
Knowing who is responsible for what and establishing a chain of commandis essential for any business. As a student of floriculture, you should havea general knowledge of job titles/careers and the responsibilities involved.Following are some generalized descriptions of the careers in a greenhouseoperation and the responsibilities associated with each. Any given greenhousebusiness may have more or fewer positions than those listed here. However,someone must be responsible for all the activities described. Figures 1.8 and1.9 outline typical business structures for a large and a small greenhousebusiness.
Greenhouse Manager or Owner/ManagerIn many instances the greenhouse manager also owns the business. The
manager is responsible for the total greenhouse operation. This person out-lines and assigns duties and coordinates the activities of various workinggroups. He or she must deal with the problems related to the various indi-viduals' work. The manager's job is to make sure the business achieves itsproduction and marketing goals.
In a small operation, managers directly supervise all production, market-ing, and maintenance. They must be thoroughly familiar with crop productiontechniques, business principles, and personnel management. A two- or four-year college degree (B.S. or Associate degree) in floriculture is highly desirable,though graduates of a strong high school or post high school vocationalprogram might qualify. Regardless of education, several years of practicalexperience are required.
Production ManagerThe production manager's job is to plan and supervise the growing of
crops which the management has decided to produce. Responsibilities include
Typical chain of(-Figure 1.8
command in a large MANAGERgreenhouse operation or
Owner/Manager
MarketingManager
ProductionManager
MaintenanceManager
OfficeStaff
SectionForeman
MaintenanceStaff
Growers
Grower'sAssistants
I MANAGERor
Owner/Manager
I-Figure 1.9Typical chain ofcommand in a smallgreenhouse operation)
OfficeStaff Grower
AssistantGrowers
0.1
18
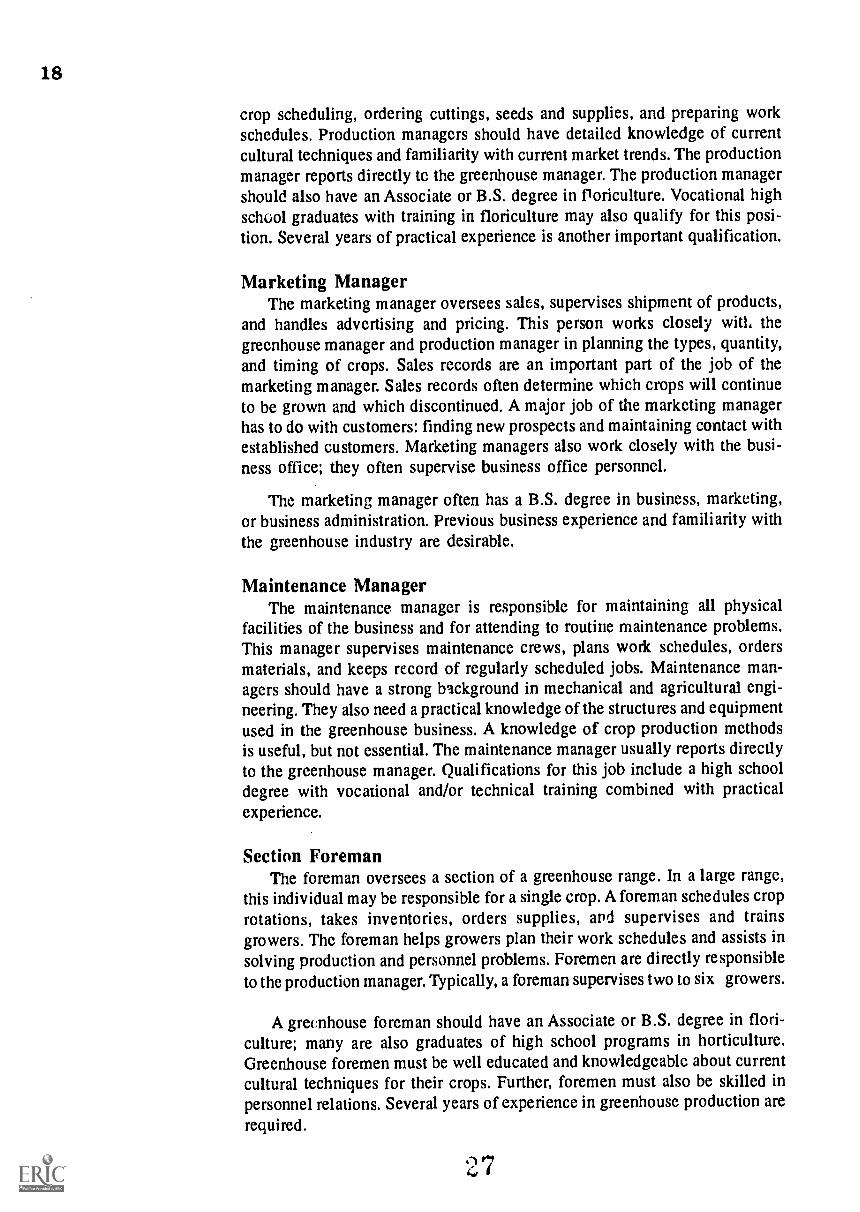
crop scheduling, ordering cuttings, seeds and supplies, and preparing workschedules. Production managers should have detailed knowledge of currentcultural techniques and familiarity with current market trends. The productionmanager reports directly to the greenhouse manager. The production managershould also have an Associate or B.S. degree in floriculture. Vocational highschuol graduates with training in floriculture may also qualify for this posi-tion. Several years of practical experience is another important qualification.
Marketing ManagerThe marketing manager oversees sales, supervises shipment of products,
and handles advertising and pricing. This person works closely with thegreenhouse manager and production manager in planning the types, quantity,and timing of crops. Sales records are an important part of the job of themarketing manager. Sales records often determine which crops will continueto be grown and which discontinued. A major job of the marketing managerhas to do with customers: finding new prospects and maintaining contact withestablished customers. Marketing managers also work closely with the busi-ness office; they often supervise business office personnel.
The marketing manager often has a B.S. degree in business, marketing,or business administration. Previous business experience and familiarity withthe greenhouse industry are desirable.
Maintenance ManagerThe maintenance manager is responsible for maintaining all physical
facilities of the business and for attending to routine maintenance problems.This manager supervises maintenance crews, plans work schedules, ordersmaterials, and keeps record of regularly scheduled jobs. Maintenance man-agers should have a strong background in mechanical and agricultural engi-neering. They also need a practical knowledge of the structures and equipmentused in the greenhouse business. A knowledge of crop production methodsis useful, but not essential. The maintenance manager usually reports directlyto the greenhouse manager. Qualifications for this job include a high schooldegree with vocational and/or technical training combined with practicalexperience.
Section ForemanThe foreman oversees a section of a greenhouse range. In a large range,
this individual may be responsible for a single crop. A foreman schedules croprotations, takes inventories, orders supplies, and supervises and trainsgrowers. The foreman helps growers plan their work schedules and assists insolving production and personnel problems. Foremen are directly responsibleto the production manager. Typically, a foreman supervises two to six growers.
A greenhouse foreman should have an Associate or B.S. degree in flori-culture; many are also graduates of high school programs in horticulture.Greenhouse foremen must be well educated and knowledgeable about currentcultural techniques for their crops. Further, foremen must also be skilled inpersonnel relations. Several years of experience in greenhouse production arerequi red.

GrowerThe grower is responsible for doing the physical work involved in grow-
ing a greenhouse crop, following directions given. The individual grower isoften responsible for a limited number of large crops or for several smallcrops. Growers prepare soil, plant crops, fertilize, water, pinch and prunecrops, and apply pesticides. They frequently harvest cut flowers and pottedplants and transport them to grading and shipping areas. The grower reportsto the greenhouse foreman.
Growers typically are graduates of a high school program in floricultureand/or graduates of a two-year technical college in greenhouse production.Usually one or more years of practical experience arc also required.
Grower's AssistantA grower's assistant helps the grower perform his or her responsibilities.
In addition to jobs directly involved in growing plants, this person may workat maintenance and repair of facilities and equipment during off-peak periodsin the summer. In large operations, some assistants are involved only ingrading, packing, and shipping. Other assistants are employed on a seasonalbasis during periods of heavy work loads or when certain crops, such asbedding plants, demand a lot of work like transplanting.
Most grower's assistants are graduates of horticulture high school pro-grams. The training for a grower's assistant is a good solid foundation forentry into the greenhouse business. Employers look for productive and reli-able assistants - those who are willing to learn, accept responsibility, and getalong well with fellow employees. Such grower's assistants can expect in-creased responsibilities and pay during the first year of employment. Aninterest in plants and in people and some knowledge of mechanics are allimportant for a successful employee in a greenhouse business.
Academic Careers in Floriculture
In addition to actually working in the greenhouse business, there are twofloriculture careers available in the academic world: teaching and research.
TeachingTeaching floriculture at either the high school or the college level is a
demanding career. Instructors teach a wide variety of courses ranging fromgeneral introductory floriculture, which covers all aspects of greenhouseproduction, to advanced, detailed courses such as bedding plant production,flowering pot plant production, or greenhouse equipment and construction(the more advanced, detailed courses). The generalized courses usually aretaught at the high school level and the more specialized courses at the collegelevel (in two- and four-year programs).
Regardless of the leve!, floriculture instructors and students should haveaccess to at least one sizeable greenhouse for laboratory exercises andpracticum. Only in greenhouses can students obtain the valuable hands-onexperience they need for growing floriculture crops and operating greenhouseequipment.
c.)
19
20
The educational qualification tide a B.S. teaching degree with expe-rience in floriculture for the high school level and an M.S. degree in flori-culture (minimum) for college level teaching, with experience in greenhouseproduction. Many instructors at the college level also have a Ph.D. degreein floriculture.
ResearchCareers in floriculture research require advanced training in some aspect
of floriculttce. A Ph.D. degree is usually required. Researchers are hired byuniversities, colleges, and private industry. They usually work on solvingproblems of floriculture production such as height control, pest/diseasemanagement, nutrition, irrigation, etc. The results of their research are thentranslated into procedures that greenhouse producers can implement in theirproduction practices. A career in floriculture research requires the mostspecialized training and education.
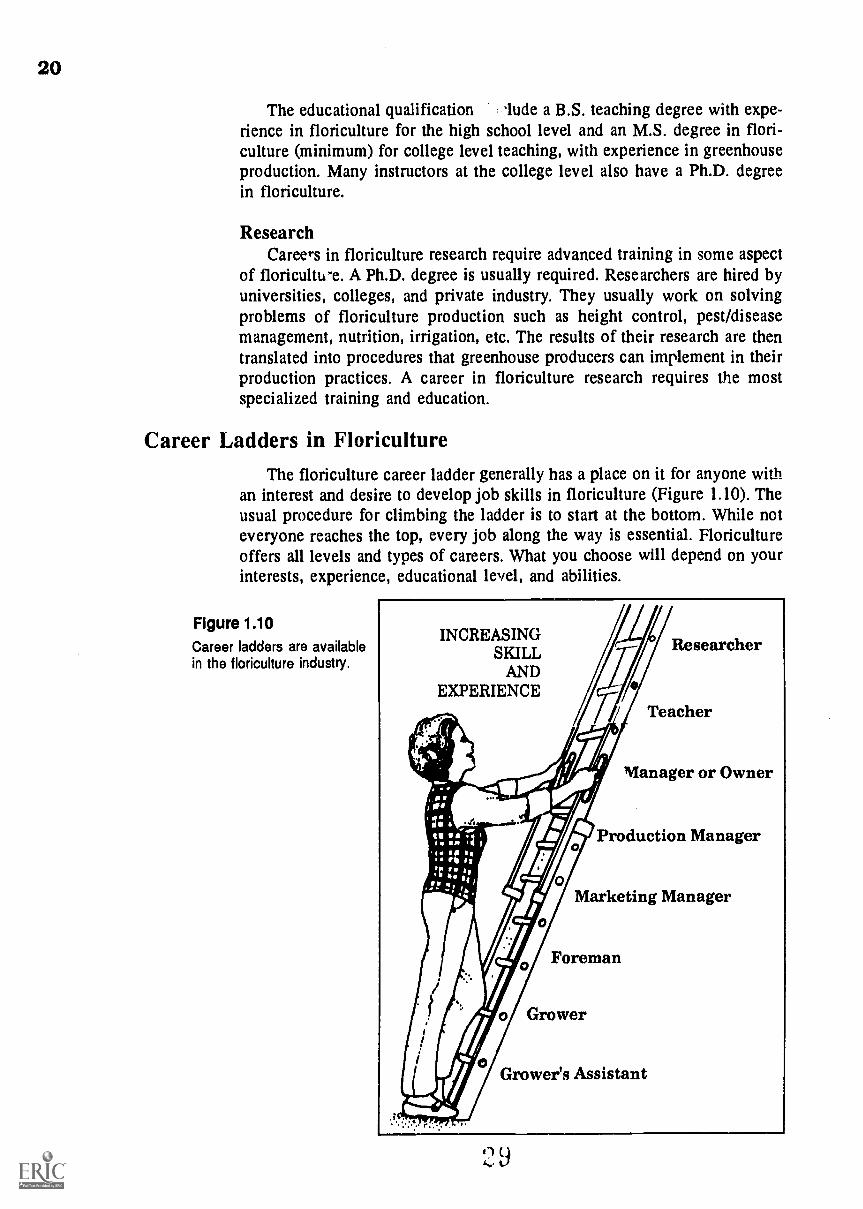
Career Ladders in FloricultureThe floriculture career ladder generally has a place on it for anyone with
an interest and desire to develop job skills in floriculture (Figure 1.10). Theusual procedure for climbing the ladder is to start at the bottom. While noteveryone reaches the top, every job along the way is essential. Floricultureoffers all levels and types of careers. What you choose will depend on yourinterests, experience, educational level, and abilities.
Figure 1.10Career ladders are availablein the floriculture industry.
INCREASINGSKILL
ANDEXPERIENCE
Researcher
Teacher
Manager or Owner
Production Manager
Marketing Manager
Foreman
Grower
Grower's Assistant
2 9

Entry Level Positions in FloricultureYour vocational horticulture program has been designed to give you two
choices: 1) prepare for entry level position in the horticulture industry, or2) prepare for advanced education at a two- or four-year institution of higherlearning. The vocational horticulture program typically includes severalinstructional areas besides floriculture (Figure 1.11). Your school may providetraining in one, several, or even all of these areas. As you consider trainingfor any of the entry-level positions in horticulture, you may have questionsabout the nature of each job, expected income, job skills, and experience oreducational requirements. One way to learn about a job is to develop a "jobprofile" chart. Table 1.15 on the next page profiles careers that are availablein floriculture.
With successful completion of your vocational training program, you willhave the skills needed for an entry-level job in floriculture such as grower'sassistant. Even if your school offers training in only one of the instructionalareas (Figure 1.11), you will still be prepared for entry into several jobs inthat employment area. You will also have had opportunity to explore horti-culture as a career before you enroll in a college program.
Figure 1.11 Vocational horticulture instructional areas
FLORICULTURE
FRUITS ANDVEGETABLES
dif s!4;015LANDSCAPING
8 I
NURSERY
21

Table 1.15 Job profile chart
Job RegularIncome
RegularHours
Offers Varietyin Work
Much Travel Work inRequired One Place
FringeBenefits
Work withOthers
Manager orOwner/Manager
Yes Generally, butsome overtimerequired
Yes No Yes Yes Yes
ProductionManager
Yes Yes, but there arepeak seasons
Yes No Yes Yes Yes
MarketingManager
Yes Yes, but there arepeak seasons
Yes No Yes Yes Yes
MaintenanceManager
Yes Yes Yes No Yes There maybe some
Yes
Section Foreman Yes Yes, but there arepeak seasons
Yes No Yes There maybe some
Yes
Grower Yes Yes, but there arepeak seasons
Sometimes No Yes There maybe some
Yes
Grower's Assistant Some-times
Sometimes Sometimes No Yes Not to anygood extent
Notnecessarily
Teacher Yes Usually Yes No Yes Yes Yes
Researcher Yes Sometimes Yes Sometimes Yes Yes Notnecessarily
MinimumEducational
Requirements
Two- or four-yearcollege degreein floriculture
Two- or four-yearcollege degrPein floriculture
College degree inmarketing or business
-tigh school with coursein agriculture, hort, .
culture, or mechanics
Two- or four-yearcollege degreein floriculture
Two-year degree ingreenhouse productionand management
High school with coursein agriculture orhorticulture
College degree (B.S.)in horticulture for highschool level; M.S. orPh. D. for college level
College degrees - B.S.& M.S., but Ph.D.preferred

23
In conclusion:
In Chapter 1 we defined floriculture and explored the history of thisexciting industry. The major segments of the floriculture industry are beddingplants, potted flowering plants, foliage plants, and cut flowers. The floricul-ture production statistics of wholesale value nationally and in Ohio areimpressive. Floriculture as we know it started in Europe and is still greatlyinfluenced by the overseas industry. Some of the careers that are availablein floriculture include that of greenhouse manager, production manager,marketing manager, maintenance manager, section foreman, grower, andgrower's assistant. Also, positions are available in teaching and research.

24
This review is to help you check yourself on what you have learned about an overview ofthe greenhcuse industry. If you need to refresh your mind on any of the following questions,refer to the page number given in parentheses.
1. Define "floriculture." (page 2)
2. In what part of the world did the floriculture industry originate? (page 3)
3. What are the four major segments of the floriculture industry by order of theireconomic importance? (page 3)
4. What states rank first and second in the U.S. in each of these four major segments?(page 5)
5. What are your state's major contributions to the floriculture industry in the U.S.?
6. List the major floriculture-producing countries of the world today. Locate eachcountry on a world map. (page 9)
7. Approximately what percent of the cut flowers sold in the United States today areimported? (page I I)
8. Why are growers concerned about proposed amendments to Quarantine 37? (page 13)
9. What are the three classifications of greenhouse businesses? (page 13)
10. What are the major costs of operating a greenhouse business? (page 15)
11. What are the major responsibilities of:greenhouse manager? (page 16)
production manager? (page 16)
marketing manager? (page 18)
maintenance manager? (page 18)
section foreman? (page 18)
12. What is the difference between a section foreman and a grower? (pages 18-19)
13. What entry-level position in the greenhouse will you be qualified for when you havegraduated from a high school vocational program in horticulture? (page 19)
14. What academic careers are available in horticulture? (page 19)

CHAPTER 2
GREENHOUSE STRUCTURES
Competencies for Chapter 2
As a result of studying this chapter, you should be able to do the following:
1. Identify suitable locations for greenhouses.2. Determine soil and water table characteristics of the building site.3. Determine space requirements.4. List the types of greenhouse structures.5. Determine the life expectancy of greenhouse F, auctures.6. Design plans for greenhouse structures.7. Describe the major glazings used on greenhouses and the advantages
and disadvantages of each.8. Determine the importance af light to greenhouse crops.9. Summarize the purposes of the headhouse; identify its location in relation
to the greenhouse.10. Follow zoning requirements.
Related Science Concepts1. Describe the make-up of light waves.2. Determine temperature and wind velocity.3. Estimate weight-holding capabilities of a
greenhouse frame.
111'i HID%I I
HIP °P110iniiruninlinnnu'
Related Math Concepts1. Apply measuring skills to calculate angles and distance in feet.2. Apply basic operations to whole numbers, decimals, and fractions.3. Apply basic operations to ratios and percents.4. Read, interpret, and construct charts, graphs, and tables.5. Read topography maps.
Terms to Know
A-frameacrylicaquifercold framecurtain walleaveenergy conservationeven-spanfiberglass
footerfossil fuelgableglazinggreenhouse rangelight transmissionnitratepollutantpolyethylene
259
polyvinyl fluoridepurlinquonset housesash barside posttopographytrussultraviolet (UV) radiationuneven-span

26
INTRODUCTIONThis chapter will cover the basics of greenhouse design, glazings, and
suitable locations. Choosing the greenhouse structure, glazing, and locationwill depend on many variables including economics, availability of supplies,and types of floriculture crops to be grown. In order to understand fully theconcepts to be discussed, you need to know just what a greenhouse is. Bydefinition, a greenhouse is a structure characterized by the following features:1. The structure must be covered with a transparent glazing.2. The structure must be artificially heated.3. People working inside it must be able to stand upright without touching
the roof.
A structure like a cold frame would not be considered a greenhouse. However,as we will see, there are many structuies that are greenhouses by definition.
SUITABLE GREENHOUSE LOCATIONSIn time, the decision as to the best location for a greenhouse or greenhouse
range may be up to you. What are the factors that you should take intoconsideration? Building a greenhouse is a major, long-term investment. Care-ful site selection before construction will prevent many potential problems.The following guidelines should be helpful in this major decision.
Land Area
When building a greenhouse or greenhouse range, allow room for expan-sion. Most greenhouse businesses begin on a small scale and enlarge as theybccome established. A rule of thumb is to purchase at least twice as muchland as the growing area of the greenhouse structure (Figure 2.1). Forexample, if you plan to build a one-acre grenhouse range, buy at least two
Figure 2.1 This grower purchased enough land for expansion. At the start, two 80' x 40' greenhouses were built.With available space, the size of the operation could be doubled in the future.
Property Boundary
120' 80'
Existing Greenhouse Future Expansion
40'
200'

27
acres of land. That will give you enough room for future expansion. Don'tlimit tl future growth of your greenhouse business by purchasing too small
a plot of land. Be smart and plan for the future now!
Topography
A second factor to consider is the topography or "la,' of the land" on whichthe greenhouse will be built. Select a site as level as possible so that gradingcosts will be minimal. Also, a greenhouse built on level land rather than ona hillside is easier to automate. (Discussion of automation will come later.)Select a site with soil that drains easily - that is not located in a depression.(This is no longer critical for those growers who recirculate their irrigation
water.)
Windbreaks
If possible, build the greenhouse to the south or southeast of a hill or treeline. The hill or tree line will act as a windbreak, since the direction of thewinter wind is usually from the north or northwest. This windbreak willsignificantly decrease heat loss. (See Chapter 3 on energy conservation.)There is one precaution, however. Be sure to locate the greenhouse at least100 feet away from the hill or tree line (Figure 2.2). A natural windbreak willalso act as a snow fence. A greenhouse built too close to a natural windbreakmay be in trouble during a heavy snowfall. Snow will drift to the south ofa windbreak just as it does by a snow fence. As a result, the greenhouse maybecome buried with snow.
Zoning PermitNo matter where a greenhouse is constructed - in a city, town, or town-
ship- you must check with local zoning ordinances. First, make sure thatgreenhouses are permitted on the land you are considering buying. Forexample, residential zoning will not permit the building of a greenhouse onthat land, as a greenhouse is considered a business.
Figure 2.2 A treeline windbreak should be at least 100 feet to the north or northwest of a greenhouse.
100 feet minimum
riti

28
*
Labor Availability
In spite of advances in automation, greenhouses still require substantiallabor for smooth operation. Another consideration in locating a greenhouseis the potential labor supply in the vicinity. If possible, locate near an urbanarea or at least within easy commuting distance. Pay as high wages as possibleto attract quality workers from the vicinity of the greenhouse. Offset thehigher wages by automating as much as possible. It is a good policy toestimate labor requirements in advance, so that you will have an idea whetherthese requirements can be met in the local area.
Transportation and Shipping
Wholesale growers should locate near major forms of transportation foreasy access to shipping routes. Examples are interstate highways, commercialairports, and truck distribution centers. Ready access to any of these willminimize shipping costs. The grower will not have to transport plants longdistances for shipment. Those not so located must pass the extra costs on tothe consumer.
Water Supply and Quality
One of the most important aspects to investigate before building a green-house is the quantity and quality of the water supply. Watering plants in agreenhouse is one of the most important tasks involved in floriculture; itrequires an enormous amount of water. If no city water is available, the growerwill have to rely on well water for irrigation needs. If a well must be dug,a geological sunfey should first be done on the land. This should includeinformation about the quantity of water existing in aquifers and other sub-surface sources of water.
Equally important to quantity is the quality of the water supply. If thewater source for a greenhouse is a polluted well, the plants will probably beof poor quality no matter what other cultural measures the grower implements.The result will be a greenhouse doomed to failure. A thorough test of cityand/or well water should be conducted to determine the levels of nitratenitrogen, phosphorus, and other pollutants (including herbicides), as well asthe pH and alkalinity of the water. The cost involved in such a survey andin having water tests done is a wise investment. A well that dries up or a watersupply that is pollnted will mean the end of your greenhouse business!
Fuel Cost
The cost of fuel is one of the largest expenses of a greenhouse grower.Therefore, a potential greenhouse location must be carefully researched as tofuel availability and acceptability of fuel pr.ces in that area.
Market Accessibility
Locating near the market is very important for retail growers who relyon customers getting to the greenhouse. The market potential snould beexplored before building. The competition should be scouted out and surveysconducted (if possible) as to the greenhouse market demands of the local area.

Wholesale growers should consider locating in an area that is centrallylocated for the market area they serve. This will minimize transportation costs.
A central location is especially important for growers of pot plants andbedding plants, as these products are more expensive to ship than are cut
flowers.
GREENHOUSE STRUCTURES AND GLAZING MATERIALS
Prior to 1950, all greenhouses in existence were made of glass. Plastics
were not yet available for widespread commercial use. Today, mainly the
older greenhorses are glazed (or covered) with glass. Sometimes, greenhouses
are still constructed using glass because it does have some excellent advan-
tages. But most greenhouses today are glazed with flexible or rigid plastics.
Glass
Glass is a very transparent glazing material. It transmits approximately90 percent of the sunlight striking its surface. Unlike plastics, glass is notaffected by ultraviolet (UV) radiation from the sun. So its longevity runs from
several decades to over 100 years. Glass also does not expand or contract like
plastics do in response to changes in temperature. Glass does not have the
warping problems sometimes encountered in plastic greenhouses. And,finally, glass is readily available. Pane width is typically 16 to 20 inches.
But there are certain disadvantages to glass. It is fairly expensive and itbreaks easily. Also, its relatively heavy weight requires a substantial frame
for support.
Range StructureGlass greenhouses usually are built using A-frame or even-span construc-
tion. With even-span construction, the two sides of the roof are equal in width
and the pitch or angle of the two halves of the roof is the same (Figure 2.3).
Rarely, a glass greenhouse is built as an uneven-span structure with one roof
longer than the other (Figure 2.4). This type of construction is suitable for
greenhouses built on the side of a hill. However, uneven-span construction
makes automation difficult.
Figure 2.3Even-span greenhouse frame. Roof angles,
al and a, are equal; roof widths IN, and IN2
are equal.
ADVANTAGE
DISADV( NTAGE
29
30
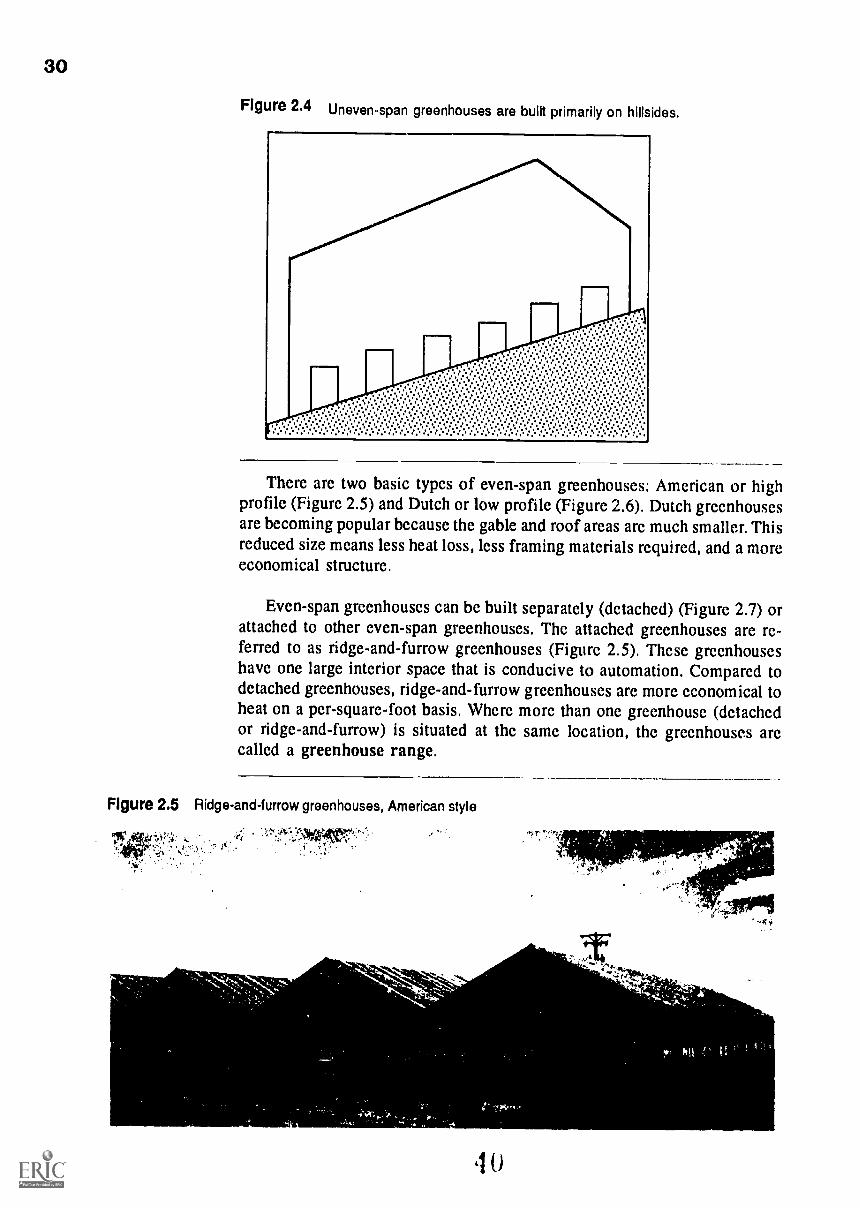
Figure 2.4 Uneven-span greenhouses are built primarily on hillsides.
There are two basic types of even-span greenhouses: American or highprofile (Figure 2.5) and Dutch or low profile (Figure 2.6). Dutch greenhousesare becoming popular because the gable and roof areas are much smaller. Thisreduced size means less heat loss, less framing materials required, and a moreeconomical structure.
Even-span greenhouses can be built separately (detached) (Figure 2.7) orattached to other even-span greenhouses. The attached greenhouses are re-ferred to as ridge-and-furrow greenhouses (Figure 2.5). These greenhouseshave one large interior space that is conducive to automation. Compared todetached greenhouses, ridge-and-furrow greenhouses are more economical toheat on a per-square-foot basis. Where more than one greenhouse (detachedor ridge-and-furrow) is situated at the same location, the greenhouses arecalled a greenhouse range.
Figure 2.5 Ridge-and-furrow greenhouses, American style
Aliblounigyar,,Ahip.112 A,.
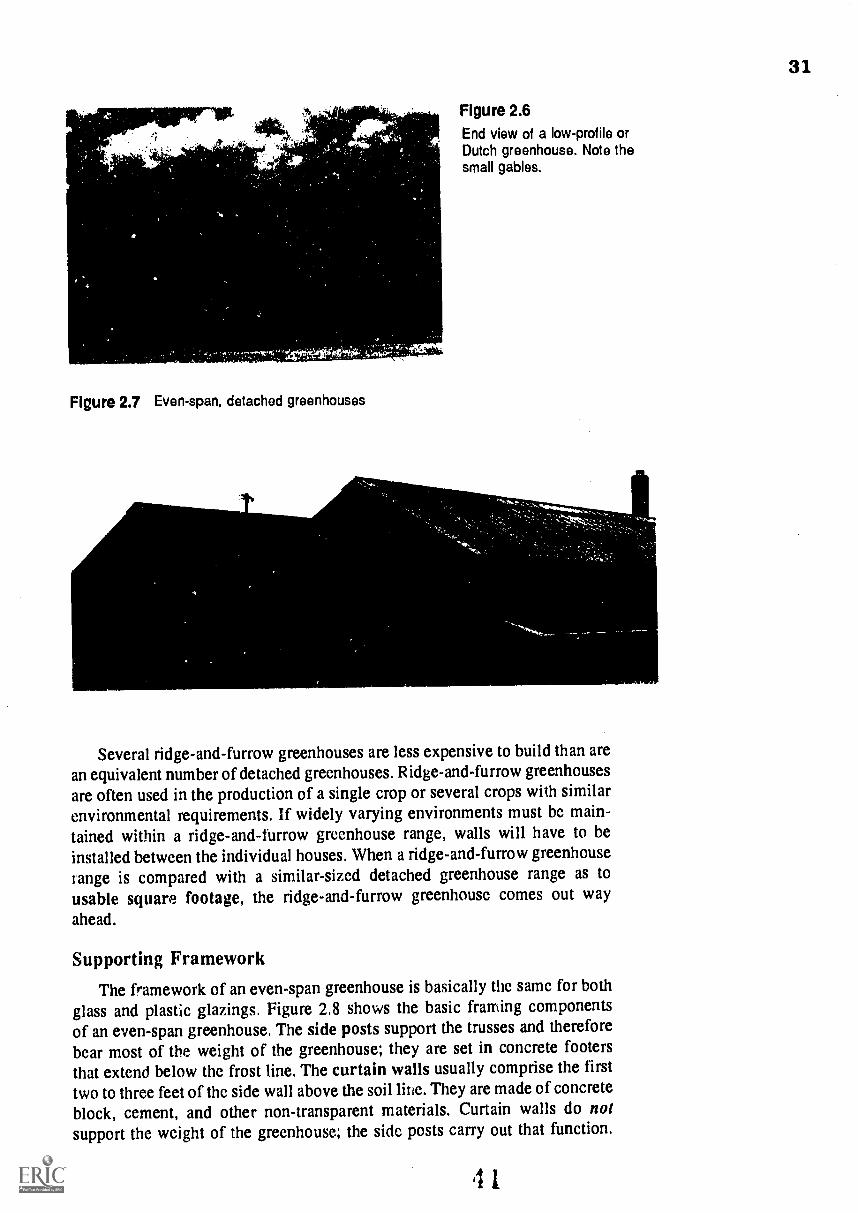
Figure 2.7 Even-span, detached greenhouses
31
Figure 2.6End view of a low-profile orDutch greenhouse. Note thesmall gables.
Several ridge-and-furrow greenhouses are less expensive to build than arean equivalent number of detached greenhouses. Ridge-and-furrow greenhousesare often used in the production of a single crop or several crops with similarenvironmental requirements. if widely varying environments must be main-
tained within a ridge-and-furrow greenhouse range, walls will have to beinstalled between the individual houses. When a ridge-and-furrow greenhouse
range is compared with a similar-sized detached greenhouse range as tousable square footage, the ridge-and-furrow greenhouse comes out wayahead.
Supporting Framework
The framework of an even-span greenhouse is basically the same for bothglass and plastic glazings. Figure 2.8 shows the basic framing componentsof an even-span greenhouse. The side posts support the trusses and thereforebear most of the weight of the greenhouse; they are set in concrete footersthat extend below the frost line. The curtain walls usually comprise the first
two to three feet of the side wall above the soil line. They are made of concrete
block, cement, and other non-transparent materials. Curtain walls do notsupport the weight of the greenhouse; the side posts carry out that function.
.1 1.
32
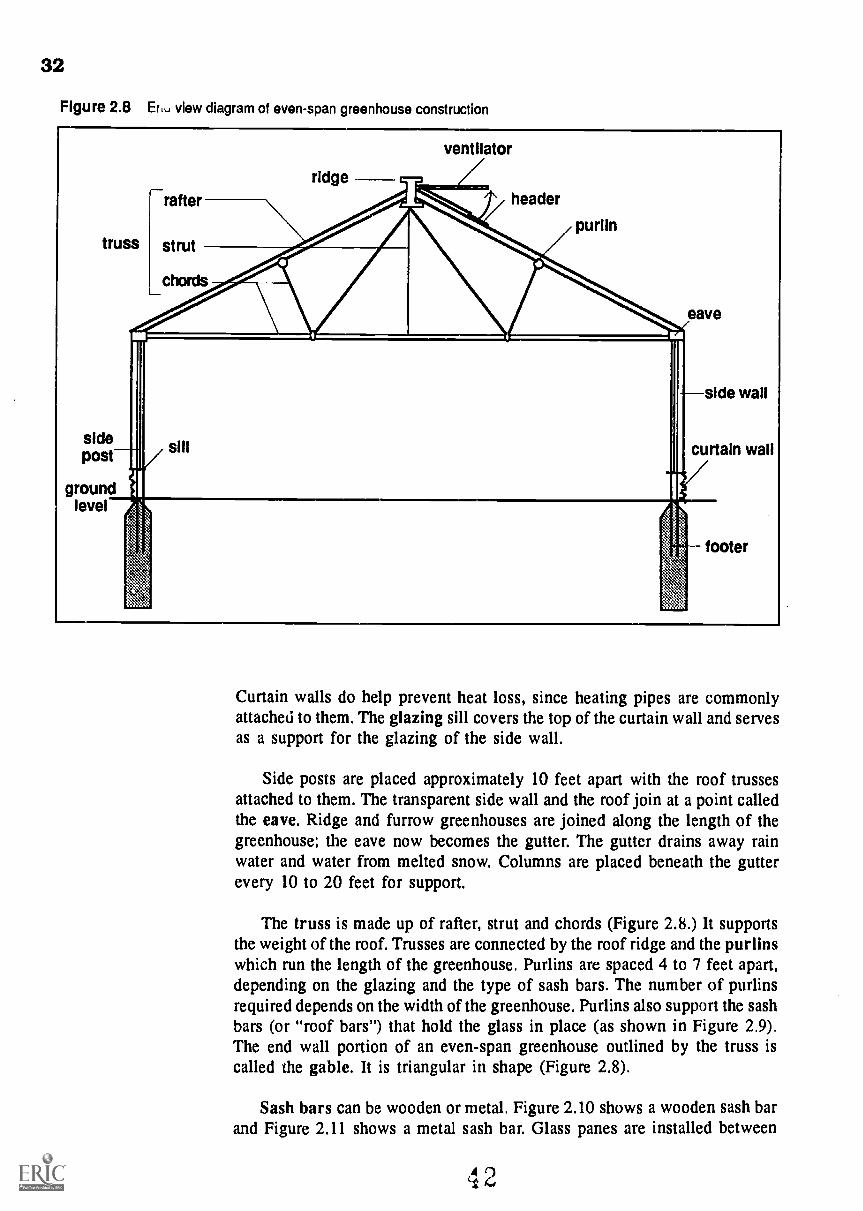
Figure 2.8 Eriu view diagram of even-span greenhouse construction
ventilator
truss
sidepost
groundlevel
rafter
strut
chords
ridgeheader
purlin
eave
side wall
curtain wall
.111111111
footer
Curtain walls do help prevent heat loss, since heating pipes are commonlyattached to them. The glazing sill covers the top of the curtain wall and servesas a support for the glazing of the side wall.
Side posts are placed approximately 10 feet apart with the roof trussesattached to them. The transparent side wall and the roof join at a point calledthe nye. Ridge and furrow greenhouses are joined along the length of thegreenhouse; the eave now becomes the gutter. The gutter drains away rainwater and water from melted snow. Columns are placed beneath the gutterevery 10 to 20 feet for support.
The truss is made up of rafter, strut and chords (Figure 2.8.) It supportsthe weight of the roof. Trusses are connected by the roof ridge and the purlinswhich run the length of the greenhouse. Purlins are spaced 4 to 7 feet apart,depending on the glazing and the type of sash bars. The number of puffinsrequired depends on the width of the greenhouse. Purlins also support the sashbars (or "roof bars") that hold the glass in place (as shown in Figure 2.9).The end wall portion of an even-span greenhouse outlined by the truss iscalled the gable. It is triangular in shape (Figure 2.8).
Sash bars can be wooden or metal. Figure 2.10 shows a wooden sash barand Figure 2.11 shows a metal sash bar. Glass panes are installed between

33
Figure 2.9Typical even-span constructionshowing a purlin running the lengthof the greenhouse, supportingthe sash bars and connectingthe trusses
Figure 2.10Wooden sash bar with the glass being held in place by an
aluminum 15ar cap
Figure 2.11 Aluminum sash bar showing a drip groove to drain away watercondensing on the glass pane
1100."-A glass
purlin
aluminum bar cap
putty
drip groove
aluminum sash bar
4 '

34
ADVANTAGE
the sash bars (Figure 2.12). The upper panes overlap the lower panes byapproximately 1/4 inch. A putty material is applied to the grooves of the barbefore the glass is installed to form a weather-tight seal. More putty is appliedon top of the glass. Aluminum sash bar caps are then screwed into place overthe glass to hold it securely (Figure 2.13). Aluminum sash bar caps alsoincrease the life of wooden sash bars. These caps lengthen the effectivenessof the putty holding the glass in place for both aluminum and wooden sashbars.
Rigid Plastics
Besides glass, several rigid plastics have been developed for use in glaz-ing even-span greenhouses. Two of the most commonly used rigid plasticsare acrylic and polycarbonate. They are available under many brand namesand can be purchased in single or double layers. Double-layered acrylic andpolycarbonate sheets are preferred because of the dead air space betweenlayers that acts as an insulator (Figure 2.14). The two sheets or layers ofplastic are held apart by evenly spaced plastic ribs. The result is dead airspaces that run the length of the panel. Figure 2.15 shows a greenhouse withside walls made of double-layer acrylic. Note the distance between sash bars.The use of double-layer rigid plastic glazing means energy savings to thegrower. Research has shown that a double-layer rigid plastic greenhouse willuse from 50 to 60 percent less fuel for heating than a conventional glassgreenhouse. This is very significant with today's escalating fuel costs anddepletion of fossil fuel resources.
Figure 2.12Aluminum sash bar holding glass panes in place
Flgoie 2.13Close-up view of an aluminum sash bar(Figure 2.12) showing the sash bar cap

Figure 2.14 Cross section of a 16-mm thick, double-layer, rigid plastic glazing
dead air space
t4- -16mm
/-41
/ /ribs holding two layers apart
,
two layers of plastic
Figure 2.15Greenhouse under construction using double-layer acrylicglazing. Note the wide spacing of the sash bars.IMSb..
Other advantages of double-layer plastics are the following:1. They have high light transmission (85 to 90 percent).2. They are not easily broken.3. They are lightweight compared to glass.
Therefore, the even-span greenhouse structure for double-layer plastic glazing
can be less substantial than for glass. The plastic panes are lighter and larger,so the roof bars can be further apart than with glass panes of the same size.Larger panes mean less shadow cast by the frame on the crops below.
The primary disadvantage of acrylic and polycarbonate double glazingsis their cost. These are the most expensive glazings available. However, since
we discovered that they greatly reduce fuel consumption, these glazings willpay for themselves in a relatively short time. Acrylic glazings last approxi-mately 25 years and polycarbonates last from 10 to 15 years.
Another disadvantage of acrylic and polycarbonate double glazings is that
they contract and expand significantly in response to temperature changes.
This "movement" must be taken into consideration when one is designing sashbars and other framing for these glazings.
DISADVANTAGE
35
36
Semi-rigid Plastics - FRP
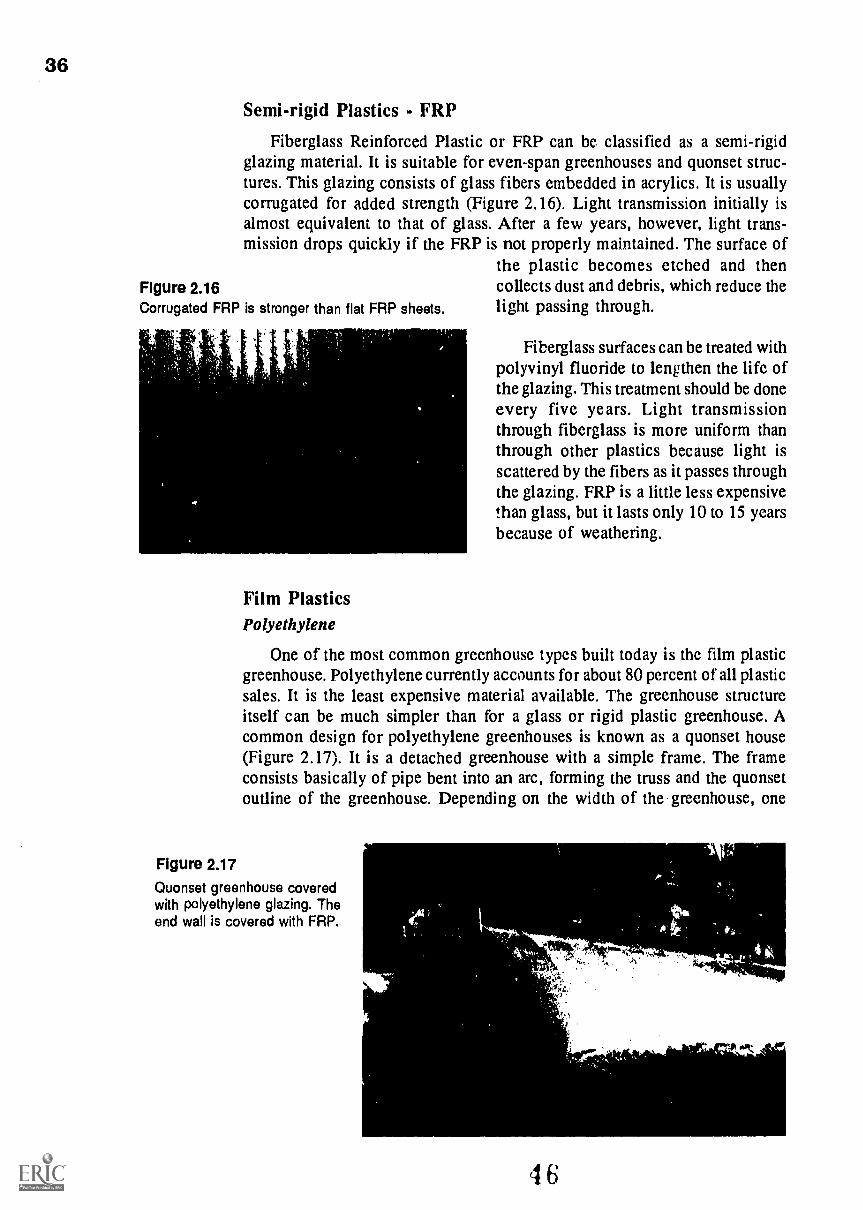
Fiberglass Reinforced Plastic or FRP can be classified as a semi-rigidglazing material. It is suitable for even-span greenhouses and quonset struc-tures. This glazing consists of glass fibers embedded in acrylics. It is usuallycorrugated for added strength (Figure 2.16). Light transmission initially isalmost equivalent to that of glass. After a few years, however, light trans-mission drops quickly if the FRP is not properly maintained. The surface of
the plastic becomes etched and thenFigure 2.16 collects dust and debris, which reduce theCorrugated FRP is stronger than flat FRP sheets, light passing through.
Fiberglass surfaces can be treated withpolyvinyl fluoride to lengthen the life ofthe glazing. This treatment should be doneevery five years. Light transmissionthrough fiberglass is more uniform thanthrough other plastics because light isscattered by the fibers as it passes throughthe glazing. FRP is a little less expensivethan glass, but it lasts only 10 to 15 yearsbecause of weathering.
Film PlasticsPolyethylene
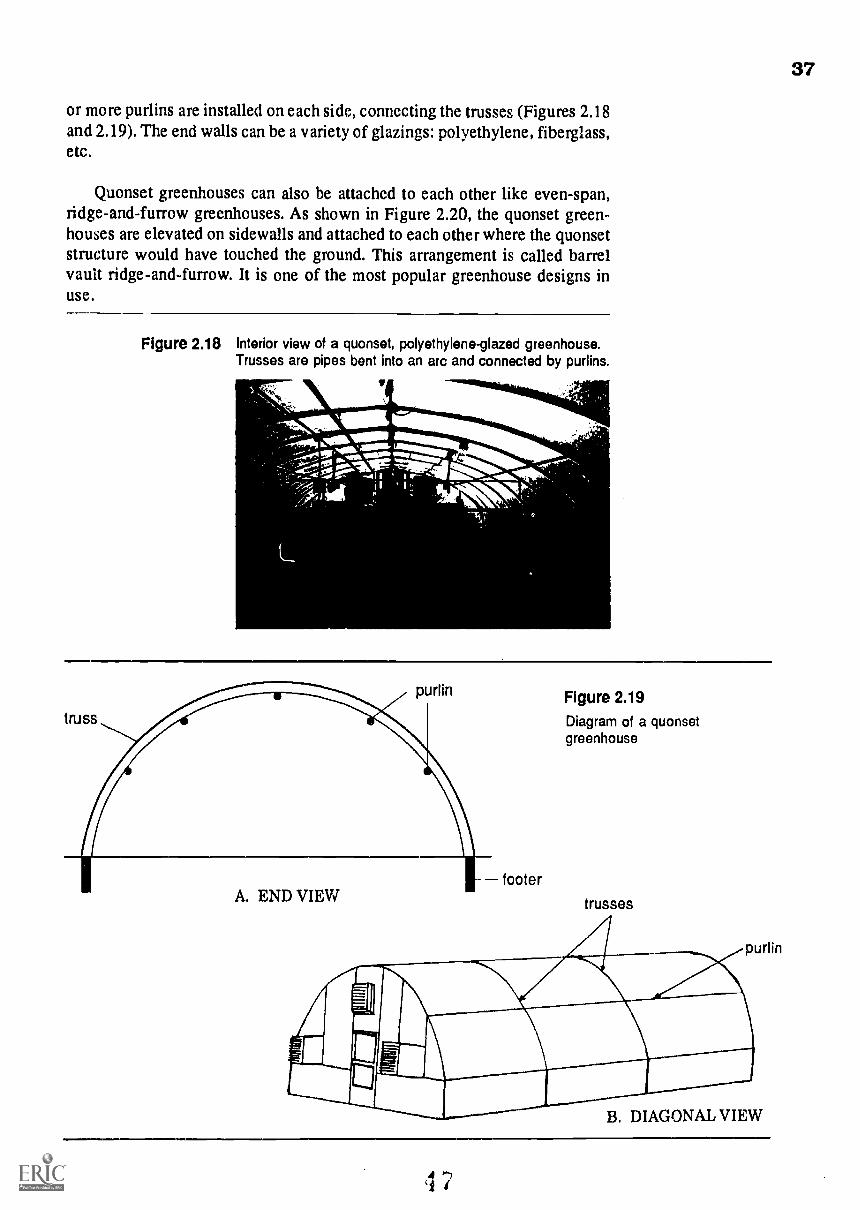
One of the most common greenhouse types built today is the film plasticgreenhouse. Polyethylene currently accounts for about 80 percent of all plasticsales. It is the least expensive material available. The greenhouse structureitself can be much simpler than for a glass or rigid plastic greenhouse. Acommon design for polyethylene greenhouses is known as a quonset house(Figure 2.17). It is a detached greenhouse with a simple frame. The frameconsists basically of pipe bent into an arc, forming the truss and the quonsetoutline of the greenhouse. Depending on the width of the greenhouse, one
Figure 2.17
Quonset greenhouse coveredwith polyethylene glazing. Theend wall is covered with FRP.
.
37
or more purlins are installed on each side, connecting the trusses (Figures 2.18and 2.19). The end walls can be a variety of glazings: polyethylene, fiberglass,etc.
Quonset greenhouses can also be attached to each other like even-span,ridge-and-furrow greenhouses. As shown in Figure 2.20, the quonset green-houses are elevated on sidewalls and attached to each other where the quonsetstructure would have touched the ground. This arrangement is called barrelvault ridge-and-furrow. It is one of the most popular greenhouse designs inuse.
Figure 2.18 Interior view of a quonset, polyethylene-glazed greenhouse.Trusses are pipes bent into an arc and connected by purlins.\ ---.1.1111"411111%044
-""'"ftiftwo,4,4404816...,_:;eal
Figure 2.19
Diagram of a quonsetgreenhouse
A. END VIEW trusses
B. DIAGONAL VIEW

38
Figure 2.20 Barrel vault ridge-and-furrow greenhouse range
44. ArLarriaailt..si
Not only is polyethyIene Lexpensive, but it is easy to install. It comesin large sheets which make covering the greenhouse much easier than if small
pieces had to be spliced together. It is easily attached to the end walls andalong the length of the base of the greenhouse. Figure 2.21 shows the railand spindle and snaplock devices commonly used to attach polyethylene tothe structure. The snaplock system is the easier of the two for installation.
Most polyethylene greenhouses are glazed with two layers of plastic that
are inflated by a squirrel cage fan (Figure 2.22). As with rigid double-layerplastics, a dead air space is created, providing insulation for the greenhouse.Growers can enjoy a potential fuel savings of 40 percent compared to the cost
for a glass greenhouse.
The main drawback of double polyethylene greenhouses is reduced lighttransmission through the glazing. Roughly 5 to 10 percent less light is trans-
mitted through polyethylene than through glass. However, the simple framing
of a polyethylene greenhouse casts much fewer shadows than an even-span
Figure 2.21 Polyethylene glazing attachment devices: A) rail and spindle system, and
B) snaplock system
plate to hold spindles
spindle
rail
plastic heets
plastic sheets
holder
snaplock
39
Figure 2.22 Squirrel cage fan used for inflating double-layer film plastic greenhouses
greenhouse frame does is N.tially offsets the lower light transmission ofthe double glazing.
The other disadvantage of polyeth) ne is its very short life span. Theultraviolet rays of the sun break down polyethylene; after two or three yearsthe plastic becomes quite yellow and brittle. The result is reduced lighttransmission and tears in the glazing. Thus, this kind of glazing has to be
replaced every two or three years. A lot of labor and time are involved in thisprocedure. These factors offsets the very low cost of the glazings. Severalvariations of polyethylene are available, includir; brands containing UVinhibitors. Even these have to be replaced every three years, however.
Polyvinyl Fluoride
Another film plastic glazing material similar to polyethylene is polyvinyl
fluoride. It can be used on the same frames as polyethylene. Polyvinyl fluorideis much more expensive than polyethylene. But it lasts up to 10 years becauseit is resistant to UV radiation. Polyvinyl fluoride has excellent light trans-mission, close to that of glass.
Table 2.1 on the next page summarizes the major greenhouse glazings we
have discussed and lists some of their properties.
GREENHOUSE FRAMING MATERIALS
Greenhouses are built to provide as much light as possible to the crops.Ideally, there is minimal casting of shadows from the frame to the crop below.
There are basically two types of framing materials used in the greenhouseindustry; wood and metal. Many of t le older greenhouses are constructed with
wooden frames, while most new grc enhouses have metal frames. Both kinds
have their advantages and disadvmtages.

40
Table 2.1 Characteristics of different greenhouse glazings
Glazing RelativeCost
ApproximateLongevity
Averageqv Light
T ransmission
Durability Heat RetentionAbility
Glass moderate 25+ years 90 excellent low
Double high 20+ years 83 excellent highAciy lic
Double high 7-12 years 80 good highPo lycarbonate
FRP moderate 10-15 years 88 good medium(dropping rapidlyafter 3-5 years)
Double-layer low 2-3 years 84 poor highPolyethylene
Double-layerPolyvinyl
low/moderate
10 years 89 fair high
Fluoride Film
Wooden Frames
Wooden frames are less expensive than metal frames and are readilyavailable. However, in time, wood will decay. It is also susceptible to attackfrom termites and carpenter ants. Precautions must be taken, therefore, toimprove the longevity of the wood. Cedar or redwood should be used toconstruct wooden frames, as these woods are resistant to decay and insects.
To help preserve the wood and increase light intensity, the wood shouldbe coated with a white greenhouse paint. Painting, of course, requires labor.It is a task that must be repeated periodically, since paint eventually will breakdown. Caution: Never use mercury-based paints! These paints are toxic toplants. They will ruin a greenhouse crop.
Some growers also treat the wood with an approved preservative beforeconstruction. This treatment adds more years to the life of the frame. How-ever, avoid using ,:reosote and pentachlorophenol because of their toxicity toplants. Sites on which wooden greenhouses will be built should be inspectedfor termites and carpenter ants. Extermination treatment should be done ifnecessary. All wood scraps and other potential sources of food for these pestssib.,ald be promptly removed from the location.
Wooden frames are the most suitable for lightweight glazings such aspolyethylene and other plastics. Heavy glazings such as glass require moresash bars spaced closer together to hold the glass panes adequately. The resultis more shadows cast on the crop below.
Metal Frames
With advances in metal technology, metal greenhouse frames have become
more attractive. Prices have decreased and metal strength has increased. Earlymetal frames were mainly iron - strong and relatively inexpensive. But ironrusts easily. Iron frames required considerable maintenance because theyneeded frequent coats of white paint to prevent rust.
Aluminum frames, though the most expensive kind, offer several advan-
tages over other frames. Aluminum is both lightweight and very strong. Sashbars and other framing components can be further apart, letting more lightinto the growing area. Furthermore, aluminum is rust resistant and requireslittle maintenance. Growers who paint the frames white do so to maximizelight intensity inside the structure.
THE HEADHOUSE
All greenhouse locations should have a headhouse or service building.Large operations may have two or more headhouses. When you plan a green-house layout, use this rule of thumb. Make the headhouse equivalent in size
to at least 10 percent of the total greenhouse growing area. For example, acertain greenhouse contains 40,000 square feet of growing area. Its headhouse,then, should contain at least 4,000 square feet. This may seem like too much
space for a service building, but many important functions are carried out in
the headhouse.
Headhouses are used for planting crops, mixng soil, cold storage, housingboilers, and loading docks for shipping plants. Administrative offices are
located here, too.
Figures 2.23 and 2.24 show two headhouses of a large, modem greenhouse
grower. One headhouse contains the administrative offices for the managersand growers along with the support staff (Figure 2.23). The other hadhousehas many different areas: a shipping area with loading docks, a planting area,cold storage for finished crops, and a worker break room (Figure 2.24).
Figure 2.23Headhouse of a modern growerhousing administrative offices
41

42
Figure 2.24Large headhouse with loading docks
A) Outside view
B) Inside, the area is used for plantshipments, planting, mixing soil,and cold storage of finished crops.
-
Headhouses should be constructed with efficient and easy access. Forexample, a headhouse could be located in the center of a greenhouse range.This would be especially helpful for large greenhouse ranges (Figure 2.25).For a small greenhouse range or a single greenhouse, the headhouse shouldbe located on the north side/end of the greenhouse. The building will serveas a windbreak from the prevailing north-northwest winter winds, helpingreduce heat loss from the greenhouse (Figure 2.26).
Figure 2.25
For a large greenhouse operation, theheadhouse should be centrally located foreasy access from all greenhouses.
greenhouseranges eadhouse

43
1,1,./....M......ea agse
Figure 2.26For a single greenhouse or small greenhouserange, locate the headhouse on the north end.
In conclusion:
In Chapter 2 you discovered what factors are important to consider when
:.?lecting the location for a greenhouse. The two types of glazing used onbreenhouses are glass and plastic (of various kinds). Greenhouse frames areconstructed out of wood or metal (more commonly metal today). The typeof glazing and framing used depends on what crops are to be grown, the lighttransmission requirements, and economics. The headhouse of a greenhouseoperation serves many important functions, including shipping and receiving,
a potting room, storage, and administrative offices.
44
This review is to help you check yourself on what you have learned about greenhousestructures. If you need to refresh your mind on any of the following questions, refer to thepage number given in parentheses.
I. Define "greenhouse." (page 26)
2. What factors should be considered in selecting a suitable greenhouse location?(pages 26-29)
3. Contrast the characteristics of an American style greenhouse with those of a Dutch stylegreenhouse. (page 30)
4. What is a greenhouse range? (page 30)
5. What are the three parts of an even-span greenhouse tniss? What is the function of a truss?(page 32)
6. Sketch and label the major parts of an even-span greenhouse. (page 32)
7. Sketch and label the major parts of a quonset greenhouse frame. (pages 36-37)
8. What is the function of a sash bar cap? (page 34)
9. What is the main advantage of using rigid plastic glazing (considering its expense)?(pages 34-35)
10. Why must polyethylene be replaced every two or three years? (page 39)
11. What are two precautions that must be taken when using wooden greenhouse frames?(page 40)
12. List four activities that take place in a headhouse. (page 41)
CHAPTER 3
CONTROLLING THE GREENHOUSE ENVIRONMENT
Competencies for Chapter 3
As a result of studying this chapter, you should be able to do the following:
J. Describe three forms of heat loss from a greenhouse.2. Describe methods of controlling heat levels in a greenhouse.3. Identify the common heating fuel sources.4. List the major greenhouse heating systems and the advantages and
disadvantages of each.5. Describe heat cnnservation techniques for greenhouses.6. Describe the major cooling equipment used in greenhouses.7. Place and set a thermostat.8. Describe the importance and functions of carbon dioxide generators.
Related Science Concepts
1. Illustrate radiation, conduction and air leakage.2. Describe photosynthesis and its importance to plants.3. Explain factors that affect heat flow rate.
Related Math Concepts
1. Apply measuring skills to determine temperature and humidity.2. Apply basic operations to whole numbers, decimals, and fractions.
3. Apply basic operations to ratios and percents.4. Read, interprzt, and construct charts, graphs, and tables.5. Contrast Btu rating with cost of the major fuels.
Terms to Know
biothermBtucellul_combustioncondensationconductionecosystemevaporative coolingexcelsiorheat exchanger
45
infraredlouverspasteurization (soil)photosynthesisradiationstomatathermostatventilatorviscosity

46
HEATING PRINCIPLES
Introduction
Heating greenhouses in cold climates is a major expense for the green-house grower, second only to the cost of labor. Many heating systems areavailable for heating greenhouses. Choosing the right system for a particulargreenhouse depends on a number of variables:
climate* expense of the equipment* size of the greenhouse* cost and availability of heating fuels
Once the heating system is functioning, the greenhouse grower must payattention to two important items:
1) distributing heat in the greenhouse, and2) conserving heat.
These concerns will be discussed later in this chapter.
Solar Energy
The primary heat source of any greenhouse is the sun. Solar energyentering the greenhouse is converted into heat and trapped inside by theglazing. In southern states, little if any additional heat is required. In Ohioand other northern states, however, a significant portion of the year is cold.After sunset, the solar warmth accumulated in the greenhouse during the daydissipates, leaving the plants too cool at night. Cloudy weather also reducesthe amount of solar energy the greenhouse collects during the day and makesartificial heating necessary.
Rate of Heat Addition
When heating a greenhouse, the objective is to add heat at the same rateat which it is lost. Greenhouse air temperature should be maintained withno variation. If heat is added at a higher rate than it is lost, the air temperaturein the structure will rise. In some cases, this is the desired goal, for examplewhen raising night temperature to day temperature in the morning. However,usually the grower wants to avoid adding more heat than is needed, for theresult would be needlessly high fuel bills.
Measure of Heat
The unit of heat measurement used in the greenhouse industry is theBritish thermal unit or Btu. One Btu is the amount of heat required to raise1 pound of water one degree Fahrenheit. For example, to heat 10 pounds ofwater one degree Fahrenheit would require 10 Btu's. Heating equipment isclassified by the number of 13tu's produced. The heating requirement of agreenhouse is stated in terms of Btu's needed per hour of heat to be supplied.
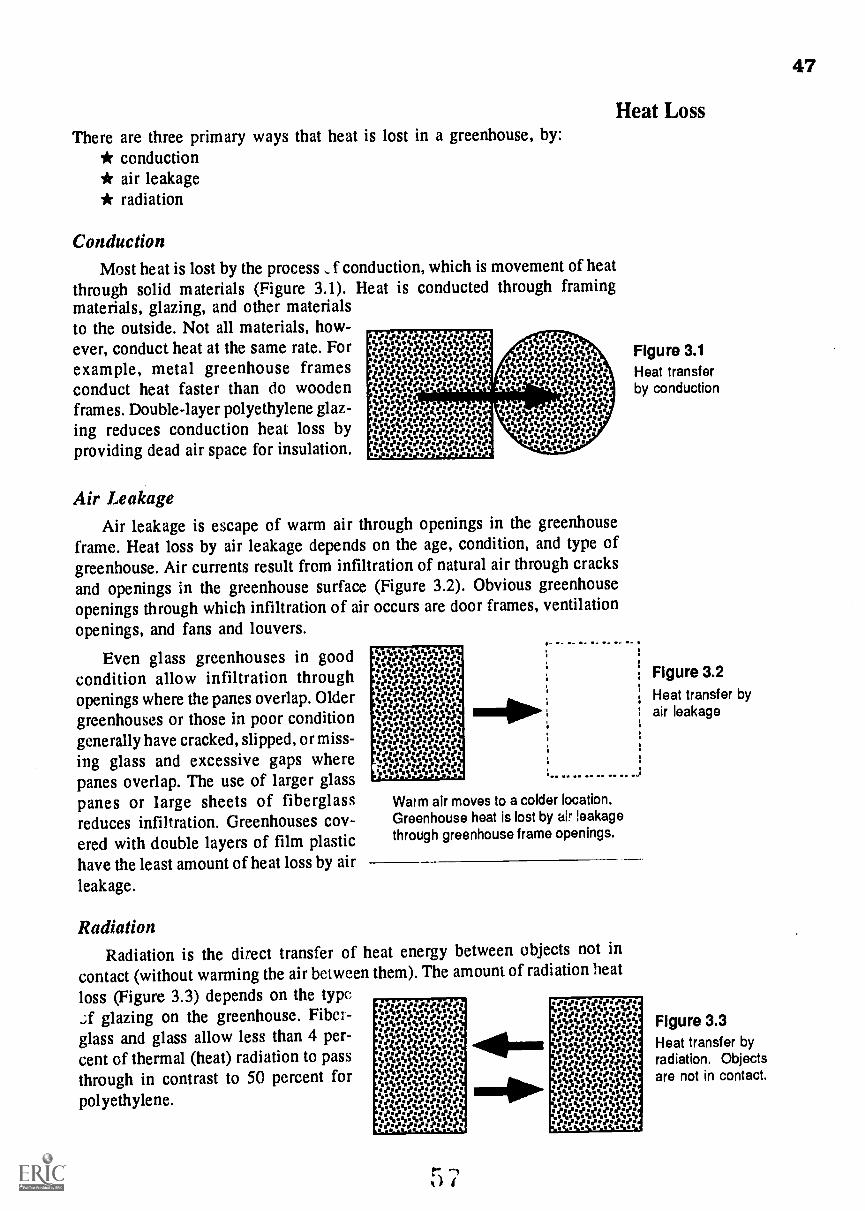
There are three primary ways that heat is lost in a greenhouse, by:* conduction* air leakage* radiation
ConductionMost heat is lost by the process .f conduction, which is movement of heat
through solid materials (Figure 3.1). Heat is conducted through framingmaterials, glazing, and other materialsto the outside. Not all materials, how-ever, conduct heat at the same rate. Forexample, metal greenhouse framesconduct heat faster than do woodenframes. Double-layer polyethylene glaz-ing reduces conduction heat loss byproviding dead air space for insulation.
Air LeakageAir leakage is escape of warm air through openings in the greenhouse
frame. Heat loss by air leakage depends on the age, condition, and type ofgreenhouse. Air currents result from infiltration of natural air through cracksand openings in the greenhouse surface (Figure 3.2). Obvious greenhouseopenings through which infiltration of air occurs are door frames, ventilationopenings, and fans and louvers.
Even glass greenhouses in goodcondition allow infiltration throughopenings where the panes overlap. Oldergreenhouses or those in poor conditiongenerally have cracked, slipped, or miss-ing glass and excessive gaps wherepanes overlap. The use of larger glasspanes or large sheets of fiberglassreduces infiltration. Greenhouses cov-ered with double layers of film plastichave the least amount of heat loss by airleakage.
1
a."0.V.7011AVAtiNti. 0.0.0.0.0.0.". 0.0.0.0.0.0.0.
. 0.0.0.0.0.0.0.110%01.01.01.010%.%. 080.0.0.0.0.0.goas....10%01010%.0.0.0.0.0.0.0.1.01.01.0101.01.00%. 0.0.0.0.0.0.0.10.0.0101.0601006.%. 0.0.0.080.0.0.as.a.0.01.006001.0%. 0.0.0.0.0.0.0.101.01.010%01.010%. 0.0.0.0.0.0.0.
1.0.0.0.0.0.0.0.'0%0401.0.01.0.0%
100.
Heat Loss
Watm air moves to a colder location.Greenhouse heat is lost by air ieakagethrough greenhouse frame openings.
Figure 3.1Heat transferby conduction
; Figure 3.2Heat transfer byair leakage
RadiationRadiation is the direct transfer of heat energy between objects not in
contact (without warming the air between them). The amount of radiation heat
loss (Figure 3.3) depends on the type_A' glazing on the greenhouse. Fiber-glass and glass allow less than 4 per-cent of thermal (heat) radiation to passthrough in contrast to 50 percent forpolyethylene.
414141471414.0.
gaara71:11110;a:Seas.s.0.0000ese.. 0014.80.0.e.e.logi."0,0e0.0.0.. 0.0.0.0.0.0.0.210.0.10001.0.11006. 0.0.0.06N-0.0.1.0.01.0.00%%. 0.0.0.0.0.0.0.Is0.06,000000001%. 0.0.0.0.0.e."assass50.0.005.5. 0.0.0.0.0.0.0.1.0.".0.0.0105.1%ses0.0.0.0.0.0.000%00600600%. 0.0.0.0.0.0.08asses".0.0050.0.t*esZetaistalk
Figure 3.3Heat transfer byradiation. Objectsare not in contact.
47

48
Figure 3.4 depicts how heat is gained and lost by a greenhouse. Other heatloss factors are also important. The size of a greenhouse is significant. Smallgreenhouses have more surface area relative to the volume enclosed. So, theylose more heat per square foot and are more difficult (and more expensiveper square foot) to heat than are larger houses. More heat is lost by conductionfrom corrugated fiberglass than from flat fiberglass because the corrugatedfiberglass has a larger surface area.
Figure 3.4 Types of heat exchange between the greenhouse and surroundings
conductionheat lossor gain
heat loss through ventilation
solar heat input
thermal radiationto sky
or gain to soil
Adapted from Conserving Energy in Ohio Grdenhouses, Cooperative Extension Service Buiiefn,The Ohio State University
HEATING FUELS
The three most commonly used heating fuels in the greenhouse industrytoday are natural gas, fuel oil, and coal.
DISADVANTAGE
Coal
Coal is the least expensive fuel, but also the least well adapted for green-house use. Coal is not easily stored. It has to be stockpiled at the site, takingup valuable land that could be used for greenhouse space. Then coal requiresa great deal of labor for handling.
Coal is also a "dirty" fuel. It is very dusty to work with. Most important,coal significantly pollutes the air when burning. Coal must be burned inaccordance with EPA regulations. When burned, it produces considerableamounts of ash that must be disposed of properly. Coal is sometimes usedas a back-up fuel wher there is a shortage of the primary fuel.
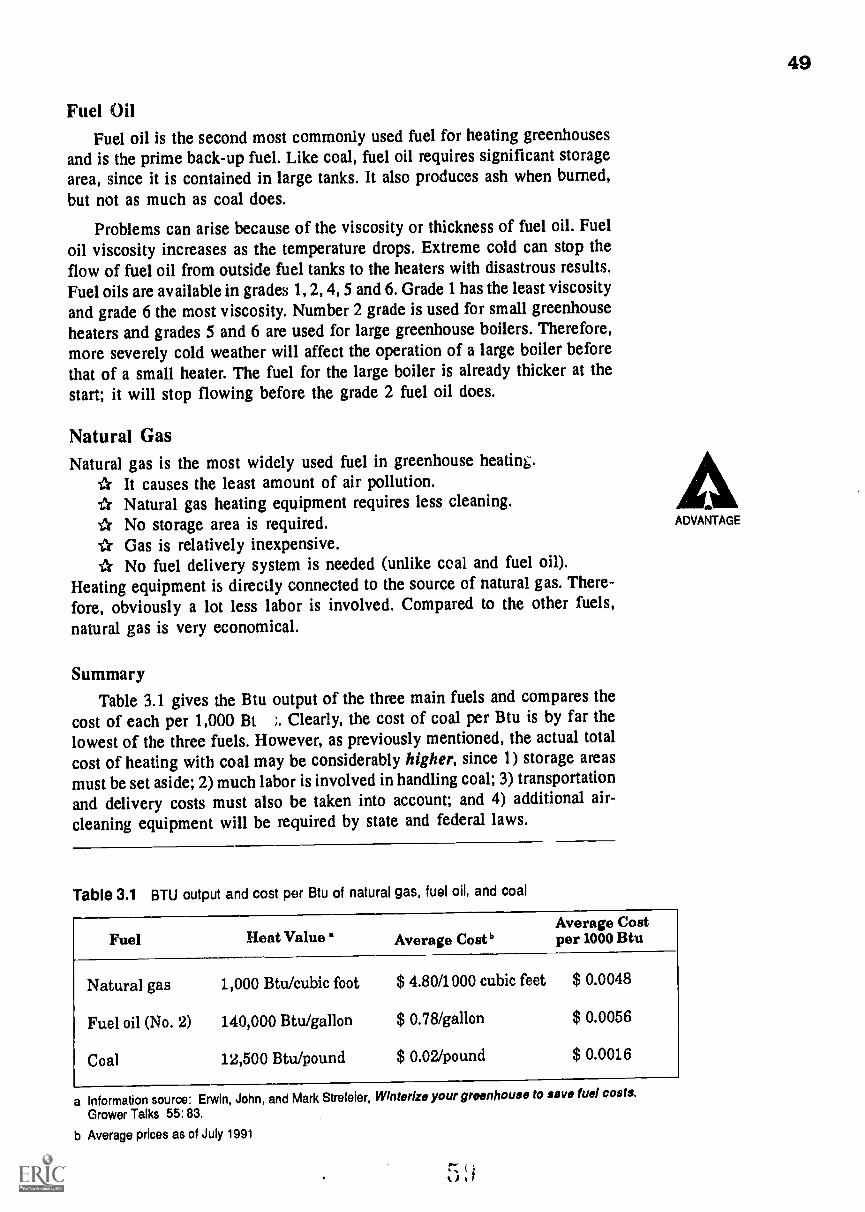
Fuel OilFuel oil is the second most commonly used fuel for heating greenhouses
and is the prime back-up fuel. Like coal, fuel oil requires significant storagearea, since it is contained in large tanks. It also produces ash when burned,but not as much as coal does.
Problems can arise because of the viscosity or thickness of fuel oil. Fueloil viscosity increases as the temperature drops. Extreme cold can stop theflow of fuel oil from outside fuel tanks to the heaters with disastrous results.Fuel oils are available in grades 1, 2, 4, 5 and 6. Grade 1 has the least viscosityand grade 6 the most viscosity. Number 2 grade is used for small greenhouseheaters and grades 5 and 6 are used for large greenhouse boilers. Therefore,more severely cold weather will affect the operation of a large boiler beforethat of a small heater. The fuel for the large boiler is already thicker at thestart; it will stop flowing before the grade 2 fuel oil does.
Natural GasNatural gas is the most widely used fuel in greenhouse heating.
* It causes the least amount of air pollution..0t. Natural gas heating equipment requires less cleaning.* No storage area is required.* Gas is relatively inexpensive.* No fuel delivery system is needed (unlike coal and fuel oil).
Heating equipment is directly connected to the source of natural gas. There-fore, obviously a lot less labor is involved. Compared to the other fuels,natural gas is very economical.
SummaryTable 3.1 gives the Btu output of the three main fuels and compares the
cost of each per 1,000 Bt ;. Clearly, the cost of coal per Btu is by far thelowest of the three fuels. However, as previously mentioned, the actual totalcost of heating with coal may be considerably higher, since 1) storage areasmust be set aside; 2) much labor is involved in handling coal; 3) transportationand delivery costs must also be taken into account; and 4) additional air-cleaning equipment will be required by state and federal laws.
Table 3.1 BTU output and cost per Btu of natural gas, fuel oil, and coal
Fuel Heat Value Average Cost'Average Costper 1000 Btu
Natural gas 1,000 Btu/cubic foot $ 4.80/1000 cubic feet $ 0.0048
Fuel oil (No. 2) 140,000 Btu/gallon $ 0.78/gallon $ 0.0056
Coal 12,500 Btu/pound $ 0.02/pound $ 0.0016
a Information source: Erwin, John, and Mark Strefeier, Winterize your greenhouse to save fuel costs.
Grower Talks 55: 83.
b Average prices as of July 1991
ADVANTAGE
49

50
Fuel oil is slightly more expensive per Btu than is natural gas, but, likecoal, oil costs are increased because of the required storage tanks, delivery,and more maintenance of heating equipment. Natural gas is the best buybecause it bums clean (and thus, cleaning heaters is not so time-consuming).Also, natural gas requires virtually no handling.
Fuel and the Environment
Whatever fuel is chosen for heating a greenhouse, the effects of its com-bustion on the environment must be taken into consideration. Coal should behard and as free of sulfur as possible to reduce air pollution. If high sulfurlevels are present, scrubbers will have to be installed in the stack to reducepollutants. Fuel oil and natural gas should be free of contaminants and of highenough quality to ensure efficient combustion (conversion to mostly heat)with minimal pollution. Heaters should be cleaned on a regular basis to ensureefficient combustion.
The location of the stack in relation to the greenhouse is an importantfactor, often overlooked. If the stack is located on the same side of thegreenhouse as the prevailing winter wind, the exhaust is likely to infiltratethe structure. This polluted air can cause many problems including distortedfoliage and flower growth, shattering of flowers (petals falling prematurely),and in some cases even worker discomfort. Therefore, the stack should belocated on the opposite side of the greenhouse from the prevailing wind, sothe exhaust fumes will be carried away from the greenhouse, not over it.
HEATING SYSTEMS
ADVANTAGE
There are several ways to supply heat to a greenhouse.* steam* hot water* infrared* solar
Generally, steam heating is the most commonly used system in largegreenhouse ranges. Hot water heating is most often used in smaller green-house ranges and single greenhouses. Infrared heating is used infrequently insmall greenhouse ranges and in single greenhouses. Solar heating is stilllargely experimental and can be considered only in areas of the country thatexperience mostly sunny winter weather. Each of these systems has its ad-vantages and disadvantages.
Steam
The use of steam heat in greenhouses is an advantage in many ways.
1. Steam heat take: .taller mains and heating lines because of the highertemperature of steam.
2. Steam heating lines can be heated or cooled more rapidly.3. Steam can be transprted very efficiently over long distances.4. Steam used for heating is also available for pasteurization.
However, there are some disadvantages to using steam heat.
1. The temperature can not be adjusted. Typically, steam comes at tempera-tures of 212° to 215° degrees Fahrenheit, leaving no flexibility in "fine-tuning" desired temperatures. DISADVANTAGE
2. Steam lines do not hold heat very long. They can not serve as a reservoirof heat in the event of boiler failure as hot water lines do.
3. A steam system must have steam traps installed with return lines. Thecondensed steam (water) is then reheated and circulated again as steam.
Hot Water
Hot water heating has a number of distinct advantages.
1. The water temperature can be adjusted as needed.2. The temperature of the heating lines is more uniform.3. No traps are needed.4. Less water treatment is required, as no extra water is added.
However, the disadvantages are:
1. The expense of hot water heating is higher than for steam heating becausehot water requires more extensive piping and larger diameter lines thansteam does.
2. Hot water does not produce as many Btu's as steam does, so more piping
is required to heat a greenhouse.3. Response time for changing heat levels in the greenhouse is slower than
with steam because of the lower temperature of hot water.4. Hot water can not be used for pasteurization. If steam pasteurization is
needed in a greenhouse heated by hot water, a separate steam source such
as a portable steam generator must be purchased.
InfraredThe advantages of infrared heaters are:
1. Infrared heaters are a clean and very efficient (90 percent) source of heat.
2. The infrared heater heats the plants, soil and benches directly withoutheating the air. The heat given off by these objects in turn warms the air.(The heating principle is the same as the sun heating the earth.)
3. Thus, air temperatures can be several degrees lower than in conventionally
heated greenhouses.4. Problems of condensation on plants are reduced.
5. Heat loss and heating cost are both reduced. Growers have found a 30-50
percent reduction in fuel bills.
The disadvantages of infrared heating are as follows.
1. In large greenhouse ranges, uneven heating is a common occurrence withinfrared heating. Placement of the infrared heater must be directly over the
plants to be warmed. Since the air is not heated to the extent of conven-tional steam and hot water heating, any plants that are not directly underthe heaters may get too cold and decline in quality.
ADVANTAGE
DISADVANTAGE
51

52
2. A great deal of overhead equipment is needed. Sometimes the reflectorsreduce the amount of natural light reaching the crop.
3. As the crop grows larger, the canopy of vegetation may completely blockinfrared energy from reaching the soil. The result can be very cold soilswhich inhibit seed and plant growth; also, growth of root rot organismsis more likely.
Solar
Solar heating has its advantages:
1. Energy from the sun is theoretically at least an unlimited resource. Solarheating uses solar collectors to store the sun's energy by day and releaseit at night to heat the greenhouse.
2. Once established, solar heating actually lowers heating costs.3. This non-polluting fuel decreases our dependency on fossil fuels.
However, using solar energy for heating purposes presents problems, as itis not very efficient at this time. The main disadvantages are:
1. Solar heating is very dependent upon and influenced by the weather.Periods of cloudy weather greatly diminish the usefulness of solar heaters.They are simply not practical in areas of the country where clouds arecommon.
2. Solar collectors take up considerable space and can be quite expensive.Research has shown that it takes a collector surface area of one half toone square foot to heat one square foot of greenhouse floor area.
3. With the use of solar heat, a back-up heating system is essential to takeover during cloudy weather and severe cold.
Summary - Table 3.2 compares the advantages of each of these four systemsof greenhouse heating.
Thermostats
Types
Heating systems in the vast majority of greenhouses today are automati-cally controlled. Very few manual systems still exist, requiring monitoring ofgreenhouse heat levels by greenhouse personnel and manual operation ofheating valves in response to changes in greenhouse temperatures. AutomLticcontrol of heating systems is accomplished by a thermostat, a device thatoperates electric or pneumatic valves. Many thermostats measure greenhousetemperature by means of a strip made of two types of metal that expand andcontract at different rates. Other thermostats, like those used in computer-controlled heating systems, are solid state. They measure air temperatureelectronically.
Placement
Regardless of the type of thermostat in use, its placement in the green-house is of critical importance. For accurate measurement of the heat in agreenhouse, thermostats must be placed at or near crop level in a location
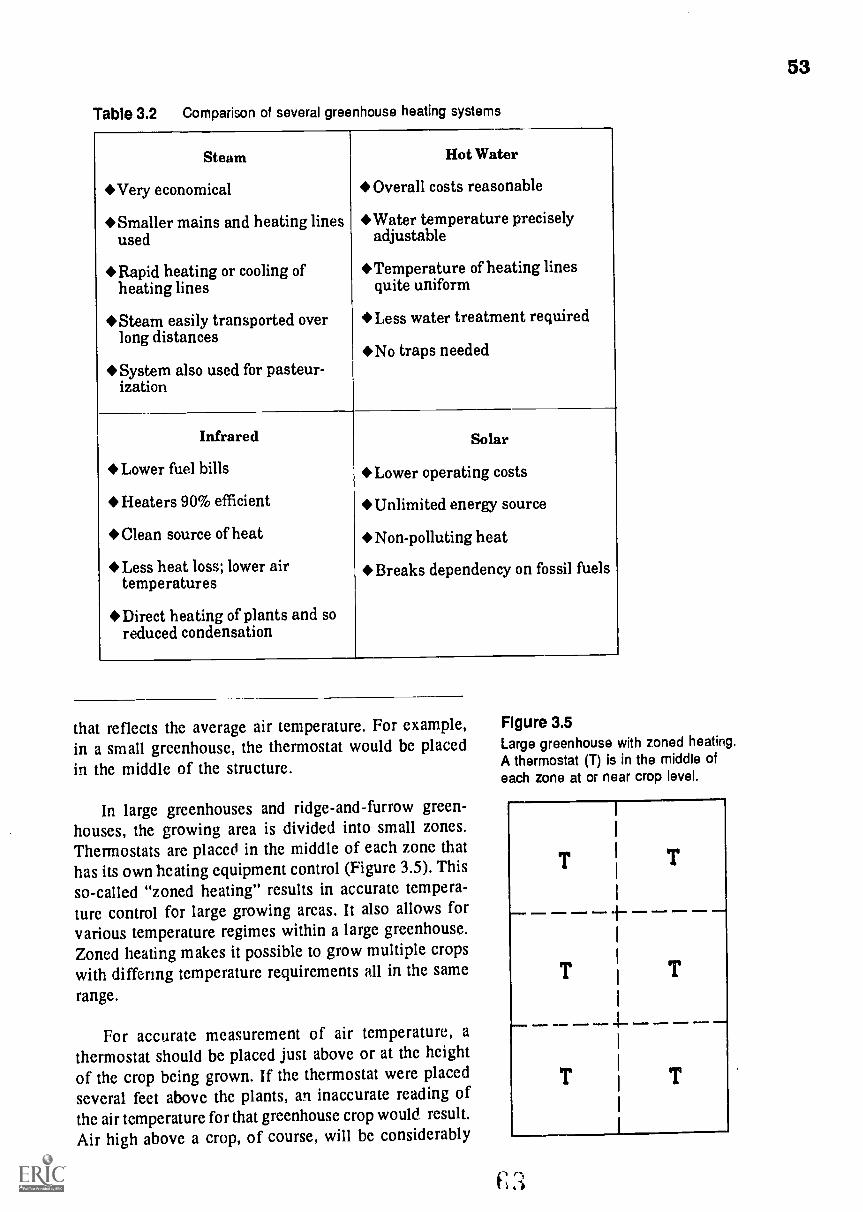
Table 3.2 Comparison of several greenhouse heating systems
Steam
Very economical
Smaller mains and heating linesused
Rapid heating or cooling ofheating lines
Steam easily transported overlong distances
System also used for pasteur-ization
Hot Water
Overall costs reasonable
Water temperature preciselyadjustable
Temperature of heating linesquite uniform
Less water treatment required
No traps needed
Infrared Solar
Lower fuel bills Lower operating costs
Heaters 90% efficient Unlimited energy source
Clean source of heat Non-polluting heat
Less heat loss; lower airtemperatures
Breaks dependency on fossil fuels
Direct heating of plants and soreduced condensation
that reflects the average air temperature. For example,in a small greenhouse, the thermostat would be placedin the middle of the structure.
In large greenhouses and ridge-and-furrow green-houses, the growing area is divided into small zones.Thermostats are placed in the middle of each zone that
has its own heating equipment control (Figure 3.5). Thisso-called "zoned heating" results in accurate tempera-ture control for large growing areas. It also allows forvarious temperature regimes within a large greenhouse.Zoned heating makes it possible to grow multiple cropswith differing temperature requirements all in the same
range.
For accurate measurement of air temperature, athermostat should be placed just above or at the heightof the crop being grown. If the thermostat were placed
several feet above the plants, an inaccurate reading ofthe air temperature for that greenhouse crop would result.Air high above a crop, of course, will be considerably
Figure 3.5Large greenhouse with zoned heating.A thermostat (T) is in the middle ofeach zone at or near crop level.
53
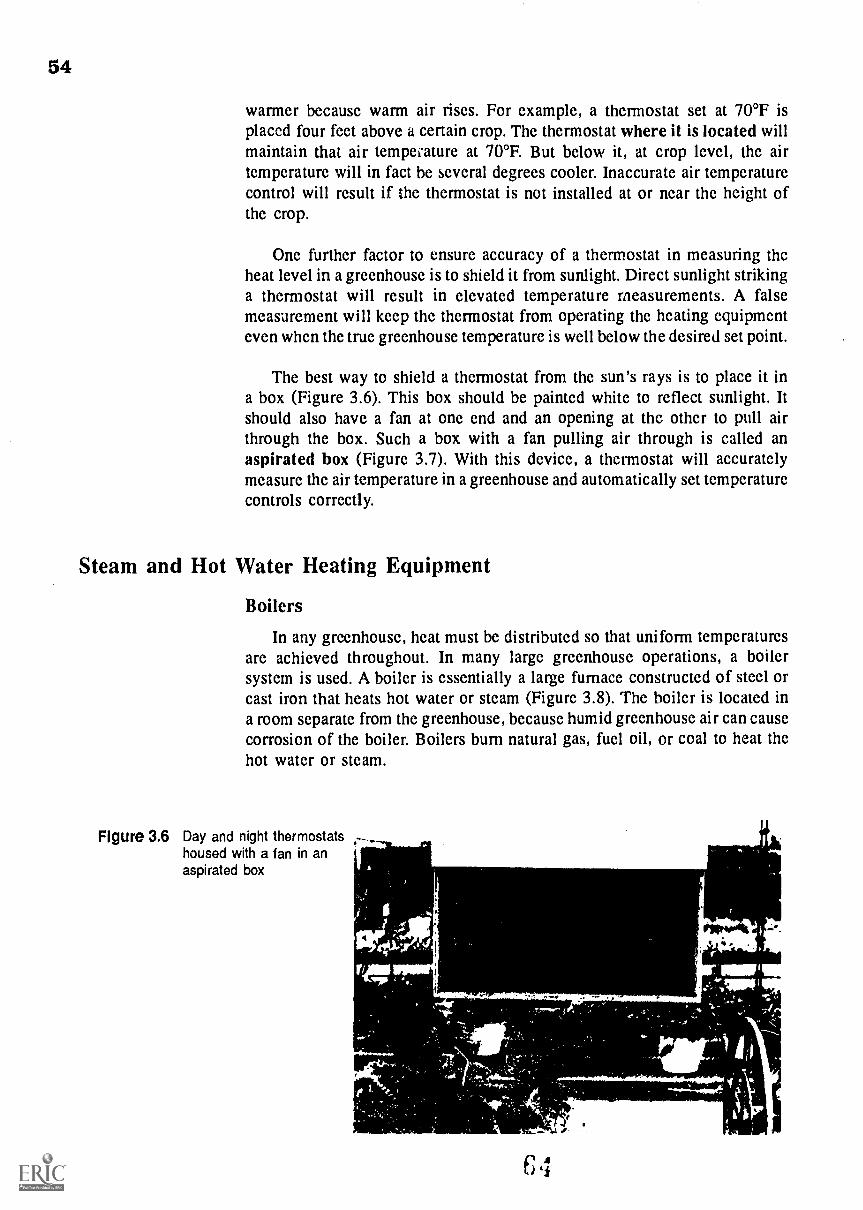
54
warmer because warm air rises. For example, a thermostat set at 70°F isplaced four feet above a certain crop. The thermostat where it is located willmaintain that air tempe;ature at 70°F. But below it, at crop level, the airtemperature will in fact be several degrees cooler. Inaccurate air temperaturecontrol will result if the thermostat is not installed at or near the height ofthe crop.
One further factor to ensure accuracy of a thermostat in measuring theheat level in a greenhouse is to shield it from sunlight. Direct sunlight strikinga thermostat will result in elevated temperature measurements. A falsemeasurement will keep the thermostat from operating the heating equipmenteven when the true greenhouse temperature is well below the desired set point.
The best way to shield a thermostat from the sun's rays is to place it ina box (Figure 3.6). This box should be painted white to reflect sunlight. Itshould also have a fan at one end and an opening at the other to pull airthrough the box. Such a box with a fan pulling air through is called anaspirated box (Figure 3.7). With this device, a thermostat will accuratelymeasure the air temperature in a greenhouse and automatically set temperaturecontrols correctly.
Steam and Hot Water Heating Equipment
Boilers
In any greenhouse, heat must be distributed so that uniform temperaturesare achieved throughout. In many large greenhouse operations, a boilersystem is used. A boiler is essentially a large furnace constructed of steel orcast iron that heats hot water or steam (Figure 3.8). The boiler is located ina room separate from the greenhouse, because humid greenhouse air can causecorrosion of the boiler. Boilers bum natural gas, fuel oil, or coal to heat thehot water or steam.
Figure 3.6 Day and night thermostatshoused with a fan in anaspirated box

55
Figure 3.7 The aspirated box suspended in the middle of the greenhouse
;./
1
Figure 3.8 Boiler system used to 'mat a large greenhouse range
The hot water or steam from the boiler is circulated in pipes placed in
the greenhouse and returned to the boiler for reheating. The pipes that dis-
tribute the hot water or steam heat may be mounted on the curtain wall (Figure
3.9A), under benches (Figure 3.9B), or above the crops (Figure 3.9C). The
perimeter pipes on curtain walls are often finned to increase the heat output
per linear foot of pipe (Figure 3.9A). Square metal fins in a series are attached
to the pipe to increase its surface area for heating.
Steam heating systems require installation of a steam trap in the heating
pipes. This device traps steam in the pipes, but allows condensed steam
(water) to flow out and return to the boiler to be reheated into steam.
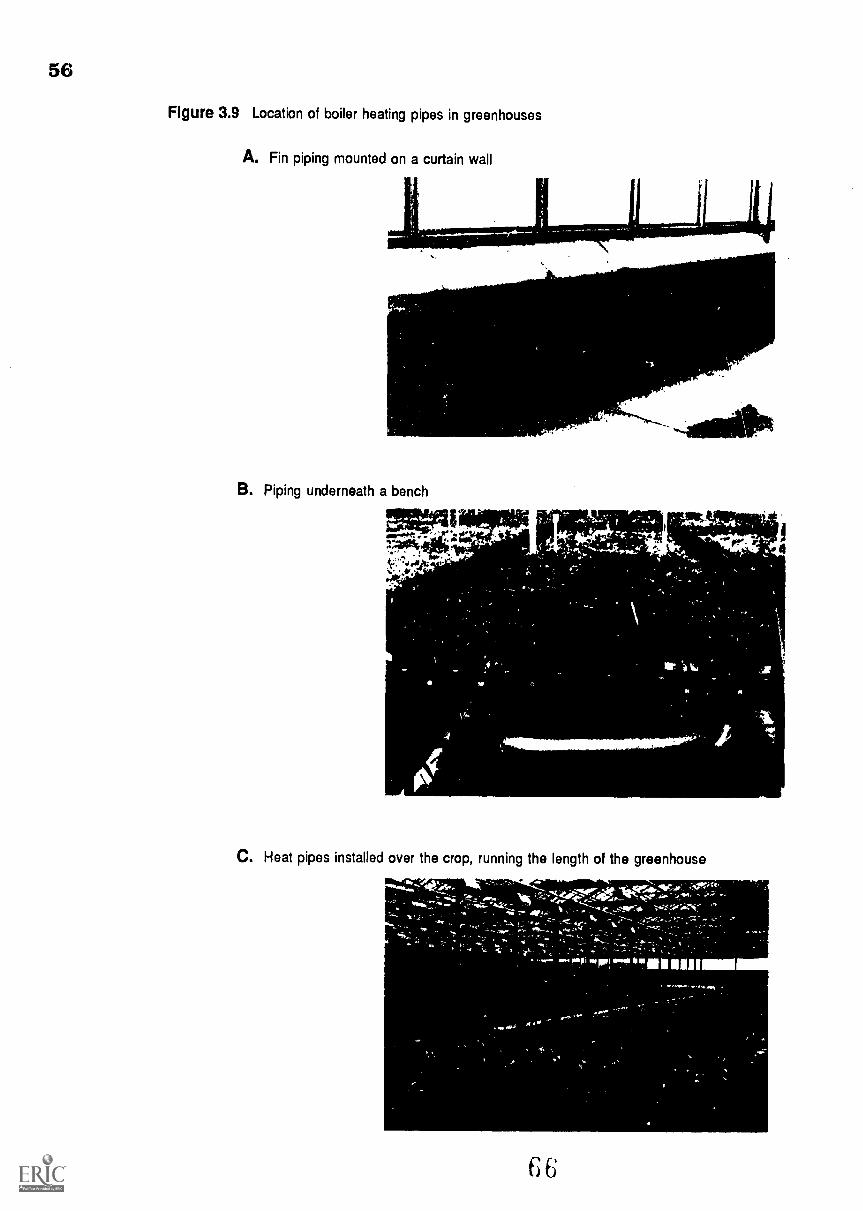
56
Figure 3.9 Location of boiler heating pipes in greenhouses
A. Fin piping mounted on a curtain wall
B. Piping underneath a bench
1*._
S.
C. Heat pipes installed over the crop, running the length of the greenhouse,=1....-

In order to keep boilers operating and burning fuel efficiently, regularmaintenance must be done. Every year (usually during the summer when
heating is not required), the boilers should be thoroughly cleaned and in-
spected by qualified personnel. Throughout the year on a daily basis, boilers
should also be checked for proper operation. Any irregularities should becorrected immediately. Following a routine maintenance schedule shouldresult in a safe, efficient boiler. It should also help keep fuel costs down.
Unit Heaters
Unit heaters fueled by gas or oil are commonly used in small greenhouses.
They are sometimes used in combination with perimeter hot water or steampiping from boilers. Unit heaters either operate by circulating hot water or
steam within, or by burning fuel to warm the air. Unlike boilers, unit heaters
are located in the greenhouse they heat. Boilers are usually located in the
headhouse some other location. The two basic types of unit heaters arehorizontal and vertical.
HorizontalHorizontal unit heaters are suspended from the
roof (Figure 3.10), usually in pairs. In each heateris a fan that blows the warm air out horizontally;hence its name. The warm air is directed into a fanjet which in turn blows the warm air into a poly-ethylene air distribution tube for distribution through-
out the greenhouse (Figure 3.11).
Figure 3.11Two horizontal steam unit heaters equipped with fan
jets blow air into polyethylene tubes for distribution
throughout the greenhouse.
Figure 3.10Front and back views of a gas-firedhorizontal unit
A 4
57
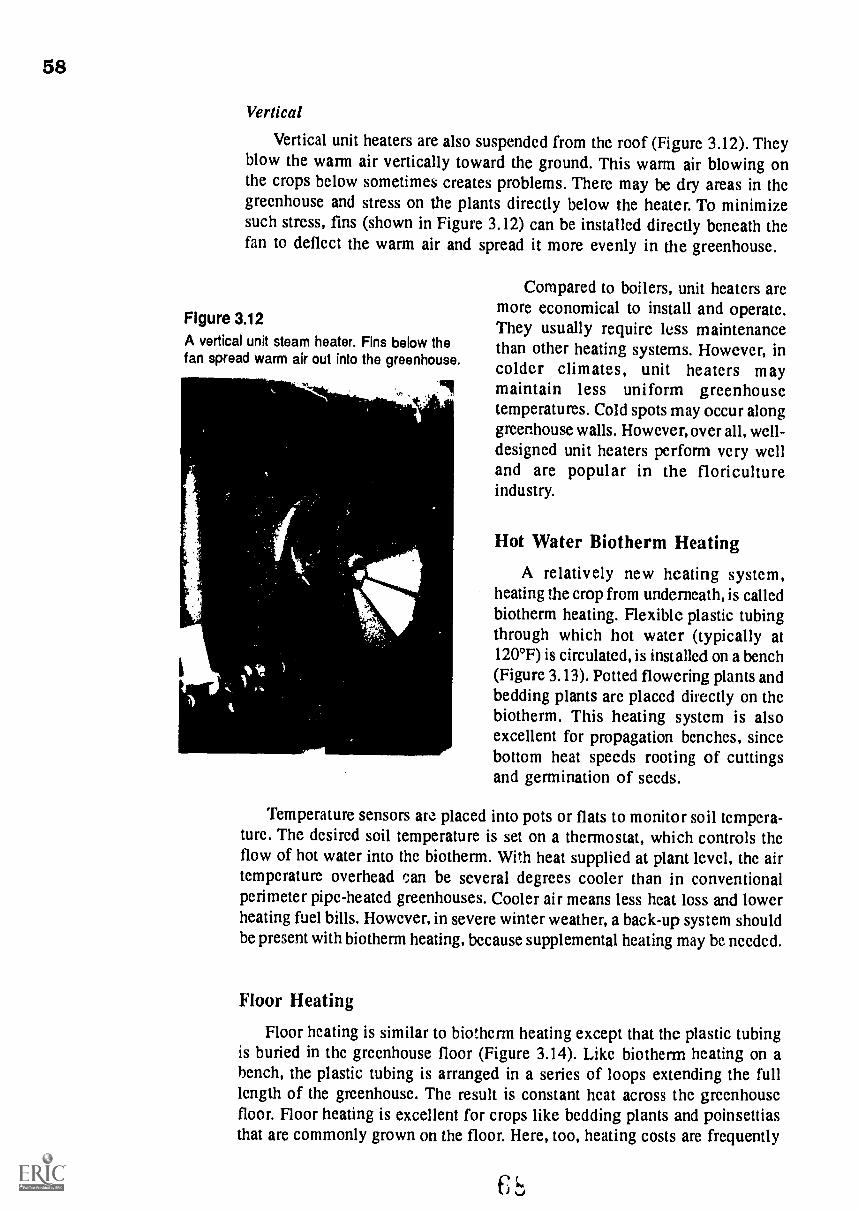
58
Vertical
Vertical unit heaters are also suspended from the roof (Figure 3.12). Theyblow the warm air vertically toward the ground. This warm air blowing onthe crops below sometimes creates problems. There may be dry areas in thegreenhouse and stress on the plants directly below the heater. To minimizesuch stress, fins (shown in Figure 3.12) can be installed directly beneath thefan to deflect the warm air and spread it more evenly in the greenhouse.
Compared to boilers, unit heaters arcmore economical to install and operate.
Figure 3.12 They usually require less maintenanceA vertical unit steam heater. Fins below the than other heating systems. However, infan spread warm air out into the greenhouse. colder climates, unit heaters may
maintain less uniform greenhousetemperatures. Cold spots may occur alonggreenhouse walls. However, over all, well-designed unit heaters perform very welland are popular in the floricultureindustry.
eo"
Hot Water Biotherm Heating
A relatively new heating system,heating the crop from underneath, is calledbiotherm heating. Flexible plastic tubingthrough which hot water (typically at120°F) is circulated, is installed on a bench(Figure 3.13). Potted flowering plants andbedding plants are placed directly on thebiotherm. This heating system is alsoexcellent for propagation benches, sincebottom heat speeds rooting of cuttingsand germination of seeds.
Temperature sensors are placed into pots or flats to monitor soil tempera-ture. The desired soil temperature is set on a thermostat, which controls theflow of hot water into the biotherm. With heat supplied at plant level, the airtemperature overhead can be several degrees cooler than in conventionalperimeter pipe-heated greenhouses. Cooler air means less heat loss and lowerheating fuel bills. However, in severe winter weather, a back-up system shouldbe present with biotherm heating, bccause supplemental heating may be needed.
Floor Heating
Floor heating is similar to biotherm heating except that the plastic tubingis buried in the greenhouse floor (Figure 3.14). Like biotherm heating on abench, the plastic tubing is arranged in a series of loops extending the fulllength of the greenhouse. The result is constant heat across the greenhousefloor. Floor heating is excellent for crops like bedding plants and poinsettiasthat are commonly grown on the floor. Here, too, heating costs are frequently
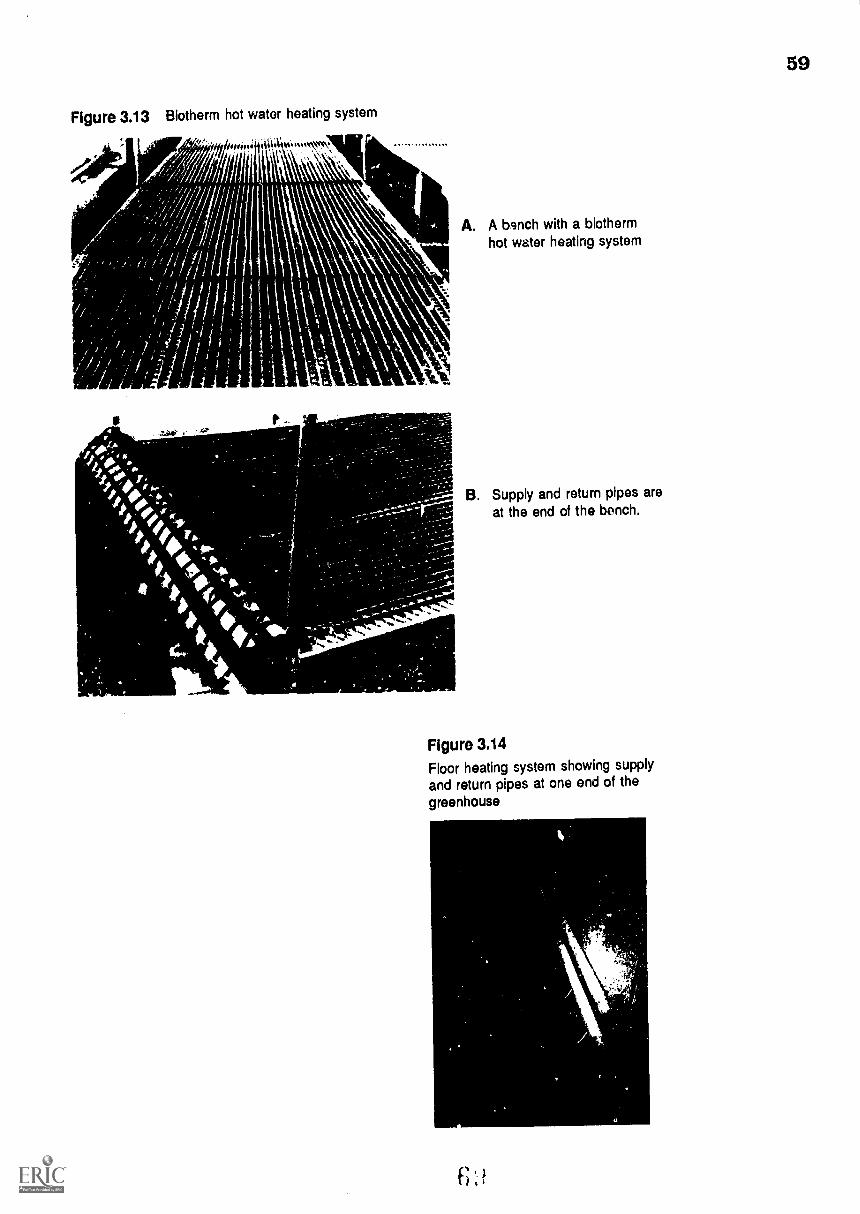
Figure 3.13 Biotherm hot water heating system
16,P
A. A banch with a biothermhot water heating system
B. Supply and return pipes areat the end of the bench.
Figure 3.14Floor heating system showing supplyand return pipes at one end of the
greenhouse
59
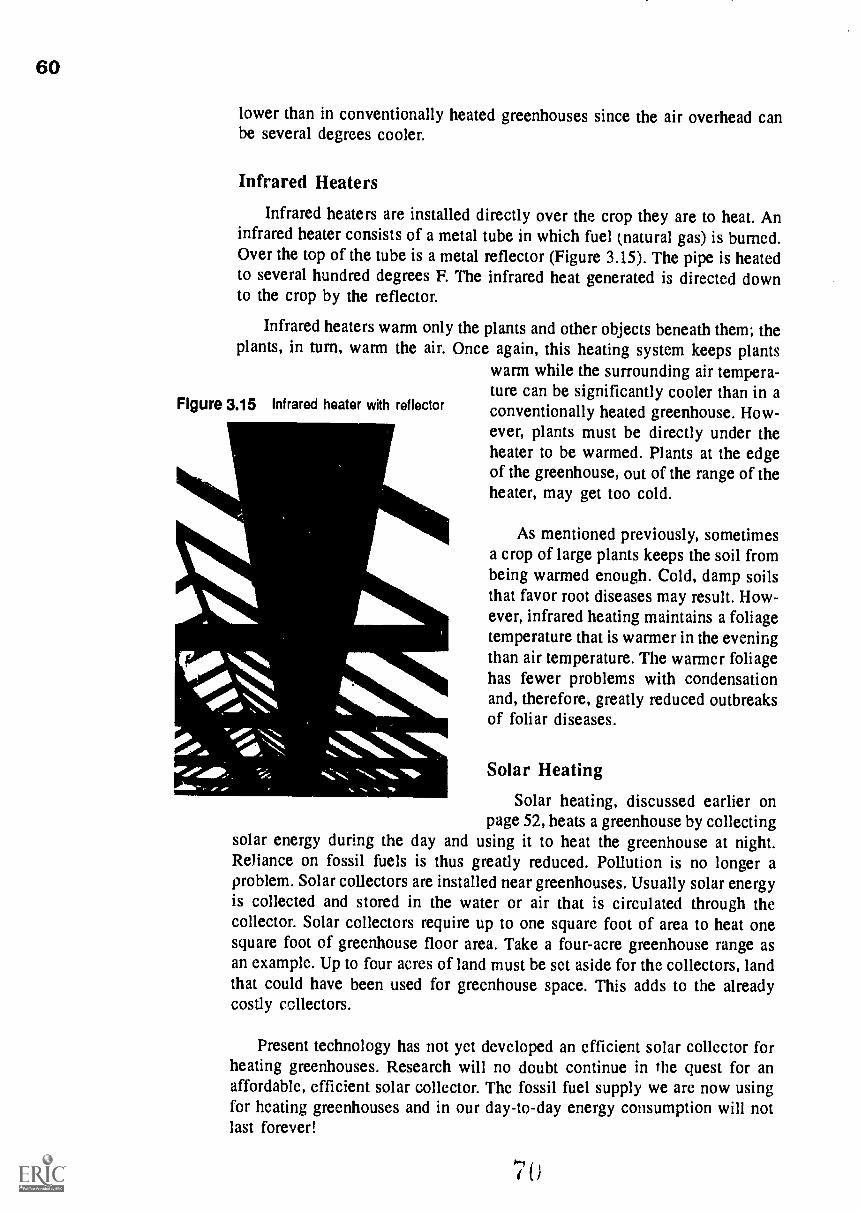
60
lower than in conventionally heated greenhouses since the air overhead canbe several degrees cooler.
Infrared Heaters
Infrared heaters are installed directly over the crop they are to heat. Aninfrared heater consists of a metal tube in which fuel (natural gas) is burned.Over the top of the tube is a metal reflector (Figure 3.15). The pipe is heatedto several hundred degrees F. The infrared heat generated is directed downto the crop by the reflector.
Infrared heaters warm only the plants and other objects beneath them; theplants, in turn, warm the air. Once again, this heating system keeps plants
warm while the surrounding air tempera-ture can be significantly cooler than in a
Figure 3.15 Infrared heater with reflector conventionally heated greenhouse. How-ever, plants must be directly under theheater to be warmed. Plants at the edgeof the greenhouse, out of the range of theheater, may get too cold.
As mentioned previously, sometimesa crop of large plants keeps the soil frombeing warmed enough. Cold, damp soilsIN that favor root diseases may result. How-ever, infrared heating maintains a foliagetemperature that is warmer in the eveningthan air temperature. The warmer foliagehas fewer problems with condensationand, therefore, greatly reduced outbreaksof foliar diseases.
Solar Heating
Solar heating, discussed earlier onpage 52, heats a greenhouse by collecting
solar energy during the day and using it to heat the greenhouse at night.Reliance on fossil fuels is thus greatly reduced. Pollution is no longer aproblem. Solar collectors are installed near greenhouses. Usually solar energyis collected and stored in the water or air that is circulated through thecollector. Solar collectors require up to one square foot of area to heat onesquare foot of greenhouse floor area. Take a four-acre greenhouse range asan example. Up to four acres of land must be set aside for the collectors, landthat could have been used for greenhouse space. This adds to the alreadycostly collectors.
Present technology has not yet developed an efficient solar collector forheating greenhouses. Research will no doubt continue in the quest for anaffordable, efficient solar collector. The fossil fuel supply we are now usingfor heating greenhouses and in our day-to-day energy consumption will notlast forever!
710

61
GREENHOUSE ENERGY CONSERVATION
With rising fuel prices and the inflation present in the world today, people
in the greenhouse industry are continually challenged to keep their productionpractices as efficient as possible and their prices to the floral consumer asstable as possible. A major way to save on production costs is to conserve
energy in the greenhouse by reducing heat loss. Reduction of heat loss mansthat less fuel is required to heat the greenhouse; lower heating bills result.Some conservation methods are very simple; others are more advanced. All
have the same goal of lowering fuel consumption.
Greenhouse LocationThe location of a greenhouse itself can save on heating costs. Locating
a greenhouse to the south of a hill or tree line will reduce the amount of heat
lost to a prevailing wind. Windbreaks can save 5 to 10 percent in fuel usage.
Interior Ceilings/Thermal ScreensThe majority of heat loss from a greenhouse occurs through the roof, given
its large surface area. Interior ceilings that close off the roof at eave heightgreatly reduce the area that has to be heated (Figure 3.16). An interior ceiling
can be made out of polyethylene, cloth, or thin metkiilic strips. Depending on
the material, an interior ceiling can also serve to reduce light intensity in the
greenhouse (which will be discussed later). Interior ceilings typically aredrawn at night and folded up by day. Such practices can reduce energyrequirements by as much as 30 percent.
Thermal screens are similar to interior ceilings except that black poly-ethylene or heavy cloth is drawn not only across the crop overimaj, but also
surrounding the crop. Thermal screens, therefore, reduced heat loss through
the roof and the side walls of the greenhouse. The total area that has to be
Figure 3.16 Interior ceiling at eave height
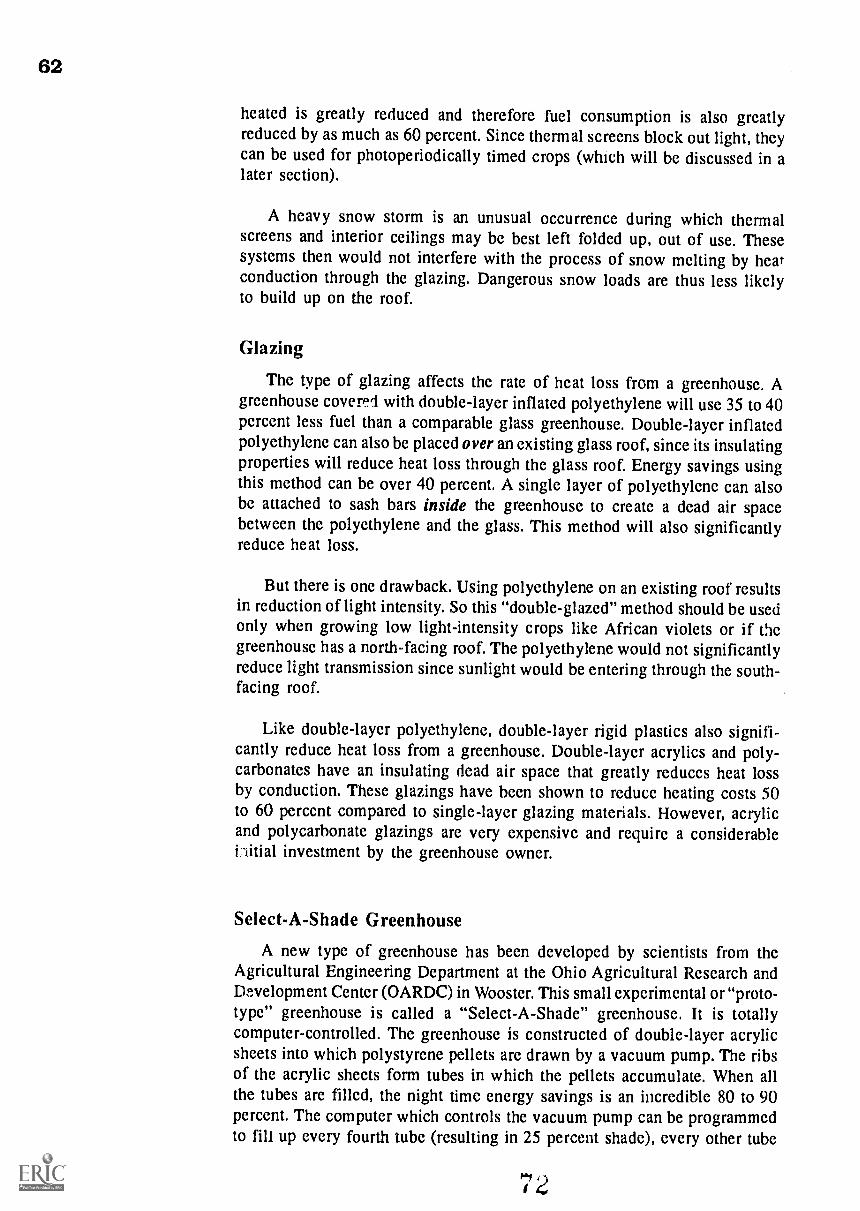
62
heated is greatly reduced and therefore fuel consumption is also greatlyreduced by as much as 60 percent. Since thermal screens block out light, theycan be used for photoperiodically timed crops (which will be discussed in alater section).
A heavy snow storm is an unusual occurrence during which thermalscreens and interior ceilings may be best left folded up, out of use. Thesesystems then would not interfere with the process of snow melting by heatconduction through the glazing. Dangerous snow loads are thus less likelyto build up on the roof.
Glazing
The type of glazing affects the rate of heat loss from a greenhouse. Agreenhouse covetri with double-layer inflated polyethylene will use 35 to 40percent less fuel than a comparable glass greenhouse. Double-layer inflatedpolyethylene can also be placed over an existing glass roof, since its insulatingproperties will reduce heat loss through the glass roof. Energy savings usingthis method can be over 40 percent. A single layer of polyethylene can alsobe attached to sash bars inside the greenhouse to create a dead air spacebetween the polyethylene and the glass. This method will also significantlyreduce heat loss.
But there is one drawback. Using polyethylene on an existing roof resultsin reduction of light intensity. So this "double-glazed" method should be usedonly when growing low light-intensity crops like African violets or if thegreenhouse has a north-facing roof. The polyethylene would not significantlyreduce light transmission since sunlight would be entering through the south-facing roof.
Like double-layer polyethylene, double-layer rigid plastics also signifi-cantly reduce heat loss from a greenhouse. Double-layer acrylics and poly-carbonates have an insulating dead air space that greatly reduces heat lossby conduction. These glazings have been shown to reduce heating costs 50to 60 percent compared to single-layer glazing materials. However, acrylicand polycarbonate glazings are very expensive and require a considerableiiitia1 investment by the greenhouse owner.
Select-A-Shade Greenhouse
A new type of greenhouse has been developed by scientists from thcAgricultural Engineering Department at the Ohio Agricultural Research andDFNelopment Center (OARDC) in Wooster. This small experimental or "proto-type" greenhouse is called a "Select-A-Shade" greenhouse. It is totallycomputer-controlled. The greenhouse is constructed of double-layer acrylicsheets into which polystyrene pellets are drawn by a vacuum pump. The ribsof the acrylic sheets form tubes in which the pellets accumulate. When allthe tubes are filled, the night time energy savings is an incredible 80 to 90percent. The computer which controls the vacuum pump can be programmedto fill up every fourth tube (resulting in 25 percent shade), every other tube
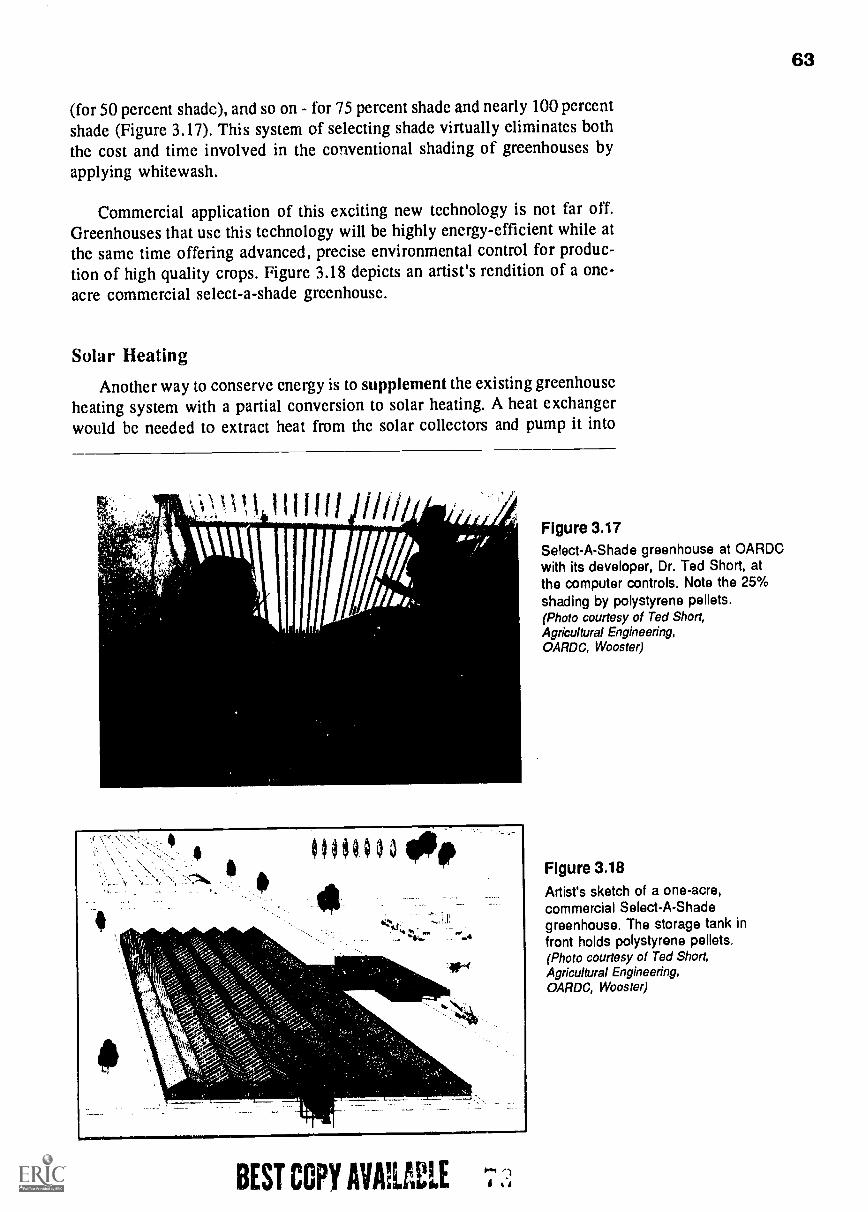
(for 50 percent shade), and so on - for 75 percent shade and nearly 100 percentshade (Figure 3.17). This system of selecting shade virtually eliminates boththe cost and time involved in the conventional shading of greenhouses by
applying whitewash.
Commercial application of this exciting new technology is not far off.
Greenhouses that use this technology will be highly energy-efficient while atthe same time offering advanced, precise environmental control for produc-tion of high quality crops. Figure 3.18 depicts an artist's rendition of a one-acre commercial select-a-shade greenhouse.
Solar HeatingAnother way to conserve energy is to supplement the existing greenhouse
heating system with a partial conversion to solar heating. A heat exchangerwould be needed to extract heat from the solar collectors and pump it into
14. . i1L 1
14
;"';'
BEST COPY MIME
Figure 3.17Select-A-Shade greenhouse at OARDCwith its developer, Dr. Ted Short, atthe computer controls. Note the 25%shading by polystyrene pellets.(Photo courtesy of Ted Short,Agricultural Engineering,OARD C, Wooster)
Figure 3.18Artist's sketch of a one-acre,commercial Select-A-Shadegreenhouse. The storage tank infront holds polystyrene pellets.(Photo courtesy of Ted Short,Agricultural Engineering,OARDC, Wooster)
63

64
the circulation lines. Such a system would not totally eliminate fuel consump-tion, but could significantly reduce it in areas of the country with enough sunin winter. Considerable space, however, and a large investment are requiredfor solar collectors. This system is therefore not feasible for many greenhouseproducers.
Waste Heat from Power Plants
Greenhouses that are located near nuclear power plants that use water forcooling purposes in the generation of electricity can use the waste water forheating. In nuclear power plants, water drawn from rivers or lakes is circu-lated through generating equipment to keep it cool. The resulting waste waterhas been heated by this process to well over 100°F.
This hot waste water, piped to nearby greenhouses, can be used for heatingpurposes instead of being returned as is to rivers and streams. Dumping ofhot waste water into waterways creates many problems for the aquatic life,raising the water temperature significantly and disrupting the whole eco-system. For the greenhouse manager, minimal heating of the waste water isnecessary, since it is already hot when received from the power plant. Heatingfuel bills thus are very low compared to those involved in heating cold waterfrom a well or a city water supply.
Greenhouse energy conservation measures should be practiced by allproducers of floriculture crops. Gone are the days of inexpensive fuels andunlimited fuel reserves. We know now that the world supply of fossil fuelswill not last forever. It is imperative for each person to do his/her part to usethis precious resource wisely while alternate methods of heating greenhousesare being developed. Reducing energy costs also means lower prices forgreenhouse customers to pay. Energy conservation benefits everyone involvedin the floriculture industry.
GREENHOUSE VENTILATION AND COOLING EQUIPMENT
Introduction
Just as the cold season requires heating of a greenhouse, warm seasonsdemand cooling of a greenhouse. Greenhouse ventilation and cooling servethree functions. They
* reduce excessive levels of heat,maintain the optimum carbon dioxide concentrations for photo-synthesis, and
*- reduce relative humidity, achieving better disease control.
While ventilation and cooling systems can be manually operated, mostgreenhouses today have automated systems with thermostats controlling theequipment. Like heating thermostats, cooling thermostats should be placedat crop level for accurate temperature control. Following is a discussion ofthe ventilation and cooling systems commonly used in greenhouses.
141 A
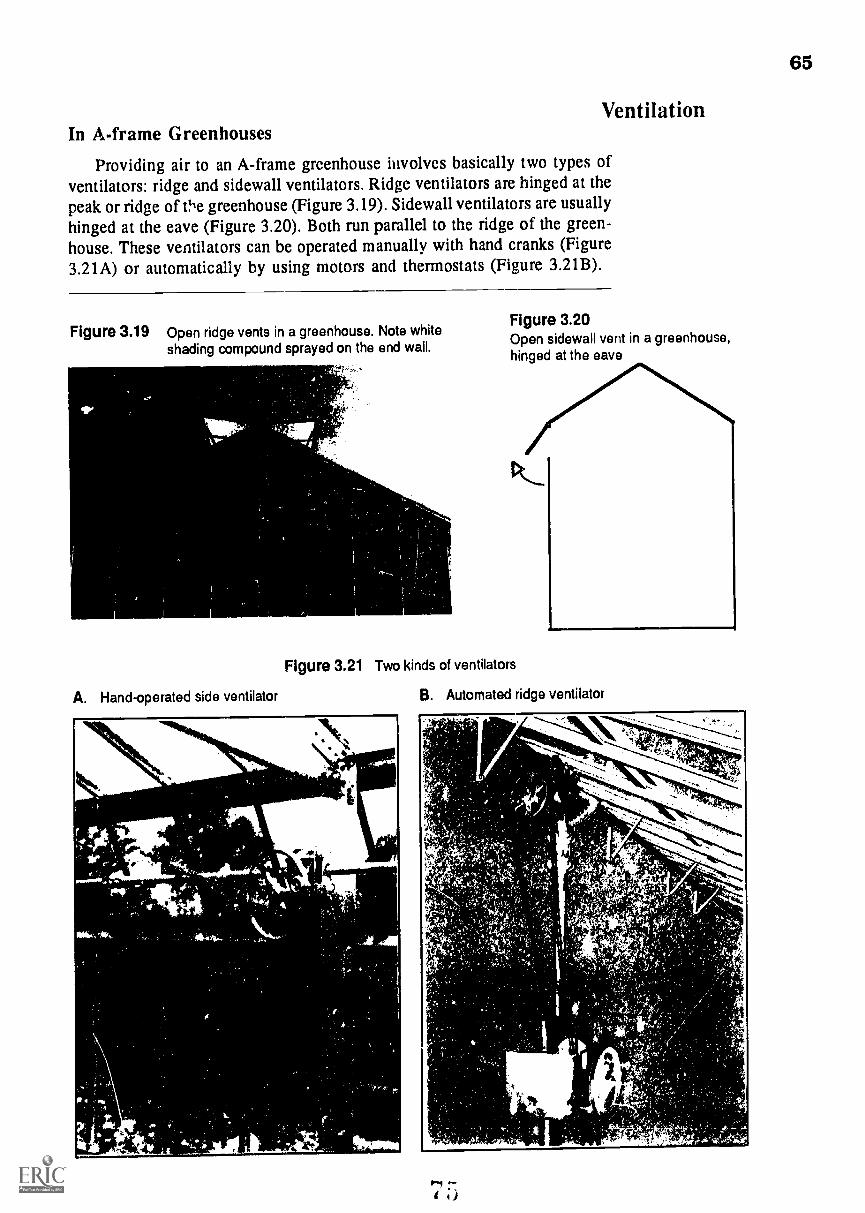
VentilationIn A-frame Greenhouses
Providing air to an A-frame greenhouse involves basically two types ofventilators: ridge and sidewall ventilators. Ridge ventilators are hinged at the
peak or ridge of Vie greenhouse (Figure 3.19). Sidewall ventilators are usuallyhinged at the eave (Figure 3.20). Both run parallel to the ridge of the green-house. These ventilators can be operated manually with hand cranks (Figure3.21A) or automatically by using motors and thermostats (Figure 3.21B).
Figure 3.19 Open ridge vents in a greenhouse. Note whiteshading compound sprayed on the end wall.
A. Hand-operated side ventilator
Figure 3.20
Open sidewall vent in a greenhouse,hinged at the eave
Figure 3.21 Two kinds of ventilators
B. Automated ridge ventilator
-"414441446._
r
411V
I.
65

66
These ventilators operate on the "chimney effect" principle. As Figure3.22 shows, hot air rising in a greenhouse needs to escape through openedridge ventilators. In windy weather, the ridge ventilator opposite the prevail-ing wind direction should be opened to prevent damage to the ventilatorsystem. The powerful suction created through the ridge ventilator helps pullhot air to the outside. Opening sidewall ventilators enhances the chimneyeffect by drawing in cool air to replace the hot air escaping through the ridgeventilators.
Flgure 3.22 Chimney-effect air flow through ridge and sidewall ventilators
Prevailing wind direction
4..410
Ridge vents
Sidewall vents
In Quonset Greenhouses
In certain types of greenhouses, ridge and sidewall ventilators can not beused. Instead, greenhouses like quonset film plastic houses use forced air orfan ventilation. (This forced air ventilation can, of course, be used in A-framegreenhouses, too.) Exhaust fans are typically installed on one end or side wallof the greenhouse (Figure 3.23A). In the opposite wall are the louvers throughwhich air enters the greenhouse (Figure 3.23B). Cool outside air is pulled intothe greenhouse through the louvers by the exhaust fans at the same time asthe fans exhaust and remove the hot air (Figure 3.24). Both fans and louversshould be installed at crop height so that the air at plant level is cooled tothe right temperature.
A more recent, mergy-efficient form of cooling used in quonset green-houses is side vent cooling. Inflatable polyethylene tubes are rolled up ordown by a crank over side vents. This method eliminates use of fans.

Figure 3.23 A) Exhaust fans and B) louvers are both part of a fan ventilation system. Whenthe fans are off, the louvers are closed to keep out rain and cold air.
A
Louvers
Figure 3.24
Fan ventilation through an A-frame greenhouse.Fans and louvers are placed at crop height.
Exhaust fan
For Winter Cooling
Another form of fan ventilation is used forwinter cooling. Greenhouses occasionally get over-heated on sunny winter days. The same fan jets andpolyethylene air distribution tubes that are used inthe heating system can also distribute cold outsideair through the greenhouse. When the thermostatindicates a need for cooling, inlet louvers openbehind the fan jet and allow cold outside air to be
drawn into the tube (Figure 3.25). The cold air isthen forced into the greenhouse through holes inthe tube and becomes mixed with the overheatedgreenhouse air. The greenhouse is thus cooledwithout the shock to plants of an abrupt tempera-ture change.
Figure 3.25
Fan jet in front of open inlet louvers draws outside airinto the convection tube for winter cooling.
AMMO
I
67

68
AIR COOLING METHODS
Fan and Pad Cooling
In summer, often ventilation alone is not sufficient to prevent excessiveheat build-up inside a greenhouse. On sunny hot days, it is not unusual forthe greenhouse air temperature to be 20 or 30 degrees warmer than the outsideair temperature, even with ventilators open. Thus, other methods must be usedto cool greenhouses during hot weather. Fan and pad cooling is a commonlyused "air conditioning" system that works on the principle of evaporativecooling. Water evaporation removes heat from the air and cools it. You havefelt this on a windy day when you climbed out of the swimming pool. As soonas your body was exposed to the wind, you felt cold. The water on your skin,through rapid evaporation, was removing heat from your body.
The basic parts of a fan and pad cooling system are the following(Figure 3.26):
* exhaust fanst`r cooling pad made out of excelsior or cross-fluted cellulose* water reservoir or sump* pump* water distribution pipe and overhead baffle
The pad is installed just inside the end or sidewall that has vents or louversin it to allow air in. Cross-fluted cellulose or formed paper pads last aboutten years, while excelsior pads last only a few years.
Exhaust fans are installed in the opposite wall (Figure 3.27). As the fanspull the warm outside air through the pad, some of the trickling water evapo-rates. This evaporation removes heat from the air, reducing the temperature
Figure 3.26 Cooling pad components. A baffle installed over the water distribution pipedistributes water evenly over the top of the pad.
waterdistributionpipe
pumpL')
baffle
pad
SUmp
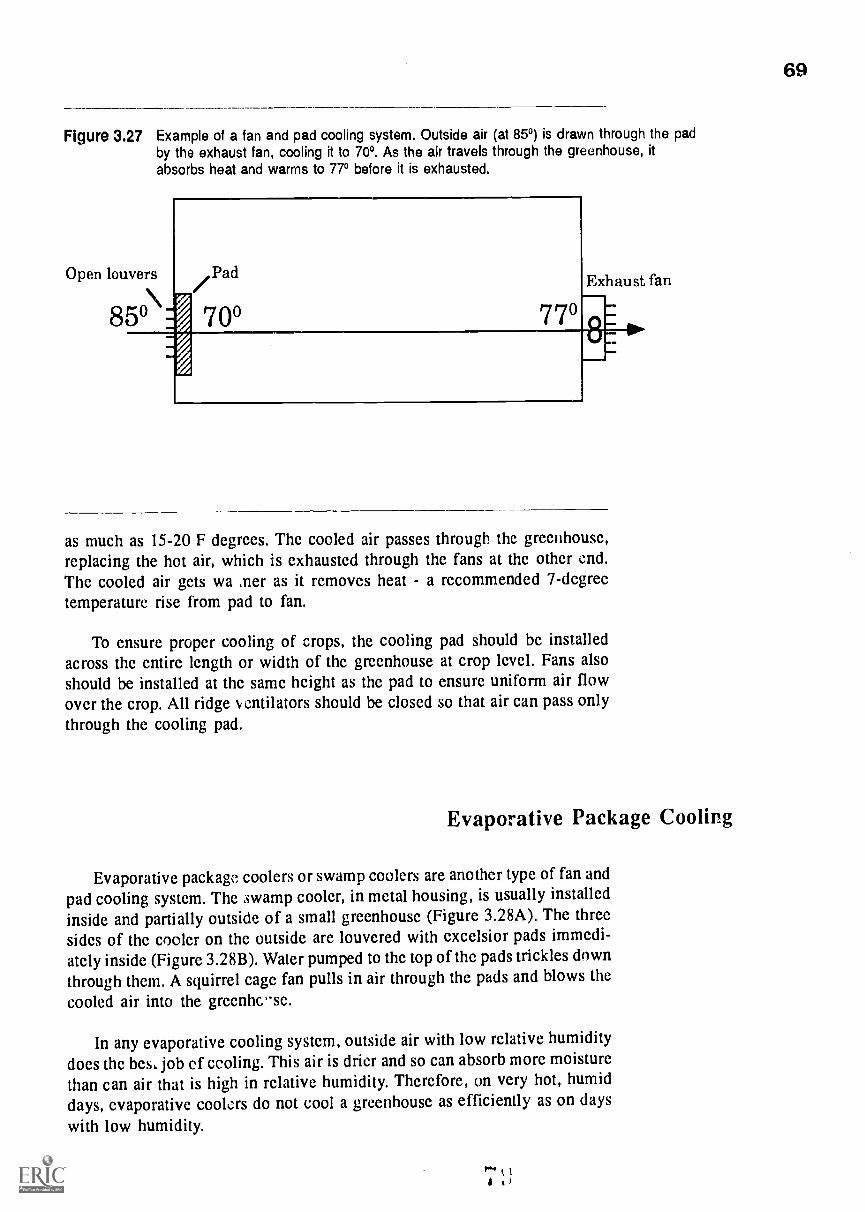
69
Figure 3.27 Example of a fan and pad cooling system. Outside air (at 85°) is drawn through the padby the exhaust fan, cooling it to 700. As the air travels through the greenhouse, itabsorbs heat and warms to 77° before it is exhausted.
Open louvers
85°\ P
ad/70° 770
Exhaust fan
8VMS
as much as 15-20 F degrees. The cooled air passes through the greenhouse,replacing the hot air, which is exhausted through the fans at the other end.The cooled air gets wa ,ner as it removes heat - a recommended 7-degreetemperature rise from pad to fan.
To ensure proper cooling of crops, the cooling pad should be installedacross the entire length or width of the greenhouse at crop level. Fans alsoshould be installed at the same height as the pad to ensure uniform air flowover the crop. All ridge ventilators should be closed so that air can pass onlythrough the cooling pad.
Evaporative Package Cooling
Evaporative package coolers or swamp coolers are another type of fan and
pad cooling system. The swamp cooler, in metal housing, is usually installedinside and partially outside of a small greenhouse (Figure 3.28A). The threesides of the cooler on the outside are louvered with excelsior pads immedi-ately inside (Figure 3.28B). Water pumped to the top of the pads trickles downthrough them. A squirrel cage fan pulls in air through the pads and blows thecooled air into the greenhc-se.
In any evaporative cooling system, outside air with low relative humiditydoes the bes, job of cooling. This air is drier and so can absorb more moisturethan can air that is high in relative humidity. Therefore, on very hot, humiddays, evaporative coolers do not cool a greenhouse as efficiently as on days
with low humidity.

70
Figure 3.28 An evaporative package cooler outside the greenhouse
A. Exterior view
1
B. Interior view of an evaporative packagecooler with its squirrel cage fan, pumpingequipment, and excelsior pad
a
High Pressure Fog Cooling
Another cooling system that uses water evaporation to cool the green-house is high pressure fog. Nozzles mounted either overhead in the green-
house or by sidewall vents produce fog from
Figure 3.29 water forced through them at high pressure
High pressure fog cooling. Fogging nozzles are(Figure 3.29). Exhaust fans and open vents then
located next to the sidewall vents, circulate the fog throughout the greenhouse,where it quickly evaporates, cooling the air.
It is very important that this fog consists ofwater droplets that are extremely small and thatthere is good air circulation. The fog shouldevaporate without leaving water on the plants.Fog that leaves foliage wet creates an idealenvironment for the development of plantdiseases.
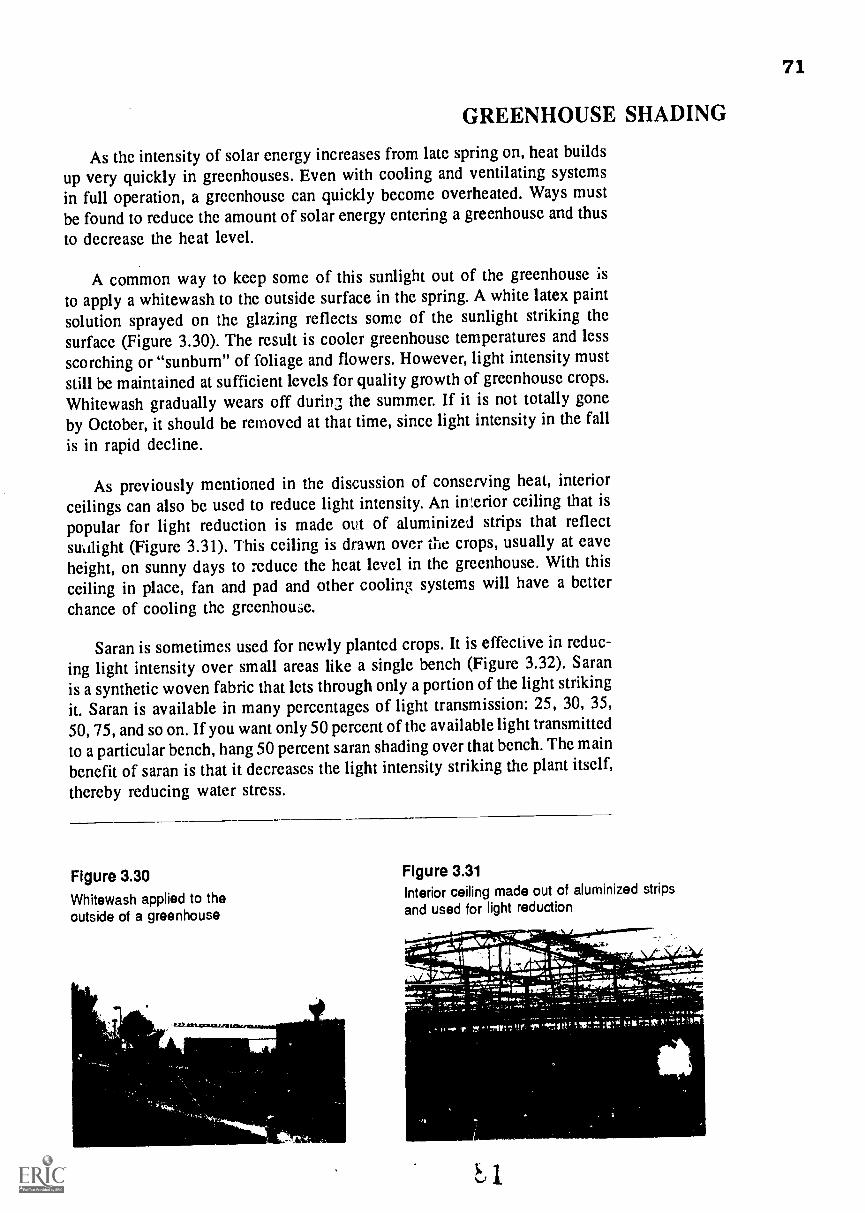
GREENHOUSE SHADING
As the intensity of solar energy increases from late spring on, heat builds
up very quickly in greenhouses. Even with cooling and ventilating systemsin full operation, a greenhouse can quickly become overheated. Ways must
be found to reduce the amount of solar energy entering a greenhouse and thus
to decrease the heat level.
A common way to keep some of this sunlight out of the greenhouse isto apply a whitewash to the outside surface in the spring. A white latex paintsolution sprayed on the glazing reflects some of the sunlight striking thesurface (Figure 3.30). The result is cooler greenhouse temperatures and lessscorching or "sunburn" of foliage and flowers. However, light intensity muststill be maintained at sufficient levels for quality growth of greenhouse crops.Whitewash gradually wears off durinj the summer. If it is not totally goneby October, it should be removed at that time, since light intensity in the fall
is in rapid decline.
As previously mentioned in the discussion of conserving heat, interiorceilings can also be used to reduce light intensity. An imerior ceiling that ispopular for light reduction is made out of aluminized strips that reflectsukilight (Figure 3.31). This ceiling is drawn over the crops, usually at caveheight, on sunny days to reduce the heat level in the greenhouse. With thisceiling in place, fan and pad and other cooling systems will have a betterchance of cooling the greenhoue.
Saran is sometimes used for newly planted crops. It is effective in reduc-ing light intensity over small areas like a single bench (Figure 3.32). Saranis a synthetic woven fabric that lets through only a portion of the light striking
it. Saran is available in many percentages of light transmission: 25, 30, 35,
50, 75, and so on. If you want only 50 percent of the available light transmittedto a particular bench, hang 50 percent saran shading over that bench. The main
benefit of saran is that it decreases the light intensity striking the plant itself,
thereby reducing water stress.
Figure 3.30 Figure 3.31
Whitewash apphed to theoutside of a greenhouse
Interior ceiling made out of aluminized stripsand used for light reduction
71
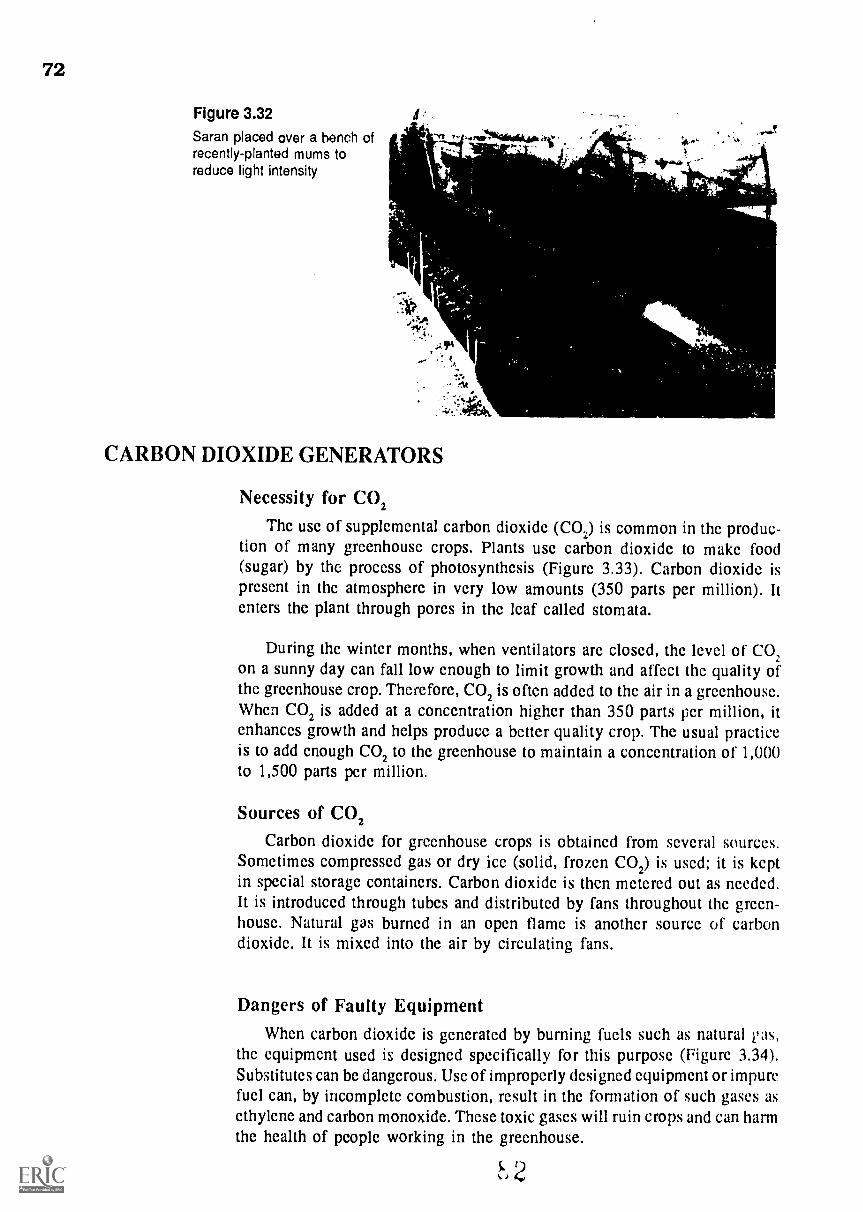
72
Figure 3.32
Saran placed over a bench ofrecently-planted mums toreduce light intensity
-Y1 r.
CARBON DIOXIDE GENERATORS
e
I
:14
Necessity for CO2
The use of supplemental carbon dioxide (CO2) is common in the produc-tion of many greenhouse crops. Plants use carbon dioxide to make food(sugar) by the process of photosynthesis (Figure 3.33). Carbon dioxide ispresent in the atmosphere in very low amounts (350 parts per million). Itenters the plant through pores in the leaf called stomata.
During the winter months, when ventilators arc closed, the level of CO2on a sunny day can fall low enough to limit growth and affect the quality ofthe greenhouse crop. Therefore, CO2 is often added to the air in a greenhouse.When CO2 is added at a concentration higher than 350 parts per million, itenhances growth and helps produce a better quality crop. The usual practiceis to add enough CO2 to the greenhouse to maintain a concentration of 1,000to 1,500 parts per million.
Sources of CO2
Carbon dioxide for greenhouse crops is obtained from several sources.Sometimes compressed gas or dry ice (solid, frozen CO2) is used; it is keptin special storage containers. Carbon dioxide is then metered out as needed.It is introduced through tubes and distributed by fans throughout the green-house. Natural gas burned in an open flame is another source of carbondioxide. It is mixed into the air by circulating fans.
Dangers of Faulty EquipmentWhen carbon dioxide is generated by burning fuels such as natural gas,
the equipment used is designed specifically for this purpose (Figure 3.34).Substitutes can be dangerous. Use of improperly designed equipment or impurefuel can, by incomplete combustion, result in the formation of such gases asethylene and carbon monoxide. These toxic gases will ruin crops and can harmthe health of people working in the greenhouse.
2

73
Figure 3.33 A schematic of photosynthesis
GLEN : .r _ C
from fires, cars,animals, planr,/
decay process*
Carbon dioxide + water in the(6 CO) (13 H10)
light sugar + oxygen(cd.ht04) (6 Oa)
htss$0
PHOTOSYNTHESIS* the most extensive chemical process on earth
* the only source of oxygen in the atmosphere
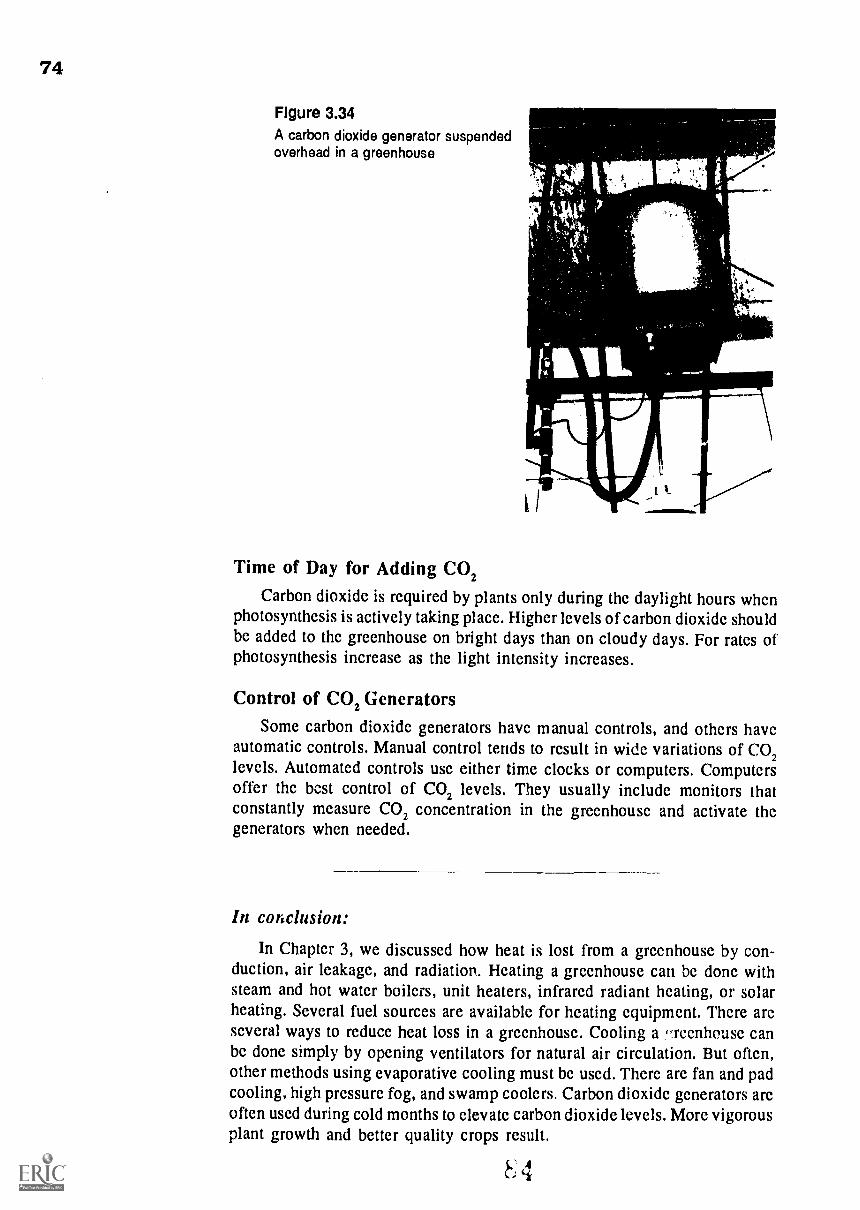
74
Figure 3.34A carbon dioxide generator suspendedoverhead in a greenhouse
Time of Day for Adding CO2
Carbon dioxide is required by plants only during the daylight hours whenphotosynthesis is actively taking place. Higher levels of carbon dioxide shouldbe added to the greenhouse on bright days than on cloudy days. For rates ofphotosynthesis increase as the light intensity increases.
Control of CO2 Generators
Some carbon dioxide generators have manual controls, and others haveautomatic controls. Manual control tends to result in wide variations of CO2levels. Automated controls use either time clocks or computers. Computersoffer the best control of CO2 levels. They usually include monitors thatconstantly measure CO2 concentration in the greenhouse and activate thegenerators when needed.
In conclusion:
In Chapter 3, we discussed how heat is lost from a greenhouse by con-duction, air leakage, and radiation. Heating a greenhouse can be done withsteam and hot water boilers, unit heaters, infrared radiant heating, or solarheating. Several fuel sources are available for heating equipment. There areseveral ways to reduce heat loss in a greenhouse. Cooling a -reenhouse canbe done simply by opening ventilators for natural air circulation. But often,other methods using evaporative cooling must be used. There are fan and padcooling, high pressure fog, and swamp coolers. Carbon dioxide generators areoften used during cold months to elevate carbon dioxide levels. More vigorousplant growth and better quality crops result.
i; 4L;
75
This review is to help you check yourself on what you have learned about controlling the green-
house environment. If you need to refresh your mind on any of the following questions, refer to
the page number given in parentheses.
1. What are the three ways that heat is lost from a greenhouse? (page 47)
2. Define "Btu." At what rate should heat be added to a greenhouse? (page 47)
3. Which heating fuel is the most desirable? least desirable? Why? (pages 48-49)
4. What type of heating system is most commonly used for heating a large greenhouse range?
a small greenhouse? (page 50)
5. Why should boilers not be located in the greenhouse? (page 54)
6. How do horizontal and vertical unit heaters differ? (pages 57-58)
7. Discuss the proper placement of thermostats in a greenhouse. (pages 52-54)
8. What are two ways to reduce heat loss from a greenhouse? (page 48)
9. Which glazings significantly reduce heat loss from a greenhouse? How is this possible?
(page 62)
10. What are the three purposes of ventilating a greenhouse? (page 64)
11. What are the differences between ventilating an even-span, glass greenhouse and a quonset
greenhouse? (pages 65-66)
12. What principle is illustrated by a fan and pad system of cooling the greenhouse? (page 68)
13. Draw and label the major parts of a fan and pad cooling system. (page 68)
14. Why are fan and pad cooling systems more effective in cooling a greenhouse in Ohio during
the summer than in Florida? (page 69)
15. What are two other evaporative cooling systems used in greenhouses? (pages 69-70)
16. What is the purpose of applying whitewash to the glazing of a greenhouse? (page 71)
17. Discuss the use of saran in a greenhouse. (page 71)
18. Why is carbon dioxide important for greenhouse crops? (page 72)
19. At what time of year are carbon dioxide generatois usually used? Why? (page 72)
(continued)
76
Chapter 3 Review (continued)
20. What are three sources of carbon dioxide for greenhouse use? Discuss the most commonlyused method. (page 72)
21. What level of carbon dioxide should be provided in the greenhouse by CO2 generators?(page 72)

CHAPTER 4
GREENHOUSE EQUIPMENT AND LIGHTING
Competencies for Chapter 4
As a result of studying this chapter, you should be able to do the following:
1. Identify major types of greenhouse benching.2. Describe the major systems of supplemental lighting and the uses of
each.3. Describe the two major photoperiodic lighting techniques.4. Set time clocks to regulate lighting.
Related Science Concept
1. Determine plant light needs.
1111
Related Math Concepts
1. Apply measuring skills to calculate aisle space and usabl? grc ing area
in square feet.2. Apply measuring skills to calculate footcandles needed for adequate
lighting.3. Apply basic operations to whole numbers, decimals, and frarlions.
4. Apply basic operations to ratios and percents.5. Read, interpret, and construct charts, graphs, and tables.
Terms to Knowcyclicfluorescent lampfootcandleground benchheadhouseHigh-Intensity Discharge (HID) lightinghigh-pressure sodium lampincandescent lamp
77
leachlong-night plantpeninsulaphotoperiodporoussupplemental lightingvegetative
78
INTRODUCTION
In this chapter we will discuss the equipment commonly used in modemgreenhouses. Knowing how to use this equipment efficiently is essential forproducing quality floriculture crops. As you will see, equipment used ingreenhouses can range from very simple in design and concept to very complex,at the cutting edge of technology. Both are needed and can be used success-fully together to produce fine greenhouse crops.
GREENHOUSE BENCHES
Greenhouse benches provide basic convenience in the production of crops.They permit better control of pests, watering, fertilization, and heating andcooling. The position of greenhouse benches is basically either 1) at groundlevel, or 2) raied.
The raised greenhouse benches can be constructed ofic snow fence,
expanded metal, orwire mesh.
Ground Benches
Figure 4.1Ground bench forplanting. The bedwooden boards.
Most cut flower crops are grown in ground benches (Figure 4.1). Main-taining and hafvesting cut flower crops is more easily done in ground benchesbecause the plants usually attain heights of several feet with maturity (Figure4.2), Ideally, ground benches should have a V-shaped concrete bottom toisolate the greenhouse soil from the field soil beneath the greenhouse. Such
a bottom prevents harmful field soilorganisms from invading the greenhousesoil. Usually drainage tile is installed atthe bottom of the V. The tile should fall aminimum of 1 inch per 100 feet of benchlength in order to drain off the water.
a cut-flower crop, ready foris slightly raised with 2" x 4"
1
Ground benches should be at least 6inches deep and, for ease of handling crops,no more than 4 feet wide. (Some cut flowercrops like roses grow best in benches wherethe soil is 12 inches deep.) Some groundbenches have a short, raised edge tocontain the soil or mulch better and to serveas an attachment for watering equipment.

Raised Benches
Raised benches are the most common typeof bench used for pot and bedding plant produc-tion. These benches can be made out of wood ormetal, with or without side boards. Most ra 'sedbenches are without side boards; thus the is
better air circulation among the plants.
The maximum width for raised benches that
can be worked from both sides is 6 feet. Forbenches that are against a side wall, the width
should be no more than 3 feet. Raised benches
are typically 30 to 36 inches high for conve-nience in handling and maintaining the pottedcrops grown on them.
Snow FenceThe snow fence bench is one of the most
simply constructed benches available (Figure4.3). Snow fencing is made from thin redwoodslats or strips woven together by wire. A strip ofsnow fence can be laid out on a wooden frameof 2" x 4" boards and fastened to it. Supports forsnow fencing can be metal post, concrete blocks,
or other similar weighted material.
Figure 4.2
Crops of most cut flowers are raised inground benches for easy accessibility.
Expanded Metal
Expanded metal benches are composed of a metal or wooden frame onto
which an expanded metal "matrix" is attached (Figure 4.4). The metal should
be ru resistant for longevity. Expanded metal benches can hold considerable
weight and remain durable longer than snow fencing.
IIS 11 *It^& t
Figure 4.3Snow fence bench composed ofa wooden frame supported by
concrete blocks
79

80
IsiworFigure 4.4
Expanded metal bench
1r, ,Nt V y 1 A
Wire Mesh
Wire mesh benches are similar to expanded metal benches. The heavygauge wire that is used is "woven" into a 1- or 2-inch-square mesh pattern(Figure 4.5). Like expanded metal, wire mesh is easy to install on woodenor metal frames. However, it is not as strong as expanded metal.
Bench AT rangement
Bench arrangement is an important consideration when planning a green-house. The greenhouse grower's goal is to use as much greenhouse floor spaceas possible for crop production. After all, no profit can be made on emptyfloor space! Aisle width must be kept to a minimum. Center aisles only are
Figure 4.5
Wire mesh bench
4..
Alb-

typically 3 to 4 feet wide to accommodate service carts and other largo pieces
of equipment. Side aisles, however, are typicall3 t8 inches wide, allowingonly for people access to the crop. Frugal use of !;pace means more profit for
the wise grower.
Retail BenchingRetail 'enching is typically raised benches that are used for displaying
plants for sale. Aisles are wide- 3 feet or more- to facilitate the flow of
customer traffic (Figure 4.6). This benching arrangement makes use of 50 to
60 percent of the greenhouse floor area. Such benching would be found in
a retail grower's customer greenhouse, attached to the retail building.
Standard Benching
Standard benching, typically used for cut flower crops, makes use of about
70 percent of the greenhouse floor yea. The benches run parallel to the length
of the greenhouse (Figure 4.6). These long benches make maintenance of cut
flower crops more convenient. Also, support wires and photoperiodic equip-
ment can be more efficiently used.
Peninsular BenchingPeninsular benching, used for potted plant production, features raised
benches running along the sidewalls the full length of the greenhouse. From
these benches, shorter benches project out toward the middle aisle like a series
of peninsulas (Figure 4.6). The aisles between the peninsular benches are
typically 18 inches wide. The usable production area in a peninsula bench
greenhouse is 75 to 80 percent.
Rolling Benches
Rolling Lnches are a recent innovation in the greenhouse industry (Figure
4.7). They are typically used for potted plant production. The benches, in
series, are typically oriented along the length or axis of the greenhouse (Figure
4.6), usually with one aisle separating. Eliminating aisle space greatly in-
creases the usable growing area. The "floating aisle" can be created anywhere
the grower chooses by simply moving apart two benches at the desired place
(Figure 4.7B). This arrangement gives the grower 90 to 95 percent of the
greenhouse floor area for crop production.
Some greenhouses with a rolling bench system have gone one step further.
They also have a system for transporting the benches of finished plants from
the greenhouse to the headhouse. Figure 4.8 shows a rolling bench being
moved out of a row of benches and onto such a roller device. This is an
efficient, easy way to move plants within a greenhouse using rolling bench
technology.
81
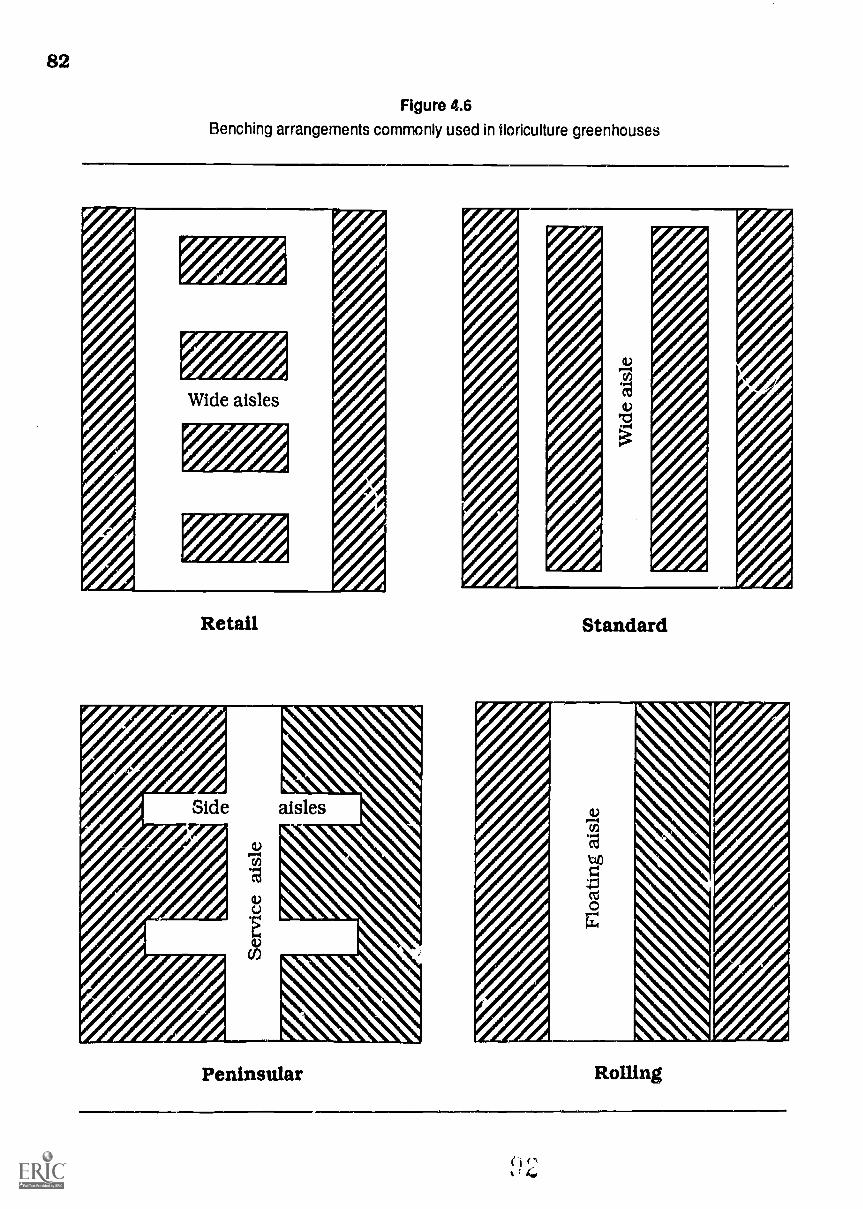
alsre IVA
NXN
ajsie 1111E(314

83
Figure 4.7 A rolling bench system showing A) the benches pushed together, andB) an aisle between the benches. Note the slots in the bench on theleft that permit it to move past the equipment supports.
A
ari1aimu. L RILL_Agatha lie
Figure 4.8A rolling bench is being moved ontoanother roller device for transportingto the headhouse.
Doubletiered Benches
Double-tiered benches make up the most technologically advanced bench-ing system. Also, this bench arrangement uses the most area of any benchingsystem - up to 180 percent of the production area - for potted plants. The high-
tech equipment needed, however, requires considerable investment anddemands careful maintenance after installation.
Use of the double-tic -ed benching system in the Unixd States is very rare.
Only large-scale, well-established greenhouse growers 'lave such a system(Figure 4.9). Double-tiered benching has two requirements: 1) rolling benches,
and 2) a source of light for the bottom tier of benches. The light, of course,must be provided, because the upper tier blocks direct light from reachingthc crod on the lower tier. High Intensity Discharge (HID) lamps installedbeneath t.sle upper tier are the light source for the lower tier (Figure 4,10),
84
Figure 4.9
A
111ot f it
The double-tiered benches are rotated daily so that each tier receives oneday of natural light alternating with one day of HID light. Machines at eachend of the double-tiered row of benches coordinate the rotation.
Figure 4.9 shows the following progression.
1. A bench is moved onto a waiting machine by a second machine at theother end (Figure 4.9A & B).
2. The waiting machine raises the bench (Figure 4.9C).3. The machine moves the bench onto the upper tier (Figure 4.9D).4. At the same time, the second machine on the opposite end accepts the
end bench pushed onto it from the upper tier, lowers it, and moves thcbench onto the bottom tier.
This cycle is repeated until all the benches in a given row have been rotated.This system is fully automated. No workers need be present during the rotation.
Ebb and Flow Bench InsertsIn certain bench systems, an irrigation system is built in and is an important
part of the bench system. Ebb and flow bench irrigation is such a system.
A double-tiered benching system showing the sequence of moving a rolling bench from thebottom tier to the top tier. The bottom tier is illuminated by HID lamps.

Figure 4.10HID lamps Installed beneath theupper tier provide light for thecrop growing below.
(For more information on this system, see page 100.) Water is pumped onto
the bench for a period of time. The potted plants take up the water throughdrainage holes. The unused water is drained into a reservoir and reused.
Floor "Benching" (without benches)
Many crops, including bedding plants, poinsettias, and Easter lilies, can
be grown directly on the greenhouse floor. No benching equipment isrequired. The grower places bedding flats on the floor in rows with flatstouching. Narrow aisles at appropriate intervals permit access to all the flats.
Spacing of potted plants on the floor is done to ensure the best growthpossible. At the same time, the grower wants to obtain maximum dollar value
for each square foot of greenhouse space. Floor benching affords up to 90
percent use of the greenhouse floor area for growing crops.
For optimum growing conditions, the floor must beclean, well drained, and free of weeds. These conditions
can be accomplished in several ways:
1. laying a synthetic weed barrier over greenhouse
soil,2. applying a layer of coarse gravel to the floor, or3. installing a concrete floor.
Regular concrete floors should have a slope or"hump" to drain off irrigation water for recycling(Figure 4.11). Another form of concrete floor that can
be used for floor benching is porous concrete (Figure
4.12). This special type of rough-looking, "unfinished"concrete allows water to pass through it; no sloping of
the floor is required. However, experience has shown
that. porous concrete has its problems. It easily becomesclogged with soil and is difficult to clean. Also, weeds
readily grow on its rough surface. Unlike solid concrete
floors, porous concrete floors contribute to ground water
contamination since they permit fertilizers and pesti-
cides to le:-.ch through.
Figure 4.11Bedding plants grown on humped concretefloors kept very clean. The floor gutter drainsoff excess irrigation water.
85

86
Figure 4.12Porous concrete floor
AMMAN!'
Summary
Table 4.1 summarizes the benching arrangements in use today. Usablespace ranges from a low of about 50 percent for retail benching to 180 percentfor double-tiered benching. The choice for the grower depends on the expenseof the benching system involved, what type of crop is to be grown, and theprofitability of the benching arrangement (percent usable space).
Table 4.1 Commonly used greenhouse benching arrangements
BenchingArrangement
CropsGrown
%UsableProduction Area
Retail Bedding plants, potted plants; 50-60display for sak
Standard Mainly cut flowers; 70some potted and bedding plPnts
Peninsular Potted plants 75-80
Rolling Potted plants 90-95
Floor (no-bench) Bedding plants; potted plants Up to 90
Double-tiered Potted plants Up to 180
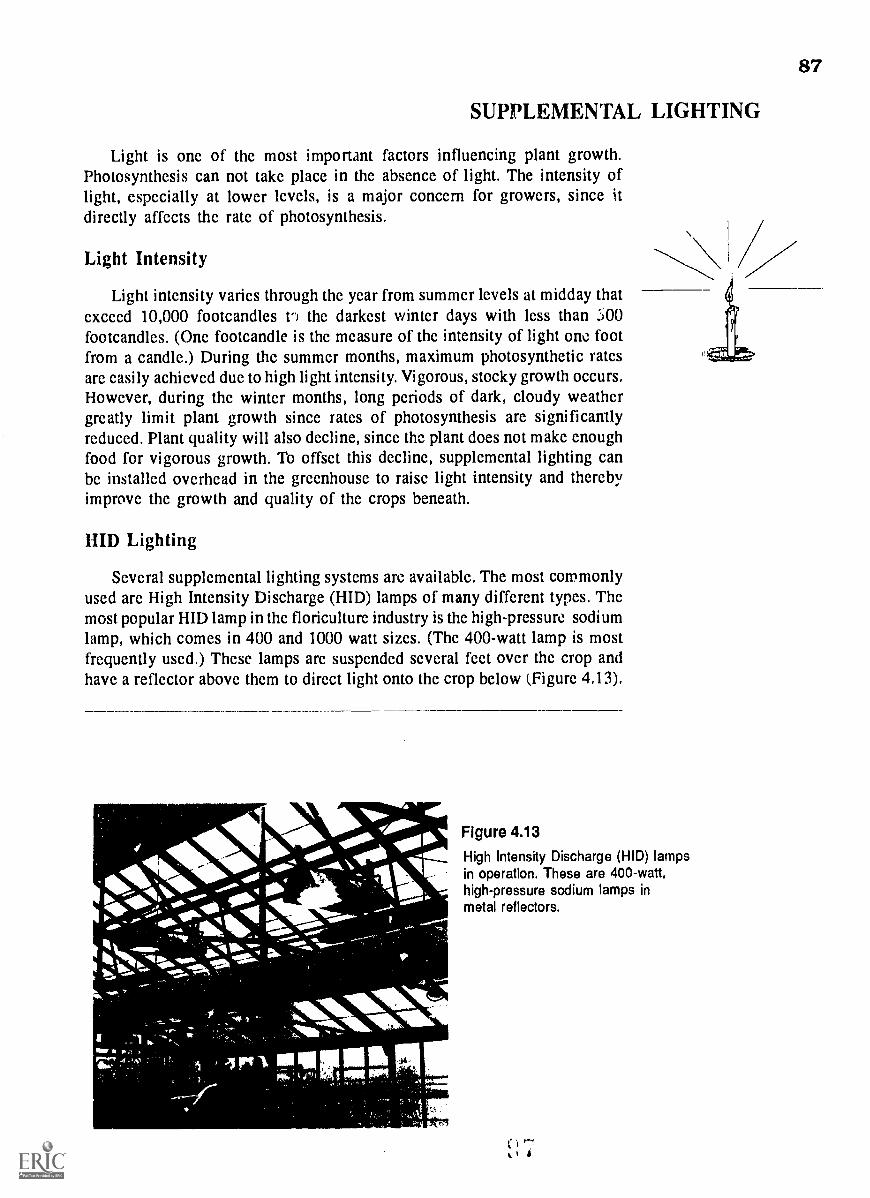
SUPPLEMENTAL LIGHTING
Light is onc of the most important factors influencing plant growth.Photosynthesis can not take place in the absence of light. The intensity oflight, especially at lower levels, is a major concern for growers, since itdirectly affects the rate of photosynthesis.
Light Intensity
Light intensity varies through the year from summcr levels at midday thatexceed 10,000 footcandles t') the darkest winter days with less than 300footcandlcs. (One footcandle is the measure of thc intensity of light one footfrom a candle.) During the summer months, maximum photosynthetic ratesare easily achieved duc to high light intensity. Vigorous, stocky growth occurs.However, during the winter months, long periods of dark, cloudy weathcrgreatly limit plant growth since rates of photosynthesis are significantlyreduced. Plant quality will also decline, since the plant does not make enoughfood for vigorous growth. To offset this decline, supplemental lighting canbc installed overhead in the greenhouse to raise light intensity and therebyimprove the growth and quality of the crops beneath.
HID Lighting
Several supplemental lighting systcms are available. The most commonlyused arc High Intensity Discharge (HID) lamps of many different types. Thcmost popular HID lamp in thc floriculture industry is the high-pressure sodiumlamp, which comes in 400 and 1000 watt sizes. (The 400-watt lamp is mostfrequently used.) These lamps are suspended several feet over the crop andhave a reflector above them to direct light onto thc crop below (Figure 4.13).
Figure 4.13
High Intensity Discharge (HID) lampsin operation. These are 400-watt,high-pressure sodium lamps inmetal reflectors.
C1'7,
87

88
High-pressure sodium lamps emit good quality light and arc very efficient.They convert 25 percent of the electricity used into usable light. (By contrast,incandescent lamps convert only 7 percent of the electricity used into usablelight.) The life expectancy of the high-pressure sodium lamp is about 24,000hours.
Other HID lamps that arc used include high pressure mercury dischargeand high pressure metal halide lamps (both more commonly used in Europethan in the U.S.) and low pressure sodium lamps.
Fluorescent Lighting
Fluorescent lamps are commonly used in small germination rooms orother limited areas because of their low light intensity. They can be placedclose to plants without burning them. They emit good quality light, however,
The use of fluorescent lighting in a large greenhouse operation would casta lot of shade on the crop because of the number of fixtures required. In alarge operation, fluorescent lighting would do more harm than good. So, itis limited to use in growth and germination chambers where supplementallight is the only light.
Photoperiod Lighting and Shading
Introduction
"Photoperiod" may be defined as the length of time experienced in lightand in darkness by an organism in a 24-hour period. Photoperiod is veryimportant in floriculture production because it affects the flowering and/orvegetative growth of several greenhouse crops. The photoperiod of thesecrops can be regulated so that they flower at a specific time.
By regulating phot )period, growers can make plants flower at times ofthe year they would not naturally bloom. Mums (chrysanthemums) arc oneof the most important commercial crops that requires photoperiodic manipu-lation for year-round production. Mums normally flower in the fall whennights are long. (The length of night, not daylight, is actually what determinesphotoperiodic response in plants.) To bring mums into flower in late springor summer, growers must artificially lengthen the night period. Some othcrphotoperiodic greenhouse crops arc poinsettias, kalanchoes, azaleas, and cenainspecies of orchids Most of these crops arc "long night" plants; that is, theyrequire long duration of darkness in order to bloom.
Photoperiod Equipment
To lengthen the night, plants arc covered with a light-proof cloth sup-ported by wire framing (Figure 4.14). The wire keeps the cloth from damagingthe plants as it is pulled past them. Shade cloth is applied in the late afternoonand removed in the morning. A tight-mesh, black sateen cloth or syntheticcloth is most commonly used for shading.

S.her -,...K
sh- , e
Figure 4.14A light-proof shade cloth drawnover a bench of mums
One kind of shade cloth is white on one side and black on the other (Figure4.15). On sunny, hot summer days, the white side of the shade cloth shouldbe exposed when pulled. It will help reflect the late afternoon sun and thusgreatly reduce heat build-up under the cloth. Many crops are delayed inblooming if exposed to high temperatures during bud and flower develop-ment.
Light penetration through the covering should be less than 2 footcandlesin order to prevent delay of blooming and/or disfigured flowers. Shade clothmust be checked as it ages, as it may start to let light leak through. As it wearsout, shade cloth can first be applied in double layers; then it should be
discarded.
Figure 4.15A light-proof shade cloth that iswhite on one side and black onthe other
89

90
When growers want to keep long-night plants like mums from flowering(in late fall, winter, and early spring), they shorten the nights with supple-mental light. One common practice is to split each long night into two shortnights with supplemental light to prevent flowering and keep plants vegeta-tive. Ten footcandles of light at crop level from incandescent lamps installed2 to 3 feet above will prevent flower formation. This simulates plant growthconditions during the short nights of summer. It is commonly referred to asstandard mum lighting (Figure 4.16).
If the light intensity of incandescent lamps is questionable, reflectors canbe installed above them to increase the amount of light cast on the plants.Light meter readings should be taken periodically to make certain that thecrop is receiving at least 10 footcandles of light.
A couple of lighting techniques in use are contrnlled by timers orcomputers.
Continuous interrupted night lighting, typically from 10 p.m to 2 a.m.,has the same effect as extending the day. Both result in shortening of thenight.
C'yclic lighting is a method that supplies light at short intervals (typically6 minutes per half hour) throughout the lighting period of 10 p.m. to2 a.m. The results are the same as with the other two methods: shortenednights i.nd vegetative growth. Growers save on their electric bills, sincecyclic lighting uses significantly less electricity than does continuouslighting.
Figure 4.16
Poinsettia stock plants kept vegetative bythe use of incandescent lamps above them(standard mum lighting)
In conclusion:
Chapter 4 covered the two basic types of benches used in the greenhouseindustry: ground benches for cut flowers and raised benches for bedding andflowering potted plants. The benching arrangements make use of from 50percent to nearly 200 percent of usable production arca. We discussed supple-mental and photoperiodic lighting systems. Lighti; g systems such as HIDlighting and fluorescent lighting are used primarily in winter when lightintensities are low. By manipulating length of night, greenhouse crops thatare photoperiodic can be forced into bloom on a year-round basis. Photo-periodic shade cloth and standard mum lighting arc used to change the lengthof night.
(
91
This review is to help you check yourself on what you have learned about greenhouse equipmentand lighting. If you need to refresh your mind on any of the following questions, refer to thepage number given in parentheses.
1. What type of benches arc used for cut flower production? for flowering potted plantproduction? (pages 78-80)
2. Draw the benching arrangements commonly used in the greenhouse industry. Whicharrangements use more than 75% of the usable production area? (pages 82-86)
3. When is supplemental lighting needed in greenhouses? (pagR 87)
4. How does light intensity affect plant growth? (page 87)
5. What type of supplemental lighting is most commonly used in the greenhouse industry?(page 87)
6. What arc the disadvantages of using fluorescent lighting for supplemental lighting?(page 88)
7. Define "photoperiod." (page 88)
8. How is photoperiod important to the greenhouse industry? (page 88)
9. Name three greenhouse crops that are photoperiodic with regard to flowering. (page 88)
10. What equipment is used to regulate the length of night, either delaying or promotingflowering of photoperiodic crops? (pages 88-90)

CHAPTER 5
GREENHOUSE IRRIGATION SYSTEMS
Competencies for Chapter 5
As a result of studying this chapter, you should be able to do the following:
1. Determine plants' water needs.2. Determine required quantity and quality of water.3. Identiiy commonly used watering equipment.4. Set and adjust irrigation system.5. Maintain an automatic watering system.6. Hand irrigate plants.7. Discuss the use of intermittent mist systems. SI
8. Identify water quality monitoring devices.9. Describe methods used to prevent ground water contamination.
10. Scout the crop for overwatering or underwatering problems.11. Give the advantages of greenhouse environment control computers.12. Control watering schedule by computer.
Related Science Concepts
1. Define the measurement and use of the pH scale.2. Follow steps to minimize spread of pathogens by watering system.3. Time watering for most efficient use by plants.4. Describe the physical and chemical properties of water.5. Analyze water quality.6. Interpret weather data from roof-mounted weather station.
Related Math Concepts
1. Apply measuring skills to calculate amount of fertilizer to add towatering system.
2. Apply basic operations to whole numbers, decimals, and fractions.3. Apply basic operations to ratios and percents.4. Read, interpret, and construct charts, graphs, and tables.
Terms to Knowacidity ECHO rockwool
aeroponics geometric design runoffalkalinity germination soldble salts
asexual hydroponics spaghetti tubesaspirated chamber intermittent mist turgid
capillary action perimeter water breaker
capillary mat pH weighted leaf
drip gutter relative humidity
931 r)t 4,
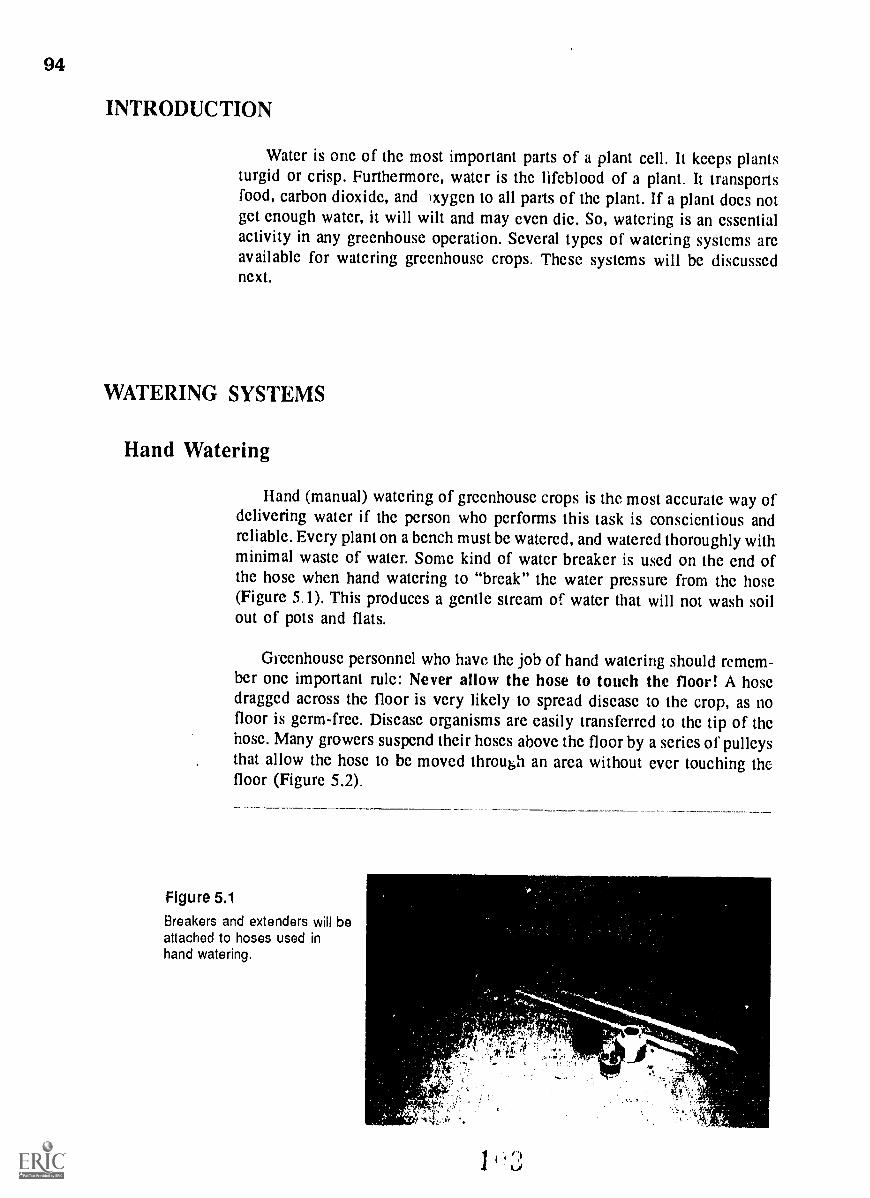
94
INTRODUCTION
Water is one of the most important parts of a plant cell. It keeps plantsturgid or crisp. Furthermore, water is the lifeblood of a plant. It transportsfood, carbon dioxide, and )xygen to all parts of the plant. If a plant does notget enough water, it will wilt and may even die. So, watering is an essentialactivity in any greenhouse operation. Several types of watering systems arcavailable for watering greenhouse crops. These systems will be discussednext.
WATERING SYSTEMS
Hand Watering
Hand (manual) watering of greenhouse crops is the most accurate way ofdelivering water if the person who performs this task is conscientious andreliable. Every plant on a bench must be watered, and watered thoroughly withminimal waste of water. Some kind of water breaker is used on thc end ofthe hose when hand watering to "break" the water pressure from the hose(Figure 5.1). This produces a gentle stream of water that will not wash soilout of pots and flats.
Greenhouse personnel who have the job of hand watering should remem-ber one important rule: Never allow the hose to touch the floor! A hosedragged across the floor is very likely to spread disease to the crop, as nofloor is germ-free. Disease organisms arc easily transferred to the tip of thehose. Many growers suspend their hoses above the floor by a series of pulleysthat allow the hose to be moved through an area without ever touching thefloor (Figure 5.2).
Figure 5.1
Breakers and extenders will beattached to hoses used inhand watering.
r
, g
c'.1T1;(71i'
t.q
OP,

Okke."
If
95
Figure 5.2A hose used for watering is suspended abovethe greenhouse floor by pulleys.
Automatic Watering
Though manual watering may be the "best" method of watering, it is verylabor-intensive. Also, its effectiveness depends to a great degree on the personapplying the water. There arc several alternatives in watering systems thatrequire a fraction of the laboi of hose watering. These systems can be automatedand arc also very effective. They involve significantly lower production costsand can produce better quality crops.
Spaghetti Tube Watering
Chapin and StuppyA spaghetti tube watering system for flowering potted crops consists of
thin black tubes leading to individual pots from the water supply pipe, whichis installed the length of the bench. At the end of each spaghetti tube is eithera lead (Chapin) tube or yellow plastic (Stuppy) weight that holds the tube inthe pot and disperses water into the pot (Figure 5,3). With this wateringsystem, several hundred pots can be watered at the same time. Chapin andStuppy tubes should be placed near the center of the pot for uniform wettingof the root medium.
Water Loops
Water loops arc another form of spaghetti tube watering. With water loops,the spaghetti tube, in the shape of a ring at the end, has tiny holes throughwhich water drips into the pot (Figure 5.4). Water loops distribute water moreevenly through the pot. Particularly useful in large diameter pots, water loopsarc placed so that the plant i:, in the center of the loop.
1

96
Spray Tubes
Spaghetti tubes can also be attachcd to spray tubes that consist of a plasticstake pushed into the soil. From a slanted surface at the top of the stake, wateris dispersed into the pot (Figure 5.5). The stake makes a better anchor forthis system than do the weights of the Chapin and Stuppy systems, which areeasily dislodged.
Figure 5.3 Two spaghetti tube watering systems. Note the larger black water supply line.
A. Chapin
vka yv"VW
W Ife0440rattit4414A a adah
V* -At*,.
. . .
4
B. Stuppy
Figure 5.4
A water loop attached to the water supply pipe. Bottom viewshows the tiny holes that allow the water to drop through.

97
Watering Systems for Hanging Baskets Figure 5.5Spray tuba showing spaghetti tube ending atslanted sudace on stake for water dispersalIsraeli Drip Watering
This watering system was developed inIsrael for use with hanging baskets. A plas-tic pipe is first installed above the hangingbaskets. When the water supply is turnedon, water drips into the hanging baskets fromjunctions e-enly spaced in the supply pipe(Figure 5.6). Watering is uniform along thelength of the water line. Since wet foliageresults, watering should be done early in theday. Then by nightfall, with the plants dryagain, there will be less chance for devel-opment of foliar disease.
ECHO Watering
The ECHO system for hanging basketsenables growers to rotate and water hangingbaskets without performing any labor. Sev-eral hundred hanging baskets are suspendedfrom a moving cable (Figure 5.7). Whenthey need watering, the cable rotates thehanging baskets slowly past a water breaker,which irrigates each plant as it passes un-derneath. As each basket clears the waterbreaker, the water shuts off until the nexthanging basket is in place. The ECHOsystem can be totally automated as to timeof watering and amount of water to beapplied to each plant.
spaghetti tube
stake
Figure 5.6 An Israeli drip system, suspended by a support pipe, is used for irrigating hanging baskets.
support pipe
Israeli drip line
ii
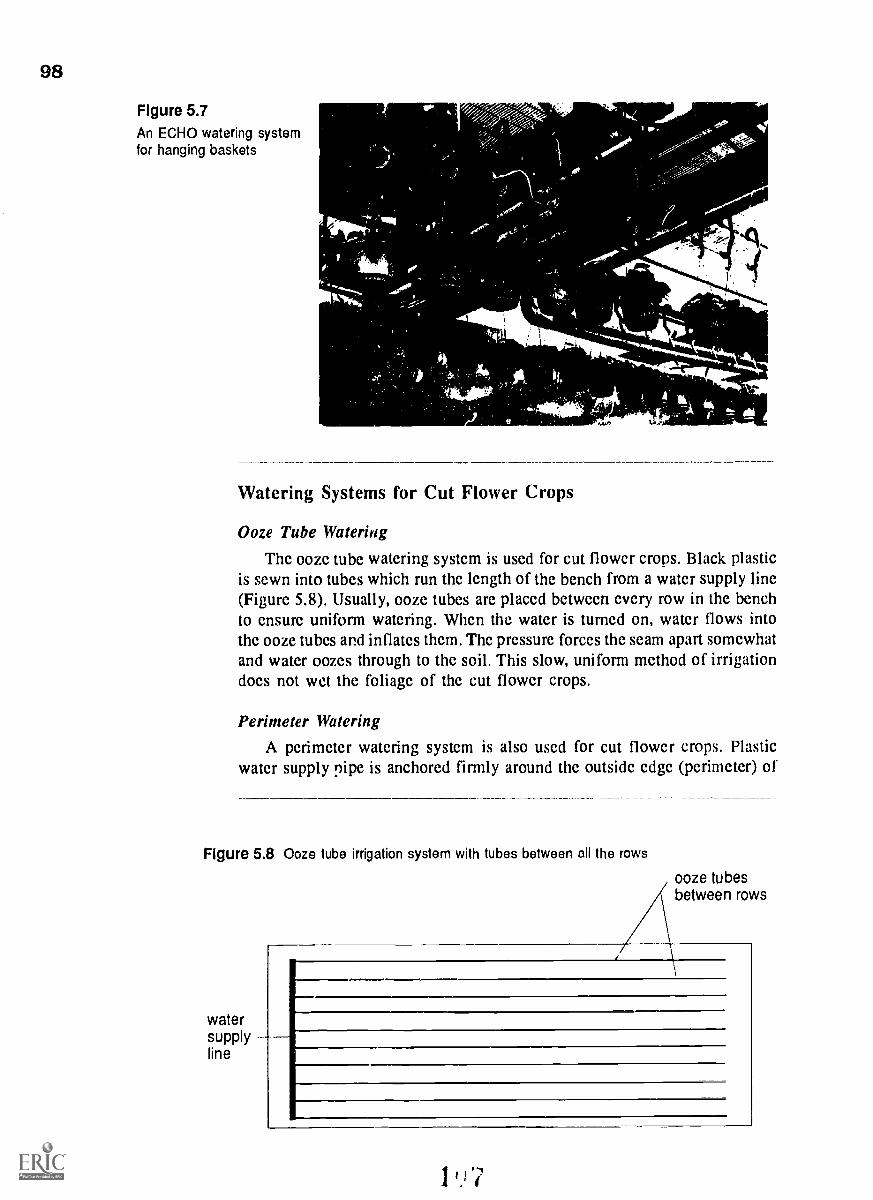
98
Figure 5.7An ECHO watering systemfor hanging baskets
ask
Oa,
41,
Watering Systems for Cut Flower Crops
Ooze Tube Watering
The ooze tube watering system is used for cut flower crops. Black plasticis sewn into tubes which run the length of the bench from a water supply line(Figure 5.8). Usually, ooze tubes are placed between every row in the benchto ensure uniform watering. When the water is turned on, water flows intothe ooze tubes and inflates them. The pressure forces the scam apart somewhatand water oozes through to the soil. This slow, uniform method of irrigationdoes not wet the foliage of the cut flower crops.
Perimeter Watering
A perimeter watering system is also used for cut flower crops. Plasticwater supply pipe is anchored firmly around the outside edge (perimeter) of
Figure 5.8 Ooze tube irrigation system with tubes between all the rows
watersupplyline
ooze tubesbetween rows

Figure 5.9 A perimeter watering system used for cut flower crops
the bench (Figure 5.9). Nozzles, installed generally 20 to 30 inches apart inthe pipe, apply water to the soil in a flat spray without wetting the foliage.
Watering Systems for Potted Flowering Plants
Capillary Mat Watering
Capillary mat watering is used for potted cowering plants. This is anothermethod that does not wet the foliage, and thus is ideal for crops like Africanviolets. Greenhouse producers who use this system must first level the benchesand then lay a thin piece of plastic cover-ing the bottom. A water-absorbent fibermat is laid over the bottom layer of plastic.The mat is in turn covered by a second thinplastic sheet, perforated with thousands of
NNWtiny holes (Figure 5.10). This top layer ofplastic is usually black for better controlof algal growth. It also may be markedwith a series of repeating geometricdesigns for spacing pots (Figure 5.11).
The mat is kept moist usually by oozetubes or spaghetti tubes installed on thebench. Potted flowering plants placed onthe mat take up water by capillary actionthrough the drainage holes in the bottomof the pot. The water in the mat travelsthrough the holes or perforations in the topplastic layer and into the soil of the pot.
Figure 5.10 A capillary mat showing bottom plastic layer,water-absorbing fiber mat, and perforatedplastic layer on top
1111.111. I II,-
vt.
***A-C k
-.411t
1 Ilk
99

100
Figure 5.11Geometric designs on the top layerof a capillary mat used for spacinga crop of African violets
I.
'4
With such a continually wet situation, however, algal growth on the mat canbe a problem, even with the black plastic layer on top.
Ebb and Flow Watering
Ebb and flow watering is another irrigation system for potted floweringplants. It is like capillary mat watering in that 1) the foliage does not get wet,and 2) pots take up water through drainage holes by capillary action. Ebb andflow watering consists of level benches with plastic inserts to hold the water(Figure 5.12).
Water is pumped onto the bench until the bottoms of the pots are in waterdepths of between one-half and one inch. This usually takes 20 to 30 minutes.Water enters the pot through the drainage holes and moves up through thesoil by capillary action. The water is then drained away into a reservoir tobe reused (Figure 5.13).
Figure 5.12Plastic insert in ebb and flow bench. 4Nate grooves that rapidly drain offirrigation water.

101
r.,.."4 Figure 5.13,
..up An ebb and flow bench with.;vj a crop of poinsettias
Ebb and flow can also be uscd for floor-grown crops. Water is pumpedonto concrctc floors that have a very slight pitch to drain away the water.
Since this watering system reuses irrigation watcr, there is a danger ofhigh soluble salts levels in thc watcr becoming harmful for the plants. There-fore, the pH and salt levels in the watcr must be carefully monitored. (Thistopic will be discusscd further under "Water Quality" on page103.) Often thisis done automatically by computers. The computer can then dircct any necessarycorrective action. Thc computcr can also be programmed as to frequency andtiming of watering the benches (Figure 5.14).
Overhead Nozzle Watering
Overhead nozzle watering is a mcthod usually uscd only in the morningor early afternoon. Wct foliage needs time to dry by evening to avoid potentialdisease problems. Elevated nozzles are installed on a pipe that runs the length
Figure 5.14 Computer used to control an ebb and flow system in a modern greenhouse
AA&
OP" 1.7.1.z.
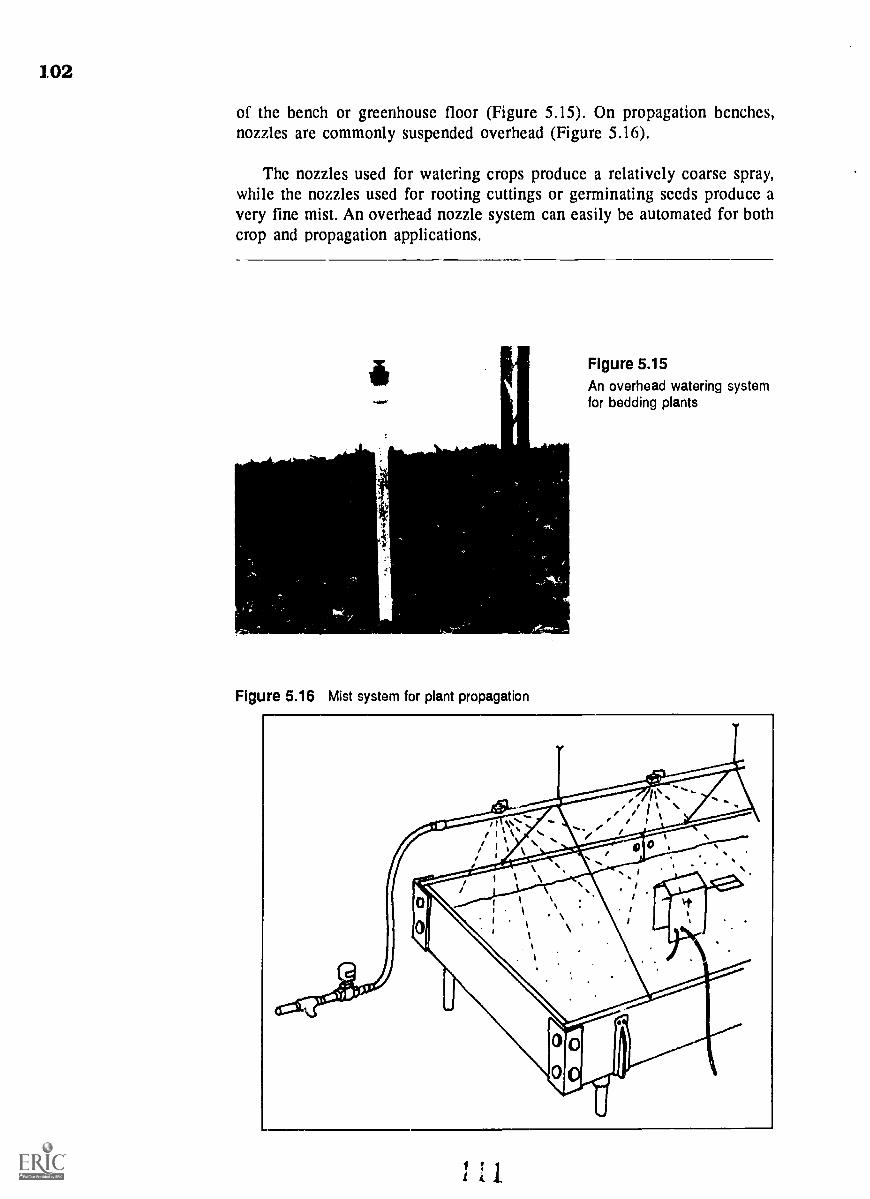
102
of the bench or greenhouse floor (Figure 5.15). On propagation bcnches,nozzles are commonly suspended overhead (Figure 5.16).
The nozzles used for watering crops produce a relatively coarse spray,while the nozzles used for rooting cuttings or germinating seeds produce avery fine mist. An overhead nozzle system can easily be automated for bothcrop and propagation applications.
Figure 5.16 Mist system for plant propagation
Figure 5.15An overhead watering systemfor bedding plants
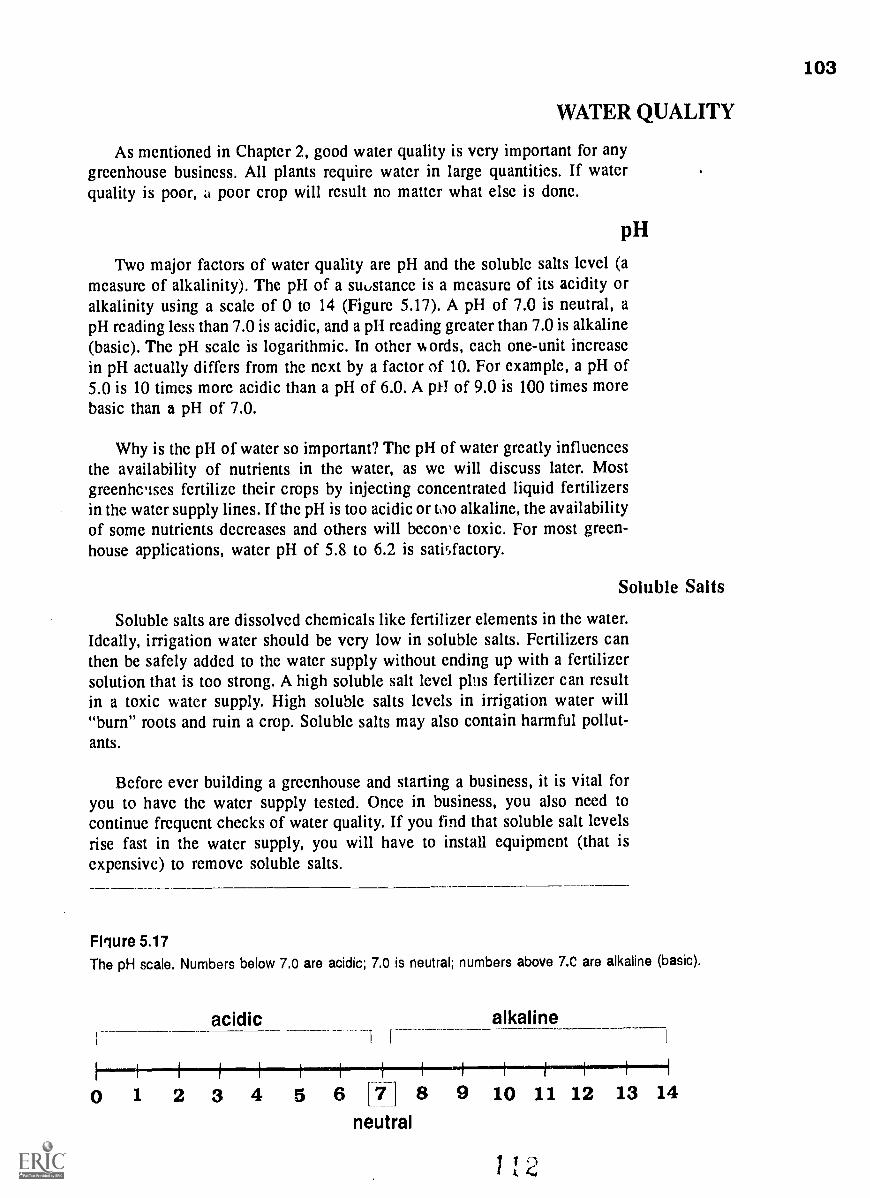
103
WATER QUALITY
As mentioned in Chapter 2, good water quality is very important for anygreenhouse business. All plants require water in large quantities. If waterquality is poor, a poor crop will result no matter what else is done.
pH
Two major factors of water quality are pH and the soluble salts level (ameasure of alkalinity). The pH of a substance is a measure of its acidity oralkalinity using a scale of 0 to 14 (Figure 5.17). A pH of 7.0 is neutral, apH reading less than 7.0 is acidic, and a pH reading greater than 7.0 is alkaline(basic). The pH scale is logarithmic. In other ords, each one-unit increasein pH actually differs from the next by a factor of 10. For example, a pH of5.0 is 10 times more acidic than a pH of 6.0. A pt! of 9.0 is 100 times morebasic than a pH of 7.0.
Why is the pH of water so important? The pH of water greatly influencesthe availability of nutrients in the water, as we will discuss later. Mostgreenhouses fertilize their crops by injecting concentrated liquid fertilizersin the water supply lines. If the pH is too acidic or too alkaline, the availabilityof some nutrients decreases and others will becon'e toxic. For most green-house applications, water pH of 5.8 to 6.2 is sathfactory.
Soluble Salts
Soluble salts are dissolved chemicals like fertilizer elements in the water.Ideally, irrigation water should be very low in soluble salts. Fertilizers canthen be safely added to the water supply without ending up with a fertilizersolution that is too strong. A high soluble salt level plus fertilizer can resultin a toxic water supply. High soluble salts levels in irrigation water will"burn" roots and ruin a crop. Soluble salts may also contain harmful pollut-ants.
Before ever building a greenhouse and starting a business, it is vital foryou to have the water supply tested. Once in business, you also need tocontinue frequent checks of water quality. If you find that soluble salt levelsrise fast in the water supply, you will have to install equipment (that isexpensive) to remove soluble salts.
Fliure 5.17The pH scale. Numbers below 7.0 are acidic; 7.0 is neutral; numbers above 7.0 are alkaline (basic).
acidic alkaline
0 1 2 3 4 5 6 [7} 8 9 10 11 12 13 14neutral
104
Alkalinity with rcgard to water quality is defined as the conccntration ofcalcium carbonate and magnesium carbonate it contains. Thesc two chemicalsin the water, especially in high conccntrations, make pH adjustmcnt difficult.Adjustment of water pH must commonly be donc for nutritional purposes.Research has also shown that watcr high in alkalinity may incrcasc soil pHand thus harm the crop.
Thus, monitoring of water quality is a continuing task of primc impor-tance. Equipment that monitors pH and solublc salt levels should bc installcd.Watcr tcsts should be frequently run. Good crops can not bc raised using waterof poor quality.
Groundwater Contamination
Concern is mounting as to thc status of our environmental well-being.Ycars of wasteful, carcless practiccs by both the public sector and industryhavc resulted in damage to the carth's delicatc ecosystems. Thc balancc ofnaturc can takc only so much abuse before it is irreversibly upset. Onc of thcmajor conccrns involvcs groundwatcr. Approximatcly half of thc populationof thc United Statcs obtains drinking water from sourccs bcncath the ground.
The agriculturc industry has madc a practicc for years of applying chemi-cals to the soil for nutritional and pcst control purposcs. Now thcy arc dis-covering that thcsc chemicals are lcaching into groundwatcr aquifers, pollut-ing them. In many sitcs across thc country, groundwatcr sourccs ncar chmnicaldumping arcas and industrial sites are so pollutcd that thc watcr is unfit todrink.
Like agronomic farming, thc floriculture industry has contributcd to ground-water contamination. Runoff watcr from greenhouPs has oftcn bcen shownto contain high levels of nitratcs. Pcsticidc levels in grccnhousc soil havcfrequently bccn testcd high. Loth nitrates and pcsticidcs leach into thc soiland contaminate groundwatcr. Soluble fertilizers and thc whole fertilizerprogram uscd in the grcenhousc industry contributc to this contaminationproblem. Hoy/ever, thcrc arc scvcral options availablc to reduce or eliminatethese problems.
Responsible Measures to Take
1. Use a closed irrigation system.One method of reducing groundwatcr contamination is to use a closedirrigation systcm such as cbb and flow for benches and floors. Othcrsystcms that addrcss thc problem head-on arc:
* hydroponics - Plants are grown in a weak fertilizcr solution that isrecycled.
* rockwool system - Nutricnt solution is recycled through a synthetic,incrt fiber.
* aeroponics - Plants arc suspended in air and their roots frequentlymisted by a nutrient solution.

105
In all these systems, there is no leaching of water into the soil. However,these systems, with their sophisticated equipment, are expensive to install.
2. Water and fertilize only when necessary.Whether or not investing in a closed irrigation system is practical, thereare simple ways to reduce groundwater contamination. Efficient fertilizermanagement is one of these. Water and fertilize only when needed by theplants. Base your schedule on environmental conditions, not on the clockor calendar. For example, do not water a moist root medium, but wait tillthe surface is dry. Learn how to recognize when the soil is dry by itsappearance or by the weight of the pot. This practice saves time and waterand reduces runoff.
3. Limit leaching time.Leaching a crop involves continuing to water it after the soil has beensaturated (i.e., when water has started to drip out of the pot's drainageholes). This practice is considered necessary to flush out excess solublesalts. But many growers allow water to leach from the pots for a longperiod of time after the soil has been saturated. Beneficial leaching actuallytakes less than one minute, usually. So leaching time during irrigationshould be limited.
Leaching may not be required at all if a low volume of water is appliedthrough a drip system like spaghetti tubes. The plants should be suppliedjust enough fertilizer that they use it all up, thus controlling salt levels inthe soil.
4. Select water-holding root media.Finally, select root media with good water-holding capacity. Soils that aretoo porous will not hold water very well; they dry out rapidly. Very poroussoils require more frequent irrigation and offer greater potential forcontamination. Root media with high water-holding capacity requiresignificantly less irrigation and produce less runoff.
5. Plan ahead for zero runoff.It is only a matter of time before legislation will be passed to prohibit waterrunoff from greenhouses. The time is already set by the government of theNetherlands. They have mandated a stop to all runoff from greenhousesin that country by the year 2000. Germany is about to follow theNetherlands' example. In the U.S., time is running out for our floricultureindustry to curb groundwater contamination. Now is the time to severelylimit or stop runoff before any more of our precious drinking water suppliesare ruined. We have met and conquered many challenges before. Withtoday's technology at our disposal and the will to meet those challenges,we can also solve this urgent problem of groundwater contamination.
1 41 I 'It

106
INTERMITTENT MIST SYSTEMS FOR PROPAGATION
Introduction
Most of thc crops uscd for pottcd flowering plants and some cut flowercrops arc propagated asexually by vegetative stem cuttings. Cuttings about2 inches long are* removed from stock plants,* stuck in a rooting mcdium, and
placed under an intermittent mist system so that roots will develop ncarthc cut cnds.
Intermittent mist maintains a constant film of moisture on thc cuttings to kccpthem cool and prevent t1iem from drying out. Rooting shotild then proceedwithout delay caused by water stress.
Equipment for Intermittent Mist Systems
An efficient mist system must bc able to deliver a finc mist consistingof tiny water droplets. Mist frequency should be casy to control. A basic mistsystem is composed of a water supply pipe with mist nozzles and a deviceto regulate frequency and duration of mist. Nozzles spray the finc mist cutin a circular (360°) pattern. Tr wcr thc cntirc bcp h with mist, thcsc nozzlesarc placed in the middle of a nch with proper spacing between thcm. Thcwatcr supply pipe may bc suspLnded directly over thc bench. Or nozzles maybc supported by vertical pipes that rise above the cuttings on the bench (Figure5.18). The vertical pipes are supplied by the main water pipe installed on thcbench.
Figure 5.18 Propagation bench with poinsettia cuttings. Note the black mist nozzlesupported by the white vertical supply line.
A
Br'T AP',"L. tot,;),

Figure 5.19
A drip gutter is installed beneath I .c/ watersupply line to catch and drain away waterdripping from the nozzles after misting.
A potential problem exists when nozzles that are suspended overheadcontinue to drip after misting is completed. Diseases readily develop in theseareas of the bench that remain too wet. To prevent this, a drip gutter can beinstalled beneath the water supply pipe. Dripping water can be drained offby these gutters (Figure 5.19).
There is a control device in every mist system that activates a solenoidvalve. This valve, an electromagnetic valve, is installed at the end of thesupply pipe. The valve allows water to flow into the pipe to produce mist.The following discussion focuses on three mist control devices.
Time Clock System
Different types of devices are used to control mist frequency and duration.One of the most common is the time clock. Two clocks are usually involved:
-et a 24-hour time clock that determines the time of day that the mist systemwill operate (during daylight hours), and
* a minute timer that controls the frequency(usually with a 6-minute cycle) and duration(in seconds) of the mist.
Weighted Leaf System
Anothcr device to control intermittent mist isthe weighted leaf (Figure 5.20). This mechanismis composed of a fine wire mesh screen or "leaf'attached to a switch. When the leaf is dry, it willbe horizontal, activating the switch that turns onthe mist. When the leaf collects enough water, itis weighed down, turning off the switch. The miststops, and the cycle starts over again. At the otherend of the leaf is a counter-balance that is adjust-able. It controls the duration and the frequencyof mist application.
Figure 5.20 Weighted leaf mechanism (in the onposition) for controlling the frequencyand duration of intermittent mist
107

108
Unlike time clocks, the weighted leaf system of control reflects the currentenvironmental conditions in the greenhouse. On sunny days, water evaporatesfaster from the leaf. Mist is automatically applied more frequently than oncloudy, cool days. Mist systems controlled by time clocks will not vary infrequency according to environmental changes. Time clock settings have tobe changed. Otherwise, cuttings may become too wet for good diseaseprevention.
Use of the weighted leaf control system also results in water conservation,if operatinz properly. However, the weighted leaf system must be perfectlylevel and the leaf absolutely clean. If mineral deposits accumulate on thescreen, the leaf will not operate properly. The screen must be cleanedperiodically,
Computer System
The other method of mist control is by computer. A computer can beprogrammed for mist frequency and duration. Some advanced models eventake into account light intensity levels and temperature when determiningmisting cycles.
GREENHOUSE ENVIRONMENT CONTROL COMPUTERS
Introduction
Within the past ten years a revolutionary development has occurred in thegreenhouse industry: the greenhouse environment control computer. Thistechnology, already well established in Europe (especially the Netherlands),is now gaining momentum in the United States. Greenhouse environmentcontrol computers monitor many environmental factors and control them allprecisely. The result of computer control is* reduced labor costs,* a morc ideal production environment, and* better quality crops.
The basic parts of a greenhouse environment control computer include thecomputer itself, sensors for monitoring indoor and outdoor conditions, anda personal computer used for programming and monitoring. There are alsoless expensive environment control computers called zone maximizers. Theseare similar to the larger computers except that they control fewer environ-mental factors. They are more affordable for the greenhouse grower who hasa smaller operation.
Monitored Environmental Factors
Greenhouse computers monitor many environmental factors:* temperature* light lcvels* CO2 concentration* relative humidity* (sometimes) soil moisture

Computers monitor these environmental factors by sensors installed in thegreenhouse. These sensors arc typically housed in aspirated chambers that aresuspended close to the crop they are monitoring. The sensors can then getaccurate readings of the immediate environmental conditions (Figure 5.21).
Conditions inside a greenhouse can be accurately controlled by a com-puter only if weather conditions outside the greenhouse a...e monitored. Aweather station should be installed outsidc to measure vind direction andspeed, temperature, and light intensity (Figure 5.22). The cemputer uses thesefactors for manipulating the inside environment.
S
T.
.-w---1---w-rs---tppmai.:,--tr Figure 5.21..! Sensors for temperature, relative
humidity, and CO2 levels are housede in this aspirated chamber and moni-.71 tored by a greenhouse environment
.4,4 control computer.
PiehlbaL:.
Figure 5.22
Weather station installed onthe roof of a greenhousemonitors weather conditionsfor the greenhouse controlcomputer.
109
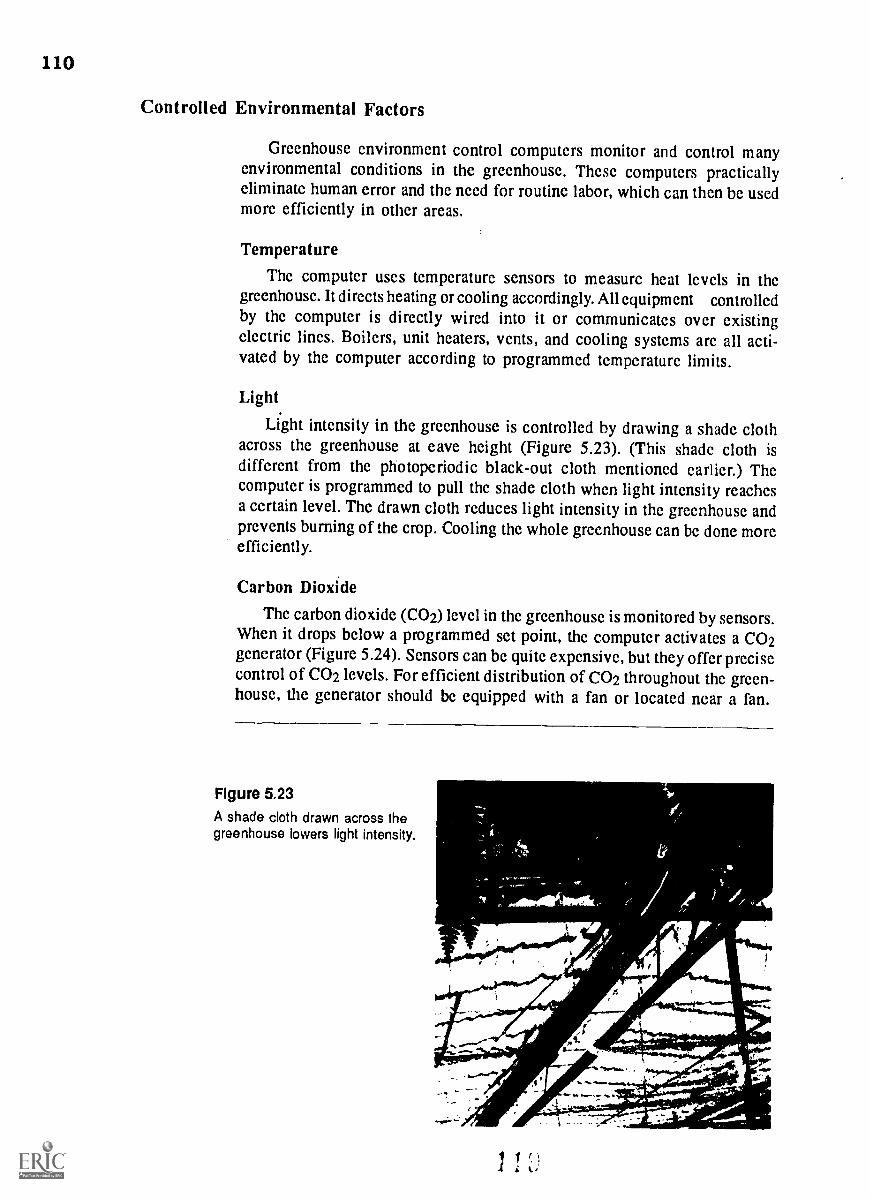
110
Controlled Environmental Factors
Greenhouse environment control computers monitor and control manyenvironmental conditions in the greenhouse. These computers practicallyeliminate human error and the need for routine labor, which can then be usedmore efficiently in other areas.
TemperatureThe computer uses temperature sensors to measure heat levels in the
greenhouse. It directs heating or cooling accordingly. All equipment controlledby the computer is directly wired into it or communicates over existingelectric lines. Boilers, unit heaters, vents, and cooling systems are all acti-vated by the computer according to programmed temperature limits.
Light
Light intensity in the greenhouse is controlled by drawing a shade clothacross the greenhouse at cave height (Figure 5.23). (This shade cloth isdifferent from the photoperiodic black-out cloth mentioned earlier.) Thecomputer is programmed to pull the shade cloth when light intensity reachesa certain level. The drawn cloth reduces light intensity in the greenhouse andprevents burning of the crop. Cooling the whole greenhouse can be done moreefficiently.
Carbon Dioxide
The carbon dioxide (CO2) level in the greenhouse is monitored by sensors.When it drops below a programmed set point, the computer activates a CO2generator (Figure 5.24). Sensors can be quite expensive, but they offerprecisecontrol of CO2 levels. For efficient distribution of CO2 throughout the green-house, the generator should be equipped with a fan or located near a fan.
Figure 5.23
A shade cloth drawn across thegreenhouse lowers light intensity.
::0;0410.41,010001t
,.144....
.4
..01

111
Figure 5.24 Computer-controlled carbon dioxide generator disperses the gas with a fan.
fziol/___0101.°411w7
GI= -=717,- 11111.-
\I
Relative HumidityRclativc humidity in a grccnhousc is basically controlled in two ways:
1. by opcning vcntilators to rcduce humidity, or2. by adding a finc mist or fog to increase humidity.
Likc thc othcr factors, thc limits for rclative humidity arc programmcd intothc computer. Whcn thc limits are exceeded, thc computer takcs correctivcaction.
WateringGreenhouse cnvironmcnt control computers can also control irrigation.
Programming can include onc or morc of thc following:sct time periods
* soil moisturc levels* light intensity level* weight of the potsProbably thc bcst control would bc a combination of morc than onc of theseitcms plus visual monitoring. Computcr control of watering equipment requiresthc installation of solenoid valves in thc water lines,
FertilizingThc level of fertilizers uscd in irrigation lincs is frequently controllcd by
computcrs. Devices that measure thc concentration and pH of thc fertilizersolution are installcd in thc irrigation linc. Thcsc deviccs continuously monitorthe irrigation systcm and takc corrective action instantly to maintainprogrammed sct points.
I t

112
Alarm System
Most greenhouse environment control computers have built-in alarms thatactivate when environmental conditions exceed the set limits. Thc computercan activate alarms and even call responsible personnel by phone to alert thcmof thc problem. An alarm system, whether it is computer-controlled or not,is an important part of any greent'ouse operation.
Disadvantages of Computer Control
While computers offer many advantages for controlling greenhouseenvironments, there are some disadvantages to consider.
1. Computers with a wide range of capabilities can be very expensive. Notall growers can afford such a large investment.
2. In the event of a power failure or computer malfunction during very hotor cold weather, thc entire crop could be ruined. Thc safest practicc is tohave a procedure for disengaging the equipment from computer controlso that the equipment can be operated manually.
3. Computers maintain set environmental factors; thcy do not have thccapability of judging quality. A computer alone should never be relied onfor long periods of time without the presence of greenhouse personnel. Forexample, it takes an experienced grower to detect a pcst or discasc problemin the early stages. Only such a qualified person can diagnose the startof nutrient deficiency symptoms and treat them.
In other words, the computer was never meant to replace the grower ormanager. The computcr can takc over many routine tasks such as temperaturecontrol. Only people can judge the condition and quality of the crop. Thccomputer is simply a complex tool that can help achieve ideal productionconditions.
In conclusion:
The watcring systems discussed in Chapter 5 ranged from hose wateringto such advanced systcms as ebb and flow. Water quality should be constantlymonitored in order to maintain pH and soluble salts at desired levels. Groundwater contamination by the greenhouse industry must bc stopped. Use of analternate irrigation practia such as a closed, recirculating irrigation systemis a possible solution. Mist systems apply mist through nozzles mountedoverhead. This constant film of moisture is ideal for germinating seeds androoting cuttings. Mist systems are controlled by timcrs, weigii,ed leaf devices,and computers. Technological advances in the greenhouse industry include thegreenhouse environment control computer. Such a computcr is capable ofmonitoring many greenhouse environmental factors and maintaining thcm atpre-set levels. However, computers will never replace people (growers andothers) who must make careful judgments on how to grow the crop,
This review is to help you check yourself on what you have learned about greenhouseirrigation systems. If you need to refresh your mind on any of the following questions, referto the page number given in parentheses.
1 Why is hand watering not recommended for irrigating crops? (page 95)
2. What is the difference between Stuppy and Chapin spaghetti tubes? (page 95)
3. Name two irrigation systems that are used for hanging basket crops. (page 97)
4. How do capillary mat irrigation systems supply water to potted crops? (page 99)
5. What is an ebb and flow irrigation system? How does it work? (page 100)
6. Why is water quality so important for any greenhouse operation? (pages 103-104)
7. What aspects of water quality should be monitored? (pages 103-104)
8. Why is groundwater contamination such a concern? (page 104)
9. How does the greenhouse industry contribute to the groundwater contamination problem?(page 104)
10. How can present irrigation systems in the greenhousegroundwater contamination? (Page 104)
industry be changed to stop
11 What other cultural practices can growers change to lessen groundwater contamination?(page 105)
12. What is the main purpose of intermittent mist systems? (page 106)
13. Describe how mist is made and spread over the bench. (pages 106-107)
14. How are intermittent mist systems controlled? (pages 107-108)
15. What environmental factors are monitored or controlled by a greenhouse environmentcontrol computer? (pages 108-111)
16. Why do these computers have a weather station outside to monitor weather conditions?(page 109)
17. Why should the equipment controlled by an environment control computer also functionwhen disconnected from the computer? (page 112)
18. As a greenhouse manager, how would you feel about leaving a greenhouse environmentcontrol computer growing your crops with no personnel present? Why? (page 112)
113

CHAPTER 6
ROOT MEDIA AND CONTAINERS
Competencies for Chapter 6As a result of studying this chapter, you should be able to do the following:
1. Give the four functions of a root medium.2. Take a sample of root medium,3. Identify the soil particles in soil.4. Identify organic and inorganic components of soil.5. Evaluate a soil sample for water-holding capacity, aeration, and
compaction,6. Define the difference between soil-based and soilless root media.7. Identify amendments commonly added to root media and discuss
their purpose.8. Mix media materials.9. Describe the process of and need for pasteurization of root media.10. Use a pH meter and a solubridge.11. Interpret results of root media tests as to pH, soluble salts, and
nutrient levels.12. Adjust root media pH with necessary chemicals.13. Adjust soluble salts in root media.14. Water and leach soil media as meded,15. Identify containers commonly used for flori-
culture crops by name, size, and use.16. Describe the commonly used propagation
materials and the advantages of each.
Related Science Concepts
1. Describe basic principles of cation exchange capacity (CEC).2. Compare chemical properties of acids and bases.3. Analyze soil structure.4. Contrast the effects of pasteurization and of sterilization of soil.
Related Math Concepts
1. Use percentages and ratios to formulate mix-your-own root media.2. Apply basic operations to whole numbers, decimals, and fractions.3, Apply basic operations to ratios and percents.4. Read, interpret, and construct charts, graphs, and tables.
115
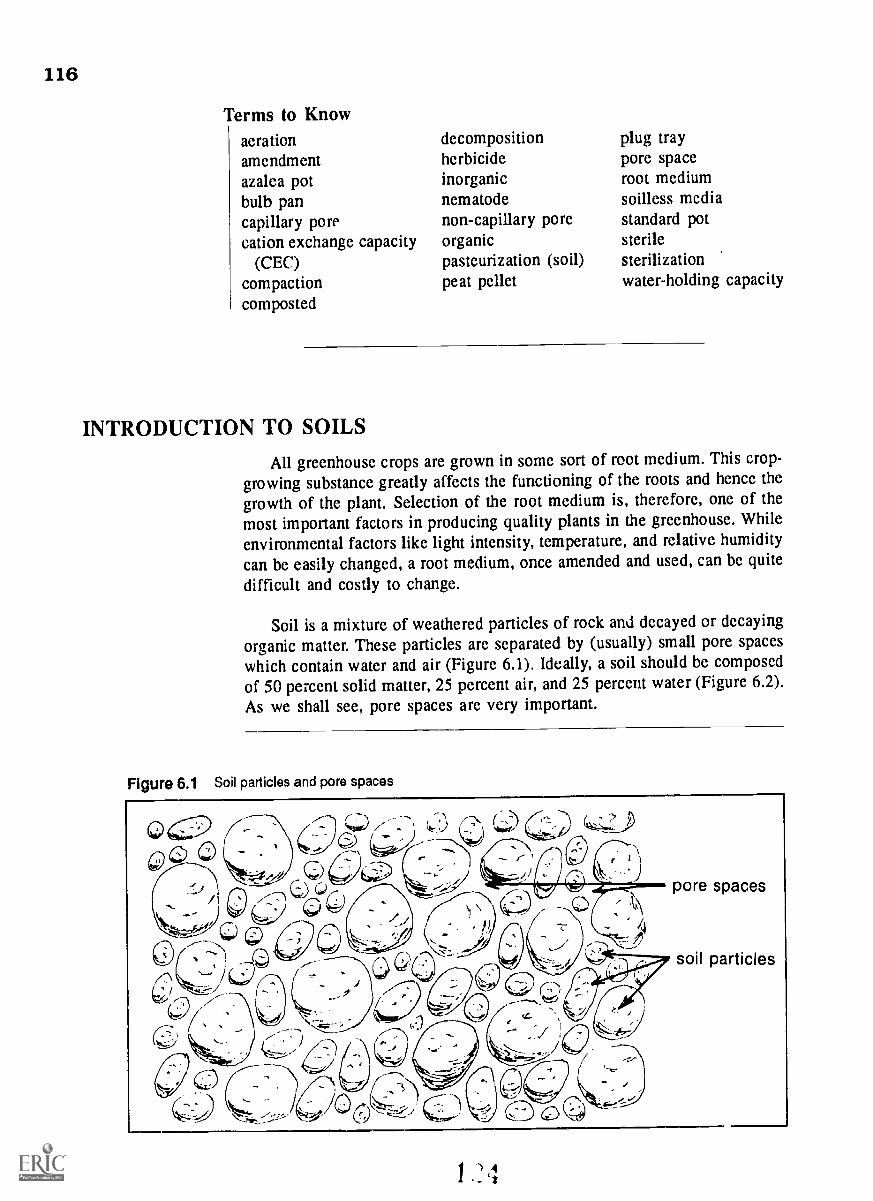
116
Terms to Knowaerationamendmentazalea potbulb pancapillary porecation exchange capacity
(CEC)compactioncomposted
decompositionherbicideinorganicnematodenon-capillary poreorganicpasteurization (soil)peat pellet
plug traypore spaceroot mediumsoilless mediastandard potsterilesterilizationwater-holding capacity
INTRODUCTION TO SOILSAll greenhouse crops are grown in some sort of root medium. This crop-
growing substance greatly affects the functioning of the roots and hence thegrowth of the plant. Selection of the root medium is, therefore, one of themost important factors in producing quality plants in the greenhouse. Whileenvironmental factors like light intensity, temperature, and relative humiditycan be easily changed, a root medium, once amended and used, can be quitedifficult and costly to change.
Soil is a mixture of weathered particles of rock and decayed or decayingorganic matter. These particles are separated by (usually) small pore spaceswhich contain water and air (Figure 6.1). Ideally, a soil should be composedof 50 percent solid matter, 25 percent air, and 25 percent water (Figure 6.2).
As we shall see, pore spaces are very important.
Figure 6.1 Soil particles and pore spaces
pore spacestt\
soil particles
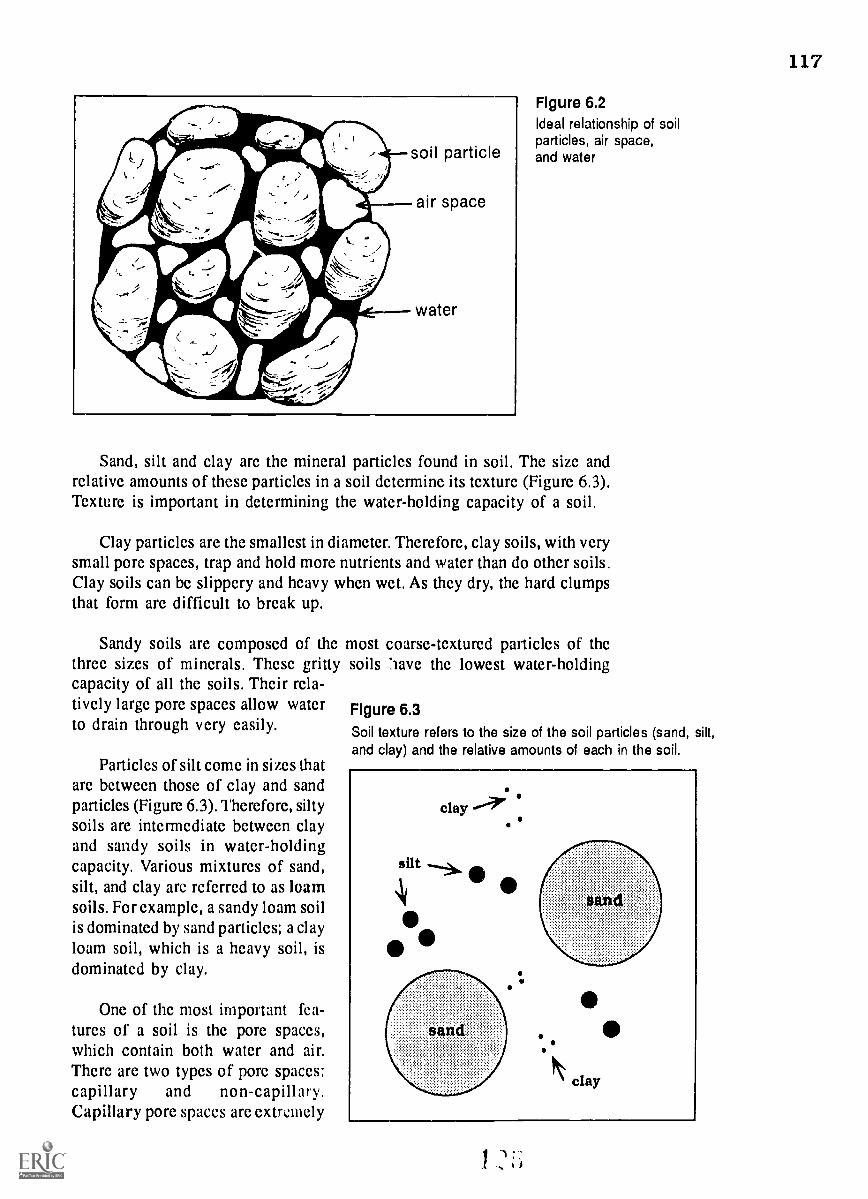
Figure 6.2Ideal relationship of soilparticles, air space,and water
Sand, silt and clay are the mineral particles found in soil. The size andrelative amounts of these particles in a soil determine its texture (Figure 6.3).Texture is important in determining the water-holding capacity of a soil.
Clay particles are the smallest in diameter. Therefore, clay soils, with verysmall pore spaces, trap and hold more nutrients and water than do other soils.Clay soils can be slippery and heavy when wet. As they dry, the hard clumpsthat form are difficult to break up.
Sandy soils are composed of the most coarse-textured particles of thethree sizes of minerals. These gritty soils :lave the lowest water-holdingcapacity of all the soils. Their rela-tively large pore spaces allow water Figure 6.3to drain through very easily. Soil texture refers to the size of the soil particles (sand, silt,
and clay) and the relative amounts of each in the soil.Particles of silt come in sizes that
are between those of clay and sandparticles (Figure 6.3). Therefore, siltysoils are intermediate between clayand sandy soils in water-holdingcapacity. Various mixtures of sand,silt, and clay arc referred to as loamsoils. For example, a sandy loam soilis dominated by sand particles; a clayloam soil, which is a heavy soil, isdominated by clay.
One of the most important fea-tures of a soil is the pore spaces,which contain both water and air.There are two types of pore spaces:capillary and non-capillary.Capillary pore spaces are extremely
clay.
_..e""r!..._
c )k clay
117

118
small and therefore hold water. An example of capillary action is providedby an ordinary window screen. The spaces in the wire screen grid are the porespaces. Dip the screen briefly into water. When you remove the screen, noticehow much water is trapped in the screen. Most of the little spaces ("pores")are still filled with water that does not easily drain away. This is capillaryaction. Clay soils have the most capillary pore space of any soil.
Non-capillary pores can be compared to the large spaces in chicken wire.Dip a piece of chicken wire in water; remove it and examine it. You will find
that the spaces do not retain water because they are too large. The water has
run right through. Non-capillary spaces permit air movement, a desirablefeature in aerating soils. Aeration is the flow of oxygen through the soil, anessential characteristic of a good root medium. For roots require oxygen justas the rest of the plant does. Sandy soils have the most non-capillary porespace of any soil (and the least capillary pore space).
ROOT MEDIA
Four Functions of Root MediaThere are four main functions expected of all root media regardless of
the crop being grown. These functions are:1. to serve as a source of nutrients,2. to supply a source of water,3. to provide adequate aeration and drainage, and
4. to support the plant in its container.
These four functions of a root medium usually are characteristic of un-disturbed field soils. But when soil from an undisturbed field is placed in apot or flat, it often loses some of these properties (such as adequate capillarypore space). As a result, the soil no longer fulfills the four functions. Itbecomes a poor root medium for use with greenhouse crops. Our aim is toproduce good greenhouse crops. So we will discuss next the types of rootmedia that are used in the greenhouse industry, the components that are used,
and proper media handling techniques.
Types of Root MediaSoil-based
Soil-based root media are used for cut flower crops grown in ground
benches and for less than half of the potted flowering crops produced in theUnited States. Field soil is amended so that it is relatively lightweight. It hasgood water-holding capacity but also adequate pore space for good aerationand drainage. The soil used must be free of harmful insects, disease organ-isms, and weed seeds (all of which can be eliminated by pasteurization). Thesoil must also be free of herbicides. A common recipe for a soil-based rootmedium (by volume) is: one part loam soil, one part sphagnum peat moss,and one part perlite or sand. There is no single, ideal recipe, 11, Never, that
can be used for all crops.

119
Soilless
Soilless or artificial root media have become very popular for potted plantproduction in the past ten years. A soilless medium is a mixture of organicand inorganic ingredients, but contains no field soil (or very little of it). Itcan be mixed on site or purchased in bags already mixed. Soilless mixes arelightweight and easy to hanole. They do not need to be pasteurized. Thecomponents of soilless root media are sphagnum peat moss, vermiculite,perlite, styrofoam, and bark or other organic ingredients.
Table 6.1 shows many of the advantages of soilless root media over soil-based mixes. Good, reliable, herbicide-free topsoil can be expensive anddifficult to find. Growers must also consider the cost of labor, equipment, andfacilities required to mix, sterilize, and store the soil.
Sources of Root MediaCommercial
All kinds of root media are readily available from commercial sources.The soilless root media are usually shipped in 4- or 6-cubic-foot bags froma wholesale greenhouse supply company. Commercially-produced root mediacommonly contain a "starter nutrient charge." In other words, the mediumcontains a small amount of fertilizer - just enough to boost the growth of anewly planted crop for a short time. There are available a lot of mixes thatgrow high quality crops. The grower must determine which mix is best forhis/her particular situation.
The main reason for using commercially-produced mixes is convenience.The time and cost of mixing your own root media is eliminated. Just makea quick phone call to order more root media. However, you lose control overhow the mix is formulated. You have to assume that the mix was properlyprepared. Also, the cost of commercially prepared mixes is considerablyhigher than for mixes made on site, You pay for the convenience of usingmixes that are already prepared.
Table 6.1 Advantages of soilless root media
1. A soilless root medium is prepared from a recipe and has the samecharacteristics from one batch to the next.
2. The components are easy to obtain.
3. Soilless root media can be mixed easily by mechanical methods.
4. Pasteurization usually is not needed, so preparation costs are reducedand energy is conserved.
5. Soilless root media are lightweight and easy to handle and use.
6. The four necessary functions of a root medium Lre easily achieved.

120
Mix-Your-Own
Root media that are just as good in quality as commercially preparedmedia can also be prepared on site. The mix-your-own method offers thegrower complet,, control of how the mix is prepared and what ingredients areadded. The grower can "fine tune" the root medium to suit the particular needsof each greenhouse crop.
Mix-your-own root media do require labor and equipment, though withautomated equipment, labor costs can be reduced. A soil-mixing machine isa necessity. In small greenhouses, some growers use portable cement mixers.In large greenhouse operations, the grower must invest in large equipment(Figure 6.4). Components of root media, such as sphagnum peat moss andperlite, must be obtained from supply companies and stockpiled to ensure acontinuous supply. The needed chemical amendments, determined from soiltests, must also be added during mixing, Above all, various batches of thesame root medium must be uniform over time. The grower must make surethat 1) the exact proportion of each ingredient is added (according to therecipe), and 2) thorough mixing of the root medium occurs.
So, mix-your-own root media do not have the convenience of commercialmixes. Mixing on site also requires an investment of labor and equipment.But the advantages are better quality control and usually lower-cost rootmedia, when all factors are considered. The individual grower must weigh theanvantages and disadvantages of commercially prepared mixes and comparethe:n with those of mixes made on-site, The decision of which method to use(or whether to use both) is up to the grower.
Figure 6.4A conveyor belt at the top feedsroot media ingredients into a soil-mixing machine.
121
Root Media Ingredients
All root media, both soil-based and soilless, must contain all the ingre-dients necessary for the four functions of a good root medium that wediscussed. A single ingredient may partially meet the four requirements, butit takes a combination of two or more ingredients to get the job done. Rootmedia ingredients are classified as either organic or inorganic.
Organic root media ingredients, like tree bark, come from sources that wereonce alive. These ingredients make the following contributions to a rootmedium. They:* improve water-holding capacity, drainage, and aeration.* improve cation exchange capacity (which is the ability of a root medium
to hold and make available nutrients for absorption by roots).* reduce compacting of a root medium. (Ti-e improved structure or clumping
of soil particles is especially important for soil-based root media.)* decompose slowly enough that they do not tie up nitrogen. Fast decom-
position will decrease the amount of available nitrogen for the roots andresult in stunted plant growth.
Inorganic ingredients come from non-living sources such as rock or clay.They do not decay like organic matter. Inorganic ingredients:* improve aeration and drainage (like sand and perlite),* improve cation exchange capacity (like clay and vermiculite),* and provide support (like sand).
As we shall see, some of these ingredients are sterile, and o 'rs are not.With ingredients that are not sterile, the root medium must be pasteurized.
Organic Ingredients
Sphagnum peat moss is one of the most common organic ingredients usedin root media. It is slightly decomposed sphagnum moss which grows in bogs.Sphagnum peat moss is light brown in color (dark brown when wet), and thesphagnum plant structure is still visible, It is very acidic. Root media containingpeat moss may have to be amended with limestone to raise the pH to anacceptable level. Sphagnum peat moss has the highest water-holding capacityof any root medium ingredient. At the same time, it can be very difficult towet. Root media high in peat moss should not be allowed to dry out completely.Sphagnum peat moss is shipped in 4- or 6-cubic-foot bales, The horticulture-grade material should be used.
Other types of peat are available, such as reed-sedge and peat humus. Butthese are not commonly used because they are much more decomposed andthey become compacted easily. Also, they do not have the water-holdingcapacity of spinnum peat moss.
Composted bark is the other commonly used organic ingredient. The
pieces oi bark should be smaller than 1/4 inch in diameter for root mediauniformity. Bark improves aeration and drainage and contributes to the cation

122
exchange capacity. Certain types, such as pine bark, have been shown toinhibit root rot organisms.
Composted yard waste, a "new" root medium ingredient, is a mixture ofcomposted leaves, grass clippings, and brush. Composting breaks down yardwastes into a rich, black root medium that is free of weed seeds, insects, anddisease organisms. Root media that contain composted yard waste are still inthe research stage. However, preliminary test results show that such mediacan grow fine-quality greenhouse crops.
There is increased interest in Ohio in using yard waste in the greenhouseindustry because yard waste will soon be banned from Ohio landfills (in1993). Landfills are rapidly filling up. Yard waste typically accounts for 20percent of the volume of solid waste in landfills. Using composted yard wastein root media would be an environmentally suitable way to recycle some ofthe yard waste. It would also provide greenhouse growers with a high-qualityroot medium component.
Inorganic Ingredients
Per lite is volcanic rock that is heated to 1800°F. The heat "pops" the rocklike popcorn and produces the familiar porous, white material known asperlite. Horticultural grade or coarse perlite is best for use in root media. Itcontributes drainage and aeration to the soil. But it has a low water-holdingcapacity and has no cation exchange capacity. The pH of pulite is slightlyabove pH 7.0.
Vermiculite is a mica-type mineral that is heated at 1400°F. Instead ofpopping, the mineral expands and forms thin, parallel plates. The appearanceof vermiculite is similar to the folds in an accordion. Vermiculite containspotassium, magnesium, and calcium for plant use. It also has good water-holding and cation exchange capacity. Vermiculite is somewhat alkaline, witha pH sometimes as high as 9.0. Horticultural grades 2, 3 and 4 are mostcommonly used in root media. When handled roughly, vermiculite can crumbleand become compnted, losing its effectiveness.
Calcined clay is a special type of clay heated to 1300°F. It is sold as'Turface' in 50-pound bags. This clay is porous and has both good water-holding capacity and an excellent cation exchange capacity. It also providesgood support. As an amendment, calcined clay usually makes up 10 to 15percent of a root medium by volume.
The three inorganic ingredients just mentioned are all heated to hightemperatures during their preparation. Therefore, they are sterile, free of weedseeds, disease organisms, and insects. No pasteurization is required whenworking with these root media ingredients.
Rockwool pieces are a synthetic material that looks similar to fiberglassinsulation. Small pieces of rockwool can be mixed into a root medium toimprove its water-holding capacity.
Coarse silica sand can be used to improve drainage and aeration of a rootmedium. It adds considerable weight and thus contributes support for plants.Sand does not have cation exchange capacity nor an appreciable water-hold-ing capacity. Root media containing sand must be pasteurized since sand is
not sterile.
Water-holding compounds can also be mixed into the root medium toimprove its water-holding capacity. These substances absorb many times theirweight in water. Thus, they help extend the time betwcen irrigations, reducinglabor costs. Plant quality can be improved, since plants are less likely to wiltin such root media.
Pasteurization of Root Media
Pasteurization of root media is sometimes done to kill harmful organisms(weeds, weed seeds, disease organisms, nematodes) without killing beneficialorganisms (mainly fungi and bacteria) that maintain proper conditions in thesoil. By contrast, sterilization of root media kills all organisms, both harmfuland beneficial. In sterilized soil, the danger is that harmful organisms mayrecolonize the root medium first, while beneficial organisms lose out. Withpasteurization, the beneficial organisms remain in the root medium and,hopefully, compete successfully with any harmful organisms that are tryingto get established. In this way, beneficial organisms resist the establishmentor spread of disease organisms in root media.
The most common pasteurizing agent for root media is steam. Chemicalpasteurization is, however, used at times, especially in outdoor areas. Chemi-cal root media pasteurization in greenhouses is very rare because:1. the chemicals used are very toxic,2. plants can not he planted in treated root media for seven to ten days after
pasteurization,3. workers must take extreme care while applying the chemicals, and4. plants usually have to be removed during treatment.
Steam-treated root media, on the other hand, can be plany,d as soon asthey cool. Steam is not toxic and is much easier to work with and apply. Care
must be taken in the use uf steam, however, as it easily bums skin and plants.
Ground beds in which cut flower crops are grown should be pasteurizedafter every crop. To prepare the bench for steaming, the soil is thoroughlytilled (broken up) and then mounded for better steam penetration. A steamdistribution pipc is placed in the middle of the bench and extends the entirelength. A tarp is placed over the bench and secured in place. Now the bench
is ready for steam pasteurization (Figure 6.5).
While steam is applied, the heat level in the soil is monitored with a soil
thermometer. The aim is to keep soil temperatures between 140° and 160°F,well below 212°F (the boiling point of water and the temperature of steam),when sterilization of the soil would take place. For these slightly lowertemperatures, aerated steam is used. This mixture of steam and air lowers thetemperature enough to complete pasteurization of the medium.
f ')I ilk.
123

124
Figure 6.5 Ground bed (for cut flowers) ready for steam pasteurization
Figure 6.6
A Lindig soil cart steaming a batch of root mediafor potted flowering plants
The process of pasteurization requires aerated steam to penetrate into theroot medium under the tarp. From the time that the coldest part of the rootmedium has reached a temperature of 140°F to 160°F, steaming is done for30 minutes. After the medium cools, it is ready for planting.
As previously mentioned, soilless root media do not usually require steam-ing because the ingredients do not harbor disease organisms. However, if soil-mixing equipment is exposed to dust and debris, or soilless media ingredientsbecome contaminated (bags torn open and contents exposed), it is a good ideato pasteurize even soilless root media. Soil-based root media for potted andbedding plants should always be pasteurized.
One method of pasteurizing root media for potted and bcdding plants isto use a Lindig soil cart with a perforated false bottom (Figure 6.6). Steamis injected into the area beneath the false bottom and is driven up into thesoil through perforations. A tarp tied on to the top of the cart contains thesteam. As with pasteurization of ground beds, the root medium in the cart issteamed for 30 minutes after the coldest portion of the medium reaches 140°to 160°F.
Root Media Analysis
Nutritional requirements of plants vary among crops and according toseason of the year, stage of crop growth, and environmental conditions.Excess fertilizer can injure plants; insufficient amounts can result in stuntedgrowth and poor quality plants. For these reasons, it is very important forgrowers to monitor their fertilizer program by conducting root medium analy-ses. These can be done at the greenhouse using testing equipment and kitsfrom manufacturers. Also, the grower can send root medium samples foranalysis to the local Cooperative Extension Service. In Ohio, analysis of thesample is thcn done at the ResearchExtension Analytical Laboratory (REAL)in Wooster.

(Sample Collection Procedure)
Whether the root mcdium is analyzed in thc greenhouse or at a lab somedistance away, samples must first be obtained. Following arc the stepsrecommended for taking samples from a ground bench or crop container (such
as pots, flats, hanging baskets).
1. Obtain a clean containcr, preferably glass or plastic.2. Randomly select sitcs for sampling throughout the ground bed or raised
bench so that the root medium sample will bc representative of the entirebench.
3. Remove any surface mulch and the top half-inch of root mcdium to obtainan accurate analysis.
4. With a trowel or soil sampling probe (which is similar to an oversizedcork borcr), remove samples of the root mcdium from thc dcpth of the
root zonc in the randomly selected sitcs. Place samples into the cleancontainer.
5. Mix the samples together and label.
Thcn, if sample testing is donc in thc greenhouse,6. Take the samples to the testing area in the headhouse. A well-equipped
greenhouse will have tables available for interpreting results (Table 6.2).
ORIf the sample is to be sent to a laboratory for analysis,6. Place container with samples in a shipping container. Complete the
information sheet supplied by the laboratory or Extcnsion Service andsubmit it with the sample (Figure 6.7). This sheet provides pertinentinformation that is uscd by the laboratory to interpret thc results correctly.Growcrs receive a detailed report that shows nutricnt, soluble salt, and pHlevels (Figure 6.8A, page 127). The report also includes recommenGationsfor correcting any nutritional aspects that are not at optimum levels(Figure 6.8B, page 128).
Table 6.2 Interpreting soil test results
SoilIngredient
Low SlightlyLow
Optimum SlightlyHigh
High ExcessivelyHirh
Major Elementsppm nitrate (nitrogen) below 60 60-100 100-175 175-200 200-275 over 275
ppm phosphorus below 6 6-8 8-14 14-16 16-20 over 20
ppm potassium below 150 150-175 175.225 225-250 250-350 over 350
ppm calcium below 200 200-250 250-325 325-350 350-500 over 500
ppm magnesium
pHsoil mix 1
below 70
5.9 & below
70-80
6-6.4
80-125
6.5-6.8
125-135
6.9-7.2
1 35-1 75
7.3-7.6
over 175
7.7 & over
soilless mix' 5.2 & below 5.3-5.5 5.6-6 6.1-6.5 6.6-7.3 7.4 & over
Soluble Saltsnot planted below 1.25 1.25-2 2-3 3-3.5 3.5-4.25 over 4.25
planted below L5 1.5-2 2-3.5 3.5-3.75 3.75-5 over 5
more than 20% soil 2 less than 20% soil
125

126Figure 6.7 Information sheet submitted with root medium sample for testing at the ResearchExtension
Analytical Laboratory.
THE RESEARCH - EXTENSION ANALYTICAL LABORATORYOHIO AGRICULTURAL RESEARCH AND DEVELOPMENT CENTER
THE OHIO STATE UNIVERSITYWOOSTER, OHIO 44691 TELEPHONE (216) 263-3760
PLEASE PRINTFLORAL CROP GROWING MEDIUM ANALYSIS
(SOILLESS MIX - - FOR COMMERCIAL GROWERS ONLY)
CHECK ONE' 1:1 STANDARD TEST - $10.00 0 STANDARD PLUS MICRONUTRIENTS $20.00(minimum 600cc/sample required)
1_1Copy No. from Sample Bag
DATE MAILED
GROWER NAME YOUR TELEPHONE NUMBER (INCLUDING
STREET ROUTE AREA CODE)
CITY/STATE/ZIP Accuracy of Recomilendations depend on the completion of this form
I. a I :
one digit per box
II I
YOUR SAMPLE IDENTIFICATION
CROP (check only one box)01 Azalea02 Bedding plant (specify)03 Bulb (specify)04 Chrysanthemum05 Cyclamen
CROP STATUS: 1. Not planted
I , ,
49. 49. , 9 ,
a
06 Easter Lily 11 Kalanchoe07 Foliage Plant (specify) 12 Poinsettia08 Geranium 13 Rose09 Gloxinia 14 Other (specify)10 Hydrangea
2. Planted (number of weeks) 3 Seedlings
TYPE OF PLANTING: 1. Potted Plant 3. Raised bench 5. Interior Plantscape (if so, light intensify2. Ground bed 4. Paks or flats measurement at sampling site was loot candles.)
GROWING MEDIUM SPECIFICS
STEAM STERILIZED? 1. Yes 2. No
FUMIGATED? 1. Yes 2. No
Component Ratio (or Percentages) of Medium?
Soil Sand Sphagnum Muck Peat Perlite
Vermiculite Styrofoam Bark (type)(II components not known, then estimate percentage of field soil in growing medium)
Was Lime applied?1. Yes 2. No
If so, what type? 1. Agricultural 2. Dolomitic 3 Hydrated. Rate
Other (specify)
How have or will plants be fertilized? 1 Dr), Fertiti;:er 2 Slow Release 3. Iniector 4. Hozon
If Injector or Hozon, indicate frequency ol application 1 Constant 2. Once-weekly 3 Other (specify)
Type of fertilizer used or to be used.Analysis or Components
Rate
PROBLEM SITUATION
Are you now having a senous problem with this crop which may be related to nutntion?1 Yes 2. No.
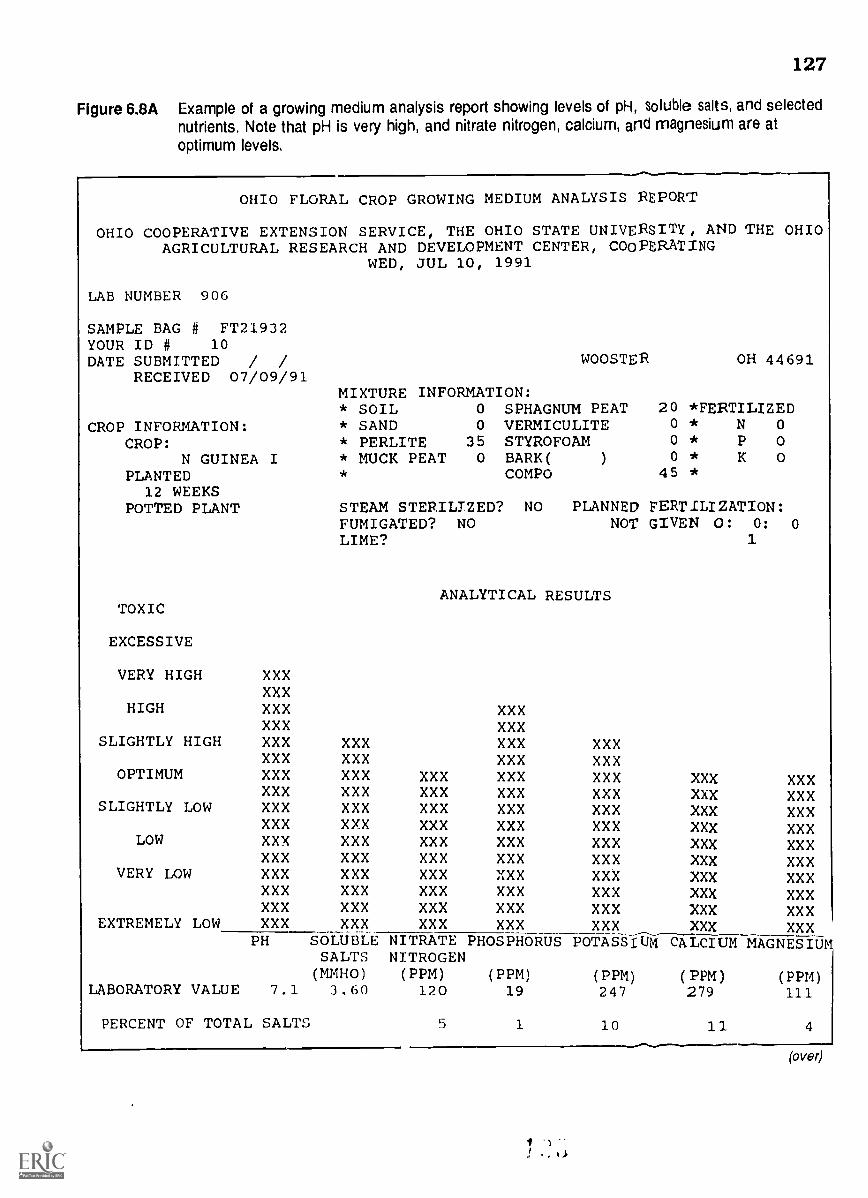
127
Figure 6.8A Example of a growing medium analysis report showing levels of pH, soluble salts, and selectednutrients. Note that pH is very high, and nitrate nitrogen, calcium, and magnesium are atoptimum levels.
OHIO FLORAL CROP GROWING MEDIUM ANALYSIS REPORT
OHIO COOPERATIVE EXTENSION SERVICE, THE OHIO STATE UNIVERSITY, AND THE OHIOAGRICULTURAL RESEARCH AND DEVELOPMENT CENTER, COOPERATING
WED, JUL 10, 1991
LAB NUMBER 906
SAMPLE BAG # FT21932YOUR ID # 10DATE SUBMITTED / /
RECEIVED 07/09/91
CROP INFORMATION:CROP:
N GUINEA IPLANTED
12 WEEKSPOTTED PLANT
TOXIC
EXCESSIVE
VERY HIGH
HIGH
SLIGHTLY HIGH
OPTIMUM
SLIGHTLY LOW
XXXXXXXXXXXXXXXXXXXXXXXXXXXXXX
LOW XXXXXX
VERY LOW XXXXXXXXX
EXTREMELY LOW XXX
WOOSTER OH 44691
MIXTURE INFORMATION:* SOIL 0 SPHAGNUM PEAT* SAND 0 VERMICULITE* PERLITE 35 STYROFOAM* MUCK PEAT 0 BARK(
COMPO
STEAM STERILIZED? NOFUMIGATED? NOLIME?
20 *FERgILIZED0 * N 00 * p oo * K 0
45 *
PLANNED FERTILIZATION:NOT GIVEN 0: 0: 0
1
ANALYTICAL RESULTS
XXXXXX
XXX XXX XXXXXX XXX XXXXXX XXX XXX XXXXXX XXX XXX XXXXXX XXX XXX XXXXXX XXX XXX XXXXXX XXX XXX XXXXXX XXX XXX XXXXXX XXX XXX XXXXXX XXX XXX XXXXXX XXX XXX XXXXXX XXX XXX XXX XXX
PH SOLUBLE NITRATE PHOSPHORUS POTASSIUM CALCIUM MAGNESIUMSALTS NITROGEN(MMHO) (PPM) (PPM) (PPM) (PPM) (PPM)
7.1 3.60LABORATORY VALUE
XXXXXXXXXXXXXXXXXXXXXXXXXXX
XXXXXXXXXXXXXXXXXXXXXXXXXXXXXX
PERCENT OF TOTAL SALTS
120 19 247 279 111
5 1 10 11 4
(over)
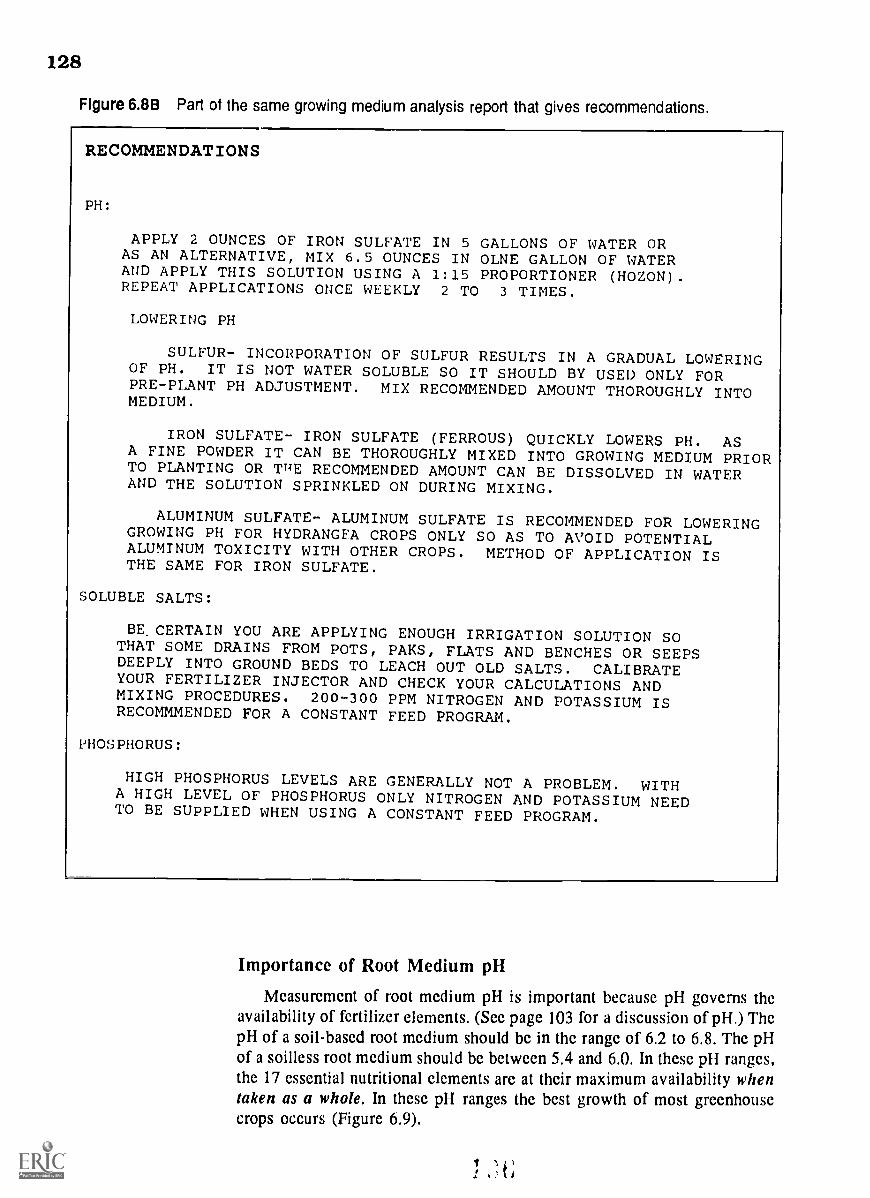
128
Figure 6.8B Part of the same growing medium analysis report that gives recommendations.
RECOMMENDATIONS
PH:
APPLY 2 OUNCES OF IRON SULFATE IN 5 GALLONS OF WATER ORAS AN ALTERNATIVE, MIX 6.5 OUNCES IN OLNE GALLON OF WATERAND APPLY THIS SOLUTION USING A 1:15 PROPORTIONER (HOZON).REPEAT APPLICATIONS ONCE WEEKLY 2 TO 3 TIMES.
LOWERING PH
SULFUR- INCORPORATION OF SULFUR RESULTS IN A GRADUAL LOWERINGOF PH. IT IS NOT WATER SOLUBLE SO IT SHOULD BY USED ONLY FORPRE-PLANT PH ADJUSTMENT. MIX RECOMMENDED AMOUNT THOROUGHLY INTOMEDIUM.
IRON SULFATE- IRON SULFATE (FERROUS) QUICKLY LOWERS PH. ASA FINE POWDER IT CAN BE THOROUGHLY MIXED INTO GROWING MEDIUM PRIORTO PLANTING OR TRE RECOMMENDED AMOUNT CAN BE DISSOLVED IN WATERAND THE SOLUTION SPRINKLED ON DURING MIXING.
ALUMINUM SULFATE- ALUMINUM SULFATE IS RECOMMENDED FOR LOWERINGGROWING PH FOR HYDRANGFA CROPS ONLY SO AS TO AVOID POTENTIALALUMINUM TOXICITY WITH OTHER CROPS. METHOD OF APPLICATION ISTHE SAME FOR IRON SULFATE.
SOLUBLE SALTS:
BE.CERTAIN YOU ARE APPLYING ENOUGH IRRIGATION SOLUTION SOTHAT SOME DRAINS FROM POTS, PAKS, FLATS AND BENCHES OR SEEPSDEEPLY INTO GROUND BEDS TO LEACH OUT OLD SALTS. CALIBRATEYOUR FERTILIZER INJECTOR AND CHECK YOUR CALCULATIONS ANDMIXING PROCEDURES. 200-300 PPM NITROGEN AND POTASSIUM ISRECOMMMENDED FOR A CONSTANT FEED PROGRAM.
PHOSPHORUS:
HIGH PHOSPHORUS LEVELS ARE GENERALLY NOT A PROBLEM. WITHA HIGH LEVEL OF PHOSPHORUS ONLY NITROGEN AND POTASSIUM NEEDTO BE SUPPLIED WHEN USING A CONSTANT FEED PROGRAM.
Importance of Root Medium pH
Measurement of root medium pH is important because pH governs theavailability of fertilizer elements. (See page 103 for a discussion of pH.) ThepH of a soil-based root medium should be in the range of 6.2 to 6.8. The pHof a soilless root medium should be between 5.4 and 6.0. In these pH ranges,the 17 essential nutritional elements are at their maximum availability whentaken as a whole. In these pH ranges the best growth of most greenhousecrops occurs (Figure 6.9),

Figure 6.9 Media pH for most plants should be in the 6.3 to 7.4 range.
TOO ACID FORMOST PLANTS
MOST DESIRABLE TOO ALKALINERANGE FOR PLANTS FOR MOST PLANTS
129
lemons 2.2-2.4
limes 1.8-2.0 9 rapefruit 3.0-3.3
drinking water6.5-8.0
ammonia 10.6-11.6strong
lye solution14.0
1.0 2.0 3.0 4.0 5.0 6.0 7.0 8.0 9.0 10.0 11.0 12.0 13.0 14.0
Some crops, however, have different root medium requirements. Azaleasand gardenias, for example, grow best in a very acidic root medium becauseof their high iron requirement. Iron is more readily available at low pH levels.Optimum pH ranges for specific greenhouse crops will be discussed later inthe production chapters.
Adjusting pH of Root Media
Raising pH
There are several materials that can be used to adjust the pH of root media.The first group we will discuss includes amendments that can be mixed withthe root medium to raise pH.
Calcium hydroxide, also known as hydrated lime, is used at a rate of oneto four pounds per cubic yard of root medium. One pound of calcium hydrox-ide can also be mixed in five gallons of water and applied to 20 square feetof ground bench. The amount applied depends upon the starting pH and thetype of root medium. A rapid (though rather short-lived) pH change and anincrease in the soluble salts level are the results. But this amendment shouldbe used with caution. Calcium hydroxide is much more reactive than agricul-tural limestone, Calcium hydroxide can damage roots and injure foliage.
Calcium carbonate, also known as agricultural limestone, is slower inaction, but safer to use on plants than is hydrated lime. Dolomitic limestoneis preferred over agricultural limestone because it is a combination of calciumand magnesium carbonate. It supplies both caicium and magnesium. Bothagricultural and dolomitic limestone are applied at rates of 2 to 4 pounds percubic yard, depending on the type and pH of the root medium.
130
Lowering pH
In several instances, pH of the root medium has to be lowered. In thefollowing section, we will discuss root medium amendments that lower thepH.
Sulfur is slow-acting but relatively long-lasting. One-quarter to two poundsof sulfur per cubic yard will usually begin to lower pH of the root mediumin six to eight weeks. Sulfur must be mixed into the root medium duringpreparation because it is not water soluble. Thus, sulfur can not be used toadjust the root medium pH of planted crops.
Iron sulfate is faster-acting at lowering pH of the root medium than issulfur. The rate of application in powder form is one-half to four pounfls percubic yard. In liquid applications, the rate is two ounces of iron sulfate perfive gallons of water. Iron sulfate serves the dual purpose of lowering pH andsupplying iron to plants. After application, any residue should be washed offplants to prevent injury.
Adjusting Soluble Salts LevelsExcess soluble salts levels in the root medium can be lowered by leaching.
(Leaching is the application of a small amount of excess water to wash awayor reduce soluble salts levels.) This practice does contribute to ground watercontamination, however, in any greenhouse that does not have a closed,recirculating irrigation system.
One leaching routine is to water the crop normally, wait for 1/4 to 1/2 hourto let the water soak through the root medium, water again normally, andrepeat this procedure the next day. Conduct a soil test to see if this correctedthe problem.
If the soluble salts level is only slightly high, stop fertilizing for a dayor two. Then conduct a soil test to determine whether the problem has beencorrected. High soluble salts levels in root media mean one of two things (andsometimes both):
1. fertilization is done too often, or2. the concentration of fertilizer is too high.
Thus, along with leaching, an adjustment of the fertilizer program may beneeded.
When levels of soluble salts are low, either frequency or concentrationof fertilizer (and sometimes both) is at fault. Gradual increase of the concen-tration of fertilizer should solve the problem. If that fails, frequency offertilization may also be increased. When you have to alter the fertilizerprogram, be sure to conduct frequent soil analyses to monitor changes insoluble salts levels.
Adjusting Nutrient ElementsA report on nutrient element levels in a particular root medium can be
obtained from soil testing laboratories such as the Research-Extension
1 ;.
Analytical Laboratory. Recommendations are given in the report for alteringlevels of individual elements in the root medium as needed.
When root medium tests are conducted in the greenhouse, two pieces ofequipment are needed: a pH meter, for measuring pH, and a solubridge (tobe discussed in Chapter 7), an instrument for measuring the soluble saltscontent in the soil. The procedure is easy. Instructions are available from thecounty Extension Service and in other references.
CONTAINERS FOR FLORICULTURE CROPS
Greenhouse crops are grown in ground benches, pots, flats, and hangingbaskets. Most of them are propagated by cuttings or seed. The selection ofcontainers to be used in production of potted flowering plants, bedding plants,and hanging baskets, and for propagation purposes is very important. The sizeand type of container affects quality, efficiency, and cost of production. Themain factor to be considered in selection of containers is the type of crop beingproduced (for example, potted flowering crops or bedding plants).
PotsMaterials
Clay
For mary years, right through the fir,i half of the twentieth century, nearlyall pots were made of clay. Clay is porous; that is, it allows air to pass throughit. Root media in pots, therefore, are well aerated and are less likely to developroot rot diseases. Also, clay pots often last a long time. They can be used andreused many times, provided they have been steam-sterilized.
However, the cost of clay pots has increased considerably, adding to thecosts of production. Also, clay pots are quite heavy. This can be an advantagein that clay potted plants are less likely to tip over. But these pots are alsoheavier to lift, a factor which adds strain to workers handling the pots. Also,shipping costs are increased. Because clay pots are porous, the root mediumtends to dry out more quickly, and thus may require more frequent wateringand fertilizing. Over time, an unsightly white crust builds up on the outsideof clay pots. This build-up is actually fertilizer salts that will have to beremoved by scrubbing. Finally, clay pots are subject to breakage.
Plastic
Most growers today use plastic pots. Plastic pots are much less expensivethan clay pots. Plastic pots are lightweight, a characteristic which meanslower production costs and easier handling of crops. Since plastic pots arenot porous, fertilizer salts can not pass through the walls of the pot. Thereis no unsightly build-up on the outside of a plastic pot. Any residues that doaccumulate on the plastic pot are easily removed. These thin-walled pots areavailable in many sizes and colors. Also, the root media in plastic pots requireless frequent waterini;, since air can not pass through the walls of the pot.
131
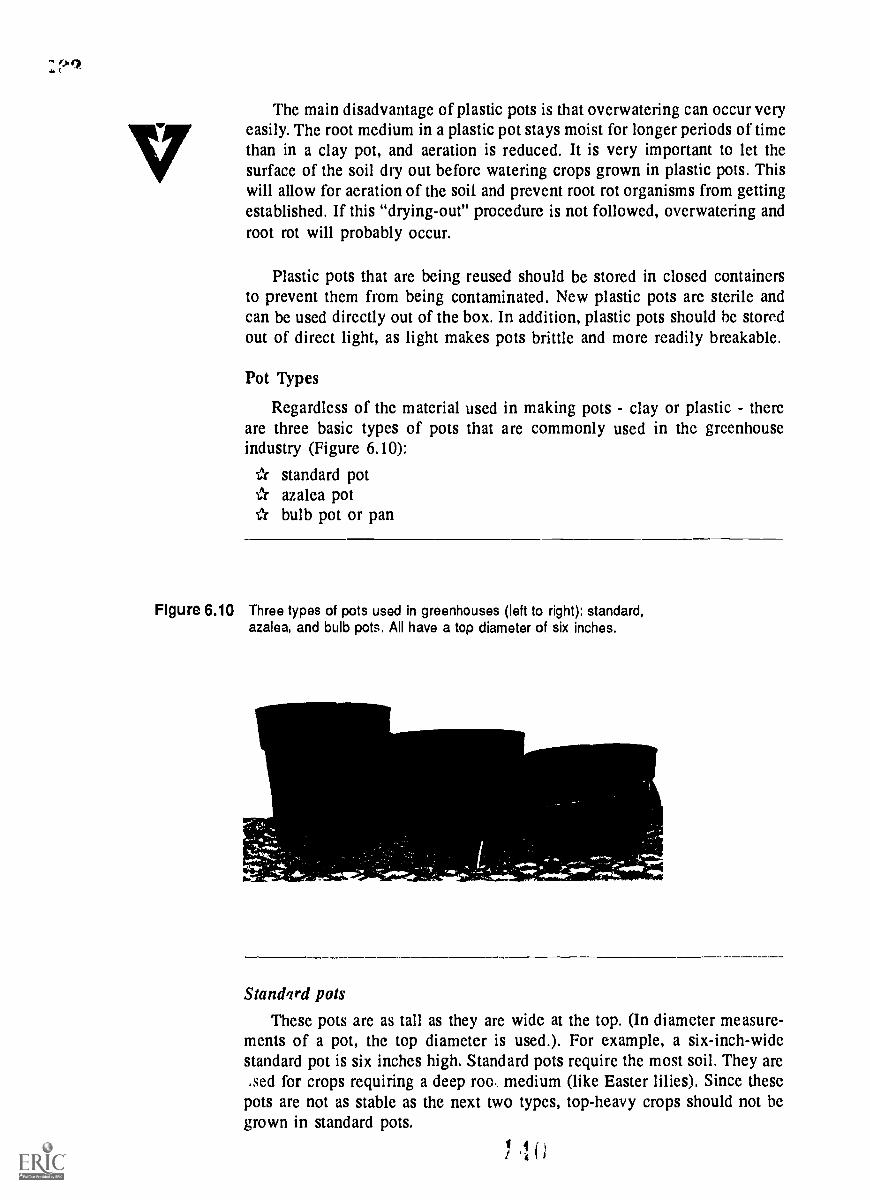
The main disadvantage of plastic pots is that overwatering can occur veryeasily. The root medium in a plastic pot stays moist for longer periods of timethan in a clay pot, and aeration is reduced. It is very important to let thesurface of the soil dry out before watering crops grown in plastic pots. Thiswill allow for aeration of the soil and prevent root rot organisms from gettingestablished. If this "drying-out" procedure is not followed, overwatering androot rot will probably occur.
Plastic pots that are being reused should be stored in closed containersto prevent them from being contaminated. New plastic pots are sterile andcan be used directly out of the box. In addition, plastic pots should be storedout of direct light, as light makes pots brittle and more readily breakable.
Pot Types
Regardless of the material used in making pots - clay or plastic - thereare three basic types of pots that are commonly used in the greenhouseindustry (Figure 6.10):
standard potazalea potbulb pot or pan
Figure 6.10 Three types of pots used in greenhouses (left to right): standard,azalea, and bulb pots. All have a top diameter of six inches.
StandIrd pots
These pots are as tall as they are wide at the top. (In diameter measure-ments of a pot, the top diameter is used.). For example, a six-inch-widestandard pot is six inches high. Standard pots require the most soil. They are,sed for crops requiring a deep roc. medium (like Easter lilies). Since thesepots are not as stable as the next two types, top-heavy crops should not begrown in standard pots,

Azalea pots
The height of an azalea pot is three-quarters of the top diameter. Forexample, an eight-inch azalea pot would be six inches tall. Because azaleapots are not as tall as standard pots, they are more stable. They are used forcrops with a large canopy like poinsettias and mums. Azalea pots also holdlesl, soil than do standard pots. Azalea pots are probably the most commonlyused type of pot in the greenhouse industry.
Bulb pot or pan
The height of a bulb pot is half of the top diameter. Thus, a six-inch bulbpan would be three inches tall. Bulb pots are used for shallow-rooted cropslike spring bulbs. These pots are the least commonly used of the three typesof pots.
FlatsFlats are very common equipment in the greenhouse. Their uses are many:
11.`r production of bedding plants (including seed germination)t transportation of plants
* production of some flowering potted plants
Flats were originally made from wood, but now nearly all flats are madefrom thin, durable plastic. The size of flat most commonly used in the industryis 11 inches wide by 22 inches long (Figure 6.11). Shorter versions are alsoused sometimes - flats about 15 inches in length.
Most flats have a basic flat bottom with or without ribs running the lengthof the flat to secure containers (cell packs and pots). Some flats are "pocketed"on the bottom to hold pot plants more securely. Other flats are "webbed" onthe bottom and are used to hold potted crops. Air circulation arid drainageare assured in these webbed flats.
Bedding plants are finished in flats.Each flat is filled with small fused-plastic inserts or cell packs which inturri are filled with root media. Seed-lings of bedding plants are then trans-planted into these cell packs. When thebedding plants are ready for plantingoutside by the customer, the plants areeasily piv,hed out of the cell pack andtransplanted without any damage to theroot system. The bedding plants thusget established quickly without any lossin quality.
Cell packs come in a variety ofsizes. They are named for the numberof cells and packs they contain, Forexample,
Figure 6.11
Three types of flats of standard size, each 11" x 22" (left toright): flat with solid ribbed bottom; flat pocketed to hold potssecurely; and flat with webbed bottom.
133
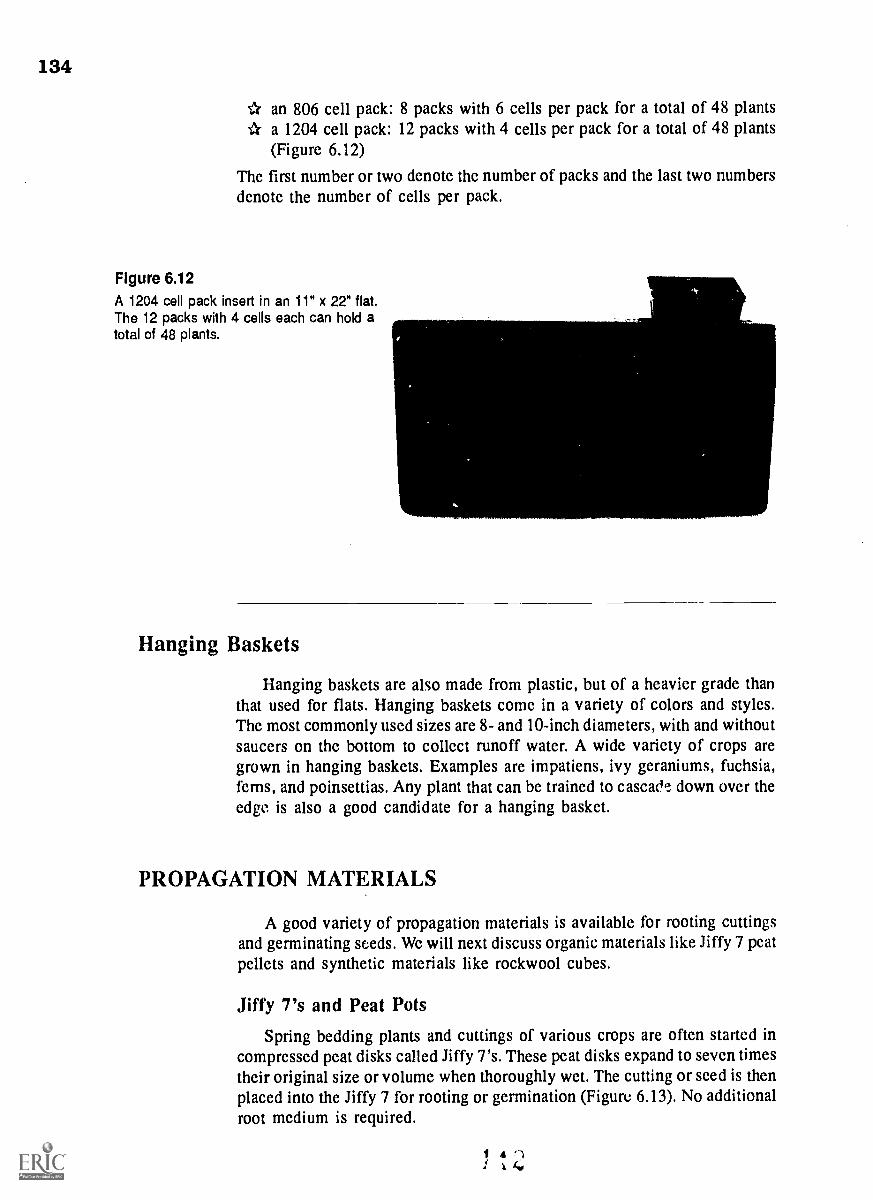
134
an 806 cell pack: 8 packs with 6 cells per pack for a total of 48 plantsa 1204 cell pack: 12 packs with 4 cells per pack for a total of 48 plants(Figure 6.12)
The first number or two denote the number of packs and the last two numbersdenote the number of cells per pack.
Figure 6.12A 1204 cell pack insert in an 11" x 22" flat.The 12 packs with 4 cells each can hold atotal of 48 plants.
Hanging Baskets
Hanging baskets are also made from plastic, but of a heavier grade thanthat used for flats. Hanging baskets come in a variety of colors and styles.The most commonly used sizes are 8- and 10-inch diameters, with and withoutsaucers on the bottom to collect runoff water. A wide variety of crops aregrown in hanging baskets. Examples are impatiens, ivy geraniums, fuchsia,ferns, and poinsettias. Any plant that can be trained to casca& down over theedge is also a good candidate for a hanging basket.
PROPAGATION MATERIALS
A good variety of propagation materials is available for rooting cuttingsand germinating seeds. We will next discuss organic materials like Jiffy 7 peatpellets and synthetic materials like rockwool cubes.
Jiffy 7's and Peat PotsSpring bedding plants and cuttings of various crops are often started in
compressed peat disks called Jiffy 7's. These peat disks expand to seven timestheir original size or volume when thoroughly wet. The cutting or seed is thenplaced into the Jiffy 7 for rooting or germination (Figure 6.13). No additionalroot medium is required.
1 f)
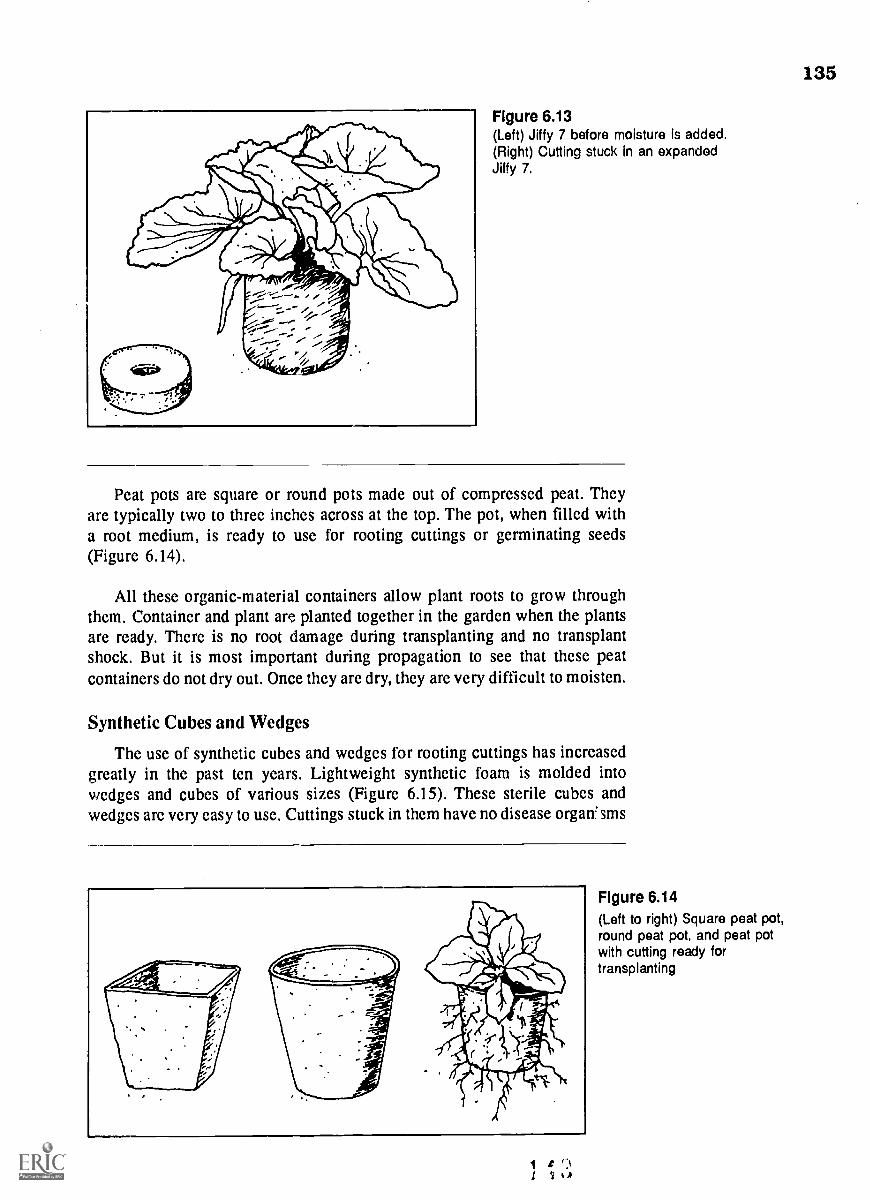
Figure 6.13(Left) Jiffy 7 before moisture is added.(Right) Cutting stuck in an expandedJiffy 7.
Peat pots are square or round pots made out of compressed peat. Theyare typically two to three inches across at the top. The pot, when filled witha root medium, is ready to use for rooting cuttings or germinating seeds(Figure 6.14).
All these organic-material containers allow plant roots to grow throughthem. Container and plant are planted together in the garden when the plantsare ready. There is no root damage during transplanting and no transplantshock. But it is most important during propagation to see that these peatcontainers do not dry out. Once they are dry, they are very difficult to moisten.
Synthetic Cubes and Wedges
The use of synthetic cubes and wedges for rooting cuttings has increasedgreatly in the past ten years. Lightweight synthetic foam is molded intowedges and cubes of various sizes (Figure 6.15). These sterile cubes andwedges are very easy to use. Cuttings stuck in them have no disease orgarfsms
Figure 6.14(Left to right) Square peat pot,round peat pot, and peat potwith cutting ready fortransplanting
135
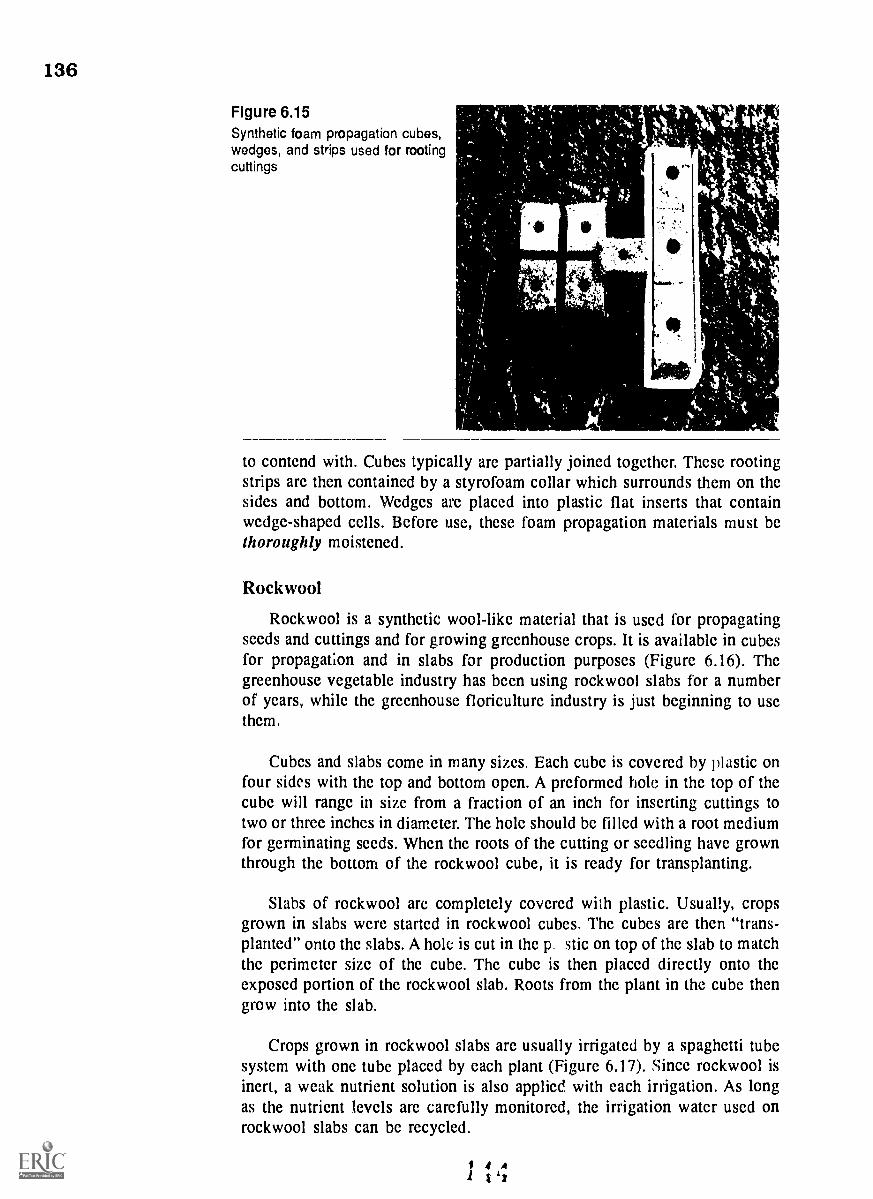
136
Figure 6.15Synthetic foam propagation cubes,wedges, and strips used for rootingcuttings
MIL
to contend with. Cubes typically are partially joined together. These rootingstrips are then contained by a styrofoam collar which surrounds them on thesides and bottom. Wedges are placed into plastic flat inserts that containwedge-shaped cells. Before use, these foam propagation materials must bethoroughly moistened.
Rockwool
Rockwool is a synthetic wool-like material that is used for propagatingseeds and cuttings and for growing greenhouse crops. It is available in cubesfor propagation and in slabs for production purposes (Figure 6.16). Thegreenhouse vegetable industry has been using rockwool slabs for a numberof years, while the greenhouse floriculture industry is just beginning to usethem.
Cubes and slabs come in many sizes. Each cube is covered by plastic onfour sides with the top and bottom open. A preformed hole in the top of thecube will range in size from a fraction of an inch for inserting cuttings totwo or three inches in diameter. The hole should be filled with a root mediumfor germinating seeds. When the roots of the cutting or seedling have grownthrough the bottom of the rockwool cube, it is ready for transplanting.
Slabs of rockwool arc completely covered with plastic. Usually, cropsgrown in slabs were started in rockwool cubes. The cubes are then "trans-planted" onto the slabs. A hole is cut in the p stic on top of the slab to matchthe perimeter size of the cube. The cube is then placed directly onto theexposed portion of the rockwool slab. Roots from the plant in the cube thengrow into the slab.
Crops grown in rockwool slabs are usually irrigated by a spaghetti tubesystem with one tube placed by each plant (Figure 6.17). Since rockwool isinert, a weak nutrient solution is also applied with each irrigation. As longas the nutrient levels are carefully monitored, the irrigation water used onrockwool slabs can be recycled.
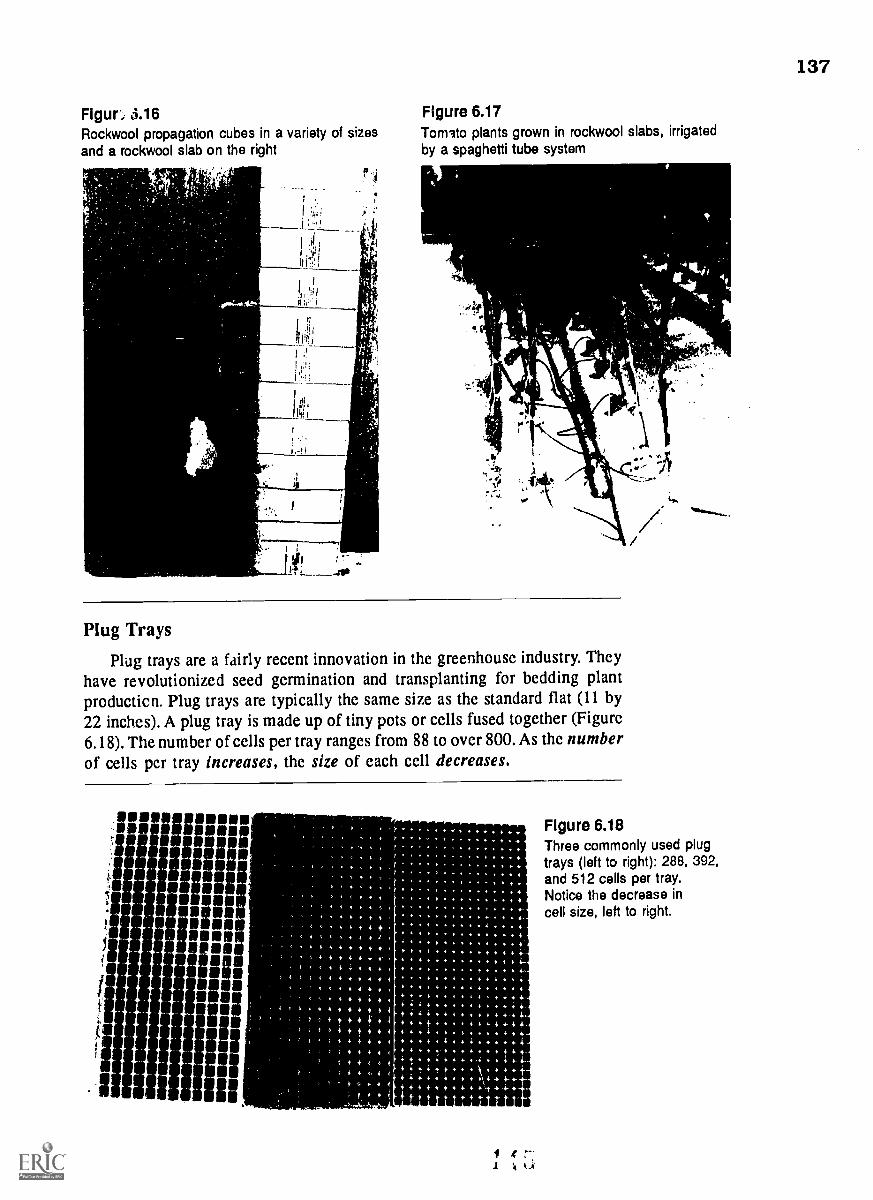
Figur: 6.16Rockwool propagation cubes in a variety of sizesand a rockwool slab on the right
Figure 6.17Tomato plants grown in rockwool slabs, irrigatedby a spaghetti tube system
Plug Trays
Plug trays are a fairly recent innovation in the greenhouse industry. Theyhave revolutionized seed germination and transplanting for bedding plantproduction. Plug trays are typically the same size as the standard flat (11 by
22 inches). A plug tray is made up of tiny pots or cells fused together (Figure6.18). The number of cells per tray ranges from 88 to over 800. As the numberof cells per tray increases, the size of each cell decreases.
a
Figure 6.18Three commonly used plugtrays (left to right): 288, 392,and 512 cells per tray.Notice the decrease incell size, left to right.
137

138
Plug trays with larger cells (e.g. 128, 200, or 288 cells per tray) aresuitable for bedding plants requiring more space and root media like seedgeraniums. Plug trays with small cells are suitable for crops like petunias andbegonias that do not require as much space or ,ermination medium.
The cells of plug trays are either square or round. Square cells are usuallydeeper and so hold more germination medium. They allow for better drainagethan do round cells. Square cells also distribute moisture and nutrients moreuniformly.
In the bottom of each cell is a large drainage hole. The seedlings or plugsare "popped out" through thic hole when they are ready for transplanting. Noroot damage or transplant shock occurs with the use of plugs. A better qualitybedding plant crop can be produced faster when plugs are used for germi-nation instead of flats with seed sown in them. (See Chapter 10 on beddingplant production.)
In conclusion:
The different types of root media used in the greenhouse industry werediscussed in Chapter 6. There are basically two types: soil-based and soilless.All root media must fulfill four functions in order to grow good qualityfloriculture crops. Growers may purchase root media or mix them themselves.Soil-based root media must be steam-pasteurized before use. The nutritionalstatus of the root medium should be monitored frequently to assure propergrowth of the crop growing in it. Containers for growing floriculture cropsinclude pots, flats, and hanging baskets. Propagation containers include Jiffy7's, synthetic foam cubes and wedges, rockwool cubes, and plug trays.

139
This review is to help you check yourself on what you have learned about root media andcontainers. If you need to refresh your mind on any of the following questions, refer to the page
number given in parentheses.
1. Define "root medium." (page 116)
1 What is the composition of soil? (pages 116-117)
3. What are the four functions of a root medium? (page 118)
4. What are the characteristics of a soil-based root medium? of a soilless root medium?
(pages 118-119)
5. What are the advantages of each type of root medium? (pages 118-119)
6. List three organic and three inorganic components of a root medium. (pages 121-122)
7. What is involved in the process of pasteurization? How does it differ from sterilization?(pages 123-124)
8. What type of root medium must be pasteurized before use? (page 124)
9. What factors should be measured when monitoring the nutritional status of a root medium?
(page 125)
10, What is included on a soil test report from the REAL laboratory? (pages 127-128)
11. How can excess soluble salts levels be reduced in root media without leaching the soil?(page 130)
12. Why are clay pots no longer commonly used in the greenhouse industry? (page 131)
13. Name the defining characteristics of standard, azalea, and bulb pots. (pages 132-133)
14. What are flats used for in the giL;enhouse? (page 133)
15. What two sizes of hanging baskets are most commonly used for crops like ivy geraniums
and fuchsia? (page 134)
16. How many plants will a 1204 flat hold (assuming one plant per cell)? (page 134)
17. What propagation materials are used for rooting cuttings? (pages 134-136)
18. What are plug trays used for? (pages 137-138)
19. Which plug tray has larger cellsone with 273 cells or one with 512 cells? (page 137)

CHAPTER 7
. NUTRITION
Competencies for Chapter 7
As a result of studying this chapter, you should be able to do the following:
1. Identify the 17 essential elements for plant growth and categorizethem as micro-elements or macro-elements.
2. List the characteristics of micro-elements and macro-elements.3. Discuss the effect of pH on the availability to plants of the essential
elements.4. Describe the forms in which fertilizers are commonly applied to
greenhouse crops.5. Describe the function of fertilizer injectors.6. Identify nutrient deficiency symptoms in plants.7. Describe the procedure for controlling soluble salts levels in root media.
8. Interpret fertilizer bag labels.9. Mix fertilizer solutions.
10. Apply liquid fertilizers.11. Apply dry fertilizers.12. Use Certilizer injectors.13. Calibrate fertilizer application equipment.14. Take soluble salts readings with a solubridge.
Related Science Concepts1. Give the one- or two-letter chemical symbol of each essential element.2. Compare chemical properties of acids and bases.
Related Math ConceptsI. Use formulas for fertilizer calculations; adjust the concentration
using ratios, percents, conversion factor, and ppm.2. Apply basic operations to ratios and percents to calibrate an injector.
3. Apply basic operations to whole numbers, decimals, and fractions.
4. Read, interpret, and construct charts, graphs, and tables.
Terms to Know
calibrationchlorosiscomplete fertilizerconstant feedfertilizer analysisHozon®
injcctorinterveinalmacro-elementsm icro-elementsppm
141
proportionerslow-release fertilizersolubridgestock tanktarget ratio
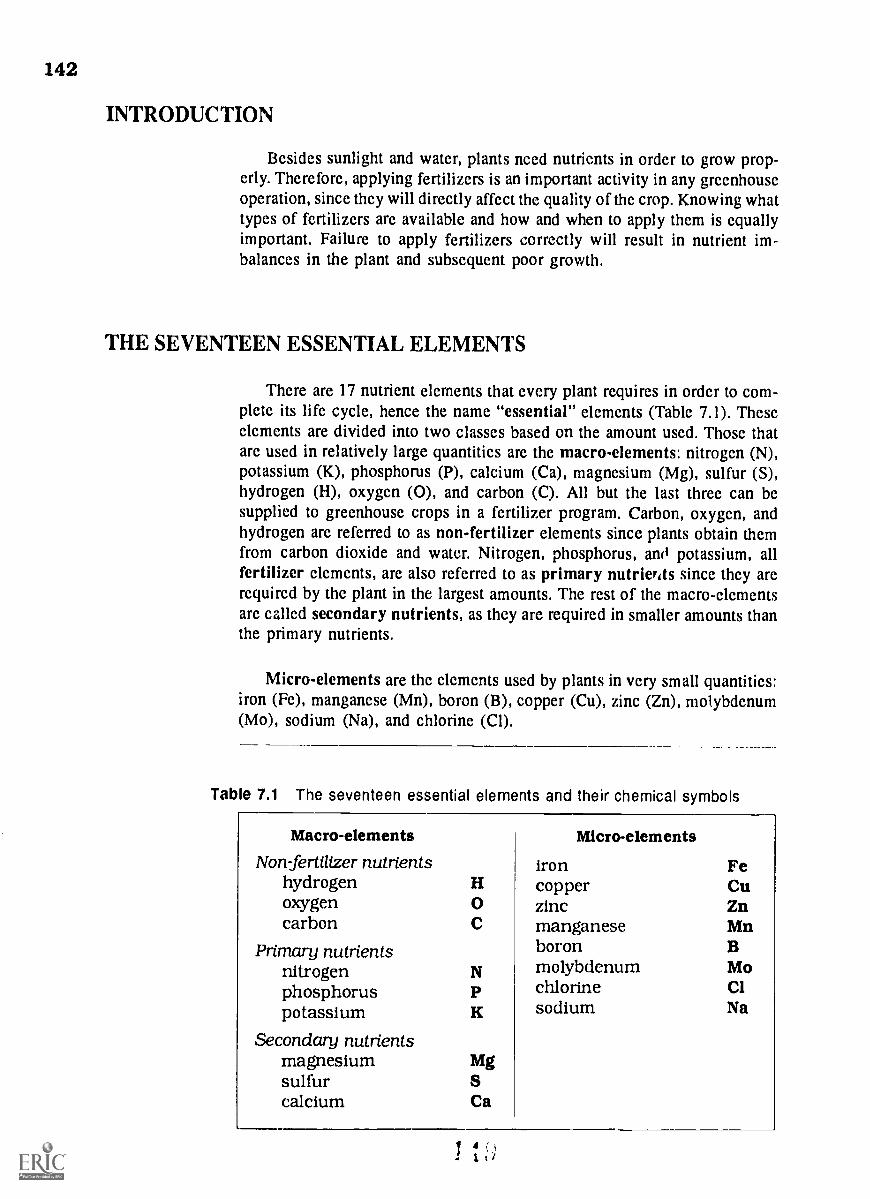
142
INTRODUCTION
Besides sunlight and water, plants need nutrients in order to grow prop-erly. Therefore, applying fertilizers is an important activity in any greenhouseoperation, since they will directly affect the quality of the crop. Knowing whattypes of fertilizers are available and how and when to apply them is equallyimportant. Failure to apply fertilizers correctly will result in nutrient im-balances in the plant and subsequent poor growth.
THE SEVENTEEN ESSENTIAL ELEMENTS
There are 17 nutrient elements that every plant requires in order to com-plete its life cycle, hence the name "essentiar elements (Table 7.1). Theseelements are divided into two classes based on the amount used. Those thatare used in relatively large quantities are the macro-elements: nitrogen (N),potassium (K), phosphorus (P), calcium (Ca), magnesium (Mg), sulfur (S),hydrogen (H), oxygen (0), and carbon (C). All but the last three can besupplied to greenhouse crops in a fertilizer program. Carbon, oxygen, andhydrogen are referred to as non-fertilizer elements since plants obtain themfrom carbon dioxide and water. Nitrogen, phosphorus, me potassium, allfertilizer elements, are also referred to as primary nutrierits since they arerequired by the plant in the largest amounts. The rest of the macro-elementsare called secondary nutrients, as they are required in smaller amounts thanthe primary nutrients.
Micro-elements are the elements used by plants in very small quantities:iron (Fe), manganese (Mn), boron (B), copper (Cu), zinc (Zn), molybdenum(Mo), sodium (Na), and chlorine (CD.
Table 7.1 The seventeen essential elements and their chemical symbols
Macro-elements
Non-fertilizer nutrientshydrogenoxygen 0carbon
Primary nutrientsnitrogenphosphoruspotassium
Secondary nutrientsmagnesium mgsulfurcalcium Ca
Micro-elements
iron Fecopper Cuzinc Znmanganese Mnboronmolybdenum Mochlorine Clsodium Na
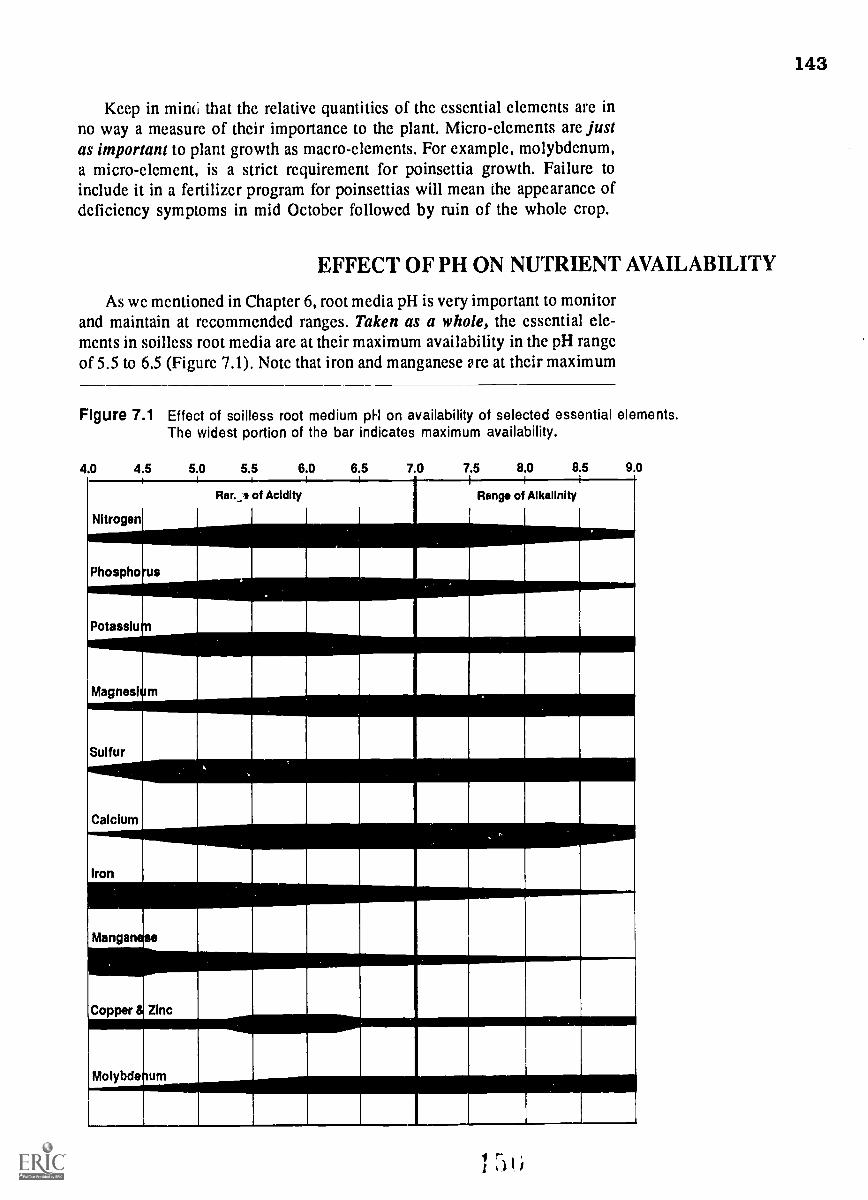
143
Keep in mind that the relative quantities of the essential elements are inno way a measure of their importance to the plant. Micro-elements are justas important to plant growth as macro-elements. For example, molybdenum,a micro-element, is a strict requirement for poinsettia growth. Failure toinclude it in a fertilizer program for poinsettias will mean the appearance ofdeficiency symptoms in mid October followed by ruin of the whole crop.
EFFECT OF PH ON NUTRIENT AVAILABILITY
As we mentioned in Chapter 6, root media pH is very important to monitorand maintain at recommended ranges. Taken as a whole, the essential ele-ments in soilless root media are at their maximum availability in the pH rangeof 5.5 to 6.5 (Figure 7.1). Note that iron and manganese are at their maximum
Flgure 7.1 Effect of soilless root medium pH on availability of selected essential elements.The widest portion of the bar indicates maximum availability.
4.0 4 5 5 0 5.5 6 0 6 5 7.0 7.5 8 0 8 5 9.0
Ran of Acidity,
Rang. of Alkalinity
Nitrogen
Phospho
Potasslu
Magnesl m .
Sulfurk .
Calcium.. -
Iron
Mange se
Copper. . Zinc
Molybde um
144
availability in soilless root media below pH 6.0 and that every element hasits own pH range for maximum availability.
In general, micro-elements are more readily available at lower pH ranges,while macro-elements are more readily available at pH 6.0 and higher. Learn-ing how pH affects nutrient availability will enable you to predict whatelements will become deficient or build up to toxic levels if root medium pHis allowed to drift from its optimum range. You will have a good start indiagnosing and correcting nutrient imbalance.
FERTILIZERS
Introduction
Fertilizers are substances that supply required nutrient elements to theroot medium. Use of fertilizers on greenhouse crops dates back to the begin-ning of greenhouse culture. The first fertilizers were animal manure and bonemeal. Today chemical compounds are the most common fertilizers used.Concern for nutrition of plants no longer involves hit-or-miss practices. Plantnutrition has become a precise science in today's high-technology world.
Classes of Fertilizers
Fertilizers can be divided into two classes: or anic and inorganic.
Organic
Common organic fertilizers are of plant or animal origin. Examples aremanure, cottonseed meal, dried blood, bone meal, and sludge (materialrecovered from sewage waste). Organic fertilizers currently are not used oftenin the greenhouse industry for the following reasons.
1. They can be difficult and unpleasant to work with.2. They do not dissolve in water for convenient application to crops.3. Their analysis is variable. Thus, the exact amount of nitrogen, potassium,
and other elements applied may be in doubt with organic fertilizers.However, organic fertilizers may make a comeback if they can beprocessed in forms that are easy and accurate to use. For there aremounting concerns about the use of inorganic fertilizers and groundwater contamination.
Inorganic
Inorganic fertilizers are minerals obtained from the earth's crust likesodium nitrate, and manufactured materials like superphosphate. These in-organic fertilizers are and were non-living. Inorganic fertilizers are the mostcommonly used fertilizers because
1. they dissolve readily in water for easy application,2. they are convenient to work with, and3, exact concentrations of nutrient elements can be applied. (Sec the
calculations on pages 149-152 in this chapter.)

145
Table 7.2 lists rates of application for some of the common inorganic andorganic fertilizers. Note: Recommendations given in this table are onlygeneralizations. Root media can vary widely in their nutritional content. Theexact quantity to be applied in a given situation should be determined frumsoil test results.
Table 7.2 Common fertilizer Ingredients for greenhouse use
Material Analysls
Rate of ApplicationEffecton pHDry Liquid
Ammonium sulfate 20-0-0 1/2 - 1 lb. per 100 sq. ft. 2 - 3 lb. per 100 gal Acid
Sodium nitrate 15-0-0 3/4 - 11/4 lb. per 100 sq. ft. 2 oz. per 2 gal Alkaline
Calcium nitrate 15-0-0 3/4- 11/2 lb. per 100 sq. ft. 3 oz. per 2 gal Alkaline
Potassium nitrate 13-0-44 1/2 - 1 lb. per 100 sq. ft. 2 oz. per 3 gal Neutral
Ammonium nitrate 33-0-0 1/4 - 1/2 lb. per 100 sq. ft. 11/2 oz. per 5 gal Acid
Di-ammoniumphosphate 21-53-0 1/2 - 3/4 lb. per 100 sq. ft. 11/4 - 11/2 oz. per 4-5 gal Acid
Treble super-phosphate 0-40-0 1 - 21/2 lb. per 100 sq. ft. Insoluble Neutral
Superphosphate 0-20-0 As recommended bysoil test
Insoluble Neutral
Potassium chloride 0-0-60 1/2 - 3/4 lb. per 100 sq. ft. 11/4 - 11/2 oz. per 4-5 gal Neutral
Potassium sulfate 0-0-50 1/2 - 1 lb. per 100 sq. ft. Not advisable Neutral
Urea formaldehyde 38-0-0 3 - 5 lb. per 100 sq. ft. Insoluble Acid
Activated sludge Usually 5-4-0 3 5 lb. per 100 sq. ft. Insoluble Acid
Animal tankage Usually 7-9-0 3 - 4 lb. per 100 sq. ft. Insoluble Acid
Cottonseed meal 7-2-2 3 - 4 lb. per 100 sq. ft. Insoluble Acid
Dried blood 12-0-0 2 - 3 lb. per 100 sq. ft. Insoluble Acid
Steamed bone meal Usually 3-20-0 5 lb. per 100 sq. ft. Insoluble Alkaline
Dolomitic limestone None As recommended bysoil test
Insoluble Alkaline
Gypsum (calciumsulfate)
None 2 - 5 lb. per 100 sq. ft. Insoluble Neutral
Sulfur None 1 - 2 lb. per 100 sq. ft. Insoluble Acid
Magnesium sulfate -epsom salts
None 8 - 12 oz. per 100 sq. ft. 1 VS lb. per 100 gal Neutral
Aluminum sulfate None Not advisable 20 lb. per 100 gal Acid

146
Forms of Fertilizers for Application
Dry Fertilizers
Dry fertilizers, as the name implies, are applied as dry granules to the rootmedium, not dissolved in water. Examples of dry fertilizers are dolomiticlimestone (to raise root medium pH), gypsum or calcium sulfate (to add sulfurand calcium), and superphosphate (to add phosphorus). In general, dryfertii.zers can not be applied in liquid solutions because they are insolublein water. Thus, dry fertilizers are mixed uniformly into the root medium beforeplanting is done. Once in the medium, they readily release nutrients directlyinto the root zone of the crop.
Slow-Release Fertilizers
Several of the dry fertilizers that are incorporated into root media areslow-release fertilizers; that is, they release their nutrients to the root mediumover a period of several months. These fertilizer granules are usually coatedwith a layer of porous plastic. When the granules become moistened, thefertilizer inside is released slowly into the root medium. Slow-release fertil-izers can be mixed in the root medium before planting or applied to the surfaceafter planting. But plastic-coated slow-release fertilizers should never beadded to the root media before steaming. Steam pasteurization will melt theplastic coating and release all the fertilizer into the root medium at once. Theresult will be a ruined crop.
Slow-release fertilizers are a convenient way of supplying nutrients to acrop gradually, since the only labor involved is the initial application. How-ever, once these fertilizers are mixed into the root medium, control of cropnutrition is lost. If a mistake is made, such as too much slow-release fertilizermixed into the root medium, little can be done to correct the situation oncethe crop is planted. Therefore, always follow label directions carefully whenapplying slow-release fertilizers.
Liquid Fertilizers
Liquid fertilizer programs are the most common means of fertilizingcrops. Fertilizers such as calcium nitrate and potassium nitrate are dissolvedin warm water and applied as a liquid to the greenhouse crop. Another typeof water-soluble fertilizer used as a liquid is known as a "complete" fertilizer.It supplies nitrogen, phosphorus, and potassium, the three primary macro-elements. However, a complete fertilizer does not necessarily supply anyother macro- or micro-element.
Methods of Application
There are two methods of applying liquid fertilizers to greenhouse crops:intermittent and constant-feed. With intermittent applications, liquid fertilizeris applied at regular intervals such as weekly, bi-weekly or even monthly. Theproblem with such applications is that there are wide fluctuations in theamount of fertilizer available in the root medium. At the time of application,relatively high concentrations of fertilizer are available, and the plant
147
immediately starts absorbing it. By the time the next application is made,fertilizer levels may be very low or non-existent. This fluctuation can resultin uneven plant growth rates and even stress, producing a poor-quality crop.
Low concentrations of fertilizer applied at every irrigation are much betterfor the greenhouse crop. Such applications keep a constant level of nutrientsavailable to the plants for steady growth without stressful fluctuations. Thisis the constant feed method of liquid fertilizer application. It is the mostcommonly used method in the greenhouse industry. It affords the grower thegreatest control over the nutrition of a greenhouse crop.
Fertilizer Injectors
When liquid fertilizers are used, the needed solution can be mixed up foreach applicatiol. Howevef this is inefficient and time-consuming. Most growersuse a device known as a fertilizer injector. This device injects small amountsof concentrated liquid fertilizer directly into the water lines so that greenhousecrops are fertilized with each watering (constant feed). The fertilizer injectormakes the job easy and fast and eliminates the labor involved in repeatedpreparation and application of fertilizer solution.
Types of Fertilizer Injectors
There are many types of fertilizer injectors in use today. They range froma simple siphon mechanism ("FIozon®") to multiple injectors each of whichinjects a single element into the water line (Figure 7.2). Some injectors arecontrolled by a computer which is programmed to maintain fertilizer concen-trations at desired set points.
Most fertilizer injectors are proportioners that inject precise amounts ofconcentrated fertilizer into the water line either by a pump or by pressure(Figure 7.2A-C). These proportioners are used in large irrigation systemsbecause they have a large water-flow capacity. Siphon injectors, such as aHozon®, draw concentrated fertilizer solution up a siphon hose and into thewater line (Figure 7.2D). Since their water flow capacity is small, siphoninjectors are suitable only for hose watering and for small irrigation systemslimited to one or two benches (e.g. spaghetti tubes).
Injector Ratios
Injectors have either fixed or variable dilution ratios. They range from1:15 for Hozon® injectors to 1:1,000 and greater. Commonly used ratios are1:100, 1:128, and 1:200. For example, an injector with a 1:100 dilution ratiohas one gallon of concentrated fertilizer injected into the water line per 99gallons of water flowing through the injector. In other words, 100 gallons ofthis fertilizer solution collected from the 1:100 ratio injector would becomprised of one gallon of concentrated fertilizer diluted in 99 gallons ofwater.

148
Figure 7.2 Most fertilizer injectors (A, B, C) are proportioners. The hozon injector (D) canbe used for hose watering and small spaghetti tube irrigation systems. Notethe concentrated fertilizer stock tanks in A, C, and D.
A
1
$,
Stock Tanks
Stock tanks containing concentrated fertilizer arc located near the injector.The siphon or fertilizer intake tube should be suspended just above the bottomof the tank. Otherwise it may become clogged with sediments that settle outof the solution. If more than one stock tank is in use, each tank should belabeled as to the fertilizer it contains so that the correct fertilizer is used. Thetanks should be covered so that no debris or harmful organisms can fall intothe tank. To control algal growth, stock tanks and covers should not permitlight to pass through. Siphon tube openings in the cover should be as smallas possible.
.1

149
FERTILIZER CALCULATIONS
Introduction
A good gfower, who must know exactly how much fertilizer is to beapplied to a given crop, will learn just how fertilizer concentrations aremeasured. He or she must learn how to calculate the amounts of fertilizer todissolve in water to achieve the desired concentrations. In this section we willlearn about fertilizer calculations with some examples.
Fertilizer Analysis
Before you start working with fertilizer calculations, you must know whatthe three numbers separated by dashes represent on the fertilizer label. Thesenumbers, called the analysis, are also found on bags of complete fertilizer.The first number is the percentage of nitrogen in the fertilizer, the secondnumber the percentage of phosphorus compound (P205), and the third numberthe percentage of potassium compound (K20). Take the commonly usedcomplete fertilizer analysis of 20-20-20. By weight, this fertilizer contains 20percent nitrogen, 20 percent P205, and 20 percent K20.
But both P205and K20 have correction factors to apply. To convert frompercent P205 to percent phosphorus, multiply P205 by the correction factor0.44. To convert percent K20 to percent potassium, multiply K20 by thecorrection factor 0.83. Therefore, a 20-20-20 fertilizer analysis would include20 percent nitrogen, 8.8 percent phosphorus (20 x 0.44 = 8.8), and 16.6percent potassium (20 x 0.83 = 16.6), or 20-8.8-16.6 percent nitrogen,phosphorus, and potassium, respectively. Other fertilizer analysis combina-tions and their rate of application are given in Table 7.2 (page 145).
Parts Per Million Measurements
Fertilizer concentrations are measured in parts per million or ppm. Thisis a very accurate way of measuring fertilizer concentration because itrepresents the actual amount of the nutrient elements in the fertilizer solu-tion. Fertilizer recommendations and ,rmu las are all based on ppm. Unfor-tunately, many growers still prepare th r fertilizer solutions by adding "somany" six-inch azalea pots of one fertilizer and "so many" pots of anotherfertilizer because "It's always been done that way." These growers have noidea how much fertilizer is actually applied to the crop. That is not goodgreenhouse practice. A grower who knows how to apply ppm formulas willalways know the concentration of fertilizer applied to the crop. He or she canmake adjustments accordingly.
There are charts that give quantities of fertilizers to dissolve in injectorstock tanks for different injection r , for various fertilizer concentrations(Table 7.3). However, only selecttu ppm solutions and ratios are given.Knowing how to calculate fertilizer amounts yourself will give you the abilityto handle your particular situation. You will not be limited to the specifica-tions of these reference charts.

150
Table 7.3 Commonly used formulas, injection ratios, and fertilizer concentrations forconstant feeding.
Per Gallon of Concentrate
InjectionRatio 100 ppm Nitrogen 150 ppm Nitrogen 200 ppm Nitrogen
30% NITROGEN FORMULAS (30-10-10, etc.)
1:200 9.00 oz. 13.50 oz. 18.00 oz.
1:150 6.75 oz. 10.125 oz. 13.50 oz.
1:128 5.76 oz. 8.64 oz. 11.52 oz.
1:100 4.50 oz. 6.75 oz. 9.00 oz.
1:24 1.08 oz. 1.62 oz. 2.16 oz.
1:15 0.675 oz. 1.012 oz. 1.35 oz.
25% NITROGEN FORMULAS (25-5-20, 25-0-25, etc.)
1:200 11.00 oz. 16.50 oz. 22.00 oz.
1:150 8.25 oz. 12.375 oz. 16.50 oz.
1:128 7.04 oz. 10.56 oz. 14.08 oz.
1:100 5.50 oz. 8.25 oz. 11.00 oz.
1:24 1.32 oz. 1.98 oz. 2.64 oz.
1:15 0.825 oz. 1.237 oz. 1.65 oz.
20% NITROGEN FORMULAS (20-20-20, 20-7-7, etc.)
1:200 13.50 oz. 20.25 oz. 27.00 oz.
1:150 10.125 oz. 15.187 oz. 20.25 oz.
1:128 8.64 oz. 12.96 oz. 17.28 oz.
1:100 6.75 oz. 10.125 oz. 13.50 oz.
1:24 1.62 oz. 2.43 oz. 3.24 oz.
1:15 1.012 oz. 1.518 oz. 2.025 oz.

151
Formulas for Calculating Fertilizer Amounts
Two formulas will he used in calculating fertilizer amounts:
(Formula #71)
ounces in 100 gallons of water =ppm desired
CFormula #2)
pounds to add to stock tank =
1* Correction factors:% P205 X 0.44 = % P% K20 X 0.83 = K
% element X correction factor* X 0.75
ounces per100 gallons X
second number volume ofof injector ratio ' stock tank in gal.
100 X 16
'Or Formula #1 is used to calculate how many ounces of fertilizer to dissolvein 100 gallons of water to achieve the desired ppm.
'Or Formula #2 is used to calculate how many pounds of fertilizer are neededto dissolve in the stock tank to obtain the desired ppm in a constant feedprogram.
Formula #1 must be used first in order to apply Formula #2. Note thecorrection factor in Formula #1, which we mentioned earlier as applying toP205 and K20. (Nitrogen does not require a correction factor.) With ppm,conversion factors, and formulas in mind, let's look at an example of fertilizercalculation.
Example of Fertilizer Calculation
A grower with a 1:128 ratio injector and a 30-gallon stock tank wants toapply 250 ppm of nitrogen to a crop of mums. The available fertilizer hasa 20-10-20 analysis, so it contains 20 percent nitrogen by weight. How manypounds of this fertilizer should the grower dissolve in the stock tank?
Step ICalculate how many cunces of the fertilizer will be needed to dissolve in 100gallons of water to produce a solution containing 250 ppm of nitrogen. Use
Formula #1.
250 250ounces/100 gallons = = = 16.7
20 x 0.75 15
16.7 ounces of 20-10-20 fertilizer dissolved in 100 gallons of water will result
in a fertilizer solution of 250 ppm of nitrogen. Note that with nitrogen, thereis no correction factor in the denominator.

152
Step 2
Take the answer from Formula #1 and plug it into Formula #2. This will tellyou how many pounds of the 20-10-20 fertilizer will be leeded in the stocktank to produce a 250 ppm fertilizer solution from the 1:128 ratio injector.
pounds to addto stock tank = 16.7 x 128 x 30/100 x 16
= 16.7 x 128 x 30/160064,128 40.1
= 1600
If the grower dissolves 40.1 pounds of the 20-10-20 fertilizer in the 30-gallonfertilizer stock tank, the 1:128 ratio injector will produce a fertilizer solutionof 250 ppm of nitrogen in the water lines.
Calibrating Fertilizer Injectors
To ensure that a fertilizer injector is working properly, it must be cali-brated periodically; that is, the dilution ratio must be calculated. Calibrationsthat show a discrepancy from the target ratio indicate that the injector is notoperating correctly. It must be repaired immediately. Otherwise, the green-house crops will continue to receive the wrong amount of fertilizer; an entirecrop could be ruined.
Calibration ProceJureA simple way to calibrate an injector is to collect a known amount of
fertilizer solution from the injector. Then measure the quantity of concen-trated fertilizer that was taken up by the injector. Determine the ratio bydividing the amount of fertilizer solution collected from the injector by theamount of concentrated fertilizer taken up by the injector.
Example
The equipment to be calibrated is a 1:100 ratio injector. The injector intakehose is placed in a known amount of fertilizer stock solution, and twenty liters(20,000 milliliters) of fertilizer solution is collected. The stock solution volumeis measured before and after collecting the fertilizer solution. The differenceis 195 ml of stock solution - the amount injected by the proportioner.
The ratio can now be calculated. It is 195:20,000 according to the originalmeasurements. Divide both sides of the ratio by 195 (the volume of stocksolution used by the injector) and the true ratio is 1:103. This is very closeto the target ratio of 1:100. No adjustment is needed. Injectors with ratios thatare more than 5 percent off the target ratio should be adjusted, if possible,or replaced.
153
NUTRITIONAL PROBLEMS
Nutritional problems can result from a number of factors. Some common
causes are over- or under-fertilizing, overwatering, and poor drainage and
aeration in the root medium. Diagnosing nutrient deficiency can be verydifficult because a number of environmental factors and diseases can causesimilar symptoms. Figure 7.3 (pages 156-157) shows some of the manypossibilities. In addition, an excess of a nutrient element or elements in a root
medium can tie up other nutrients and result in deficiency symptoms of the
latter nutrients. To confirm nutrient deficiency symptoms, samples of theaffected foliage should be sent to a laboratory for analysis.
Nutrient Deficiency Symptoms
Watch for the following deficiency symptoms associated with each of
these nutrients.
Nitrogen There is general chlorosis (yellowing) of the plapt. As time progresses,
the lower leaves turn brown and fall off. Growth of the plant is stunted.
Phosphorus There is stunting of the plant and poor bud formation. Dark green
foliage turns chlorotic with a purplish cast, especially on lower part of the
plant.
Potassium Leaf margins first develop chlorosis and then turn brown in color.
Leaf tissue eventually dies. Besides on the margins, discolored areas may be
scattered across the leaf. These symptoms begin in the lowest part of the plant
and progress upward.
Calcium Young leaves are prominently malformed and often chlorotic.Development of the stem's growing point is arrested; root growth is poor.
Magnesium Interveinal chlorosis (yellowing of the leaf between the veins)
occurs in lower or older leaves and eventually progresses toward the top of
the plant.
Iron Young leaves develop interveinal chlorosis (in contrast to the older
leaves for magnesium deficiency). Damage is confined to upper portions of
the plant.
Boron Symptoms vary according to the affected plant species: death of the
growing point followed by growth of many side shoots below it (called a
"witch's broom"); young leaves becoming thick and leathery and often chlo-
rotic; and young leaves becoming very wrinkled. Damage is confined to upper
portions of the plant.
Molybdenum Symptoms, usually found only in poinsettias, develop in October.
First, margins of the middle leaves turn chlorotic and then curl inward. As
the chlorosis spreads inward, the curled leaf margins turn brown.
H

154
Nutrient Toxicity Problems
Excess fertilizer can also cause poor growth. Roots can be easily damagedby the resulting high soluble salts levels in the root medium. With the reduc-tion of water and nutrient uptake, nutrient deficiency symptoms of someessential elements will develop. Sometimes, due to an improper fertilizerprogram, these essential elements accumulate in the plant to toxic levels. Theresult is reduced growth, chlorosis, and other visual clues that plants are nothealthy. Regardless of the cause, deficiency or toxicity of nutrients, alwayshave your diagnosis confirmed by a soil and/or foliar analysis before takingcorrective action.
Soluble Salts
Whether you run your own soil test or have a sample tested in a laboratory,a conductivity reading or measure of the soluble salts level should be partof the procedure. As mentioned previously, "soluble salts" refers to the saltscontributed to the root medium by fertilizers (both organic and inorganic).
Excess soluble salts tend to accumulate in the root medium when fertilizeris applied either too much at one time (concentration is excessive) or toofrequently. Other causes are insufficient watering and poor drainage, or acombination of these. The result is insufficient leaching of the root medium.
An instrument called a solubridge is used to measure soluble salts levelsin the root medium (Figure 7.4). A solubridge is easy to use. Every greenhouseshould have one to monitor the soluble salts levels in the root media beingused.
FIgUre 7.4A solubridge used for measuringsoluble salts levels in root media
155
Using a Solubridge
Following are the steps in using a solubridge.1 Take a sample of the root medium and allow it to dry.2. Moisten the root medium sample with distilled water, using twice as
much water as root medium. Let it soak for 24 hours.3. Insert the probe of the solubridge into the root medium-water mixture.4. Take a reading. Then consult a chart to help interpret the results.
In Chapter 6 we discussed control of soluble salts levels in root media.Remember that the best way to control soluble salts levels in root media isto use a sound fertilizer program which supplies nutrients in known amountsat recommended rates.
When you are implementing a constant feed program, include a plainwater application every third or fourth irrigation. Plain water will leach awayexcess soluble salts from the root medium. Also, when applying the dilutefertilizer solution, allow for a small amount of leaching to control soluble saltslevels further.
In conclusion:Chapter 7 dealt with the topic of nutrition of greenhouse crops. Seventeen
essential elements, both macro-elements and micro-elements, are known tobe vital to plants in the greenhouse. To supply these essential elements,growers use fertilizers in dry, liquid, or slow-release form. The most commonmethod of application is constant feed, which uses fertilizer injectors tosupply fertilizer directly in the water lines. If nutrients are in short supplyin the plant, deficiency symptoms develop that can usually be identified.Excess soluble salts in the root medium will damage roots and eventually ruinthe crop. Soil samples taken periodically should be analyzed for soluble saltseither in the greenhouse using a solubridge or at a soil testing lab. Highsoluble salts levels in the root medium can be avoided by implementing a wisefertilizer management program.
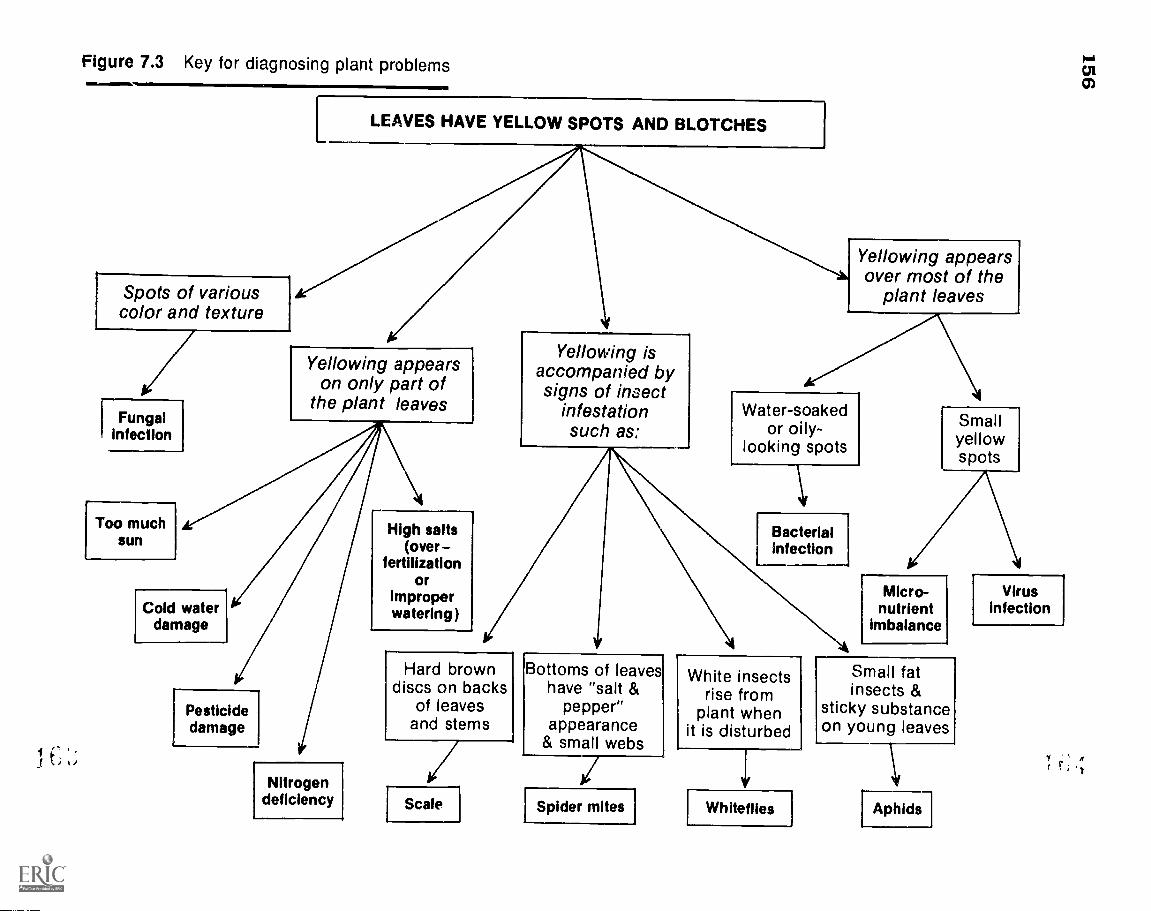
Figure 7.3 Key for diagnosing plant problems
Spots of variouscolor and texture
FungalInfection
Fo muchsun
Cold waterdamage
Pesticidedamage
j
LEAVES HAVE YELLOW SPOTS AND BLOTCHES
Yellowing appearsover most of the
plant leaves
Yellowing appearson only part of
the plant leaves
Nitrogendeficiency
High salts(over
fertilizationor
improperwatering )
Yellowing isaccompanied bysigns of insect
infestationsuch as:
Water-soakedor oily-
looking spots
Bacterialinfection
Hard browndiscs on backs
of leavesand stems
Scale
Bottoms of leaveshave "salt &
pepper"appearance
& small webs
Spider mites
White insectsrise from
plant whenit is disturbed
Whitellies
Smallyellowspots
IMicro-nutrient
imbalance
Small fatinsects &
sticky substanceon young leaves
Aphids
Virusinfection
r

Fluoride 1
toxicity
Figure 7.3 (continued)
Plants wiltquickly
OLDER LEAVES TURN YELLOW AND DROP OFF
At
Overall plantappears unhealthy
Soil is usuallydamp - algaegrowing onsoil surface
Potbound
Infectiousor non-
infectiousroot rot
[Plantstern softdiscolored
Crown rotor root
rot
V
Plal t isgetting leggyor stretched
look
Too littleeight
New leavesare smallerthan normal
Not enoughnitrogenfertilizer
Veins ofleaves arestill green
A lack of ironor other nutrient
imbalance
Too much]fertilizer
New growthis normal
As leaves agethe edges turnbrown & dry
Pollutionproblem.Check forethylene,natural
gas, etc.or pesticide
misuse.
High salts(Not being
wateredthoroughly)
Outer edges ofolder leaves turn
yellow
Soil nutritionproblem. Checkfor soluble salts
Buds turnbrown
too
Highsalts
High heator draft
[Lowhumidity
Gettingtoo drybetween
waterings
Lowlight
)

158
This review is to help you check yourself on what you have learned about nutrition. If youneed to refresh your mind on any of the following questions, refer to the page number givenin parentheses.
1. Name the essential macro-elements. Which three are not supplied by a fertilizer program?(page 142)
2. What differentiates a macro-element from a luicro-element? (page 142)
3. Name the essential micro-elements. How does their importance compare with that of macro-elements? (pages 142-143)
4. In what root medium pH range are the essential elements at their maximum availabilityfor uptake by plants? (page 143)
5. Why are inorganic fertilizers more widely used in the greenhouse industry than organicfertilizers? (page 144)
6. In what form are fertilizers most c.ommonly applied to greenhouse crops? Why? (page 146)
7. Define "constant feed" with regard to a fertilizer application program. (page 147)
8. Discuss how a fertilizer injector works. (pages 147-148)
9. On a fertilizer label, what does "15-16-17" mean? (page 149)
10. How many pounds of a 20-10-20 fertilizer should be dissolved in a 20 gallon stock tankusing a 1:100 ratio injector to supply 225 ppm of nitrogen to a mum crop? (pages 151-152)
11. Describe briefly how to calibrate a fertilizer injector. (page 152)
12. What factors can cause nutrients to become deficient in a greenhouse floriculture crop?(page 153)
13. How do magnesium deficiency symptoms differ from those of iron? (page 153)
14. If a poinsettia crop is short on nitrogen, what will the crop look like? (page 153)
15. Why should soluble salts levels in root media be measured frequently during the productionof a greenhouse crop? (page 154)
16. What factors contribute to high soluble salts levels in root media? (Page 154)
17. What instrument is used to measure soluble salts levels in a root medium? (page 155)

CHAPTER 8
INTEGRATED PEST MANAGEMENT
Competencies for Chapter 8As a result of studying this chapter, you should be able to do the following:
1. Describe the four main parts of an integrated pest management program.2. Use sanitary measures to prevent pest infestations.3. Use weed barriers on ground benches.4. Eradicate weeds inside and outside the greenhouse.5. Follow proper cleaning and sterilization procedures to maintain a
healthy environment.6. Monitor pest populations with sticky traps.7. Estimate pest population numbers.8. Evaluate chemical/culturalfoiological control options.9. Maintain records of pest populations and chemical applications.
Related Science Concepts1. Discuss the implications of pesticide resistance to horticulture.2. Explain the serious nature of pesticide hazards to people.
Related Math Concepts1. Read, interpret, and construct charts, graphs, and tables to monitor pest
populations.2. Apply basic operations to ratios and percents.3. Apply basic operations to whole numbers, decimals, and fractions.
Terms to Knowbiological control life cycle
Enearsia formosa microbe
EPA parasite
fumigant predator
infestation "soft" pesticide
IPM target pest
159

160
INTRODUCTION
In the recent past, pests of greenhouse crops were controlled almostentirely by chemical pesticides. The objective of thc grower was to controlinsect pests by completely eradicating them. (Some growers still follow thispattern.) Chemical pesticides are chemicals that are specifically formulatedto kill target (selected) pests. There are several problems with intensive useof chemical pesticides, however.
Every time a pesticide is applied, there arc a few insects that resist thedamaging effects and survive. These resistant insects then reproduce andpopulate the arca with offspring that arc also resistant to that pesticide. Eachtime the same or a similar pesticide is applied, it will kill fewer and fewerof the target pests. It will no longer be effective. This pesticide resistanceoccurs all too frequently in the greenhouse industry.
Another serious problem with pesticides is the severe hazard they poseto the environment and to plants and people when the proper precautions arcnot taken. Because of this hazard, the EPA (Environmental Protection Agency)removes many pesticide registratins every year, limiting the number ofchemical pesticides that are available for pest control.
A new, more realistic goal of pest control is now set by increasing num-bers of greenhouse growers: to keep pest populations low enough that damageis negligible. It is no longer realistic to strive for zero populations of pests.
DEFINITION OF IPM
Instead of relying almost entirely on chemical pesticides, the grower willhave to change strategies and use a combination of methods to control pestssafely and effectively. This combination or system of methods is known asintegrated pest management (1PM).
While the principles of integrated pest management remain the same, eachindividual greenhouse requires its own unique IPM program to suit its needs.Greenhouses vary in physical layout and number and type of crops producedeach year.
PRINCIPLES OF IPM
The four basic areas that arc addressed in any IPM program arc:1. Greenhouse sanitation2. Physical control3. Biological control4. Pesticides
Each of these areas will be discussed in detail and examples given of appli-cations for IPM programs.
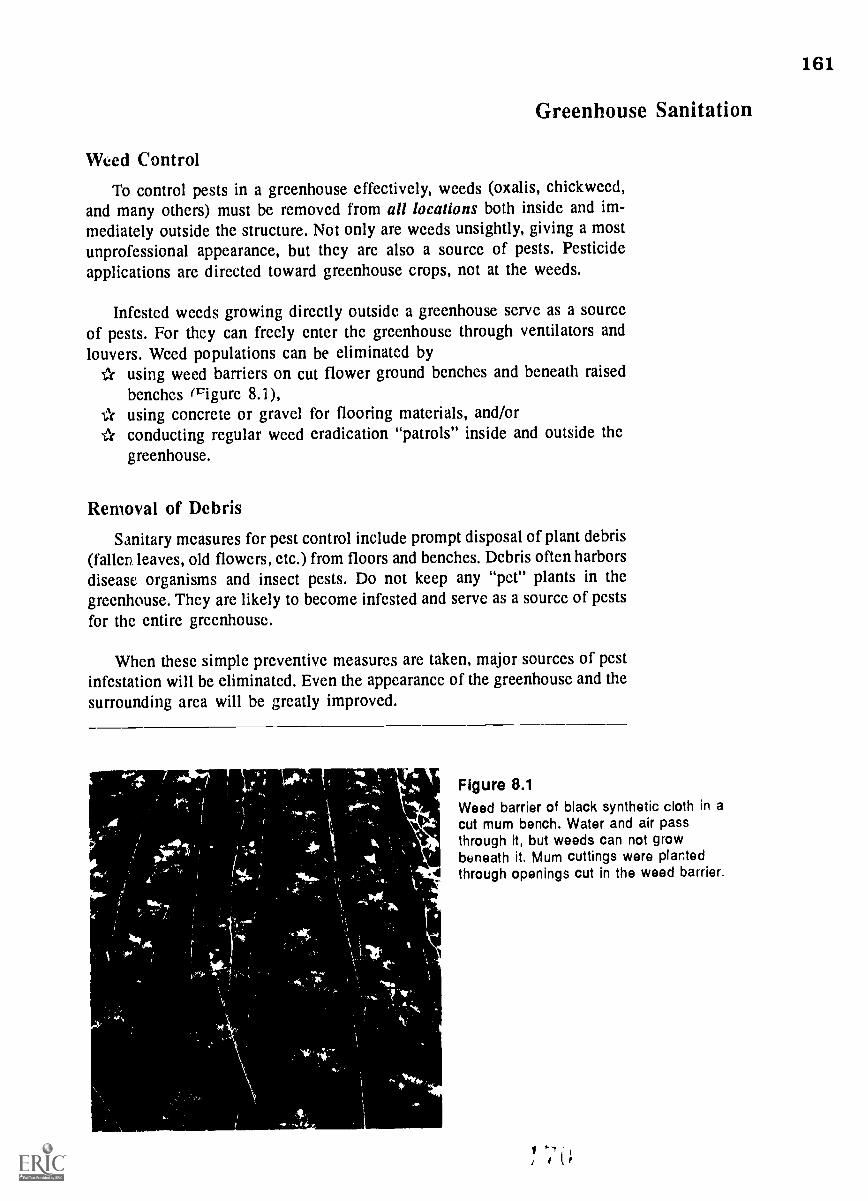
Greenhouse Sanitation
Weed Control
To control pests in a greenhouse effectively, weeds (oxalis, chickweed,and many others) must be removed from all locations both inside and im-mediately outside the structure. Not only are weeds unsightly, giving a mostunprofessional appearance, but they are also a source of pests. Pesticideapplications are directed toward greenhouse crops, not at the weeds.
Infested weeds growing directly outside a greenhouse serve as a sourceof pests. For they can freely enter the greenhouse through ventilators andlouvers. Weed populations can be eliminated by
using weed barriers on cut flower ground benches and beneath raisedbenches (9gure 8.1),
IN using concrete or gravel for flooring materials, and/orconducting regular weed eradication "patrols" inside and outside thegreenhouse.
Removal of Debris
Sanitary measures for pest control include prompt disposal of plant debris(fallen leaves, old flowers, etc.) from floors and benches. Debris often harborsdisease organisms and insect pests. Do not keep any "pet" plants in thegreenhouse. They are likely to become infested and serve as a source of pestsfor the entire greenhouse.
When these simple preventive measures are taken, major sources of pestinfestation will be eliminated. Even the appearance of the greenhouse and thesurrounding area will be greatly improved.
"""11E.M11111:2111111
Figure 8.1Weed barrier of black synthetic cloth in acut mum bench. Water and air passthrough it, but weeds can not growbeneath it. Mum cuttings were plantedthrough openings cut in the weed barrier.
161

162
Physical Control
The second area of IPM is the use of physical manipulation to preventpest infestation. Several methods can be implemented.
Screens
The first method is installation of fine mesh screens over greenhouseopenings like ventilators and louvers. These screens prevent the entry ofcommon flying insect pests like aphids, thrips, whiteflies, and others throughopenings in the greenhouse.
Yellow Sticky TrapsYellow sticky traps are another physical control method (Figure 8.2). They
come in either strips or squares (commonly, 2 x 2 inches). The yellow colorattracts winged pests like whiteflies, thrips, and winged aphids. Once theyland on the sticky surface of the trap, they are stuck and soon die. Traps shouldbe placed at plant level either suspended from overhead supports by wire orstring, or placed on a stake.
The main purpose of yellow sticky traps is to monitor pest populations,though traps do help to reduce populations as well. For monitoring purposes,one trap per 1,000 square feet is recommended. It is important to record thetypes and numbers of pests caught on the trap and to graph the results overtime. When pest populations start to increase, greenhouse growers can takeimmediate corrective action.
Figure 8.2
A 2"x 2" yellow sticky trap mountedat the canopy height of a poinsettiastock plant
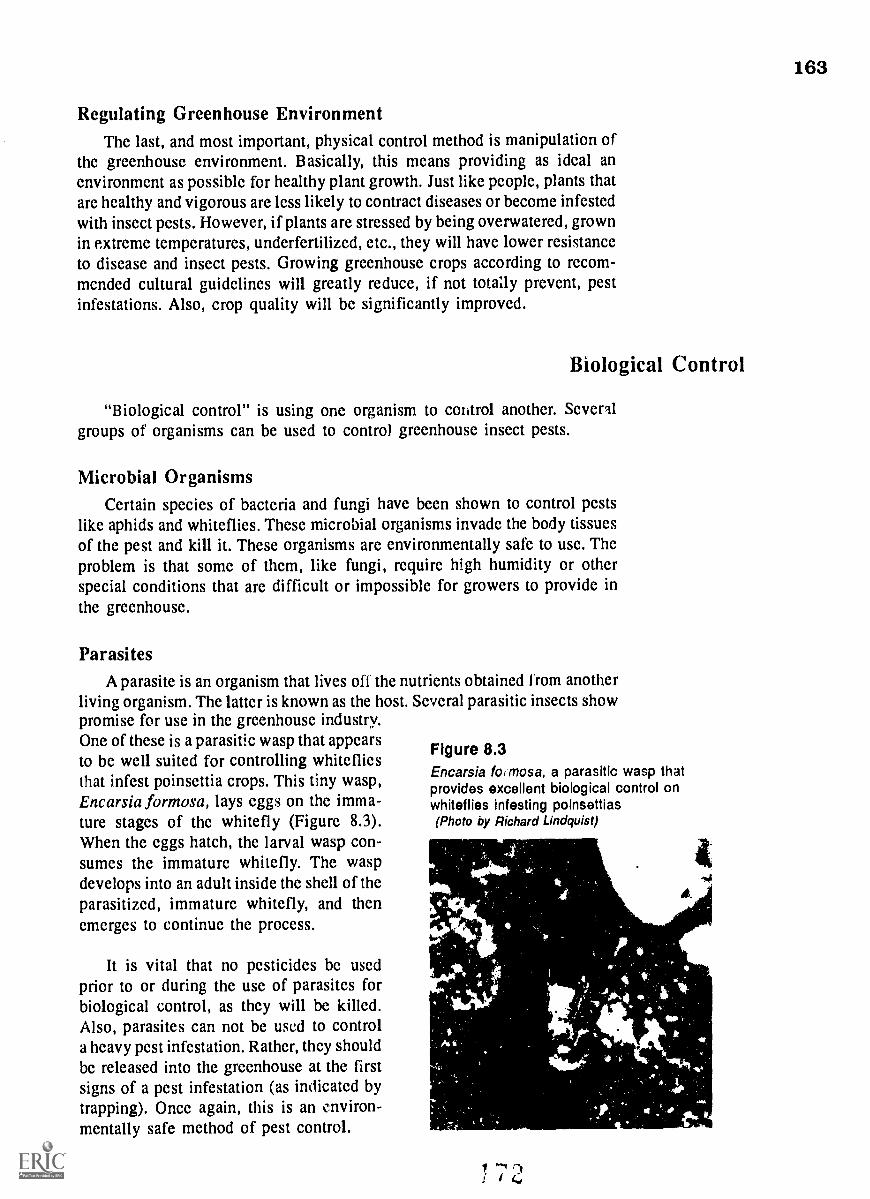
163
Regulating Greenhouse EnvironmentThe last, and most important, physical control method is manipulation of
the greenhouse environment. Basically, this means providing as ideal anenvironment as possible for healthy plant growth. Just like people, plants thatare healthy and vigorous are less likely to contract diseases or become infestedwith insect pests. However, if plants are stressed by being overwatered, grownin extreme temperatures, underfertilized, etc., they will have lower resistanceto disease and insect pests. Growing greenhouse crops according to recom-mended cultural guidelines will greatly reduce, if not totally prevent, pestinfestations. Also, crop quality will be significantly improved.
Biological Control
"Biological control" is using one organism to control another. Sever IIgroups of organisms can be used to control greenhouse insect pests.
Microbial OrganismsCertain species of bacteria and fungi have been shown to control pests
like aphids and whiteflies. These microbial organisms invade the body tissuesof the pest and kill it. These organisms are environmentally safe to use. Theproblem is that some of them, like fungi, require high humidity or otherspecial conditions that are difficult or impossible for growers to provide inthe greenhouse.
ParasitesA parasite is an organism that lives off the nutrients obtained from another
living organism. The latter is known as the host. Several parasitic insects showpromise for use in the greenhouse industry.One of these is a parasitic wasp that appears Figure 8.3to be well suited for controlling whiteflies
Encarsia foi rnosa, a parasitic wasp thatthat infest poinsettia crops. This tiny wasp, provides excellent biological control onEncarsia formosa, lays eggs on the imma- whiteflies infesting poinsettiasture stages of the whitefly (Figure 8.3). (Photo by Richard Lindquist)
When the eggs hatch, the larval wasp con-sumes the immature whitefly. The waspdevelops into an adult inside the shell of the
a.parasitized, immature whitefly, and thenemerges to continue the process.
It is vital that no pesticides be usedprior to or during the use of parasites forbiological control, as they will be killed.Also, parasites can not be used to controla heavy pest infestation. Rather, they shouldbe released into the greenhouse at the firstsigns of a pest infestation (as indicated bytrapping). Once again, this is an environ-mentally safe method of pest control.

164
PredatorsPredators are organisms that prey upon or eat other organisms. There are
several predators that may be used for controlling greenhouse pests. One isa beetle that in both its immature and adult stages voraciously devours immaturewhiteflies and adults. There is a predatory mite that is used against thrips(Figure 8.4). These mites are packaged in a bottle containing a carrier substancewith food for the mites in it. The material containing the mites is simplypoured out into a measuring spoon and sprinkled over the crop.
Like parasites, predators should be released only when pest infestationsare small so that effective control can be achieved. Keep in mind that anyuse of pesticides on crops containing predators will wipe out both predatorand pest.
The use of biological control in the greenhouse industry is very promising.Research is still being conducted to determine such factors as appropriaterelease rates for a given organism, optimum release times in the crop cycle,and many others. Biological control will not totally eradicate a pest popula-tion; it is only one of the methods used in an IPM program for control of pestpopulations.
Figure 8.4 A. A predatory mite used for biological control of thrips is packaged in a bottle. B. Themites in a nutrient carrier substance are simply sprinkled by spoonfuls over a rose crop.
A
006'
4kb.AAO
Pesticides
"Soft" PesticidesAs the EPA removes pesticides that are very harmful to the environment,
new pesticides have appeared on the market that are "softer" towards theenvironment, plants, and people. These less toxic pesticides should be incor-porated into the 1PM program. Some of these "soft" pesticides are thefollowing:
1. Special lightweight, horticultural oils. When sprayed on plants, they killpests by suffocation and do no harm to the plant.
r4"4"T ""Y 11,114!LABLE_= Li

165
2. A class of insecticidal soaps that are effective against many insect pests.3. Natural-product insecticides derived from plants and other living
organisms.4. Insect growth regulators. These usually do not kill adults. They interfere
with the pest's life cycle and prevent the young from developing intoadults.
Using Pesticides SparinglyWhen you must use pesticides, apply them only when necessary. Avoid
the "spray and pray" method which includes pesticide applications whetherneeded or not. Use yellow sticky trap data to determine pesticide applications.Be sure to rotate the classes of pesticides used so that no pesticide resistanceoccurs. Apply the pesticide wisely; that is, apply it to the part of the plantwhere the pest is located. For example, if the pest is located on the undersideof the leaf, direct the pesticide spray from below the leaf up to its undersiderather than from above onto the top of the leaf.
Wise pesticide management as outlined above will result in reducedpesticide usage and costs, increased greenhouse personnel safety, and reducedpesticide contamination of the environment. Everyone benefits from thisbadly needed change in pesticide management.
SETTING UP AN IPM PROGRAM
As we mcntioned previously, each greenhouse should have an IPM programunique to its situation. Factors to consider are1. how many different crops will be planted,2. what types of crops will be planted,3. whether crops will be physically separated, and4. whether the greenhouse will be in continuous production.
The number and types of crops will determine how complicated the IPM willbe. Smaller numbers and fewer types of crops will make it simpler to imple-ment IPM, since there will be fewer types of pests to control.
If the growing area is separated into sections by walls, a different cropcan be grown in each separate area. This makes IPM easier because pestsunique to that crop will be isolated from other crops and pests. A pest controlmethod can then be formulated just for that pest, and control will be moreeffective.
If there can be a short period of time between crops when there are noplants in the greenhouse, the greenhouse can be given a thorough treatmentto eliminate pests and disease organisms. Fumig4nts can be released withoutfear of killing beneficial predatory or parasitic insects. Benches, aisles, andother surfaces can be scrubbed down to sanitize the greenhouse. The resultwill be a good start for the next crop a clean greenhouse that is free of insectpests and disease organisms. This is difficult to accomplish when greenhousesare in continuous production.
316
These are some of the main factors to consider in implementing an IPMprogram for a greenhouse. Careful planning and a lot of time go into sucha program, but the results will be more than worth the investment. Also, youwill have a pest control program that is much safer for the environment.
In conclusion:
Chapter 8 dealt with the principles of integrated pest management (IPM).IPM is actually a number of pest control methods used together to controlgreenhouse crop pests. Each greenhouse should have its own unique IPMprogram. Four principles of IPM are used together not only to control pestinfestations, but also to prevent them in the first place.
167
This review is to help you check yourself on what you have learned about Integrated PestManagement. If you need to refresh your mind on any of the following questions, refer to the
page number given in parentheses.
I. Define "IPM." (page 160)
2. Why has IPM become the focus of ai tendon for the greenhouse industry? (page 160)
3. What are the four principles of IPM that are used in an IPM program? (page 160)
4. Why should all weeds be eliminated from inside and outside a greenhouse? (page 161)
5. Discuss greenhouse sanitation and how it reduces pest populations. (page 161)
6. How are yellow sticky traps used in an IPM program? What types of pests are caughton these traps? (page 162)
7. Explain how providing an ideal greenhouse environment for your crop will help to prevent
pest infestations. (page 163)
8. Define "biological control" of greenhouse pests. (page 163)
9. What are the three classes of biological control organisms used in greenhouses to control
pests? (pages 163-164)
10. What is Encarsia formosa? How does this organism control whitefly, a major greenhouse
pest? (page 163)
11. What types of pesticides in use today are not as harmful to the environment as those used
previously? (pages 164-165)
12. What are the four primary factors to consider when setting up an IPM program for your
greenhouse? (page 165)
CHAPTER 9
PLANT HEIGHT CONTROL BY DIF
Competencies for Chapter 9
As a result of studying this chapter, you should be able to do the following:
1. Discuss the effects of DIF on plant growth.2. Implement DIF on grenhouse crops to control plant height.
3. Describe circumstances which limit the application of DIF.
4. List greenhouse crops that can be height-limited by DIF.
5. Describe the advantages of the use of DIF.
Related Science Concepts
I. Examine plant development.2. Explain role of light in internode elongation.
Related Math Concepts
1. Apply mathematical concepts and operations to solve problems relevant
to plant height control by DIF.2. Apply measuring skills to obtain data necessary to solve problems
relevant to plant height control by DIF.3. Read, interpret, and construct charts, graphs, and tables that are relevant
to plant height control by DIF.
Terms to Know
chlorophyllDIFgrowth regulatorinternodeleaf orientationnodetemperature regime
169

170
INTRODUCTION
A common concern in the greenhouse industry is bedding plants andpottcd flowering crops that grow too tall. To prevent this, chemical growthretardants are frequently used. These chemicals do an excellent job ofcontrolling height. However, growth retardants can bc very expensive. Also,if they are not properly applied, they may harm the plants by burning thcfoliage. Some of the ncwcst growth regulators arc very powerful; thcy do notleave much room for error. Even a very small amount of excess chemicalapplied can cause a dwarfcd crop.
Anothcr mcthod that has bccn uscd to control thc hcight of selected cropslike impaticns is controlled withholding of water. Plants grown on thc dry sidctcnd to be morc compact. This method requires considerable skill and constantmonitoring. If plants arc allowed to dry out too much, thcy will suffcr lossof quality.
Research at Michigan Statc University has shown that certain day-nighttemperature rcgimcs also control plant height. This ncw conccpt, called DIF,has proved to be just as effective as chemical growth regulators. This day-night temperature regulation will bc thc focus of this chapter.
DEFINITION OF DIF
"DIF" is simply an abbreviation for thc mathematical DIFference bctwccnthe day tcmperaturc (DT) and the night temperature (NT). In othcr words,
DIF = DT -- NT. Thcrcfore,
A positive DIF occurs when DT is greater than NT.Example: greenhouse with DT of 75°F and NT of 65°F
75-65 = +10 DIFA negative DIF occurs when DT is less than NT.Example: greenhouse with DT of 68°F and NT of 72°F
68-72 = 4 DIFA zero DIF occurs whcn DT and NT are equal in a greenhouse.Example: greenhouse with DT of 70°F and NT of 70°F
70-70 = 0 DIF
EFFECTS OF DIF ON PLANT GROWTH
Internode Length
Plant height is determined by the number and length of internodes on thestem. An internode is thc portion of thc stcm betwccn two nodcs (Figure 9.1).A node is the point from which leaves and buds arise on a stem. DIF affectsthc length of thc internode and thus also affects the height of the plant.Research has shown that as DIF decreases from positive values into negativevalues, stcm intcrnodc length also decreases. As DIF increases, stcm inter-node length also increases (Figure 9.2).

Figure 9.1A plant showing an intarnodeand two nodes
Suppose three plants as identical as possible are placed in three green-houses that are identical in all respects except for DIF (Figure 9.3). All threegreenhouses have a DT of 68°F. However, greenhouse A has an NT of 64°F,greenhouse B has an NT of 68°F, and greenhouse C has an NT of 72°F. Howwill the height of these three plants compare after they have grown for severalweeks in the respective greenhouses? To answer this, DIF must be calculated.
Greenhouse A DIF 68-64 = +4Greenhouse B DIF 68-68 = 0Greenhouse C DIF 68-72 = 4
Greenhouse A has the largest (positive) DIF; so the plant in that green-house will be the tallest. The plant in greenhouse B will be shorter than thefirst because its DIF is smaller in value. The plant in greenhouse C will bethe shortest of the three because the DIF for that greenhouse is the smallestin value (Figure 9.3). The internode length of each plant is affected by thehigher or lower DIF value.
F:gure 9.2 Effects of changes in DIF on stem internode length
Decreasing DIF = decreasing internode length
Increasing DIF = increasing internode length
3 2
101-
0 +1 +2 +3
**-1
171
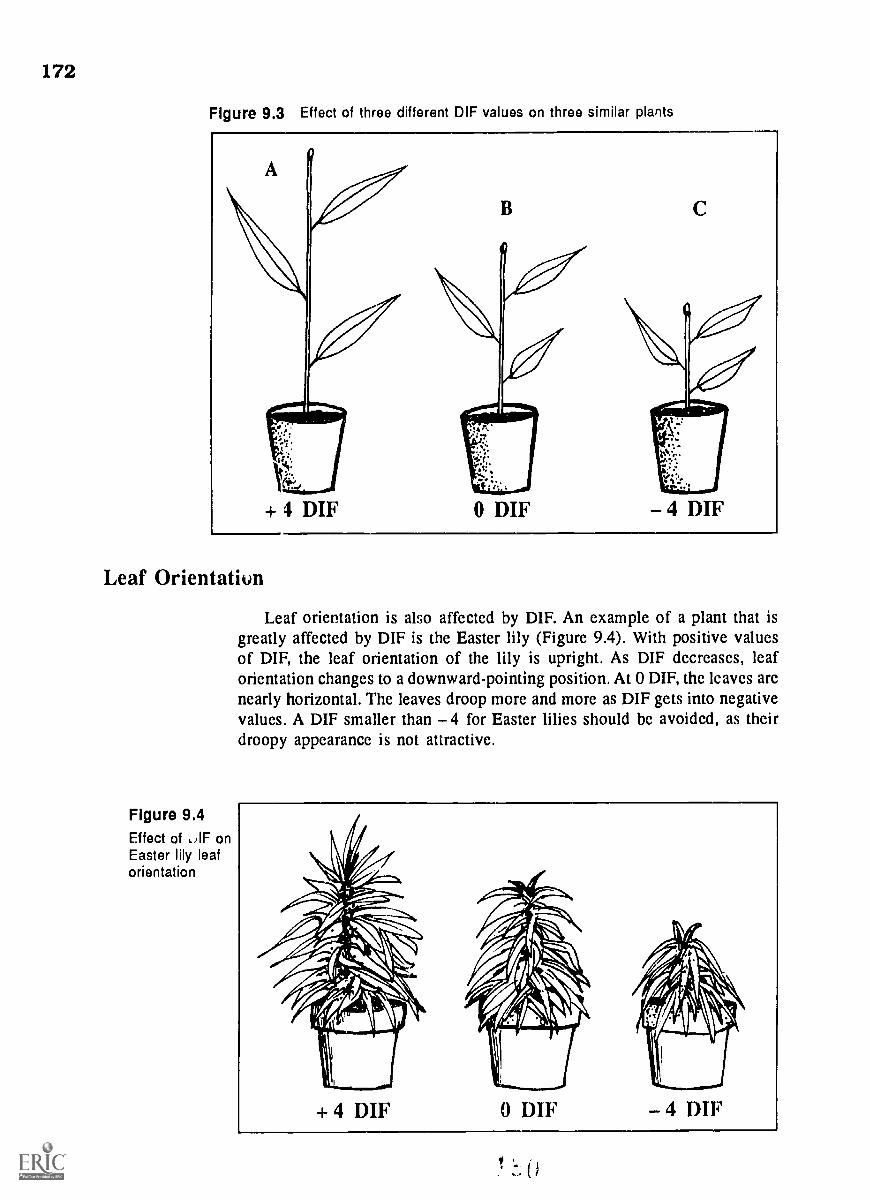
172
Figure 9.3 Effect of three different DIF values on three similar plants
+ 4 DIF 0 DIF 4 DIF
Leaf Orientatiun
Figure 9.4Effect of ,)IF onEaster lily leaforientation
Leaf orientation is also affected by DIF. An example of a plant that isgreatly affected by DIF is the Easter lily (Figure 9.4). With positive valuesof DIF, the leaf orientation of the lily is upright. As DIF decreases, leaforientation changes to a downward-pointing position. At 0 DIF, the leaves arenearly horizontal. The leaves droop more and more as DIF gets into negativevalues. A DIF smaller than 4 for Easter lilies should be avoided, as theirdroopy appearance is not attractive.
+ 4 DIF 0 DU' 4 DIF

173
Chlorophyll Content
The chlorophyll content of leavec can be affected by DIF. The youngleaves of many greenhouse crops lose some of their chlorophyll and thus turnlighter green as DIF decreases into negative values. Seedlings like those ofsalvia (especially) are the most sensitive to this. They become very chloroticif DIF is -5 or less. Thus, DIF should not be allowed to drop below -4 inorder to avoid yellow or chlorotic upper leaves. Chlorotic leaves will reducerates of photosynthesis and result in slowed growth and poorer plant quality.
APPLICATIONS OF DIF
DIF is used to control the height of poinsettias, mums, Easter lilies, andmany bedding plant species. In order to apply DIF, heating and coolingsystems must be automated for efficient temperature control. A DIF of 0 orslightly negative (e.g. -1 to -4) will reduce crop height significantly com-pared to crops grown at a positive DIF.
There are several distinct advantages in using DIF to control crop height.
1. DIF either reduces or eliminates the use of chemical retardants. This canmean significant savings.
2. DIF does not damage plants like chemicals do.3. Production costs are lower because labor costs are largely replaced.4. The environment, rather than toxic chemicals, controls plant height.
Timing
To use DIF, the greenhouse manager selectF times for changing the green-house temperature to day and night settings (for example, at 6:00 a.m. and8:00 p.m.). Since it takes time for greenhouse temperatures to reach desiredlevels, a lag tin:e must be allowed. The manager should program temperaturesettings to be ehanged 15 minutes before 6:00 a.m. and 8:00 p.m. for unitheaters, and up to one hour before the selected times for hot water heatingsystems.
Because relatively warm nights are required for 0 DIF or -DIF, green-houses should have an interior ceiling or thermal blanket to conserve heatduring cold weather. It is actually possible to have a lower heating bill using0 or -DIF than the conventional +DIF temperature regimes when heatconservation devices are in use.
Applications of DIF are up to the individual grower for implementation.Whether to use a 0 or -DIF depends on the crop being grown and the degreeof height control desired.

174
Limitations of Applying DIFThe primary limitation of using a 0 or DIF for height control is the
climatic effects on the greenhouse environment of typical summer weather.During hot weather, it is very difficult, if not impossible, to maintain green-house temperatures during the day that are cool enough to implement a 0 orDIF. For example, if the DT is 92°F, then the NT would have to be at leastthat same temperature to achieve height control (in this case, 0 DIF). Sucha night temperature would be excessively hot and could cause serious damageto the plants. In general, night temperatures above 75°F should be avoidedbecause many crops are adversely affected by them.
Therefore, during hot weather, chemical growth regulators often have tobe used. When cooler temperatures return, DIF can be reinstated for heightcontrol.
Crops Responding to DIFThere are many potted flowering plants and bedding plant species that
respond to DIF height control. Some of these are:
Bedding Plants Potted Flowering Plants
Celosia Asiatic hybrid liliesGeraniums ChrysanthemumsFuchsia Easter liliesSalvia Gerbera daisiesImpatiens Poinsettias
In conclusion:
Controlling plant height by temperature regulation was the topic ofChapter 9. This height control method, called DIF, is the mathematicaldifference between day 411c1 night temperatures. A positive DIF results in tallplants, and a 0 or slightly negative DIF results in shorter plants. DIF savesa grower considerably on the cost of chemical growth regulators. However,DIF can not be used routinely for height control in summer when nighttemperatures in the greenhouse are relatively high.

175
This review is to help you check yourself on what you have learned about plant height controlby DIF. If you need to refresh your mind on any of the following questions, refer to the pagenumber given in parentheses.
1. What is the definition of DIF? (page 170)
2. Write the mathematical equation for DIE (page 170)
3. In order to achieve a DIF of -4 when tve greenhouse night temperature is 68°F, whatshould the day temperature be? (page 170)
4. How is plant growth affected by a 0 or negative DIF? by a positive DIF? (pages 170-171)
5. Besides height control, state two other aspects of plant growth that are affected by DIF.(pages 172-173)
6. Name four advantages of using DIF to control plant height, compared to using chemicals.(page 173)
7. When setting times for changing temperatures in a greenhouse to implement DIF, why isa lag time factored in? (page 173)
8. Explain why DIF can not be implemented during hot weather for height control offloriculture crops. (page 174)
9. List three floriculture crops whose height can be controlled by DIF. (page 174)

CHAPTER 10
BEDDING PLANT PRODUCTION(including GERANIUMS)
Competencies for Chapter 10
As a result of studying this chapter, you should be able to do the following:
1. Give the scientific name of geranium.2. Categorize the different areas of bedding plant production as to wholesale
value in the U.S.3. Categorize the different areas of bedding plant production as to wholesale
value in your state.4. List major bedding plant species.5. Provide favorable condittons for seed germination.6. Sow bedding plant seed in flats and in plug trays.7. Contrast advantages with disadvantages of sowing seed in flats.8. Contrast advantages with disadvantages of sowing seed in plug trays.9. Define plug stages one through four.
10. Transplant seedlings from flats.11. Transplant seedlings from plug trays.12. Usc a constant feed program on bedding plants.13. Apply water as needed.14. Monitor root medium moisture, porosity, and nutrient content.15. Read thermometer.16. Calculate DIF.17. Finish a crop of bedding plants for sale using commercially up-to-date
methods.18. Interpret and follow production schedules.19. Carry out cultural practices designed to avoid disease and pest
occurrence.20. List the four strategies of IPHM.21. Recognize pests by their appearance on a host plant.22. Recognize pests by the damage they do to bedding plant crops.23. Recognize disease symptoms on bedding plants.24. Market finished bedding plant crops.25. Discuss the following items in connection with geranium production:
production statisticsvarietiespropagation (including root media)general culture (temperature, watering, nutrition, lighting, etc.)pinching and height controlscheduling guidelinespest and disease problemsmarketing
177 IL A)'ll

178
Related Science Concepts1. Examine plant development.2. Determine the cultural needs of bedding plants.3. Describe stages of seedling development.4. Describe disease transmission by soil organisms.
Related Math Concepts1. Apply basic operations to whole numbers, decimals, and fractions as they
relate to bedding plant production.2. Apply basic operations to ratios and percents as they relate to bedding
plant production.3. Apply mathematical concepts and operations to bedding plant production.4. Read, interpret, and construct charts, graphs, and tables related to
bedding plant production.
Terms to KnowB-Nine®bacterial blightbedding plantsblacklegBonzi®Botrytis blightbroadcasting seedbufferingcotyledonculture-indexed cuttingsCycocel®
damping-offdibbledisinfectantDNAfinishing plantsfoliarfungicidegenetichoneydewIPHMoedema
petioleplant hardeningplug growth stagesprimed seedPythiumrefined seedsaranseedersseedlingsoft pinchwater boom
BEDDING PLANTS-)
OVERVIEW OF THE BEDDING PLANT INDUSTRY
Introduction
Bedding plants ire greenhouse crops that are primarily annuals. Theseplants are usually started from seed in the greenhouse during the winter. Theyare sold in the spring as blooming plants, ready to bL transplanted directlyinto the garden. As we noted earlier, the bedding plant industry is the largestsegment of the floriculture industry. The 1990 wholesale value of beddingplants in the United States was nearly $1 billion.
Bedding plants are very popular because they add a lot of beauty to oursurroundings. Nearly every house has at least a small flower garden contain-ing colorful bedding plants. Many people also have vegetable gardens. Grow-ing their own vegetables saves on food costs and provides high qualityvegetables that may be hard to find in supermarkets.
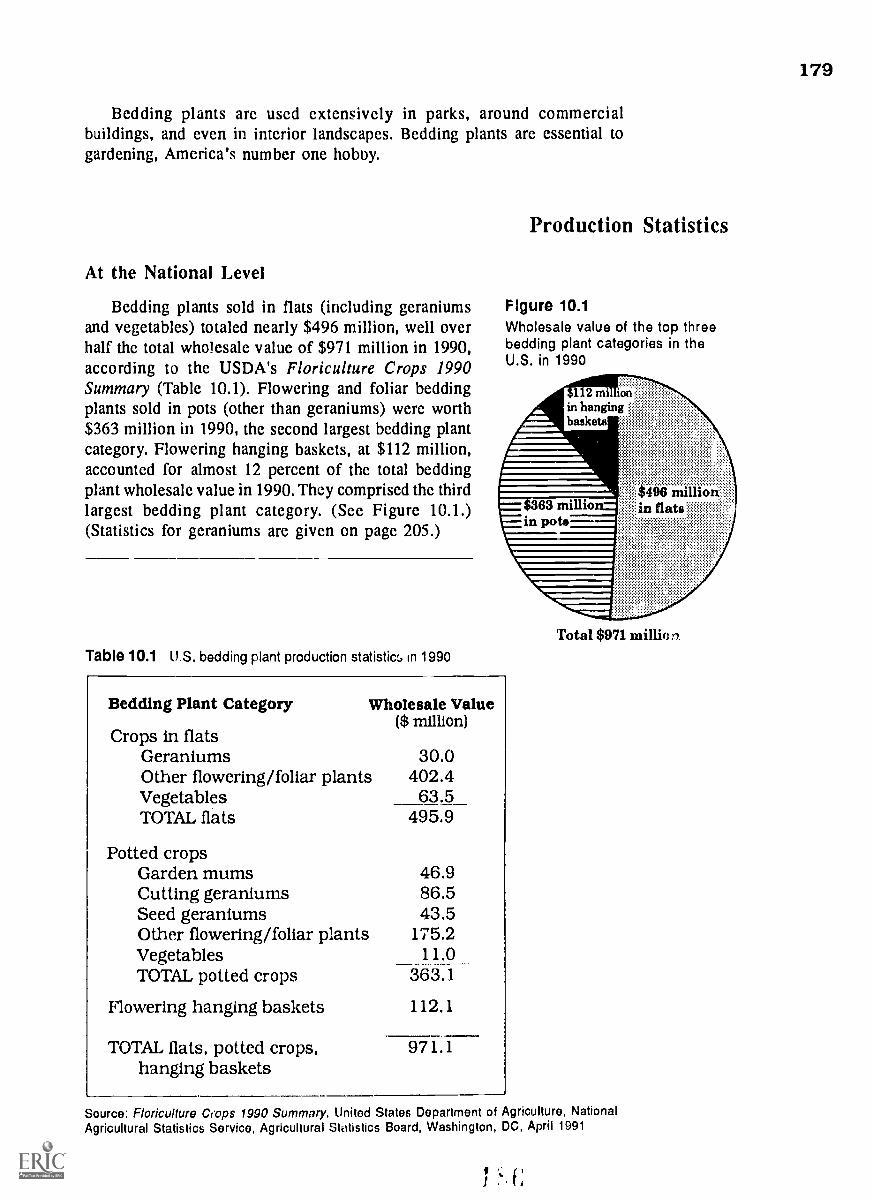
179
Bedding plants are used extensively in parks, around commercialbuildings, and even in interior landscapes. Bedding plants are essential togardening, America's number one hobby.
At the National Level
Bedding plants sold in flats (including geraniumsand vegetables) totaled nearly $496 million, well overhalf the total wholesale value of $971 million in 1990,according to the USDA's Floriculture Crops 1990Summary (Table 10.1). Flowering and foliar beddingplants sold in pots (other than geraniums) were worth$363 million in 1990, the second largest bedding plantcategory. Flowering hanging baskets, at $112 million,accounted for almost 12 percent of the total beddingplant wholesale value in 1990. They comprised the thirdlargest bedding plant category. (See Figure 10.1.)(Statistics for geraniums are given on page 205.)
Production Statistics
Figure 10.1Wholesale value of the top threebedding plant categories in theU.S. in 1990
1 2 mi ionin }tongingbaskets
$496 millionin flats
Total $971Table 10.1 U.S. bedding plant production statistic:, in 1990
Bedding Plant Category Wholesale Value
Crops in flats($ million)
Geraniums 30.0Other flowering/foliar plants 402.4Vegetables 63.5TOTAL flats 495.9
Potted cropsGarden mums 46.9Cutting geraniums 86.5Seed geraniums 43.5Other flowering/foliar plants 175.2Vegetables 11.0TOTAL potted crops 363.1
Flowering hanging baskets 112.1
TOTAL flats, potted crops,hanging baskets
971.1
Source: Floriculture Crops 1990 Summary. United States Department of Agriculture, NationalAgricultural Statistics Service, Agricultural Statistics Board, Washington, DC, April 1991

180
In Ohio
Ohio placed fifth nationally in 1990 in bedding plant production (Table10.2). Her total wholesale production value was $71 million. The categorywith the highest production in Ohio (the same as nationally) was beddingplants sold in flats. Their wholesale value was $38.8 million or nearly 55percent of the total bedding plant wholesale value. Bedding plants sold in potswere second at $22.1 million, or 30 percent of the total wholesale value.Flowering hanging baskets came in third in Ohio for wholesale value at $10.1million or 14 percent of the total wholesale value. (See Figure 10.2.)
Figure 10.2Wholesale value of the top threebedding plant categories in Ohioin 1990
:$38.til niiinia.in flatta' 0:
)
Total $71 million
Table 10.2
Ohio bedding plantproduction statisticsin 1990
In the different categories, Ohio ranked very impressivelyon the national level (Table 10.2):
11- first in flowering hanging baskets and in potted gardenmumssecond in geraniums in flats
):1- third in all bedding plants sold in flats'Or third in potted cutting geraniums and potted seed geraniums
fourth in flowering/foliar bedding plants (excludinggeraniums) sold in flatsfifth in vegetable bedding plants sold in flatsfifth in total bedding plant production
You can clearly see from these figures that Ohio is a majorbedding plant producer. You will soon be part of this excitingindustry!
Bedding Plant Category
Crops in flatsGeraniumsOther flowering/foliar plantsVegetablesTOTAL flats
Wholesale Value National($ million) Rank
3.0 231.0 4
4.8 538.8 3
Potted cr-psGarden mums 4.1 1
Cutting geraniums 6.4 3Seed geraniums 3.3 3Other flowering/foliar plants 7.9 6Vegetables 0.4 6TOTAL potted crops --2'.. 1 5
Flowering hanging baskets 10.1 1
TOTAL flats, potted crops, 71.0 5hanging baskets
Source: Floricultuis Crops 1990 Summary. United States Department of Agriculture, NationalAgricultural Statistics Service, Agricultural Statistics Board, Washington, DC, April 1991
SEED GERMINATION IN FLATS AND PLUG TRAYS
There arc two primary mcthods oi producing bedding plants from seed:germinating sccd in flats and germinating seed in plug trays. (Refer back toFigure 6.18, page 137, for a picturc of plug trays.) There are advantages toeach method. But, increasingly, growers are using plug trays for reasons wewill discuss next.
Flats
Thc usc of flats for seed germination has its advantages.
1. Little equipment is required. Sccd is usually sown by hand, though therearc simple seeding machines that speed up the process.
2. Good usc is madc of available gcrmination area. Several thousand tinyseeds of plants like tomato and marigold can be sown in a single flat.
However, thcrc arc several disadvantages of sowing seed in flats.
1. Diseases in thc soil are readily sprcad from seedling to seedling throughadjacent root systems. Whcn camping off, root rots, and other diseasesget started, they can wipc out whole flats of seedlings.
2. Seedlings that are left in a flat for several weeks will compete fornutrients and sunlight. As a result, seedlings can become stretched (leggy)and chlorotic (pale green) from lack of light and nutrients.
3. Transplanting seedlings from flats to cell packs or pots for growing onprobably presents the worst problem. Considerable root damage canoccur whcn roots of seedlings that are close together are separated fromeach other and from the germination mcdium. Adjaccnt seedlings maybc snappcd of! by fingers or tools that are being used to lift seedlingsout of thc flat.
4. Transplanting seedlings from flats takes considerable labor. It is verytedious and time-consuming.
Plug Trays
Plug trays arc madc up of many cells that function as tiny pots (as wediscussed in Chaptcr 6). Eighty-five percent of thc bcdding plants producedin thc United States arc startcd in plug trays. Thc use of plug trays forgerminating bedding plant seed offers many advantages.
1. Seeding machines (seeders) can sow hundrcds of plug trays per hour;therefore, labor costs are reduced.
2. Each seedling is grown in its own container (cell); it does not have tocompete with other plants for nutrients.
3. Seedlings produced in plug trays are spaced further apart and thus receivemorc light,
4. If a soil-borne disease attacks a seedling or seedlings, thc disease willbe confined to that particular cell(s). There is no intermingling of rootsof adjacent seedlings,
(continued)
181

182
5. There is virtually no transplant shock. Seedlings are "popped out" of thcplug tray with the root ball intact. Therefore, seedlings quickly becomeestaMished in the new container. Production time can be decreased byone or two weeks.
6. Transplanting from plug trays is much faster and so labor costs arereduced.
7. Plugs can be purchased to replace crops that failed or to grow crops thatwere not compatible with the majority of thc other bedding plant speciesin the greenhouse.
Many aspects of plug production can be automated to make it so fast andefficient that sowing in flats seems almost primitive. When properly done,plug culture results in vigorous, healthy seedlings that establish rapidly aftertransplanting. Overall production of crops grown from plugs can be fastcr andof highcr quality than those grown from flats. Because of automation,production costs that involve labor and time can be significantly reduced withbedding plant crops grown from plugs.
There are some disadvantages, however, in the use of plug trays.
1. Bedding plant production in plug trays requires a large investment inspecialized equipment like seeders, plug trays, etc.
2. Skilled personnel are needed to maintain the growing seedlings. With thevery small volume of root medium that supports each seedling, wateringand fertilizing must be precisely timed. Especially in the plug trays thatcontain several hundred cells (e.g. 512's, 800's, etc.), each cell dries outvery quickly.
3. Considerably more germination area (up to four times as much) is neededfor seedlings to germinate in plug trays as compared to flats. As manyas 1,000 seedlings can be produced in a flat. With plug trays, the largestones contain 800 cells, but most growers use 288's, 392's and 512's.
Seed Quality
Because nearly all bedding plants are produced from seed, the use of highquality seed is extremely important. The grower who tries to save onproduction costs by purchasing cheap, low quality seed may end up losingeverything. Low quality seed often germinates poorly and slowly andproduces weak seedlings. The result is a delayed, smaller-than-planned cropof low quality that will find no interested customers. Since good quality seedaccounts fo: no morc than five percent of total production costs, the extramoney spent to start a good crop will save a lot of money later.
Good Germination Percentages
Good quality seed has a high germination percentage (well over 90 per-cent). This germination percentage should be printed on the seed packet. Onlyseed that is packaged for the current production year should be purchased.Seed carried over from thc previous year will probably have reduced germi-aation percentages and lower vigor. High quality sccd germinates rapidly andshows subsequent vigorous seedling growth.
183
Refined and Primed SeedTwo types of seed to look for are 1) refined seed, which is sorted by
physical characteristics, and 2) primed seed, which is already partially ger-minated. Both types germinate faster and have improved germination percent-
ages and greater uniformity. These types of seed, however, are more expensivethan the conventional seed used for bedding plants.
CGERMINATING SEED IN FLATS
Germination MediaMany different kinds of germination media for flats are available th
soil-based and soilless. Excellent germination results can be obtained fromeither kind. A good germination medium should have good water-holdingcapacity, yet allow for good drainage and aeration. The pH of the mix should
be between 5.5 and 6.0. Growers can choose commercial, soilless mixes forraising their crops with excellent results. Or growers can mix their ownsoilless or soil-based mixes.
A common soilless germination medium is a mix (by volume) of 1:1
sphagnum peat moss and vermiculite or perlite. A soil-based mix often usedis (by volume) 1:1:1 loamy field soil, sphagnum peat moss, and coarse perlite.Any soil-based germination medium must be steam pasteurized before use.
Flats
Flats that are used for seed germination are shallow, usually 2 3/4 inchesdeep. A small volume of rooting medium in a shallow flat is all that seedlingsneed at the start, since most species are transplanted within two weeks, uponemergence. In the first short period of time, they will not develop an extensiveroot system. Shallow flats with small volumes of soil are lightweight andeasier to handle than deep flats. Also, they mean reduced production costs.
Whereas wooden flats were once the only available kind of flat, nearlyall flats used today are plastic. Wooden flats had to be sterilized by steaming;plastic flats are more easily sterilized by soaking in a disinfectant. Woodenflats were quite heavy and bulky, whereas plastic flats are lightweight and
more economical.
Sowing the Seed
Seed is sown in flats by one of two ways - broadcasting or sowing in rows.
Either way gives good results. The germination medium must be firmed intoplace and thoroughly moistened before seed is sown.
BroadcastingThe goal of broadcasting seed is to distribute seed uniformly over the
entire area of the flat. One method to accomplish this is to divide the seedto be sown into equal halves. Sow one half of the seed along the length of'
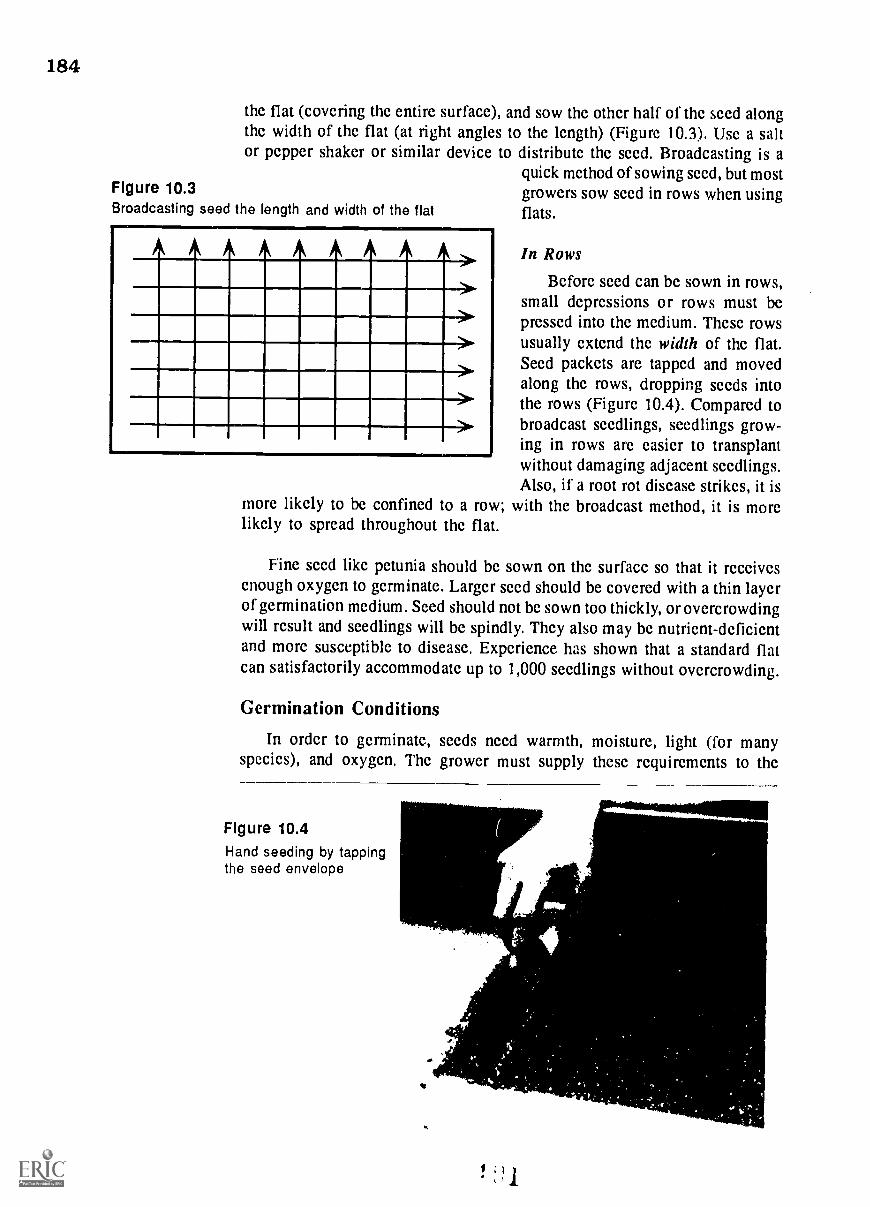
184
the flat (covering the entire surface), and sow the other half of the seed alongthe width of the flat (at right angles to the length) (Figure 10,3), Use a saltor pepper shaker or similar device to distribute the seed. Broadcasting is a
quick method of sowing seed, but mostgrowers sow seed in rows when usingflats.
Figure 10.3Broadcasting seed the length and width of the flat
aw
AAA AA AA A >
>4.-
-
>>
In Rows
Before seed can be sown in rows,small depressions or rows must bepressed into the medium. These rowsusually extend the width of the flat.Seed packets are tapped and movedalong the rows, dropping seeds intothe rows (Figure 10.4). Compared tobroadcast seedlings, seedlings grow-ing in rows are easier to transplantwithout damaging adjacent seedlings.Also, if a root rot disease strikes, it is
more likely to be confined to a row; with the broadcast method, it is morelikely to spread throughout the flat.
Fine seed like petunia should be sown on the surface so that it receivesenough oxygen to germinate. Larger seed should be covered with a thin layerof germination medium. Seed should not be sown too thickly, or overcrowdingwill result and seedlings will be spindly. They also may be nutrient-deficientand more susceptible to disease, Experience has shown that a standard flatcan satisfactorily accommodate up to 1,000 seedlings without overcrowding.
Germination Conditions
In order to germinate, seeds need warmth, moisture, light (for manyspecies), and oxygen. The grower must supply these requirements to the
Figure 10.4Hand seeding by tappingthe seed envelope
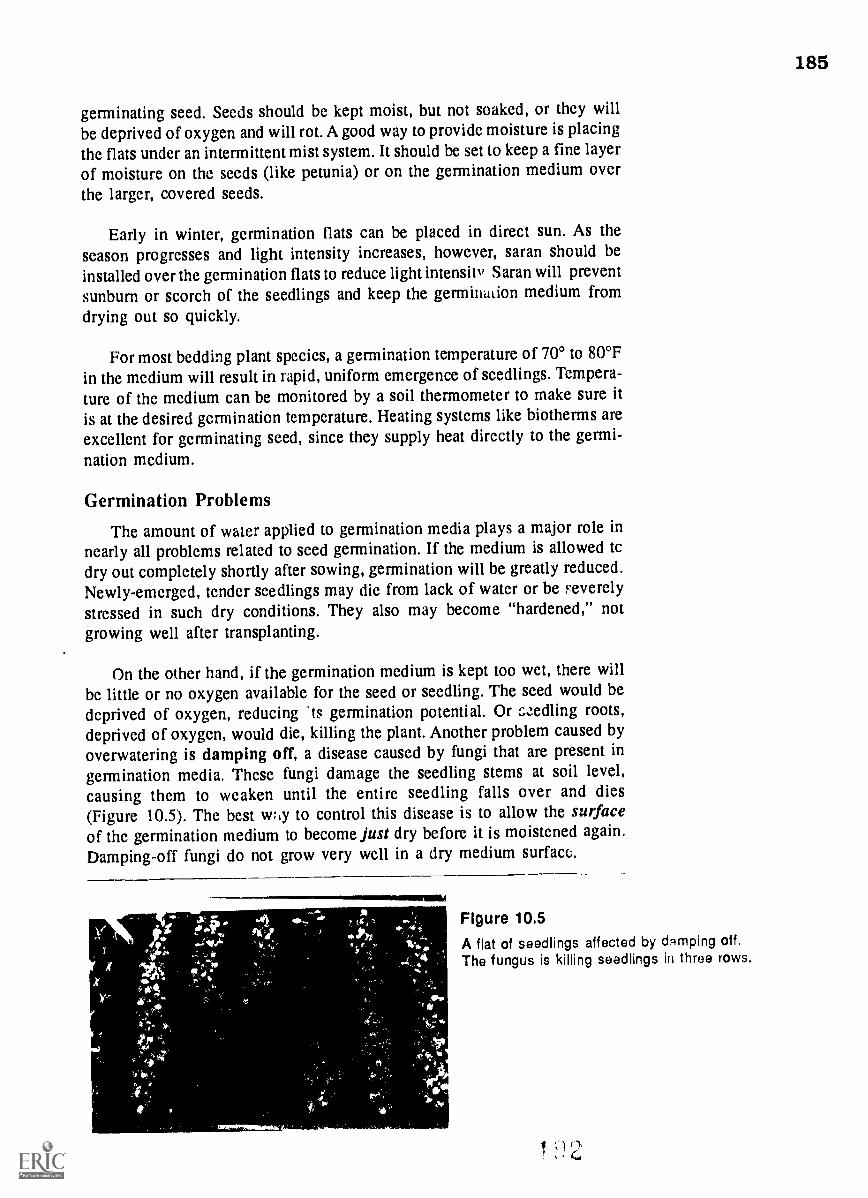
germinating seed. Seeds should be kept moist, but not soaked, or they will
be deprived of oxygen and will rot. A good way to provide moisture is placingthe flats under an intermittent mist system. It should be set to keep a fine layerof moisture on the seeds (like petunia) or on the germination medium overthe larger, covered seeds.
Early in winter, germination flats can be placed in direct sun. As theseason progresses and light intensity increases, however, saran should beinstalled over the germination flats to reduce light intensity Saran will preventsunburn or scorch of the seedlings and keep the germination medium from
drying out so quickly.
For most bedding plant species, a germination temperature of 700 to 80°F
in the medium will result in rapid, uniform emergence of seedlings. Tempera-
ture of the medium can be monitored by a soil thermometer to make sure itis at the desired germination temperature. Heating systems like biotherms areexcellent for germinating seed, since they supply heat directly to the germi-
nation medium.
Germination Problems
The amount of water applied to germination media plays a major role innearly all problems related to seed germination. If the medium is allowed tcdry out completely shortly after sowing, germination will be greatly reduced.Newly-emerged, tender seedlings may die from lack of water or be Feverel y
stressed in such dry conditions. They also may become "hardened," notgrowing well after transplanting.
On the other hand, if the germination medium is kept too wet, there willbe little or no oxygen available for the seed or seedling. The seed would bedeprived of oxygen, reducing ts germination potential. Or szedling roots,deprived of oxygen, would die, killing the plant. Another problem caused byoverwatering is damping off, a disease caused by fungi that are present in
germination media. These fungi damage the seedling stems at soil level,causing them to weaken until the entire seedling falls over and dies(Figure 10.5). The best w:,y to control this disease is to allow the surfaceof the germination medium to become just dry before it is moistened again.Damping-off fungi do not grow very well in a dry medium surface.
Figure 10.5A flat of seedlings affected by damping off.The fungus is killing seedlings in three rows.
185
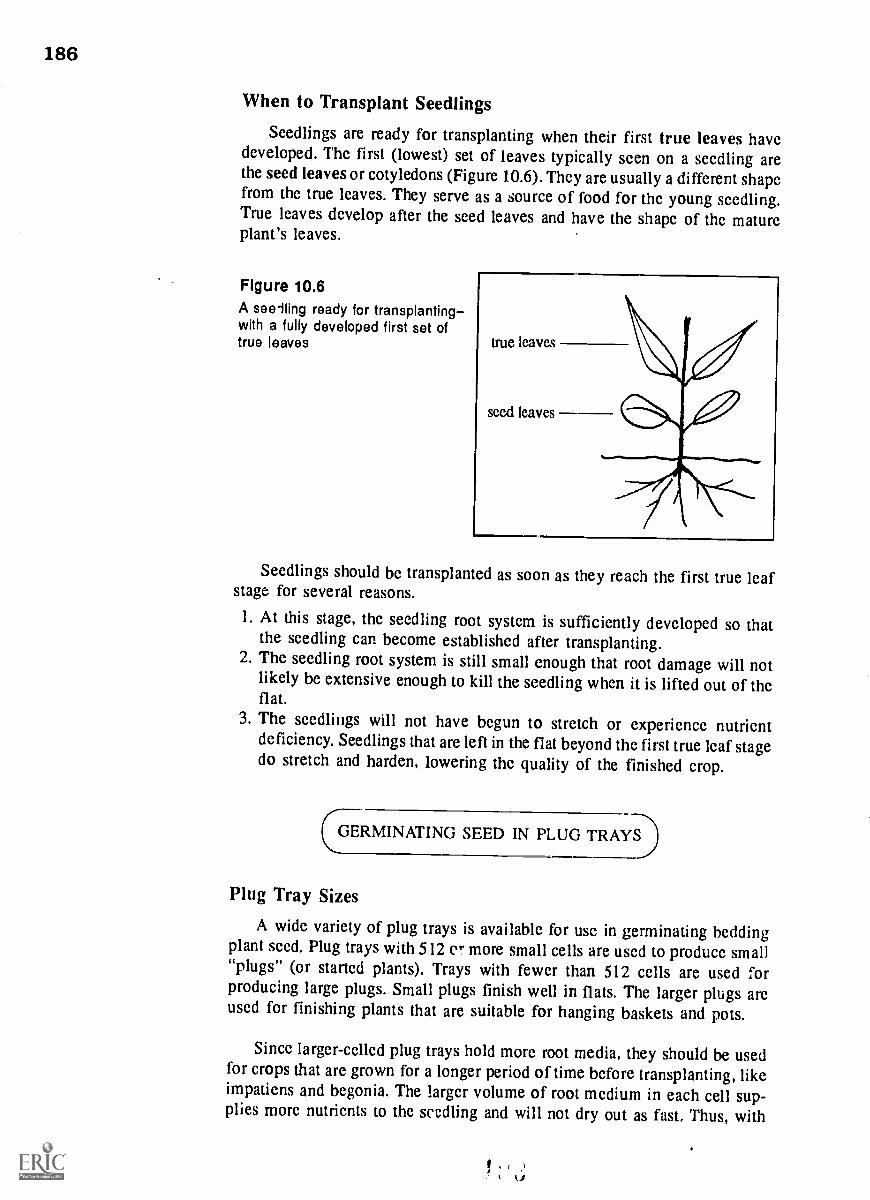
186
When to Transplant Seedlings
Seedlings are ready for transplanting when their first true leaves havedeveloped. The first (lowest) set of leaves typically seen on a seedling arethe seed leaves or cotyledons (Figure 10.6). They are usually a different shapefrom the true leaves. They serve as a source of food for the young seedling.True leaves develop after the seed leaves and have the shape of the matureplant's leaves.
Figure 10.6A seelling ready for transplantingwith a fully developed first set oftrue leaves
Seedlings should be transplanted as soon as they reach the first true leafstage for several reasons.
1. At this stage, the seedling root system is sufficiently developed so thatthe seedling can become established after transplanting.
2. The seedling root system is still small enough that root damage will notlikely be extensive enough to kill the seedling when it is lifted out of theflat.
3. The seedlings will not have begun to stretch or experience nutrientdeficiency. Seedlings that are left in the flat beyond the first true leaf stagedo stretch and harden, lowering the quality of the finished crop.
(GERMINATING SEED IN PLUG TRAYS)
Plug Tray Sizes
A wide variety of plug trays is available for use in germinating beddingplant seed, Plug trays with 512 or more small cells are used to produce small"plugs" (or started plants). Trays with fewer than 512 cells are used forproducing large plugs. Small plugs finish well in flats. The larger plugs areused for finishing plants that are suitable for hanging baskets and pots.
Since larger-celled plug trays hold more root media, they should be usedfor crops that are grown for a longer period of time before transplanting, likeimpatiens and begonia. The larger volume of root medium in each cell sup-plies more nutrients to the seedling and will not dry out as fast. Thus, with

187
reduced stress levels, the seedlings will finish faster and produce a betterquality crop than in a small-celled plug tray.
Germination Media
The germination media requirements for plug trays are quite differentfrom those for flats. Flats hold a relatively large volume of germinationmedium that supplies water and nutrients for a relatively long time period.By contrast, cells in plug trays hold very small volumes of germinationmedium (especially the 512 and smaller plug trays). Research has shown thatin just a few hours, these small volumes of germination media experiencewide fluctuations of pH, nutrient level, and water content.
To prevent such harmful fluctuations, germination media used in plugtrays should be formulated
1. to resist changes in pH (referred to as "buffering capacity"),2. with good water-holding capacity, and3. to allow for good drainage and aeration.
Nearly all germination mixes for plugs are soilless. There are manygermination media mixes on the market that are specifically blended for plugtrays. Some growers formulate their own. However they are prepared, allgermination media should be tested to verify that they meet the aboveconditions. The following test can be very helpful to the grower who is juststarting to use plug trays. He or she can plant seeds in a number of differentgermination mixes and then compare the results. Mixes that do not affordgood germination can be eliminated. Remember that the success of germi-nation depends on three factors: optimum conditions for germination, seedquality, and characteristics of the germination medium.
Seeders
Whzn plug trays are used for bedding plant seed germination, it is possibleto sow the plug trays by hand. However, this is a very tedious, exacting, time-consuming job. The smaller the seed (like petunia) the more difficult it is toplace one seed in each cell. Labor costs and the time involved make hand-sowing seeds in plug trays impractical.
Because of this problem, sowing seed in plug trays is now almost totallyautomated by the use of seeders. There are several types of seeders in use.Some can be used only for a certain-sized plug tray, while others can accom-modate many sizes. Most seeders work with a vacuun that picks up the seedand releases it onto the plug tray. The seeder deposits one seed in each cellquickly and accurately. The working of some of the seeders is as follows:
1. One kind of seeder that uses the vacuum principle has a revolving drum(Figure 10.7A). The drum has rows of perforations across it. Eachperforation picks up one seed by the vacuum inside the drum and thenrotates and expels the seed by water pressure.

188
Flgure 10.7 Types of seeders
B. Computerizedelectronic-eyeseeder
A. Drum seeder
C. Vacuum 'turbo' seeder(Photo courtesy ofBlackmore Co., Inc.,10800 Blackmore Ave.,Belleville, Michigan)
189
2. Another type of seeder has a computerized electronic eye that countsseeds, lines them up in a trough, and drops them by gravity onto the plugtray (Figure 10.7B).
3. A third kiad of seeder uses a perforated metal bar that oscillates betweentile seed hopper and the chutes. As one seed is picked up through eachhole (again by vacuum), the bar with the seed rotates 180 degrees anddrops the seed down the individual chute to the plug tray below (Figure10.7C). This process is repeated for every row of the plug tray.
Automated seeders do the job of sowing seed many times faster than canbe done by hand. In fact, there are seeders capable of sowing several hundredflats per hour. A conveyer belt moves plug trays continuously through theseeder at a constant speed. After sowing, a hopper dispenses a thin layer ofthe germination medium (like vermiculite) onto the plug tray to cover the seed(Figure 10.8). Some seeding set-ups have a watering device at the end of theline to water the sown plug trays very gently.
111111111111111810----11°
Flgure 10.8Vermiculite from a hopper is usedto cover seeds in plug trays.
SEEDLING GROWTH STAGES
Four Stages of Plug Growth
In our discussion of plug trays used for seed germination, we need tobecome familiar with the four stages of plug growth (as shown in Figure 10.9).
Stage 1 - emergence of the seedling root from the seed. This is the definitionof germination.
Stage 2 - aevelopment of the seed leaves and root system.Stage 3 - emergence of the first set of true leaves.Stage 4 - the plant is ready for transplanting.
Keep these stages in mind as we discuss the different environmental condi-
tions for plug seedlings in each stage.
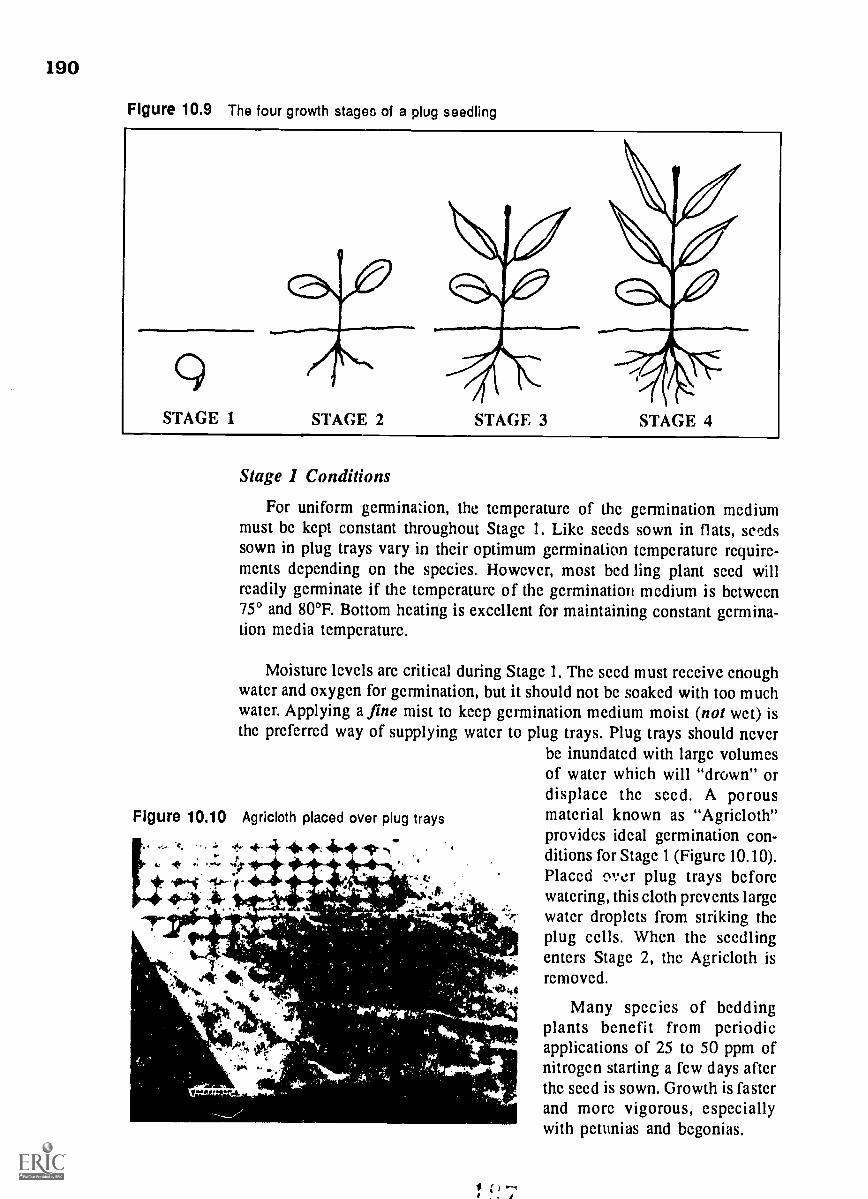
190
Flgure 10.9 The four growth stages of a plug seedling
STAGE 1 STAGE 2 STAGE 3 STAGE 4
Stage I Conditions
For uniform germination, the temperature of the germination mcdiummust be kept constant throughout Stage 1. Like seeds sown in flats, seedssown in plug trays vary in their optimum germination temperature require-ments depending on the species. However, most bed ling plant seed willreadily germinate if the temperature of the germination medium is between75° and 80°F. Bottom heating is excellent for maintaining constant germina-tion media temperature.
Moisture levels are critical during Stage 1. The seed must receive enoughwater and oxygen for germination, but it should not bc soaked with too muchwater. Applying a fine mist to keep germination medium moist (not wct) isthc preferred way of supplying water to plug trays. Plug trays should never
bc inundated with large volumesof water which will "drown" ordisplace the seed. A porous
Figure 10.10 Agricloth placed over plug trays material known as "Agricloth"provides ideal germination con-ditions for Stage 1 (Figure 10.10).Placed clver plug trays beforewatering, this cloth prevents large
.-.P; water droplets from striking theplug cells. When thc seedlingenters Stage 2, the Agricloth isremoved.0,,:t4t
44'
-lb 1/24
Many species of beddingplants benefit from periodicapplications of 25 to 50 ppm ofnitrogen starting a fcw days afterthe seed is sown. Growth is fasterand more vigorous, especiallywith petunias and begonias.
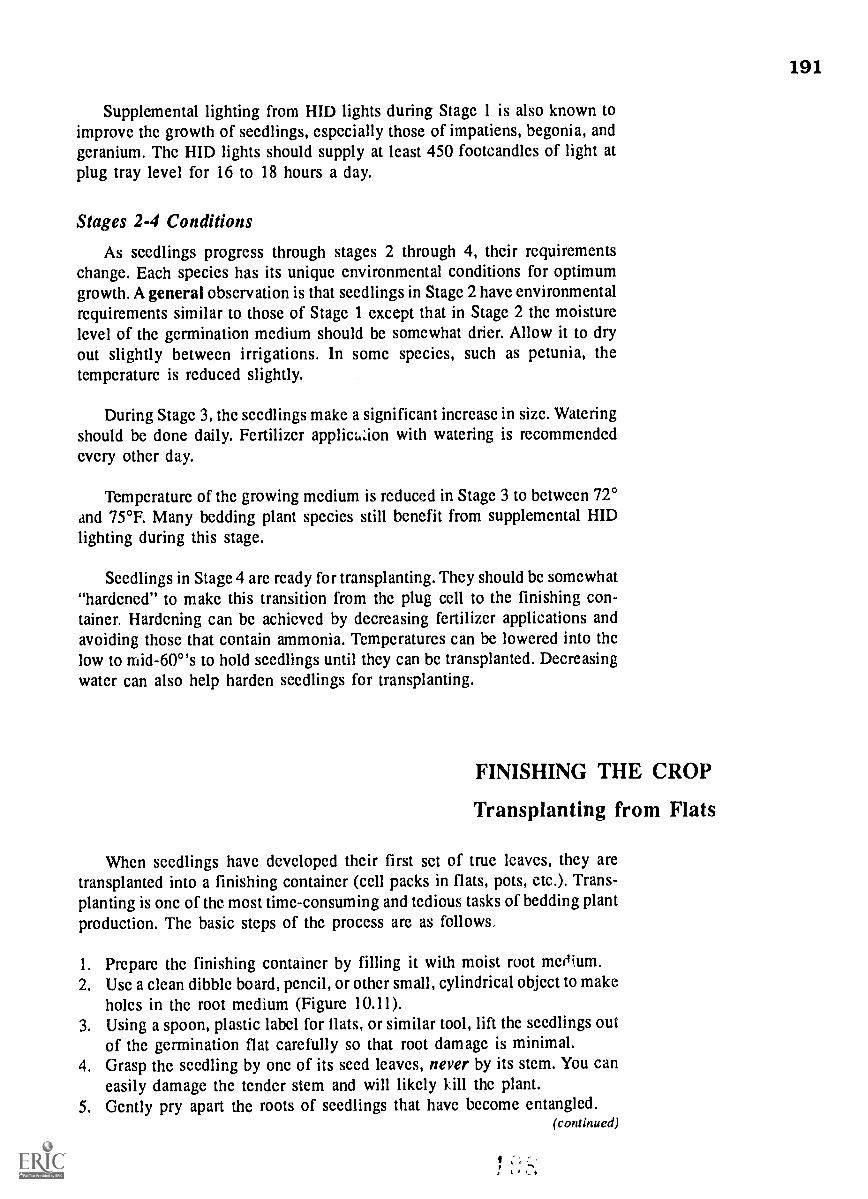
191
Supplemental lighting from HID lights during Stage 1 is also known toimprove the growth of seedlings, especially those of impatiens, begonia, andgeranium. The HID lights should supply at least 450 footcandles of light atplug tray level for 16 to 18 hours a day.
Stages 2-4 Conditions
As seedlings progress through stages 2 through 4, their requirementschange. Each species has its unique environmental conditions for optimumgrowth. A general observation is that seedlings in Stage 2 have environmentalrequirements similar to those of Stage 1 except that in Stage 2 the moisturelevel of the germination medium should be somewhat drier. Allow it to dryout slightly between irrigations. In some species, such as petunia, thetemperature is reduced slightly.
During Stage 3, the seedlings make a significant increase in size. Wateringshould be done daily. Fertilizer applicion with watering is recommendedevery other day.
Temperature of the growing medium is reduced in Stage 3 to between 72°and 75°F. Many bedding plant species still benefit from supplemental HIDlighting during this stage.
Seedlings in Stage 4 are ready for transplanting. They should be somewhat"hardened" to make this transition from the plug cell to the finishing con-tainer. Hardening can be achieved by decreasing fertilizer applications andavoiding those that contain ammonia. Temperatures can be lowered into thelow to mid-60°'s to hold seedlings until they can be transplanted. Decreasingwater can also help harden seedlings for transplanting.
FINISHING THE CROP
Transplanting from Flats
When seedlings have developed their first set of true leaves, they aretransplanted into a finishing container (cell packs in flats, pots, etc.). Trans-planting is one of the most time-consuming and tedious tasks of bedding plantproduction. The basic steps of the process are as follows.
1. Prepare the finishing container by filling it with moist root merfium.2. Use a clean dibble board, pencil, or other small, cylindrical object to make
holes in the root medium (Figure 10.11).3. Using a spoon, plastic label for flats, or similar tool, lift the seedlings out
of the germination flat carefully so that root damage is minimal.4. Grasp the seedling by one of its seed leaves, never by its stem. You can
easily damage the tender stem and will likely kill the plant.5. Gently pry apart the roots of seedlings that have become entangled.
(continued)

192
Figure 10.11A flat containing cell packs filled with a rootmedium. The dibble was used to make theholes for the seedlings.
6. Plant the seedlings in the holes in the finishing container (Figure 10.12A).7. Push the root medium gently against the roots (Figure 10.12B). The water
and nutrients in the medium will help get the plant established quickly.8. Gently water the transplanted seedlings in the finishing container.9. Place the containers under saran until the plants are established and
actively growing.
Figure 10.12
A. A seedling handled by its seed leaves, ready to be inserted into a hole in the cell pack.B. The root medium is gently pushed against the roots of the newly-transplanted seedling.
,.12.111111111111L
A
BEST CO AVal
Pi

193
Transplanting From Plug Trays
Transplanting seedlings (plugs) from plug trays to finishing containers isfast and easy. Very little, if any, transplant shock occurs, and the seedlingestablishes itself rapidly. The steps of this process are as follows.
1. Prepare the cell packs, pots, and other finishing containers by filling themwith moist root medium.
2. With a dibble, make holes in the root medium, ready for the seedlings.3. Water plug trays several hours before transplanting. The seedlings, then,
will not be experiencing water stress. Also, moist plugs are removed moreeasily than dry ones.
4. Remove plugs from the trays by simply "popping" (pushing) them out ofthe cell through the drainage hole.a. Manually - Use a narrow object (like a piece of bamboo stake) with
a blunt end to push through the drainage hole until the plug pops out(a slow, inefficient process).
b. Mechanically - Use a plug popper, a machine equipped with bluntprojections that line up with the cells of the plug tray (Figure 10.13).Position the plug tray over the projections and push a lever. All theplugs in the tray are "popped" at once, but only partially. The plugsare now loosened and easy to move out.
5. Grasp the seedling by a seed leaf and transplant it manually into thefinishing container. Or simply place the plug into a hole in the mediumin the finishing container.
6. Gently firm up the root medium against the root ball of the plug.
Transplanting Assembly Line
This plug transplanting process is oftcn mechanized on an assembly lineformat. People are spaced along a convcyor belt that moves flats, pots, orother finishing containers past them. Each worker is responsible for a certainportion of thc flat or a certain number of pots. The workers transplant plugsfrom plug cell trays just above the conveyor belt into the containers as theyare moved along (Figure 10.14). At the end of the transplanting line there isfrequently a watering station where water is applied to the newly transplanted
Figure 10.13A plug popper machine thatloosens plug seedlings intheir cells
194
Figure 10.14A plug transplanting assembly line.Workers transplant plugs into flatsas the conveyor moves them along.
plugs. The finishing containers are then loaded onto carts and moved intoplace in the greenhouse. With this method, several hundred flats can betransplanted per hour.
Root Media
Root media for bedding plants started in flats or plug trays must supplythe four functions of a root medium listed in Chapter 6. To get a finished cropof high quality, the root medium must have good water-holding capacity, yetallow for good drainage and aeration. It must supply the 17 essential nutrientsfor absorption by the roots. And it must provide anchorage for the plant. Thereare many commercial mixes that growers use and homemade mixes as well.Both soil-based and soilless mixes can produce crops of excellent quality. Themajority of growers use various soilless Peat-Lite mixes.
For best results with soilless mixes, the pH of the root medium shouldbe around 5.5 to 6.0; with soil-based mixcs it should be around 6.5. If soil-based mixes are used, they must be steamed to eliminate weeds, weed seeds,disease organisms, and insects.
Lists of suitable root media for growing bedding plants can be found inpublications that are available through your local county Extension office.
Watering
In Chapter 5 we discussed the importance of the watering procedure ininfluencing the quality of the finished crop. Conditions that are too dry willstunt growth, lower resistance of the crop to pest infestations (both insect anddisease), and significantly reduce the quality of the finished crop. Therefore,bedding plants should not be stressed from lack of water.
Growers must carefully monitor the levels of root medium moisture andapply water when needed. To control root rot diseases, the surface of the rootmedium should be allowed to dry between irrigations. When water is applied(either plain or as a constant feed program), allowance should be made forsome leaching to control soluble salts levels.
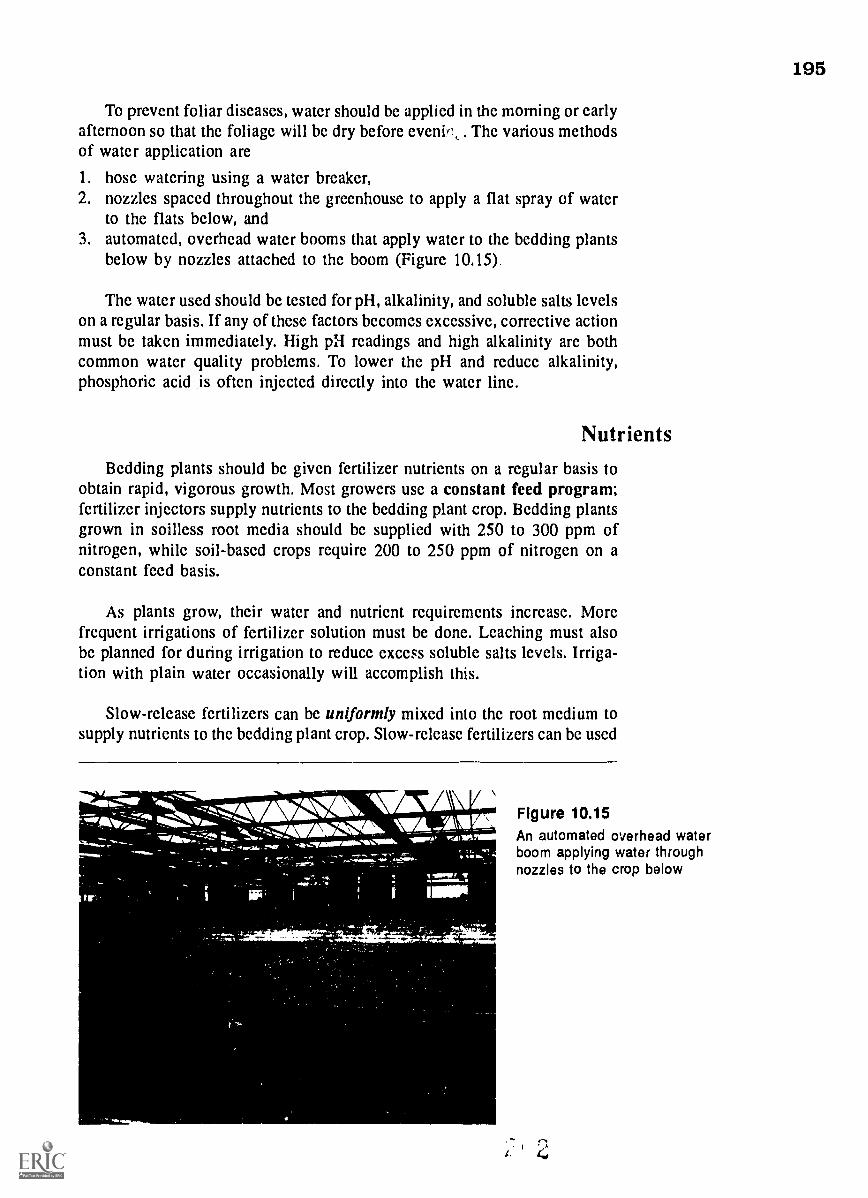
To prevent foliar diseascs, watcr should bc applied in the morning or earlyafternoon so that thc foliage will be dry before evenivi,.. Thc various methodsof water application are
1. hosc watering using a water breaker,2. nozzles spaccd throughout the greenhouse to apply a flat spray of water
to thc flats below, and3. automated, overhead watcr booms that apply watcr to the bedding plants
below by nozzles attached to thc boom (Figure 10.15)
The water used should bc tested for pH, alkalinity, and soluble salts levelson a regular basis. If any of these factors becomes excessive, corrective actionmust bc takcn immediately. High pH readings and high alkalinity are bothcommon watcr quality problems. To lower thc pH and rcduce alkalinity,phosphoric acid is oftcn injected directly into the water line.
NutrientsBedding plants should bc given fertilizer nutrients on a regular basis to
obtain rapid, vigorous growth. Most growers use a constant feed program;fertilizer injectors supply nutricnts to the bedding plant crop. Bedding plantsgrown in soilless root mcdia should bc supplied with 250 to 300 ppm ofnitrogen, while soil-based crops require 200 to 250 ppm of nitrogen on aconstant feed basis.
As plants grow, thcir water and nutricnt requirements incrcase. Morefrequent irrigations of fertilizer solution must be done. Leaching must alsobc planned for during irrigation to reducc excess soluble salts levels. Irriga-tion with plain watcr occasionally will accomplish this.
Slow-release fertilizers can be uniformly mixcd into the root mcdium tosupply nutrients to the bedding plant crop. Slow-release fertilizers can be used
ftrki-1-17nimis, " Flgure 10.15
An automated overhead waterboom applying water throughnozzles to the crop below
195
196
by themselves or in combinvion with liquid constant-feed programs. Whenslow-release fertilizers supply all the nutrients, plain water can be used forirrigat:on. For combined slow-release and liquid fertilizer programs, slow-release fertilizers are mixed into the root medium at half the recommendedrate. Remember that when you use slow-release fertilizers, you lose controlover the nutrition of the crop. You must take extreme care when determiningthe quantity of slow-release fertilizer to mix into the root medium.
Height ControlChemical growth retardants are applied to certain bedding plant crops to
keep them from stretching and becoming leggy and unsightly. The mostcommonly used growth retardant is B-Nine®, a chemical that inhibits elon-gation of the plant stem. (The plant will have shorter internodes.) B-Nine®is applied as a spray to coat the foliage uniformly with a thin film of solution.Plants should be turgid with dry leaves. The chemical should be applied earlyin the morning or during cloudy weather for ma,.imum uptake by the plantand to prevent foliar burn. Always follow directions on the label when usingchemical growth retardants.
Watering practices ?lso affect the height of bedding plants. If the rootmedium is kept on the cl-ey side (watered thoroughly but infrequently), theplants will be shorter than if the root medium is kept moist much of the time.Skill and experience are required to keep plants at just the desired moisturelevel - not so dry that they wilt and suffer from visible damage such as brownleaf edges, or even die. Even without significant wilting, flowering can bedelayed.
Before hot weather sets in, a 0 or slightly negative DIF can be appliedto bedding plant crops for height control. Remember to avoid a large negativeDIF or one smaller than 4, or chlorosis of young leaves will occur. As outsidenight temperatures become progressively warmer in the spring, DIF heightcontrol will be impossible to implement (as we discussed in Chapter 9). Thus,chemical growth retardants may have to be used if height control is neededas the sale date of the crop approaches.
TemperatureThe recommended temperatures for growing most bedding plants are 700
to 75°F during the day and approximately 10 degrees cooler during the night.Two weeks before the sale date, the temperature should be lowered (usuallyabout 5°) to harden the plants for transplanting into the customer's garden.This hardening helps the plant adjust to outdoor conditions and reducestransplant shock.
Light
Most bedding plants should be grown in full light intensity for rapid,vigorous development. However, bedding plants grown in hanging basketsneed reduced light intensity to prevent sunburn of foliage and flowers. Since

197
transplanting occurs for many bedding plants during the mid- to late winter,they experience very low light intensity for long periods Jf time. This greatlyslows the establishment and growth of transplanted seedlings. HID lightingapplied to seedlings during the first month after transplanting is very helpfulin promoting rapid establishment and vigorous growth.
Diseases (Damping off)Damping off is the most common disease of bedding plants. As mentioned
earlier, it is a problem particularly during germination, though it can alsostrike older plants. Pythium and Rhizoctonia arc the two fungi that cause mostof the damping off observed in bedding plants. These fungi, living in the soil,invade the stems of seedlings in cool, moist conditions. When the supporttissue of the stem is destroyed, the seedling falls over and dies. (See Figure10.5, page 185.) Damping off can quickly destroy a flat of seedlings, espe-ciully if the seed was broadcast in the germination flat.
Several steps that can be taken to prevent or control damping off arc:
1. Keep the surface of the germination medium dry between irrigations.2. In flats, sow seed thinly so that there is air circulation after germination.
The surface of the germination medium will then be able to dry out.3. Use steam pasteurization on the germination medium if it is soil-based
or if the soilless germination medium was contaminated.4. Use fungicide only as needed and directed.
Disease ControlThere arc four widely-used strategics for disease control on bedding
plants in the greenhouse. Used interactively, they arc known as IntegratedPlant Health Management (IPHM) (a program very similar to IPM forinsect pests). These four strategies arc:
1. good greenhouse sanitation2. ideal cultural environment for vigorous plant growth3. use of disease-resistant varieties4. use of fungicides when necessary
Keeping the greenhouse as clean as possible is the first strategy of thegreenhouse manager. Walkways, benches, and other structural aspects of thegreenhouse should be disinfected several times a ycar with an approveddisinfectant. All recycled containers should also be disinfected.
Secondly, seedlings should be kept healthy and growing vigorously by--deans of ideal environmental conditions for plants. (Disease organisms usu-ally find such an envilonment less favorable.) Like people, healthy plants arcmore resistant to disease.
Another important strategy is to purchase seed of bedding plant cultivarsthat arc resistant to disease (especially damping off). This is a genetic char-acteristic bred into the plant's DNA. A resistant cultivar is able to "fight off"disease organisms better than is a non-resistant cultivar.

198
Finally, fungicides are used when necessary to control diseases caused byfungi. Fungicides may be applied as a drench or mixed with the root medium.Regardless of application method, always follow label directions for use offungicides. Application of fungicides (or any pesticide) at excessive rates orto crops not listed on the label is illegal.
IPHM is mainly a preventive strategy that is cost effective and "soft" onthe environment. What's more, it really works!
PestsThe most common pests of bedding plants are aphids, spider mites, thrips,
and whiteflies. These pests feed on the plant, distorting growth. In severeinfestations, they even kill the plant. Sometimes in warm weather, populationsof these pests can "explode", literally covering a crop in a matter of days.
Aphids (Figure 10.16 A,B)
Aphids are typically plump green or brown insects that feed on variousplant parts, including stems and flower buds (Figure 10.16A). Most aphidsdo not have wings, though sometimes winged individuals are present (Figure10.16B). Aphids have piercing/sucking mouthparts. As these rnouthparts areused to withdraw plant sap from the plant, new growth becomes distorted.Aphids also excrete a sticky substance known as honeydew. If populationsare !arge enough, honeydew will cover large areas of the plant. A type offunk .s known as black mold or sooty mold grows on the honeydew. It ruinsthe appearance of the infested bedding plant crop. One other symptom ofaphid infestation is the presence of white flecks on the foliage. Tse are theold skins of the aphids, cast off as they molt.
Spidek Mites (Figure 10.16C)
Two-spotted spider mites are the most common mites to infest beddingplant crops. They look like small moving dots, barely visible to the nakedeye. With their rasping-scraping mouthparts, two-spotted spider mites obtainnutrients from the plant, usually from the undersides of the leaves. As a resrlt,the upper surfaces of leaves become mottled or take on a "salt and pepper"appearance. Tiny webbing is visible on the undersides of leaves and on theflowers.
Thrips (Figure 10.16D)Thrips are very small, cylindrical insects that are commonly found in
flower buds and flowers and on leaves. Like spider mites, thrips damage theplant with their scraping mouthparts. Symptoms of thrips damage are streak-ing and distorting of flower petals and defon_ leaves. The winged adultscan spread rapidly over large areas. They enter greenhouses through venti-lators, doors, and other openings.
The most damaging thrips species is the western flower thrips (Frankliniellaoccidentalis). It reproduces rapidly. Its resistance to many pesticides makesany infestation very difficult to control. Western flower thrips also transmitviral diseases from plant to plant.

A. Adult aphid with two young aphids Figure 10.16
B. Winged adult aphid
I
14r-ei
D. Adult thrips
1.
Common bedding plant pests(greatly magnified)
(courtesy of Richard Lindquist,Department of Entomology,OARDC, Wooster, Ohio)
C. Two-spotted spider mite
E. Adult greenhouse whitefly
le° Clk" 111,040":,
199
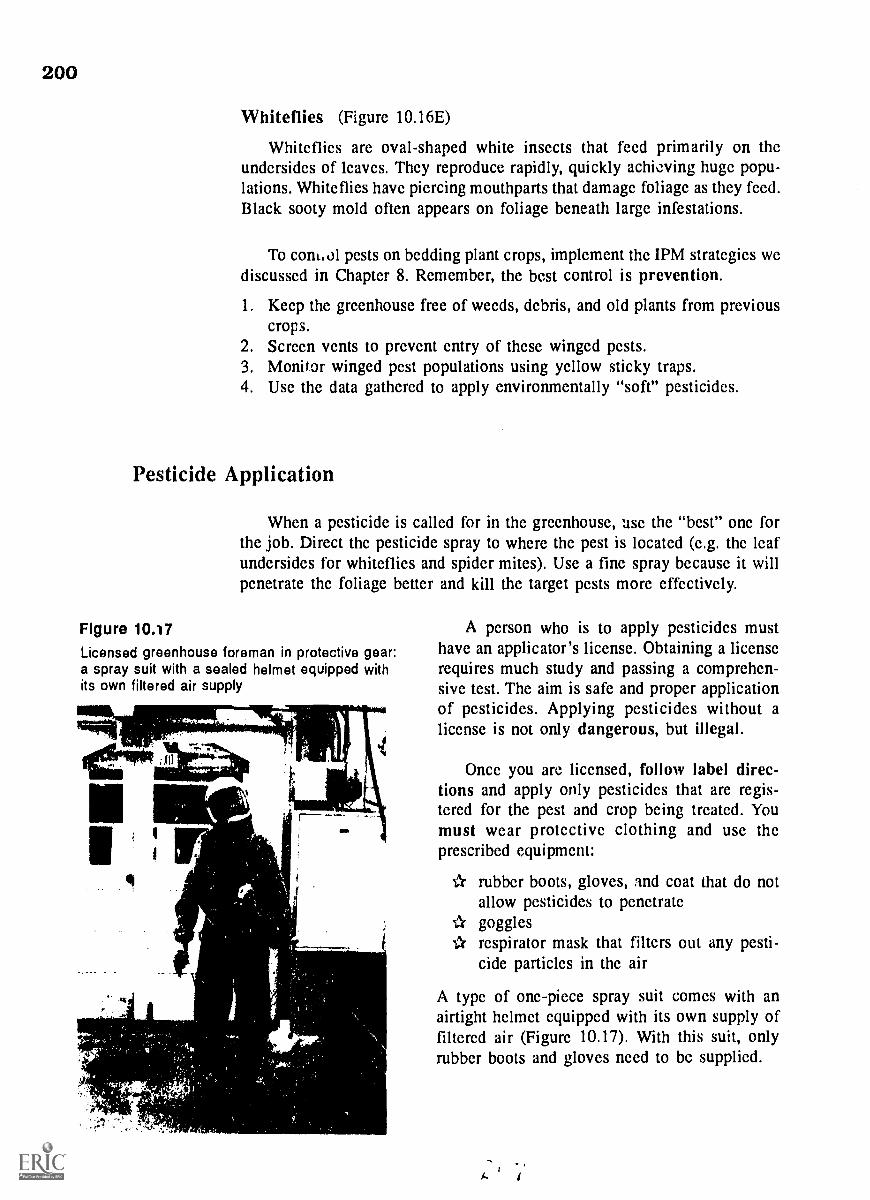
200
Whiteflies (Figure 10.16E)
Whiteflies are oval-shaped white insects that feed primarily on theundersides of leaves. They reproduce rapidly, quickly achieving huge popu-lations. Whiteflies have piercing mouthparts that damage foliage as they feed.Black sooty mold often appears on foliage beneath large infestations.
To com..ol pests on bedding plant crops, implement the IPM strategies wediscussed in Chapter 8. Remember, the best control is prevention.
1. Keep the greenhouse free of weeds, debris, and old plants from previouscrops.
2. Screen vents to prevent entry of these winged pests.3. Monitor winged pest populations using yellow sticky traps.4. Use the data gathered to apply environmentally "soft" pesticides.
Pesticide Application
When a pesticide is called for in the greenhouse, use the "best" one forthe job. Direct the pesticide spray to where the pest is located (e.g. the leafundersides for whiteflies and spider mites). Use a fine spray because it willpenetrate the foliage better and kill the target pests more effectively.
Figure 10.17Licensed greenhouse foreman in protective gear:a spray suit with a sealed helmet equipped withits own filtered air supply
110
A person who is to apply pesticides musthave an applicator's license. Obtaining a licenserequires much study and passing a comprehen-sive test. The aim is safe and proper applicationof pesticides. Applying pesticides without alicense is not only dangerous, but illegal.
Once you are licensed, follow label direc-tions and apply only pesticides that are regis-tered for the pest and crop being treated. Youmust wear protective clothing and use theprescribed equipment:
* rubber boots, gloves, and coat that do notallow pesticides to penetrate
* goggles* respirator mask that filters out any pesti-
cide particles in the air
A type of one-piece spray suit comes with anairtight helmet equipped with its own supply offiltered air (Figure 10.17). With this suit, onlyrubber boots and gloves need to be supplied.

SCHEDULES FOR BEDDING PLANT CROPS
Scheduling bedding plants for sale in the spring can be quite complicated,especially if many beddilg plant species are produced. However, specificschedules for many species am published in various greenhouse industrypublications. Check with your local Cooperative Extension Service office forcurrent recommendations. An example of schedules for a number of commonbedding plants is given on the next page in Table 10.3. These productionschedules should be used only as a guide. The environment of each green-house will be different from others due to variations in weather conditions,cultural practices, etc. that affect growth rates. Therefore, a grower will notalways follow the exact dates on published schedules. Instead, he/she is freeto modify the schedule slightly based on crop growth in that particular green-house.
Growers should always keep careful, accurate records for schedulingpurposes. Records should be kept of seed sowing dates, transplanting dates,environmental conditions throughout the crop, growth retardant applications,the date the crop was judged ready for sale, and other events and conditions.These records will be a very valuable reference when scheduling futurebedding plant crops.
Popularity of Major Bedding Plant Species
There are hundreds of bedding plant species and cultivars grown todayin the U.S. According to a survey conducted by the Professional Plant Grow-ers' Association, impatiens in 1988 was the best-selling bedding plant cropin the United States. It has remained number 1 since that time. Cuttinggeraniums are the second most popular bedding plant crop. Until 1979, petuniaswere the most popular bedding plant; they are now a distant third. Seedgeraniums are in fourth place. Tomatoes are the most popular vegetablebedding plant.
Table 10.4 lists the most popular bedding plants grown today. Illustrationsor photographs of many of these crops are available in various industry
Ageratum MarigoldsAlyssum PansiesAsters PeppersBegonia PetuniasBrowallia PhloxCabbage PortulacaCelosia SalviaColeus SnapdragonsDahlias TomatoesDusty miller VerbenaGeranium (seed & cutting) VincaImpatiens ZinniaLobelia
Table 10.4Common bedding plants grownin the United States
201
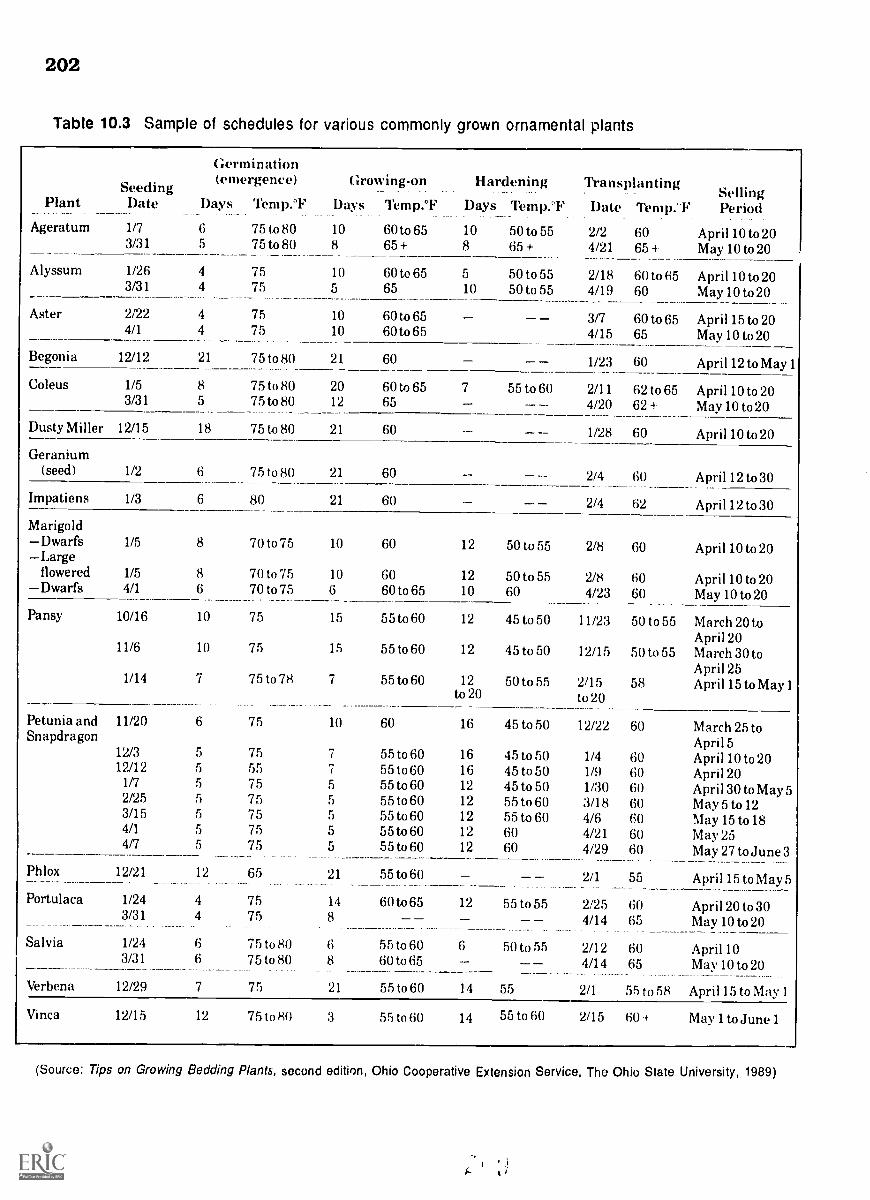
202
Table 10.3 Sample of schedules for various commonly grown ornamental plants
Seeding
Germination(emergence) Growing-on Hardening Transplanting
SellingPlant Date Days Temp.°F Days Temp.°F Days Temp."F Date_ Tem p.`F Period
Ageratum 1/7 6 7510 80 10 60to 65 10 50 to 55 2/2 60 April 10 to 203/31 5 75 to 80 8 65 + 8 65 + 4/21 65 4. May 10 to 20
Alyssum 1/26 4 75 10 60 te 65 5 50 to 55 2/18 60 to 65 April 10 to 203/31 4 75 5 65 10 50 to 55 4/19 60 May 10 to 20
Aster 2/22 4 75 10 60 to 65 3/7 60 to 65 April 15 to 204/1 4 75 10 60 to 65 4/15 65 May 10 to 20
Begonia 12/12 21 75 to 80 21 60 1/23 60 April 12 to May 1
Coleus 1/5 8 75 to 80 20 60 to 65 7 55 to 60 2/11 62 to 65 April 10 to 203/31 5 75 to 80 12 65 4/20 62 4 May10 to 20
Dusty Miller 12/15 18 75 to 80 21 60 1/28 60 April 10 to 20
Geranium(seed) 1/2 6 75 to 80 21 60 2/4 60 April 12 to 30
Impatiens 1/3 6 80 21 60 2/4 62 April 12 to 30
MarigoldDwarfs 1/5 8 70 to 75 10 60 12 50 to 55 2/8 60 April 10 to 20Large
flowered 1/5 8 70 to 75 10 60 12 50 to 55 2/8 60 April 10 to 20Dwarfs 4/1 6 70 to 75 6 60 to 65 10 60 4/23 60 May 10 to 20
Pansy 10/16 10 75 15 55 to 60 12 45 to 50 11/23 50 to 55 March 20 toApri120
11/6 10 75 15 55 to 60 12 45 to 50 12/15 50 to 55 March 30 toApril 25
1/14 7 75 to 78 7 55 to 60 12 50 to 55 2/15 58 April 15 to May 1to 20 to 20
Petunia and 11/20 6 75 10 60 16 45 to 50 12/22 60 March 25 toSnapdragon April 5
12/3 5 75 7 55 to 60 16 45 to 50 1/4 60 April 10 to 2012/12 55 7 55 to 60 16 45 to 50 1/9 60 April 20
1/7 5 75 5 55 to 60 12 45 to 50 1/30 60 Apri130 to May52/25 5 75 5 55 to 60 12 55 to 60 3/18 60 May5 to 123/15 5 75 5 55 to 60 12 55 to 60 4/6 60 May 15 to 184/1 5 75 5 55 to 60 12 60 4/21 60 May 254/7 5 75 5 55 to 60 12 60 4/29 60 May 27 toJune 3
Phlox 12/21 12 65 21 55 to 60 2/1 55 April 15 to May 5
Portulaca 1/24 4 75 14 60 to 65 12 55 to 55 2/25 60 April 20 to 303/31 4 75 8 4/14 65 May 10 to 20
Salvia 1/24 6 75 to 80 6 55 to 60 6 50 to 55 2/12 60 Apri1103/31 6 75 to 80 8 60 to 65 -- __ 4/14 65 May 10 to 20
Verbena 12/29 7 21 55 to 60 14 55 2/1 55 to 58 April 15 to May 1
Vinca 12/15 12 75 to 80 3 55 to 60 14 55 to 60 2/15 60 -4- May 1 to June 1
(Source: Tips on Growing Bedding Plants, second edition, Ohio Cooperative Extension Service, The Ohio State University, 1989)

publications.' Various professional florist associations; also have descriptionsof and infbrmation about many bedding plant species.
MARKETING BEDDING PLANTS
As we saw at the beginning of this chapter, bedding plant production is
the largest segment of the floriculture industry. The wholesale value of bed-ding plants nationally ($971 million) accounted for 35 percent of the totalfloriculture wholesale value in 1990. Flowering/foliar bedding plantsaccounted for 92 percent of the total bedding plants produced in 1990; theother 8 percent were vegetables.
Bedding plants sold in flats are the most popular marketing method,making up 52 percent of the total (Figure 10.18). Potted bedding plants weresecond at 37 percent. Flowering hanging baskets came in third at 11 percent
(Figure 10.19).
There are many different retail outlets for bedding plants: garden centers,roadside markets, mass market discount stores, retail greenhouses, and grocerystores. Growers supplying these outlets must know what their customers want
- the quality the customer expects, the varieties, and even the containers theplants should be sold in. The smart grower will produce what the customerwants. No matter how bedding plants are marketed, all containers should haveculture tags with the name, picture of the flower, mature height, and a briefcultural description of the species (Figure 10.20).
Examples are "Greenhouse Growut, "Grower Talks", and "Greenhouse Manager."
2 Examples are Ohio Florists' Association and Professional Plant Growers' Association.
Figure 10.18A bedding plant wholesale grower with a large cropof bedding plants in flats near the time of sale.
Figure 10.19Bedding plants in hanging baskets make colorfuladditions to any porch or enclosed patio.
203

204
Some growers even hold a workshop for their retail customers to informthem about important aspects of bedding plant culture while the plants areon display. Informed retailers will then care for the bedding plants prop-rlyso that they will retain greenhouse quality while on display in the retail store.
Most customers want instant color when they buy bedding plants. So mostgrowers sell bedding plants in flower or at least with buds showing color.Vegetable bedding plants should be of good size with flower buds showingin crops like tomatoes or peppers.
When bedding plants are marketed at either the wholesale or retail level,they should be displayed in an orderly fashion in arrangements that allow easyaccess for the customer. Wholesale growers display their bedding plaat cropsin their production greenhouses; retail outlets usually display the beddingplains on raised benches and counters. Retail areas sometimes have plantsgrouped by similar cultural requirements to help customers decide what plantswill grow well in their gardens. Other display strategies include groupingplants by flower color or mature size.
Figure 10.20
Bedding plant flats with labelsin each section describing theparticular plcalt and its culture
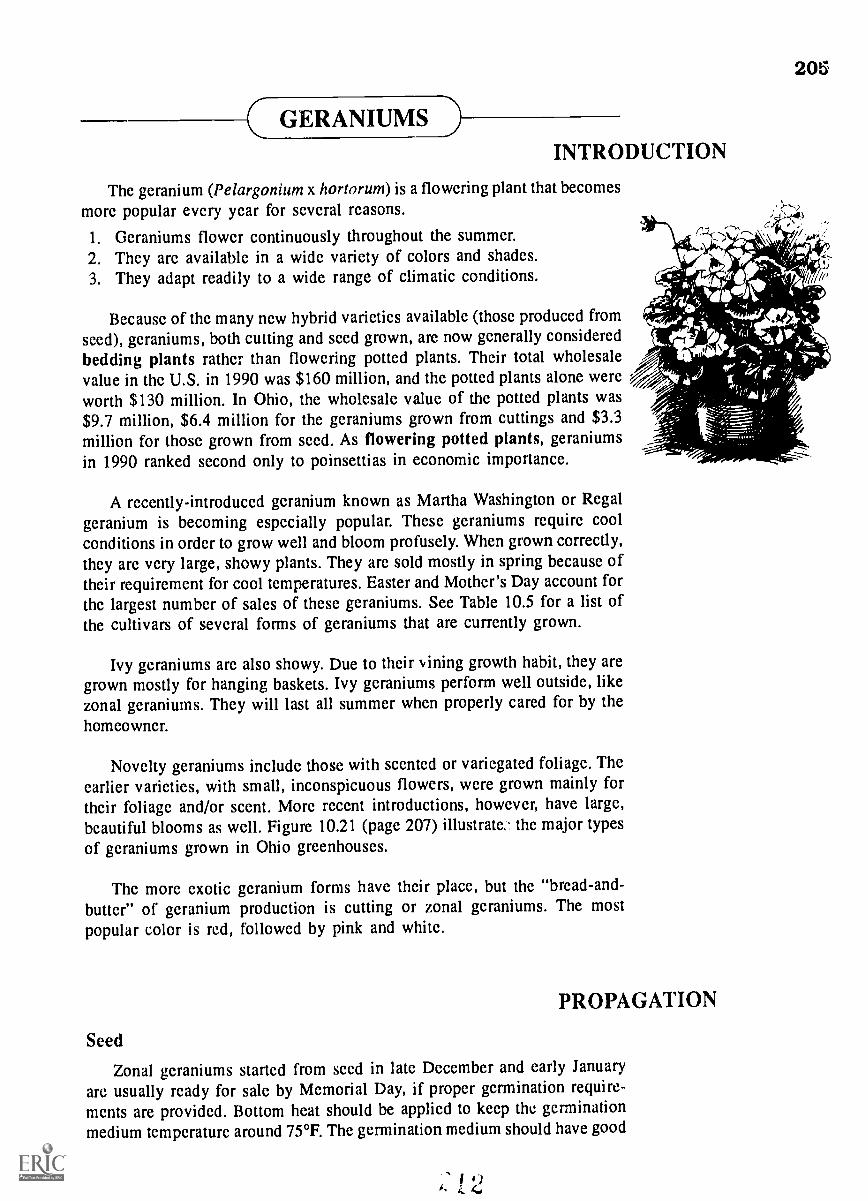
--C GERANIUMSINTRODUCTION
The geranium (Pelargonium x hortorum) is a flowering plant that becomesmore popular every year for several reasons.
1. Geraniums flower continuously throughout the summer.2. They are available in a wide variety of colors and shades.3. They adapt readily to a wide range of climatic conditions.
Because of the many new hybrid varieties available (those produced fromseed), geraniums, both cutting and seed grown, are now generally consideredbedding plants rather than flowering potted plants. Their total wholesalevalue in the U.S. in 1990 was $160 million, and the potted plants alone wereworth $130 million. In Ohio, the wholesale value of the potted plants was$9.7 million, $6.4 million for the geraniums grown from cuttings and $3.3million for those grown from seed. As flowering potted plants, geraniumsin 1990 ranked second only to poinsettias in economic importance.
A recently-introduced geranium known as Martha Washington or Regalgeranium is becoming especially popular. These geraniums require coolconditions in order to grow well and bloom profusely. When grown correctly,they are very large, showy plants. They are sold mostly in spring because oftheir requirement for cool temperatures. Easter and Mother's Day account forthe largest number of sales of these geraniums. See Table 10.5 for a list ofthe cultivars of several forms of geraniums that are currently grown.
Ivy geraniums are also showy. Due to their \pining growth habit, they aregrown mostly for hanging baskets. Ivy geraniums perform well outside, likezonal geraniums. They will last all summer when properly cared for by thehomeowner.
Novelty geraniums include those with scented or variegated foliage. Theearlier varieties, with small, inconspicuous flowers, were grown mainly fortheir foliage and/or scent. More recent introductions, however, have large,beautiful blooms as well. Figure 10.21 (page 207) illustrate.. the major typesof geraniums grown in Ohio greenhouses.
The more exotic geranium forms have their place, but the "bread-and-butter" of geranium production is cutting or zonal geraniums. The mostpopular color is red, followed by pink and white.
Seed
205
PROPAGATION
Zonal geraniums started from seed in late December and early Januaryarc usually ready for sale by Memorial Day, if proper germination require-ments are provided. Bottom heat should be applied to keep the germinationmedium temperature around 75°F. The germination medium should have good
4: 2
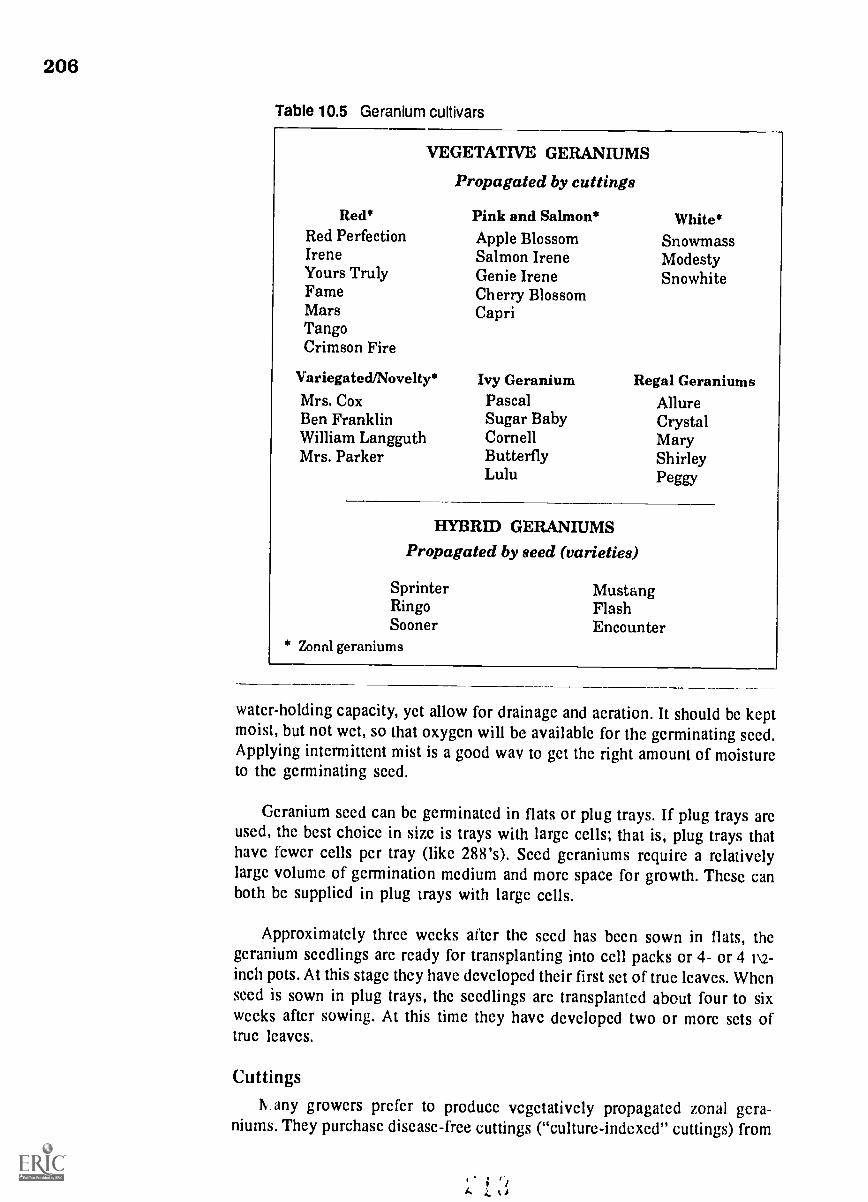
206
Table 10.5 Geranium cultivars
VEGETATIVE GERANIUMS
Propagated by cuttings
Red* Pink and Salmon* White*Red Perfection Apple Blossom SnowmassIrene Salmon Irene ModestyYours Truly Genie Irene SnowhiteFame Cherry BlossomMars CapriTangoCrimson Fire
Variegated/Novelty* Ivy Geranium Regal GeraniumsMrs. Cox Pascal AllureBen Franklin Sugar Baby CrystalWilliam Langguth Cornell MaryMrs. Parker Butterfly Shirley
Lulu Peggy
HYBRID GERANIUMSPropagated by seed (varieties)
Sprinter MustangRingo FlashSooner Encounter
* Zonal geraniums
water-holding capacity, yet allow for drainage and aeration. It should be keptmoist, but not wet, so that oxygen will be available for the germinating seed.Applying intermittent mist is a good way to get the right amount of moistureto the germinating seed.
Geranium seed can be germinated in flats or plug trays. If plug trays arcused, the best choice in size is trays with large cells; that is, plug trays thathave fewer cells per tray (like 288'0. Seed geraniums require a relativelylarge volume of germination medium and more space for growth. These canboth be supplied in plug trays with large cells.
Approximately three weeks after the seed has been sown in flats, thegeranium seedlings arc ready for transplanting into cell packs or 4- or 4 1\2-inch pots. At this stage they have developed their first set of true leaves. Whenseed is sown in plug trays, the seedlings arc transplanted about four to sixweeks after sowing. At this time they have developed two or more sets oftrue leaves.
Cuttings
11.any growers prefer to produce vegetatively propagated zonal gera-niums. They purchase disease-free cuttings ("culture-indexed" cuttings) from
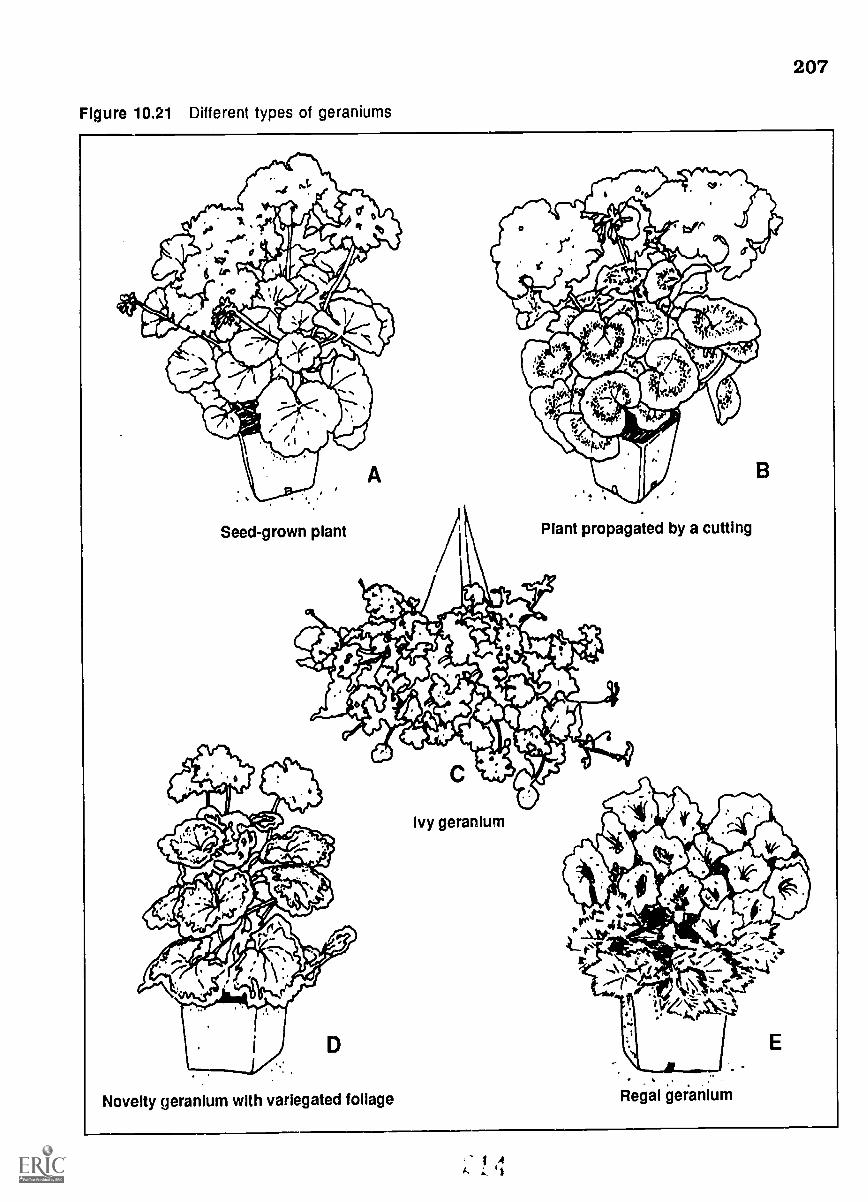
207
Figure 10.21 Different types of geraniums
Seed-grown plant Plant propagated by a cutting
Ivy geranium
Novelty geranium with variegated foliage. .
Regal geranium

208
a specialist propagator. These cuttings are initially free of disease organisms.The grower must then keep the geranium crop free of disease by implementingIPHM principles.
Some growers produce their own cuttings from stock plants they raise inthe greenhouse. These stock plants must be raised from culture-indexed cuttingsthat are purchased from a specialist propagator. The cuttings, purchased anytime from May to August, are planted as soon as they arrive. All equipmentand products, including root medium, containers, tools, and benches, mustbe disinfected before the stock plants are planted. This practice greatlyreduces, if not eliminates, the risk of disease. Stock plants that are diseasedwill produce inferior cuttings, which may, in turn, mean ruin of the crop.
As the stock plants grow, they are pinched several times to encouragebranching. This is continued all summer to establish plants that contain manybranches (Figure 10.22). A single stock plant established in June can poten-tially yield between 30 and 40 cuttings the following spring.
Cuttings are usually removed by being snapped off by hand to preventthe spread of disease through contaminated knives or other tools. In prepa-ration, everyone who handles the cuttings should wash his or her handsthoroughly with soap to prevent contamination. Terminal stem cuttings rangefrom 1 1/2 to 3 inches in length (Figure 10.23). They should be taken in themorning when the stock plants are turgid, so that the snap-off is clean. Allleaves at the base of the cutting should be removed so that the petiole (leafstem) is not covered by rooting medium.
Figure 10.22A well-branched geranium :.,tockplant that has been pinched
k Li
"
41,"1,
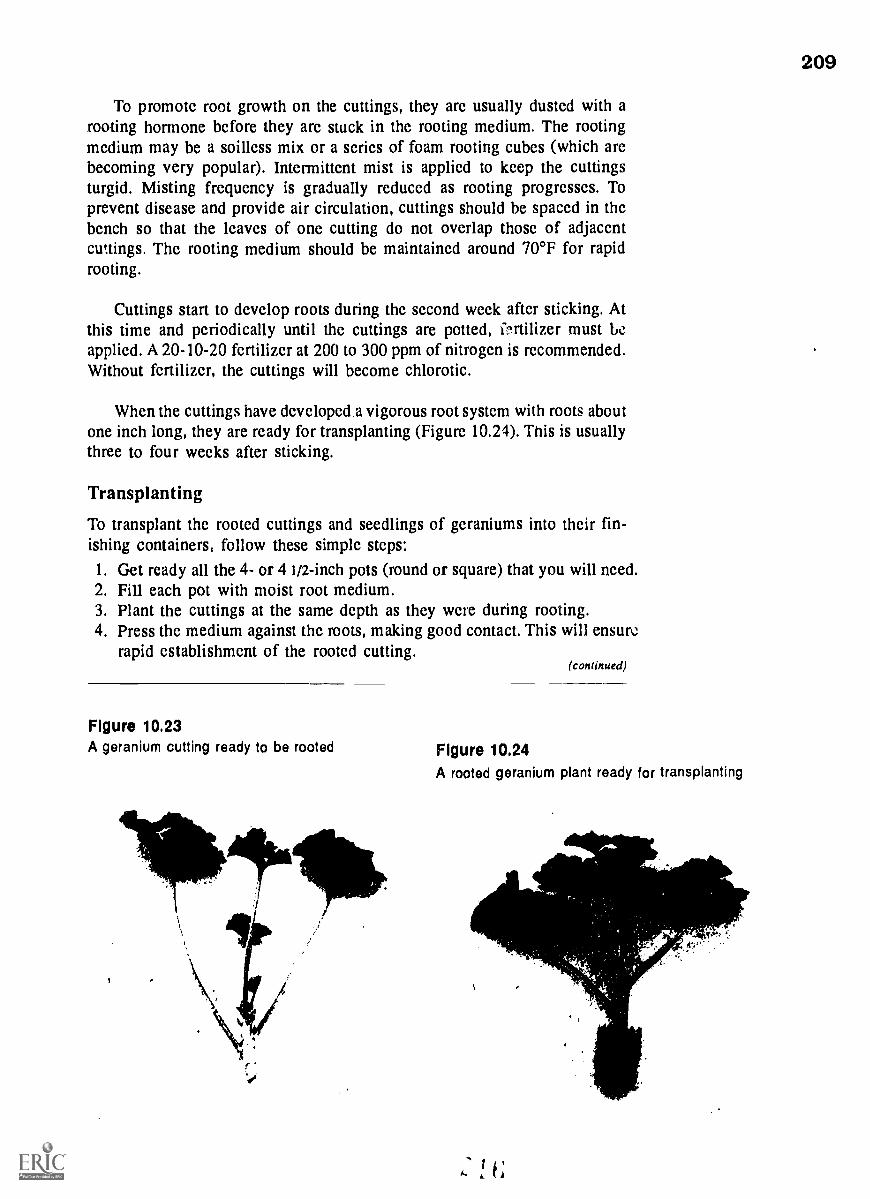
To promote root growth on the cuttings, they are usually dusted with arooting hormone before they are stuck in the rooting medium. The rootingmedium may be a soilless mix or a series of foam rooting cubes (which arebecoming very popular). Intermittent mist is applied to keep the cuttingsturgid. Misting frequency is gradually reduced as rooting progresses. Toprevent disease and provide air circulation, cuttings should be spaced in thebench so that the leaves of one cutting do not overlap those of adjacentcuttings. The rooting medium should be maintained around 70°F for rapidrooting.
Cuttings start to develop roots during the second week after sticking. Atthis time and periodically until the cuttings are potted, iNiilizer must beapplied. A 20-10-20 fertilizer at 200 to 300 ppm of nitrogen is recommended.Without fertilizer, the cuttings will become chlorotic.
When the cuttings have developed,a vigorous root system with roots aboutone inch long, they are ready for transplanting (Figure 10.24). This is usuallythree to four weeks after sticking.
Transplanting
To transplant the rooted cuttings and seedlings of geraniums into their fin-ishing containers, follow these simple steps:
1. Get ready all the 4- or 4 1/2-inch pots (round or square) that you will need.2. Fill each pot with moist root medium.3. Plant the cuttings at the same depth as they were during rooting.4. Press the medium against the roots, making good contact. This will ensure
rapid establishment of the rooted cutting.(continued)
Figure 10.23A geranium cutting ready to be rooted Figure 10.24
A rooted geranium plant ready for transplanting
VOor
209
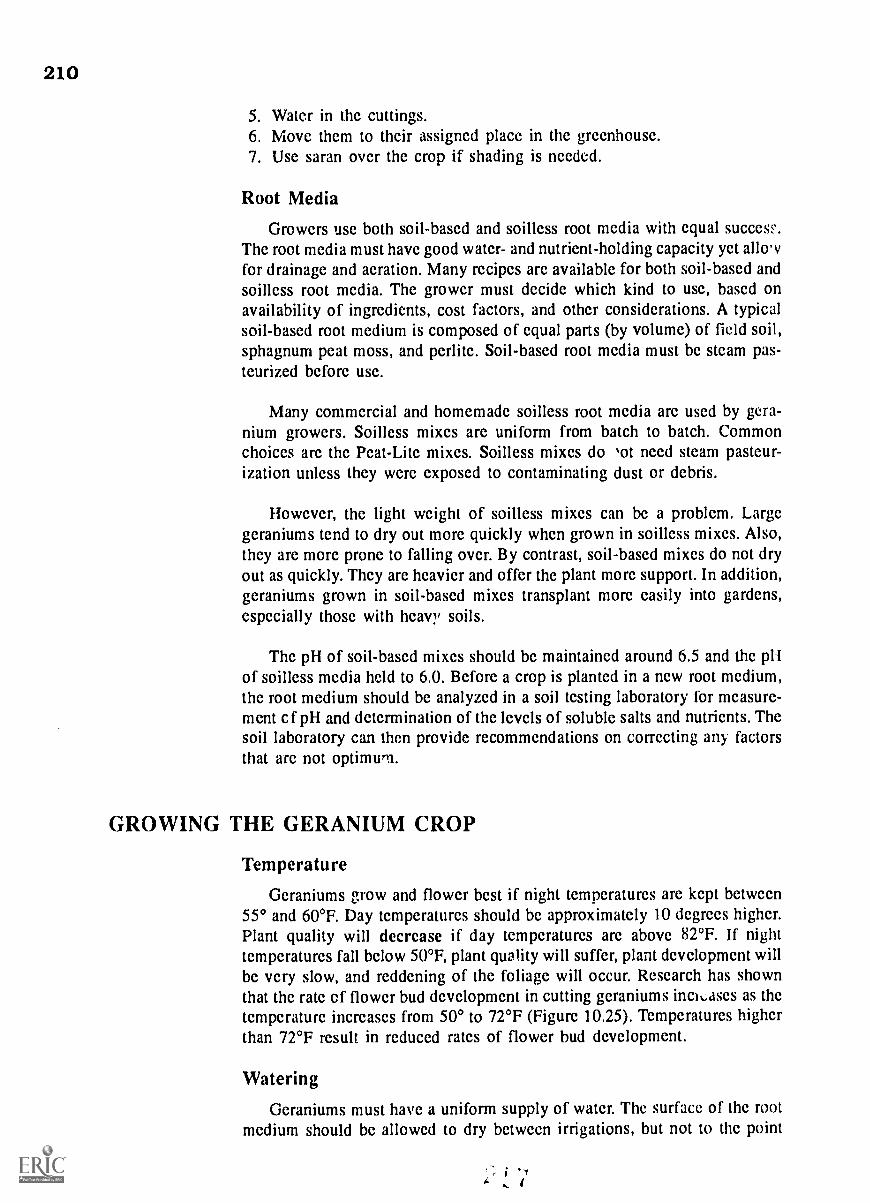
210
5. Water in the cuttings.6. Move thcm to their assigned place in thc grccnhousc.7. Use saran ovcr thc crop if shading is nceded.
Root Media
Growcrs use both soil-bascd and soilless root mcdia with equal succesF.Thc root media must havc good watcr- and nutricnt-holding capacity yct allowfor drainagc and acration. Many recipcs arc availablc for both soil-bascd andsoillcss root mcdia. Thc grower must dccide which kind to use, based onavailability of ingredients, cost factors, and othcr considcrations. A typicalsoil-based root mcdium is composed of cqual parts (by volume) of field soil,sphagnum pcat moss, and perlitc. Soil-based root mcdia must be steam pas-teurized bcforc usc.
Many commcrcial and homemade soillcss root mcdia arc uscd by gera-nium growers. Soilless mixcs are uniform from batch to batch. Commonchoiccs arc thc Pcat-Litc mixcs. Soilless mixcs do ,ot need steam pasteur-ization unless thcy were cxposed to contaminating dust or dcbris.
Howcvcr, thc light weight of soilless mixcs can be a problcm. Largegcraniums tcnd to dry out morc quickly whcn grown in soillcss mixes. Also,thcy arc more pronc to falling over. By contrast, soil-bascd mixcs do not dryout as quickly. Thcy are hcavicr and offer the plant morc support. In addition,gcraniums grown in soil-based mixcs transplant morc easily into gardcns,especially thosc with heavy, soils.
Thc pH of soil-bascd mixes should bc maintaincd around 6.5 and the pHof soilless media held to 6.0. Bcforc a crop is planted in a new root medium,the root mcdium should bc analyzed in a soil testing laboratory for mcasurc-mcnt cf pH and determination of thc levels of solublc salts and nutrients. Thesoil laboratory can then provide recommendations on correcting any factorsthat arc not optimum.
GROWING THE GERANIUM CROP
Temperature
Gcraniums grow and flower bcst if night temperatures arc kcpt between550 and 60°F. Day temperatures should bc approximately 10 degrees highcr.Plant quality will decrease if day temperatures arc above 82°F. If nighttemperatures fall bclow 50°F, plant quality will suffcr, plant development willbe vcry slow, and reddening of thc foliagc will occur. Research has shownthat the ratc cf flower bud development in cutting gcraniums inci..ases as thetemperature incrcascs from 50° to 72°F (Figure 10,25). Temperatures higherthan 72°F rcsult in reduced rates of flower bud development.
Watering
Gcraniums must have a uniform supply of water. The surface of thc rootmcdium should bc allowed to dry between irrigations, but not to thc point
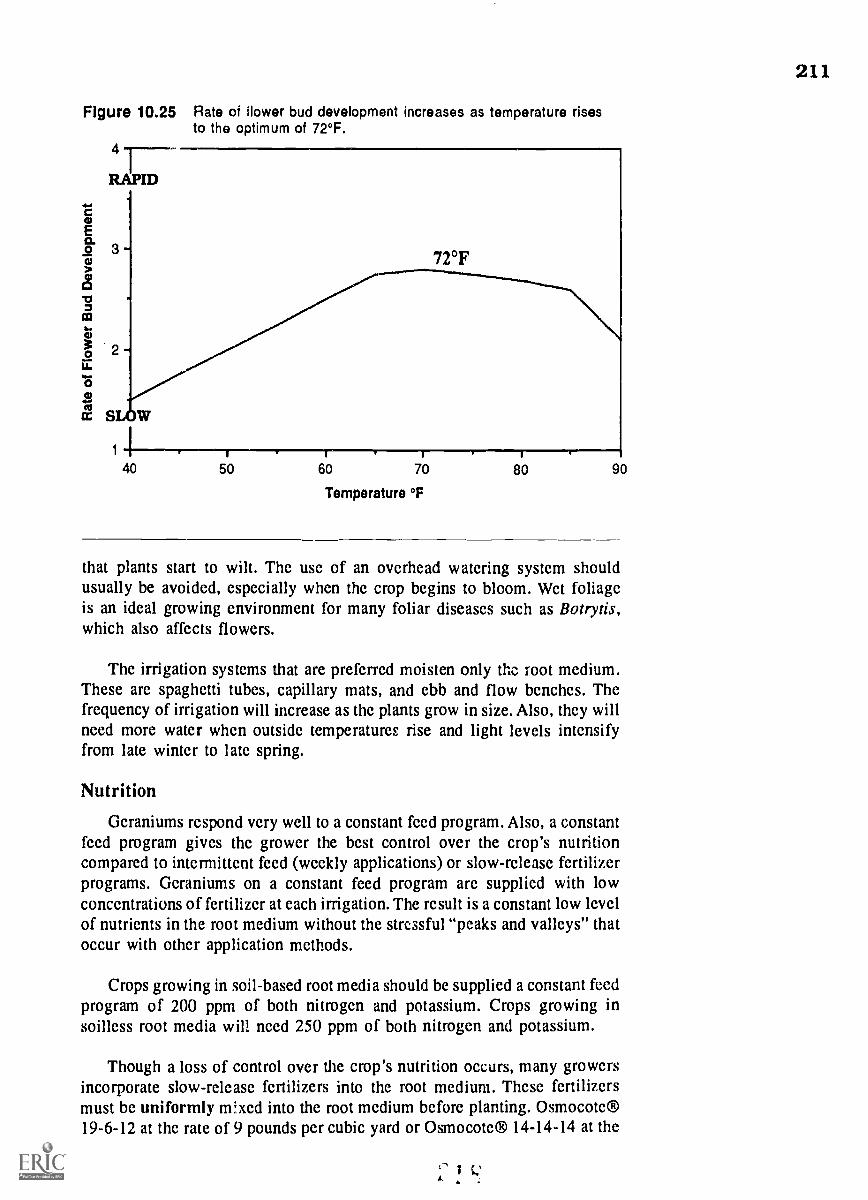
211
Figure 10.25 Rate of flower bud development increases as temperature risesto the optimum of 72°F.
4
RAPID
72°F
1
40 50 60 70
Temperature °F
80 90
that plants start to wilt. The use of an overhead watering system shouldusually be avoided, especially when the crop begins to bloom. Wet foliageis an ideal growing environment for many foliar diseases such as Botrytis,which also affects flowers.
The irrigation systems that are preferred moisten only thc root medium.These are spaghetti tubes, capillary mats, and ebb and flow benches. Thefrequency of irrigation will increase as the plants grow in size. Also, they willneed more water when outside temperatures rise and light levels intensifyfrom late winter to late spring.
Nutrition
Geraniums respond very well to a constant feed program. Also, a constantfeed program gives the grower the best control over the crop's nutritioncompared to intermittent feed (weekly applications) or slow-release fertilizerprograms. Geraniums on a constant feed program are supplied with lowconcentrations of fertilizer at each irrigation. The result is a constant low levelof nutrients in the root medium without the stressful "peaks and valleys" thatoccur with other application methods.
Crops growing in soil-based root media should be supplied a constant feedprogram of 200 ppm of both nitrogen and potassium. Crops growing insoilless root media will need 250 ppm of both nitrogen and potassium.
Though a loss of control over the crop's nutrition occurs, many growersincorporate slow-release fertilizers into the root medium. These fertilizersmust be uniformly m!xed into the root medium before planting. Osmocote®19-6-12 at the rate of 9 pounds per cubic yard or Osmocote ® 14-14-14 at the
212
rate of 12 pounds per cubic yard is mixed into the root medium. Osmocote®can also be applied to each pot as a top-dress,
Light
Geraniums require high light intensity for rapid growth and profuse flow-ering. Shading may be required for some varieties because the flowers aresusceptible to sunburn when exposed to full sun. High light intensities resultin thicker-diameter stems, more branching, and more flowering. Geraniumsgrown under low light intensity show slowed growth rates, spindly stems, and
less intense color in both flower and foliage.
Pinching
Some growers pinch cutting geraniums to produce well-branched, com-pact plants with many flowers. For most modern varieties, pinching is notnecessary, since well-branched, compact characteristics are bred into them.If pinching is done, a soft pinch is made three to four weeks after the rootedcutting is planted. This will allow enough time to insure that the plant isactively growing with an established root system. Geraniums at this stage ofgrowth branch readily after pinching.
A pinch involves removing one-half to one inch of the terminal stem whileleaving at least three nodes intact beneath the pinch. From these nodes newbranches will develop. Geraniums grown in 4 1/2-inch pots can be pinchedup to early or mid April for Memorial Day sales.
Height Control
There are several things that growers can do to keep geraniums frombecom ing leggy.1. Make sure that the geraniums are receiving full sun.2. Space the plants so that sunlight can reach each individual plant without
interference from adjacent plants.3. Allow the root medium to dry somewhat between irrigations. Moist soils
tend to promote succulent, stretched growth.
Height of geraniums can also be controlled chemically. Cycocel®, themost commonly used growth retardant, can be applied to geraniums as a 1,500ppm spray. The first application is made to the newly potted plant when ithas new growth approximately 1 1t2 inches long. Additional applications canbe made every two weeks, if necessary, until two weeks before the sale date.
A new, much stronger growth retardant called Bonzi® is also availablefor geranium height control. It is applied as a spray, but at much lowerconcentrations than Cycocel®. The recommended rates are 6 to 16 ppm, Tlv.;lower rate; would apply early in the growing season and 16 ppm would beused in the second half of the season.
Finally, DIF can also be used to control the height of geraniums. Growerscan often implement a 0 or slightly negative DIF to shorten stem internodesand produce a shorter plant. However, the use of DIF is feasible only while
.
I I
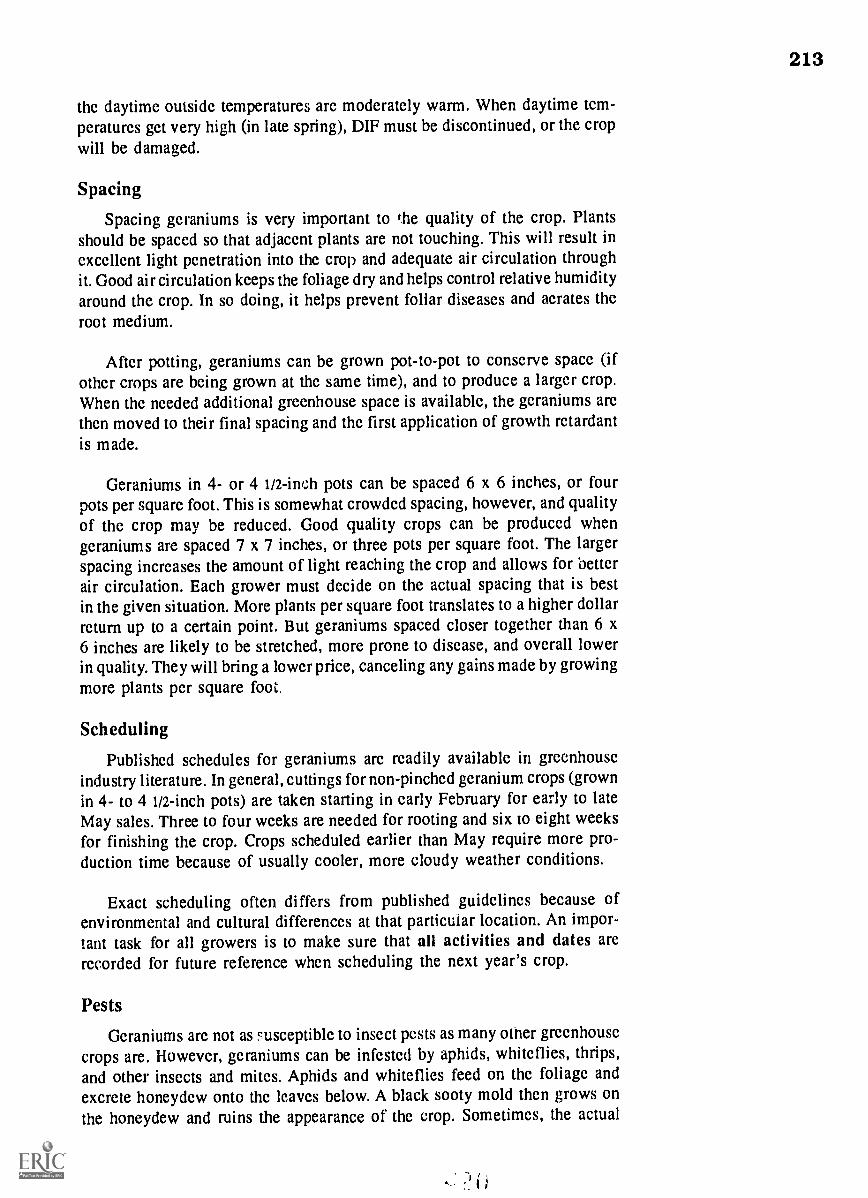
213
the daytime outside temperatures are moderately warm. When daytime tem-peratures get very high (in late spring), DIF must be discontinued, or the cropwill be damaged.
Spacing
Spacing geraniums is very important to the quality of the crop. Plantsshould be spaced so that adjacent plants are not touching. This will result inexcellent light penetration into the crop and adequate air circulation throughit. Good air circulation keeps the foliage dry and helps control relative humidityaround the crop. In so doing, it helps prevent foliar diseases and aerates theroot medium.
After potting, geraniums can be grown pot-to-pot to conserve space (ifother crops are being grown at the same time), and to produce a larger crop.When the needed additional greenhouse space is available, the geraniums arethen moved to their final spacing and the first application of growth retardantis made.
Geraniums in 4- or 4 1/2-inch pots can be spaced 6 x 6 inches, or fourpots per square foot. This is somewhat crowded spacing, however, and qualityof the crop may be reduced. Good quality crops can be produced whengeraniums are spaced 7 x 7 inches, or three pots per square foot. The largerspacing increases the amount of light reaching the crop and allows for betterair circulation. Each grower must decide on the actual spacing that is bestin the given situation. More plants per square foot translates to a higher dollarreturn up to a certain point. But geraniums spaced closer together than 6 x6 inches are likely to be stretched, more prone to disease, and overall lowerin quality. They will bring a lower price, canceling any gains made by growingmore plants per square foot.
Scheduling
Published schedules for geraniums are readily available in greenhouseindustry literature. In general, cuttings for non-pinched geranium crops (grownin 4- to 4 1/2-inch pots) are taken starting in early February for early to lateMay sales. Three to four weeks are needed for rooting and six to eight weeksfor finishing the crop. Crops scheduled earlier than May require more pro-duction time because of usually cooler, more cloudy weather conditions.
Exact scheduling often differs from published guidelines because ofenvironmental and cultural differences at that particular location. An impor-tant task for all growers is to make sure that all activities and dates arerecorded for future reference when scheduling the next year's crop.
Pests
Geraniums are not as susceptible to insect pests as many otner greenhousecrops are. However, geraniums can be infested by aphids, whiteflies, thrips,and other insects and mites. Aphids and whiteflies feed on the foliage andexcrete honeydew onto the leaves below. A black sooty mold then grows onthe honeydew and ruins the appearance of the crop. Sometimes, the actual

214
feeding of certain pests causes distortion of plant growth. Thrips damage theflower petals by their feeding habits. The petals appear streaked, and theflowers are ruined.
The best control of geranium pests is to implement IPM methods in thegreenhouse; (sec Chapter 8). Greenhouse sanitation, the use of physical andbiological controls, and the use of appropriate pesticides will greatly reduceor elimin4te present pest populations. IPM methods will also prevent newpests from oecoming established on the geranium crop.
Diseases
Bacterial
A bacterial disease called bacterial blight is the most serious disease ofgeraniums in the United States. Once it affects a crop, it can rapidly wipeout the entire crop. There is no effective cure for this disease. Symptomsinclude wilting of leaf margins and leaf spotting and yellowing (Figure 10.26).Finally, the stem rots and the plant dies.
Figure 10.26Bacterial blight of geranium
Wont
The best way to prevent this bacterial disease is to use culture-indexedcuttings that are free of disease. Implement all the good IPHM techniques thatwe have discussed.
1. Practice strict greenhouse sanitation.2. Provide an optimum growing environment for the geranium crop.
* Avoid high heat levels in the greenhouse.* Do not apply high levels of nitrogen to the crop.(High levels of heat or nitrogen encourage development of this disease.)
3. Remove any infected geraniums immediately from the greenhouse anddiscard them.
FungalA serious fungal disease is Botrytis blight. Flowers, leaves, and stems of
the geranium are affected. Flower petals turn dark, wilt, and fall off. Irregularbrown, watel-soaked spots appear on the leaves (Figure 10.27). In very humid

215
conditions, the fungus will produce masses of gray spores that cover thewater-soaked spots
Spores of the Botrytis fungus germinate readily on moist plant surfacesand are often carried on plant debris. Therefore, the best control of Botrytisblight is to avoid wetting the foliage and to keep the greenhouse clean andfree of plant debris. Be careful to provide enough air circulation to lowerrelative humidity levels and to prevent "wet spots" from occurring in thegeranium crop. Apply appropriate fungicides on a regular schedule to helpprevent Botrytis from becoming established.
Blackleg is a common stem rot of geraniums caused by the fungus Pythium.It strikes during the propagation stage and early in production, because cuttingsand young plants are most susceptible. The first symptom of blackleg isblackening of the base of the stem (Figure 10.28). Eventually, the foliageyellows and the cutting or young plant dies.
Pythium is commonly found in the root medium. Conditions in the rootmedium that favor blackleg are too much water and too high levels of solublesalts that damage the roots of the young plant. These conditions allow thefungus to invade the stem.
The following control measures are the most effective:
1. Steam pasteurize the soil.2. Disinfect all containers and tools that are used during propagation and
production.3. Use a rooting medium that is porous enough to allow good drainage and
aeration. Then developing roots are never deprived of oxygen.4. Drench the root medium with an appropriate fungicide. It will prevent
Pythium from becoming established in the soil.5. Remove and discard all affected plants.
Figure 10.27 Botrytis blight of geranium
r
:;$9?
Figure 10.28 Blackleg of geranium
(Figures 10.27-10.29 courtesy of Photo Science, Cornell University, Ithaca, New York)
12
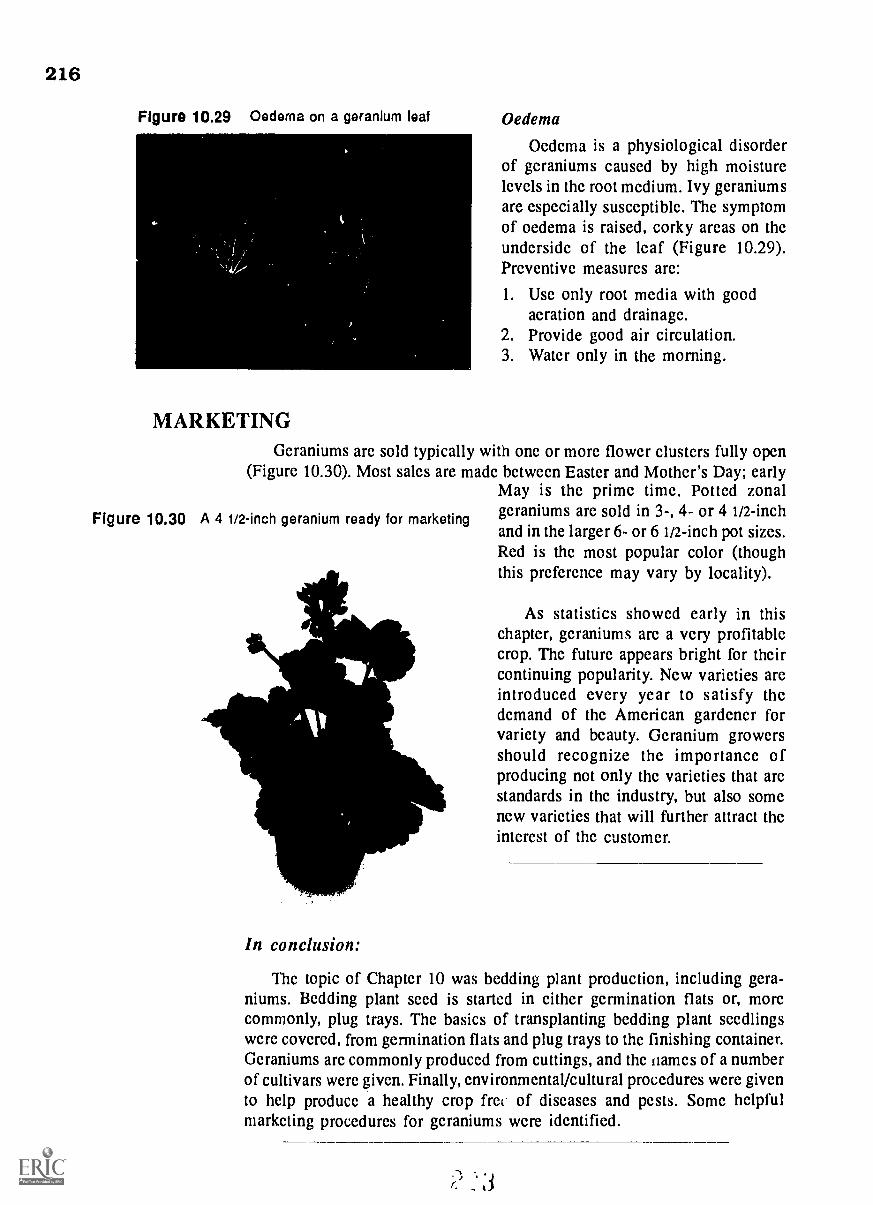
216
Figure 10.29 Oedema on a geranium leaf Oedema
Oedema is a physiological disorderof geraniums caused by high moisturclevels in thc root medium. Ivy geraniumsare especially susceptible. The symptomof oedema is raised, corky areas on thcunderside of the leaf (Figure 10.29).Preventive measures are:
1. Use only root media with goodacration and drainagc.
2. Provide good air circulation.3. Water only in the morning.
MARKETINGGcraniums are sold typically with one or more flowcr clusters fully opcn
(Figure 10.30). Most sales are made between Easter and Mothcr's Day; earlyMay is the primc time. Potted zonal
Figure 10.30 A 4 1/2-inch geranium ready for marketing geraniums are sold in 3-, 4- or 4 1/2-inchand in the larger 6- or 6 1/2-inch pot sizes.Red is the most popular color (thoughthis prcfcrcnce may vary by locality).
In conclusion:
As statistics showed early in thischapter, geraniums are a very profitablecrop. The futurc appears bright for theircontinuing popularity. Ncw varieties areintroduced every year to satisfy thedemand of the American gardener forvariety and beauty. Geranium growersshould recognize the importance ofproducing not only the varieties that arcstandards in the industry, but also somenew varieties that will further attract thcinterest of the customer.
The topic of Chapter 10 was bedding plant production, including gera-niums. Bedding plant seed is started in either gcrmination flats or, morecommonly, plug trays. Thc basics of transplanting bcdding plant seedlingswcrc covered, from gcrmination flats and plug trays to the finishing container.Gcraniums are commonly produced from cuttings, and the names of a numberof cultivars were given. Finally, environmental/cultural procedures were givento help produce a healthy crop fre( of diseases and pcsts. Some helpfulmarketing procedures for gcraniums were identified.

This review is to help you check yourself on what you have learned about production ofgeraniums and bedding plants in general. If you need to refresh your mind on any of the following
questions, refer to the page number given in parentheses.
Bedding Plants (in general)
1. Define "bedding plants." (page 178)
2. What was the wholesale value of bedding plants in the U.S. in 1990? (page 178)
3. What were the top four states in wholesale value of bedding plants in 1990? (page 6)
4. Describe the two procedures that are used for sowing bedding plant seed in flats.(pages 183-184)
5. How are seeds sown in plug trays? (pages 187-189)
6. Name three advantages of producing bedding plants in plug trays. (pages 181-182)
7. Why is it more expensive to sow seed in plug trays than in flats? (page 182)
8. Describe a plug seedling in Stage 3 of development. (pages 189-191)
9. When is a seedling start41 in a germination flat ready for transplanting? (pages 186,191)
When is a seedling started in a plug tray ready? (pages 189,191)
10. How are seedlings removed from a germination flat during transplanting? (pages
191-192) from a plug tray? (page 193)
11. What is the recommended watering and fertilization schedule for newly transplantedbedding plants that are growing rapidly? (pages 194-196)
12. Describe two methods used to control the height of bedding plants other than bywithholding water. (page 196)
13. How does damping off affect bedding plant seedlings? What conditions favor this
disease? (page 197)
14. Discuss the four principles of IPHM in a disease control program for bedding plants.
(pages 197-198)
15. What are three major pests of bedding plants? (pages 198-200)
16. How can bedding plant pest infestations be prevente.d? (page 200)
17. Where can a grower obtain scheduling guidelines for producing bedding plants?
(page 201)
18. Name ten bedding plant species that are grown today. (page 201)
'.9. What is the most popular marketing method used for bedding plants? (page 203)
4tit
217
218
Chapter 10 Review (continued)
Geraniums
1. What is the scientific name of geranium? (page 205)
2. Name other types of geraniums produced by growers besides the cutting or zonalgeranium. (page 205)
3. How are zonal geraniums propagated by a grower? (pages 206-209)
4. What is a "culture-indexed" geranium cutting? (pages 206, 208)
5. Give the recommended night temperature range for producing geraniums. (page 210)
6. Besides the constant liquid feed program, what other method is commonly used forapplying fertilizers to geranium crops? (pages 211-2121
7. Give three methods of height control of a geranium crop. How does each method work?(page 212)
8. What is the recommended spacing for geraniums grown in 4 1/2-inch pots? (page 213)
9. Name two pests that infest geranium crops. (page 213)
10. What is the most important thing a grower can do to prevent diseases from affect-ing his or her geranium crop? (page 214)
11. During which stage of production does the disease blackleg affect geranium crops?(page 215)
12. How does oedema affect a geranium crop? What can be done to prevent it? (page 216)
13. During what part of the year are most zonal geraniums marketed? (page 216)
CHAPTER 11
FLOWERING POTTED PLANT PRODUCTION
Poinsettias, Chrysanthemums, and Easter Lilies
Competencies for Chapter 11
As a result of studying this chapter, you should be able to do the following:
1. Give the scientific names of poinsettia, chrysanthemum, and Easter lily.
2. Compare the production value of poinsettias, chrysanthemums, and Easter
lilies in the U.S.3. List the commonly grown flowering potted crops in your state.4. Discuss the following items in connection with production of poinsettias,
chrysanthemums, and Easter lilies:* production statistics* varieties or cultivars* propagation (including root media)* general culture (temperature, watering, nutrition, lighting, etc.)* pinching (where applicable)
photoperiod* height control* pest and disease problems* scheduling guidelines* post-harvest care* marketing
Related Science Concepts
1. Implement IPM strategies.2. Monitor root media for nutrien, content.3. Describe how photoperiodic manipulation works.4. Contrast use of DIF with other method of height control.5. Relate pinching the growing tip to lateral branching (removing apical
dominance).6. Recognize disease and insect pest infestations.7. Recognize dangers of pesticide use.8. Describe how cooling Easter lily bulbs helps to schedule the bloom date.
Related Math Concepts
1. Apply basic operations to whole numbers, decimals, and fractions as theyrelate to flowering potted plant production.
2. Apply basic operations to ratios and percents as. they relate to flowering
potted plant production.3. Apply mathematical concepts and operations to flowering potted plant
production. (continued)
219
220
4. Read, interpret, and construct charts, graphs, and tables related to flower-ing potted plant production.
5. Read thermometers.6. Calculate crop spacing.7. Calculate DIF.8. Read and interpret fertilizer labels.9. Time watering.
10. Time crop for optimum marketability.
Terms to Know
A-Rest® pistillateapical dominance pomponsbract powdery mildewbuds breaking ray floretscontrolled temperature forcing (CTF) rooting hormonecrown buds scouting a cropcultivar sleevingcyathia splittingdisbud mum spray mumdisk florets staminatefoliar analysis standard mumnon-tunicate bulb tunicate bulb
INTRODUCTION - STATISTICS
National Production Statistics
Potted flowering plants as a whole comprise the second largest segmentof the floriculture industry behind bedding plants. According to the 1990USDA Floriculture Crops Summary, the total wholesale value for pottedflowering plants in the U.S. was $672.3 million, an impressive 25 percentincrease from 1989. Poinsettias had by far the largest production value,$183.5 million or 27 percent of the total wholesale value (Table 11.1).Chrysanthemums were a distant second at $95.8 million or 14 percent of thetotal wholesale value. Finished florist azaleas were third at $55.1 million andEaster lilies were fourth at $36.9 million. These top four crops accounted for55 percent of the total wholesale value.
Since 1989, the wholesale value of poinsettias has increased by 7 percent,azaleas by 21 percent, and Easter lilies by 11 percent. The value of chrysan-themums has remained essentially unchanged.
Ohio Production Statistics
As with bedding plants, Ohio ranked very impressively for potted flow-ering plant production in 1990. Overall, Ohio ranked fourth in the country

221
in potted flowering plant production with a wholesale value of $34.4 million(Table 11.2). Ohio's ranking for the different crops was:
* first in African violet production* second in poinsettit production* fourth in Easter lily production* fifth in finished florist azaleas* ninth in chrysanthemums
These top five crops accounted for 84 percent of Ohio's total production valueof potted flowering plants.
Keep these production statistics in mind as we discuss three specific cropsin this chapter: poinsettias, chrysanthemums, and Easter lilies. Generalrecommendations will be made for propagation, culture, and marketing ofcrops of these three important potted flowering plants.
Table 11.1 Production statistics of potted flowering plants in 1990 Li the U.S.Given in order of production value.
U.S.A.Crop Wholesale Value
($ millions)
1 Poinsettias 183.52 Crysanthemums (excluding garden mums) 95.83 Finished florist azaleas 55.14 Easter lilies 36.95 African violets 27.76 Other lilies 4.87 Other flowering plants (excluding annuals) 268.8
* Total 1990 wholesale value 672.3
Source: Floriculture Crops 1990 Summary. United States Department of Agriculture,NationalAgricultural Statistics Service, Agricultural Statistics Board, Washington, DC, Apri11991
Table 11.2 Production statistics of potted flowering plants in 1990 in Ohio.Given in order of production value.
OHIOCrop Wholesale Value
($ millions)National
Rank
1 Poinsettias 12.9 22 African violets 5.5 1
3 Finished florist azaleas 4.9 54 Crysanthemums (excluding garden mums) 3.2 95 Easter lilies 2.4 46 Other lilies 0.2 NA
7 Other flowering plants (excluding annuals) 5.3 7
* Total 1990 wholesale value 34.4 4
Source: Floriculturr Crops 1990 Summary. United States Department ofAgriculture, NationalAgricultural Statistics Service, Agricultural Statistics Board, Washington, DC, Apri11991

222
Part One (POINSETTIA PRODUCTION}
INTRODUCTION
Poinsettia (Euphorbia put,terrima) is a very popular flowering plant anda very profitable crop. It is the nuraber 1 crop in the United States and Ohioin terms of wholesale value. (Refer again to Tables 11.1 and 11.2.) Poinsettiasgrow naturally in Mexicc. They are named for Joel Poinsett, who introducedthem into the United States in the early 1800's when he was U.S. ambassadorto Mexico.
Poinsettias were used primarily as cut flowers until the early 1900s, whenthe Ecke family started breeding them in California. The Eckes developedlong-lasting varieties and made thc poinsettia suitable for potted culture andmarketing. They also bred many colors into the wide assortment of theirpoinsettias. Many of the poinsettia cultivars on the market today were devel-oped by the Ecke family. (See page 236.)
The inconspicuous flowers of the poinsettia, known as cyathia, are yellowcup-like structures clustered at the end of the stem (Figure 11.1). The cyathiacontain separate female (pistillate) and male (staminate) flower parts.Surrounding the cyathia are the colorful bracts that are commonly mistakenfor the flowers of the plant.
Poinscttias are photoperiodic with respect to flowering and are classifiedas a long-night plant. To bloom properly, these plants require 12 hours or moreof continuous darkness per day.
Figure 11.1
Colorful red poinsettia bracts surround theinconspicuous yellow flowers of poinsettiacalled cyathia. (Courtesy of Paul EckePoinsettia Ranch, Encinitas, California)
Pg.
PROPAGATION
9
Stock PlantsMany poinsettia growers buy callused or rooted cuttings from a specialist
propagator. Callused cuttings still have to be rooted under intermittent mist.Rooted cuttings typically arrive in a foam strip (Figure 11.2), ready forplanting. However, a considerable number of growers choose to produce theirown cuttings from stock plants. Growers order rooted cuttings for the spring

(between March and May, depending on the number of cuttings to be pro-duced). Cuttings grow into large, well-branched plants from which terminalstem cuttings are taken (Figure 11.3).
The culture of stock plants is much like that of the Christmas crop (whichis covered later in this chapter) However, stock plants grown before May 15must be lighted at night using mum lighting to prevent flower bud formation.Since stock plants can grow quite large, cuttings are typically potted in8-inch or larger azalea pots.
Cuttings from Stock Plants
Terminal stem cuttings 2 to 3 1/2 inches in length are taken from sturdy,vigorous growth (Figure 11.4). Excessively long stems should be avoidedalong with stems that are weak (those with a small diameter). The best timeto take cuttings is in the morning when plants are turgid from being wateredthe previous afternoon. Also, heat levels in the greenhouse are usually lowerin the morning. Cuttings are removed by hand - either snapping them off orusing a sharp knife or similar tool. To prevent the spread of disease organisms,hands and tools must be clean before cuttings arc taken. Cuttings are collectedin a sterilized container and stuck into the rooting medium before they startto wilt.
Figure 11.2Rooted poinsettia cuttings shipped in a foam stripand ready for planting
Figure 11.4Poinsettia terminal stem cuttings taken from z tockplants. (Courtesy of Paul Ecke Poinsettia Ranch,Encinitas, California)
Figure 11.3 Poinsettia stock plantsr'"" *". -.... j - 40 ,
t i
z
,
223

224
Producing cuttings by stock plants takes more greenhouse space andinvolves extra work on the part of the grower. But overall cost of the cuttingscan be reduced. Growers can also control the quality of their cuttings; qualitycontrol by the growcr is not possible with purchased cuttings. In many cases,a cultivar is patented by the company which developed it. The grower mustpay the royalty of a few cents per cutting to the owner of the plant patent.
Rooting Cuttings
Cuttings taken from stock plants are unrooted cuttings that are purchasedfrom a specialist propagator and rooted under intermittent mist. These cuttingsmay be stuck directly into the pot in which they will be finished. This methodreduces production time by one week since no further adjustments (fromtransplanting) need to be made by the cutting after it has rooted. The size ofcuttings should be as uniform as possible for best results.
While sticking cuttings directly in pots eliminates transplanting labor, italso significantly increases greenhouse space required for rooting the indi-vidual cuttings. The grower may not have the needed space available. Thus,in many greenhouses, poinsettia cuttings are rooted in flats containing arooting medium. For good root development, the medium must have goodwater-holding capacity, yet allow for aeration. Many growers use syntheticfoam cubes, wedges, or strips; (see Chapter 6). These are specially designedfor rooting cuttings; they provide ideal conditions for root devciopment andgrowth. The rooting medium must be free of disease organisms. Propagationbenches and aisles should be thoroughly disinfected before cuttings arrive.
Intermittent mist is programmed to keep a constant film of moisture onthe cuttings during the first week on the propagation bench (Figure 11.5). Themist prevents the cuttings from drying out and keeps them cool during the
Figure 11.5
Poinsettia cuttings rootingon a propagation benchunder intermittent mist r
,4

225
rooting process. During the second week, when roots start to form, the mistapplications can be spaced further apart to gradually "wean" the cuttings offthe mist. Less frequent misting also reduces the possibility of foliar diseases.
If cuttings take on a pale green appearance during propagation, they needa light application of a complete fertilizer, e.g. 100 ppm of a 20-20-20fertilizer. The intermittent mist can leach nutrients out of the leaves, and therooting medium by itself has few if any nutrients in it.
In about three to four weeks, the cuttings develop a good root system;i.e., roots that are 1 to 2 inches long. The plants are now ready for transplant-ing into their finishing containers.
Transplanting C igs and the Root Medium
The root medium into which the cuttings are transplanted can be eithera soil-based or a soilless mix. Excellent crops can be grown in either type.Most poinsettia growers use the Peat-Lite soilless mixes (as we discussed inChapter 6). Root media pH is very important for poinsettia growth. Soillessroot media should have a pH of 5.5 to 6.0, while soil-based root media shouldhave a pH of 6.0 to 6.5. At these pH ranges, the 17 essential nutrients as awhole will be at their maximum availability.
Steps for transplanting rooted cuttings
1. Get azalea pots ready. They give stability to the substantial canopy of thefinished plant.
2. Fill the pots with moistened root medium.3. Plant each cutting at the same depth as it was in the propagation medium.
If the cutting is planted deeper than this, the roots may suffocate and rot;cuttings planted too shallow will dry out too quickly.
4. Push the root medium gently around the roots to make good contact,eliminating air pockets.
5. Water the transplanted cuttings thoroughly.6. Place the potted plants under saran in the greenhouse.
CULTURE OF THE CHRISTMAS CROP
Nutrition
When the transplanted cuttings have become estabEched and are activelygrowing, it is time to start the regular nutritional program. Compared to otherflowering potted crops, poinsettias require relatively high amounts of nitrogenand potassium. Therefore, most poinsettia growers use a constant liquid feedpr gram because it is convenient and it gives them control over the crop'snutrition.
A variety of fertilizers can be used, such as complete fertilizers (15-16-17 and 20-10-20), potassium nitrate, ammonium nitrate, and calcium nitrate.For poinsettias growing in soil-based root media, 250 ppm of nitrogen andpotassium should be appliea. Poinsettias growing in soilless root media should

226
receive at least 300 ppm of nitrogen and potassium. When bract developmentbegins in mid to late October, the amount of nitrogen should be reduced tono more than 200 ppm. Two weeks before sale, fertilization is discontinuedin order to harden the plants.
Another method of fertilization is application of slow-release fertilizer tothe root medium. Osmocote® 14-14-14 or 19-6-12 can be uniformly mixedinto the root medium during preparation or added to the surface of the rootmedium after the plants have been potted. The volume of water used andfrequency of irrigation will affect the release of the fertilizer into the rootmedium. High temperatures also increase the rate of fertilizer release fromOsmocote®. Slow-ielease fertilizers can help produce excellent quality cropsif used correctly. However, the grower's control over the nutrition of the cropis considerably reduced.
Poinsettias also have a strict magnesium and molybdenum requirement.Magnesium can be applied as a separate epsom salt (magnesium sulfate)
ench at 8 ounces/100 gallons of water every month. Or magnesium (asepsom salts) can be mixed into the soil before planting. Molybdenum is addedat 0.1 ppm on a constant feed basis with the addition of ammonium molybdateto the fertilizer stock tank.
Watering
Pot sizes and types (clay and plastic), root medium, stage of growth, andenvironmental conditions all affect the amount and frequency of watering.The surface of the root medium should be allowed to dry out between waterings.If the root medium stays too wet, root rot will occur; if it is kept too dry,there will be wilting and loss of quality in the plant. Therefore, the moisturelevel of the root medium should be checked frequently, especially duringsunny, warm weather. The weight of the pot is one clue - heavy when moistand lighter when dry. The color of the root medium is another clue formoisture - dark brown for moist and light brown for dry.
Poinsettia crops are watered by a number of automated irrigation systemssuch as spaghetti tubes, capillary mat, and ebb and flow. These systems waterthe crop in a fraction of the time required for hose watering and thereforesave considerable labor costs.
Some growers produce poinsettias by growing them on the floor. Pots areplaced on square plastic water collectors (Figure 11.6). Overhead inigationwater that runs off the foliage is channeled to the bottom or the pot, whereit is absorbed by the root medium. Water collectors not only cut downsignificantly on wasted water and water runoff, but also automatically spacethe crop.
Hose watering is sometimes still needed for those isolated groups of plantson a bench or floor that may have dried out because of environmental irregu-larities in the greenhouse.
,!
/

Figure 11.6Poinsettias growing on the floor inpots set on plastic water collectors
Temperature
Poinsettias require warm temperatures for healthy growth and excellentquality. (With slight differences from one variety to another) night tempera-tures over all should bP in the low to mid 60°'s and day temperatures around70°F on cloudy days and 75° to 80°F on sunny days.
During bract development and expansion, night temperatures should be65° to 67°F. These warmer night temperatures result in large bracts thatcompletely cover the foliage. If they get above 70°F, however, flower budformation and development will be delayed. The bracts are fully developedwhen pollen is visible in the cyathia. Greenhouse night temperatures can thenbe gradually lowered over a period of several days to about 60°F to intensifythe bract color. This is called "finishing"the poinsettia crop.
Single-Stem and Pinched, BranchedPoinsettia Crops
Poinsettias may be grown as a single-stem or a pinched, branched crop. Single-stem plants are not pinched. Each plantproduces one large flower. Pinched plantsproduce several flowers. The plants aremuch larger than single-stem plants. Tocompensate for the size differences andnumber of flowers per pot, more cuttingsare planted per pot for single-stem cropsthan for pinched crops (Table 11.3).
Table 11.3Recommended number of poinsettia cuttings toplant per pot for single-stem and pinched crops
Pot Size(inches)
Cuttingsper pot
Pinched orSingle-stem
4" 1 Pinched4" 1 Single-stem5" 2 or 3 Single-stem5" 1 Pinched6" 3 or 4 Single-stem6" 1 or 2 Pinched7" 4-7 Single-stem7" 2-3 Pinched
Source: Ball RedWest Chicago, IL
7, 4"1.
Book, 15th edition. Geo. J. Ball Publishing,
227
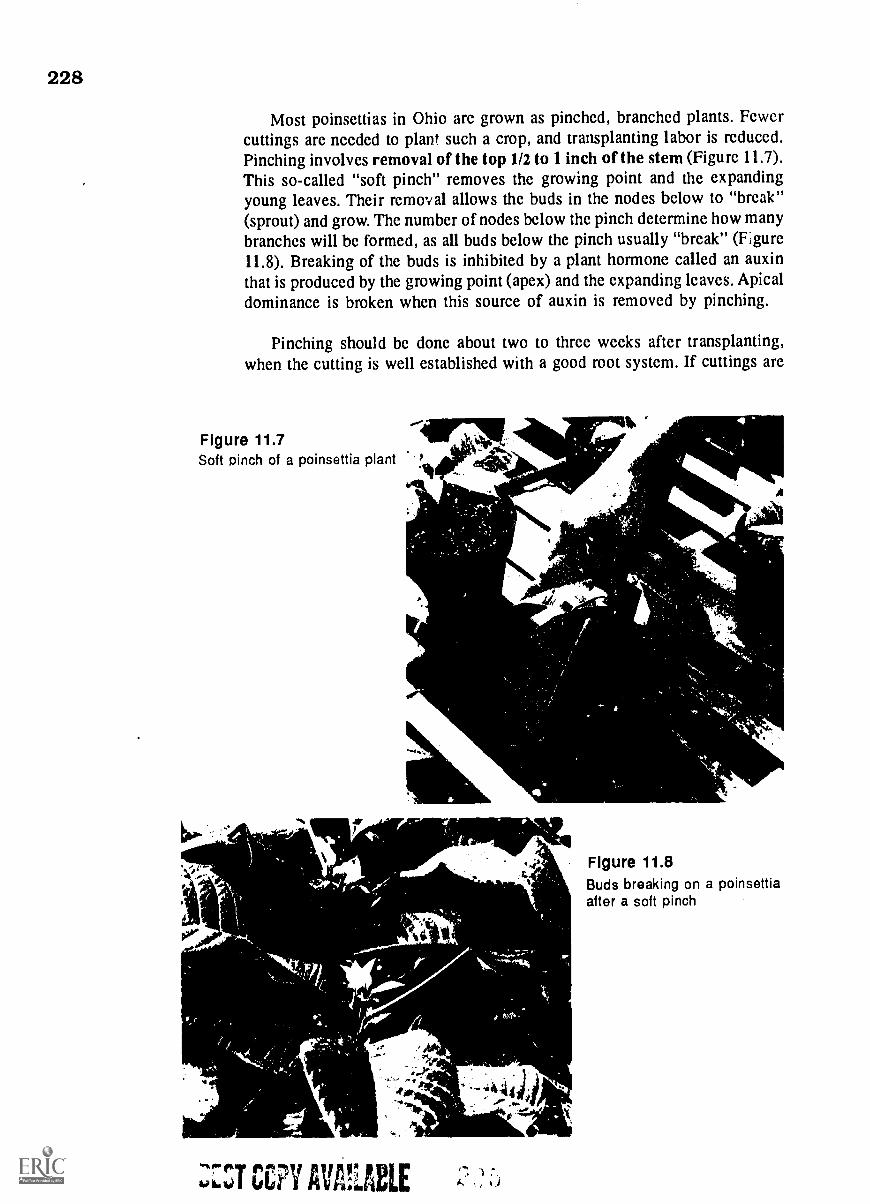
228
Most poinsettias in Ohio are grown as pinched, branched plants. Fewercuttings are needed to plant such a crop, and transplanting labor is reduced.Pinching involves removal of the top 1/2 to 1 inch of the stem (Figure 11.7).This so-called "soft pinch" removes the growing point and the expandingyoung leaves. Their removal allows the buds in the nodes below to "break"(sprout) and grow. The number of nodes below the pinch determine how manybranches will be formed, as all buds below the pinch usually "break" (Figure11.8). Breaking of the buds is inhibited by a plant hormone called an auxinthat is produced by the growing point (apex) and the expanding leaves. Apicaldominance is broken when this source of auxin is removed by pinching.
Pinching should be done about two to three weeks after transplanting,when the cutting is well established with a good root system. If cuttings are
aideFigure 11.7---4111r11
Soft pinch of a poinsettia plant Njihot.
4 A;
-.4160Jr
4
r`
°het--
!t*itb,1%.
is&
.41 Figure 11.8Buds breaking on a poinsettiaafter a soft pinch
229
pinched earlier than this, the buds will break slowly and some not at all,resulting in a smaller plant with fewer blooms.
These critical pinching dates are available in various industry publica-tions. The key factor is to allow enough time between the pinch and the startof long nights for sufficient vegetative growth to occur. Too short a time willresult in a smaller-than-desired plant.
Photoperiod
As we mentioned previously, poinsettias require 12 hours or more ofcontinuous darkness per day in order to bloom. In northern Ohio, darknessreaches 12 hours per day around the first day of fall and increases thereafter.For many poinsettia cultivars, this natural onset of long nights coincides withtheir natural time for blooming: late November and early December. This, ofcourse, is also the peak sales time for poinsettias. However, in greenhousesthat are lighted at night (internally or by external sources), this extra lightmay prevent the plants from setting bud.
To ensure darkness over the crop, photoperiodic blackout shade cloth ispulled over the crop every night at 5:00 p.m. It is removed the next morningat 8:00 a.m. The poinsettias will thus be riovided "night" that is 15 hoursin length - more than enough to induce flower bud formation.
To delay flowering of early flowering cultivars, standard mum lightingis used from 10 p.m. to 2 a.m. beginning in mid-September. This breaks thenight into two short periods of darkness and prevents flower bud formation.When the mum lighting is stopped, the poinsettias will set bud and flowerat the date desired.
Height Control
A common problem growers face is a crop of poinsettias that has growntoo tall and become leggy with weak stems. Certain factors like periods ofcloudy weather cause plants to stretch. Proper spacing (to be discussed next)helps counteract this. However, the most common height control measure isapplying Cycocel®, a chemical growth retardant that shortens the length ofthe internodes. Spray applications of 1,500 ppm are made when lateral shootsare 1 to 1 1/2 inches long and repeatcd, if necessary, at weekly intervals untilOctober 15. Application of Cycocel® or any other growth retardant afterOctober 15 is likely to damage developing bracts.
There are several other chemical growth regulators that can be used tocontrol poinsettia height. Whatever chemical you use, always follow labeldirections.
DIF can also be used to control the height of poinsettias. A 0 or slightlynegative DIF can be implemented after pinching to keep the internodes shorton new lateral branches. However, if night temperatures rise above 70°F inlate September through mid October, heat delay of flowering will occur. Also,if day temperatures rise above 70°F, it will be difficult or impossible toimplement a 0 or negative DIF. At such times, chemical growth regulatorswill be needed.
(s,A
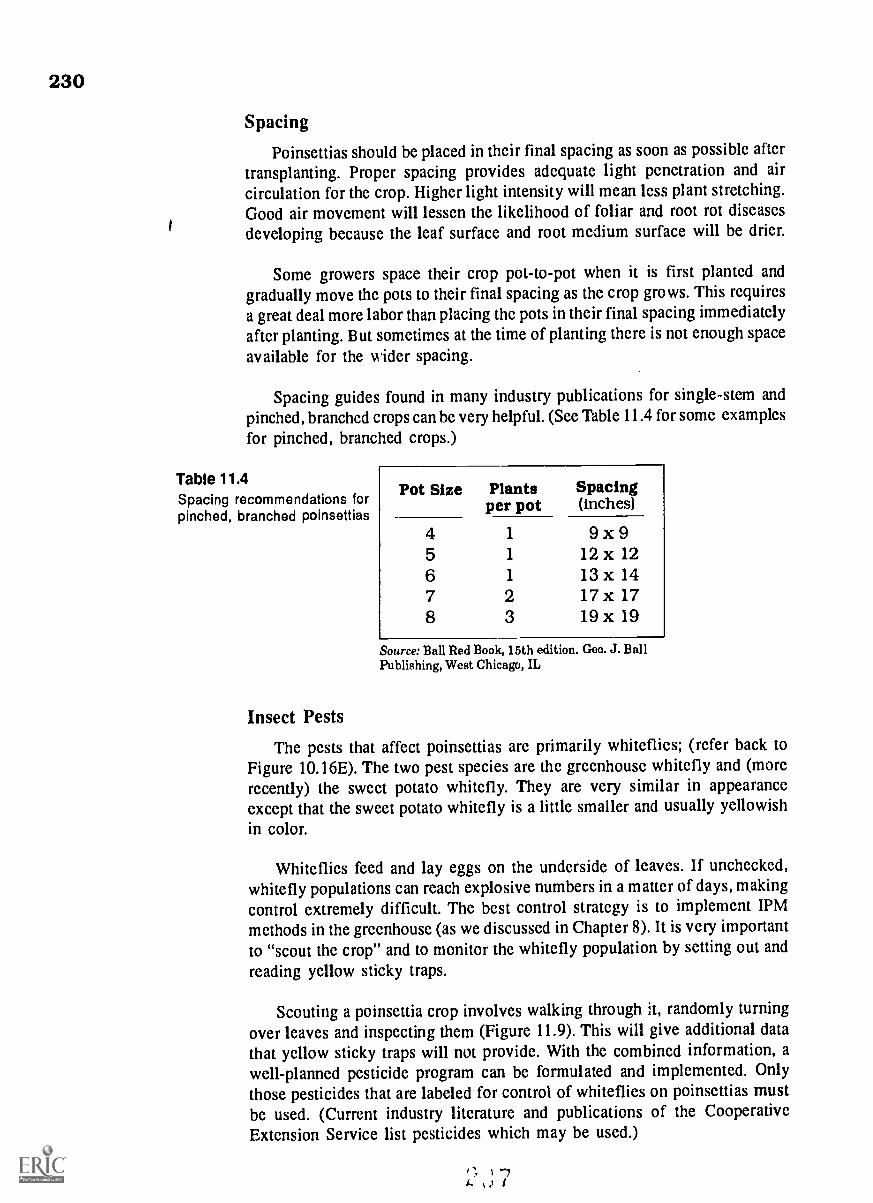
230
Spacing
Poinsettias should be placed in their final spacing as soon as possible aftertransplanting. Proper spacing provides adequate light penetration and aircirculation for the crop. Higher light intensity will mean less plant stretching.Good air movement will lessen the likelihood of foliar and root rot diseasesdeveloping because the leaf surface and root medium surface will be drier.
Some growers space their crop pot-to-pot when it is first planted andgradually move the pots to their final spacing as the crop grows. This requiresa great deal more labor than placing the pots in their final spacing immediatelyafter planting. But sometimes at the time of planting there is not enough spaceavailable for the wider spacing.
Spacing guides found in many industry publications for single-stem andpinched, branched crops can be very helpful. (See Table 11.4 for some examplesfor pinched, branched crops.)
Table 11.4Spacing recommendations forpinched, branched poinsettias
Insect Pests
Pot Size Plantsper pot
Spacing(inches)
4 1 9 x 95 1 12 x 126 1 13 x 147 2 17 x 178 3 19 x 19
Source: Ball Red Book, 15th edition. Geo. J. BallPublishing, West Chicago, IL
The pests that affect poinsettias are primarily whiteflies; (refer back toFigure 10.16E). The two pest species are the greenhouse whitefly and (morerecently) the sweet potato whitefly. They are very similar in appearanceexcept that the sweet potato whitefly is a little smaller and usually yellowishin color.
Whiteflies feed and lay eggs on the underside of leaves. If unchecked,whitefly populations can reach explosive numbers in a matter of days, makingcontrol extremely difficult. The best control strategy is to implement IPMmethods in the greenhouse (as we discussed in Chapter 8). It is very important
to "scout the crop" and to monitor the whitefly population by setting out andreading yellow sticky traps.
Scouting a poinsettia crop involves walking through it, randomly turningover leaves and inspecting them (Figure 11.9). This will give additional datathat yellow sticky traps will not provide. With the combined information, awell-planned pesticide program can be formulated and implemented. Onlythose pesticides that are labeled for control of whiteflies on poinsettias mustbe used. (Current industry literature and publications of the CooperativeExtension Service list pesticides which may be used.)

231
Figure 11.9Scouting for a whitefly infestationinvolves turning leaves over andinspecting them. Note the whiteflyin front of the Inspector's" thumb.
Research is currently under way to determine the effectiveness of Encarsiaformosa in a biological control program for both greenhouse and sweet potatowhiteflies infesting poinsettias. (See page 163 and Figure 8.3 for moreinformation about this wasp.) Results so far seem promising when comparedto chemical pesticide control methods.
Diseases
As with insect control, poinsettia disease control strategies should bemainly preventive. Implement the principles of IPHM in your poinsettiaproduction program. Keep the growing area clean and provide ideal culturalconditions for poinsettia growth, and you will certainly prevent many diseasesfrom getting started in the crop. Sometimes, however, in spite of all thepreventive measures you take, other factors enter in and diseases do becomeestablished. They must be dealt with immediately to prevent their spreadthroughout the crop.
Gray Mold
Gray mold is a foliar disease that covers leaves and bracts with a grayfungal growth. It eventually kills the tissue, causing brown leaf and bractmargins and, ultimately, ruin of the crop. The causative fungus is Botrytis.It can affect all stages of plant growth. Wet foliage, cool temperatures, andinjured plant tissue all favor its development.
The best line of defense involves the following steps.
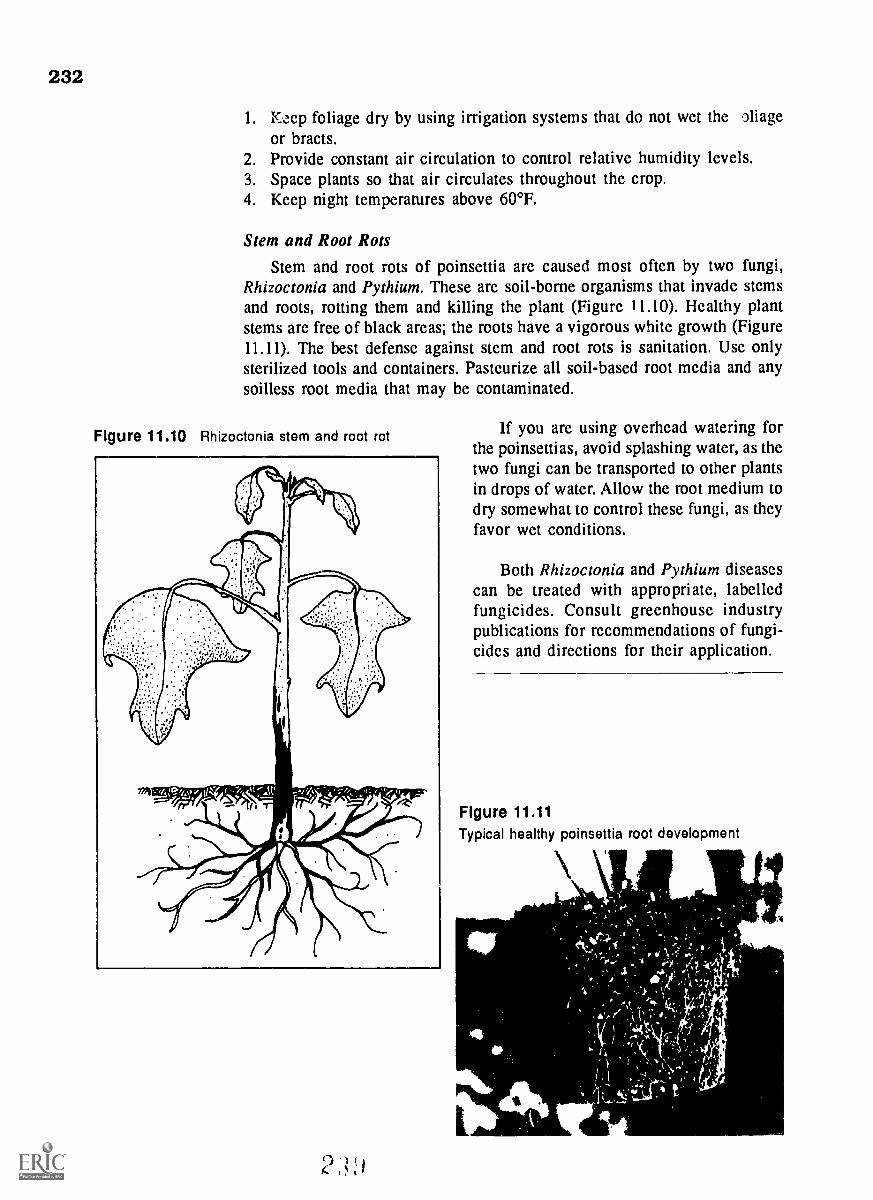
232
1. Kcep foliage dry by using irrigation systems that do not wet the liageor bracts,
2. Provide constant air circulation to control relative humidity levels,3. Space plants so that air circulates throughout the crop.4. Keep night temperatures above 60°F.
Stem and Root Rots
Stem and root rots of poinsettia are caused most often by two fungi,Rhizoctonia and Pythium. These are soil-borne organisms that invade stemsand roots, rotting them and killing the plant (Figure 11.10). Healthy plantstems are free of black areas; the roots have a vigorous white growth (Figure11.11). The best defense against stem and root rots is sanitation. Use onlysterilized tools and containers. Pasteurize all soil-based root media and anysoilless root media that may be contaminated.
Figure 11.10 Rhizoctonia stem and root rot If you are using overhead watering forthe poinsettias, avoid splashing water, as thetwo fungi can be transported to other plantsin drops of water. Allow the root medium todry somewhat to control these fungi, as theyfavor wet conditions.
Both Rhizoctonia and Pythium diseasescan be treated with appropriate, labelledfungicides. Consult greenhouse industrypublications for recommendations of fungi-cides and directions for their application.
Figure 11.11Typical healthy poinsettia root development
_at
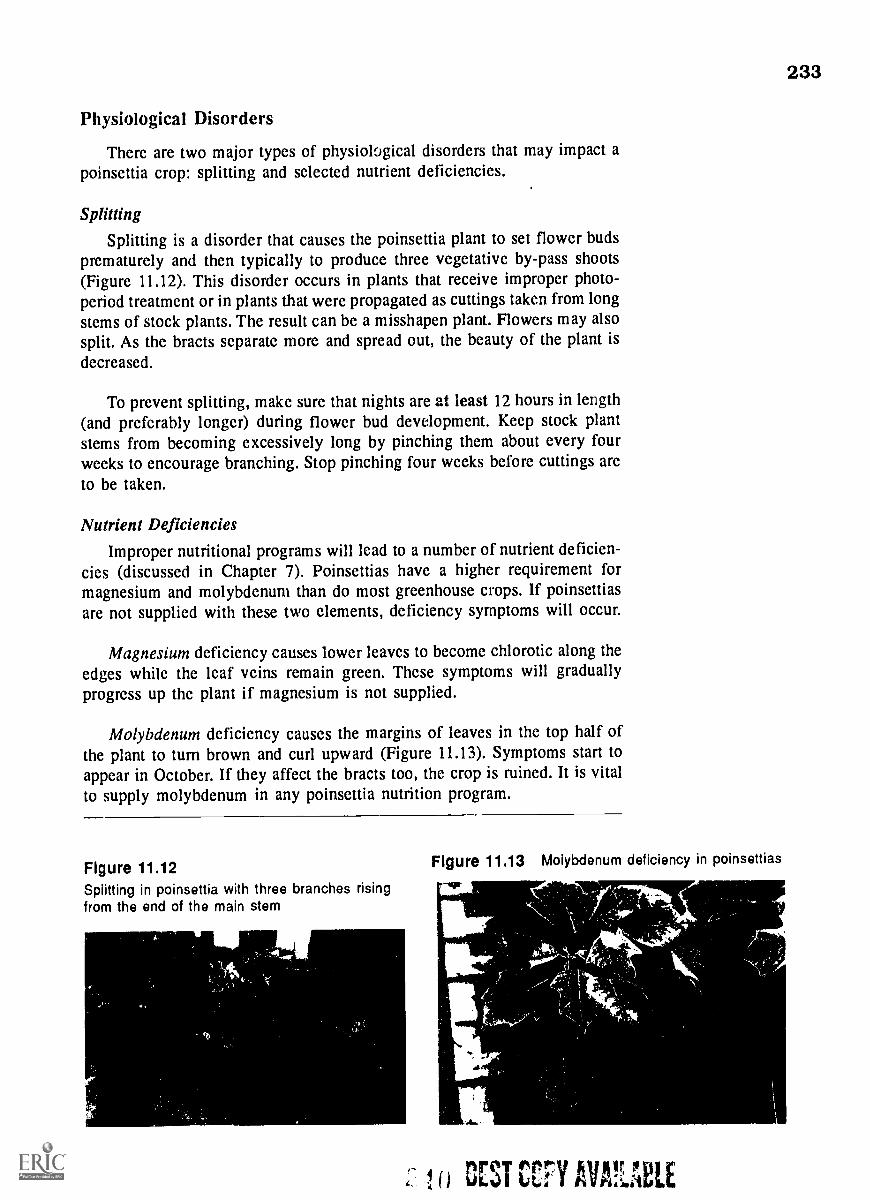
Physiological Disorders
There are two major types of physiological disorders that may impact apoinsettia crop: splitting and selected nutrient deficiencies.
Splitting
Splitting is a disorder that causes the poinsettia plant to set flower budsprematurely and then typically to produce three vegetative by-pass shoots(Figure 11.12). This disorder occurs in plants that receive improper photo-period treatment or in plants that were propagated as cuttings taken from longstems of stock plants. The result can be a misshapen plant. Flowers may alsosplit. As the bracts separate more and spread out, the beauty of the plant isdecreased.
To prevent splitting, make sure that nights are at least 12 hours in length(and preferably longer) during flower bud development. Keep stock plantstems from becoming excessively long by pinching them about every fourweeks to encourage branching. Stop pinching four weeks before cuttings areto be taken.
Nutrient Deficiencies
Improper nutritional programs will lead to a number of nutrient deficien-cies (discussed in Chapter 7). Poinsettias have a higher requirement formagnesium and molybdenum than do most greenhouse crops. If poinsettiasare not supplied with these two elements, deficiency symptoms will occur.
Magnesium deficiency causes lower leaves to become chlorotic along theedges while the leaf veins remain green. These symptoms will graduallyprogress up the plant if magnesium is not supplied.
Molybdenum deficiency causes the margins of leaves in the top half ofthe plant to turn brown and curl upward (Figure 11.13). Symptoms start toappear in October. If they affect the bracts too, the crop is ruined. It is vitalto supply molybdenum in any poinsettia nutrition program.
Figure 11.12Splitting in poinsettia with three branches risingfrom the end of the main stem
Flgure 11.13 Molybdenum deficiency in poinsettias..
1-
0 OUT CCP! AVAUBLE
233

234
PR6DUCTION SCHEDULE GUIDELLNES
Poinsettias are typically scheduled to bloom in late November to earlyDecember for Christmas sales. However, a significant number of poinsettias(25 percent for some growers) is being grown for Thanksgiving sales as well.
Major considerations in setting up a growing schedule for poinsettias are:1. selection of cultivars to be used (see next section)2. size of pot and finished plant desired3. number of plants per pot and growth form (single-stern or pinched)4. sale date of the crop
Many factors enter in to scheduling a poinsettia crop. The most criticalis figuring out the date to start the crop so that it will bloom on time. (SeeFigure 11.14 for a sample growing schedule.). The total number of daysslcessary to accomplish all the steps of production must be counted back--Ws from the sale date to determine when the crop should be started. Forfinched crop, the major time periods involved are:
1. length of rooting time for cuttings produced by the grower (usually 3 to4 weeks)
2. time from planting to the pinch (2 to 3 weeks in most cases)3. time from pinching to the start of long nights (to obtain sufficient crop
height, and this varies with pot size)4. the start of long nights and up to bloom date (which varies according to
the cultivar)
Specific schedule guidelines may be obtained from industry publications andfrom sales representatives of companies that sell poinsettia cuttings and plants.
POINSETTIA CULTIVARSPoinsettia cultivars are classified according to the number of weeks of
long nights they require to bloom. (For example, a nine-week cultivar requiresnine weeks of long nights in order to bloom.) Within each of these cultivargroupings, there are many colors - shades of red, pink, and white; pink/white,red/white, and red/pink novelty types; and even yellow cultivars (Table 11.5).Specific information on growing these cultivars is available from poinsettiasources and industry publications.
POST-HARVEST CARE
When poinsettias are ready to be shipped to the customer, proper handlingof the plants during shipment is very important to maintain their quality.Because they are of tropical origin, poinsettias must L. protected from coldweather by sleeving of the plants. They must be transported in sealed boxesin a heated truck.
When the plants arrive at the store (or home), they should be removedfrom the box and unsleeved immediately. (If the poinsettias must be leftsleeved for a while, they should be unsleeved within 24 hours.) Leaving theplants boxed up or sleeved will cause drooping leaves and bracts and possiblyleaf and bract drop.
a 1",

235
After carefully removing the sleeve by tearing it off, inspect the plant fordamage. Water it if the medium feels dry. Place it in light bright enough toread by easily and in a room temperature between 65° and 75°F.
Home consumers need easy-to-read care tags included with the poinsettiaso they will know how to care for it. The tag should state basic culturalrequirements for growth in the home,
If the grower follows these procedures, the beautiful poinsettia that leftthe greenhouse will reach its destination without any loss of quality. Growersmust educate their customers on the importance of post-harvest care andhandling of the crop that they worked so hard to produce.
Figure 11.14 SAMPLE GROWING SChEDULE FOR POINSETTIAS
1 2 3
5. CutrIgs arc taken from disease-free stock plants.
. After one week, cuttings are callused, Unroofed cuttings may be purchased at this stage.
. After about 4 weekc, rooted cuttings are transferred to pots. Rooted cuttings may be purchased at thisstage.
4. Plants are pinched to encourage branching. The pinch date varies with the cultivar and height desired.
5. Bracts should begin to show color in early November.
6. Plants ready for market in early December can be held at reduced temperatures.
4
IMIIII: 1 ,
236
Table 11.5 Poinsettia cultivars commonly grown in Ohio greenhouses
Red Cultivars
Eckespoilit® LiloEckespoint® Red SailsAnnette Hegg TM Brilliant DiamondGrossTm SupjibiMikkel® RochfordGutbierTm V-14 Glory
Novelty Types
Eckespoint® Jingle BellsGutbierTm V-14 MarbleAnnette Hegem Marble
Pink Cultivars
Annette Hegg Tm Hot PinkGutbierTm V-14 PinkEckespoint® Pink PeppermintGutbierTm V-14 Hot Pink
White Cultivars
Annette Hege TopwhiteGutbierTm V-14 WhiteMikkel® White Rochford
Yellow Cultivar
Eckespoint® Lemon Drop
MARKETING
As we stated earlier, poinsettias are the most popular potted plant cropgrown in the United States. Poinsettias are a very profitable crop because theyare so beautiful in any setting. Poinsettias are grown in a wide variety ofcontainers - from a pot barely an inch in diameter (for mini-poinsettias) to12-inch and larger azalea pots. Poinsettias are also grown in hanging basketsand even fAi trees! Both make spectacular splashes of color (Figure 11.15).
With continuing research in plant breeding, new cultivars are introducedon the mrket every year. New colors and color shades bred into poinsettiassatisfi a wide variety of tastes among consumers.
There has been a definite trend to grow more poinsettias for Thanksgiving.Many growers are supplying retail outlets with poinsettias in early to mid-November as sales increase every year for Thanksgiving. There have evenbeen discussions of the plausibility of introducing poinsettias into the marketfor other holidays such as Easter! For now, in the consumer's mind, poin-seuias are still associated with the Christmas season (which, for retail stores,ira;iudes Thanksgiving). Convincing the American public to buy this plant atany other season of the year will likely be a major challenge.

A. Conventional-sized poinsettias, mini-poinsettias, and"personal" poinsettias in transparent plastic containers
B. Poinsettias grown in hanging baskets
MK_
Figure 11.15Poinsettias are marketed in many forms.
C. Poinsettias grown in tree form (courtesy of PaulEcke Poinsettia Ranch, Encinitas, California)
237
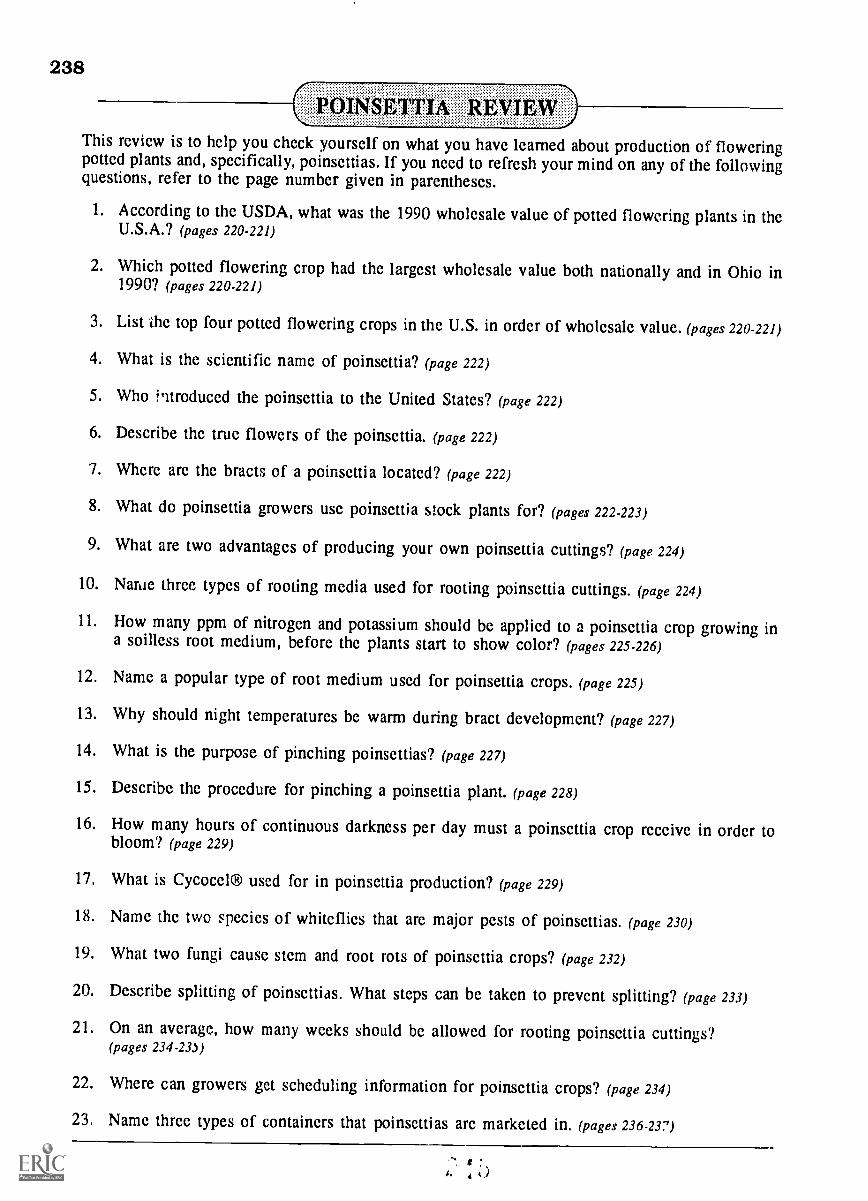
238
POINSETTIAThis review is to help you check yourself on what you have learned about production of floweringpotted plants and, specifically, poinsettias. If you need to refresh your mind on any of the followingquestions, refer to the page number given in parentheses.
1. According to the USDA, what was the 1990 wholesale value of potted flowering plants in theU.S.A.? (pages 220-221)
2. Which potted flowering crop had the largest wholesale value both nationally and in Ohio in1990? (pages 220-221)
3. List ihe top four potted flowering crops in the U.S. in order of wholesale value. (pages 220-221)
4. What is the scientific name of poinsettia? (page 222)
5. Who introduced the poinsettia to the United States? (page 222)
6. Describe the true flowers of the poinsettia. (page 222)
7. Where are the bracts of a poinsettia located? (page 222)
8. What do poinsettia growers use poinsettia stock plants for? (pages 222-223)
9. What are two advantages of producing your own poinsettia cuttings? (page 224)
10. Name three types of rooting media used for rooting poinsettia cuttings. (page 224)
11. How many ppm of nitrogen and potassium should be applied to a poinsettia crop growing ina soilless root medium, before the plants start to show color? (pages 225-226)
12. Name a popular type of root medium used for poinsettia crops. (page 225)
13. Why should night temperatures be warm during bract development? (page 227)
14. What is the purpose of pinching poinsettias? (page 227)
15. Describe the procedure for pinching a poinsettia plant. (page 228)
16. How many hours of continuous darkness per day must a poinsettia crop receive in order tobloom? (page 229)
17. What is Cycocel® used for in poinsettia production? (page 229)
18. Name the two species of whiteflies that are major pests of poinsettias. (page 230)
19. What two fungi cause stem and root rots of poinsettia crops? (page 232)
20. Describe splitting of poinsettias. What steps can be taken to prevent splitting? (page 233)
21. On an average, how many weeks should be allowed for rooting poinsettia cuttings?(pages 234-233)
22. Where can growers get scheduling information for poinsettia crops? (page 234)
23. Name three types of containers that poinsettias are marketed in. (pages 236-237)

r-POTTi].D CHRYSANTHEMUMPRODUCTION
Part Two
INTRODUCTION
Potted chrysanthcmums (Chrysanthemum morifolium) arc thc sccond mostimportant crop in thc United States. Thc 1990 wholesalc value was rcportcdat $95.8 million or 14 percent of thc total wholcsale valuc for pottcd plants.Ohio ranked ninth in the nation at $3.2 million; and 9 percent of the totalwholesalc valuc of potted crops in Ohio was from pottcd mums.
Mums comc in a varicty of colors. They arc relativcly casy to grow andthcy last a long time in the homc. What appcars to bc a singlc mum flowcris actually a compositc of flowcrs callcd florets, quitc complcx in structure.Thc flat, outermost, petal-shapcd florcts arc callcd ray florcts; the short,innermost florets (which arc totally hiddcn in some flower forms) are calleddisk florcts (Figure 11.16).
Thc sizc and arrangcmcnt of thcsc two typcs of florcts makc for a varictyof flowcr forms. Thcy gcncrally fall into the following groups (shown inFigurc 11.17):
daisy incurveanemone fujidecorative spidcrpompon spoon tip
Chrysanthemums arc also classified according to thc number of wccks oflong nights thcy nccd in ordcr to bloom. Response groups vary from 6 to 15wccks. The majority of pot mums require 7 to 10 weeks of long nights tobloom.
PROPAGATION
Commercial propagation of mum cuttings is a highly specialized business.Spccial cultural techniques arc uscd to develop vigorous stock plants and
produce disease- and insect-frce cuttings.(continued page 242)
Figure 11.16Cross section of a mum showingpetal-like outer ray florets andshort inner disk florets
239
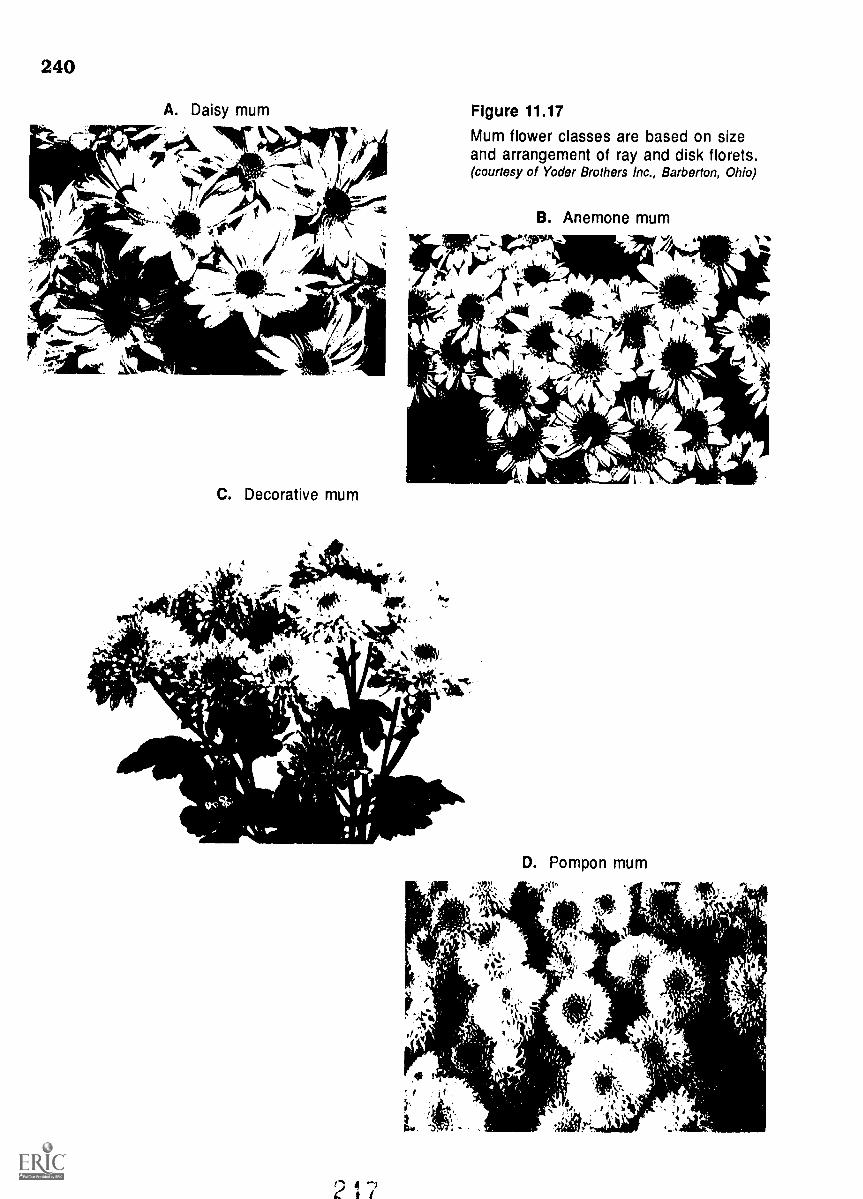
240
A. Daisy mum Figure 11.17
Mum flower classes are based on sizeand arrangement of ray and disk florets.(courtesy of Yoder Brothers Inc., Barberton, Ohio)
B. Anemone mum
C. Decorative mum
D. Pompon mumN'tf
,:kI
lits%-t r1,
Go,
,
, ,
'401r.4---

E. Incurve mum
G. Spider mum
Figure 11.17 ,icontinued)
F. Fuji mum
, 'OA
H. Spoon tip mum
241

242
Most growers purchase cuttings from specialist propagators because thequality of the cutting is very important. Cuttings obtained from propagatorsare reliably uniform, vigorous, and frx of insects and disease. Growers whotry to produce their own cuttings have a very difficult time achieving suchgoals; their cuttings are almost always of inferior quality.
Cuttings may be purchased already rooted and ready to plant. While theyare more ex, lnsive, rooted cuttings eliminate the labor, space, equipment, andtime needed for unrooted cuttings. However, growers who have the time andequipment do purchase unrooted cuttings.
Unrooted cuttings are handled as follows:
1. Choose a pot that will serve for the finished mum plants.2. Fill it with rooting medium and moisten it.3. Take the mum cutting and dip the tip of it in a rooting hormone. (This
will cause faster rooting and produce more roots.)4. Stick the cutting 1 to 1 1/2 inches into the root medium.5. Water it in.6. Place the cutting under intermittent mist for about two weeks.
* Keep a constant film of moisture for the first several days.* Gradually decrease misting frequency as cuttings root.
7. Place saran over misting bench if necessary on warm, sunny days.8. When the cutting has a vigorous root system, it is ready to be placed in
the greenhouse (Figure 11.18).
Root Media
Growers use a variety of soil-based and soilless mixes for pot mums.Growing media must be loose and well drained, yet with good water- andnutrient-holding capacity. Soil-based media should be steam pasteurized beforeuse. Most growers use soilless media composed of various amounts of peatmoss, perlite, vermiculite, pine bark, and other ingredients.
Potting
Pot mums are usually plantedone cutting to a 4 or 4 1/2 inch pot,
* two or three cuttings per 5 or 5 1/2 inch pot, andfour or five cuttings per 6 or 6 1/2 inch pot.
Azalea pots are typically used for pot mums. Rooted cuttings should bepianted so that the root system is completely covered by moist root medium.In soilless root media, rooted cuttings can be planted an inch deeper than thelevel at which they were rooted. Planting this deep will firmly anchor thecutting in the root medium and promote better branching.
Cuttings should be graded by size, vigor, and extent of root system. Thosewith similar characteristics should be planted together in a pot. Cuttingsshould be planted at a 45° angle with the tops extending over the pot rim(Figure 11.19). This allows more room for growth for each cutting and resultsin a better shaped plant.

Immediately after potting, the crop should be maintained in an environ-ment of high humidity and warm nights (usually 65° to 68°F) for rapidestablishment. Short night conditions are also needed to keep plants vege-tative. The crop should be lighted from 10 p.m. to 2 a.m. with incandescentlighting. If needed, saran can be used over the crop to reduce the water stressresulting from high light intensity.
disak.Figure 11.18Mum cutting which has taken root
CORRECT
2,14.1
INCORRECT
Figure 11.19Contrast of correct andincorrect potting of mumcuttings
243
244
POT MUM CULTURE
Temperature
Temperature control is important with mums because temperature caninfluence flower bud initiation and development. Most commercial mumvarieties initiate flower buds and grow best at night temperatures of 62° to65°F and day temperatures of 72° to 75°F. Night temperatures should not droplower than 62°F until flower buds begin to show color.
When flower buds begin to show color, night temperatures should belowered to 56° to 60°F and day temperatures to 66° to 70°F. These tempera-tures will help intensify flower color and strengthen the stems.
During the summer, growers often have problems maintaining propertemperatures. Temperatures that are too warm may cause heat delay. Day-time temperatures that stay above 90°F for a week or more, or night tempeva-tures that are over 80°F will cause heat delay. This means that the pot mumcrop blooms several days to weeks after its scheduled flowering date.
Careful selection of varieties that are resistant to heat delay should reduceor eliminate the problem. Reduce heat levels in the greenhouse as much aspossible and pull photoperiodic shade cloth early in the evening when thegreenhouse has started to cool. Heat can build up very rapidly under shadecloth and become a major cause of stress on summer pot mums.
Watering
Mums have a relatively high water requirement. The plants will wiltquickly in sunny, warm conditions if the root medium dries out. The mediummust be kept moist, but not wet. The medium surface should be allowed todry out between irrigations to help control root rot diseases.
Most pot mums are watered by automated irrigation systems that do notwet the foliage. Many growers use spaghetti tubes with one tube per pot(Figure 11.20). Other systems used for pot mum irrigation are capillary matand ebb and flow. As the crop nears the sale date, the frequency of wateringshould be lessened to help harden the ph it to the home environment.
Nutrit ion
Constant feeding is recommended for pot mum culture, since it gives thebest control over the nutrition of the crop. Pot mums require large amountsof nitrogen and potassium, especially during the vegetative stage beforeflower development. To get rooted cuttings off to a rapid start, they shouldbe watered in with a fertilizer solution containing 200 to 300 ppm of nitrogen.Once the crop is established, a constant feed program of 350 to 400 ppm ofnitrogen and potassium should be implemented for a soilless root medium(200 to 300 ppm for a soil-based root medium).
To increase the longevity of pot mums in the home, fertilizer applicationsshould be totally stopped three weeks before the sale date. This helps hardenthe plant and increase its post-harvest life in the home environment.

245
10' ,
Figure 11.20Close-up of a spaghetti tubebeing used to water a pot mum
Throughout production of the crop, soil and plant fertility levels shouldbe monitored with soil tests and foliar analyses. Crop requirements fornutrients are affected by environmental conditions; (for example, dark, cloudyweather will lower nutritional requirements). Soil tests and foliar analyseswill indicate whether there is a need for changing fertilizer applications. Whena constant feed program is in use, a small amouriZ lf leaching should befigured in each time to control soluble salt levels.
Light
Pot mums should be grown in full light intensity to obtain vigorous, rapidgrowth. Low light intensity results in leggy growth (stretching), fewer flowers,and smaller flowers. In the summer, when light intensity is very high, saraninstallation may be needed over the pot mums, or shading applied to the roof.Intensity of the light striking the pot mums must be lowered to prevent petalscorching (sunburn) and to reduce water stress in the plants.
Photoperiod
When grown naturally, mums bloom in the fall. Thrcugh the use ofphotoperiodic equipment, however, pot mums can be brought into flower atany time of the year. They are long-night plants with respect to their photo-periodic requirement for flowering. They require a minimum night length(darkness) of 12 hours per day in order to bloom. The number of weeks oflong nights required varies with the cultivar. This information can be obtainedfrom chrysanthemum propagator companies.
Pot mums scheduled to bloom from May into early November must besupplied an artificial long night, since natural night length is not enough forthese crops to initiate flower buds. Photoperiodic blackout shade cloth isdrawn over the crop typically at 5 p.m. al ;moved the next morning at8 a.m. (Figure 11.21). This results in a lo. 0 night of 15 hours, more thanenough to produce a blooming crop.
It is very important that the shade cloth does not leak any light throughit. Pot mums exposed to even low levels of light during flower bud initiation
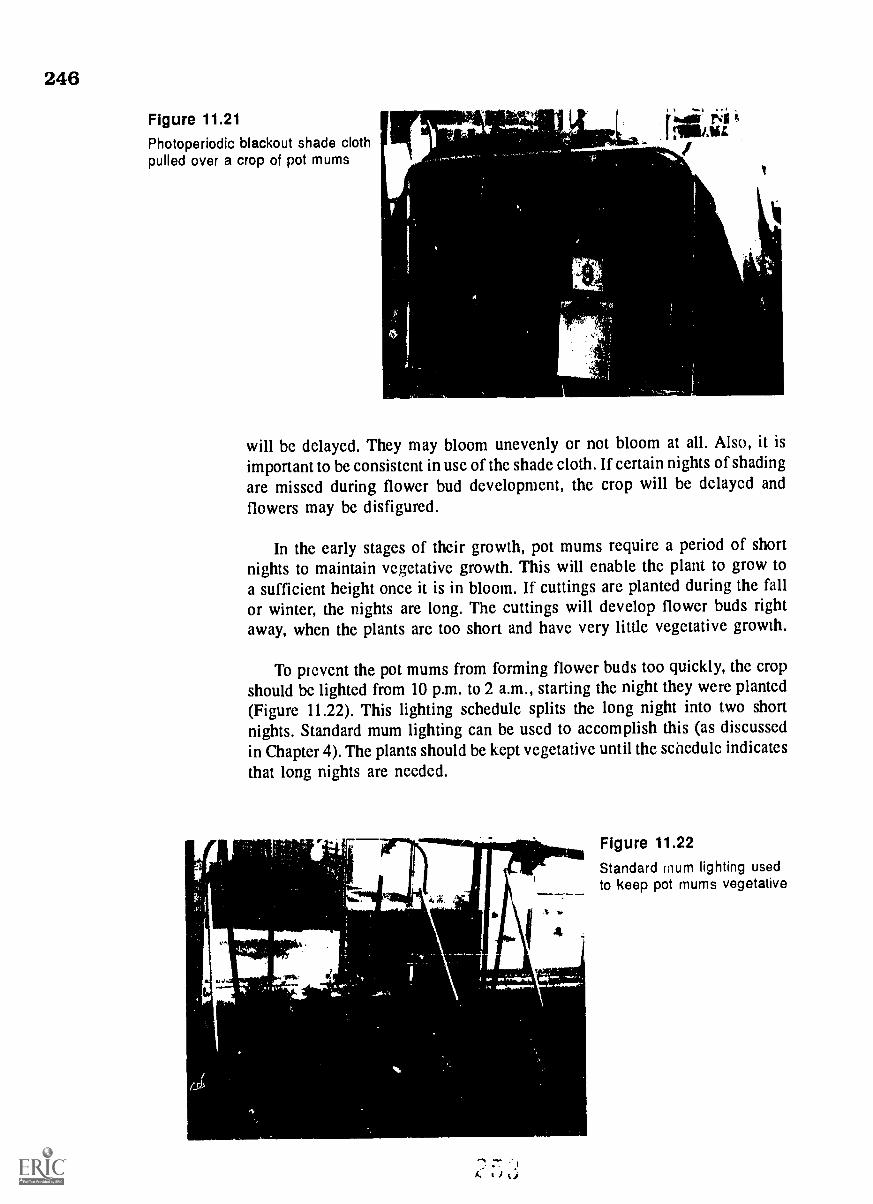
246
Figure 11.21
Photoperiodic blackout shade clothpulled over a crop of pot mums
gam-
. 1
lv:WWL
will be delayed. They may bloom unevenly or not bloom at all.Also, it isimportant to be consistent in use of the shade cloth. If certain nights ofshading
are missed during flower bud development, the crop will be delayed andflowers may be disfigured.
In the early stages of their growth, pot mums require a period of shortnights to maintain vegetative growth. This will enable the plant to grow toa sufficient height once it is in bloom. If cuttings are planted during the fallor winter, the nights are long. The cuttings will develop flower buds rightaway, when the plants are too short and have very little vegetative growth.
To pievent the pot mums from forming flower buds too quickly, the cropshould be lighted from 10 p.m. to 2 a.m., starting the night they were planted(Figure 11.22). This lighting schedule splits the long night into two shortnights. Standard mum lighting can be used to accomplish this (as discussedin Chapter 4). The plants should be kept vegetative until the schedule indicates
that long nights are needed.
1044
Figure 11.22
Standard mum lighting usedto keep pot mums vegetative
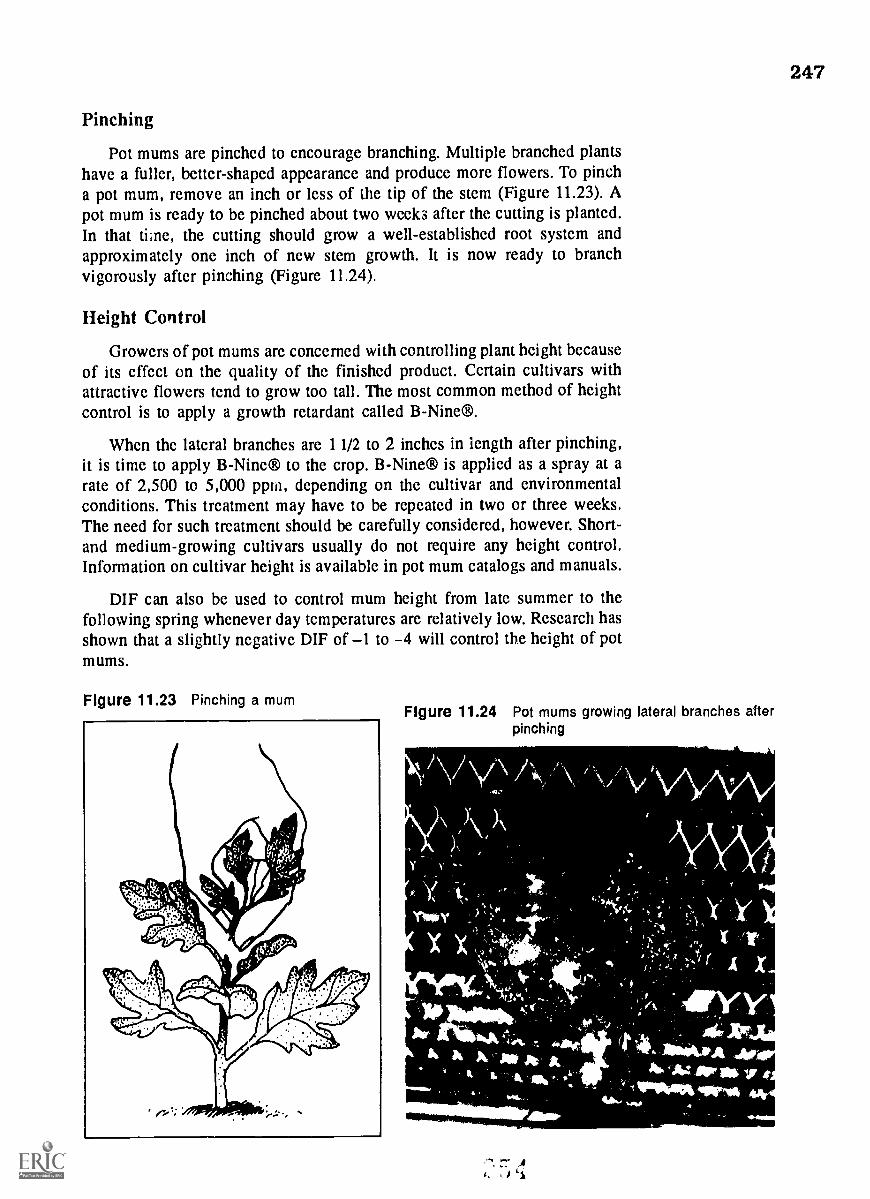
Pinching
Pot mums are pinched to encourage branching. Multiple branched plantshave a fuller, better-shaped appearance and produce more flowers. To pincha pot mum, remove an inch or less of the tip of the stem (Figure 11.23). Apot mum is ready to be pinched about two weeks after the cutting is planted.In that time, the cutting should grow a well-established root system andapproximately one inch of new stem growth. It is now ready to branchvigorously after pinching (Figure 11.24).
Height Control
Growers of pot mums are concerned with controlling plant height becauseof its effect on the quality of the finished product. Certain cultivars withattractive flowers tend to grow too tall. The most common method of heightcontrol is to apply a growth retardant called B-Nine®.
When the lateral branches are 1 1/2 to 2 inches in length after pinching,it is time to apply B-Nine® to the crop. B-Nine® is applied as a spray at arate of 2,500 to 5,000 ppm, depending on the cultivar and environmentalconditions. This treatment may have to be repeated in two or three weeks.The need for such treatment should be carefully considered, however. Short-and medium-growing cultivars usually do not require any height control.Information on cultivar height is available in pot mum catalogs and manuals.
DIF can also be used to control mum height from late summer to thefollowing spring whenever day temperatures are relatively low. Research hasshown that a slightly negative DIF of 1 to -4 will control the height of potmums.
Figure 11.23 Pinching a mumFigure 11.24 Pot mums growing lateral branches after
pinching
_oh
_A
247
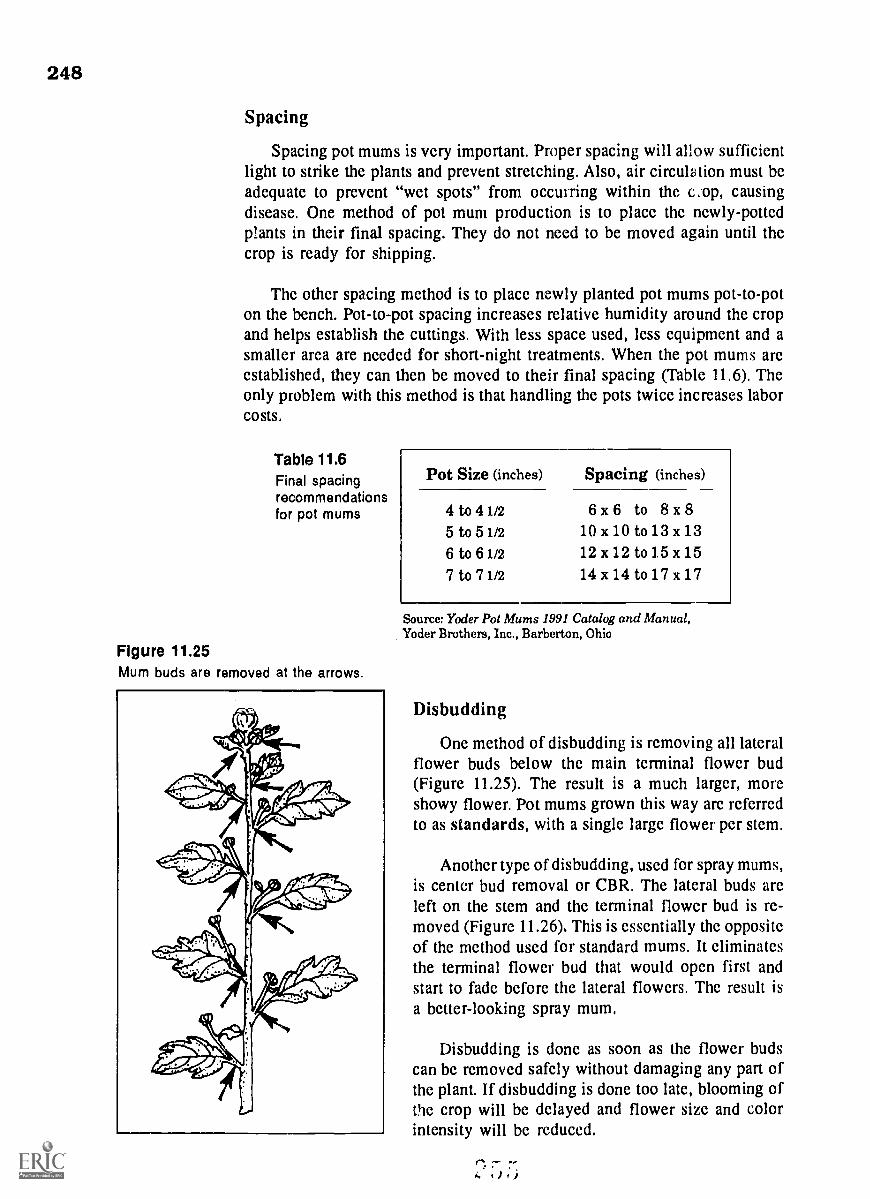
248
Spacing
Spacing pot mums is very important. Proper spacing will allow sufficientlight to strike the plants and prevent stretching. Also, air circuh3tion must beadequate to prevent "wet spots" from occurring within the c.op, causingdisease. One method of pot mum production is to place the newly-pottedplants in their final spacing. They do not need to be moved again until thecrop is ready for shipping.
The other spacing method is to place newly planted pot mums pot-to-poton the bench. Pot-to-pot spacing increases relative humidity around the cropand helps establish the cuttings. With less space used, less equipment and asmaller area are needed for short-night treatments. When the pot mums arcestablished, they can then be moved to their final spacing (Table 11.6). Theonly problem with this method is that handling the pots twice increases laborcosts.
Table 11.6Final spacingrecommendationsfor pot mums
Figure 11.25Mum buds are removed at the arrows.
Pot Size (inches) Spacing (inches)
4 to 41/2
5 to 5 1/2
6 to 6 1/2
7 to 71/2
6 x 6 to 8 x810 x 10 to 13 x 1312 x 12 to 15 x 15
14 x 14 to 17 x 17
Source: Yoder Pot Mums 1991 Catalog and Manual,Yoder Brothers, Inc., Barberton, Ohio
Disbudding
One method of disbudding is removing all lateralflower buds below the main terminal flower bud(Figure 11.25). The result is a much larger, moreshowy flower. Pot mums grown this way arc referredto as standards, with a single large flower per stem.
Another type of disbudding, used for spray mums,is center bud removal or CBR. The lateral buds arcleft on the stem and the terminal flower bud is re-moved (Figure 11.26). This is essentially the oppositeof the method used for standard mums. It eliminatesthe terminal flower bud that would open first andstart to fade before the lateral flowers. The result isa better-looking spray mum.
Disbudding is done as soon as the flower budscan be removed safely without damaging any part ofthe plant. If disbudding is done too late, blooming ofthe crop will be delayed and flower size and colorintensity will be reduced.

249
Figure 11.26Center bud removal (CBR)used on pot mums
Scheduling
Though thcy bloom naturally only in the long-night months, pot mumsare in demand year-round. The growcr must manipulate photoperiod with allthc othcr cultural conditions to obtain good-quality blooming pot mums alltwelve months of the year.
Pot mums can be scheduled very precisely when all cultural consider-ations are optimum. Production schedules are based on cultivars selected,season of the ycar, and growing techniques. Using a continuous pot mumrotation, it is possible to produce up to four crops per bench each year.
To determine their crop schedules, commercial growers usually refer tochrysanthemum manuals published by suppliers. file s? manuals provide tableswith suggested dates for planting, pinching, lighting, photoperiodic shading,and blooming. Growers using these publications may follow thc printcdschedules exactly. More likely, thcy will usc thcm as guidelines to developtheir own particular schedules. (You may want to do the same in schedulingyour crop.)
Pests
Thc major insect pcsts of pot mums arc aphids, leaf miners, spidcr mitcs,thrips, and whiteflics. Thc larval stagc of the leaf miner bores through leaftissue. Thc primary symptom of leaf miner damage is white, meandering trailswhich disfigure the foliage. (Sce Chapter 8 for descriptions of damagc causedby the othcr pcsts.) Figurc 11.27 shows somc of thc common pests of potmums (greatly enlarged) and in somc cascs thc damage they caused.
Thc most effective pcst control is achieved by implementing IPMstrategies in thc greenhouse.
1. Kecp greenhouses insidc and outside free of wccds and accumulated deadplant material.
2. Monitor pcst populations with yellow sticky traps; scout the crop andgraph pest populations over timc.
3. Install screening material over vents to keep pests from entering thegreenhouse.
4. Purchase disease- and insect-free cuttings from a mum specialistpropagator.
5. Use only pesticides that are registered for control of the particular peston pot mums; apply pesticides carefully, as directed.

250
Figure 11.27Insects and other peststhat attack mums
A. Aphids
4 0 'gar rn:47;jellilljelaill4 ).
*addiligiadiin.soaciae.,_ rt.,-..
42,. :itN -V4. W 7"; ',.1.2'' '044 - tita
_.
C. Spider mites
41.
BEST Cerl AVEACLE (4'5
B. Leaf miners
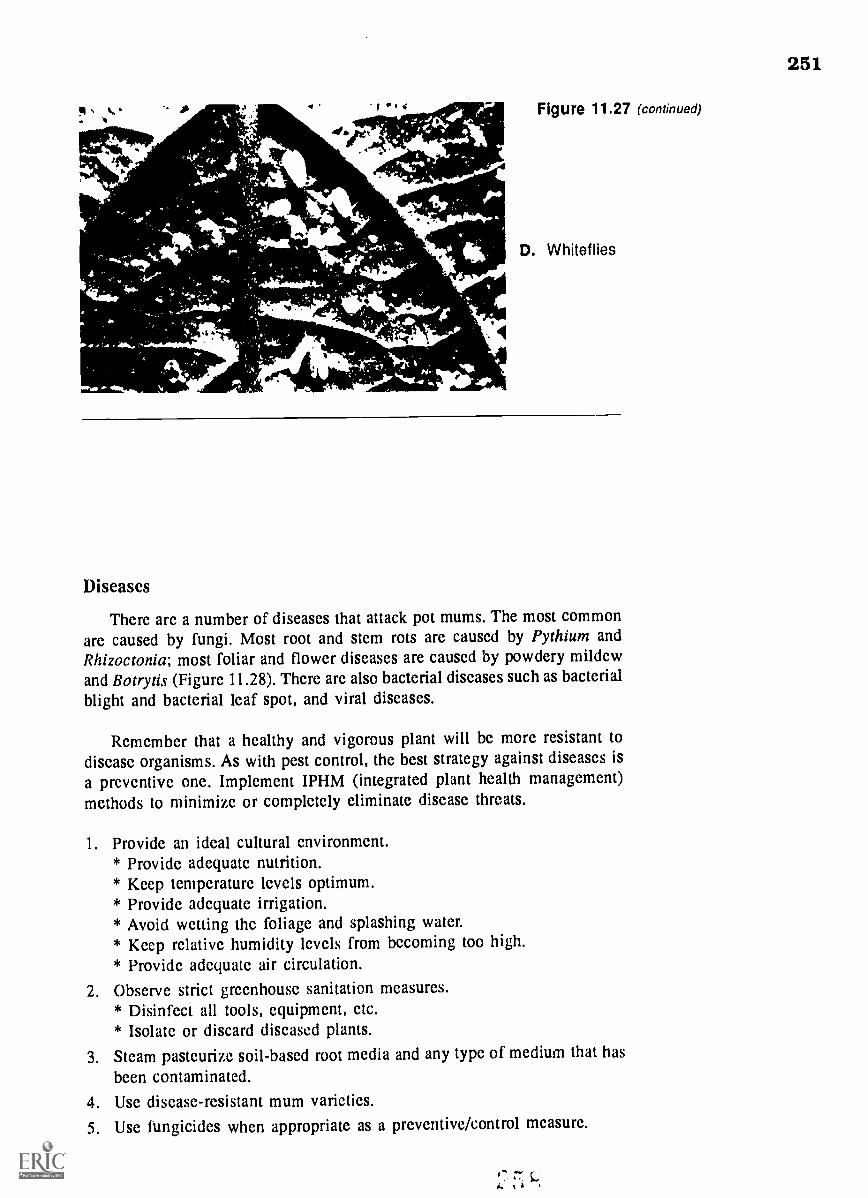
251
-
.-.414111
41
Figure 11.27 (contin ued)
D. Whiteflies
Diseases
Thcre arc a number of diseascs that attack pot mums. The most commonarc caused by fungi. Most root and stem rots are caused by Pythium andRhizoctonia; most foliar and flower diseases are causcd by powdery mildewand Botrytis (Figure 11.28). Thcrc arc also bacterial diseases such as bacterialblight and bacterial leaf spot, and viral diseases.
Rcmcmbcr that a healthy and vigorous plant will bc morc resistant todisease organisms. As with pcst control, the best strategy against diseases is
a preventive one. Implement IPHM (integrated plant health management)methods to minimize or completely eliminate diseasc threats.
1. Provide an ideal cultural environment.* Provide adequate nutrition.* Kcep temperature levels optimum.* Provide adequate irrigation.* Avoid wetting the foliage and splashing water.* Keep relative humidity levels from becoming too high.
* Provide adequate air circulation.
2. Observe strict greenhouse sanitation measures.* Disinfect all tools, equipment, ctc.* Isolate or discard diseased plants.
3. Steam pasteurize soil-based root media and any type of medium that has
been contaminated.
4. Usc disease-resistant mum varieties.
5. Usc fungicides when appropriate as a preventive/control measurc.

252
A. Pythium root and stem rot
C. Botrytis (gray mold)
Figure 11.28Diseases of mums
B. Rhizoctonia root and stem rot
4
t
D. Powdery mildew
+et 41
AL
-.4--44111.14=1
Crown Bud Formation
Crown buds are small terminal flower buds on the mum plant that neverfully develop and open. They form when the plants are exposed to improperphotoperiod. Immediately below the crown bud are small strap-shaped leaves(Figure 11.29). Sometimes, vegetative by-pass shoots form below these leavesand grow up around the crown bud. Flowering is seriously delayed, and theshape of the flowering plant can be distorted. The formation of crown budscan ruin a crop.

253
Flgure 11.29Crown bud formation in pot mums.Note the strap-shaped leaves rightbelow the crown bud.
Crown buds will form in response to even small amounts of light duringflower bud development - light leaking through the shade cloth or light fromnearby outside sources such as street lights. It is very important to keep theshade cloth in good condition. No more than two footeandles of light shouldpass through it. If the pot mum crop is exposed to extraneous light at night,it will have to be shaded even if the nights are naturally long enough for thecrop to bloom.
Inconsistent shading of a crop can also result in crown bud formation.Growers must pull the shade cloth every night until the flower buds showcolor. Missing several nights may result in crown bud formation. Also, bloom-ing of the crop will be delayed one day for every missed night.
Table 11.7 lists some of the common physiological disorders that pot mumgrowers encounter, along with the possible causes. Many of these problemscan be avoided if proper cultural procedures are implemented.
CUT MUM APPLICATIONS
IntroductionThe mum flower forms that arc used for cut flower production are the
same as those for pot mums. Many cultivars are available for cut mum culture.Some can be flowercd on a year-round basis; others flower best only at certain
times of the year. Refer to the manuals published by mum suppliers for helpin choosing cultiv ars that will perform best in your situation.
Mums grown for cut flowers are classified into three categories
(Figure 11.30):
1. Standard mums are large-flowered cultivars (with the flower more than4 inches in diameter). They have all lateral or side buds removed. Theremaining terminal flower bud produces a large flower, often called a
"football" mum.
2. Spray mums are smaller-flowered cultivars with all flower buds allowedto develop except one. The center bud is removed to give the spray mum
r; t

254
Figure 11.30Comparison of the three kinds of mums: (left to right) spray mum, disbud mum, standard mum
Table 11.7 Possible causes of physiological disorders of pot mums
PROBLEM POSS113LE CAUSE
Plants too short
Plants too tall
Uneven flowering
Malformed flowers
Poor growth
Not enough shoots
Poor root systemLack of fertilizerExcess growth retardantNot enough long days
Too many long daysSpaced too closelyTemperature too highNot enough light
Cool night t..,mperaturesFailure to provide complete
darkness at night
InsectsImproper day length control
Not enough lightToo much or too little fertilizerImproper soil pHImproper. watering
Cool night temperaturesLack of humidityImproper pinchLack of fertilizer
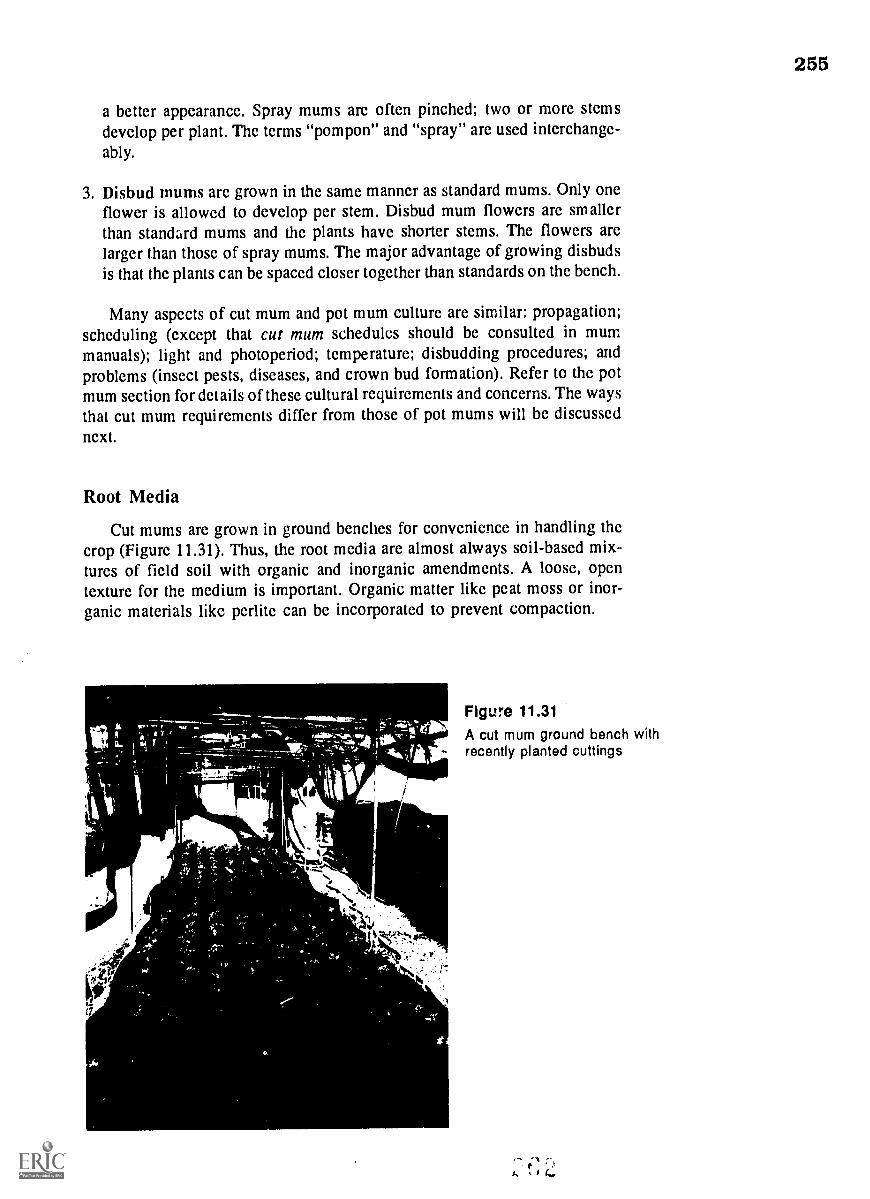
a better appearance. Spray mums arc often pinched; two or more stemsdevelop per plant. The terms "pompon" and "spray" arc used interchange-ably.
3. Disbud mums are grown in the same manner as standard mums. Only oneflower is allowed to develop per stem. Disbud mum flowers are smallerthan standard mums and the plants have shorter stems. The flowers arelarger than those of spray mums. The major advantage of growing disbudsis that the plants can be spaced closer together than standards on the bench.
Many aspects of cut mum and pot mum culture are similar: propagation;scheduling (except that cut mum schedules should be consulted in mummanuals); light and photoperiod; temperature; disbudding procedures; andproblems (insect pests, diseases, and crown bud formation). Refer to the potmum section for details of these cultural requirements and concerns. The waysthat cut mum requirements differ from those of pot mums will be discussednext.
Root Media
Cut mums are grown in ground benches for convenience in handling thecrop (Figure 11.31). Thus, the root media arc almost always soil-based mix-tures of field soil with organic and inorganic amendments. A loose, opentexture for the medium is important. Organic matter like peat moss or inor-ganic materials like perlite can be incorporated to prevent compaction.
I /11/1/___
Figure 11.31A cut mum ground bench with
- recently planted cuttings
255

256
Growers reuse the same growing medium in mum benches year after year.It is steam pasteurized at least annually (and preferably after every crop) toeliminate weeds, disease organisms, and insects.
Planting and Spacing
Cuttings should be planted in the ground bench at the same depth at whichthey were propagated; that is, quite shallow (Figure 11.32). After being wateredin, any cuttings that fall over slightly should be straightened immediately.Support is required to keep the stems straight. A series of welded wire gridsis often used and gradually raised as the crop increases in height (Figure11.33).
Cut mums are spaced 4 x 6 inchesin the summer and 5 x 6 inches in thewinter for single-stem plants. Recom-mended spacing for pinched crops is6 x 8 inches in the summer and 7 x 8inches in the winter. More space isneeded per plant in the winter becauselight intensity in the greenhouse then isconsiderably lower than during thesummer. Some growers leave out thecenter row of mums entirely during thewinter to "open up" the bench so thatmore light will penetrate the crop.
Watering
The principles concerning pot mumirrigation also apply to cut mum irriga-tion. However, as water is applied to acrop of cut mums, it should never vo et the foliage. Mature crops take a longertime to dry; while they are drying, disease organisms have a chance to
Figure 11.32Rooted mum cutting properly planted
Figure 11.33As the crop grows, this weldedwire grid is raised just enoughto keep the upper part of eachstem protruding through theopenings in the fabric.
XLIMIMIIII60.11Wat

257
Figure 11.34Ooze tube irrigation for cut mumsgrowing in a ground bench
establish themselves. The most common "safe" way to irrigate a cut mum crop
is by using ooze tubes (Figure 11.34) or a perimeter nozzle system that wets
the root medium only.
Nutrition
The principles of nutrition are the same for cut and pot mums. However,since cut mums are grown in soil-based root media, they should be providedwith lower amounts of fertilizer than if they were growing in soilless rootmedia. A constant feed program of 200 to 250 ppm of nitrogen should be used.
During the winter, however, ..ne root medium in the ground bench can become
quite cool or even cold. At that time, avoid using ammonium nitrogen fer-tilizers, for their rate of utilization by the crop is greatly slowed in coldweather. Ammonium levels tend to build up in the root medium, becoming
toxic to the plant.
Harvesting
Cut mum flowers may be harvested in the bud stage or when the bud isabout two-thirds fully open. Cut mums that are to be shipped long distancesusually travel better if harvested in the bud stage (showing color). The retailer
can then "open" the flower buds upon arrival before the flowers are sold. Cut
mums that arc sold locally, however, are usually harvested two-thirds fully
open. Their short trip (shipping) to the customer is not likely to damage the
tender petals.
Mum stems are cut about two inches above the soil line when the cut mum
flowers are ready for harvesting. The lower quarter or third of the foliage is
stripped from the stems and the flowers are placed in a warm floral preser-vative solution. (This warm solution is absotbed faster by the stems than acold solution.) Buckets of cut mums are then placed in coolers for storage.

258
MARKETING OF POT MUMS AND CUT MUMS
Pot Mums
Packaging and Shipping
Pot mums are ready to sell when flowers are at least half open. If plantsare shipped at this stage, the flowers will continue to open normally and willbe in top quality when they reach the consumers.
Pot mums (like most potted plants) should be sleeved and/or boxed fordelivery. Different sizes of paper and plastic sleeves are available. A specialstand with a wide base is used for sleeving. The sleeves are nested over arod. A plate on top of the rod supports the pot (Figure 11.35). The pot mumis sleeved by pulling the sleeve up around the plant (Figure 11.36). Finallythe sleeve is stapled shut at the top.
In cold weather, all packing should bk. done inside in a warm area. Loadingof delivery trucks should also be done in the headhouse. Furthermore, thetruck must be kept warm during transport using electric heaters that will notpollute the air with harmful gases.
Statistics
Pot mums are second only to poinsettias in economic importance offlowering potted plants. The national wholesale value in 1990 was $95.8million or 14 percent of the total flowering potted plant wholesale value.
Figure 11.35A sleeving device composed of a widebase, rod, and plate on top
Figure 11.36Sleeved pot mums before the sleeves arestapled shut
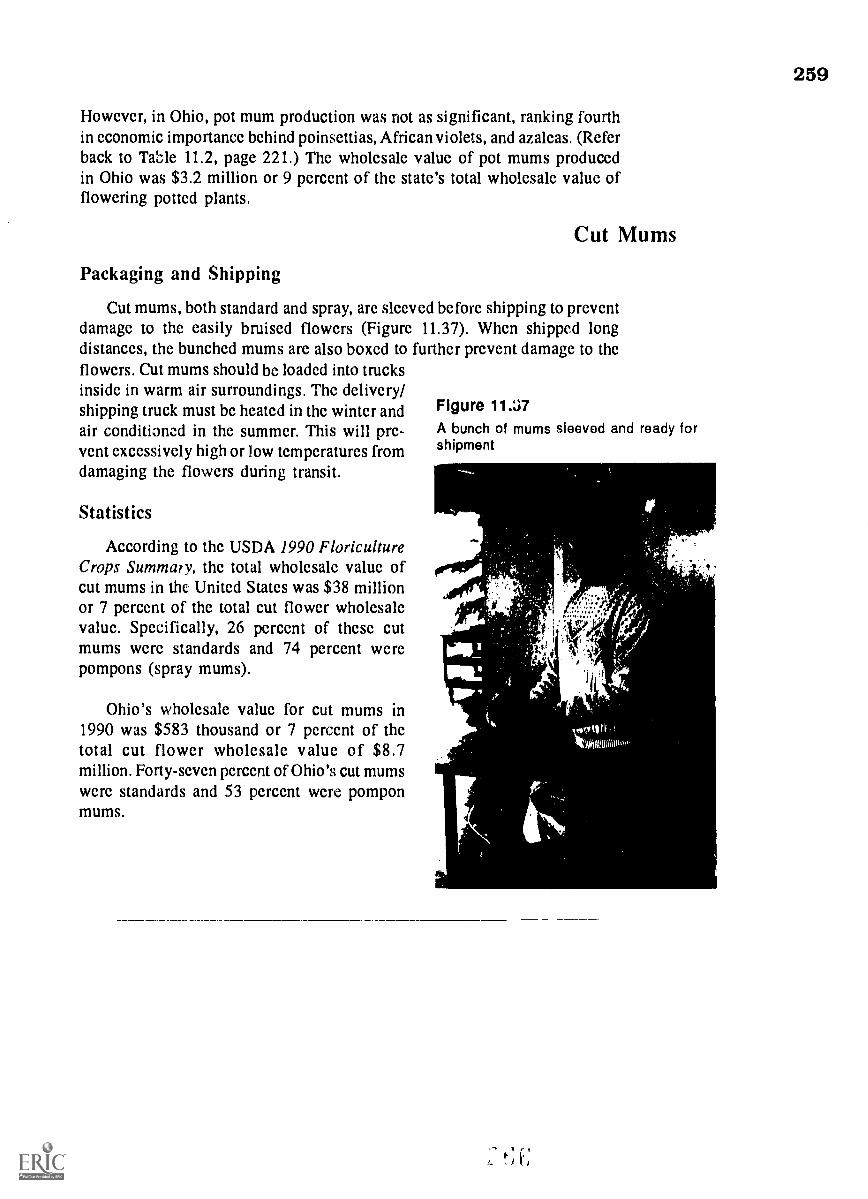
However, in Ohio, pot mum production was not as significant, ranking fourthin economic importance behind poinsettias, African violets, and azaleas. (Referback to Table 11.2, page 221.) The wholesale value of pot mums producedin Ohio was $3.2 million or 9 percent of the state's total wholesale value offlowering potted plants.
Cut Mums
Packaging and Shipping
Cut mums, both standard and spray, are sleeved before shipping to preventdamage to the easily bruised flowers (Figure 11.37). When shipped longdistances, the bunched mums are also boxed to further prevent damage to theflowers. Cut mums should be loaded into trucksinside in warm air surroundings. The delivery/shipping truck must be heated in the winter and Figure 11:J7air conditioned in the summer. This will pre- A bunch of mums sleeved and ready for
vent excessively high or low temperatures from shipment
damaging the flowers during transit.
Statistics
According to the USDA 1990 FloricultureCrops Summary, the total wholesale value ofcut mums in the United States was $38 millionor 7 percent of the total cut flower wholesalevalue. Specifically, 26 percent of these cutmums were standards and 74 percent werepompons (spray mums).
Ohio's wholesale value for cut mums in1990 was $583 thousand or 7 percent of thetotal cut flower wholesale value of $8.7million. Forty-seven percent of Ohio's cut mumswere standards and 53 percent were pomponmums.
259

260
This review is to help you check yourself on what you have learned about production of pottedchrysanthemums. If you need to refresh your mind on any of the following questions, refer to thepage number given in parentheses.
1. What is the scientific name of chrysanthemum? (page 239)
2. Describe the following mum flower forms: daisy, anemone, decorative, pompon, incurve, fuji,spider, and spoon tip. (pages 239-241)
3. How are potted and cut chrysanthemums propagated? (pages 239, 242)
4. What are the three most common pot sizes for growing pot mums? (page 242)
5. Why are cuttings placed at a 45° angle when they are planted in a pot? (pages 242-243)
6. What is the recommended night temperature for pot mums during flower bud development?(page 244)
7. Why is the night temperature lowered when flower buds show color? (page 244)
8. For a constant feed program, how many ppm of nitrogen and potassium should be applied toa vigorously growing pot mum crop? to a cut mum crop? (page 244)
9. Since chrysanthemums are a long-night crop with respect to photoperiod, how do growersproduce pot and cut mum crops during the short nights of summer? (pages 245-246)
10. What are two methods a grower can use to control the height of pot mum crops? (page 247)
11. What is a standard pot mum? (page 248)
12. Where can growers get scheduling information for pot and cut mum crops? (page 249)
13. Discuss IPM strategies for preventing pest infestations of pot and cut mum crops.(pages 249-251)
14. What is the best way to prevent pot and cut mum diseases? (pages 251-252)
15. Why do crown buds form in pot and cut mum crops? (pages 252-253)
16. What is the difference between a standard and a spray cut mum? (pages 253-255)
17. At what stages of development are cut mums ready for harvesting? (page 257)
18. Describe the procedure for harvesting cut mums. (page 257)
19. State the procedure for sleeving pot mums when they are ready for sale. (page 258)
20. Why should pot and cut mums be loaded into trucks inside the headhouse for shipping in winter?(page 258)

EASTER LILY PRODUCTION)
INTRODUCTION
The Easter lily (Gillum longiflorum) is grown primarilyfor Easter sales in the United States. It grows from a bulband produces a cluster of beautiful, fragrant white flowersover a one- to two-week period (Figure 11.38). Most Easterlily bulbs produced in the United States come from thePacific coastal states of Oregon and northern California.Bulbs are dug from the fields in the fall and shipped togrowers in crates filled with damp sphagnum peat moss(Figure 11.39). The peat moss keeps the bulbs moist andprevents them from rubbing against each other and dam-aging the bulbs.
An Easter lily bulb is technically a non-tunicate bulb(Figure 11.40). That is, it lacks the tunic or outer paper-like, brown covering found on tulip and onion bulbs(tunicate bulbs). The Easter lily bulb is made up of sepa-rate scales, rather than continuous scales (like an onion's),that surround the central stem of the bulb. A tunic reduceswater loss from a bulb and helps to protect it from damage.Thus, unprotected Easter lily bulbs must never be leftexposed for long periods of time. They must be handledcarefully.
The two main cultivars used for Easter lily productionin the United States are Ace and Nellie White. Severalother cultivars are used for cut flower production, such asAri and Georgia from Florida.
The top five states in Easter lily production in 1990were California, Michigan, Pennsylvania, Ohio, and New
Figure 11.39Easter lily bulbs on sphagnum peat moss used topack the bulbs in shipping crates
dr-
Part Three
Figure 11.38 A beautiful Easter lily
`
Figure 11.40The Easter lily bulb is a non-tunicatebulb made up of separate fleshyscales.
261
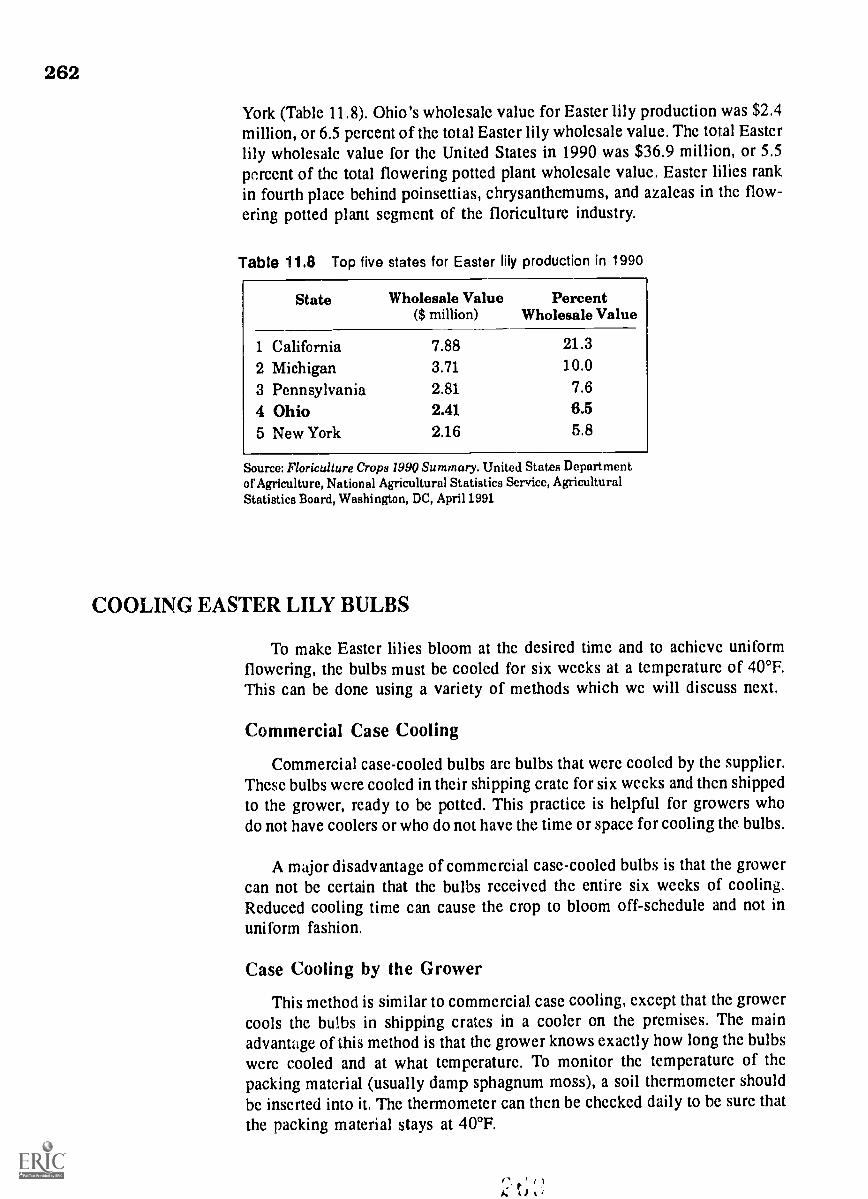
262
York (Table 11.8). Ohio's wholesale value for Easter lily production was $2.4million, or 6.5 percent of the total Easter lily wholesale value. The total Easterlily wholesale value for the United States in 1990 was $36.9 million, or 5.5percent of the total flowering potted plant wholesale value. Easter lilies rankin fourth place behind poinsettias, chrysanthemums, and azaleas in the flow-ering potted plant segment of the floriculture industry.
Table 11.8 Top five states for Easter lily production in 1990
State Wholesale Value Percent($ million) Wholesale Value
1 California 7.88 21.3
2 Michigan 3.71 10.0
3 Pennsylvania 2.81 7.6
4 Ohio 2.41 6.5
5 New York 2.16 5.8
Source: Floriculture Crops 1990 Summary. United States Departmentof Agriculture, National Agricultural Statistics Service, AgriculturalStatistics Board, Washington, DC, Apri11991
COOLING EASTER LILY BULBS
To make Easter lilies bloom at the desired time and to achieve uniformflowering, the bulbs must be cooled for six weeks at a temperature of 40°F.This can be done using a variety of methods which we will discuss next.
Commercial Case Cooling
Commercial case-cooled bulbs arc bulbs that were cooled by the supplier.These bulbs were cooled in their shipping crate for six weeks and then shippedto the grower, ready to be potted. This practice is helpful for growers whodo not have coolers or who do not have the time or space for cooling the. bulbs.
A major disadvantage of commercial case-cooled bulbs is that the growercan not be certain that the bulbs received the entire six weeks of cooling.Reduced cooling time can cause the crop to bloom off-schedule and not inuniform fashion,
Case Cooling by the Grower
This method is similar to commercial case cooling, except that the growercools the bulbs in shipping crates in a cooler on the premises. The mainadvantage of this method is that the grower knows exactly how long the bulbswere cooled and at what temperature. To monitor the temperature of thepacking material (usually damp sphagnum moss), a soil thermometer shouldbe inserted into it. The thermometer can then be checked daily to he sure thatthe packing material stays at 40°F.

263
Natural Cooling
Natural cooling is different from the previous two methods. 'fhe bulbs areremoved from the shipping case and potted before cooling. As soon as bulbsare potted, they are placed in an outdoor location where the temperature iscool, but not freezing. With this method, some rooting of the bulb takes placebefore cooling is completed. The result is an increased number of flowers perplant.
However, weather conditions can be quite variable. The bulbs may nothave received enough cooling when it is time to force them into bloom.Monitoring the root medium temperature is essential during this time. Alighting treatment may be required to complete the cooling effects on the bulbat the end of the cooling period (to be discussed under lighting).
Controlled Temperature Forcing
Controlled temperature forcing (CTF) is the cooling method of choice forproducing top quality Easter lilies. In this method, the bulbs are potted as soonas they arrive and are allowed to root for three weeks. The root medium iskept around 53°F for rapid root development. At the end of the three-weekperiod, the bulbs are placed in a cooler at 40°F for six weeks.
Thus, CTF offers the grower the most control over the cooling phase ofEaster lily production. CTF produces the highest quality crop because it* produces more flowers per plant,* produces longer lower leaves,* makes the crop easier to force, and* brings the whole crop into bloom at once (rather than over a period of a
week or more).
PLANTING EASTER LILY BULBS
Root Media
Easter lilies are susceptible to root rot diseases. To prevent their devel-opment, selection of a root medium that has good aeration and drainage isimportant. With soil-based mixes, the field soil should be amended withperlite and sphagnum peat moss. One such mix that works well is 4 parts soil,1 part perlite, and 1 part coarse sphagnum peat moss (by volume). The mixmust be steam pasteurized before use. Many growers use Peat-Lite root mediamixes, since they are light and well-drained and promote healthy root devel-opment.
The pH of the root medium should be between 6.5 and 6.7. Superphos-phate should not be used to amend the root medium. Leafscorch will resultfrom pH levels that are too low or the presence of superphosphate in the rootmedium.
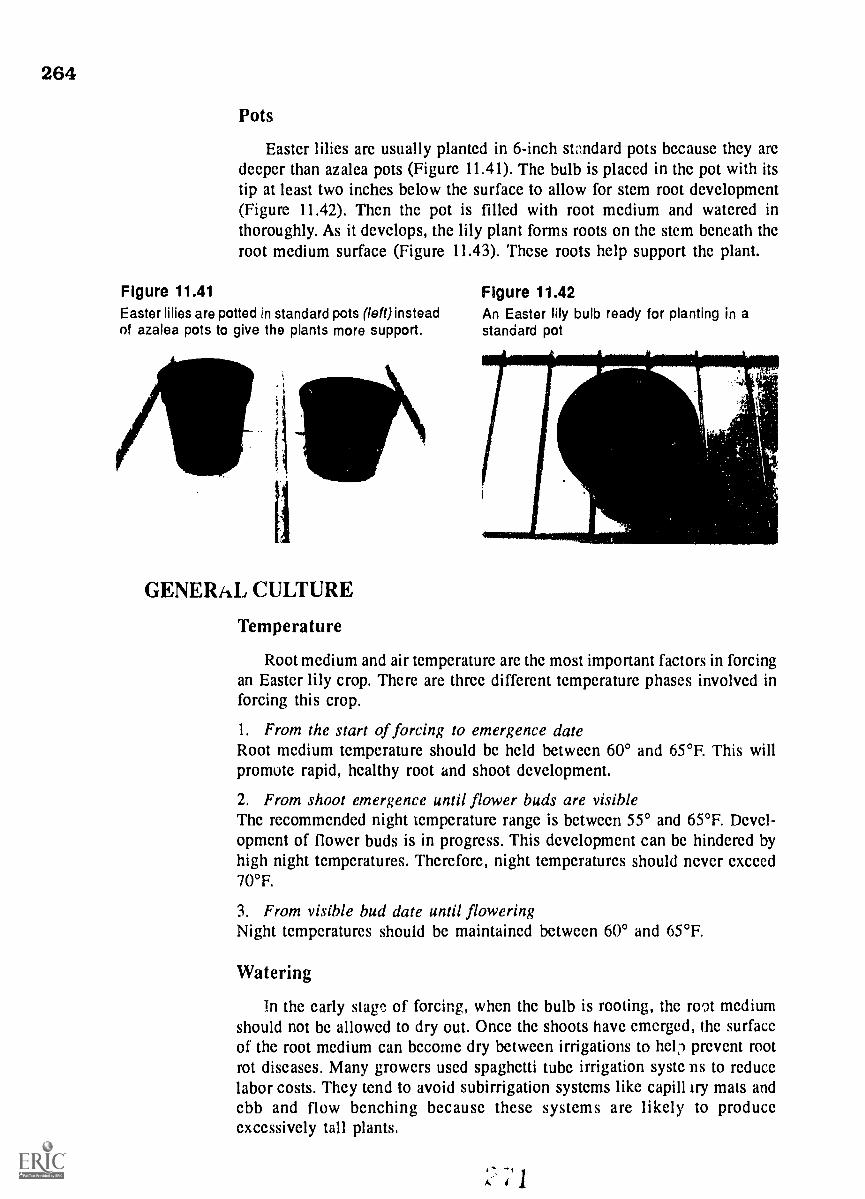
264
Pots
Easter lilies are usually planted in 6-inch standard pots because thcy arcdeeper than azalea pots (Figure 11.41). The bulb is placed in thc pot with itstip at least two inches below thc surfacc to allow for stcm root development(Figure 11.42). Thcn the pot is filled with root medium and watered inthoroughly. As it develops, the lily plant forms roots on thc stem beneath theroot mcdium surface (Figure 11.43). Thcse roots help support thc plant.
Figure 11.41Easter lilies are potted in standard pots (left) insteadof azalea pots to give the plants more support.
ft\GENERAL CULTURE
Figure 11.42An Easter lily bulb ready for planting in astandard pot
,r
Temperature
Root mcdium and air tcmperaturc arc thc most important factors in forcingan Eastcr lily crop. There are three diffcrcnt tcmperaturc phases involved inforcing this crop.
1. From the start of forcing to emergence dateRoot mcdium temperature should bc held between 60° and 65°F. This willpromote rapid, healthy root and shoot development.
2. From shoot emergence until flower buds are visibleThc recommended night temperature range is between 55° and 65°F. Devel-opment of flower buds is in progress. This development can bc hindcrcd byhigh night tcmperatures. Therefore, night tcmperaturcs should never exceed70°F.
3. From visible bud date until floweringNight temperatures should be maintained between 60° and 65°F.
Watering
In the early stage of forcing, whcn thc bulb is rooting, thc root mediumshould not be allowed to dry out. Once thc shoots have emerged, the surfaceof thc root medium can become dry between irrigations to hel:) prevent rootrot diseases. Many growers uscd spaghetti tubc irrigation systc ns to reducelabor costs. Thcy tend to avoid subirrigation systcms like capill try mats andcbb and flow benching because these systcms are likely to produceexcessively tall plants,

265
Nutrition
Figure 11.43Roots forming along the stemhelp anchor lily plants.
Adequate nitrogen helps to maintain good green foliage and improve theoverall appearance of the plant. The best nutritional program is to inject 200ppm of both nitrogen and potassium at each irrigation for soil-based rootmedia and 250 ppm for soilless root media. Weekly applications of a completefertilizer at 2 pounds per 100 gallons of water is recommended when injectionis not available. Osmocote® can also be mixed uniformly into the root mediumto supply nitrogen and potassium. For all nutritional program, a small amountof leaching should be allowed after each irrigation. This will prevent solublesalts from building up in the root medium and damaging the roots,
Lighting
Research has shown that lighting Easter lily shoots upon emergence is agood substitute for cooling the bulbs on a day-for-day basis. For example,a shipment of bulbs that was commercial case-cooled received only 35 daysof cooling instead of 42 days (six weeks). When the lilies emerged, they weregiven special lighting for 7 days (42-35 days). The results were the same asif the bulbs had received the full six weeks of cooling.
To light Easter lilies upon emergence, standard mum lighting is installedoverhead, (See Chapter 4, page 88.) The crop is lighted from 10:00 p.m. to2:00 a.m. with incandescent lamps that provide at least 10 footcandles of lightat crop level.
266
Only light of full intensity will produce a crop of the highest pcssiblequality. The glazing must be kept clean so that it will transmit thc maximumamount of light.
Height Control
When height control of a crop is necessary, chemical growth retardantscan be used. The most popular is A-Rest®.
As a drench
Prepare a solution of 4 fluid ounces of A-Rest® per 16 gallons of water. Whenthe shoots are 6 to 8 inches tall, each pot receives 8 fluid ounces of thissolution two times (with one week between applications).
As a spray
Prepare a solution of 0.5 pint A-Rest® and 3.5 pints of water. Spray this halfgallon of solution on 100 square feet of bench area two times, one week apart,when thc shoots arc 6 to 8 inches tall.
A more effective means of height control is to use a 0 or slightly negativeDIF. Avoid using a large negative DIF because the lily leaves will curvedownward, making the plant look droopy. (See Figure 9.4, page 172.) Sincelilies are forced during the winter and early spring when cool day tempera-tures arc common, implementation of DIF for height control is usually easy.
Spacing
Proper spacing of the Easter lily crop is very important for crop qualityand for adequate air circulation that helps prevent diseases. The recommendedspacing for lilies grown from bulbs up to 8 inches it . !!mference is 6 x8 spacing, or three pots per square foot. For larger buic 'qc crop will needmore space - about 7 x 8 inch centers between pots.
When the crop is spaced properly, light will be able to penetrate each plantand prevent stretching. Air will circulate through the crop and eliminate "wetspots," reducing the occurrence of root rot disease.
Scheduling
Scheduling an Easter lily crop can be a challenge for several reasons.Because of thc variation in the date when Easter falls, different growingconditions may be encountered each year. Rate of plant development is affectedby maturity of the bulb when harvested, the cooling temperatures used andthcir duration, and the cultural practices 'used during forcing. The importanceof accurate crop scheduling cannot be overemphasized. An Easter lily cropthat is not ready for Easter is almost worthless.
Whether growers have their bulbs cooled by an outside source or cool thcbulbs themselves, there are schedules available from lily bulb suppliers andindustry sources such as the Ohio Florists' Association.
267
General gaidelines for scheduling arc as follows:
1. Aim for thc crop to comc into bloom onc week before Easter - Palm
Sunday.2. Set aside six weeks for cooling. If CIF is used, allow an additional three
wccks for rooting thc plants in pots bcforc cooling.
3. Plan on 110 to 115 days for the properly cooled bulbs to force into bloom
in the greenhouse.4. Add up all those numbcrs of days and count back that many days from
Palm Sunday. Now you know when you will need to receive the bulbs.5. At eight wccks before Easter, aim at a shoot height of 4 to 6 inchcs for
thc plants.6. To have buds visible at seven weeks before Easter, kccp night tempera-
tures at 60°F. To have buds visible at six weeks, maintain a nighttemperature of 65°F.
Monitoring thc progress of the Easter lily crop is very important, andcomparing the development of the plants to published schedules. If develop-
ment needs to be slowed down or speeded up, temperatures can be adjustedaccordingly. See Figure 11.44 for a sample growing schedule for a CTF Easter
lily crop.
Pests
Thc two primary pests of Easter lilies are aphids and bulb mites. Aphidsdamage Eastcr lilies by feeding on the foliage and excreting honeydew ontothc plant. Thc result is deformed growth, black sooty mold on the foliage,and a crop that is ruined in appearance. Bulb mites feed on the bulb scales,causing serious damage to the bulb. Thc damaged bulb tissue allows diseaseorganisms to become established.
Control of both pests is done by application of registered pcsticidcs atlabel ratcs by a licensed pcsticidc applicator. IPM methods should be imple-mented to help prevent aphid infestation. Bulbs should be inspected uponrcccipt for symptoms of bulb mitc infestation.
Diseases
Root rot, a fungal disease causcd by Pythium and Rhizoctonia, is theprimary disease that affccts Eastcr lilies. It causes roots to rot and turn brown
(while health, roots arc whitc). Overwatering is thc main causc of this disease,
because wct root media promote the establishment of the disease organisms.
To prevent thc occurrence of root rots:
1. Use pasteurized soil.2. Allow thc surfacc of thc root mcdium to dry bctwccn irrigations.
3. Use only fungicides that arc labeled for Easter lilies. Apply them as a
drench monthly.
If root rot does become established, isolate the affected plants from thc
rest of thc crop. Gently knock thc root ball of each plant out of the pot. Thcn
set the plants back lightly into thc pots. Give them a light watering until new

268
Flgure 11.44 SAMPLE GROWING SCHEDULE FOR A CTF EASTER LILY CROP
2 3 4 5
1. Bulbs are dug from the field and shipped to growers forpotting,
2. Growers receive bulbs ald pot them immediately. The rootmedium with the bulbs is maintained at 63°F for threeweeks and then cooled to 400 for six weeks.
3. Easter lily shoots should be 4 to 6 inches tall about 65days before Easter,
4. Flower buds should be visible seven weeks before Easterwhen grown at 60°F night temperature. The first budsshould begin to point downward three weeks before Easter.
S. Plants can be held at the puffy bud stage for up to twoweeks if kept at 35° to 40°F with high relative humidity.Storage in a lighted cooler is preferable.
6. The optimum stage for marketing is when only the firstflower is open. Other buds will gradually open in thecustomer's home.
6

root growth is evident. Thcsc practiccs will discourage thc growth of thcfungal disease organisms. Thc roots will have a chance to dry out somewhat
and producc ncw, healthy growth.
Holding the Crop in Cold Storage
Sometimes, part or all of an Eastcr lily crop that has comc into bloom
too early has to be kept in storage. Plants may be stored at the stage whcnthe first flower bud looks puffy and white (Figure 11.45). The plants should
be irrigated first, then placed in a 350 to 40°F cooler, either lighted or in thc
dark. Easter lilies can be stored up to two weeks in this puffy bud stage. Thc
root medium should bc checked periodically and irrigatcd bcforc it completely
dries out. When thc lily plants are removed from cold storage, they shouldbe given an hour or two to warm up slowly in thc headhouse. They shouldnot be placed directly into a warm, sunny greenhouse. A slow warming will
reduce water stress considerably by keeping thc foliage from warming upfastcr than thc root medium. (Cold roots do not take up water very well.)
MARKETING
An Easter lily should bc sold Mum the first flower is open. Usually, the
pots are covered with colorful foil and dccorated with an attractive ribbon.
As the flower buds open, the pollen-bearing anthers inside should be removed
as soon as possible (Figure 11.46). Anthers produce an abundance of yellow
pollen, which can fall onto the petals and discolor them. Also, removal of the
anthers prolongs the life of the flower.
As stated previous;y, Easter lily sales in 1990 ranked this crop fourth inflowering potted plant production. Ohio is a major Eastcr lily-producing state.
Its 1990 ranking was fourth in thc country at $2.4 million wholesale value.
Figure 11.45 Easter lilies at the white puffy-budstage can oe placed in cold storage.
"
Figure 11.46 Flower parts of an Easter lilywith the anthers labeled
,
269

270
!ILY
This review is to help you check yourself on what you have learned about Easter lily production.If you need to refresh your mind on any of the following questions, refer to the page number givenin parentheses.
1. What is the scientific name of the Easter lily? (page 261)
2. What are the two most popular Easter lily cultivars? (page 261)
3. Why do Easter lilies have to be cooled during production? (page 262)
4. At what temperature and for how long must Easter lily bulbs be cooled? (page 262)
5. List the four cooling methods used for Easter lily bulbs. (pages 262-263)
6. Which Easter lily bulb cooling method is most commonly used? Why? (page 263)
7. What type of pot is best to plant Easter lily bulbs in? (page 264)
8. For a constant feed program, what is the recommended ppm of nitrogen and potassium to beapplied to an Easter lily crop growing in a soilless root medium? (page 265)
9. If Easter lily bulbs are not cooled for the required period of time, what can be done upon shootemergence to substitute for the missed cooling time? (page 265)
10. How can DIF be used to control the height of Easter lilies? (page 266)
11. Why is scheduling Easter lilies more difficult than aeduling other potted flowering plants?(page 266)
12. What is the main disease of Easter lilies? How cm it be prevented? (page 267)
13. At what stage of their development can Easter lilies be stored in a cooler to keep them fromblooming too early? (pages 268-269)
14. Why should the anthers of an Easter lily be removed? (page 269)

CHAPTER 12
MINOR POTTED CROPS
Competencies for Chapter 12As a result of studying this chapter, you should be able to do the following:
1. Give the scientific name of each crop.2. Describe the major cultural guidelines for five minor flowering potted
plants.3. Describe the major cultural guidelines for foliage plants.4. Identify each crop by its distinctive flowering and foliar characteristics.5. Name the minor potted crops with the highest wholesale value in your
state.
Related Science Concepts
1. Examine plant development.2. Determine cultural needs of minor potted crops.3. Describe the effects of environmental conditions on crop growth and
quality.4. Describe the processes of acclimation and hardening of Florida-grown
foliage plants for indoor use.5. Implement IPHM strategies.6. Implement 1PM strategies.7. Examine techniques of plant propagation.
Related Math Concepts1. Apply basic operations to whole numbers, decimals, and fractions as they
relate to minor potted crops.2. Apply basic operations to ratios and percents as they relate to minor potted
crops.3. Apply mathematical concepts and operations to minor potted crops.
4. Read, interpret, and construct charts, graphs, and tablesrelated to minor potted crops.
Terms to Know
acclimationcormphyllocladesucculent
271 I. I
272
INTRODUCTION
In Chapter 11 we discussed three major flowering potted crops. In thischapter are several other potted crops that are not as major, but still meritdiscussion.
'Or African violetsCineraria
'Or Cyclamen'Or Holiday cacti'Or Kalanchoe
Foliage plants
African violets are close behind Easter lilies in wholesale value. Theyflower year-round in the home with little care. Cineraria and cyclamen areproduced in abundance during the spring for Valentines' Day, Easter andMother's Day. These two plants produce very showy flowers that last severalweeks in the home.
Holiday cacti are very popular during the Thanksgiving, Christmas, andEaster holidays. They come in a wide variety of colors and bloo:i year afteryear in the home with a minimum of care. Kalanchoe is another colorfulflowering plant that is produced year-round. The flowers last up to one monthin the home. Kalanchoe plants are quite tolerant of harsh home conditions.
Potted foliage plants are found in nearly every household and officebuilding in the United States. Foliage plants not only improve the appearanceof a room, but actually purify the air, removing pollutants and adding oxygen.We will now get into a brief discussion of the cultural guidelines for producingeach of these crops.
Figure 12.1 African violet in bloom
4.m._. 4"
Nlf kik
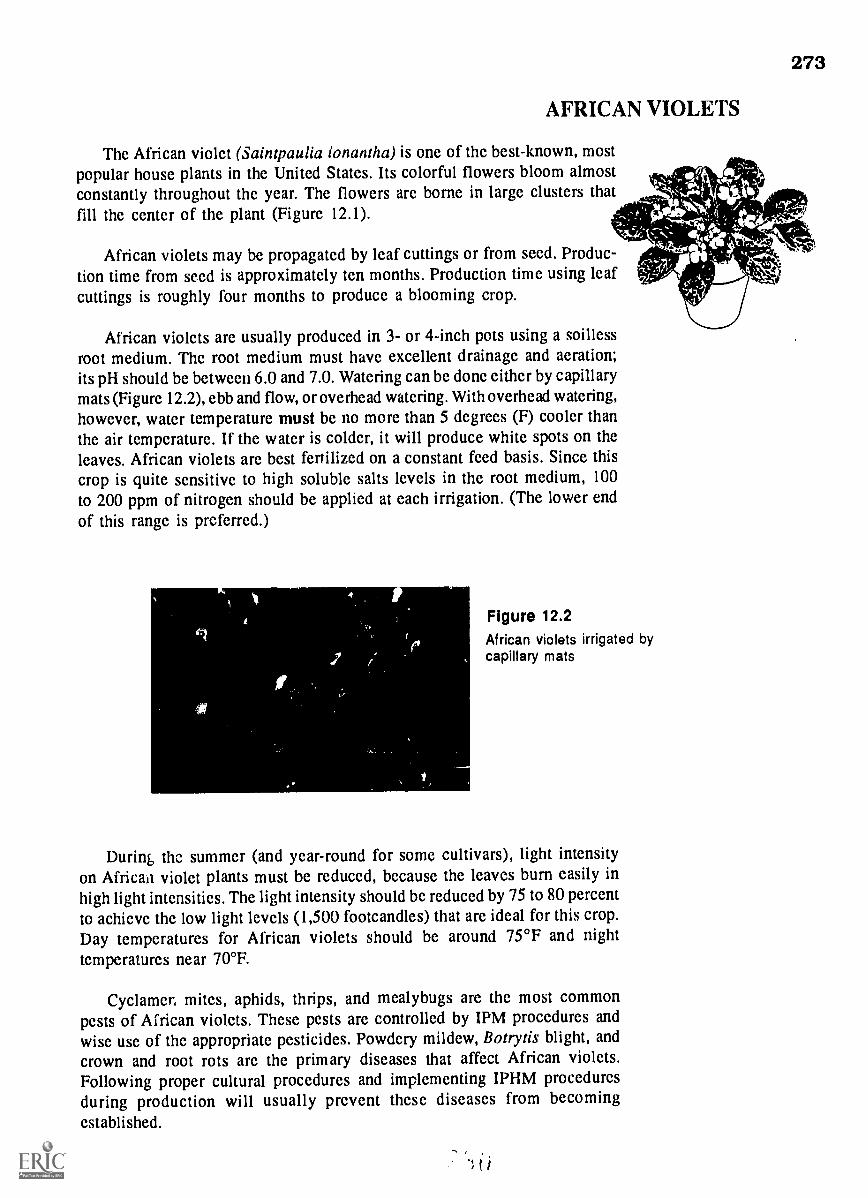
AFRICAN VIOLETS
The African violet (Saintpaulia ionantha) is one of the best-known, mostpopular house plants in the United States. Its colorful flowers bloom almostconstantly throughout the year. The flowers are borne in large clusters thatfill the center of the plant (Figure 12.1).
273
African violets may be propagated by leaf cuttings or from seed. Produc-tion time from seed is approximately ten months. Production time using leafcuttings is roughly four months to produce a blooming crop.
African violets are usually produced in 3- or 4-inch pots using a soillessroot medium. The root medium must have excellent drainage and aeration;its pH should be between 6.0 and 7.0. Watering can be done either by capillarymats (Figure 12.2), ebb and flow, or overhead watering. With overhead watering,however, water temperature must be no more than 5 degrees (F) cooler thanthe air temperature. If the water is colder, it will produce white spots on theleaves. African violets are best fertilized on a constant feed basis. Since thiscrop is quite sensitive to high soluble salts levels in the root medium, 100to 200 ppm of nitrogen should be applied at each irrigation. (The lower endof this range is preferred.)
Figure 12.2African violets irrigated bycapillary mats
During the summer (and year-round for some cultivars), light intensityon African violet plants must be reduced, because the leaves burn easily inhigh light intensities. The light intensity should be reduced by 75 to 80 percentto achieve the low light levels (1,500 footcandles) that are ideal for this crop.Day temperatures for African violets should be around 75°F and night
temperatures near 70°F.
Cyclamen mites, aphids, thrips, and mealybugs are the most commonpests of African violets. These pests are controlled by IPM procedures andwise use of the appropriate pesticides. Powdery mildew, Botrytis blight, and
crown and root rots are the primary diseases that affect African violets.Following proper cultural procedures and implementing IPHM proceduresduring production will usually prevent these diseases from becomingestablished.

274
CINERARIA
Cineraria (Senecio x hybridus) is a cool temperature crop that is produccdmainly for sales from Valentines' Day through Easter. This plant has a large,colorful flower cluster in the center of the plant, surroundcd by large leaves(Figure 12.3). The ir my flower colors include white, lavender, blue, rcd, pink,and multiple colors
Figure 12.3The large flower clusterof cineraria
V641'd
Cincraria arc started from seed sown in August and on into October forJanuary through April sales. Some growers prefer to purchase started plantsut a later date to avoid the labor and space required for seedling germinationand growth. Approximately six months are required to produce a finished cropof cineraea started from seed. Four to five months are required for a cinerariacrop produced from started plants.
The root medium that is used should be well drained with good aerationand good water-holding capacity. The pH for a soilless root medium shouldbe 5.5 to 6.0. Cineraria are potted in either 4- or 6-inch azaka pots; for thcmass market, 4-inch pots are v_ry profitable. A constant feed program of 100ppm of both nitrogen and potassium is recommended.
For the first four to six weeks after transplanting, night temperaturesshould be 62° to 65°F for rapid vegetative growth. After this period, thc cropmust be exposed to cool temperatures for flower bud development and bloom-ing. The night temperature should be lowered to 45° to 50°F for a minimumof four weeks and preferably six weeks. Day temperatures during this timeshould be no higher than 60°F. Cineraria grow and flower bes when givenfull light intensity, especially during the winter months.
The major pests of cineraria are whiteflies, aphids, and thrips. 1PM strat-egies should be implemented during production, as these pests, in a matterof days, can "explode" into huge populations on this crop. Powdery mildewand Botrytis will attack cineraria if air circulation is not adequate and/or thefoliage is wet during the night. Viral diseases also affect cineraria, resultingin streaking of the foliage and flowers. Thrips can spread these viral diseases,so control of thrips is very important in disease prevention.
I
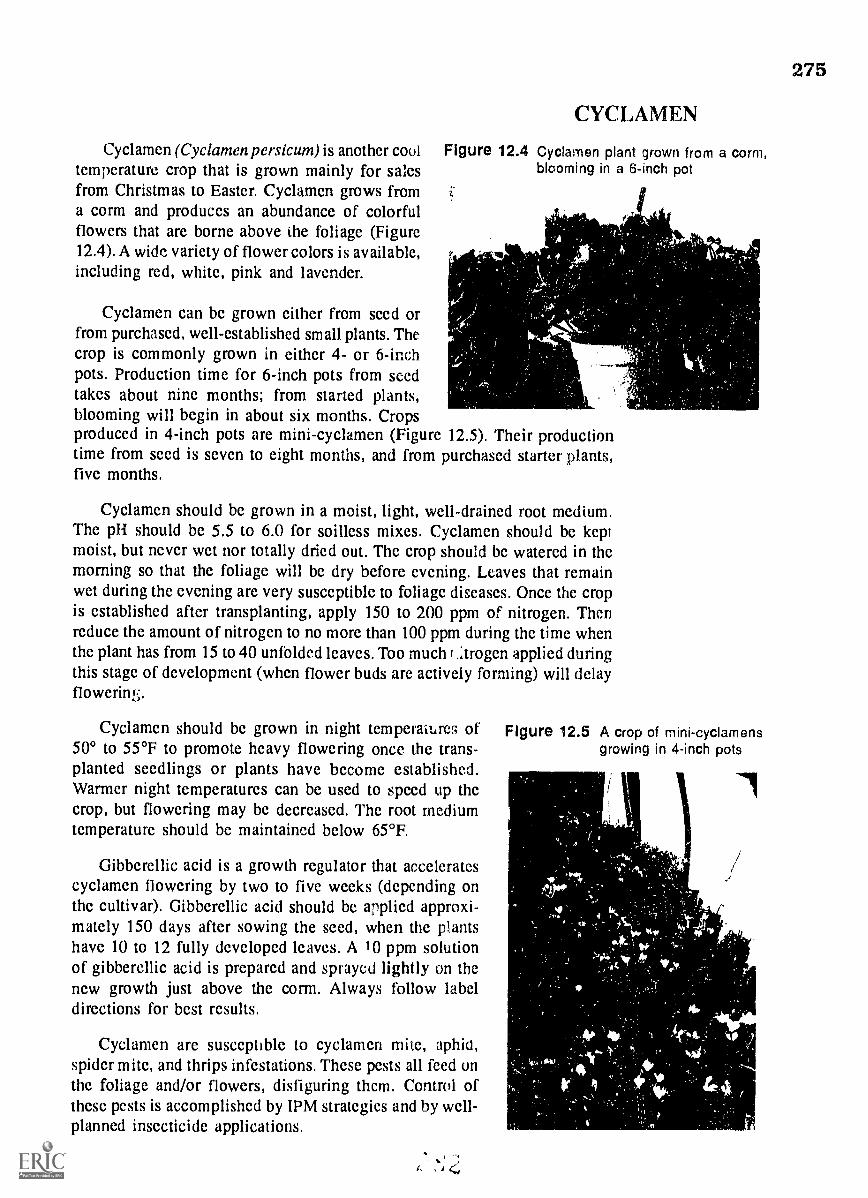
Cyclamen (Cyclamen persicum) is another cooltemperature crop that is grown mainly for salesfrom Christmas to Easter. Cyclamen grows froma corm and produccs an abundance of colorfulflowers that are borne above ihe foliage (Figure12.4). A wide variety of flower colors is available,including red, whitc, pink and lavender.
CYCLAMEN
Figure 12.4 Cyclamen plant grown from a corm,blooming in a 8-inch pot
Cyclamen can bc grown cither from sccd orfrom purchased, well-established small plants. Thecrop is commonly grown in eithcr 4- or 6-inchpots. Production time for 6-inch pots from seedtakes about nine months; from started plants,blooming will begin in about six months. Cropsproduced in 4-inch pots are mini-cyclamen (Figure 12.5). Their productiontime from sccd is seven to eight months, and from purchased starter plants,five months.
Cyclamen should bc grown in a moist, light, well-drained root medium.Thc pH should bc 5.5 to 6.0 for soilless mixes. Cyclamen should bc keptmoist, but never wct nor totally dried out. Thc crop should be watered in thcmorning so that thc foliage will bc dry before evening. Leaves that remainwet during the evening are very susceptible to foliage diseases. Once the cropis established after transplanting, apply 150 to 200 ppm of nitrogen. Thenreduce the amount of nitrogen to no morc than 100 ppm during thc time whenthe plant has from 15 to 40 unfolded leaves. Too much t arogen applied duringthis stage of development (whcn flower buds are actively forming) will delayflowerins.
Cyclamen should bc grown in night temperaiLres of Figure 12.5 A crop of mini-cyclamens50° to 55°F to promote heavy flowering once the trans- growing in 4-inch pots
planted seedlings or plants have become established.Warmer night temperatures can bc used to speed up thccrop, but flowering may bc decreased. Thc root medium 1temperature should be maintained below 65°F.
Gibberellic acid is a growth regulator that acceleratescyclamen flowering by two to five weeks (depending onthc cultivar). Gibberellic acid should be applied approxi-mately 150 days aftcr sowing the seed, when thc plantshave 10 to 12 fully developed leaves. A 10 ppm solutionof gibberellic acid is preparcd and sprayed lightly on thencw growth just above the corm. Always follow labeldirections for best results.
Cyclamen are susceptible to cyclamen mite, aphid,spider mitc, and thrips infestations. These pests all feed onthe foliage and/or flowers, disfiguring them. Control ofthese pests is accomplished by IPM strategies and by well-planned insecticide applications.
A,,
275

276
Crown rots and root rots are two common diseases that affect cyclamen.Crown rot is characterized by rotting flowers and leaves that are often coveredby the gray growth of the fungus mold, Botrytis. The fungi Pythium andRhizoctonia cause root rots, which ultimately kill the plant. These diseases
can usually be controlled using the IPHM techniques of proper watering,adequate air circulation, maintaining dry foliage, and others.
HOLIDAY CACTI
Three major types of holiday cactus are on the market today: Thanks-giving cactus (Schlumbergera truncata), Christmas cactus (Schlumbergerabridgesii), and Easter cactus (Rhipsalidopsis gaertneri), Easter cactus is thenewest of the three cacti for production in the United States. All three plantsnaturally produce a profusion of showy flowers in the home around the timeof the holiday for which they are named. Flower colors include red, white,peach, lavender, dark purple, and orange.
These hwiday cacti are all similar in appearance, especially the Thanks-giving and Christmas cacti, An easy way to tell these two cacti apart is toexamine the phylloclades (stem segments). (See Figure 12.6.) The edges ofthe phylloclades of Thanksgiving cactus are toothed or pointed; those ofChristmas cactus are rounded. The phylloclades of Easter cactus are moreelongated than the other two cacti. They also bear easily visible tufts of brown"hairs" along the two edges and the ends of the phylioclades.
Holiday cacti are propagated by cuttings taken from stock plants. Schedul-ing guidelines are published in industry literature. In general, the Schlumbergeraspecies require eight to twelve months from propagating cuttings to a finishedcrop, depending on when cuttings were tooted. Easter cactus requires 12months to produce a finished crop, starting with propagation.
Figure 12.6Three types of holiday cactus can bedifferentiated by the shape of thephylloclade:A) Thanksgiving cactusB) Christmas cactusC) Easter cactus
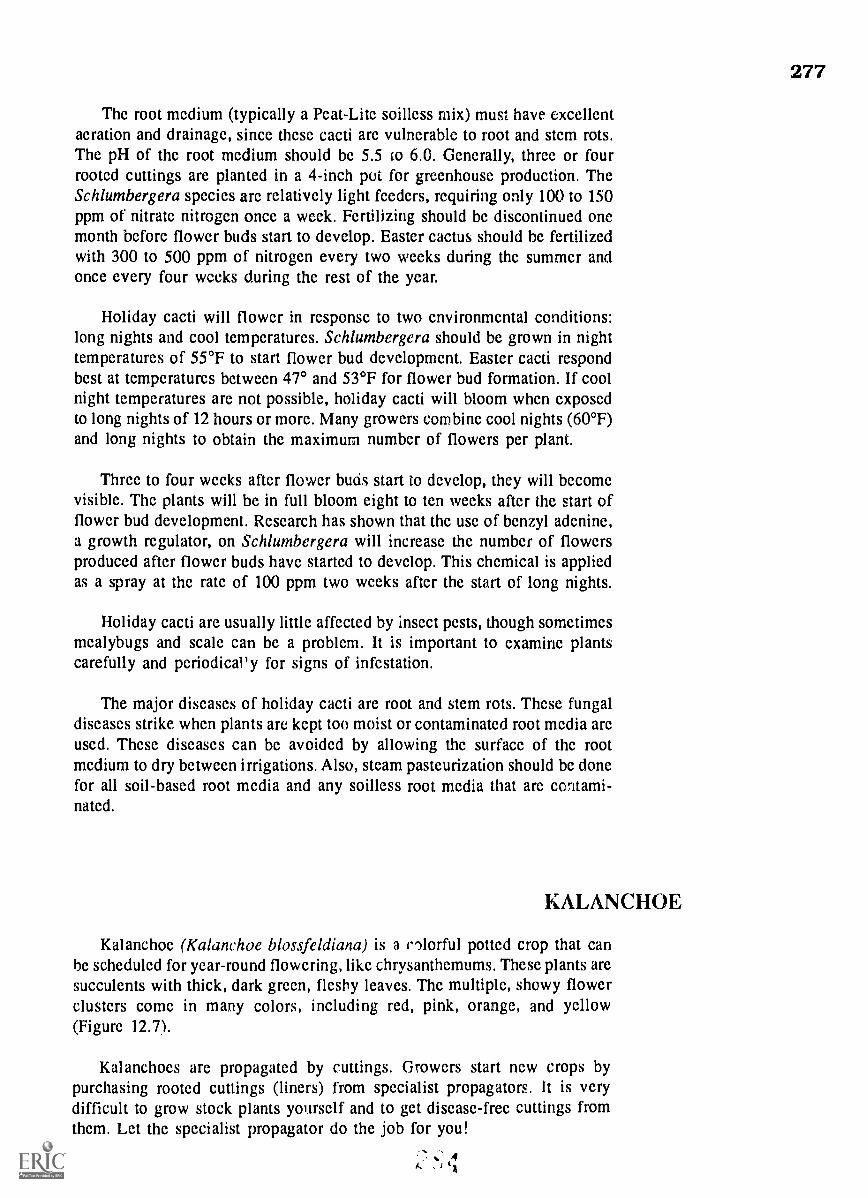
277
The root medium (typically a Peat-Lite soilless mix) must have excellentaeration and drainage, since these cacti are vulnerable to root and stem rots.The pH of the root medium should be 5.5 co 6.0. Generally, three or fourrooted cuttings are planted in a 4-inch pot for greenhouse production. TheSchlumbergera species are relatively light feeders, requiring only 100 to 150ppm of nitrate nitrogen once a week. Fertilizing should be discontinued onemonth before flower buds start to develop. Easter cactus should be fertilizedwith 300 to 500 ppm of nitrogen every two weeks during the summer andonce every four weeks during the rest of the year.
Holiday cacti will flower in response to two environmental conditions:long nights and cool temperatures. Schlumbergera should be grown in nighttemperatures of 55°F to start flower bud development. Easter cacti respondbest at temperatures between 47° and 53°F for flower bud formation. If coolnight temperatures are not possible, holiday cacti will bloom when exposedto long nights of 12 hours or more. Many growers combine cool nights (60°F)and long nights to obtain the maximum number of flowers per plant.
Three to four weeks after flower buds start to develop, they will becomevisible. The plants will be in full bloom eight to ten weeks after the start offlower bud development. Research has shown that the use of benzyl adenine,a growth regulator, on Schlumbergera will increase the number of flowersproduced after flower buds have started to develop. This chemical is appliedas a spray at the rate of 100 ppm two weeks after the start of long nights.
Holiday cacti are usually little affected by insect pests, though sometimesmealybugs and scale can be a problem. It is important to examine plantscarefully and periodical!), for signs of infestation.
The major diseases of holiday cacti are root and stem rots. These fungaldiseases strike when plants are kept too moist or contaminated root media areused. These diseases can be avoided by allowing the surface of the rootmedium to dry between irrigations. Also, steam pasteurization should be donefor all soil-based root media and any soilless root media that are contami-nated.
KALANCHOE
Kalanchoe (Kalanchoe blossfeldiana) is a rIlorful potted crop that canbe scheduled for year-round flowering, like chrysanthemums. These plants aresucculents with thick, dark green, fleshy leaves. The multiple, showy flowerclusters come in many colors, including red, pink, orange, and yellow(Figure 12.7).
Kalanchoes are propagated by cuttings. Growers start new crops bypurchasing rooted cuttings (liners) from specialist propagators. It is verydifficult to grow stock plants yourself and to get disease-free cuttings fromthem. Let the specialist propagator do the job for you!

278
Figure 12.7Kalanchoes produce multiple flowerclusters that are accentuated bydark green, glossy leaves.
Apr
Cuttings are planted in either soil-based or soilless root media. The rootmedium should have excellent drainage and aeration. The pH for soil-basedmixes should be between 6.0 and 6.5, and the pH for soilless mixes from 5.5to 6.0. Kalanchoes typically are produced in 4- or 6-inch azalea pots.
Kalanchoes should be grown at night temperatures of 650 to 68°F; thc daytemperature should be 75° to 78°F. The root medium should be kept consis-tently moist for the first two weeks after transplanting so that the cuttingswill get established rapidly. Then you will find that this crop does not haveas high a water requirement as most other potted crops. Once established, thecrop should be watered only when the surface of the root medium dries out.Avoid overhead hose watering, since this can cause stem and crown rots andpowdery mildew. Spaghetti tube and capillary mat systems are recommended.
Kalanchoes should be on a constant feed program with respect to nutri-
tion. With less frequent irrigations, fertilizer concentration must be increasedto make up for this. Apply 300 to 400 ppm of both nitrogen and potassiumuntil one week before the start of long nights. After that, apply 150 to 200
ppm of both of these elements. Reducing the amount of fertilizer duringflower bud formation results in more flowers per plant.
For kala.ichoes grown in 4-inch or smaller pots, pinching is generally notneeded to produce a full-looking plant. For pots 5 inches and larger, if needed,pinch the cuttings to fill out the pot. Make a soft pinch, removing the top one-half inch of the stem two to three weeks after potting.
Kalanchoes, like chrysanthemums, are long-night plants with respect tophotoperiod and flowering. Kala.whoes need at least 13 hours of darkness anight, with 14 or 15 hours preferred. Long nights should be implemented untilflower buds show color. Photoperiodic black cloth is usually used from March
1 until October. Missing any long nights will delay the crop. Scheduling ofthis crop is also similar to chrysanthemums in that the crop is first given aperiod of short nights so it can attain sufficient height. Then, long nights areapplied to bring the crop into bloom. Schedules are available from industryliterature and suppliers of kalanchoe cuttings.
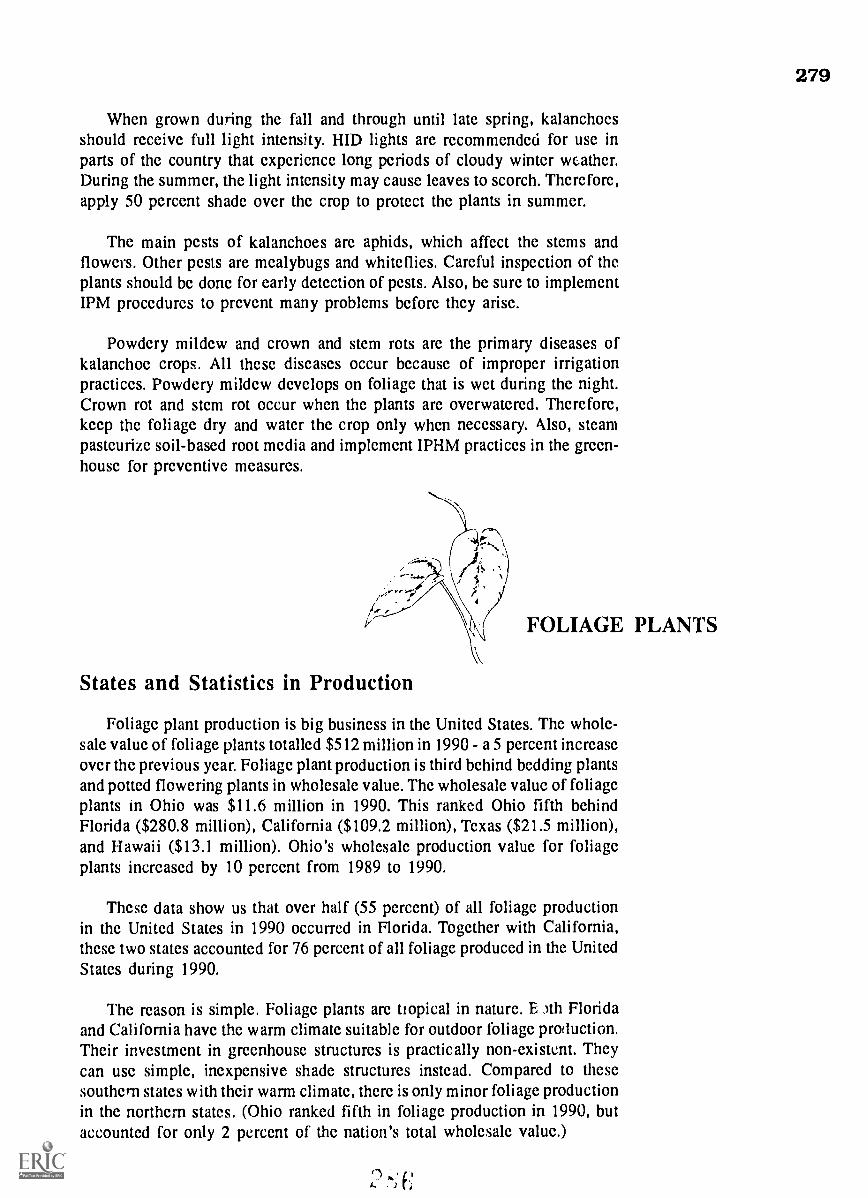
279
When grown during the fall and through until late spring, kalanchoesshould receive full light intensity. HID lights are recommended for use inparts of the country that experience long periods of cloudy winter wcather.During the summer, the light intensity may cause leaves to scorch. Therefore,apply 50 percent shade over the crop to protect the plants in summer.
The main pests of kalanchoes are aphids, which affect the stems andflowers. Other pests are mealybugs and whiteflies. Careful inspection of theplants should be done for early detection of pests. Also, be sure to implementIPM procedures to prevent many problems before they arise.
Powdery mildew and crown and stem rots are the primary diseases ofkalanchoe crops. All these diseases occur because of improper irrigationpractices. Powdery mildew develops on foliage that is wet during the night.Crown rot and stem rot occur when the plants are overwatered. Therefore,keep the foliage dry and water the crop only when necessary. Also, steampasteurize soil-based root media and implement IPHM practices in the green-house for preventive measures.
States and Statistics in Production
FOLIAGE PLANTS
Foliage plant production is big business in the United States. The whole-sale value of foliage plants totalled $512 million in 1990 - a 5 percent increaseover the previous year. Foliage plant production is third behind bedding plantsand potted flowering plants in wholesale value. The wholesale value of foliageplants in Ohio was $11.6 million in 1990. This ranked Ohio fifth behindFlorida ($280.8 million), California ($109.2 million), Texas ($21.5 million),and Hawaii ($13.1 million). Ohio's wholesale production value for foliageplants increased by 10 percent from 1989 to 1990.
These data show us that over half (55 percent) of all foliage productionin the United States in 1990 occurred in Florida. Together with California,these two states accounted for 76 percent of all foliage produced in the UnitedStates during 1990.
The reason is simple. Foliage plants are tropical in nature. Elth Floridaand California have the warm climate suitable for outdoor foliage production.Their investment in greenhouse structures is practically non-existent. Theycan use simple, inexpensive shade structures instead. Compared to thesesouthern states with their warm climate, there is only minor foliage productionin the northern states. (Ohio ranked fifth in foliage production in 1990, butaccounted for only 2 percent of the nation's total wholesale value.)
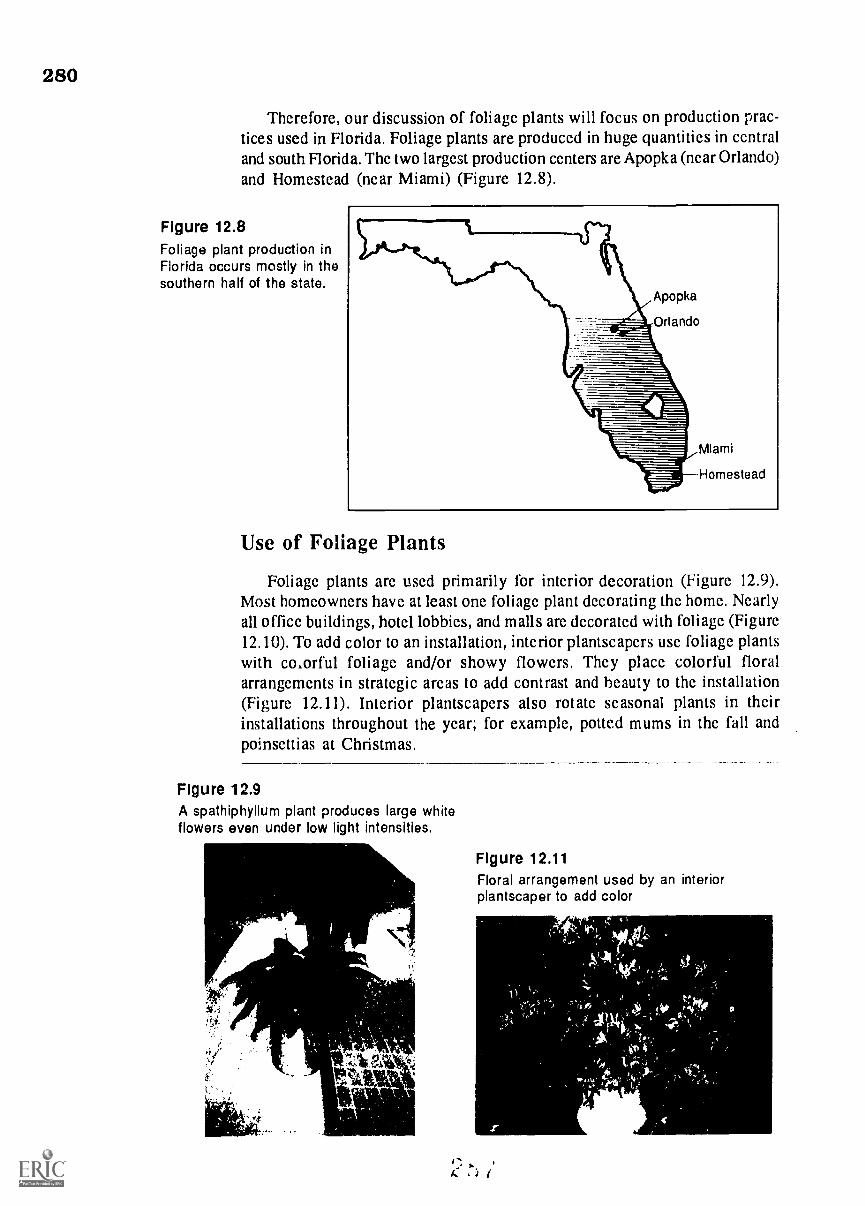
280
Thcrefore, our discussion of foliagc plants will focus on production prac-tices used in Florida. Foliage plants are produced in huge quantities in centraland south Florida. Thc two largcst production ccnters are Apopka (ncar Orlando)and Homcstcad (ncar Miami) (Figure 12.8).
Figure 12.8Foliage plant production inFlorida occurs mostly in thesouthern half of the state.
Use of Foliage Plants
Foliage plants arc used primarily for intcrior decoration (Figure 12.9).Most homeowners havc at least onc foliagc plant decorating thc homc. Ncarlyall officc buildings, hotcl lobbics, and malls arc dccoratcd with foliagc (Figurc12.10). To add color to an installation, intcrior plantscapers usc foliagc plantswith coxrful foliagc and/or showy flowers. Thcy placc colorful floralarrangcmcnts in stratcgic arcas to add contrast and beauty to thc installation(Figure 12.11). Intcrior plantscapers also rotatc scasonal plants in thcirinstallations throughout the year; for examplc, potted mums in thc fall andpoinscttias at Christmas.
Figure 12.9A spathiphyllum plant produces large whiteflowers even under low light intensities.
Figure 12.11Floral arrangement used by an interiorplantscaper to add color
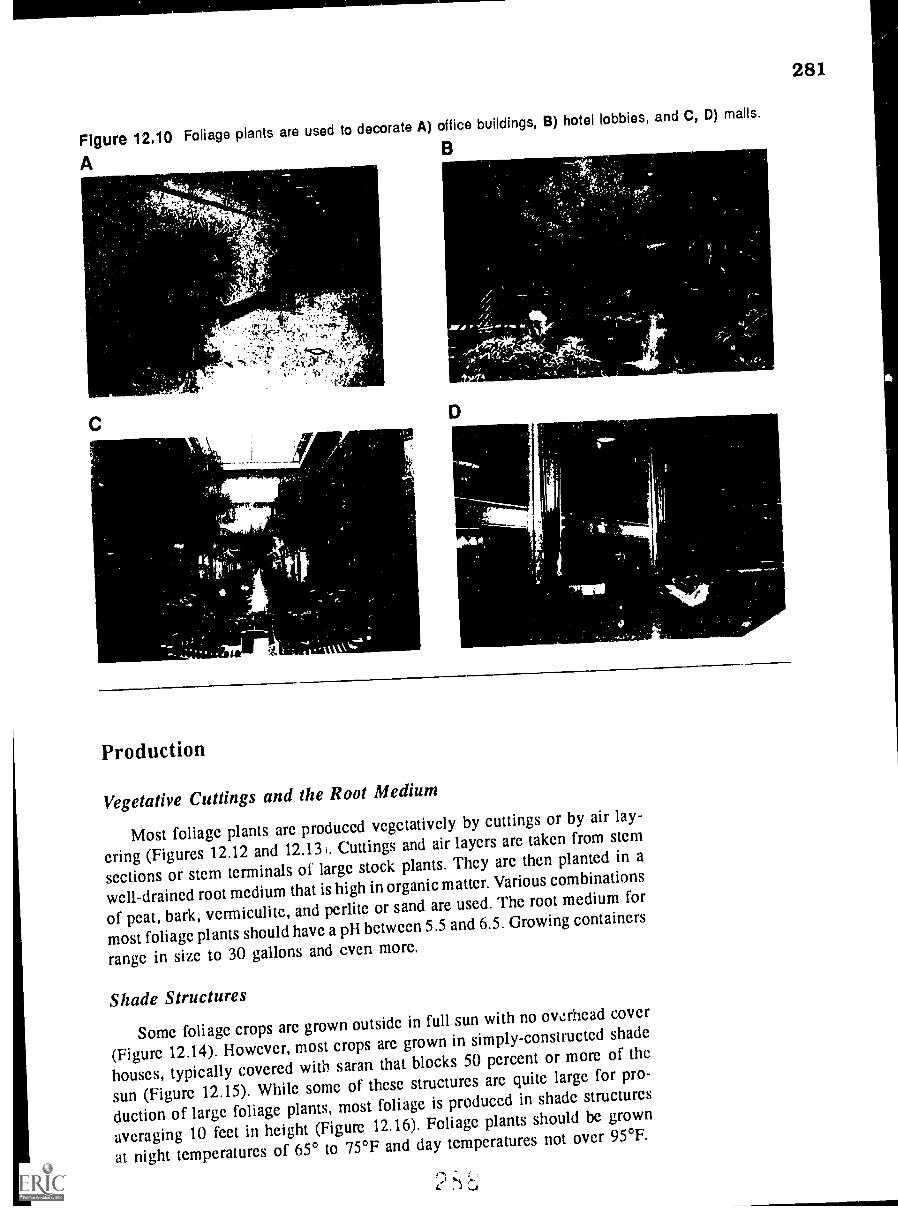
Figure 12.10 Foliage plants are used to decorate A) office buildings, B) hotel lobbies, and C, D) malls.
A
-1410-
. `41. ' L
it
Production
Vegetative Cuttings and the Root Medium
Most foliage plants arc produccd vegetatively by cuttings or by air lay-
ering (Figures 12.12 and 12.131. Cuttings and air layers are takcn from stcm
sections or stcm terminals of large stock plants. They arc then planted in a
well-drained root medium that is high in organic mattcr. Various combinations
of peat, bark, vermiculite, and perlite or sand are used. Thc root medium for
most foliage plants should have a pH between 5.5 and 6.5. Growing containers
range in size to 30 gallons and even more.
Shade Structures
Some foliage crops arc grown outsidc in full sun with no ovorhead cover
(Figure 12.14). However, most crops arc grown in simply-constructed shade
houses, typically covered with saran that blocks 50 percent or morc of the
sun (Figure 12.15). While some of these structures arc quite large for pro-
duction of large foliage plants, most foliage is produced in shade structures
averaging 10 feet in height (Figure 12.16). Foliage plants should bc grown
at night temperatures of 65° to 75°F and day temperatures not over 95°F.
I N.4i
281
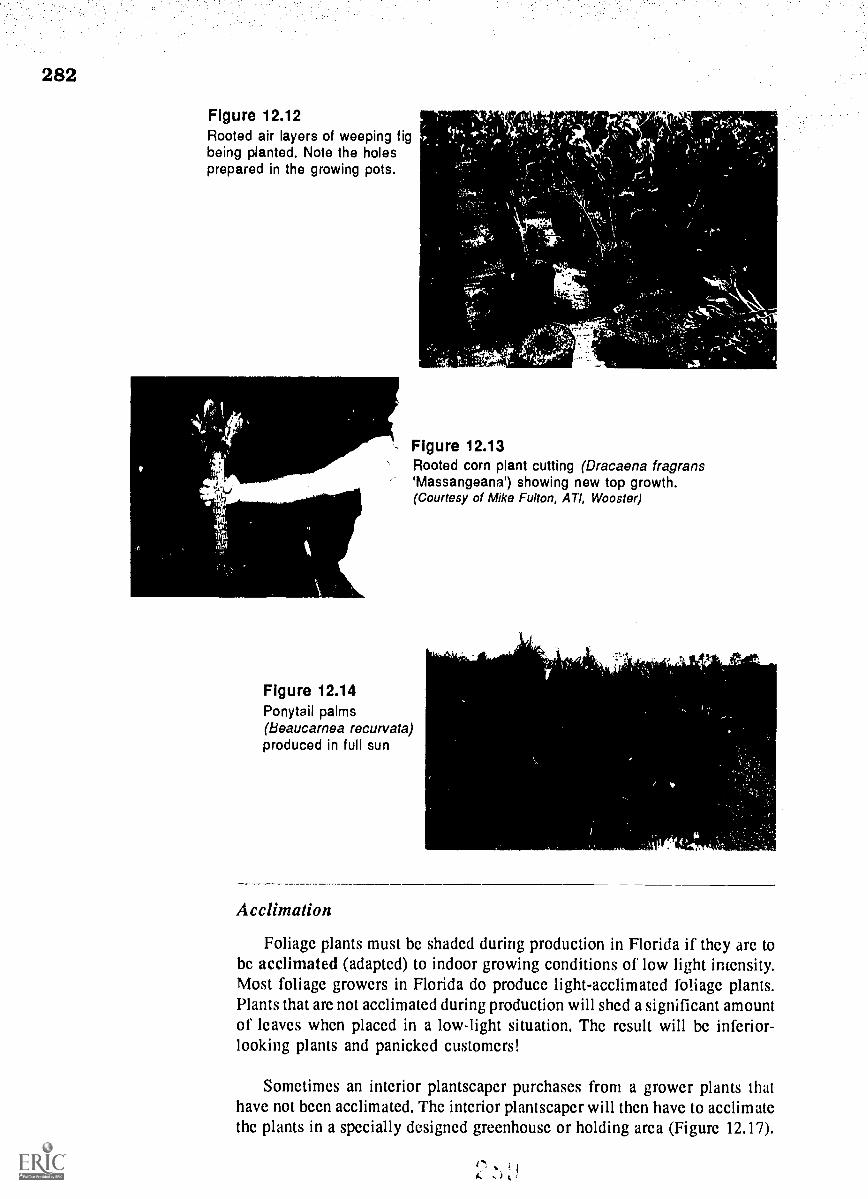
282
Figure 12.12Rooted air layers of weeping figbeing planted. Note the holesprepared in the growing pots.
;4..
- Figure 12.13Rooted corn plant cutting (Dracaena fragranssMassangeanas) showing new top growth.(Courtesy of Mike Fulton, ATI, Wooster)
Figure 12.14Ponytail palms(Beaucarnea recurvata)produced in full sun
h s
Acclimation
Foliage plants must be shaded during production in Florida if they are tobe acclimated (adapted) to indoor growing conditions of low light intensity.Most foliage growers in Florida do produce light-acclimated foliage plants.Plants that are not acclimated during production will shed a significant amountof leaves when placed in a low-light situation, The result will be inferior-looking plants and panicked customers!
Sometimes an interior plantscaper purchases from a grower plants thathave not been acclimated, The interior plantscaper will then have to acclimatethe plants in a specially designed greenhouse or holding area (Figure 12.17).
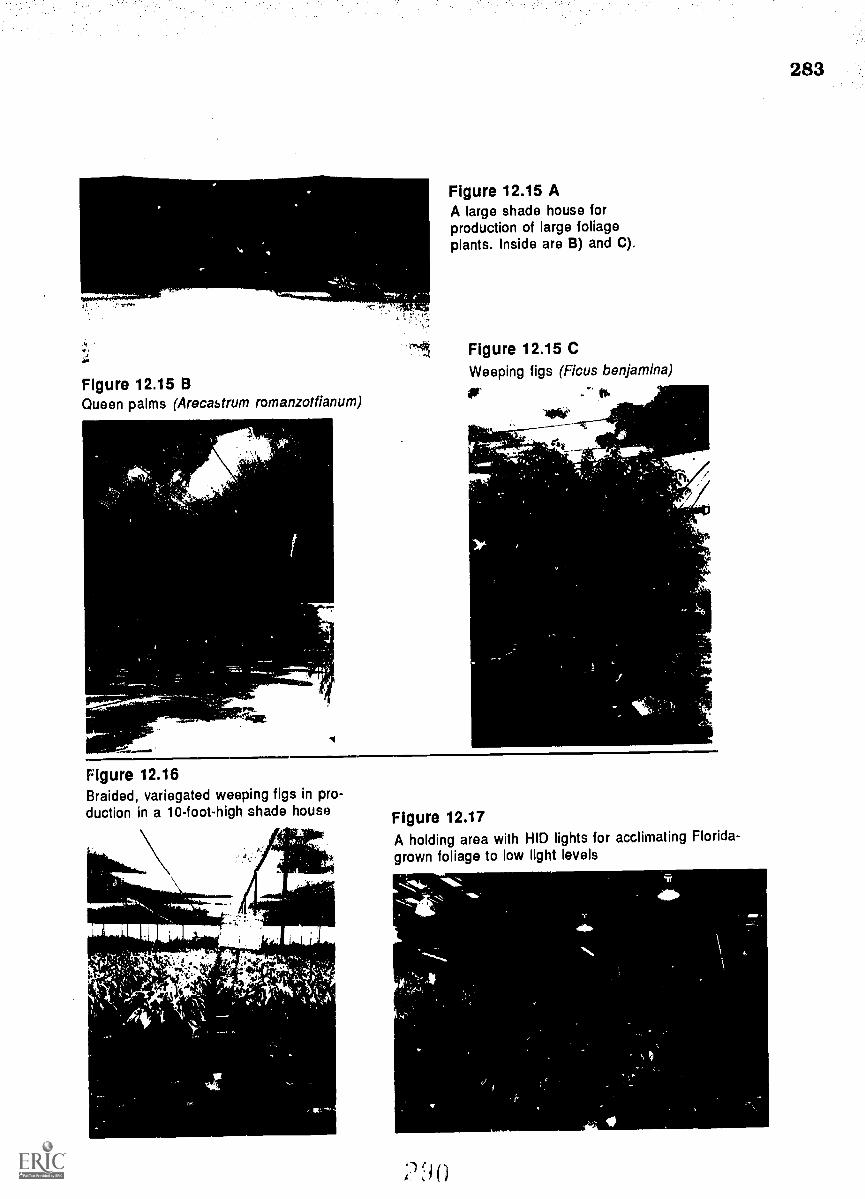
Figure 12.15 BQueen palms (Arecastrum romanzotfianum)
-...
Figure 12.15 AA large shade house forproduction of large foliageplants. Inside are B) and C).
(1 Figure 12.15 CWeeping figs (Ficus benjamina)
to.
1.6vN
_
VA
Figure 12.16Braided, variegated weeping figs in pro-duction in a 10-foot-high shade house Figure 12.17
A holding area with HID lights for acclimating Florida-grown foliage to low light levels
;71
283
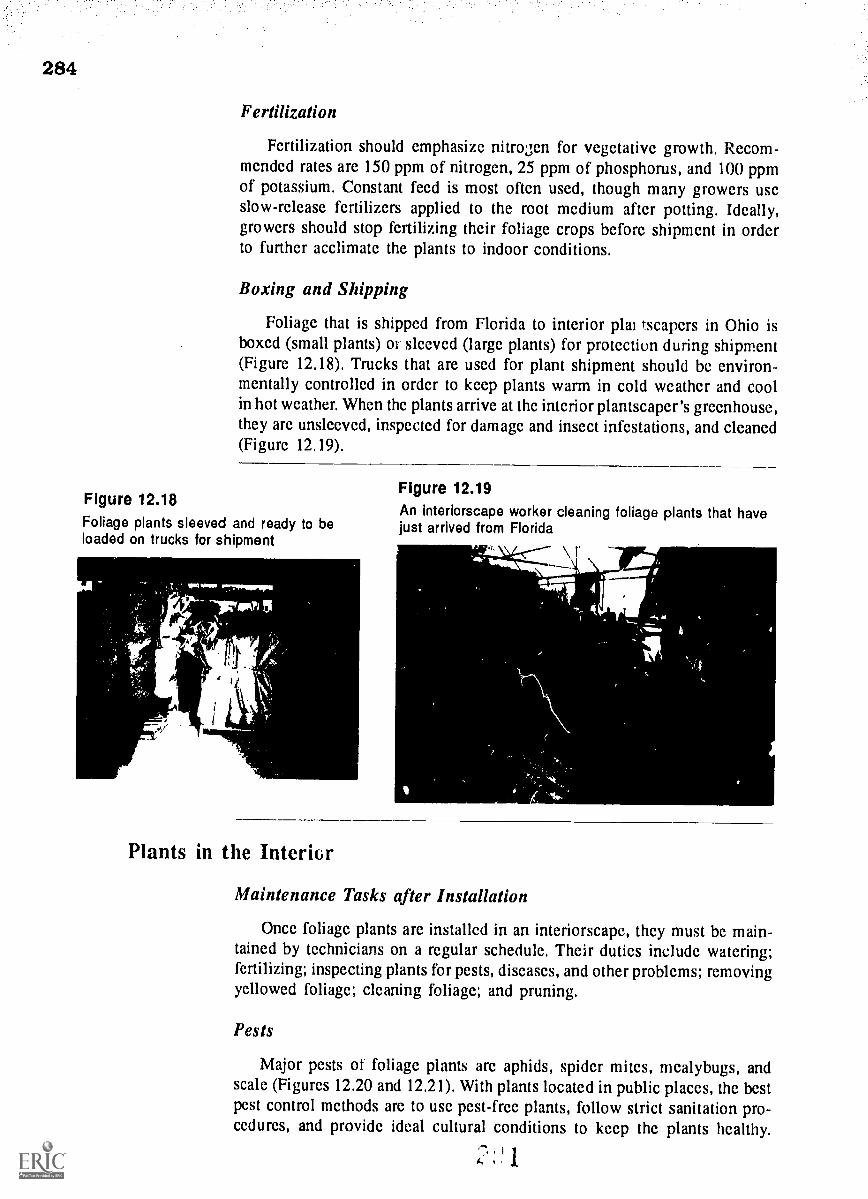
284
Fertilization
Fertilization should emphasize nitrogen for vegetative growth. Recom-mended rates arc 150 ppm of nitrogen, 25 ppm of phosphorus, and 100 ppmof potassium. Constant feed is most often used, though many growers useslow-release fertilizers applied to the root medium after potting. Ideally,growers should stop fertilizing their foliage crops before shipment in orderto further acclimate the plants to indoor conditions.
Boxing and Shipping
Foliage that is shipped from Florida to interior plai tscapers in Ohio isboxed (small plants) or sleeved (large plants) for protection during shipment(Figure 12.18). Trucks that are used for plant shipment should be environ-mentally controlled in order to keep plants warm in cold weather and coolin hot weather. When the plants arrive at the interior plantscaper's greenhouse,they arc unsleeved, inspected for damage and insect infestations, and cleaned(Figure 12.19).
Figure 12.18Foliage plants sleeved and ready to beloaded on trucks for shipment
Or.2.
Figure 12.19An interiorscape worker cleaning foliage plants that havejust arrived from Florida
4 1111F--
A
Plants in the Interior
Maintenance Tasks after Installation
Once foliage plants arc installed in an interiorscape, they must be main-tained by technicians on a regular schedule. Their duties include watering;fertilizing; inspecting plants for pests, diseases, and other problems; removingyellowed foliage; cleaning foliage; and pruning.
Pests
Major pests ot foliage plants arc aphids, spider mites, mealybugs, andscale (Figures 12.20 and 12.21). With plants located in public places, the bestpest control methods arc to use pest-free plants, follow strict sanitation pro-cedures, and provide ideal cultural conditions to keep the plants healthy.
A,
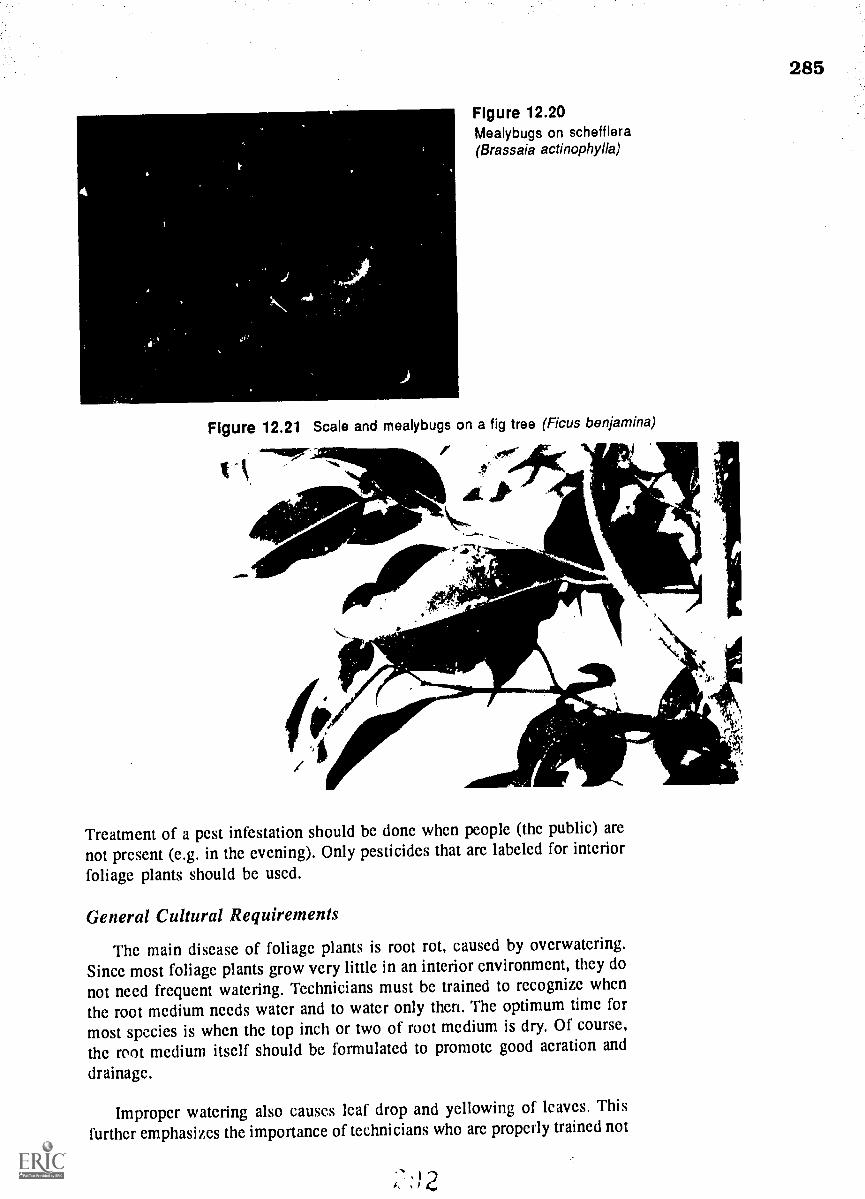
285
Figure 12.20Mealybugs on schefflera(Brassaia actinophylla)
Figure 12.21 Scale and mealybugs on a fig tree (Ficus benjamina)
.7i1(
'
1
Treatment of a pest infestation should be done when people (the public) are
not present (e.g. in the evening). Only pesticides that are labeled for interiorfoliage plants should be used.
General Cultural Requirements
The main disease of foliage plants is root rot, caused by overwatering.
Since most foliage plants grow very little in an interior environment, they do
not need frequent watering. Technicians must be trained to recognize whenthe root medium needs water and to water only then. The optimum time for
most species is when the top inch or two of root medium is dry. Of course,
the root medium itself should be formulated to promote good aeration and
drainage.
Improper watering also causes leaf drop and yellowing of leaves. Thisfurther emphasizes the importance of technicians who are properly trained not
,12, 1
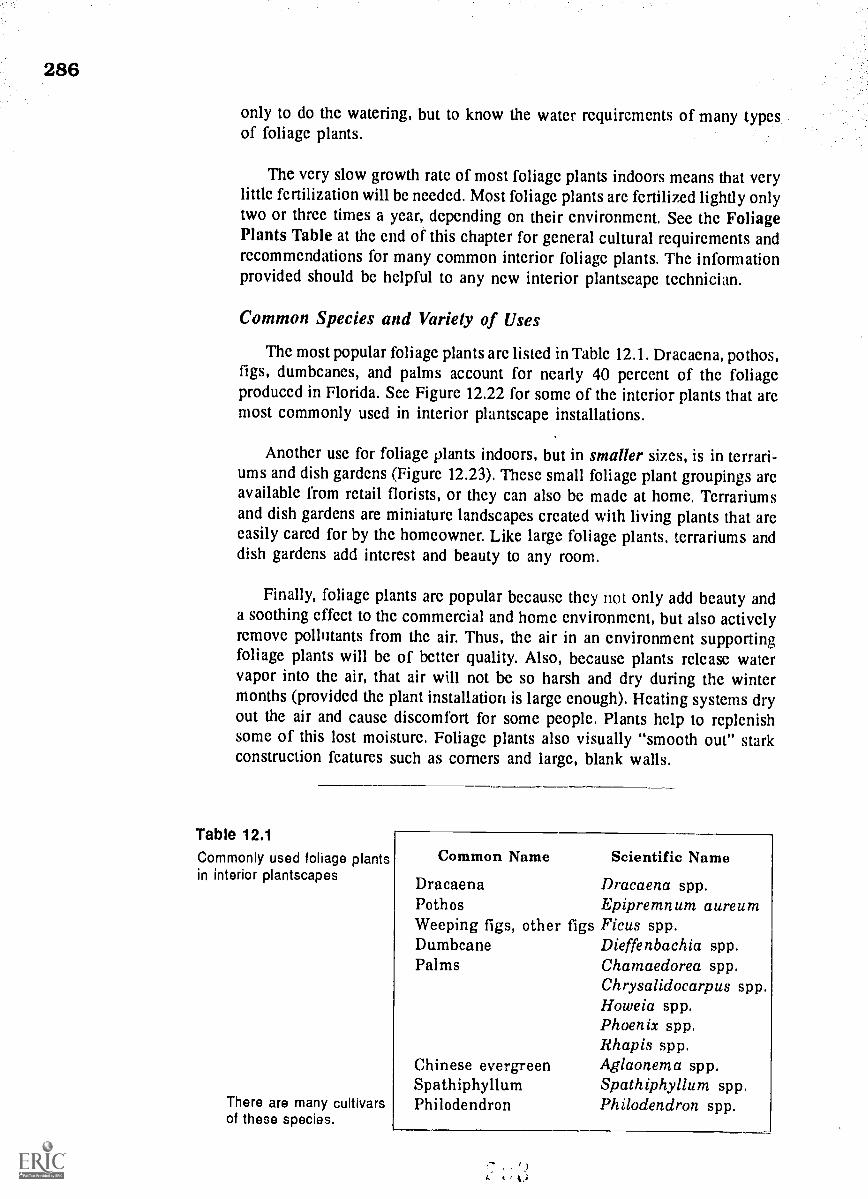
286
only to do the watering, but to know the water requirements of many typesof foliage plants.
The very slow growth rate of most foliage plants indoors means that verylittle fertilization will be needed. Most foliage plants are fertilized lightly onlytwo or three times a year, depending on their environment. See the FoliagePlants Table at the end of this chapter for general cultural requirements andrecommendations for many common interior foliage plants. The informationprovided should be helpful to any ncw interior plantscape tcchnician.
Common Species and Variety of Uses
Thc most popular foliage plants are listed in Table 12.1. Dracaena, pothos,figs, dumbcancs, and palms account for nearly 40 percent of the foliageproduced in Florida. See Figure 12.22 for some of the interior plants that aremost commonly used in interior plantscape installations.
Another use for foliage plants indoors, but in smaller sizes, is in terrari-ums and dish gardens (Figure 12.23). These small foliage plant groupings areavailable from retail florists, or they can also bc made at home. Terrariumsand dish gardens are miniature landscapes created with living plants that areeasily cared for by the homeowner. Like large foliage plants, terrariums anddish gardens add interest and beauty to any room.
Finally, foliage plants are popular because thcy not only add bcauty anda soothing effect to the commercial and home environment, but also activelyremove pollutants from the air. Thus, the air in an environment supportingfoliage plants will be of better quality. Also, because plants release watervapor into the air, that air will not be so harsh and dry during the wintermonths (provided the plant installation is large enough). Heating systems dryout the air and causc discomfort for some people. Plants help to replenishsome of this lost moisture. Foliage plants also visually "smooth out" starkconstruction features such as corners and large, blank walls.
Table 12.1Commonly used foliage plantsin interior plantscapes
There are many cultivarsof these species.
Common Name Scientific Name
Dracaena Dracaena spp.Pathos Epipremnum aureumWeeping figs, other figs Ficus spp.Dumbcane Dieffenbachia spp.Palms Chamaedorea spp.
Chrysalidocarpus spp.Howe ia spp.Phoenix spp.Rhapis spp.
Chinese evergreen Aglaonema spp.Spathiphyllum Spathiphyllum spp.Philodendron Philodendron spp.
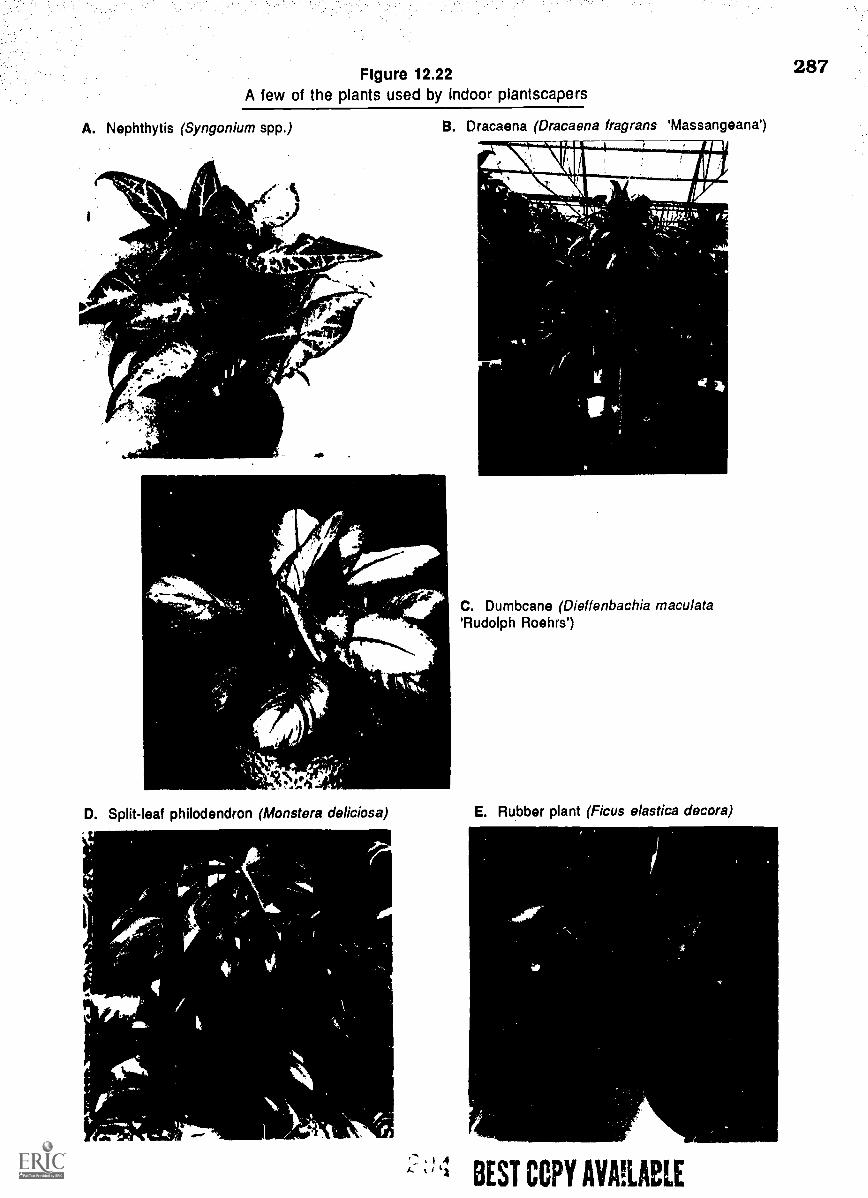
Figure 12.22A few of the plants used by Indoor plantscapers
A. Nephthytis (Syngonium spp.)
4k.c,e(
.40tra.
Al*to
.60
411.
B. Dracaena (Dracaena fragrans 'Massangeana')
C. Dumbcane (Dieffenbachia maculata'Rudolph Roehrs')
D. Split-leaf philodendron (Monstera deliciosa) E. Rubber plant (Ficus elastica decora)
1,4
BEST COPY MIME
287
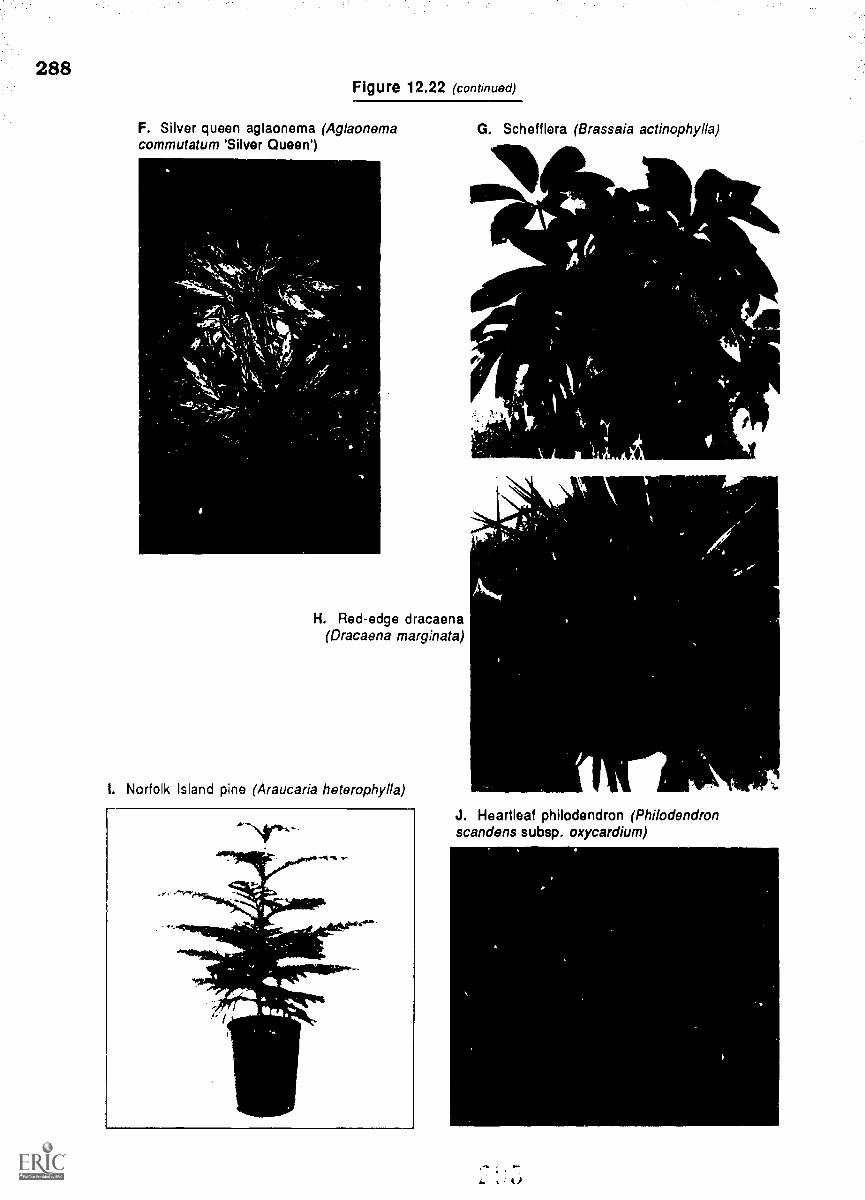
288Figure 12.22 (continued)
F. Silver queen aglaonema (Aglaonemacommutatum 'Silver Queen')
far.
H. Red-edge dracaena(Dracaena marginata)
Norfolk Island pine (Araucaria heterophylla)
G. Schaff lera (Brassaia actinophylla)
ft
J. Heartleaf philodendron (Philodendmnscandens subsp. oxycardium)
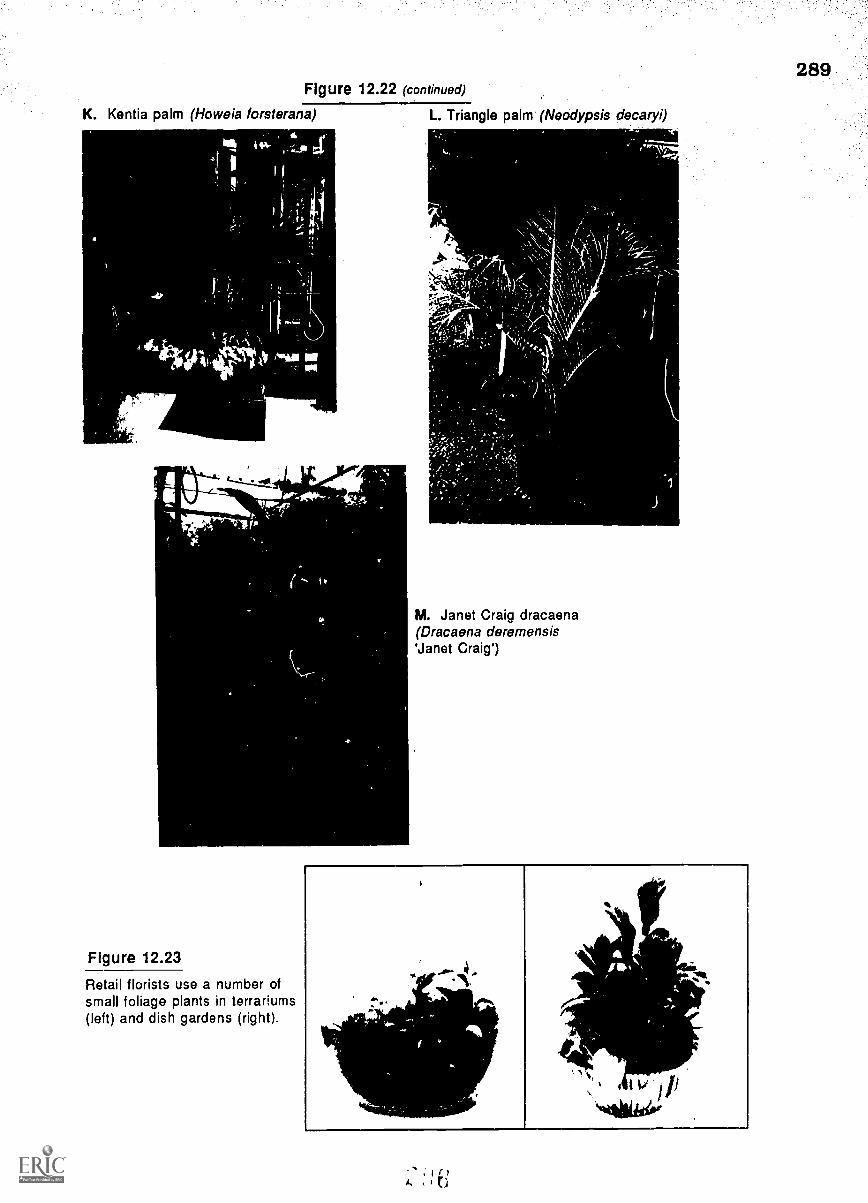
Figure 12.22 (continued)
K. Kentia palm (Howeia forsterana)
Figure 12.23
Retail florists use a number ofsmall foliage plants in terrariums(left) and dish gardens (right).
L. Triangle palm (Neodypsis decaryi)
,041
M. Janet Craig dracaena(Dracaena deremensis'Janet Craig')
289
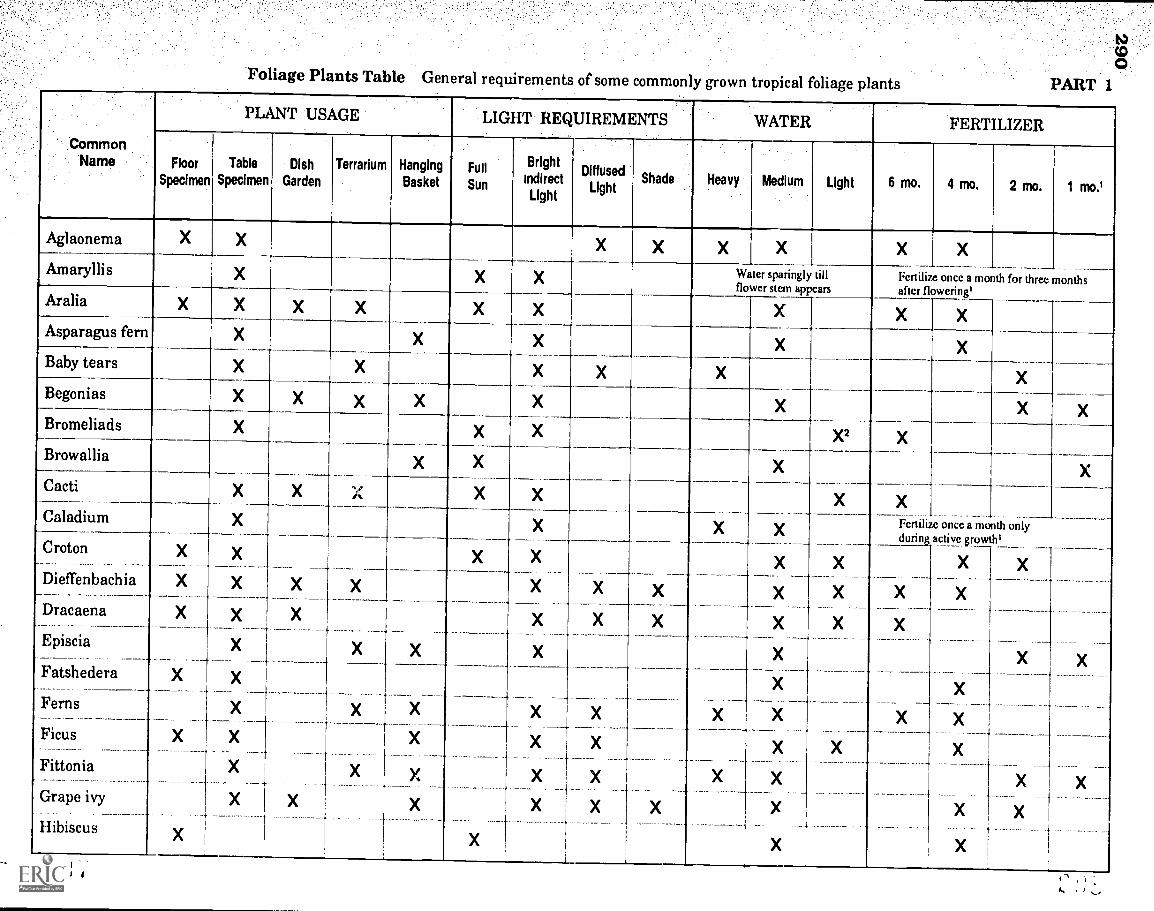
Foliage Plants Table General requirements of some commonly grown tropical foliage plants PART 1
CommonName
PLANT USAGE LIGHT REQUIREMENTS WATER FERTILIZER
FloorSpecimen
Table
SpecimenDish
GardenTerrarium Hanging
BasketFug
Sun
BrightindirectLight
DiffusedLight
Shade Heavy Medium Light 6 mO. 4 mo. 2 mo. 1 mo.,
Aglaonema X X X X X X XAm llisary X X X Water sparingly till
flower st appearsernFertilize once a mo th for three monthsafter fl wering'
_Aralia X X X X X X X X XAsparagus fern X X X X XBaby tears X X X X X XBegonias
_X X X X
_
X X
X2
X XBromeliads X X X XBrowallia _
X
X X X
X_
XCacti
.
Caladium_ X X X X X
once a monthactive growth'
X
X
X
X
X
X
X
X X
X
X
X X X
X
Fertilizedurin
X
X
only
X
X
I
X
X
Croton
Dieffenhachia
Dracaena
Episcia
Fatshedera
X
X
X X
X_
X
X
X
X
X
X
X
_
X
X
X
X
X 1
X
X
1
t
1X
_
----1
X
X
XX
X
X
X
X
X
X
_X
X
X
X
, _
_
X
X
X
X
X
Ferns
Ficus.
Fittonia
Grape ivy
1 X
X--X
Xt
X X
-
X_ X
X
X
X
X
Hibiscus X
I
4

Hoya X X
X
X _x
X X X
XX Xx X xIvy X X
Jade plant X
xX X x X x x X
X
XXMoses-in-the-cradle
X
XNephthytis
Norfolk Islandpine
1-X X X X X X
XXX
X
X
1
X
X
X
X
X
X X XX X
X
X
X
Parlor palm X X X IX
X
x _
X
X -1
X
1
X
X
X
X
XXX
xX
Pellionia _X
X
X
X
X
X
X
X
X
_ X
X
X
X
X
X
X
XPeperomia
Philodendron
X X
X
X
X
X
X
X
X---i
1 X
x
X
X
X
X
X
X
X
xX
X
X
X
X
X
X
X
Pilea
X
Pothos x x
X
X
X
X
X
X
X
X
X
_
X
X
. .
Prayer plant X.1
X X
X
X
X
Sansevieria tX
X
X
1
X
X
1 X ---1
X
X X_
X
X
1
X
X
.
Scheffiera
Shrimp plant
Spider plant
Swedish ivy
Velvet plant
X
X
X
X
X
X
X
X
XVinca vine
Waffl plant
Wandering Jew
X
X
-
1
1 X1
X
X
X
X
X XZebra plant X
I Omit during midwinter. 2 Bromeliad "cup" must be kept filled with water at all times; medium should be dry. Part 2 follows on the next page.
ts3t.,
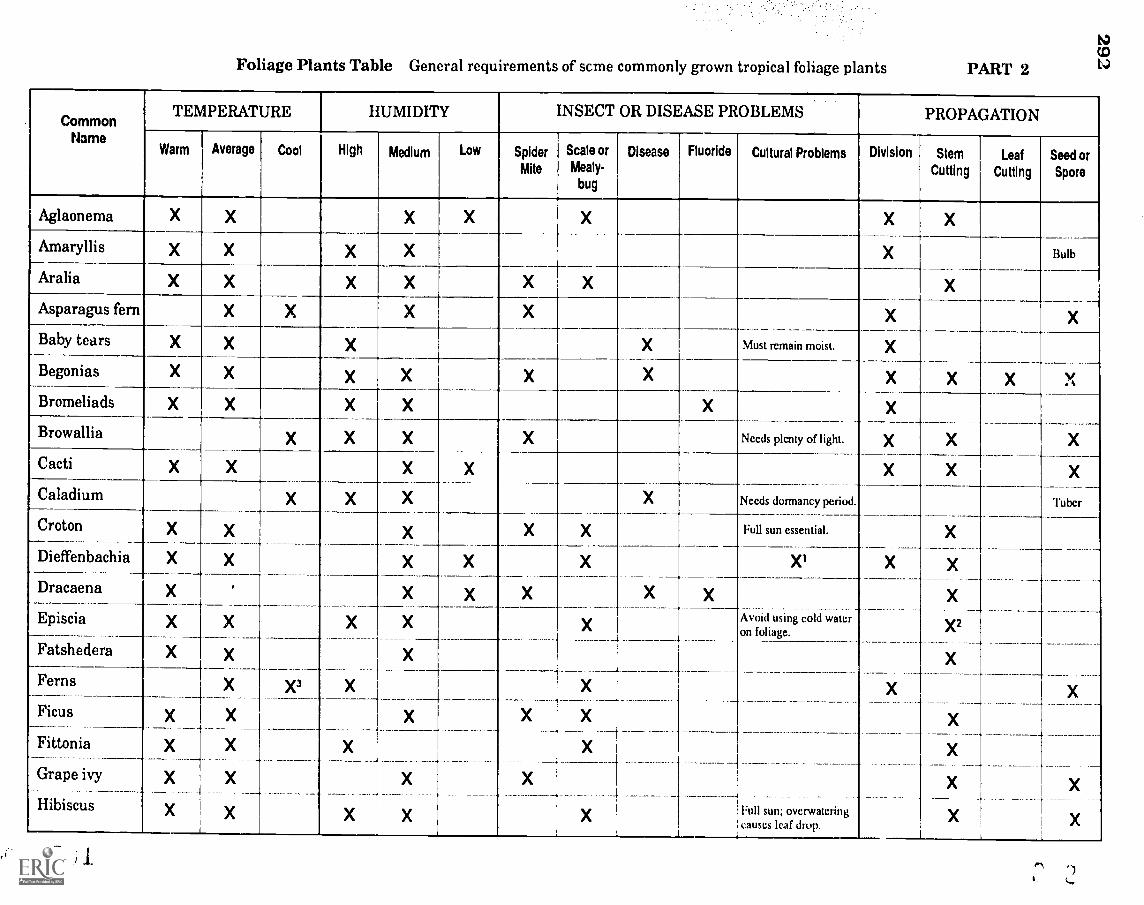
Foliage Plants Table General requirements of scme commonly grown tropical foliage plants PART 2CDL.)
CommonMame
TEMPERATURE IIUMIDITY INSECT OR DISEASE PROBLEMS PROPAGATION
Warm Average Cool High Medium Low Spiderme
Scale or
Mealy-
bug
Disease Fluoride Cultural Problems Division StemCutting
Leaf
CuttingSeed orSpore
Aglaonema X X X X X X X
Amaryllis X X x X X
X
Bulb
Ara ha X X X X X X
Asparagus fern X X X X X
Baby tears X X X X Must remain moist. X
X X v. k
X
X
Begonias X X X X X X X
Bromeliads X X X X X X
Browallia x X X X Needs plenty of light. X X
X-1Cacti X X X X X
Caladium X X
X
X Needs dormancy period.
X
X
X
X
Tuber
Croton X
X
X X X
_. .
Full sun essential.
Dieffenbachia X X
X
X
X
X
X x
XI
Avoid using cold wateron foliage.
Dracaena X
X
X
X
X
X
Episcia
Fatshedera
X
X
X
X
X
X
X
X
X
X X2
X
X
X
X
Ferns
X
X
X
X
X
X
X3 X
Ficus X
X
X
Fittonia
Grape ivy
Hibiscus
X
X
X
X
Full sun; overwateringcauses leaf drop.
X
X

(page 2) PART 2
Hoya X X X X X X
Ivy X X X X X X
Jade plant X X3 X X X X XMoses-in-thecradle X X X X X
Nephthytis X X X X X X
Norfolk IslandX . x X X X X_pine
Parlor palm X X X X X
Pellionia X X X X X
Peperomia X X X X X
Philodendron X X X X X
Pi lea X X X X
Pothos X X X X X
Prayer plant X X X X X x X
San sevieria X X X X X X
Schell lera X X X X X X X
Shrimp plant X X X X X X
X X x x X2Spider plant
Sensitive tooverfertilization. X XSwedish ivy X X X X
X XX XVelvet plant----i
X
X SeAsonal availability. X XVinca vine X X X
Waffle plant X X X X X
X
_
X X X XWandering Jew X
X XWater carefully; needshumidity.
XZebra plant- -4
X X
1 Excessive leaf drop due to excess'vAwatevoxic effect from plant juices. 2 Cut off entire offset or runner. 3 Plants do not thrive at higher temperatures.
This table was developed by D.C. Kiplinger and A.W. Welch; additions by R. W. McMahon
294
This review is to help you check yourself on what you have learned about the production of severalminor potted crops, including foliage plants. If you need to refresh your mind on any of the followingquestions, refer to the page number given in parentheses.
1. Give the scientific name along with the common name of each flowering crop discussed inthis chapter. (pages 273-277)
2. Which crops discussed in tills chapter may be started from seed? (pages 273-275)
3. What is the recommended ppm of nitrogen to be supplied to an African violet crop on aconstant feed basis? (page 273)
4. Give the production time required for African violets started from leaf cuttings. (page 273)
5. Culturally, how are cineraria and cyclamen similar? (pages 274-275)
6. During w.tiat parts of the year are cineraria and cyclamen produced? (pages 274-275)
7. Outline the recommended nutritional program for cineraria. (page 274)
8. What effect does gibberellic acid have on cyclamen? (page 275)
9. From what structure do cyclamen produce leaves and flowers? (page 275)
10. What are the three types of holiday cacti? (page 276)
11. What is the phylloclade of a holiday cactus? (page 276)
12. How ar e. holiday cacti propagated? (page 276)
13. What do holiday cacti require in order to bloom? (page 277)
14. What are the major diseases of holiday cacti? (page 277)
15. By what method are kalanchoes propagated? (page 277)
16. What should the night temperature be for kalanchoes? (page 278)
17. At which concentration of nitrogen (in ppm) should kalanchoes be fertilized on a constantfeed basis? (page 278)
18. What is the photoperiodic requirement of kalanchoes with regard to flowering?(page 278)
19. What are the major diseases of kalanchoes? Identify the preventive measures to be taken forthese diseases. (page 279)
20. Where are most foliage plants produced in the United States? (page 279)
295Chapter 12 Review (continued)
21. What are the most common propagation methods of foliage plants? (page 281)
22. Why do foliage plants have to be acclimated before they are placed in a !iome oroffice building? (page 282)
23. Name two methods of fertilizer application for the production of foliage plants.(page 284)
24. How are foliage plants shipped from their production areas to Ohio? (page 284)
25. List the major pests and diseases of foliage plants. (pages 284-285)
26. Why are foliage plants fertilized very lightly once they are placed in an interiorenvironment? (page 286)
27. List the five most popular types of foliage plants. (page 286)
28. Large foliage plants are used in homes and public places. What are two different usesfor small foliage plants? (page 286)
29. What benefits do people obtain from having foliage plants in their homes and workenvironments? (page 286)

CHAPTER 13
CUT FLOWER PRODUCTION
Competencies for Chapter 13
As a result of studying this chapter, you should be able to do the following:1. Identify five common cut flower clops grown in the U.S.A.2. Give the scientific name of each of these cut flower plants.3. Name any cut flower crops in your state.4. Describe general cultural guidelines for cut flower crops.5. Describe the importance of support for many cut flower crops.6. Recognize the most common problems (diseases, pests, etc.) of each cut
flower crop studied.7. Describe post-harvest handling of cut flower crops.
Related Science Concepts
1. Describe and name different floret arrangemente 'n flowers.2. Examine plant development.3. Describe the effects of greenhouse environmental t...Jnditions on cut flower
growth and quality.4. Determine cultural needs of cut flower crops.5. Describe photoperiodic manipulation in relation to cut flower crops.6. Implement IPHM strategies.7. Implerr,mt IPM strategies.
Related Math Concepts
1. Apply basic operations to whole numbers, decimals, and fractions asthey relate to cut flower crops.
2. Apply basic operations to ratios and percents as they relate to cut flowercrops.
3. Apply mathematical concepts and operations to cut flower crops.4. Read, interpret, and construct charts, graphs, and tables related to cut
flower crops.5. Read thermometers.6. Set thermostats.
Terms to Know
calyxcymeethylenerhizomesepals
297
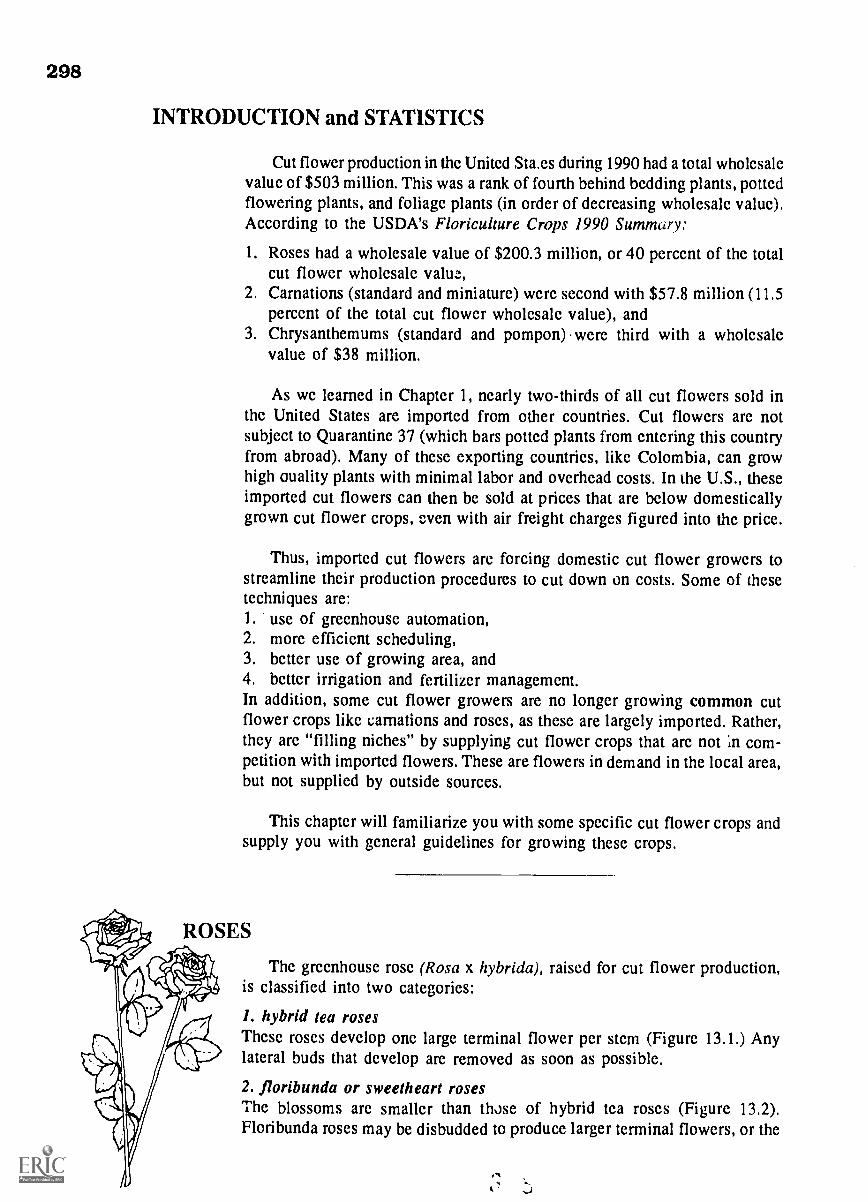
298
INTRODUCTION and STATISTICS
Cut flower production in the United Sta,es during 1990 had a total wholesalevalue of $503 million. This was a rank of fourth behind bedding plants, pottedflowering plants, and foliage plants (in order of decreasing wholesale value).According to the USDA's Floriculture Crops 1990 Summary:
1. Roses had a wholesale value of $200.3 million, or 40 percent of the totalcut flower wholesale value,
2. Carnations (standard and miniature) were second with $57.8 million (11.5percent of the total cut flower wholesale value), and
3. Chrysanthemums (standard and pompon) were third with a wholesalevalue of $38 million.
As we learned in Chapter 1, nearly two-thirds of all cut flowers sold inthe United States are imported from other countries. Cut flowers arc notsubject to Quarantine 37 (which bars potted plants from entering this countryfrom abroad). Many of these exporting countries, like Colombia, can growhigh auality plants with minimal labor and overhead costs. In the U.S., theseimported cut flowers can then be sold at prices that are below domesticallygrown cut flower crops, even with air freight charges figured into the price.
Thus, imported cut flowers are forcing domestic cut flower growers tostreamline their production procedures to cut down on costs. Some of thesetechniques are:1. use of greenhouse automation,2. more efficient scheduling,3. better use of growing area, and4. better irrigation and fertilizer management.In addition, some cut flower growers are no longer growing common cutflower crops like carnations and roses, as these are largely imported. Rather,they arc "filling niches" by supplying cut flower crops that arc not n com-petition with imported flowers. These are flowers in demand in the local area,but not supplied by outside sources.
This chapter will familiarize you with some specific cut flower crops andsupply you with general guidelines for growing these crops.
ROSES
The greenhouse rose (Rosa x hybrida), raised for cut flower production,is classified into two categories:
1. hybrid tea rosesThese roses develop one large terminal flower per stem (Figure 13.1.) Anylateral buds that develop are removed as soon as possible.
2. floribunda or sweetheart rosesThe blossoms arc smaller than those of hybrid tea roses (Figure 13.2).Floribunda roses may be disbudded to produce larger terminal flowers, or the
Figure 13.1 Hybrid tea rose Figure 13.2 Floribunda or sweetheart rosewith lateral buds intact
lateral buds may be allowed to bloom. This will result in a spray of flowerson each stem.
According to the USDA's Floriculture CrG;.; 1990 Summary, 83 percentof all roses grown and sold in the United States during 1990 were hybrid tearoses. The remaining 17 percent were floribunda roses. The most popular rosecolors are red, followed by pink, yellow, and white cultiv ars.
Greenhouse roses are grown in ground benches which typically run thelength of the greenhouse. Rose growers frequently apply a mulch over theroot medium io conserve moisture and reduce soil coml. action. Rose plantsneed this cuhure because they are in production up to ten years before theyare replaced by a new crop. Most rose crops are irrigated by a system thatdoes not wet the foliage. A type of perimetersystem is most widely used.
Roses are extremely susceptible to pov, derymildew, a fungal disease that covers the leaveswith a white, powdery growth (Figure 13.3).Moisture on plants favors powdery mildew de-velopment. Red spider mites and aphids are thetwo most serious pests of cut rose crops.
Rose flowers are harvested when the petalsare just beginning to unfurl (Figure 13.4). Thisdegree of unfurling varies somewhat amongcultivars. Rose flowers are graded by the lengthof the stem, placed in a floral preservative solu-tion, and stored in a cooler until they are sold.
Figure 13.3 Powdery mildew on rose leaves
299
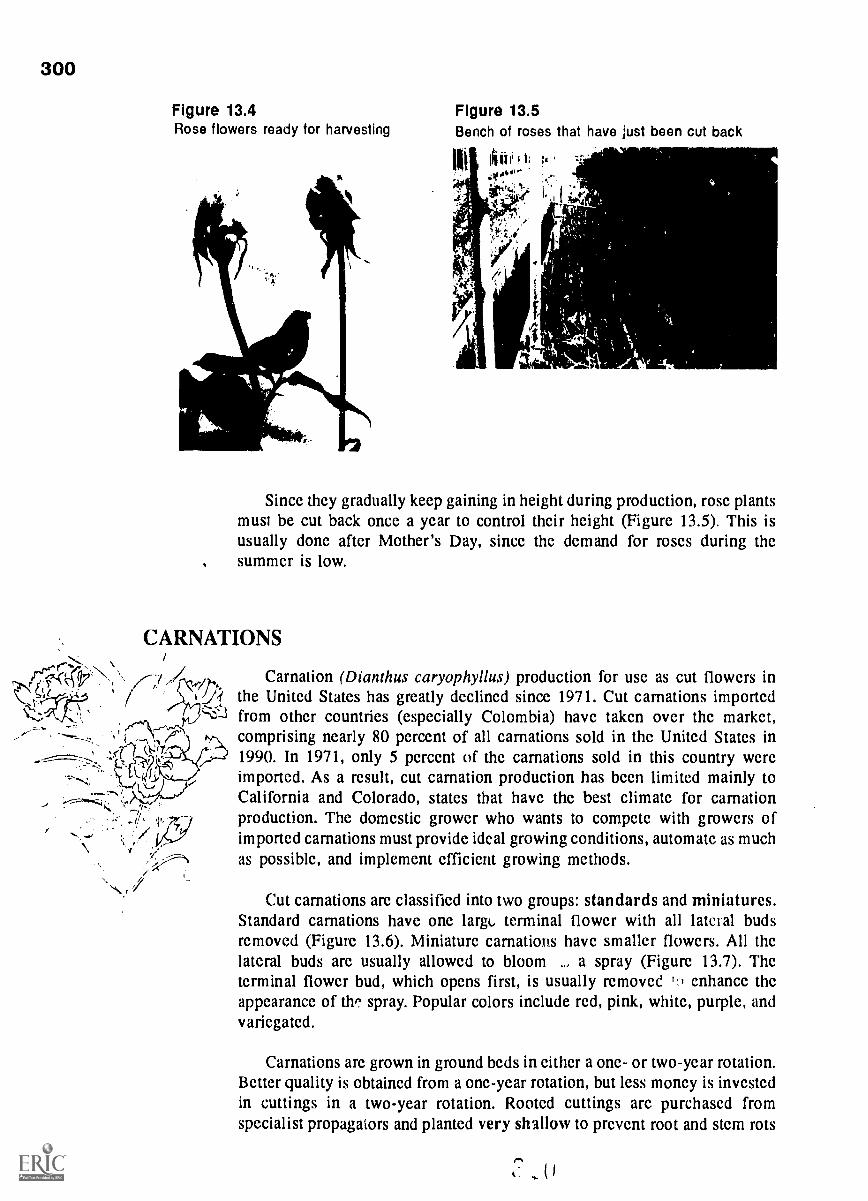
300
Figure 13.4 Figure 13.5Rose flowers ready tor harvesting Bench of roses that have just been cut back
Since they gradually keep gaining in height during production, rose plantsmust be cut back once a year to control their height (Figure 13.5). This isusually done aftcr Mother's Day, since the demand for roses during thesummer is low.
CARNATIONS
Carnation (Dianthus caryophyllus) production for use as cut flowers inthe United States has greatly declined since 1971. Cut carnations importedfrom other countries (especially Colombia) have takcn over thc market,comprising nearly 80 percent of all carnations sold in the United States in1990. In 1971, only 5 percent of the carnations sold in this country wereimported. As a result, cut carnation production has bccn limited mainly toCalifornia and Colorado, statcs that have the best climate for carnationproduction. The domestic grower who wants to compete with growers ofimported carnations must provide ideal growing conditions, automate as muchas possible, and implement efficient growing methods.
Cut carnations are classified into two groups: standards and miniatures.Standard carnations have one largL, terminal flower with all lateral budsremoved (Figure 13.6). Miniature carnations have smaller flowers. All thelateral buds are usually allowed to bloom .., a spray (Figure 13.7). Theterminal flower bud, which opens first, is usually removed ;!, enhance thcappearance of dr spray. Popular colors include red, pink, white, purple, andvariegated.
Carnations arc grown in ground beds in either a one- or two-ycar rotation.Better quality is obtained from a one-year rotation, but less moncy is investedin cuttings in a two-year rotation. Rooted cuttings are purchased fromspecialist propagators and planted very shallow to prevent root and stcm rots
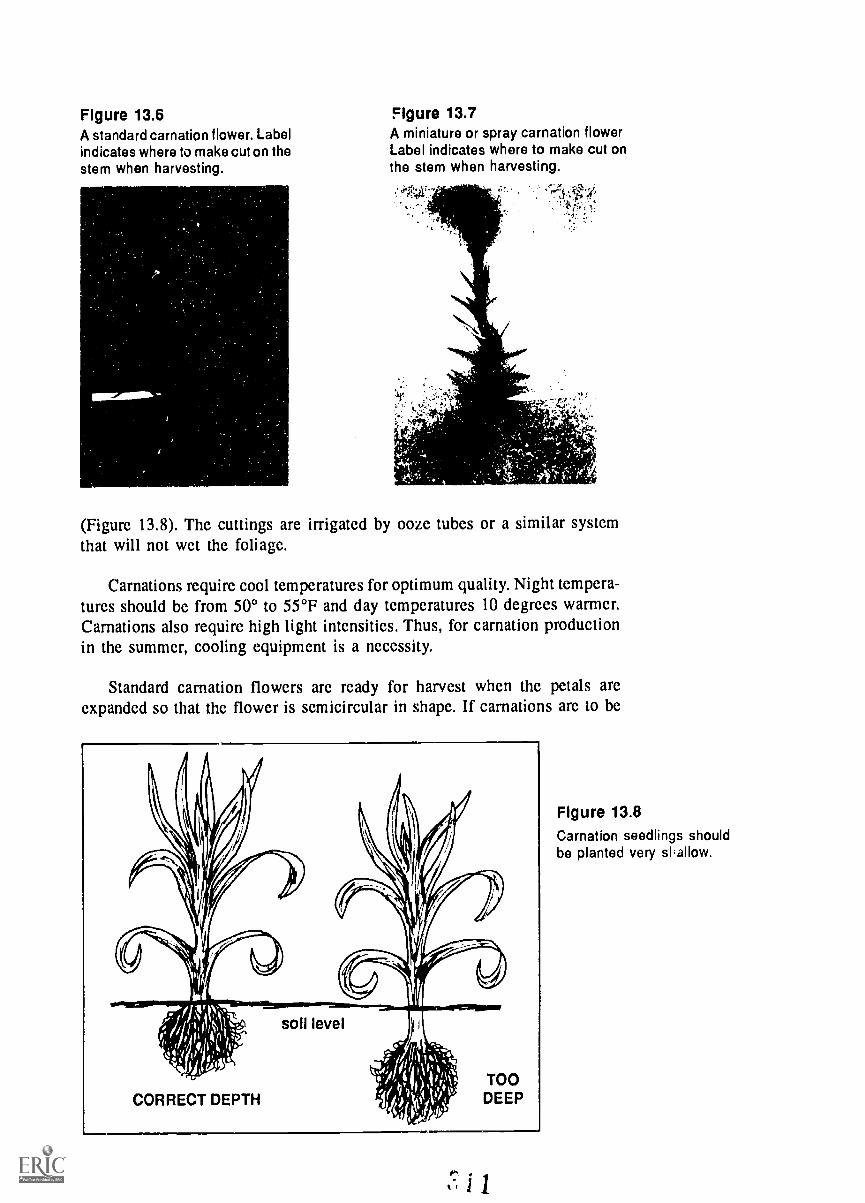
Figure 13.6A standard carnation flower. Labelindicates where to make cut on thestem when harvesting.
Figure 13.7A miniature or spray carnation flowerLabel indicates where to make cut onthe stem when harvesting.
(Figure 13.8). The cuttings are irrigated by ooze tubes or a similar systemthat will not wet the foliage.
Carnations require cool temperatures for optimum quality. Night tempera-tures should be from 500 to 55°F and day temperatures 10 degrees warmer.Carnations also require high light intensities. Thus, for carnation productionin the summer, cooling equipment is a necessity.
Standard carnation flowers are ready for harvest when the petals areexpanded so that the flower is semicircular in shape. If carnations are to be
soli level
CORRECT DEPTHTOODEEP
Figure 13.8Carnation seedlings shouldbe planted very sl.allow.
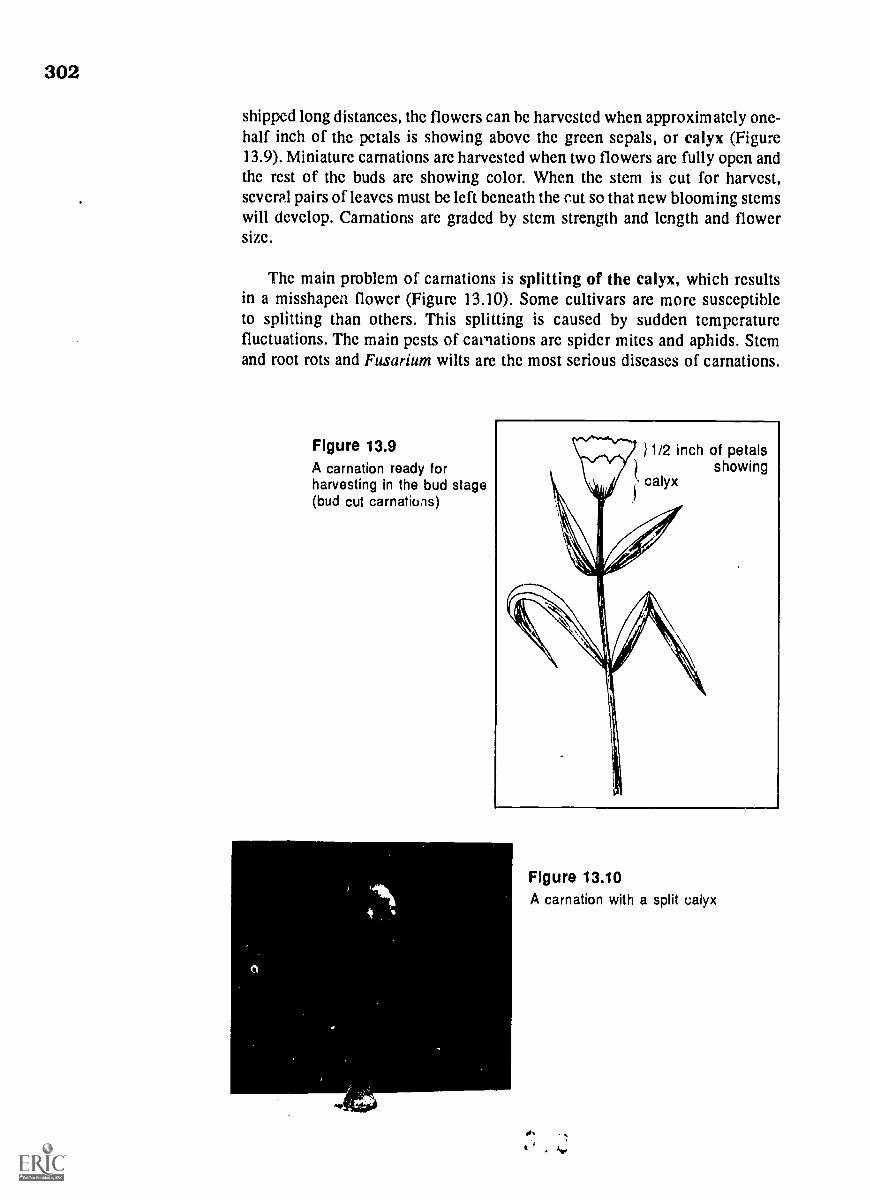
302
shipped long distances, the flowers can be harvested when approximately one-half inch of the petals is showing above the green sepals, or calyx (Figure13.9). Miniature carnations are harvested when two flowers are fully open andthe rest of the buds are showing color. When the stem is cut for harvest,several pairs of leaves must be left beneath the cut so that new blooming stemswill develop. Carnations are graded by stem strength and length and flowersize.
The main problem of carnations is splitting of the calyx, which resultsin a misshapen flower (Figure 13.10). Some cultivars are more susceptibleto splitting than others. This splitting is caused by sudden temperaturefluctuations. The main pests of cailations are spider mites and aphids. Stemand root rots and Fusarium wilts are the most serious diseases of carnations.
Figure 13.9A carnation ready forharvesting in the bud stage(bud cut carnations)
Figure 13.10A carnation with a split calyx
oht
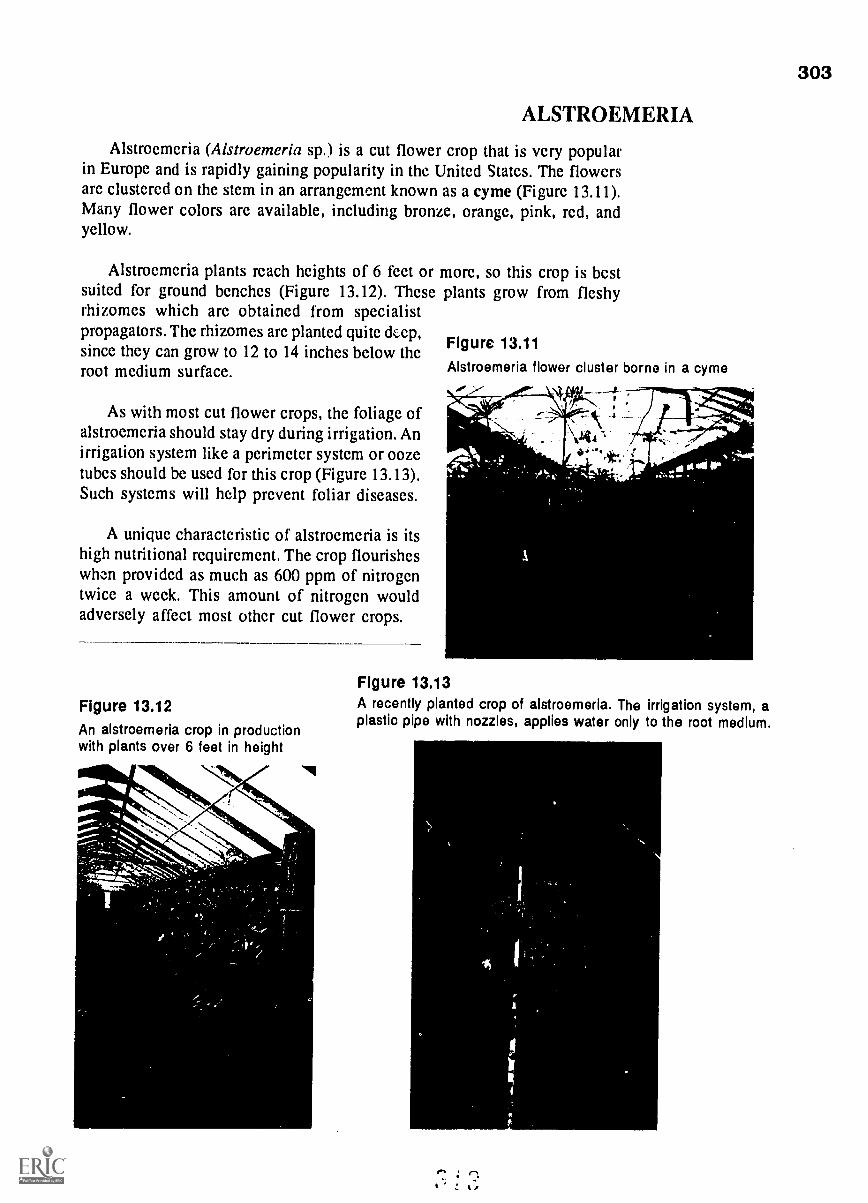
ALSTROEMERIA
Alstroemeria (Aistroemeria sp.) is a cut flower crop that is very popularin Europe and is rapidly gaining popularity in the United States. The flowersare clustered on the stem in an arrangement known as a cyme (Figure 13.11).Many flower colors are available, including bronze, orange, pink, red, andyellow.
Alstroemeria plants reach heights of 6 feet or more, so this crop is bcstsuited for ground benches (Figure 13.12). These plants grow from fleshyrhizomes which are obtained from specialistpropagators. The rhizomes are planted quite dcep,
Figure 13.11since they can grow to 12 to 14 inches below theroot medium surface.
As with most cut flower crops, the foliage ofalstroemeria should stay dry during irrigation. Anirrigation system like a perimeter system or oozetubes should be used for this crop (Figure 13.13).Such systems will help prevent foliar diseases.
A unique characteristic of alstroemeria is itshigh nutritional requirement. The crop flourisheswhzn provided as much as 600 ppm of nitrogentwice a week. This amount of nitrogen wouldadversely affect most other cut flower crops.
Figure 13.12An alstroemeria crop in productionwith plants over 6 feet in height
Alstroemeria flower cluster borne in a cyme
Figure 13.13A recently planted crop of alstroemeria. The irrigation system, aplastic pipe with nozzles, applies water only to the root medium.
303

304
For alstroemeria to broom, the rhizomes must be kept cool in a rootmedium temperature of 40°F for four to six weeks (depending on the cultivar).After receiving this cold treatment, the plants are lighted from 10 p.m. to 2a.m. with standard mum lighting to speed up flowering. As long as the rootmedium temperature does not exceed 60°F, the plants will bloom continuouslyfor two to three years. Then they tend to lose vigor and decrease flower output.It is then time to dig up the rhizomes, divide them (discarding the olderportions), and replant them.
Alstroemeria flowers arc ready for harvesting when the first flowers ineach flower cluster (cyme) begin to open. Alstroemeria are graded by boththe number of flower clusters per stem and by stem length.
Generally, alstroemeria are not susceptible to insect pests. However, aphidsand whiteflies can become a problem during warm weather. The only signifi-cant disease problem is leaf mottling, caused by a virus. This problem canbe prevented by proper greenhouse sanitation and use of culture-indexedplants from specialist propagators.
FREESIA
Freesia (Freesia refracta) is another European cut flower that is becomingpopular in the United States. The plant grows from a corm that is planted inground benches. The leaves of freesia are similar to those of gladiolus, andthe lily-like flowers are both colorful and very fragrant. Each flower consistsof many florets on a spike that is usually perpendicular to the rest of the stem(Figure 13.14). In other words, the spike is on a horizontal plane. Freesiaflower colors include white, yellow, blue, pink, and red.
Figure 13.14 Fragrant freesia flowers
Freesia corms should be purchased from a specialistpropagator, since this plant is very susceptible to viraldiseases. The corms are planted 2 inches deep in groundbenches - 80 to 100 corms per square yard. When theplants have started to grow and have developed three orfour leaves, the root medium temperature must be main-tained at about 55°F. Thus, planting should be done inthe fall, from September to December, when these coolsoil temperatures are easier to maintain. Freesia mayalso be grown from seed. But production time will bean additional three months compared to crops startedfrom corms.
Freesia flowers are ready for harvesting when thefirst floret opens. Long-term storage is not recommended,since freesia flowers are easily damaged by ethylene.
The main pest of freesia is aphids. The seriousdisease problem is viral diseases, as mentionedpreviously.

SNAPDRAGONS
The snapdragon (Antirrhinum majus) is grown from seed, unlike mostother cut flower crops. The popularity of this cut flower is once again increas-ing after peaking in the 1950's. The most popular flower colors are white,pink, and yellow for year-round sales. Red and bronze-colored cultivars arepopular in the fall.
Snapdragons are divided into four groups based on their optimum photo-period and temperature requirements. These four groups collectively cover theentire year, so, with careful cultivar selection, quality snapdragon flowers canbe produced year-round.
The snapdragon flower is composed of many florets arranged verticallyon a spike (Figure 13.15). The lowest floret opens first, followed by the nexthighest floret, until all the florets have opened.
Snapdragon seed can be started either in plug trays or standard flats. Inflats, no more than 1,000 seeds or half a seed packet should be sown perstandard flat. When the seedlings have developed their first set of true leaves,they are transplanted from the flat to the ground bed. PI, g seedlings may betransplanted when two or more sets of true leaves are visible.
Snapdragons are grown at night temperatures of 50° to 55°F. Day tem-peratures ideally should be no higher than 60°F. However, transplanted seed-lings at first should be given somewhat warmer temperatures (around 60°Fat night) to help them become rapidly established.
It is extremely important to keep the flowzrspikes vertical during development. If they areallowed to fall over, the tip will bend upwards,causing a permanent bend in the spike. Thisruins the appearnce and quality of the plant.The spikes should be supported with a series ofwelded wire meshes aligned vertically over thebench.
Snapdragon spikes are ready for harvestingwhen the lowest one-third of the florets haveopened. Leaves are stripped off the lowest one-third of each stem, and the spike is placed in asolution of floral preservative. Again, the spikesmust be kept in a vertical position during storageso that the tip of the spike will not bend. Snap-dragon flowers are graded by the length of thespike and stem.
The main pests of snapdragons are aphids,thrips, and whiteflies. The primary diseases ofsnapdragons are damping-off during the seedlingstage and Botrytis during production.
Figure 13.15
305
A bench of snapdragons
°: I C.
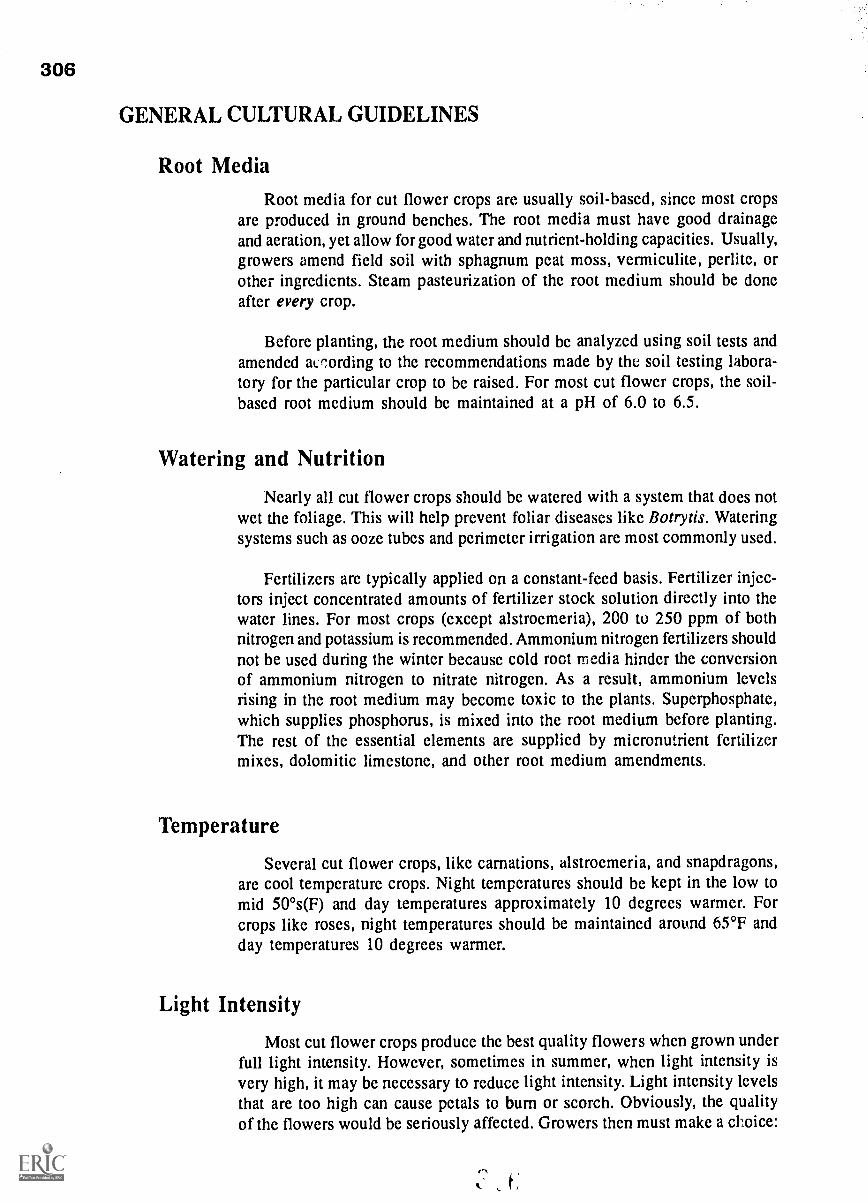
306
GENERAL CULTURAL GUIDELINES
Root MediaRoot media for cut flower crops are usually soil-based, since most crops
are produced in ground benches. The root media must have good drainageand aeration, yet allow for good water and nutrient-holding capacities. Usually,growers amend field soil with sphagnum peat moss, vermiculite, perlite, orother ingredients. Steam pasteurization of the root medium should be doneafter every crop.
Before planting, the root medium should be analyzed using soil tests andamended ac,ording to the recommendations made by the soil testing labora-tory for the particular crop to be raised. For most cut flower crops, the soil-based root medium should be maintained at a pH of 6.0 to 6.5.
Watering and Nutrition
Nearly all cut flower crops should be watered with a system that does notwet the foliage. This will help prevent foliar diseases like Botrytis. Wateringsystems such as ooze tubes and perimeter irrigation are most commonly used.
Fertilizers are typically applied on a constant-feed basis. Fertilizer injec-tors inject concentrated amounts of fertilizer stock solution directly into thewater lines. For most crops (except alstroemeria), 200 to 250 ppm of bothnitrogen and potassium is recommended. Ammonium nitrogen fertilizers shouldnot be used during the winter because cold root media hinder the conversionof ammonium nitrogen to nitrate nitrogen. As a result, ammonium levelsrising in the root medium may become toxic to the plants. Superphosphate,which supplies phosphorus, is mixed into the root medium before planting.The rest of the essential elements are supplied by micronutrient fertilizermixes, dolomitic limestone, and other root medium amendments.
Temperature
Several cut flower crops, like carnations, alstroemeria, and snapdragons,are cool temperature crops. Night temperatures should be kept in the low tomid 50°s(F) and day temperatures approximately 10 degrees warmer. Forcrops like roses, night temperatures should be maintained around 65°F andday temperatures 10 degrees warmer.
Light Intensity
Most cut flower crops produce the best quality flowers when grown underfull light intensity. However, sometimes in summer, when light intensity isvery high, it may be necessary to reduce light intensity. Light intensity levelsthat are too high can cause petals to burn or scorch. Obviously, the qualityof the flowers would be seriously affected. Growers then must make a choice:
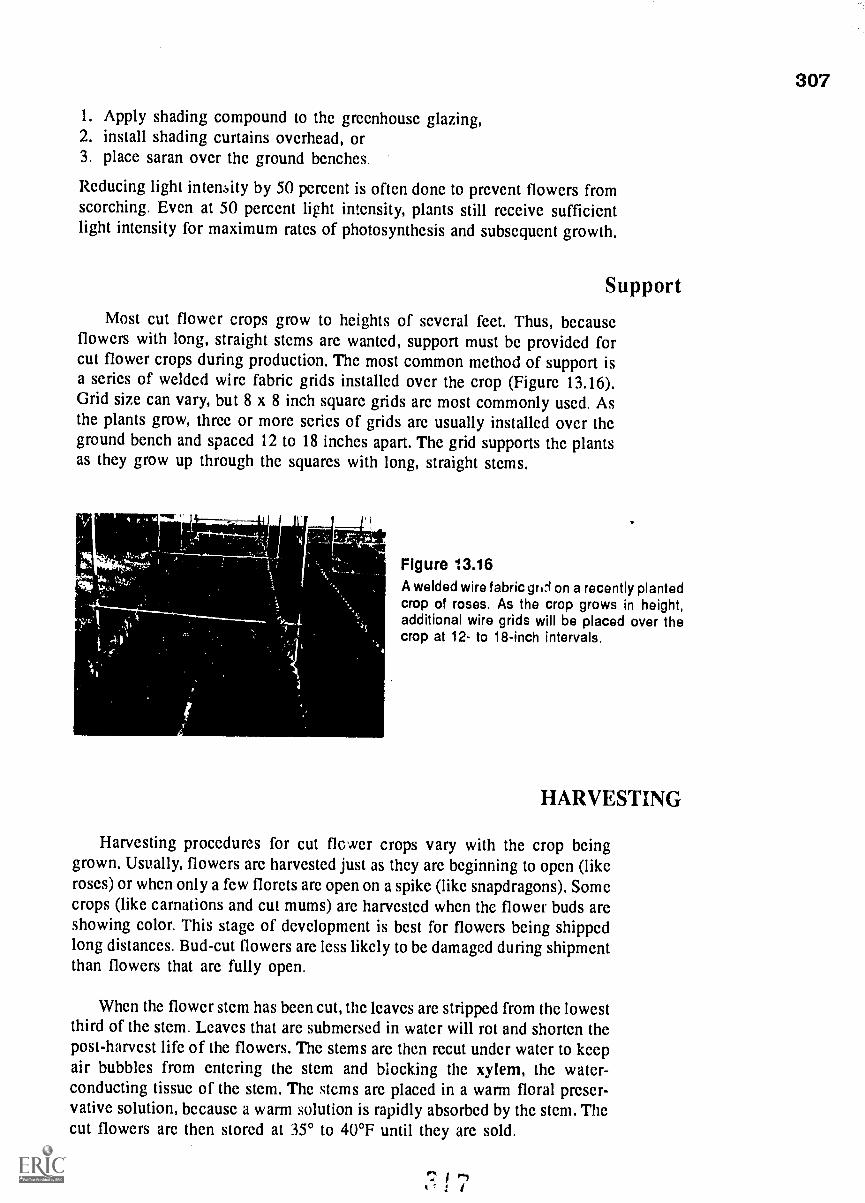
307
1. Apply shading compound to the greenhouse glazing,2. install shading curtains overhead, or3. place saran over the ground benches.
Reducing light intensity by 50 percent is often done to prevent flowers fromscorching. Even at 50 percent light intensity, plants still receive sufficientlight intensity for maximum rates of photosynthesis and subsequent growth.
SupportMost cut flower crops grow to heights of several feet. Thus, because
flowers with long, straight stems are wanted, support must be provided forcut flower crops during production. The most common method of support isa series of welded wire fabric grids installed over the crop (Figure 13.16).Grid size can vary, but 8 x 8 inch square grids are most commonly used. Asthe plants grow, three or more series of grids are usually installed over theground bench and spaced 12 to 18 inches apart. The grid supports the plantsas they grow up through the squares with long, straight stems.
Figure 13.16A welded wire fabric grIl on a recently plantedcrop of roses. As the crop grows in height,additional wire grids will be placed over thecrop at 12- to 18-inch intervals.
HARVESTING
Harvesting procedures for cut flower crops vary with the crop beinggrown. Usually, flowers are harvested just as they are beginning to open (likeroscs) or when only a few florets are open on a spike (like snapdragons). Somecrops (like carnations and cut mums) are harvested when thc flower buds areshowing color. This stage of development is best for flowers being shippedlong distances. Bud-cut flowers are less likely to be damaged during shipmentthan flowers that are fully open.
When the flower stem has been cut, the leaves are stripped from the lowestthird of the stem. Leaves that are submersed in water will rot and shorten thepost-harvest life of the flowers. The stems arc then recut under water to keepair bubbles from entering the stem and blocking the xylem, the water-conducting tissue of the stem. The stems are placed in a warm floral preser-vative solution, because a warm solution is rapidly absorbed by the stem. Thecut flowers are then stored at 35° to 40°F until they are sold.
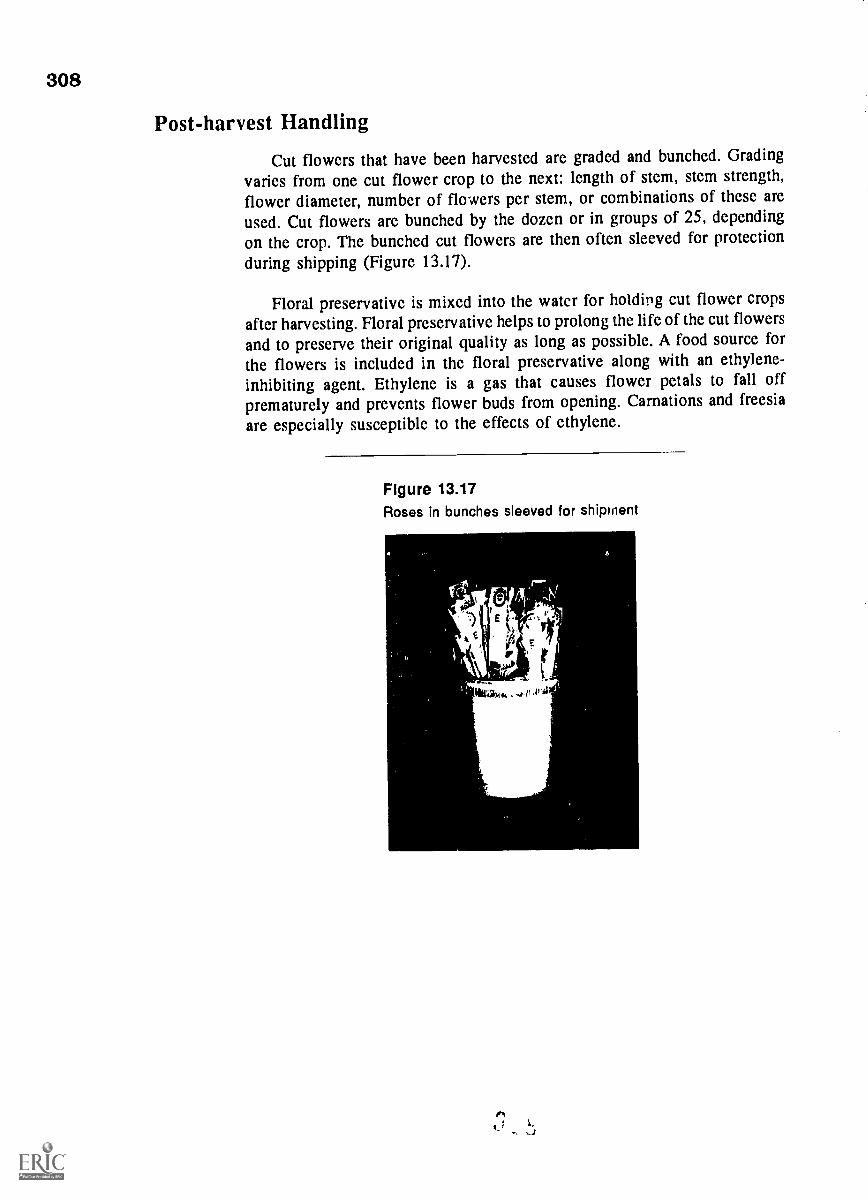
308
Post-harvest Handling
Cut flowers that have been harvested are graded and bunched. Gradingvaries from one cut flower crop to the next: length of stem, stem strength,flower diameter, number of flowers per stem, or combinations of these areused. Cut flowers are bunched by the dozen or in groups of 25, dependingon the crop. The bunched cut flowers are then often sleeved for protectionduring shipping (Figure 13.17).
Floral preservative is mixed into the water for holding cut flower crops
after harvesting. Floral preservative helps to prolong the life of the cut flowers
and to preserve their original quality as long as possible. A food source forthe flowers is included in the floral preservative along with an ethylene-inhibiting agent. Ethylene is a gas that causes flower petals to fall offprematurely and prevents flower buds from opening. Carnations and freesia
are especially susceptible to the effects of ethylene.
Figure 13.17Roses in bunches sleeved for shipment
309
HAPTER 13 RE W
This review is to help you check yourself on what you have learned about the production of cutflowers. If you need to refresh your mind on any of the following questions, refer to the page numbergiven in parentheses.
1. Name four commonly grown cut flower crops. (page 298ff)
2. Give the scientific name of each of these four plants. (page 298ff)
3. What was the wholesale value of cut flower production in the United States in 1990? (page 298)
In your state?
4. What effect do imported cut flowers have on the production of cut flowers in the United States?(page 298)
5. What is the difference between hybrid tea and sweetheart roses? (pages 298-299)
6. Why is it important that the irrigation system for cut rose crops never wets the foliage?(page 299)
7. At which stage are roses usually ready for harvesting? (page 299)
8. How are roses graded after they are harvested? (page 299)
9. What are the two categories of cut carnations? (page 300)
10. What percentage of all carnations sold in the United States in 1990 were imported? (page 300)
11. Where are most carnations grown in the United States? (page 300)
12. In what range of night temperatures should carnations be grown? (page 301)
13. Describe the procedure for harvesting the two categories (forms) of carnations you namedin question 9. (pages 301-302)
14. What is splitting of the calyx? How can it be prevented in a carnation crop? (page 302)
15. What is the cyme of an alstroemeria? (page 303)
16. How does an alstroemeria crop differ from other cut flower crops with regards to nutrition?(page 303)
17. What is the main requirement of alstroemeria crops in order to bloom? (page 304)
18. For alstroemeria to bloom continuously, what root medium temperature is required? (page 304)
19. At which stage of flower development are alstroemeria flowers ready fcr harvesting? (page 304)
20. How are alstroemeria flowers graded? (page 304)
21. What is the main disease problem of alstroemeria? (page 304)
f
310
Chapter 13 Review (continued)
22. What underground structure do freesias grow from? (page 304)
23. Describe the freesia flower. (page 304)
24. At which stage of flower development is the freesia flower ready for harvesting? (page 304)
25. How are snapdragons propagated? (page 305)
26. What are the criteria for classifying snapdragons into four groups? (page 305)
27. Describe the snapdragon flower. (page 305)
28. Give the recommended night and day temperatures for a snapdragon crop. (page 305)
29. Why must snapdragon flowers be kept vertical during development in the greenhouse?(page 305)
30. At which stage of development are snapdragon flowers ready for harvest? (page 305)
31. What are the maivi pests of snapdragon crops? (page 305)
32. What is the most clmmon method of applying fertilizers to cut flower crops? (page 306)
33. How are cut flower crops typically supported in the bench? (page 307)
34. Why should cut flowers be re-cut under water before they are placed in a floral preservativeand stored? (page 307)
35. What is ethylene? How does it affect cut flower crops? (page 308)
36. What can be done to prevent or lessen the effects of ethylene on cut flower crops? (page 308)

REFERENCES
Ball, Vic, Ball Redbook, 15th edition, George J. Ball Publishing, West Chicago, IL, 1991
Boodley, James W., The Commercial Greenhouse, Delmar Publishers, Inc., Albany, NY, 1981
Ecke, Paul, Jr Matkin, 0. A.; and Hartley, David, E., The Poinsettia Manual, 3rd edition, PaulEcke Poinsettias, Encinitas, CA, 1990
Feilner, Veronica, Greenhouse Operation and Management (student reference), University of Missouri-Columbia, Columbia, MO, 1990
Greenhouse Grower, Meister Publishing, Willoughby, OH
Grower Talks, George J. Ball Publishing, West Chicago, IL
Larson, Roy A., Introduction to Floriculture, Academic Press, New York, NY, 1980
Laurie, Alex; Kiplinger, D. C.; and Nelson, Kennard S., Commercial Flower Forcing, 8th edition,McGraw-Hill, New York, NY, 1979
Nelson, Kennard S., Flcwer and Plant Production in the Greenhouse, 4th edition, Interstate Publishers,Danville, IL, 1991
Nelson, Paul V., Greenhouse Operation and Management, 4th edition, Prentice Hall, Englewood Cliffs,NJ, 1991
Ohio Cooperative Extension Service, Tips on Growing Bedding Plants, 2nd edition, The Ohio StateUniversity, Columbus, OH, 1989
Ohio Cooperative Extension Service, Tips on Growing Poinsettias, The Ohio Stal3 University,Columbus, OH, 1988
Ohio Cooperative Extenshn Service, Tips on Growing Zonal Geraniums, 2nd edition, The Ohio StateUniversity, Columbus, OH, 1991
Ohio Florists' Association, Floriculture Crops: Chemical Use Booklet (A Guide for In,1Miticide, Fungicide, Growth Regulator, and Herbicide Application), Bulletin No. 735, OhioFlorists' Association, Columbus, OH, 1991
USDA (United States Department of Agriculture), National Agricultural Statistics Service, anAgricultural Statistics Board, Floriculture Crops 1990 Summary, Washington, DC, 1(:)1
Voigt, Alvi 0., Flower Marketing Information Newsletter, The Pennsylvania State University Collegeof Agriculture and Cooperative Extension Service, June 1991

A-frame
A-Rest®
acclimation
acidity
acrylic
aeration
aeroponics
alkalinity
amendment
apex
GLOSSARY
greenhouse frame that with its sidewalls and even-span roof forms the letter "A"in outline.
chemical applied to greenhouse crops to control height.
preparing a plant grown outdoors for indoor environmental conditions byregulating factors such as light, water, and temperature.
condition of the root medium or water with a pH of less than 7.0.
rigid plastic used to cover greenhouses; often used in double-layer form.
penetration or infiltration of air in a substance such as a root medium.
growing plants in air by spraying nutrients periodically onto the roots.
(with regard to water quality) the concentration of calcium carbonate andmagnesium carbonate in water.
any substance mixed into a root medium that improves one or more of itsphysical properties.
the main growing point of a plant
apical dominance growth of a plant exclusively from the apex because of the presence of an auxinthat inhibits the growth of lateral buds beneath the apex.
aquifer underground soil layer that contains enough water to be a potential source of waterfor a greenhouse operation.
asexual in plants, the vegetative rather than the sexual stage of development.
aspirated chamber box equipped with a fan that moves air through it.
azalea pot pot with height three-quarters of the diameter of the pot.
B-Nine® chemical applied to g.zenhouse crops to control their height.
bacterial blight disease affecting foliage and flowers that is caused by bacteria.
bedding plants plants that are started under precisely controlled greenhouse conditions and soldin spring to customers for planting outdoors.
biological control use of a beneficial predator or parasite organism for the control of a pestof pests organism.
biotherrn bottom heating system of a greenhouse bench comprised of a series of blackplastic tubes through which hot water circulates.
blackleg disease of geraniums caused by the fungus Pythium that attacks and blackens thebase of the stem.
Bonzi® chemical growth retardant used to control the height of various floriculture crops.
312 "4.,

313
Botrytis blight fungal disease characterized by water-soaked spots on the foliage, dark and wiltedflower petals, and gray mold growing on various plant parts.
bract petal-like modified leaf of a plant
British Thermal measure of heating efficiency in fuels; the amount of heat required to raise oneUnit (Btu) pound of water one degree Fahrenheit.
broadcasting seed sowing bedding plant seed uniformly by scattering seed across germination
buds breaking lateral buds beginning to sprout and gww after the apex has been removedby pinching.
making additions to root media or water offset pH changes
pot with height one-half of the diameter of the pot
procedure used on a fertilizer injector to verify the accuracy of its performance.
protective covering of the flower bud
movement of water upward through tiny "tubes" in the root medium.
irrigation system for potted plant crops that consists of a water-absorbent matthat supplies water to the crops through the drainage holes of the pots.
small space in a root medium that is capable of holding water and oxygen.
measure of the ability of a root medium to attract and hold nutrients for plantuse.
complex chemical compound in the cell wall of plants that gives the plant itsstrength.
green pigment in plants that is responsible for photosynthesis
yellowing of leaves from lack of chloroply,il
buffering
bulb pan (pot)
calibration
calyx
capillary action
capillary mat
capillary pore
cation exchangecapacity (CEC)
cellulose
chlorophyll
chlorosisadj. chlorotic
cold frame
combustion
compaction
complete fertilizer
composted
condensation
media in flats.
small structure composed of side walls and a transparent top in which beddingplants are started from seed in early spring; no heat except that of the sun isprovided.
burning of a substance such as a greenhouse fuel.
condition of a root medium in which the particles are pressed together and littleair is present.
fertilizer containing nitrogen, phosphorus, and potassium.
advanced decomposition of root medium components carried out under controlled
conditions.
formation of water from water vapor on surfaces that have been cooled due tofalling greenhouse temperatures. (continued)
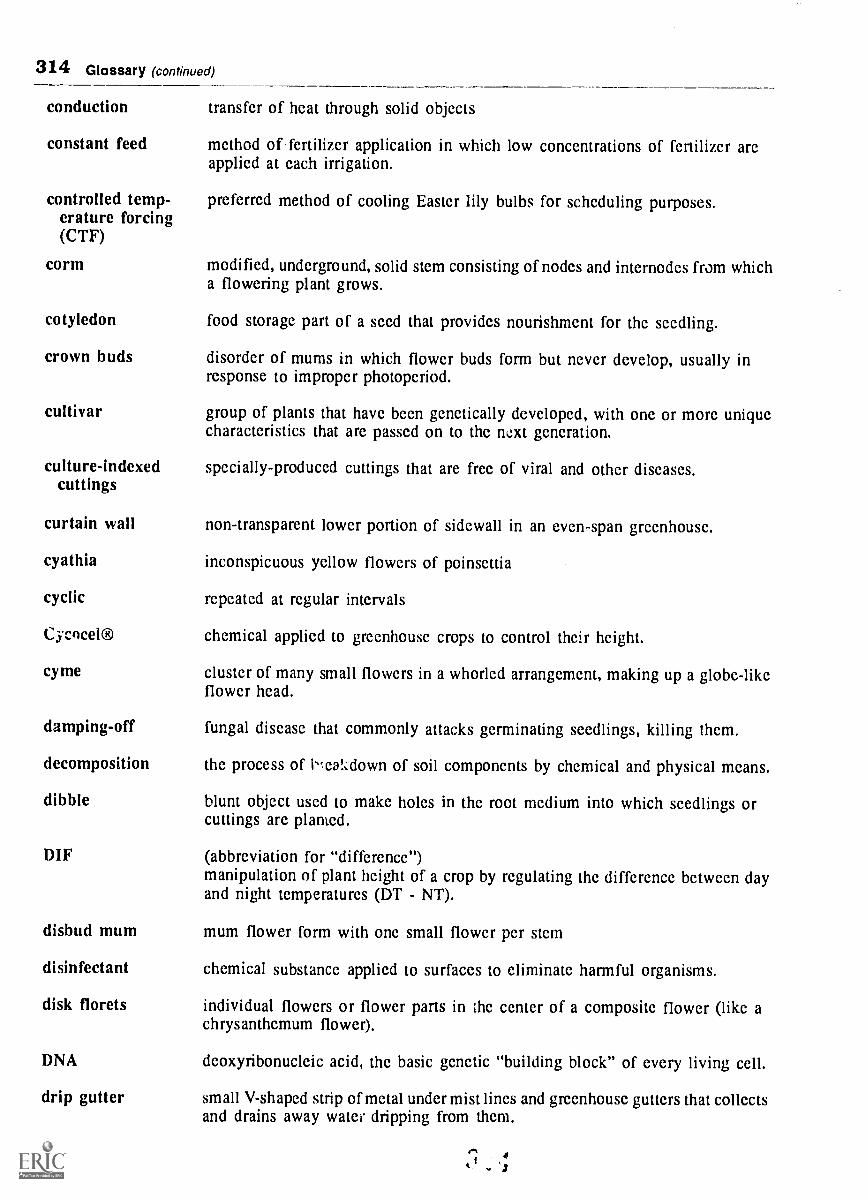
314 Glossary (continued)
conduction transfer of heat through solid objects
constant feed method of fertilizer application in which low concentrations of fertilizer arcapplied at each irrigation.
controlled temp- preferred method of cooling Easter lily bulbs for scheduling purposes.erature forcing(CTF)
corm modified, underground, solid stem consisting of nodes and internodes from whicha flowering plant grows.
cotyledon food storage part of a seed that provides nourishment for the seedling.
crown buds disorder of mums in which flower buds form but never develop, usually inresponse to improper photoperiod.
cultivar group of plants that have been genetically developed, with one or more uniquecharacteristics that are passed on to the next generation.
culture-indexed specially-produced cuttings that are free of viral and other diseases.cuttings
curtain wall non-transparent lower portion of sidcwall in an even-span greenhouse.
cyathia inconspicuous yellow flowers of poinsettia
cyclic repeated at regular intervals
Cycocel® chemical applied to greenhouse crops to control their height.
cyme cluster of many small flowers in a whorled arrangement, making up a globe-likeflower head.
damping-off fungal disease that commonly attacks germinating seedlings, killing them.
decomposition the process of 1ca'.:down of soil components by chemical and physical means.
dibble blunt object used to make holes in the root medium into which seedlings orcuttings are planted.
DIF (abbreviation for "difference")manipulation of plant height of a crop by regulating the difference between dayand night temperatures (DT - NT).
disbud mum mum flower form with one small flower per stein
disinfectant chemical substance applied to surfaces to eliminate harmful organisms.
disk florets individual flowers or flower parts in the center of a composite flower (like achrysanthemum flower).
DNA deoxyribonucleic acid, the basic genetic "building block" of every living cell.
drip gutter small V-shaped strip of metal under mist lines and greenhouse gutters that collectsand drains away water dripping from them.
" 4

315
rave part of the greenhouse where the roof and sidewall join together.
ECHO Environmentally Controlled Hanging-basket Operator - a watering system.
ecosystem balanced interaction of all organisms with their environment, in a particularlocation.
Encarsia formosa small parasitic wasp used for biological control of whiteflies.
energy conservation procedures implemented in the greenhouse to reduce the amount of heat lost fromthe structure.
environmental having to do with the surroundings and influencing factors such as air, water, andland (and including plants and animals).
EPA Environmental Protection Agency
ethylene colorless, odorless gas that causes distorted plant growth and flower drop fromplants.
evaporative cooling greenhouse cooling process that removes heat from the air by changing waterfrom the liquid to the gaseous state.
even-span greenhouse design with two roofs of equal lengths and angles joined at the peakor ridge.
excelsior shredded aspen commonly used in pad cooling systems.
fertilize to add nutrients in known amounts to a root medium.
fertilizer analysis the three numbers of a fertilizer label that correspond to the percent weight ofnitrate, phosphate, and potassium salt.
fiberglass greenhouse covering made from a mixture of acrylic plastic and glass fibers.
finishing plants the final phase of plant production in which plants become salable.
floriculture growing and marketing of bedding plants, flowering potted plants, cut flowers,and foliage plants.
fluorescent lamp low wattage, tube-shaped, electrical lamp used for limited supplementarygreenhouse lighting.
foliage plant plant grown mainly for its foliage and commonly used to decorate buildinginteriors.
foliar having to do with leaves
foliar analysis determination of the nutrient content of a plant by running tests on selected leavesin a laboratory.
footcandle measure of light intensity one foot away from a lighted candle.
footer foundation for a greenhouse or other permanent structure.
(continued)p.(.1 t
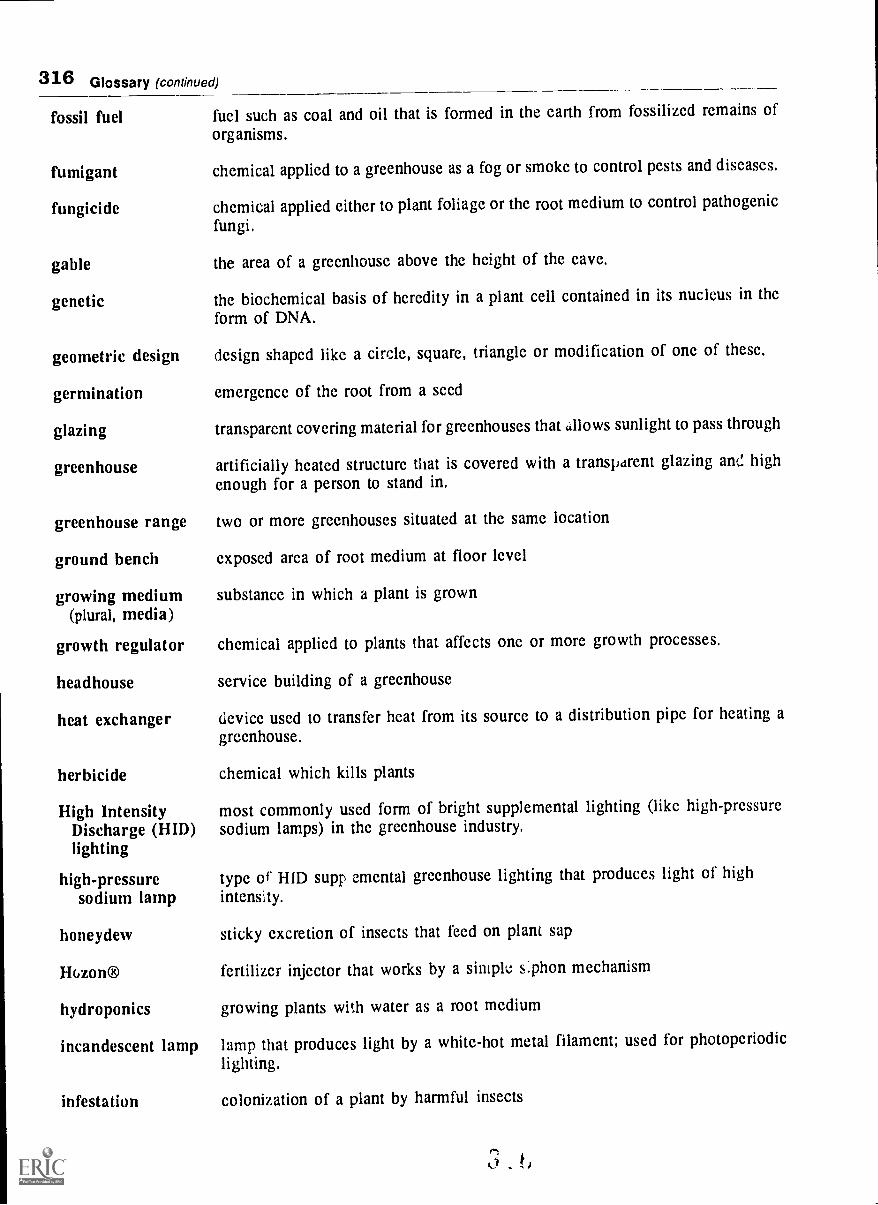
316 Glossary (continued)
fossil fuel
fumigant
fungicide
gable
genetic
geometric design
germination
glazing
greenhouse
greenhouse range
ground bench
growing medium(plural, media)
growth regulator
headhouse
heat exchanger
herbicide
High IntensityDischarge (HID)lighting
high-pressuresodium lamp
honeydew
H6zon®
hydroponics
incandescent lamp
infestation
fuel such as coal and oil that is formed in the earth from fossilized remains oforganisms,
chemical applied to a greenhouse as a fog or smoke to control pests and diseases.
chemical applied either to plant foliage or the root medium to control pathogenicfungi,
the area of a greenhouse above the height of the eave.
the biochemical basis of heredity in a plant cell contained in its nucleus in theform of DNA.
design shaped like a circle, square, triangle or modification of one of these,
emergence of the root from a seed
transparent covering material for greenhouses that alows sunlight to pass through
artificially heated structure that is covered with a transparent glazing and highenough for a person to stand in,
two or more greenhouses situated at the same location
exposed area of root medium at floor level
substance in which a plant is grown
chemical applied to plants that affects one or more growth processes.
service building of a greenhouse
device used to transfer heat from its source to a distribution pipe for heating agreenhouse.
chemical which kills plants
most commonly used form of bright supplemental lighting (like high-pressuresodium lamps) in the greenhouse industry.
type of HID supp emental greenhouse lighting that produces light of highintensity.
sticky excretion of insects that feed on plant sap
fertilizer injector that works by a simplo s:phon mechanism
growing plants with water as a root medium
lamp that produces light by a white-hot metal filament; used for photoperiodiclighting.
colonization of a plant by harmful insects
317
infrared type of invisible thermal radiation that does not affect plant growth.
injector device that injects precise amounts of concentrated fertilizer into irrigation lines.
inorganic not originating from living organisms
Integrated Pest a combination of four methods for the control and prevention of insect pestManagement infestations in the greenhouse.(IPM)
Integrated PlantHealth Manage-ment (IPHM)
a combination of four methods for the control and prevention of diseases thataffect greenhouse crops.
intermittent mist applications of tiny droplets of water at frequent, regular intervals.
internode section of a plant stem between two nodes
interveinal arca between the veins of a leaf
irrigation process of applying water to greenhouse crops
leach to saturate the root medium with 10 percent more water than needed for irrigation.
leaf orientation the angle at which leaves are held from the stem
life cycle the different sexual and asexual stages that complete the life of a plant or animal.
light transmission passage of light through a greenhouse covering
liners small starter plants usually potted in 2 1/4-inch pots
long-night plant plint which requires a period of darkness longer than a certain number of hoursin order to express a growth response.
louver; movable overlapping strips of metal installed in greenhouse walls to let outsideair into the structure.
macro-elements elements essential to healthy plant growth, in relatively large amounts
microbe a microscopic organism
micro-elements elements essential to healthy plant growth, in ilinute amounts
nematode small wmm-like organism that commonly feeds on plant roots
nRrate nitrogen in the form of a compound that is utilized by plants
node arca of a stern from which leaves, flowers, and branches arise
non-capillary pore large space in a root medium that will riot hold water
non-tunicate bulb form of bulb with separate fleshy scales surrounding the central bulb stem, andno paper-like tunic on the outside.
(continued)

318 Glossary (continued)
oedema
organic
parasite
pasteurization (soil)
peat pellet
peninsula
perimeter
pesticide
petiole
pH
photoperiod
photosynthesis
phylloclade
pistillate
plant hardening
plug growth stages
plug tray
pollutant
polyethylene
polyvinyl fluoride
pompons
pore space
physiological disordcr (notably in ivy geraniums) characterized by raised, corkyarcas on the undcrside of leaves, in responsc to high levels of moisturc in theroot medium.
originating from living organisms
organism that obtains its nutrients by living off anothcr living organism.
heating soil by steam at 140°-160°F for 30 minutcs in ordcr to kill harmfulorganisms.
comprcsscd disk of sphagnum peat, moistened and uscd for germinating sceds.
raiscd benching arrangement consisting of a series of benches projecting out froma common bench.
outcr walls or edge of a greenhousc or bcnch
onc of a class of chemicals uscd to control inscct pcsts, discasc organisms, andplant height.
stcm of a leaf
measure of acidity or alkalinity in watcr or soil
length of time in light and darkncss cxpericnccd by an organism in a 24-hourperiod.
process of food manufacture in green plants by which carbon dioxide and watcrare converted into sugar and oxygcn in thc prcscnce of light.
flattened stem segment of a holiday cactus
containing thc female parts of thc flower
process of preparing a greenhouse plant for outsidc growing conditions throughdecrcascd fertilizer and watcr applications.
four definitive stages of plug seedling growth from germination to transplantingstage.
tray (typically thc size of a standard flat) madc up of many cells fused together;uscd for germinating bedding plant seed.
introduced substance that is ur.:ally harmful to the organisms living in thatenvironment.
film plastic uscd for covering grccnhouscs; lasts up to three years.
film plastic used for covering greenhouses; lasts up to ten years.
spray mums characterized by small globular flowers
area between individual particles of a root medium
porous
powdery mildew
ppm
predator
primed seed
propagation
proportioner
purlin
Pythium
Quarantine 37
quonset house
radiation
ray florets
refined seed
relative humidity
rhizome
rockwool
root medium
rooting hormone
runoff
saran
sash bar
scouting a crop
seeders
seedling
319
physical condition of a substance in which air and water readily pass through it.
fungal disease characterized by white powdery growth on plant surfaces.
parts per million, a measure of very small concentrations in volumes of liquid.
organism that feeds on other organisms
seed that has been partially germinated
the process of increasing the population of a plant species
device used to inject precise amounts of concentrated fertilizer into irrigatioalines. (See injector.)
greenhouse framing which connects the trusses
fungus that causes several plant diseases
policy enforced by the U.S. Animal and Plant Health Inspection Servicerestricting imports of potted flowering plants from other countries into theUnited States.
film plastic greenhouse with a roof shaped like a semi-circle.
loss of heat from a greenhouse by direct transfer of heat from the inside to theoutside witnout warming the air.
the (usually) larger, strap-like individual flowers or petals around the edge of acomposite flower like a chrysanthemum.
seed that has been sorted by physical characteristics
amount of water contained in the air at a given temperature expressed as a percentof the total amount of water the air can hold at that temperature.
underground stem
synthetic root medium resembling fiberglass insulation
any substance in which a plant is grown
chemical applied to the base of cuttings that enhances rooting.
drainage of excess greenhouse irrigation water into the soil beneath.
synthetic woven fabric used to reduce light intensity
greenhouse framing which holds glazing panes in place
visually inspecting a crop for pests
machines used to sow seed in plug trays
young plant that has just sprouted from a seed
3 ';)
(continued)
320 Glossary (continued)
sepals individual sections of the outer covering of a flower bud.
side post part of the greenhouse frame which supports the truss in an even-span greenhouse.
sleeving the process of placing plastic or paper around harvested cut flowers or pottedplants to cover and protect them iluring shipment.
slow-release fertilizer applied to a root medium that is released slowly over a period of severalfertilizer weeks to several months.
"soft" pesticide pesticide that is relatively harmless to the environment
soft pinch removal of the uppermost one-half to one inch of a plant stem to promote lateralbranching.
soilless media root media that contain less than 20 percent field soil by volume; most soillessroot media contain 0 percent field soil.
soluble salts dissolved chemicals such as fertilizer nutrients in the water.
solubridge instrument used to measure the soluble salts concentration in root media.
spaghetti tubes system of irrigation for flowering potted plants consisting of small black tubestipped with either plastic or lead water breakers placed in each pot.
splitting physiological disorder of poinsettias in which flowers form prematurely,vegetative by-pass shoots form, and a misshapen plant results.
spray mum (also, mum flower form with several small flowers per stempompon mum)
staminate containing the male parts of the flower
standard mum mum flower form with one flower more than four inches in diameter per stem.
standard pot pot with height equal to the diameter
sterile free of any living organisms
sterilization process of killing all living organisms
stock tank large covered container that holds a concentrated fertilizer solution.
stomata tiny openings or pores in leaves through which carbon dioxide and water vaporpass.
succulent plant with thick fleshy leaves, adapted to survive in a dry environment.
supplemental additional lighting supplied to greenhouse crops most commonly in the form oflighting high pressure sodium lamps.
target pest pest singled out for "control" in a pest control program
target ratio specified ratio(s) of a fertilizer injector
321temperature regime 24-hour temperature changes implemented per day during crop production.
thermostat device which controls the heating and cooling equipment in a greenhouse.topography physical characteristics of the land
truss greenhouse framing, comprised of rafters, struts, and chords, that. supports theweight of the roof in an even-span or uneven-span greenhouse structure; inquonset greenhouses, framing composed of pipe bent into an arc.
tunicate bulb form of bulb with continuous fleshy scales surrounding the central bulb stem andcovered by a brown, paper-like tunic.
turgid plant condition of "crispness" of stems and leaves
ultraviolet (UV) type of light which causes most plastic coverings to darken and become brittle.uneven-span greenhouse design with two roofs of unequal length and angle joined at the ridge.vegetative referring to the foliar parts of a plant; i.e. its stems and leaves; also, asexual.ventilator small movable section of the greenhouse roof or sidewall used for ventilation.viscosity measure of how easily a liquid flows
water boom irrigation device consisting of a long water distribution pipe with water nozzlesspaced at regular intervals along its length.
water breaker attachment at the end of an irrigation hose that reduces the pressure of the wateras it is applied to greenhouse crops.
water-holding ability of a root medium to retain water for plant usecapacity
weighted leaf device used to control the frequency and duration of intermittent mist systems.