cassandra installation over ubuntu 1. installing vmware · pdf filecassandra installation over...
TRANSCRIPT
Cassandra Installation over Ubuntu
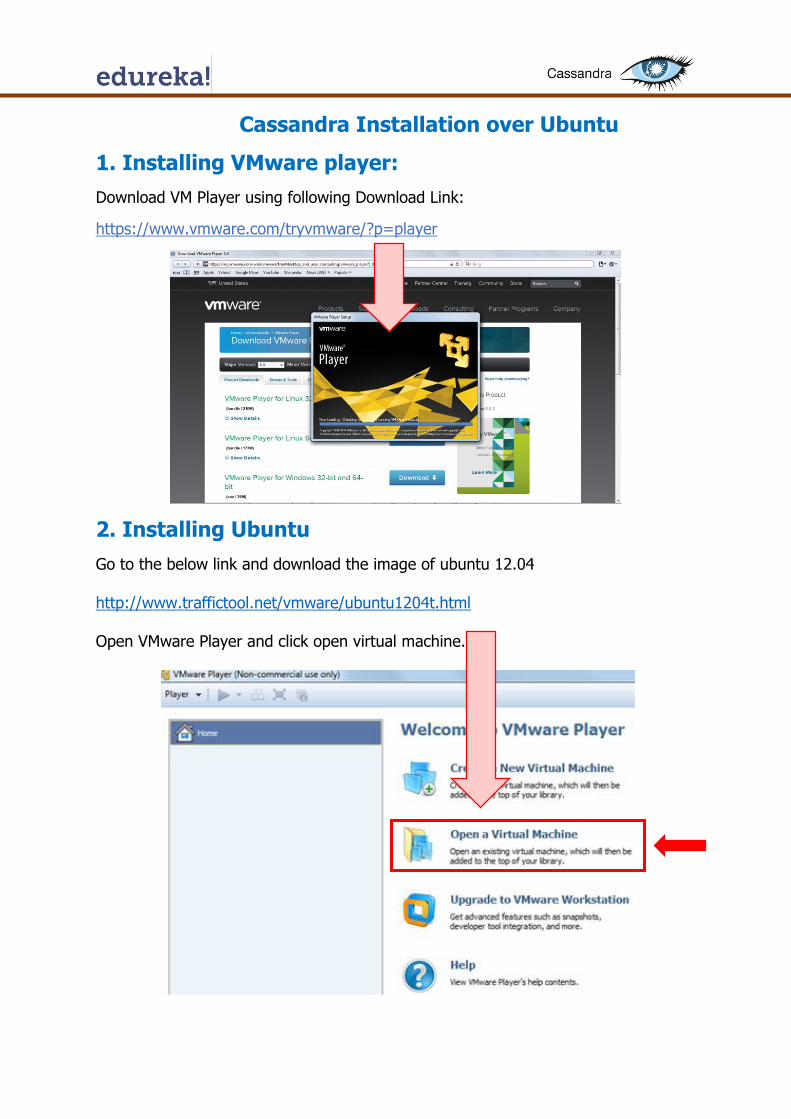
1. Installing VMware player:
Download VM Player using following Download Link:
https://www.vmware.com/tryvmware/?p=player
2. Installing Ubuntu
Go to the below link and download the image of ubuntu 12.04 http://www.traffictool.net/vmware/ubuntu1204t.html Open VMware Player and click open virtual machine.
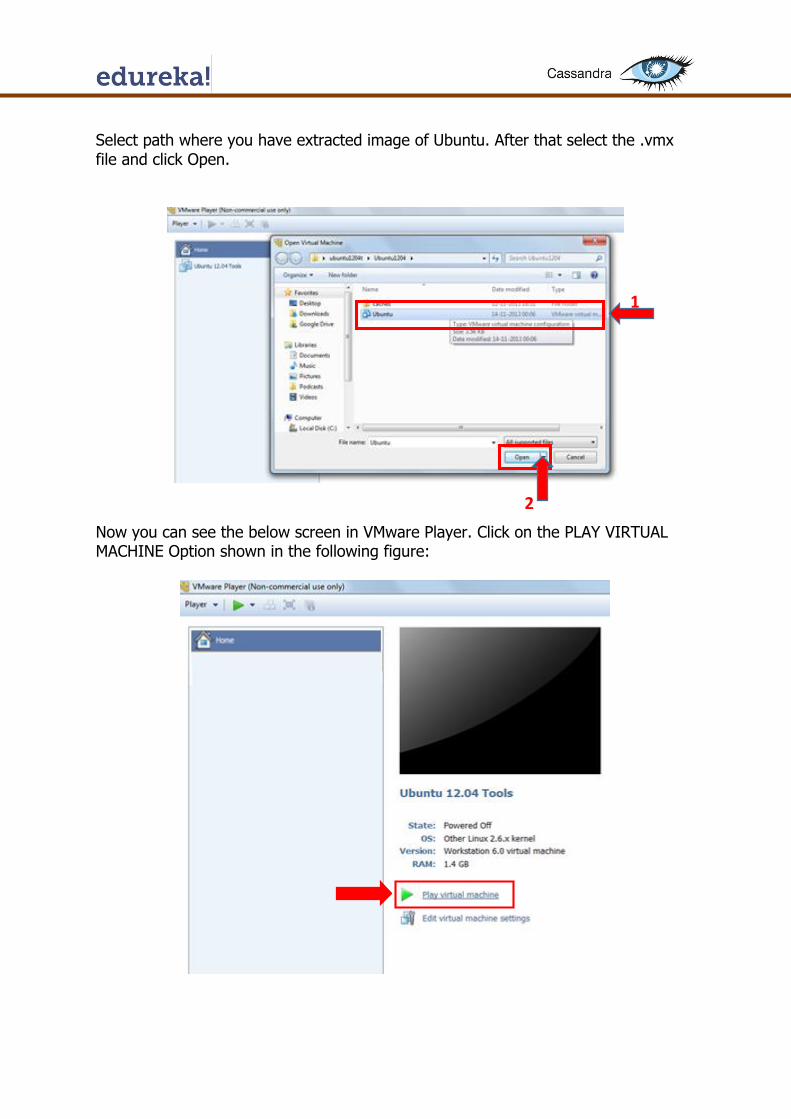
Select path where you have extracted image of Ubuntu. After that select the .vmx file and click Open.
Now you can see the below screen in VMware Player. Click on the PLAY VIRTUAL MACHINE Option shown in the following figure:
1
1
2
1
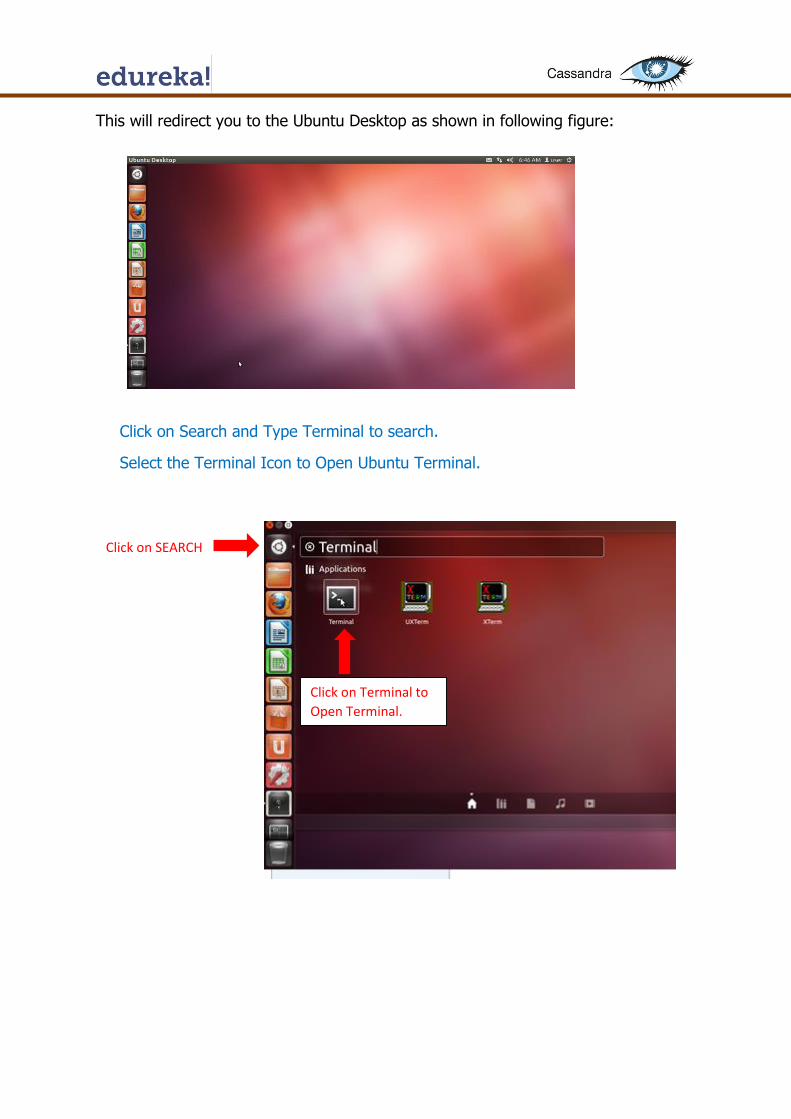
This will redirect you to the Ubuntu Desktop as shown in following figure:
Click on Search and Type Terminal to search.
Select the Terminal Icon to Open Ubuntu Terminal.
Click on SEARCH
Click on Terminal to
Open Terminal.
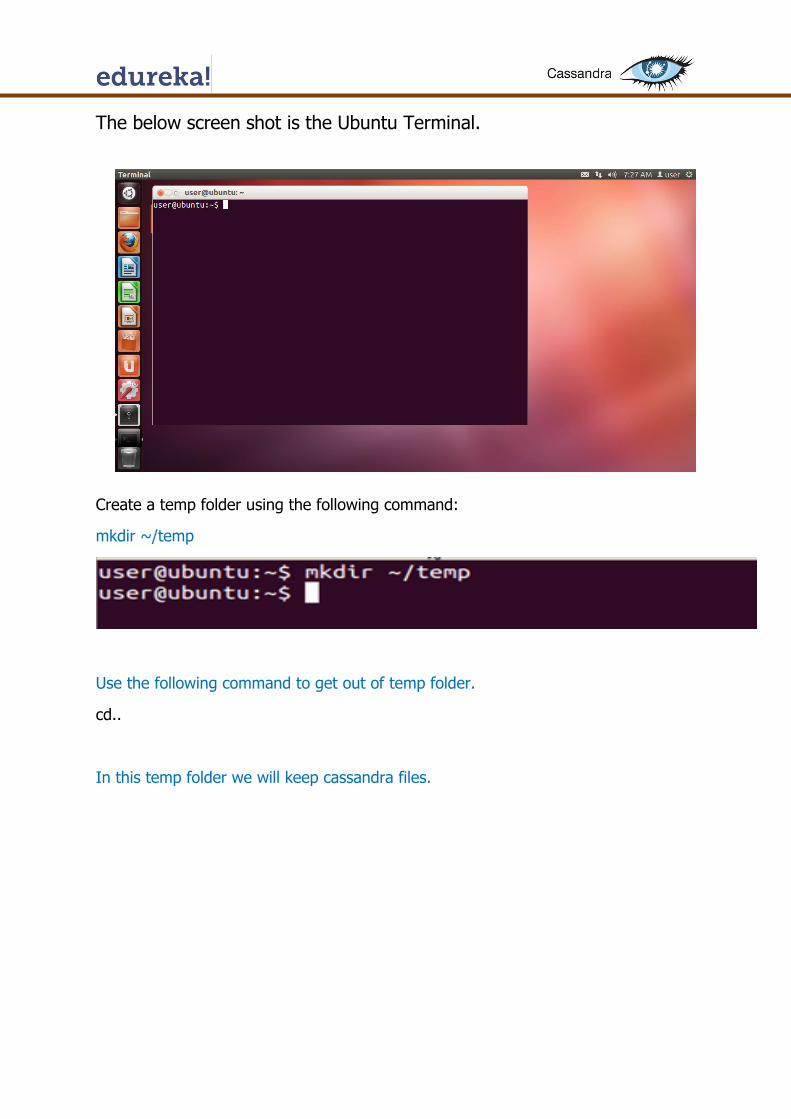
The below screen shot is the Ubuntu Terminal.
Create a temp folder using the following command:
mkdir ~/temp
Use the following command to get out of temp folder.
cd..
In this temp folder we will keep cassandra files.

3. Installing JAVA:
To update the use following Command:
sudo apt-get update
The above command downloads the package lists from the repositories and
"updates" them to get information on the newest versions of packages and their
dependencies.
To install JAVA use the following Command:
sudo apt-get install openjdk-7-jre-headless
Password for user is password
It will ask the following highlighted option. Answer it as y
Wait till it becomes 100%

To check whether JAVA got installed or not use following command:
java -version
Run the following commands to set JAVA_HOME and PATH:
JAVA_HOME=/usr/local/java/jdk1.7.0_25
PATH=$PATH:$HOME/bin:$JAVA_HOME/bin
JRE_HOME=/usr/local/java/jdk1.7.0_25
PATH=$PATH:$HOME/bin:$JRE_HOME/bin
export JAVA_HOME
export JRE_HOME
export PATH
Use following Commands to make above Paths persistent.
sudo nano /etc/profile
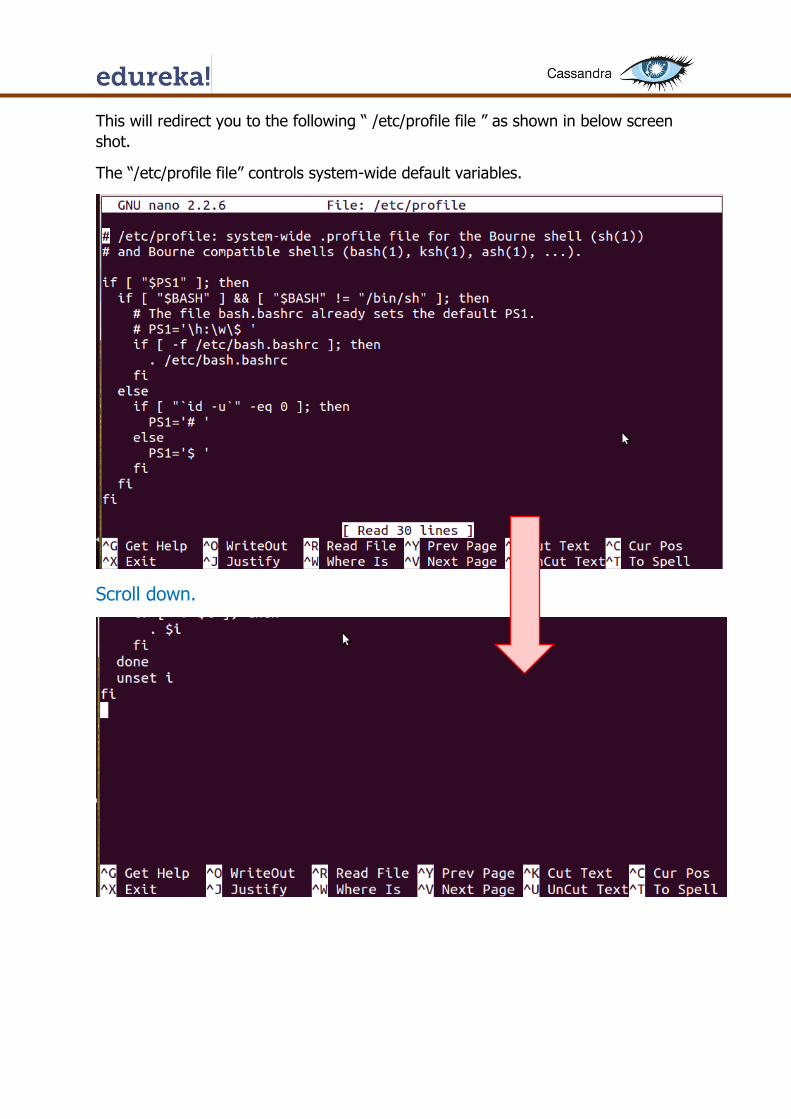
This will redirect you to the following “ /etc/profile file ” as shown in below screen
shot.
The “/etc/profile file” controls system-wide default variables.
Scroll down.

Paste the Command that you used for setting the pathh variables (as
shown in below figure) and save by using the Ctrl+O command and
enter.
The above highlighted part in the The path variables got saved as shown in above
figure.
Close the Terminal.
And open New Terminal for Cassandra Installation.

4. Installing Cassandra
Download the binary files for Cassandra from the Web. Use a location to store (say temp folder) the downloaded file.
cd ~/temp
Use the following address to download the binary files from the Web (or Internet). wget http://www.us.apache.org/dist/cassandra/1.2.11/apache-cassandra-1.2.11-bin.tar.gz
Wait till it gets 100% Done.
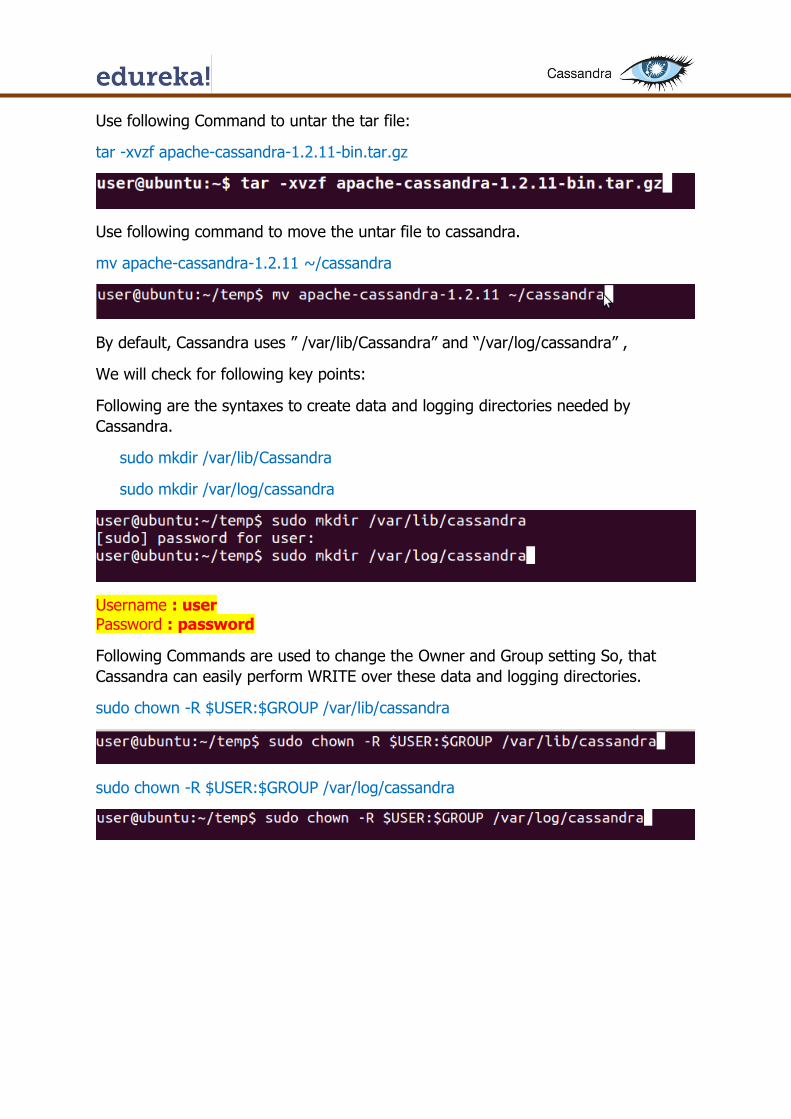
Use following Command to untar the tar file:
tar -xvzf apache-cassandra-1.2.11-bin.tar.gz
Use following command to move the untar file to cassandra.
mv apache-cassandra-1.2.11 ~/cassandra
By default, Cassandra uses ” /var/lib/Cassandra” and “/var/log/cassandra” ,
We will check for following key points:
Following are the syntaxes to create data and logging directories needed by
Cassandra.
sudo mkdir /var/lib/Cassandra
sudo mkdir /var/log/cassandra
Username : user Password : password
Following Commands are used to change the Owner and Group setting So, that
Cassandra can easily perform WRITE over these data and logging directories.
sudo chown -R $USER:$GROUP /var/lib/cassandra
sudo chown -R $USER:$GROUP /var/log/cassandra

Now it’s time to set the Cassandra Variables.
Run the following Commands to set the Cassandra Variables.
export CASSANDRA_HOME=~/cassandra
export PATH=$PATH:$CASSANDRA_HOME/bin
Now We will be configuring Cassandra’s per thread stack size to a larger one than
default. That can be done by using following Steps:
Open the cassandra-env.sh file using following command;
nano ~/cassandra/conf/cassandra-env.sh
This will redirect you to the following cassandra environment file:

Scroll the file till you get the following highlited Text:
Change the highlighted text (JVM_OPTS)
to the below shown New values.
Save it using command Ctrl+O
Save Done.
Use Ctrl+X to exit.
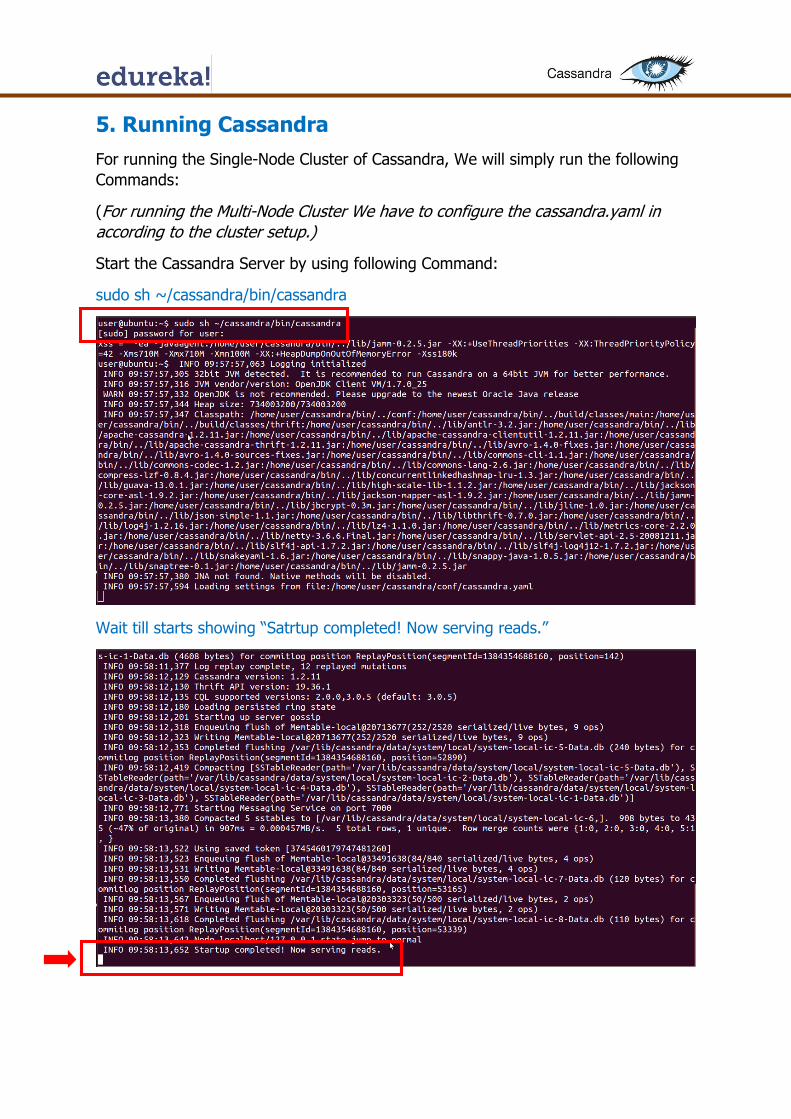
5. Running Cassandra
For running the Single-Node Cluster of Cassandra, We will simply run the following
Commands:
(For running the Multi-Node Cluster We have to configure the cassandra.yaml in
according to the cluster setup.)
Start the Cassandra Server by using following Command:
sudo sh ~/cassandra/bin/cassandra
Wait till starts showing “Satrtup completed! Now serving reads.”
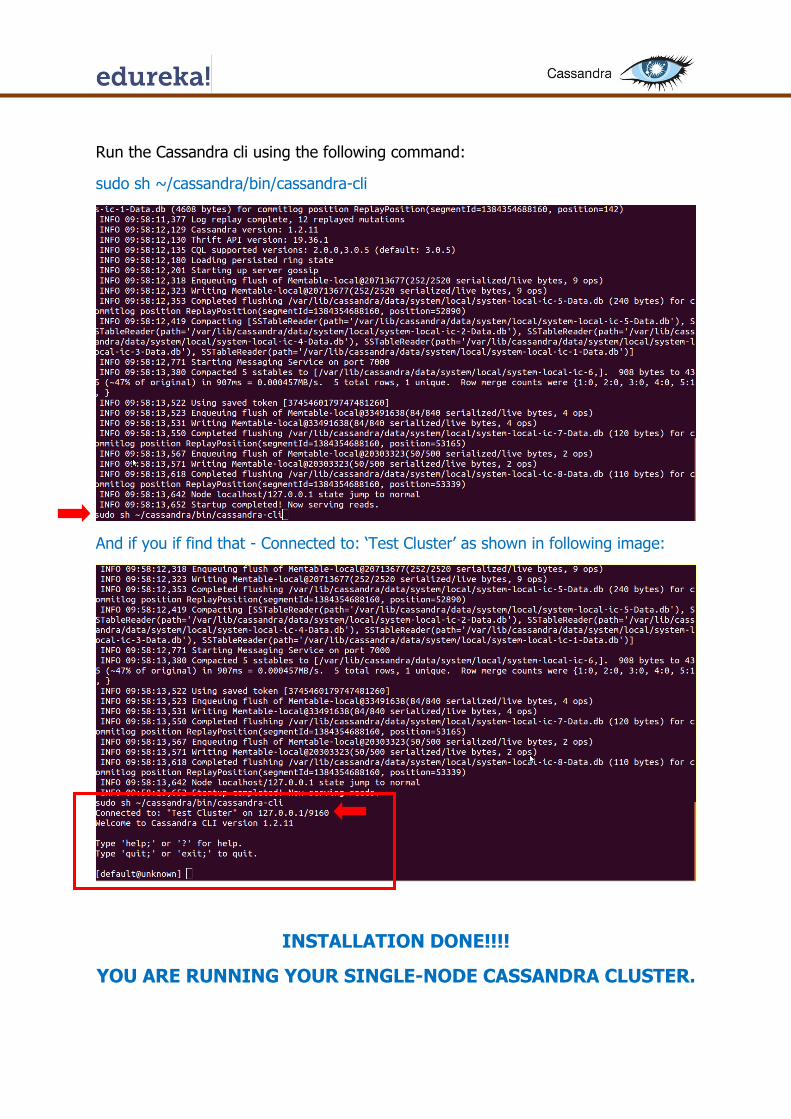
Run the Cassandra cli using the following command:
sudo sh ~/cassandra/bin/cassandra-cli
And if you if find that - Connected to: ‘Test Cluster’ as shown in following image:
INSTALLATION DONE!!!!
YOU ARE RUNNING YOUR SINGLE-NODE CASSANDRA CLUSTER.