canning fruits and vegetables - ideals
TRANSCRIPT

Q. 630.
7
116c
no.1112
cop. 5


<
'. JIVERSITY OFILLINOIS LIBRARY
AT URBANA-CHAMPAIGNAGRICULTURE


College of Agriculture • Cooperative Extension Service
University of Illinois at Urbana-Champaign
CIRCULAR 111
2
UNIVERSITY OF ILLINOIS
A8RICULT(JRt LIBRARY
^o^mmR\C>
hu5^uBRftRN
CANNINGFRUITS ANDVEGETABLES

CANNING FRUITS AND VEGETABLES
Homemade tomato juice . . . from tomatoes you grew yourself.
Applesauce . . . straight from the tree you climbed as a kid.
Greenbeans . . . remember the hot, sunny afternoon you picked them.
Yes, home canning's popularity in recent years may well stem from the
satisfactions that come when you can say, "I did it myself."
For some people, home canning is another way to stretch the family
budget. If you have a home garden or a source of fresh produce at a
reasonable cost, you may be able to make food dollars go farther.
And some people enjoy home canning because they recognize the
process as one of the basic "home arts" practiced through necessity bygenerations before them.
Whatever the reasons, there's a growing interest in home canning
fruits and vegetables. Basically, the practice is easy. Yet every year there
are cases of food poisoning -some fatal - because of improper canning
techniques.
If you're canning for the first time, or just want to brush up on your
techniques, consider the importance of food safety before you begin.
Food safety and home canning
To be safe, canned foods must be heated to a high enough temperature
for a long enough time to kill enzymes, yeasts, molds, and bacteria that
cause food spoilage. Furthermore, the canned food must be tightly sealed
so that organisms in the air cannot get in and cause spoilage.
The time and temperature needed to destroy organisms in different
foods varies. The temperature of boiling water, 212° F., is effective in
killing organisms in acid foods. In low-acid foods a much higher tempera-
ture, 240° F., is needed to make the food safe to eat and to maintain good
quality. To obtain a temperature of 240° F., you must use a pressure
canner. . . . There is no substitute for this piece of equipment.
The exact times given in this circular for processing fruits and vege-
tables are based on work by the Consumer and Food Economics Research
Institute, Agricultural Research Service, U.S. Department of Agriculture.
The recommended processing times are only for fruits and vegetables
prepared and packed according to directions given in this publication.
Failure to use the proper temperature for the length of time required
for the food being canned can result in disaster!
Acid and low-acid foods
Acid foods include all fruits, tomatoes, and pickled vegetables. These
foods can be safely processed in the boiling water bath.
Low-acid foods include all vegetables except tomatoes and pickled
vegetables. Meats, fish, and poultry are also low-acid. It is not safe to

use a boiling water bath for these foods. All low-acid foods must be pro-
cessed in a pressure canner at 240° F. or higher. The dangerous botulism-
producing bacteria which may be present in low-acid foods will not be
destroyed unless the food is heated to 240° F. for the proper period of
time.
Botulism
Clostridium botulinum is a bacterium that does not need air to grow.
It is found in soil and in water - almost everywhere in the environment.
This organism forms a spore which is very resistant to heat. In the ab-
sence of air, as in a sealed jar, and in the presence of low-acid food, the
spores will germinate and produce gas and a toxin. It is this toxin that
causes botulism, a very serious food poisoning.
Though the spores are very resistant to heat, the toxin they form is
easily destroyed by heat. Therefore, in home canning of low-acid foods
there are three rules to follow:
1. Always process low-acid foods in a pressure canner at 10 pounds or
more pressure for the recommended time.
2. Boil low-acid home canned foods for at least 10 to 20 minutes before
tasting. Corn and spinach should be boiled for 20 minutes.
3. Destroy all bulging, swollen, or leaking cans of food as well as food
from glass jars with bulging lids. Do not taste.
Types of canners
Pressure canner. This equipment is used for processing all commonvegetables except tomatoes and pickles. For safe use of the pressure
canner, check the safety valve. Clean the pet-cock opening by drawing a
string or narrow strip of cloth through it. A dial pressure gauge should be
checked each year before the canning season. See your county extension
adviser, dealer, or manufacturer about checking it. A weighted gauge
needs only to be thoroughly cleaned.
Wash the canner kettle well before using it. Wipe the cover with a
damp, clean cloth — don't put it in water.
When using the canner, follow the manufacturer's directions.
Pressure saucepan. A pressure saucepan having an accurate indicator
or gauge for controlling pressure at 10 pounds (240° F.) may be used for
processing vegetables in pint jars. You will need to add 20 minutes to the
processing times given for the pressure canner (pages 9 through 13)
.
Boiling-water-bath canner. Acid foods can be processed safely in a
boiling-water-bath canner. Use this type of canner for fruits, tomatoes,
and pickled vegetables. Any large vessel will do for a boiling-water-bath
canner if it meets these requirements: It should be deep enough to haveat least 1 inch of water over the top of the jars and an inch or two of

extra space for boiling. It should have a snug-fitting cover. And there
should be a rack to keep the jars from touching the bottom. Do not over-
load the canner. Jars should not touch one another or touch the sides of
the canner.
If your pressure canner is deep enough, you can use it as a water bath.
Set the cover in place without fastening it. Be sure to have the pet cock
wide open so that steam escapes and no pressure is built up.
Class jars and closures
Use only jars manufactured especially for home canning. Processing
times are given for half-pint, pint, or quart jars, so do not use jars larger
than those recommended for whatever is being canned.
Use only jars and lids that are perfect. You cannot have an airtight
seal with a defective jar or lid. Jars do not need to be sterilized when food
is to be processed in the boiling water bath or in the pressure canner.
However, they do need to be clean and hot. If you have a dishwasher, use
it for this job.
Two types of closures for glass jars are shown in the diagram below.
Be sure to follow the sealing directions for each type of closure.
Porcelain-lined zinc cap. If the porcelain lining is cracked, broken, or
loose, or if there is even a slight dent at the seal edge, discard the cover.
Opening these jars by thrusting a knife blade into the rubber and prying
ruins many good covers. Each time you use a jar, have a new rubber ring
of the right size. Wash the rings in hot sudsy water and then rinse themwell. Fit the wet rubber ring on the shoulder of the jar. Fill the jar leaving
the necessary headspace. Carefully wipe off any food you may have
spilled on the ring or rim. Screw the cap on firmly, then turn it back 14
inch. As soon as the food has been processed, complete the seal by screw-
ing the cap tight.
Metal
•"screw band
Metal lid with
sealing
compound
Seals here
Porcelain
ined
screw cap
Rubber
Seals here
Two types of closures for glass jars are the two-piece cap on the left and the
porcelain-lined zinc cap on the right.

Two-piece cap. The metal lid with sealing compound can be used only
once. Pretreat the lids according to the manufacturer's directions. Fill the
jar then wipe the rim clean. Put the lid on the jar with the sealing com-pound next to the glass. Screw the metal band down tight. The lid has
enough give to let air escape while the food is being processed. Do not
screw it farther after taking the jar from canner. The band may be re-
moved after the contents of the jar are cold, usually after 24 hours.
Important first steps in canning
1. Assemble all the canning equipment you will need before the canning
season begins. Be sure all equipment is clean and in good operating
condition.
2. Select fruits and vegetables suitable for canning. Remember canning
will not improve the quality of a food. For best quality results, choose
sound, firm, and ripe fruits and young, tender vegetables. Sort them for
_ size and maturity, so they will cook evenly. Can them quickly while
they are fresh— if possible within 2 to 3 hours after they are gathered.
If you must store them for a short time, put them in a cool, well-
ventilated place.
3. Wash all fruits and vegetables thoroughly. When you remove dirt, youget rid of some of the bacteria that are hardest to kill. Wash in small
batches and use several changes of water. Prepare the food according
to directions given on pages 9 through 15 for the fruit or vegetable
you are canning.
Canning without salt or sugar
You can pack safely without adding salt to vegetables or sugar to
fruits. The small amounts of sugar or salt used in canning do not help to
prevent spoilage. Fruits may be packed in their own juice, extracted juice,
or water. When canning unsweetened fruits or unsalted vegetables, use the
same processing times recommended for those with sugar or salt added.
Sirups for canning fruits
For packing fruits, add the following amounts of sugar to each quart
of water or fruit juice:
Kind of sirup Sugar (cups) Yield (cups)
Thin 2 5
Medium 3 5V2Heavy 4% 6V2
Boil the sugar and the water or fruit juice for 2 minutes or until the
sugar is dissolved. Remove any scum. If you are using fruit juice, you can
make it by crushing juicy, well-ripened fruit and bringing it to a boil over
low heat. Strain through jelly bag or other cloth. Sugar can be added
directly to juicy fruits that are packed hot. To do this add i/> cup sugar to
each quart of raw, prepared fruit. Heat to simmering (185° to 210° F.).
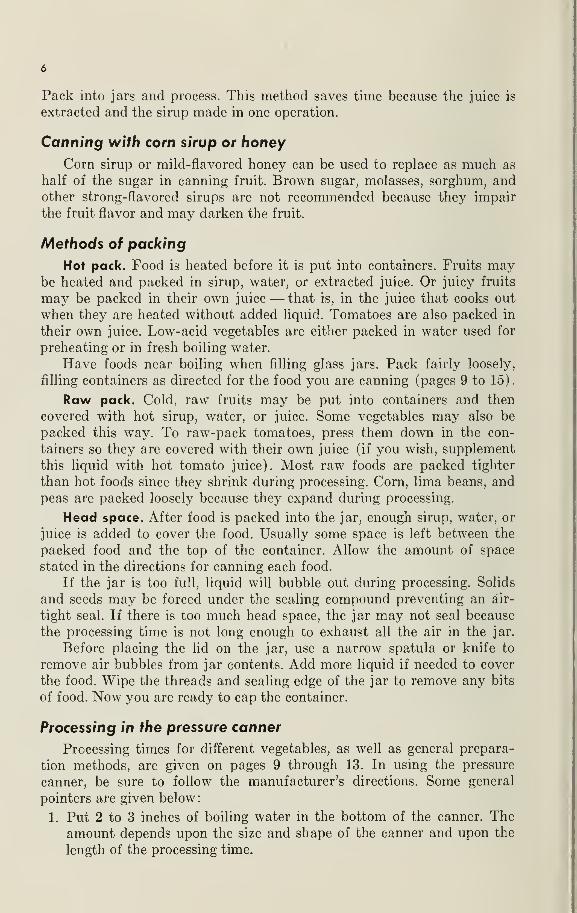
Pack into jars and process. This method saves time because the juice is
extracted and the sirup made in one operation.
Canning with corn sirup or honey
Corn sirup or mild-flavored honey can be used to replace as much as
half of the sugar in canning fruit. Brown sugar, molasses, sorghum, andother strong-flavored sirups are not recommended because they impair
the fruit flavor and may darken the fruit.
Methods of packing
Hot pack. Food is heated before it is put into containers. Fruits maybe heated and packed in sirup, water, or extracted juice. Or juicy fruits
may be packed in their own juice— that is, in the juice that cooks out
when they are heated without added liquid. Tomatoes are also packed in
their own juice. Low-acid vegetables are either packed in water used for
preheating or in fresh boiling water.
Have foods near boiling when filling glass jars. Pack fairly loosely,
filling containers as directed for the food you are canning (pages 9 to 15).
Raw pack. Cold, raw fruits may be put into containers and then
covered with hot sirup, water, or juice. Some vegetables may also be
packed this way. To raw-pack tomatoes, press them down in the con-
tainers so they are covered with their own juice (if you wish, supplement
this liquid with hot tomato juice). Most raw foods are packed tighter
than hot foods since they shrink during processing. Corn, lima beans, and
peas are packed loosely because they expand during processing.
Head space. After food is packed into the jar, enough sirup, water, or
juice is added to cover the food. Usually some space is left between the
packed food and the top of the container. Allow the amount of space
stated in the directions for canning each food.
If the jar is too full, liquid will bubble out during processing. Solids
and seeds may be forced under the sealing compound preventing an air-
tight seal. If there is too much head space, the jar may not seal because
the processing time is not long enough to exhaust all the air in the jar.
Before placing the lid on the jar, use a narrow spatula or knife to
remove air bubbles from jar contents. Add more liquid if needed to cover
the food. Wipe the threads and sealing edge of the jar to remove any bits
of food. Now you are ready to cap the container.
Processing in the pressure canner
Processing times for different vegetables, as well as general prepara-
tion methods, are given on pages 9 through 13. In using the pressure
canner, be sure to follow the manufacturer's directions. Some general
pointers are given below:
1. Put 2 to 3 inches of boiling water in the bottom of the canner. Theamount depends upon the size and shape of the canner and upon the
length of the processing time.
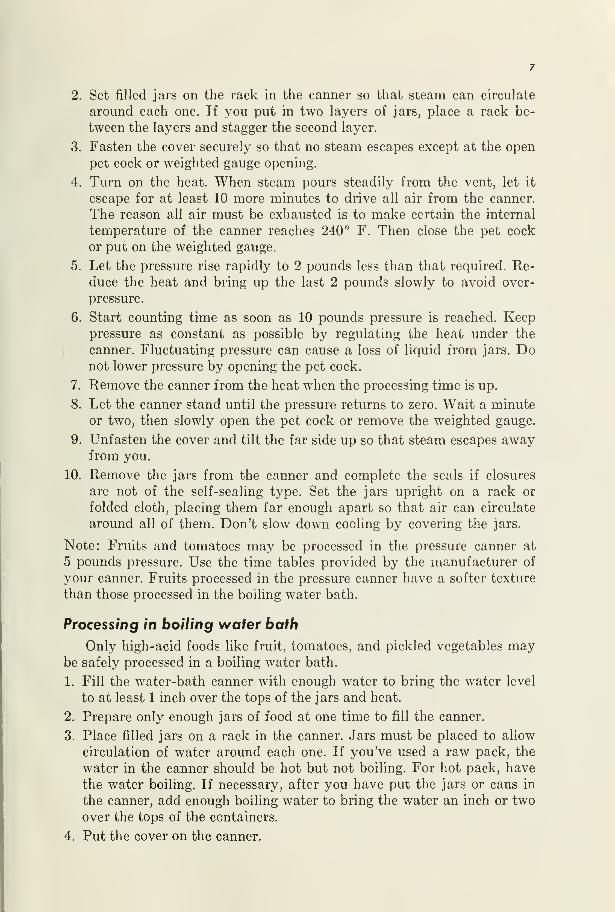
2. Set filled jars on the rack in the canner so that steam can circulate
around each one. If you put in two layers of jars, place a rack be-
tween the layers and stagger the second layer.
3. Fasten the cover securely so that no steam escapes except at the open
pet cock or weighted gauge opening.
4. Turn on the heat. When steam pours steadily from the vent, let it
escape for at least 10 more minutes to drive all air from the canner.
The reason all air must be exhausted is to make certain the internal
temperature of the canner reaches 240° F. Then close the pet cock
or put on the weighted gauge.
5. Let the pressure rise rapidly to 2 pounds less than that required. Re-duce the heat and bring up the last 2 pounds slowly to avoid over-
pressure.
6. Start counting time as soon as 10 pounds pressure is reached. Keeppressure as constant as possible by regulating the heat under the
canner. Fluctuating pressure can cause a loss of liquid from jars. Donot lower pressure by opening the pet cock.
7. Remove the canner from the heat when the processing time is up.
8. Let the canner stand until the pressure returns to zero. Wait a minuteor two, then slowly open the pet cock or remove the weighted gauge.
9. Unfasten the cover and tilt the far side up so that steam escapes awayfrom you.
10. Remove the jars from the canner and complete the seals if closures
are not of the self-sealing type. Set the jars upright on a rack or
folded cloth, placing them far enough apart so that air can circulate
around all of them. Don't slow down cooling by covering the jars.
Note: Fruits and tomatoes may be processed in the pressure canner at
5 pounds pressure. Use the time tables provided by the manufacturer of
your canner. Fruits processed in the pressure canner have a softer texture
than those processed in the boiling water bath.
Processing in boiling water bath
Only high-acid foods like fruit, tomatoes, and pickled vegetables maybe safely processed in a boiling water bath.
1. Fill the water-bath canner with enough water to bring the water level
to at least 1 inch over the tops of the jars and heat.
2. Prepare only enough jars of food at one time to fill the canner.
3. Place filled jars on a rack in the canner. Jars must be placed to allow
circulation of water around each one. If you've used a raw pack, the
water in the canner should be hot but not boiling. For hot pack, have
the water boiling. If necessary, after you have put the jars or cans in
the canner, add enough boiling water to bring the water an inch or two
over the tops of the containers.
4. Put the cover on the canner.

5. Start counting time as soon as the water returns to a rolling boil, andprocess as long as needed. If the water boils down during processing,
add enough boiling water to keep jars covered. Processing times for
fruits and tomatoes are given on pages 13 through 15.
6. Remove the jars from the canner as soon as the processing time is up.
Unless the jars have self-sealing closures, complete the seals as soon as
you take the jars out of the canner.
7. Set the jars on a rack or folded cloth top side up and far enough apart
so that air can circulate around them. Don't set hot jars on a cold
surface or in a draft as sudden cooling may break the jar. Do not cover
jars while they are cooling.
Checking seals
Check all containers after they are thoroughly cooled for proper seals.
Test the seal on jars with screw bands and metal lids by removing the
band gently and then pressing on the center of the lid. If the lid stays
down and does not move, the jar is sealed. Examine jars with porcelain-
lined caps for leaks by turning them over in your hand.
Food in leaky containers may be used at once or it may be recanned.
If you decide to recan, empty the container and pack and reprocess the
food in a perfect container for the full recommended time.
Make sure that containers are clean and that they are labeled to showcontent and date of canning before storing them in a cool, dry place.
Storing canned fruits and vegetables
Store canned foods in a cool, dry place. For best nutritive value and
eating quality, use within one year. Canned foods stored in a warm place
or in direct sunlight may lose eating quality in a few weeks or months
depending upon the temperature. Dampness may corrode lids and cause
leakage which, in turn, will cause the food to spoil.
Freezing does not cause the food to spoil unless the seal or jar is
damaged. However, canned foods that have frozen are not as tasty as
those that have been stored properly.

DIRECTIONS FOR CANNING VEGETABLES
Preparation Methods and Processing Times for Pressure Conner
Product and general preparation methodsProcessing time at
10 pounds pressure
(minutes)
ASPARAGUS
Break off tough ends; remove scales. Wash thoroughly. Cutinto 1-inch pieces.
Hot pack: Cover with boiling water; boil 2 or 3 minutes. Packasparagus to Y2 inch of top of jars. Add % teaspoon salt to
pints; 1 teaspoon salt to quarts. Cover with fresh boiling water
to x/2 inch of top of jars. Adjust jar lids.
Raw pack : Pack as tightly as possible without crushing to 3^inch of top of jars. Add 3^ teaspoon salt to pint jars; 1 teaspoon
salt to quart jars. Cover with boiling water to l/^ inch of top
qf jars. Adjust jar lids.
Pint jars— 25
Quart jars— 30
Pint jars— 25
Quart jars— 30
BEANS, DRY, WITH TOMATOES OR MOLASSES
Wash dry beans. Cover with boiling water and boil for 2 min-
utes. Remove from heat; allow to soak 1 hour. Heat again to
boiling. Drain and save liquid for making sauce.
Tomato sauce: Mix 1 cup tomato catsup with 3 cups liquid from
beans (use water if there is not enough liquid). Heat to boiling.
Molasses sauce: Combine 1 quart water or liquid from beans,
3 tablespoons dark molasses, 1 tablespoon vinegar, 2 teaspoons
salt, and % teaspoon dry mustard. Heat to boiling.
Hot pack: Fill jars three-quarters full with hot beans. Add a
small piece of salt pork, ham, or bacon. Fill jars to 1 inch of top
with hot sauce. Adjust jar lids.
Pint jars— 65
Quart jars— 75
BEANS, FRESH LIMA
Use only young, tender beans. Shell and wash.
Hot pack: Cover with boiling water and bring to boil. Packhot beans loosely to 1 inch of top of jars. Add x/2 teaspoon salt
to pints; 1 teaspoon salt to quarts. Cover with boiling water
to 1 inch of top of jars. Adjust jar lids.
Raw pack: Pack the raw washed beans into clean jars. Packsmall-type beans to 1 inch of top of pint jars and to V/2 inches
of top of quart jars; pack larger beans to % inch of top of pint
jars and \\i inch of top of quarts. Do not press or shake down.
Add }/2 teaspoon salt to pints; 1 teaspoon to quarts. Coverwith boiling water to within Y2 inch of top of jar. Adjust jar
lids.
Pint jars— 40
Quart jars— 50
Pint jars— 40
Quart jars— 50
BEANS, SNAP
Use only fresh, tender beans. Remove ends; break or cut into
1-inch pieces. Wash thoroughly.
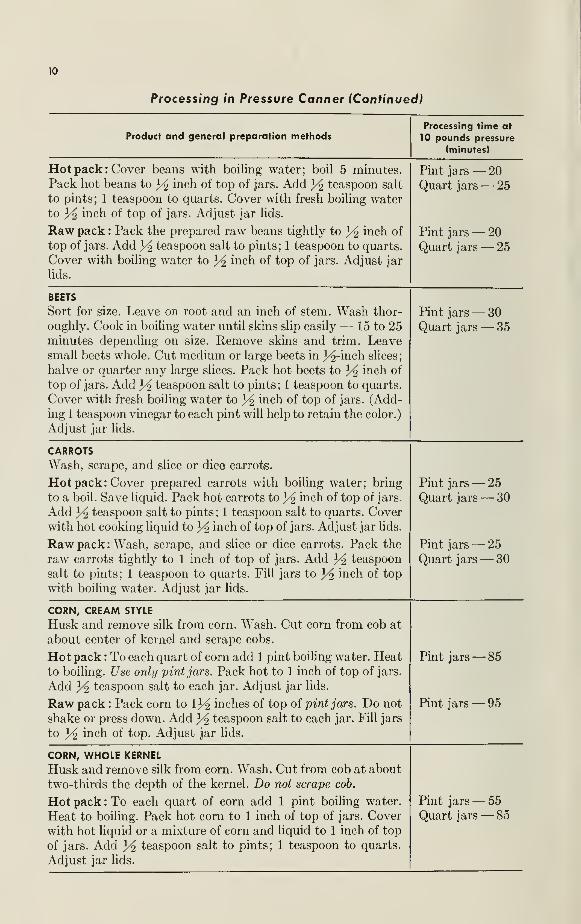
10
Processing in Pressure Conner (Continued)
Product and general preparation methodsProcessing time at
10 pounds pressure
(minutes)
Hot pack : Cover beans with boiling water; boil 5 minutes.
Pack hot beans to Y inch of top of jars. Add Y teaspoon salt
to pints; 1 teaspoon to quarts. Cover with fresh boiling water
to Yi inch of top of jars. Adjust jar lids.
Raw pack : Pack the prepared raw beans tightly to Y inch of
top of jars. Add Yi teaspoon salt to pints; 1 teaspoon to quarts.
Cover with boiling water to Y inch of top of jars. Adjust jar
lids.
Pint jars— 20
Quart jars— 25
Pint jars —Quart jars
20-25
BEETS
Sort for size. Leave on root and an inch of stem. Wash thor-
oughly. Cook in boiling water until skins slip easily— 15 to 25
minutes depending on size. Remove skins and trim. Leavesmall beets whole. Cut medium or large beets in 3^-inch slices;
halve or quarter any large slices. Pack hot beets to Y inch of
top of jars. Add Y teaspoon salt to pints; 1 teaspoon to quarts.
Cover with fresh boiling water to Y inch of top of jars. (Add-
ing 1 teaspoon vinegar to each pint will help to retain the color.)
Adjust jar lids.
Pint jars— 30
Quart jars— 35
CARROTS
Wash, scrape, and slice or dice carrots.
Hot pack: Cover prepared carrots with boiling water; bring
to a boil. Save liquid. Pack hot carrots to Y inch of top of jars.
Add Y teaspoon salt to pints; 1 teaspoon salt to quarts. Coverwith hot cooking liquid to Y inch of top of jars. Adjust jar lids.
Raw pack : Wash, scrape, and slice or dice carrots. Pack the
raw carrots tightly to 1 inch of top of jars. Add Y teaspoon
salt to pints; 1 teaspoon to quarts. Fill jars to Y inch of top
with boiling water. Adjust jar lids.
Pint jars —Quart jars
25-30
Pint jars— 25
Quart jars — 30
CORN, CREAM STYLE
Husk and remove silk from corn. Wash. Cut corn from cob at
about center of kernel and scrape cobs.
Hot pack : To each quart of corn add 1 pint boiling water. Heatto boiling. Use only pint jars. Pack hot to 1 inch of top of jars.
Add Y teaspoon salt to each jar. Adjust jar lids.
Raw pack : Pack corn to 13^ inches of top of pint jars. Do not
shake or press down. Add Y teaspoon salt to each jar. Fill jars
to Y inch of top. Adjust jar lids.
Pint jars— 85
Pint jars— 95
CORN, WHOLE KERNEL
Husk and remove silk from corn. Wash. Cut from cob at about
two-thirds the depth of the kernel. Do not scrape cob.
Hot pack : To each quart of corn add 1 pint boiling water.
Heat to boiling. Pack hot corn to 1 inch of top of jars. Cover
with hot liquid or a mixture of corn and liquid to 1 inch of top
of jars. Add Y teaspoon salt to pints; 1 teaspoon to quarts.
Adjust jar lids.
Pint jars— 55
Quart jars— 85

11
Processing in Pressure Conner (Continued)
Product and general preparation methodsProcessing time at
10 pounds pressure
(minutes)
Raw pack: Pack corn to 1 inch of top of jars. Do not shake or
press down. AddY teaspoon salt to pints; 1 teaspoon to quarts.
Fill to'l/2 inch of top with boiling water. Adjust jar lids.
Pint jars —Quart jars-
55-85
HOMINYPlace 2 quarts dry field corn in an enameled pan. Add 8 quarts
water and 2 ounces lye. Boil vigorously Y hour, then allow to
stand 20 minutes. Rinse off lye, using several hot-water rinses.
Then rinse with cold water to cool for handling. Work hominywith hands until dark tips of kernels are removed (about 5
minutes). Separate the tips from the corn by floating them off
in water or by placing the corn in a coarse sieve and washing
thoroughly. Add water to cover the hominy about 1 inch ; boil
5 minutes; change water. Repeat 4 times. Then cook until ker-
nels are soft (3^ to % hour). Drain. This will make about 6
quarts. Pack hot hominy to Y inch of top of jar. Add Y2 tea-
spoon salt to pints; 1 teaspoon to quarts. Fill with boiling water
to x/2 mch of top of jars. Adjust jar lids.
Pint jars— 60Quart jars— 70
MUSHROOMSTrim stems and discolored parts of mushrooms. Soak in cold
water for 10 minutes to remove soil. Wash in clean water.
Leave small mushrooms whole; cut larger ones into halves or
quarters. Steam 4 minutes or heat gently for 15 minutes with-
out added liquid in a covered saucepan. Pack hot mushroomsto Y inch of top of jars. Add boiling water, if necessary, to
bring liquid to Y inch of jar top. Add 34 teaspoon salt to half-
pints; 3^2 teaspoon to pints. For better color, add ascorbic acid
— }/$ teaspoon (250 milligrams) for each pint. Adjust jar lids.
Half-pint jars—30
Pint jars— 30
OKRAUse only tender pods. Wash and trim. Cook for 1 minute in
boiling water. Leave whole or cut into 1-inch lengths. Pack hot
okra to Y2 inch of jar tops. Add Y% teaspoon salt to pints; 1
teaspoon to quarts. Cover with boiling water to Y inch of jar
tops. Adjust jar lids.
Pint jars— 25
Quart jars— 40
PEAS, GREEN
Wash shelled peas.
Hot pack: Cover with boiling water. Bring to boil. Pack hot
peas loosely to 1 inch of top of jars. Add Y2 teaspoon salt to
pints; 1 teaspoon to quarts. Cover with boiling water to 1 inch
of top of jars. Adjust jar lids.
Raw pack: Pack peas to 1 inch of top. Do not shake or press
down. Add Y teaspoon salt to pints; 1 teaspoon to quarts.
Cover with boiling water to 13^ inches of top of jars. Adjust jar
lids.
Pint jars— 40
Quart jars— 40
Pint jars— 40
Quart jars— 40

12
Processing in Pressure Conner (Continued)
Product and general preparation methodsProcessing time at
10 pounds pressure
(minutes)
POTATOES, CUBED
Wash, pare, and dice potatoes into 3^-inch cubes. To prevent
potato cubes from darkening, dip them in a brine (1 teaspoon
salt to 1 quart water). Drain. Cook for 2 minutes in boiling
water and drain. Pack hot potatoes to Y inch of top of jars.
Add Y teaspoon salt to pints; 1 teaspoon to quarts. Coverwith boiling water to Y inch of jar top. Adjust jar lids.
Pint jars— 35Quart jars— 40
POTATOES, WHOLEUse small potatoes 1 to 2Yi inches in diameter. Wash, pare,
and cook in boiling water for 10 minutes. Drain. Pack hot po-
tatoes to Y inch of top of jars. Add Y2 teaspoon salt to pints;
1 teaspoon to quarts. Cover with boiling water to Y inch of
jar top. Adjust jar lids.
Pint jars —Quart jars
30-40
PUMPKIN, CUBED
Wash, remove seeds, and peel pumpkin. Cut into 1-inch cubeslAdd water to barely cover; bring to boil. Pack hot cubes to y<i
inch of top of jars. Add Yi teaspoon salt to pints; 1 teaspoon
to quarts. Fill with hot cooking liquid to Y inch of top of jars.
Adjust jar lids.
Pint jars— 55
Quart jars— 90
PUMPKIN, STRAINED
Wash, remove seeds, and peel pumpkin. Cut into 1-inch cubes.
Steam until tender, about 25 minutes. Put through strainer or
food mill. Simmer until heated through, stirring to prevent
sticking. Pack hot to Yi inch of top of jars. Add no liquid or
salt. Adjust jar lids.
Pint jars— 65
Quart jars— 80
SPINACH (and other greens)
Can only tender, freshly picked spinach. Look over and washcarefully. Discard imperfect leaves and tough stems and mid-
ribs. Place about 2Y pounds of spinach in a cheesecloth bag
and steam about 10 minutes or until thoroughly wilted. Packhot spinach loosely to Y inch of top of jars. Add Y teaspoon
salt to pints; Y teaspoon to quarts. Cover with boiling water
to Y mch of top of jars. Adjust jar lids.
Pint jars —Quart jars
70-90
SQUASH, SUMMERWash but do not peel. Trim ends. Cut squash into 3^-inch
slices; halve or quarter to make pieces uniform in size.
Hot pack: Add water barely to cover. Bring to boil. Pack hot
squash to Y inch of top of jars. Add Y teaspoon salt to pints;
1 teaspoon to quarts. Cover with hot cooking liquid to Y inch
of top of jars. Adjust jar lids.
Raw pack : Pack raw squash tightly into clean containers to 1
inch of top of jar. Add Y teaspoon salt to pints; 1 teaspoon
to quarts. Cover with boiling water to Y inch of jar top. Ad-
just jar lids.
Pint jars— 30
Quart jars— 40
Pint jars— 25
Quart jars — 30

13
Processing in Pressure Conner (Concluded)
Product and general preparation methodsProcessing time at
10 pounds pressure
(minutes)
SQUASH, WINTER
Prepare, pack, and process same as pumpkin.
SWEETPOTATOES, DRY PACK
Wash sweetpotatoes. Sort for size. Boil or steam until partly
soft (20 to 30 minutes). Peel and cut in pieces if large. Packhot sweetpotatoes tightly to 1 inch of top of jars. Press gently
to fill spaces. Add no salt or liquid. Adjust jar lids.
Pint jars— 65
Quart jars— 95
SWEETPOTATOES, WET PACK
Wash sweetpotatoes. Sort for size. Boil or steam until skins
slip easily. Peel and cut in pieces. Pack hot sweetpotatoes to
1 inch of top of jars. Add 3^2 teaspoon salt to pints; 1 teaspoon
to quarts. Cover with boiling water to 1 inch of top of jars.
Adjust jar lids.
Pint jars— 55
Quart jars— 90
DIRECTIONS FOR CANNINGFRUITS, TOMATOES, AND PICKLED VEGETABLES
Preparation Methods and Processing Times for Boiling Water Bath
Product and general preparation methodsProcessing time
(minutes)
APPLES
Wash, pare, and cut in pieces. To keep fruit from darkening,
drop into water containing 2 tablespoons each of vinegar andsalt per gallon. Drain; boil 5 minutes in thin sirup or water.
Pack hot fruit to within y% inch of top of jars. Cover with hot
sirup or water. Leave 3/£ inch headspace at top of jars. Adjust
jar lids.
Pint jars— 15
Quart jars— 20
APPLESAUCE
Make applesauce, sweetened or unsweetened. Heat thoroughly,
stirring to keep it from sticking to pan. Pack hot to 3<± inch of
top of jars. Adjust jar lids.
Pint jars— 10
Quart jars— 10
APRICOTS
Follow method and processing time for peaches. Peeling may be omitted.
BEETS, PICKLED
Select tender beets. Cut off tops, leaving 1 inch stem. Also
leave on roots. Wash. Cover with boiling water; cook until
tender. Remove skins and trim. Leave small beets whole; slice
larger beets. For sirup use 2 cups vinegar (or 13^ cups vinegar
and 3^2 CUP water) to 2 cups sugar. Heat to boiling. Pack hot
beets in jars to 3^ inch of top. Add J/£ teaspoon salt to a pint;
1 teaspoon to a quart. If desired, add 3 to 6 whole cloves. Coverwith boiling pickling sirup, leaving 3^ inch headspace at top of
jars. Adjust jar lids.
Pint jars— 30
Quart jars— 30

14
Processing in Water Bath (Continued)
Product and general preparation methodsProcessing time
(minutes)
BERRIES (Strawberries lose flavor and color when canned.)
Hot pack: (for firm berries) Wash berries and drain well. AddY cup sugar to each quart. Cover pan and bring to boil, shak-
ing pan to keep fruit from sticking. Pack hot to Y inch of top
of jars. Adjust jar lids.
Raw pack : (for red raspberries and other soft berries) Washberries and drain well. Fill jars toY inch of top. For a full pack,
shake down while filling. Cover with boiling sirup to Y inch
of top of jars. Adjust jar lids.
Pint jars —Quart jars-
10
15
Pint jars— 10
Quart jars— 15
CHERRIES
Wash cherries. If desired, remove pits.
Hot pack : Use method and processing times for firm berries, above, adding a small
amount of water when heating unpitted cherries to keep them from sticking to pan.
Raw pack : Fill jar to Y inch of top. For full pack, shake cher-
ries down when filling containers. Cover with boiling sirup to
Y2 inch of jar top. Adjust jar lids.
Pint jars— 20
Quart jars— 25
FRUIT JUICES
Wash, remove pits if desired, and crush fruit. Heat to simmer-ing (185°-210° F.). Strain through cloth bag. Add sugar if de-
sired, about 1 cup to 1 gallon. Reheat to simmering. Fill jars
to top with hot juice. Adjust jar lids.
Pint jars— 5
Quart jars— 5
FRUIT PUREES
Use sound, ripe fruit. Wash; remove pits if desired. Cut large
fruit in pieces. Simmer until soft, adding a little water if neces-
sary to keep fruit from sticking. Put through food mill or
strainer. Add sugar to taste. Heat again to simmering. Fill
jars to Y inch of top with hot puree. Adjust jar lids.
Pint jars— 10
Quart jars— 10
PEACHES
Select firm, ripe peaches. Wash. Dip in boiling water, then
quickly in cold water. Peel, cut peaches in halves, remove pits.
Slice if desired. To prevent darkening, drop fruit into water
containing 2 tablespoons each of vinegar and salt per gallon.
Drain just before heating or packing raw.
Hot pack: Heat peaches in hot sirup. Very juicy peaches maybe heated with sugar, without water. Pack hot fruit to Y inch
of top of jars. Cover with boiling sirup to Y2 inch of top of jars.
Adjust jar lids.
Raw pack : Pack raw fruit to Y2 inch of top of jars. Fill with
boiling sirup to Y inch of top of jars. Adjust jar lids.
Pint jars— 20
Quart jars— 25
Pint jars— 25
Quart jars— 30
PEARS
Wash, peel, cut in halves, and core. Proceed as with peaches using either hot or
raw pack.

15
Processing in Water Bath (Concluded)
Product and general preparation methodsProcessing time
(minutes)
PLUMS
Wash. To can whole, prick skins to prevent their bursting.
Freestone varieties may be halved and pitted.
Hot pack: Heat to boiling in sirup or juice. Very juicy plumsmay be heated with sugar, adding no water. Pack hot fruit to
Y inch of top of jars. Cover with boiling sirup to Y inch of top
of jars. Adjust jar lids.
Raw pack : Pack raw fruit to Y inch of top of jars. Cover with
boiling sirup to Y inch of top of jars. Adjust jar lids.
Pint jars— 20
Quart jars— 25
Pint jars —Quart jars
20-25
RHUBARB
Select young tender rhubarb. Wash and cut into 3^-inch pieces.
Add }/2 cup sugar to each quart and let stand to draw out juice.
Bring to boiling. Pack hot to Y2 inch of top of jars. Adjust jar
lids.
Pint jars —Quart jars
10
-10
SAUERKRAUT
Heat well-fermented sauerkraut to simmering (185°-210° F.).
Pack hot kraut into containers; cover with hot juice, filling to
Y inch of top of jar. Adjust jar lids.
Pint jars— 15
Quart jars— 20
TOMATOES
Use only perfect, ripe red tomatoes. Scald in boiling water for
about 30 seconds. Then dip quickly in cold water. Slip off skins
and cut out stem ends.
Hot pack: Quarter peeled tomatoes. Heat slowly to boilding
point, stirring often. Pack hot to Y2 inch of top of jars. Add Yteaspoon salt to pints; 1 teaspoon to quarts. Adjust jar lids.
Raw pack : Tomatoes may be left whole or cut in halves or
quarters. Pack tomatoes, pressing gently to fill space, to Yinch of top of jars. Add no water. Add Y2 teaspoon salt to pints;
1 teaspoon to quarts. Adjust jar lids. (This method gives better-
quality canned tomatoes than the hot pack.)
Pint jars— 10
Quart jars— 10
Pint jars— 35
Quart jars— 45
TOMATO JUICE
Use ripe, juicy red tomatoes. Wash, remove stem ends, and cut
into pieces. Simmer until softened, stirring often. Put throughfood mill or strainer. Add 1 teaspoon salt to each quart juice.
Reheat at once just to boiling. Pack boiling hot juice to Y inch
of top of jars. Adjust jar lids.
Pint jars— 10
Quart jars— 10
For more information on preserving food at home, write to the InformationOffice, College of Agriculture, University of Illinois at Urbana-Champaign, UrbanaIllinois 61801, to obtain the following circulars: How to Prepare Fruits and Vege-
tables for Freezing, Circular 602 and Freezing Cooked and Prepared Foods, Circular
835.
Your county extension adviser in home economics will help you with questions youmay have about home food preservation.

GUIDE FOR 1 QUART CANNED FRUIT OR VEGETABLE FROM FRESH FOOD
Exactly how much fresh fruit or vegetable is needed depends on the quality,
variety, and maturity and sometimes the size of fresh food you are using. The
size of the pieces and whether the food is packed raw or hot also makes a differ-
ence in how much is needed. It takes about 4 medium apples, peaches, or toma-
toes ; about 3 medium pears ; and about 12 plums to make a pound. The following
amounts of fresh fruits or vegetables are suggested for a quart of canned food.
Plan on Plan on
For one this number For one this number
canned quart of pounds canned quart of pounds
Apples 2y2~3 Okra iy2Apricots 2-2V2 Peaches 2-3
Asparagus 2y2-±y2 Pears 2-3
Beans, lima, in pods 3-5 Peas, green, in pods 3-6
Beans, snap 1K-2H Plums 1^-23^Beets, without tops 2-3K Pumpkin or winter squash 1K-3Berries, except strawberries L-2 Spinach or other greens 2-6
quart boxes Squash, summer 2-4
Carrots, without tops 2-3 Sweetpotatoes 2-3
Cherries, canned unpitted 2-2Y2 Tomatoes 2H-3HCorn, sweet, in husks 3-6 Tomatoes, for juice 3-33^
WARNING: Proper heating and correct sealing are absolutely essential for
successful canning. Be sure you use the processing method and processing time
given for each food. If not destroyed by heat, bacteria can grow in a sealed jar.
Examine canned foods before using. Do not taste the food if the container is
leaky, the lid bulges, or the seal is faulty; or if liquid spurts when you openthe container, the food has a peculiar odor, or mold is present. Destroy the
food at once.
As a safeguard against botulism, heat home-canned, low-acid vegetables to
boiling. Boil at least 10 minutes before tasting or using. Spinach and corn
should be boiled for 20 minutes.
This circular was prepared by Geraldine Acker, Professor of Foods and Nutrition.
It replaces Circular 943.
The Illinois Cooperative Extension Service provides equal opportunities in programs andemployment.
Urbana, Illinois May, 1975
Issued in furtherance of Cooperative Extension Work, Acts of May 8 and June 30, 1914, in co-operation with the U.S. Department of Agriculture. JOHN B. CLAAR, Director, Cooperative Exten-sion Service, University of Illinois at Urbana-Champaign.
20M—S-7S—310S9


UNIVERSITY OF ILLINOIS-URBANA
Q.630.7IL6C C005
CIRCULAR URBANA. ILL.
11121975
3 0112 019533394