c user manual - wiesbaden.de · important 1. do not drop the rekorder or give a hard impact, it...
TRANSCRIPT

DR2Professional Digital Recorder
User Manual
TM
C
M
Y
CM
MY
CY
CMY
K
Page-Cover.pdf 24.05.2007 11:00:36

For Customers in U.S.A. or CanadaIf you have any questions about this product, you can mail to [email protected]
Regulatory Information:
This device complies with part 15 of FCC rules. Operation is subject to the following two conditions:(1) This device may not cause harmful interference, and (2) This device must accept any interference received, including interference that may cause undesired operation.
FCC Notice:This equipment has been tested and found to comply with the limits for a Class B digital device, pursuant to part 15 of the FCC Rules. These limits are designed to provide reasonable protection against harmful interference in a residential installation. This equipment generates, uses, and can radiate radio frequency energy and, if not installed and used in accordance with the instructions, may cause harmful interference to radio communications. However, there is no guarantee that interference will not occur in a particular installation. If this equipment does cause harmful interference to radio and television reception, which can be determined by turning the equipment off and on, the user is encouraged to try to correct the interference by one or more of the following measures:-Reorient or relocate the receiving antenna.-Increase the separation between the equipment and receiver.-Connect the equipment into an outlet on a circuit different from that to which the receiver is connected.-Consult the dealer or an experienced radio/ TV technician for help.
01
DR2
C
M
Y
CM
MY
CY
CMY
K
Page-1.pdf 23.05.2007 16:50:10

For Customers in EuropeThis product conforms to the following European Directives:89/336/EEC (EMC Directive)This product complies with EN55022/A1:2000 and EN 55024/A1:2001 for use in the following areas: residential, commercial and light industrial.
02
C
M
Y
CM
MY
CY
CMY
K
Page-2.pdf 23.05.2007 16:50:10

ContentsPreparation...................................................................................................................................05 - Manual instruction.....................................................................................................................05 - Liability exemption statement...................................................................................................05Important......................................................................................................................................06Safety Precaution.........................................................................................................................07Features of the product...............................................................................................................08A list of accessories......................................................................................................................09Product Drawing & Function Keys...........................................................................................10Description of LCD display.........................................................................................................11Operation instructions of function buttons..........................................................................12-13PC Connection........................................................................................................................14-17 Basic functions..............................................................................................................................18 - Power on/off...............................................................................................................................18 - Volume setting...........................................................................................................................18 - Mode switch...............................................................................................................................19 - Lock function.............................................................................................................................19 - Play music..................................................................................................................................19 - FM radio....................................................................................................................................20 - Record function......................................................................................................................21-22 - Manual adjustment.....................................................................................................................22 - Monitoring.................................................................................................................................22 - Play recorded files.....................................................................................................................23Additional functions......................................................................................................................23 - EQ setting...................................................................................................................................23 - Repeat mode...............................................................................................................................23 - ID3 language selection...............................................................................................................24 - File management........................................................................................................................24Firmware upgrade........................................................................................................................25
03
C
M
Y
CM
MY
CY
CMY
K
Page-3.pdf 23.05.2007 16:50:50

ContentsSystem setting...............................................................................................................................26 - Selection menue.........................................................................................................................26 - OS language...............................................................................................................................26 - Idle.............................................................................................................................................26 - Sleep...........................................................................................................................................26 - Backlight time............................................................................................................................26 - Contrast......................................................................................................................................27 - Scroll .........................................................................................................................................27 - ASD.. .........................................................................................................................................27 - Default ........................................................................................................................................27 - About (this device)......................................................................................................................27Main menu tree diagram.............................................................................................................28Customer support.........................................................................................................................29 - Trouble shooting..........................................................................................................................29Specifications................................................................................................................................30
04
C
M
Y
CM
MY
CY
CMY
K
Page-4.pdf 23.05.2007 16:51:14

Preparation
Manual Instruction
Thank you for purchasing Soundman Digital Rekorder DR2. This manual systematically introduces the operation method, skills and relevant precautions. Please read it carefully so as to master the operation method quickly.
We try to provide products with appearance identical to the pictures displayed in this manual, but the real one may more or less differ from the pictures. Please see the real product for reference. The PC we mentioned in this manual, except otherwise specified, refers to desk computer or notebook computer with Windows operating system*. All products, devices, digital audio rekorders we mentioned in this manual, except otherwise specified, refer to digital audio rekorder.* Tested with WindowsXP, MacOSX, Linux Debian Sarge.
Liability Exemption statement
1. All the information written in this manual was produced with our company's careful caution, but there still may be some mistakes. Soundman will not be responsible for this maybe mistakes.2. Since we cannot control users' understanding of this manual, Soundman will not be responsible for any accident or other loss caused by misunderstanding of this manual. We will also not be responsible for any loss caused by using our product or the claim by the third party.3. Soundman will be responsible only for the inherent problem of the device,but not for data loss, revision of the device or other indirect losses resulting from mal-operation of software, maintenance or other accidents. Soundman will not be responsible for restoration of the personal data lost.4. Soundman reserves the right of modifying the software, hardware and user manual of this device without special notice.5. To make copies, publish, transfer, store in traceable system or translate to any other languages without written authorization from Soundman is prohibited.
05
C
M
Y
CM
MY
CY
CMY
K
Page-5.pdf 23.05.2007 16:50:38

Important1. Do not drop the rekorder or give a hard impact, it could cause malfunction. 2. Do not subject the rekorder to high temperature or direct sunlight.3. Keep it far away from humid place.4. Do not disassemble it.5. Use dry cloth to clean the rekorder.6. Do not contact chemicals such as benzene or diluents.7. Take the battery out, if left unused for a long period.
06
C
M
Y
CM
MY
CY
CMY
K
Page-6.pdf 23.05.2007 16:51:03

Safety PrecautionBefore using this device, please carefully read and understand every safety instruction listed in this chapter, and observe them strictly in future use to ensure that the device provides you with pleasure and entertainment for a long time.1. Read carefully all the attached user's materials and fully understand the operation guide and warnings of this device. 2. Check if the contents in the package of the device are consistent to the packing list. If not, please contact the dealer immediately. 3. When it is left unused for a long period of time, the battery should be taken out from battery chamber. If liquid leakage of battery is detected and the device works abnormally, please do not dismantle the device for cleaning, which may lead to irremediable damages to the device. In this case, please do not hesitate to contact Soundman customer service center for technical support and help from Soundman professional servicemen. But Soundman shall take no liability for damages resulting from battery liquid leakage. 4. This device is a hi-tech electronic product, which should keep away from heat, cold and moisture when being used. Special care should be taken to observe the following points: a) The device should not be exposed to strong sunlight, and should keep away from heat sources. b) Avoid using the device outdoor at low temperature for a long period of time. c) The device should not be placed in the environment of extra-humidity; Care should be taken so that water and other liquids are not spilled onto the device. If it happens, the device should be switched off immediately. d) The device should not be used in dust-plagued or very dirty places. e) Do not clean the device with any type of detergent containing chemical elements or other solutions in order to avoid damages from corrosion or moisture. If necessary, please clean it with soft cloth or paper slightly.5. Do not use the device in strong magnetic field, strong electric charge or electromagnetic interference environment in order to prevent data from being lost. 6. Do not drop the device on the ground or suffer from fierce impact from other objects, which may lead to unnecessary loss. 7. The device should be opened under no circumstances. The manufacturer takes no liability for damages resulting from unauthorized tampering.
07
C
M
Y
CM
MY
CY
CMY
K
Page-7.pdf 23.05.2007 16:54:04

Features of the product
This device is a new generation of multi-function digital recorder player, which can play music (MP3 and WAV), with built-in FM reception function, and also the capability of recording the signal of built-in Mic, ext. microphone, FM signal. It can also serve as a plug-and-play USB disk.
Here we list some major functions and features here for your reference:- OLED2 Color Display- Show Artist and Song Name- Show Lyrics- Multi ID3 Language support- integrated FM Radio- Combined Mic-IN/Line-IN Jack (powered/unpowered mixed)- Built-In Microphone- Frequency Range 20Hz - 20kHz- Signal to Noise Ratio 85 dB- Recording possible from: Radio, Mic-IN (powered), Mic-IN (unpowered), Line-IN und Built-IN-Microphone- Mic-IN 3V (Plug-in-Power) manual level adjustment- Line-IN (Plug-in-Power) manual level adjustment- 0 / -10 / -20dB switchable- Recording MP3 (selectable 96, 128, 196)- Recording WAV (ADPCM)- Playing Formats: MP3, WAV, WMA- Play Mode: Normal, Repeat one, Repeat all, Shuffle, Random shuffle- Plug-and-play USB(2) Mass-storage (Up/Download/Saving all PC Datatypes possible)- Firmware update possible- 2GB internal memory- AAA/LR03 1,5V Battery (over 6h Recordtime with WAV format, standard battery format)- Dimensions in mm: 72,5 x 35,5 x 18,5 (HxWxD)
08
C
M
Y
CM
MY
CY
CMY
K
Page-8.pdf 06.09.2007 16:10:31
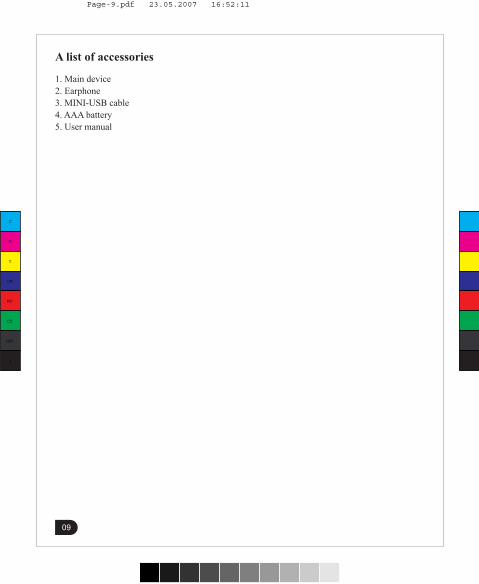
A list of accessories
1. Main device2. Earphone3. MINI-USB cable 4. AAA battery5. User manual
09
C
M
Y
CM
MY
CY
CMY
K
Page-9.pdf 23.05.2007 16:52:11

10
Mini USB jack Record buttonPlay button
Key lock
5-way key - up, down, left, right, Menu
Lanyard
Internal MIC
Battery compartment
Earphone Jack
External Mic in Jack Line in Jack
MIC
IN
LIN
E IN
C
M
Y
CM
MY
CY
CMY
K
Page-10.pdf 23.05.2007 16:52:42

Description of LCD display
11
Volume indicatorEqualizer
Key lock
Mode
Song name
Album information
Play mode
Play status
Powerindicator
Trackinformation
Elapse time Total timeof the song
C
M
Y
CM
MY
CY
CMY
K
Page-11.pdf 23.05.2007 16:55:43

12
Operation instructions of function buttons
Note: Short press ----- press a button for less than one secondLong press ----- press a button for more than one second
Function buttons Status Button press mode Functions
Power on
SleepStop/pause
Play
Long
Short
Short
Short
SleepPower on
Play files
Pause
Pause
Stop/pause
Play
Play
Menu
FM (normal radio mode)
FM (normal radio mode)
FM (preset radio mode)
Recording
Long
Long
Short
Short
Long
Long
Stop
Short
Short
Short
Short manuall adjustment +
Scan fast forward
Scan forward continuously
Move to the next file
Scan fast forward
Move to the next file
Enter sub menu
Scan broadcasting frequency from low to highScan forward with 0.05MHz as a unit
Continuously selecting preset broadcasting stations
Pause
Stop/pause
Play
Play
Long
Long
Short
Short
Long
Stop
Fast search backwards
Continuously search file backwards
Move to the last file
Fast search backwards
Move to the beginning of the current files
C
M
Y
CM
MY
CY
CMY
K
Page-12.pdf 23.05.2007 16:55:15

Operation instructions of function buttons
13
Function buttons Status Button press mode Functions
FM (normal radio mode)
FM (normal radio mode)
FM (preset radio mode)
Long
Short
Short
ShortRecording manuall adjustment -
Scan broadcasting frequency from low to high
Scan forward with 0.05MHz as a unit
Continuously selecting preset broadcasting stations
Play(within 5 minutes after play start)
Short Move to the last file
Enter the previous stage menu
ShortMenu
Volume up continuouslyStop/pause/play/FM
Stop/pause/play/FM Volume up
Long
Short
Menu Move to the previous menu item
Short
Volume down continuouslyStop/pause/play/FM
Stop/pause/play/FM Volume down
Long
ShortMenu Move to the next menu itemShort
Stop/pause/playStop/pause/play
Menu
M Long
ShortShort
REC
Stop/pause/FMRecord
Sleep/stop/pause/play/record
Sleep/stop/pause/play/record
On
Off
LongRecord/Music Internal Mic,Ext-Mic(with/without Power),Line-In
ShortShort
Go to the mode select menu
Get into setting menuConfirm the selection
Start recordingStop recording
Function buttons idle
Function buttons resume
0dB/-10dB/-20dB adjustmentRecording Short
C
M
Y
CM
MY
CY
CMY
K
Page-13.pdf 23.05.2007 16:54:59

14
The recorder will appear as a removable driver under My Computer .
PC Connection
Connect the recorder to the PC with the provided USB cable
.Mass storage PC ConnectionWindows will show "Found New Hardware" when the recorder is first connected. The recorder will then recognized as a new recorder under My computer. Please note that, depends on the hardware configuration, it may take several minutes for Window to recognize the recorders for the first time.
Note: The PC we mentioned in this manual, except otherwise specified, refers to desk computer or notebook computer with Windows operating system; All products, recorders, digital audio recorders we mentioned in this manual, except otherwise specified, refer to digital audio recorders.
Add-on Function:1.The recorder can also be used as an external drive for storage of non-music files.2.The recorder is compatiable with Music Match. You can directly rip your audio CDs to WAV or MP3 format using Music Match software and directly download to the recorder..*Our recorder does not support WAV files downloaded or created by other music players. It only support WAV files recording direct from the recorder.
C
M
Y
CM
MY
CY
CMY
K
Page-14.pdf 23.05.2007 16:54:37

15
Disconnecting The Recorder From PCClick the icon on the system tray.
When the interface "Unplug or Eject Hardware" appears, click "Stop".
When the "Safe To Remove Hardware" popup window appears, click the [ok] button and disconnect the USB cable from PC.
WARNING: Do not unplug the recorder when the screen is still displaying "Do Not Disconnect".as doing so may corrupt the files stored in the recorder and you will need to re-format the recorder.. If the recorder encounter abnormal interruption during recording such as battery removal,you may also need to re-format it.
How to Format the RecorderThe purpose of re-formatting the recorder is to try to restore the player to normal operation. This is for when the recorder is not able to function properly or in cases where your player is unable to power on. Keep in mind, that the content of the recorder will be removed once being formatted.1.Connect the recorder to the PC.2.Right click the additional drive and click Format.3.Click "Yes" to confirm.
C
M
Y
CM
MY
CY
CMY
K
Page-15.pdf 23.05.2007 16:55:58

CAUTION:ONLY UNPLUG THE RECORDER WHEN ALL DOWNLOAD PROCEDURESARE COMPLETED.
- Drag and Drop for general file- DRM file transfer through Windows Media Player
After the recorder is connected to computer for uploading/downloading, no special operation otherthan simple “drag-drop” is needed.
1. Connect the recorder with your computer by the included USB cable (refer to P.14 for details).2. Double click “my computer” in Windows, you will find a new icon “removable disk”, whichrepresents your recorder.3. Drag your files to “removable disk”.
recorder.
You can also drag and drop files to the recorder in Windows XP.
C
M
Y
CM
MY
CY
CMY
K
Page-16.pdf 23.05.2007 16:56:12

17
Synchronization using Windows Media Player9 (Windows ME, 2000) under Mass StoragePC Connection.
DRM File Transfer
1. Run Windows Media Player 92. Connect your recorder to the computer3. Select "Copy to CD or recorder ".4. Drag the desired songs in PC to the left pane.5. Select removable disk6. Click copy
C
M
Y
CM
MY
CY
CMY
K
Page-17.pdf 24.05.2007 10:57:46

18
Basic Functions
Power on/offPower onPress "play/pause" button to start the device
Shut off1. Long press "play" button, the device will be shut off, as the progress bar displayed below.2. When the progress bar is full, the device will be shut off automatically.3. If releasing the "play" button before the progress bar is full, the device will resume to the former status. Designed in this way, the device will not be shut off accidentally.
Volume settingAdjust the volume by using "VOL+" and "VOL-" on the main device1. Press the button briefly to adjust the volume section by section; long press on the button to adjust the volume continuously.
C
M
Y
CM
MY
CY
CMY
K
Page-18.pdf 24.05.2007 10:58:15

19
Basic Function
Mode switchThis device has three working modes: music mode, FM mode and record mode.Press "M" to enter "mode selection" item, press "vol+" button or "vol-" button to select desired mode among "music mode", "FM" and "record mode" .
Lock functionWhen switching on "HOLD" lock button, all the functions cannot be operated. Switch on the device when it is shut off, "locked" will be displayed. When it is playing, there will be an icon of "locked" on the upper left of screen.
Play musicPlay/pauseThe device will enter music mode or record mode when it is normally started, press " " button to begin playing when it is playing, press " " button to pause playing. The file is in STOP status when the device is normally started.1. Select play file 1) When it is pause/stop, short press " " button or " " button to select files in the music bank. 2) When it is playing, short press " " button briefly to play the next file, while press " " button within 5 seconds to play the previous file, and after 5 seconds to play the current files from the beginning.2. Fast forward/fast backward Press " " button or " " button for more than one second to begin fast forward or fast backward.
C
M
Y
CM
MY
CY
CMY
K
Page-19.pdf 24.05.2007 10:58:02

20
Basic Function
FM radio
Important: Only when earphone is plugged in earphone jack, the FM radio can be received.
Normal FM mode In normal FM mode, you can scan broadcasting station automatically or manually. There are "mode, auto scan, frequency preset, frequency save, record sensitive, frequency selection, system setting and return" are available.Menu under normal FM mode Mode: Switch working mode Auto scan: scan all the frequency automatically Frequency preset: switch to frequency preset mode Frequency save: save the current radio frequency Sensitivity: set the sensitivity of auto scan Frequency selection: switch between common frequency and campus frequency Setting: get into the system setting menu. Please refer to "system setting" part in this manual for details.Preset FM mode You can select a FM program from the pre-saved ones in preset FM mode. "mode selection, auto scan, normal mode, channel deleting, sensitivity, frequency selection, system setting and return" are available.Menu in preset FM mode Mode selection: switch working mode Auto scan: scan all the frequency automatically Normal mode: switch to normal FM mode Channel deleting: deleted the saved FM channel Sensitivity: set the sensitivity of auto scan Frequency selection: switch between common frequency and campus frequency Setting: get into the system setting menu. Please refer to "system setting" part in this manual for details.
C
M
Y
CM
MY
CY
CMY
K
Page-20.pdf 24.05.2007 10:57:16

21
Basic Function
Broadcast auto scan In preset FM mode, press "M" button enter menu and select "auto scan", the digital recorder will start to scan broadcasting stations in all the frequencies and the scanned broadcasting stations will be automatically stored in preset channels.
Campus frequency FM mode provides "campus frequency", a low frequency ranging from 76 to 87.5MHz.
Record function Before select the record mode must set the record quality.
When use the DR2 as dictating machine with the build-in microphone, Mic-IN for recording selected, is a middle or low compression recommended. So the device need less memory.
For professional music- and voicerecording (Concert, Interview ...) will use seperate microphones what must connected in the ext. Mic-IN jack. By this professional recording should always select the high quality WAV format. The WAV files are after drag and drop on the computer very easy to burn on a CD.
Recording: In record mode, it can record via built-in Mic/External Mic/Line-in 1) Long press "Rec" button to choose the recording method 2) Short press "Rec" button again to begin recording 3) Short press "Rec" button again to stop recording. 4) Press " " to pause recording 5) Recorded files are stored as default files .
Note:In record mode , auto silent detect (ASD) function is invalid.
C
M
Y
CM
MY
CY
CMY
K
Page-21.pdf 24.05.2007 10:58:05

Basic Function
FM record In FM mode,the programs from FM station can be recorded in MP3 or WAV format. 1) Press "Rec" button to begin recording 2) Press "Rec" button again to stop recording 3) Press " " button to pause the recording Recorded files are stored as default files .
Manual record level controlThe DR2 dispose of a manual record level control.This function is only available if ext. mic-in is selected.
The basic mode for the record level is 0dB. The record leveldynamic, which is shown in the display, is up to the sensitivityof the connected microphone and the sound-pressure which youare going to record.
If the level is high, you can switch into the -10dB step or -20 dBpressing the joystick. So you can reduce the input sensitivity of thegain with 10dB steps.
Inside the 10dB the fine-tuning will be executed with the joystick.Pressing the joystick to the right for up, pressing the joystick left for down.
The switch-over between the 10dB steps as well as thefine-tuning is practicable during recording.
MonitoringThis can be monitored over headphones during the admission.
Play recorded filesAll the voice files recorded by built-in Mic/external Mic/Line-in/FM will be saved in the menu of "record mode", The operation of which is the same with play operation in "music mode" and "record mode".
22
C
M
Y
CM
MY
CY
CMY
K
Page-22.pdf 24.05.2007 10:58:25

Additional Function
EQ setting Select the playing EQ. "normal, rock, jazz, pop, classic, bass" are available.
Repeat mode The play modes of digital player are "normal, repeat one, repeat all, shuffle, random shuffle and return". You can select "return" to keep the original setting. Normal: play all the music with the by turns. Repeat one: repeat playing the current music file Repeat all: repeat playing all the music files by turns Shuffle: randomly play one of all the music files Random shuffled: select one music file from all, and repeat playing it
Recording Quality Setting the Encoding rate of MP3 files when MP3 is encoded while recording. "96Kbps, 128Kbps,192Kbps" are available. You can also select WAV (ADPCM) as the recording format.
23
C
M
Y
CM
MY
CY
CMY
K
Page-23.pdf 31.08.2007 13:40:10

24
Additional FunctionID3 language selection"English, simplified Chinese, traditional Chinese, Japanese, Korean, Slavic "choices are available. File managementDelete1. Press "M" button to enter function menu, select "delete files" function. 2. Press "M" button to enable delete function;3. Search the needless files by using " " or " " button, and select "yes" to delete the file; select "no" to return to the menu. Or press "REC" button to return to play interface.4. When the message "file deleted" is display, press "REC" button to return to main menu.
Note: Read-only files in the player cannot be deleted, "delete failure" will be displayed when they are being deleted.
C
M
Y
CM
MY
CY
CMY
K
Page-24.pdf 24.05.2007 10:59:16

25
Firmware upgradeFirmware upgrade file and upgrade procedures are available from the below website.http://www.soundman.de
You are recommended to check the availability of new firmware release version to perform upgrade periodically to enhance the performance of the recorder.
Notes: 1) Disconnection during firmware upgrading may cause failure to the device.2) Do not change the file name or extension of the upgraded files.
C
M
Y
CM
MY
CY
CMY
K
Page-25.pdf 24.05.2007 10:58:44

26
System settingSystem setting selection menueIn all working modes, the following system settings can be conducted“Interface language, auto shut off, timing shut off, backlight time, contrast, scroll speeddefault settings, about and return”.
Interface LanguageSet the operation interface display language. “English, German” are available.You can also select “return” to keep the original settings.
Auto shut offUse to set the auto shut off time for digital recorder. When the idle time of the recorderreaches the preset shut off time, the digital recorder will shut off automatically to saveenergy. The auto shut off choices are “1 minute, 2 minutes, 3 minutes, 5 minutes”. Youcan also select “return” to keep the original settings.
Timing shut offPreset auto shut off time. When the time runs out, the device will shutt off automatically.“Off, 15, 30 60, 90” minutes are available. You can also select “return” to keep the original settings.
Note:Voice mode do not support character scroll function.
Backlight timeIt is used to set the time of LCD backlight after each operation.“Off, 10 seconds, 30 seconds, 60 seconds, permanent” are available.You can also select “return” to keep the original settings.
Note:1) When the recorder is running out of power, the backlight will be become dimmer. The battery should be replaced to make it resume the normal status.2) When record is underway, the screen will switch to half-bright automatically.
C
M
Y
CM
MY
CY
CMY
K
Page-26.pdf 24.05.2007 10:57:49

27
System settingContrastIt is used to set the contrast of LCD, totally 10 grades:"1,2,3,4,5,6,7,8,9,10" are available.
Scroll If the length of character string is too long to be displayed by LCD, LCD will scroll displaying the character string. The speed of scroll can be selected among "off, slow, moderate and fast. You can also select "exit" to keep the original settings.
ASD (Auto Silence Detection)This item allows you to choose the length of silence before ending the current line-in recording and starting a new file. You can also turn the silence detection off or 1, 2, 3 seconds of silence detect.
Default If "yes" is selected, the digital player will resume to system default setting; if "no" is selected, the digital player will keep the current setting.
About (this device)Used to display the version information, capacity and leftover capacity of this device
C
M
Y
CM
MY
CY
CMY
K
Page-27.pdf 24.05.2007 11:00:05

27
Main menu tree diagram
* If Normal Mode is currently selected
MAIN MENU
MODE
EQ
MUSICRecord
RadioEXITNormalRockJazzPopClassicBasExit
Mic-In fileLine-In fileExt Mic fileFM fileExit Mode
Auto TuneNormal ModeDelete ChannelSensitiveSettingsExit
Play Mode
NormalRepeat oneRepeat AllShuffleRandom ShuffleExit
Delete
ID3 Language
Rec Quality
WAV96kbps128kbps192kbps256Kbps320kbps
Exit
English
German
EnglishSimplified ChineseTraditional ChineseJanpaneseKoreanCyrillicExit
Setting
OS Language
Exit
IDLESleepBacklightContrastScrollASDDefaultAboutExit
0dB-10dB-20dB Exit
C
M
Y
CM
MY
CY
CMY
K
Page-28.pdf 24.05.2007 10:59:48

28
Customer Support
Trouble Shooting
1. The device refuses to work or LCD does not display. Check if there is enough battery power. Check if the polarities of battery are correct.2. The device does not respond to button press Check if the "hold" button is in "on" position. If it is in "off" position, button press does not work.3. It can not play MP3 files Check if there is a MP3 file in the RAM memory. Check if the recorder is in music mode.4. It can not play voice files Check if there is a voice file in the RAM memory. Check if the recorder is in record mode .5. Installation drive program and software update program cannot be installed. Drive program and software update program support WIN98, ME, 200, XP, XP Pro and XP Home.6. After the device is connected to the computer, there is not a recorder icon on the computer. Make sure that the drive program has been correctly installed and the recorder is powered on. Connect USB jack correctly to the computer. Make sure that the device has been correctly installed by checking the "device manager" of the computer.7. How to resume the default value of the recorder, Select "resume default setting" in the system setting of the device and select "yes" to resume the default value.8. LCD backlight is not on. Check if the backlight setting in the system setting of the device is set in "off" position.
C
M
Y
CM
MY
CY
CMY
K
Page-29.pdf 24.05.2007 11:00:20

29
Note: The above-mentioned specifications of digital audio player are subject to change for the purpose of performance upgrading without special notice.
For further informations please look into the webpages http://www.soundman.deEspecially recommended settings for user of soundman binaural microphones.
______________________________________________________________________________
MANUFACTURED AND DISTRIBUTED BY SOUNDMAN
www.soundman.de [email protected]
72.5 x 35.5 x 18.5mm25g (battery not included)2GBOne alkaline battery 1.5V AAAMini USB (USB 2.0)87.5-108MHz, auto/manual scan, 30 channels are presetWAV, Mp3, WMA, support VBRWAV (ADPCM), MP3 (96kbps, 128kbps, 192Kbps,encoding rate available) Capacitive Mic85dB20Hz-20KHz>13 hoursNormal, Rock, Jazz, Classic, Pop, BassNormal, Repeat one, Repeat all, Shuffle, Random shuffle
Dimensions ( L x W x H)Net weightRAM memoryPower supplyPC interfaceFMPlay
Digital recording format
Build-in MicSignal-yo-noise ratioRange of sound frequencyDuration of batteryEQ modePlay mode
C
M
Y
CM
MY
CY
CMY
K
Page-30.pdf 06.09.2007 15:29:31