c# label control - weeblymadhavanaresh.weebly.com/uploads/4/3/2/7/43270315/controls...c# label...
TRANSCRIPT

C# Label Control
Labels are one of the most frequently used C# control. We can use the Label control to display text in a set location on the page. Label controls can also be used to add descriptive text to a Form to provide the user with helpful information. The Label class is defined in the System.Windows.Forms namespace.
Add a Label control to the form - Click Label in the Toolbox and drag it over the forms Designer and drop it in the desired location.
If you want to change the display text of the Label, you have to set a new text to the Text property of Label.
label1.Text = "This is my first Label";
In addition to displaying text, the Label control can also display an image using the Image property, or a combination of the ImageIndex and ImageList properties.
label1.Image = Image.FromFile("C:\\testimage.jpg");
The following C# source code shows how to set some properties of the Label through coding.
Print Source Code using System;
using System.Drawing;
using System.Windows.Forms;
namespace WindowsFormsApplication1
{
public partial class Form1 : Form
{
public Form1()
{

InitializeComponent();
}
private void Form1_Load(object sender, EventArgs e)
{
label1.Text = "This is my first Lable";
label1.BorderStyle = BorderStyle.FixedSingle;
label1.TextAlign = ContentAlignment.MiddleCenter;
}
}
}
C# Button Control
Windows Forms controls are reusable components that encapsulate user interface functionality and are used in client side Windows applications. A button is a control, which is an interactive component that enables users to communicate with an application. The Button class inherits directly from the ButtonBase class. A Button can be clicked by using the mouse, ENTER key, or SPACEBAR if the button has focus.
When you want to change display text of the Button , you can change the Text property of the button.
button1.Text = "Click Here";
Similarly if you want to load an Image to a Button control , you can code like this

button1.Image = Image.FromFile("C:\\testimage.jpg");
The following C# source code shows how to change the button Text property while Form loading event and to display a message box when pressing a Button Control.
Print Source Code using System;
using System.Drawing;
using System.Windows.Forms;
namespace WindowsFormsApplication1
{
public partial class Form1 : Form
{
public Form1()
{
InitializeComponent();
}
private void Form1_Load(object sender, EventArgs e)
{
button1.Text = "Click Here";
}
private void button1_Click(object sender, EventArgs e)
{
MessageBox.Show("http://cshap.net-informations.com");
}
}
}
C# TextBox Control
A TextBox control is used to display, or accept as input, a single line of text. This control has additional functionality that is not found in the standard Windows text box control, including multiline editing and password character masking.

A text box object is used to display text on a form or to get user input while a C# program is running. In a text box, a user can type data or paste it into the control from the clipboard.
For displaying a text in a TextBox control , you can code like this
textBox1.Text = "http://csharp.net-informations.com";
You can also collect the input value from a TextBox control to a variable like this way
string var;
var = textBox1.Text;
C# TextBox Properties
You can set TextBox properties through Property window or through program. You can open Properties window by pressing F4 or right click on a control and select Properties menu item

The below code set a textbox width as 250 and height as 50 through source code.
textBox1.Width = 250;
textBox1.Height = 50;
Background Color and Foreground Color
You can set background color and foreground color through property window and programmatically.
textBox1.BackColor = Color.Blue;
textBox1.ForeColor = Color.White;
Textbox BorderStyle
You can set 3 different types of border style for textbox, they are None, FixedSingle and fixed3d.
textBox1.BorderStyle = BorderStyle.Fixed3D;
TextBox Events
Keydown event
You can capture which key is pressed by the user using KeyDown event
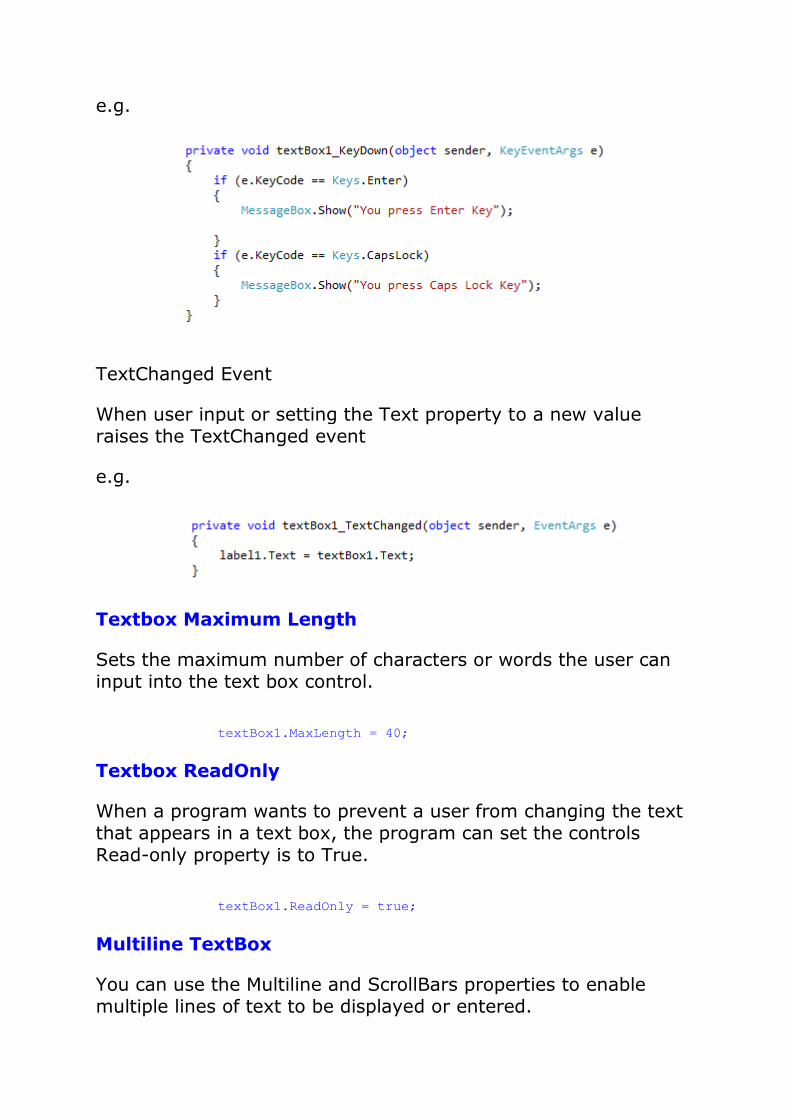
e.g.
TextChanged Event
When user input or setting the Text property to a new value raises the TextChanged event
e.g.
Textbox Maximum Length
Sets the maximum number of characters or words the user can input into the text box control.
textBox1.MaxLength = 40;
Textbox ReadOnly
When a program wants to prevent a user from changing the text that appears in a text box, the program can set the controls Read-only property is to True.
textBox1.ReadOnly = true;
Multiline TextBox
You can use the Multiline and ScrollBars properties to enable multiple lines of text to be displayed or entered.

textBox1.Multiline = true;
Textbox passowrd character
TextBox controls can also be used to accept passwords and other sensitive information. You can use the PasswordChar property to mask characters entered in a single line version of the control
textBox1.PasswordChar = '*';
The above code set the PasswordChar to * , so when the user enter password then it display only * instead of typed characters.
How to Newline in a TextBox
You can add new line in a textbox using many ways.
textBox1.Text += "your text" + "\r\n";
or
textBox1.Text += "your text" + Environment.NewLine;
How to retrieve integer values from textbox ?
int i;
i = int.Parse (textBox1.Text);
Parse method Converts the string representation of a number to its integer equivalent.
String to Float conversion
float i;
i = float.Parse (textBox1.Text);
String to Double conversion
double i;
i = float.Parse (textBox1.Text);

How to allow only numbers in a textbox
Many of us have faced a situation where we want the user to enter a number in a TextBox. Click the following link that are going to make a Numeric Textbox which will accept only numeric values; if there are any values except numeric. More about.... How do I make a textbox that only accepts numbers
Autocomplete TextBox
From the version Visual Studio 2005, some of the controls support Autocomplete feature including the TextBox controls. The properties like AutoCompleteCustomSource, AutoCompleteMode and AutoCompleteSource to perform a TextBox that automatically completes user input strings by comparing the prefix letters being entered to the prefixes of all strings in a data source. More about.... C# Autocomplete TextBox
From the following C# source code you can see some important property settings to a TextBox control.
Print Source Code
using System;
using System.Drawing;
using System.Windows.Forms;
namespace WindowsFormsApplication1
{
public partial class Form1 : Form
{
public Form1()
{
InitializeComponent();
}
private void Form1_Load(object sender, EventArgs e)
{
textBox1.Width = 250;
textBox1.Height = 50;
textBox1.Multiline = true;
textBox1.BackColor = Color.Blue;
textBox1.ForeColor = Color.White;
textBox1.BorderStyle = BorderStyle.Fixed3D;

}
private void button1_Click(object sender, EventArgs e)
{
string var;
var = textBox1.Text;
MessageBox.Show(var);
}
}
}
C# ComboBox Control
C# controls are located in the Toolbox of the development environment, and you use them to create objects on a form with a simple series of mouse clicks and dragging motions. A ComboBox displays a text box combined with a ListBox, which enables the user to select items from the list or enter a new value .
The user can type a value in the text field or click the button to display a drop down list. You can add individual objects with the Add method. You can delete items with the Remove method or clear the entire list with the Clear method.
How add a item to combobox
comboBox1.Items.Add("Sunday");
comboBox1.Items.Add("Monday");
comboBox1.Items.Add("Tuesday");

ComboBox SelectedItem
How to retrieve value from ComboBox
If you want to retrieve the displayed item to a string variable , you can code like this
string var;
var = comboBox1.Text;
Or
var item = this.comboBox1.GetItemText(this.comboBox1.SelectedItem);
MessageBox.Show(item);
How to remove an item from ComboBox
You can remove items from a combobox in two ways. You can remove item at a the specified index or giving a specified item by name.
comboBox1.Items.RemoveAt(1);
The above code will remove the second item from the combobox.
comboBox1.Items.Remove("Friday");
The above code will remove the item "Friday" from the combobox.
DropDownStyle
The DropDownStyle property specifies whether the list is always displayed or whether the list is displayed in a drop-down. The DropDownStyle property also specifies whether the text portion can be edited.

comboBox1.DropDownStyle = ComboBoxStyle.DropDown;
ComboBox Selected Value
How to set the selected item in a comboBox
You can display selected item in a combobox in two ways.
comboBox1.Items.Add("test1");
comboBox1.Items.Add("test2");
comboBox1.Items.Add("test3");
comboBox1.SelectedItem = "test3";
or
comboBox1.SelectedIndex = comboBox1.FindStringExact("test3");
ComboBox DataSource Property How to populate a combo box with a DataSet ?
You can Programmatically Binding DataSource to ComboBox in a simple way..
Consider an sql string like...."select au_id,au_lname from authors";
Make a datasource and bind it like the following...
comboBox1.DataSource = ds.Tables[0];
comboBox1.ValueMember = "au_id";
comboBox1.DisplayMember = "au_lname";
Combobox SelectedIndexChanged event
The SelectedIndexChanged event of a combobox fire when you change the slected item in a combobox. If you want to do something when you change the selection, you can write the program on SelectedIndexChanged event. From the following code you can understand how to set values in the SelectedIndexChanged event of a combobox. Drag and drop two combobox on the Form and copy and paste the following source code.
using System;
using System.Windows.Forms;
namespace WindowsFormsApplication1
{
public partial class Form1 : Form
{
public Form1()
{
InitializeComponent();

}
private void Form1_Load(object sender, EventArgs e)
{
comboBox1.Items.Add("weekdays");
comboBox1.Items.Add("year");
}
private void comboBox1_SelectedIndexChanged(object sender,
EventArgs e)
{
comboBox2.Items.Clear();
if (comboBox1.SelectedItem == "weekdays")
{
comboBox2.Items.Add("Sunday");
comboBox2.Items.Add("Monday");
comboBox2.Items.Add("Tuesday");
}
else if (comboBox1.SelectedItem == "year")
{
comboBox2.Items.Add("2012");
comboBox2.Items.Add("2013");
comboBox2.Items.Add("2014");
}
}
}
}
Output
ComboBox Databinding
You can bind data to a Combobox from various resources like Dataset, List, Enum, Dictionary etc. From the following link you can study more about ... ComboBox Databinding
ComboBox Default Value How to set a default value for a Combo Box
You can set combobox default value by using SelectedIndex property
comboBox1.SelectedIndex = 6;
Above code set 6th item as combobox default value

ComboBox readonly How to make a combobox read only
You can make a ComboBox readonly, that means a user cannot write in a combo box but he can select the given items, in two ways. By default, DropDownStyle property of a Combobox is DropDown. In this case user can enter values to combobox. When you change the DropDownStyle property to DropDownList, the Combobox will become read only and user can not enter values to combobox. Second method, if you want the combobox completely read only, you can set comboBox1.Enabled = false.
Autocomplete ComboBox
From the version Visual Studio 2005, some of the controls support Autocomplete feature including the ComboBox controls. From the following link you can see how to make .... Autocomplete ComboBox
ComboBox Example
The following C# source code add seven days in a week to a combo box while load event of a Windows Form and int Button click event it displays the selected text in the Combo Box.
C# Timer Control
What is Timer Control ?
The Timer Control plays an important role in the development of programs both Client side and Server side development as well as in Windows Services. With the Timer Control we can raise events at a specific interval of time without the interaction of another thread.
Use of Timer Control

We require Timer Object in many situations on our development environment. We have to use Timer Object when we want to set an interval between events, periodic checking, to start a process at a fixed time schedule, to increase or decrease the speed in an animation graphics with time schedule etc.
A Timer control does not have a visual representation and works as a component in the background.
How to Timer Control ?
We can control programs with Timer Control in millisecond, seconds, minutes and even in hours. The Timer Control allows us to set Intervel property in milliseconds. That is, one second is equal to 1000 milliseconds. For example, if we want to set an interval of 1 minute we set the value at Interval property as 60000, means 60x1000 .
By default the Enabled property of Timer Control is False. So before running the program we have to set the Enabled property is True , then only the Timer Control starts its function.
Timer example
In the following program we display the current time in a Label Control. In order to develop this program, we need a Timer Control and a Label Control. Here we set the timer interval as

1000 milliseconds, that means one second, for displaying current system time in Label control for the interval of one second.
using System;
using System.Windows.Forms;
namespace WindowsFormsApplication1
{
public partial class Form1 : Form
{
public Form1()
{
InitializeComponent();
}
private void timer1_Tick(object sender, EventArgs e)
{
label1.Text = DateTime.Now.ToString();
}
}
}
Start and Stop Timer Control
The Timer control have included the Start and Stop methods for start and stop the Timer control functions.
Here we run this program only 10 seconds. In order to doing this ,in the following program we set Timer interval as 1000 (1 second) and check each seconds for stopping the Timer Control after 10 seconds.
Print Source Code
using System;
using System.Windows.Forms;
namespace WindowsFormsApplication2
{
public partial class Form1 : Form
{
int second = 0;

public Form1()
{
InitializeComponent();
}
private void Form1_Load(object sender, EventArgs e)
{
timer1.Interval = 1000;
timer1.Start();
}
private void timer1_Tick(object sender, EventArgs e)
{
label1.Text = DateTime.Now.ToString();
second = second + 1;
if (second >= 10)
{
timer1.Stop();
MessageBox.Show("Exiting from Timer....");
}
}
}
}
Print Source Code
using System;
using System.Drawing;
using System.Windows.Forms;
namespace WindowsFormsApplication1
{
public partial class Form1 : Form
{
public Form1()
{
InitializeComponent();
}
private void Form1_Load(object sender, EventArgs e)
{
comboBox1.Items.Add("Sunday");
comboBox1.Items.Add("Monday");
comboBox1.Items.Add("Tuesday");
comboBox1.Items.Add("wednesday");
comboBox1.Items.Add("Thursday");
comboBox1.Items.Add("Friday");
comboBox1.Items.Add("Saturday");
comboBox1.SelectedIndex =
comboBox1.FindStringExact("Sunday");
}
private void button1_Click(object sender, EventArgs e)
{
string var;
var = comboBox1.Text;
MessageBox.Show(var);
}
}

}
ListBox Control
The ListBox control enables you to display a list of items to the user that the user can select by clicking.
In addition to display and selection functionality, the ListBox also provides features that enable you to efficiently add items to the ListBox and to find text within the items of the list. You can use the Add or Insert method to add items to a list box. The Add method adds new items at the end of an unsorted list box.
listBox1.Items.Add("Sunday");
If you want to retrieve a single selected item to a variable , you can code like this
string var;
var = listBox1.Text;
The SelectionMode property determines how many items in the list can be selected at a time. A ListBox control can provide single or multiple selections using the SelectionMode property . If you change the selection mode property to multiple select , then you

will retrieve a collection of items from ListBox1.SelectedItems property.
listBox1.SelectionMode = SelectionMode.MultiSimple;
The following C# program initially fill seven days in a week while in the form load event and set the selection mode property to MultiSimple. At the Button click event it will display the selected items.
using System;
using System.Drawing;
using System.Windows.Forms;
namespace WindowsFormsApplication1
{
public partial class Form1 : Form
{
public Form1()
{
InitializeComponent();
}
private void Form1_Load(object sender, EventArgs e)
{
listBox1.Items.Add("Sunday");
listBox1.Items.Add("Monday");
listBox1.Items.Add("Tuesday");
listBox1.Items.Add("Wednesday");
listBox1.Items.Add("Thursday");
listBox1.Items.Add("Friday");
listBox1.Items.Add("Saturday");
listBox1.SelectionMode = SelectionMode.MultiSimple;
}
private void button1_Click(object sender, EventArgs e)
{
foreach (Object obj in listBox1.SelectedItems )
{
MessageBox.Show(obj.ToString ());
}
}
}
}
How to bind a ListBox to a List ?
First you should create a fresh List Object and add items to the List.
List<string> nList = new List<string>();
nList.Add("January");
nList.Add("February");
nList.Add("March");
nList.Add("April");

The next step is to bind this List to the Listbox. In order to do that you should set datasource of the Listbox.
listBox1.DataSource = nList;
Full Source code
private void button1_Click(object sender, EventArgs e)
{
List<string> nList = new List<string>();
nList.Add("January");
nList.Add("February");
nList.Add("March");
nList.Add("April");
listBox1.DataSource = nList;
}
How to bind a listbox to database values ?
First you should create a connection string and fetch data from database to a Dataset.
connetionString = "Data Source=ServerName;Initial Catalog=databasename;User
ID=userid;Password=yourpassword";
sql = "select au_id,au_lname from authors";
After that you should set Listbox datasoure as Dataset.
listBox1.DataSource = ds.Tables[0];
listBox1.ValueMember = "au_id";
listBox1.DisplayMember = "au_lname";

using System;
using System.Data;
using System.Data.SqlClient;
using System.Windows.Forms;
namespace WindowsFormsApplication1
{
public partial class Form1 : Form
{
public Form1()
{
InitializeComponent();
}
private void button1_Click(object sender, EventArgs e)
{
string connetionString = null;
SqlConnection connection;
SqlCommand command;
SqlDataAdapter adapter = new SqlDataAdapter();
DataSet ds = new DataSet();
int i = 0;
string sql = null;
//connetionString = "Data Source=ServerName;Initial
Catalog=databasename;User ID=userid;Password=yourpassword";
//sql = "select au_id,au_lname from authors";
connection = new SqlConnection(connetionString);
try
{
connection.Open();
command = new SqlCommand(sql, connection);
adapter.SelectCommand = command;
adapter.Fill(ds);
adapter.Dispose();
command.Dispose();
connection.Close();
listBox1.DataSource = ds.Tables[0];
listBox1.ValueMember = "au_id";
listBox1.DisplayMember = "au_lname";
}
catch (Exception ex)
{
MessageBox.Show("Cannot open connection ! ");
}

}
}
}
How to refresh DataSource of a ListBox ?
How to clear the Listbox if its already binded with datasource ?
When you want to clear the Listbox, if the ListBox already binded with Datasource, you have to set the Datasource of Listbox as null.
listBox1.DataSource = null;
How to SelectedIndexChanged event in ListBox ?
This event is fired when the item selection is changed in a ListBox. You can use this event in a situation that you want select an item from your listbox and accodring to this selection you can perform other programming needs.
You can add the event handler using the Properties Window and selecting the Event icon and double-clicking on SelectedIndexChanged as you can see in following image.
The event will fire again when you select a new item. You can write your code within SelectedIndexChanged event . When you double click on ListBox the code will automatically come in you code editor like the following image.

From the following example you can understand how to fire the SelectedIndexChanged event
First you should drag two listboxes on your Form. First listbox you should set the List as Datasource, the List contents follows:
List<string> nList = new List<string>();
nList.Add("First Quarter");
nList.Add("Second Quarter");
When you load this form you can see the listbox is populated with List and displayed first quarter and second quarter. When you click the "Fist Quarter" the next listbox is populated with first quarter months and when you click "Second Quarter" you can see the second listbox is changed to second quarter months. From the following program you can understand how this happened.
Print Source Code
using System;
using System.Data;
using System.Data.SqlClient;
using System.Windows.Forms;
using System.Collections.Generic;
namespace WindowsFormsApplication1
{
public partial class Form1 : Form
{
public Form1()
{
InitializeComponent();
}
List < string > fQ = new List < string > ();

List < string > sQ = new List < string > ();
private void Form1_Load(object sender, EventArgs e)
{
fQ.Add("January");
fQ.Add("February");
fQ.Add("March");
sQ.Add("April");
sQ.Add("May");
sQ.Add("June");
List < string > nList = new List < string > ();
nList.Add("First Quarter");
nList.Add("Second Quarter");
listBox1.DataSource = nList;
}
private void listBox1_SelectedIndexChanged(object sender, EventArgs
e)
{
if (listBox1.SelectedIndex == 0)
{
listBox2.DataSource = null;
listBox2.DataSource = fQ;
}
else if (listBox1.SelectedIndex == 1)
{
listBox2.DataSource = null;
listBox2.DataSource = sQ;
}
}
}
}
ked ListBox Control
The CheckedListBox control gives you all the capability of a list box and also allows you to display a check mark next to the items in the list box.

The user can place a check mark by one or more items and the checked items can be navigated with the CheckedListBox.CheckedItemCollection and CheckedListBox.CheckedIndexCollection. To add objects to the list at run time, assign an array of object references with the AddRange method. The list then displays the default string value for each object.
Dim days As String() = {"Sunday", "Monday", "Tuesday"};
checkedListBox1.Items.AddRange(days);
You can add individual items to the list with the Add method. The CheckedListBox object supports three states through the CheckState enumeration: Checked, Indeterminate, and Unchecked.
checkedListBox1.Items.Add("Sunday", CheckState.Checked);
checkedListBox1.Items.Add("Monday", CheckState.Unchecked);
checkedListBox1.Items.Add("Tuesday", CheckState.Indeterminate);
Print Source Code
using System;
using System.Drawing;
using System.Windows.Forms;
namespace WindowsFormsApplication1
{
public partial class Form1 : Form
{
public Form1()

{
InitializeComponent();
}
private void Form1_Load(object sender, EventArgs e)
{
checkedListBox1.Items.Add("Sunday", CheckState.Checked);
checkedListBox1.Items.Add("Monday", CheckState.Unchecked);
checkedListBox1.Items.Add("Tuesday", CheckState.Indeterminate);
checkedListBox1.Items.Add("Wednesday", CheckState.Checked);
checkedListBox1.Items.Add("Thursday", CheckState.Unchecked);
checkedListBox1.Items.Add("Friday", CheckState.Indeterminate);
checkedListBox1.Items.Add("Saturday",
CheckState.Indeterminate);
}
}
}
C# RadioButton Control
A radio button or option button enables the user to select a single option from a group of choices when paired with other RadioButton controls. When a user clicks on a radio button, it becomes checked, and all other radio buttons with same group become unchecked
The RadioButton control can display text, an Image, or both. Use the Checked property to get or set the state of a RadioButton.
radioButton1.Checked = true;
The radio button and the check box are used for different functions. Use a radio button when you want the user to choose only one option. When you want the user to choose all appropriate options, use a check box. Like check boxes, radio buttons support a Checked property that indicates whether the radio button is selected.
Print Source Code
using System;
using System.Drawing;
using System.Windows.Forms;
namespace WindowsFormsApplication1
{
public partial class Form1 : Form
{
public Form1()
{
InitializeComponent();
}
private void Form1_Load(object sender, EventArgs e)
{
radioButton1.Checked = true;
}
private void button1_Click(object sender, EventArgs e)
{
if (radioButton1.Checked == true)
{
MessageBox.Show ("You are selected Red !! ");
return;
}
else if (radioButton2.Checked == true)
{
MessageBox.Show("You are selected Blue !! ");
return;
}
else
{
MessageBox.Show("You are selected Green !! ");
return;
}
}
}
}
C# CheckBox Control
CheckBoxes allow the user to make multiple selections from a number of options. CheckBox to give the user an option, such as
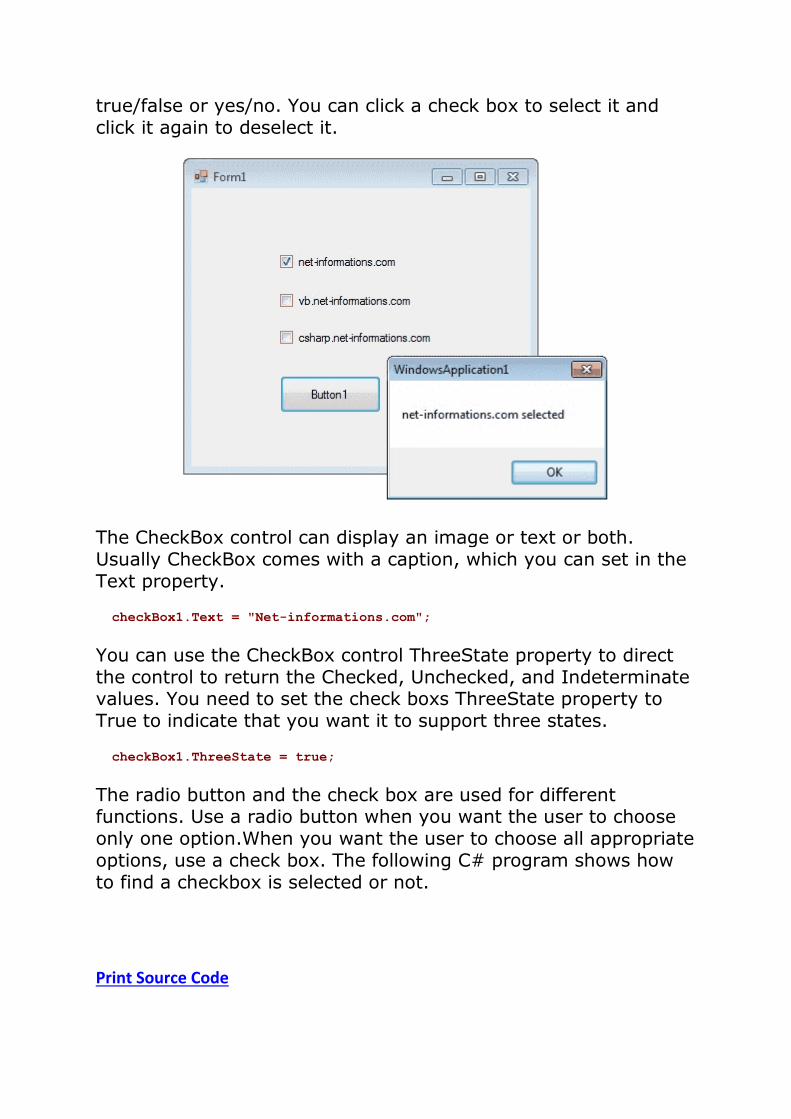
true/false or yes/no. You can click a check box to select it and click it again to deselect it.
The CheckBox control can display an image or text or both. Usually CheckBox comes with a caption, which you can set in the Text property.
checkBox1.Text = "Net-informations.com";
You can use the CheckBox control ThreeState property to direct the control to return the Checked, Unchecked, and Indeterminate values. You need to set the check boxs ThreeState property to True to indicate that you want it to support three states.
checkBox1.ThreeState = true;
The radio button and the check box are used for different functions. Use a radio button when you want the user to choose only one option.When you want the user to choose all appropriate options, use a check box. The following C# program shows how to find a checkbox is selected or not.
Print Source Code

using System;
using System.Drawing;
using System.Windows.Forms;
namespace WindowsFormsApplication1
{
public partial class Form1 : Form
{
public Form1()
{
InitializeComponent();
}
private void button1_Click(object sender, EventArgs e)
{
string msg = "";
if (checkBox1.Checked == true)
{
msg = "net-informations.com";
}
if (checkBox2.Checked == true)
{
msg = msg + " vb.net-informations.com";
}
if (checkBox3.Checked == true)
{
msg = msg + " csharp.net-informations.com";
}
if (msg.Length > 0)
{
MessageBox.Show (msg + " selected ");
}
else
{
MessageBox.Show ("No checkbox selected");
}
checkBox1.ThreeState = true;
}
}
}
C# PictureBox Control
The Windows Forms PictureBox control is used to display images in bitmap, GIF , icon , or JPEG formats.
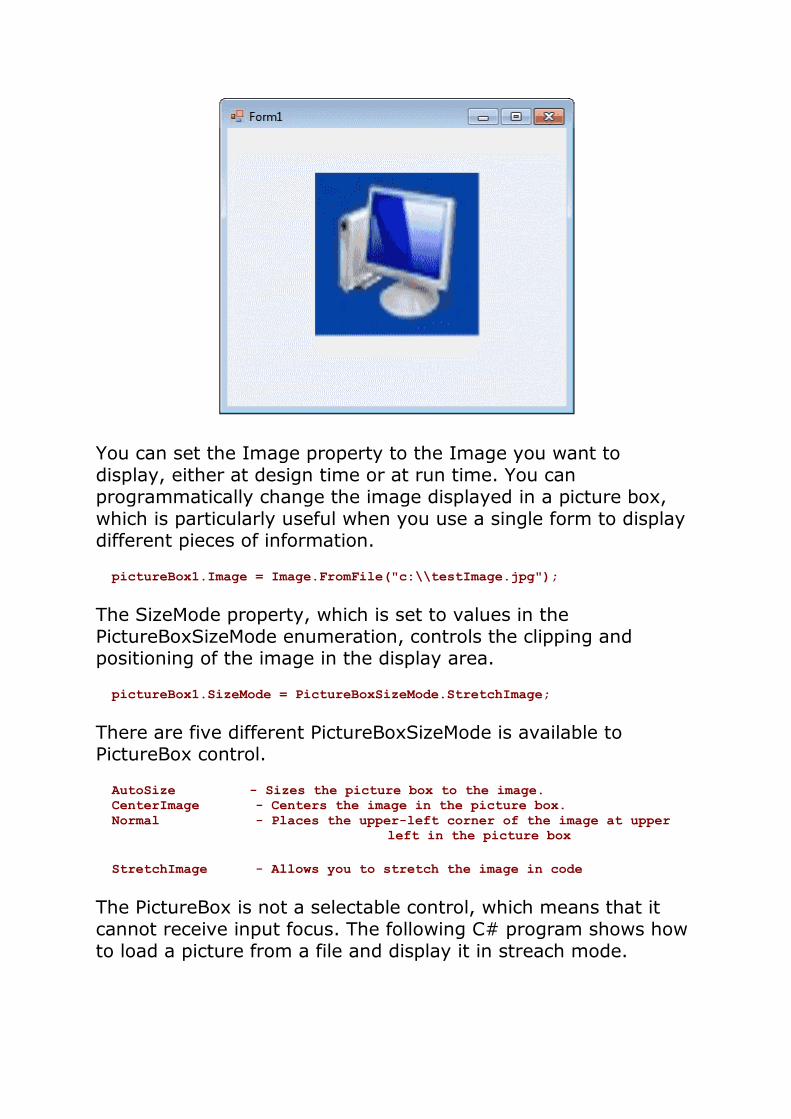
You can set the Image property to the Image you want to display, either at design time or at run time. You can programmatically change the image displayed in a picture box, which is particularly useful when you use a single form to display different pieces of information.
pictureBox1.Image = Image.FromFile("c:\\testImage.jpg");
The SizeMode property, which is set to values in the PictureBoxSizeMode enumeration, controls the clipping and positioning of the image in the display area.
pictureBox1.SizeMode = PictureBoxSizeMode.StretchImage;
There are five different PictureBoxSizeMode is available to PictureBox control.
AutoSize - Sizes the picture box to the image.
CenterImage - Centers the image in the picture box.
Normal - Places the upper-left corner of the image at upper
left in the picture box
StretchImage - Allows you to stretch the image in code
The PictureBox is not a selectable control, which means that it cannot receive input focus. The following C# program shows how to load a picture from a file and display it in streach mode.

Print Source Code
using System;
using System.Drawing;
using System.Windows.Forms;
namespace WindowsFormsApplication1
{
public partial class Form1 : Form
{
public Form1()
{
InitializeComponent();
}
private void Form1_Load(object sender, EventArgs e)
{
pictureBox1.Image = Image.FromFile("c:\\testImage.jpg");
pictureBox1.SizeMode = PictureBoxSizeMode.StretchImage;
}
}
}
C# ProgressBar Control
A progress bar is a control that an application can use to indicate the progress of a lengthy operation such as calculating a complex result, downloading a large file from the Web etc.

ProgressBar controls are used whenever an operation takes more than a short period of time. The Maximum and Minimum properties define the range of values to represent the progress of a task.
Minimum : Sets the lower value for the range of valid values for
progress.
Maximum : Sets the upper value for the range of valid values for
progress.
Value : This property obtains or sets the current level of progress.
By default, Minimum and Maximum are set to 0 and 100. As the task proceeds, the ProgressBar fills in from the left to the right. To delay the program briefly so that you can view changes in the progress bar clearly.
The following C# program shows a simple operation in a progressbar .
Print Source Code
using System;
using System.Drawing;
using System.Windows.Forms;
namespace WindowsFormsApplication1
{
public partial class Form1 : Form
{
public Form1()
{
InitializeComponent();
}
private void button1_Click(object sender, EventArgs e)
{
int i;
progressBar1.Minimum = 0;
progressBar1.Maximum = 200;
for (i = 0; i <= 200; i++)
{
progressBar1.Value = i;
}
}

}
}
C# ScrollBars Control
A ScrollBar allows you to view content that is outside of the current viewing area by sliding the Thumb to make the content visible.
The ScrollBar control contains a Track control. The Track control consists of a Thumb control and two RepeatButton controls. You can increase and decrease the Value property of the ScrollBar control by pressing the RepeatButton controls or by moving the Thumb. You can set the Value property yourself in code, which moves the scroll box to match. The Minimum and Maximum properties determine the range of values that the control can display. The default range of values for the Value property is from 0 to 1.
The following C# program shows a TextBox control with scrollbars.
Print Source Code

using System;
using System.Drawing;
using System.Windows.Forms;
namespace WindowsFormsApplication1
{
public partial class Form1 : Form
{
public Form1()
{
InitializeComponent();
}
private void Form1_Load(object sender, EventArgs e)
{
textBox1.Multiline = true;
textBox1.ScrollBars = ScrollBars.Both;
}
}
}
C# DateTimePicker Control
The DateTimePicker control allows you to display and collect date and time from the user with a specified format.
The DateTimePicker control has two parts, a label that displays the selected date and a popup calendar that allows users to select a new date. The most important property of the DateTimePicker is the Value property, which holds the selected date and time.
dateTimePicker1.Value = DateTime.Today;

The Value property contains the current date and time the control is set to. You can use the Text property or the appropriate member of Value to get the date and time value.
DateTime iDate;
iDate = dateTimePicker1.Value;
The control can display one of several styles, depending on its property values. The values can be displayed in four formats, which are set by the Format property: Long, Short, Time, or Custom.
dateTimePicker1.Format = DateTimePickerFormat.Short;
Convert String to DateTime
You can use the methods like Convert.ToDateTime(String), DateTime.Parse() and DateTime.ParseExact() methods for converting a string-based date to a System.DateTime object. More about..... String to DateTime
How to find date difference ?
The DateTime.Substract method may be used in order to find the date-time difference between two instances of the DateTime method. More about..... Find date difference
How to to set datetime object to null ?
By default DateTime is not nullable because it is a Value Type, using the nullable operator introduced in C# 2, you can achieve this. More about..... Datetime object to null
The following C# program shows how to set and get the value of a DateTimePicker1 control.
Print Source Code
using System;
using System.Drawing;
using System.Windows.Forms;
namespace WindowsFormsApplication1
{
public partial class Form1 : Form
{

public Form1()
{
InitializeComponent();
}
private void Form1_Load(object sender, EventArgs e)
{
dateTimePicker1.Format = DateTimePickerFormat.Short;
dateTimePicker1.Value = DateTime.Today;
}
private void button1_Click(object sender, EventArgs e)
{
DateTime iDate;
iDate = dateTimePicker1.Value;
MessageBox.Show("Selected date is " + iDate);
}
}
}
C# Treeview Control
The TreeView control contains a hierarchy of TreeViewItem controls. It provides a way to display information in a hierarchical structure by using collapsible nodes . The top level in a tree view are root nodes that can be expanded or collapsed if the nodes have child nodes.
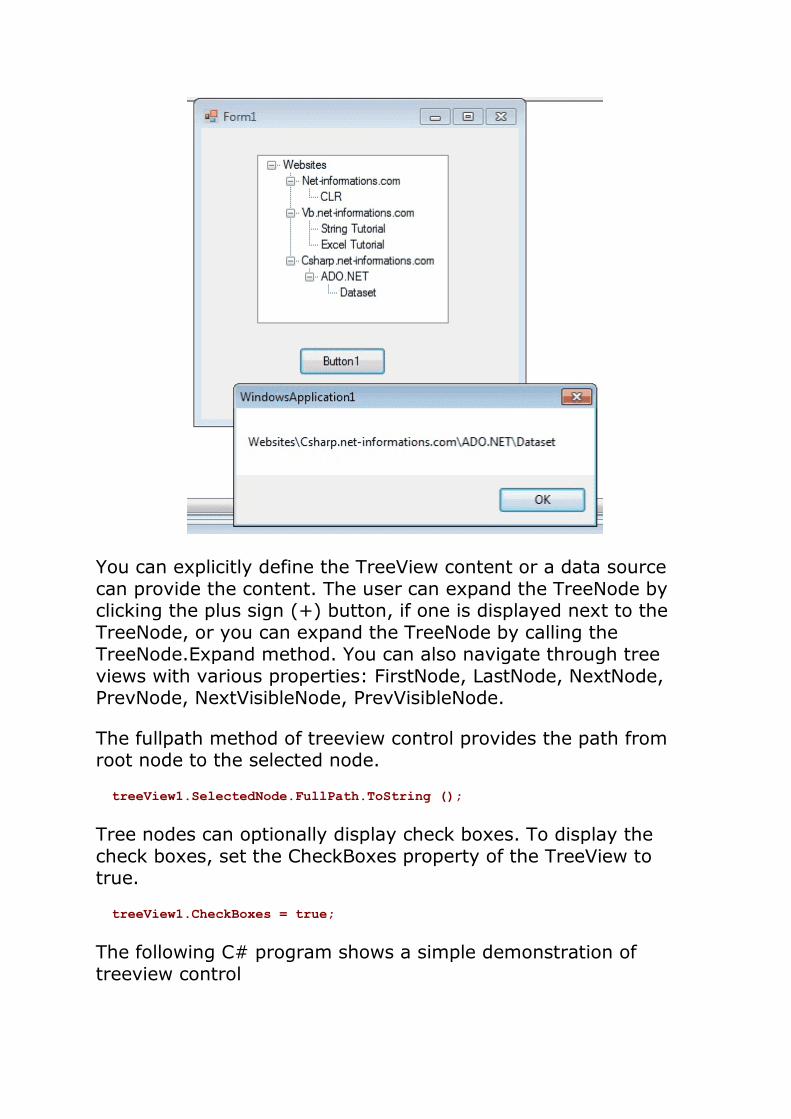
You can explicitly define the TreeView content or a data source can provide the content. The user can expand the TreeNode by clicking the plus sign (+) button, if one is displayed next to the TreeNode, or you can expand the TreeNode by calling the TreeNode.Expand method. You can also navigate through tree views with various properties: FirstNode, LastNode, NextNode, PrevNode, NextVisibleNode, PrevVisibleNode.
The fullpath method of treeview control provides the path from root node to the selected node.
treeView1.SelectedNode.FullPath.ToString ();
Tree nodes can optionally display check boxes. To display the check boxes, set the CheckBoxes property of the TreeView to true.
treeView1.CheckBoxes = true;
The following C# program shows a simple demonstration of treeview control

Print Source Code
using System;
using System.Drawing;
using System.Windows.Forms;
namespace WindowsFormsApplication1
{
public partial class Form1 : Form
{
public Form1()
{
InitializeComponent();
}
private void Form1_Load(object sender, EventArgs e)
{
TreeNode tNode ;
tNode = treeView1.Nodes.Add("Websites");
treeView1.Nodes[0].Nodes.Add("Net-informations.com");
treeView1.Nodes[0].Nodes[0].Nodes.Add("CLR");
treeView1.Nodes[0].Nodes.Add("Vb.net-informations.com");
treeView1.Nodes[0].Nodes[1].Nodes.Add("String Tutorial");
treeView1.Nodes[0].Nodes[1].Nodes.Add("Excel Tutorial");
treeView1.Nodes[0].Nodes.Add("Csharp.net-informations.com");
treeView1.Nodes[0].Nodes[2].Nodes.Add("ADO.NET");
treeView1.Nodes[0].Nodes[2].Nodes[0].Nodes.Add("Dataset");
}
private void button1_Click(object sender, EventArgs e)
{
MessageBox.Show(treeView1.SelectedNode.FullPath.ToString ());
}
}
}
C# ListView Control
The ListView control is an ItemsControl that is derived from ListBox.
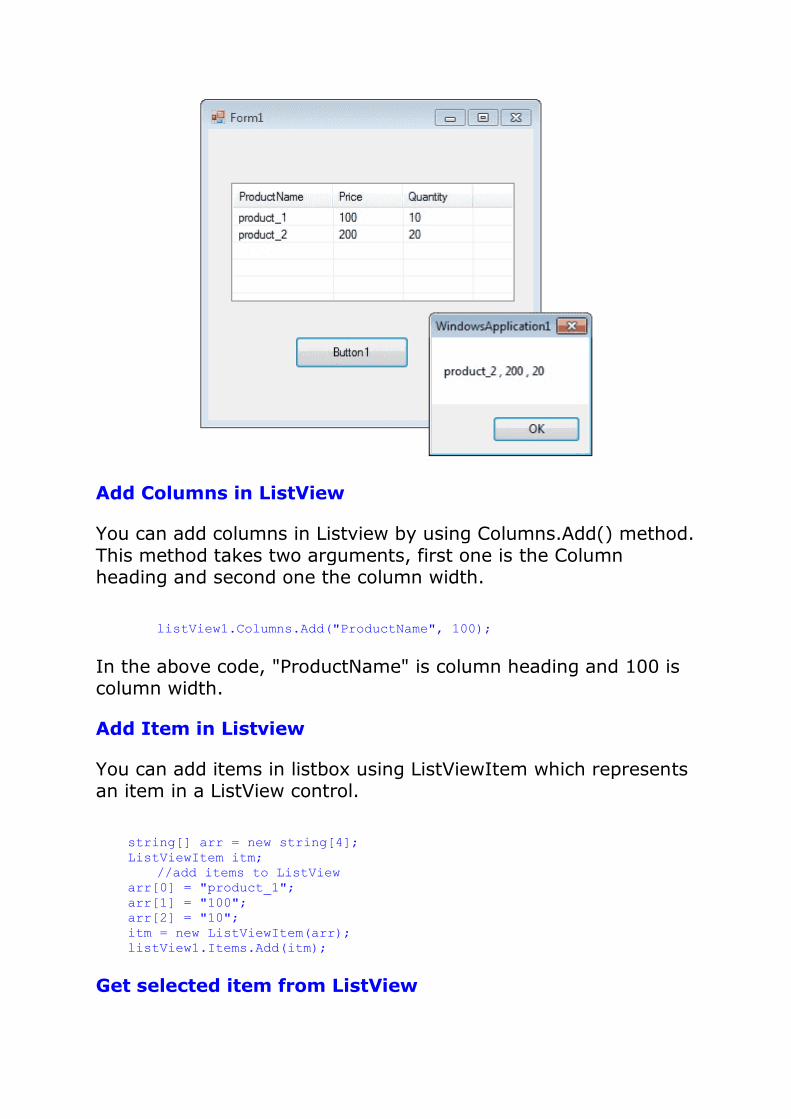
Add Columns in ListView
You can add columns in Listview by using Columns.Add() method. This method takes two arguments, first one is the Column heading and second one the column width.
listView1.Columns.Add("ProductName", 100);
In the above code, "ProductName" is column heading and 100 is column width.
Add Item in Listview
You can add items in listbox using ListViewItem which represents an item in a ListView control.
string[] arr = new string[4];
ListViewItem itm;
//add items to ListView
arr[0] = "product_1";
arr[1] = "100";
arr[2] = "10";
itm = new ListViewItem(arr);
listView1.Items.Add(itm);
Get selected item from ListView

productName = listView1.SelectedItems[0].SubItems[0].Text;
Above code will return the itme from first column of first row.
Sorting Listview Items
If the Sorted property of Listview is set to true, then the ListView items are sorted. The following code sorts the ListView items:
ListView1.Sorted = true;
Add Checkbox in Listview
You can add checkbox in Listview columns.
myListView.CheckBoxes = true;
myListView.Columns.Add(text, width, alignment);
ListView provides a large number of properties that provide flexibility in appearance and behavior. The View property allows you to change the way in which items are displayed. The SelectionMode property for a ListView determines how many items a user can select at one time.
The following C# program first set its view property as Details and GridLines property as true and FullRowSelect as true.
listView1.View = View.Details;
listView1.GridLines = true;
listView1.FullRowSelect = true;
Finally at the button click event, it will display the selected row values in a message box.
Print Source Code
using System;
using System.Drawing;
using System.Windows.Forms;
namespace WindowsFormsApplication1
{

public partial class Form1 : Form
{
public Form1()
{
InitializeComponent();
}
private void Form1_Load(object sender, EventArgs e)
{
listView1.View = View.Details;
listView1.GridLines = true;
listView1.FullRowSelect = true;
//Add column header
listView1.Columns.Add("ProductName", 100);
listView1.Columns.Add("Price", 70);
listView1.Columns.Add("Quantity", 70);
//Add items in the listview
string[] arr = new string[4];
ListViewItem itm ;
//Add first item
arr[0] = "product_1";
arr[1] = "100";
arr[2] = "10";
itm = new ListViewItem(arr);
listView1.Items.Add(itm);
//Add second item
arr[0] = "product_2";
arr[1] = "200";
arr[2] = "20";
itm = new ListViewItem(arr);
listView1.Items.Add(itm);
}
private void button1_Click(object sender, EventArgs e)
{
string productName = null;
string price = null;
string quantity = null;
productName = listView1.SelectedItems[0].SubItems[0].Text;
price = listView1.SelectedItems[0].SubItems[1].Text;
quantity = listView1.SelectedItems[0].SubItems[2].Text;
MessageBox.Show (productName + " , " + price + " , " +
quantity);
}
}
}
C# Menu Control
A Menu on a Windows Form is created with a MainMenu object, which is a collection of MenuItem objects. MainMenu is the

container for the Menu structure of the form and menus are made of MenuItem objects that represent individual parts of a menu.
You can add menus to Windows Forms at design time by adding the MainMenu component and then appending menu items to it using the Menu Designer.
After drag the Menustrip on your form you can directly create the menu items by type a value into the "Type Here" box on the menubar part of your form. From the following picture you can understand how to create each menu items on mainmenu Object.

If you need a seperator bar , right click on your menu then go to insert->Seperator.
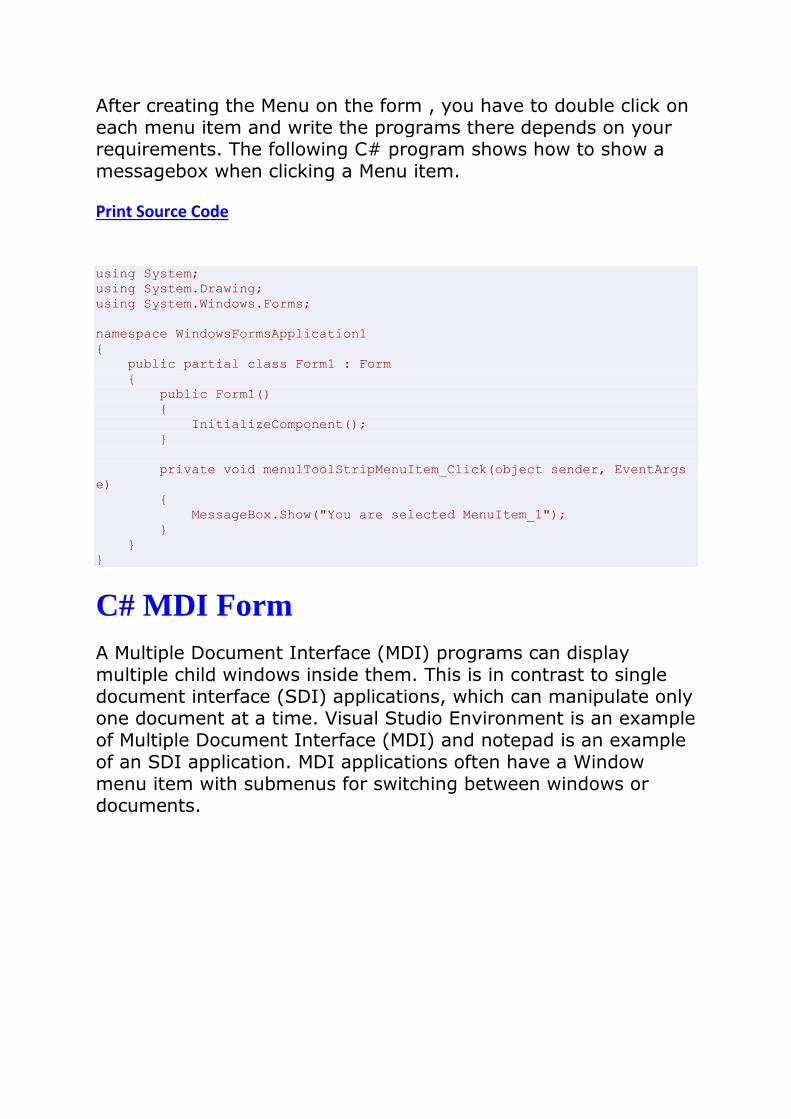
After creating the Menu on the form , you have to double click on each menu item and write the programs there depends on your requirements. The following C# program shows how to show a messagebox when clicking a Menu item.
Print Source Code
using System;
using System.Drawing;
using System.Windows.Forms;
namespace WindowsFormsApplication1
{
public partial class Form1 : Form
{
public Form1()
{
InitializeComponent();
}
private void menu1ToolStripMenuItem_Click(object sender, EventArgs
e)
{
MessageBox.Show("You are selected MenuItem_1");
}
}
}
C# MDI Form
A Multiple Document Interface (MDI) programs can display multiple child windows inside them. This is in contrast to single document interface (SDI) applications, which can manipulate only one document at a time. Visual Studio Environment is an example of Multiple Document Interface (MDI) and notepad is an example of an SDI application. MDI applications often have a Window menu item with submenus for switching between windows or documents.

Any windows can become an MDI parent, if you set the IsMdiContainer property to True.
IsMdiContainer = true;
The following C# program shows a MDI form with two child forms. Create a new C# project, then you will get a default form Form1 . Then add two mnore forms in the project (Form2 , Form 3) . Create a Menu on your form and call these two forms on menu click event. Click here to see how to create a Menu on your form How to Menu Control C#.
NOTE: If you want the MDI parent to auto-size the child form you can code like this.
form.MdiParent = this;
form.Dock=DockStyle.Fill;
form.Show();
Print Source Code

using System;
using System.Drawing;
using System.Windows.Forms;
namespace WindowsFormsApplication1
{
public partial class Form1 : Form
{
public Form1()
{
InitializeComponent();
}
private void Form1_Load(object sender, EventArgs e)
{
IsMdiContainer = true;
}
private void menu1ToolStripMenuItem_Click(object sender, EventArgs
e)
{
Form2 frm2 = new Form2();
frm2.Show();
frm2.MdiParent = this;
}
private void menu2ToolStripMenuItem_Click(object sender, EventArgs
e)
{
Form3 frm3 = new Form3();
frm3.Show();
frm3.MdiParent = this;
}
}
}
C# Color Dialog Box
There are several classes that implement common dialog boxes, such as color selection , print setup etc.

A ColorDialog object is a dialog box with a list of colors that are defined for the display system. The user can select or create a particular color from the list, which is then reported back to the application when the dialog box exits. You can invite a color dialog box by calling ShowDialog() method.
ColorDialog dlg = new ColorDialog();
dlg.ShowDialog();
The following C# program invites a color dialog box and retrieve the selected color to a string.
Print Source Code
using System;
using System.Drawing;
using System.Windows.Forms;
namespace WindowsFormsApplication1
{
public partial class Form1 : Form
{
public Form1()
{
InitializeComponent();
}

private void button1_Click(object sender, EventArgs e)
{
ColorDialog dlg = new ColorDialog();
dlg.ShowDialog();
if (dlg.ShowDialog() == DialogResult.OK)
{
string str = null;
str = dlg.Color.Name;
MessageBox.Show (str);
}
}
}
}
Font Dialog Box
Font dialog box represents a common dialog box that displays a list of fonts that are currently installed on the system. The Font dialog box lets the user choose attributes for a logical font, such as font family and associated font style, point size, effects , and a script .
The following C# program invites a Font Dialog Box and retrieve the selected Font Name and Font Size.
Print Source Code

using System;
using System.Drawing;
using System.Windows.Forms;
namespace WindowsFormsApplication1
{
public partial class Form1 : Form
{
public Form1()
{
InitializeComponent();
}
private void button1_Click(object sender, EventArgs e)
{
FontDialog dlg = new FontDialog();
dlg.ShowDialog();
if (dlg.ShowDialog() == DialogResult.OK)
{
string fontName;
float fontSize;
fontName = dlg.Font.Name;
fontSize = dlg.Font.Size;
MessageBox.Show(fontName + " " + fontSize );
}
}
}
}
C# OpenFile Dialog Box
The OpenFileDialog component allows users to browse the folders of their computer or any computer on the network and select one or more files to open. The dialog box returns the path and name of the file the user selected in the dialog box.

The FileName property can be set prior to showing the dialog box. This causes the dialog box to initially display the given filename. In most cases, your applications should set the InitialDirectory, Filter, and FilterIndex properties prior to calling ShowDialog.
The following C# program invites an OpenFile Dialog Box and retrieve the selected filename to a string.
Print Source Code
using System;
using System.Drawing;
using System.Windows.Forms;
namespace WindowsFormsApplication1
{
public partial class Form1 : Form
{
public Form1()
{
InitializeComponent();
}
private void button1_Click(object sender, EventArgs e)
{
OpenFileDialog dlg = new OpenFileDialog();
dlg.ShowDialog();

if (dlg.ShowDialog() == DialogResult.OK)
{
string fileName;
fileName = dlg.FileName;
MessageBox.Show(fileName);
}
}
}
}
C# Print Dialog Box
A user can use the Print dialog box to select a printer, configure it, and perform a print job. Print dialog boxes provide an easy way to implement Print and Print Setup dialog boxes in a manner consistent with Windows standards.
The Print dialog box includes a Print Range group of radio buttons that indicate whether the user wants to print all pages, a range of pages, or only the selected text. The dialog box includes an edit control in which the user can type the number of copies to print. By default, the Print dialog box initially displays information about the current default printer.
Print Source Code

using System;
using System.Drawing;
using System.Windows.Forms;
namespace Win
dowsFormsApplication1
{
public partial class Form1 : Form
{
public Form1()
{
InitializeComponent();
}
private void button1_Click(object sender, EventArgs e)
{
PrintDialog dlg = new PrintDialog();
dlg.ShowDialog();
}
}
}
keyPress event in C#
Handle Keyboard Input at the Form Level in C#
Windows Forms processes keyboard input by raising keyboard events in response to Windows messages. Most Windows Forms applications process keyboard input exclusively by handling the keyboard events.
How do I detect keys pressed in C#
You can detect most physical key presses by handling the KeyDown or KeyUp events. Key events occur in the following order:
KeyDown
KeyPress
KeyUp
How to detect when the Enter Key Pressed in C#
The following C# code behind creates the KeyDown event handler. If the key that is pressed is the Enter key, a MessegeBox will displayed .

if (e.KeyCode == Keys.Enter)
{
MessageBox.Show("Enter Key Pressed ");
}
How to get TextBox1_KeyDown event in your C# source file ?
Select your TextBox control on your Form and go to Properties window. Select Event icon on the properties window and scroll down and find the KeyDown event from the list and double click the Keydown Event. The you will get the KeyDown event in your source code editor.
private void textBox1_KeyDown(.....)
{
}
Difference between the KeyDown Event, KeyPress Event and KeyUp Event
KeyDown Event : This event raised as soon as the user presses a key on the keyboard, it repeats while the user keeps the key depressed.
KeyPress Event : This event is raised for character keys while the key is pressed and then released. This event is not raised by noncharacter keys, unlike KeyDown and KeyUp, which are also raised for noncharacter keys

KeyUp Event : This event is raised after the user releases a key on the keyboard.
KeyPress Event :
using System;
using System.Windows.Forms;
namespace WindowsFormsApplication1
{
public partial class Form1 : Form
{
public Form1()
{
InitializeComponent();
}
private void textBox1_KeyPress(object sender, KeyPressEventArgs e)
{
if (e.KeyChar == (char)Keys.Enter)
{
MessageBox.Show("Enter key pressed");
}
if (e.KeyChar == 13)
{
MessageBox.Show("Enter key pressed");
}
}
}
}
KeyDown Event :
using System;
using System.Windows.Forms;
namespace WindowsFormsApplication1
{
public partial class Form1 : Form
{
public Form1()
{
InitializeComponent();
}
private void textBox1_KeyDown(object sender, KeyEventArgs e)
{
if (e.KeyCode == Keys.Enter)
{
MessageBox.Show("Enter key pressed");
}
}
}
}
How to Detecting arrow keys in C#
In order to capture keystrokes in a Forms control, you must derive a new class that is

based on the class of the control that you want, and you override the ProcessCmdKey().
protected override bool ProcessCmdKey(ref Message msg, Keys keyData)
{
//handle your keys here
}
More about.... Detecting arrow keys from C#
KeyUp Event :
The following C# source code shows how to capture Enter KeyDown event from a TextBox Control.
using System;
using System.Windows.Forms;
namespace WindowsFormsApplication1
{
public partial class Form1 : Form
{
public Form1()
{
InitializeComponent();
}
private void textBox1_KeyUp(object sender, KeyEventArgs e)
{
if (e.KeyCode == Keys.Enter)
{
MessageBox.Show("Enter key pressed");
}
}
}
}
How to create Dynamic Controls in C# ?
How to create Control Arrays in C# ?
Visual Studio .NET does not have control arrays like Visual Basic 6.0 does. The good news is that you can still set things up to do similar things. The advantages of C# dynamic controls is that they can be created in response to how the user interacts with the application. Common controls that are added during run-time are the Button and TextBox controls. But of course, nearly every C# control can be created dynamically.

How to create Dynamic Controls in C# ?
The following program shows how to create a dynamic TextBox control in C# and setting the properties dynamically for each TextBox control. Drag a Button control in the form and copy and paste the following source code . Here each Button click the program create a new TextBox control dyanmically.
using System;
using System.Windows.Forms;
namespace WindowsFormsApplication1
{
public partial class Form1 : Form
{
int cLeft = 1;
public Form1()
{
InitializeComponent();
}
private void button1_Click(object sender, EventArgs e)
{
AddNewTextBox();
}
public System.Windows.Forms.TextBox AddNewTextBox()
{
System.Windows.Forms.TextBox txt = new
System.Windows.Forms.TextBox();
this.Controls.Add(txt);
txt.Top = cLeft * 25;
txt.Left = 100;
txt.Text = "TextBox " + this.cLeft.ToString();
cLeft = cLeft + 1;
return txt;
}
}
}

C# Timer Control
What is Timer Control ?
The Timer Control plays an important role in the development of programs both Client side and Server side development as well as in Windows Services. With the Timer Control we can raise events at a specific interval of time without the interaction of another thread.
Use of Timer Control
We require Timer Object in many situations on our development environment. We have to use Timer Object when we want to set an interval between events, periodic checking, to start a process at a fixed time schedule, to increase or decrease the speed in an animation graphics with time schedule etc.
A Timer control does not have a visual representation and works as a component in the background.
How to Timer Control ?
We can control programs with Timer Control in millisecond, seconds, minutes and even in hours. The Timer Control allows us to set Intervel property in milliseconds. That is, one second is equal to 1000 milliseconds. For example, if we want to set an interval of 1 minute we set the value at Interval property as 60000, means 60x1000 .

By default the Enabled property of Timer Control is False. So before running the program we have to set the Enabled property is True , then only the Timer Control starts its function.
Timer example
In the following program we display the current time in a Label Control. In order to develop this program, we need a Timer Control and a Label Control. Here we set the timer interval as 1000 milliseconds, that means one second, for displaying current system time in Label control for the interval of one second.
using System;
using System.Windows.Forms;
namespace WindowsFormsApplication1
{
public partial class Form1 : Form
{
public Form1()
{
InitializeComponent();
}
private void timer1_Tick(object sender, EventArgs e)
{
label1.Text = DateTime.Now.ToString();
}
}
}
Start and Stop Timer Control
The Timer control have included the Start and Stop methods for start and stop the Timer control functions.

Here we run this program only 10 seconds. In order to doing this ,in the following program we set Timer interval as 1000 (1 second) and check each seconds for stopping the Timer Control after 10 seconds.
using System;
using System.Windows.Forms;
namespace WindowsFormsApplication2
{
public partial class Form1 : Form
{
int second = 0;
public Form1()
{
InitializeComponent();
}
private void Form1_Load(object sender, EventArgs e)
{
timer1.Interval = 1000;
timer1.Start();
}
private void timer1_Tick(object sender, EventArgs e)
{
label1.Text = DateTime.Now.ToString();
second = second + 1;
if (second >= 10)
{
timer1.Stop();
MessageBox.Show("Exiting from Timer....");
}
}
}
}