by tom moldvay t h e l o s t c it y the lost city dungeon
TRANSCRIPT

The Lost City
Campaign Sourcebook
a collection of original work and material gathered from the pages of Dragonsfoot and
elsewhere on the internet
with contributions by: Andy Campbell, Jason Cone, Lowell Francis, Geoff Gander, Zach Howard, Jim Holloway, Michael Kaluta, Bob Kindel, Luc Le Quiniat,
James Maliszewski, Mike Monaco, M.W. Poort (Fingolwyn), Scott Rogers, Demos Sachlas,
and Tom
edited by Demos Sachlas
March, 2018
Dungeon Module B4
T h e L o st C ity
AN ADVENTURE FOR CHARACTER LEVELS 1-3
Lost in the desert! The only hope for survival lies in a ruined city rising out of the sands. Food, water, and wealth await heroic adventurers inside an ancient pyramid ruled by a strange race of masked beings.
This module includes a cover folder with maps, and a descriptive booklet with a ready-made adventure for the DUNGEON & DRAGONS® Basic game. It also includes enough information to continue the adventure beyond level 3, using the DUNGEONS & DRAGONS® Expert game rules.
DUNGEONS & DRAGONS and D&D are registered trademarks of TSR Hobbies, Inc. Distributed to the book trade in the United States by Random House, Inc., and in Canada by Random House of Canada, Ltd.
Distributed to the toy and hobby trade by regional distributors. Distributed in the United Kingdom by TSR Hobbies (UK) Ltd.
© 1982 TSR Hobbies, Inc. All Rights Reserved.
by Tom Moldvay
All Rights Re ser ve d © 1 98 0 TS R Ho bbie s. Inc
P R I N T E D I N U .S .A . 9 0 4 9 IS B N 0 -93 56 96 -5 5 -5
2
Table of Contents
Retrospective: The Lost City 3 by James Maliszewski Memories of Tom Moldvay 4 by Bob Kindel About the Artist 5 from “The Art of Jim Holloway” Printing History 7 with notes from the Acaeum Origins of the Lost City 8 by Demos Sachlas Worship of the Ancient Gods 11 by Demos Sachlas and Andy Campbell The Cynidicean Mosaics 14 by Demos Sachlas Holmes and the Lost City 16 by Zach Howard Notes on the Underground City 17 by Jason Cone
Expanding the Adventure 21 by Demos Sachlas New Monsters 30 by Demos Sachlas The Emirates of Ylaruam 31 by Lowell Francis The DM’s Guide to Cynidicea 34 by Geoff Gander Review: “Mystara: Return to the Lost City” 36 by Scott Rogers Review: “Masque of Dreams” 39 by Scott Rogers Review: “Elder Evils” 45 by Demos Sachlas 2013 Gen Con Championship 47 by Tom Acknowledgements 48

3
Retrospective: The Lost City
by James Maliszewski
I've mentioned before that, back in the day, my friends and I didn't really distinguish between "D&D" and "AD&D." Indeed, the distinction between them was somewhat baffling to us, since we freely bought and used products for both game systems to use in our weird Holmes/AD&D/Moldvay mishmash campaigns. A good case in point of this principle in action was 1982's The Lost City, the final part of what I call Tom Moldvay's "Pulp Fantasy Trilogy," the previous two installments being The Isle of Dread and Castle Amber. That the module was sold as part of the B-series aimed at players of the 1981 Basic Rules didn't matter one whit to me. I simply thought the module's premise was really cool, which trumped any consideration of TSR's ridiculous attempts at brand management. The Lost City's connection to pulp fantasy is readily apparent, as it presents a decadent subterranean civilization of great antiquity (Cynidicea) in the thrall of a foul alien being known as Zargon, whom many worship as a god. The player characters are flung headlong into this civilization, which is riven with factions and secret societies, each of which has its own plots and goals. Success in this module is judged at least in part by how adeptly the PCs can navigate the
treacherous waters of Cynidicean society in order to achieve their own goals, whatever they may be. What's interesting is that the module itself consists largely of a dungeon crawl inside a ziggurat buried in the sand. The ziggurat itself is a well-presented low-level dungeon (with the obligatory wight encounter -- nearly every introductory module includes an encounter with these undead, it seems), but what attracted me to the module was the aforementioned subterranean civilization and its factions, which are only briefly sketched out in the actual text of the module. Yet, that brief sketch is pregnant with ideas, many of which sustained my campaign for weeks and months. What Moldvay did here is nothing short of remarkable. He presented us with a mini-sandbox campaign setting that reminds me both of Howard's "Red Nails" and Paul Jaquays's The Caverns of Thracia, but in a format more readily accessible to inexperienced referees. I can't stress enough how inspirational I found this module when I first read it. Even now, I consider it the best thing Moldvay ever wrote and one of the great adventures of the Golden Age. Compare it to its AD&D contemporary, Pharaoh, which was released in the same year, and Moldvay's genius is all the more apparent. The Lost City is a bit of a throwback in many ways. It presents no story; it's almost pure location and so much of that location is left to the referee to develop for himself, aided only by a few short paragraphs and some maps provided by the module. Despite that -- or perhaps because of it -- I find myself continually drawn back to The Lost City, whereas Pharaoh, a module I loved when it was released in 1982, no longer holds much appeal to me. I find it a pity that it was Hickman's epic storylines that carried the day rather than Moldvay's evocations of pulp fantasy like this one. More than 25 years later, it's hard to judge whether the former created an audience for that style of adventure or whether it simply catered to an already-existing one that Moldvay's style wasn't serving. Either way, The Lost City is an overlooked masterpiece and a reminder of the amazing creativity of the late Tom Moldvay. He is deeply missed.. James Maliszewski started roleplaying in the late Fall of 1979, when he opened up a copy of the Dungeons & Dragons Basic Set edited by Dr. J. Eric Holmes originally purchased for his father. More than 30 years later, he's still playing. His blog is where James collects his memories and musings about roleplaying games and related nonsense, as well as articles about the history of the hobby from its earliest beginnings to the present day. He can be contacted at [email protected]

4
Memories of Tom Moldvay
by Bob Kindel
Tom Moldvay was the editor of the second edition of the D&D Basic Set (1981). He co-created the continental setting introduced in module X1, and wrote or co-wrote several modules for the Basic/Expert line. He died in March, 2007 at the age of 58. Upon learning of his passing, Mike Monaco asked Tom’s friend, Bob Kindel, to share his reminiscences. Bob Kindel (dba The diceman), was one of the guys who answered my flier looking for players at the library, and has been playing in Telengard. Bob’s been attending conventions (as a player, GM, vendor, and convention organizer) for a very long time, and seems to know just about everyone in the industry. I met him at Borders so we could check each other out, as you have to do these days. Turned out he’s a nice guy with no obvious social stigmas. When we got down to the crunch and I said I’m using the Moldvay D&D rules, he asked me if I knew Tom. I had learned a few years ago that Mr. Moldvay lived (and died) in Akron, the next town over. But I was stoked to find out Bob and Tom were friends and had gamed together. When I mentioned that as boys, my brother and I had started with AD&D and considered “Basic” D&D the kiddy version and AD&D the “adult” version, Bob quickly interjected that Tom Moldvay held the reverse to be true. After all, AD&D really tried to cover every eventuality and provide a rule (or at least a random table) for every occasion; Basic D&D leaves it up to the DM and players to work out how they want the game to to play, and invites tinkering, expansion, and customization. Thirty years later I can see that Moldvay was right. Gygax, Arneson, and Holmes have been justly celebrated and are well-documented among gamers on various web sites and forums, but I think that Moldvay deserves more recognition. Anyway enough from me; the point of this post is to reproduce the essay Bob wrote after I began pestering him about writing down some of the oral history of D&D and its creators.
Mike Monaco
I have been asked by Mike to write about Tom Moldvay as a sort of “living history” effort. I don’t know about “living history” but I will give you some living memories before my cerebral cortex shorts out. I won’t give you the nuts and bolts stuff you can get from wikipedia.com. I reviewed their entry and it’s about as accurate as Wikipedia gets. I first met Tom in the mid-70s. He was at Kent and ran an excellent SF con called 1st Dimension Con or something. It had Harlan Ellison (who spent Saturday evening standing outside the film site trying to convince people to boycott the showing of A Boy and His Dog) and Frederick Pohl (who sat in front of me at an Ellison reading and spent most of the time making fun of him). It was such a good con, in fact, that Tom once told me that he and the committee had spent four years paying for it. Tom was always more interested in being an SF writer than game designer. It chagrined him that he couldn’t make a living in SF. At gaming, however, he was a natural. When Boot Hill was first published, an editor asked him to write a module for the system as soon as he could. Tom finished one over the weekend. “Could have done it quicker,” he said “but I needed to read the rules first.” The module? The legendary Mad Mesa with cowboys fighting dinosaurs (1 copy available on Amazon for $83.19). When the orange cover Palace of the Silver Princess (D+D module B3) was pulled by TSR, it was to Tom they turned to do a superfast edit so that the revised edition (with green cover) could go out close to schedule. Legend has it that TSR pulled it because of “x-rated art.” The art really wasn’t much worse than one found in comics. It was changed, however, because D+D was under fire from the religious right. Tom insisted it needed to be rewritten because when it was reviewed, the editor noticed that there was no way to get into the 2nd story of the palace. He also cleaned up a lot of detail stuff and gave it the Moldvay touch. Tom was always a good man to turn to when you needed fast work — both professionally or in gaming. When I needed my 7 figure Asterix minis painted in two days for a con event, Tom did them for me in one. I didn’t know Tom during the TSR years but got to know him well after he left TSR for health reasons and moved back to Akron. He was always active in the local gaming group, the AKS, and was on the con committee with me at many NeoCons (later NeoVention). If you like, I’ll share some memories of those days in a later post.
©2011 Bob Kindel

5
About the Artist
Q & A with Jim Holloway
Jim Holloway was a prolific artist for TSR in the 1980s. In addition to painting the cover for B4: The Lost City, he also contributed most of the interior black-and-white illustrations. The result is a uniform look to the adventure, in Holloway’s distinctive style. The following questions and answers were taken from “The Art of Jim Holloway” website. What is your educational background? Where did you learn to illustrate? I am self taught, never had lessons except to study some oils my pop did. I barely passed art in high school and flunked it in college. There is nothing better to get you to improve your work than to be constantly told by art directors and fellow artists how crummy you are. This, more than anything, kept me trying to improve my work - which I think the new stuff will show, particularly the upcoming remakes. College: Attended Cameron U. Majored in Art - stayed for almost three semesters, failed miserably (you're not supposed to make money with Art), dropped out and went to work. Employers: 1970s - started out painting lead fishing lures, worked in various print shops doing offset printing, and one 1930s era Platen motorized printing press (scary!). Painted signs and store windows (always on the outside and in winter!). Did a series of animal paintings for the Children's Wing of Comanche Memorial Hospital. Did (briefly) crime sketches for the Lawton Police Dept (I am NOT a narc!!!!). Late 1970s - became Head Artist for a branch of CA Parschall, where we illustrated manuals for the US Army, particularly the Lance Missle System and M109 SP Howitzers. I bought a copy of Artist Market 78(?) saw an ad for Dragon Magazine, submitted art, eventually hired in 1980 at TSR, kicked to the curb in 1985, and have freelanced ever since. I'm sure many fans are wondering ... why was 95% of the artwork purged? And how did the rest (5%) survive? TSR never returned any of the older stuff in the early years when I was happy working there. The few that I did get back in the later years I was really not happy with - most were rush jobs, or neat ideas ruined by writers who knew more about art than we did (not all of them, there were quite a few writers I did like). I usually destroyed them because I knew I could have
done better. Other reasons, I never knew we'd be around long enough to be considered classic, never thought about doing prints in the early days. Had a really nice, working fireplace. To be honest, I never knew I had fans till a couple of years ago when Paranoia started up again. There were people at TSR that threw away fan letters addressed to me, so to anyone who wrote me then, I was not being a snob by not answering, I just never received them. Who were some of your influences early on? I liked a lot of Virgil Finlay's art, especially the technique, stipling. Frazetta was the one who got me started. One guy really inspires me to this day is Fred Gwynne (aka Herman Munster). Not a lot of people know this, but he was a really great artist. He published a bunch of art books and he had a really great sense of humor. What mediums did you generally use for your early first edition black and white pictures? Are they acrylics? Did you use special paper? Did you paint on A4 sized sheets, or did you make your paintings/ inkworks larger and reduce them for better detail in the mods? In the early days I used to use the impossible-to-clean-or-keep-working German Rapidographs, the frustration of cleaning them and trying to put them back together probably shortened my lifespan considerably. I used a paper that had a bit of texture to it. By adjusting the speed and pressure on the texture I could vary the width of the line, so it wasn't necessary to switch to different pens. After a while I was able to do this with smoother bristol paper and now I use cheap disposable pens. All b/w drawings were done in India ink, sometimes shaded with a wash of the ink diluted with water. Most b/w's were done 100% because they had to get out right away. I'll do paintings larger so they can be reduced, again depending on how fast it had to be done. All early paintings were done in acrylics for speed, I think the Borderlands painting may be the first done in oils. Most of the paintings after that were done in a combination oils and acrylics, backgrounds done in acrylics. Editor’s note: Harry Quinn and Steve Sullivan are also listed in the art section of the credits. Harry Quinn painted the dynamic scene on the back cover of the module, (a trio of adventurers narrowly escaping three swinging pendulum blades covered in what looks to be green slime, from the tomb trap in room 26a). Steve Sullivan contributed two small compass illustrations for the map section.

6

7
Printing History
The working title for B4 Lost City was "The Lost City of Cynidecia". The 3-hole-punching on some of the early B-series modules does seem to indicate a different printing (probably earlier), but this is not proven. First (1982): Angled yellow banner in upper left. TSR Face logo. ISBN on back cover bottom left, Product Number (394-52498-5TSR0550) back cover bottom right. Second: Contents identical to First, but has a cardboard header stapled to the top of the module, with the D&D logo and some other advertising. Note that the module itself, separated from the header, is indistinguishable from a First print. Third: Angled yellow banner in upper left. TSR Face logo. ISBN is centered on the back cover bottom, and Piece Code (9049XXX1401) is on back cover bottom right instead of the Product Number.
Fourth (1983?): Red banner across top and more modern "Dungeons & Dragons" logo. Angled TSR logo. ISBN and Product Number back cover bottom center, Piece Code back cover bottom left.
Foreign Editions B4 La Cité Perdue (French) First print (1983). Printed by TSR. Purple cover. Matches the US Third print, with the exception that roughly one-third of the interior artwork is missing, and much of the remaining artwork has been re-sized and shuffled around.
B4 La Cité Perdue (French) Second print (1986). Printed by Transecom. Blue cover. Released soon after the Third French print of the D&D Basic Set in 1985. B4 Die Vergessene Stadt (German) B4 La Citta Perduta (Italian) First Italian print. Interior is identical to the US version. Rear cover states "Printed in Spain". This print appears to be rarer than the Second print below. B4 La Citta Perduta (Italian) Second Italian print. Interior is identical to the US version. Rear cover states "Printed in Italy". B4 Lost City (Japanese) B4 La Ciudad Perdida (Spanish) Aside from translation, identical to US version. Unknown which US print this matches, however. B4 Den glömda staden (Swedish) Size is UK-standard A4. No other differences.

8
Origins of the Lost City
by Demos Sachlas
Tom Moldvay's "The Lost City" presents a multi-level dungeon housed within an ancient step-pyramid as the centrepiece for a richly evocative campaign setting. While primarily a Basic game adventure intended for character levels 1-3, enough additional material is included to greatly expand the module using the D&D Expert rules, introducing the transitional Basic/Expert concept developed further by TSR UK in module B10 “Night’s Dark Terror”. Based on the classic pulp trope of a ruined city populated by the dwindling remnants of a lost race, with a sinister Lovecraftian creature, and wrapped in the Hellenistic trappings of Ptolemaic Egypt, “The Lost City” stands as a true classic and represents an enduring creative achievement, rivaling “The Keep on the Borderlands” for number of times it has been revisited in later publications.
The Hyborian Connection As editor of the revised edition of the Basic rulebook, Moldvay included a sample dungeon (“The Haunted Keep”) possibly inspired by H.P. Lovecraft's "The Rats in the Walls". He subsequently based an entire module (“Castle Amber”) on the Averoinge stories by Clark Ashton Smith. It was therefore only natural for him to draw upon the works of Robert E. Howard, the other member of the infamous Weird Tales triumvirate, for 1982's "The Lost City". Two tales by Howard that are frequently compared are the short story "Xuthal of the Dusk" (the title was changed to "The Slithering Shadow" for its original publication in Weird Tales, September, 1933) and the more polished novella "Red Nails" (published in Weird Tales, July, 1936). Both owe a literary debt to Edgar Rice Burroughs’ Opar as well as to H.R. Haggard, and each contributes key elements to “The Lost City”. In the opening paragraphs of "Xuthal of the Dusk", Conan is facing a harsh fate: For days they had fled into the desert, pursued so far by Stygian horsemen that when they shook off the pursuit, they dared not turn back. They pushed on, seeking water, until the camel died. Then they went on foot. For the past few days their suffering had been intense.
(Xuthal of the Dusk) The Players’ Background section of “The Lost City” presents a similar predicament:
You headed east, the same way the caravan was headed before the storm. Days passed. Your mounts died and you soon drank the last of your water. The end of the desert was not in sight.
(B4: The Lost City) In Howard’s tale, Conan and his companion discover the ancient, almost deserted city of Xuthal. Its few remaining citizens spend most of their time in a drug-addled stupor, and are terrorized by a subterranean, tentacled creature which prowls about the city, feeding upon them. "That was Thog, the Ancient, the god of Xuthal, who dwells in the sunken dome in the center of the city. He has always dwelt in Xuthal. Whether he came here with the ancient founders, or was here when they built the city, none knows. But the people of Xuthal worship him. Mostly he sleeps below the city, but sometimes at irregular intervals he grows hungry, and then he steals through the secret corridors and the dim-lit chambers, seeking prey. Then none is safe."
(Xuthal of the Dusk) Moldvay’s Cynidiceans are likewise preyed upon by Zargon, an ancient monster that is worshiped as a god. With the rise of the cult of Zargon, most Cynidiceans "began to look for strange pleasures. They sought oblivion in rare wines and bizarre drugs" and after their civilization collapses “spend most of their time living in strange dream worlds.” At its height, Cynidicea was a "rich and fertile kingdom. Its people reclaimed much land from the desert," but after the coming of Zargon "Workers no longer repaired the irrigation ditches" and "rich land turned into desert." The city was ultimately sacked by barbarians. Xuchotil in "Red Nails" is also surrounded by abandoned irrigation ditches, “half filled in places, and overgrown with cactus” and likewise fell to hostile invaders.
The Pyramid of Saqqara, Egypt, circa 1870-1880

9
In Xuchotil, the inhabitants are divided into three warring factions, only two of which remain by the time Conan and his companion arrive. In “The Lost City” those Cynidiceans trying to revive the worship of the old gods are divided into three factions, which quarrel over the proper means by which to restore Cynidicea’s former glory.
Classic Scenarios In the revised Basic rulebook, there are clues that Moldvay had already conceptualized the adventure to be published as module B4. In his section on choosing a scenario (page B52) he provides the following examples: Destroying an Ancient Evil: The evil is usually a monster or NPC (the exact type not known by the players). Sometimes the evil has been deeply buried and re-awakened by recent digging. This theme is often used along with others; for example, an ancient evil may have to be destroyed before some ruins are resettled. Finding a Lost Race: The players find a once-human race which has lived underground for so long that it has begun to change. Its members might have developed infravision, changed color, or begun to fall back into animal ways. This scenario works well when used with Destroying an Ancient Evil, since Lost Races are often servants of the ancient powers. This scenario requires extra work and imagination by the DM, since details for the Lost Race must be invented. As described in the DM’s Background, a pyramid was constructed on the site of the original shrine of Zargon, and excavations deep below the surface reawakened the slumbering creature. The Cynidiceans retreated underground, over subsequent generations developing infravision, white hair, and pale skin. Most Cynidiceans now wear animal masks, acting out strange dream-like beliefs, although after the single reference to drug-use by the worshippers of Zargon, the strange dream-like behaviour is presented as more of a mental affliction.
The Pyramid Dungeon In an article posted on The Black Gate, veteran game designer Lawrence Schick discussed the origins of the Known World setting for the D&D game. Between 1974-76, Schick and Moldvay collaborated to create a fictional world setting for their D&D campaigns: We decided to plot out a single giant Pangea-type continent on which there would be fantasy-fictionalized versions of each of the above cultures. We also added homelands for the nonhuman races: Orcs, Goblins, Elves, Dwarves, Hobbits, Lizard-Men,
Deep Ones, Kzinti Catfolk, and Barsoomian Tharks, as well as a pirate kingdom, and areas where prehistoric creatures were the norm. Plus in every land there would be hidden cults that worshiped Lovecraftian Elder Gods. The maps and keys provided include a reference to "Tentrumtoom...K88 (ruined city & pyramid dungeon)." Schick and Moldvay were both members of the Kent State University Science Fiction Club and The Kent State University Gamer's Guild is listed in the credits of B4 for playtesting. It is therefore tempting to speculate that the ruined city and pyramid dungeon of Tentrumtoom may represent an earlier version of “The Lost City”.
The location of Tentrumtoom (in red), site of a ruined city with a pyramid dungeon in the original Known World setting, a possible precursor to module B4 “The Lost City”. Location K88 is situated to the northeast of the continent in a vast forest, similar to the surroundings of Xuchotil in "Red Nails”. Howard describes the city as a single massive structure, divided into various quarters and consisting of four separate tiers of chambers. Moldvay’s pyramid is based on an Egyptian step pyramid, with features of a Mesoamerican temple, such as the broad ramp of steps leading up to a shrine area (although ascending the back as opposed to the front of the pyramid). Many of the traps within Moldvay’s pyramid are intended for tomb-raiders, including a rolling boulder as similarly featured in the opening scene of Raiders of the Lost Ark, released a year earlier. The lower levels (Tiers 7-9) include wall paintings depicting the journey of the dead in the Cynidicean conception of an afterlife, clearly modeled after Hellenistic beliefs, and similar to the tomb paintings inside Egyptian pyramids. The underground city in B4 is built within huge upper catacombs. There are similarities to the cavern with the “domed city” in the sample cross-section of levels depicted in the Holmes rulebook (which also contains an underground lake with a small island). Moldvay

10
may have likewise been inspired by Paul Jacquays' Caverns of Thracia, which contains a sizable inhabited natural cavern deep below the surface. In Howard’s tale, the catacombs beneath Xuchotil contain the bones of long-dead kings and queens, and the crypts of ancient wizards. Their underground passageways are haunted by fearsome creatures, but also contain powerful artifacts. The lower catacombs beneath the underground city in module B4 likewise harbor terrible monsters. Their large entrance is accordingly sealed with a huge stone slab.
Cynidicea/Cyrenaica The original Known World setting also featured a city named Cynidicea (far distant from the ruined city of Tentrumtoom) whose people share a linguistic heritage with Thyatis, Karameikos, Akoros, Darokin, and Keraptis. In this earlier version of the Known World setting, The Empire of Thyatis was modeled after the ancient Mediterranean cultures of Greece and Rome, although in module X1 was described as similar to the medieval Byzantine empire. It is therefore possible that Cynidicea in the original Known World setting may have been inspired by the north African region of Cyrenaica, which was colonized by the Greeks and ultimately conquered by Alexander the Great. During the Ptolemaic dynasty, Hellenistic culture mixed with Egyptian beliefs, and the region later became a Roman province, following the death of Cleopatra. In selecting a location for “The Lost City” in the revised Known World setting, it is tempting to conjecture that Moldvay may have chosen to transplant his original pyramid dungeon to a desert environment as in “Xuthal of the Dusk” rechristening the city “Cynidicea” to take advantage of the already fleshed-out cultural backdrop, perhaps influenced by its proximity to the Empire of Thyatis in the revised setting. The potential connection between Cynidicea and Cyrenaica is further supported by various names in the module drawn from contemporary sources such as King Alexander, Queen Zenobia (a Palmyrene "warrior queen" who conquered Egypt in the 3rd century), Demetrius (a Greek name common among Seleucid rulers), and even Darius (the Persian emperor). A final intriguing link between Cynidicea and Cyrenaica is the medicinal plant silphium, which was indigenous to Cyrene. Among its many uses was a cure for madness. In the suggestions for further adventures in the module is "The Antidote" in which a small white flower found only in certain parts of the lower catacombs is discovered to be a cure for the dream-like state of the Cynidiceans.
Conclusion
Decades after its original publication “The Lost City” continues to fire the imagination with its fully realized lost race, competing religious factions, and nightmarish Lovecraftian nemesis. Almost certainly inspired by two similar Conan stories by Robert E. Howard, and evoking the atmospheric backdrop of Hellenistic Egypt, the module can easily serve as the basis for an entire campaign set within the sprawling underground cavern of a forgotten civilization. Additional Reading: “Xuthal of the Dusk” or “The Slithering Shadow” was was adapted by Roy Thomas, John Buscema and Alfredo Alcala in Savage Sword of Conan #20, and again by Fred Van Lente and Guiu Vilanova in Conan the Avenger #13-15 (2015) Return to Xuthal by Charles Hoffman in The Robert E Howard Reader (2010) edited by Darrell Schweitzer, pages 94-112 “Red Nails” was adapted by Roy Thomas and Barry Windsor-Smith in Savage Tales #2-3 and reprinted in color for the Marvel Treasury Edition #4 (1975). The story was reprinted in the black-and-white magazine Conan Saga (1987) and many times since then, both in black-and-white and in full color, by Marvel and more recently by Dark Horse. “The Nameless City” by H. P. Lovecraft describes the ruins of a prehistoric city, deep within the deserts of the Arabian peninsula. The city was originally constructed by a race of ancient reptilian creatures, who now inhabit a vast underground cavern. The “Known World” D&D Setting: A Secret History, posted on Black Gate: Adventures in Fantasy Literature, February 7th, 2015, by Lawrence Schick
A coin of Magas of Cyrene circa 300 - 282/75 BC. Rev: silphium and small crab symbols.

11
Worship of the Ancient Gods
by Demos Sachlas and Andy Campbell
The Cynidicean pantheon is represented by a divine triad, each of whom is derived from Greco-Roman and Norse or Egyptian predecessors. The Cynidicean concept of an afterlife is fittingly Hellenistic in origin, although with clear Egyptian influences.
The Brotherhood of Gorm. Their god, Gorm, is the god of war, storms, and justice. The followers of Gorm are male fighters of Lawful alignment. All wear golden masks of the face of Gorm, a long-haired, bearded man with a stern gaze. Each Brother also wears iron chain mail over a blue tunic. Under the armor, each has a small blue lightning bolt tattooed on his right shoulder. The Brothers believe in justice tempered by mercy. They worship Gorm on the fourth day of each week and consider lightning storms to be holy. He is often depicted as a strong, long-haired, bearded man with a stern gaze holding a lightning bolt in his right hand, and a balance in his left hand. Gorm is a god of the sky (represented by the blue tunics of the brotherhood) as well as thunderstorms. Like the Greek god, Zeus, he is usually depicted wielding a lightning bolt. However, since Gorm does not explicitly rule over the Cynidicean pantheon, he is perhaps closer to the Norse thunder god, Thor. Interestingly, both Zeus and Thor share a Roman connection. The Romans adopted many of the Greek gods as their own, aligning Jupiter with Zeus. They also linked their pantheon to those of conquered peoples, associating Jupiter with the Germanic Thor. Since the fourth day of the Roman week was originally Jupiter’s day, it became regarded by the Anglo-Saxons as “Thor’s day”. Gorm’s worship on the fourth day of each week can therefore be construed as an allusion to both Zeus and Thor. As a god of storms, Gorm is also the “cloud-gatherer” and weather master. He oversees the climatic conditions enabling crops to grow, providing an important link to agriculture. Given the Cynidicean’s efforts to create arable land in a desert environment, this explains the brotherhood’s reverence for lightning storms. Gorm represents war not in a chaotic or a destructive sense, but as a protective force or as a means to achieve peace. He therefore has less in common with the Greek god, Ares, and is closer to the Roman god, Mars. Earlier in their history, the Cynidiceans were
successful in defending their civilization against a serpent race invasion, although after establishing their city, did not engage in any known wars of aggression. Virility was an essential characteristic of Mars and linked to his role as an agricultural guardian. Thor was associated with fertility as well as the turn of the seasons. These qualities are shared by Gorm and appeal to his male followers, but in their connection to the harvest, serve as a link to Madarua. Finally, Gorm is regarded as the law-giver. The first king of Cynidicea was favoured by Gorm, and responsible for setting the tenets of the society which would flourish in the centuries to come. The Cynidicean legal system was founded on the principle of justice, as represented by the balance, tempered by mercy.
The Magi of Usamigaras. This faction worships Usamigaras, the god of healing, messengers, and thieves. They are all Neutral magic-users, wearing silver masks of the face of Usamigaras, the smiling child. The Magi also carry silver daggers and wear rainbow colored robes. The right palm of each is marked with small silver lines in the shape of a five-pointed star. The Magi are usually friendly toward clerics, thieves, elves, and magic-users, but look down upon fighters, dwarves, and halflings. Usamigaras is worshipped on certain days when the heavenly stars and planets are in the right patterns. The Magi record the positions of the stars and planets so that they will know when their holy days are. Usamigaras is often depicted as a winged child with two snakes twined about its body, holding a wand in his right hand, and a handful of coins in the other. Hermes was the Greek god of messengers and thieves, similar to Usamigaras, but also of trade and commerce. Whereas Hermes is occasionally depicted holding a purse, Usamigaras holds a handful of (possibly pickpocketed) coins. Like Hermes, Usamigaras was probably the Cynidicean god most often sent to interact with mortals (deliver messages of a divine nature, assign geases). Able to pass freely through boundaries, Hermes was also responsible for carrying the souls of the dead to the underworld, and Usamigaras may have played a similar role in the Cynidicean mythos. Hermes was linked to practitioners of magic, and in Alexandria was regarded “the teacher of all secret wisdoms”. He was frequently depicted holding a stick or scepter, representing a magic wand. This later

12
evolved into the caduceus, a winged staff with two snakes wound around it. The caduceus of Hermes is often confused with the rod of Aesculapius, the god of healing, which only bears one snake. This is because the caduceus has erroneously been used as a symbol of medicine, although Moldvay exploits this association to incorporate Usamigaras as a patron of clerics. Hermes’ counterpart in Hellenistic Egypt was the Egyptian god, Thoth, also associated with passage to the underworld. The two deities were combined and worshiped by secret societies in ancient times, whose philosophical treatises later served as the framework for occult writings during Renaissance studies of alchemy, astrology, and ritual magic. The magi of Usamigaras may also be modeled on the Persian magi, priests of Zoroaster, who were likewise known for their use of magic, astrology, and foretelling the future. It is unclear why Usamigaras is depicted as a halfling, or as a smiling child. Perhaps this is a reference to the youthfulness of Hermes, one of the youngest of the Olympian gods.
The Warrior Maidens of Madarua. The Maidens worship Madarua, goddess of birth, death, and the changing seasons. They are Neutral female fighters. The Warrior Maidens wear bronze masks of Madarua, a beautiful woman. They also wear bronze chain mail armor over green tunics. Each Maiden has a small, sickle-shaped scar on the inside of her left wrist. Madarua has a special holy day at the beginning of each of the four seasons. Madarua is often depicted as a beautiful woman holding a sword in her right hand, and a sheaf of wheat in her left. Madarua is associated with Demeter, the Greek goddess of the harvest, who presided over the changing seasons as well as the cycle of life and death. She was often depicted holding a sheaf of wheat. Madarua’s link to agriculture is reflected in the green tunics of her warrior maidens, as well as the sickle-shaped scar on their wrists. The special holy days at the beginning of each of the four seasons mark the winter solstice, summer equinox, summer solstice, and winter equinox. Worship of Demeter may have evolved from a prototypical earth goddess. She and her daughter, Persephone, were worshiped in rites known as the sacred mysteries, some of which only involved women,
echoing the exclusivity of the sisterhood of warrior maidens. Many ancient cultures speak of a divine marriage between a male sky god and a female earth goddess. This might be implied in the Cynidicean cosmology as a relationship between Gorm and Madarua, establishing the nucleus of a divine family, in which Usamigaras could represent the mischievous child (as reflected in the masks of the magi). Madaura’s martial aspect seems borrowed from the Greek goddess, Athena, herself a warrior (Athena Promachos) and protector of cities. Unlike Ares, she represented military strategy, although preferred battle as a last resort or as a means to resolve conflict. Statues of Athena were frequently depicted as armored and helmeted, holding a huge spear. Athena was a virgin goddess (Athena Parthenos) representing another possible aspect of Madarua, whose warrior maidens are somewhat amazon-like in their segregation from men. “Third”, a “Warrior Maid of Maruda” is an NPC from Cynidicea in the 2e module “Return to the Keep on the Borderlands” by John Rateliff. ”Maruda’s Champion” is the matriarch and first rank, the “Hallowed Mask” are the chosen few and second rank, while the “Warrior Maids” are third rank. Further inspiration for fleshing out the warrior maidens of Madarua may be found in the 1980s graphic novel series “Sisterhood of Steel” by Christy Marx.
Brief descriptions of Gorm, Usamigaras, and Madarua were included on pages 40-41 of Book I: Codex of the Immortals, in the “Wrath of the Immortals” boxed set, part of the D&D Challenger series, published in 1992. Gorm was described as an Empyreal, Sphere of Energy; AL C, a former king of Cynidicea, whose special interests were justice, storms, and war. Madarua was described as an Empyreal, Sphere of Energy; AL L, a rare fighting-woman of the ancient Nithian Empire. A minor patroness of women. Usamigaras was described as an Empyreal, Sphere of Energy; AL N. A halfling in life, who gained the ability to cast spells as a result of a wish. He eventually became ruler of Cynidicea, plundering the city’s riches. Patron of healing, messengers, and thieves.
13
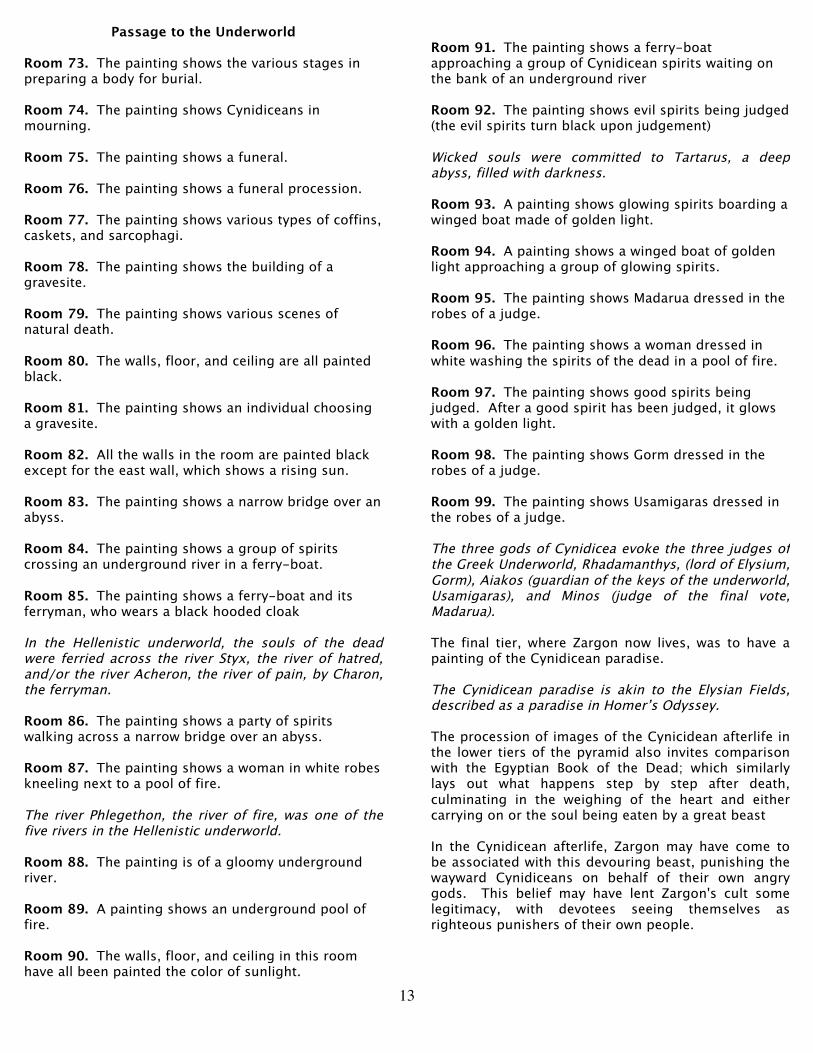
Passage to the Underworld Room 73. The painting shows the various stages in preparing a body for burial. Room 74. The painting shows Cynidiceans in mourning. Room 75. The painting shows a funeral. Room 76. The painting shows a funeral procession. Room 77. The painting shows various types of coffins, caskets, and sarcophagi. Room 78. The painting shows the building of a gravesite. Room 79. The painting shows various scenes of natural death. Room 80. The walls, floor, and ceiling are all painted black. Room 81. The painting shows an individual choosing a gravesite. Room 82. All the walls in the room are painted black except for the east wall, which shows a rising sun. Room 83. The painting shows a narrow bridge over an abyss. Room 84. The painting shows a group of spirits crossing an underground river in a ferry-boat. Room 85. The painting shows a ferry-boat and its ferryman, who wears a black hooded cloak In the Hellenistic underworld, the souls of the dead were ferried across the river Styx, the river of hatred, and/or the river Acheron, the river of pain, by Charon, the ferryman. Room 86. The painting shows a party of spirits walking across a narrow bridge over an abyss. Room 87. The painting shows a woman in white robes kneeling next to a pool of fire. The river Phlegethon, the river of fire, was one of the five rivers in the Hellenistic underworld. Room 88. The painting is of a gloomy underground river. Room 89. A painting shows an underground pool of fire. Room 90. The walls, floor, and ceiling in this room have all been painted the color of sunlight.
Room 91. The painting shows a ferry-boat approaching a group of Cynidicean spirits waiting on the bank of an underground river Room 92. The painting shows evil spirits being judged (the evil spirits turn black upon judgement) Wicked souls were committed to Tartarus, a deep abyss, filled with darkness. Room 93. A painting shows glowing spirits boarding a winged boat made of golden light. Room 94. A painting shows a winged boat of golden light approaching a group of glowing spirits. Room 95. The painting shows Madarua dressed in the robes of a judge. Room 96. The painting shows a woman dressed in white washing the spirits of the dead in a pool of fire. Room 97. The painting shows good spirits being judged. After a good spirit has been judged, it glows with a golden light. Room 98. The painting shows Gorm dressed in the robes of a judge. Room 99. The painting shows Usamigaras dressed in the robes of a judge. The three gods of Cynidicea evoke the three judges of the Greek Underworld, Rhadamanthys, (lord of Elysium, Gorm), Aiakos (guardian of the keys of the underworld, Usamigaras), and Minos (judge of the final vote, Madarua). The final tier, where Zargon now lives, was to have a painting of the Cynidicean paradise. The Cynidicean paradise is akin to the Elysian Fields, described as a paradise in Homer’s Odyssey. The procession of images of the Cynicidean afterlife in the lower tiers of the pyramid also invites comparison with the Egyptian Book of the Dead; which similarly lays out what happens step by step after death, culminating in the weighing of the heart and either carrying on or the soul being eaten by a great beast In the Cynidicean afterlife, Zargon may have come to be associated with this devouring beast, punishing the wayward Cynidiceans on behalf of their own angry gods. This belief may have lent Zargon's cult some legitimacy, with devotees seeing themselves as righteous punishers of their own people.

14
The Cynidicean Mosaics
by Demos Sachlas
50. MAIN ENTRY CHAMBER The high, arched ceiling of this room is supported by a double row of pillars. Each pillar is carved into a statue of a king or queen of Cynidicea. A series of mosaic pictures decorate the walls of the room. These start in the northeast corner and continue clockwise around the room. In the center of the north wall is a pair of huge stone doors. At the base of the double doors, the floor is partially covered with sand. The mosaics show scenes from the history of Cynidicea. From the northeast corner, the mosaics show: 1. A tribe of squat, heavy-browed humanoids wielding crude stone weapons worship a lizard-headed god. The first mosaic depicts a tribe of Neanderthals worshiping a lizard-headed god. Close examination of the mosaic reveals the large bones, powerful muscles, and apelike faces of this race. They are holding stone-tipped spears and stone axes, clubs, and hammers. The lizard-headed god is horned with many tentacles, clearly representing Zargon. This mosaic would have been made during the reign of King Alexander and Queen Zenobia, based on legends of the original primitive inhabitants of this area. There might have been whispered legends of a lizard-headed god worshiped by the Neanderthals, based on cave paintings or stories passed down by the conquering ancestors of the Cynidiceans. 2. A large band of tall, black-haired people battle the humanoids and take over their hunting grounds. The next mosaic shows a battle between a large band of a tall, black-haired human race and the indigenous Neanderthals. These are the ancestors of the Cynidiceans, a branch of the Thyatic people (from whom the modern day peoples of Thyatis and Darokin descend). They are using iron weapons against the Neanderthals, who are shown fleeing. The arid hunting grounds are depicted as devoid of much vegetation. 3. A village rises over the scene of the battle. In the arid lands around the village are fields of grain and vast herds of cattle and sheep. The third mosaic is of a village constructed over the scene of the battle. The lands around the village have begun to be cultivated and a rudimentary irrigation
network can be seen among the fields of grain and vast herds of cattle and sheep. 4. A great leader arises in time of need and gathers the villagers into an army that destroys an enemy army of snake-headed humanoids. A prominent figure is depicted organizing the villagers in the face of an army of snake-headed humanoids. Rather than lizard-men, these snake-headed humanoids likely represent a race of now extinct serpent-men. The snake-headed humanoids are being ruthlessly slaughtered, although a few are depicted casting hateful backward glances while retreating deep underground. 5. The victorious leader is crowned king, thus founding the line of the rulers of Cynidicea. In the next mosaic, the leader who defeated the enemy army is being crowned as the first king of Cynidicea. Observant characters may note that the king bears a certain likeness to Gorm. This technique was used by the maker of the mosaic to impart an aura of divinity to the founder of the line of Cynidicean rulers, although some believe that Gorm was in fact the first god-king of Cynidicea. 6. The stone city of Cynidicea is built on the site where the village stood. The next mosaic shows the stone walls of Cynidicea, against the same background as the original village. The surrounding lands are even more cultivated, and there are many workers in the fields, as well as herders of cattle and sheep. 7. Scenes of the splendor of the kingdom at its height. Turning to the next mosaic, we see a rich and fertile kingdom at its height. The citizens are richly clothed, and engaged in trade and other activities. High stone walls and monumental architecture are present. There are depictions of the Brotherhood of Gorm, the Magi of Usamigaras, and the Warrior Maidens of Madarua. 8. The births of King Alexander and Queen Zenobia. Alexander and Zenobia were likely brother and sister, possibly twins. Much of the Cynidicean dynasty were in fact sibling monarchs. The newborn rulers are depicted more like miniature adults than as infants, although King Alexander is lacking a beard. There are many foreign dignitaries present.

15
9. The great pyramid is built. Countless slaves are shown toiling on the construction of a great step-pyramid with five tiers. This project would have been initiated when Alexander and Zenobia were still alive. 10. Slaves digging under the pyramid uncover the foundations of a pre-historic temple. The next mosaic depicts the uncovering of the foundations of a pre-historic temple that were incorporated into the construction of the great pyramid. The lower dungeon levels were already in existence, and were only widened and painted with scenes depicting the passage of the soul to the afterlife. Construction was likely ongoing at the time of Alexander and Zenobia’s death. 11. The death of King Alexander and Queen Zenobia and their burial in the pyramid. The mosaic which follows illustrates the deaths of King Alexander and Queen Zenobia in separate scenes, as well as their internment within the great pyramid. King Alexander wears a jeweled crown, is dressed in plate mail and holds a sword. The armor and sword are surrounded by a golden halo. Queen Zenobia wears a matching jeweled crown and holds a sceptre, also surrounded by a golden halo. Their bodies are shown being embalmed and prepared for burial. Also depicted in the mosaic are the household slaves. These are shown being herded together and killed. 12. The worship of the old gods Gorm, Usamigaras, and Madarua is replaced by the worship of a large humanoid with many tentacles. There came a time when the worship of the ancient gods was forsaken in favor of the cult of Zargon. The monster has the head of a giant lizard with a large black horn in the middle of its forehead, and a dozen tentacles in place of arms or legs. Its victims were regarded as religious sacrifices. Who completed this mosaic is a mystery. It is dated after Zargon killed the original workers digging deep beneath the pyramid. After the creature started receiving criminals from the jails and its cult arose, work on the mosaics likely resumed – possibly by apprentices or a different master artisan. 13. Life becomes a year-round carnival for the Cynidiceans. All Cynidiceans are now masked.
The next mosaic depicts a view of the city teeming with masked Cynidiceans. It appears to be a festival such as mardi gras. There came a time when most of the citizens worshiped Zargon, looking for strange pleasures, and seeking oblivion in rare wines and bizarre drugs. 14. The Cynidiceans meet a barbaric, golden-haired people (the ancestors of the Heldann tribes mentioned in module X1). The last mosaic shows a barbaric, golden-haired people mingling with the Cynidiceans. Scholars have established that these are the ancestors of the modern, Heldann tribes. The army lost its discipline, people outside the city rebelled, or moved away as chaos spread outward from Cynidicea. From X1 - The Heldann are a barbaric, fair-haired people who hunt, fish, and raise crops on isolated farms. They are related to the people in the northeastern kingdoms but acknowledge no ruler among themselves higher than the individual household leader. Their culture is very similar to that of medieval Iceland. 15. The final picture is not a mosaic. It is a crudely painted sketch that shows the tribesmen looting Cynidicea. Barbarian warriors of the Heldannic tribes eventually stormed over the walls and destroyed the city. The only Cynidiceans who survived were those who fled underground to the vast catacombs under the city. There, led by the Priests of Zargon, the Cynidiceans tried to rebuild the city. There is room on the wall for more pictures, but the space is blank.
16
Holmes and the Lost City
by Zach Howard
When Dungeon Module B4 The Lost City was released in 1982, TSR's revised D&D Basic Set and new Expert Set had only been out for about one year. The original Basic Set edited by J. Eric Holmes had been for sale for about four years before that, so TSR naturally assumed that a number of DMs would run the new modules using the original Basic rules. Thus the next two modules in the Basic series, B3 Palace of the Silver Princess and B4 The Lost City, contain guidance on using the module with the original set. These modules were authored (B4) or co-authored (B3, with Jean Wells) by the editor of the revised Basic rulebook, Tom Moldvay. He acknowledges Holmes Basic referees with the same words in each module: "Enough information will be given in the room encounters and Wandering Monster Tables so that DMs with the 1st edition of the D&D Basic rule book (the blue-covered Basic) will be able to use all monsters in this module" (pg 2 of B4). Moldvay also explains the new monster stat blocks in detail, and gives enough information on Movement distance to allow conversion to the Holmes rules. Moldvay introduced a large number of new monsters in the revised Basic set, and he uses these extensively in B4. In the Wandering Monster descriptions, Moldvay notes the monsters found in both Basic rulebooks and only covers these briefly. But for monsters not found in Holmes he provides a more extensive description allowing a Holmes DM to fully employ these new monsters. Monsters in dungeon rooms are treated similarly. In a way this technique allows the module to serve as a supplementary bestiary for Holmes Basic or OD&D (or even AD&D) without need for a separate new rulebook. The design of B4 shows off the Basic/Expert split very well, with Tiers 1-5 (rooms 1-57) of the pyramid dungeon dedicated to fully described rooms with Basic level encounters, and Tiers 6-10 (rooms 58-100) described briefly and stocked mostly with Expert level encounters. Tiers 1-5 contain the following monsters new to Moldvay Basic, listed here in order of appearance: Cave Locust, Giant Ferret, Sprite, Killer Bee, Gecko (Giant Lizard), Giant Bat including Giant Vampire Bat, Rock Baboon, Spitting Cobra, Draco (Giant Lizard), Wolf, Pit Viper, Oil Beetle, White Ape, Giant Shrew, Tiger Beetle, Driver Ant, Tuatara (Giant Lizard), Thoul, Rock Python, and Living Iron Statues. This group is heavy on the oversized vermin, nicely supplementing the Holmes Monster List. These tiers also contain several fully described new monsters: Banshee, Cynidicean (Men), Werefox and Polymar. Incidentally, the Polymar is a B/X version of Moldvay's Protein Polymorph that
appeared earlier in the Fiend Folio (1981). This is perhaps a clue that a portion of this module was written before the revised Basic Set was released. Tiers 6-10 contain the following monsters new to the Expert Set: Giant Scorpion, Wood Golem, Caecilia Worm, Giant Weasel, Devil Swine and Bone Golem, plus the unique entity Zargon. The other Expert level monsters found on these tiers were already present in Holmes Basic. While the Holmes Basic DM may be more comfortable using these more powerful monsters with low level characters, chances are the concentration of deadly threats will require expansion of the rules for higher level play. In addition, there are also some spells and magic items not found in Holmes. The new Expert rulebook would serve well for higher level play, and even contains a page on using it with the Holmes Basic rulebook. Alternately, the majority of the spells and items are also found in the OD&D rules, which are a natural fit with Holmes Basic, being the rules that Holmes used when preparing Basic. The module encourages the DM to expand the room descriptions for the lower pyramid level, making it an early B/X transition module like the later B10 Night's Dark Terror was touted to be. The expanding steps of Tiers 1-5 and reverse 'shrinking steps' for Tiers 6-10 is a great parallel design and a neat twist on presenting lower dungeon layers that allows 10 dungeon levels to fit in a single module of 28 pages plus maps. Furthermore, with 10 dungeon levels this module is one the fullest published realizations of the early D&D layered dungeon concept, first sketched out in OD&D and then more evocatively illustrated in the Holmes Basic rulebook by the Skull Mountain Cross Section by Tom Wham. B4 itself contains a cross-section map that shows the influence of Skull Mountain by also including an underground city and lake. An enterprising DM could even adapt the Lost City module for use as the dungeon found inside Skull Mountain. Zach Howard maintains the celebrated Zenopus Archives, a blog and website devoted to Holmes Basic D&D and the other writings of J. Eric Holmes.

17
Notes on the Underground City
by Jason Cone
Philotomy’s Musings by Jason Cone was a very influential website discussing the original D&D rules. Jason launched a B4 campaign using Holmes Basic, and extended his campaign using OD&D. His detailed campaign log can be found online. The following notes describing his changes to the module are incomplete, but have an old school feel and are worth consideration for any B4 campaign. Even though a great deal of the adventure takes place in the pyramid tiers, it is the underground city of Cynidicea, itself, that provides the heartbeat of this adventure. The "old god factions" that worship Gorm, Usamigaras, and Madarua have secret bases in the upper tiers of the pyramid (far from the city and the influence of the Temple of Zargon), but they have their main strongholds in the city, itself. The majority of the monsters from the upper tiers originally come from here, below the pyramid, and not from the desert, above. The city and its underdark environs are the major source of food, water, and the other resources that keep the entire location from being nothing more than a dust-choked tomb. Life in Cynidicea drifts by in a chaotic, dream-like manner, for the most part. Cynidiceans keep to themselves out of apathy or caution, but everyone acknowledges the Temple of Zargon as the dominant authority. Most Cynidiceans give nominal allegience to the Temple, and all fear the power of Zargon. The average Cynidicean does not love Zargon, but few hate his dominance; instead, most simply accept Zargon as a fact of their existence. The dream-like state Cynidiceans exist in helps to promote this apathy. However, a small percentage of the adult population is more strongly aligned for or against Zargon, and is a full-member of one of the four factions. Each of the "old god factions" possesses thirty dedicated members, and is led by a 3rd level NPC (as detailed in the original module). The Temple of Zargon is served by a cabal of ten clerics with spellcasting ability, but can also draw on acolytes (i.e. 1st level clerics with no spell capability), goblinoid servitors, subhuman slaves, and undead. The Temple also maintains its power by holding a monopoly on clerical magic; none of the old god factions have clerics. The ten members of Temple Cabal include a C8 (the high priest), a C6 (Darius the rebel), a C5, two C4s, two C3s, and three C2s.
Slavery is common in Cynidicea. There are three types of slaves in the city. The first are Cynidicean slaves; these are normal Cynidiceans from a hereditary slave caste. They wear special masks, and generally serve as personal attendants performing household or entertainment functions. They are generally highly-valued and well-treated; they are often more like family members than anything else. Both of the other two types of slaves descend from the Zargon-worshipping neanderthal-like race that the Cyndiceans conquered before founding the city; these are subhuman workers and monitors. Subhuman workers are roughly man-sized, with muscular, ape-like physiques. They are used for manual labor. Subhuman monitors are magically enhanced and mutated subhuman workers; they are much larger and stronger, but are mentally weaker and more compliant than normal subhumans. They are bred to obedience, and traditionally were kept under control with the aid of certain drugs and conditioning. They are used to keep control of the workers, as guards, and for especially heavy labor. Over the years, fewer and fewer subhuman monitors have been bred; all of them are now under the control of the Temple of Zargon. Subhuman workers and subhuman monitors somtimes "go feral" if their masters lose focus and neglect to maintain their conditioning. Feral subhumans usually flee the city and manage a savage existence in the wild areas where few Cynidiceans go (this includes the pyramid and the underdark caves around the city). One other "faction" of note exists in the city. A colony of dark fey-like beings make their home amidst the fungal forests and fields of the city. These are not typical woodlands sprites, but an underdark equivalent at home in the phantasmagoric caverns of the deep earth. They are neutral in outlook, and can serve as excellent spies and sources of information. However, like many fey, they are not wholly trustworthy. The Upper Tiers Although the upper tiers are fully detailed in the original module, referees may want to consider a few modifications that work well with this material. First are a few changes to the maps, to facilitate frequent passage between the upper tiers and the lost city, itself. Second are some changes to the various monsters, consolidating them and providing explanations for their presence in the pyramid. Lastly, referees should assume that the pyramid construction includes numerous small air shafts and vents (sometimes incorporated into decorative carvings); these provide a potential means for sound, air, and small creatures and vermin to travel throughout the pyramid. As written in the original module, passage from Tier 3 to Tier 4 happens at 20a, where a ramp descends into the burial chambers/crypts. Unfortunately, it descends

18
into a rather dangerous section of the Tier, and it is very unlikely that the "old god" factions could go this way without running afoul of traps and undead. For example, it seems impossible that the trap at 39 would be untriggered, if this way was used at all. The addition of a secret trap door in the floor of the central north-south passage on Tier 3 resolves these difficulties. This secret trap door is 40' south of the door to the revolving corridor, and it leads to a steeply sloping tunnel, almost a chute, though with hand-holds, that ends up at Tier 4, room 35. This addition makes frequent passage between Tiers 3 and 4 possible. As written, passage from Tier 4 to Tier 5 occurs through the secret ladder connecting 27A and 44. This is the only access, and it is absolutely necessary for the "old god" factions in the upper tiers to pass this way when travelling to-and-from the Lost City, itself. Unfortunately, this means that travel through the chambers of Darius must be fairly common, which presents some difficulties. Such traffic would need to pass through areas guarded with living statues, gargoyles, and pit traps. It also seems unlikely that the robe of Darius has lain undisturbed on a chair while dozens of people go trooping by it on a regular basis. Referees can resolve this issue by making the secret door from 45 to 44 a one-way secret door (it can only be opened from room 45) and adding a passage leading east from room 44. The passage ends in a normal (two way) secret door where it intersects the north/south corridor. With this addition, passage between Tiers 4 and 5 can occur without going through the chambers of Darius. Suggestions for changes to the monsters: Room 5. These “sprites” are a party of dark fey from the fungal forest of the Lost City, below. Dungeon Level Two Replace rock baboons with subhuman workers. Room 16. Replace wolf with a HD 2+2 giant serpent or lizard. Room 25. Replace white apes with feral subhuman monitors with white ape statistics. Room 41. Ogres become subhuman monitors with ogre statistics. Room 42. Dopplegangers become 4 wererats (affiliated with the pack at 51).
Room 46. Remove dead Cynidicean. Add a Usamigaras-oriented supernatural source for snakes. Room 49. Gargoyles here don't have typical gargoyle appearance. Instead, they look like statues of bird-men in a pseudo-Egyptian style. Room 49A. The pit trap is a "new construction" that has been added since Darius died (this explains why he doesn't know about it). Room 50. Add scores of rats and dozens of giant rats. These will avoid combat, if possible. Room 51. Werefoxes become wererats with werefox charm abilities and stats. These are the leaders of a secret wererat pack that lairs on this tier. In addition to the fountains that supply potable water, "manna" from the old gods regularly appears at the feet of the great idols. This food is tied to ancient legends and would be seen as a great and hopeful sign by the faithful followers of the old gods, were its presence known. As it is, the rats and wererats devour the manna, and its existence is unknown. The wererats are not aligned with any of the factions, and serve their own interests. Room 52. The purpose of the elaborate trap in this room is to protect a reliquary containing objects holy to the old gods. The reliquary is concealed beneath the mundane treasure, hidden by a false bottom in the box. Room 54. Owlbear becomes a drunken and feral subhuman monitor with owlbear stats. The major encounter of the original module is the conflict with Demetrius on Tier 5 (area 57). Referees might consider making this area the temporary home of Demetrius. In such a scenario, Demetrius is here (rather than in the city, below), because he was caught plotting against the current Patriarch/High Priest of the Temple and was forced to flee with the followers and mercenaries loyal to him. In addition to hobgoblin mercenaries and loyal Cynidiceans, Demetrius maintains an uneasy truce with the pack of wererats living on the tier. The pyramid's entrance hall and main chapel are overrun with rats and giant rats, who thrive due to the presence of water and "manna" in the chapel. The wererats make their home among these creatures. The wererats are well-aware of the "old god" factions and their travel between the Lost City and the upper tiers, but the old god factions are unaware of the wererats, which is how the lycanthropes like it.

19
The Lower Tiers The entire exploration of the lost city is an underground adventure. However, this section of the dungeon (i.e. the lower tiers) takes on the role of the "mythic underworld" or "descent into hell." Zargon is an ancient being that embodies chaos (similar to a Lovecraftian Great Old One), and this portion of the dungeon is his domain, under his direct influence. The madness and chaos that infects the lost civilization comes from here, and Tier 10 is the fountainhead from which it flows; the closer you get to Zargon, the weirder and more dangerous things become. PCs that enter this section of the dungeon will soon recognize that they've crossed over into bizarre territory; there is a chaotic, phantasmagorical, and other-worldly atmosphere to the place. Tier 6 RANDOM ENCOUNTERS The referee should roll 1d12 + 1d8 every turn, or when the PCs enter a encounter area labelled 'EMPTY'. 2 Slimecrawlers (1-6) 3 Sacrificial Procession* 4 Animate Statues (1-4) 5 Gelatinous Cube (1-4) 6 Rust Monster (1) 7 Creature Pod (1-4) 8-9 Weird Event (q.v. Weird Event Table) 10-13 NO ENCOUNTER 14 Vermin (q.v. Vermin Table)* 15 Yellow Mold* 16 Gray Ooze (1) 17 Harvesting Party (2-10) 18 Mutant Monster* 19 Chaos Babies (3-10) 20 Displacer Beasts (1-4) DUNGEON KEY Room 58. EMPTY This room is empty; roll on the encounter table. Room 59. THE TENEBROUS OVOID This room contains ancient and crumbling furnishings which suggest it may have once been a barracks of some sort. However, the feature that commands immediate attention is a large (7' diameter) black ovoid, its surface glistening and mildly reflective. The egg-shaped body sits motionless in the center of the chamber (and cannot be moved). Characters examining it may note that the space around the sphere seems oddly warped, and they might also notice a shadowy flicker of movement within the blackness or glimpse a fleeting wash of rainbow
iridescence across its polished surface (the referee is encouraged to roll some dice before announcing this to the perceptive characters...). Missiles and spells appear to have no effect on the ovoid, nor does striking it with objects. However, characters approaching the ovoid will definitely notice the warping effect - as if the object were bending the space around it, somehow. It detects as both evil and magical. Touching the surface with bare flesh will cause the face of the ovoid to appear. If the face of the ovoid manifests, PCs will see a ghostly, reptilian visage swim up out of the blackness. The face has a single, crimson eye and speaks with a forked tongue. The face will wait patiently until asked a yes or no question, at which time it will answer. The answer depends on the alignment of the character who asked the question: a Chaotic questioner prompts a truthful response 55% of the time, a Neutral questioner gets a truthful response 25% of the time, and a Lawful questioner gets a truthful response 15% of the time. No matter what type of response is given, there is also a 50% chance that the face will follow its answer by making a spitting motion, disgorging a black pudding directly at the questioner. The face will answer only one question from any given questioner. If a given characters asks a second question the face will not answer, but will immediately spit a black pudding at the offending character. Lastly, if the character touching the ovoid attempts to leave without asking a question, the face will spit a black pudding. Black Pudding (AC 6; HD 10*; hp 45; MV 20’; #AT 1; D 3-18; AL N) The Priests of Zargon consider the tenebrous ovoid a holy artifact, but fear to use it except in dire need. They have experimented with the object, trying to please Zargon and elicit more reliable and repeated responses through sacrifices and rituals, but they haven't succeeded. In fact, some of their attempts resulted in the offending tester (usually a slave or captive) being transformed or cursed by Zargon. Room 60. MAN’S BEST FRIEND Blink dogs guarding fallen master Room 61. CHAMBER OF THE SCORPION MAN The stairs descend into a large, unnaturally warm chamber. Pillars (not shown on the map) dot the room, dividing it into 20’ x 20’ areas, each of which has a groined and vaulted ceiling. The place is dimly lit by gently flickering braziers positioned in some sections, creating little islands of reddish light; the room smells hot and oily, but there is little smoke from the fires. The floor is concealed by gently swirling vapors which are mostly grey, but are sometimes shot through with pale colors. This mist is strangely dry, and varies from six inches to up to three feet in depth as it roils about the room. Bones and the remains of various creatures

20
(including humans) hang from chains here and there. Amongst these grim decorations are chimes that tinkle and echo throughout the room. Lurking in a misty, dark corner of the room is the Scorpion Man. Once a noted musician in the city, this victim of Zargon's chaotic influence now has the body of a giant scorpion, but a human torso growing upright where the scorpion's head would normally be. His muscular human arms end in scorpion pincers, and his face is a horror-wracked visage that is no longer capable of speech, but can manage croaks and hissing noises. He wears an ivory mask depicting a beautiful, bearded youth in his prime. Not sane, the Scorpion Man scuttles through this chamber alone, with a half-understood longing for his lost humanity gnawing at his soul. Music brings the Scorpion Man his only surcease; anyone entering his chamber can earn safe passage by lulling him with song. When the PCs first enter, the Scorpion Man will begin beating a great kettle drum. This is his signal for them to start playing or singing music (although the PCs may or may not know this; it is knowledge that is closely guarded by the Priests of Zargon, who use this trick when entering and leaving the lower tiers). The Scorpion Man will continue to beat the drum until the PCs appear to be leaving the room or until they approach him. If they start to leave without playing music, he will attack. If they approach him, he will beat the drum with increased fervor, gesturing and croaking at them. He might even rip off his mask and fix them with a wild, imploring stare. If they still fail to play music, he will attack. It is possible that the mists in this place will conceal the Scorpion Man's lower body from PCs as they approach him, but the closer they get, the more likely they are to notice his monstrous nature. Playing music is likely to lull the Scorpion Man, but even this is not certain. Music played poorly will anger him. Music played well will gentle him and fill him with memories of his humanity. Music played sublimely will cause him to weep at its poignancy, and then erupt in berserk fury at his loss. If successfully lulled, the Scorpion Man will retreat to a corner, lost in reverie; he will remain lulled for d6+3 turns. Scorpion Man (AC 2; HD 4*; hp 18; MV 50’; #AT 3; D 1-6/1-6/1-6 + poison; AL C). If either of the Scorpion Man's claw attacks hit, his sting attack gains a +2 bonus to hit. Room 62. EMPTY This room is empty; roll on the encounter table. Room 63. WRAITH LAIR Players in the hall will note the temperature plummeting abruptly as they near the door, and see delicate lattices of rime coating the stones and the portal, itself. Their breath comes out in puffs of white
vapor. Also, mundane and arcane sources of light (e.g. a magic user's light spell) will seem to be dimmed, offering only half their normal illumination. Clerical sources of light (e.g. a cleric's light spell) will function normally. Nevertheless, the shadows thrown by all light sources will appear to twist and dance unnaturally, seeming to suggest half-formed figures lurking and watching from the walls. Direct examination of the shadows will cause them to appear normal, again. The door to this room is locked, and the hoarfrost makes picking it difficult (-20%) unless the lock is heated. Even unlocked, the door remains swollen and difficult to open. PCs forcing their way in will see a cold and dark chamber, thick with dust and stillness. Mundane and arcane lights within the room shed only a 5' radius of light, maximum. Clerical sources of light shed half their normal illumination. Room 64. WERETIGER LAIR Mated pair. mother is insane. evidence of chains. Adopted chaos children 'babies'. Angry dad, humoring the mother. Good food. Babies malicious. Perhaps wererat appearance with weretiger stats. Room 65. EMPTY This room is empty; roll on the encounter table. Room 66. WOOD GOLEMS Room 67. EMPTY This room is empty; roll on the encounter table. Room 68. EMPTY This room is empty; roll on the encounter table. Room 69. MEDUSAE Twin sisters; wear elaborate masks and veils; looking for a human to mate with. Room 70. EMPTY This room is empty; roll on the encounter table. Room 71. CAECILIA Room 72. MINOTAURS One-eyed, one-horned lizard men. “Philotomy’s The Lost City” collects Jason Cone’s campaign log for his B4 campaign, and is posted on The Delvers, hosted by burnedfx http://thedelvers.com/philotomys-b4-the-lost-city Philotomy’s OD&D Musings, a collection of interpretations, house rulings, expansions, and general pontification on the nature of OD&D, can be found at http://save.vs.totalpartykill.ca/grab-bag/philotomy/

21
Expanding the Adventure
by Demos Sachlas
I ran module B4: The Lost City in its entirety as part of a long-running D&D campaign in 1983-5. My group was captivated by the setting, and I found myself taking advantage of each and every one of the suggestions for further adventures, filling up page after page of my DM’s notebook with detailed notes and intricate maps. The PCs had embarked upon their careers in the Grand Duchy of Karameikos with my expansion of “The Haunted Keep” and then explored the Caverns of Quasqueton in module B1: In Search of the Unknown. They were mostly 2nd or 3rd level by the time the party decided to join a caravan headed north as guards, across the Cruth Mountains to Selenica, and then eastwards, into the mysterious Alasiyan Desert. Each of the PCs joined one or another of the different factions within the lost city. The party ultimately vanquished Zargon, and we continued the campaign using the further adventures suggested by Moldvay. When they finally emerged from the desert, each of the PCs had reached name level. Years later, when the group was embroiled in module X10: Red Arrow, Black Shield, the renewed Kingdom of Cynidicea was able to provide troops – one unit for each of the three factions within the city – in support of the Republic of Darokin’s war against the Master of the Desert Nomads. I came across my old notebook a few years back, and since my handwriting was a challenge for others to decipher, assisted in converting my three decades-old notes* into a document capturing my 16-year-old imagination (with all of its limitations). They are reorganized and presented, with various changes, in the following section, as well as in a separate underground city expansion, all of the maps having been professionally redone by M.W. Poort (Fingolwyn). Tier 5. Driver Ant Colony Since they were not included in the 1st edition of the D&D Basic rulebook (the “blue-covered” Basic, edited by John Eric Holmes), Tom Moldvay provided a full description of driver ants as part of the wandering monster table for level 3. He went on to state “the DM can add a special tunnel to their lair, if desired”. My take on this lair was fairly pedestrian, and is included herein. One could alternately use Paul Fairbrother's "The Creeping Doom" published in The Judges Guild Journal #16 (Aug-Sept 1979). It won 3rd
place in a Judges Guild dungeon design contest, under the category of mini-dungeons, and is a fully fleshed-out giant ant colony. In either case, it would be interesting to use the driver ants as monsters encountered among the sands of the ruined city, should the party require any added incentive to enter the pyramid… Tiers 6-10. Dungeon Levels 4-6 Many feel that the suggested monsters for the lowest tiers is totally “gonzo”, but I attempted to rationalize Moldvay’s placement. I came up with wandering monster tables, based on his suggestions, and encounter “scripts” inspired by his example. The Priests of Zargon require a fairly direct path to the second lowest tier, the antechamber to the lair of Zargon. This would most likely be from room 61 on Tier 6, to room 66, which is guarded by the wood golems. From there, the priests would lead their captives through the trap door in the floor, down the ladder, past room 79 on Tier 7 (see Moldvay’s sample description for how to handle the hellhounds) and then deeper still, to room 90 on Tier 8. Next, it’s a short distance to room 87, containing the djinni, then down the stairs to room 96 on Tier 9, gaurded by the bone golem. From here, the priests would escort their victim to room 93 and then propel the fresh sacrifice to meet Zargon, below. Tier 6 (Dungeon Level 4) bears many similarities to Tiers 2-3 and 5, with rooms for storage, pyramid workers, and each of the three factions. Tiers 7-9 are comparable to Tier 4, with painted walls depicting the passage of the dead. It should be noted that parts of the lowest levels likely predate the founding of Cynidicea, representing the lair beneath the original shrine where Zargon retreated into a state of hibernation. The lowest tiers contain some huge creatures which challenge notions of dungeon ecology, although this is arguably in keeping with the early spirit of the game. Chaotic monsters might have been attracted by the evil influence of Zargon, while neutral creatures are merely scavenging for food. The undead have likely resided in their tombs for ages, and as for the lycanthropes, I opted to make them appear like Cynidiceans wearing the appropriate masks, as Moldvay does elsewhere in the module. *you can find my original notes at https://docs.google.com/file/d/0B2v9dwHeulokZmkxZVM4TWctdVU/edit many thanks to Luc Le Quiniat for initiating the transcription!

22
TIER 5 (Dungeon Level Three)

23
Driver Ant Colony The driver ants have burrowed into room 50. Main Entry Chamber on Tier 5, the ground floor of the pyramid, entering through the northwest corner.
G - 3 driver ants at each location (AC 3; HD 4*; hp 20, 17, 15; MV 60’; #AT 1; D 2-12; Save F2; ML 7; AL N), acting as guards
1. 5 driver ants (AC 3; HD 4*; hp 19, 18, 17, 13, 12;
MV 60’; #AT 1; D 2-12; Save F2; ML 7; AL N), acting as reinforcements for the outside guards. They will arrive after 3 rounds.
2. This room has an unstable ceiling, potentially resulting in a minor cave-in if any character steps into the north corner, (1-2 on 1d6). A body partially covered by fallen rubble, (only the legs are sticking out) holds a bag with 300 sp and 10 gp (covered by the rubble). This treasure will be unrecoverable if there is a cave-in!
3. 14 driver ants (AC 3; HD 4*; hp 19 each; MV 60’; #AT 1; D 2-12; Save F2; ML 7; AL N) are guarding the nest-lair (area 4) here. They will fight to prevent anyone from descending further into the lair.
4. Nest-lair This area contains 3000 gp worth of gold nuggets. There are only 3 driver ants (AC 3; HD 4*; hp 17, 15, 9; MV 60’; #AT 1; D 2-12; Save F2; ML 7; AL N) here. (Most of the work having already been done). The nuggets weigh 10 times their worth.
5. Hatching chamber There are a number of large white eggs covering the floor of this chamber. Some of the eggs are beginning to hatch, and newly formed driver ant larvae are emerging.
6. 3 driver ant guards (AC 3; HD 4*; hp 20, 19, 7; MV 60’; #AT 1; D 2-12; Save F2; ML 7; AL N)
7. There are 600 sp laying loose in this room. They are covered in a strange discharge which acts as contact poison (save vs. Poison or die).
8. Exit shaft All of the driver ants that are supposed to be in here are up and outside through a 100’ long winding tunnel in the ceiling. If any characters try to climb up, the tunnel will implode, and unless the character saves vs Death Ray, he will smother to death in 6 rounds.
TIER 6 (Dungeon Level 4)
Wandering Monster Table: Level 4
1. Cynidicean (see Part 6: New Monsters) 2. Living Statue: Crystal (#AP 1; AC 4; HD 3; hp 7;
MV 30’; #AT 2; D 1-6/1-6; Save F3; ML 11; AL L)
3. Ogre (#AP 5; AC 5; HD 4+1; hp 22; MV 30’; #AT 1; D 1-10; Save F4; ML 10; AL C)
4. Priests of Zargon (#AP 3; AC 5; C3; hp 10; MV 20’; #AT 1 or spells; D 1-6 or spells; Save C3; ML 8; AL C)
5. Priests of Zargon (as above) 6. Priests of Zargon (as above) 7. Snake: Giant Rattler (#AP 2; AC 5; HD 4*; hp 25;
MV 40’; #AT 2 bites; D 1-4 + poison; Save F2; ML 8; AL N)
8. Spider, Giant: Black Widow (#AP 1; AC 6; HD 3*; hp 12; MV 20’; #AT 1 bite; D 2-12 + poison; Save F2; ML 8; AL N)
Cynidicean. The DM may use one of the encounters given in Part 6 or make up a new one. This could also be an encounter with members of one of the factions. Living Statue: Crystal. Living crystal statues are life forms made of crystal. These appear like statues of ancient Cynidicean warriors. Ogre. The ogres serve the Priests of Zargon. These are patrolling for escaped Cynidicean prisoners. Priests of Zargon. There is a 50% chance this party of priests is escorting a Cynidicean prisoner to sacrifice to Zargon. Giant Rattlesnake. A giant rattlesnake is a 10’ long snake with brown and white scales set in a diamond pattern. They are very fast and may attack a second time at the end of every round. Black Widow Spider. Black widow spiders are 6’ long and colored black with a red “hourglass” mark on their abdomens.
KEY TO TIER 6 (Dungeon Level 4) 58. Storage Room This room appears empty apart from a few pieces of corroded metal on the floor. This room was once used to store tools for the slaves digging beneath the pyramid. Only a few broken pickaxes and shovels remain. These have been damaged by the black pudding in room 59. Their wooden handles are gone, and their metal heads are barely identifiable.

24
59. Abandoned Guards’ Quarter This room contains several pieces of partially destroyed furniture. In the center of the room you see a large, black amorphous blob. An appalling stench rises to your nostrils. This black pudding (AC 6; HD 10*; hp 45; MV 20’; #AT 1; D 3-24; Save F5; ML 12; AL N) has just entered the room and is very hungry! It has already dissolved many of the wooden bunk beds and foot lockers that were in here. If the party does not attack, there is a chance it will simply continue to feed. 60. Abandoned Overseer’s Room This room contains an old bed, a table, a chair, and a padlocked wooden chest. Three reddish-brown dogs are sniffing about the room. As you enter, they turn and gaze upon you, tails wagging. These blink dogs (AC 5; HD 4*; hp 18 each; MV 40’; #AT 1; D 1-6; Save F4; ML 6; AL L) have just escaped from the displacer beasts in room 77 on Tier 7. If the party doesn’t attack, the blink dogs may try to enlist their aid against the displacer beasts. The pack will disappear once the party leaves, reappearing in the corridor outside room 77 on the lower level. If the displacer beasts are defeated, the blink dogs will disappear once more, reappearing to help the party in a future encounter on Tier 7 or 8. The locked chest contains 2000 sp and a gem worth 500 gp. 61. Abandoned Slave Quarters This room contains a number of dusty sleeping pallets. Suddenly, you hear a loud snapping noise, and see a scorpion the size of a small horse advancing menacingly towards you, pincers outstretched. This giant scorpion (AC 2; HD 4*; hp 18; MV 50’; #AT 3; D 1-10/1-10/1-4 + poison; Save F2; ML 11; AL C) found its way into the pyramid some time ago. It mostly feeds on the giant vermin wandering the dungeon. 62. Abandoned Guard Captain’s Room This room contains an old bed, a writing table, a chair, and a wooden chest. Besides a dented helmet on the desk, this room appears to be empty. This room holds nothing of any value, the dented helmet being irreparable.
63. Abandoned Guard Captain’s Room This room contains an old bed, a writing table, a chair, and a large, padlocked wooden chest. Suddenly, two pale, manlike, partially transparent figures appear. The figures are two wraiths (AC 3; HD 4**; hp 18 each; MV 40’, fly 80’; #AT 1; D 1-6 + energy drain; Save F4; ML 12; AL C). The guard captain was killed by the original wraith and now both guard his treasure. The chest is trapped with a poison dart (fires as a 6 HD monster, for 1d4 + poison). Inside are 3000 ep, 5000 sp, and 8 pieces of jewelry worth a total of 9600 gp. 64. Abandoned Kitchen This room appears to be a kitchen, with two long tables covered in cooking utensils at the south end. You see two men wearing tiger masks and tiger-skin robes in the process of preparing a meal. The two men are weretigers (AC 3; HD 5*; hp 23 each; MV 50’; #AT 3; D 1-6/1-6/2-12; Save F5; ML 9; AL N) also exploring the pyramid. If the party doesn’t attack, the reaction of the weretigers should be determined randomly. On a roll of 9-12 they will invite the party to join them for dinner. On a roll of 6-8 the party may join, but will not be asked. On a roll of 2-5, the weretigers will become suspicious and attack. A large iron kettle beneath one of the tables contains 2000 ep and 3 gems worth a total of 1510 gp. 65. Old Food Storeroom This room contains a few moldy crates. The crates once held food, but are now empty. 66. Old Tool Storeroom This room is lined with empty racks. Walking stiffly towards you are two short, manlike figures. They appear to have been roughly carved out wood. The wood golems (AC 7; HD 2+2*; hp 11 each; MV 40’; #AT 1; D 1-8; Save F1; ML 12; AL N) let no one pass through this room to the next tier unless they are accompanied by the Priests of Zargon. There is a trap door in the center of the floor concealing a huge pit with a ladder going down to room 79 on Tier 7.

25
67. Abandoned Guards’ Quarters This room contains six double bunk beds. At the foot of each bunk bed are two wooden chests. The Priests of Zargon use this room. The chests contain spare robes for use by the priests. 68. Abandoned Messroom This room contains two long tables and some benches. There is an odd-shaped outcropping in the east wall. Any dwarf or other character knowledgeable about mining will notice on a roll of 1 or 2 on 1d6 that this section of the wall consists of harder rock than around it, resulting in it having being left behind while mining. Otherwise the room is empty. 69. Abandoned Slave Barracks This room appears to be a barracks. It contains statues of people in various poses. You also see two women with snakes for hair, each wearing a wooden mask. The two women are medusae (AC 8; HD 4**; hp 18 each; MV 30’; #AT 1 + stone gaze; D 1-6 + poison; Save F4; ML 8; AL C). They are sisters who were cursed by Madarua and now live as outcasts. They are willing to share information about the level, but will remove their masks and attack if the party attempts to leave. A leather bag under one of the beds holds 11 gems worth a total of 1100 gp, a rope of climbing, a potion of heroism, a potion of animal control, a magic-user/elf scroll (phantasmal force), and a ring of weakness. 70. Abandoned Cleric’s Quarters (Gorm) The room is sparsely furnished with rotting furniture. This includes a bed, a desk, a chest, and a writing table with a wooden chair. All of the furniture is covered with a thick layer of dust This room was once the quarters of a high priest of the Brotherhood of Gorm. The chest contains a suit of iron chain main and a tattered blue tunic. 71. Abandoned Cleric’s Quarters (Usamigaras) This room contains an old bed, a writing table, a chair, and a chest. A portion of the east wall appears to have collapsed. A large grey worm-like creature with sharp teeth encircling a cavernous mouth suddenly emerges from the rubble and rears its ugly head.
The creature is a caecilia (AC 6; HD 6; hp 27; MV 20’; #AT 1; D 1-8; Save F3; ML 9; AL N). It burrowed into this room, but the entry tunnel collapsed behind it. 72. Abandoned Cleric’s Quarters (Madarua) This room might have once been the quarters of a cleric. Just as you enter, two huge, bull-headed men finish smashing the contents of the room to pieces. The minotaurs (AC 6; HD 6; hp 27 each; MV 40’; #AT 2; D 1-6/1-6; Save F6; ML 12; AL C) recently entered the pyramid and formed a loose alliance with the Priests of Zargon. They rejoice in causing havoc and destruction, and will automatically be heard if they are listened for. Their treasure is 4 gems worth a total of 1700 gp in a pouch on the floor. TIERS 7 & 8 (Dungeon Level 5)
Wandering Monster Table: Level 5
1. Living Statue: Iron (#AP 3; AC 2; HD 4*; hp 15; MV 10’; #AT 2; D 1-8/1-8 + special; Save F4; ML 11; AL N)
2. Mummy (#AP 2; AC 3; HD 5+1*; hp 16; MV 20’; #AT 1; D 1-12 + disease; Save F5; ML 12; AL C)
3. Priests of Zargon (#AP 3; AC 5; HD 3; hp 10; MV 30’; #AT 1 or spells; D 1-6 or spells; Save C3; ML 8; AL C)
4. Priests of Zargon (as above) 5. Priests of Zargon (as above) 6. Snake, Rock Python (#AP 2; AC 6; HD 5*; hp 22;
MV 30’; #AT 1 bite/1 squeeze; D 1-4/2-8; Save F3; ML 8; AL N)
7. Spider, Giant: Tarantella (#AP 1; AC 5; HD 4*; hp 14; MV 40’; #AT 1; D 1-8 + poison; Save F2; ML 8; AL N)
8. Wraith (#AP 4; AC 3; HD 4**; hp 21; MV 40’/80’; #AT 1; D 1-6 + energy drain; Save F4; ML 12; AL C)
Living Statue: Iron. Living iron statues have bodies which can absorb iron and steel. These appear like ancient Cynidicean funerary statues. Mummy. On seeing a mummy, each character must save vs. paralysis or be paralyzed with fear until the mummy attacks someone or goes out of sight. Priests of Zargon. There is a 50% chance this party of priests is escorting a Cynidicean prisoner to sacrifice to Zargon. Rock Python. A rock python is a 20’ long giant snake with brown and yellow scales set in a spiral pattern.

26
Tarantella. A huge hairy magical spider which looks like a 7’ long tarantula. Its bite does not kill; instead, it causes the victim (if a saving throw vs. Poison is failed) to have painful spasms which resemble a frantic dance. Anyone watching must save vs. Spells or start to dance in the same way. Wraith. A wraith can only be hit by silver or magical weapons, but silver weapons will only do half damage.
KEY TO TIER 7 Room 73. This room contains two large sarcophagi. Painted on the walls are the various stages in preparing a body for burial. The sarcophagi are empty. Room 74. This room contains two large sarcophagi. The walls are painted with scenes of Cynidiceans in mourning. The sarcophagi contain two mummies (AC 3; HD 5+1*; hp 23 each; MV 20’; #AT 1; D 1-12 + disease; Save F5; ML 12; AL C). These creatures are avoided by the Priests of Zargon. Inside the sarcophagi are 5000 gp and 4 pieces of jewelry worth a total of 3200 gp. Room 75. The walls of this room are painted with scenes of a Cynidicean funeral. Three giant weasels are tearing apart the body of a recent victim. The three giant weasels (AC 7; HD 4+4*; hp 22 each; MV 50’; #AT 1 + drain blood; D 2-8; Save F3; ML 8; AL N) are not under the influence of Zargon and have been terrorizing the priests. The body is that of a hapless elf with 77 gp and a magic-user/elf scroll (dispel magic, web). Room 76. This room contains two large sarcophagi. Along the walls are paintings of a Cynidicean funeral procession. The sarcophagi are empty.
Room 77. Various types of coffins, caskets and sarcophagi are painted on the walls. In the center of the room are two large black panthers with six legs and pairs of tentacles with sharp, horn-like edges growing from their shoulders. Two displacer beasts (AC 4; HD 6*; hp 27 each; MV 50’; #AT 2; D 2-8/2-8; Save F6; ML 8; AL N) have chased a pack of blink dogs into the pyramid. Four gems worth 700 gp total are inlaid as part of a jeweled casket. Room 78. Painted on the walls of this room are scenes showing the building of a gravesite. Two thin, taloned, 8’ tall humanoids with sharp teeth and rubbery, green skin are sitting among rotting leather sacks. The two trolls (AC 4; HD 6+3*; hp 30 each; MV 40’; #AT 3; D 1-6/1-6/1-10; Save F6; ML 10; AL C) are trying to figure out how to get past the hellhounds. The sacks contain 6000 gp. Room 79. The walls of this room are painted with various scenes of natural death. There is a huge open pit with a ladder continuing down. As you enter, two large reddish dogs sit down beside a pile of copper pieces and grin at you, strangely. Two hellhounds (AC 4; HD 5*; hp 23 each; MV 40’; #AT 1; D 1-6 or breath; Save F5; ML 9; AL C). Buried under 9000 cp is a sword +1, +3 vs Dragons, and a wand of trap detection with 12 charges. For a full description of this room, please refer to page 20 in module B4. The ladder descends from room 66 on Tier 6 and continues down to room 90 on Tier 8. Room 80. The walls, floor and ceiling of this room are all painted black. Two sturdy-looking men wearing bear masks and bearskin cloaks are lifting a stone chest. They glance in your direction as you enter. The two men are werebears (AC 2; HD 6*; hp 27 each; MV 40’; #AT 3; D 2-8/2-8/2-16; Save F6; ML 10; AL L) who may consider joining forces with the party. They

27
discovered the secret door to room 82 and were planning to store their treasure within. The chest contains 4000 ep. Room 81. This room contains two large sarcophagi. The walls of are painted with scenes of an individual choosing a gravesite. The sarcophagi are empty. Room 82. All the walls in this room are painted black, except for the east wall, which shows a rising sun. This room is empty.
KEY TO TIER 8 Room 83. The painting in this room shows a narrow bridge spanning a deep abyss. This room is empty. Room 84. The painting in this room shows a group of spirits crossing an underground river in a ferry-boat. A long, sinuous lizard sleeps atop a loose pile of coins. The lizard is a basilisk (AC 4; HD 6+1**; hp 28; MV 20’; #AT 1; D 1-10 + stone gaze, stone touch; Save F6; ML 9; AL N). It awakens and turns its gaze upon anyone who disturbs its coins. There are 4000 gp and 2000 pp in the pile. Room 85. The painting in this room shows a ferry-boat and its ferryman, who wears a black hooded cloak. His name is inscribed on the wall in Cynidicean. The name of the ferryman is Kharon. Room 86. The painting shows a party of spirits walking across a narrow bridge over an abyss. There is a large creature with a dragon-like body and eight serpentine heads in the center of this room, hissing as it advances.
An eight-headed hydra (AC 5; HD 8*; hp 64; MV 40’; #AT 8; D 1-10 each; Save F8; ML 9; AL N) blocks their passage, and must be defeated if the party is to pass. The creature entered the pyramid through a subterranean passage. The Priests of Zargon keep it supplied with sacrificial victims deemed unsuitable for their master. It will not attack characters wearing priest robes. The hydra’s treasure consists of 4000 cp, 3000 gp, and 4 pieces of jewelry worth 3800 gp total, in a large pile in the northeast corner. Room 87. The painting in this room shows a woman in white robes kneeling next to a pool of fire. There is also a spiral staircase leading downwards. Emerging from the stairs is a tall, human-like being surrounded by clouds! The djinni (lesser) (AC 5; HD 7+1*; hp 33; MV 30’, fly 80’; #AT 1 + special; D 2-16 (fists) or 2-12 (whirlwind); Save F14; ML 12; AL N) will not permit anyone to pass unless his riddle is answered:
The longer it stands, the shorter it grows; the shorter it grows, the brighter it glows!
The answer, of course, is a candle. If the party can’t answer correctly, the djinni may instead be offered a suitable bribe or service, otherwise he attacks. Room 88. The painting in this room is of a gloomy underground river. You see two large, hairy brutes dressed in animal skins and carrying huge clubs and spears arguing over a huge stone chest. The 2 hill giants (AC 4; HD 8; hp 36 each; MV 40’; #AT 1; D 2-16; Save F8; ML 8; AL C) wandered into the pyramid from the north, gathered as much treasure as they could, and are planning on leaving. They will automatically be heard if they are listened for. The chest contains 12,000 sp, 5000 gp, 1 piece of jewelry worth 1100 gp, a potion of healing, a sword +2, a helm of reading language and magic, and a cursed scroll (the reader will become 1” tall unless a save vs. Spells is made: MV 1’; #AT 0). Room 89. The painting in this room shows an underground pool of fire. There is also a horrid monster with a man’s face, the body of a lion, leathery bat wings, and a tail ridged with spikes.

28
The manticore (AC 4; HD 6+1*; hp 28; MV 40’ fly 60’; #AT 3; D 1-4/1-4/2-8; Save F6; ML 9; AL C) was polymorphed into its present form by one of the Magi of Usamigaras in order to battle the Priests of Zargon, but proved difficult to control. It has been attempting to find its way out. A huge bag holds its treasure of 4000 gp and 6 pieces of jewelry worth a total of 6000 gp. Room 90. The walls, floor and ceiling in this room have all been painted the color of sunlight. There is a huge opening in the ceiling from which a ladder descends from room 79 on Tier 7. Otherwise the room is empty. Room 91. The painting in this room shows a ferry-boat approaching a group of Cynidicean spirits waiting on the bank of an underground river. There is also a chest in one corner. One of the spirits in the foreground is actually a spectre (AC 2; HD 6**; hp 27; MV 50’, fly 100’; #AT 1; D 1-8 + drain 2 energy levels; Save F6; ML 11; AL C). The treasure chest is trapped with gas (save vs. Spells or lose half Strength and Dexterity (-20% on all thiefly ability rolls) for 24 turns), and contains 7000 gp. The gas fills the entire room for one hour. TIERS 9 & 10 (Dungeon Level 6)
Wandering Monster Table: Level 6
1. Banshee (#AP 1; AC 3; HD 5*; hp 22; MV 50’; #AT 1; D 1-4/round; Save F5; ML 12; AL N)
2. Living Statue: Rock (#AP 1; AC 4; HD 5**; hp 16; MV 20’; #AT 2; D 2-12/2-12; Save F5; ML 11; AL C)
3. Polymar (#AP 1; AC 9; HD 10*; hp 43; MV 20’; #AT 3; D 1-6/1-6/1-6; Save F5; ML 10; AL C)
4. Priests of Zargon (#AP 3; AC 5; HD 3; hp 10; MV 30’; #AT 1 or spells; D 1-6 or spells; Save C3; ML 8; AL C)
5. Priests of Zargon (as above) 6. Priests of Zargon (as above) 7. Rhagodessa (#AP 2; AC 5; HD 4+2; hp 18; MV
50’; #AT 1 leg/1 bite; D 0/2-16; Save F2; ML 9; AL N)
8. Spectre (#AP 1; AC 2; HD 6**; hp 33; MV 50’/100’; #AT 1; D 1-8 + double energy drain; Save F6; ML 11; AL C)
Banshee. Banshees are pale ghost-like figures. They have glowing red eyes and a large, dark mouth. All those within 30’ of a wailing banshee take 1-4 points of damage each round automatically. Living Statue: Rock. Living rock statues have an outer crust of stone but are filled with hot magma (fiery lava). It will squirt the magma from its finger tips for 2d6 points of damage per hit. These appear cyclopean with a glowing red eye. Polymar. The polymar is a semi-intelligent creature that can change its shape. These appear lizard-like, attacking with three tentacles. Priests of Zargon. There is a 50% chance this party of priests is escorting a Cynidicean prisoner to sacrifice to Zargon. Rhagodessa. A rhagodessa looks like a huge hairy spider with an oversized head and jaws (mandibles). It has 5 pairs of legs; the front pair end in suckers which help the creature to grasp its prey. A hit with a sucker-leg does no damage but means that the victim is stuck. In the next round of combat, the victim will be pulled to the rhagodessa’s mandibles and will automatically be bitten for 2d8 points of damage. Spectre. Ghostly spectres have no solid bodies, and can only be hit by magic weapons.
KEY TO TIER 9 Room 92. The painting in this room shows evil spirits being judged (the evil spirits turn black upon judgement). There is also a grotesquely fat man wearing a porcine mask, sitting with his back against a chest, and eating a haunch of meat. The man is a devil swine. (AC 3; HD 9*; hp 40; MV 60’ 40’ in human form; #AT 1; D 2-12; Save F9; ML 10; AL C). He has charmed many of the Priests of Zargon into believing that he is an emissary of Zargon, so that the priests keep him supplied with plenty of food. The chest is locked and contains 4000 sp. Scattered about are some bones and scraps. Room 93. The painting in this room shows glowing spirits boarding a winged boat made of golden light. Before you have a chance to examine it however, you feel the floor give way beneath you.

29
This room was originally constructed to be the antechamber to the final tier in the pyramid tomb, representing the spirit’s embarkation to paradise. The Priests of Zargon lead their victims here as offerings of sacrifice, flinging them into the room. Room 94. This room contains a large sarcophagus. The painting shows a winged boat of golden light approaching a group of glowing spirits. The sarcophagus contains a vampire (AC 2; HD 9**; hp 40; MV 40’, fly 60’; #AT 1; D 1-10 + drain 2 energy levels; Save F9; ML 11; AL C). If reduced to 0 hp it will become gaseous and flee to one of the sarcophagi on Tier 7. This creature will seek to transform the party into vampires under its control in order to take over the lost city. It is avoided by the Priests of Zargon. The sarcophagus contains 6000 gp and 10 pieces of jewelry worth 7000 gp total. Room 95. The painting in this room shows Madarua dressed in the robes of a judge. In the center of the room is a creature with the head of a lion, a goat and a dragon. There is also a small glass chest behind the creature. Close examination will reveal that the eyes of the painting of Madarua have been scratched out. The chimera (AC 4; HD 9**; hp 40; MV 40’, fly 60’; #AT 5 + breath; D 1-3/1-3/2-8/2-8/3-12 + breath; Save F9; ML 9; AL C) made its way into the pyramid at a time when the stone double doors to the main entry chamber on Tier 5 were not blocked with sand. It is not under the control of the Priests of Zargon, who must keep it supplied with jewelry to appease it. The small glass chest contains 12 pieces of jewelry worth 13,000 gp total. Room 96. The painting in this room shows a woman dressed in white washing the spirits of the dead in a pool of fire. There is also a large, 4-armed skeleton wielding four swords advancing towards you! The bone golem (AC 2; HD 8**; hp 36; MV 40’; #AT 4; D 1-8 each; Save F4; ML 12; AL N) is the final guardian on the route to the lair of Zargon. It lets no one pass through this room unless they are accompanied by the Priests of Zargon.
Room 97. The painting in this room shows good spirits being judged. After a good spirit has been judged, it glows with a golden light. Atop a massive pile of coins and jewelry in the center of the room is a large, blue, winged, lizard-like creature. A blue dragon (AC 0; HD 9**; hp 40; MV 30’, fly 80’; #AT 3 or breath; D 2-7/2-7/3-30; Save F9; ML 9; AL C) dwells in this chamber. It has a 20% chance of being asleep when the party enters the room. The dragon is wild and so does not talk or use spells. It made its way into the pyramid some time ago and found both food and treasure plentiful. It has therefore started to collect a small horde and is content to remain for the time being. The mound consists of 6000 sp, 15,000 gp, and 18 pieces of jewelry worth 20,000 gp total. Room 98. The painting in this room depicts Gorm dressed in the robes of a judge. Close examination will reveal that the eyes of the painting of Gorm have been scratched out. Room 99. The painting in this room depicts Usamigaras dressed in the robes of a judge. There is also a scrap of paper on the floor. Close examination will reveal that the eyes of the painting of Usamigaras have been scratched out. The paper reads:
When thunder from a blue cloud peals; lightning wards off magic and steel; to protect its glittering mound with zeal!
The verse contains a warning about what lies in room 97 to the west. It was accidentlly dropped by one of the neophyte Priests of Zargon.
KEY TO TIER 10 Room 100. LAIR OF ZARGON For a full description of this room, please refer to page 23 in module B4.

30
New Monsters
by Demos Sachlas
Cynidiceans Cynidiceans could be used as an albino-type PC race (allowing for subterranean adventures with elves and dwarves using their infravision). A Cynidicean NPC, “Third”, a Warrior Maid of “Maruda” was featured in the AD&D 2e module "Return to the Keep on the Borderlands" by John D. Rateliff. Polymar As noted by Zach Howard, the polymar is a B/X version of Moldvay's protein polymorph, contributed to the AD&D 1e Fiend Folio. Serpent Men An army of snake-headed humanoids is depicted in one of the mosaics on the ground floor of the pyramid, another literary nod to the works of Robert E. Howard, who created a fictional race of serpent men for his tales of King Kull. Howard’s serpent men had scaled skin and snake-like heads. They knew sorcery and alchemy, and possessed magical powers, such as the ability to appear human through the use of illusion. The race was incorporated into the Cthulhu mythos by H. P. Lovecraft, in his story “The Nameless City” and have also become part of the Marvel Universe through Howard’s King Kull and Conan stories. In waging a clandestine war against humanity, serpent men attempt to infiltrate human society through the formation of snake cults, as famously portrayed in the movie “Conan the Barbarian” (1982). In D&D terms, statistics for lizard men could be used, but with the special ability to appear human. Magic-users among serpent men could potentially make formidable adversaries. Undead In addition to the banshee, there are two ghost-like encounters (the haunts of King Alexander and Queen Zenobia in area 25a, and the possessing spirit of Demetrius, a deceased, 6th level Lawful cleric and former elder in the Cult of Usamigarus, in area 45).
Zargon In the original module, Zargon is described as a cunning creature, but not quite a god. It is 15’ tall and roughly humanoid in shape, with a dozen tentacles in place of arms or legs. Its lizard-like head is crowned by a 2’ long, black horn, above a single, red eye. The monster’s origins are shrouded in mystery. It was worshipped as a god by a neanderthal race, prior to their destruction by the ancestors of the Cynidiceans. Retreating to a hidden, underground lair beneath its shrine, it entered a state of hibernation, until digging under the great pyramid reawakened it. Zargon reappeared as the Tentacled Horror in Necromancer Games’ “Tome of Horrors II” (2004). The creature was elevated to much more powerful status in Wizard of the Coast’s “Elder Evils” (2007) for D&D 3.5e, and was also mentioned as a Warlock patron for “The Great Old One” archetype on page 139 of the Sword Coast Adventurer’s Guide (2015) for D&D 5e.
There are similarities between Zargon and the god Dagoth from the movie “Conan the Destroyer” (1984). Both are monsters worshiped as gods, whose life source resides in their singular horn. Dagoth “the Dreaming God” is reawakened after his horn is replaced, and can only be defeated by removing it. The movie was released two years after B4: The Lost City. It’s therefore interesting to speculate whether Zargon may have had anything to do with the conception of Dagoth. Gerry Conway and Roy Thomas wrote the screenplay for the sequel to “Conan the Barbarian”, which was later published as Marvel Graphic Novel #59 “The Horn of Azoth” (1990) by Gerry Conway and Roy Thomas, Mike Docherty, Tony DeZuniga, and Tom Vincent. The development of the screenplay is discussed in the foreward to the graphic novel. Conway and Thomas were originally hired by Edward R Pressman in 1982 to script the sequel to “Conan the Barbarian”. Together with Roger Donaldson, the prospective director of the new movie, the four met in Los Angeles to develop the plotline. The result was a screenplay for what was to be called “Conan, King of Thieves”. The story underwent several changes when Pressman sold the rights to the movie to producer Dino De Laurentis. Donaldson was replaced with director Richard Fleisher, who hired Stanley Mann to rewrite the final screenplay, which was renamed “Conan the Destroyer”, although Conway and Thomas still received “story” credit for the final movie.

31
The Emirates of Ylaruam: RPG Items I Like
by Lowell Francis
WHAT IS IT? Classic D&D region supplement covering a fantasy nation with an Arabian flavor. TO BEGIN... We come now to the second volume in the gazetteer series. I talked a little bit about the series and Mystara setting as a whole in my first review on GAZ1: The Grand Duchy of Karameikos. It's interesting to look at how the follow up matches the patterns of the first book and how much it deviates from them. The Emirates of Ylaruam generally stays with the style of the first gazetteer, but doesn't rigidly adhere to it. There's greater emphasis on adventure seeds, a more distinct player character section, and a richer treatment of a single city. I like each volume in the series seems linked but at the same time shift to fit their subject. In this case we have industry veteran Ken Rolston at the helm. He would later design two other entries in the series, GAZ4: The Kingdom of Ierendi, and GAZ7: The Northern Reaches.
PRESENTATION Design-wise, The Emirates keeps the same basic three parts: folio cover, map and 64-page booklet. Clyde Caldwell provides a cover combining the classic Arabian tropes with a map background. There's beefcake and cheesecake present in the illustration. A full-color page has smaller map of Ylaruam, showing its relation to its neighbors (the Dwarves of Rockhome, the Empire of Thyatis and – oddly - the the Viking-like Soderfjord Jarldoms directly to the north). The folio interior shows two top-down building illustrations and a two-page spread of an underground complex. That's accompanied by three detail inserts. The large fold-out map offers another classic hex-treatment of the Emirates, and five city maps. These are a little more detailed than those in GAZ1. They have keyed and labeled locations. The saddle-stapled booklet keeps the basic text design, with three columns of tiny text. This volume has much lighter and less obtrusive watermarks on the pages. Doug Chaffee provides all of the interior B&W illustrations. They're OK, a little basic and echoing the style of Elmore or early Easley. Unlike the previous volume, the images here focus on places and general scenes, rather than the NPCs. The Emirates are the Arabian analogue for the Mystara setting. It's interesting to look at given our present context. I'll talk a little bit later to some of my reaction to the material and choices. For the moment I want to focus on the details presented here. THE BOOKLET ITSELF Ylaruam takes magical geography to an extreme - a desert kingdom bordered by mountains with icy climates and more temperate lands directly next door. It has ocean access as well. The booklet of material opens with two versions of the land's history: the local and the DM version. Ylaurum has historically served as the home to two distinct groups - hazar (city-dweller) and nomad. Conquered early by the Thyatians and Alphatians, with both establishing colonies in the more hospitable areas. Then arose a prophet, Al-Kalim, who quested and petitioned an Immortal to aid his peoples. Al-Kalim brought back his support and created the Nahmeh, the text which describes the dream and rules of the people of Ylaruam. Armed with this, the people of the Emirates threw out the foreigners. A confederation arose from the various tribes under the dynasty of Al-Kalim, the first Sultan. He established the Eternal University in the Emirates and a wise council known as the Preceptors. However with the passing of Al-Kalim, two factions arise. The first believes in rules by choice of the most wise, i.e. the decision of the Preceptors. The second believes in rule by the family of Al-Kalim. The former have control in the setting currently, but the latter represent a significant force in the region. The supplement lays

32
this out in some detail over three pages, complete with a nice timeline that includes a few future events. Several topics get 2-3 page treatments next: ecology, peoples, and economics. The Emirates have a fairly rich and diverse environment. Each of the six provinces possesses slightly different climates and resources. While the desert makes up the majority of the land in the region, it includes coastal plains, grasslands, and plateaus. Some provinces possess greater access to fertile lands, encouraging a focus on urban settlement and lifestyle. Others much rely on a nomadic lifestyle. The provinces have distinct cultural heritages, with several heavily influences by contact with one or more of the colonial or foreign powers. Add to that significant ethnic groups in the land. While the Alasiyan culture and people dominate the region, the Emirates have peoples of Makistani, Thyatian, Alphatian and even Nithian descent. That's one of my favorite details of this supplement, and a story that runs through the various gazetteers. As you read through them, you begin to get a strong and present sense of older cultures, especially the Makistani. We see how they spread, rose, fell, and integrated with the various nations of the continent. That's a challenging concept to get across to readers, and perhaps even more challenging to get across to players. Consider
that as a GM you can set up a particular set of elements as a national archetype: the Arabs of Ylaruam, the Italians of Darokin. Now add to that the complication of ethnic lines and sub-groups, people who live within the land but don't stake their primary identity as national. In Karameikos we got two primary groups: the colonial nobility and the native Traldarans. In GAZ2 we begin to see a richer and more complicated approach. THE WAYS OF THE EMIRATES The largest section of the booklet covers society in the Emirates. That begins with the life and history of Al-Kalim. His words and teachings, as recorded in the Nahmeh, provide the key text for life in the Emirates. Interestingly, Al-Kalim began as a conventional hero - a skillful tactician who organized his people against foreign oppression. It would be only later in his lifetime, when it proved practical, that he focused on mysticism and philosophy. Again there's a practicality here that just begins to grapple with what living in a fantasy world like this would mean. Al-Kalim quests and bargains, gaining aid for the Emirates and pushing him forward on his own path to become an Immortal. Al-Kalim, retired from life, does not die, but continues on that quest for immortality. Lacking gods in a conventional sense, Mystara borrows more than a little of the Heroquesting themes of Glorantha. It actually becomes a little hard to follow in the text - on the one hand, Al-Kalim seems to be using the Immortals, in particular the Old Man of the Sea. His work seems to be focused on results, manipulation and general philosophies. On the other hand, the articles of faith have the people of the Emirates giving faith to the Immortal Guardian. How much that's a specific or abstract figure isn't as well described as it could be. Al-Kalim's writings, as laid out in the Nahmeh, provide guidelines for right living and treatment. They also provide for the division of the peoples into three “ways”: of the Follower, of the Warrior and of the Scholar. The Scholar includes clerics, and the rules offer four culturally specific spells (including detect water and truthtelling). The rules include an interesting concept as well, gaining experience in ones social status. That's a new model for consideration. The book suggests ways in which NPCs “level up” and gain EXP through following the codes and rules of their particular class and status. That's a neat idea and the book doesn't overplay it. Instead it offers the DM a new way of thinking about the how and why of NPCs in a setting. The sixteen pages of the society chapters cover many topics. From social structures and obligations, it moves to cover the politics of the region. The Emirates offers an interesting challenge for players in the form of a strong bureaucracy insulating the nobility from petitions and possessing a great deal of power. The book considers the policies operating internally (a
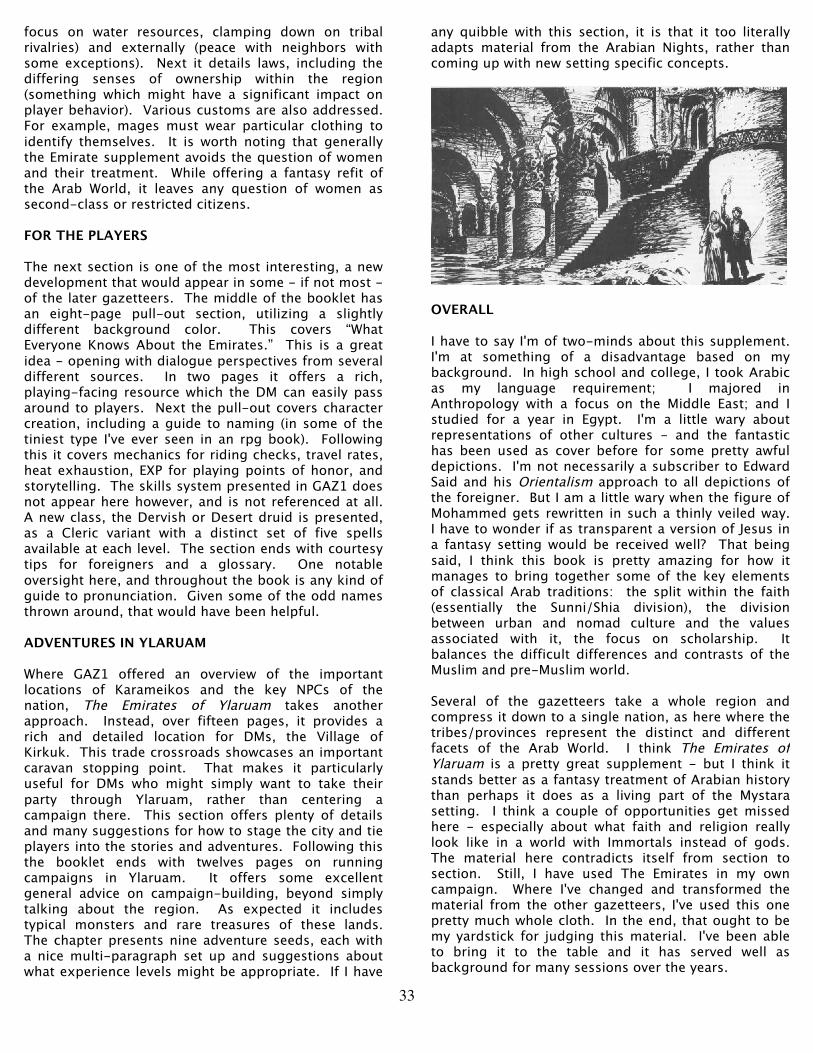
33
focus on water resources, clamping down on tribal rivalries) and externally (peace with neighbors with some exceptions). Next it details laws, including the differing senses of ownership within the region (something which might have a significant impact on player behavior). Various customs are also addressed. For example, mages must wear particular clothing to identify themselves. It is worth noting that generally the Emirate supplement avoids the question of women and their treatment. While offering a fantasy refit of the Arab World, it leaves any question of women as second-class or restricted citizens. FOR THE PLAYERS The next section is one of the most interesting, a new development that would appear in some - if not most - of the later gazetteers. The middle of the booklet has an eight-page pull-out section, utilizing a slightly different background color. This covers “What Everyone Knows About the Emirates.” This is a great idea - opening with dialogue perspectives from several different sources. In two pages it offers a rich, playing-facing resource which the DM can easily pass around to players. Next the pull-out covers character creation, including a guide to naming (in some of the tiniest type I've ever seen in an rpg book). Following this it covers mechanics for riding checks, travel rates, heat exhaustion, EXP for playing points of honor, and storytelling. The skills system presented in GAZ1 does not appear here however, and is not referenced at all. A new class, the Dervish or Desert druid is presented, as a Cleric variant with a distinct set of five spells available at each level. The section ends with courtesy tips for foreigners and a glossary. One notable oversight here, and throughout the book is any kind of guide to pronunciation. Given some of the odd names thrown around, that would have been helpful. ADVENTURES IN YLARUAM Where GAZ1 offered an overview of the important locations of Karameikos and the key NPCs of the nation, The Emirates of Ylaruam takes another approach. Instead, over fifteen pages, it provides a rich and detailed location for DMs, the Village of Kirkuk. This trade crossroads showcases an important caravan stopping point. That makes it particularly useful for DMs who might simply want to take their party through Ylaruam, rather than centering a campaign there. This section offers plenty of details and many suggestions for how to stage the city and tie players into the stories and adventures. Following this the booklet ends with twelves pages on running campaigns in Ylaruam. It offers some excellent general advice on campaign-building, beyond simply talking about the region. As expected it includes typical monsters and rare treasures of these lands. The chapter presents nine adventure seeds, each with a nice multi-paragraph set up and suggestions about what experience levels might be appropriate. If I have
any quibble with this section, it is that it too literally adapts material from the Arabian Nights, rather than coming up with new setting specific concepts.
OVERALL I have to say I'm of two-minds about this supplement. I'm at something of a disadvantage based on my background. In high school and college, I took Arabic as my language requirement; I majored in Anthropology with a focus on the Middle East; and I studied for a year in Egypt. I'm a little wary about representations of other cultures - and the fantastic has been used as cover before for some pretty awful depictions. I'm not necessarily a subscriber to Edward Said and his Orientalism approach to all depictions of the foreigner. But I am a little wary when the figure of Mohammed gets rewritten in such a thinly veiled way. I have to wonder if as transparent a version of Jesus in a fantasy setting would be received well? That being said, I think this book is pretty amazing for how it manages to bring together some of the key elements of classical Arab traditions: the split within the faith (essentially the Sunni/Shia division), the division between urban and nomad culture and the values associated with it, the focus on scholarship. It balances the difficult differences and contrasts of the Muslim and pre-Muslim world. Several of the gazetteers take a whole region and compress it down to a single nation, as here where the tribes/provinces represent the distinct and different facets of the Arab World. I think The Emirates of Ylaruam is a pretty great supplement - but I think it stands better as a fantasy treatment of Arabian history than perhaps it does as a living part of the Mystara setting. I think a couple of opportunities get missed here - especially about what faith and religion really look like in a world with Immortals instead of gods. The material here contradicts itself from section to section. Still, I have used The Emirates in my own campaign. Where I've changed and transformed the material from the other gazetteers, I've used this one pretty much whole cloth. In the end, that ought to be my yardstick for judging this material. I've been able to bring it to the table and it has served well as background for many sessions over the years.

34
The DM’s Guide to Cynidicea: A rules supplement for use in any Mystara campaign
edited by Geoff Gander
Geoff Gander has compiled a gazetteer style supplement for campaigning in Cynidicea on Mystara, which can be found on the Vaults of Pandius. The introduction is reproduced, below, together with a brief summary of each of the major sections. When the adventure module B4, entitled The Lost City, was published by TSR in 1982, a new and fascinating world was introduced. Players and DMs were presented with a unique underground city named Cynidicea, which was populated by humans who had adapted to their environment in ways unknown to their surface cousins. The adventure also provided a history that was quite detailed for its time, which provided the DM with a sufficient background to understand the major motives of the various characters, as well as presenting a relatively complete overview of the city. The module also provided political intrigue, through the machinations of the followers of Gorm, Usamigaras, and Madarua, as well as the villainy of the followers of the evil being known as Zargon. This conflict between good and evil in its simplest form allowed the players to make moral decisions as to who was "right" or "wrong", and possibly even question their own beliefs. Finally, the adventure provided an overview of the entire Cynidicean cavern after the initial adventure was over, as well as further scenarios for adventures, so as to provide DMs and players with opportunities for continued play in this fascinating environment. This book picks up where The Lost City left off. Some of the ideas presented in the original module have been further developed into campaign ideas, and some of the regions briefly described - such as the Lower Catacombs, the Eye of Zargon, and the Isle of Death - are given more attention. The factions presented in the original module are also fleshed out considerably, providing a comprehensive overview of their motives, origins, and strategies. Important NPCs from each group are also presented, so as to provide players with contacts, and potential enemies. Attention is also paid to Zargon, along with speculations as to his origins; other important villains are also introduced, to add greater depth to adventures and campaigns based in Cynidicea.
We have also striven to reveal the history of the Cynidiceans themselves. Who are they, and where do they come from? These questions we have tried to answer in this book, based on information from the adventure itself, GAZ 2: The Emirates of Ylaruam, and our own imaginations. Finally, we have provided information about the drug-induced decadence that afflicts the Cynidiceans, providing more concrete information as to the effects of drugs, as well as basic rules for drug use and withdrawal, which could also be used on a general basis in any campaign. Who Are The Cynidiceans? Discusses the historical stock of the Cynidiceans, the fan-created “Doulakki” (Hellenistic Greeks) whose lineage is related to the Milenians (Ancient Greeks) and the Traldar of Karameikos, all of whom are descended from the fair-skinned Neathar people. A Timeline Of Cynidicea Presents a timeline from BC 5500 to AC 1000, the present day. Zargon is revealed to have been sent as a Herald of the Outer Beings to Akhor, sole survivor of a Carnifex* colony, after he founds the Emperor of Mogreth. The creature is later banished to a pocket dimension, sealed by five electrum discs, which are scattered throughout Mogreth, in BC 3900. The city-state of Cynidicea is founded by the Doulakki in BC 797. Gorm, a black-skinned Tanagoro prince from far away Skothar, becomes the first king of Cynidicea in BC 766. Over a century later, Ashtat, a Nithian warrior woman, becomes one of its queens in BC 682. Usamigaras, a magic-using halfling, became king centuries later, in BC 385. Alexander is crowned in BC 159. Both Alexander and his queen, Zenobia, die in BC 127 at which time the cult of Zargon gains control over the kingdom. The city ultimately falls to Antalian warriors from what are now the Soderfjord Jarldoms in BC 98. The underground city of Cynidicea is founded, and the population unknowingly mixes with goblins polymorphed into human form by the Magi of Usamigaras. A portion of the population is transferred to the Hollow Moon by the Immortals in AC 311. *The Carnifex, a race of magic-using lizardmen, were introduced by Tom Moldvay in module M3: Twilight Calling (1986). This ancient race has been extensively developed by Gander and others on the Vaults. (As a side note, one of the pregenerated characters in module M3 - Morgana, a Neutral 33rd-level magic-user - is described as having been a former ruler of the Lost City of Cynidcea!)
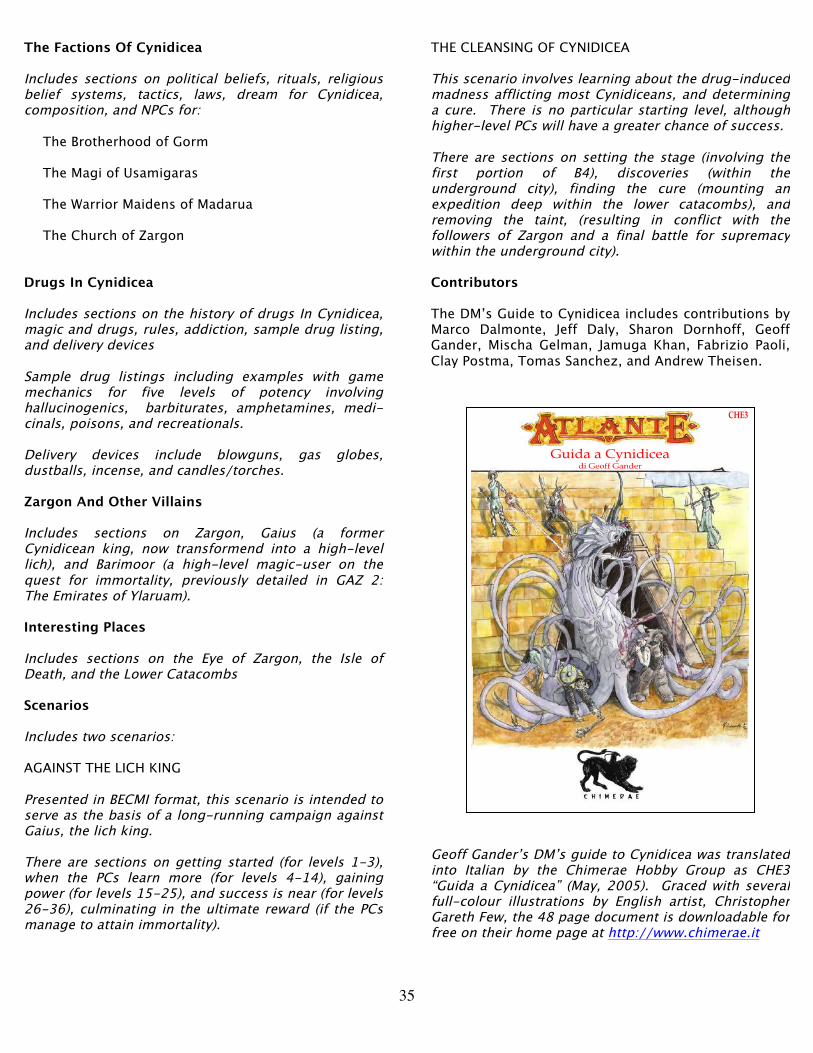
35
The Factions Of Cynidicea Includes sections on political beliefs, rituals, religious belief systems, tactics, laws, dream for Cynidicea, composition, and NPCs for:
The Brotherhood of Gorm The Magi of Usamigaras The Warrior Maidens of Madarua The Church of Zargon
Drugs In Cynidicea Includes sections on the history of drugs In Cynidicea, magic and drugs, rules, addiction, sample drug listing, and delivery devices Sample drug listings including examples with game mechanics for five levels of potency involving hallucinogenics, barbiturates, amphetamines, medi-cinals, poisons, and recreationals. Delivery devices include blowguns, gas globes, dustballs, incense, and candles/torches. Zargon And Other Villains Includes sections on Zargon, Gaius (a former Cynidicean king, now transformend into a high-level lich), and Barimoor (a high-level magic-user on the quest for immortality, previously detailed in GAZ 2: The Emirates of Ylaruam). Interesting Places Includes sections on the Eye of Zargon, the Isle of Death, and the Lower Catacombs Scenarios Includes two scenarios: AGAINST THE LICH KING Presented in BECMI format, this scenario is intended to serve as the basis of a long-running campaign against Gaius, the lich king. There are sections on getting started (for levels 1-3), when the PCs learn more (for levels 4-14), gaining power (for levels 15-25), and success is near (for levels 26-36), culminating in the ultimate reward (if the PCs manage to attain immortality).
THE CLEANSING OF CYNIDICEA This scenario involves learning about the drug-induced madness afflicting most Cynidiceans, and determining a cure. There is no particular starting level, although higher-level PCs will have a greater chance of success. There are sections on setting the stage (involving the first portion of B4), discoveries (within the underground city), finding the cure (mounting an expedition deep within the lower catacombs), and removing the taint, (resulting in conflict with the followers of Zargon and a final battle for supremacy within the underground city). Contributors The DM’s Guide to Cynidicea includes contributions by Marco Dalmonte, Jeff Daly, Sharon Dornhoff, Geoff Gander, Mischa Gelman, Jamuga Khan, Fabrizio Paoli, Clay Postma, Tomas Sanchez, and Andrew Theisen.
Geoff Gander’s DM’s guide to Cynidicea was translated into Italian by the Chimerae Hobby Group as CHE3 “Guida a Cynidicea” (May, 2005). Graced with several full-colour illustrations by English artist, Christopher Gareth Few, the 48 page document is downloadable for free on their home page at http://www.chimerae.it

36
Review:
"Mystara: Return to the Lost City"
by Scott Rogers
As 2003 was nearing an end, Paizo Publishing had finalized the release of its first sixteen issues of Dragon Magazine (#299 - #314) after having received the magazine’s licensing rights from Wizards of the Coast. Prior to this and beginning with issue #274, the venerable magazine had begun providing 3rd edition D&D-based content to its readers. Three years after 3rd edition D&D had been released, Wizards of the Coast would address perceived problems in this rule set by publishing the revised 3.5 edition D&D rules. Accordingly, the staff at Dragon also shifted their focus to align the magazine’s content with this newly released half-edition rules upgrade. At this point in time, what many D&D fans knew about the background of Cynidicea, its deities, Zargon’s grip over this once-glorious society, and anything else relating it to Ylaruam/Mystaran lore had been gleaned from three primary sources. Specifically, Tom Moldvay’s classic D&D module “B4: The Lost City”, Ken Rolston’s “Gazetteer 2: The Emirates of Ylaruam”, and Aaron Allston’s “Wrath of the Immortals – Book 1: Codex of the Immortals”. Beyond this, the word from official publications or periodicals was mostly silent on this mystifying setting. Of course, hard-core fans of Cynidicea made notes, sketches, histories, speculations, maps, and other customized content as
they took Moldvay up on his in-module offer (see B4’s “Part 5: Expanding the Adventuring”) to extend their explorations beyond the first five tiers of the ziggurat. As 2004 began to appear on the horizon, the staff that was publishing Dragon Magazine #315 desired to release this issue with a unifying theme that had not been seen within the magazine’s pages before. Due to this, #315 is a special issue as it sought to spotlight the 3.5 edition rule set while also combining it with a love for the many different campaign settings within the D&D universe. In turn, staff and contributors scribed articles that demonstrated how the 3.5 edition rules could be specifically integrated into each of these campaign worlds. Then retiring editor-in-chief Chris Thomasson recalled in his “From the Editor” page that finding good content for this issue was not the problem, but getting it all to fit within the normal size and limitations of a single magazine. Regarding which settings made it into the issue, it did not seem to matter whether the setting was officially supported by Wizards of the Coast or was unofficially being kept alive by the fans of D&D. Almost every D&D campaign setting was covered in this issue, well-known or obscure: Forgotten Realms, Greyhawk, Dragonlance, Ravenloft, Planescape, Dark Sun, Eberron, Blackmoor, Mystara, Taladas, Birthright, Maztica, and the list goes on. At last, the official silence on Cynidicea was broken when issue #315 was gifted with four articles that explored the campaign world of Mystara. While space was also granted in this issue to write about the Hollow World, Blackmoor, and Red Steel settings, it was this fourth article addressing the backdrop of Cynidicea and its ongoing saga with Zargon that will receive the focus in this review. The “Mystara: Return to the Lost City” article (pp. 88-92) is credited to Michael Mearls and receives almost five full pages. As each of these pages is divided into either two or three columns of written content it provides a decent amount of reading material for those interested. The article itself is divided into five sections: the history and background of Cynidicea, the Cynidiceans, geography in the underground lost city, the cults and gods of Cynidicea, and updated statistics for a 3.5 edition Zargon. Also within the article is a map, plus two short sidebars that quickly summarize how the Mystara setting was originally created and information (“Elixir of Fantasy”) on the hallucinogenic drug used to suppress the people of Cynidicea. Before delving into a review of each section and a final summary of this article, it should be noted that Mearls’ focus seems to be two-fold in his approach. His first objective appears to revisit the setting of Cynidicea for those who are already familiar with it or to expose it to those who know little to nothing about it. The second objective aims to provide some 3.5 edition updates for those who wish to adventure within Cynidicea using

37
what was Wizards of the Coast’s most current D&D rules set at that time. HISTORY AND BACKGROUND OF CYNIDICEA The first section in this article gives an almost full page to an historical overview of the Cynidiceans’ rise and fall. Overall, the article’s accounting of Cynidicean history is mostly faithful to the spirit of Moldvay’s original, as told in module B4’s “DM’s Background” section. However, two key differences stand out between both of these accounts. First, Moldvay’s descriptions explain Cynidicean history in more of a matter-of-fact, analytical voice to primarily give the DM the information required to run the game and understand the setting’s background. Mearls’ retelling of the Cynidicean past uses a bit more of a storyteller quality to lure in the reader with a narrative hook. Second, the article not only adds some supplementary story embellishments to accent the basic facts presented from B4, but also adds some original story content not mentioned in prior official sources. One example of this is a plot addition known as the “Time of Rage”, referring to a time when Zargon took revenge on the Cynidiceans after an initially successful rebellion only temporarily defeated it and its followers. While this approach may be considered non-canon by some, hearing another’s perspective on how “The Lost City” scenario came to be is akin to hearing how another DM chose to run B4 in his or her personal campaign. One underrated aspect of module B4 is that Moldvay leaves a certain amount of history open for the DM to interpret what specifically happened, and when, to cause this great society to originally fall into ruin. One excellent and realized example of expanding from this foundation can be found in the Vaults of Pandius article “The Dungeon Master's Guide to Cynidicea”, as it provides a thorough and historical accounting of how present day Cynidicea came to be. In the same vein, Mearls’ first section is a welcome way to start the article and also draw in casual readers because it provides a story-based hook for those who might not otherwise know much about this setting. This section could also be used to form the basis of a plot device for a DM and party to start an adventure in this setting or act as a semi-alternative history for Cynidicea. THE CYNIDICEANS This shorter section covers some basics on the Cynidicean people at the article’s point in their historical timeline. Mearls’ population for the remaining number of Cynidiceans living in the lost city is placed at around 1000 and they still retain many of their familiar aspects, such as their albino characteristics and infravision ability. The familiar Cynidicean themes of masks, drugs, and drug-induced behavior are also briefly discussed in this section. GEOGRAPHY
A new half page map of the lost underground city, with ten locations keyed on it, is provided. This section also includes a short paragraph that describes each of these locations. The map in the article is illustrated as two dimensional, but otherwise is structurally similar to the “Underground City Map” that was delivered with module B4. In looking at the differences in map dimensions (as measured in feet), the article map is slightly off from the original B4 map, but the discrepancy is not enough to be deemed noticeable. The above ground structures and other natural formations are almost identical between both maps. Most inspiring is the first location, the underground lake, being keyed as “Lake Moldvay” in tribute to its creator. Nine of the ten locations keyed on the article map share similarity to B4’s map. It should be noted that the following above ground areas from B4 are not keyed in the article map: City Docks, Water-Filled Chasm, Rock Bridges, Water Channels, Orpheus Park, the Stronghold of Gorm, the Stronghold of Usamigaras, the Stronghold of Madura, and the Wasteland. Despite this, a few of these non-keyed areas are briefly discussed in the paragraph descriptions written for other keyed locations. The article map does provide one newly keyed location, with description, for the nameless ruins from B4 that were situated between the Rock Bridges and Orpheus Park. Regarding the location descriptions, each stays faithful to Moldvay’s original purpose for it. Mearls’ does add a new flourish or twist into most of these descriptions, giving each location more campaign potential or utility. For example, an unstable planar portal from the Elemental Plane of Water is actually providing water to Lake Moldvay in the article’s variation of the underground city. DMs could use these extras to create new objectives, quests, or plot points as they design their adventure or simply choose to ignore it altogether. THE CULTS AND GODS OF CYNIDICEA In this section, the familiar four factions of Gorm, Usamigaras, Madura, and Zargon return from B4 to provide adventurers with potential allies, foes, and political intrigue. Each faction receives a sub-section of about three to five paragraphs in length. Along with highlighting the major leaders and factions in the underground city, this section also begins to introduce some 3.5 edition elements into this setting. As the article factors Mearls’ “Time of Rage” incident into this Cynidicean timeline, the relative strengths and geographic positions of the different factions have shifted around from B4. The Zargonites current leader is Zaranna, a 12th level cleric (no statistics given), who received her leadership position by assassinating the previous high priest of Zargon. B4’s Darius is mentioned nowhere in the

38
article and leaves open the possibility that Zaranna herself, the earlier pre-“Time of Rage” rebellion, or some other influence was responsible for his removal as high priest. Although both Moldvay and Mearls mention that Zargon is not a deity, it is able to grant spells to its clerics through some unknown means. In a nod to the 3.5 edition rules, Zargon’s clerical domains (Destruction, Evil, Law) and favored weapon (light flail) are given to the reader. The followers of Gorm have been forced into hiding in chambers outside the underground city and are still being led by Kanadius, a 10th level cleric (no statistics given). Due to prior events, Kanadius has become more cautious about whom he trusts, but a dedicated party could still earn him as an ally. Gorm’s clerical domains (Air, Law, Water) and favored weapon (long sword) are given to the reader. The faction of Usamigaras has become even more mysterious and covert since B4, and presently dwells in sewers underneath the underground city. This faction is still being led by Auriga Sirkinos, a 9th level wizard (no statistics given). Auriga has become even more untrustworthy and unreliable since B4, and is ultimately out for himself. Motivations and behavior for Auriga’s betraying nature are also provided. This sub-section adds a potential plot point in the form of Loraya, an honorable 2nd level wizard who believes her faction is not doing enough to rid her people of Zargon’s influence. Usamigaras’ clerical domains (Healing, Magic, Trickery) and favored weapon (dagger) are given to the reader. The warrior maidens of Madura receive the longest of the faction write-ups. The article is written such that a party of adventurers would encounter Madura first and most likely ally with them. Pandora, a 10th level fighter (no statistics given), still leads the Madura faction and seems the most motivated to free the Cynidiceans from Zargon. The warrior maidens currently control much of the ziggurat and are motivated to finding allies beyond the above ground ruins of Cynidicea. Madura’s clerical domains (Death, Healing, Protection) and favored weapon (long spear) are given to the reader. ZARGON, THE DEVOURER IN THE DEPTHS The most explicit integration of 3.5 edition rules into this article occurs on its final page, which includes a basic write-up of Zargon along with a full set of updated statistics, skills, feats, abilities, etc. for it. In the encounter in B4’s room #100, Zargon is an almost-impossible encounter for 1st - 3rd level parties and even a tough fight for parties in the 4th - 6th level range. The 3.5 edition update of Zargon transforms it from a low-to-mid level party conqueror from B4 to an all-out terror in Mearls’ article. While Zargon’s origin is still mostly shrouded in mystery at this point in D&D product history, Mearls
chooses to classify it as an Outsider. Zargon’s height has increased from 15 to 35 feet and it has also received a hit point boost from B4’s original of 80 to 275. Attack-wise, Zargon retains his six tentacles and one bite attacks, receives a constricting grappling offense, and is also given an additional gore attack for good measure. In addition, resistances, skills, feats, special abilities, and spell-like abilities only begin to account for Zargon’s challenge rating of 16. This article makes Zargon a brutal opponent that parties will need to research, evaluate, and prepare for before actually engaging. One noticeable difference from B4 is the speed and nature of Zargon’s rejuvenating capabilities. While B4 states that Zargon’s rejuvenating process is very slow, any party that wants to permanently destroy Mearls’ Zargon must defeat it and then throw its horn into the Eye of Zargon within a single day. If this task is not accomplished by that time limit, the horn dissolves and Zargon physically reforms in Lake Moldvay within one to four days and with all memories intact. These changes were perhaps made to give the party some imperative to immediately venture to the Eye of Zargon if they managed to defeat Zargon and take its horn into their possession. SUMMARY Overall, Mearls’ article succeeds in reestablishing a connection between a new generation of D&D fans and a classic campaign setting that existed 20-or-so years prior to the article’s publishing date. Completist B4 fans will want to have this article in their collections of “all things Cynidicean”. In reading through the content of the article, the following items stand out as new or different to anyone who already owns module B4: Mearls’ light embellishments in the Cynidicean story, the adding of spare details in the map descriptions to give the locations a little more value, updating the faction details and their leaders’ current motivations, listing the deities’ domains and favored weapons, and providing a full 3.5 rules updating for Zargon. In retrospect, this article embodied the first published attempt to modernize Zargon and Cynidicea for the, then, present day and it appears that Mearls’ efforts were not lost on Wizards of the Coast. The “Elixir of Fantasy” sidebar from this article was later replicated almost word-for-word in Dungeon Magazine #142. Some details in this article were either copied or used to help inspire other changes that would be integrated into the 2007 3.5 edition tome “Elder Evils”. At present, Chapter 10 of “Elder Evils” represents Wizards of the Coast’s most up-to-date word on where Zargon and Cynidicea stand in the 3.5 edition-and-beyond era. However, that is the subject for a different review. The next word on Cynidicea would occur approximately three years later in Dungeon Magazine #142 when a new adventure for this setting would appear within its pages.

39
Review:
“Masque of Dreams”
by Scott Rogers
INTRODUCTION The words “Return to the Lost City” were boldly proclaimed in huge lettering on the cover of Paizo Publishing’s then January issue of Dungeon Magazine. It was now late 2006 and three years had passed since the last official word on anything Cynidicean had been circulated via Dragon Magazine #315. Rather than write another descriptive summary article about Cynidicea, Paizo opted to use its sister magazine Dungeon to publish a new 3.5 edition adventure that would actively let the reader quest within this memorable setting. Dungeon Magazine #142 (January 2007) not only made good on placing such an adventure into its readers’ hands, but also gave it upfront focus in terms of its cover art (credit: James Ryman). The “Masque of Dreams” adventure receives fifteen pages (pp. 14-30) within the covers of issue #142 and is credited to B. Matthew Conklin III, with Michael M. Kaluta and Robert Lazzaretti receiving credit for art and maps, respectively. Of these fifteen pages, roughly ten are dedicated to the actual adventure mechanics while the other five are set aside for: supplemental maps/artwork/tables/sidebars, a couple of sidebar advertisements, and an unrelated three
panel comic strip. From a broad standpoint, the publisher’s classified this adventure as “Any Setting, Low Level (1st - 5th), Urban & Wilderness”. The article is divided into the following sections: an introduction, adventure background/synopsis/hooks, chapters 1-4 of the adventure, and the adventure’s conclusion. Also included are the aforementioned maps of the areas used within the adventure and beautiful artwork from Kaluta. A desert encounters table is available to use when the party adventures into this locale. Finally, two supplemental sidebars with related adventure information are included. The first sidebar, “Elixir of Fantasy”, describes the hallucinogenic drug used to control the Cynidicean people and borrows heavily from a similar sidebar in Dragon Magazine #315. In the second sidebar, Conklin explains how to scale the adventure for low-level parties who want to start the adventure higher than 1st level. In this same sidebar, he also promotes some awareness about Tom Moldvay’s “B4: The Lost City” module and Michael Mearls’ “Mystara: Return to the Lost City” article from Dragon Magazine #315. ADVENTURE BACKGROUND To summarize the adventure’s purpose and scope, the introductory teaser written for it provides the following starter description: A masquerade ball at a remote desert oasis turns tragic when the party is crashed by goblin minions of a priestess of Zargon. Can the PCs rescue the abducted guests before they become the latest victims of the Lost City of the valley of Death? A D&D adventure for 1st-level characters. The article leads off with Conklin elaborating further on this foundation while also noting this adventure is intended for four 1st level characters and can be placed into any setting, not just Mystara. Conklin also neatly summarizes the historical rise and fall of Cynidicea in two paragraphs, highlighting only those facts that synchronize with both the B4 and Dragon Magazine #315 historical accountings. The vain Lady Ashinana Vestang, a rising marchioness in the desert, discovers some Cynidicean people in an outpost while treasure hunting in the Valley of Death (the named area for where the ruins of Cynidicea exist). Not finding any treasure, yet wanting to use the expedition to help her social climbing within nobility circles, Vestang brings the Cynidiceans back to her oasis as captives to show them off at a future masquerade gala. At the start of the adventure, she is unaware that one of the captives, Policrates, is a Zargonite in contact with Neheshru, a 3rd level Zargonite priestess. Neheshru’s plan is to drug the guests at the gala and take them captive back to the underground city to be used as sacrifices for Zargon.

40
Before the gala starts, the players will have heard news that Vestang is celebrating not only her first year as lady of the oasis, but also the “findings” from her recent “archeological expedition”. Due to her vanity, Vestang invites the whole oasis to the gala, which could easily include the players whether they reside close by or are just passing through this area. Conklin also provides a few additional reasons why the players could be invited to the gala. Characters who don’t previously know each other will have an opportunity to socialize together at the party, giving this adventure an interesting and unique premise on which to start a campaign with new characters. Players are also free to have their characters talk with other NPCs at the gala, possibly creating future storyline opportunities or quests as the DM sees fit. THE ADVENTURE – CHAPTER ONE: ASHINANA’S OASIS The content in this chapter covers all parts of the adventure from its beginning to just before Vestang reveals the Cynidicean captives to her gala guests. Provided in this section is a complete map of Vestang Manor, room and location descriptions, and general descriptions for the nature and feel of the gala as it is taking place. It also explains Vestang’s and Policrates’ underlying motivations in more detail, how the gala came to be, and Policrates’ subtle role in gaining Vestang’s confidence and slowly manipulating her over time. Two new NPCs are also introduced, Delvis Sandstone and Ilsinan. Sandstone is Vestang’s captain of the guard and is given some history and a back-story. Ilsinan, a Madura cleric sent to spy on the Zargonites, is also given a quick history and back-story. Full character statistics are provided for Vestang, Sandstone, and Ilsinan The adventure begins in Ashinana’s Oasis a few days before the gala is being thrown at Vestang Manor. This gives each player some time to become acquainted with the local area, culture, and events. The oasis, about the size of a hamlet, will be very busy at this time due to many locals and neighbors wanting to pay tribute to Vestang and enjoy the festivities. Some light almanac-like figures are offered for the oasis: population, population breakdown, authority figures, and assets. It should be noted that a map of the oasis is not provided in this adventure. Based on the information provided throughout this article, a DM could choose to make a new oasis map, reuse a pre-existing map, or rework a similar-sized village or hamlet map into an oasis. Later on in Chapter 2 of the adventure, important residents of Ashinana’s Oasis will be noted along with their professions. This information could also help a DM fill out an oasis map and provide role-playing opportunities for players. The night before the gala, goblins working for the Zargonites will deliver the elixir of fantasy drug to Policrates and then perform some light looting of the
locals in the area. If the players detect or find the goblins, they have an opportunity to fight or subdue them. This encounter gives the party the choice to engage in combat or role-play with the goblins and, later, the oasis authorities. When arriving at the party, characters will need to be adorned in gala-appropriate garb and masks to be let inside the manor. Accordingly, the wearing of obvious armor and weapons will not be allowed in the manor. An NPC employee working for Vestang has been added to the adventure to handle these costuming details, yet an underdressed party could still find other ways in, such as using role-playing or stealth skills. During the gala, the manor is full of guests, nobles, and visitors with numerous entertainers amusing the crowds. Exotic animals and creatures thought to be important to the Cynidiceans are on display outside on the manor’s patio. Policrates, two other Zargonites, and a few other Cynidiceans, who have all been made manor servants, will be waiting in the servants’ quarters to be unveiled later to the gala crowd. Ilsinan has been locked away in the manor’s wellhead after having been caught by Policrates for meddling with Neheshru’s plan to drug the gala drinks. THE ADVENTURE – CHAPTER TWO: DREAMS The content for the second chapter in this adventure covers all parts from the unveiling of the Cynidicean captives to moments after the drug is consumed. Setup and execution of Vestang’s introduction of the Cynidiceans to the gala guests is given, as is the response from the guests. Also supplied is more back-story describing Ilsinan’s interference into Neheshru’s plans and how the players and a few other NPCs are the fortunate recipients of the non-drugged drinks she had time to switch. In all, most of the 150 NPCs at the party should succumb to the elixir of fantasy’s effects after a toast is made and the drinks are consumed. Conklin provides a good description for how the hallucinogenic drug affects the average individual. Specific hallucinations were supplied in the prior chapter for Vestang and Sandstone, but Conklin provides additional delusions for a list of some prominent citizens of the oasis who were invited to the gala. It is possible for a player to have met and engaged earlier with some of these citizens upon arriving in the oasis. In turn, this potentially provides an additional level of role-playing intrigue once the delusions and hallucinations start. For generic or nameless gala NPCs, additional tips for drugged behavior are presented based on the type of mask the partygoer is wearing. In the end, the gala descends into pure madness and chaos following everyone’s consumption of the drug.
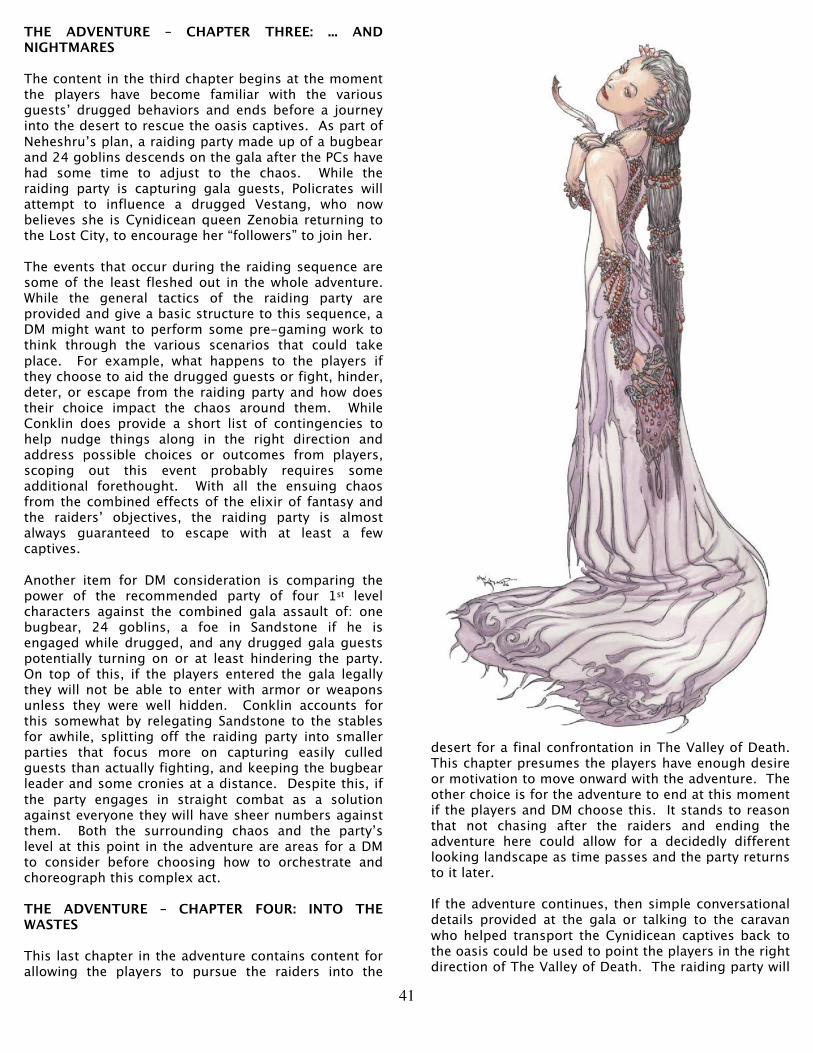
41
THE ADVENTURE – CHAPTER THREE: ... AND NIGHTMARES The content in the third chapter begins at the moment the players have become familiar with the various guests’ drugged behaviors and ends before a journey into the desert to rescue the oasis captives. As part of Neheshru’s plan, a raiding party made up of a bugbear and 24 goblins descends on the gala after the PCs have had some time to adjust to the chaos. While the raiding party is capturing gala guests, Policrates will attempt to influence a drugged Vestang, who now believes she is Cynidicean queen Zenobia returning to the Lost City, to encourage her “followers” to join her. The events that occur during the raiding sequence are some of the least fleshed out in the whole adventure. While the general tactics of the raiding party are provided and give a basic structure to this sequence, a DM might want to perform some pre-gaming work to think through the various scenarios that could take place. For example, what happens to the players if they choose to aid the drugged guests or fight, hinder, deter, or escape from the raiding party and how does their choice impact the chaos around them. While Conklin does provide a short list of contingencies to help nudge things along in the right direction and address possible choices or outcomes from players, scoping out this event probably requires some additional forethought. With all the ensuing chaos from the combined effects of the elixir of fantasy and the raiders’ objectives, the raiding party is almost always guaranteed to escape with at least a few captives. Another item for DM consideration is comparing the power of the recommended party of four 1st level characters against the combined gala assault of: one bugbear, 24 goblins, a foe in Sandstone if he is engaged while drugged, and any drugged gala guests potentially turning on or at least hindering the party. On top of this, if the players entered the gala legally they will not be able to enter with armor or weapons unless they were well hidden. Conklin accounts for this somewhat by relegating Sandstone to the stables for awhile, splitting off the raiding party into smaller parties that focus more on capturing easily culled guests than actually fighting, and keeping the bugbear leader and some cronies at a distance. Despite this, if the party engages in straight combat as a solution against everyone they will have sheer numbers against them. Both the surrounding chaos and the party’s level at this point in the adventure are areas for a DM to consider before choosing how to orchestrate and choreograph this complex act. THE ADVENTURE – CHAPTER FOUR: INTO THE WASTES This last chapter in the adventure contains content for allowing the players to pursue the raiders into the
desert for a final confrontation in The Valley of Death. This chapter presumes the players have enough desire or motivation to move onward with the adventure. The other choice is for the adventure to end at this moment if the players and DM choose this. It stands to reason that not chasing after the raiders and ending the adventure here could allow for a decidedly different looking landscape as time passes and the party returns to it later. If the adventure continues, then simple conversational details provided at the gala or talking to the caravan who helped transport the Cynidicean captives back to the oasis could be used to point the players in the right direction of The Valley of Death. The raiding party will

42
be able to travel 30 miles each day until they reach the valley within three to four days and setup a camp next to the famed ziggurat. This section contains a map showing the proximity of Ashinana’s Oasis to The Valley of Death. Old school Mystara fans will be interested to know this map places the oasis on the main road between Parsa (10 miles to the northwest) and Sulba (22 miles to the southeast), with the Lost City being about a three to four day journey northeast of the oasis. Also included is a desert encounters table that will come into use for each day the party is traveling in the desert. When the players reach The Valley of Death, a final map is supplied to illustrate the goblin encampment outside the ziggurat. While traveling in the desert toward the Lost City, one unique location the party may happen upon is Dragongrave, so named for it being the resting place of a long dead brass dragon. Its only inhabitant is Degalla, a brass wrymling who remained hidden while the Zargonite raiding party passed. Degalla will be mostly friendly to the party if they cooperate with her questions and answer her riddle. If she is successfully befriended, the young brass wyrm will follow the party, provide guidance if they become lost in the desert, and assist if they are running low on food or water. To what degree Degalla becomes an ally to the party can be left up to the DM’s discretion. Another unique location the party might encounter on its trek to the Lost City is the Lake of Dust or Death’s Oasis, so named for it being a former oasis that died due to its lone occupant, a desiccator. The desiccator is an undead water vampire-like creature native to the Elemental Plane of Water. Based on the full statistics given for the desiccator it can potentially be a problem for a low-level party in combat. A few potential ways for a party to overcome or avoid this creature are: engaging in combat, elemental turning, or distracting the creature with water. Upon reaching the ziggurat, the players will first encounter the goblin camp that has been setup outside of it to hold and watch the raider’s prisoners. By this point in the adventure, the goblins have sent representatives to fetch Neheshru who will be inspecting the prisoners in the encampment when the players arrive. The longer the players take to get to the camp the more prisoners the Zargonites will sacrifice to Zargon. Upon seeing the players’ group, Neheshru and two Zargonites thugs will step up to fight the party while the rest of the encampment forms a circle around the action. Full statistics for Neheshru and a typical Zargonite thug are given. Upon defeating Neheshru in combat, the rest of the encampment will scatter in fear. This offers the players with the decision to either see the oasis captives safely back to Ashinana’s Oasis or explore what is inside the ziggurat.
CONCLUDING THE ADVENTURE If the players are able to safely return Lady Vestang and the other captives to the oasis, they each receive a hero’s welcome and a separate 500 GP reward from Lady Vestang. Vestang will petition and fund the party for future expeditions into the ziggurat, and its tunnels below, in exchange for some of the treasures that are discovered in it. If Ilsinan is still alive she will encourage the players into the same direction as Vestang, but with a different goal of defeating the Zargonites. If the players want to leave this setting and if Sandstone is still alive, he takes the earlier raid as a sign to reclaim his ancestral land as mentioned in his back-story. SUMMARY Taken as a whole, there is a lot to like about this adventure, but it is not without some areas that could use improvement or at least some introspection. In looking at the strengths of this adventure, some things do stand out. First, this adventure provides an alternative retelling for how the players could end up adventuring within the B4 ziggurat and the underground city below it. B4’s starting story hook of the PCs as lost members of a caravan was convenient for its time, but it didn’t necessarily create a desire for the party to want be there in the first place. As caravan workers, once the party allied with any members of the ziggurat factions and received the water they needed to stay alive, there was not much else to keep them there. Unless, of course, the party possessed an unyielding desire to want to further explore the ziggurat, tomb raid their new surroundings, or end the evil that was Zargon. Conklin’s adventure has the advantage of the party being able to begin it by making relational attachments and connections in the oasis first and then dipping a few toes into the B4 pool by the end of it. If the party wishes to adventure more within this setting, then using Lady Vestang to fund future expeditions into the world of B4 become a different way to send the party in, but well stocked and equipped this time. In effect, Vestang’s oasis becomes Hommlet to the ziggurat’s moat house. Second, I was impressed at the amount of role-playing opportunities that were presented in this adventure. In helping to aid 1st level adventurers past the idea that combat is the only solution for every problem, Conklin’s adventure is flexible enough to allow diplomatic and stealthy solutions to aid the party in progressing forward. Regarding areas of improvement for this adventure, a few things also stand out. First, the most nagging thing that stood out was the notion that if the party starts at 1st level they might be

43
overpowered at some points when combat presents itself. Conklin helps the DM work around some of this by: making the goblins in the first encounter a bit cowardly, splitting up the raiding party at the gala and holding back its strongest member, and isolating a bloodthirsty Sandstone after he has been drugged. However, the gala’s no armor no weapons rules leaves the characters with fewer offensive options in the biggest skirmish in the adventure. The players may also have their hands full fighting Neheshru who is a 3rd level cleric and her two 2nd level fighter henchmen after a long journey through the desert. However, potential allies are provided in the form of Ilsinan, Degalla, and maybe other NPCs like Vestang’s guards, if the players & DM agree to this. Second, the raiding party sequence will require the DM to multi-task the following: managing a tactical raiding party that splits into smaller groups, a group of players who may or may not split up during this same sequence, and a fixed number of drugged gala NPCs who are acting in a chaotic fashion due to the elixir of fantasy. This sequence almost looks like a parody of a war game turned on its head. As such, a DM will want to know how he or she will proceed through it successfully, so that PCs and NPCs are both achieving their objectives in the middle of a crazy chaotic zone. After “Masque of Dreams” and Dungeon Magazine #142 were issued, this appeared to be the first adventure published in the world of Cynidicea following Moldvay’s B4 module. This adventures shows there was more to the Cynidicean legacy and its fight with Zargon than just the monumental Lost City ziggurat that many tend to think about when such discussions are invoked. Through his adventure, Conklin pays obvious homage and respect to Moldvay and the legacy that he left us. The next official word on Cynidicea would be published later that same year in 2007 when Wizard’s of the Coast would release the 3.5 edition “Elder Evils” book. In picking up where
Mearls’ left off in Dragon Magazine #315, “Elder Evils” would take Mearls’ CR16 Zargon and further refine it into an epic-level force of evil. ADDENDUM: DUNGEON #142 ONLINE SUPPLEMENT From 2003 to 2007, Paizo had been releasing online supplements in the PDF format to support Dungeon in its paper magazine form. Dungeon Magazine #142 also received the same treatment and its official map and handout supplement is available for download at Paizo’s official Dungeon Magazine Downloads & Online Supplements web page. If you wish to DM this adventure, downloading this supplement is highly recommended, as it contains some map resources not available in the article and larger versions of Kaluta’s wonderful artwork. Page 1: Art: Vestang manor party (Michael M. Kaluta) Page 2: Map: Vestang manor - unlabeled (Ground Floor, 2nd Floor, Wellhead) (Robert Lazzaretti) Map: Vestang manor - labeled (Ground Floor, 2nd Floor, Wellhead) (Robert Lazzaretti) Page 3: Art: Ilsinan and different party masks (Michael M. Kaluta) Page 4: Art: Lady Ashinana Vestang (Michael M. Kaluta) Page 5: Map: Proximity of Ashinana’s Oasis to The Valley of Death - unlabeled (Robert Lazzaretti) Map: Proximity of Ashinana’s Oasis to The Valley of Death - labeled (Robert Lazzaretti) Page 6: Art: Party encounter at Dragongrave (Michael M. Kaluta) Page 7: Map: Goblin Camp - unlabeled (Robert Lazzaretti) Map: Goblin Camp - labeled (Robert Lazzaretti)

44
Concept sketches for Jeweled Woman (Lady Ashinana Vestang) by Michael Kaluta

45
Review:
“Elder Evils”
by Demos Sachlas
“Elder Evils” by Robert J. Schwalb is a supplement for the v.3.5 revision of the Dungeons and Dragons game, published in December, 2007. A one-page introduction emphasizes the high stakes involved in dealing with elder evils – the fate of not only kingdoms, but entire worlds or even the multiverse, hangs in the balance. Chapter 1 provides suggestions for incorporating an elder evil into the campaign world, including signs and portents. The next nine chapters describe various horrors, such as the “Hulks of Zoretha” or “The Worm that Walks”. Chapter 10 is devoted to Zargon. Background This section provides a brief summary of the rise and fall of Cynidicea. Interestingly, it’s the decadence of its citizenry that leads to the rise of the Cult of Zargon, not the other way around. Likewise, the fall to a barbarian horde is in retaliation for depradations on its people, not an opportunistic invasion. These are small differences, but create a slightly different feel compared to the original module.
Zargon once ruled the Nine Hells of Baator and fathered the ancient baatorians, a long-extinct race that preceded the baatezu. He was overthrown by Asmodeus, who tore away Zargon’s horn and flung it down into the Material Plane. After taking centuries to regenerate, Zargon crawled up out of the earth and conquered Cynidicea. His influence contaminated the land, and strange storms poisoned the earth with brown slime, which bred new creatures (the “whelps” of Zargon). A percentile table for the Sign of Eerie Weather is given. 71-100 results in a rain of slime, which contaminates all exposed water sources and may pollute exposed creatures (collapsing into puddles of slime from which they reemerge as whelps). The barbarian leader Zankar falls to Zargon after a running 7-day battle in the ruins of the city. The “gods” become alarmed and arrive to punish Zargon, although some of them fall to the creature as well (it is stated that high-level wizards, priests, or other adventurers may be substituted for the gods, which is probably a good idea). Survivors of the barbarian invasion witness the fall of the gods and flee in terror into the caves beneath the city. Asmodeus finally arrives and imprisons Zargon in solid stone (a nod to the “Conan, King of Thieves” screenplay, perhaps), also burying the creature’s Cynidicean worshippers in the tunnels beneath the city. Goals Zargon originally sought to reclaim the Nine Hells, but now desires to claim the Material Plane. Zargon in the Campaign A timeline is given in which Dorn, son of high cultist Darius and his lover Neheshru, flees Cynidicea in order to escape Zargon. However, fate has other plans. In the lost city, Darius begins to dig Zargon out from his prison, triggering horrific storms, while Dorn falls in with the cult of Juiblex, the demon lord of oozes. The rival cultists of Zuggtmoy try to frame the cult, but the PCs learn the truth. The party is hired by an archeologist named Vanessa to find the lost city, although she is lost in one of Zargon’s storms, captured, and indoctrinated into the cult. Dorn returns and Vanessa seduces him, convincing him to slay his own father, Darius. Zargon is freed and transforms the cultists into his whelps. Short paragraphs are given for placing Zargon in Eberron or Faerun, including suggested locations for Cynidicea in these campaign settings.
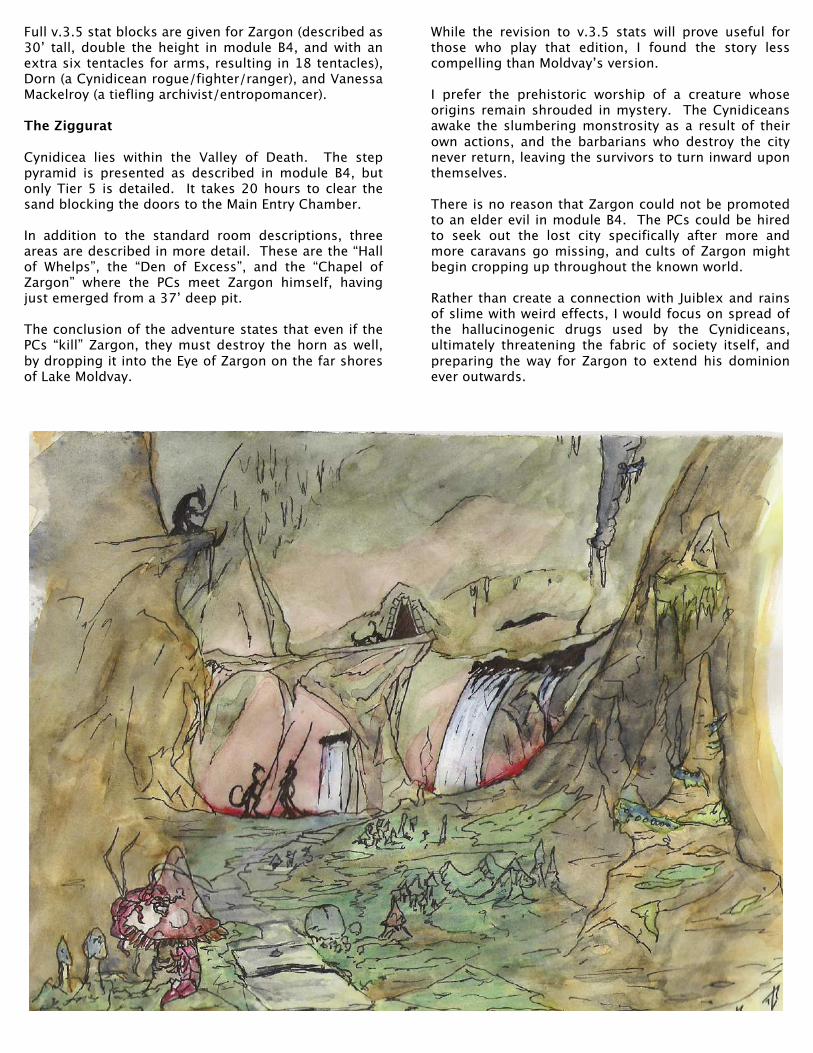
46
Full v.3.5 stat blocks are given for Zargon (described as 30’ tall, double the height in module B4, and with an extra six tentacles for arms, resulting in 18 tentacles), Dorn (a Cynidicean rogue/fighter/ranger), and Vanessa Mackelroy (a tiefling archivist/entropomancer). The Ziggurat Cynidicea lies within the Valley of Death. The step pyramid is presented as described in module B4, but only Tier 5 is detailed. It takes 20 hours to clear the sand blocking the doors to the Main Entry Chamber. In addition to the standard room descriptions, three areas are described in more detail. These are the “Hall of Whelps”, the “Den of Excess”, and the “Chapel of Zargon” where the PCs meet Zargon himself, having just emerged from a 37’ deep pit. The conclusion of the adventure states that even if the PCs “kill” Zargon, they must destroy the horn as well, by dropping it into the Eye of Zargon on the far shores of Lake Moldvay.
While the revision to v.3.5 stats will prove useful for those who play that edition, I found the story less compelling than Moldvay’s version. I prefer the prehistoric worship of a creature whose origins remain shrouded in mystery. The Cynidiceans awake the slumbering monstrosity as a result of their own actions, and the barbarians who destroy the city never return, leaving the survivors to turn inward upon themselves. There is no reason that Zargon could not be promoted to an elder evil in module B4. The PCs could be hired to seek out the lost city specifically after more and more caravans go missing, and cults of Zargon might begin cropping up throughout the known world. Rather than create a connection with Juiblex and rains of slime with weird effects, I would focus on spread of the hallucinogenic drugs used by the Cynidiceans, ultimately threatening the fabric of society itself, and preparing the way for Zargon to extend his dominion ever outwards.

47
Gen Con 2013
D&D Championship Recap
by Tom
The D&D Championship is held every year at GenCon. It is the longest running event at the con. This year we would be playing again with the same 5 guys as last year. Team name: "Don't Make this Weird" The D&D Championship was 2 rounds this year. We played our first round at 8am on Thursday, starting the con off right. The first round started in the desert blasted ruins of at the lost city of Cynidicea. We entered a pyramid where cultists of Zargon had gone before. We ran into the cultists fighting the undead former rulers of the city. We tried to convince the rulers we were on their side but our diplomacy skills failed us and we ended up fighting both the undead and the cultists of Zargon. After that fight we plumed the depths of the pyramid and found the entrance to a vast cavern below the city. Within the cavern were temples of three of the city's patron gods. In each temple was a clue or riddle that revealed the hiding place of a magical staff of great power. The riddles were just complex enough that we could decipher them, but not the crazed cultists of Zargon. Still, we had to hurry, Zargon was returning soon, and we needed the magic staffs to help defeat him. At each of the relics were guardians. We needed at least 1 staff before entering the temple of Zargon or there would be no hope for our success. We solved all 3 riddles. One stumped us for a good 20 minutes, the second we solved in under a minute by not overthinking and doing the obvious, the third we solved in about 2 minutes thanks to help from reading the original B4 adventure and recognizing some of the symbols. I really like it when the adventure background is released before the con and there are some rewards for reading it and doing some extra research. With 2 staffs in hand, we entered the Temple of Zargon. We had to find a way to the caverns beneath before time ran out. We had less than an hour to go. The temple was represented by the famed moathouse of T1. It was guarded by cultists of Zargon and a golden statue-construct of Zargon himself. We quickly spread out and looked for anything that would get us below while weathering the attacks of the Zargon cultists. We soon found 3 levers. Once all were thrown the correct direction, black sludge covered slides were revealed. Four of us made it down the slides but one
was left behind to the tender mercies of the cultists of Zargon. We ended up in first place in our time slot (and since it was the first of the convention, first place over all). We captured 2 staffs, solved 3 riddles, found the exit in the temple of Zargon, and got 4 PCs out of the exit. We spent the rest of the convention watching the leaderboard. We were a little concerned when we dropped to second on the first day, but we held that until Sunday. I enjoyed having the opportunity to watch that as the convention went on. The final was Sunday at 8am. It started in the cavern below the temple of Zargon. The place was filled with ruins of countless battles against the monster. And deep within the cavern we could here what could only be Zargon himself. As we closed, we picked up here and there, discarded potions of healing, whetstones, and other magical aids. We were assumed to have all 3 staffs (the tan, green, and blue disks on the following picture). Each staff could be planted like a battle standard and each gave various special powers and weakened Zargon in a zone 5 around them. We relied heavily on the Staff of Usamigaras which gave PCs in the zone a +2 bonus to all defenses and allowed a 1/round d20 reroll which our strikers used to good effect on a number of occasions. We quickly found we were fighting not only Zargon present (the huge carrion crawler) but Zargon past (the roper) as well. We focused fire on Zargon present until we brought him down. Then we focused fire on Zargon past and brought him down as well. Bringing down the two Zargons took 6 or 7 rounds during which we were being overrun by more and more monsters and cultists. We had to ignore them to get to the prize. We had to get the horns of Zargon present and Zargon past (the pink disks) and exit the cavern. Only one of us got out alive. The goliath fighter. He was bloodied and had cultists and zombie dragons chasing after him, but he made it. The rest of our bodies bled out on the cavern floor. Our Team "Don't Make this Weird" consists of Kirk, John, Tom, David, and Justin. Our home players are myself, Kirk, and John. We have been playing off and on with David for about 7 years now (he helps us round out the table when our home players cannot all make it). He is a fantastic player and runs a wizard better than anyone we have played with. A recent addition to our teams is Justin. Justin is another excellent player. He has played our Fighter for the last two years.
48
Acknowledgements
“Retrospective: The Lost City” posted on Grognardia, June 10, 2009, by James Maliszewski. http://grognardia.blogspot.ca/2009/06/retrospective-lost-city.html “Memories of Tom Moldvay” posted on Swords and Dorkery, February 2, 2011, by Mike Monaco. https://mikemonaco.wordpress.com/2011/02/02/memories-of-tom-moldvay/#comments “Meet Jim (Q & A)” posted on “The Art of Jim Holloway” website, November 30, 2012 http://www.jimhollowayart.com/id10.html “Printing History” posted on the Acaeum https://www.acaeum.com/ddindexes/modpages/b.html The Pyramid of Saqqara, Egypt, circa 1870-1880, by Felix Bonfils. http://www.galerieflak.com/en/the-pyramid-of-saqqara/ A coin of Magas of Cyrene circa 300 - 282/75 BC. Rev: silphium and small crab symbols. https://upload.wikimedia.org/wikipedia/commons/b/bb/Magas_as_Ptolemaic_governor%2C_first_reign%2C_circa_300-282_or_275_BC_Didrachm.jpg Roman mosaic of musicians and masked actors in a play, Pompeii, Italy, by Dioscurides. https://commons.wikimedia.org/wiki/File:Vagrant_musicians_MAN_Napoli_Inv9985.jpg “Notes on the Underground City” posted on Dragonsfoot Forums/Board Index/Dungeons & Dragons/Classic D&D/Expanding the Lost City (B4), August 13, 2009, by Philotomy Jurament. https://www.dragonsfoot.org/forums/viewtopic.php?p=770201#p770201 “The Emirates of Ylauram: RPG Items I Like” posted on Age of Ravens, January 12, 2012, by Lowell Francis. http://ageofravens.blogspot.ca/2012/01/emirates-of-ylaruam-rpg-items-i-like.html The Dungeon Master’s Guide to Cynidicea: A rules supplement for use in any Mystara campaign. http://pandius.com/cynidgaz.html Italian translation of Geoff Gander’s Dungeon Master’s Guide to Cynidicea “CHE3 Guida a Cynidicea” illustrated by Christopher Gareth Few, by Chimerae Hobby Group (May, 2005) http://www.chimerae.it/prodotti.CHE3.html Additional resources for “Masque of Dreams” posted by author B Matthew Conklin III: (includes errata, expanded Dancing Tabi, and expanded NPCs) http://dungeonmagazine.pbworks.com/w/page/18401049/Masque%20of%20Dreams Gen Con 2013: D&D Championship Recap. http://community.wizards.com/forum/4e-general-discussion/threads/3893506 Illustrations credits: Illustrations on pages 2, 46 by Christopher Gareth Few, reproduced with permission. Illustration of Zargon on page 6, by Jim Holloway, reproduced with permission. Illustrations on pages 41 (colour illustration of Lady Ashinana Vestang), 43 (colour illustration of Cynidicean masks), and 44 (concept sketches for Lady Ashinana Vestang), by Michael Kaluta, reproduced with permission. Many thanks to Mr. Kaluta for sharing his concept sketches!