bw_quickeasy_aprmay_2011
TRANSCRIPT

beadworkmagazine.com©2011 Interweave Press LLC. Not to be reprinted. All rights reserved.
Quick+ Easy
Q+E 3 GATEWAYS BRACELET Phyllis Dintenfass Create this intriguing textured cuff using peyote stitch, cylinder beads, and twisted bugles
Q+E 6 SPARKLING MEDALLIONS Amy Haftkowycz These classic earrings are easy to make using simple fringe and netting techniques
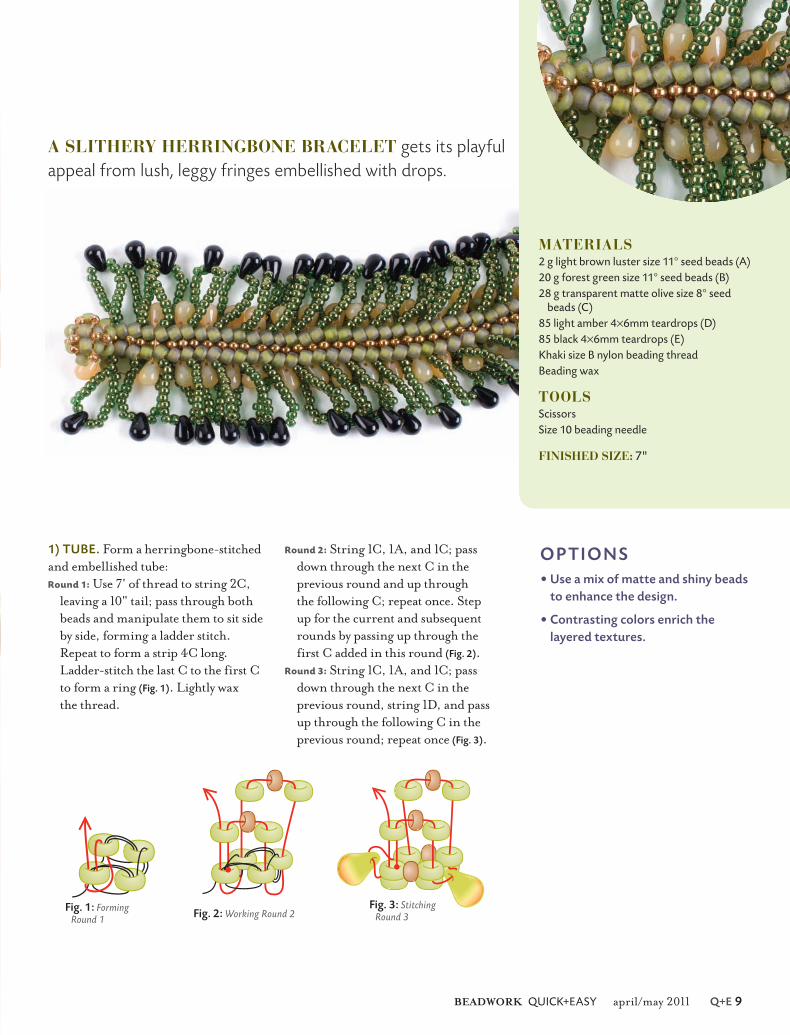
Q+E 8 CATCH ME A CATERPILLAR Doris Coghill Combine tubular herringbone stitch and embellished fringe to create this fabulously fun bracelet
Q+E 12 PETITE CHARM PENDANT Nancy Zellers Embellish a crystal rivoli with right-angle weave and peyote stitch for a simply elegant necklace
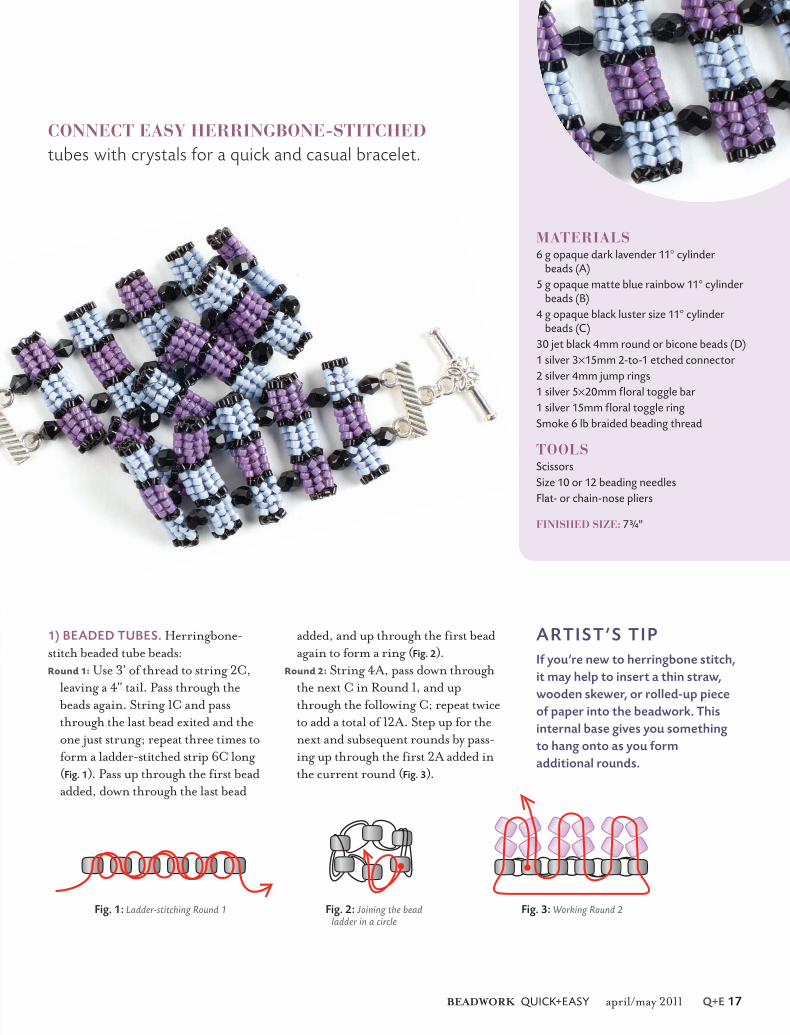
Q+E 16 MAKING TRACKS Gina Cooper String together tubular beaded beads in several colors for a fantastic casual look
Q+E 19 SPECIAL ADVERTISING SECTION
Q+E 28 LUCKY CLOVERS Rachel McEnroe Wear a little Irish luck with sets of four emerald crystals embellished on a right-angle-weave base of pearls
Q+E 30 CROSSOVER BRACELET Phyllis Dintenfass Construct this intricately patterned bracelet by linking multiple herringbone-stitched components
Q+E 34 VICTORIAN PEARL MEDALLION Barbara Falkowitz Channel the elegance of another era with a bead-embroidered medallion in pearl and gold
Q+E 38 STAR-CROSSED BRACELET Laina Goodman Defy the fashion fates with a bracelet featuring herringbone-stitched petals crossed under a faceted crystal stone
Q+E 42 CLASSIC QUARTET Roxanne Rogers Use peyote stitch and picots to form the simple band and stylish focal of this charming ring
Q+E 46 GATHERINGS: Portland Bead SocietyQ+E 48 MORE TECHNIQUES
p. Q+E 12 Petite Charm Pendantby Nancy Zellers
p. Q+E 28 Lucky Cloversby Rachel McEnroe
p. Q+E 3 Gateways Braceletby Phyllis Dintenfass
p. Q+E 30 Crossover Braceletby Phyllis Dintenfass
p. Q+E 16 Making Tracksby Gina Cooper
APRIL/MAY 2011
SUBSCRIBER BONUS PROJECT DOWNLOADS
Hybrid SectionOpener_download.indd 1 2/16/11 4:49 PM
02162011164951


BEADWORK QUICK+EASY april/may 2011 Q+E 3
TECHNIQUESodd-count peyote stitchtwo-drop peyote stitchladder stitch
See pp. Q+E 48 and 94 for helpful technique information.
gateways bracelet P h y l l i s D i n t e n f a s s
BW QE03-05 Dintenfass_QE.indd 3 2/10/11 11:44 AM
02102011114507

Q+E 4 beadworkmagazine.com
MATERIALS10 g matte black size 11° cylinder
beads (A)1 g each size 11° cylinder beads in
gold-lined clear (B), brown luster (C), bronze luster (D), terracotta (E), matte salmon metallic (F), antique gold luster (G), transparent brown matte (H), gray opal (I), silver (J)
1 g bronze matte size 11º seed beads (K)
1 g gray luster size 8º seed beads (L)1 g bronze matte sparkle size 2 (6mm)
twisted bugle beads (M)1 bronze 20mm decorative button
with shankWhite size D nylon beading thread
TOOLSScissorsSize 12 beading needle
FINISHED SIZE: 7½"
ENVISION PEEKING THROUGH A GATED window as you create this modern cuff with twisted bugles and cylinder beads. Alternate rows of one- and two-count peyote stitch to make the beading interesting and provide rich texture.
1) CLOSED SECTION. Peyote-stitch the
first portion of the cuff:
Rows 1 and 2: Use 6' of thread to string
14A, leaving a 2' tail.
Row 3: String 2A, skip the 2A previously
strung, and pass through 1A; repeat
three times to add a total of 8A.
String 2A and tie a knot with the work-
ing and tail threads to secure the beads.
Pass back through the last 2A added.
Row 4: String 1B and pass back through
the next 2A from the previous row;
repeat three times to add a total of 4B.
Row 5: String 2A and pass back through
the nearest bead added from the pre-
vious row; repeat to add a total of 10A.
Form a turnaround to step up for the
next and subsequent rows by looping
the thread around the exposed thread
between beads from the previous two
rows and passing back through the
final 2A added in the current row.
ARTIST’S TIPS
• If you’re using similar colors
for the “dots,” lay them out in
a row to keep track.
• Be sure that the beads snap
into place in each peyote-
stitched row.
• It’s best to end and begin new
threads in a closed section
rather than in an open one.
• To shorten the bracelet, add
fewer rows of dots in the first
section. To lengthen, add
more rows of the background
color on the button end.
• I use contrasting-color thread
to accentuate the pixilated
nature of this design.
Row 6: Repeat Row 4, substituting A
for B.
Row 7: Repeat Row 5.
Rows 8–39: Repeat Rows 4–6, substitut-
ing the next cylinder-bead color in the
materials list for the B in Rows 8, 12,
16, 20, 24, 28, 32, and 36.
Rows 40–43: Repeat Rows 4–7 (Fig. 1).
2) OPEN SECTION. Form an opening
in the base:
Strip 1: String 2A; pass through the last
2A exited in the previous row and the
2A just added; repeat seven times,
using tight tension to form a ladder-
stitched strip 8 pairs long (Fig. 2—
green thread).
Connector: String 12A (Fig. 2—blue thread).
Strip 2: String 2A; pass through the last
2A exited on the connector and the
2A just added; repeat six times to
form a matching ladder-stitched strip
BW QE03-05 Dintenfass_QE.indd 4 2/10/11 11:44 AM
02102011114508

BEADWORK QUICK+EASY april/may 2011 Q+E 5
to Strip 1. Stitch the last pair of 2A to
the first 2A in Row 43. Repeat the
entire thread path to reinforce. Weave
through beads to exit from the last
pair of 2A added, toward the inside of
the opening (Fig. 2—red thread).
3) POSTS. Add bugle and seed-bead
strands inside the opening:
Post 1: String 1K, 1L, 1M, 1L, and 1K;
pass through the mirror 2A directly
across the opening. Weave through
beads, forming a hidden turnaround,
skip the next 2A, and pass through
the next 2A, toward the inside of
the opening.
Posts 2–4: Repeat Post 1 three times to
add a total of 4 posts. Weave through
beads to exit from the nearest end 2A
of the connector (Fig. 3).
Repeat Step 1, Rows 3–43, through Step 3,
reversing the order of the colored beads
Fig. 4: Attaching the button and forming the decreases
Fig. 1: Finishing the first closed section
added in the Step 1, Row 4 repeats.
Repeat Step 1, Rows 3–43, through Step 3
again, then repeat Step 1, Rows 3–43,
reversing the order of the colored beads
in the Step 1, Row 4 repeats.
4) CLASP LOOP. Ladder-stitch an
opening for the button by repeating
Step 2 and adding enough pairs of 2A to
each strip so the opening is large enough
to accept the button. Repeat Step 1,
Rows 6, 5, and 4, to finish the square. If
the space is too large, repeat Step 3, Post
1, to close the opening’s size. Repeat the
entire thread path again to reinforce.
Secure the thread and trim.
5) BUTTON. Use the tail thread and
A to peyote-stitch 2 rows or enough to
adjust for size, working in the same
two-drop/one-drop pattern. Work an-
other row, stringing the shank of the
button to form the center stitch instead
of using 2A. Work 2 more rows of peyote
stitch in the same fashion, incorporat-
ing the button shank into the rows.
Once the button is fully incorporated
into the beadwork, work rows of peyote
stitch with one decrease at the begin-
ning of each row (Fig. 4). Secure the
thread and trim. ✦
PHYLLIS DINTENFASS designs jewelry, publishes patterns, and teaches beadweaving throughout the United States. Her work has appeared in numerous magazines and books and in juried exhibits internationally. For other available patterns and kits, visit www.phylart.com.
RESOURCES Check your local bead shop or
contact: Japanese cylinder beads: Joan Painter Gallery, (360) 569-2644, www.painterartbeads.com. All other seed beads and Nymo or One-G beading thread: Whim Beads, (800) 232-3111, www.whimbeads.com. Buttons: Jo-Ann Fabric and Craft Stores, (888) 739-4120, www.joann.com.
Fig. 2: Adding the strips and connector
Fig. 3: Adding the posts
BW QE03-05 Dintenfass_QE.indd 5 2/10/11 11:44 AM
02102011114523

sparkling medallions A m y H a f t k o w y c z
TECHNIQUESfringenetting
See pp. Q+E 48 and 94 for helpful technique information.
ARTIST’S TIPS
• These beaded components work
wonderfully when stitched together
for bracelets and necklaces.
• Replace the 3mm crystal bicones and
3mm rounds with 3mm crystal pearls
for a different look.
BW QE06-07 Haftkowycz_QE.indd 6 2/10/11 11:46 AM
02102011114639

BEADWORK QUICK+EASY april/may 2011 Q+E 7
THESE EASY EARRINGS are a beautiful nod to vintage sparkle.
MATERIALS1 g silver-lined brown size 15° seed
beads (A)1 g soft gold–lined clear size 11° seed
beads (B)14 antique rose gold luster 3mm
fire-polished rounds (C)14 beige gold luster 4mm fire-polished
rounds (D)14 padparadscha satin 3mm crystal
bicones (E)2 cream 3mm glass pearls
2 brass 8×18mm swirl links2 brass ½" lever-back ear wiresSmoke 4 lb braided beading thread
TOOLSScissorsSize 12 beading needlesFlat-nose or chain-nose pliers
FINISHED SIZE: 21⁄8"
1) DANGLE. Use tight thread tension
to stitch a beaded disc:
Round 1: Use 3' of thread to string {1A,
1C, 1A, and 1B} seven times, leaving
a 6" tail. Pass through the beads again
to form a circle, tie a square knot with
the working and tail threads, and
weave through beads to exit the
second A added (Fig. 1—blue thread).
Trim the tail.
Round 2: String 1D and 1B, pass back
through the D, skip the next B of
Round 1, and pass through the follow-
ing A/C/A of Round 1, pulling tight to
form a fringe; repeat to form a total of
7 fringes. Weave through beads to exit
the B at the tip of the first fringe
(Fig. 1—red thread).
Joining fringe: Pass through the B at the
tip of the next fringe; repeat around
to connect the fringe tips into a circle,
pulling tightly to form a dome (Fig. 2—
blue thread). Repeat the thread path
several times to reinforce.
Adding the pearl: String 1 pearl; pass
through the B directly across from
the last B exited and the nearest D
in Round 2, toward the outside edge
of the bead disc (Fig. 2—red thread).
Netting: String 2A, 1E, and 2A; working
counterclockwise, pass through the
next D in Round 2, toward the out-
side edge of the beaded disc (Fig. 3).
Repeat around to add a total of
7 strands. Working clockwise, string
2A, pass up through the nearest E,
string 2A, and pass down through the
next D in Round 2 (Fig. 4). Repeat
around to complete the netted crosses
between each D. Weave through beads
to exit from 1C of Round 1.
Hanging loop: String 6A; pass through
the last C exited to form a loop (Fig 5).
Repeat the thread path several
times to reinforce. Secure the thread
and trim.
Fig. 5: Forming the beaded loop
Fig.1: Stitching Rounds 1 and 2 Fig. 2: Joining Round 2 and adding the center pearl
Fig. 3: Stitching the first layer of netting
Fig. 4: Adding the second layer of netting
2) ASSEMBLY. Use 1 jump ring
to attach the beaded disc to one end
of the swirl connector. Attach 1 ear
wire to the other end of the swirl
connector.
Repeat Steps 1 and 2 to form the
second earring. ✦
Co-owner of Artful Beads Studio and Workshop in Pennington, New Jersey, AMY HAFTKOWYCZ
is a self-taught lampworker as well as a certified PMC artisan. Amy has enjoyed reaching out in many new directions since opening Artful Beads in 2006. Developing class projects, learning countless techniques, and forging new friendships have made the Artful Beads experience truly one of a kind. She lives in Pennington with her husband and six cats.
RESOURCES: Check your local bead shop or
contact: Braided beading thread and all beads and findings: Artful Beads Studio and Workshop, (609) 737-1077, www.artfulbeadstudio.com.
BW QE06-07 Haftkowycz_QE.indd 7 2/10/11 11:46 AM
02102011114639

catch me a caterpillarD o r i s C o g h i l l
TECHNIQUEStubular herringbone stitchladder stitchfringesquare stitch
See pp. Q+E 48 and 94 for helpful technique information.
BW QE08-10 Coghill_QE.indd 8 2/10/11 11:47 AM
02102011114810
BEADWORK QUICK+EASY april/may 2011 Q+E 9
MATERIALS2 g light brown luster size 11° seed beads (A)20 g forest green size 11° seed beads (B)28 g transparent matte olive size 8° seed
beads (C)85 light amber 4×6mm teardrops (D)85 black 4×6mm teardrops (E)Khaki size B nylon beading threadBeading wax
TOOLSScissorsSize 10 beading needle
FINISHED SIZE: 7"
1) TUBE. Form a herringbone-stitched
and embellished tube:
Round 1: Use 7' of thread to string 2C,
leaving a 10" tail; pass through both
beads and manipulate them to sit side
by side, forming a ladder stitch.
Repeat to form a strip 4C long.
Ladder-stitch the last C to the first C
to form a ring (Fig. 1). Lightly wax
the thread.
Fig. 3: Stitching Round 3
Fig. 1: Forming Round 1 Fig. 2: Working Round 2
Round 2: String 1C, 1A, and 1C; pass
down through the next C in the
previous round and up through
the following C; repeat once. Step
up for the current and subsequent
rounds by passing up through the
first C added in this round (Fig. 2).
Round 3: String 1C, 1A, and 1C; pass
down through the next C in the
previous round, string 1D, and pass
up through the following C in the
previous round; repeat once (Fig. 3).
OPTIONS
• Use a mix of matte and shiny beads
to enhance the design.
• Contrasting colors enrich the
layered textures.
A SLITHERY HERRINGBONE BRACELET gets its playful appeal from lush, leggy fringes embellished with drops.
BW QE08-10 Coghill_QE.indd 9 2/10/11 11:47 AM
02102011114810

Q+E 10 beadworkmagazine.com
Round 4: String 1C, 1A, and 1C; pass
down through the next C in the pre-
vious round; string 10A, 1E, and 10A;
pass up through the following C in
the previous round; repeat once
(Fig. 4—blue thread). Repeat the thread
path again to secure the round, this
time omitting the fringe loops (Fig. 4—
red thread).
Rounds 5–62: Repeat Rounds 3 and 4
thirty times or to the desired length.
Note: The clasp adds ½" to the length.
repeat six times for a total of 7 rows.
Stitch the last row to the first row
added in this section to form a thick
loop (Fig. 6). Stitch 1C to each of the
open sides of the loop to close the loop
into a beaded bead. Secure the work-
ing thread and trim.
Loop: Thread a needle on the tail thread
and weave through beads to exit out
from a C in Round 1. String 12C and
pass down through the next C in the
round so the loop has one fringe on
Fig. 4: Working Round 4
2) FINISHING. Close the tube and add
the closure:
Close tube: Work a ladder-stitched thread
path on the last Cs added to pull the
tube together. Exit up through 1C.
Beaded button closure: String 1C, 1A, and
1C and pass down through the next C
in the round, making sure the fringe
loops sit on each side of the stitch.
Catch the thread between beads and
pass back up through the last C added
(Fig. 5); working with loose tension,
Fig. 7: Adding the loop
each side (Fig. 7). Repeat the thread
path several times to reinforce.
Secure the thread and trim. ✦
DORIS COGHILL left the corporate world in 2000 to pursue beading full time. She keeps busy with her website (www.beadsbydee.com), designing, and teaching.
RESOURCES: Check your local bead shop or
contact: Teardrop beads: Shipwreck Beads, (800) 950-4232, www.shipwreckbeads.com.
Fig. 5: Stitching the strip
Fig. 6: Forming the button
BW QE08-10 Coghill_QE.indd 10 2/10/11 11:48 AM
02102011114811

WWW.CREATE-YOUR-STYLE.COM
For years Swarovski has been on the cutting edge of innovation always paving the way for outstanding
trends and designs. With Flat Backs from the SWAROVSKI ELEMENTS assortment you can create
your own style from scratch using loose crystal elements. A myriad of shapes, colors and effects is
a vailable to bring a delightful sparkle to your creations. Swarovski Flat Backs feature unique cuts,
can be combined perfectly with each other and are applied easily to a wide range of carrier materials.
Interested in this sparkling product? Head to WWW.CREATE-YOUR-STYLE.COM to fi nd out more!
SWAROVSKI FLAT BACKS –THE DIFFERENCE IS CRYSTAL CLEAR
BW QE11 swarovski ad_QE.indd 11 2/10/11 11:48 AM
02102011114841

petite charm pendant N a n c y Z e l l e r s
TECHNIQUESflat and circular right-angle weavetubular peyote stitch
See pp. Q+E 48 and 94 for helpful technique information.
BW QE12-14 Zellers_QE.indd 12 2/10/11 3:08 PM
02102011150844

BEADWORK QUICK+EASY april/may 2011 Q+E 13
THE PEARLY CROWN OF SEED BEADS framing the pendant, along with the delicate look of the chain, create a very wearable, feminine piece of jewelry with a Victorian feel.
MATERIALS½ g smoky gold bronze metallic size 15°
seed beads (A)2 g smoky gold bronze metallic size 11° seed
beads (B)1 g pearl size 11° seed beads (C)1 amethyst 14mm crystal rivoli2 brass 4mm jump rings1 brass 7×13mm filigree oval box claspGold size D nylon beading thread
TOOLSScissors2 size 12 beading needlesChain- or flat-nose pliers
FINISHED SIZE: 20¾" (necklace); 1" (pendant)
1) PENDANT. Use right-angle weave to
form the back of the beaded bezel and
secure with peyote stitch:
Round 1: Use 4' of thread to string 6B,
leaving a short tail. Pass through all
the beads again and exit from the first
B strung (Fig. 1—blue thread).
Round 2, Units 1–6: String 4B; pass
through the last B exited and the first
B just added to form the first right-
angle-weave unit. *String 3B; pass
back through the next B of Round 1,
through the side B of the previous
unit, the 3B just added, and the fol-
lowing B of Round 1. String 3B, pass
through the side B of the previous
unit, the last B just exited in Round 1,
and the first B just added. Repeat
from * twice to add a total of 5 units.
To form the last unit, string 2B, pass
through the side B of the first unit,
the next B of Round 1, the side B of
the previous unit, and the first of the
2B just added (Fig. 1—red thread).
Round 3: String 3B; pass through the last
B exited and the first B just added to
create the first right-angle-weave unit.
*String 3B; pass back through the
next B of Round 2 and pass through
the side B of the previous unit, the 3B
just added, and the next B of Round 2.
String 2B; pass through the side B of
the previous unit, the last B exited in
Round 2, and the first B just added.
Note: The right-angle-weave units in
Round 3 will alternate between
regular and increase units. Repeat
from * four times for a total of 11
units. To form the last unit, string 2B,
pass through the side B of the first unit,
Fig. 1: Working Rounds 1 and 2
BW QE12-14 Zellers_QE.indd 13 2/10/11 3:08 PM
02102011150845

Q+E 14 beadworkmagazine.com
back through the next B of Round 2,
and through the side and top B of the
previous unit (Fig. 2—green thread).
Round 4: Use A to work 1 unit of circular
right-angle weave off each top B in
each unit of Round 3 for a total of
18 units. Note: Every other unit in
Round 3 has 2 beads; weave 1 unit
into each of them (Fig. 2—blue thread).
Round 5: Use A to work 1 unit of circular
right-angle weave off each top A of
Round 4 for a total of 18 units (Fig. 2—
red thread).
Round 6: Insert the rivoli face up in the
beadwork. Work tubular peyote stitch
with 1A in each stitch between each
top A of Round 5 for a total of 18A.
Pass through all the beads in Round 6
again to reinforce (Fig. 3—blue thread).
Weave through beads to exit a top A in
Round 4.
Embellishment: Work tubular peyote stitch
with 1C for a total of 18C. Weave
through beads to exit the next A in
Round 4 (Fig. 3—red thread).
Bail: Use B to work a strip of right-angle
weave 5 units long. String 1B; pass
through the bottom A of the last right-
angle-weave unit exited in Round 4
(Fig. 4). String 1B and pass through the
end bead of the final unit just formed.
Add C in some of the gaps between
units if desired. Secure the threads
and trim. Set the pendant aside.
2) CHAIN. Form the chain using right-
angle weave:
Chain: Use 4' of thread to work a strip of
right-angle weave about 19" long or to
the desired length. String 6B; pass
through the last B exited to form a
loop (Fig. 5—blue thread).
Embellishment: Working back along the
length of the chain, add 1C between
every other right-angle-weave unit,
alternating sides (Fig. 5—red thread).
Fig. 2: Adding Rounds 3–5
Fig. 5: Making the six-bead loop and embellishing with C
Fig. 4: Forming and attaching the bail
Fig. 3: Securing the rivoli and embellishing the pendant
String 6B; pass through the last B
exited to form a loop. Secure the
thread and trim.
3) FINISHING. String the pendant on
the chain using the bail. Use 1 jump
ring to connect one loop at the end of
the chain to one half of the clasp. Repeat
at the other end of the necklace using
the other half of the clasp. ✦
NANCY ZELLERS has been designing bead jewelry and teaching for about fifteen years. See more of her jewelry designs at www.nzbeads.com or in her recent book, Bead Tube Jewelry (Kalmbach, 2011). Nancy lives in Aurora, Colorado, where she has a studio decorated in hot pink and lime green.
RESOURCES Check your local bead shop or
contact: All materials: Beyond Beadery, (800) 840-5548, www.beyondbeadery.com.
BW QE12-14 Zellers_QE.indd 14 2/10/11 3:08 PM
02102011150846

®
Let Your Creativity Flow
®
Free Shipping in the USA on Orders $10 or More!a r t b e a d s . c o m
YO U R T R U S T E D S O U R C E F O R E XC E P T I O N A L B E A D S & S U P P L I E S TM
Phone: 253.857.3433 or Toll-Free: 1.866.715.BEAD (2323). Email: [email protected]
Great International Rates with $1.99 Shipping to Canada
With thousands of seed bead choices and endless focal elements, Artbeads.com is sure to get your crea vity flowing. You’ll be inspired by cap va ng focal pieces and our vastselec on of TOHO™ and Miyuki seed beads to create your next jewelry masterpiece.
BW QE15 arbeads ad_QE.indd 15 2/10/11 11:51 AM
02102011115058

making tracksG i n a C o o p e r
TECHINQUESladder stitchherringbone stitch
See pp. Q+E 48 and 94 for helpful technique information.
BW QE16-18 Cooper_QE.indd 16 2/10/11 11:53 AM
02102011115358
BEADWORK QUICK+EASY april/may 2011 Q+E 17
CONNECT EASY HERRINGBONE-STITCHED tubes with crystals for a quick and casual bracelet.
MATERIALS6 g opaque dark lavender 11° cylinder
beads (A)5 g opaque matte blue rainbow 11° cylinder
beads (B)4 g opaque black luster size 11° cylinder
beads (C)30 jet black 4mm round or bicone beads (D)1 silver 3×15mm 2-to-1 etched connector2 silver 4mm jump rings1 silver 5×20mm floral toggle bar1 silver 15mm floral toggle ringSmoke 6 lb braided beading thread
TOOLSScissorsSize 10 or 12 beading needlesFlat- or chain-nose pliers
FINISHED SIZE: 7¾"
1) BEADED TUBES. Herringbone-
stitch beaded tube beads:
Round 1: Use 3' of thread to string 2C,
leaving a 4" tail. Pass through the
beads again. String 1C and pass
through the last bead exited and the
one just strung; repeat three times to
form a ladder-stitched strip 6C long
(Fig. 1). Pass up through the first bead
added, down through the last bead
Fig. 2: Joining the bead ladder in a circle
Fig. 1: Ladder-stitching Round 1 Fig. 3: Working Round 2
added, and up through the first bead
again to form a ring (Fig. 2).
Round 2: String 4A, pass down through
the next C in Round 1, and up
through the following C; repeat twice
to add a total of 12A. Step up for the
next and subsequent rounds by pass-
ing up through the first 2A added in
the current round (Fig. 3).
ARTIST’S TIP
If you’re new to herringbone stitch,
it may help to insert a thin straw,
wooden skewer, or rolled-up piece
of paper into the beadwork. This
internal base gives you something
to hang onto as you form
additional rounds.
BW QE16-18 Cooper_QE.indd 17 2/10/11 11:53 AM
02102011115359

Q+E 18 beadworkmagazine.com
Rounds 5–10: Repeat Rounds 2–4, using
B in place of A for Rounds 5 and 6.
Weave through the final round in a
ladder-stitched thread path. Secure
the thread and trim.
Repeat entire step 13 times for a total
of 14 beaded beads. To add variation
between beads, switch the sections
in which A and B are used.
2) ASSEMBLY. Begin a new 2' thread
on a beaded bead that exits up through
a bottom bead in Round 3. String 1D
and one loop of the 2-to-1 connector;
pass back through the D just strung and
the tube bead just exited, then weave
through beads to exit down through the
top bead in the same Round 3 stack. Pass
through the D and connector, then back
through the D and through the side of
the beaded tube to exit between the top
and bottom beads of Round 3 on the op-
posite side of the tube (Fig. 5—blue thread).
*String 1D, pass down through a bottom
bead in Round 3 of another beaded
tube, and weave through beads to exit
down through the top bead in the same
Round 3 stack. Pass back through the D
just added and pass up through the mir-
ror top bead of the first beaded tube.
Weave through beads to exit up through
the nearest bottom bead of the same
stack, then pass through the last D added
and through the side of the second
beaded tube (Fig. 5— red thread). Repeat
from * to connect the remaining beaded
beads, finishing with 1D and the other
connector. Repeat entire step, incorpo-
rating the other side of each connector
and weaving between the top and bot-
tom beads in Round 8.
3) FINISHING. Use 1 jump ring to
attach one connector to the toggle bar.
Repeat with the remaining jump ring
and toggle ring. ✦
Fig. 4: Adding Round 3
Fig. 5: Attaching the connector and beaded beads with jet beads
Round 3: String 4A, pass down through
the next top A from the previous
round, and up through the following
top A; repeat twice to add a total of
12A (Fig. 4).
Round 4: String 2C, pass down through
the next top A from the previous
round, and up through the following
top A; repeat around to add a total
of 6C.
ARTIST’S TIP
You can also create the bracelet using
single-drop tubular herringbone stitch
for all the rows. Just pick up 2 cylinder
beads instead of 4.
GINA COOPER is a mostly self-taught artisan beader who specializes in free-form beadwoven peyote jewelry and bead embroidery. Originally from Blackpool, England, she now resides in Florida, perfecting “beach beading,” where she hosts a local beading group and teaches for local bead stores. Gina also creates stained-glass mosaics and life-casting sculptures. See more of her work at www.creationsbygina.weebly.com.
RESOURCES Check your local bead shop
or contact: Seed beads: Fusion Beads, (888) 781-3559, www.fusionbeads.com. All other materials: Fire Mountain Gems and Beads, (800) 355-2137, www.firemountaingems.com.
BW QE16-18 Cooper_QE.indd 18 2/14/11 2:54 PM
02142011145431

ADVERTORIAL
Beader’s Studiothe Inspiredpresents
ADVERTORIAL
BW QE19-27apr11Advert_QE.indd 19 2/10/11 11:59 AM
02102011120215

Q+E 20 beadworkmagazine.comQ+E 20 beadworkmagazine.commmmmmmm
PF Beads ELIMINATE PROBLEMS WITH FADING OR FLAKINGAs most beaders know, those pretty galvanized and Ceylon silver-lined fi nishes on seed beads eventually fade or fl ake over time. It’s frustrating to put hours (or months) into a project only to have the beads fail. Luck-ily, Toho has created a seed bead with a new durable fi nish. If you’ve been avoiding those seed-bead fi nishes because you want to create lasting, heirloom-quality jewelry, you’ll want to try Toho’s PF beads.
This durable fi nish is available in eighteen galvanized colors and fourteen matte-galvanized. Shades such as aluminum, silver gray, and rose gold are perfect for beaders who love the look of metals in their jewelry. This same durable fi nish is also available for more than two dozen colors of silver-lined beads. Choose soft pinks, lavenders, and mint greens for sweet spring bracelets, earrings, and necklaces. Selected PF beads are available in a variety of shapes, including rounds, triangles, cubes, magatamas, 3-cuts, bugles, charlottes, and more. For a full list of available colors and shapes of PF beads, visit www.tohobeads.net.
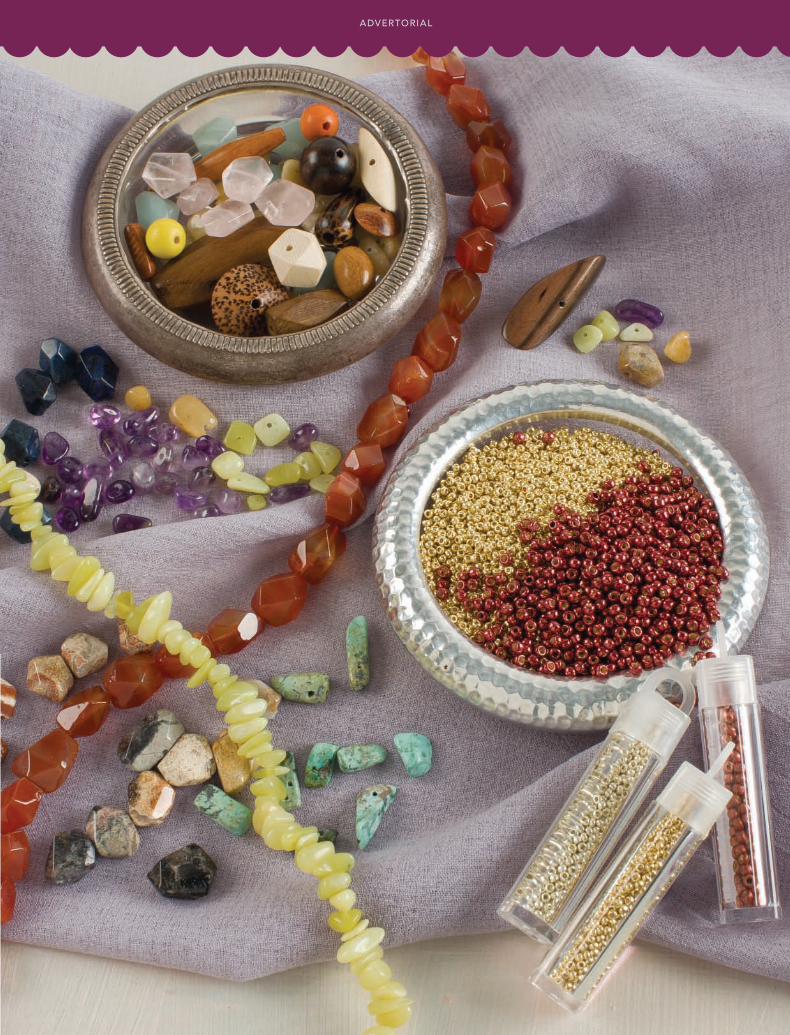
Mix It Up with GEMSTONES, PEARLS, WOOD, AND SHELLSShare your love of Mother Nature by mixing gemstone chips, nuggets, and simple cuts with earthy beads and pendants made of wood, freshwater pearls, and shells. Knot these gorgeous gemstones onto silk or cord or string them on beading wire for an elegant multistrand necklace or a bold, chunky bracelet.
Try these combinations for spring: • Embrace the lushness of a forest by pairing wood
beads with red creek jasper, African turquoise, labra-dorite, or crazy lace agate.
• Evoke a cool ocean breeze by combining silver leaf, picture jasper, or amazonite with freshwater pearls and natural shells.
• Mimic bright, fl oral gardens by choosing rose quartz, amethyst, olive jade, or yellow jade paired with color-ful pearls.
In addition to its huge selection of semiprecious gem-stones, FusionBeads.com offers the best online selec-tion of Swarovski Elements products, charms, sterling and Thai hill tribe silver, artisan-handcrafted beads, seed beads, glass beads, and much more. Be inspired by new jewelry designs each week and enjoy free stan-dard shipping on all U.S. orders.
Mix It Up with GEMSTONES PEARLS
ADVERTORIAL
BW QE19-27apr11Advert_QE.indd 20 2/14/11 2:56 PM
02142011145601
ADVERTORIAL
BW QE19-27apr11Advert_QE.indd 21 2/10/11 11:59 AM
02102011120216

Q+E 22 beadworkmagazine.com
Create a Stunning BEADED CUFF BRACELET Begin your unique cuff bracelet with Lacy’s Stiff Stuff, a washable, shrink-resistant material that feels like stiff felt. If you like, you can dye it and then cut out the shape you need. You can also sketch your design on it or just go with your creative fl ow. Next, choose a lightweight aluminum cuff, from a sweet ½" band to a bold 2" statement. Finally, select your focal pieces from a huge range of options. Choose a brilliant Swarovski rivoli or a handful of dramatic rhinestones. Or follow one of the biggest jewelry trends by selecting resin and glass cabochons and cameos. Small resin fl owers and vintage-style cameos provide color and class without weighing down your designs. Finish your piece by embroidering Toho and Delica seed beads around your focals and attaching Lacy’s Stiff Stuff to the cuff with a jewelry adhesive.
Visit Artbeads.com today and turn your imaginative ideas into a gorgeous reality. With free shipping on qualifying orders and hundreds of free design ideas, Artbeads.com is your source for colorful seed beads, unique focal pieces, and inspiration.
Select the BEST BEADING WIRE for Your JewelryThe number of beading wire options can seem over-whelming, but there’s a simple trick to choosing the right spool: the larger number of strands, the more fl exible the wire will be. A long elegant crystal necklace may require maximum fl exibility for it to drape correctly when worn, while a short choker with chunky gem-stones may require less.
U.S.-made Beadalon offers three choices of strong nylon-coated wire. Beadalon 49, the choice of profes-sional jewelry designers, has the most fl exibility, while economically priced Beadalon 7 has the least. If you’re not sure how much fl exibility your design needs, Bead-alon 19 is a good choice with its perfect combination of strength, fl exibility, and affordability. Once you’ve cho-sen the type of wire, choose the largest diameter wire possible that will fi t through the smallest bead hole in your design. Try .010 beading wire for tiny, lightweight seed beads and .036 for heavy gemstones and large glass beads.
For more beading wire tips, including how to use fi nd-ings such as EZ-Crimps, Wire Guardians, and Bead Bumpers, visit www.beadalon.com.
ADVERTORIAL
BW QE19-27apr11Advert_QE.indd 22 2/10/11 11:59 AM
02102011120217

ADVERTORIAL
BW QE19-27apr11Advert_QE.indd 23 2/10/11 12:00 PM
02102011120218

Q+E 24 beadworkmagazine.com
Introducing 22 New Colors of GALVANIZED ROUND ROCAILLES AND DELICASIf you love the metallic look of galvanized seed beads, you’ll be delighted to learn that round rocailles (sizes 6°, 8°, and 11°) and size 11° Delicas now come in twen-ty-two colors. For pretty spring necklaces, bracelets, and earrings, choose shades such as pink blush, sea foam, and dusty orchid. If the mixed metal or steam-punk jewelry trends are more your style, take note of the silver, gold, and pewter shades now available.
Miyuki’s Duracoat Galvanized® beads solve that annoying problem of a fi nish that quickly wears off or fades. Duracoat® is an extra-durable coating on the bead’s surface. As with any delicate glass beads, these beads still require gentle care, but now they are suit-able for use in jewelry that is worn, not only museum-quality pieces that must be admired from afar.
Delicas in size 8° and 10° with the Duracoat® fi nish will be available this spring. Additional bead shapes such as magatamas, drops, and squares will be added in the future. Keep up with the latest news at www.miyuki-beads.co.jp/english.
Indulge in Everyday Luxury with 100% PURE SILK CORDSPearl knotting on silk is a classic jewelry-making tech-nique that’s often reserved for special occasions. Why limit yourself? Try knotting this durable and stretch-resistant 100% pure silk cord in between small gem-stones or delicate crystals for everyday bracelets or necklaces. Snug the beads against the knots or leave longer gaps between the knots to show off the vibrant colors of these twisted three-ply cords.
Choose from classic black and white cords in ten sizes (00, 0, A, B, C, D, E, F, FF, FFF) or sixteen colors in sizes E, F, FF, and FFF. The cord comes in ½ ounce spools or on cards. Colors include a range of gemstone-inspired tones including amethyst, turquoise, and jade. Match the silk cord to your favorite beads for a unifi ed look or choose a contrasting hue to add an unexpected pop of color.
This luxuriously smooth pure silk cord feels lightweight and comfortable, making it the perfect base for warm-weather jewelry. Find a bead shop near you at www.beadsmith.com.
ADVERTORIAL
BW QE19-27apr11Advert_QE.indd 24 2/10/11 12:00 PM
02102011120219

ADVERTORIAL
BW QE19-27apr11Advert_QE.indd 25 2/10/11 12:00 PM
02102011120219

Q+E 26 beadworkmagazine.com
Add Drama to Your Jewelry with SWAROVSKI FLAT BACKSWith the touch of an iron or heat-setting tool, you canaffi x Swarovski Flat Back Hotfi x onto many different types of fabric, including wool, cotton, linen, Lycra, silk, and denim. The fl at back of the crystal has a layer of hot-melt adhesive that bonds with the fabric. It’s easy to add crystals to ribbons for springtime bracelets and necklaces, but don’t stop there. Using a two-part epoxy for the best bond, glue Swarovski Flat Back No Hotfi xto metal pendants, fl at-glass cabochons, shell discs, wooden pendants, resin beads, or almost any other surface you desire. You could attach individual Flat Backs in Capri Blue to a metal cuff for an ocean-inspired bracelet or add tiny SWAROVSKI ELEMENTS in Sunfl ower inside earring bezels. Another idea is to attach a large Flat Back to ultrasuede and surround it with brick stitch to create a dramatic custom focal. Swarovski Flat Backs come in a huge range of colors, sizes, and cuts, including a beautiful butterfl y perfect for spring jewelry. For more inspiration, visit www.CREATE-YOUR-STYLE.com.
Discover MUST-HAVE HOW-TO resourcesThe best companion to your beading and jewelry-making adventures? Beautifully illustrated instructional books, of course. Interweave is happy to offer a wide variety of books that are packed with fun projects and helpful tips. Filled with step-by-step photography and gorgeous designs, each book will educate and inspire you. Plus, there’s something for every skill level. Try your hand at metal clay with Kate McKinnon, take a 101 through wire with Denise Peck, perfect your copper work with Sharilyn Miller, personalize your metal jewelry with Lisa Niven Kelly, or discover the beauty of glass beads with Stephanie Sersich. Interweave’s expert authors will teach you everything you need to know to make beautiful handcrafted jewelry. Build a library that you can reference time and time again with Interweave’s outstanding books. For more information, visit www.interweavestore.com/Beading-Jewelry/Books. Beading-Jewelry/Books.
ADVERTORIAL
BW QE19-27apr11Advert_QE.indd 26 2/10/11 12:00 PM
02102011120235

d
ADVERTORIAL
BW QE19-27apr11Advert_QE.indd 27 2/10/11 12:00 PM
02102011120235

lucky clovers R a c h e l M c E n r o e
TECHNIQUESright-angle weavenetting
See pp. Q+E 48 and 94 for helpful technique information
ARTIST’S TIPS
• Select a similar color for the pearls
and size 11° beads to make the
crystal flowers appear more vibrant.
• To strengthen the bracelet, pass back
through the base a second time.
BW QE28-29 McEnroe_QE.indd 28 2/10/11 12:04 PM
02102011120506

BEADWORK QUICK+EASY april/may 2011 Q+E 29
CRYSTAL FLOWERS appear to float across this elegant right-angle-weave bracelet.
MATERIALS3 g clear silver-lined crystal size 11° Japanese
seed beads (A)32 Indian sapphire 4mm crystal bicones (B)28 emerald 4mm crystal bicones (C)46 light gray 6mm crystal pearls (D)1 clear 13mm glass faceted button Crystal 6 lb braided beading thread
TOOLSScissorsSize 10 beading needle
FINISHED SIZE: 7"
1) BASE. Right-angle weave a base of
pearls and seed beads:
Unit 1: Use 6' of thread to string {1D and
1A} four times, leaving a 3" tail. Pass
through all again to form a circle and
tie a square knot. Weave through
beads to exit from the third D (Fig. 1—
blue thread).
Unit 2: String {1A and 1D} three times,
then string 1A; pass through the last D
exited from Unit 1 and the first four
beads added in this unit (Fig. 1—
red thread).
Units 3–15: Repeat Unit 2 thirteen times.
Don’t trim the thread.
2) EMBELLISH. Add a layer of bicone
“flowers” to the base:
Flower 1: String {1A and 1B} twice, then
string 1A; pass through the last D
exited to form a loop. Weave through
the next A/D/A/D in the base unit
(Fig. 2—blue thread). String 1A and 1B,
pass through the middle A of the loop
just added, then string 1B and 1A and
pass through the last D exited (Fig. 2—
red thread).
Flower 2: Repeat Flower 1 to embellish
the next base unit, this time using C
instead of B.
Flowers 3–15: Repeat Flowers 1 and 2 to
embellish the entire base. Finish with
a Flower 1 embellishment.
3) CLASP. Form a button/loop clasp:
Button: String 5A, the button, and 5A;
pass through the last D exited (Fig. 3).
Repeat the thread path to reinforce.
Secure the working thread and trim.
Loop: Start a new 8" thread that exits
from the D at the other end of the
bracelet. String 26A or enough to
Fig. 2: Stitching the first flower
Fig. 3: Adding the button Fig. 4: Forming the loop
Fig. 1: Stitching Units 1 and 2 of the base
loop snugly around the button; pass
through the last D exited (Fig. 4).
Repeat the thread path to reinforce.
Secure the tail thread and trim. ✦
RACHEL McENROE, a senior in high school, has been beading for three years. Besides beading, Rachel’s other hobbies include language lessons (Russian, Arabic, and Chinese), pottery, and spending time with her many pets. Rachel lives in central New Jersey with her parents, one brother, and one sister.
RESOURCES Check your local bead shop or
contact: Swarovski pearls and crystals, seed beads, and FireLine braided beading thread: Fusionbeads.com, (888) 781-3559, and Beadaholique, www.beadaholique.com.
BW QE28-29 McEnroe_QE.indd 29 2/10/11 12:05 PM
02102011120507

TECHNIQUESherringbone stitch
See pp. Q+E 48 and 94 for helpful technique information.
crossover braceletP h y l l i s D i n t e n f a s s
BW QE30-32 Dintenfass_QE.indd 30 2/10/11 12:08 PM
02102011120852

BEADWORK QUICK+EASY april/may 2011 Q+E 31
ARTIST’S TIP
Passing through beads a second time
and keeping your stitching tight will
help form the subtle domed shapes
of the components in this project.
1) FIRST COMPONENT. Use tight
tension to herringbone-stitch a slightly
domed component:
Round 1: Use 2' of thread to string 4A,
pass through all the beads again to
form a circle, and exit through the
second A strung, leaving a 4" tail to
weave in later.
Round 2: String 2A and pass through the
next A from the previous round;
repeat three times. Step up for the
next and subsequent rounds by pass-
ing up through the first A added in
the round. Adjust the beads so the
holes sit above the ones below to begin
the herringbone-stitched rib (Fig. 1).
Round 3: String 2A, pass down through
the next A from the previous round,
and pass up through the following A;
repeat three times (Fig. 2—blue thread).
HERRINGBONE-STITCHED COMPONENTS line up to form this bracelet. Stitch two extra components and you’ve got a cute pair of earrings to complete your ensemble. MATERIALS
5 g each size 11º seed beads in mixed matte olive (A) and metallic peacock (B)
1 g mixed matte olive size 8º seed beads (C)1 brass 15mm button with shankBlack size D nylon or smoke 6 lb braided
beading thread
TOOLSScissorsSize 10 beading needle
FINISHED SIZE: 7"
Fig. 1: Adding Round 2
Fig. 2: Stitching Rounds 3 and 4
Fig. 3: Forming Rounds 5 and 6
Fig. 4: Stitching Round 7
Round 4: String 2A, pass down through
the next A from the previous round,
then string 2B, and pass up through
the following A; repeat three times
(Fig. 2—red thread).
Round 5: String 2A, pass down through
the next A from the previous round,
through the nearest 2B, and up
through the following A; repeat three
times (Fig. 3—blue thread).
Round 6: String 2A, pass down through
the next A from the previous round,
then string 4B, and pass up through
the following A; repeat three times
(Fig. 3—red thread).
Round 7: String 1A, 1C, and 1A; pass
down through the next A from the
previous round, through the nearest
4B, and up through the following 2A;
repeat three times (Fig. 4). Don’t trim
the thread. Set aside.
BW QE30-32 Dintenfass_QE.indd 31 2/10/11 12:27 PM
02102011122730

Q+E 32 beadworkmagazine.com
ARTIST’S TIP
It helps make cleaner beadwork
if you put the tip of your nail
between each herringbone stitch
as you work it, manipulating it
into its classic V shape.
Fig. 5: Connecting components
Fig. 6: Adding the button
Fig. 7: Forming the loop
2) SUBSEQUENT COMPONENTS.
Repeat Step 1, Rounds 1–6. Repeat
Round 7 for three of the points only,
then work the final point by stringing
1A, passing through 1C from the previ-
ous component, stringing 1A, and pass-
ing down through the next A in the
current component. Weave through the
herringbone-stitched rib to form a
turnaround (Fig. 5). Repeat the thread
path to reinforce. Secure the thread and
trim. Repeat the entire step five more
times to form a total of 7 components or
enough to fit the wrist minus the width
of the button.
3) CLASP. Stitch a button/loop clasp:
Button: Begin a new 1' thread that exits
from 1C at the other end of the brace-
let. String 6A, the button, and 6A,
then pass through the last C exited to
form a loop (Fig. 6); repeat the thread
path several times to reinforce. Secure
the thread and trim.
Loop: Begin a new 1' thread that exits 1C
at the other end of the bracelet. String
26A or enough to fit snugly around
the button, then pass through the last
C exited to form a loop (Fig. 7); repeat
the thread path several times to rein-
force. Secure the thread and trim. ✦
PHYLLIS DINTENFASS designs jewelry and publishes her patterns in magazines and books as well as teaches nationwide. Her work has been juried into numerous competitions, and she welcomes individual commissions. Check her website for current kit information: www.phylart.com.
RESOURCES Check your local bead shop
or contact: Button: Joann Fabrics and Crafts, (888) 739-4120, www.joann.com. All other materials: Beyond Beadery, (800) 840-5548, www.beyondbeadery.com.
2) SUBSEQUENT COMPONENTS.
Repeat Step 1, Rounds 1–6. Repeat
R d 7 f r three of the points only
BW QE30-32 Dintenfass_QE.indd 32 2/10/11 12:08 PM
02102011120853
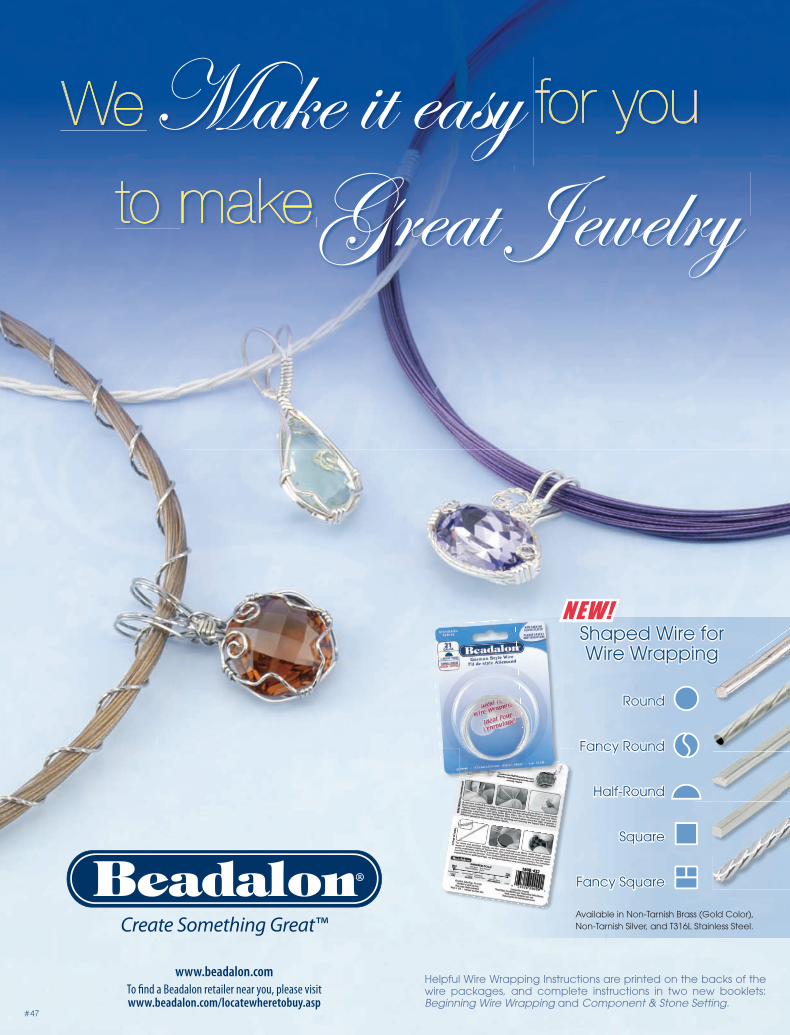
for youMake it easyGreat Jewelry
We
to make
Helpful Wire Wrapping Instructions are printed on the backs of the wire packages, and complete instructions in two new booklets: Beginning Wire Wrapping and Component & Stone Setting.
www.beadalon.comTo fi nd a Beadalon retailer near you, please visit www.beadalon.com/locatewheretobuy.asp
®
Create Something Great™
Shaped Wire forWire Wrapping
Round
Fancy Round
Half-Round
Square
Fancy Square
NEW!
Available in Non-Tarnish Brass (Gold Color), Non-Tarnish Silver, and T316L Stainless Steel.
BW QE33 beadalon ad_QE.indd 33 2/10/11 12:09 PM
02102011120923

INthth
victorian pearl medallionB a r b a r a F a l k o w i t z
TECHNIQUESbead embroiderystringingwirework
See pp. Q+E 48 and 94 for helpful technique information.
BW QE34-36 Falkowitz_QE.indd 34 2/10/11 12:11 PM
02102011121208
BEADWORK QUICK+EASY april/may 2011 Q+E 35
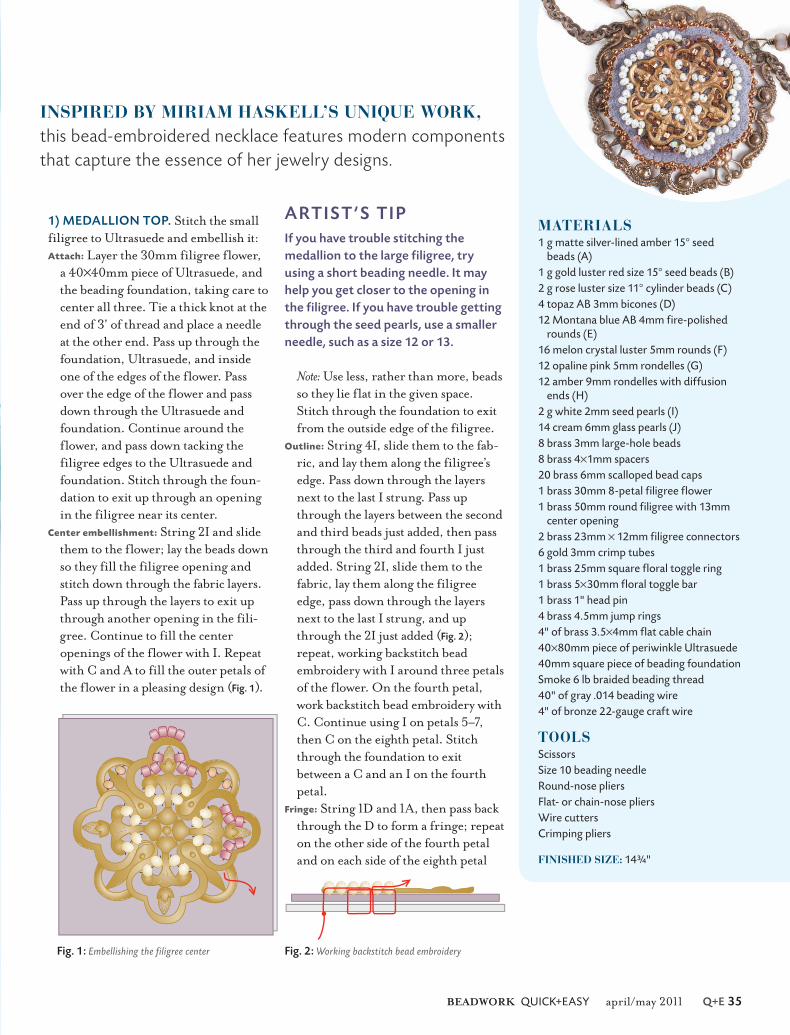
INSPIRED BY MIRIAM HASKELL’S UNIQUE WORK, this bead-embroidered necklace features modern components that capture the essence of her jewelry designs.
MATERIALS1 g matte silver-lined amber 15° seed
beads (A)1 g gold luster red size 15° seed beads (B)2 g rose luster size 11° cylinder beads (C)4 topaz AB 3mm bicones (D)12 Montana blue AB 4mm fire-polished
rounds (E)16 melon crystal luster 5mm rounds (F)12 opaline pink 5mm rondelles (G)12 amber 9mm rondelles with diffusion
ends (H)2 g white 2mm seed pearls (I)14 cream 6mm glass pearls (J)8 brass 3mm large-hole beads8 brass 4×1mm spacers20 brass 6mm scalloped bead caps1 brass 30mm 8-petal filigree flower1 brass 50mm round filigree with 13mm
center opening2 brass 23mm × 12mm filigree connectors6 gold 3mm crimp tubes1 brass 25mm square floral toggle ring1 brass 5×30mm floral toggle bar1 brass 1" head pin4 brass 4.5mm jump rings4" of brass 3.5×4mm flat cable chain40×80mm piece of periwinkle Ultrasuede40mm square piece of beading foundationSmoke 6 lb braided beading thread40" of gray .014 beading wire4" of bronze 22-gauge craft wire
TOOLSScissorsSize 10 beading needleRound-nose pliersFlat- or chain-nose pliersWire cuttersCrimping pliers
FINISHED SIZE: 14¾"
1) MEDALLION TOP. Stitch the small
filigree to Ultrasuede and embellish it:
Attach: Layer the 30mm filigree flower,
a 40×40mm piece of Ultrasuede, and
the beading foundation, taking care to
center all three. Tie a thick knot at the
end of 3' of thread and place a needle
at the other end. Pass up through the
foundation, Ultrasuede, and inside
one of the edges of the flower. Pass
over the edge of the flower and pass
down through the Ultrasuede and
foundation. Continue around the
flower, and pass down tacking the
filigree edges to the Ultrasuede and
foundation. Stitch through the foun-
dation to exit up through an opening
in the filigree near its center.
Center embellishment: String 2I and slide
them to the flower; lay the beads down
so they fill the filigree opening and
stitch down through the fabric layers.
Pass up through the layers to exit up
through another opening in the fili-
gree. Continue to fill the center
openings of the flower with I. Repeat
with C and A to fill the outer petals of
the flower in a pleasing design (Fig. 1).
Note: Use less, rather than more, beads
so they lie flat in the given space.
Stitch through the foundation to exit
from the outside edge of the filigree.
Outline: String 4I, slide them to the fab-
ric, and lay them along the filigree’s
edge. Pass down through the layers
next to the last I strung. Pass up
through the layers between the second
and third beads just added, then pass
through the third and fourth I just
added. String 2I, slide them to the
fabric, lay them along the filigree
edge, pass down through the layers
next to the last I strung, and up
through the 2I just added (Fig. 2);
repeat, working backstitch bead
embroidery with I around three petals
of the flower. On the fourth petal,
work backstitch bead embroidery with
C. Continue using I on petals 5–7,
then C on the eighth petal. Stitch
through the foundation to exit
between a C and an I on the fourth
petal.
Fringe: String 1D and 1A, then pass back
through the D to form a fringe; repeat
on the other side of the fourth petal
and on each side of the eighth petal
Fig. 1: Embellishing the filigree center Fig. 2: Working backstitch bead embroidery
ARTIST’S TIP
If you have trouble stitching the
medallion to the large filigree, try
using a short beading needle. It may
help you get closer to the opening in
the filigree. If you have trouble getting
through the seed pearls, use a smaller
needle, such as a size 12 or 13.
BW QE34-36 Falkowitz_QE.indd 35 2/10/11 12:11 PM
02102011121209

Q+E 36 beadworkmagazine.com
for a total of 4 fringes (Fig. 3). Secure
and trim the thread on the
fabric back.
2) FOCAL ASSEMBLY. Finish the
necklace’s centerpiece:
Prepare backing: Carefully trim the Ultra-
suede to ¼" from the pearl outline on
the medallion top. Take care to avoid
clipping any stitches. Turn the piece
over and trim the beading foundation
to 1⁄8" inside the Ultrasuede’s edge.
Trace the outline of the Ultrasuede
onto another 40×40mm piece of
Ultrasuede and trim along the line.
This is the medallion’s backing.
Picot edging: Place the medallion top, fil-
igree side up, on top of the backing.
Secure a 3' thread onto the backing
and sew through the medallion top,
very near the edge. String 3B; pass
through the backing and medallion
top, one bead’s width from the last
stitch. Pass back through the last bead
strung. String 2B, pass through the
backing and medallion top (one bead’s
width from the last stitch), and back
through the last B added; repeat
around the backing to finish the
medallion (Fig. 4). For the last stitch,
add 1B, pass down through the first B
added in this section, and weave
through the backing (Fig. 5). Secure
the thread and trim.
Finishing: Secure a 3' thread onto the
back of the medallion near the center.
Tack the medallion to the 50mm fili-
gree through the middle opening in
several places, reinforcing the stitches.
Secure the thread and trim.
3) NECKLACE ASSEMBLY. Form a
chain to hang the focal piece:
Connectors: Use 2" of craft wire to form a
wrapped loop that attaches to the
upper-left side of the large filigree.
String 1G, 1 bead cap (narrow end
first), 1J, 1 bead cap (wide end first),
and 1G; form a wrapped loop that
connects to the narrow end of 1 fili-
gree connector. Repeat this section to
add the other filigree connector to the
upper-right side of the large filigree.
Decorative chain: Use 1 jump ring to
attach 2" of chain to the large filigree
in the opening just below the wrapped
loop on the upper-left side. Use 1 jump
ring to connect the other end of the
chain to the upper-left side of the fili-
gree connector. Repeat this section to
add another 2" chain to the upper-
right side of the large filigree and fili-
gree connector. Set the assembly aside.
Toggle bar: Use the head pin to string
1A and the toggle bar (front to back);
form a wrapped loop. Set aside.
Bead chain: Use 10" of beading wire to
string 1 crimp tube; pass through the
upper-left side of one filigree connec-
tor, then pass back through the tube
and crimp. Repeat to attach a second
10" piece of beading wire to the
upper-right side of the same filigree
connector. Use the left beading wire
to string 2 brass 3mm beads (to cover
crimps), {1H, 1 bead cap (narrow end
first), 1J, 1 bead cap (wide end first),
1F, 1E, 1F} twice using G in place of F
the second time, and 3A; repeat with
the right beading wire. Use both
strands to string {1H, 1 spacer, 1J,
1 spacer, 1F, 1E, 1F} twice. Use both
wires to string 1 crimp tube and the
wrapped loop of the toggle bar; pass
back through the tube and crimp.
Repeat entire section using the right
filigree connector and toggle ring. ✦
BARBARA FALKOWITZ is co-owner of Artful Beads Studio and Workshop in Pennington, New Jersey, where she designs and teaches original work. A trip to Prague and Jablonex served as a great source of inspiration, and Barbara feels lucky to be a part of the bead world.
RESOURCES Check your local bead shop or
contact: Fireline beading thread, Soft Flex beading wire, Delicas, and all other beads and findings: Artful Beads Studio and Workshop, (609) 737-1077, www.artfulbeadstudio.com.
Fig. 3: Stitching the outline
Fig. 4: Adding the picot edging
Fig. 5: Forming the final picot-edging stitch
ARTIST’S TIP
Different styles of filigree can
be substituted for the ones
listed. You need the smaller
filigree to be approximately
two-thirds the size of the
larger one to accommodate the
embroidery and picot edging.
BW QE34-36 Falkowitz_QE.indd 36 2/10/11 12:11 PM
02102011121209

FusionBeads.comINSPIRING SELECTION EXCEPTIONAL QUALITY GUARANTEED SERVICE
FREE SHIPPING!NO MINIMUM ORDER!
CRYSTALS TECHNIQUES GEMSTONES
INSPIRATION SEED BEADS
MIXED MEDIA COLOR IDEAS TOOLS
NEW JEWELRY DESIGNS EVERY WEEK ON OUR INSPIRATION PAGE!
FREE SHIPPING! NO MINIMUM ORDER!
BW QE37 fusionbeads ad_QE.indd 37 2/10/11 12:12 PM
02102011121310

LAYERS OF HERRINGBONE-STITCHED PETALS surround a ruby crystal in this antique-inspired bracelet. The floral centerpiece can also become the focal piece for a necklace.
1) BEZEL. Work tubular peyote stitch to
bezel the square stone:
Rounds 1 and 2: Use 3' of thread to string
32F, leaving a 6" tail. Tie a square knot
to form a circle and pass through the
first 2F to clear the knot. Pass the tail
through a few beads and trim it close to
the work (Fig. 1—black thread).
Round 3: String 1F, skip the 1F previously
added, and pass through the following
F; continue to work tubular peyote
stitch with 1F in each stitch for a total
of 16F. Step up for the next round by
passing through the first bead added
in this round (Fig. 1—purple thread).
Round 4: Work tubular peyote stitch with
1F in each stitch for a total of 16F
(Fig. 1—green thread).
Round 5: Work tubular peyote stitch with
1A in each stitch (Fig. 1—blue thread). Pass
through the 16A just added to tighten
(Fig. 1—red thread). Weave through beads
to exit from Round 1.
Round 6: Work tubular peyote with 1A in each
stitch. Place the square stone into the bead-
work faceup, then pass through all the As
just added to tighten. Weave through beads to
star-crossed bracelet L a i n a G o o d m a n
TECHNIQUEStubular peyote stitchherringbone stitchfringestringingcrimping
See pp. Q+E 48 and 94 for helpful technique information.
Fig. 1: Working Rounds 1–5 and tightening Round 5
ARTIST’S TIP
This bracelet should fit snugly,
so include the clasp when you
measure the length of the
band. For example, the clasp
and crimp covers take up about
1", so the band should measure
5¾" for a 6¾" bracelet.
BW QE38-40 Goodman.indd 38 2/10/11 12:15 PM
02102011121510

BEADWORK QUICK+EASY april/may 2011 Q+E 39 BEADWORK QUICK+EASY a
MATERIALS1 g sparkling silver size 15° seed beads (A)3 g gray gold luster size 15° seed beads (B)1 g metallic copper size 15° seed beads (C)1 g turquoise bronze luster size 11° seed
beads (D)1 g beige bronze luster size 11° seed
beads (E)1 g steel blue size 11° cylinder beads (F)1 g dusty rose size 11° cylinder beads (G)57 crystal 2.5mm crystal bicones (H)20 indigo 2.5mm crystal bicones (I)15 champagne 3mm crystal bicones (J)46 crystal gold luster 4mm fire-polished
rounds (K)75 antique cream 4mm pearls (L)1 ruby 10×10mm faceted, foil back, square
crystal stone1 sterling 15×10mm 2-strand filigree bow
clasp4 sterling 2×3mm spiral crimp tubes4 sterling silver 4mm crimp coversSmoke 4 lb braided beading thread36" of nylon .014 braided beading wireTransparent tape
TOOLSSize 12 beading needleScissorsChain- or flat-nose pliersWire cuttersCrimping pliers
FINISHED SIZE: 6¾"
exit from Round 3 (Fig. 2). Note: These
rounds are worked out of order, with
Round 6 attached to Round 1. Take
care when setting up for the petals to
exit the correct round.
2) OUTER PETAL BASE. Work tubular
herringbone stitch to set up a base for
the petals:
Round 1: String 2B and pass through the
next F in Round 3; repeat fifteen
times to add 32B. Step up for the next
and subsequent rounds by passing up
through the first B added in the
current round.
Round 2: String 2B, pass down through
the next B of the previous round and
up through the following B; repeat
fifteen times to add a total of 32B.
Round 3: Repeat Round 2.
3) OUTER PETALS. Work flat herring-
bone stitch to form individual petals:
Row 1: String 2B, pass down through the
next B of Round 3 in Step 2, then
string 1C and pass up through the fol-
lowing B of Round 3; repeat twice.
String 2B and pass down through the
next B in Round 3. To step up for the
next and subsequent rows, loop the
thread between beads of the previous
rounds and pass back up through the
last 2 beads exited (Fig. 3).
Row 2: String 2B and pass down through
the next B, C, and B of Row 1; repeat
twice. String 2B and pass down
through the next B of Row 1; step
up (Fig. 4).
Rows 3–10: Repeat Rows 1 and 2 eight
times, substituting G for C in Row 3,
D for C in Row 5, H for C in Row 7,
and I for C in Row 9.
Fig. 2: Securing the stone Fig. 3: Stitching Row 1 of the large petal
Fig. 4: Stitching Row 2 of the large petal
Picots: String 1C and pass down through
the next B/I/B of Row 10; repeat
twice. String 1C and pass down
through the next B in Row 10. Weave
through beads to exit the first B of
the next herringbone-stitched stack in
Round 3 of the petal base (Fig. 5).
Repeat this section three more times to
create 4 petals around the base. Weave
through beads to exit the bezel’s Round 2
from a bead that’s centered over a large petal.
BW QE38-40 Goodman.indd 39 2/10/11 12:15 PM
02102011121526

Q+E 40 beadworkmagazine.com
ARTIST’S TIP
If you don’t want to string the
beads for the band in a random
order, make up two patterns and
alternate them when you put them
through the bail of the flower.
4) INNER PETALS. Herringbone-stitch
the small petals:
Row 1: String 2A, pass through the next
F of the bezel’s Round 2; repeat once.
String 2A and pass through the fol-
lowing F of Round 2. Form a hidden
turnaround at the end of this and
subsequent rows as with the large
petals.
Row 2: String 2A, pass down through the
next A of Row 1, string 1C, and pass
up through the following A; repeat
once. String 2A and pass down
through the next A of Row 1.
Row 3: String 2A, pass down through the
next A/C/A of Row 2; repeat once.
String 2A and pass down through the
next A of Row 1.
Rows 4–9: Repeat Rows 2 and 3 three
times, substituting F for C in Row 4,
E for C in Row 6, and I for C in Row 8.
Picots: String 1C, pass down through the
next A/I/A of Round 9; repeat once.
String 1C and pass down through the
next B in Row 9. Weave through beads
to exit the nearest F on Round 2 of
the bezel.
Repeat this section three times to form
4 inner petals. Weave through beads to
exit from Round 1 of the bezel.
5) CENTER EMBELLISHMENT. String
1C, 1H, and 1C; pass back through the
H. String 1C and pass through the next
F in Round 1 of the bezel. String 1A, 1C,
and 1A; pass through the next F in
Round 1 (Fig. 6). Repeat this section
around the bezel for a total of 8 fringes
and 8 picots. Weave through beads to
exit 1A in Round 5.
6) BAIL. Peyote-stitch a bail to the back
of the flower:
Row 1: String 1B and pass through the
next A in Round 5 of the bezel; repeat
three times (Fig. 7—green thread).
Row 2: String 1B and pass back through
the last A added in Row 1 of the bail;
repeat three times (Fig. 7—blue thread).
Rows 3–16: Repeat Row 2 fourteen times
(Fig. 7—red thread).
Zip: Lay the beadworked strip across the
back of the stone. Match the beads of
Row 16 to those of the bezel’s Round 5
so they interlock like a zipper. Weave
through the beads of both Row 16 and
Round 5 to form a seamless join
(Fig. 8). Pass through all the beads
added in this step again to reinforce.
Secure the thread and trim.
7) FINISHING. Cut a 9" length of wire
and place a piece of tape 1" from the tip;
repeat three times. On each wire, string
H, J, K, and L in random patterns using
half of the beads needed for the desired
length of the band, then string 12B on
each wire. Gather the open wire ends
and string the flower’s bail, centering it
on the Bs just strung. Separate the wires
again and string H, J, K, and L in ran-
dom order on each wire to form the
other half of the band. Use 1 crimp tube
to connect each wire end to half of the
clasp; repeat with the remaining 3 wires,
placing 2 wires on each clasp loop.
Remove the tape from the other wire
ends and use crimp tubes to connect to
the other clasp half. Add the crimp
covers to every 2 crimps. ✦
With a background in fashion design, LAINA
GOODMAN has a passion for all media, including beadweaving, metalwork, metal clay, sewing, felting, and more. As co-owner of Artful Beads Studio and Workshop in Pennington, New Jersey, she has the opportunity to teach classes and share her enthusiasm for everything artistic. Laina lives in Hillsborough, New Jersey, with her husband and their cat.
RESOURCES Check your local bead shop or contact: Braided beading thread, Delicas, and all beads and findings: Artful Beads Studio and Workshop, (609) 737-1077, www.artfulbeadstudio.com.
Fig. 7: Forming the bail
Fig. 6: Embellishing the flower’s center
Fig. 8: Attaching the bail
Fig. 5: Adding Rows 3–10 and the picot of the large petal
BW QE38-40 Goodman.indd 40 2/10/11 12:15 PM
02102011121526

BEADWORK april/may 2011 41
BW QE41 toho ad_QE.indd 41 2/10/11 12:16 PM
02102011121556

Awp
classic quartet R o x a n n e R o g e r s
TECHNIQUESodd-count peyote stitchpicot
See pp Q+E 48 and 94 for helpful technique information.
BW QE42-44 Rogers_QE.indd 42 2/10/11 12:18 PM
02102011121812

BEADWORK QUICK+EASY april/may 2011 Q+E 43
ACCENT A FOUR-CRYSTAL CENTERPIECE with a sparkling margarite, then finish it with an odd-count peyote-stitched band to create a beautiful vintage-style ring.
MATERIALS2 g antique gold size 15° seed beads (A)4 Indian pink 3mm crystal bicones (B)4 burgundy 6mm crystal bicones (C)1 foil-backed volcano 5mm margariteSmoke 6 lb braided beading thread
TOOLSScissors2 size 12 beading needles
FINISHED SIZE: 22mm (ring top)
1) RING TOP. Stitch the crystal and
seed-bead ring top:
Round 1: Use 4' of thread to string {1A
and 1C} four times, leaving an 8" tail.
Tie a knot to form a circle and pass
through beads to exit from the first C
added (Fig. 1—blue thread).
Round 2: String 9A and pass through the
last C exited to form a loop, then pass
through the next A and C; repeat
three times to form a total of 4 loops.
Weave through beads to exit from the
first 5A added in this round (Fig. 1—
red thread).
Round 3: String 3A and pass through the
last A exited and the next 4A added
in the previous round to form a picot.
String 1B and pass through the fol-
lowing 5A from the previous round.
Repeat to add a total of 12A and 4B.
Weave through beads to exit from
the first B added in this round (Fig. 2).
Round 4: String 5A, pass through the last
B added, and weave through beads to
exit from the following B added in the
previous round; repeat to add a total
of 20A (Fig. 3). Secure the thread
and trim.
Fig. 1: Stitching Rounds 1 and 2
Fig. 2: Adding Round 3
Fig. 3: Forming Round 4
ARTIST’S TIP
Use firm tension
when working the
band so the ring
holds a tight shape.
BW QE42-44 Rogers_QE.indd 43 2/10/11 12:25 PM
02102011122529

Q+E 44 beadworkmagazine.com
Fig. 4: Stitching the first strands onto the center
Fig. 5: Finishing and reinforcing the ring top
Fig. 6: Connecting the strip to the ring top
Fig. 7: Adding the picots to the band
Center: Place a needle on the tail thread
and pass through the nearest C.
String 4A, the margarite, and 1A;
pass back through the margarite.
String 4A; pass through the C oppo-
site the last one exited (Fig. 4). String
4A; pass through the margarite and
1A and pass back through the mar-
garite. String 4A; pass through the
C adjacent to the last one exited (Fig. 5—
blue thread). Repeat the thread path on
the opposite side to reinforce and cen-
ter the beads (Fig. 5—red thread). Secure
the tail thread and trim. Set aside.
2) BAND. Work odd-count peyote stitch
to form the ring band:
Strip: Use 5' of thread to peyote-stitch a
strip 31A wide (or an odd number of
A long enought to fit around the back
of the finger) and 7 rows long, leaving
a 6" tail. Weave through beads to exit
from an end A in Row 3.
Connection: String 4A, pass back through
the first A of one picot of the ring top’s
Round 3, the nearest A from Round
2, and the third A from the same
picot. String 3A, pass back through
the first A added in this section, and
pass through the end A in Row 5 of
the strip. Repeat the thread path to
reinforce and weave through beads to
exit up through the end A of Row 1
(Fig. 6).
Picots: String 3A and pass back through
the last A exited on the strip to form a
picot. Weave through beads to exit
from the end A in Row 7. String 3A
and pass back through the last A
exited (Fig. 7).
Repeat the Connection and Picots sec-
tions to connect the other end of the
strip to the ring top. ✦
ARTIST’S TIP
Add or subtract 2 beads in the band
length for each half-size adjustment.
For example, 41 beads would make
a size 8½ ring; 43 beads would make
a size 9.
ROXANNE ROGERS is a self-taught beader and has been beading for about four years. Her inspiration comes from her son and daughter-in-law.
RESOURCES Check your local bead shop
or contact: All materials: FusionBeads.com, (888) 781-3559.
BW QE42-44 Rogers_QE.indd 44 2/10/11 12:18 PM
02102011121827

BEADWORK april/may 2011 45
BW QE45 beadsmith ad_QE.indd 45 2/10/11 12:19 PM
02102011121858

Q+E 46 beadworkmagazine.com
Y O U R B E A D I N G C O M M U N I T Y
gatherings Michelle Mach
Longtime Portland Bead Soci-
ety member Carol Perrenoud
recalls the group’s first meeting
back in 1988. “It was standing
room only. We didn’t know so many
people cared about beads.” Now that
this Oregon group has grown to about
400 members, she says that it’s unusual
to have fewer than 100 people at their
meetings, most of which feature nation-
ally recognized speakers, such as Valerie
Hector, Gail Crosman Moore, and
Sharilyn Miller.
Access to inspiring speakers is just
one benefit. Members can apply for
education grants to fund bead classes
or borrow from a library of 1,300 books,
magazines, videos, and DVDs housed
at a local bead shop. They can attend
the group’s annual retreat or compete
in its bead challenge. Last year, the
society sponsored a traveling display
of its members’ beadwork that rotated
to area libraries.
From her booth at the society’s annual bead show, Bobbye Brown shows off a colorful display of beadwork from around the world.
Carol Perrenoud took first place with her whimsical purse in the 2010 Margaret Scovil beaded bag competition held at the society’s annual retreat.
The society purchased Jennifer Gallagher’s Sweet Glass Basket through funds raised for its museum gift program. The piece will go to the Bead Museum in Glendale, Arizona. (You can see more of Jennifer’s work on page 40.)
PORTLAND BEAD SOCIETYTo raise money for its activities,
the organization hosts a two-day bead
show each November, attracting more
than 75 vendors and 1,200 shoppers.
A second annual show, Art and Ele-
gance in Beads, gives members a venue
for selling their finished work. This
show is held jointly with other guilds in
the area, but the society’s support for
the creative community doesn’t stop
there. They also purchase beadwork for
Portland’s Museum of Contemporary
Craft and the Bead Museum in
Glendale, Arizona.
Not surprisingly, members gener-
ously share their beading skills. One
member, Bobbye Brown, aka The Bead
Lady, regularly visits schools, shelters,
and children’s groups, using beads as a
way to educate people about history and
geography. Others volunteer to teach
classes at the children’s hospital and
homeless shelters.
For one member joining the Port-
land Bead Society was a life-changing
event. When Teresa Sullivan joined
nearly twenty years ago, she was mainly
interested in trade beads and their his-
tory. But exposure to seed-bead artists,
such as David Chatt and Joyce Scott
helped develop her interest in bead-
weaving. Now, Teresa teaches and
exhibits internationally, her interest in
beads transformed from a sideline to a
full-time career.
Society President Karen Bettin notes
that with so much going on the chal-
lenge for members is “keeping a balance
between helping out with these wonder-
ful activities and still having time to do
what we love: bead.”
Learn more about the Portland Bead Society at
www.beadport.com.
BW QE46 Gatherings_QE.indd 46 2/10/11 12:21 PM
02102011122059

\
From setting up your workspace and selecting proper tools and materials to mastering techniques and exhibiting your work, The Workbench Guide to Jewelry Techniques is your trusted companion for all your creative jewelry projects.
Inside you’ll fi nd:
conversion tables, and an extensive list of resources
What If Your Workbench Could Talk?
Find The Workbench Guide to Jewelry Techniques as well as a great selection of other
Interweave products at your local bead shop or independent craft retailer.
The Workbench Guide to Jewelry Techniques
$34.95, 320 pgs,
volume!
BW QE47 workbench guide ad_QE.indd 47 2/10/11 2:04 PM
02102011140419
Q+E 48 beadworkmagazine.com
more techniques
These basic instructions are for techniques used in this issue’s projects and are from The Beader’s Companion (Interweave, 2005). Don’t have this popular book? Call (800) 272-2193 or visit interweavestore.com.
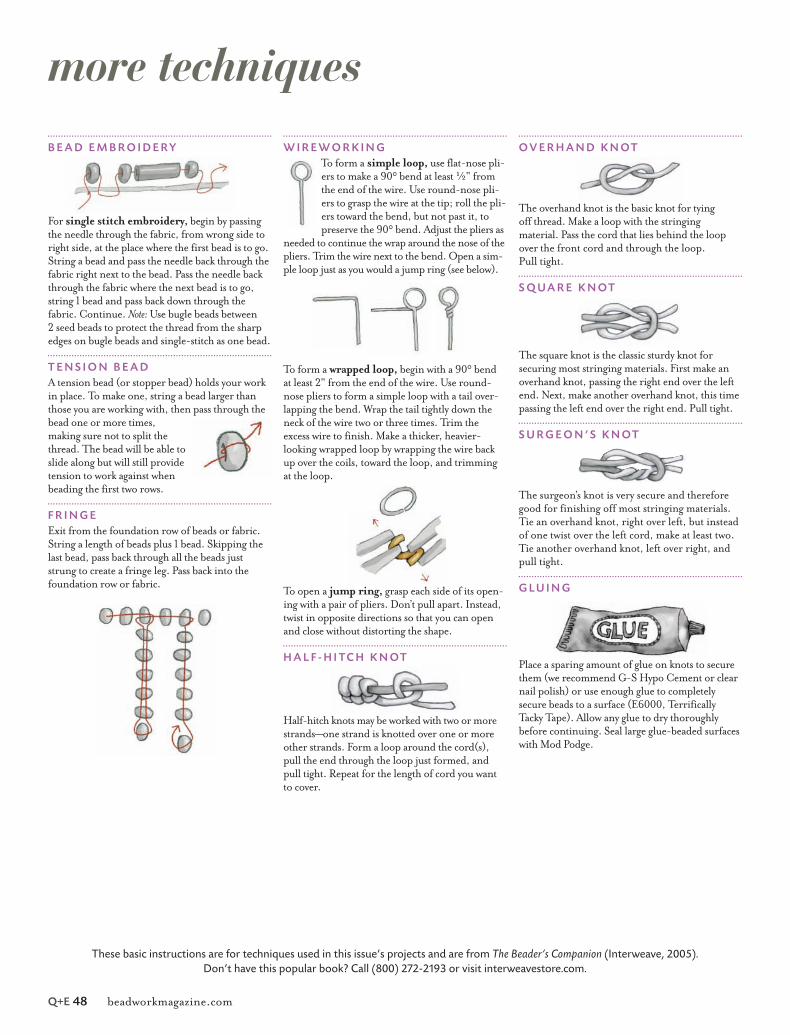
B E A D E M B R O I D E RY
For single stitch embroidery, begin by passing the needle through the fabric, from wrong side to right side, at the place where the first bead is to go. String a bead and pass the needle back through the fabric right next to the bead. Pass the needle back through the fabric where the next bead is to go, string 1 bead and pass back down through the fabric. Continue. Note: Use bugle beads between 2 seed beads to protect the thread from the sharp edges on bugle beads and single-stitch as one bead.
T E N S I O N B E A D
A tension bead (or stopper bead) holds your work in place. To make one, string a bead larger than those you are working with, then pass through the bead one or more times, making sure not to split the thread. The bead will be able to slide along but will still provide tension to work against when beading the first two rows.
F R I N G E
Exit from the foundation row of beads or fabric. String a length of beads plus 1 bead. Skipping the last bead, pass back through all the beads just strung to create a fringe leg. Pass back into the foundation row or fabric.
W I R E W O R K I N G
To form a simple loop, use flat-nose pli-ers to make a 90° bend at least ½" from the end of the wire. Use round-nose pli-ers to grasp the wire at the tip; roll the pli-ers toward the bend, but not past it, to preserve the 90° bend. Adjust the pliers as
needed to continue the wrap around the nose of the pliers. Trim the wire next to the bend. Open a sim-ple loop just as you would a jump ring (see below).
To form a wrapped loop, begin with a 90° bend at least 2" from the end of the wire. Use round-nose pliers to form a simple loop with a tail over-lapping the bend. Wrap the tail tightly down the neck of the wire two or three times. Trim the excess wire to finish. Make a thicker, heavier-looking wrapped loop by wrapping the wire back up over the coils, toward the loop, and trimming at the loop.
To open a jump ring, grasp each side of its open-ing with a pair of pliers. Don’t pull apart. Instead, twist in opposite directions so that you can open and close without distorting the shape.
H A L F - H I TC H K N OT
Half-hitch knots may be worked with two or more strands—one strand is knotted over one or more other strands. Form a loop around the cord(s), pull the end through the loop just formed, and pull tight. Repeat for the length of cord you want to cover.
O V E R H A N D K N OT
The overhand knot is the basic knot for tying off thread. Make a loop with the stringing material. Pass the cord that lies behind the loop over the front cord and through the loop. Pull tight.
S Q U A R E K N OT
The square knot is the classic sturdy knot for securing most stringing materials. First make an overhand knot, passing the right end over the left end. Next, make another overhand knot, this time passing the left end over the right end. Pull tight.
S U R G E O N ’ S K N OT
The surgeon’s knot is very secure and therefore good for finishing off most stringing materials. Tie an overhand knot, right over left, but instead of one twist over the left cord, make at least two. Tie another overhand knot, left over right, and pull tight.
G L U I N G
Place a sparing amount of glue on knots to secure them (we recommend G-S Hypo Cement or clear nail polish) or use enough glue to completely secure beads to a surface (E6000, Terrifically Tacky Tape). Allow any glue to dry thoroughly before continuing. Seal large glue-beaded surfaces with Mod Podge.
BW QE48 More Techniques_QE.indd 48 2/10/11 12:21 PM
02102011122159