building bridges - canal & river trust · about building bridges. to ensure the restoration or...
TRANSCRIPT

Building Bridges A guide for volunteers carrying out restoration work on waterway bridges

Welcome! In this guide you will find suggestions and ideas that are designed to help you
and other volunteers carry out restoration work on the bridges of Britain’s
canals and waterways.
Working in Partnership Waterway Recovery Group (WRG) is the national coordinating body for
voluntary labour on the inland waterways of Britain. WRG is part of The Inland
Waterways Association (IWA), which is a registered charity. To achieve its aims,
and that of IWA, WRG (and its regional groups) work with regional and local
canal societies to run weekend work parties and week long work camps (Canal
Camps) every year, helping restore the derelict canals in Britain.
The Canal & River Trust (CRT) formally took over the work of British
Waterways on the 2nd July 2012. The Trust are responsible for 2,000 miles of
canals, rivers, docks and reservoirs, along with museums, archives and historic
buildings and ensuring these assets are maintained, preserved and developed
The Canal & River Trust is keen to give local people and communities the
chance to come together and look after a section of a canal or waterways - to
‘take up and make one’s own’.
This guide aims to enable volunteers to
carry out minor (and some more major)
repairs to canal bridges in desperate need
of restoration.
Is this guide for you? Yes, if you are a volunteer, an organisation such as a community group or
charity, or a local business wanting to adopt a local canal bridge and help
restore it to its former glory.
This guide addresses many of the main issues to be aware of when organising
and carrying out restoration work, but does not include everything that needs
to be considered. In partnership with your local Canal & River Trust Volunteer
Coordinator you will plan and deliver work in accordance with the necessary
legislation and good practice relating to safety, heritage, environment and
volunteering.
Introduction
2
What can you do? repointing painting brickwork repairs

Identify a bridge in need of help! Step 1 - The first step is to identify a bridge in need of restoration or repair*.
This could be a bridge you pass whilst walking your dog, one you drive past
every day or even one you’ve cruised past on your boat! The bridge might
need repointing; repainting; reconstruction ...or it could just be in need of a
bit of TLC. Intervention now could save the need for more major repairs at
a later date. All of this can be done by volunteers with the appropriate level
of skills, experience and with supervision in place! It may be necessary for
volunteers to undergo training with the Canal & River Trust before starting
restoration work on a bridge.
Step 2 - Once you have identified a project that your volunteer or
community group would like to get involved with, the second step is to
contact your local Canal & River Trust Volunteer Coordinator. There will be
a lot of things to consider and your local Volunteer Coordinator is your link
to the rest of the Trust. They will be able to liaise with all the experts and
everyone involved with a bridge repair. The Volunteer Coordinator will be
able to confirm if there is a budget in place for the repairs and if volunteers
can carry out the work. In some cases the bridge will be of heritage value,
and may require certain types of consent before work can start.
Step 3 - The Volunteer Coordinator will then help you
coordinate a site meeting with all the interested parties to
discuss the project in more detail.
Getting organised Helpful tipsWhat to discuss at the site meeting Agree on the main jobs and discuss how long it will take [Hint: Take
little steps. It is better to start small and build up to bigger jobs.]
Agree a provisional timetable to start work
Discuss volunteers abilities for the job – skills, interests, time,
availability
When to carry out the work and discuss budgets
Decide on what materials are required/ who will supply them
Welfare arrangements (eg. toilets)
Agree who is supervising the project
Consider what skills you might need and if training is required
Health and Safety issues/ Permission to work
Discuss access, parking and requirements for scaffolding
3
Volunteers are your most valuable resource!
* Not all waterway bridges are owned by Canal & River Trust, please check.

4
t: 0303 040 4040e: [email protected]
“Quote.......................................... ............................................................ ........................ ........................................ .................... .................... ........................................................................................ ”- Richard Parry, Chief Executive, Canal & River Trust
Contact Canal & River Trust About Building Bridges

To ensure the restoration or repair work is a safe and enjoyable experience
for all involved it is essential that the work is adequately planned, organised
and supervised. Your method statements and risk assessment will need to be approved by the Canal & River Trust before work can proceed.
Planning and Health and SafetyRisk Assessments: A Risk Assessment is an important tool in protecting
volunteers, staff and members of the public as well as complying with the law.
It helps you focus on the risks that really matter on your site – the ones with
the potential to cause harm.
Conducting a risk assessment is not difficult or demanding. It is just a case
of looking at the activity and identifying the hazards (anything that has the
potential to do harm) associated with it. By gauging the likelihood that the
hazard will do harm, and the severity of the harm caused, a risk rating can be
calculated. If the risk rating is low, the activity can proceed; if it is medium more
control measures might need to be considered, and if it is high more control
measures are likely to be required to reduce the risk to an acceptable level.
More guidance regarding risk assessments can be found on the HSE website
http://www.hse.gov.uk/pubns/indg163.pdf
Method Statements: Clear, step by step guidance on how to carry out the
work so that everyone has an agreed reference point. The method statement
should take into account the heritage implications of the project and ensure
clear and concise information is available to all volunteers.
Specialist Access: Volunteers will be working on and around the bridge
structure for the duration of a project – to ensure volunteers are not exposed
to the risk of working at height specialist access may be used to access some
areas of the bridge.
Canal & River Trust will be resposible for organising the installation,
modification and maintenance of the agreed access arrangements and carrying
out daily or weekly inspections. Requirements for access should be discussed
at the initial site meeting with the Canal & River Trust.
Personal Protective Equipment: The Canal & River Trust will provide personal
protective equipment (PPE) to all volunteers working on the project. PPE
should be used when all other measures are deemed inadequate to control
exposure to health and safety risks whilst carrying out a task. PPE can include
items such as safety helmets and hard hats, gloves, eye protection, high-visibility
clothing, and safety footwear. To make sure the right type of PPE is chosen,
consider the different hazards in the workplace and identify the PPE that will
provide adequate protection against them; this may be different for each job.
Useful information can be found on the HSE website http://www.hse.gov.uk/
coshh/basics/ppe.htm and http://www.hse.gov.uk/pubns/indg174.pdf
Put an action plan together
5

Publicity: Think what you want to achieve with the restoration project and who
you want to get involved.
Advertise for volunteers well in advance.
Posters on notice boards in libraries, on site, and other community
venues (with permission).
Press Release/contact local newspaper and radio stations about
the work and invite them along to see you in action!
Make the local community aware of your plans and look at ways
to create partnerships with other existing groups (e.g. community
groups, Scouts) to support the work and create a really diverse
volunteering experience which benefits the community.
Volunteering can also offer opportunities for people to develop
learn own skills and interests.
Insurance: Make sure your group has public liability insurance in place, or the
activity is covered by the Canal & River Trust insurance policy.
Equipment: Here is a suggested list of equipment:
Safety Equipment – hard hats, gloves, safety specs
First Aid Kit
Hand tools
Lifejackets or throw lines if working near the waters edge
Mixer for mortar
Materials – sand, lime mortar, bricks
….plus tea, coffee and biscuits!
50% of the population live within five miles of
one of the Canal & River Trust’s canals or rivers
6
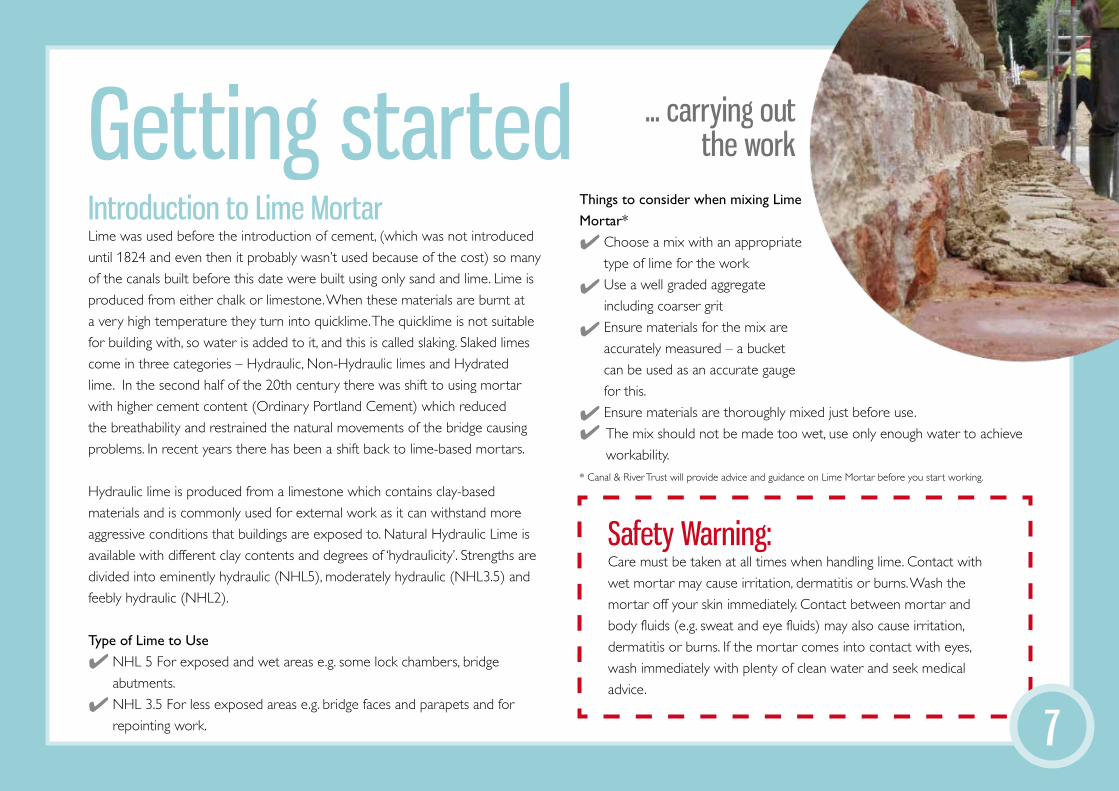
Getting startedIntroduction to Lime MortarLime was used before the introduction of cement, (which was not introduced
until 1824 and even then it probably wasn’t used because of the cost) so many
of the canals built before this date were built using only sand and lime. Lime is
produced from either chalk or limestone. When these materials are burnt at
a very high temperature they turn into quicklime. The quicklime is not suitable
for building with, so water is added to it, and this is called slaking. Slaked limes
come in three categories – Hydraulic, Non-Hydraulic limes and Hydrated
lime. In the second half of the 20th century there was shift to using mortar
with higher cement content (Ordinary Portland Cement) which reduced
the breathability and restrained the natural movements of the bridge causing
problems. In recent years there has been a shift back to lime-based mortars.
Hydraulic lime is produced from a limestone which contains clay-based
materials and is commonly used for external work as it can withstand more
aggressive conditions that buildings are exposed to. Natural Hydraulic Lime is
available with different clay contents and degrees of ‘hydraulicity’. Strengths are
divided into eminently hydraulic (NHL5), moderately hydraulic (NHL3.5) and
feebly hydraulic (NHL2).
Type of Lime to Use NHL 5 For exposed and wet areas e.g. some lock chambers, bridge
abutments.
NHL 3.5 For less exposed areas e.g. bridge faces and parapets and for
repointing work.
Things to consider when mixing Lime Mortar* Choose a mix with an appropriate
type of lime for the work
Use a well graded aggregate
including coarser grit
Ensure materials for the mix are
accurately measured – a bucket
can be used as an accurate gauge
for this.
Ensure materials are thoroughly mixed just before use.
The mix should not be made too wet, use only enough water to achieve
workability. * Canal & River Trust will provide advice and guidance on Lime Mortar before you start working.
7
Safety Warning: Care must be taken at all times when handling lime. Contact with
wet mortar may cause irritation, dermatitis or burns. Wash the
mortar off your skin immediately. Contact between mortar and
body fluids (e.g. sweat and eye fluids) may also cause irritation,
dermatitis or burns. If the mortar comes into contact with eyes,
wash immediately with plenty of clean water and seek medical
advice.
... carrying out the work
Why repoint?Mortar, being softer than the building materials
around it, often erodes over time due to the effects
of the weather. If the mortar ‘fails’ or falls away there
is nothing to protect the bridge from the elements
and water is able to penetrate the bridge and erode
its structure. By repointing the bridge you will help
slow the deterioration of the structure. This activity
should be carried out under the supervision of an
individual who has experience using Lime Mortar.
Lime mortar repointing work should not be carried
out during periods of heavy rainfall or cold/frosty
conditions (under 5°C and falling). The ideal time
to carry out work is from late March – end of
September.
PreparationTo prepare your bridge for repointing you must: Clear out joints of old mortar to an
approximate depth of 25mm or twice the
joint height, taking care to avoid damaging or
scratching the brick. Note: Cutting out using
powered tools is not usually permitted.
All joints should be brushed and flushed out
with water to remove dust and loose materials.
Repointing the joints Prior to repointing, sufficient water should be
applied to the bricks/stone to ensure that water
is not drawn out of the new mortar too quickly.
The standard mix for repointing mortar is
Natural Hydraulic Lime (NHL) 3.5 Hanson or
St Astier at 1:2.5 with well graded ‘sharp’ sand.
0.5 soft sand might be required to get the right
colour mortar.
Working from a hawk, fill damaged joints using a
heritage pointing tool.
Deep joints should be repointed in two stages
with a drier mortar being used to ‘pack out’
the back of the joint before returning to the
standard repointing mix.
Fill the joints with mortar until it is flush with
the face of the stone or bricks.
After filling the joints the mortar should be
‘beaten’ with a churn brush to expose the
aggregate, compact the surface and remove
excess mortar.
Protect new mortar from the
elements by covering your work
with damp hessian and plastic
sheeting.
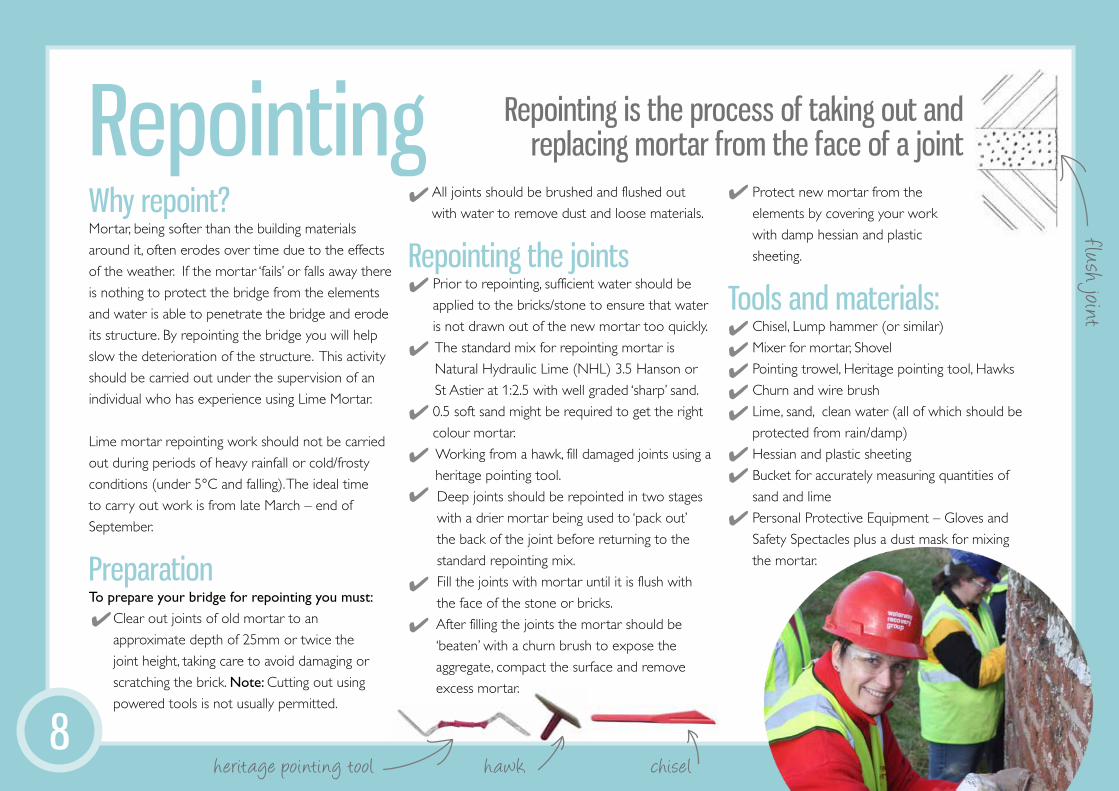
Tools and materials: Chisel, Lump hammer (or similar)
Mixer for mortar, Shovel
Pointing trowel, Heritage pointing tool, Hawks
Churn and wire brush
Lime, sand, clean water (all of which should be
protected from rain/damp)
Hessian and plastic sheeting
Bucket for accurately measuring quantities of
sand and lime
Personal Protective Equipment – Gloves and
Safety Spectacles plus a dust mask for mixing
the mortar.
Repointing Repointing is the process of taking out and replacing mortar from the face of a joint
8
flush joint
chiselhawkheritage pointing tool

Repointing Step-by-step guide
When removing small areas of cement rich mortar which has covered the edges of the bricks, the mortar edges need to be weakened by stirking along the line of the original joint before chasing out.
Keep ready mixed lime mortar in a sealed container until needed. Lime mortars should be ‘beaten’ to the correct consistency before use. The mortar should have a consistency of modelling clay and should hang from a pointing tool.
Once the joint is filled it should be given a rough texture by striking or stippling with a churn brush to expose the aggregate. The mortar needs to be still green but stiff – too early and the texture is too extreme and the bricks become stained; too late and no impression will be made.
Cut out mortar using a chisel, which will not wedge in the joint. Remove the mortar to a depth of at least twice the width of the joint back to sound backing mortar (Deep tamping may be necessary to fill any large voids.
The mortar should be placed into the prepared damp joint without touched the face of the brickwork and pressed in hard using the pointing tool.
Ideally work should be carried out between March and September. In hot or windy weather the finished work should be kept damp for 7-14 days and protected from direct sunlight. When working in the winter months mortars should always be protected from exposure to frost.
Cutting is complete when all joints are clear of debris with a square face at the old backing mortar and no old mortar sticking to the bricks. Flush the joint with clean water until it runs clear, working from top to bottom on the wall as repointing proceeds. Effective repointing needs damp joints, but not running with water.
On old brickwork the finished face of the joint should be slightly recessed never extending beyond the original joint width.
New condition.Moisture evaporating through joints.
Images and text © Canal & River Trust 9
1.
4.
7.
2.
5.
8.
3.
6.
9.

Britain’s canals relied heavily on brick as their principal building material. A lot of
the softer bricks were prone to frost damage due to the damp nature of the
canal environment and as a consequence many bridges are in desperate need
of repair with large cracks, crumbling bricks and whole sections missing. Some
bridges have also been exposed to excessive movement, invasive vegetation
growth, and water penetration from poor pointing – all of which can cause
brickwork to fail or crack.
PreparationTo prepare your bridge for repair to brickwork you must: Clear bridge wall of any loose debris/ brickwork and assess how much
other damaged brickwork must be removed.
Remove damaged brickwork along the line of crack, back to solid
brickwork using hand tools.
Where possible reclaim and clean bricks so that they can be used in the
rebuilding process.
Clear brickwork of loose debris in preparation for the rebuilding.
Brickwork repairs Working to a plan agreed by Canal & River Trust and using WRG’s Practical
Restoration Handbook – Brickwork section https://www.waterways.org.uk/
wrg/wrg_documents/practical_restoration_handbook/prh_brickwork and
CRT’s Approved Process: Heritage Works (available from your Volunteer
Coordinator) as a guide start your brickwork repairs.
Lime mortar for brickwork repairs needs to be of a firmer / thicker
consistency (as usually used for pointing) and the bricks will need to
effectively be ‘shaken’ into position. A thinner mix (normal brick laying
consistency) will increase susceptibility to frost damage.
All new work should be temporarily covered with hessian and polythene
to prevent damage from environmental conditions.
It is important to repair brickwork sympathetically especially when working
on bridge parapets. Brickwork bonding pattern and courses must be
maintained.
Ensure you have an experienced bricklayer to 3 to 4 novices on site.
Major Brickwork Repairs Major brickwork repairs should only be carried out by experienced
bricklayers, due to the technical nature of the work.
Major brickwork repairs may become notifiable under Construction,
Design and Management Regulations if the planned work is going to last
longer than 30 days or involves 500 person days of work.
Brickwork repairs
10
Important Information: Replacement bricks need to be a good match in colour, texture and
size with originals. New bricks must be approved by the Canal &
River Trust before use.

Brickwork repairs (cont.)Replacing whole bricksCutting out, usually of whole bricks, is best done by hand with a hammer and
chisel taking great care not to damage adjacent sound bricks. Use of powered
chisels and cutting tools should generally be avoided. Wedge shaped jointing
chisels should not be used as they can damage the brick edges or arises.
Replacement bricks should then be placed on a mortar bed, the side and top
joints should then be packed solid with mortar and pointed up. Where the
replacements form a patch of several bricks, temporary supports or wedges may
be needed to prevent the masonry from collapsing.
RebuildingWhere structural damage such as excessive cracking, bulging or settlement has
occurred, it may be necessary to demolish a section of a wall and rebuild it.
Depending on the size and shape of the rebuild, and the probability of further
movement, the new work may be reinforced brick ties (see diagram). It is
important to extend the repair well beyond the immediate vicinity of the defect
and to use a flexible mortar. This will help to disperse stresses as the new work
‘settles in’ with the old.
11
Tools and Materials Required Plugging Chisel and Bolster
Lump hammer (or similar)
Mixer for mortar, Shovel
Repointing tools
Hawk, Brick Trowel
Brick line and pins, Spirit level
Soft and wire brush
Materials for mortar mix
(lime, sand, clean water)
Hessian and plastic sheeting
Bucket for accurately
measuring quantities of sand
and lime
Personal Protective
Equipment – Gloves and
Safety Spectacles plus a dust
mask for mixing the mortar.
…and lots of bricks!
Diagram © Canal & River Trust

Many canal bridges were painted white as a warning to boats for decorative
purposes or as an attempt to protect the brickwork and now form a
significant element in the heritage value of the structure. Over the years
paintwork can become defective and start to flake, blister, peel or crack
exposing the brickwork underneath. Volunteers can easily get involved in the
repainting of these bridges.
There are numerous types of paints that can be used for this type of
conservation work. Your local Canal & River Trust Heritage Advisor will specify
the type of paint and application methods to be used. The main factor to
consider when choosing paint is its ability to allow water to escape out of the
structure as it is near impossible to make it completely waterproof.
Preparation All work to remove paint must comply with the Approved Process: Heritage
Works for Cleaning Historic Fabric and due to the use of chemicals this work
will often be carried out by contractors.
Painting Before starting to paint ensure the surface is dry and any loose materials
are removed by brushing. Mould growth, moss and lichen should be
removed by brushing and scraping.
Using either a brush or roller, paint should be applied and worked well
into all surfaces
The painting process may involve several coats so ensure you have taken
into this account in your planning. Each coat should be done in one
session to avoid patching.
Ensure that there is adequate protection from the elements, such as
moisture or excessively high/low temperatures, whilst carrying out the
work. Where necessary, finished work should be protected from adverse
conditions until it has cured.
Tools and materials required: Paint
Paint brushes/rollers
Hand brush
Plastic sheeting
Cleaning materials for removing paint from brushes
Personal Protective Equipment – gloves and safety spectacles
Warning signs for the public
Repainting
12

Useful linksWRG Health & Safety Booklet To help keep you safe on site, this booklet contains initial Health and Safety Information that new volunteers
need to know. http://issuu.com/waterwaysassoc/docs/health_and_safety_guide_131115
WRG Health & Safety Video WRG’s Health & Safety Video contains important Health & Safety information that all volunteers need to know.
https://www.waterways.org.uk/wrg/health_safety/wrg_health_safety_video
Practical Restoration HandbookThe purpose of the handbook is very simple – to give guidance on practical restoration work carried out
by volunteers. The authors of the chapters come from a range of organisations and from professional and
experienced people within the waterways restoration movement.
https://www.waterways.org.uk/wrg/health_safety/practical_restoration_handbook
CRT Approved Processes - Heritage WorksThis document describes ‘best practice’ standards for works of repair to heritage assets (i.e. historic waterway
buildings and structures).The purpose of these standards is to ensure a consistent, approved approach to
practical heritage conservation. (contact your local CRT Volunteers Coordinator)
13Waterway Recovery Group is part of The Inland Waterways Association (registered office: Island House, Moor Road, Chesham, HP5 1WA). The Inland Waterways Association is a non-profit distributing company limited by guarantee, registered in England no 612245, and registered as a charity no 212342. VAT registration no 342 0715 89. Copyright Waterway Recovery Group 2014. Photos supplied by WRG volunteers.