build a dc motor
DESCRIPTION
Build a DC motor. Prof. Anderson Alphabrima Barrie, Hassan Hayat , Matt Madjar , Mitesh Patel, and Nate Pelton Electrical and Computer Engineering. Contents of Your Bag. A two square inch piece of foam to serve as the base of your motor 1 bar style magnet (ceramic, 2”x ¾ “) - PowerPoint PPT PresentationTRANSCRIPT

1
Build a DC motorProf. Anderson
Alphabrima Barrie, Hassan Hayat, Matt Madjar, Mitesh Patel, and
Nate PeltonElectrical and Computer
Engineering

2
Contents of Your Bag
A two square inch piece of foam to serve as the base of your motor
1 bar style magnet (ceramic, 2”x ¾ “) 4 jumbo paper clips, only two of which will be used A two inch section of plastic drinking straw Two sections of insulated wire, with both ends stripped 1 D-size battery A two foot length of magnet wire (AWG 24) 1 sheet of sand paper 2 rubber bands 1 Section of wooden dowel PLEASE LET US KNOW IF YOU ARE MISSING ANY
SUPPLIES

3
Step 1: Building the Coil
Leave two inches of spare wire Wrap the wire around the
dowel 8 times» Make sure to finish wrapping
where you started Wrap the long section of
magnet wire around one half of the coil» So that you have a two inch
section of spare wire on each half of the coil
» Wrap the two inch section of wire around the coil twice to ensure that the coil will be stable

4
Make the commutator
Sand the bottom half of each of the two inch sections of spare wire
Hint: Place the sand paper on the table and drag the wire across it, making sure to get as much insulation off as possible

5
Step 2: Building the Base
Unfold the open ends of the two paper clips
Stick them into the flat face of the foam block, as close to the edges as possible

6
Step 2 Continued
Wrap one end of the insulated wire around the paper clip, as close to the foam block base as possible.
Repeat for other side
7
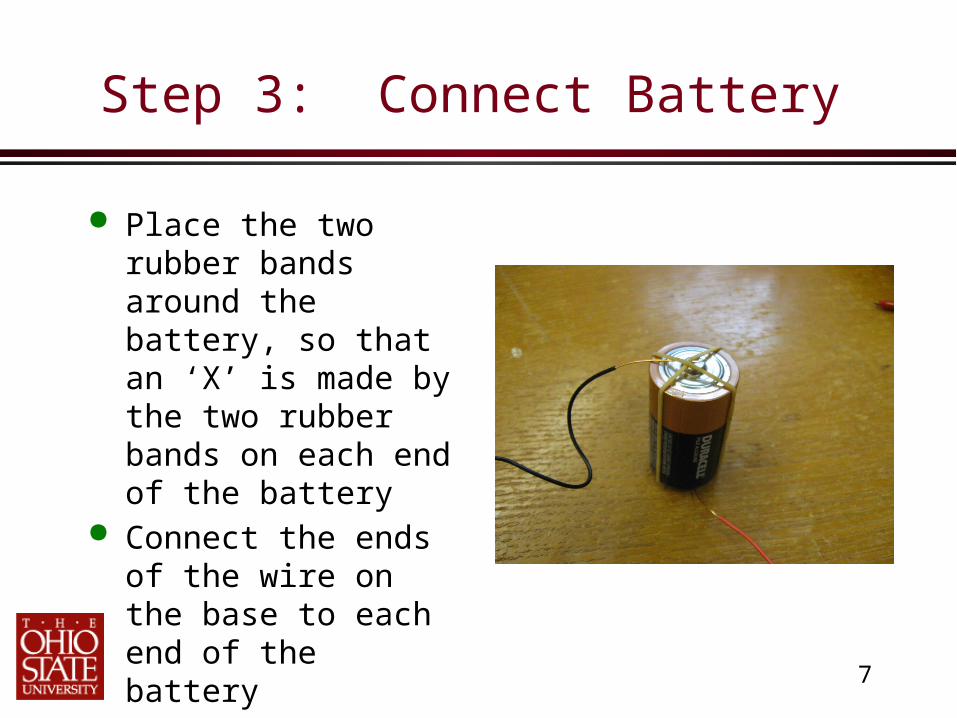
Step 3: Connect Battery
Place the two rubber bands around the battery, so that an ‘X’ is made by the two rubber bands on each end of the battery
Connect the ends of the wire on the base to each end of the battery» Polarity does not matter
in this experiment

8
Step 4; adding the magnet
Just lay the magnet on the foam between the paper clips

9
Step 5: Add the coil
Hang the coil from step one in the bottom of the open end of the paper clips
It will complete the circuit when the sanded side of the commutator is down
Hints:» Make sure all components are
level and that the wires coming out of the coil are as straight as possible.
» When unfolding the paperclips, try to make their unfolded length the same
» Use the section of plastic drinking straw to support the paper clips if needed

10
Making Your Motor Run
If all steps were done correctly and carefully, your motor should run just by manually turning the coil and then letting go.
If your motor does not run correctly, there are several things that could be wrong:» Not enough insulation was sanded from the bottom half of
the coil lead wires, try to get as close to the coil as possible when sanding
» A wire or coil lead wire is either bent or out of alignment. Check these components.
» Sometimes it takes a bit of intuition to bend a paperclip or coil wire in the right direction to balance all the necessary components.