big-ip® access policy manager® authentication ... · overview: configuring and administering a...
TRANSCRIPT
BIG-IP® Access Policy Manager®
Authentication Configuration Guide
Version 11.4


Table of Contents
Legal Notices.....................................................................................................7
Acknowledgments.............................................................................................9
Chapter 1: Authentication Concepts......................................................................................13
Authentication in Access Policy Manager........................................................................14
Supported authentication methods..................................................................................15
About adding authentication to an access policy.............................................................16
About AAA traffic and route domains...............................................................................16
About AAA and pools.......................................................................................................16
About RADIUS authentication..........................................................................................16
Configuring for RADIUS authentication and authorization ...................................17
Completing the authentication process for RADIUS.............................................17
About RADIUS accounting...............................................................................................18
Configuring RADIUS Accounting..........................................................................19
Completing the authentication process for RADIUS accounting...........................20
About LDAP and LDAPS authentication..........................................................................21
About the differences between auth and query types...........................................22
What are nested groups?......................................................................................22
Task summary for configuring for LDAPS authentication......................................23
About Active Directory authentication..............................................................................25
About Active Directory password management....................................................25
Configuring an Active Directory AAA server ........................................................25
Completing the authentication process for Active Directory..................................26
Active Directory's cross-domain support rules......................................................28
About using HTTP for authentication...............................................................................28
What are hidden parameters?...............................................................................28
Task summary for HTTP authentication................................................................28
Task summary for configuring HTTPS authentication...........................................30
About RSA SecurID authentication..................................................................................31
About RSA SecurID configuration requirements for APM AAA.............................32
Task summary for RSA SecurID authentication....................................................33
About TACACS+ authentication and accounting..............................................................34
Task summary for TACACS+ authentication and accounting................................34
About OCSP authentication.............................................................................................36
Task summary for OCSP authentication...............................................................36
About CRLDP configuration.............................................................................................38
Task summary for CRLDP configuration...............................................................38
Chapter 2: AAA and Configuring High Availability...............................................................43
Overview: Configuring AAA high availability....................................................................44
3
Table of Contents

Guidelines for setting up RADIUS authentication for AAA high availability......................44
Task summary for configuring AAA high availability.........................................................44
Chapter 3: Kerberos Authentication with End-User Logons...............................................47
About basic authentication and Kerberos end-user logon...............................................48
How does end-user logon work?......................................................................................48
About Kerberos authentication requirements...................................................................49
Task summary for configuring end-user login support.....................................................50
Access policy example for end-user login........................................................................52
Kerberos authentication troubleshooting tips...................................................................53
Chapter 4: Local User Database.............................................................................................55
Overview: Configuring and administering a local user database.....................................56
About backing up and restoring users...................................................................56
About local user database synchronization across devices..................................56
About writing to a local user database from an access policy...............................56
Task summary.......................................................................................................57
Overview: Using a local user database to control authentication.....................................59
About locking a user out of an AAA server using a local user database ..............59
About writing to a local user database from an access policy...............................60
Task summary.......................................................................................................60
Overview: Branching in an access policy based on local user database groups.............63
Creating an access policy to branch based on local DB group membership........63
Chapter 5: NTLM Authentication for Microsoft Exchange Clients......................................67
Overview: Configuring APM for Exchange clients that use NTLM authentication............68
About using NTLM authentication ........................................................................68
About configuration requirements for NTLM authentication..................................68
About reusing a machine account for different BIG-IP systems............................68
About Outlook Anywhere and NTLM authentication.............................................69
Task summary for Exchange clients that use NTLM authentication......................69
Chapter 6: HTTP Basic Authentication for Microsoft Exchange Clients............................77
Overview: Configuring APM for Exchange clients that use HTTP Basic..........................78
About Exchange profiles.......................................................................................78
Task summary for Exchange clients that use HTTP Basic authentication............78
Appendix A: AAA Session Variables.......................................................................................83
How to view session variables.........................................................................................84
AAA server session variables for access policy rules......................................................84
Appendix B: AAA Configuration Examples............................................................................87
AAA server configuration examples.................................................................................88
4
Table of Contents

Example for converting hex attributes...................................................................88
Example of authenticating and authorizing users with Active Directory................89
Example of LDAP auth and query default rules....................................................90
Appendix C: Troubleshooting AAA Configurations..............................................................91
List of troubleshooting tips for authentication...................................................................92
RADIUS authentication and accounting troubleshooting tips ...............................92
LDAP authentication and query troubleshooting tips ...........................................93
Active Directory authentication and query troubleshooting tips............................94
RSA SecurID on Windows using RADIUS configuration troubleshooting tips.......95
OCSP authentication troubleshooting tips ............................................................96
CRLDP authentication troubleshooting tips ..........................................................97
TACACS+ authentication troubleshooting tips ......................................................97
5
Table of Contents

6
Table of Contents

Legal Notices
Publication Date
This document was published on May 15, 2013.
Publication Number
MAN-0359-04
Copyright
Copyright © 2012-2013, F5 Networks, Inc. All rights reserved.
F5 Networks, Inc. (F5) believes the information it furnishes to be accurate and reliable. However, F5 assumesno responsibility for the use of this information, nor any infringement of patents or other rights of thirdparties which may result from its use. No license is granted by implication or otherwise under any patent,copyright, or other intellectual property right of F5 except as specifically described by applicable userlicenses. F5 reserves the right to change specifications at any time without notice.
Trademarks
Access Policy Manager, Advanced Client Authentication, Advanced Routing, APM, Application SecurityManager, ARX, AskF5, ASM, BIG-IP, BIG-IQ, Cloud Extender, CloudFucious, Cloud Manager, ClusteredMultiprocessing, CMP, COHESION, Data Manager, DevCentral, DevCentral [DESIGN], DNS Express,DSC, DSI, Edge Client, Edge Gateway, Edge Portal, ELEVATE, EM, Enterprise Manager, ENGAGE, F5,F5 [DESIGN], F5Management Pack, F5 Networks, F5World, Fast Application Proxy, Fast Cache, FirePass,Global TrafficManager, GTM,GUARDIAN, IBR, Intelligent Browser Referencing, Intelligent Compression,IPv6 Gateway, iApps, iControl, iHealth, iQuery, iRules, iRules OnDemand, iSession, L7 Rate Shaping,LC, Link Controller, Local Traffic Manager, LTM, Message Security Manager, MSM, OneConnect,OpenBloX, OpenBloX [DESIGN], Packet Velocity, Policy Enforcement Manager, PEM, Protocol SecurityManager, PSM, Real Traffic Policy Builder, Rosetta Diameter Gateway, ScaleN, Signaling DeliveryController, SDC, SSLAcceleration, StrongBox, SuperVIP, SYNCheck, TCP Express, TDR, TMOS, TrafficManagement Operating System, Traffix Diameter Load Balancer, Traffix Systems, Traffix Systems(DESIGN), Transparent Data Reduction, UNITY, VAULT, VIPRION, vCMP, virtual ClusteredMultiprocessing, WA, WAN Optimization Manager, WebAccelerator, WOM, and ZoneRunner, aretrademarks or service marks of F5 Networks, Inc., in the U.S. and other countries, and may not be usedwithout F5's express written consent.
All other product and company names herein may be trademarks of their respective owners.
Patents
This product may be protected by U.S. Patent 7,114,180; 8,301,837. This list is believed to be current as ofMay 15, 2013.
Export Regulation Notice
This product may include cryptographic software. Under the Export Administration Act, the United Statesgovernment may consider it a criminal offense to export this product from the United States.
RF Interference Warning
This is a Class A product. In a domestic environment this product may cause radio interference, in whichcase the user may be required to take adequate measures.

FCC Compliance
This equipment has been tested and found to comply with the limits for a Class A digital device pursuantto Part 15 of FCC rules. These limits are designed to provide reasonable protection against harmfulinterference when the equipment is operated in a commercial environment. This unit generates, uses, andcan radiate radio frequency energy and, if not installed and used in accordance with the instruction manual,may cause harmful interference to radio communications. Operation of this equipment in a residential areais likely to cause harmful interference, in which case the user, at his own expense, will be required to takewhatever measures may be required to correct the interference.
Anymodifications to this device, unless expressly approved by themanufacturer, can void the user's authorityto operate this equipment under part 15 of the FCC rules.
Canadian Regulatory Compliance
This Class A digital apparatus complies with Canadian ICES-003.
Standards Compliance
This product conforms to the IEC, European Union, ANSI/UL and Canadian CSA standards applicable toInformation Technology products at the time of manufacture.
8
Legal Notices

Acknowledgments
This product includes software developed by Bill Paul.
This product includes software developed by Jonathan Stone.
This product includes software developed by Manuel Bouyer.
This product includes software developed by Paul Richards.
This product includes software developed by the NetBSD Foundation, Inc. and its contributors.
This product includes software developed by the Politecnico di Torino, and its contributors.
This product includes software developed by the Swedish Institute of Computer Science and its contributors.
This product includes software developed by the University of California, Berkeley and its contributors.
This product includes software developed by the Computer Systems Engineering Group at the LawrenceBerkeley Laboratory.
This product includes software developed by Christopher G. Demetriou for the NetBSD Project.
This product includes software developed by Adam Glass.
This product includes software developed by Christian E. Hopps.
This product includes software developed by Dean Huxley.
This product includes software developed by John Kohl.
This product includes software developed by Paul Kranenburg.
This product includes software developed by Terrence R. Lambert.
This product includes software developed by Philip A. Nelson.
This product includes software developed by Herb Peyerl.
This product includes software developed by Jochen Pohl for the NetBSD Project.
This product includes software developed by Chris Provenzano.
This product includes software developed by Theo de Raadt.
This product includes software developed by David Muir Sharnoff.
This product includes software developed by SigmaSoft, Th. Lockert.
This product includes software developed for the NetBSD Project by Jason R. Thorpe.
This product includes software developed by Jason R. Thorpe for AndCommunications, http://www.and.com.
This product includes software developed for the NetBSD Project by Frank Van der Linden.
This product includes software developed for the NetBSD Project by John M. Vinopal.
This product includes software developed by Christos Zoulas.
This product includes software developed by the University of Vermont and State Agricultural College andGarrett A. Wollman.
This product includes software developed by Balazs Scheidler ([email protected]), which is protected underthe GNU Public License.
This product includes software developed by Niels Mueller ([email protected]), which is protected underthe GNU Public License.

In the following statement, This software refers to theMitsumi CD-ROMdriver: This software was developedby Holger Veit and Brian Moore for use with 386BSD and similar operating systems. Similar operatingsystems includes mainly non-profit oriented systems for research and education, including but not restrictedto NetBSD, FreeBSD, Mach (by CMU).
This product includes software developed by the Apache Group for use in the Apache HTTP server project(http://www.apache.org/).
This product includes software licensed from Richard H. Porter under the GNU Library General PublicLicense (© 1998, Red Hat Software), www.gnu.org/copyleft/lgpl.html.
This product includes the standard version of Perl software licensed under the Perl Artistic License (© 1997,1998 TomChristiansen and Nathan Torkington). All rights reserved. Youmay find the most current standardversion of Perl at http://www.perl.com.
This product includes software developed by Jared Minch.
This product includes software developed by the OpenSSL Project for use in the OpenSSL Toolkit(http://www.openssl.org/).
This product includes cryptographic software written by Eric Young ([email protected]).
This product contains software based on oprofile, which is protected under the GNU Public License.
This product includes RRDtool software developed by Tobi Oetiker (http://www.rrdtool.com/index.html)and licensed under the GNU General Public License.
This product contains software licensed from Dr. Brian Gladman under the GNU General Public License(GPL).
This product includes software developed by the Apache Software Foundation (http://www.apache.org/).
This product includes Hypersonic SQL.
This product contains software developed by the Regents of the University of California, SunMicrosystems,Inc., Scriptics Corporation, and others.
This product includes software developed by the Internet Software Consortium.
This product includes software developed by Nominum, Inc. (http://www.nominum.com).
This product contains software developed by Broadcom Corporation, which is protected under the GNUPublic License.
This product contains software developed byMaxMind LLC, and is protected under the GNULesser GeneralPublic License, as published by the Free Software Foundation.
This product includes Intel QuickAssist kernel module, library, and headers software licensed under theGNU General Public License (GPL).
This product includes software licensed fromGerald Combs ([email protected]) under the GNUGeneralPublic License as published by the Free Software Foundation; either version 2 of the License, or any laterversion. Copyright ©1998 Gerald Combs.
This product includes software developed by Daniel Stenberg. Copyright ©1996 - 2012, Daniel Stenberg,([email protected]). All rights reserved.
Permission to use, copy, modify, and distribute this software for any purpose with or without fee is herebygranted, provided that the above copyright notice and this permission notice appear in all copies.
THE SOFTWARE IS PROVIDED "AS IS", WITHOUT WARRANTY OF ANY KIND, EXPRESS ORIMPLIED, INCLUDING BUT NOT LIMITED TO THE WARRANTIES OF MERCHANTABILITY,FITNESS FOR A PARTICULAR PURPOSE ANDNONINFRINGEMENTOF THIRD PARTY RIGHTS.IN NO EVENT SHALL THEAUTHORSORCOPYRIGHTHOLDERS BE LIABLE FORANYCLAIM,DAMAGES OR OTHER LIABILITY, WHETHER IN AN ACTION OF CONTRACT, TORT OROTHERWISE, ARISING FROM, OUT OF OR IN CONNECTION WITH THE SOFTWARE OR THEUSE OR OTHER DEALINGS IN THE SOFTWARE.
10
Acknowledgments

Except as contained in this notice, the name of a copyright holder shall not be used in advertising or otherwiseto promote the sale, use or other dealings in this Software without prior written authorization of the copyrightholder.
This product includes software developed by Thomas Williams and Colin Kelley. Copyright ©1986 - 1993,1998, 2004, 2007
Permission to use, copy, and distribute this software and its documentation for any purpose with or withoutfee is hereby granted, provided that the above copyright notice appear in all copies and that both thatcopyright notice and this permission notice appear in supporting documentation. Permission to modify thesoftware is granted, but not the right to distribute the complete modified source code. Modifications are tobe distributed as patches to the released version. Permission to distribute binaries produced by compilingmodified sources is granted, provided you
1. distribute the corresponding source modifications from the released version in the form of a patch filealong with the binaries,
2. add special version identification to distinguish your version in addition to the base release versionnumber,
3. provide your name and address as the primary contact for the support of your modified version, and4. retain our contact information in regard to use of the base software.
Permission to distribute the released version of the source code alongwith corresponding sourcemodificationsin the form of a patch file is granted with same provisions 2 through 4 for binary distributions. This softwareis provided "as is" without express or implied warranty to the extent permitted by applicable law.
This product contains software developed by Google, Inc. Copyright ©2011 Google, Inc.
Permission is hereby granted, free of charge, to any person obtaining a copy of this software and associateddocumentation files (the "Software"), to deal in the Software without restriction, including without limitationthe rights to use, copy, modify, merge, publish, distribute, sublicense, and/or sell copies of the Software,and to permit persons to whom the Software is furnished to do so, subject to the following conditions:
The above copyright notice and this permission notice shall be included in all copies or substantial portionsof the Software.
THE SOFTWARE IS PROVIDED "AS IS", WITHOUT WARRANTY OF ANY KIND, EXPRESS ORIMPLIED, INCLUDING BUT NOT LIMITED TO THE WARRANTIES OF MERCHANTABILITY,FITNESS FOR A PARTICULAR PURPOSE ANDNONINFRINGEMENT. IN NO EVENT SHALL THEAUTHORS OR COPYRIGHT HOLDERS BE LIABLE FOR ANY CLAIM, DAMAGES OR OTHERLIABILITY, WHETHER IN ANACTIONOF CONTRACT, TORT OROTHERWISE, ARISING FROM,OUT OF OR IN CONNECTION WITH THE SOFTWARE OR THE USE OR OTHER DEALINGS INTHE SOFTWARE.
11
BIG-IP® Access Policy Manager® Authentication Configuration Guide


Chapter
1Authentication Concepts
• Authentication in Access Policy Manager• Supported authentication methods• About adding authentication to an access
policy• About AAA traffic and route domains• About AAA and pools• About RADIUS authentication• About RADIUS accounting• About LDAP and LDAPS authentication• About Active Directory authentication• About using HTTP for authentication• About RSA SecurID authentication• About TACACS+ authentication and
accounting• About OCSP authentication• About CRLDP configuration

Authentication in Access Policy Manager
Access Policy Manager® provides several benefits when it comes to authenticating and authorizing users.
DescriptionBenefit
Administrators can add various types of supported authentication methods asbasic components to an access policy.
Policy component
Administrators can combinemultiple authenticationmechanisms in an arbitrarymanner in a single access policy.
Flexibility
Administrators should see high optimization (approximately 250 logins/sec.).Performance
Administrators can configure an access policy to retrieve user credentials frommultiple sources (for example, client certificate fields) as input to anauthentication subsystem.
Extensible
Administrators can customize login page input and add the customized loginpage to an access policy.
Customizable input
Administrators can use the results from an authentication subsystem as inputfor various other functionality, for instance, resource assignments.
Generic output
These illustrations depict the use of authentication as an access policy component. They also show howvarious authentication schemas are combined together within a single access policy, and the result fromauthentication is used for assigning the appropriate resources to a user.
Figure 1: Create a AAA server object
Figure 2: Create an access policy
14
Authentication Concepts

Supported authentication methods
Access Policy Manager® uses the concept of access policies to authenticate and authorize users on thesystem. You can add authentication to an access policy using AAA servers (Authentication, Authorization,and Accounting) or client certificates. The stringent nature of the authentication mechanism you use forAccess Policy Manager should match the authentication level for your local network. That is, you shoulduse standards for the Access Policy Manager authentication that are equally as high as those you use foryour local network.
You can set up authentication using Access Policy Manager by any combination of the following methods.
Note: To use a specific authentication method, you must have a server that supports the scheme at yoursite.
DescriptionAuthenticationmethod
Uses the server at your site that supports using the RADIUS protocol.RADIUS
Uses the server at your site that supports authentication using LDAP.LDAP
Uses the server at your site that supports Kerberos authentication against aWindows 2000 or later server. For a list of network ports required for
Microsoft ActiveDirectory
authentication with Active Directory, refer to the Microsoft KB article 832017under sections such as:
• Kerberos Distribution Center• Group Policy• DNS Server
Uses external web-based authentication servers to validate user credentials, andto control user access to specific network resources. This method includes HTTPbasic, HTTP NTLM, and HTTP form-based methods.
Note: For HTTP Auth, NTLMv2 is currently not supported.
HTTP
Uses the RADIUS protocol for authentication. To use this authenticationmethod,you must select RADIUS as the authentication method.
RSA SecurID overRADIUS
Uses the RSA Native SecurID protocol for authentication. You must have anauthentication server set up and select SecurID as the authentication method.
RSA Native SecurID
Uses the Oracle Access Manager (OAM) server for authentication andauthorization to eliminate the need to deploy a WebGate proxy in front of eachapplication.
Oracle Access Manager
Distributes certificate revocation information across a network that identifieshow the server obtains CRL information.
CRLDP
Retrieves the revocation status of the X.509 certificate to ensure the AccessPolicy Manager obtains real-time revocation status during the certificateverification process.
Online Certificate StatusProtocol (OCSP)
Encrypts the entire body of the authentication packet. The system collects usercredentials using the login screen agent in the access policy, and stores the
Terminal AccessController Access
collected credentials in the session.logon.last.username andsession.logon.last.password session variables.
Control System(TACAS+)
15
BIG-IP® Access Policy Manager® Authentication Configuration Guide

DescriptionAuthenticationmethod
Obtains assertions from an external SAML Identity Provider (IdP). Use thismethod when you configure a BIG-IP system as a SAML service provider.
SAML
About adding authentication to an access policy
You can add authentication to any access policy or any branch in an access policy. Typically, you add aLogon Page action and then add an authentication action, requiring users to authenticate using a clientcertificate or an AAA (Authentication, Authorization, and Accounting) server.
You can even add multiple authentication types to an access policy, so, for example, a user who fails ActiveDirectory authentication might then attempt RADIUS authentication. Or, you might require authenticationusing a certificate and an AAA server.
About AAA traffic and route domains
To use route domains for AAA authentication traffic, you must use the pool option in the AAA serverconfiguration. When Use Pool is the selected Server Connection option, the server address field can takean IP address with route domain (IPAddress%RouteDomain) format. The route domain value is ignoredwhen the AAA server is configured in direct option.
About AAA and pools
When an AAA server supports high availability, you can configure a pool for it in the AAA configurationitself. An AAA server does not load-balance over a pool that is attached to a virtual server.
About RADIUS authentication
Access PolicyManager® supports authenticating and authorizing the client against external RADIUS servers.When a client connects with the user name and password, Access Policy Manager authenticates against theexternal server on behalf of the client, and authorizes the client to access resources if the credentials arevalid.
Figure 3: How RADIUS works
16
Authentication Concepts

• The client requests access to network resources through Access Policy Manager.• Access Policy Manager then issues a RADIUS Access Request message to the RADIUS server,
requesting authorization to grant access.• The RADIUS server then processes the request, and issues one of three responses to Access Policy
Manager: Access Accept, Access Challenge, or Access Reject.
Configuring for RADIUS authentication and authorization
The Access Policy Manager ®is a NAS (Network Access Server), that operates as a client of the serverconfigured here.
1. On the Main tab, click Access Policy > AAA Servers.The AAA Servers list screen opens.
2. From the AAA Servers by Type menu, choose the server type you want to create.A screen listing existing servers of that type opens.
3. Click Create.The New Server properties screen opens.
4. In the Name field, type a unique name for the authentication server.5. For theMode setting, select the Authentication option.6. If you selected Use Pool, type a name for the AAA server pool.7. Provide the address required for your server connection:
• If you selected Direct, type in a server address for the AAA server.• If you selected Use Pool, type in the IP addresses of the pool members and click Add. (When Use
Pool is selected, you have the option to type the server address in route domain format:(IPAddress%RouteDomain).
8. If you selected Use Pool, you have the option to select a Server Pool Monitor to track the health of theAAA server.
9. In the Secret field, type the shared secret password of the server.10. In the Confirm Secret field, re-type the shared secret password of the server.11. In the Timeout field, type a timeout interval (in seconds) for the AAA server.
This setting is optional.If you use the Timeout setting, you can also use the Retries setting. If these settings are enabled, theAccess Policy Manager attempts to reach the AAA server within the specified time frame, in seconds.If the server does not respond, the Access Policy Manager retries the authentication attempt, dependingon how many retries you specify.
12. In the Retries field, type the number of times the BIG-IP system should try to make a connection to theserver after the first attempt fails.This setting is optional.
13. Click Finished to add the new server to the configuration, and return to the main screen.
The RADIUS server is added to the AAA Servers list.
Completing the authentication process for RADIUS
Before you set up a RADIUS access policy to complete the authentication process, you must have at leastone RADIUS authentication server configured.
17
BIG-IP® Access Policy Manager® Authentication Configuration Guide

1. On the Main tab, click Access Policy > Access Profiles.The Access Profiles List screen opens.
2. In the Access Policy column, click the Edit link for the access profile you want to configure to launchthe visual policy editor.The visual policy editor opens the access policy in a separate screen.
3. Click the (+) sign anywhere in the access policy to add a new action item.An Add Item screen opens, listing predefined actions on tabs such as General Purpose, Authentication,and so on.
4. From the Authentication tab, select RADIUS Auth and click Add Item.5. On the properties popup, select the AAA RADIUS server you want to associate to the agent, and click
Save.6. Click Apply Access Policy to save your configuration.
This adds the authentication server to the access policy, and completes the overall authentication process.
RADIUS attributes
The following table lists the specific RADIUS attributes that Access Policy Manager® sends with RADIUSrequests.
PurposeAttribute
Indicates the name of the authenticated user.User-Name
Indicates the password of the authenticated user.User-Password
Indicates the identifying IP Address of the NAS.NAS-IP-Address
Indicates the identifying IPv6 Address of the NAS.NAS-IPv6-Address
Indicates the identifying name of the NAS .NAS-Identifier
Indicates the type of service the user has requested.Service-Type
Indicates the physical port number of the NAS that is authenticating the user.NAS-Port
About RADIUS accounting
You can report user session information to an external RADIUS accounting server. If you select this modeonly, the system assumes that you have set up another type of authentication method to authenticate andauthorize your users to access their resources.
18
Authentication Concepts

1. After RADIUS accounting runs successfully in an access policy, Access Policy Manager® sends anaccounting start request message to the external RADIUS server. The startmessage typically containsthe user's ID, networks address, point of attachment, and a unique session identifier.
2. When the session is destroyed, Access Policy Manager issues an accounting stop message to theexternal RADIUS server, providing information on the final usage in terms of time, packets transferred,data transferred, and reason for disconnect, as well as other information related to the user's access.
This accounting data is used primarily for billing, statistical, and general network monitoring purposes.
Note: You can perform both RADIUS authentication and accounting actions. Keep in mind that if youselect this mode, the RADIUS server and the RADIUS accounting server must run on different service ports.
Configuring RADIUS Accounting
1. On the Main tab, click Access Policy > AAA Servers.The AAA Servers list screen opens.
2. From the AAA Servers by Type menu, choose the server type you want to create.A screen listing existing servers of that type opens.
3. Click Create.The New Server properties screen opens.
4. In the Name field, type a unique name for the authentication server.5. For theMode setting, select Accounting.6. If you selected Use Pool, type a name for the AAA server pool.7. Provide the address required for your server connection:
• If you selected Direct, type in a server address for the AAA server.• If you selected Use Pool, type in the IP addresses of the pool members and click Add. (When Use
Pool is selected, you have the option to type the server address in route domain format:(IPAddress%RouteDomain).
8. If you selected Use Pool, you have the option to select a Server Pool Monitor to track the health of theAAA server.
9. In the Accounting Service Port field, type the service port for your accounting server. The default is1813.
10. In the Secret field, type the shared secret password of the server.11. In the Confirm Secret field, re-type the shared secret password of the server.12. In the Timeout field, type a timeout interval (in seconds) for the AAA server.
This setting is optional.If you use the Timeout setting, you can also use the Retries setting. If these settings are enabled, theAccess Policy Manager attempts to reach the AAA server within the specified time frame, in seconds.If the server does not respond, the Access Policy Manager retries the authentication attempt, dependingon how many retries you specify.
13. In the Retries field, type the number of times the BIG-IP system should try to make a connection to theserver after the first attempt fails.This setting is optional.
14. Click Finished to add the new server to the configuration, and return to the main screen.
19
BIG-IP® Access Policy Manager® Authentication Configuration Guide

Completing the authentication process for RADIUS accounting
Before you set up a RADIUS access policy to complete the authentication process, you must have at leastone RADIUS authentication server configured.
1. On the Main tab, click Access Policy > Access Profiles.The Access Profiles List screen opens.
2. In the Access Policy column, click the Edit link for the access profile you want to configure to launchthe visual policy editor.The visual policy editor opens the access policy in a separate screen.
3. Click the (+) sign anywhere in the access policy to add a new action item.An Add Item screen opens, listing predefined actions on tabs such as General Purpose, Authentication,and so on.
4. Under Authentication, select RADIUS Acct and click Add item.5. On the properties popup, select the AAA RADIUS accounting server you want to associate to the agent,
click Save.6. Click Apply Access Policy to save your configuration.
This adds the authentication server to the access policy, and completes the overall authentication process.
RADIUS accounting attributes
These tables list specific RADIUS accounting attributes that Access Policy Manager® sends for RADIUSAccounting-Request start messages and RADIUS Accounting-Request stop messages.
RADIUS attributes for RADIUS Accounting start messages
PurposeAttribute
Indicates the name of the authenticated user.User-Name
Indicates a unique accounting ID to make it easy to match start and stoprecords in a log file. It is essentially a user's session ID.
Acct-Session-Id
Indicates whether the accounting-request marks the beginning of theuser service (Start) or the end (Stop).
Acct-Status-Type
Indicates how the user was authenticated, whether by RADIUS, the NASitself, or by another remote authentication protocol.
Acct-Authentic
Indicates the type of service the user has requested.Service-Type
Identifies the IP address of the NAS that is requesting authentication of theuser. The administrator can enter this address on the AAA RADIUS serverconfiguration page.
Nas-IP-Address
Indicates the identifying IPv6 Address of the NAS.NAS-IPv6-Address
Indicates the identifying name of the NAS.NAS-Identifier
The physical port number of the NAS that is authenticating the user. It isalways set to 0.
NAS-Port
Contains the IP address of the initiator end of the tunnel.Tunnel-Client-Endpoint
Administrators can make resource assignments using this attribute.Class
20
Authentication Concepts

RADIUS attributes for RADIUS Accounting stop messages
PurposeAttribute
Indicates how the session was terminated. Access Policy Manager supportsthree values for this attribute: User Request, Session Timeout, Admin Reset.
Acct-Terminate-Cause
A unique accounting ID to make it easy to match start and stop records in alog file. It is essentially a user's session ID.
Acct-Session-Id
Indicates whether the accounting-request marks the beginning of theuser service (Start) or the end (Stop).
Acct-Status-Type
Indicates the number of seconds the user has received service for.Acct-Session-Time
Indicates the type of service the user has requested.Service-Type
Indicates the address configured for the user.Framed-IP-Address
Indicates the identifying IPv6 Address of the NAS.NAS-IPv6-Address
Indicates the identifying name of the NAS .NAS-Identifier
Indicates the number of octets received from the port over the course of theservice provided.
Acct-Input-Octets
Indicates the number of octets sent to the port in the course of delivering theservice provided.
Acct-Output-Octets
Note: If the user does not log off, but simply closes the web browser window,the Access Policy Manager sends the RADIUS stop message when the user'ssession times out. RADIUS accounting messages are sent asynchronously.The Access PolicyManager stores the user sessions start and end informationin its database, and sends them to the RADIUS accounting server.
About LDAP and LDAPS authentication
You can use LDAPS in place of LDAP when the authentication messages between the Access PolicyManager® and the LDAP server must be secured with encryption. However, there are instances where youwill not need LDAPS and the security it provides. For example, authentication traffic happens on the internalside of Access Policy Manager, and might not be subject to observation by unauthorized users. Anotherexample of when not to use LDAPS is when authentication is used on separate VLANs to ensure that thetraffic cannot be observed by unauthorized users.
Figure 4: How LDAP works
21
BIG-IP® Access Policy Manager® Authentication Configuration Guide

LDAPS is achieved by directing LDAP traffic over a virtual server that uses server side SSL to communicatewith the LDAP server. Essentially, the system creates an LDAP AAA object that has the address of thevirtual server. That virtual server (with server SSL) directs its traffic to a pool, which has as a member thathas the address of the LDAP server.
Figure 5: How LDAPS works
Task summary for configuring for LDAPS authentication
About the differences between auth and query types
There are two types of authentication that pertain only to Active Directory and LDAP authentications, andthey use two separate access policy items.
• The auth type access policy item is authentication only. In this case, the Access Policy Manager® justverifies the user's credentials against an external server.
• The query type access policy item causes the Access Policy Manager to query the external server foradditional information about the user. The query type does not authenticate user credentials; to do so,add the auth type to your access policy.
The auth and query methods are independent of each other, and you do not necessarily need to have themconfigured within the same access policy.
Attention: If you use LDAP query, Access Policy Manager does not query for the primary group and addit to the memberOf attribute. You must manually look up the attribute memberOf as well as the primarygroup. (If you use AD query, you can use the information in the Fetch Primary Group attribute.)
What are nested groups?
The nested group feature is used to identify groups to which the user belongs. Access Policy Manager®
stores such groups in the memberOf session variable.
For example, if user1 is a member of group1 and group2, and group1 is a member of group3 and group4,then user1 belongs to all four of these groups. In addition, group3 and group4 privileges are nested by user1through group1.
22
Authentication Concepts

This is true, however, provided that the nested group feature is enabled on Access Policy Manager. Thecontents of the memberOf session variable differs depending on whether the nested group feature is enabledor disabled.
• Enabled - The memberOf session variable contains all groups to which the user belongs. As in theexample, this includes group1, group2, group3, and group4.
• Disabled - The memberOf session variable contains groups to which the user belongs directly. Basedon the example, this would be group1 and group2.
Note: The nested groups feature works slightly differently for LDAP than for Active Directory. For anActive Directory query, you can use nested groups in conjunction with, or independently from, the FetchPrimary Group option.
Task summary for configuring for LDAPS authentication
To set up this configuration, perform the procedures in the task list.
Task listAbout LDAP and LDAPS authenticationConfiguring for LDAPS authentication and authorizationCompleting the authentication process for LDAP and LDAPSTesting LDAPS authentication
Configuring for LDAPS authentication and authorization
1. Select Access Policy > AAA Servers > LDAP.The LDAP Servers screen displays.
2. Click Create.The New Server properties screen opens.
3. In the Name field, type a unique name for the authentication server.4. Select Use Pool even if you have only one pool member.5. Type a name for the AAA server pool.6. Populate the Server Addresses field by typing the IP address of a pool member and clicking Add.
If you have more than one pool member, repeat this step.
7. For theMode setting, select LDAPS.8. In the Service Port field, type the port number of the server.
The default is 389 for LDAP, and 636 for LDAPS.
9. In the Admin DN field, type the distinguished name (DN) of the user with administrator rights.Type the value in this format: CN=administrator,CN=users,DC=sales,DC=mycompany,DC=com.
10. In the Admin Password field, type the administrative password for the server.11. In the Verify Admin Password field, re-type the administrative password for the server.12. For SSL Profile (Server), select the SSL server profile from the list.
LDAPS is achieved by directing LDAP traffic over a virtual server that uses a server side SSL tocommunicate with the LDAP server.
13. In the Timeout field, type a timeout interval (in seconds) for the AAA server.This setting is optional.
23
BIG-IP® Access Policy Manager® Authentication Configuration Guide

If you use the Timeout setting, you can also use the Retries setting. If these settings are enabled, theAccess Policy Manager attempts to reach the AAA server within the specified time frame, in seconds.If the server does not respond, the Access Policy Manager retries the authentication attempt, dependingon how many retries you specify.
14. Click Finished to add the new server to the configuration, and return to the main screen.
This adds the new LDAPS server to the AAA Server List.
Completing the authentication process for LDAP and LDAPS
Before you can set up your access policies to complete the authentication process, you must have at leastone authentication server configured.
1. On the Main tab, click Access Policy > Access Profiles.The Access Profiles List screen opens.
2. In the Access Policy column, click the Edit link for the access profile you want to configure to launchthe visual policy editor.The visual policy editor opens the access policy in a separate screen.
3. Click the (+) sign anywhere in the access policy to add a new action item.An Add Item screen opens, listing predefined actions on tabs such as General Purpose, Authentication,and so on.
4. Under Authentication, select either LDAP Auth or LDAP Query and click Add item.5. Select the AAA LDAP server you want to associate to the agent, and click Save.6. For LDAP Quth and LDAP Query, specify the SearchDN, and SearchFilter settings.
SearchDN is the base DN from which the search is done. Certain fields are relevant and specific to theagent that you select. For example, for LDAPAuth agent,UserDN is applicable, while for LDAPQueryagent, Fetch Nested Group is available. For more information on the available fields for each agent,refer to the online help.
7. Click Apply Access Policy to save your configuration.
This adds the authentication server to the access policy, and completes the overall authentication process.
Attention: If you use LDAP Query, Access Policy Manager® does not query for the primary group and addit to the memberOf attribute. You must manually look up the attribute memberOf as well as the primarygroup.
Testing LDAPS authentication
Before starting this procedure, make sure that all the appropriate steps were performed to create an LDAPSauthentication.
1. Ensure that LDAP authentication works in your environment.An intermediate virtual server should not exist for this verification step.
2. Create an access policy that uses a AAA object that points directly to the LDAP server.3. Add an intermediate virtual server without a server-side SSL profile.
Using the same access policy that you just created, modify the AAA object to point to a virtual server.
4. Implement LDAPS by enabling server side SSL, and change the pool member to use port 636.5. Review the log messages in Access Policy Manager® reports.6. Make sure to set the Access Policy log level to Debug.
24
Authentication Concepts

To set log levels, see System > Logs > Configurations > Options > .
7. Review the log for LDAPmessages and locate and confirm that the bind and search operation succeeds.
About Active Directory authentication
You can authenticate using Active Directory authentication with Access Policy Manager. We support usingKerberos-based authentication through Active Directory.
About Active Directory password management
Access Policy Manager® supports password management for Active Directory authentication. This processworks in the following sequence order:
• Access Policy Manager uses the client's user name and password to authenticate against the ActiveDirectory server on behalf of the client.
• If the user password on the Active Directory server has expired, Access Policy Manager returns a newlogon screen back to the user, requesting that the user change their password.
• After the user submits the new password, Access Policy Manager attempts to change the password onthe Active Directory server. If this is successful, the user's authentication is validated.
If the password change fails, it is likely that the Active Directory server rejected it because the passworddid not meet the minimum requirements such as password length.
Note: By default, users are given only one attempt to reset their password. However, an administrator canconfigure the max logon attempt allowed of the authentication agent to a value larger than 1, which givesusers multiple opportunities to reset their passwords. However, when using an access policy for CitrixReceiver client access, you must set max logon attempt to 1.
Configuring an Active Directory AAA server
Configure anActive Directory AAA server in Access PolicyManager® (APM®) to specify domain controllersand credentials for APM to use for authenticating users.
1. On the Main tab, click Access Policy > AAA Servers > Active Directory.The Active Directory Servers list screen opens.
2. Click Create.The New Server properties screen opens.
3. In the Name field, type a unique name for the authentication server.4. In the Domain Name field, type the name of the Windows Domain.5. For the Server Connection setting, select one of these options:
• Select Use Pool to set up high availability for the AAA server.• Select Direct to set up the AAA server for standalone functionality.
6. If you selected Direct, type a name in the Domain Controller field.7. If you selected Use Pool, configure the pool as described here:
a) Type a name in the Domain Controller Pool Name field.
25
BIG-IP® Access Policy Manager® Authentication Configuration Guide

b) Specify the Domain Controllers in the pool by typing the IP address and hostname for each andclicking the Add button.
c) To monitor the health of the AAA server, you have the option to select a health monitor. Only thegateway_icmp monitor is appropriate in this case; you can select it from the Server Pool Monitorlist.
8. In the Admin Name field, type an administrator name that has Active Directory administrativepermissions.APM uses the information in the Admin Name and Admin Password fields for AD Query. If ActiveDirectory is configured for anonymous queries, you do not need to provide an Admin Name. Otherwise,APM needs an account with sufficient privilege to bind to an Active Directory server, fetch user groupinformation, and fetch Active Directory password policies to support password-related functionality.(APM must fetch password policies, for example, if you select the Prompt user to change passwordbefore expiration option in an AD Query action.) If you do not provide Admin account information inthis configuration, APM uses the user account to fetch information. This works if the user account hassufficient privilege.
Note: The administrator name is case-sensitive.
9. In the Admin Password field, type the administrator password associated with the Domain Name.10. From the Kerberos Preauthentication Encryption Type list, select an encryption type.
The default is None. If you specify an encryption type, the BIG-IP® system includes Kerberospreauthentication data within the first authentication service request (AS-REQ) packet.
11. In the Timeout field, type a timeout interval (in seconds) for the AAA server. (This setting is optional.)12. Click Finished to add the new server to the configuration, and return to the main screen.
This adds the new Active Directory server to the AAA Server List.
Completing the authentication process for Active Directory
Before you set up your access policies to complete the authentication process, you must have at least oneauthentication server.
1. On the Main tab, click Access Policy > Access Profiles.The Access Profiles List screen opens.
2. In the Access Policy column, click the Edit link for the access profile you want to configure to launchthe visual policy editor.The visual policy editor opens the access policy in a separate screen.
3. Click the (+) sign anywhere in the access policy to add a new action item.An Add Item screen opens, listing predefined actions on tabs such as General Purpose, Authentication,and so on.
4. On the Authentication tab, select AD Auth or AD Query, and click Add Item.5. If you are adding AD Query, you can set these options.
DescriptionOption
Enter a search filter; otherwise if left empty, the policy uses thedefault filter, sAMAccountName=%{session.logon.last.username}.
SearchFilter
Enable this setting to populate the user's primary group in the sessionvariables. This setting is optional.
Fetch Primary Group
26
Authentication Concepts

DescriptionOption
Specifies whether AD cross domain authentication support is enabledfor AD Auth agent. This setting is optional.
Cross Domain Support
Enable to populate the user's membership in the session variables.This setting is optional.
Fetch Nested Groups
Set (N days) to prompt user to change the password before it expires.The default is none (disabled). This setting is optional.
Prompt user to changepassword before expiration
6. If you are adding AD Auth, you can set these options.DescriptionOption
Specifies whether AD cross domain authentication support is enabled forAD Auth agent.
Cross Domain Support
Specifies whether Access Policy Manager performs a password policycheck.
Note: Enabling this option increases overall authentication trafficsignificantly because Access Policy Manager must retrieve additional
Complexity check forPassword Reset
information. Because this option might require administrative privileges,if you enable it you should specify the administrator name and passwordon the AAA Active Directory server configuration page.
When enabled, displays the comprehensive error messages generated bythe authentication server to show on the user's Logon page. This setting
Show Extended Error
is intended for use in testing only in a production or debuggingenvironment. If you enable this setting in a live environment, your systemmight be vulnerable to malicious attacks
Specifies the number of user authentication logon attempts to allow.
Note: To use this access policy for Citrix Receiver client access, set thevalue to 1.
Max Logon AttemptsAllowed
Specifies the number of times that Access PolicyManager allows the userto try to change password.
Max Password ResetAttempts Allowed
7. Select the AAA Active Directory server to associate with the agent, and click Save.8. Click Apply Access Policy to save your configuration.
This adds the authentication server to the access policy, and completes the overall authentication process.
Attention: If you use AD query, Access Policy Manager does not query for the primary group and add itto the memberOf attribute. You must manually look up the attribute memberOf as well as the primary group.
27
BIG-IP® Access Policy Manager® Authentication Configuration Guide

Active Directory's cross-domain support rules
Active Directory's cross-domain rules
ExplanationRules
If you enable cross domain support, and enable split domain usernameat the login page, and then the user enters his user name, such as
Cross-domain support andsplit domain from usernameare both enabled. [email protected], Access PolicyManager® uses the [email protected]
as the user principal name to authenticate the user againstUSERNAME.COM domain.
Access PolicyManager handles the user's input as a simple user name andescape "@" and "\" chars. In other words, Access Policy Manager uses
Cross-domain support isenabled but split domain fromusername is disabled user\@[email protected] to authenticate the user,
where DEFAULTREALM.COM is the domain name that was configuredon the AAA AD Server configuration page.
Regardless of whether split domain from username option is enabled ordisabled, Access Policy Manager uses [email protected] toauthenticate the user.
If user does not specify a user'sdomain
About using HTTP for authentication
HTTP authentication methods use external web-based servers to validate user credentials. Access PolicyManager® (APM®) supports these HTTP authentication methods:
• HTTP basic authentication• HTTP NTLM authentication• HTTP form-based authentication• HTTP custom post
Tip: Use HTTPS instead of HTTP authentication for improved security, because HTTP authenticationpasses user credentials as clear text. To support HTTPS authentication, you must also set up and configureAccess Policy Manager through a layered virtual server.
What are hidden parameters?
If you choose to use HTTP form-based authentication, youmust provide hidden form parameters and valuesif there are any. When present, these values are required by the authentication server login form at yourlocation.
Task summary for HTTP authentication
To set up this configuration, perform the procedures in the task list. You can choose to configure with HTTPBasic, HTTP NTLM, or HTTP form-based.
28
Authentication Concepts
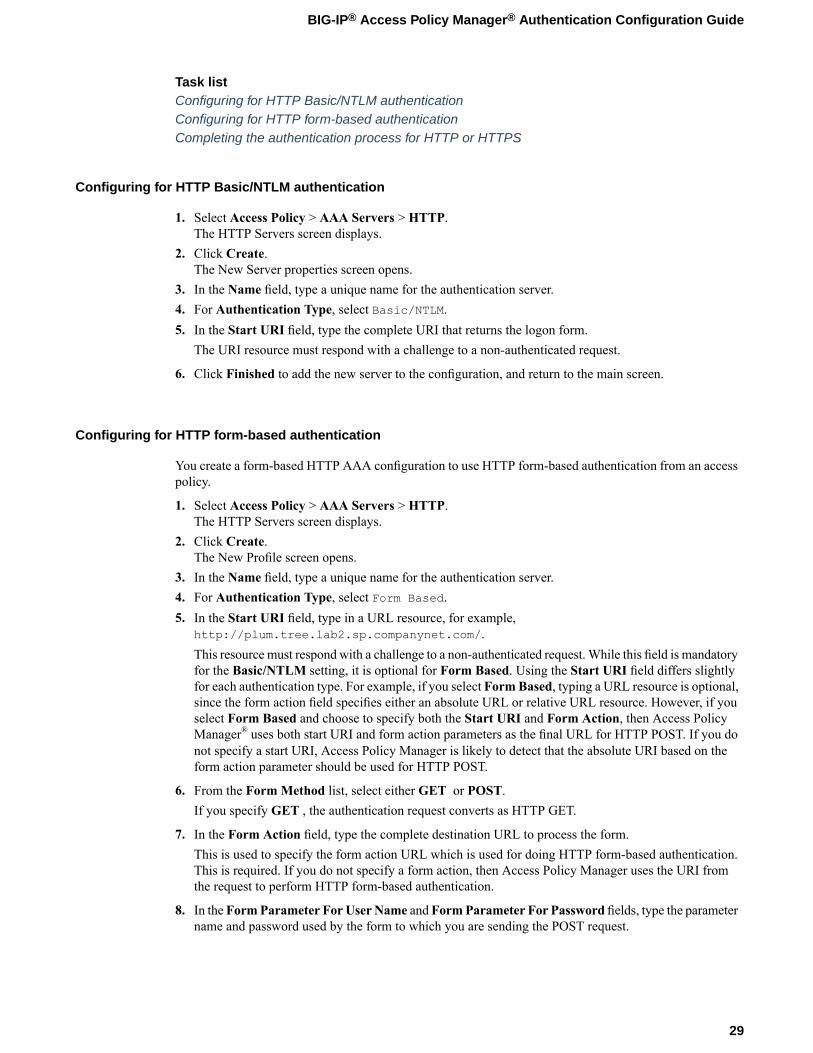
Task listConfiguring for HTTP Basic/NTLM authenticationConfiguring for HTTP form-based authenticationCompleting the authentication process for HTTP or HTTPS
Configuring for HTTP Basic/NTLM authentication
1. Select Access Policy > AAA Servers > HTTP.The HTTP Servers screen displays.
2. Click Create.The New Server properties screen opens.
3. In the Name field, type a unique name for the authentication server.4. For Authentication Type, select Basic/NTLM.5. In the Start URI field, type the complete URI that returns the logon form.
The URI resource must respond with a challenge to a non-authenticated request.
6. Click Finished to add the new server to the configuration, and return to the main screen.
Configuring for HTTP form-based authentication
You create a form-based HTTP AAA configuration to use HTTP form-based authentication from an accesspolicy.
1. Select Access Policy > AAA Servers > HTTP.The HTTP Servers screen displays.
2. Click Create.The New Profile screen opens.
3. In the Name field, type a unique name for the authentication server.4. For Authentication Type, select Form Based.5. In the Start URI field, type in a URL resource, for example,
http://plum.tree.lab2.sp.companynet.com/.This resource must respond with a challenge to a non-authenticated request. While this field is mandatoryfor the Basic/NTLM setting, it is optional for Form Based. Using the Start URI field differs slightlyfor each authentication type. For example, if you select FormBased, typing a URL resource is optional,since the form action field specifies either an absolute URL or relative URL resource. However, if youselect Form Based and choose to specify both the Start URI and Form Action, then Access PolicyManager® uses both start URI and form action parameters as the final URL for HTTP POST. If you donot specify a start URI, Access Policy Manager is likely to detect that the absolute URI based on theform action parameter should be used for HTTP POST.
6. From the Form Method list, select either GET or POST.If you specify GET , the authentication request converts as HTTP GET.
7. In the Form Action field, type the complete destination URL to process the form.This is used to specify the form action URL which is used for doing HTTP form-based authentication.This is required. If you do not specify a form action, then Access Policy Manager uses the URI fromthe request to perform HTTP form-based authentication.
8. In theFormParameter For User Name and FormParameter For Password fields, type the parametername and password used by the form to which you are sending the POST request.
29
BIG-IP® Access Policy Manager® Authentication Configuration Guide

9. In the Hidden Form Parameters/Values field, type the hidden form parameters required by theauthentication server logon form at your location.
10. In theNumber Of Redirects To Follow field, type how far from the landing page, in pages, the requestshould travel before failing.
11. For the Successful Logon Detection Match Type setting, select the method your authenticating serveruses, and specify the option definition.
12. Click Finished to add the new server to the configuration, and return to the main screen.
Completing the authentication process for HTTP or HTTPS
Before you can set up your access policies to complete the authentication process, you must have at leastone authentication server configured.
1. On the Main tab, click Access Policy > Access Profiles.The Access Profiles List screen opens.
2. In the Access Policy column, click the Edit link for the access profile you want to configure to launchthe visual policy editor.The visual policy editor opens the access policy in a separate screen.
3. Click the (+) sign anywhere in the access policy to add a new action item.An Add Item screen opens, listing predefined actions on tabs such as General Purpose, Authentication,and so on.
4. Under Authentication, select HTTP Auth and click Add item.If you are working with HTTPS, select HTTPS Auth. The serverssl profile for the virtual servershould be set if you select HTTPS.
5. On the properties popup, select the AAAHTTP server you want to associate to the agent and click Save.6. Click Apply Access Policy to save your configuration.
This adds the authentication server to the access policy, and completes the overall authentication process.
Task summary for configuring HTTPS authentication
To set up this configuration, perform the procedures in the task list.
Task listConfiguring for HTTPS authenticationSetting up the access profile using the HTTP agentCompleting the authentication process for HTTP or HTTPS
Configuring for HTTPS authentication
You create an AAA HTTPS configuration to authenticate users using HTTPS.
1. Configure a layered Local Traffic Manager® virtual server that converts HTTP to HTTPS.2. Patch the DNS to send HTTPAuth traffic to the external HTTP server through the layered virtual server.
The start URLs will remain the same; for example, http://plumtree.lab2.sp.companynet.com.
3. Use the IP address of the layered virtual server in the start URL, that is, http://IP address oflayered virtual server.
30
Authentication Concepts

4. Select Access Policy > AAA Servers > HTTP.The HTTP Servers screen displays.
5. From the AAA Servers by Type menu, choose the server type you want to create.A screen listing existing servers of that type opens.
6. In the Name field, type a unique name for the authentication server.7. For Authentication Type, select Basic/NTLM.8. In the Start URI field, type the IP address of the layered virtual server that you created in step 1. Use
this format: http:IP address.9. Click Finished to add the new server to the configuration, and return to the main screen.
Setting up the access profile using the HTTP agent
1. On the Main tab, click Access Policy > Access Profiles.The Access Profiles List screen opens.
2. Click the name of the access profile for which you want to edit the access policy.The properties screen opens for the profile you want to edit.
3. Add the HTTP agent to your access policy, and make sure to select the virtual HTTP server you created.This is important so that the HTTPS traffic goes through the virtual server.
4. Click Apply Access Policy to save your configuration.
Completing the authentication process for HTTP or HTTPS
Before you can set up your access policies to complete the authentication process, you must have at leastone authentication server configured.
1. On the Main tab, click Access Policy > Access Profiles.The Access Profiles List screen opens.
2. In the Access Policy column, click the Edit link for the access profile you want to configure to launchthe visual policy editor.The visual policy editor opens the access policy in a separate screen.
3. Click the (+) sign anywhere in the access policy to add a new action item.An Add Item screen opens, listing predefined actions on tabs such as General Purpose, Authentication,and so on.
4. Under Authentication, select HTTP Auth and click Add item.If you are working with HTTPS, select HTTPS Auth. The serverssl profile for the virtual servershould be set if you select HTTPS.
5. On the properties popup, select the AAAHTTP server you want to associate to the agent and click Save.6. Click Apply Access Policy to save your configuration.
This adds the authentication server to the access policy, and completes the overall authentication process.
About RSA SecurID authentication
RSA SecurID is a two-factor authentication mechanism based on a user PIN or password and code that anauthenticator generates and provides to the user.
31
BIG-IP® Access Policy Manager® Authentication Configuration Guide

A token is an authentication code generated every 60 seconds by an authenticator (hardware or software)assigned to the user.
Figure 6: How Access Policy Manager works with RSA SecurID
1. The client submits the user name and PIN code to Access Policy Manager®.2. Access Policy Manager sends the user-specified inputs to the RSA authentication server.3. Based on the authentication results, Access Policy Manager grants or denies access to the client.
About RSA SecurID configuration requirements for APM AAA
Before you can use a SecurIDAAA server in Access PolicyManager®, you need tomeet specific requirementsfor configuration elements and settings on RSA SecurID, as described here.
Authentication agent
To provide RSA SecurID authentication for APM®, the RSA Authentication Manager requires anauthentication agent for APM in its database.
To create an authentication agent from the RSA Security Console, you need:
• Hostname• IP addresses for all network interfaces• Agent Type (set to Standard Agent)
RADIUS client
To provide RSA SecurID authentication for APM, RSA Authentication Manager requires a RADIUS clientthat corresponds to the authentication agent for APM.
To create a RADIUS client from the RSA Security Console, you need:
• Hostname• IP addresses for all network interface• RADIUS secret (this RADIUS secret must match the corresponding RADIUS secret on the APM system).
Character requirements setting in a SecurID token policy
To avoid a problem in the RSA SDK with alphabetic-only PIN policies, do not use them. When you set upa SecurID token policy, set the character requirements to one of these values:
• Require numeric PINs• Allow alpha-numeric PINs
32
Authentication Concepts

Task summary for RSA SecurID authentication
Task listConfiguring a SecurID AAA server in APMAdding RSA SecurID authentication to an access policy
Configuring a SecurID AAA server in APM
Configure a SecurID AAA server for Access PolicyManager® to request RSA SecurID authentication froman RSA Manager authentication server.
1. On the Main tab, click Access Policy > AAA Servers.The AAA Servers list screen opens.
2. On the menu bar, click AAA Servers By Type, and select SecurID.The SecurID screen opens and displays the servers list.
3. Click Create.The New Server properties screen opens.
4. In the Name field, type a unique name for the authentication server.5. In the Configuration area, for the Agent Host IP Address (must match the IP address in SecurID
Configuration File) setting, select an option as appropriate:
• Select from Self IP List: Choose this when there is no NAT device between APM and the RSAAuthentication Manager. Select an IP from the list of those configured in Access Policy Manager.
• Other: Choose this when there is a NAT device in the network path between Access PolicyManagerand the RSA Authentication Manager server. If selected, type the address as translated by the NATdevice.
6. For the SecurID Configuration File setting, browse to upload the sdconf.rec file.Consult your RSA Authentication Manager administrator to generate this file for you.
7. Click Finished to add the new server to the configuration, and return to the main screen.
This adds a new RSA SecurID server to the AAA Servers list.
Adding RSA SecurID authentication to an access policy
Before you add RSA SecurID authentication to an access policy, you must have at least one AAA SecurIDserver configured in Access Policy Manager®.
You add RSA SecurID authentication to an access policy so that APM can request RSA SecurIDauthentication using the AAA SecurID server that you specify.
1. On the Main tab, click Access Policy > Access Profiles.The Access Profiles List screen opens.
2. In the Access Policy column, click the Edit link for the access profile you want to configure to launchthe visual policy editor.The visual policy editor opens the access policy in a separate screen.
3. Click the (+) sign anywhere in the access policy to add a new action item.An Add Item screen opens, listing predefined actions on tabs such as General Purpose, Authentication,and so on.
4. Under Authentication, select RSA SecurID and click Add Item.
33
BIG-IP® Access Policy Manager® Authentication Configuration Guide

A properties popup screen opens.5. From theAAA Server list in the properties popup screen, select the SecurID AAA server that you want
to associate to the agent.6. SetMax Logon Attempts to a value from from 1 to 5.
Note: To use this access policy for Citrix Receiver client access, you must setMax Logon Attempts to1.
7. Click Save.8. Click Apply Access Policy to save your configuration.
This adds RSA SecurID AAA authentication server to the access policy.
About TACACS+ authentication and accounting
Access PolicyManager® supports authenticating and authorizing the client against Terminal Access ControllerAccess Control System (TACACS+) servers. TACACS+ is a mechanism used to encrypt the entire body ofthe authentication packet. If you use TACACS+ authentication, user credentials are authenticated on aremote TACACS+ server. If you use the TACACS+ Accounting feature, the accounting service sendsstart and stop accounting records to the remote server.
Attention: Access Policy Manager must include a TACACS+ server configuration for every TACACS+server that exists.
Task summary for TACACS+ authentication and accounting
To set up this configuration, perform the procedures in the task list.
Task listConfiguring for TACACS+ authentication and authorizationCompleting the authentication process for TACACS+
Configuring for TACACS+ authentication and authorization
1. On the Main tab, click Access Policy > AAA Servers.The AAA Servers list screen opens.
2. From the AAA Servers by Type menu, choose the server type you want to create.A screen listing existing servers of that type opens.
3. Click Create.The New Server properties screen opens.
4. In the Name field, type a unique name for the authentication server.5. For the Server Connection setting, select one of these options:
• Select Use Pool to set up high availability for the AAA server.• Select Direct to set up the AAA server for standalone functionality.
6. If you selected Use Pool, type a name for the AAA server pool.
34
Authentication Concepts

7. Provide the address required for your server connection:
• If you selected Direct, type in a server address for the AAA server.• If you selected Use Pool, type in the IP addresses of the pool members and click Add. (When Use
Pool is selected, you have the option to type the server address in route domain format:(IPAddress%RouteDomain).
8. If you selected Use Pool, you have the option to select a Server Pool Monitor to track the health of theAAA server.
9. Type in a TACACS+ service port or select one from the list. The default is 49.10. Type in a secret key to use to encrypt and decrypt packets sent or received from the server, and then
re-type the secret key to confirm.11. For the Service setting, select the name of the service that the user is requesting to be authenticated to
use. Identifying what the user is asking to be authenticated for enables the TACACS+ server to behavedifferently for different types of authentication requests. You can select from the following options:login, ARAP, Connection, Firewall, Last, PPP, Shell, SLIP, System, TTY-DaemonFor information on all the other settings, which are optional, please refer to the online help.
12. Click Finished to add the new server to the configuration, and return to the main screen.
Completing the authentication process for TACACS+
1. On the Main tab, click Access Policy > Access Profiles.The Access Profiles List screen opens.
2. Click Create.The New Profile screen opens.
3. In the Name field, type a name for the access profile.4. In the Language Settings area, add and remove accepted languages, and set the default language.
A browser uses the highest priority accepted language. If no browser language matches the acceptedlanguages list, the browser uses the default language.
5. Click Finished.6. In the Access Policy column, click the Edit link for the access profile you want to configure to launch
the visual policy editor.The visual policy editor opens the access policy in a separate screen.
7. Click the (+) sign anywhere in the access policy to add a new action item.An Add Item screen opens, listing predefined actions on tabs such as General Purpose, Authentication,and so on.
8. Select TACACS+ Auth, and click Add item.9. Optionally, select TACACS_Acct if you want to add it as part of your access policy.10. Click Apply Access Policy to save your configuration.
This adds the authentication server to the access policy, and completes the overall authentication process.Policy example for TACACS+ authentication and accounting
This is an example of an access policy with all the associated elements needed to authenticate and authorizeusers with TACACS+ authentication. Note that the server used for authentication can be different from theserver used for TACACS+ accounting service.
35
BIG-IP® Access Policy Manager® Authentication Configuration Guide

Figure 7: How TACACS Plus works
About OCSP authentication
Access PolicyManager® supports authenticating and authorizing the client against Online Certificate StatusProtocol (OCSP). OCSP is a mechanism used to retrieve the revocation status of an X.509 certificate bysending the certificate information to a remote OCSP responder. This responder maintains up-to-dateinformation about the certificate's revocation status. OCSP ensures that Access Policy Manager alwaysobtains real-time revocation status during the certificate verification process.
Attention: Access PolicyManager must include anOCSP responder configuration for everyOCSP responderthat exists.
Task summary for OCSP authentication
To set up this configuration, perform the procedures in the task list.
Task listConfiguring for OCSP authentication and authorizationConfiguring a clientssl profile for OCSPCompleting the authentication process for OCSP
Configuring for OCSP authentication and authorization
1. On the Main tab, click Access Policy > AAA Servers.The AAA Servers list screen opens.
2. From the AAA Servers by Type menu, choose the server type you want to create.A screen listing existing servers of that type opens.
3. In the Name field, type a unique name for the authentication server.4. Type the URL used to contact the OCSP service on the responder.
For information on all other settings, please refer to the online help as they are optional settings.
Configuring a clientssl profile for OCSP
You need a clientssl profile to use OCSP authentication from an access policy.
36
Authentication Concepts

1. On the Main tab, click Local Traffic > Profiles > SSL > Client.The Client profile list screen opens.
2. Click Create.The New Client SSL Profile screen opens.
3. In the Name field, type a unique name for the profile.4. From the Parent Profile list, select a profile from which the new profile inherits properties.5. Select the Custom check box for Client Authentication.
The settings become available.6. From the Certificate list, select the option that is applicable to the agent you selected when you edited
the access policy.
• Select request if the Client Cert Inspection agent is used in the access policy.• Select ignore if the On-Demand Cert Auth agent is used.
7. From the Trusted Certificate Authorities list, select the Certificate Authority that issues the usercertificates.
8. From the Advertised Certificate Authorities list, select the advertised Certificate Authority file forclient certificate authentication.
9. Click Finished.
Completing the authentication process for OCSP
1. On the Main tab, click Access Policy > Access Profiles.The Access Profiles List screen opens.
2. Click Create.The New Profile screen opens.
3. In the Name field, type a name for the access profile.4. In the Language Settings area, add and remove accepted languages, and set the default language.
A browser uses the highest priority accepted language. If no browser language matches the acceptedlanguages list, the browser uses the default language.
5. Click Finished.6. In the Access Policy column, click the Edit link for the access profile you want to configure to launch
the visual policy editor.The visual policy editor opens the access policy in a separate screen.
7. Click the (+) sign anywhere in the access policy to add a new action item.An Add Item screen opens, listing predefined actions on tabs such as General Purpose, Authentication,and so on.
8. Under Authentication, select either Client Cert Inspection or On-Demand Cert Auth, and clickAdd item.
9. Select OSCP Auth, and click Add item.10. Click Apply Access Policy to save your configuration.
This adds the authentication server to the access policy.
After adding the OCSPAuth agent to the access policy, update the agent to include a proper OCSP responder.
Policy example for OCSP authentication
This is an example of an access policy with all the associated elements needed to authenticate and authorizeusers with OCSP authentication. Notice that you must add either the Client Cert Inspection agent or the
37
BIG-IP® Access Policy Manager® Authentication Configuration Guide

On-Demand Cert Auth agent before the OCSP Auth object in your access policy. One of those agents isrequired in order to receive the X.509 certificate from the user. This is also important since both agentsstore the user information as well as the issuer certificates in the session variables. This allows the OCSPAuth agent to check the revocation status of the user's certificate.
Figure 8: How OCSP works
About CRLDP configuration
Access Policy Manager® supports retrieving Certificate Revocation Lists (CRLs) from network locations(distribution points). Certificate Revocation List Distribution Point (CRLDP) AAA defines how to accessa CRL file from a distribution point. A distribution point is either an LDAP Uniform Resource Identifier(URI) or a directory path that identifies the location where the CRLs are published.
Task summary for CRLDP configuration
To set up this configuration, perform the procedures in the task list.
Task listConfiguring an AAA server for CRLDPConfiguring a clientssl profile for CRLDPCreating an access profileConfiguring an access policy that uses the CRLDP agentAccess policy example for CRLDP agent
Configuring an AAA server for CRLDP
Create a CRLDP AAA configuration to specify how to access CRLs.
1. On the Main tab, click Access Policy > AAA Servers/CRLDP.The CRLDP Servers list screen opens.
2. Click Create.The New Server properties screen opens.
3. In the Name field, type a unique name for the authentication server.4. For the Server Connection setting, select one of these options:
• Select Use Pool to set up high availability for the AAA server.
38
Authentication Concepts

• Select Direct to set up the AAA server for standalone functionality.
5. If you selected Use Pool, type a name for the AAA server pool.6. Provide the address required for your server connection:
• If you selected Direct, type in a server address for the AAA server.• If you selected Use Pool, type in the IP addresses of the pool members and click Add. (When Use
Pool is selected, you have the option to type the server address in route domain format:(IPAddress%RouteDomain).
7. If you selected Use Pool, you have the option to select a Server Pool Monitor to track the health of theAAA server.
8. In the Service Port field, type a CRLDP service port or choose one from the list. The default is 389 .9. For Base DN, type a CRLDP base distinguished name.
This setting applies for certificates that specify the CRL distribution point in directory name (dirName)format. Access Policy Manager uses the Base DN when the value of the X509v3 attribute,crlDistributionPoints, is of type dirName. In this case, Access Policy Manager tries to match the valueof the crlDistributionPoints attribute to the Base DN value. An example of a Base DN value iscn=lxxx,dc=f5,dc=com.
Note: If the client certificate includes the distribution point extension in LDAP URI format, the IPaddress, Base DN and Reverse DN settings configured on the agent are ignored; they are specific todirectory-based CRLDP. All other settings are applicable to both LDAP URI and directory-based CRLDPs.
10. Click Finished to add the new server to the configuration, and return to the main screen.
An CRLDP AAA server is available for use in a CRLDP Auth agent in an access policy.
Configuring a clientssl profile for CRLDP
1. On the Main tab, click Local Traffic > Profiles > SSL > Client.The Client profile list screen opens.
2. Click Create.The New Client SSL Profile screen opens.
3. In the Name field, type a unique name for the profile.4. From the Parent Profile list, select a profile from which the new profile inherits properties.5. Select the Custom check box for Configuration.
The settings become available.6. From the Certificate list, select the option that is applicable to the agent you selected when you edited
the access policy.
• Select request if the Client Cert Inspection agent is used in the access policy.• Select ignore if the On-Demand Cert Auth agent is used.
7. From the Trusted Certificate Authorities list, select the Certificate Authority that issues the usercertificates.
8. (Optional) From theAdvertised Certificate Authorities list, select the Certificate Authority that issuesthe user certificates.
9. Click Finished.
A new clientSSL profile is available.
39
BIG-IP® Access Policy Manager® Authentication Configuration Guide

Creating an access profile
You create an access profile to provide the access policy configuration for a virtual server that establishesa secured session.
1. On the Main tab, click Access Policy > Access Profiles.The Access Profiles List screen opens.
2. Click Create.The New Profile screen opens.
3. Type a name for the access profile.4. In the Language Settings area, add and remove accepted languages, and set the default language.
A browser uses the highest priority accepted language. If no browser language matches the acceptedlanguages list, the browser uses the default language.
5. Click Finished.
This creates an access profile with a default access policy.
Configuring an access policy that uses the CRLDP agent
1. On the Main tab, click Access Policy > Access Profiles.The Access Profiles List screen opens.
2. In the Access Policy column, click the Edit link for the access profile you want to configure to launchthe visual policy editor.The visual policy editor opens the access policy in a separate screen.
3. Click the (+) sign anywhere in the access policy to add a new action item.An Add Item screen opens, listing predefined actions on tabs such as General Purpose, Authentication,and so on.
4. From Authentication, select either Client Cert Inspection or On-Demand Cert Auth and click Additem.A properties screen displays.
5. Click Save.The properties screen closes.
6. Click the (+) sign anywhere in the access policy to add a new action item.An Add Item screen opens, listing predefined actions on tabs such as General Purpose, Authentication,and so on.
7. From Authentication, select CRLDP Auth, click Add item and configure the CRLDP server setting inthe properties screen.
8. Click Save.The properties screen closes.
9. Configure the appropriate endings on the branches.10. Click Apply Access Policy to save your configuration.
The access policy is complete.
To put the access policy into effect, attach the access profile to a virtual server.
Access policy example for CRLDP agent
This is an example of an access policy with all the associated elements needed to retrieve CRLs usingCRLDP. Notice that you must add either the Client Cert Inspection agent or On-Demand Cert Auth agent
40
Authentication Concepts

before the CRLDP object in your access policy. One of those agents is required in order to receive the X.509certificate from the user. This is also important because both agents store the user information, as well asthe issuer certificates, in the session variables. This allows the CRDLP Auth agent to check the revocationstatus of the user's certificate.
Figure 9: How CRLDP works
41
BIG-IP® Access Policy Manager® Authentication Configuration Guide


Chapter
2AAA and Configuring High Availability
• Overview: Configuring AAA high availability• Guidelines for setting up RADIUS
authentication for AAA high availability• Task summary for configuring AAA high
availability

Overview: Configuring AAA high availability
Using AAA high availability with Access Policy Manager®, you can configure multiple authenticationservers to process requests, so that if one authentication server goes down or loses connectivity, the otherscan resume authentication requests, and new sessions can be established, as usual. The Access PolicyManager supports the following authentication servers for high availability: RADIUS, Active Directory,LDAP, CRLDP, and TACACS+.
Note: Although new authentications fail if the BIG-IP® system loses connectivity to the server, existingsessions are unaffected provided that they do not attempt to re-authenticate.
Guidelines for setting up RADIUS authentication for AAA high availability
When you use RADIUS as the authentication method for AAA high availability, there are general guidelinesthat you must follow when you set up your server connections.
• In a non-high availability environment, both the Direct and Use Pool options use the self IP address asa source IP address of the packet reaching the RADIUS server. For this scenario, you just need to addone IP address to the RADIUS allowed IP list to achieve this.
• In a high availability environment where theUse Pool option is used, the floating self IP address is usedas a source IP of the RADIUS packet reaching the back-end. For this scenario, you need to add one selfIP address (which is floating self IP address) to the RADIUS allowed IP list because the IP address isused even after a failover occurs.
• In a high availability environment where theDirect option is used, the self IP address is used as a sourceIP address of the RADIUS packet reaching the back-end. In this scenario, you need to add the self IPaddress from both active and standby devices to the RADIUS allowed IP list so that when failoveroccurs, the self IP address from the second device is accepted by the RADIUS server.
Task summary for configuring AAA high availability
To set up this configuration, follow the procedures in the task list.
Task listSetting up a AAA Active Directory server object for high availabilitySetting up a AAA server object for high availabilityTesting AAA high availability for supported authentication serversUpgrading an Access Policy Manager high availability failover pair
Setting up a AAA Active Directory server object for high availability
1. On the Main tab, click Access Policy > AAA Servers.The AAA Servers list screen opens.
2. From the AAA Servers by Type menu, choose the server type you want to create.
44
AAA and Configuring High Availability

A screen listing existing servers of that type opens.3. Click Create.
The New Server properties screen opens.4. In the Name field, type a unique name for the authentication server.5. In the Domain Name field, type the name of the Windows Domain.6. For Server Connection, select Use Pool.7. Type a name in the Domain Controller Pool Name field.8. Specify the Domain Controllers to include in the pool by typing the IP address and hostname for each
one and clicking the Add button.9. To monitor the health of the AAA server, you have the option to select a health monitor. Only the
gateway_icmp monitor is appropriate in this case; you can select it from the Server Pool Monitorlist.
10. In the Admin Name field, type an administrator name that has Active Directory administrativepermissions.APM uses the information in the Admin Name and Admin Password fields for AD Query. If ActiveDirectory is configured for anonymous queries, you do not need to provide an Admin Name. Otherwise,APM needs an account with sufficient privilege to bind to an Active Directory server, fetch user groupinformation, and fetch Active Directory password policies to support password-related functionality.(APM must fetch password policies, for example, if you select the Prompt user to change passwordbefore expiration option in an AD Query action.) If you do not provide Admin account information inthis configuration, APM uses the user account to fetch information. This works if the user account hassufficient privilege.
Note: The administrator name is case-sensitive.
11. In the Admin Password field, type the administrative password for the server.12. In the Verify Admin Password field, re-type the administrative password for the server.13. In the Timeout field, type a timeout interval (in seconds) for the AAA server. This setting is optional.14. Click Finished to add the new server to the configuration, and return to the main screen.
This adds the new Active Directory server to the AAA Server List.
Setting up a AAA server object for high availability
Use this procedure to set up high availability for these authentication server types only: RADIUS, LDAP,CRLDP, and TACACS+. When setting up high availability for these server types, specify IP addresses ofpool members that you want to use as part of this feature.
1. On the Main tab, click Access Policy > AAA Servers.The AAA Servers list screen opens.
2. From the AAA Servers by Type menu, choose the server type you want to create.A screen listing existing servers of that type opens.
3. In the Name field, type a unique name for the authentication server.4. For the Server Connection setting, select Use Pool.5. Type a name for the server pool.6. For the Server Addresses setting, type in the IP addresses of the pool members, and click Add.7. You have the option to select a Server Pool Monitor to track the health of the AAA server.8. Specify any additional settings based on the authentication server that you selected. See online help for
more information.
45
BIG-IP® Access Policy Manager® Authentication Configuration Guide

9. Click Finished to add the new server to the configuration, and return to the main screen.
Testing AAA high availability for supported authentication servers
To effectively test that high availability works for your authentication servers, you should have two serversthat are accessible, where you can remove one of them from the network.
Note: High availability is supported for these authentication server types only: RADIUS, Active Directory,LDAP, CRLDP, and TACACS+.
1. Begin a tcpdump on the Access Policy Manager®, using a protocol analyzer, and scanning for packetsdestined for the specific port for your authentication server.
2. Log in to the virtual server with both servers active.3. Using the tcpdump records, verify that the requests are being sent to the higher priority server.4. Log out of the virtual server.5. Disable the higher-priority server.6. Log in to the virtual server again.7. Verify that the request is being sent to the other server.8. Log out again, re-enabling the server, and try one more time to verify that the new requests are being
sent to the high priority server.
Upgrading an Access Policy Manager high availability failover pair
To ensure that upgrading a failover pair is successful, make sure that the Local TrafficManager active-standbyunits were configured correctly if you are migrating from a previous version.
Attention: During the upgrade, all users currently logged on to the system will have to log on again.
1. Connect to a standby unit of a failover pair.2. Upgrade the standby unit.3. Press Force offline on the unit to trigger a failover to this newly upgraded unit.
The newly upgraded unit will take over as the active unit.
4. Once the upgraded unit takes over as active, restart the upgraded unit.This extra step of additional restart is required to flush out any of the old sessions which may beenintroduced from the previously active unit from an older version of the software.
5. Wait for the upgraded unit to come back up.6. Once the upgraded unit becomes the active unit, bring the other unit back online by pressing Release
offline.This unit is now the standby unit.
7. Upgrade the standby unit.
46
AAA and Configuring High Availability
Chapter
3Kerberos Authentication with End-User Logons
• About basic authentication and Kerberosend-user logon
• How does end-user logon work?• About Kerberos authentication requirements• Task summary for configuring end-user login
support• Access policy example for end-user login• Kerberos authentication troubleshooting tips

About basic authentication and Kerberos end-user logon
Access Policy Manager® provides an alternative to the current form-based login authentication method.This alternative method uses a browser login box that is triggered by an HTTP 401 response to collectcredentials. A SPNEGO/Kerberos or basic authentication challenge can generate a HTTP 401 response.
This option is useful when a user is already logged in to the local domain and you want to avoid submittingan APM HTTP form for collecting user credentials. The browser automatically submits credentials to theserver and bypasses the login box to collect the credentials again.
Note: Because SPNEGO/Kerberos is a request-based authentication feature, the authentication processis different from other authentication methods, which run at session creation time. SPNEGO/Kerberosauthentication can occur at any time during the session.
The benefits of this feature include:
• Provides flexible login mechanism instead of restricting you to use only the form-based login method.• Eliminates the need for domain users to explicitly type login information again to log in to Access Policy
Manager.• Eliminates the need for user password transmission with Kerberos method.
Important: Administrators should not turn off the KeepAlive setting on the web server because turningthat setting off might interfere with Kerberos authentication.
How does end-user logon work?
To retrieve user credentials for end-user logon, you can use basic authentication or SPEGNO/Kerberosmethods or both.
Basic authenticationUse this method to retrieve user credentials (user name and password) from a browser. You can thinkof this method as a replacement for form-based authentication used by the standard login screen. If youuse basic authentication, the system populates the user name and password session variables, which canthen be used by any other authentication actions, such as Active Directory or RADIUS.
SPNEGO/KerberosUse this method to retrieve user credentials through SPNEGO/Kerberos authentication header. Withthe Kerberos method, the client system must first join a domain and a Kerberos action must follow. TheKerberos action does not run immediately; it runs only when clients request SPNEGO/Kerberosauthentication. By default, Kerberos authentication runs not only on the first request, but also onsubsequent requests where authentication is needed, such as for new connections. Access PolicyManager®validates the request by confirming that a valid ticket is present.
Note: You can disable Kerberos per request-based authentication in the AAA Kerberos serverconfiguration in APM®. If you disable it, authentication occurs while the access policy runs andsubsequent authentications do not occur. In that case, end-user logon does not occur.
Note: You can achieve multi-domain support for Kerberos authentication through multiple virtual servers.Each virtual server must have its own access policy and its own Kerberos configuration.
48
Kerberos Authentication with End-User Logons

Both methods require that an HTTP 401 Response action item be configured in the access policy and thatthe authentication method be specified in the action item. In cases where both methods are selected, thebrowser determines which method to perform based on whether the system has joined a domain. The HTTP401 Response action has two default branches to indicate whether basic authentication or Kerberos methodis performed.
Figure 10: How SPNEGO/Kerberos end-user login works
The end-user logon works with events happening in this order:
• The client becomes a member and connects to the domain.• The client connects to a virtual server on the BIG-IP® system.• The access policy runs and issues a 401 HTTP request action.• If Kerberos is present, the browser forwards the Kerberos ticket along with the request when it receives
the 401 HTTP request.• Access PolicyManager validates the Kerberos ticket after the request is received and determines whether
or not to permit the request.
About Kerberos authentication requirements
To configure Kerberos authentication, youmust meet specific configuration requirements as described here.
Virtual serverThe virtual server IP address and host name are necessary to configure DNS.
DNS configurationMake sure you have the zone file and PTR record for the virtual server IP address. For example:
testbed.lab.companynet 10.10.4.100
Browser configurationConfigure the browser to use Kerberos. Typically, Internet Explorer is already configured for Kerberos;however, you might need to configure it for trusted sites. To use Firefox, you must configure it fornegotiate authentication.
49
BIG-IP® Access Policy Manager® Authentication Configuration Guide

Task summary for configuring end-user login support
To set up this configuration, perform the procedures in the task list. You can configure end-user logonsupport with Basic authentication or Kerberos method or both.
Task listJoining a domainConfiguring an AAA server for Kerberos authenticationCreating an access profileConfiguring an access policy for end-user logon support
Joining a domain
To use Kerberos authentication, you need the client joined and connected to a domain and you need a keytabfile.
1. Create a surrogate user in the domain.In this example, the hostname of the virtual server on the BIG-IP system is testbed.lab.companynet andthe user name is john.setspn -U -A HTTP/testbed.lab.companynet john
2. Map the user account to the service account and generate a keytab file for the service.You can use the ktpass utility to do this. In this example, LAB.COMPANYNET specifies the Kerberosauthentication realm.c:>ktpass -princ HTTP/[email protected] [email protected] -crypto rc4-hmac-nt -ptype KRB5_NT_SRV_HST -pass password-out c:\temp\john.keytab
Configuring an AAA server for Kerberos authentication
Configure a Kerberos AAA server so that you can add it to a Kerberos authentication action in an accesspolicy.
1. On the Main tab, click Access Policy > AAA Servers > Kerberos.The Kerberos Servers list screen opens.
2. Click Create.The New Server properties screen opens.
3. In the Name field, type a unique name for the authentication server.4. In the Auth Realm field, type a Kerberos authentication realm name (administrative name), such as
LAB.COMANYNET.Type the realm name all uppercase; it is case-sensitive.
5. In the Service Name field, type a service name; for example, HTTP.6. In the Keytab File area, click Choose File to locate and upload the keytab file.
A keytab file contains Kerberos encrypted keys (these are derived from the Kerberos password). Youcan use this file to log into Kerberos without being prompted for a password.
50
Kerberos Authentication with End-User Logons

7. Click Finished to add the new server to the configuration, and return to the main screen.
Creating an access profile
You create an access profile to provide the access policy configuration for a virtual server that establishesa secured session.
1. On the Main tab, click Access Policy > Access Profiles.The Access Profiles List screen opens.
2. Click Create.The New Profile screen opens.
3. Type a name for the access profile.4. In the Language Settings area, add and remove accepted languages, and set the default language.
A browser uses the highest priority accepted language. If no browser language matches the acceptedlanguages list, the browser uses the default language.
5. Click Finished.
This creates an access profile with a default access policy.
Configuring an access policy for end-user logon support
Configure an access policy like this one to handle basic and SPEGNO/Kerberos authentication challengeswithout submitting an Access Policy Manager® HTTP form to collect user credentials.
1. On the Main tab, click Access Policy > Access Profiles.The Access Profiles List screen opens.
2. In the Access Policy column, click the Edit link for the access profile you want to configure to launchthe visual policy editor.The visual policy editor opens the access policy in a separate screen.
3. Click the (+) sign anywhere in the access policy to add a new action item.An Add Item screen opens, listing predefined actions on tabs such as General Purpose, Authentication,and so on.
4. Under General Purpose, select HTTP 401 Response, and click Add item.A properties screen opens.
5. In the 401 Response Setting area from the HTTP Auth Level list, select basic+negotiate, and clickSave.The HTTP 401 Response agent is added to the access policy with
6. To perform basic authentication, add an authentication server agent after the Basic branch.7. To use the Kerberos authentication method:
a) Add the Kerberos Auth agent after the Negotiate branch.b) On the Kerberos Auth agent properties screen, specify the Kerberos AAA server.
8. Specify the appropriate endings on each branch.9. Click Apply Access Policy.
For an access policy to go into effect, you must add the corresponding access profile to the virtual server.
51
BIG-IP® Access Policy Manager® Authentication Configuration Guide

Access policy example for end-user login
This is an example of an access policy with all the associated elements needed to successfully support theend-user login feature. Notice that separate branches were created to support using either basic authenticationor Kerberos method to retrieve user credentials.
Note: For basic authentication, the user name and password validation occurs at the session creation time.After the access policy completes, the session cookie is used to validate the session.
Note: By default, Kerberos runs not only at the access policy run time but also at any time in the session.
Figure 11: Example access policy for end-user login
52
Kerberos Authentication with End-User Logons

Figure 12: Example properties for an HTTP 401 response action
Figure 13: Example properties for a Kerberos Auth action on the Negotiate branch
Kerberos authentication troubleshooting tips
You might choose to verify Kerberos authentication configurations in some instances. Use thesetroubleshooting tips to help resolve any issues you might encounter.
53
BIG-IP® Access Policy Manager® Authentication Configuration Guide

Verify the keytab file
From the command line, use the klistcommand as shown in this example.
Important: The command must be typed on one line.
klist -keWRFILE:/config/filestore/files_d/Common_d/kerberos_keytab_file_d/\:Common\:SUN-SPNEGO-APM106_key_file_2
The output for the example contains information like this.
Keytab name:FILE:/config/filestore/files_d/Common_d/kerberos_keytab_file_d/:Common:SUN-SPNEGO-APM106_key_file_2KVNO Principal3 HTTP/[email protected](arcfour-hmac)
Verify Kerberos delegation
From the command line, use the kinit command, as shown in this example.
kinit HTTP/[email protected]
You are prompted for a password and should receive a ticket (no output, no error).
Verify ticket
From the command line type: klist. Here is sample output: /etc/krb5.conf
Capture a TCP dump
Make sure the client sends the ticket to the BIG-IP® system; this verifies that the client setup is successful.
54
Kerberos Authentication with End-User Logons

Chapter
4Local User Database
• Overview: Configuring and administering alocal user database
• Overview: Using a local user database tocontrol authentication
• Overview: Branching in an access policybased on local user database groups

Overview: Configuring and administering a local user database
You can create multiple local user databases to provide on-box authentication, to control user access, tosegment your users, and to store user information.
During access policy operation, you can read from and write to a local user database.
• You can read from a local user database to:
• Determine whether a user is locked out of a local user database instance.• Check the number of failed login attempts for a user.• Check group membership for the user to determine which access policy branch to take.
Note: Groups are text strings. You create them from the Configuration utility.
• You can write to a local user database primarily to increment or reset the number of login failures for auser. You can also update the locked out status for the user; although this option provides flexibility,use it sparingly. Normally, locked out status is set programmatically.
About backing up and restoring users
You can export user data from a local user database instance to a comma-separated values (CSV) file. Thepurpose is to provide you with a way to back up user data, which you can import from the CSV file.
Note: Dynamically created users are not included in the CSV file that you export to back up user data.(You can configure the Local Database action to dynamically create users from an access policy.)
About local user database synchronization across devices
When BIG-IP® systems are included in a Sync-only device group, configuration data is synchronizedautomatically or manually using ConfigSync. ConfigSync has no effect on local user databases, however.In a Sync-only device group, the active node provides the local user database data to the other nodes initially,and then provides updated data every five minutes.
Synchronization status
The date and time of the last high availability (HA) synchronization displays in the Configuration utilityon the Local User List and Local Database Instance screens. If errors occur, they are logged and thenavailable in Access Policy Manager® reports.
About writing to a local user database from an access policy
Administrators using the Configuration utility to update user data need to know that user data can also beupdated by access policies. When you include a Local Database action in an access policy and configure awrite action in it, it can make these changes in a local user database instance.
56
Local User Database

Updates to local user databases in the Common partition
You can use the Local Database action to write to local user databases in the Common partition, in additionto the partition in which you create the access policy.
Note: Usually, you have read-only access to the Common partition from any other partition. The LocalDatabase write action is an exception to this general rule.
Changes to individual user data
The Local Database action can change these types of information for a user:
• Number of login failures• Locked out status - If you change the locked out status for a user, you could change the result of other
access policy actions, such as a local database read action, or a local database authentication action.
Note: When you create a Local Database write action, although groups is on the list of destination DBproperties, you cannot write to it. The groups that are entered using the Configuration Utility are preserved.
Addition and deletion of dynamic users
The Allow User Creation option of the Local Database action creates a user when one does not already existin a local user database. You can use this option to track login attempts by users who are not found in thelocal user database and to lock them out for a period of time. Dynamically created users are removed fromthe database after 20 minutes.
Task summary
Configuring a local user database instanceAdding a user to a local user database instanceForcing change of password for a local user database instance
Configuring a local user database instance
Configure a local user database instance so you can add users and user data to it.
1. On the Main tab, select Access Profiles > Local User DB >Manage Instances.The Manage Instances screen displays.
2. Click Create New Instance.The Create New Local User DB Instance popup screen displays.
3. In the Name field, type a unique name for the database instance.4. In the Lockout Interval (in seconds) field, type the number of seconds to keep a user account locked.
The default setting is 600 seconds.
5. In the Lockout Threshold field, type the maximum number of login failures to allow.The default setting is 3.
6. Click OK.
You have created a local user database instance.
57
BIG-IP® Access Policy Manager® Authentication Configuration Guide
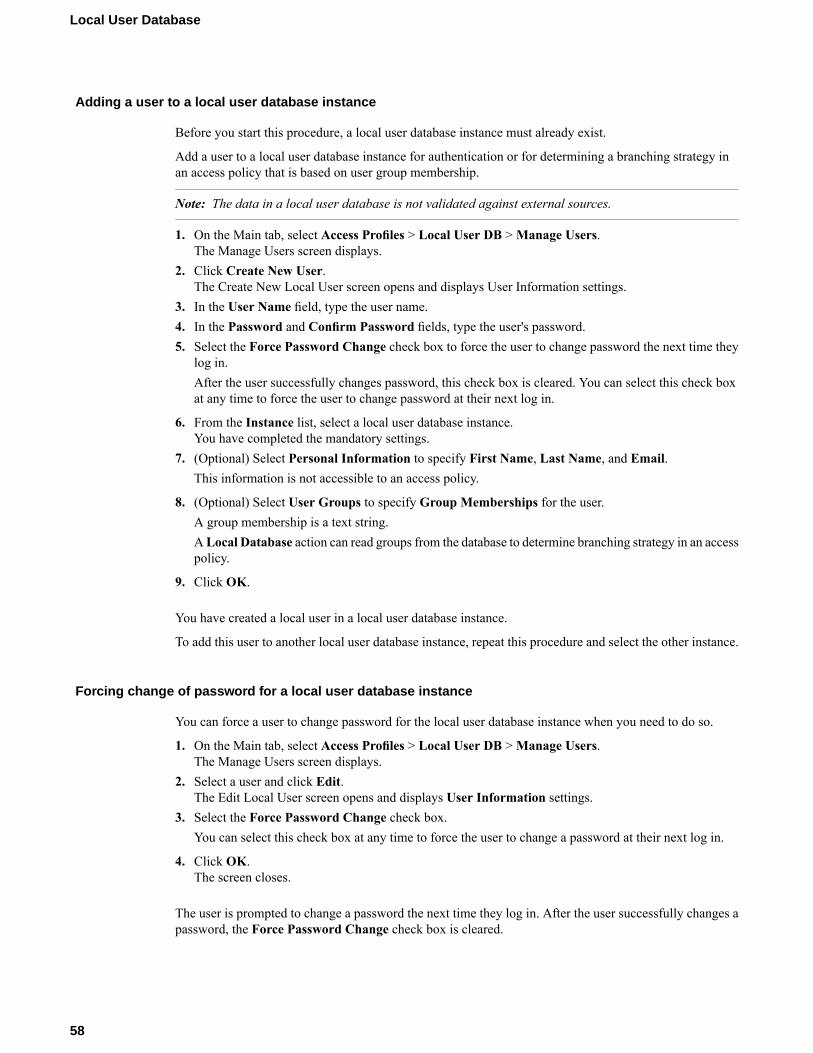
Adding a user to a local user database instance
Before you start this procedure, a local user database instance must already exist.
Add a user to a local user database instance for authentication or for determining a branching strategy inan access policy that is based on user group membership.
Note: The data in a local user database is not validated against external sources.
1. On the Main tab, select Access Profiles > Local User DB >Manage Users.The Manage Users screen displays.
2. Click Create New User.The Create New Local User screen opens and displays User Information settings.
3. In the User Name field, type the user name.4. In the Password and Confirm Password fields, type the user's password.5. Select the Force Password Change check box to force the user to change password the next time they
log in.After the user successfully changes password, this check box is cleared. You can select this check boxat any time to force the user to change password at their next log in.
6. From the Instance list, select a local user database instance.You have completed the mandatory settings.
7. (Optional) Select Personal Information to specify First Name, Last Name, and Email.This information is not accessible to an access policy.
8. (Optional) Select User Groups to specify Group Memberships for the user.A group membership is a text string.ALocal Database action can read groups from the database to determine branching strategy in an accesspolicy.
9. Click OK.
You have created a local user in a local user database instance.
To add this user to another local user database instance, repeat this procedure and select the other instance.
Forcing change of password for a local user database instance
You can force a user to change password for the local user database instance when you need to do so.
1. On the Main tab, select Access Profiles > Local User DB >Manage Users.The Manage Users screen displays.
2. Select a user and click Edit.The Edit Local User screen opens and displays User Information settings.
3. Select the Force Password Change check box.You can select this check box at any time to force the user to change a password at their next log in.
4. Click OK.The screen closes.
The user is prompted to change a password the next time they log in. After the user successfully changes apassword, the Force Password Change check box is cleared.
58
Local User Database

Overview: Using a local user database to control authentication
You can authenticate users directly against a local user database using the Local DB Auth action from anaccess policy.
Also, you can use the local user database to track login failures and lock a user out for a period of time.(This is possible whether authentication occurs against an external AAA server, or a local user database.)Furthermore, you can use the local database to count login failures by users that are not found in a userdatabase, and locking them out for a period of time. You can accomplish these tasks by using Local Databaseactions to read and write information from an access policy.
About locking a user out of an AAA server using a local user database
Amacro, AD auth and LocalDB lockout, is available in the visual policy editor that provides a good exampleof using the Local Database action to lock users out of an external AAA server.
Figure 14: AD auth and LocalDB lockout macro
1. A local database action (LocalDB - Read) reads the locked_out database property and determineswhether the user is locked out.
2. Exiting the LocalDB - Read action on the User Locked Out branch leads to a logging action and a Failureterminal.
3. If the login (ADAuth) fails, a local database write action (LocalDB -Write (Incr)) increments the numberof login failures by 1.
Note: To keep actual logon attempts aligned with the number recorded by the LocalDB - Write (Incr)action (incrementing by 1), theMax Logon Attempts Allowed property in the AD Auth action is set to1. If it was set to another number, for example 2, you would need to configure the LocalDB - Write (Incr)action to increment login failures by the same number, 2.
4. ALoop terminal in the macro causes the macro to loop through the ADAuth and LocalDB -Write (Incr)actions until authentication succeeds or until the maximum number of logon attempts is surpassed andthe macro exits through the Loop terminal.
5. If the login, AD Auth, succeeds, a Local Database write action, LocalDB - Write (Reset), resets theuser's login failures to 0 (zero).
59
BIG-IP® Access Policy Manager® Authentication Configuration Guide

Figure 15: AD auth and LocalDB lockout macrocall in an access policy
In an access policy, three branches follow the macro:
• Successful: The user logged in successfully.• Loop: The user failed to log in the maximum number of times and is locked out now.• Failure: The user is locked out and does not get another chance to try to log in.
About writing to a local user database from an access policy
Administrators using the Configuration utility to update user data need to know that user data can also beupdated by access policies. When you include a Local Database action in an access policy and configure awrite action in it, it can make these changes in a local user database instance.
Updates to local user databases in the Common partition
You can use the Local Database action to write to local user databases in the Common partition, in additionto the partition in which you create the access policy.
Note: Usually, you have read-only access to the Common partition from any other partition. The LocalDatabase write action is an exception to this general rule.
Changes to individual user data
The Local Database action can change these types of information for a user:
• Number of login failures• Locked out status - If you change the locked out status for a user, you could change the result of other
access policy actions, such as a local database read action, or a local database authentication action.
Note: When you create a Local Database write action, although groups is on the list of destination DBproperties, you cannot write to it. The groups that are entered using the Configuration Utility are preserved.
Addition and deletion of dynamic users
The Allow User Creation option of the Local Database action creates a user when one does not already existin a local user database. You can use this option to track login attempts by users who are not found in thelocal user database and to lock them out for a period of time. Dynamically created users are removed fromthe database after 20 minutes.
Task summary
Authenticating users and locking them out with a local databaseUnlocking a user who is locked out of a local user database instance
60
Local User Database

Authenticating users and locking them out with a local database
Before you start this task: create a local user database instance in Access Policy Manager®, add users to thelocal database instance, and then create an access profile.
Authenticate a user against a local user database when an external AAA server is not available. Read andwrite to a local user database when you want to track failed login attempts and lock out users that repeatedlyattempt and fail to log in.
Note: For enhanced security, F5® recommends that you place Local Database actions before and after aLocalDB Auth action to read and write user information. This enables you to track and block login attemptsby any user. This process is demonstrated in the example access policy described here. (You can use thissame process to lock users out of an AAA server by substituting another authentication action for theLocalDB Auth action.)
1. On the Main tab, click Access Policy > Access Profiles.The Access Profiles List screen opens.
2. In the Access Policy column, click the Edit link for the access profile you want to configure to launchthe visual policy editor.The visual policy editor opens the access policy in a separate screen.
3. On an access policy branch, click the plus symbol (+) to add an item to the access policy.Repeat this action from the visual policy editor whenever you want to add an item to the access policy.A popup screen displays actions on tabs, such as General Purpose and Authentication, and provides asearch field.
4. On the selection screen, type logon in the search field, select Logon Page from the results, and selectAdd Item.A logon page should precede other actions in the access policy.
Note: A locked out user is not presented with a logon page, regardless of how many authenticationattempts are allowed.
5. Make any changes that you require to the logon page properties and click Save.The properties screen closes and the visual policy editor is displayed.
6. On the fallback branch after the last action that you added, click the plus symbol (+) to add an item tothe access policy.A popup screen opens.
7. Add a Local Database action and configure it to read the user's locked out status, and create a branchfor a locked out user.a) Type local in the search field.
Search is not case-sensitive.A list of matching actions displays.
b) Select Local Database and click Add Item.A properties screen opens.
c) From the LocalDB Instance list, select a local user database.d) In the User Name field, retain the default session variable or type another variable name or a user
name.e) Click Add new entry
A new line is added to the list of entries with the Action set to Read, and with a Session Variablefield and default value in the Destination column.
f) In the Destination column Session Variable field, type session.localdb.locked_out (or typethe name of another variable).
61
BIG-IP® Access Policy Manager® Authentication Configuration Guide

g) In the Source column from the DB Property list, select locked_out.The entry is complete. A read action reads a value from the database into a session variable.
h) Click the Add Branch Rule button.New Name and Expression settings are displayed.
i) In the Name field, replace the default name by typing a new name.The default name is Branch Rule n where n is a number. The name appears on the branch in theaccess policy, so it should be descriptive.
j) Click the change link in the Expression section.A popup screen opens.
k) Click the Add Expression button.Settings are displayed.
l) From the Agent Sel. list select LocalDB.TheCondition list displaysLocalDBAuth Passed. TheLocalDBAuth Passed list displays Passed.
m) From the LocalDB Auth Passed list, select Locked User Out.The branch rule is complete.
n) Click Finished.The popup screen closes.
o) Click Save.The properties screen closes and the visual policy editor is displayed.
8. On the fallback branch after the previous action , add a LocalDB Auth action and configure propertiesfor it.Valid values for the properties, LocalDB Instance andMax Logon Attempts Allowed, are availablefrom lists.
Note: A user that accumulates the maximum number of logon failures specified in the LocalDB Authaction is locked out of the local user database instance and exits the action on a Locked User Out branch.A user that is not found in the local user database exits the action to the fallback branch.
9. On the fallback branch after the last action that you added, click the plus symbol (+) to add an item tothe access policy.A popup screen opens.
10. Add a Local Database action to increment and write login failures. Configure it to allow user creation.a) Set the LocalDB Instance and User Name fields to the same values you selected previously.b) From the Allow User Creation list, select Yes.
At each subsequent login attempt, login failures increase until the user is eventually locked out.
c) Add a new entry and configure it to read the login_failures DB property into a session variable.d) Add a new entry and configure it to write the value of an expression that increments the number of
failures into the login_failures DB property.
Here is an example of the expression:expr { [mcget {session.localdb.login_failures}] + 1 }.
11. On the successful branch after the Local DB Auth action, add a Local Database action and configureit to reset login failures to 0 (zero).a) Set the LocalDB Instance and User Name fields to the same values you selected previously.b) Add a new entry and configure it to write the value of an expression that evaluates to zero into the
login_failures DB property.
Here is an example of the expression:expr { "0" }.
62
Local User Database

12. Click Save.The properties screen closes and the visual policy editor displays.
13. Click the Apply Access Policy link to apply and activate the changes to the access policy.
Figure 16: Sample access policy (with logging action on the User Locked Out branch)
You must add the access profile to a virtual server in order for this access policy to take effect.
Unlocking a user who is locked out of a local user database instance
You can unlock a user who is locked out of a local user database instance if you do not want to wait the forlockout interval to elapse.
Note: The lockout interval is configurable and can be different for each local user database instance.
1. On the Main tab, select Access Profiles > Local User DB >Manage Users.The Manage Users screen displays.
2. Select a user for whom the Locked Out column specifies yes.3. Click Unlock User.
The account is unlocked in the local user database instance.
Overview: Branching in an access policy based on local user database groups
You can store user group membership strings in a local user database instance. You can add one or morestrings for a user to the database. The strings can reflect any grouping strategy that you want to apply. Youcan make user group-based branching decisions in an access policy by reading the group information forthe user from the database, and creating rules for branching based on it.
Before you can perform this task, you need users and user group membership strings configured in a localuser database instance. You also need an access profile.
Task summaryCreating an access policy to branch based on local DB group membership
Creating an access policy to branch based on local DB group membership
You can use an access policy to retrieve user group membership from a local user database instance andconfigure branch rules to provide different actions for users in different groups.
1. On the Main tab, click Access Policy > Access Profiles.
63
BIG-IP® Access Policy Manager® Authentication Configuration Guide

The Access Profiles List screen opens.2. In the Access Policy column, click the Edit link for the access profile you want to configure to launch
the visual policy editor.The visual policy editor opens the access policy in a separate screen.
3. On an access policy branch, click the plus symbol (+) to add an item to the access policy.Repeat this action from the visual policy editor whenever you want to add an item to the access policy.A popup screen displays actions on tabs, such as General Purpose and Authentication, and provides asearch field.
4. Type local in the search field.Search is not case-sensitive.A list of matching actions is displayed.
5. Select Local Database and click Add Item.A properties screen displays.
6. From the LocalDB Instance list, select a local user database.7. In theUser Name field, retain the default session variable or type another variable name or a user name.8. From the Allow User Creation list, retain the default value (No).9. Click Add new entry.
A new line is added to the list of entries.10. Configure the entry to read the groups from the database and store them in a variable:
a) From the Action list, select Read.b) In the Source column from the DB Property list, select groups.c) In the Destination column Session Variable field, retain the default value, session.localdb.groups
or type the name of a variable.d) In the Source column from the DB Property list, select groups.
You have configured an action that reads the user's groups into a variable.
11. Click the Branch Rules tab to edit a branch rule.12. Click the Add Branch Rule button.
New Name and Expression settings are displayed.13. In the Name field, replace the default name by typing a new name over it.
The default name is Branch Rule n where n is a number. The name appears on the branch in the accesspolicy and so should be descriptive.
14. Click the change link in the Expression section.A popup screen opens.
15. Click the Advanced tab.Use this tab to enter TCL expressions.A text input field is displayed.
16. Type an expression into the text input field.If you expect groups to include only one entry, you can type an expression similar to this one.
expr { [mcget {session.localdb.groups}] eq "eng" }
If you expect groups to include multiple entries, you can type an expression similar to this one
expr { [mcget {session.localdb.groups}] contains "sales" }
17. Click Finished.The popup screen closes.
18. Add more branch rules to provide branches for different user groups.19. Click Save.
The properties screen closes and the visual policy editor displays.
64
Local User Database

20. (Optional) Add any other branches and actions that you need to complete the access policy.
When the access policy runs and takes the branch with the Local Database read action, additional branchingis done based on group membership.
Figure 17: Sample access policy that uses local user DB groups in a branching strategy
65
BIG-IP® Access Policy Manager® Authentication Configuration Guide


Chapter
5NTLM Authentication for Microsoft Exchange Clients
• Overview: Configuring APM for Exchangeclients that use NTLM authentication

Overview: Configuring APM for Exchange clients that use NTLMauthentication
Access PolicyManager® supports Microsoft Exchange clients that are configured to use NTLM by checkingNTLM outside of the APM™ session as needed. APM requires a machine account and an NTLM AuthConfiguration to perform these checks. APM requires an Exchange profile to support Exchange clientsregardless of the authentication they are configured to use.
About using NTLM authentication
Microsoft software systems use NTLM as an integrated single sign-on (SSO) mechanism. However, in anActive Directory-based SSO scheme, Kerberos replaces NTLM as the default authentication protocol.NTLM is still used when a domain controller is not available or is unreachable, such as when the client isnot Kerberos-capable, the server is not joined to a domain, or the user authenticates remotely over the web.
About configuration requirements for NTLM authentication
In Access Policy Manager®, you need to configure these elements:
• Machine account• NTLM authentication configuration• Kerberos SSO configuration• Exchange profile that specifies the NTLM authentication configuration and specifies Kerberos SSO
configurations for the specific Microsoft Exchange services being supported• Access profile that specifies the Exchange profile• Access policy• Pool of servers for the Exchange service; to support Outlook Anywhere, supply a pool of Outlook
Anywhere servers• Virtual server that specifies the access profile and the pool
You also need to configure a special account in Active Directory for Kerberos constrained delegation (KDC).
About reusing a machine account for different BIG-IP systems
You can use the same machine account for two BIG-IP® systems when they are in an active-standbyconfiguration. Otherwise, F5 recommends that you create a new NTLMmachine account using the AccessPolicy Manager® user interface on each BIG-IP system.
Creating a new NTLMmachine account on each BIG-IP system is helpful, for example, when two systemsindependently update their configurations without propagating them, or when you replicate the configurationinto different BIG-IP systems using any configuration replication method. If you export a configurationand import it on another system, the machine account is included; however, after the import completes, youstill need a new machine account and an NTLM authentication configuration that uses the new machineaccount on the target system.
68
NTLM Authentication for Microsoft Exchange Clients

About Outlook Anywhere and NTLM authentication
Access Policy Manager® supports Outlook Anywhere clients that are configured to use NTLM and HTTPBasic protocols independently. Typically, mobile devices use HTTP Basic authentication, while OutlookAnywhere clients can use both NTLM and HTTP Basic authentication. APM determines whether a clientuses NTLMor HTTPBasic authentication and enforces the use of one or the other. After a client authenticateswith NTLM or HTTP Basic, APM supports single sign-on with the back-end application or server usingKerberos constrained delegation (KCD).
Task summary for Exchange clients that use NTLM authentication
Task listConfiguring a machine accountCreating an NTLM Auth configurationSetting up a delegation account to support Kerberos SSOCreating a Kerberos SSO configuration in APMConfiguring an Exchange profileCreating an access profile for Exchange clientsConfiguring an access policy for NTLM authenticationAdding the access profile to the virtual serverMaintaining a machine account
Configuring a machine account
You need to configure a machine account so that Access Policy Manager® can establish a secure channelto a domain controller.
1. On the Main tab, click Access Policy > Access Profiles > NTLM >Machine Account.A new Machine Account screen opens.
2. In the Configuration area, in theMachine Account Name field, type a name.3. In theDomain FQDN field, type the fully qualified domain name (FQDN) for the domain that you want
the machine account to join.4. (Optional) In the Domain Controller FQDN field, type the FQDN for a domain controller.5. In the Admin User field, type the name of a user who has administrator privilege.6. In the Admin Password field, type the password for the admin user.
APM™ uses these credentials to create the machine account on the domain controller. However, APMdoes not store the credentials and you do not need them to update an existing machine accountconfiguration later.
7. Click Join.
This creates a machine account and joins it to the specified domain.
Creating an NTLM Auth configuration
Create an NTLM Auth configuration to specify the domain controllers that a machine account can use tolog in.
69
BIG-IP® Access Policy Manager® Authentication Configuration Guide

1. On the Main tab, click Access Policy > Access Profiles > NTLM > NTLM Auth Configuration.A new NTLM Auth Configuration screen opens.
2. In the Name field, type a name.3. From theMachine Account Name list, select the machine account configuration to which this NTLM
Auth configuration applies.You can assign the same machine account to multiple NTLM authentication configurations.
4. For each domain controller, type a fully qualified domain name (FQDN) and click Add.
Note: You should add only domain controllers that belong to one domain.
By specifyingmore than one domain controller, you enable high availability. If the first domain controlleron the list is not available, APM™ tries the next domain controller on the list, successively.
5. Click Finished.
This specifies the domain controllers that a machine account can use to log in.
Setting up a delegation account to support Kerberos SSO
Before you can configure Kerberos SSO in Access Policy Manager®, you must create a delegation accountin Active Directory. Note that for every server realm, you must create a delegation account in that realm.
1. Open the Active Directory Users and Computers administrative tool and create a new user account.The user account should be dedicated for delegation and the Password never expires setting enabled.
2. Run the setspn command-line tool for the user account from an elevated command prompt:The setspn command-line tool is available in Windows 2000 and Windows Server 2003 from SupportTools; it needs to be installed. The setspn tool is built into Windows Server 2008; it is available if youhave the Active Directory Domain Services (AD DS) server role installed.a) Click theWindows Start button, right-clickCommandPrompt, and then clickRun as administrator.
An elevated command prompt opens.b) Type an setspn command.
Example of command usage on Windows Server 2003: setspn -AHTTP/bigcompany.lab.appnet.com domainname\userfordelegation
Note: In Windows Server 2008, use the newly introduced -L option instead of -A. It validates theunicity of the service principal name (SPN) in the domain.
3. Return to the Active Directory Users and Computers screen to open your account again.A Delegation tab should appear.
4. Click the Delegation tab.5. Select Trust this user for delegation to specified services only.6. Select Use any authentication protocol, and add all your services to the list under Services to which
this account can present delegated credentials.Every service should have Service Type HTTP (or http) and host name of the pool member or webapplication resource host that you will use in your configuration.
7. Click OK.This creates the new delegation account.
70
NTLM Authentication for Microsoft Exchange Clients

Creating a Kerberos SSO configuration in APM
Before you create a Kerberos SSO configuration in Access Policy Manager®, create a delegation accountin Active Directory.
To support Kerberos single sign-on authentication from APM®, you must create a Kerberos SSOconfiguration.
1. On the Main tab, click Access Policy > SSO Configurations > Kerberos.The SSO Configurations screen opens for Kerberos type.
2. Click Create.The New SSO Configuration screen opens.
3. In the Name field, type a name for the SSO configuration.4. In the Credentials Source area, specify the credentials that you want cached for Single Sign-On.5. In the Kerberos Realm field, type the name of the realm in uppercase.
For example, MY.HOST.LAB.MYNET.COM
6. In the Account Name field, type the name of the Active Directory account configured for delegation.7. In theAccount Password andConfirmAccount Password fields, type the delegation account password.8. Click Finished.
Configuring an Exchange profile
If any of the Exchange clients you support authenticate using NTLM, you must first create these objects:
• A machine account
• An NTLM Auth configuration
• At least one Kerberos SSO configuration
Note: For APM to support Kerberos SSO, a delegation account is required on Active Directory.
You create an Exchange profile to specify how to handle traffic from Microsoft Exchange clients.
1. On the Main tab, click Access Policy > Application Access/Microsoft Exchange.A list of Exchange profiles displays.
2. Click Create.A Create New Exchange Profile screen pops up and displays general settings.
3. In the Exchange Name field, type a name for the Exchange profile.4. From the Parent Profile list, select a profile.
The Exchange profile inherits settings from the parent profile that you select.
Note: APM supplies a default Exchange profile named exchange.
5. Repeat these steps for one or more Microsoft Exchange services:a) From Service Settings on the left, select an Exchange service.
Settings for the service are displayed in the right pane.b) In the URL field, retain any default settings that are displayed or type a path to use to match the
Exchange client.Default settings for this field are supplied in the default exchange profile.
71
BIG-IP® Access Policy Manager® Authentication Configuration Guide

c) From theFront EndAuthentication list, select the type of authentication to use:Basic,Basic-NTLM,or NTLM.Only the applicable authentication types for the particular the Exchange service are included on thelist.
Note: If you select NTLM or Basic-NTLM, you must also select a configuration from NTLMConfiguration list on the General Settings screen.
d) From the SSO Configuration list, select an SSO configuration, if needed, for use after initial login.For Basic-NTLMand NTLM authentication types, only Kerberos SSO is supported.
You configured settings for one or more Microsoft Exchange services.6. Click OK.
The screen closes.
The Exchange profile is displayed on the list.
Apply this Exchange profile by adding it to an access profile.Task summary for Exchange clients that use NTLM authenticationCreating a Kerberos SSO configuration in APMCreating an access profile for Exchange clients
Creating an access profile for Exchange clients
You create an access profile to provide the access policy configuration for a virtual server that establishesa secured session. You add an Exchange profile to the access policy to specify how to handle traffic fromMicrosoft Exchange clients
1. On the Main tab, click Access Policy > Access Profiles.The Access Profiles List screen opens.
2. Click Create.The New Profile screen opens.
3. In the Name field, type a name for the access profile.4. (Optional) In the Configurations area from the Exchange list, select an Exchange profile.
Exchange profiles specify any SSO configurations forMicrosoft Exchange services, such as Autodiscover,Outlook Anywhere, and so on. The configuration in the Exchange profile is used forMicrosoft Exchangeclients regardless of any SSO configuration you select from the SSO Configuration list in this accessprofile.
5. In the Language Settings area, add and remove accepted languages, and set the default language.A browser uses the highest priority accepted language. If no browser language matches the acceptedlanguages list, the browser uses the default language.
6. Click Finished.
The access profile appears in the Access Profiles List.Task summary for Exchange clients that use NTLM authenticationConfiguring an Exchange profileConfiguring an access policy for NTLM authentication
72
NTLM Authentication for Microsoft Exchange Clients

Configuring an access policy for NTLM authentication
You configure an access policy for NTLM authentication to support Outlook Anywhere clients that log inusing NTLM to also gain SSO access to a backend server that is protected by Kerberos KCD.
Note: NTLM authentication occurs before an access policy runs. If NTLM authentication fails, an errordisplays and the access policy does not run.
1. On the Main tab, click Access Policy > Access Profiles.The Access Profiles List screen opens.
2. In the Access Policy column, click the Edit link for the access profile you want to configure to launchthe visual policy editor.The visual policy editor opens the access policy in a separate screen.
3. Click the (+) sign anywhere in the access policy to add a new action item.An Add Item screen opens, listing predefined actions on tabs such as General Purpose, Authentication,and so on.
4. On the Endpoint Security (Server-Side) tab, selectClient for MS Exchange and clickAdd Item to addthe action to the access policy.A Client for MS Exchange action determines whether the client is using Microsoft Exchange orActiveSync protocols. You must add this action before an NTLM Auth Result action.The Client for MS Exchange action popup screen opens.
5. Click Save.The properties screen closes and the visual policy editor displays.
6. Check whether the Outlook Anywhere client authenticated using NTLM.a) Click the [+] sign on the successful branch after the Client for MS Exchange action.
An Add Item window opens.b) On the Authentication tab, select NTLM Auth Result.c) Click Add Item.
A popup screen opens.d) Click Save.
The properties screen closes and the visual policy editor is displayed.
7. Configure a branch in the access policy for an Outlook Anywhere client that has authenticated usingNTLM.a) Click the [+] sign on the successful branch after the NTLM Auth Result action.
An Add Item window opens.b) On the Assignment tab, select SSO Credential Mapping and click Add Item.
The SSO Credential Mapping screen opens.c) Click Save.
The properties screen closes and the visual policy editor is displayed.d) On the fallback branch after the SSO Credential Mapping action, click the Deny ending.
A pop-up window opens.e) Select Allow and click Save.
You have completed a branch in the access policy for an Outlook Anywhere client that, havingpreviously authenticated with NTLM, has SSO (Kerberos KCD) access on the back end.
8. Configure a branch in the access policy for an Outlook Anywhere client that uses HTTP Basicauthentication.a) Click the [+] sign on the fallback branch after the NTLM Auth Result action.
An Add Item window opens.
73
BIG-IP® Access Policy Manager® Authentication Configuration Guide

b) On the Logon tab, select Logon Page and click the Add Item button.The Logon Page Agent properties screen opens.
c) Make any changes that you require to logon page properties and click Save.The properties screen closes and the visual policy editor is displayed.
d) On the Successful branch after the Logon Page action, add an authentication action.e) On the Successful branch after the authentication action, add an SSO Credential Mapping action.f) On the fallback branch after SSO Credential Mapping, change the ending from Deny to Allow.
You have completed a branch in the access policy to authenticate an Outlook Anywhere client that usesHTTP Basic authentication and provides SSO (Kerberos KCD) access for the client on the back end.
9. (Optional) On the fallback branch after the MS Exchange Client action, configure a branch for a clientthat is not an Outlook Anywhere client.You could add Logon Page, authentication, and SSO Credential Mapping actions or other actions here.
10. Click the Apply Access Policy link to apply and activate the changes to the access policy.
You have created an access policy that checks whether the client is an Outlook Anywhere client and whethersuch a client has authenticated using NTLM. If so, the policy provides SSO (Kerberos KCD) access on thebackend server.
Figure 18: Example access policy with actions based on whether NTLM authentication occurred
Adding the access profile to the virtual server
You associate the access profile with the virtual server so that Access PolicyManager® can apply the profileto incoming traffic.
1. On the Main tab, click Local Traffic > Virtual Servers.The Virtual Server List screen opens.
2. Click the name of the virtual server you want to modify.3. In the Access Policy area, from the Access Profile list, select the access profile.4. Click Update to save the changes.
Your access policy is now associated with the virtual server.
Maintaining a machine account
In some networks, administrators run scripts to find and delete outdated machine accounts on the domaincontrollers. To keep the machine account up-to-date, you can renew the password periodically.
1. On the Main tab, click Access Policy > Access Profiles > NTLM >Machine Account.The Machine Account screen opens.
2. Click the name of a machine account.The properties screen opens and displays the date and time of the last update to the machine accountpassword.
3. Click the Renew Machine Password button.The screen refreshes and displays the updated date and time.
74
NTLM Authentication for Microsoft Exchange Clients

This changes the machine account last modified time.
75
BIG-IP® Access Policy Manager® Authentication Configuration Guide


Chapter
6HTTP Basic Authentication for Microsoft Exchange Clients
• Overview: Configuring APM for Exchangeclients that use HTTP Basic

Overview: Configuring APM for Exchange clients that use HTTP Basic
Access Policy Manager® (APM®) requires an Exchange profile to support Microsoft Exchange clients. AnExchange profile is specified in the access profile attached to the virtual server that handles the traffic fromExchange clients.
About Exchange profiles
An Exchange profile specifies service settings for Microsoft Exchange clients. Based on the settings, AccessPolicy Manager® (APM™) identifies the client, authenticates the client and, when an SSO configuration isspecified, provides SSO.
In an Exchange profile, you can specify settings for one or more of these Microsoft Exchange services:
• ActiveSync• Autodiscover• Exchange Web Service• Offline Address Book• Outlook Anywhere
ForMicrosoft Exchange clients that are configured to use NTLM, youmust include an NTLM authenticationconfiguration in the Exchange profile.
Note: With an NTLM authentication configuration, APM supports only Kerberos SSO on the back end.
An Exchange profile is specified in an access profile.
Task summary for Exchange clients that use HTTP Basic authentication
Task listHTTP Basic Authentication for Microsoft Exchange ClientsConfiguring an Exchange profileCreating an access profile for Exchange clientsConfiguring an access policy for Microsoft Exchange clientsAdding the access profile to the virtual server
Configuring an Exchange profile
If any of the Exchange clients you support authenticate using NTLM, you must first create these objects:
• A machine account
• An NTLM Auth configuration
• At least one Kerberos SSO configuration
Note: For APM to support Kerberos SSO, a delegation account is required on Active Directory.
You create an Exchange profile to specify how to handle traffic from Microsoft Exchange clients.
78
HTTP Basic Authentication for Microsoft Exchange Clients
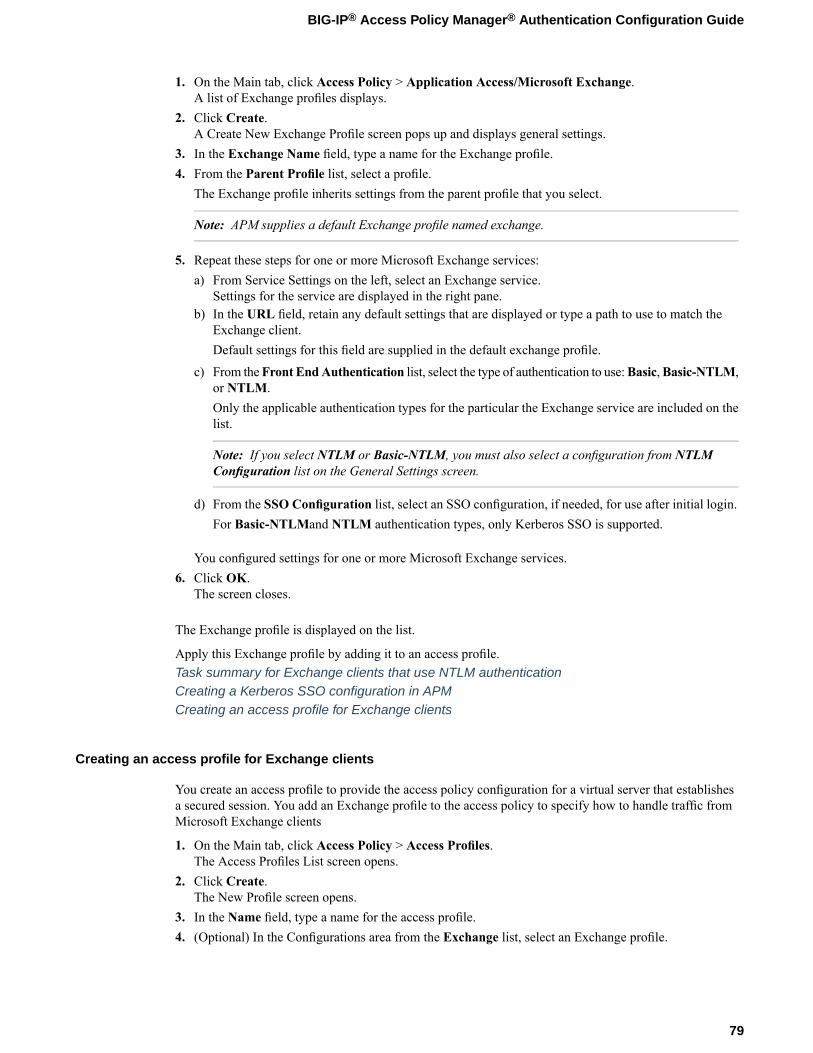
1. On the Main tab, click Access Policy > Application Access/Microsoft Exchange.A list of Exchange profiles displays.
2. Click Create.A Create New Exchange Profile screen pops up and displays general settings.
3. In the Exchange Name field, type a name for the Exchange profile.4. From the Parent Profile list, select a profile.
The Exchange profile inherits settings from the parent profile that you select.
Note: APM supplies a default Exchange profile named exchange.
5. Repeat these steps for one or more Microsoft Exchange services:a) From Service Settings on the left, select an Exchange service.
Settings for the service are displayed in the right pane.b) In the URL field, retain any default settings that are displayed or type a path to use to match the
Exchange client.Default settings for this field are supplied in the default exchange profile.
c) From theFront EndAuthentication list, select the type of authentication to use:Basic,Basic-NTLM,or NTLM.Only the applicable authentication types for the particular the Exchange service are included on thelist.
Note: If you select NTLM or Basic-NTLM, you must also select a configuration from NTLMConfiguration list on the General Settings screen.
d) From the SSO Configuration list, select an SSO configuration, if needed, for use after initial login.For Basic-NTLMand NTLM authentication types, only Kerberos SSO is supported.
You configured settings for one or more Microsoft Exchange services.6. Click OK.
The screen closes.
The Exchange profile is displayed on the list.
Apply this Exchange profile by adding it to an access profile.Task summary for Exchange clients that use NTLM authenticationCreating a Kerberos SSO configuration in APMCreating an access profile for Exchange clients
Creating an access profile for Exchange clients
You create an access profile to provide the access policy configuration for a virtual server that establishesa secured session. You add an Exchange profile to the access policy to specify how to handle traffic fromMicrosoft Exchange clients
1. On the Main tab, click Access Policy > Access Profiles.The Access Profiles List screen opens.
2. Click Create.The New Profile screen opens.
3. In the Name field, type a name for the access profile.4. (Optional) In the Configurations area from the Exchange list, select an Exchange profile.
79
BIG-IP® Access Policy Manager® Authentication Configuration Guide

Exchange profiles specify any SSO configurations forMicrosoft Exchange services, such as Autodiscover,Outlook Anywhere, and so on. The configuration in the Exchange profile is used forMicrosoft Exchangeclients regardless of any SSO configuration you select from the SSO Configuration list in this accessprofile.
5. In the Language Settings area, add and remove accepted languages, and set the default language.A browser uses the highest priority accepted language. If no browser language matches the acceptedlanguages list, the browser uses the default language.
6. Click Finished.
The access profile appears in the Access Profiles List.Task summary for Exchange clients that use NTLM authenticationConfiguring an Exchange profileConfiguring an access policy for NTLM authentication
Configuring an access policy for Microsoft Exchange clients
Before you configure this access policy, you must have an AAA Active Directory server configured inAccess Policy Manager®.
You configure an access policy to support Microsoft Exchange clients with login, HTTP basic authentication,and SSO.
Note: This access policy does not support Microsoft Exchange clients that are configured to authenticateusing NTLM.
1. On the Main tab, click Access Policy > Access Profiles.The Access Profiles List screen opens.
2. In the Access Policy column, click the Edit link for the access profile you want to configure to launchthe visual policy editor.The visual policy editor opens the access policy in a separate screen.
3. On an access policy branch, click the plus symbol (+) to add an item to the access policy.A popup screen displays actions on tabs, such as General Purpose and Authentication, and provides asearch field.
4. On the Logon tab, select Logon Page and click the Add Item button.The Logon Page Agent properties screen opens.
5. Make any changes that you require to the properties and click Save.The properties screen closes and the visual policy editor displays.
6. On the fallback branch after the last action that you added, click the plus symbol (+) to add an item tothe access policy.A popup screen opens.
7. On the Authentication tab, select AD Auth.A properties screen displays.
8. From the Server list, select a server.9. Click Save.
The properties screen closes and the visual policy editor displays.10. On the successful branch after the last action that you added, click the plus symbol (+) to add an item
to the access policy.A popup screen displays actions on tabs, such as General Purpose and Authentication, and provides asearch field.
11. On the Assignment tab, select SSO Credential Mapping and click Add Item.A properties screen opens.
80
HTTP Basic Authentication for Microsoft Exchange Clients

12. Click Save.The properties screen closes and the visual policy editor displays.
13. Click the Apply Access Policy link to apply and activate the changes to the access policy.
Adding the access profile to the virtual server
You associate the access profile with the virtual server so that Access PolicyManager® can apply the profileto incoming traffic.
1. On the Main tab, click Local Traffic > Virtual Servers.The Virtual Server List screen opens.
2. Click the name of the virtual server you want to modify.3. In the Access Policy area, from the Access Profile list, select the access profile.4. Click Update to save the changes.
Your access policy is now associated with the virtual server.
81
BIG-IP® Access Policy Manager® Authentication Configuration Guide


Appendix
AAAA Session Variables
• How to view session variables• AAA server session variables for access
policy rules

How to view session variables
You can examine the session variables that are in use in one of these ways:
• Use the sessiondump command• Run Access Policy Manager reports
AAA server session variables for access policy rules
You can authorize users with user information provided by your authentication servers in the form ofattributes. These attributes, converted into session variables, can be used to create rules.
Common session variables for all authentication methods.
DescriptionSession Variable
Provides user credentials. The username string is storedafter encrypting, using the system's client key.
session.logon.last.username
Provides user credentials. The password string is storedafter encrypting, using the system's client key.
session.logon.last.password
Session variables for RADIUS
DescriptionSession Variable
Provides the result of the RADIUS authentication. Theavailable values are:
session.RADIUS.last.result
• 0: Failed• 1: Passed
$attr_name is a value that represents the user’s attributesreceived during RADIUS authentication. Each attribute isconverted to separate session variables.
session.RADIUS.last.attr.$attr_name
Displays the error message for the last login. Ifsession.RADIUS.last.result is set to 0, then
session.RADIUS.last.errmsg
session.RADIUS.last.errmsg might be useful fortroubleshooting purposes. Example:
c76a50c0.session.RADIUS.last.errmsg 13Access-Reject
Session variables for RSA SecurID
DescriptionSession Variable
Provides the result of the RSA SecurID authentication. Theavailable values are:
session.securid.last.result
• 0: Failed
84
AAA Session Variables

DescriptionSession Variable• 1: Passed
Session variables for Active Directory
DescriptionSession Variable
$attr_name is a value that represents the user’s attributesreceived from the Active Directory. Each attribute isconverted to separate session variables.
session.ad.last.attr.$attr_name
primarygroup.$attr_name is a value that represents theuser’s group attributes received from the Active Directory.Each attribute is converted to separate session variables.
session.ad.last.attr.primarygroup.$attr_name
AD Auth agent sets this variable to the actual user domainused for successful Active Directory authentication, whethercross-domain support is enabled or disabled.
session.ad.last.actualdomain
Provides the result of the Active Directory authentication.The available values are:
session.ad.last.authresult
• 0: Failed• 1: Passed
Provides the result of the Active Directory query. Theavailable values are:
session.ad.last.queryresult
• 0: Failed• 1: Passed
Displays the error message for the last login. Ifsession.ad.last.authresult or
session.ad.last.errmsg
session.ad.last.queryresult is set to 0, thensession.ad.last.errmsg might be useful fortroubleshooting purposes.
Session variables for LDAP
DescriptionSession Variable
Provides the result of the LDAP authentication. The availablevalues are:
session.ldap.last.authresult
• 0: Failed• 1: Passed
Provides the result of the LDAP query. The available valuesare:
session.ldap.last.queryresult
• 0: Failed• 1: Passed
$attr_name is a value that represents the user's attributesreceived during LDAP/query. Each attribute is converted toseparate session variables.
session.ldap.last.attr.$attr_name
Useful for troubleshooting, and contains the last errormessage generated for LDAP, for exampleaad2a221.ldap.last.errmsg.
session.ldap.last.errmsg
85
BIG-IP® Access Policy Manager® Authentication Configuration Guide

Session variables for CRLDP
DescriptionSession Variable
Provides the client certificate received from the user in PAMformat.
session.ldap.ssl.cert.whole
Provides the issuer certificate of the client certificate in PAMformat.
session.ssl.cert.certissuer
Sets the result of the CRLDP authentication. The availablevalues are:
session.crldp.last.result
• 0: Failed• 1: Passed
Sets the status of the authentication to Failed.session.crldp.last.status
Session variables for TACACS+
DescriptionSession Variable
Provides TACACS+ accounting start time and date set bythe accounting agent.
session.tacasplus.last.acct.start_date;session.tacasplus.last.acct.start_time
Allows the accounting agent to set the available values toeither of the following values:
session.tacacsplus.last.acctresult
• 0: Failed• 1: Succeeds
Contains the error message string when the TACACS+authentication or accounting fails.
session.tacacsplus.last.errmsgs
Sets to 1 when authentication succeeds, or 0 when it fails.session.tacacsplus.last.result
Session variables for OCSP
DescriptionSession Variable
Provides the client certificate received from the user in PAMformat.
session.ssl.cert.whole
Provides the issuer certificate of the client certificate in PAMformat.
session.ssl.cert.certissuer
Sets the result of the OCSP authentication. The availablevalues are:
session.ocsp.last.result
• 0: Failed• 1: Passed
Sets the status of the authentication to Failed.session.ocsp.last.status
Session variables for RSA Adaptive Authentication (AA)
DescriptionSession Variable
Sets the result of the RSA adaptive authentication. Theavailable values are:
session.rsa_aa.last.result
• 0: Failed• 1: Passed
86
AAA Session Variables

Appendix
BAAA Configuration Examples
• AAA server configuration examples

AAA server configuration examples
This appendix includes AAA configuration examples for all authentication methods.
Example for converting hex attributes
The following are examples for converting hex attributes for RADIUS, Active Directory, and LDAP.
Handling of binary value attribute for RADIUS
For RADIUS authentication, we convert attributes to hex if they have unprintable characters, or they arebased on attribute type. We convert class attribute to hex even if it contains only printable values (byattribute type). No other attributes are encoded to hex if they do not contain unprintable characters.
Case 1:
Handling of attributes with single value
1bf80e04.session.radius.last.attr.class 62 /0x54230616000001370001ac1d423301caa87483dadf740000000000000007
Case 2:
Handling of attributes with multiple values (mix of binary and non binary values)
243be90d.session.radius.last.attr.class 119 0x6162636465666768696 /a6b6c6d6e6f707172737475767778797a | 0x54220615000001370001ac1d423301caa87483/dadf740000000000000006
If the attribute type does not require hex encoding, and some of the values are unprintable, then only thosevalue(s) are encoded to hex.
3888eb70.session.radius.last.attr.login-lat-group 37 /0x6d7920bda12067726f757032 | mygroup1
Handling of binary value attribute for Active Directory
For Active Directory, we cannot base the conversion on attribute type. The decision to convert attributevalue to hex is made only if the value contains unprintable characters. If the session variable contains severalvalues, and one or more of those values is unprintable, then we convert only those particular values to hex.
Case 1:
Handling of attributes with single value
7ecc84a2.session.ad.last.attr.objectSid 58 /0x01050000000000051500000013fe8e97c03cd5b5ad04e2e255040000
88
AAA Configuration Examples

Case 2:Handling of attributes with multiple values (mix of binary and non binary values)
7ecc84a2.session.ad.last.attr.memberOf 460 |CN=printablegroup,OU=groups,OU=someco,DC=sherwood,DC=labt,DC=fp,DC=somelabnet,DC=com |0x434e3d756e7072696e7461626c6520c2bdc2a12067726f75702c4f553d67726f7570732c4f553d66352| /c44433d73686572776f6f642c44433d6c6162742c44433d66702c44433d66356e65742c44433d636f6d| /CN=Domain Users,CN=Users,DC=smith,DC=labt,DC=fp,DC=somlabnet,DC=com | /CN=CERTSVC_DCOM_ACCESS,CN=Users,DC=smith,DC=labt,DC=fp,DC=somelabnet,DC=com| /CN=Users,CN=Builtin,DC=smith,DC=labt,DC=fp,DC=somelabnet,DC=com |
Handling of binary value attribute for LDAP
The conversion of attributes to hex for LDAP is identical to Active Directory.
Case 1:Handling of attributes with single value
9302eb80.session.ldap.last.attr.objectGUID 34 /0xfef232d3039be9409a72bfc60bf2a6d0
Case 2:Handling of attributes with multiple values (mix of binary and non binary values)
29302eb80.session.ldap.last.attr.memberOf 251 | /CN=printable group,OU=groups,OU=someco,DC=smith, /DC=labt,DC=fp,DC=somelabnet,DC=com | /0x434e3d756e7072696e7461626c6520c2bdc2a12067726f75702c4f553d67726f7570732c4f553d66352c/44433d73686572776f6f642c44433d6c6162742c44433d66702c44433d66356e65742c44433d636f6d|
Example of authenticating and authorizing users with Active Directory
This is an example of an access policy with all the associated elements that are needed to authenticate andauthorize your users with Active Directory query and Active Directory authentication. Notice that the objectswere added to the access policy as part of the authentication process.
Figure 19: Example of an access policy for AD auth and query
89
BIG-IP® Access Policy Manager® Authentication Configuration Guide

Example of LDAP auth and query default rules
In this example, after successful authentication, the system retrieves a user group using an LDAP query.Resources are assigned to users if the user group has access to the network access resources. Additionally,users are directed to the webtop ending.
In the following figure, the rule for LDAP query was changed from default rule to check for user’s groupattribute.
Figure 20: Example of an access policy for LDAP auth query
90
AAA Configuration Examples

Appendix
CTroubleshooting AAA Configurations
• List of troubleshooting tips for authentication

List of troubleshooting tips for authentication
Refer to these tables for all AAA server authentication troubleshooting tips.
RADIUS authentication and accounting troubleshooting tips
You might run into problems with RADIUS authentication and accounting in some instances. Follow thesetips to try to resolve any issues you might encounter.
RADIUS authentication and accounting access policy action troubleshooting
Possible explanations and corrective actionsPossible error messages
Authentication faileddue to timeout
• Check that the Access PolicyManager is configured as a client on theRADIUS server.
• You might have encountered a general network connection problem.
Authentication faileddue to RADIUS accessreject
• Check that the shared secret on the RADIUS server is valid.• Check that the user credentials are entered correctly.
Additional troubleshooting tips for RADIUS authentication and accounting
Steps to takeYou should
Check to see if your accesspolicy is attempting to performauthentication
• Refer to the message boxes in your access policy to display informationon what the access policy is attempting to do.
• Refer to/var/log/apm to view authentication and accounting attemptsby the access policy.
Note: Make sure that your log level is set to the appropriate level. Thedefault log level is notice
Check the RADIUS Serverconfiguration
• Confirm that the Access Policy Manager is registered as a RADIUSclient. Since the Access Policy Manager makes requests from the selfIP address to the RADIUS server for authentication requests, theaddress of the self-IP address should be registered as a RADIUS client.
• Check the RADIUS logs and check for any errors.
Confirm network connectivity • Access the Access PolicyManager through the command line interfaceand check your connectivity by pinging the RADIUS server using thehost entry in the AAA Server box.
• Confirm that the RADIUS port 1812 is not blocked between the AccessPolicy Manager and the RADIUS server.
Capture a TCP dump • Take a TCP dump from theAccess PolicyManager when authenticationattempts are made. For example, %TCP dump-i 1.1 -s /tmp/dump. Youmust first determine what interface the self IP address is on. TheseTCP dumps indicate activities between the Access Policy Managerand the authentication server.
92
Troubleshooting AAA Configurations
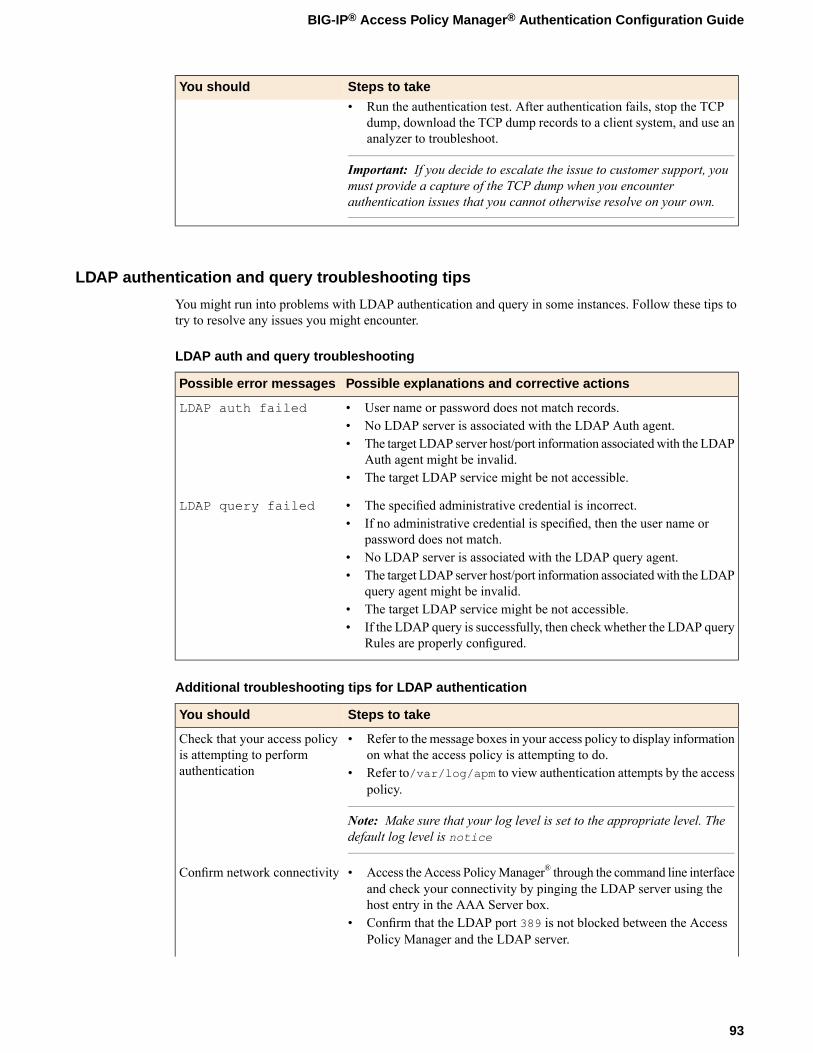
Steps to takeYou should• Run the authentication test. After authentication fails, stop the TCP
dump, download the TCP dump records to a client system, and use ananalyzer to troubleshoot.
Important: If you decide to escalate the issue to customer support, youmust provide a capture of the TCP dump when you encounterauthentication issues that you cannot otherwise resolve on your own.
LDAP authentication and query troubleshooting tips
You might run into problems with LDAP authentication and query in some instances. Follow these tips totry to resolve any issues you might encounter.
LDAP auth and query troubleshooting
Possible explanations and corrective actionsPossible error messages
LDAP auth failed • User name or password does not match records.• No LDAP server is associated with the LDAP Auth agent.• The target LDAP server host/port information associatedwith the LDAP
Auth agent might be invalid.• The target LDAP service might be not accessible.
LDAP query failed • The specified administrative credential is incorrect.• If no administrative credential is specified, then the user name or
password does not match.• No LDAP server is associated with the LDAP query agent.• The target LDAP server host/port information associatedwith the LDAP
query agent might be invalid.• The target LDAP service might be not accessible.• If the LDAP query is successfully, then check whether the LDAP query
Rules are properly configured.
Additional troubleshooting tips for LDAP authentication
Steps to takeYou should
Check that your access policyis attempting to performauthentication
• Refer to the message boxes in your access policy to display informationon what the access policy is attempting to do.
• Refer to/var/log/apm to view authentication attempts by the accesspolicy.
Note: Make sure that your log level is set to the appropriate level. Thedefault log level is notice
Confirm network connectivity • Access theAccess PolicyManager® through the command line interfaceand check your connectivity by pinging the LDAP server using thehost entry in the AAA Server box.
• Confirm that the LDAP port 389 is not blocked between the AccessPolicy Manager and the LDAP server.
93
BIG-IP® Access Policy Manager® Authentication Configuration Guide

Steps to takeYou should
Confirm network connectivity • Access the Access PolicyManager through the command line interfaceand check your connectivity by pinging the LDAP server using thehost entry in the AAA Server box.
• Confirm that the LDAP port 389 is not blocked between the AccessPolicy Manager and the LDAP server.
Check the LDAP serverconfiguration
• Verify that the administrative credentials are correct on the LDAPserver, and that they match the credentials used by the AAA entry.
Note: A good test is to use full administrative credentials with all rights.If that works, you can use less powerful credentials for verification.
Capture a TCP dump • Take a TCP dump from theAccess PolicyManager when authenticationattempts are made. For example, %tcpdump-i 1.1 -s /tmp/dump. Youmust first determine what interface the self-IP is on. These TCP dumpsindicate activities between the Access Policy Manager and theauthentication server.
• Run the authentication test. After authentication fails, stop the TCPdump, and download the TCP dump to a client system, and use ananalyzer to troubleshoot.
Important: If you decide to escalate the issue to customer support, youmust provide a capture of the TCP dump when you encounterauthentication issues that you cannot otherwise resolve on your own.
Active Directory authentication and query troubleshooting tips
You may run into problems with Active Directory authentication and query processes in some instances.Follow these tips to try to resolve any issues you may encounter.
Active Directory auth authentication and query troubleshooting
Possible explanations and corrective actionsPossible error messages
This error occurs when the principal/domain name does not match thedomain controller server's database. For example, if the actual domain is
Domain controllerreply did not matchexpectations.(-1765328237) SALES.MYCOMPANY.COM, and the administrator specifies STRESS as the
domain, then the krb5.conf file displays the following:default_realm = SALES SALES = { domain controller= (domain controller server) admin = (adminserver) So, when the administrator tries to authenticate withuseraccount@SALES, the krb5 library notices that the principal nameSALES differs from the actual one in the server database.
Additional troubleshooting tips for Active Directory authentication
Steps to takeYou should
Check that your access policyis attempting to performauthentication
• Refer to the message boxes in your access policy to display informationon what the access policy is attempting to do.
• Refer to /var/log/apm to view authentication attempts by the accesspolicy.
94
Troubleshooting AAA Configurations

Steps to takeYou should
Note: Make sure that your log level is set to the appropriate level. Thedefault log level is notice.
Confirm network connectivity • Access theAccess PolicyManager® through the command line interfaceand check your connectivity by pinging the Active Directory serverusing the host entry in the AAA Server box.
• Confirm that the Active Directory port (88 or 389) is not blockedbetween the Access Policy Manager, and the Active Directory server.
Check the Active Directoryserver configuration
• Confirm that the Active Directory server name can be resolved to thecorrect IP address, and that the reverse name resolution (IP address toname) is also possible.
• Confirm that the Active Directory server and the Access PolicyManager have the correct time setting configured.
Note: Since Active Directory is sensitive to time settings, use NTP to setthe correct time on the Access Policy Manager.
Capture a TCP dump • Take a TCP dump from theAccess PolicyManager when authenticationattempts are made. For example, %tcpdump-i 1.1 -s /tmp/dump.Youmust first determine what interface the self IP address is on. TheseTCP dumps indicate activities between the Access Policy Managerand the authentication server.
• Run the authentication test. After authentication fails, stop the TCPdump, and download the TCP dump to a client system, and use ananalyzer to troubleshoot.
Important: If you decide to escalate the issue to customer support, youmust provide a capture of the TCP dump when you encounterauthentication issues that you cannot otherwise resolve on your own.
RSA SecurID on Windows using RADIUS configuration troubleshooting tips
You might run into problems with RSA SecurID on Windows using RADIUS configuration. Follow thesetips to try to resolve any issues that you encounter.
RSA SecurID on Windows using RADIUS configuration troubleshooting
Possible explanations and corrective actionsPossible error messages
Even if the RADIUS server was started from the SecurID options windowon theWindows SecurID server, the server might not be active. InWindows
The RADIUS server isinactive
Services Manager, make sure that the server is set to start each time theserver boots, and is currently running. RSA SecurID authentication usingRADIUS takes place on a different port than the native securid ID.
While using RSA SecurID over RADIUS, the SecurID server is a clientof itself. The RADIUS service functions as a standalone process, and if
The SecurID isconfigured
the SecurID server is not set up as a client of itself, it rejects the Accessincorrectly forPolicy Manager ®authentication request and does not store anything in thelogs.
RADIUSauthentication
95
BIG-IP® Access Policy Manager® Authentication Configuration Guide

Possible explanations and corrective actionsPossible error messages
Check that RSA Authentication Manager is configured properly. Tofacilitate communication between Access Policy Manager and the RSA
No response from theRSA SecurID server
Authentication Manager, you must add an Authentication Agent record tothe RSA Authentication Manager database. The Authentication Agentrecord identifies the Access Policy Manager within its database, andcontains information about communication and encryption. To create theAuthentication Agent record, you need this information.
• Host name• IP addresses for all network interfaces
When adding the Authentication Agent record, you should configure theAccess Policy Manager as a Standard Agent. The RSA AuthenticationManager uses this setting to determine how to communicate with AccessPolicy Manager. You must also add a RADIUS client that corresponds tothe Authentication Agent. To create the RADIUS client, you need thisinformation.
• Host name• IP addresses for all network interfaces• RADIUS secret (This RADIUS secret must match the corresponding
RADIUS secret on the Access Policy Manager.)
OCSP authentication troubleshooting tips
Youmight run into problems with OCSP authentication in some instances. Follow these tips to try to resolveany issues you might encounter.
OCSP auth and query troubleshooting
Possible explanations and corrective actionsPossible error messages
Make sure that a valid OCSP responder configuration is assigned to theOCSP agent in the access policy.
No AAA serverassociated with theagent
The user/issuer certificate session variables are missing. Make sure thateither the Client Cert Inspection agent or On-Demand Cert Auth agent is
User/Issuercertificate not
configured in the access policy (or use a variable assignment agent to createthem).
found for thesession
Make sure that the OCSP responder is up and running and reachable fromthe BIG-IP® system.
Failure to connectto OCSP responder(BIO callbackfailure)
Indicates that no valid basic response was found in the OCSP response.Check the configuration on the remote OCSP responder.
Error parsing theOCSP response(invalid response)
Make sure that the signing certificate and key are valid.Error signing OCSPrequest
This happens when the nonce setting is enabled on the OCSP responderconfiguration and the received OCSP response does not contain a validnonce. Check the remote OCSP responder connection and setting.
No valid nonce foundin the response
96
Troubleshooting AAA Configurations

Possible explanations and corrective actionsPossible error messages
This happens when the nonce received in the response does not match withthe nonce sent in the request. Make sure that the connection from BIG-IPsystem to OCSP responder is secure.
Nonce verificationfailed
Make sure that the OCSP responder has a valid CA and verify othercertificate settings.
Failure to verifyresponse
Make sure that the BIG-IP system and OCSP responder clocks are in sync.Status times invalid
Indicates that the status of the user certificate is revoked.OCSP response - Certwith serial number'x' has been revoked
Indicates a failure in creating the OCSP request; either the supplieduser/issuer certificates are not valid or the CertID digest configured in theOCSP responder setting is not valid.
Failed to add certto OCSP request
CRLDP authentication troubleshooting tips
You might run into problems with CRLDP authentication in some instances. Follow these tips to try toresolve any issues you might encounter.
CRLDP auth and query troubleshooting
Possible explanations and corrective actionsPossible error messages
Make sure that a valid CRLDP responder configuration is assigned to theCRLDP agent in the access policy.
No AAA serverassociated with theagent
The user/issuer certificate session variables are missing. Make sure thateither the Client Cert Inspection agent or On-Demand Cert Auth agent is
User/Issuercertificate not
configured in the access policy (or use a variable assignment agent to createthem).
found for thesession
Make sure that the CRLDP server is up and running and reachable fromthe BIG-IP system.
Failure to connectto CRLDP server
Indicates that no valid CRL DP is configured on the LDAP server. Makesure that the LDAP server used in the CRLDP server configuration hasvalid CRL DPs configured.
No LDAP URL found inthe DP list
Indicates that the status of the user certificate is revoked.CRLDP response -Cert with serialnumber 'x' has beenrevoked
TACACS+ authentication troubleshooting tips
You might run into problems with TACACS+ authentication in some instances. Follow these tips to try toresolve any issues you might encounter.
97
BIG-IP® Access Policy Manager® Authentication Configuration Guide

TACACS+ auth and query troubleshooting
Possible explanations and corrective actionsPossible error messages
Make sure that a valid TACACS+ server configuration is assigned to theagent (TACACS+ Auth or TACACS+ Acct) used in the access policy.
No AAA serverassociated with theagent
Make sure that the TACACS+ server is up and running and reachablefrom the BIG-IP® system.
Failure to connect toTACACS+ server
Supplied user credentials are not valid.Login incorrect
Make sure that the shared encryption key configured on the TACACS+server configuration matches with the key on the remote TACACS+server.
Invalid replycontent, incorrectkey
Indicates either the wrong keys or that the authentication action (LOGIN)is not supported on the server.
Invalid AUTHEN/STARTpacket from server
Indicates that the TACACS+ server does not support the authentication.Check the settings on the server.
Unacceptable authenmethod
Caused by internal errors on the remote TACACS+ server. Check thelogs on the remote TACACS+ server and also the configuration.
Unexpected failurereturn/legal statusvalue fromauthenticationfunction/Permissionerror
98
Troubleshooting AAA Configurations

Index
A
AAA configuration examples 88AAA high availability
testing for supported authentication servers 46AAA server object
setting up high availability 45AAA troubleshooting tips
list of 92access policy
for Active Directory AAA server 26for LDAP 24
access profileadding to virtual server 74, 81creating 40, 51, 72, 79for HTTP agent 31
accounting attributesdescriptions 20list of 20
Active Directory AAA serveraccess policy for 26
Active Directory authentication and query session variablesdescriptions 84
Active Directory cross-domain rules 28Active Directory password management
about 25Active Directory troubleshooting tips
list of 94AD auth and LocalDB lockout macro
example 59loop terminal, about 59
attributesfor RADIUS 18
authenticationadding to access policy 16and Logon Page action 16configuring for external server 28configuring for LDAP 23deploying with Access Policy Manager 14
authentication: configuring end-user login 50authentication and authorization
configuring HTTP Basic/NTLM 29configuring HTTPS 30configuring LDAPS 23
authentication methodconfiguring for HTTP form-based method 29
authentication methodsfor Active Directory 25for HTTP 28for LDAP 21for LDAPS 21for OCSP 36for RADIUS 16for RADIUS accounting 18for RSA SecurID 31for TACACS+ 34overview 15
authentication serverstesting support for AAA high availability 46
B
basic authentication and Kerberos end-user logonabout 48
BIG-IP systemsmachine account, sharing 68
C
certificate revocation listretrieving 38
clientssl profileconfiguring for CRLDP 39
common session variablesdescriptions 84
CRL distribution pointdirectory path (dirName) 38LDAP URI 38
CRLDPabout 38configuring clientssl profile 39
CRLDP access policyexample 37, 40
CRLDP Auth agentincluding in access policy 40
CRLDP session variablesdescriptions 84
CRLDP troubleshooting tipslist of 97
cross-domain rules for Active Directory 28
D
delegation accountKerberos SSO 68setting up 70
description of session variables 84domain join 69
E
end-user loginabout 48
end-user logon access policyexample 52
end-user logon support, configuring 51Exchange profile
access profile, property of 68access profile setting 72, 79configuring 71, 78Microsoft Exchange services, for 68
external HTTPS serverconfiguring authentication 30
99
Index

H
hex attributesconverting 88
hidden parametersabout 28
high availability44
configuring AAA 44RADIUS guidelines 44testing for supported authentication servers 46
HTTP Basic/NTLMconfiguring for authentication 29
HTTP form-basedconfiguring authentication 29
HTTPSconfiguring for authentication 30
K
Kerberos authentication methodsupporting 71
Kerberos authentication requirementsabout 49
Kerberos authentication troubleshooting tips 53Kerberos configuration
domain, joining a 50user account, creating 50
Kerberos SSOconfiguring 71setting up a delegation account 70supporting 71
L
LDAP auth and query default rulesexample 89–90
LDAP authentication and query session variablesdescriptions 84
LDAPSconfiguring for authentication 23
LDAP troubleshooting tipslist of 93
local database usersdynamic 56exporting and importing from file 56
local database write actionCommon partition 56, 60locked out status, updating 56, 60login failures, updating 56, 60
local userpassword change, forcing 58
local user database59
authenticating users 61configuring 56creating 57in an access policy 59locking a user account 63lockout interval 57lockout threshold 57read action, example of 59
local user database (continued)unlocking user account 63user lockout 61
local user database HAConfigSync, compared to 56error message reporting 56schedule, understanding 56sync status, viewing 56
local usersadding 58
Logon Page actionand authentication actions 16configuring in an access policy 16
M
machine accountrenewing password for 74replication 68
machine trust accountconfiguring in Access Policy Manager 69
Microsoft Exchange applicationsservice settings for 78
Microsoft Exchange clientHTTP basic authentication, supporting 80
Microsoft Exchange clientsand NTLM authentication 68providing full proxy for 68, 78
Microsoft Exchange client trafficAPM configuration for 71, 78
N
nested groupsabout 22
NTLM authenticationabout using 68accessing domain-joined Microsoft Exchange clients 69delegation account 68determining NTLM 73Kerberos SSO requirement 68machine accoun 68
O
OCSPabout 36authenticating with 36configuring clientssl profile 36
OCSP session variablesdescriptions 84
OCSP troubleshooting tips 96
P
poolhigh availability 16load-balancing 16
100
Index

Q
query typesfor LDAP 22
R
RADIUS attributesdescriptions 18list of 18
RADIUS high availability guidelines 44RADIUS session variables
descriptions 84RADIUS troubleshooting tips 92routing domain 16RSA AA session variables
descriptions 84RSASecurID
about 33RSA SecurID on Windows troubleshooting tips 95RSA SecurID session variables
descriptions 84
S
server objectsetting up for high availability 45
service settingsActiveSync 78Autodiscover 78Exchange Web Service 78NTLM authentication 78Offline Address Book 78Outlook Anywhere 78
sessiondump command 84
session variablein APM reports 84
session variables description 84SSO
configuring with Kerberos 71supporting 71
T
TACACS+task summary 34
TACACS+ access policyexample 35
TACACS+ session variablesdescriptions 84
TACACS+ troubleshooting tips 97troubleshooting tips
for Active Directory 94for CRLDP 97for Kerberos authentication 53for LDAP 93for OCSP 96for RADIUS 92for RSA SecurID on Windows 95for TACACS+ 97
U
user lockoutfrom a local database 59from an external system 59
W
write action, example of 59
101
Index

102
Index