better made and lighter than my efforts and the good ones ... and techniques/gimbal head.pdf ·...
TRANSCRIPT
© Natures Photos 2016 Page| 1
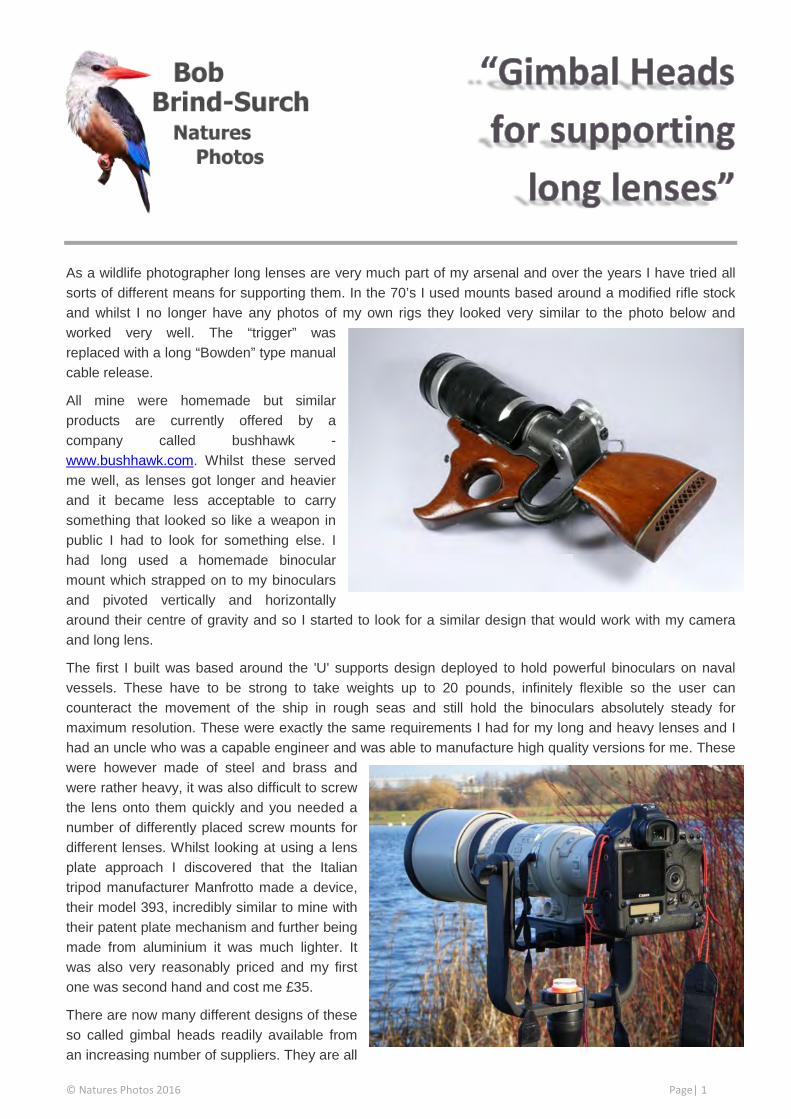
As a wildlife photographer long lenses are very much part of my arsenal and over the years I have tried all sorts of different means for supporting them. In the 70’s I used mounts based around a modified rifle stock and whilst I no longer have any photos of my own rigs they looked very similar to the photo below and worked very well. The “trigger” was replaced with a long “Bowden” type manual cable release.
All mine were homemade but similar products are currently offered by a company called bushhawk - www.bushhawk.com. Whilst these served me well, as lenses got longer and heavier and it became less acceptable to carry something that looked so like a weapon in public I had to look for something else. I had long used a homemade binocular mount which strapped on to my binoculars and pivoted vertically and horizontally around their centre of gravity and so I started to look for a similar design that would work with my camera and long lens.
The first I built was based around the 'U' supports design deployed to hold powerful binoculars on naval vessels. These have to be strong to take weights up to 20 pounds, infinitely flexible so the user can counteract the movement of the ship in rough seas and still hold the binoculars absolutely steady for maximum resolution. These were exactly the same requirements I had for my long and heavy lenses and I had an uncle who was a capable engineer and was able to manufacture high quality versions for me. These were however made of steel and brass and were rather heavy, it was also difficult to screw the lens onto them quickly and you needed a number of differently placed screw mounts for different lenses. Whilst looking at using a lens plate approach I discovered that the Italian tripod manufacturer Manfrotto made a device, their model 393, incredibly similar to mine with their patent plate mechanism and further being made from aluminium it was much lighter. It was also very reasonably priced and my first one was second hand and cost me £35.
There are now many different designs of these so called gimbal heads readily available from an increasing number of suppliers. They are all

© Natures Photos 2016 Page| 2
better made and lighter than my early efforts and the good ones have full roller bearings which are superb for supporting the heavy weight lenses I regularly use. If you shoot with seriously long lenses, no other head comes close to offering the stability, articulation, and flexibility and whilst I have and do occasionally use ball heads and special fluid video heads I would absolutely recommend a good gimbal head. I have even recently started to experiment with using them to photograph dragonflies on the wing with a shorter 100-400 zoom lens and found this arrangement to be very effective.
There are now at least 2 dozen different manufacturers around the world producing different versions. A quick search of the web will produce many companies and many suppliers, some good and some not so. It was once the case that the quality level was reflected in the price and only the best, and most expensive, offered all the features and exceptional construction serious photographers were looking for. Most are based around a design using half the ‘U’ shaped support of the Manfrotto 393 which whilst requiring better and stronger bearings is less bulky and makes for easier lens mounting. The first and market leader has been the well know Wimberley. It was designed and built by company founder David Wimberley for a lifetime of
hard use and trouble-free dependability and has been through at least two variants but is very expensive at £543 (July 2016). It’s a workhorse that remains arguably the most popular head of its kind on the planet.
Over recent years however a number of alternatives have appeared on the markets which are much cheaper. Some are not particularly high quality and I wouldn’t want to use them to support my heavy and very expensive lens but some are very good and in my view equally as effective.
Regardless of manufacturer and style, the objective of a gimbal head is to create a perfectly balanced lens/camera combination that permits easy and free movement in both vertical and horizontal axes and yet will remain stationery in whatever position it placed. Additionally, if a lens has a collar (and most long telephotos do), the camera and lens can be
rotated from horizontal to vertical while being panned or tilted. If everything is set up properly the lens and camera should be movable using just one finger and when you remove that finger, the entire assembly will stay put.
The better-made gimbals are stout, use proper bearings on the joints, rather heavy, and designed to be extremely rigid when locked in place and supporting a heavy load. Because movement dampening at any point is critical, only gimbals manufactured to the highest standards and using the best materials are capable of adequately handling the largest telephotos.
All are designed to mount on the 1/4” or preferably (given the weight of the lenses) 3/8” mounting screw of a tripod and heavier tripods are essential especially when using heavier lenses. The loads, when combining a 600mm or 800mm lens with a professional camera body and a gimbal head, can easily exceed 11 ½ Kg (25 lbs) or more.
I saw my first Wimberley, the version 1 model, about 12 years ago and was sold on the idea immediately. What didn’t attract me quite so quickly however was the price so I stuck with my Manfrotto device for many years. When the improved second-generation Wimberley Version II was announced in 2009 I took the plunge although still I found it hard to justify the cost. What I soon realised however was that the Wimberley was indeed a superb gimbal and arguably, for a long time, it was the best gimbal money could buy. It was also the only gimbal money could buy, at least until about six years ago. But time moves on and when something is this good the competition soon catches up. This has certainly been the case in the rather
Wimberley v2

© Natures Photos 2016 Page| 3
specialist world of gimbal heads. What surprises me however is that, at least up until now, the great tripod and head manufacturer Manfrotto haven’t waded in with an alternative to their original design.
There are those who will argue that the Wimberley’s simplicity, attention to detail, and ruggedness are all but impossible to beat. Though I was at first tempted to agree I now find that these admirable traits are being matched by others. Over recent years, the popularity of gimbals has spread throughout the photography and bird watching community (bird watchers use them for supporting spotting scopes) and with this popularity has come an ever-growing list of challengers to Wimberley’s position.
I can’t claim to have seen or used all the different versions out there but have tried a number and certainly have my favourites. The following is an account of what I have used, what works for me and what doesn’t. There are two principle approaches and designs. One is based around the ½ ‘U’ or ‘J’ shaped support design initially used by Wimberley and the other a lighter side mounted device also now offered by Wimberley.
Perhaps the first “alternative” to appear was one made by Jobu – www.jobu-design.co.uk. The design and appearance was very similar to the Wimberley except for the professional version (for use with large lenses) which has differently placed locking knob for the horizontal movement. All similar alternatives to the Wimberley have two primary locking knobs. One for the rotational axis and one for the ‘swinging’ arm. Some also have other knobs to control “drag”, the ease of swinging the arm. The first design of Wimberley had rotational locking knob on the top of the boss that attaches to the tripod, just like the Jobu but the later Wimberly and other versions have moved it to the side and importantly the same side as the locking knob for the swing arm. This may seem a minor point and downside of the Jobu but it’s really important in use. Where locking knobs are placed one on one side and one on the other it requires an extra hand to operate them. One for each knob and one for the camera making 3 ! The Jobu is an excellent design and in many ways is better than the Wimberley but in my view suffers from this simple bad positioning of the control knobs (see photo above compared to the Wimberley previous page).
Jobu Design (www.jobu-design.com) currently (July 2016) produce 3 models of gimbal heads, the Jobu Pro2 (available in green or black), the Heavy Duty Mk. II and the Jr.3. The also make a side mount version (see later). They are manufactured in Canada and are all excellent gimbals very much along the lines of the Wimberley, but varying considerably in detail such as tilt and pan lock knob placement (already mentioned) and construction methods. Jobu’s Pro series is extremely well built and incredible stiff and rigid. It has full ball-bearing support in tilt and pan axes, and numerous helpful features such as a low-profile arm locking catch, powder-coating, and soft-touch knobs. As with most Gimbal heads their quick release plate is a standard Arca-Swiss type.
I was pleasantly surprised by the Pro2 I tried at a show. It was easily one of the smoothest gimbals available, thanks in no small part to Jobu’s use of ball bearings for all articulated parts. The was also very stoutly built and easily a match strength-wise for any other gimbal in its price range. I would have no qualms using the Pro for the heaviest of lenses.
Jobu Pro2
© Natures Photos 2016 Page| 4
I particularly liked the very convenient tilt arm lock that, with the push of a thumb, locks the arm in place for lens attachment or removal. Although some of the other gimbal manufacturers have a similar device they would do well to copy the simplicity of the Jobu approach in future versions of their own products.
The less expensive Jr.3 is designed for smaller and lighter lenses. It has fewer adjustment features; the swing arm and lens platform can only be moved up or down by removing a pair of screws and using one of three paired hole options and their associated vertical spacing to change swing arm height. Cumbersome, but it works in a pinch.
Overall, the Jobu units are exceptional gimbals and most certainly as good as the best currently available. They are not cheap and whilst the simple locking approach is to be commended they are let down by the placement of the other knobs, but you most certainly get some real value for money.
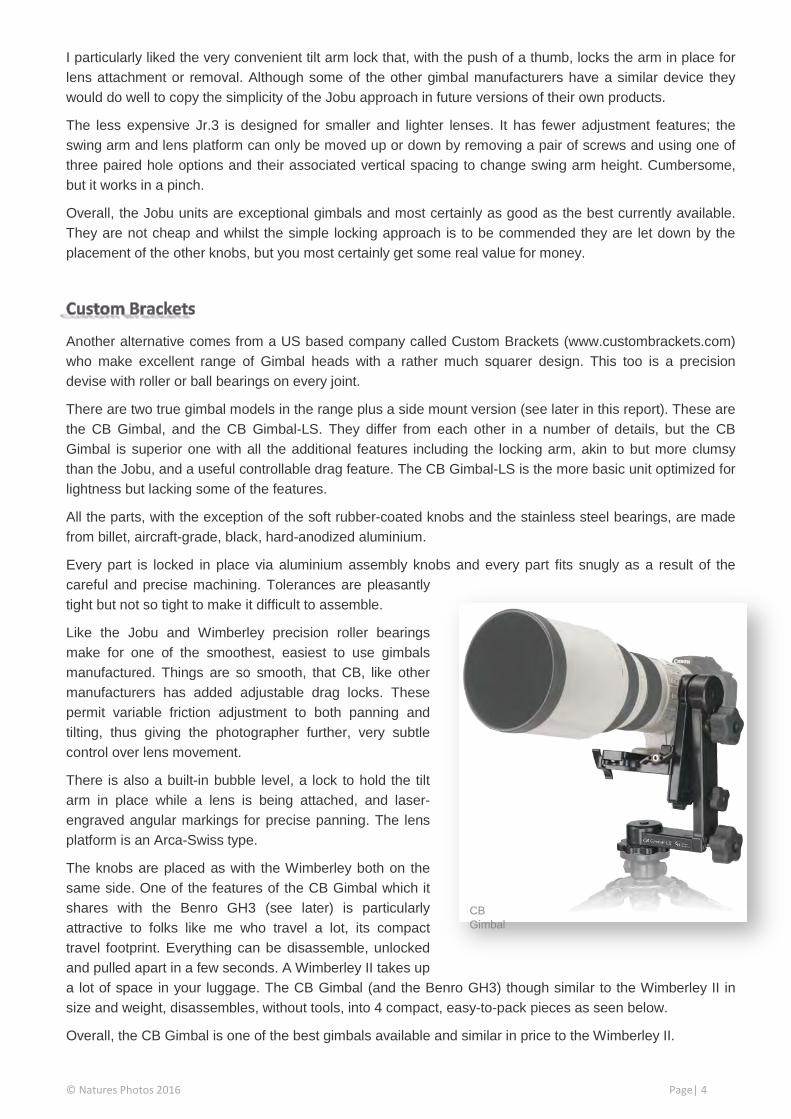
Another alternative comes from a US based company called Custom Brackets (www.custombrackets.com) who make excellent range of Gimbal heads with a rather much squarer design. This too is a precision devise with roller or ball bearings on every joint.
There are two true gimbal models in the range plus a side mount version (see later in this report). These are the CB Gimbal, and the CB Gimbal-LS. They differ from each other in a number of details, but the CB Gimbal is superior one with all the additional features including the locking arm, akin to but more clumsy than the Jobu, and a useful controllable drag feature. The CB Gimbal-LS is the more basic unit optimized for lightness but lacking some of the features.
All the parts, with the exception of the soft rubber-coated knobs and the stainless steel bearings, are made from billet, aircraft-grade, black, hard-anodized aluminium.
Every part is locked in place via aluminium assembly knobs and every part fits snugly as a result of the careful and precise machining. Tolerances are pleasantly tight but not so tight to make it difficult to assemble.
Like the Jobu and Wimberley precision roller bearings make for one of the smoothest, easiest to use gimbals manufactured. Things are so smooth, that CB, like other manufacturers has added adjustable drag locks. These permit variable friction adjustment to both panning and tilting, thus giving the photographer further, very subtle control over lens movement.
There is also a built-in bubble level, a lock to hold the tilt arm in place while a lens is being attached, and laser-engraved angular markings for precise panning. The lens platform is an Arca-Swiss type.
The knobs are placed as with the Wimberley both on the same side. One of the features of the CB Gimbal which it shares with the Benro GH3 (see later) is particularly attractive to folks like me who travel a lot, its compact travel footprint. Everything can be disassemble, unlocked and pulled apart in a few seconds. A Wimberley II takes up a lot of space in your luggage. The CB Gimbal (and the Benro GH3) though similar to the Wimberley II in size and weight, disassembles, without tools, into 4 compact, easy-to-pack pieces as seen below.
Overall, the CB Gimbal is one of the best gimbals available and similar in price to the Wimberley II.
CB Gimbal
© Natures Photos 2016 Page| 5
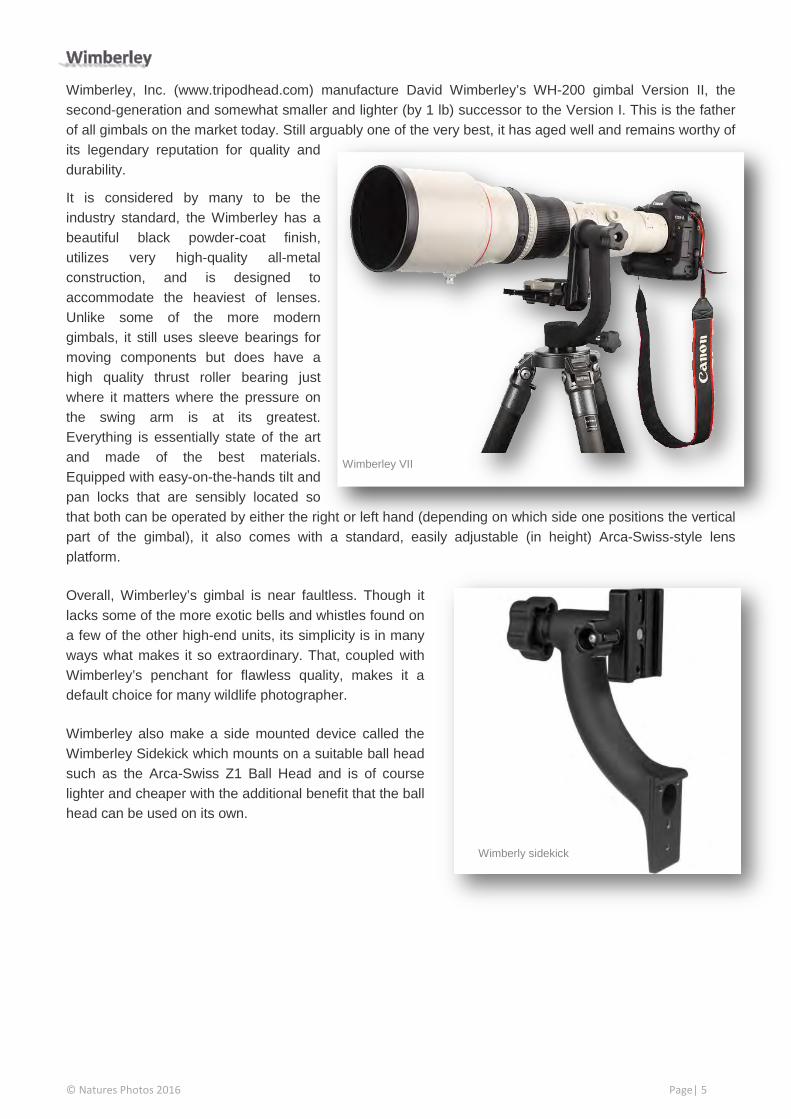
Wimberley, Inc. (www.tripodhead.com) manufacture David Wimberley’s WH-200 gimbal Version II, the second-generation and somewhat smaller and lighter (by 1 lb) successor to the Version I. This is the father of all gimbals on the market today. Still arguably one of the very best, it has aged well and remains worthy of its legendary reputation for quality and durability.
It is considered by many to be the industry standard, the Wimberley has a beautiful black powder-coat finish, utilizes very high-quality all-metal construction, and is designed to accommodate the heaviest of lenses. Unlike some of the more modern gimbals, it still uses sleeve bearings for moving components but does have a high quality thrust roller bearing just where it matters where the pressure on the swing arm is at its greatest. Everything is essentially state of the art and made of the best materials. Equipped with easy-on-the-hands tilt and pan locks that are sensibly located so that both can be operated by either the right or left hand (depending on which side one positions the vertical part of the gimbal), it also comes with a standard, easily adjustable (in height) Arca-Swiss-style lens platform.
Overall, Wimberley’s gimbal is near faultless. Though it lacks some of the more exotic bells and whistles found on a few of the other high-end units, its simplicity is in many ways what makes it so extraordinary. That, coupled with Wimberley’s penchant for flawless quality, makes it a default choice for many wildlife photographer.
Wimberley also make a side mounted device called the Wimberley Sidekick which mounts on a suitable ball head such as the Arca-Swiss Z1 Ball Head and is of course lighter and cheaper with the additional benefit that the ball head can be used on its own.
Wimberley VII
Wimberly sidekick

© Natures Photos 2016 Page| 6
Benro (www.benro.com) is a new entry to the market. They are a Chinese company founded in 1995 which originally produced professional photographic tripods and heads for the Chinese market where it was a leader for many years. It has however now grown to export to over 40 countries in Asia, Europe and America developing into a large scale operation with a total of 65,000 square metres of factory and production area.
They claim to have pioneered a number of developments in materials and technology including the Benro carbon fibre tubes used in their CF tripods. They also claim that the metal components used in their tripods being solid magnesium alloy provide greater vibration reduction and strength and are approximately 30% lighter than aluminium alloy.
Their tripods were first introduced into the UK by a company called Kenro 2009 and have been exceptionally well received both by the trade and directly by the end users even against very well established and well known existing brands, due largely to their functional and user friendly design, price and overall value for money.
Some claim that they have simply copied the designs of other companies and whilst I can’t offer any view on the merits or ethics of this they have, at least in respect to their gimbal heads, done an exceptionally good job of it.
They currently manufacture two ‘J’ type and one side mount type. The cheaper the GH2 model is so similar to the Wimberley it is very hard to tell them apart both in looks or importantly in performance. In use you would be very hard pressed to tell the difference. They haven’t been around as long as the Wimberley so I can’t be sure about their long term durability but as the construction including the strategically placed roller bearings is almost identical and the quality seems to be very good indeed. I don’t have any serious doubts about this device and use one regularly myself. The GH3 is similar to the Custom Brackets CB Gimbal and like that model breaks apart for easier transport and has a locking lever easier mounting and dismounting of your lens and camera.
Benro GH2 Benro GH3

© Natures Photos 2016 Page| 7
4th Generation Designs makes a well-respected side mounted head called the Mongoose which because of its design is lighter (1lb lighter than the Wimberly) and more compact than any of the traditional “J” mount designs. It also uses very high quality bearings and is an excellent option for albeit at a premium price.
Due to its side mount design some don’t recommend using it with anything larger than a 500mm f4 but then that’s the largest many of us use anyway. It’s also worth remembering that the older Canon and Nikon lenses are heavier than the more modern equivalents and I would personally not be happy with a Mk1 500mm f4 from canon on a Mongoose head. They do make a low mount arm adaptor which turns this into a more traditional “J” mount design for heavier lenses.
Basically the performance is very good and if weight and compactness is the issue these are the gimbal of choice accepting they come at a price.
A relatively new product and manufacturer called Movo has entered the Gimbal head marketplace with what on the surface seemed excellent product and at a very attractive price.
In all respects it closely resembles the Benro and the Wimberly heads and utilises the now standard “J” mount design. Having tested one for a very short while I have to say that the performance is very good but nowhere near as good as the Benro or Wimberly it tries to emulate. The head bearings are not as high quality and don’t lock as firmly as the other two models therefore you can’t lock the swinging arm rigidly something that is necessary if you want a firm fixed platform or want to carry the tripod, gimbal and attached lens over your shoulder. The base colar bearings also don’t seem to be of quite the same quality but in my investigations are perfectly good enough and do lock. The primary benefit of this head has to be the price currently (July 2016) considerably under hundred pounds for the aluminium GH700 version and only a little more for the carbon fibre GH800 version.
Movo GH700
Mongoose head

© Natures Photos 2016 Page| 8
Lensmaster (www.lensmaster.co.uk) is a UK company who have a slightly different but highly effective design which is of equal quality to all the others I have looked at but, with the exception of the Movo, significantly cheaper. In the words of Rob the company owner and himself an engineer “I wanted a simple, easy to use Gimbal... ... so I made one!”
They make two models the RH2 (left) and the RH1 (below) which is a side mount version. Both use high quality roller bearings throughout and the main body is made from aircraft grade aluminium which is then treated and Powder coated with a statin scratch resistant finish. Attached to this is an Arca Swiss type clamp as in all the other models available. One of the real benefits of the roller bearing design employed by Lensmaster is that the Gimbal is easy to maintain simply wash in warm soapy water or a solvent like petrol, dry and add a little grease to the outer bearings. The super smooth main bearings and shaft are both maintenance free and never need oil or grease.
In my view this is an excellent alternative to the Wimberley and offers all the advantages at a fraction of the cost. You are dealing with a local UK supplier if you have any problems and they are also an extremely responsive company who will get back to you if required usually in a few hours !
For lighter lenses you don’t really need the full ‘J’ shaped support - see also mongoose head above. Simply attaching the lens by its collar onto the swivel mount is all that is required. This however only works well for collared (often smaller) lenses. In my view however perhaps with the exception of the mongoose head, when using these gimbals with a large, heavy camera body (e.g. a pro body with vertical grip), and long telephotos they can be difficult to balance properly. Generally, 400 f/5.6 and 300 f/4 fixed or zoom lenses with medium-weight camera bodies work well. Heavier camera bodies on these lenses can be problematic. However where they are suitable for the lens in use they are cheaper and lighter. I have used a Lensmaster RH1 recently to capture dragonflies in flight with a 100-400 Canon zoom lens.
Many photographers have told me of the cheap Gimbal heads they found on eBay all basically variants of a manufacturer called Beike from China. I have seen these as low as £50 but they are cheap for a reason they are very poor quality and I was certainly not consider putting a heavy lens which may cost thousands of pounds on such a support. A cursory glance they look very similar to the Wimberly design but looking more closely they are smaller slimmer and made of far less quality material. The upright is an aluminium casting and I have heard tales of its snapping when put under pressure. The thought of my £6000 lens hitting
Lensmaster RH2
Lensmaster RH1

© Natures Photos 2016 Page| 9
the ground because I’ve saved just a few pounds on my Gimbal head doesn’t warrant thinking about. I do know of a number of people who’ve successfully uses head with a spotting scope for birdwatching and that end it works perfectly well. Spotting scopes are not particularly heavy although again I probably spend more money and buy a Lensmaster variant as materials and bearings are of a ,uch better quality.
Prices as of July 2016 (N.B. this is not an exhaustive list of prices and as always hunting around on the web may get you better value)
Wimberley Mk2 £543
Wimberley Side Kick £250 – requires a substantial ballhead e.g. Swiss Acra Z1 @ £300
Benro GH1 - Side mount £170
Benro GH2 - “”J” mount £200
Benro GH3 – “break down version” £300
Jobo Mk4 £430
Custom Barckets £500
Lensmaster RH2 £147
Lensmaster RH1 – “sidemount” £117
Mongoose M3.6 – “sidemount” £450 - Mongoose swinging arm adaptor extra £80
Beike (eBay) £40
The Wimberley was the original and set the standard but the Benro is a great head – in my view and under constant use equal in every way to the Wimberly and is a much more attractive price.
For pure price and simplicity the Lensmaster simply can’t be beaten. They have set a completely new standard which I for one really welcome. Couple this to their first rate customer service and this is a gimbal which is really hard to beat.
The mongoose head is very high quality and lightweight. The basic side mount version is excellent but in my view not suitable for very heavy lenses. They do make a low mount arm which can be added to it but this increases the price from £450 to £530 and whilst lighter than the Benro is in my view no better quality.
Some of the older established American brands such as Jobo and Custom Brackets are good but overpriced and no better quality.
In summary then whilst a few years ago I would have recommended the Wimberly without hesitation if it was white I was now looking for I would go from mongoose head and if using it with long lenses are mongoose head with an integrated low mount arm. If weight is less of an issue but I still want quality at a good price I would without hesitation by the Benro GH2.
If price was more of an issue and I was prepared for a head which doesn’t fully lock I would go for the Lensmaster RH2.
© Natures Photos 2016 Page| 10
Newcomers like Movo have a good product but the bearings let it down however at £89 on Amazon it is a quality product and far better in every way than the cheaper options such as Beike. If price is your main consideration but you want a quality product then whilst I’ve only tested this for a few weeks it is definitely something worth looking at.
My recommendation therefore is the Benro RH2 or on price alone the Lensmaster RH2
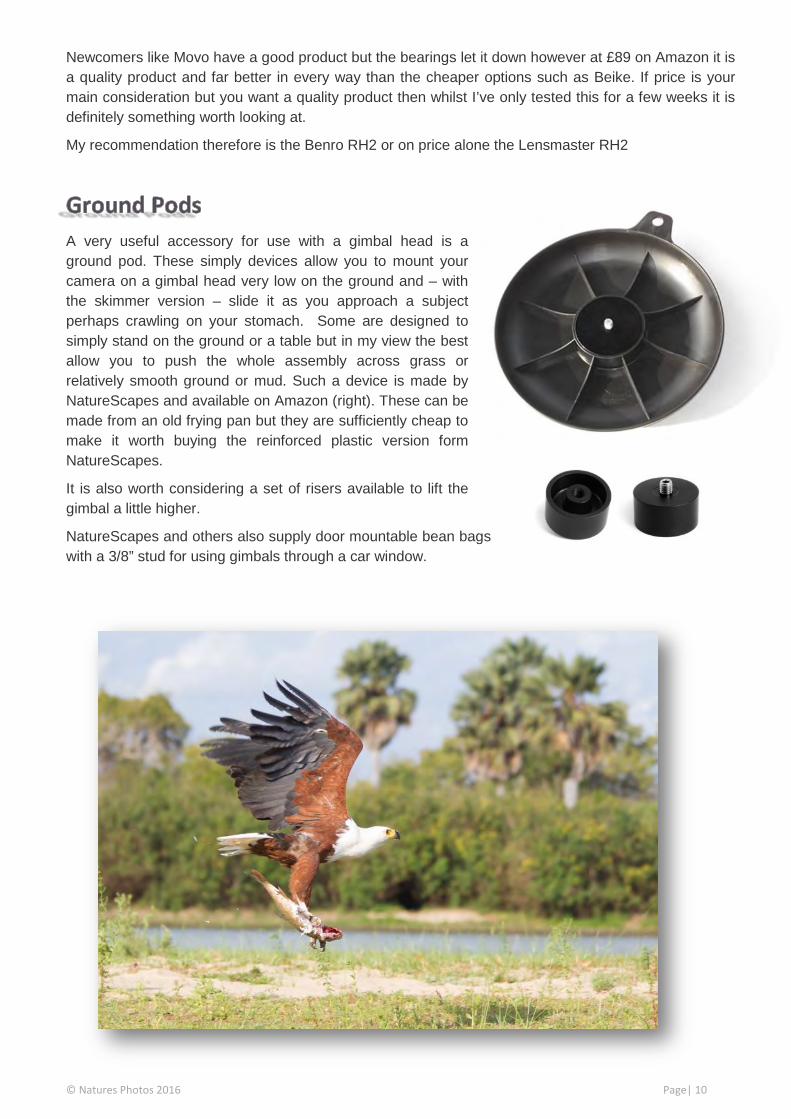
A very useful accessory for use with a gimbal head is a ground pod. These simply devices allow you to mount your camera on a gimbal head very low on the ground and – with the skimmer version – slide it as you approach a subject perhaps crawling on your stomach. Some are designed to simply stand on the ground or a table but in my view the best allow you to push the whole assembly across grass or relatively smooth ground or mud. Such a device is made by NatureScapes and available on Amazon (right). These can be made from an old frying pan but they are sufficiently cheap to make it worth buying the reinforced plastic version form NatureScapes.
It is also worth considering a set of risers available to lift the gimbal a little higher.
NatureScapes and others also supply door mountable bean bags with a 3/8” stud for using gimbals through a car window.

© Natures Photos 2016 Page| 11

© Natures Photos 2016 Page| 12