battery motor charge time - citizen bike · your electric-assisted or e-bike works reliably under...
TRANSCRIPT

Your electric-assisted or e-bike works reliably under all weather conditions, although an excessive water exposure could damage the electronics and/or the electric motor.
Never touch the electronics on the e-bike with wet hands and never touch the plus and minus poles at the same time, as the strong short-circuit current could cause injury.
The batteries used are subject to weather influences. Cold temperatures can affect battery performance. The performance of the batteries can decrease by up to 1/3 in below-zero temperatures. Please remember that your range will decrease if you ride in winter. When the temperature reaches 20°C/68°F again, the batteries will revert to full performance.
Never attempt to repair electronics on the e-bike yourself, always ask a specialist in the event of a problem.
Before we begin
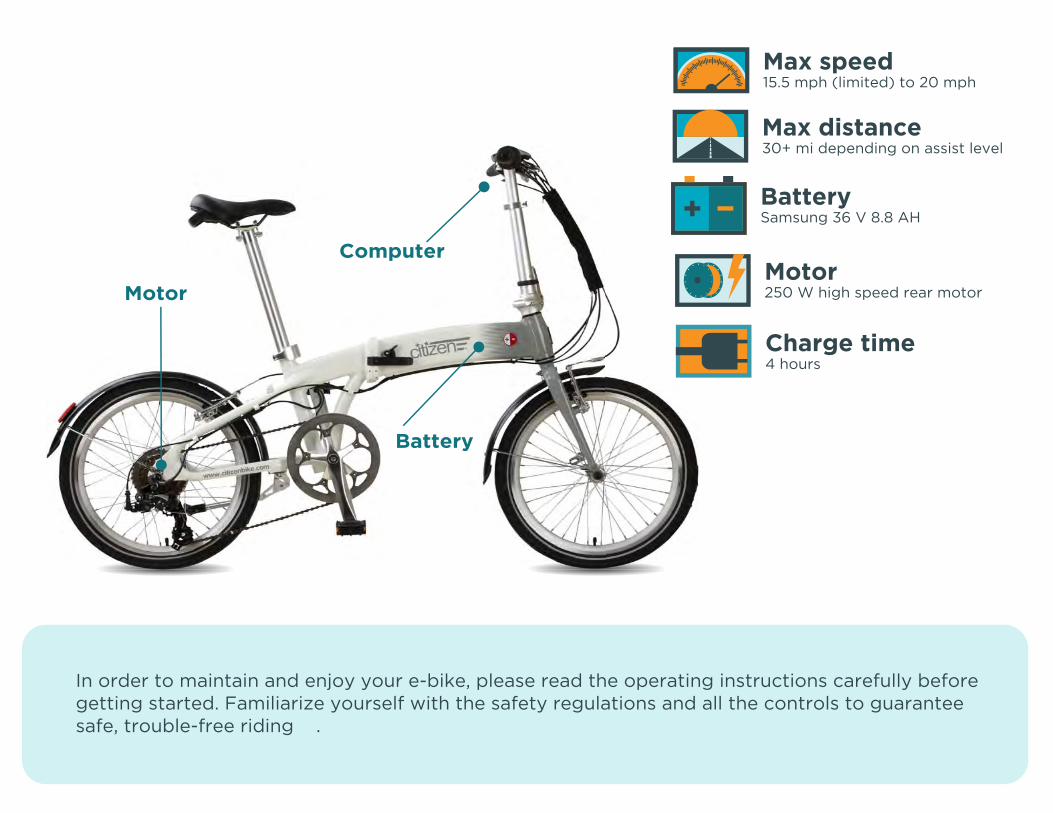
In order to maintain and enjoy your e-bike, please read the operating instructions carefully before getting started. Familiarize yourself with the safety regulations and all the controls to guarantee safe, trouble-free riding .
Computer
Battery
Motor
Max speed15.5 mph (limited) to 20 mph
Max distance30+ mi depending on assist level
BatterySamsung 36 V 8.8 AH
Motor250 W high speed rear motor
Charge time4 hours

RANGE OVERVIEW
The performance of your e-bike depends on the load, the road conditions, braking and accelerating maneuvers and tire pressure. Please keep these factors in mind while you are riding.
With the wind, normaltemperature, normal load
Against the wind, normal temperature and normal load
With the wind, ≤2° gradient, normal temperature and normal load
Even Road
Even Road
Hilly Road
Bike weight < 50 lbsRider < 220 lbs
Maximum AssistModerate Assist
RANGE
STARTING, PARKING AND RANGE
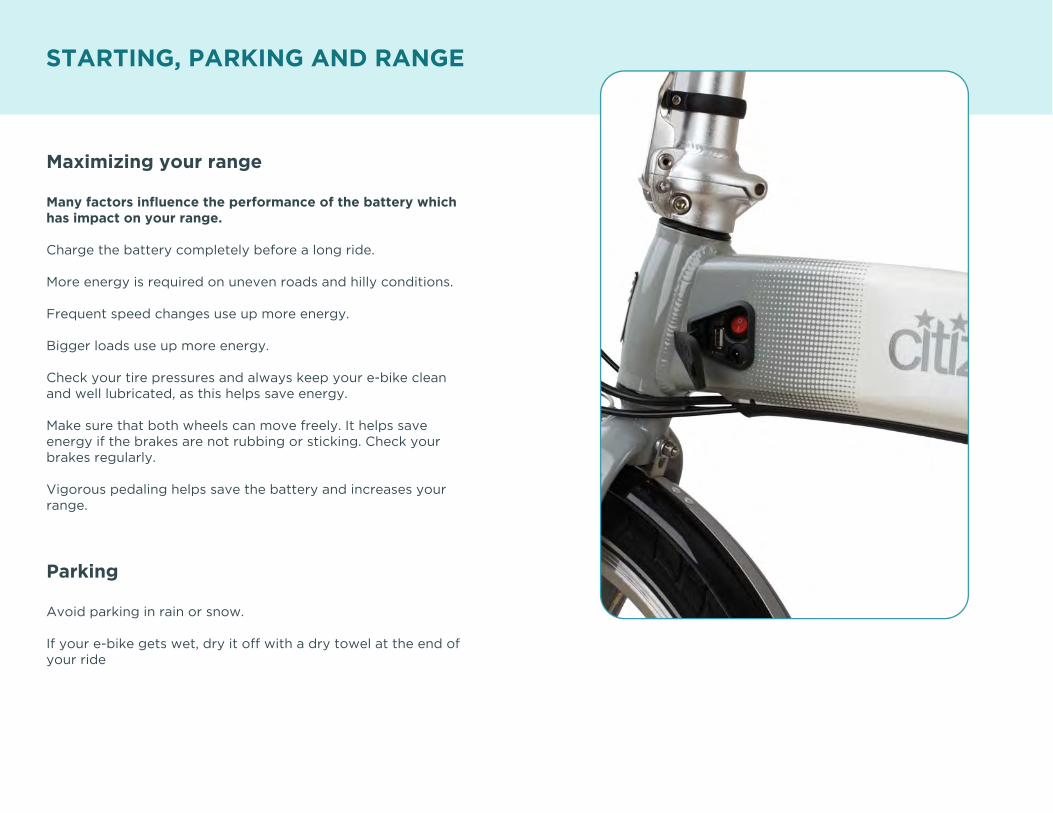
Maximizing your range
Many factors influence the performance of the battery which has impact on your range.
Charge the battery completely before a long ride.
More energy is required on uneven roads and hilly conditions.
Frequent speed changes use up more energy.
Bigger loads use up more energy.
Check your tire pressures and always keep your e-bike clean and well lubricated, as this helps save energy.
Make sure that both wheels can move freely. It helps save energy if the brakes are not rubbing or sticking. Check your brakes regularly.
Vigorous pedaling helps save the battery and increases your range.
Parking
Avoid parking in rain or snow.
If your e-bike gets wet, dry it off with a dry towel at the end of your ride
Take your first ride in an open space so you can get used to the acceleration. Once you are used to the bike, you can enjoy the assistance of the electric motor in normal riding conditions.
The control unit has a low-voltage protection system which automatically switches off the power assist if the battery voltage falls below a certain level.
Do not use power assist on slippery or dirty ground.
Switch power assist off if the drive is not behaving normally to avoid damaging the electrical components.
Never take passengers with you or overload your e-bike. This could damage the electrical components.
Concentrate on the road in front of you. Avoid potholes, gravel, wet road markings, oil and other obstacles.
Be careful when braking. Always brake with the rear wheel brake first, as it is less aggressive than the front wheel brake.
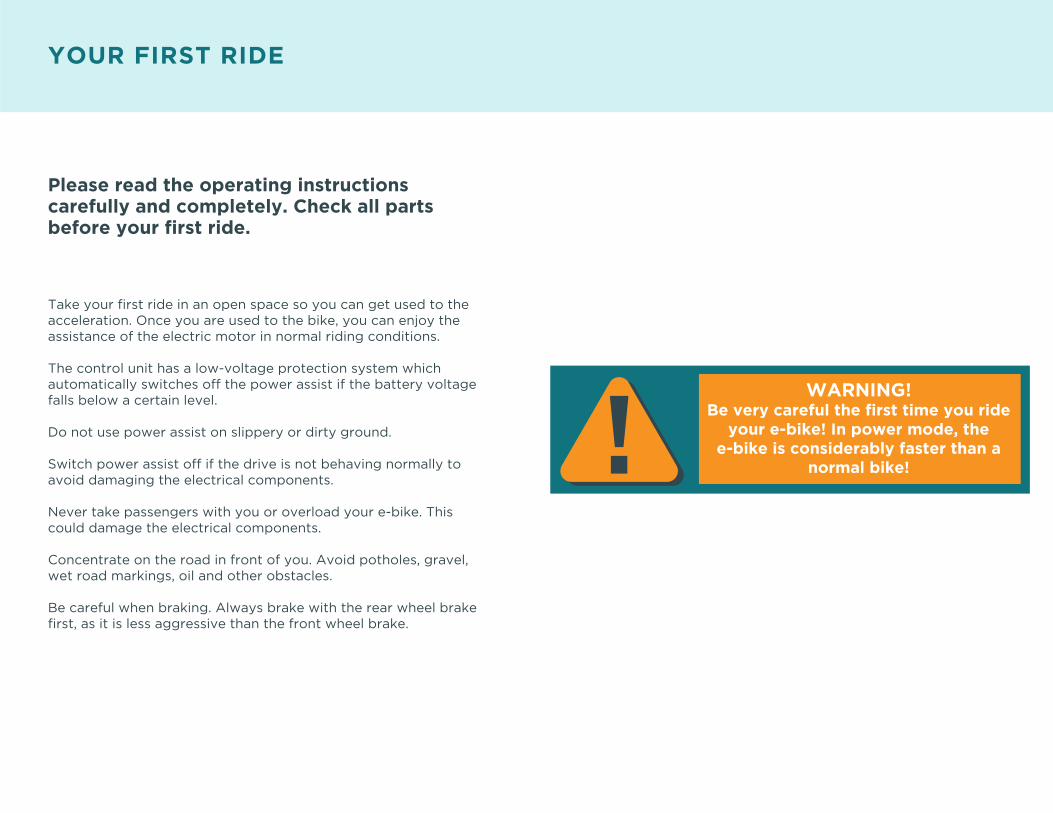
WARNING!Be very careful the first time you ride
your e-bike! In power mode, the e-bike is considerably faster than a
normal bike!
YOUR FIRST RIDE
Please read the operating instructions carefully and completely. Check all parts before your first ride.
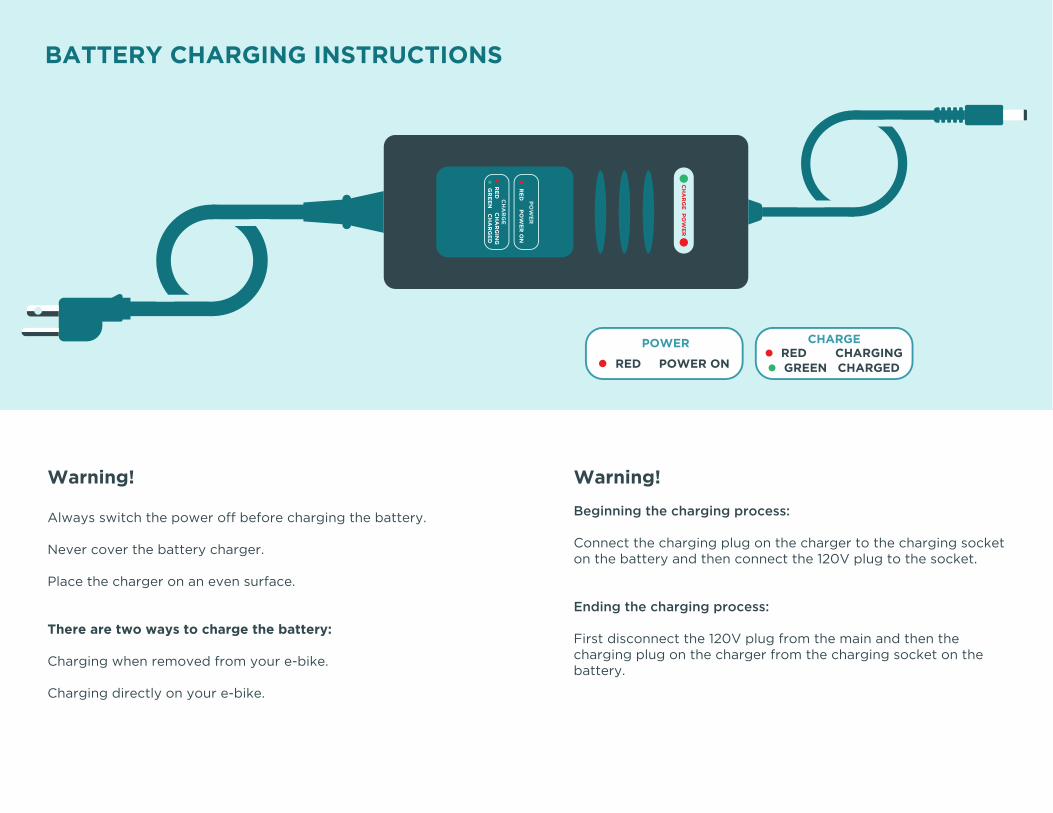
BATTERY CHARGING INSTRUCTIONS
Warning!
Always switch the power off before charging the battery.
Never cover the battery charger.
Place the charger on an even surface.
There are two ways to charge the battery:
Charging when removed from your e-bike.
Charging directly on your e-bike.
Warning!
Beginning the charging process:
Connect the charging plug on the charger to the charging socket on the battery and then connect the 120V plug to the socket.
Ending the charging process:
First disconnect the 120V plug from the main and then the charging plug on the charger from the charging socket on the battery.
POWER
RED POWER ON
CHARGERED CHARGINGGREEN CHARGED

SAFETY INSTRUCTIONS FOR THE BATTERY AND CHARGER
Your e-bike has a lithium-ion battery. Never charge the battery with a replacement charger which is not designed for this purpose. Using an unsuitable charger on a lithium ion battery could lead to overheating, fire or explosion.
Keep the battery charged when your e-bike is not in use. You can charge the battery separately or directly on the e-bike.
Never charge the battery near flammable materials.
Never charge the battery near infants and small children.
Remove any valuable objects from near battery while it is charging.
The charging time depends on how full the battery was. If the battery was completely empty, it will take 4 to 6 hours before it is fully charged. When the battery is fully charged, the LED on the charger switches from red to green. You should now discon-nect the charger from the battery.
Never leave the charger connected to the battery for an extended period. Lithium-ion batteries have very low discharge rates, they do not need to be connected to the charger all the time (charging overnight is safe).
It is normal for the battery and the charger to get warm while charging.
The battery is half charged when new. Please charge it as quickly as possible. The first three times, charge the battery for at least 12 hours.
There is a control light on the charger. The red control light means that the battery is charging, the green one means that the battery is fully charged (the green light is also lit if no battery is connected).
Please make sure that the charger voltage matches your local voltage.
The charger must always be used indoors.
Charge the battery out of reach of children.
Do not open the charger, it is a high-voltage unit.
Never touch the two battery electrodes at the same time as this could cause an electric shock.
Never take the battery out of the e-bike while it is charging.
Please charge the battery for at least 2 hours every 2 months.
Do not allow liquids or metals to penetrate into the charger.
Never use the charger in oily, dusty, dirty or damp environments. Avoid direct sunlight.
Avoid using the charger in thunderstorms.
Always use the charger in cool, well ventilated places.
Never use the battery near heat sources such as open fires or flames.
Do not hit the battery and avoid strong vibrations.
The warranty is voided if the battery is opened or damaged.
Your e-bike is designed for normal road traffic and for a single person.
Never use your e-bike for extreme maneuvers, such as extreme off-road use, jumps or excess load. This could damage the ebike and cause serious injuries.

WARNING!Do not over-lubricate. If oil gets onto
the wheels or the brake pads, this reduces the performance of the
brakes and increases braking distances.
MAINTENANCE
Do not clean your e-bike with a pressure washer. Water could penetrate into the motor causing damage to the electrical components.
Only use a damp cloth with a neutral detergent to clean your e-bike. Do not use acidic detergents as these could damage the frame or components of your e-bike.
In everyday use, please keep the control unit clean and dry, keep it away from water, vibrations and dirt as these could damage the controller.
The drive chain can throw excess oil onto the wheels, wipe any excess oil away immediately. Never oil the pedal step. Wash excess oil from the wheels or brake pads with soapy water. Dry the e-bike before using it again.
PEDALS
CHAIN
BOTTOMBRACKET
MOTOR
Put 4 drops of oilon the axle.
Put 1 drop of oil oneach link of the chain.
Ask your bike shop.
Ask your bike shop.
Every 6 months
Every 6 months
Every 6 months
Every year
Oil the following components with light engine oil (20W) as follows:
Make sure you carry out the following safety checks before you ride
SERVICE OVERVIEW
Brakes
Check that the brakes are working properly.
Visually inspect the brake cables to check correct alignment to the wheels.
Make sure that the handbrake cables are lubricated and there is no evidence of wear. Make sure the brake levers are lubricated and tightly fixed to the handlebars.
Wheels and tires
Check the tire pressure (printed on the sidewall of the tire).
Check the wheels are running correctly and that there is no damage.
Check the tension and make sure all spokes are in place.
Check the axle nuts are tightened properly.
Control Unit
Make sure the handlebars and stem are properly adjusted and tightened.
Check that the handlebars and fork are pointing straight ahead.
Check that the control bearing lock is properly adjusted and tightened.
Chain
Make sure the drive is oiled and clean and runs smoothly.
Bearings
Check that all bearings are lubricated and turn freely.
Check the control bearings, wheel bearings, pedal bearings and bottom brackets.
Crank and pedals
Check that the pedals and crank are seated correctly.
Check that the crank arm is properly fitted to the axle.
Derailleur gears Check the function of the front and rear gears.
Check the gear lever is properly fitted to the handlebars.
Make sure that the gear, gear levers and handbrake cables are properly lubricated.
Frame and forks
Check that the frame and fork are not bent or broken.
If parts are bent or broken, they must be replaced immediately.
Accessories
Make sure that all reflectors are properly fitted and not covered.
Make sure that all other connections on the e-bike are correctly and securely fastened and working correctly.
Always wear a helmet.
COMPUTER COMPUTER

UP Button
POWER Button
DOWN Button
Pass Level
Battery Capacity
Cruise Function
Power-Assisted Function
Single Trip Time
Total Trip Time
Throttle Display
6Km/H Power Assist
Riding Speed (metric)
Riding Speed (US)
Maximum Speed
Average Speed
Distance (metric)
Distance (US)
Trip Distance
Total Distance
Battery Voltage
Brake Display
Backlight & Headlight
1
2
3
4
5
6
7
9
10
8
11
12
13
14
Km/H
MPH
MXS
AVS
KM
MIL
DST
ODO
VOL
ASSIST
CRUISE
PAS
TM
TTM
THROTTLE
14 13 12 11
10
9
7654
3
2
1
8
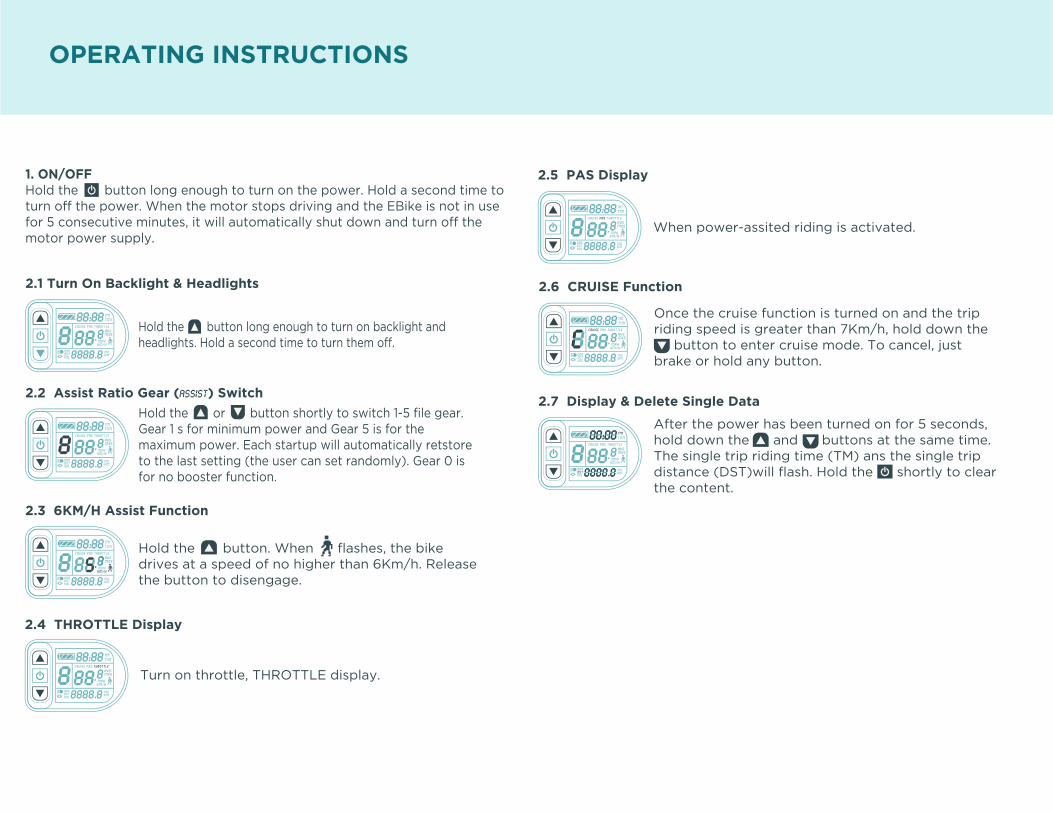
1. ON/OFFHold the button long enough to turn on the power. Hold a second time to turn off the power. When the motor stops driving and the EBike is not in use for 5 consecutive minutes, it will automatically shut down and turn off the motor power supply.
OPERATING INSTRUCTIONS
Hold the button long enough to turn on backlight and headlights. Hold a second time to turn them off.
2.1 Turn On Backlight & Headlights
Hold the or button shortly to switch 1-5 file gear. Gear 1 s for minimum power and Gear 5 is for the maximum power. Each startup will automatically retstore to the last setting (the user can set randomly). Gear 0 is for no booster function.
2.2 Assist Ratio Gear (ASSIST) Switch
Hold the button. When flashes, the bike drives at a speed of no higher than 6Km/h. Release the button to disengage.
2.3 6KM/H Assist Function
Turn on throttle, THROTTLE display.
2.4 THROTTLE Display
When power-assited riding is activated.
2.5 PAS Display
Once the cruise function is turned on and the trip riding speed is greater than 7Km/h, hold down the button to enter cruise mode. To cancel, just brake or hold any button.
2.6 CRUISE Function
After the power has been turned on for 5 seconds, hold down the and buttons at the same time. The single trip riding time (TM) ans the single trip distance (DST)will flash. Hold the shortly to clear the content.
2.7 Display & Delete Single Data
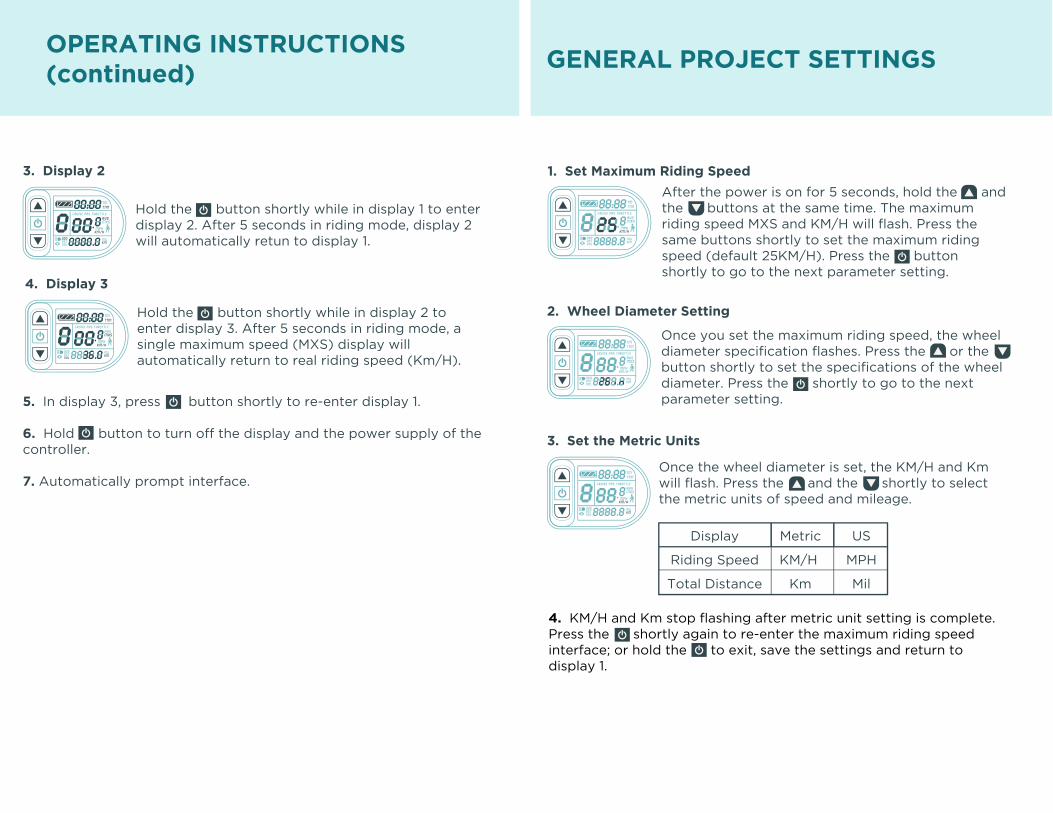
Hold the button shortly while in display 1 to enter display 2. After 5 seconds in riding mode, display 2 will automatically retun to display 1.
3. Display 2
Hold the button shortly while in display 2 to enter display 3. After 5 seconds in riding mode, a single maximum speed (MXS) display will automatically return to real riding speed (Km/H).
4. Display 3
After the power is on for 5 seconds, hold the and the buttons at the same time. The maximum riding speed MXS and KM/H will flash. Press the same buttons shortly to set the maximum riding speed (default 25KM/H). Press the button shortly to go to the next parameter setting.
1. Set Maximum Riding Speed
Once you set the maximum riding speed, the wheel diameter specification flashes. Press the or the button shortly to set the specifications of the wheel diameter. Press the shortly to go to the next parameter setting.
2. Wheel Diameter Setting
5. In display 3, press button shortly to re-enter display 1.
6. Hold button to turn off the display and the power supply of the controller.
7. Automatically prompt interface.Once the wheel diameter is set, the KM/H and Km will flash. Press the and the shortly to select the metric units of speed and mileage.
3. Set the Metric Units
Display
Riding Speed
Total Distance
Metric
KM/H
Km
US
MPH
Mil
4. KM/H and Km stop flashing after metric unit setting is complete. Press the shortly again to re-enter the maximum riding speed interface; or hold the to exit, save the settings and return to display 1.
OPERATING INSTRUCTIONS(continued)
GENERAL PROJECT SETTINGS
